

Performing my cutting-a-kayak-in-half trick gave me a long overdue chance to see exactly how they’re put together, as well as other stuff, like why it was failing and how well certain glues stuck.

The neoprene inside
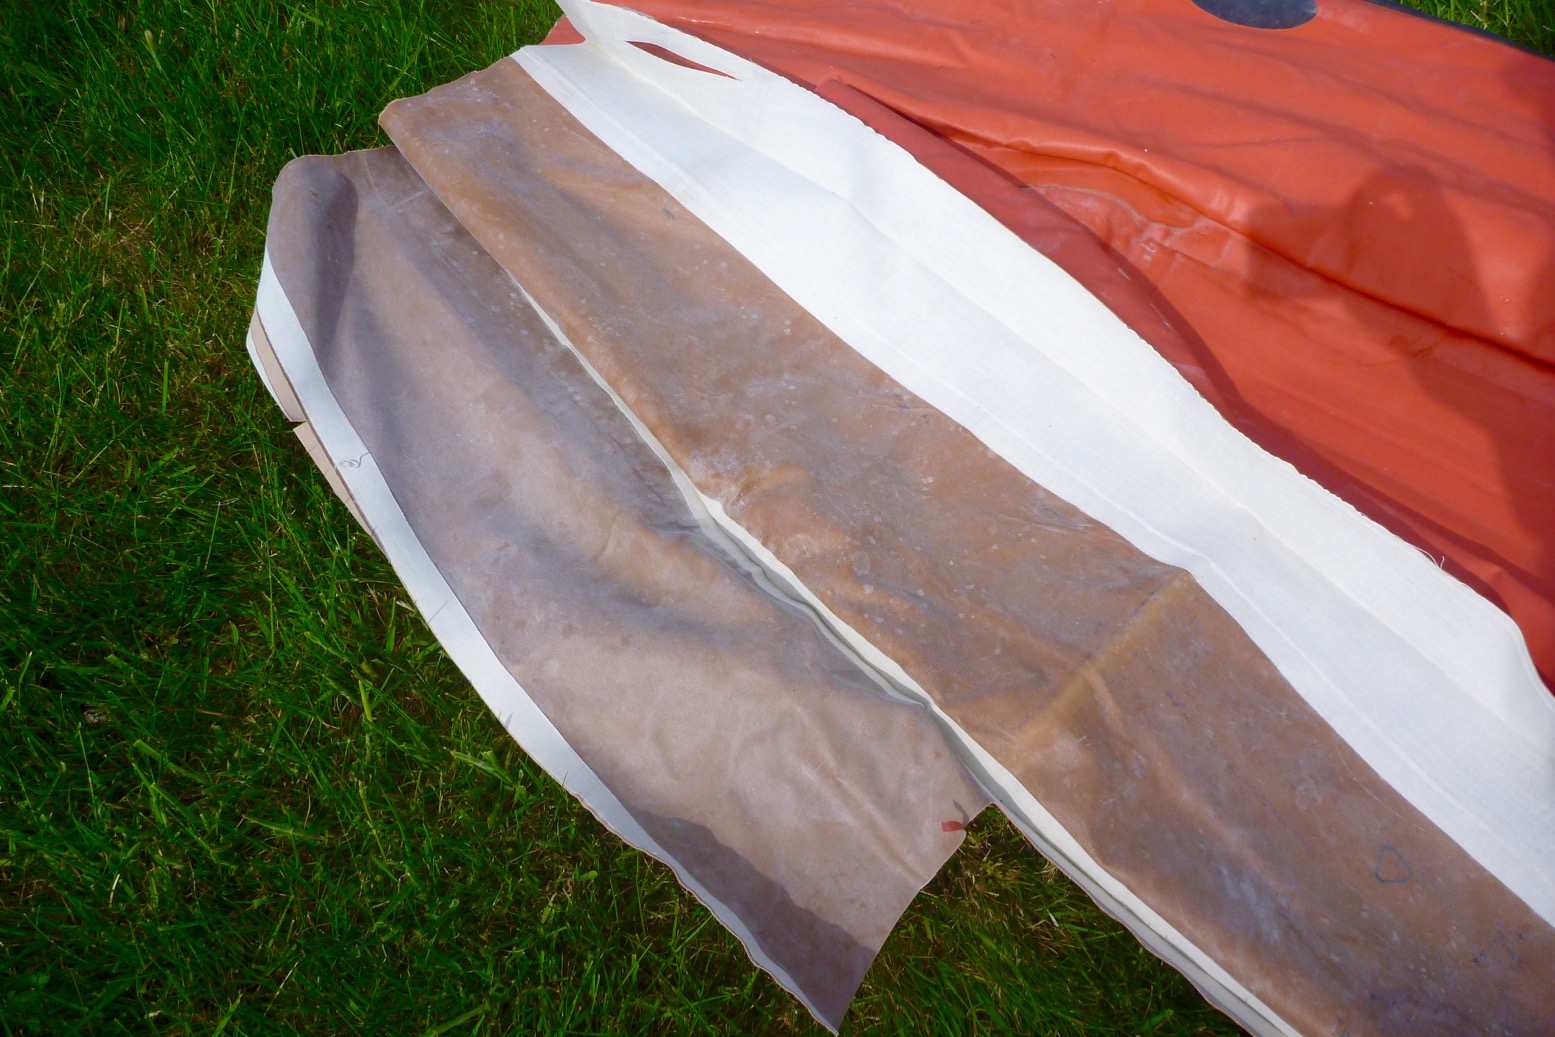
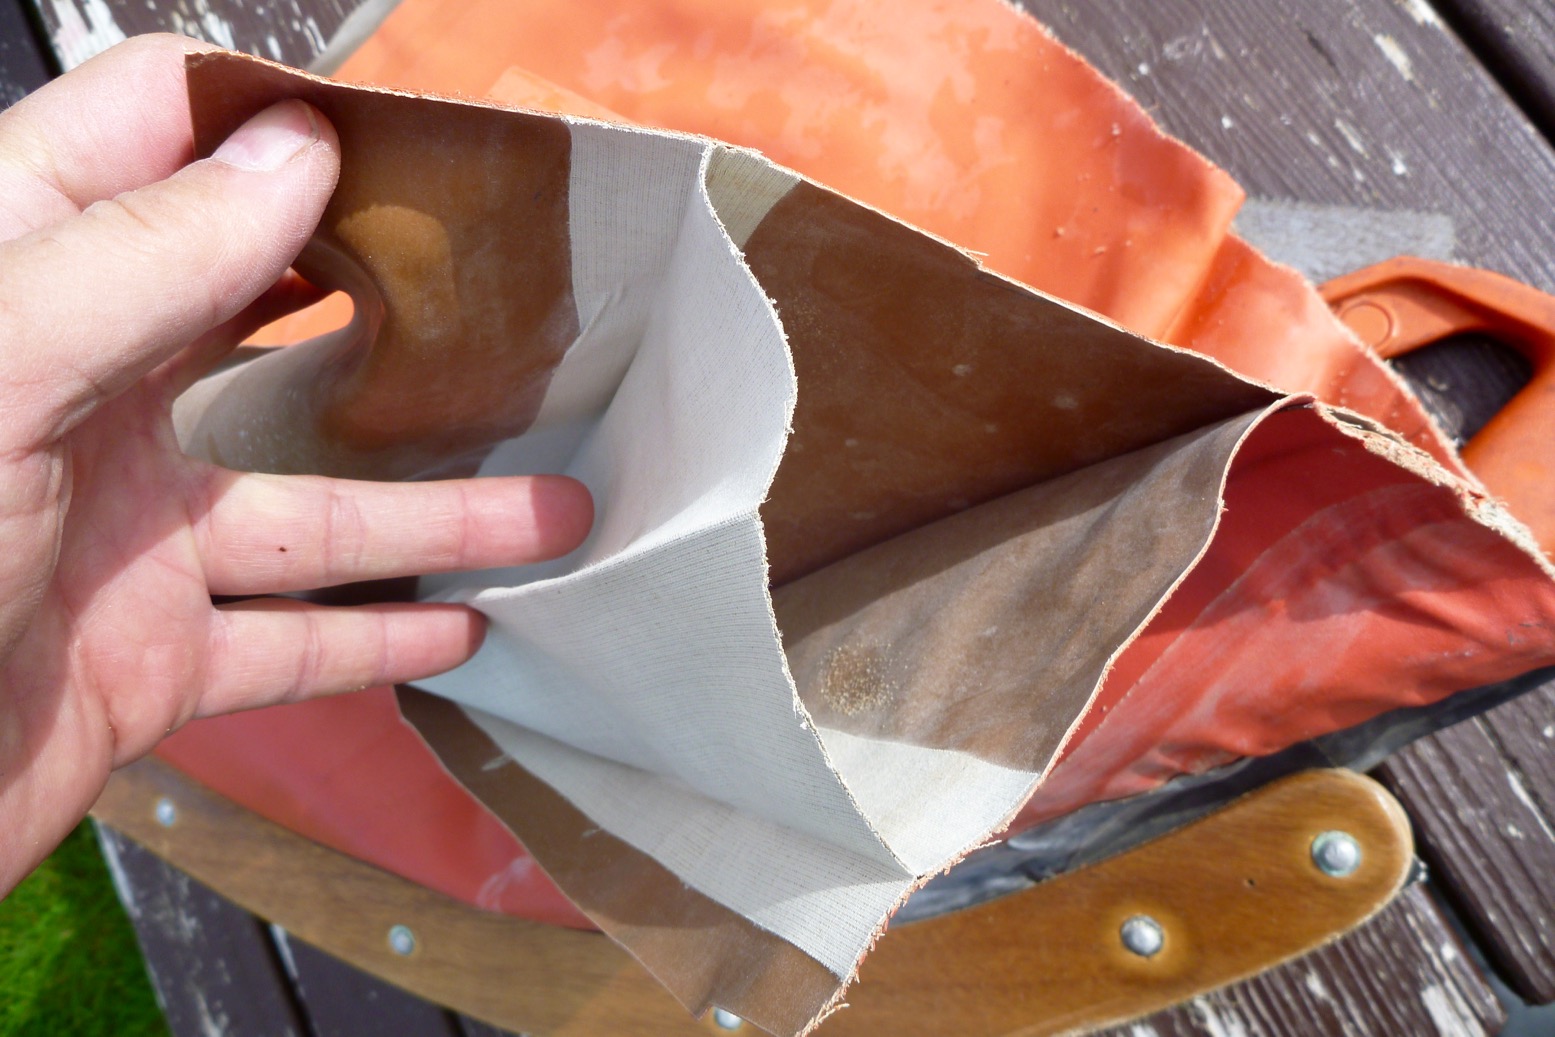
I used to assume it was the same coloured coating inside the boat as out; it’s just simpler. But of course, the diagram left is clear: what’s outside and what’s inside an IK hull is not the same stuff. There’s no need to waste UV-resistant hypalon coating (or colouring or that matter) inside the boat’s benighted chambers. All it needs to be is the same durable and airtight coating, and neoprene – the brown rubber-like coating left – does that fine.
I bet I’m not the only one to mistake ‘neoprene‘ as simply that closed-cell sponge used in wetsuits or laptop sleeves. In its solid form it’s a durable synthetic rubber, but I presume lacks the full-on UV resistance of hypalon which DuPont invented shortly after.

I-beam floor
As mentioned here, an inflated vessel will seek equilibrium by attaining a rotund form, be it tube or sphere. A flat inflated plane such as an airbed or an IK floor needs to be a series of parallel tubes unless it’s just a non-inflated sheet, like packraft- and white-water raft floors.
So this is an IK I-beam floor (above): probably the same tough core of nylon or polyester scrim, but without the impermeable hypalon and neoprene coatings of the exterior panels.
Note the pre-folds or creases to help the Semperit pack flat. I imagine modern IKs do the same, but it all explains the necessary attention to detail which makes ‘tubeless’ IKs like this so labour intensive, compared to ‘bladder’ designs like Aire.
Twin side-tube IKs like this Forelle, the Incept and Grabner Holidays, have two smaller tubes one on top of the other, rather than one fat side tube like my Seawave (below, red) or Amigo. It gives the same buoyancy, more freeboard (above water height), a slimmer profile (more speed) and more volume inside (easier loading). The red Seawave below is 82cm wide; the Semperit is 72. It makes the boat look a whole lot better too and overall, because it’s also as stable, I’d say it’s the best design for an IK, but it also needs I-beam sections to constrain the two side tubes.

I can’t say I could suck air through the scrim easily, but I’m pretty sure it’s porous – I didn’t find any transfer holes to allow air to flow between adjacent tubes – they might be a weak point.
When an IK like this is over-inflated (or left in the sun) and has no PRVs (none on the Semperit), it’s this scrim which either tears apart, most probably at the T-join where it’s glued to the neoprene. I tried tearing sections of scrim by hand; impossible where it was uncut, but as soon as you nick it with a knife it would tear quite easily, like thin cotton cloth. This fabric was at least 40-years-old and had one or two patches of mildew, but was still tough and the whole assembly of the boat has held together amazingly well over the years.


Where mine failed
Inspecting the fatal second leak alongside the earlier repair, it seemed air was pushing through where two sections of I-beam scrim butted against each other. Perhaps the old coatings stretched differentially here or were just worn out. It did look like the hypalon was simply flaking away.
I could have fixed that leak but, as mentioned, another would probably pop up whack-a-mole style somewhere else, quite possible while at sea in either my- or a new owner’s hands.
Glue test
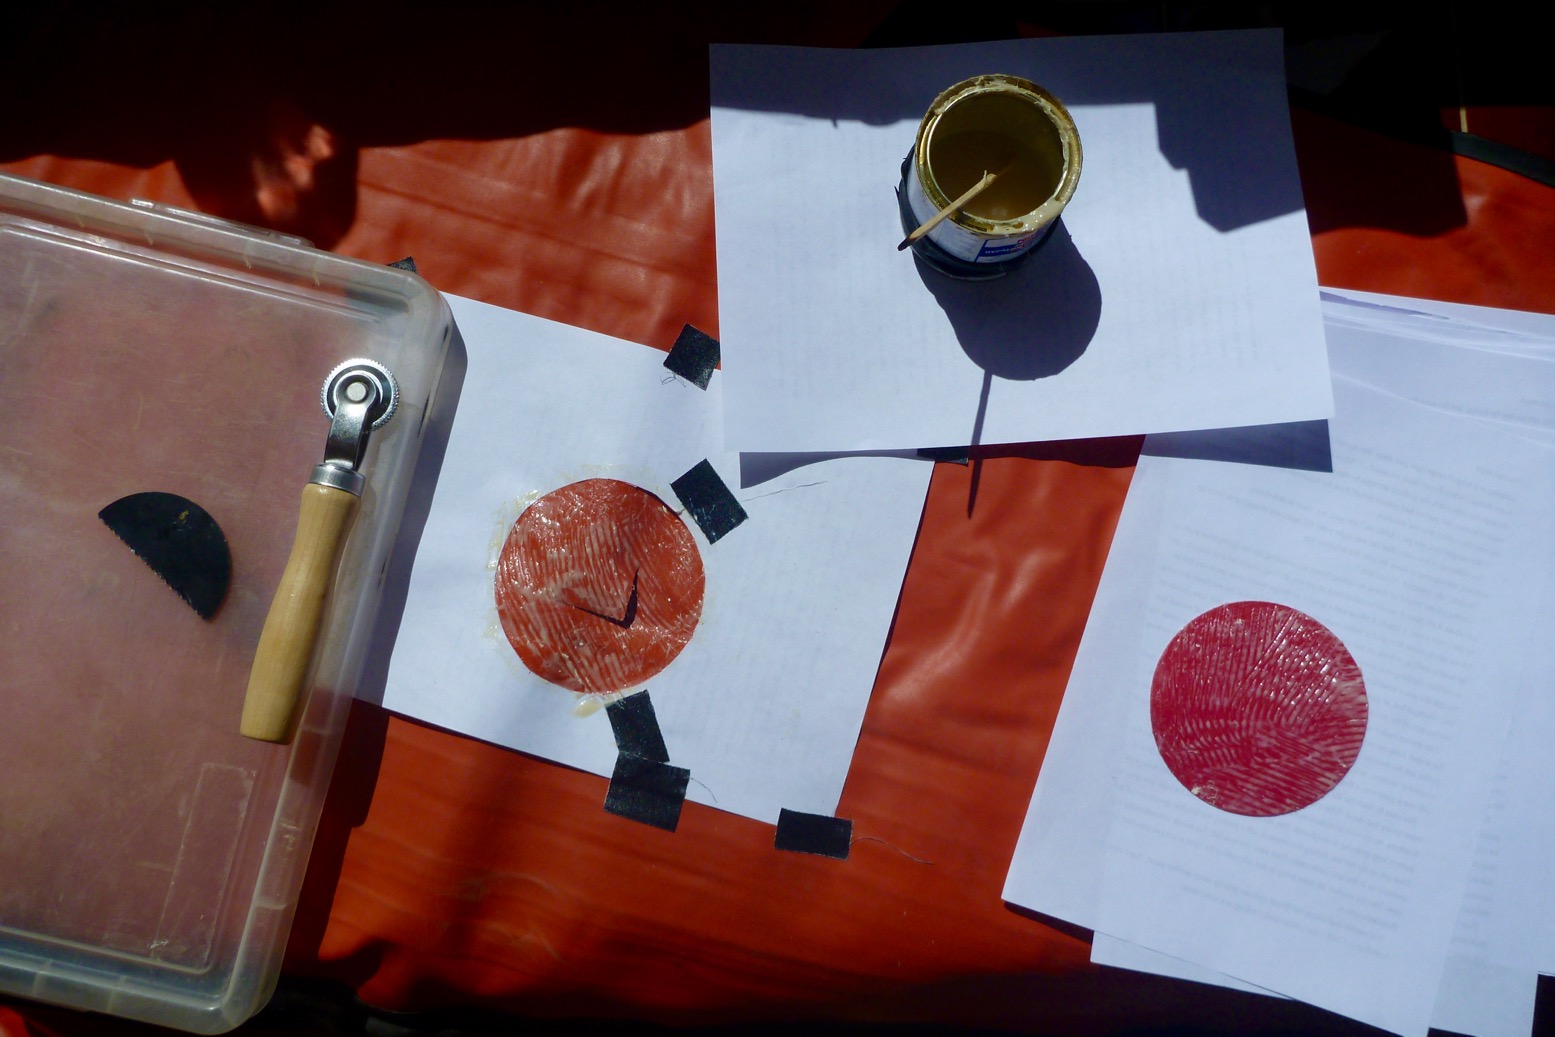
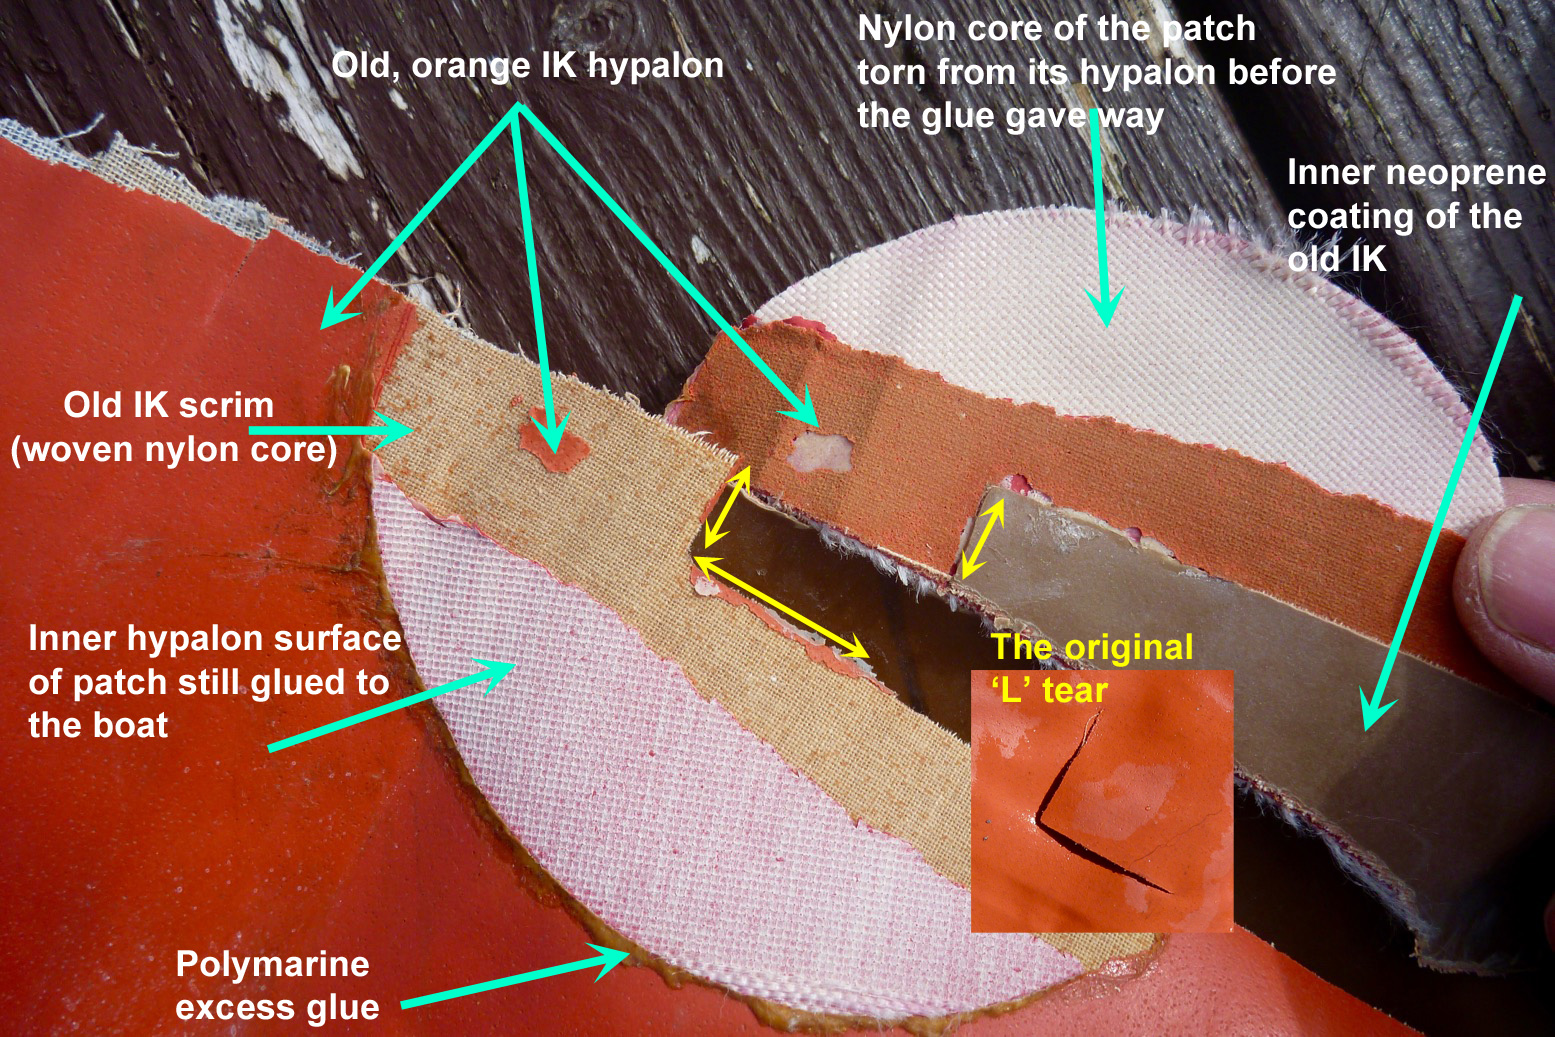
I repaired the big original ‘L’ tear with a 5″ round patch of hypalon and two-part glue (above and left). I then patched a down-to-the-scrim scratch under the hull with one-part Bostik 1782 (left). I used the same glue to repair the initial new leak inside (bubbling water, above).
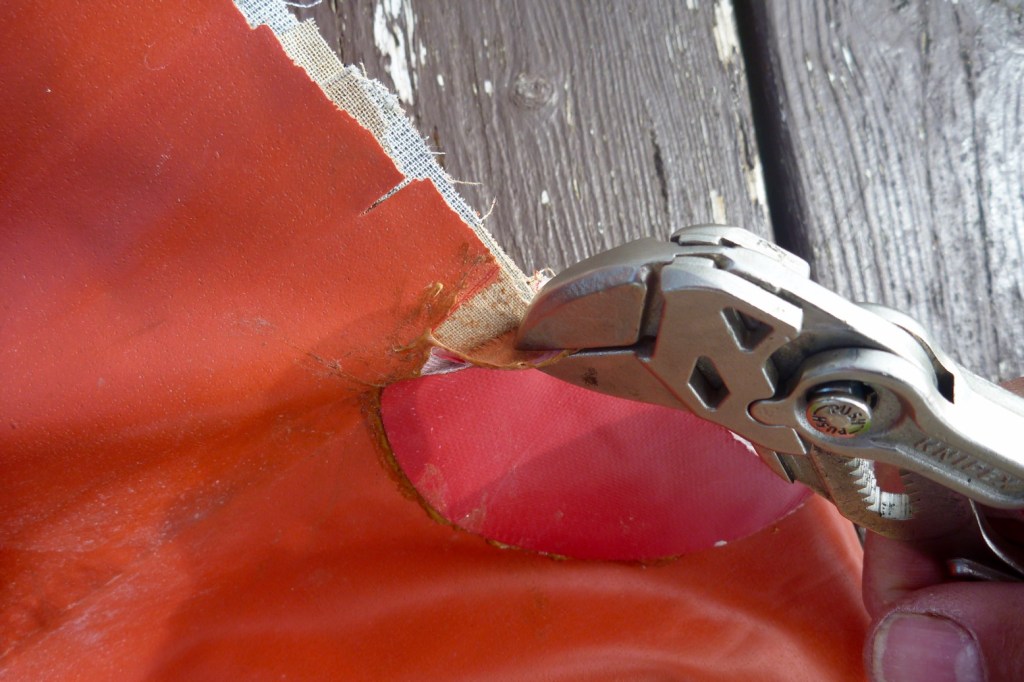

Although I’m pretty sure they’d have lasted, I could easily pull off the Bostik patches by hand. Pulling off the big round Polymarine’d patch was another matter. It just so happened I’d sawn through the round patch but, only once I got some pliers under a lip (above left) was I able to separate it from the hull. As you can see in the big image below, either the ancient orange hypalon coating of the IK, or the newer red hypalon of the patch separated from their respective nylon cores – the glue’s bond was stronger than the actual hypalon coatings, new or ancient.

I get a bit lazy about having to faff about with two-part glue, and I also wonder if I ever guestimating the 25:1 ratio correctly. But as you can see, this stuff sticks. If you absolutely, positively want things to stay stuck or sealed, use two-part adhesives.
I still don’t know if the second part curing agent merely speeds up the drying process, or is chemically integral to creating the very strong bond. I’d think it’s the latter, otherwise why bother.
There’s more about glues and repairs here.

Other stuff
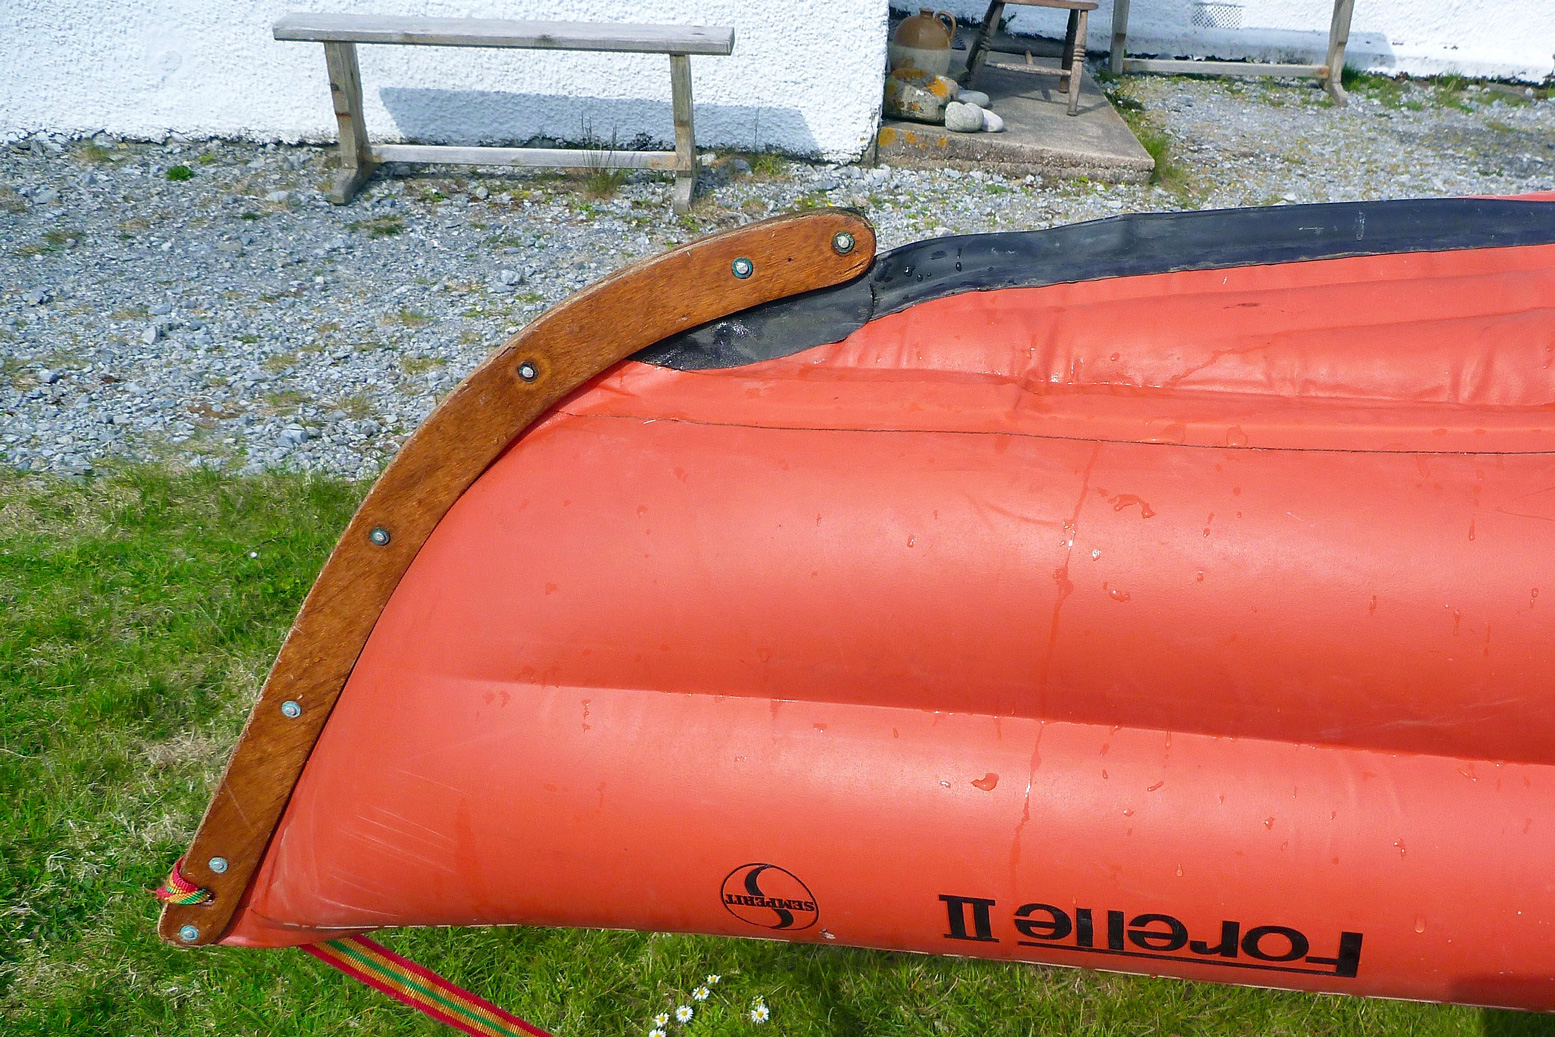
The distinctive marine plywood bow has lasted fine – no warping at all and the rivets are still intact.
It may have been an early design solution to easily joining the three sections of the hull in a nice sharp point, though they managed that join easily enough at the back. Maybe it was as much for protection and a frontal tracking aid.

