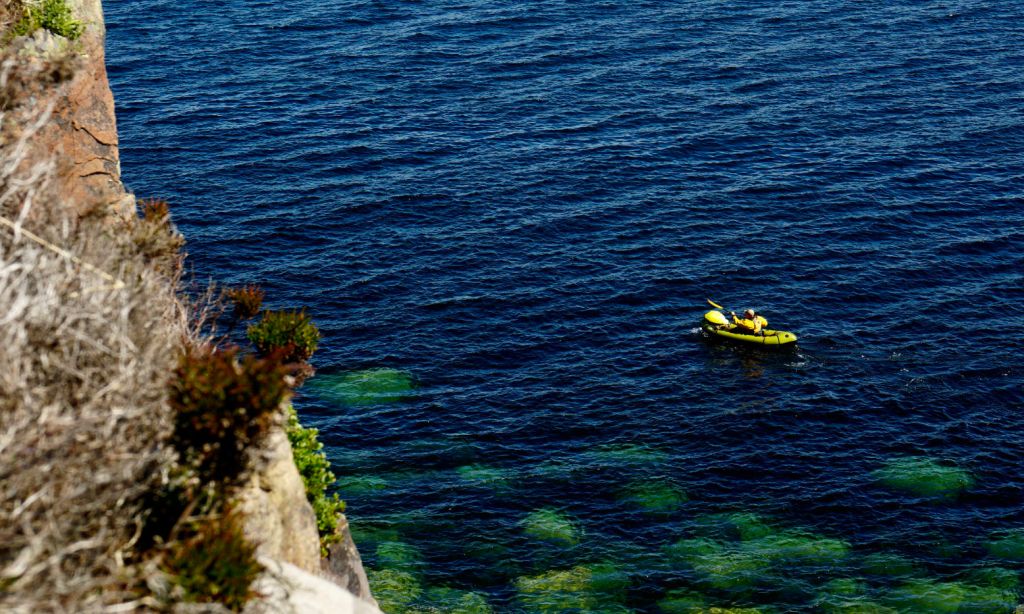
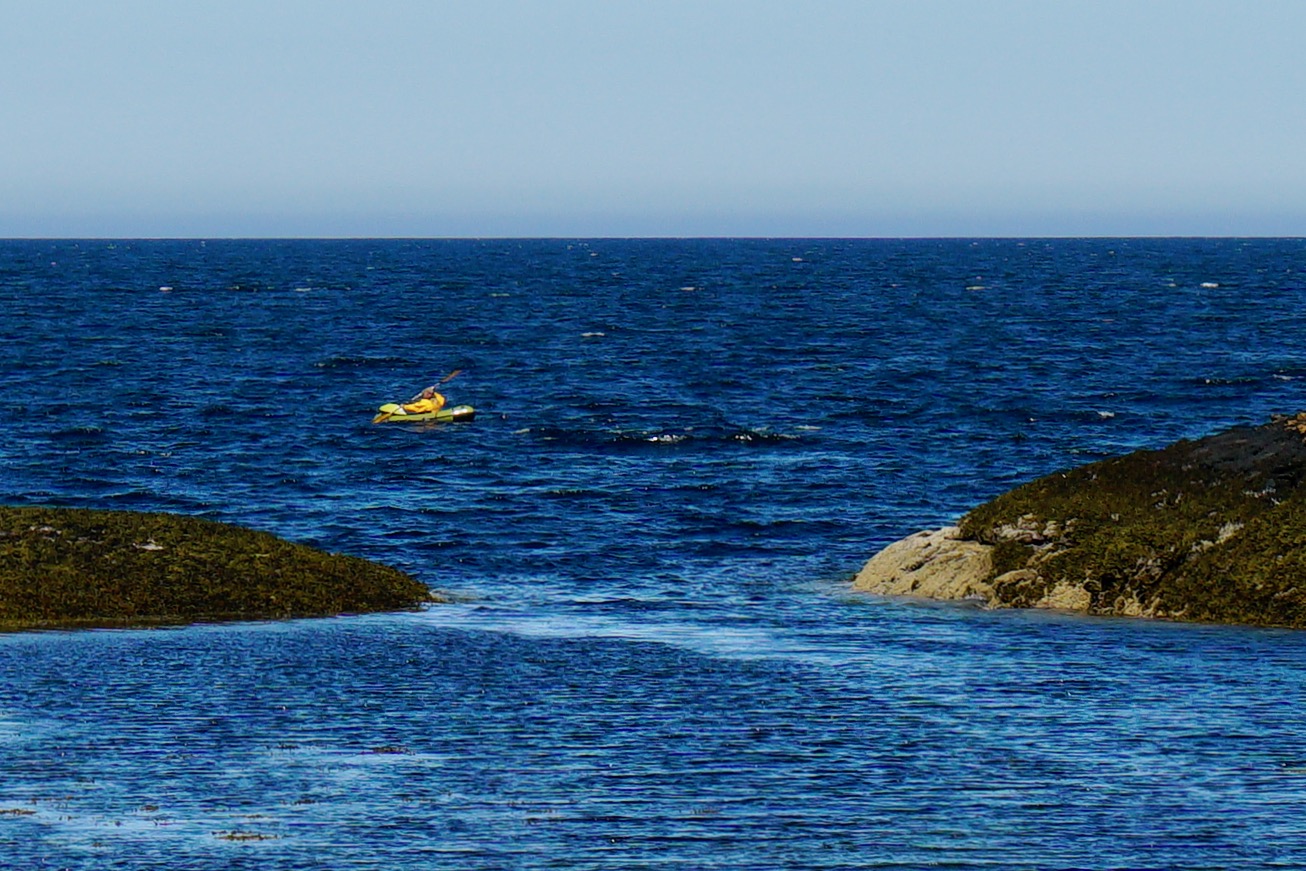
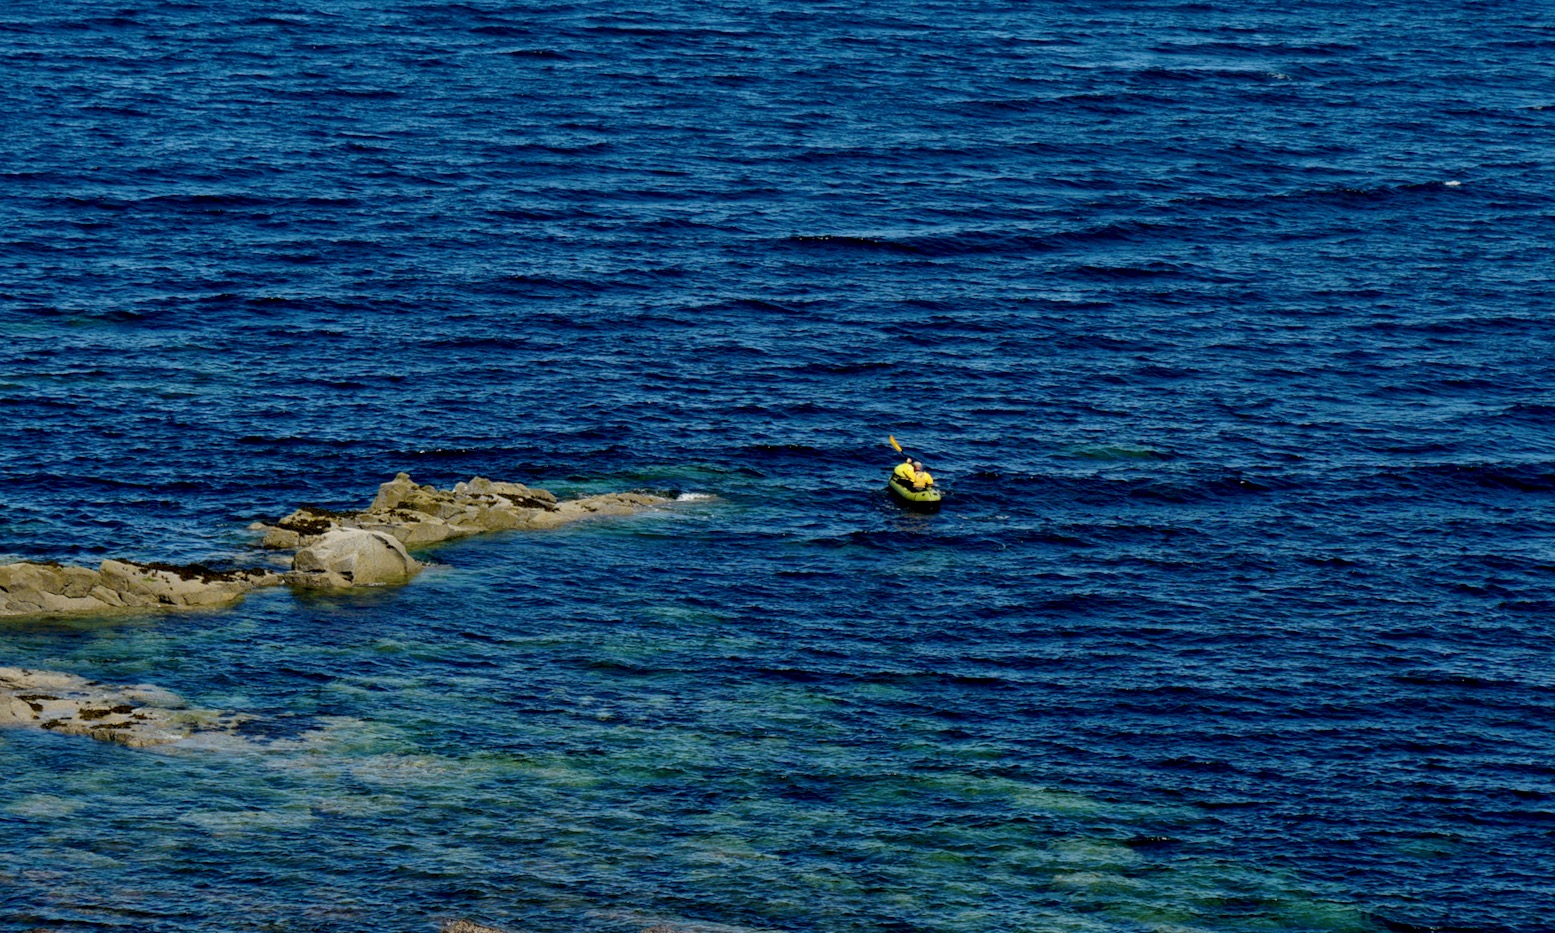
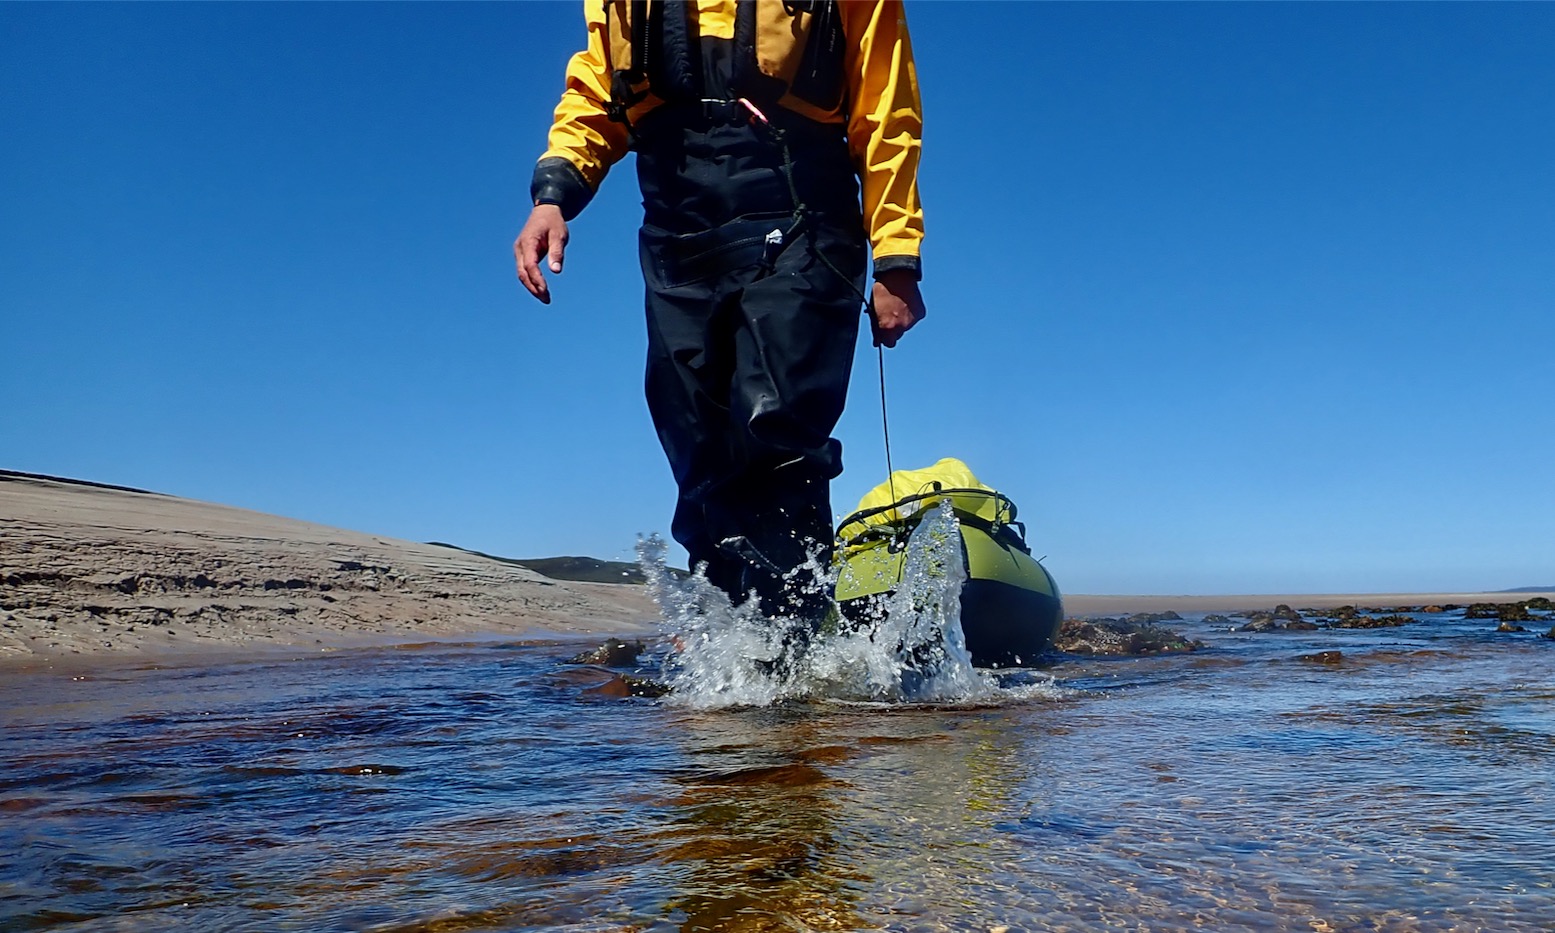
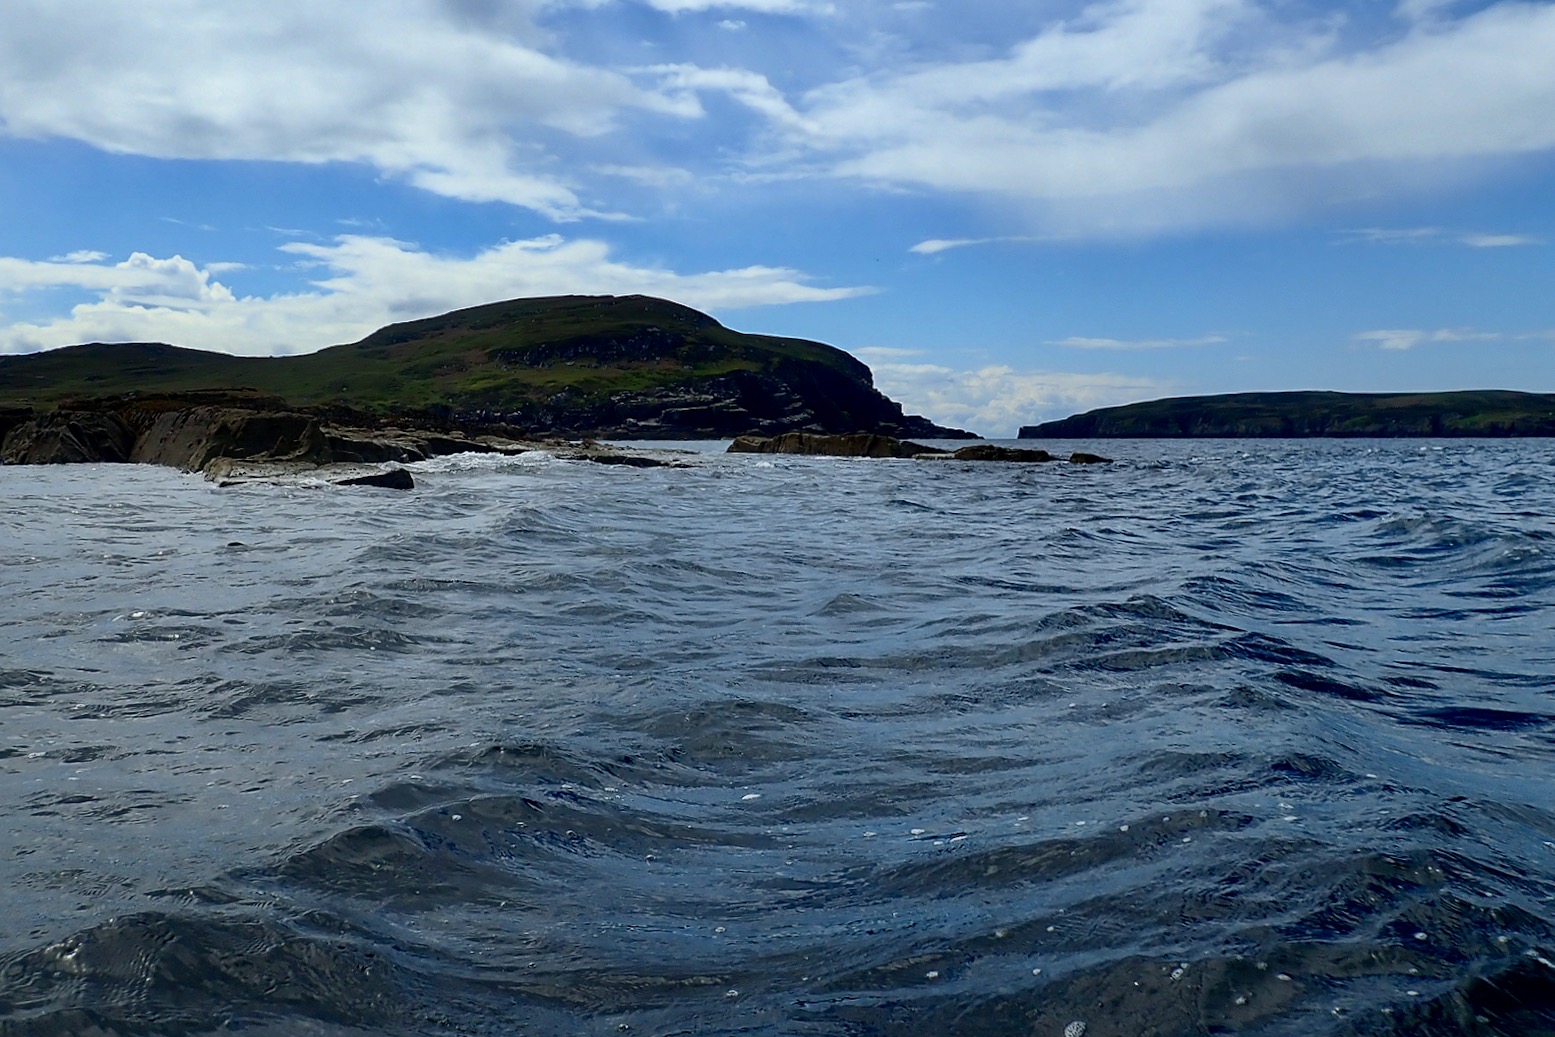
Walking back four miles along the Jurassic Coast the other evening (left) was a lot more tiring and took longer than paddling nearly the same distance to get there. That’s not so surprising. A steady paddle on a calm day with only your arms is a lot less effort than walking 340 metres of elevation gain, carrying the boat on your back.
NouadhiWhat? Hello?
It wasn’t helped by the fact that the TXL was in my Lomo Blaze, a holdall with basic backpack straps, so the whole weight was hanging from my shoulders. I like my Lomo; unlike a rucksack the bag is made from heat-welded PVC which is waterproof. Yes it may have a regular zip for the lid, but it cost 40 quid and is a lot easier to load, access and see what I’ve forgotten this time. I’ve even used it as a ditch bag on desert trips (left; sadly I needed to ditch that time). But Lomo is not a great backpack for long. As I neared Kimmeridge, mesmerised by the setting sun, I had a vision of a Better Way…
I’ve been through this all before …how to carry the boat and gear sustainably over land and water. Besides trolleys for train trips, there are packframes like the Lastenkraxe fit to carry a well-fed moose calf, pack harnesses like the NRS Paragon and Six Moons Flex PR which wrap around anything. Even my huge, airtight Mk1 Watershed UDB sausage bag became semi rigid when ‘pressurised’, but had a rubbish, ill-placed ‘harness’ (so needed an NRS). The wheeled Ortlieb 140 could also be backpacked – but not long term.
You want a stable, well-supported pack on terrain like this: ie; a proper backpack or harness with chest strap and hip belt
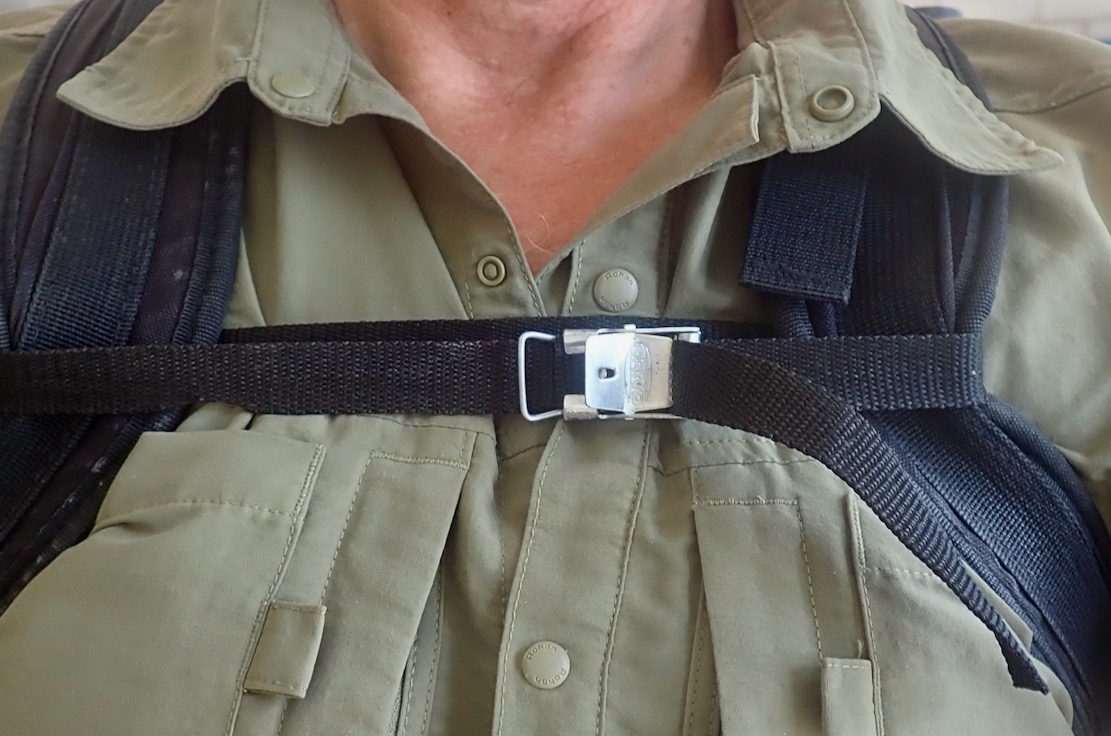
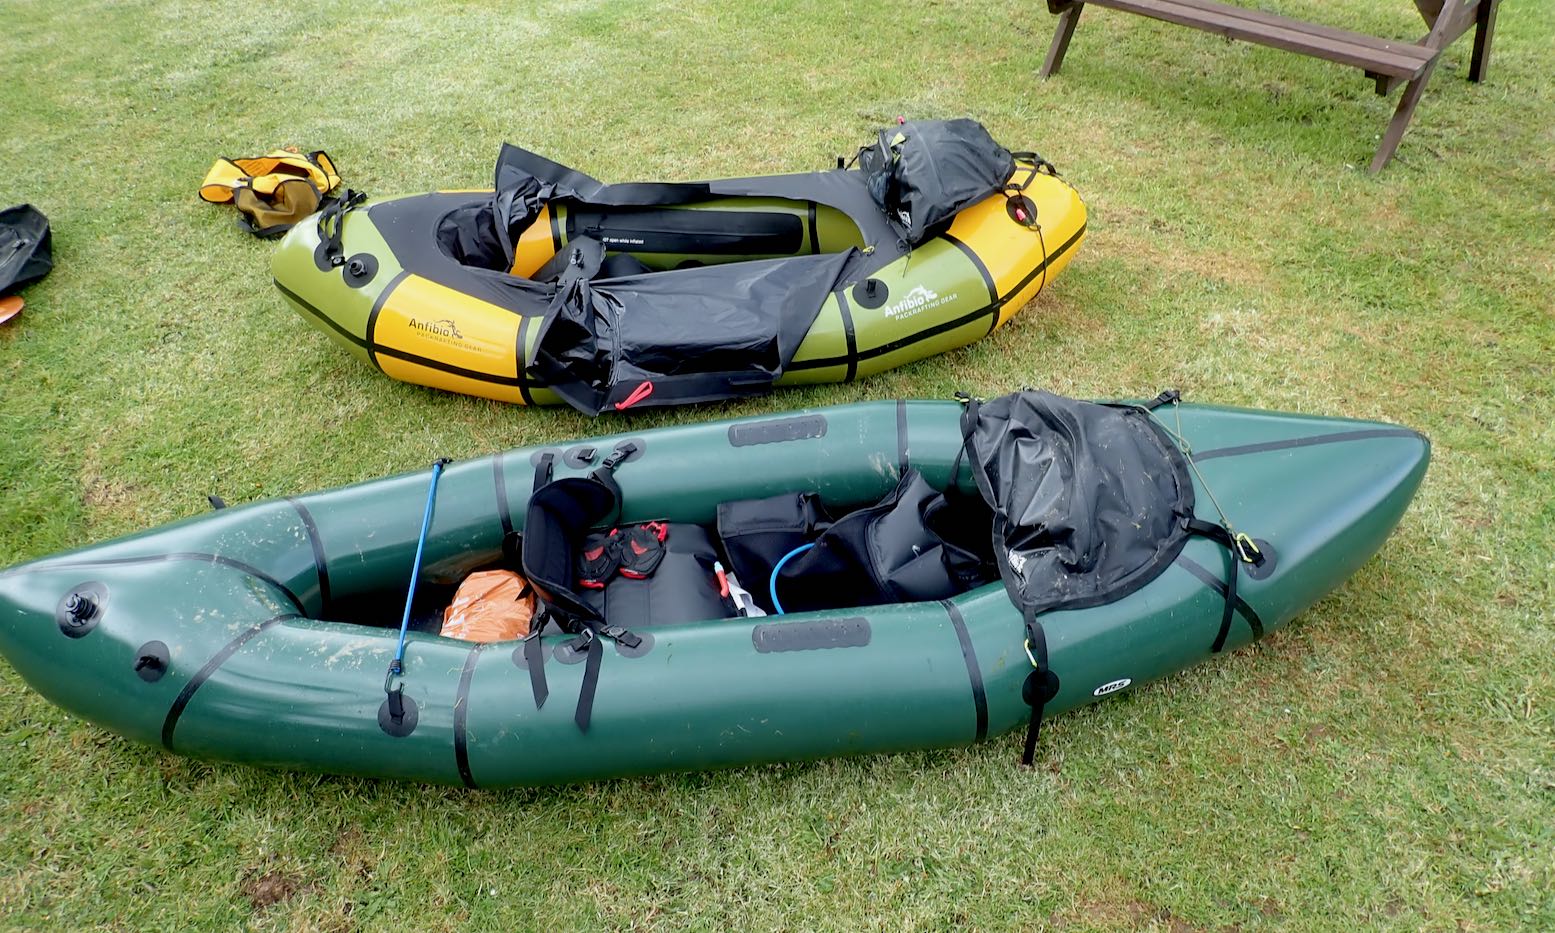
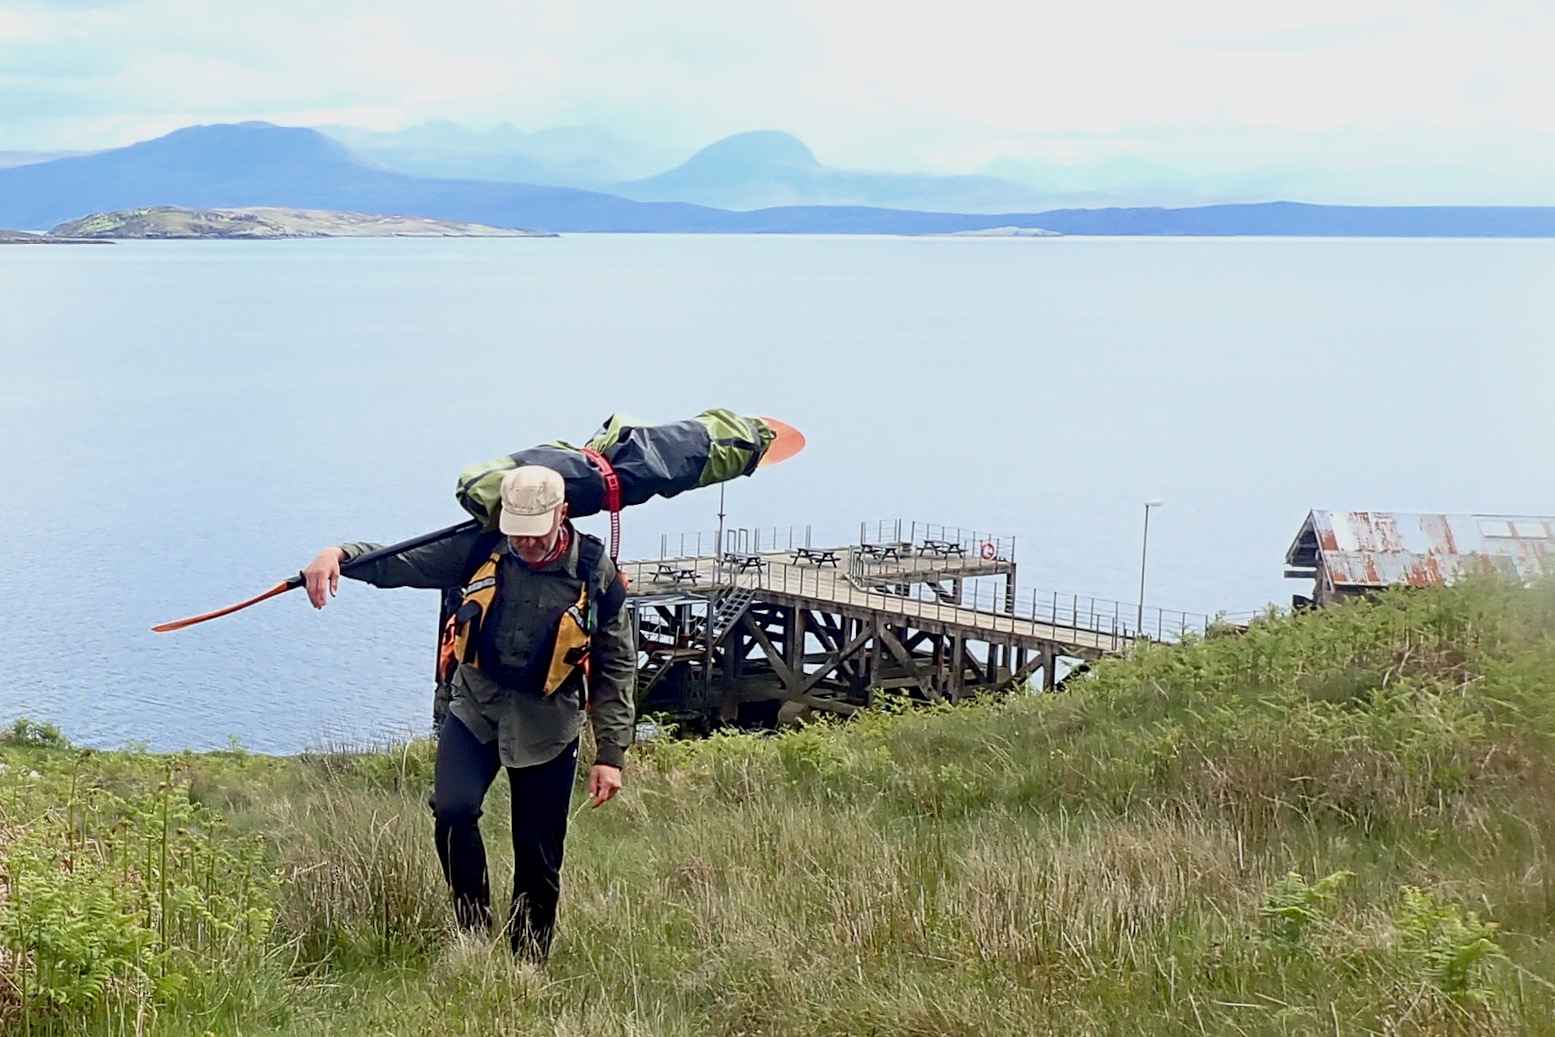
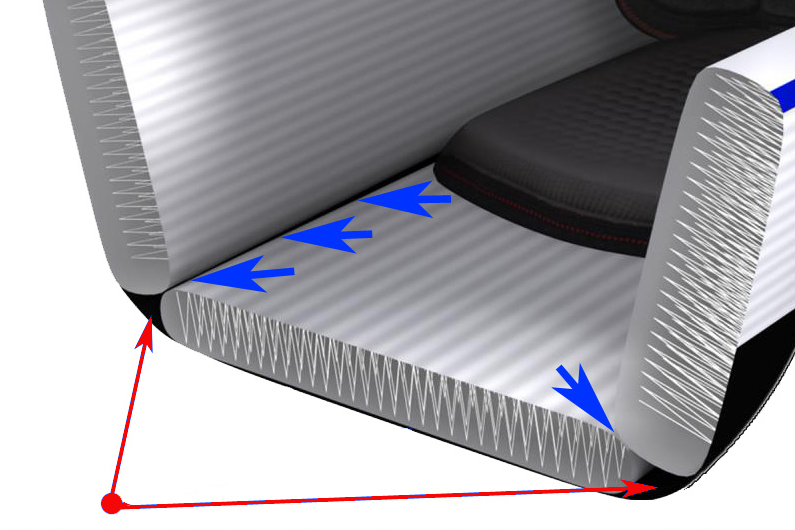
For a multi-day trip, mixing walking and paddling (aka ‘packrafting‘), like we did in Knoydart (above), packframes or just a proper rucksack make sense. But for day paddles they’re overkill and awkward to stash or keep dry on the water. My brainwave was using the paddle shafts as an external packframe to create a rigid rod from the top of my holdall to the waist (below).
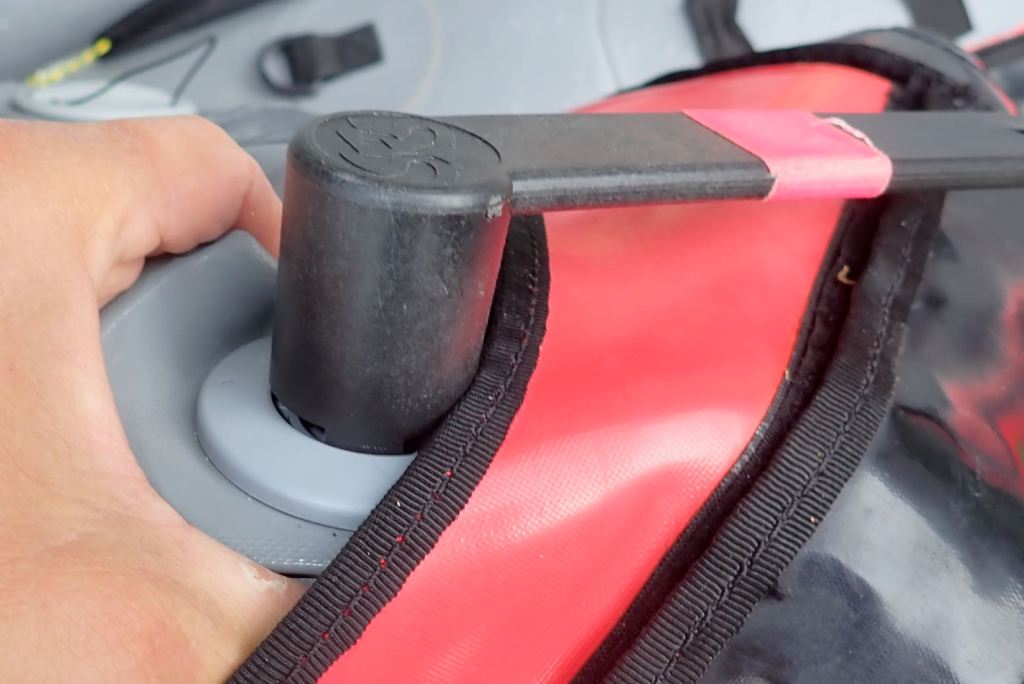
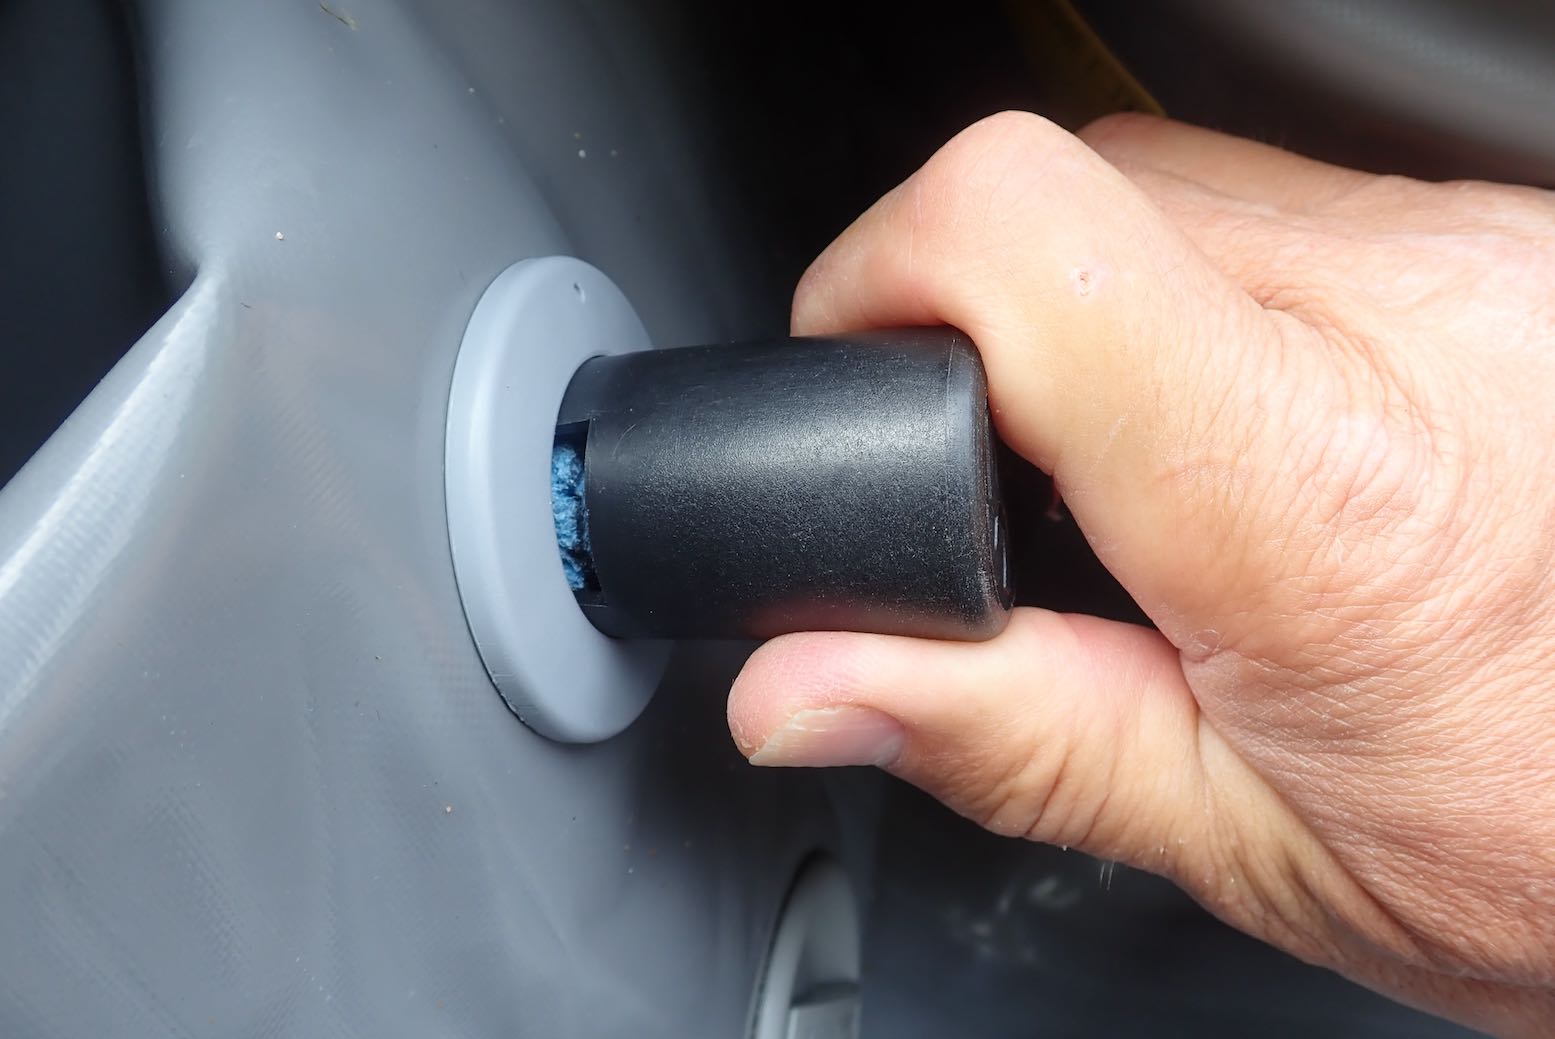
Paddle shafts twisted into the Molle on the left (top of pack; not load), and then ziptied to the Molle (right) where the weight will rest on the paddle’s collar.
As we should all know by now: for longer walks over rough ground weight supported low on you waist is more sustainable than hanging high from your shoulders. It makes you less sore and much more stable which adds up to less fatigue. That’s why both the heavy hauling Lastenkraxe (below left) and Six Moons Flex come with such generously padded hip belts: it’s where most of the weight is carried.
PaddedMolle
The Lomo 60 Blaze is just a holdall with backpack straps and handy grab handles at each end; it doesn’t have a hip belt but it does have a run of Molle webbing lashing points (above right) to which I sometimes strap my paddles. The shafts from a 4-part paddle could be lashed to the Molle each side (or even a whole 2-part paddle), with the lower sticks hooking into any waist strap or belt. Though it would be nice, for a couple of hours with 8 kilos there’s no need for a fully padded belt with pockets and an SOS ripcord.
Paddle shaft zips to the bag’s Molle loops then tucks in behind any belt, even the one holding up your trousers. Minimal and reversible adaption: the bodger’s Holy Grail ;-)
The shafts are zip tied (blue) to the Molle at the lower end, so the weight rests on the shaft’s collar (above). The shaft then tucks behind a belt and the weight should at least partially be spread onto the hips, not all hanging from the shoulders. While I was at it, I decided to cut off the Lomo’s redundant carry handles. They get in the way when groping around for the backpack straps which can perform the same carrying function. I ‘zip-sewed’ the loose ends into loops (left) to take a half paddle or two on each side.
With belt and chest strap; pulls in close, weight part carried low. Better mass distribution and centralisation.Hanging from the shoulders; OK for short, flat walks
All that was needed was a chest strap (left and above left) to pull the weight in close. This alone makes a big difference to stability, I find. Tested outside with the Lomo loaded for a day paddle, it felt pretty good considering the minimal effort involved. Best of all a belt doesn’t have to be attached to the bag in any way and could even be your trouser belt. Just tuck in the shaft ends, tighten up and jog forth. The advantage is that for a day paddle ending in a walk of a couple of hours, no extra gear is needed, bar a belt or strap. In the boat the near empty holdall and belt are rolled up out of the way or stuffed in the Deckpack. Assuming you’ve not repurposed your paddle as a packstaff, your day-paddling outfit ought to be a lots easier to carry, especially over rough or steep terrain.
What air pressure does a typical packraft run? 1 psi, 1.5, 2.5? Answer at the bottom of the page.
Air bagging. Air bagging. Oh isn’t it wild?
Most inflatable devices come with an air pressure rating at which they perform best, including inflatable kayaks which run from 2psi/0.14bar up to 10psi/0.7bar in drop stitch. On the cheapest vinyl Intex or Sevylor dinghies, as well as slackrafts there won’t be a number, instead you get a ‘stretch gauge‘ (left). With a Sevy you keep pumping until a sliding black tab settles between A and B; your squishy slackraft is probably now at less than 1psi but is good to go. Add a bit more air to try and make it feel less of a water sofa and the thing will burst a seam. It may do that anyway if you give it a week or two or look at it too long.
Right from the start packrafts never had air pressure ratings. You just aired it up with a flimsy nylon airbag (above) until you couldn’t get any more in. The airbag idea was surprisingly effective once you got the knack, and the bag weighed next to nothing. You then unscrewed it without trying to lose any air, quickly screwed on the cap, then topped off by mouth via the separate twist lock elbow valve (left) with all you had in your lungs. The more you blew the firmer you boat became – and that definitely made a difference to response on the water. It helped if you didn’t smoke and played lead trumpet in the local jazz band.
Once on the water all inflatable boats cool down and the hard-won air pressure inside drops a bit so you have to top it up again to get the boat firm. What was the air pressure? As much as possible but what did it matter as you couldn’t overdo it with your lungs. Stronger lunged paddlers and opera singers paddled firmer boats. And anyway, such very low pressure would be difficult to measure with a normal handheld manometer.
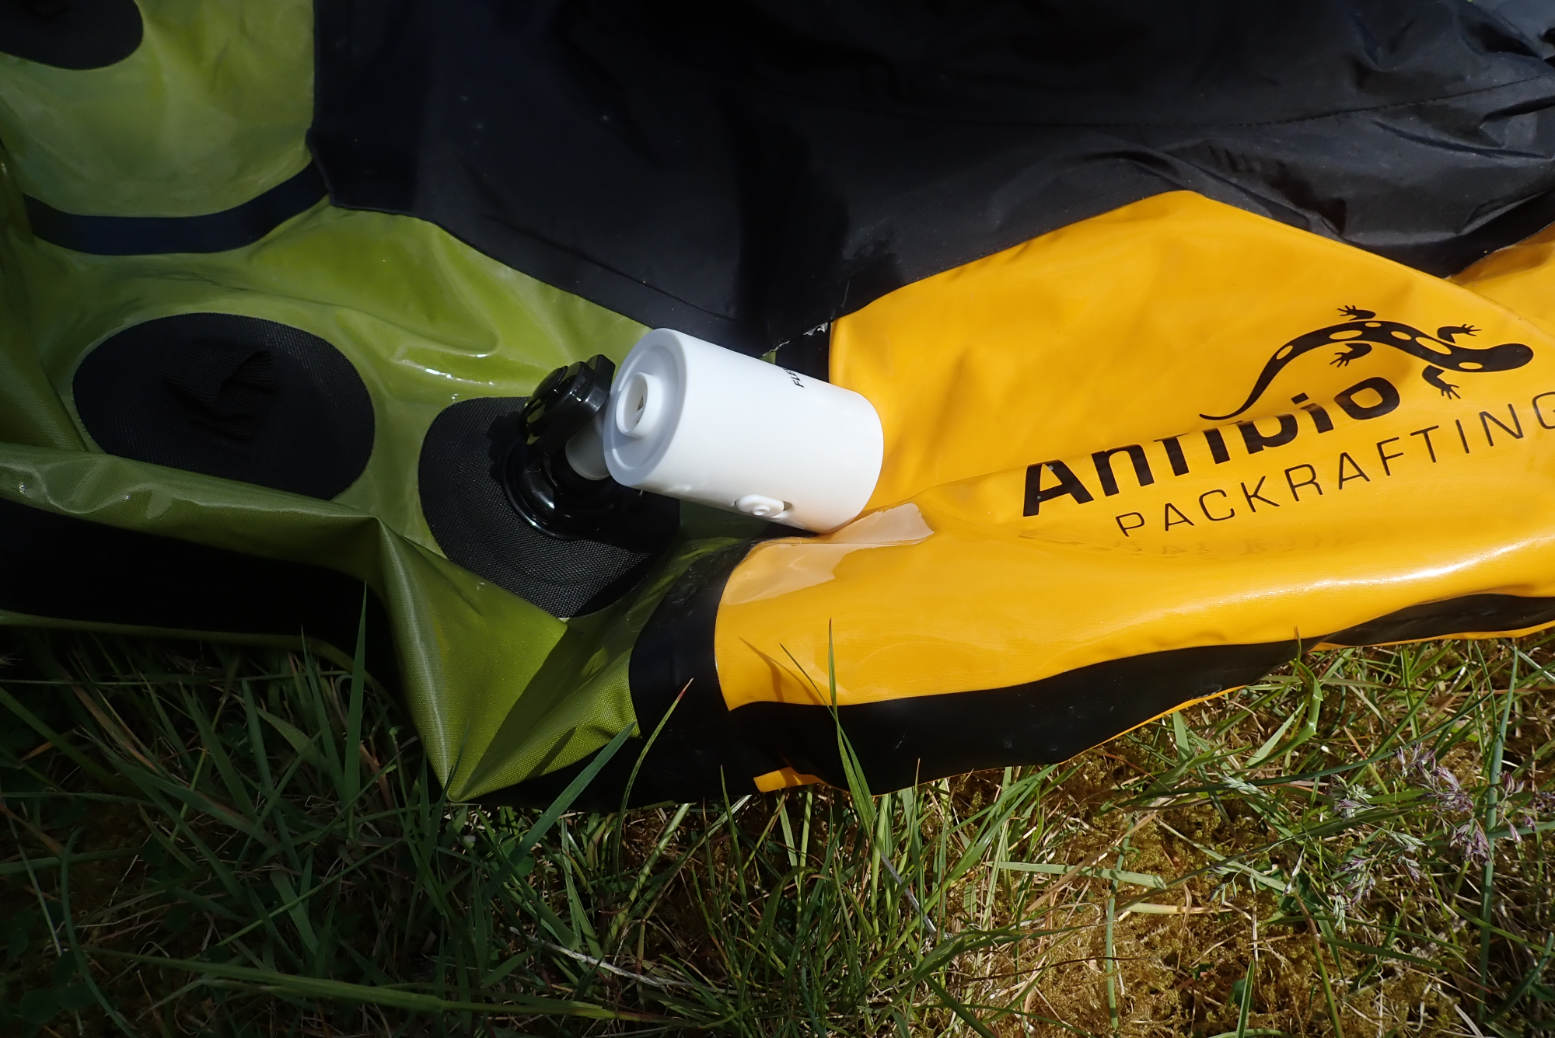
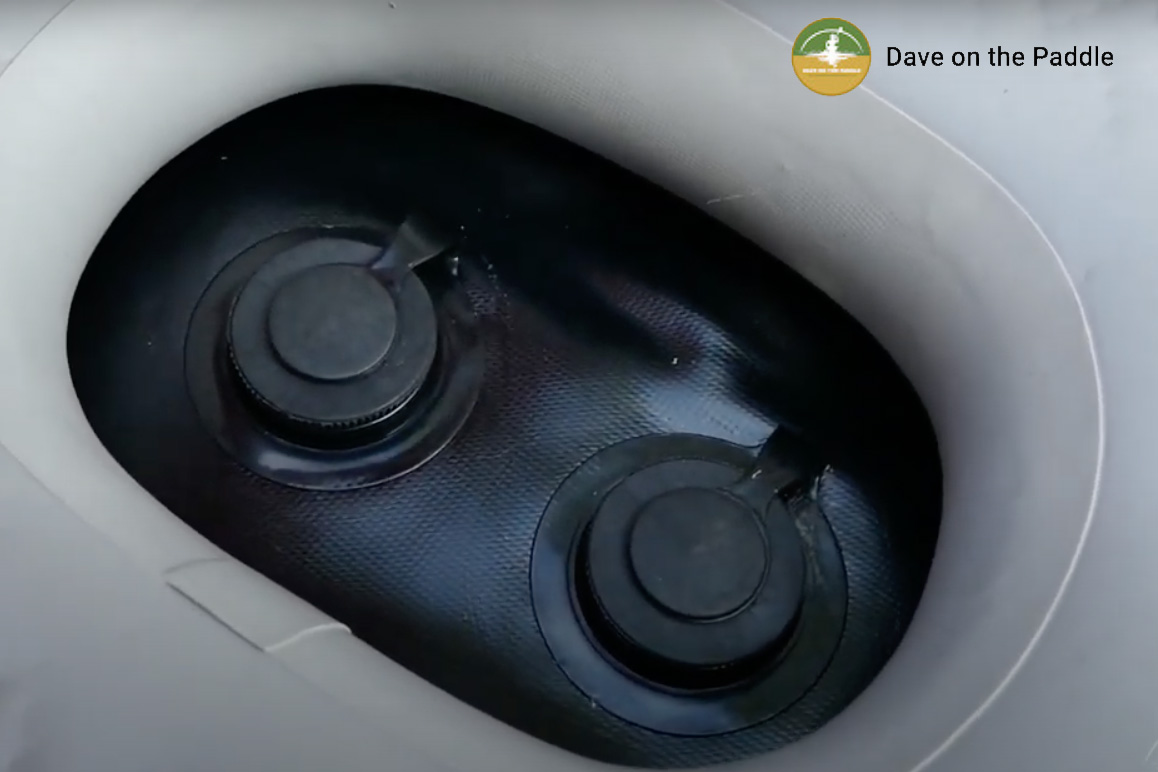
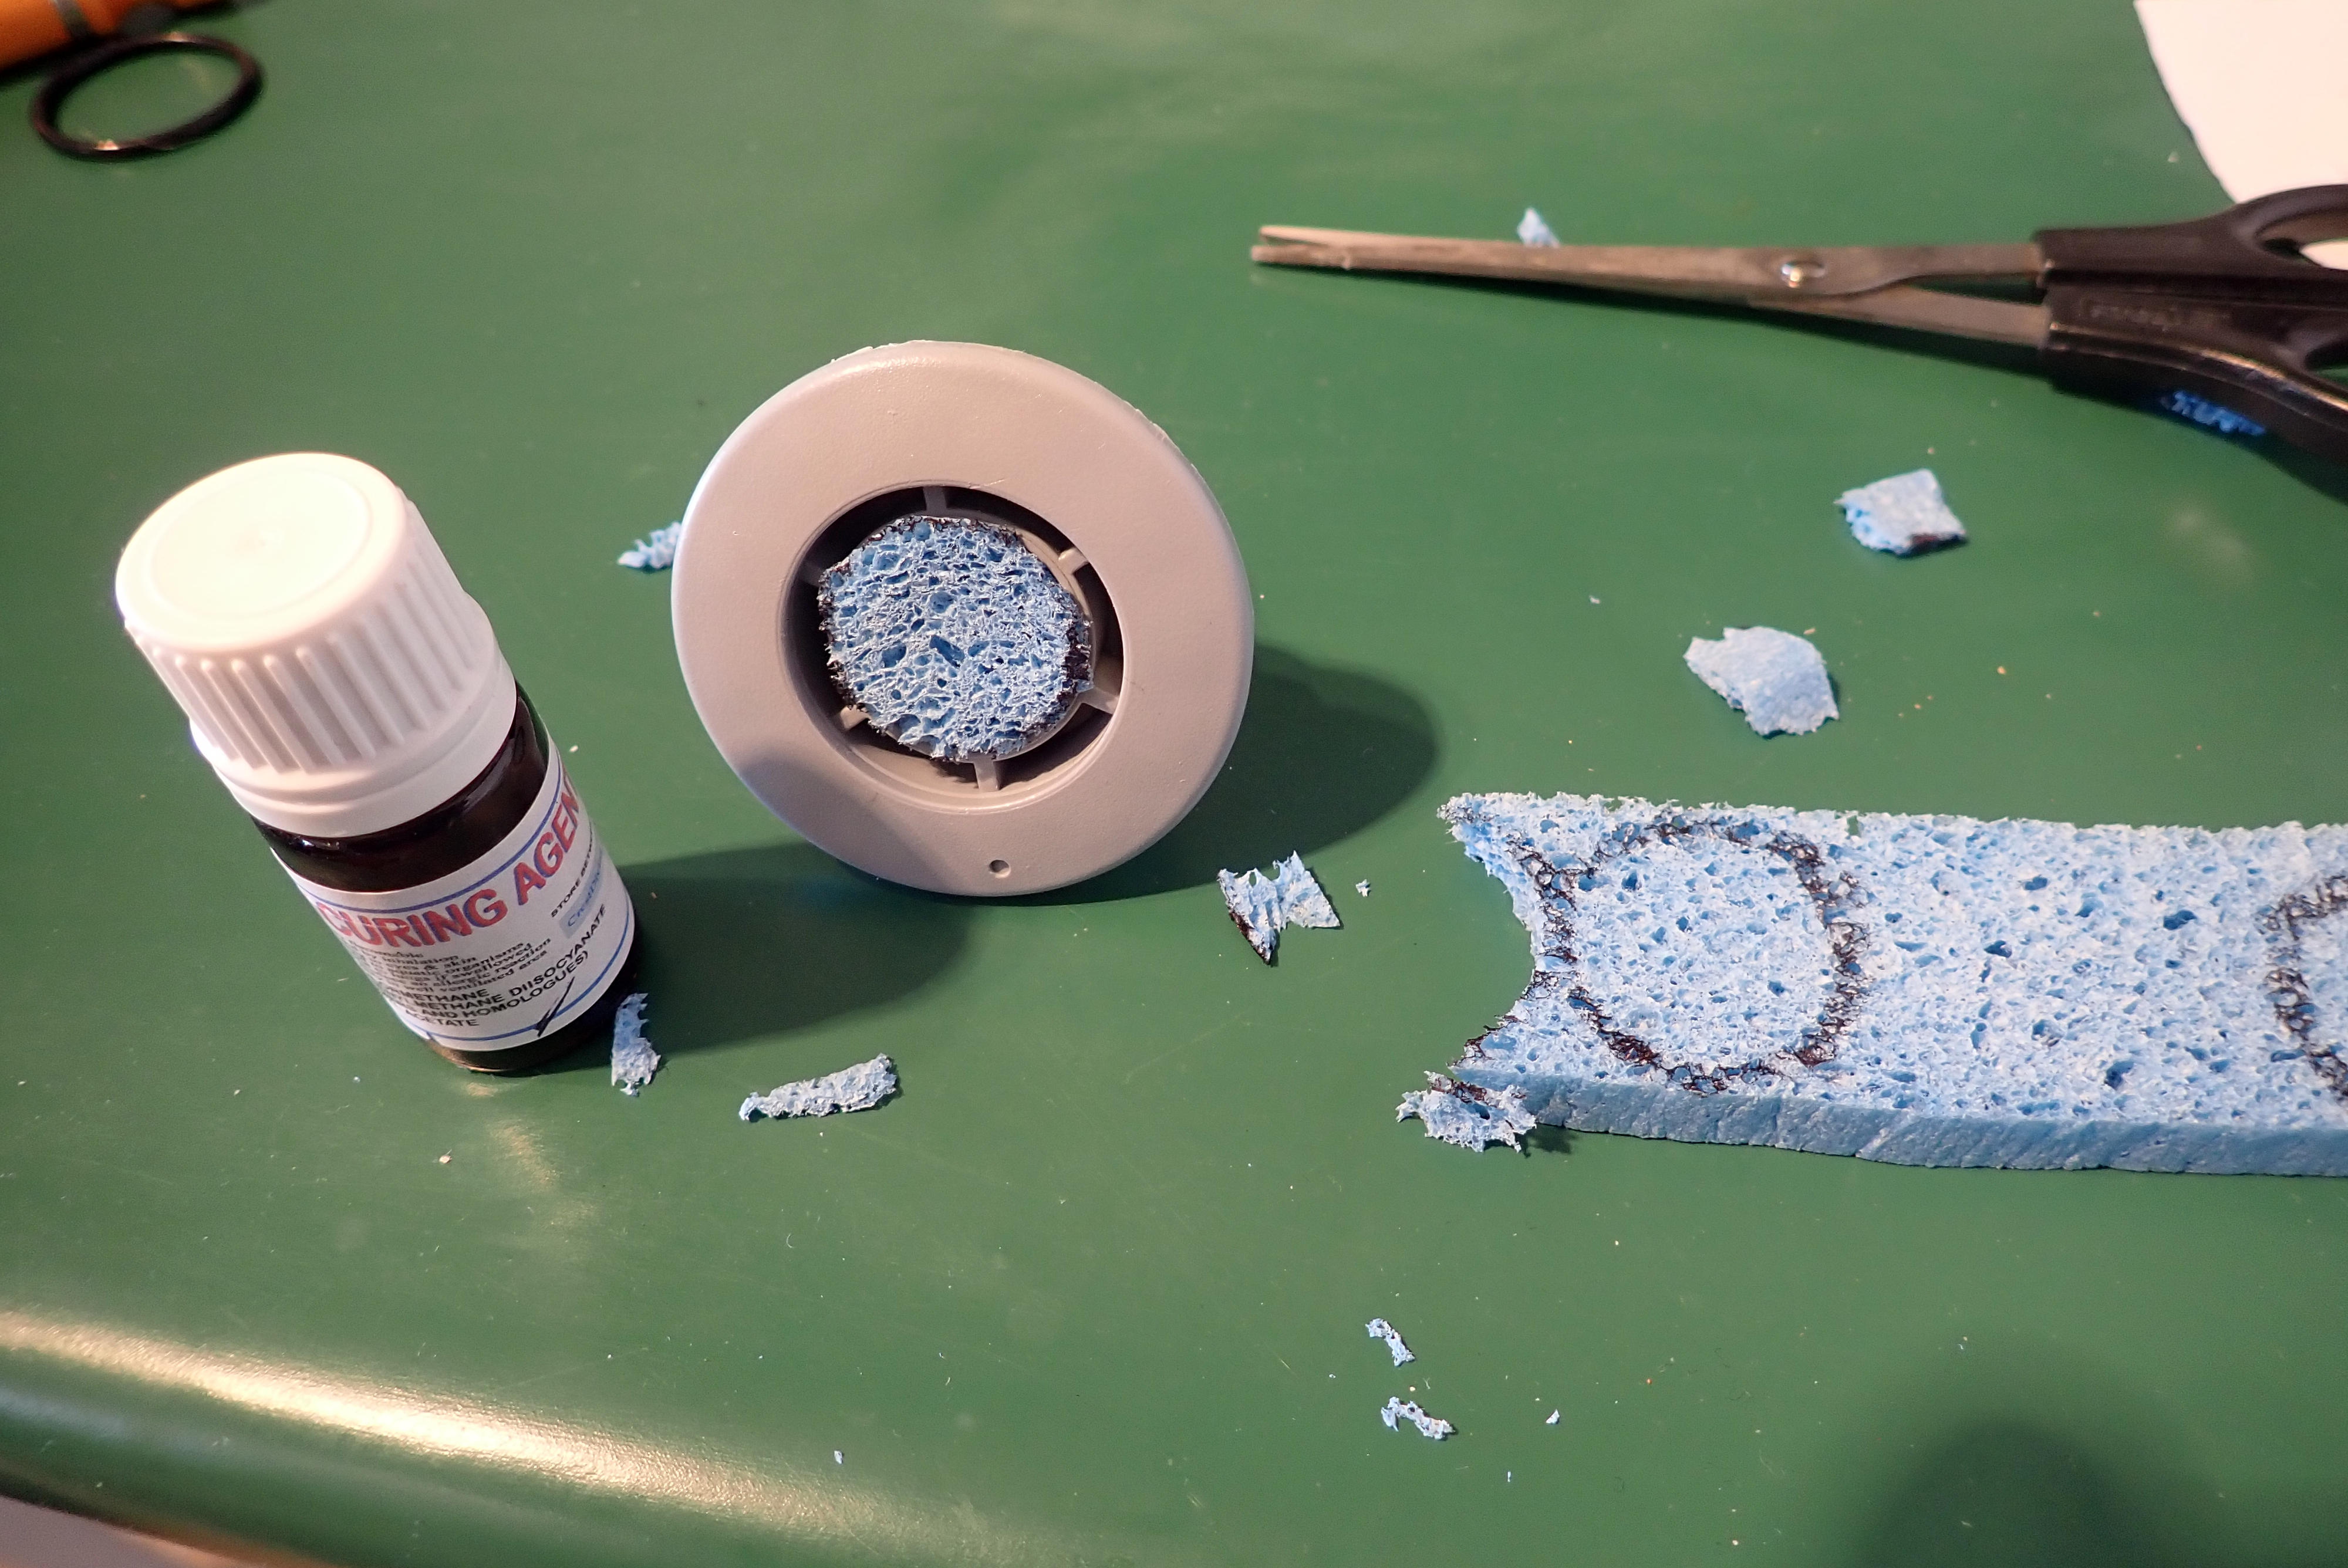
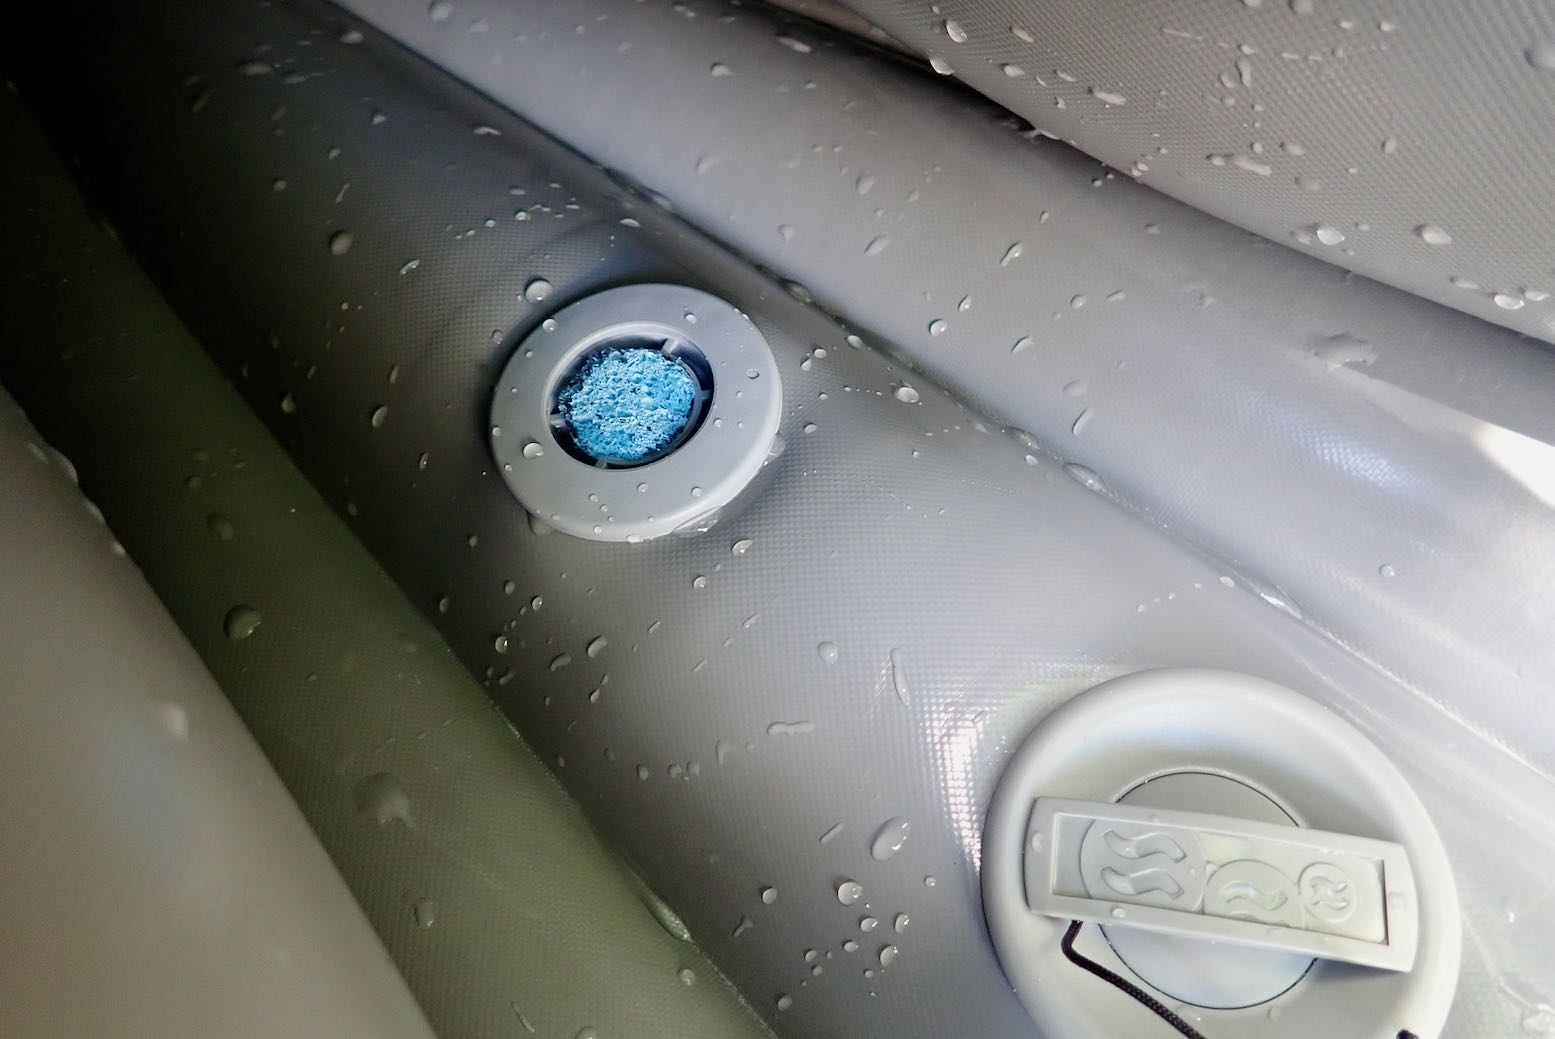
These days most packrafts use simple and effective one-way Boston-type valves (left) which screw off for a wide open ‘fast inflation’ port for airbagging, but have a one-way valve built into the cap for topping up, just like a car tyre. What goes in, stays in so you can build up pressure and get the boat good and firm. No more crumby twist-locks and undignified topping up by mouth.
Mini electric pump; ditch the airbagMini handpump to top up
Better still, inexpensive pocket electric inflators like Flextail (above left) do the job of airbagging while mini handpumps (above right; adapted from party balloon inflators) can do the important topping up without giving yourself a lung hernia. But what’s the air pressure!? Who cares, it’s better than it used to be provided you could pump the handpump with all you had – I find it takes 100 jabs. A Flextail or similar will burn out long before it can get close to a handpump’s final pressure.
Tip: all these pumps are handy but I always leave an airbag in my packraft’s storage pockets in case the Flextail packs up or I forget it. Otherwise it will be a lot of blowing or handpumping to air a boat up. And with a Boston-type valve as above, a short section of half inch garden hose makes inflating by mouth much easier should you’re topping-up handpump pack up too.
Kokopelli and French-made Mekong packrafts (and maybe others) feature a RIB-style Leafield D7 push-fit inflation valve. That’s push-fit as opposed to more secure bayonet fitting as on proper IKs and iSUP boards. It’s what Gumotex IKs used years ago and is actually not a bad idea on a packraft as the pump nozzle on the end of a hose will blow off the valve as pressure climbs, meaning you have to try hard to over-inflate the boat.
Black boat and Englishman
But these one-way valves have now made over-inflation a possibility, and we know how that can end. However, one thing we’ve learned with TPU packrafts over the last decade or two is that it’s virtually impossible to burst a well-made packraft using a human-powered pump, even a high-pressure iSUP barrel pump. You would really have to go at it or leave a fully inflated black boat out in the midday sun. The fabric and simple but strong sewn and heat-welded assembly spreads forces equally across the single chamber hull ring. So much so that MYO packrafts have become a thing for individuals with a big table and a sharp pair of scissors.
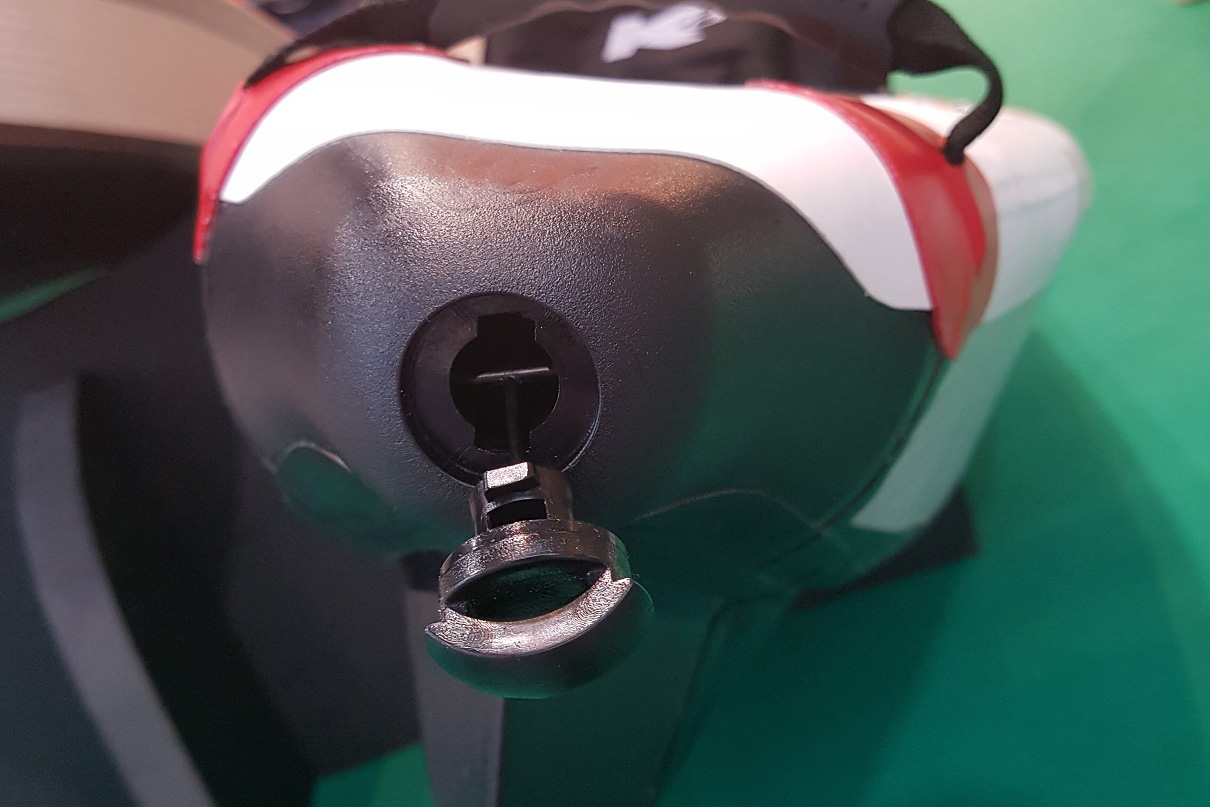
With a D7 valved packraft you could use a handheld manometer (left) with a push-fit adapter to read the boat’s pressure. Such manometers have a pin in their throat which pushes open the D7’s sprung valve stem just as the gauge body seals around the valve housing, so getting get a live pressure reading.
I don’t have a D7-equipped packraft at hand, but I do have a Bravo Alu 4 R.E.D barrel pump fitted with a 14.5psi/1 bar inline manometer (left). With an adapter jammed in the Boston’s threaded port I ought to be able to get a full-pressure reading off my Anfibio TXL.
I’m guessing about 2psi / 0.14bar to get a pinging firm TXL. It’s what my early Gumotex IKs used to run, using the now obsolete footpump. When the Seawave came out, rated at 3.6psi/ 0.25 bar, that was quite a revelation, though before that I ran a 4.3psi/ 0.3bar Grabner Amigo and you could have battered down a wall with that boat, proving that rigidity didn’t require drop stitch panels as long as the boat was solidly assembled. At Grabner prices, you’d expect that to be the case.
Back to the test. And the answer is…. just 0.1 bar or 1.4 psi. And this was with the TXL as tight as a drum such as I could never manage with the balloon handpump but might have with a K-Pump Mini. Now we know.
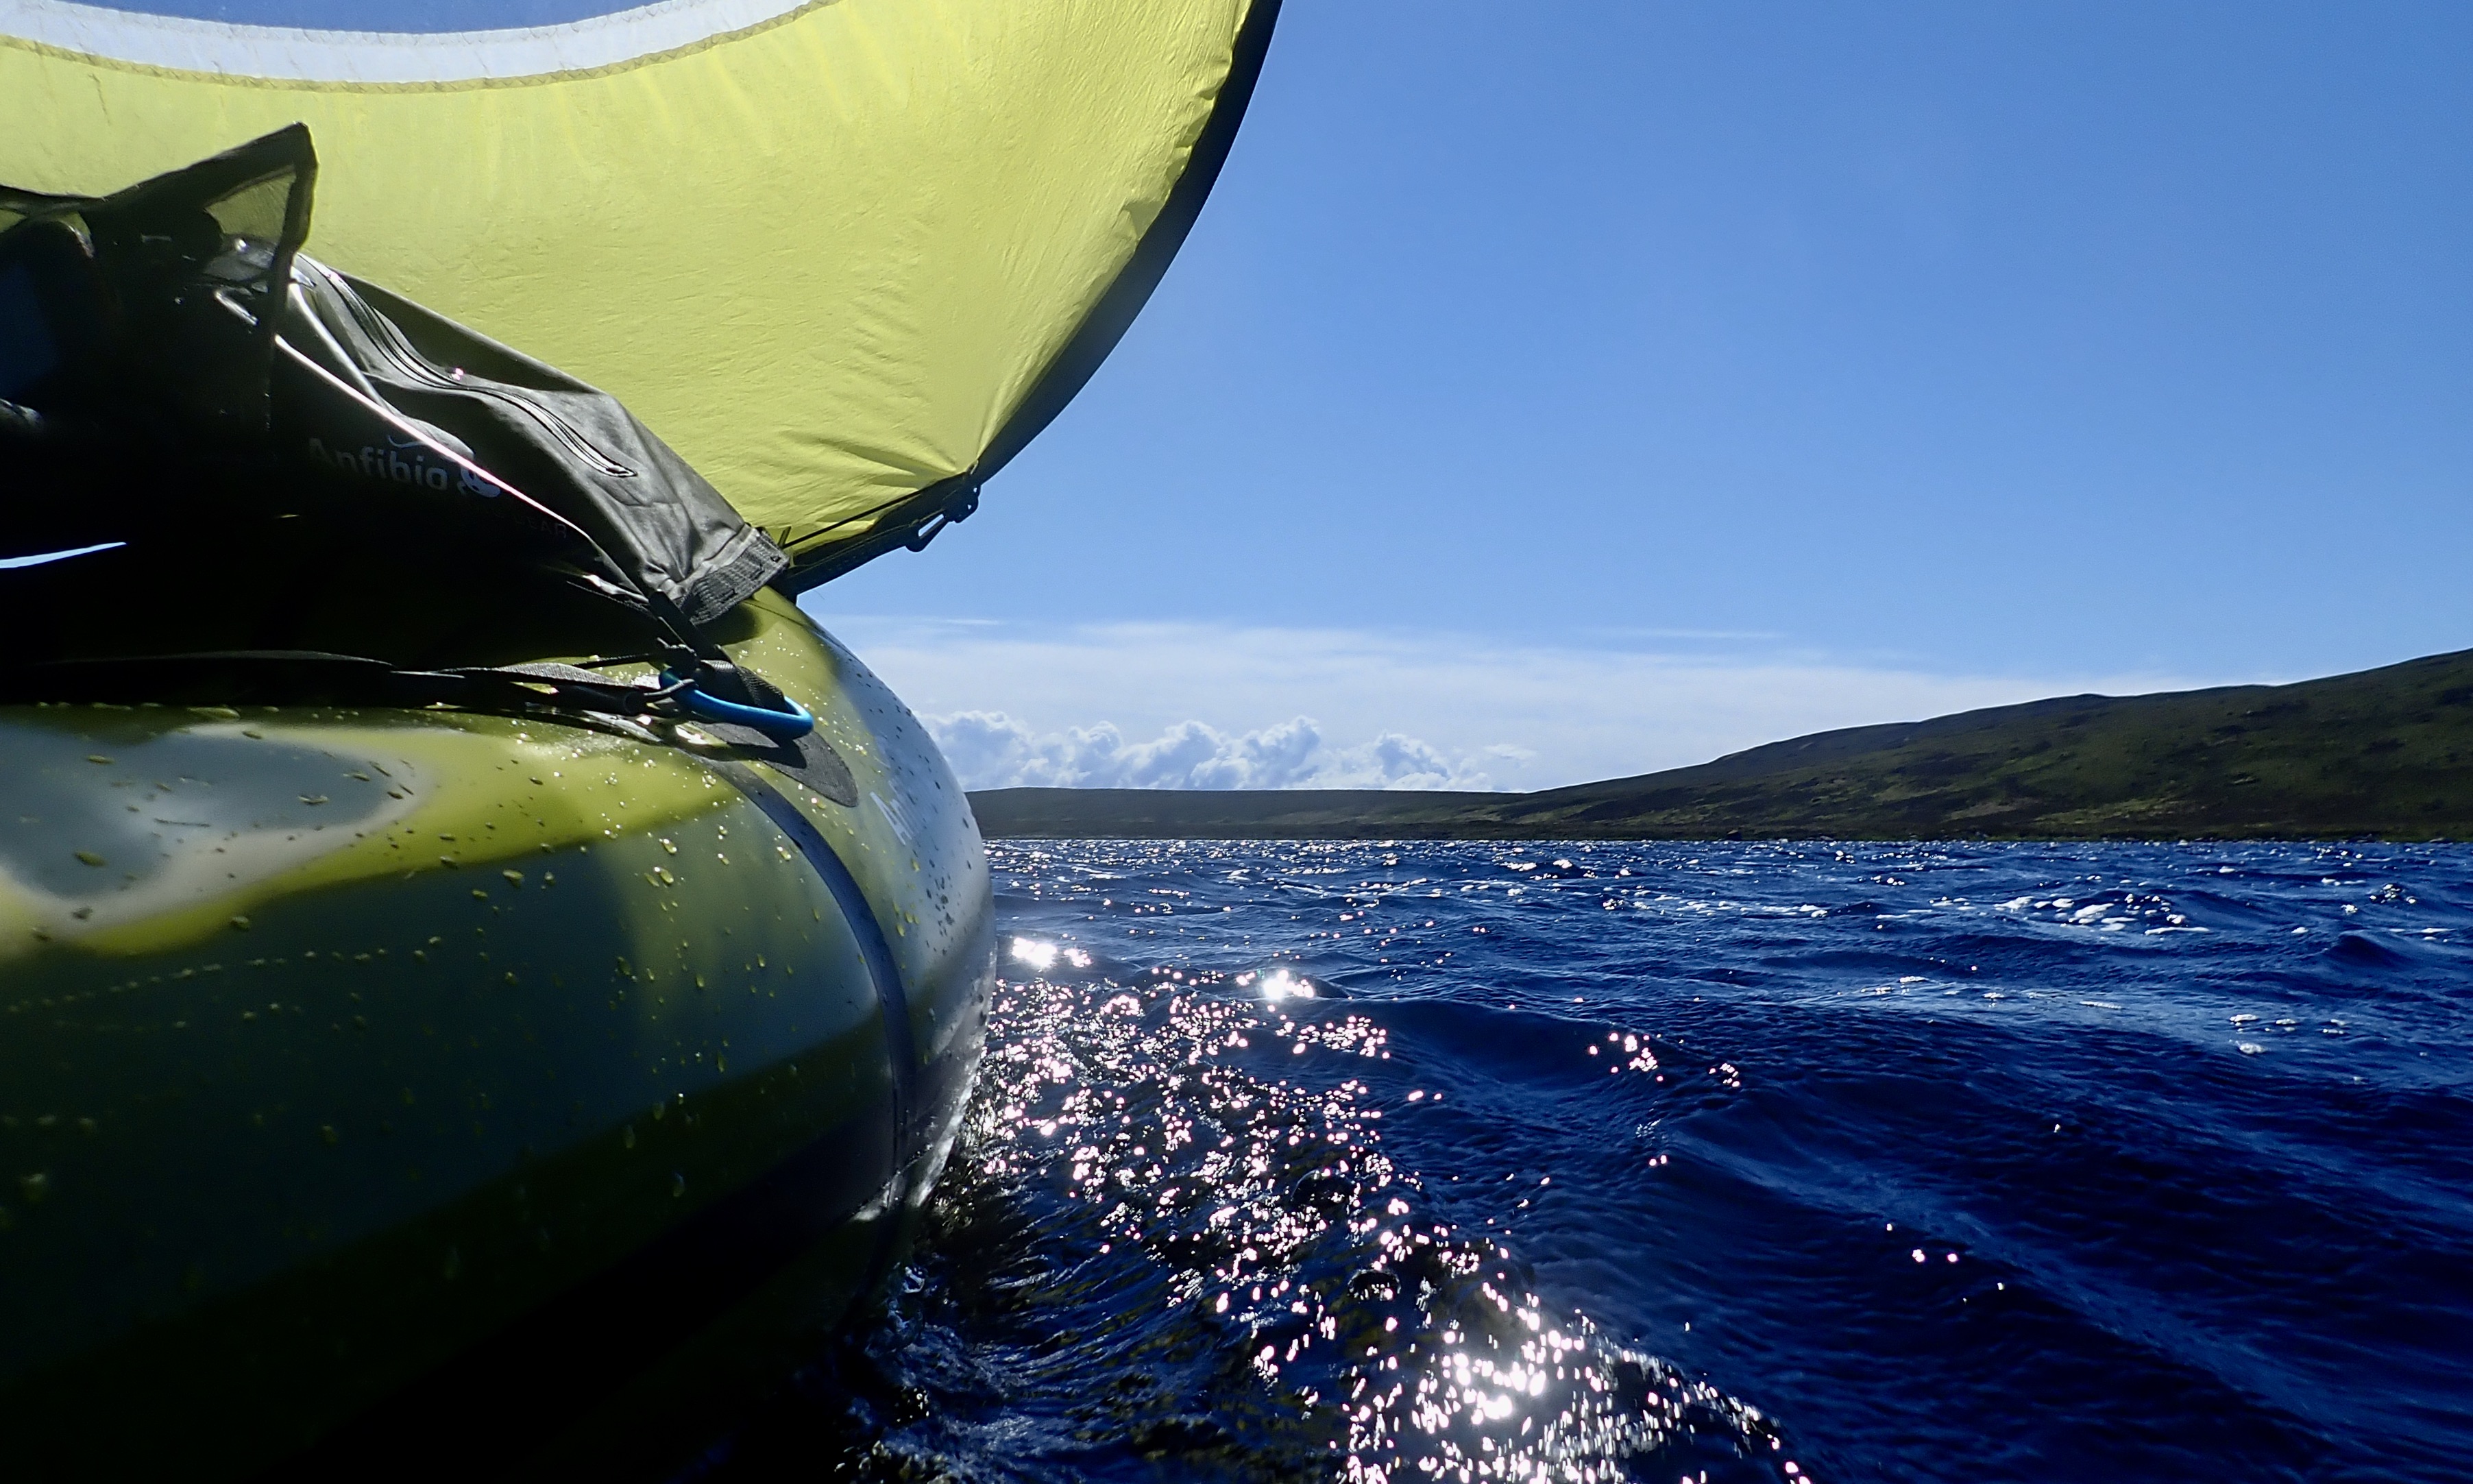
Two good-value, four-part paddles from Anfibio ideal for packraft or IK travels. The yellow VertexTour is a newer redesign and a lot lighter, even with a longer range of length adjustments and has a better clamp. But the black Wave (left) has the classic dihedral (two-faced) blade. What is the difference and does it matter?
What they say
Anfibio Vertex Tour Our new, redesigned Vertex Tour paddle comes with a classic double blade, fine shaft and sub one-kilo weight. Equally suitable for lakes, calm rivers and moderate whitewater. The position length is adjustable from 210cm to 225cm at free angle.
Anfibio Wave High-quality, lightweight carbon paddle for long tours on calm waters. Freely adjustable in length and angle.
I’ve done several hours with both paddles and for this comparison we took both on a 15-mile paddle down the Wey in Surrey in the TXL. It was a hot day but water doesn’t get any flatter unless it’s an ice rink. Below some weights and measures to mull over.
Weight g
Length cm
Shaft cm
Shaft g
Shaft ø
Blade gm
Longest piece cm
Blade cm
Price
Anfibio Vertex
851g
210-225
118cm
303g fibreglass
29mm
274g
63cm (blade)
44 x 19.5cm
€125
Anfibio Wave
1011g
210-220
108cm
283g carbon
29mm
365g
65cm (blade)
44 x 16cm
€125
I didn’t notice until I weighed the blades, but the two are made quite differently. The larger Vertex blade – about 650cm2 – has a molded central ‘corrugation’ to stiffen the blade. The Wave has a classic dihedral (two-faced) power face which is said to power smoothly through the water better than a plain flat blade. The Wave blade is also smaller – 600cm2 at a guess.
Black Wave dihedralYellow vertex more flat faced
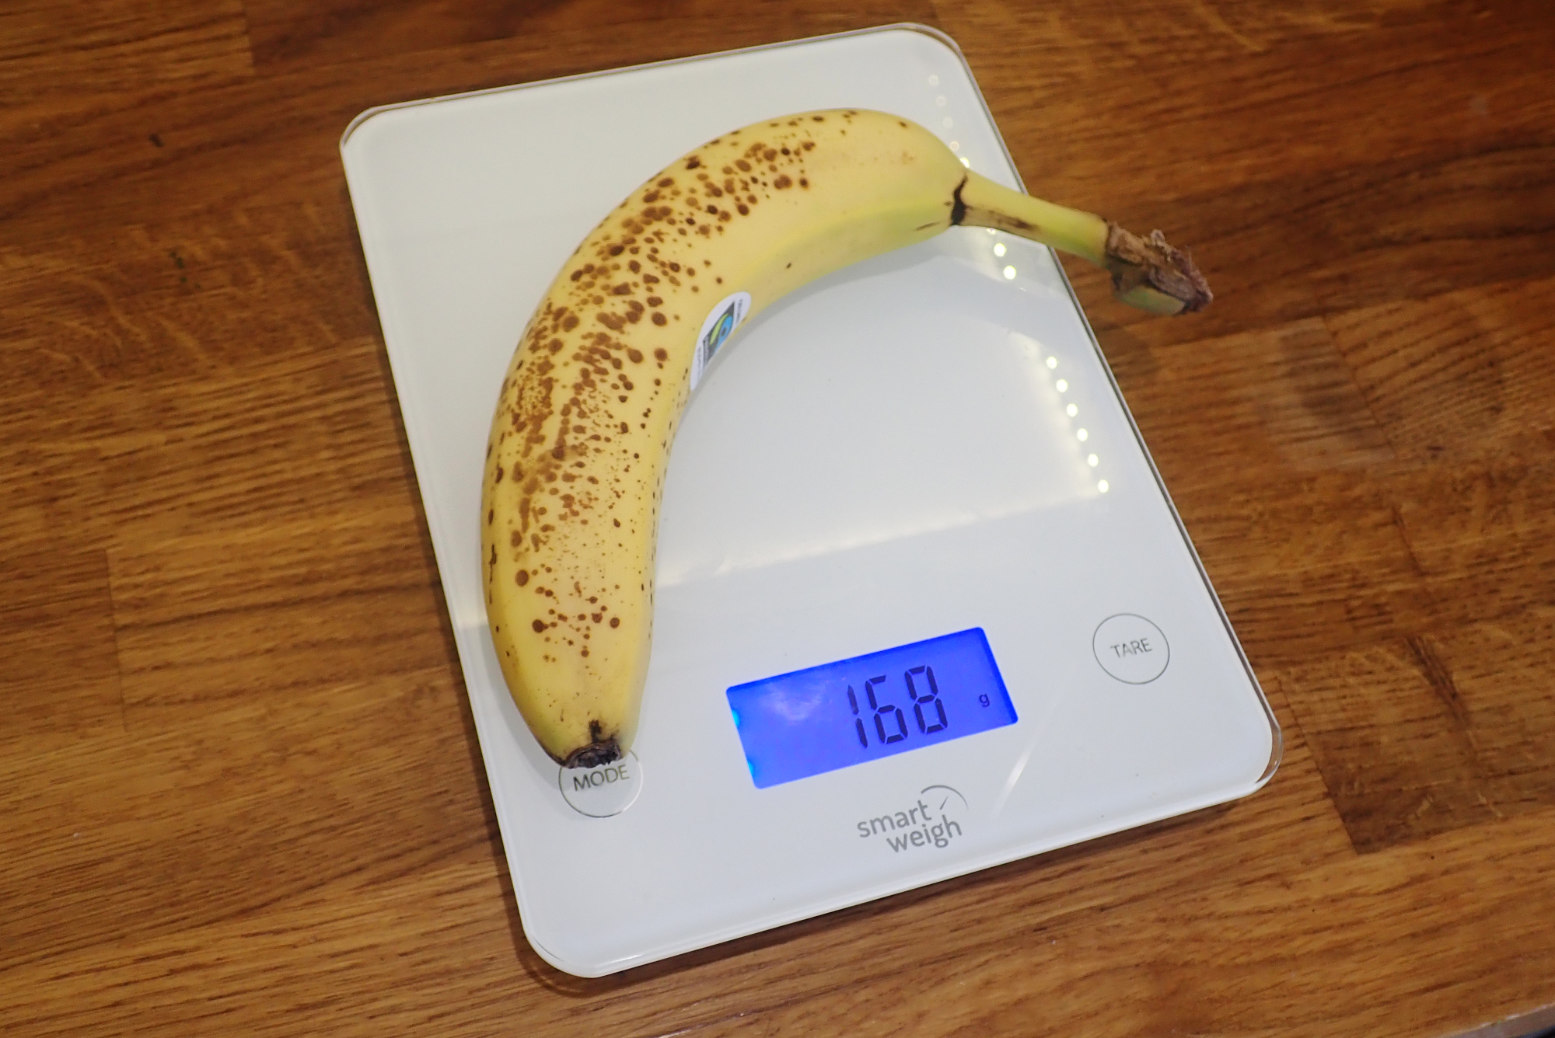
People ask: what is the the weight of a large banana?
So the main differences are weight, blade size and blade face, and I suppose adjustable length and the texture of the shafts. Will you notice the difference in a packraft? I very much doubt it but I think I’d prefer to paddle all day with the smaller bladed and dihedral Wave, even if it’s 160g heavier: the weight of a large banana.
I have a theory with length-adjustable paddles that into the wind or upstream (ie; max effort) you can ‘lower the gearing’ by shortening the paddle and leverage. Meanwhile downwind you can get the most of your paddle by setting it at full length overdrive. It’s good to have the option and one day I will test this theory but really, we paddle as hard as the situation demands. Sometimes easy, sometimes more efortful.
Wave shows the carbon weave; both are 29mm ø, good for smaller hands
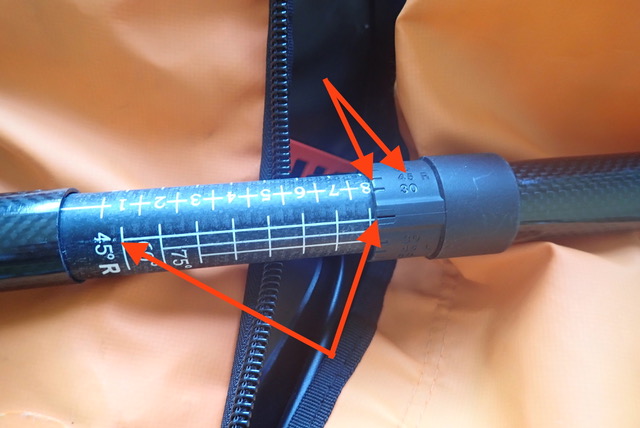
Feather angle alignment My Vertex came with no alignment line on the lever clamp to set the angle against a grid. It took me a while to work this out until I couldn’t and a couple of yellow tape arrows set at my preferred 45°R. Anfibio have since told me this was a production flaw and current Vertex have an alignment marker on the clamp. A permanent alternative to my stick-on arrows would be melting a slot into the clamp with a hot knife. It would be easiest to do this with the paddle feathered at zero (no offset) which is easy to estimate. Think before you melt or use tape!
No index line on the clamp. Tape arrows addedTwo ways of setting alignment on the Wave
The Wave’s alignment system is as you’d expect. In fact there are two ways: a slot on the clamp to align with the grid; and pre-set angles molded into the clamp to align with the zero line on the grid. As it is, on both paddles the white alignment grid gets slid over at each assembly and will probably wear away over the years so you’ll end up with a tape marker anyway. That’s what I’ve done on my old Werners which had a grid sticker on the outside which eventually peeled off.
The blades on both paddles felt a little loose once mounted on the shafts. Maybe they’re made that way as the shaft may swell over the years as it did on my carbon AquaBound. It’s unlikely you’d notice on the move but no movement is best. A small bit of thin tape (left; not a full wrap) was enough to remove any play and if the tape wears or pulls off it’s easy to apply some more. Once clamped down there was no play at the shaft join.
On the Wey you might notice the weight swapping from one to the other, but after a while you’re just paddling. In a way the ideal combo would be fitting the smaller Wave blades on the longer, better clamped Vertex shaft, but oddly they’re not interchangeable.
In the end, for €125 you will not be disappointed because either paddle will proper your boat forward, adjust readily and fit easily in your pack.
Incidentally, I did an IK&P survey when I paddled the Wey in 2021. 2022 numbers in red. In over a decade I saw my first every packraft actually being used on the water! An underinflated MRS. I got the feeling the owner didn’t know that airbagging was not enough; you have to top up too. Has he not read my book?!
Hardshell canoes: 1 1
Hardshell kayaks: 1 8 (group)
Hardshell SoT: 1 0
Vinyl IKs (rock-bottom cheapies): 5 1
PVC (bladder) IKs 3 0
Packrafts 0 1!
iSUPs: 10+ (mostly women or mixed groups goofing off) 10
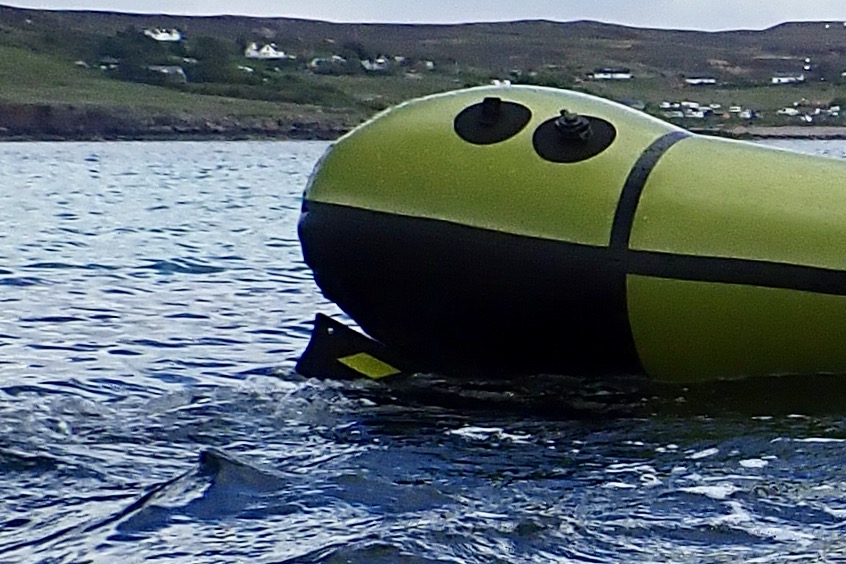
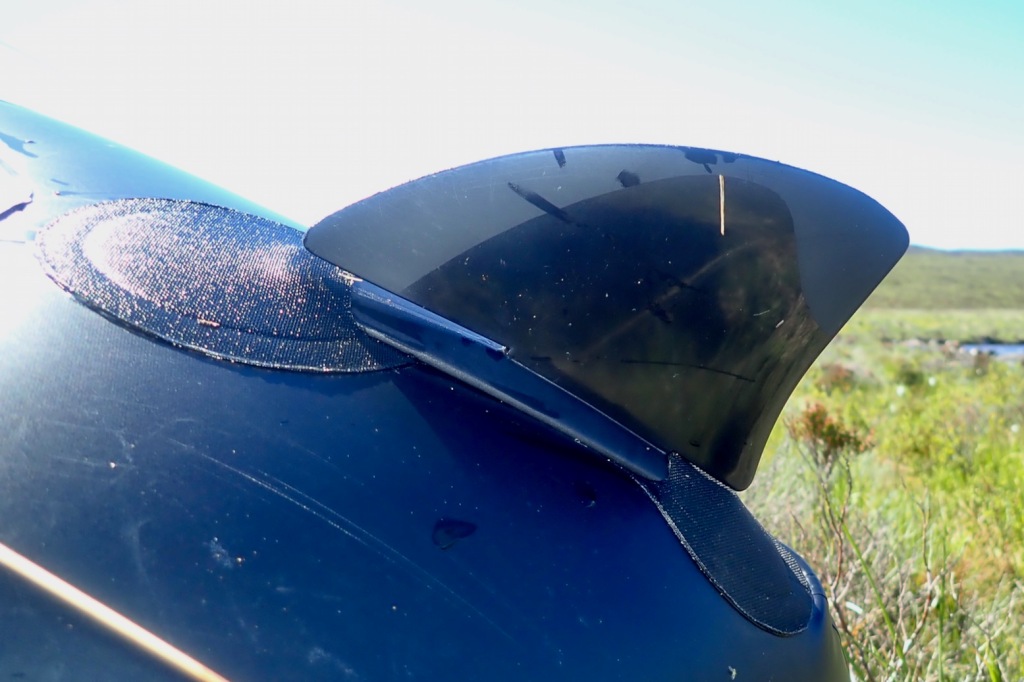
After various trials I decided for sailing the TXL would benefit with a skeg on the floor where it would be fully submerged except momentarily when cresting bigger waves. The standard position angled on the stern (left) sits too high on the buoyant TXL so doesn’t have much effect, though the TXL tracks pretty well on flat water, with or without the air floor, solo or two up. You can mount the skeg back-to-front (right) for more bite, but I hope tracking when sailing will be greatly improved with a fully immersed skeg. When the wind allows, I want the TXL to be a reliable sailer on longer paddles.
Under the floor stays fully submerged, even with the air floor.
I could’ve simply made an extension to the stock skeg, but decided having two positions for the stock skeg would be less bulky. Like on an IK or a SUP board, the long but shallow Anfibio skeg would work well mounted horizontally under the floor (above, left). I’d already tried a skeg under the bow, but that did not work well at all. Waiting for good glue, I’d stuck that front skeg patch on with Aquasure and was surprised how easily it peeled off with less than a minute with the hairdryer.
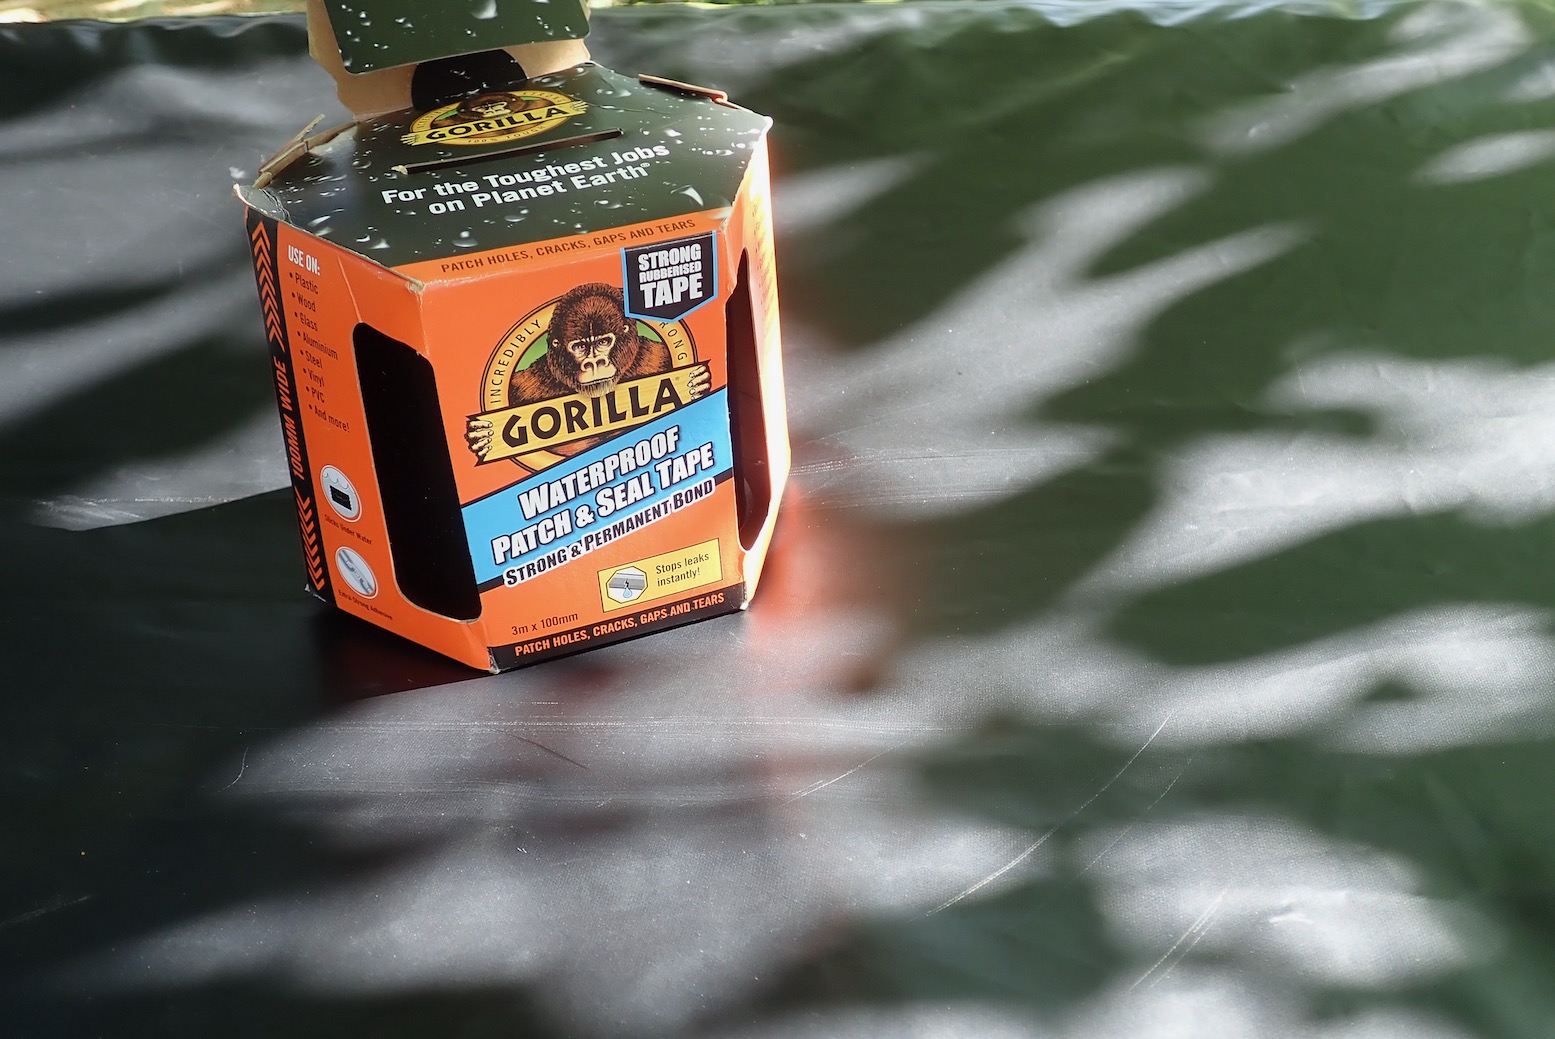
Just as I was about to clean the removed patch and glue it on with Helaplast (recommended by Anfibio), I thought super tacky Gorilla Patch & Seal tape would be even easier, using the spare Anfibio skeg patch as a template. But I decided P&S is just thick ‘rubber’ tape suited to sealing, not supporting a knocked about skeg. In fact regular, string backed Gorilla ‘duct’ tape would have worked (a good way to test the idea), and I’ve found lasts surprisingly well on a packboat. In the end I decided the liberated fabric-backed Anfibio patch would be best.
The most important thing is to mount the patch straight along the centre line otherwise you’ll be going round in circles. This is best judged with the boat inflated. After that, it’s the same Helaplast sequence as detailed here. While gluing, I decided to add a couple of tabs low in the front to make the thigh straps hook more effectively over the knees.
Floor-mounted skegLower mounts for thigh straps
The benefit of having two positions for the rear skeg instead of a bigger fin is that you can choose: use the standard position for shallow rivers (if a skeg is even needed) and use the floor mount on open water where wind and waves may push the boat around more, and if you hope to sail in a straight line.
Foam backrest Sat up front, the stock inflatable backrest (below left) does the job, but in a low-pressure boat, the air cushion just adds more mushiness where you want support. As I say in the book or on Seats: sit on air; lean on foam. There is no advantage to inflated backrests other than saving a bit of packed space (might they also be cheaper to produce?). In this way, regular solo packrafts, where you lean on the back of the boat are better. Seated centrally in the TXL, you need a supportive IK-style backrest.
Anfibio air backrest; mushy and wobblyMRS Nomad uses foam backrest
After a few outings I’ve decided to replace it with a spare foam SoT backrest (below), an idea which has worked well on my IKs for years. IK makers too have a blind spot when it comes to front seats. Today’s price for the backrest on ebayUK is 17 quid (left). Once I ditched the heavy ‘brass’ clips which came with mine, it weighs 200g, only 40g more than the Anfibio item (the ebay one shown left uses lighter plastic spring clips).
The foam backrest fits right on the TXL: the long tapes reuse the TXL’s front buckles and, less well, the rear straps come back through the flat tab mounts. A slide ring would work better here. I could have reused the thin, cinchable elastic cord which came with the Anfibio backrest but I suspect it was part of the problem (and thought so on the Anfibio Revo too). Counter-tensioned, non-elastic straps attached to a firm panel add up to better support. Up to a point the thinner foam backrest also makes more room behind it, too. And I won’t miss deflating the stock backrest to save on packed space, neither!
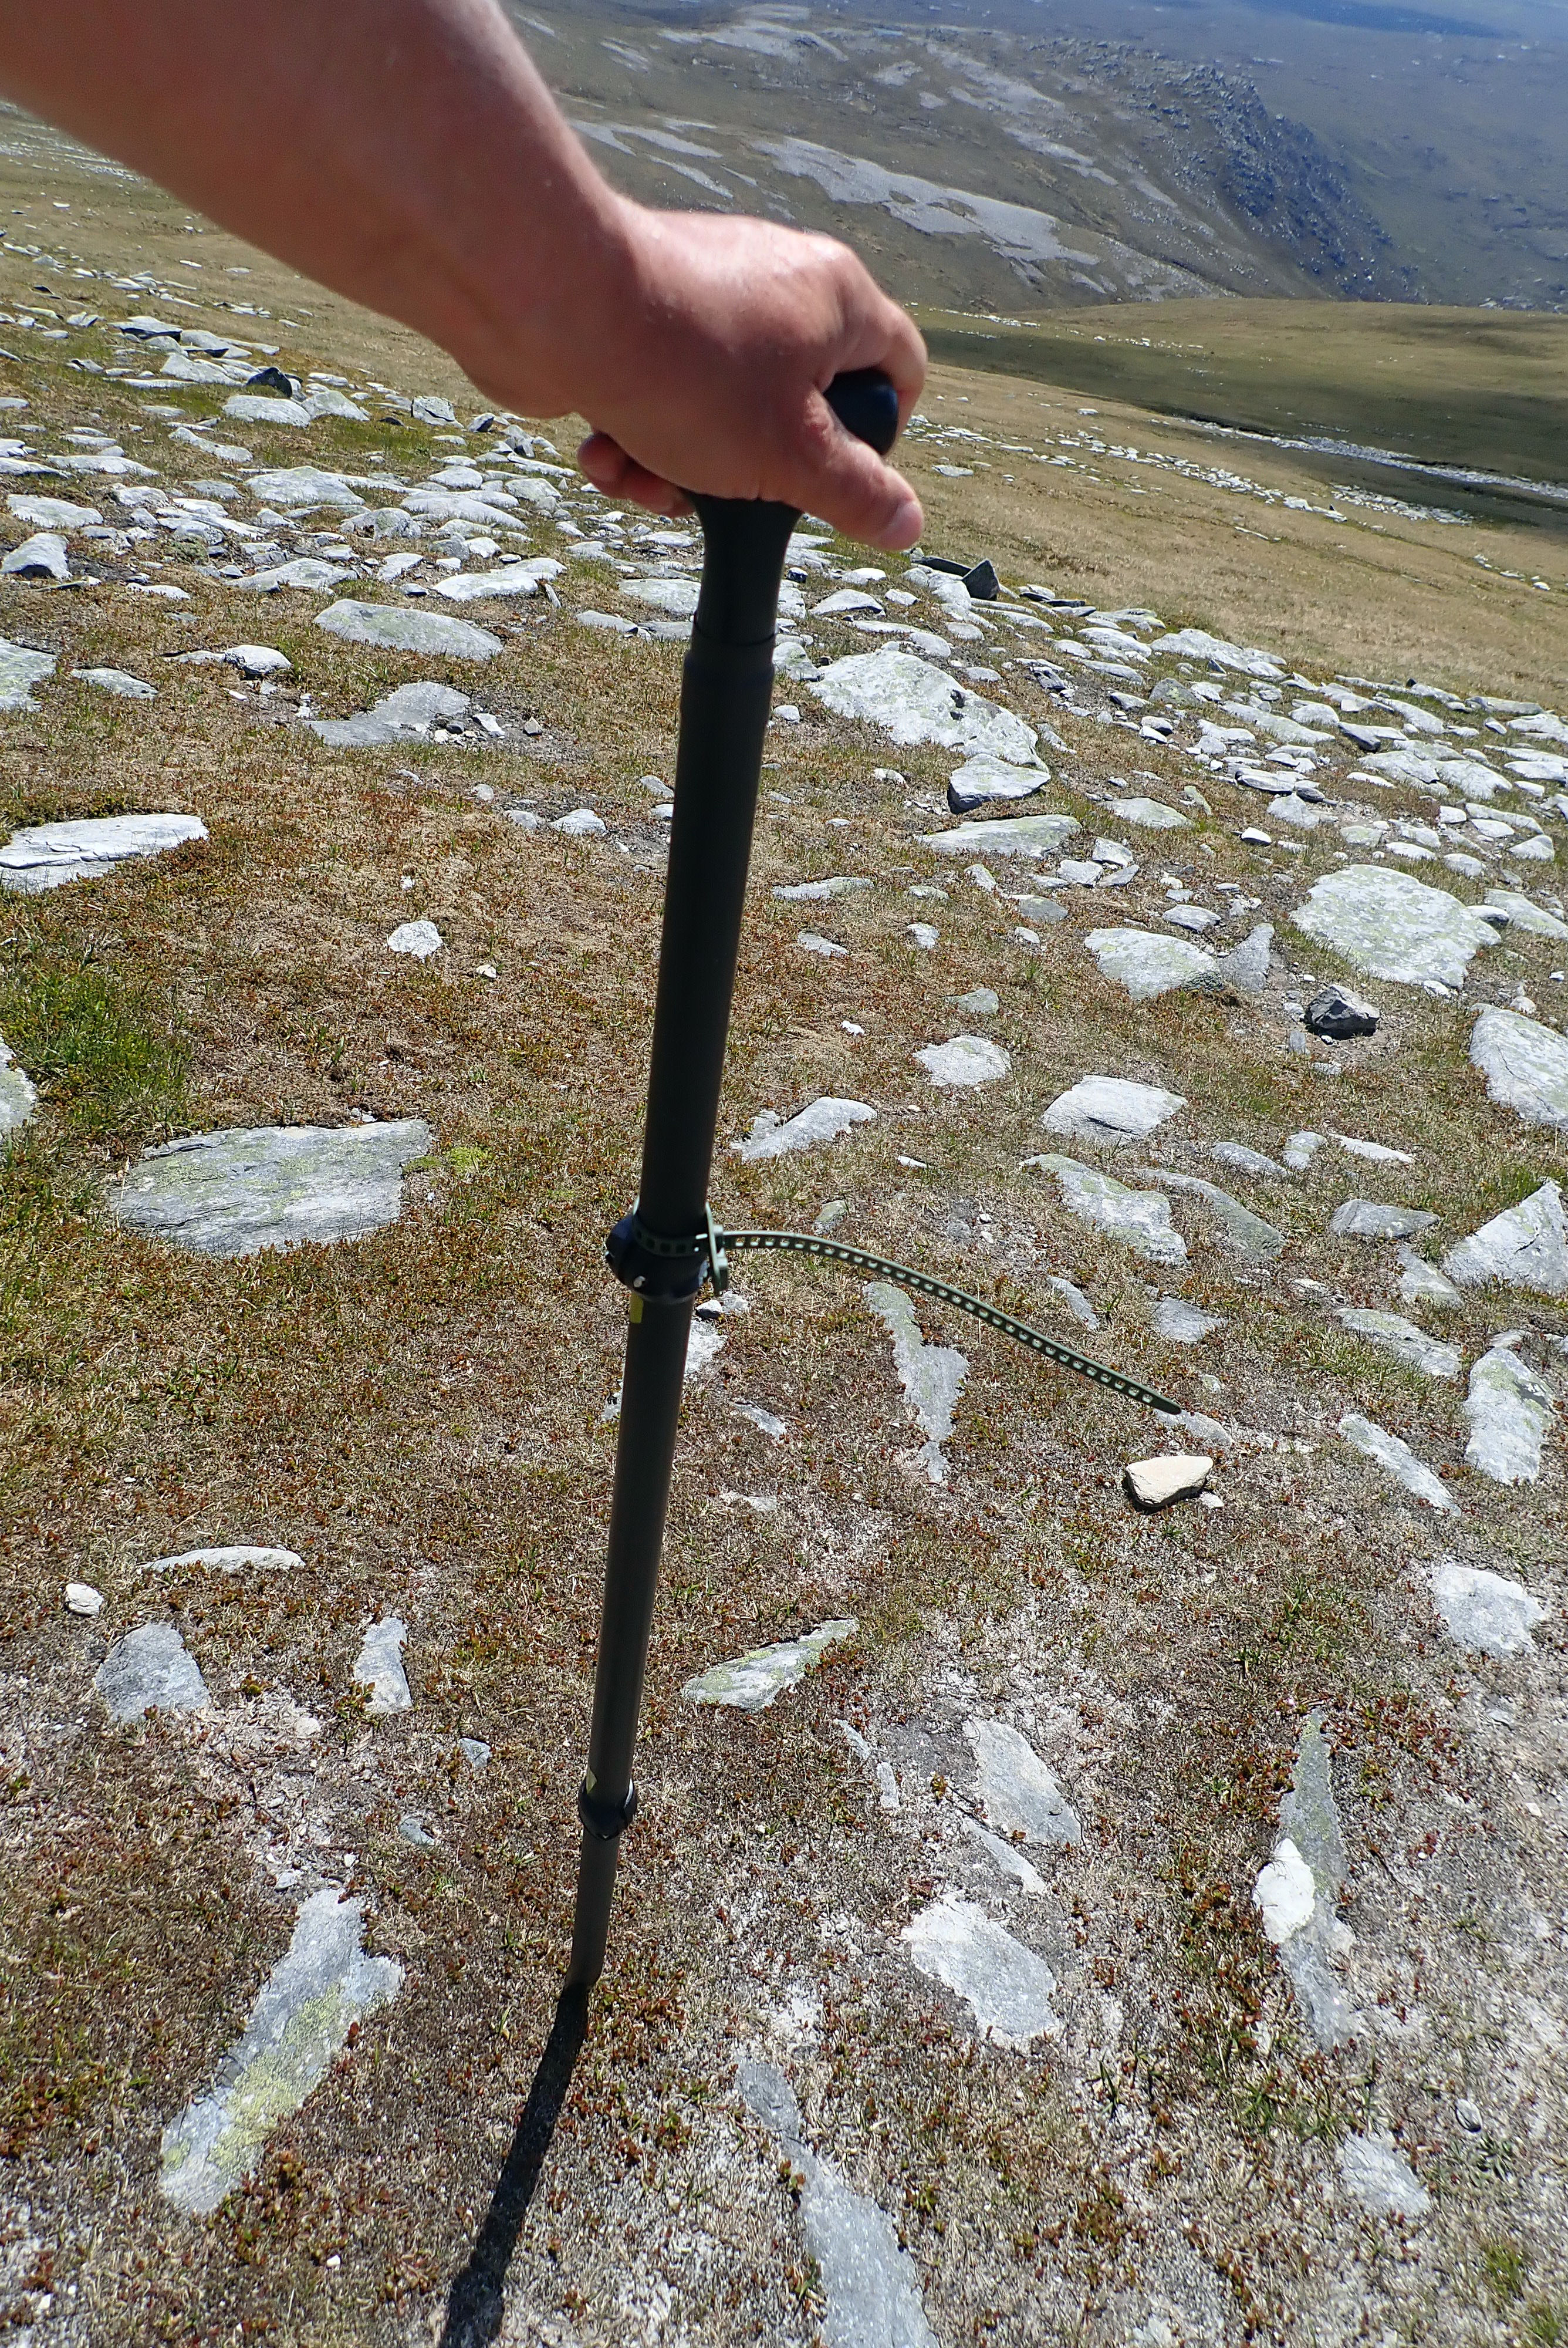
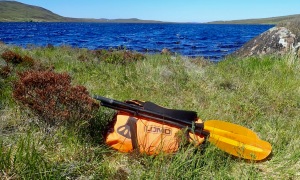
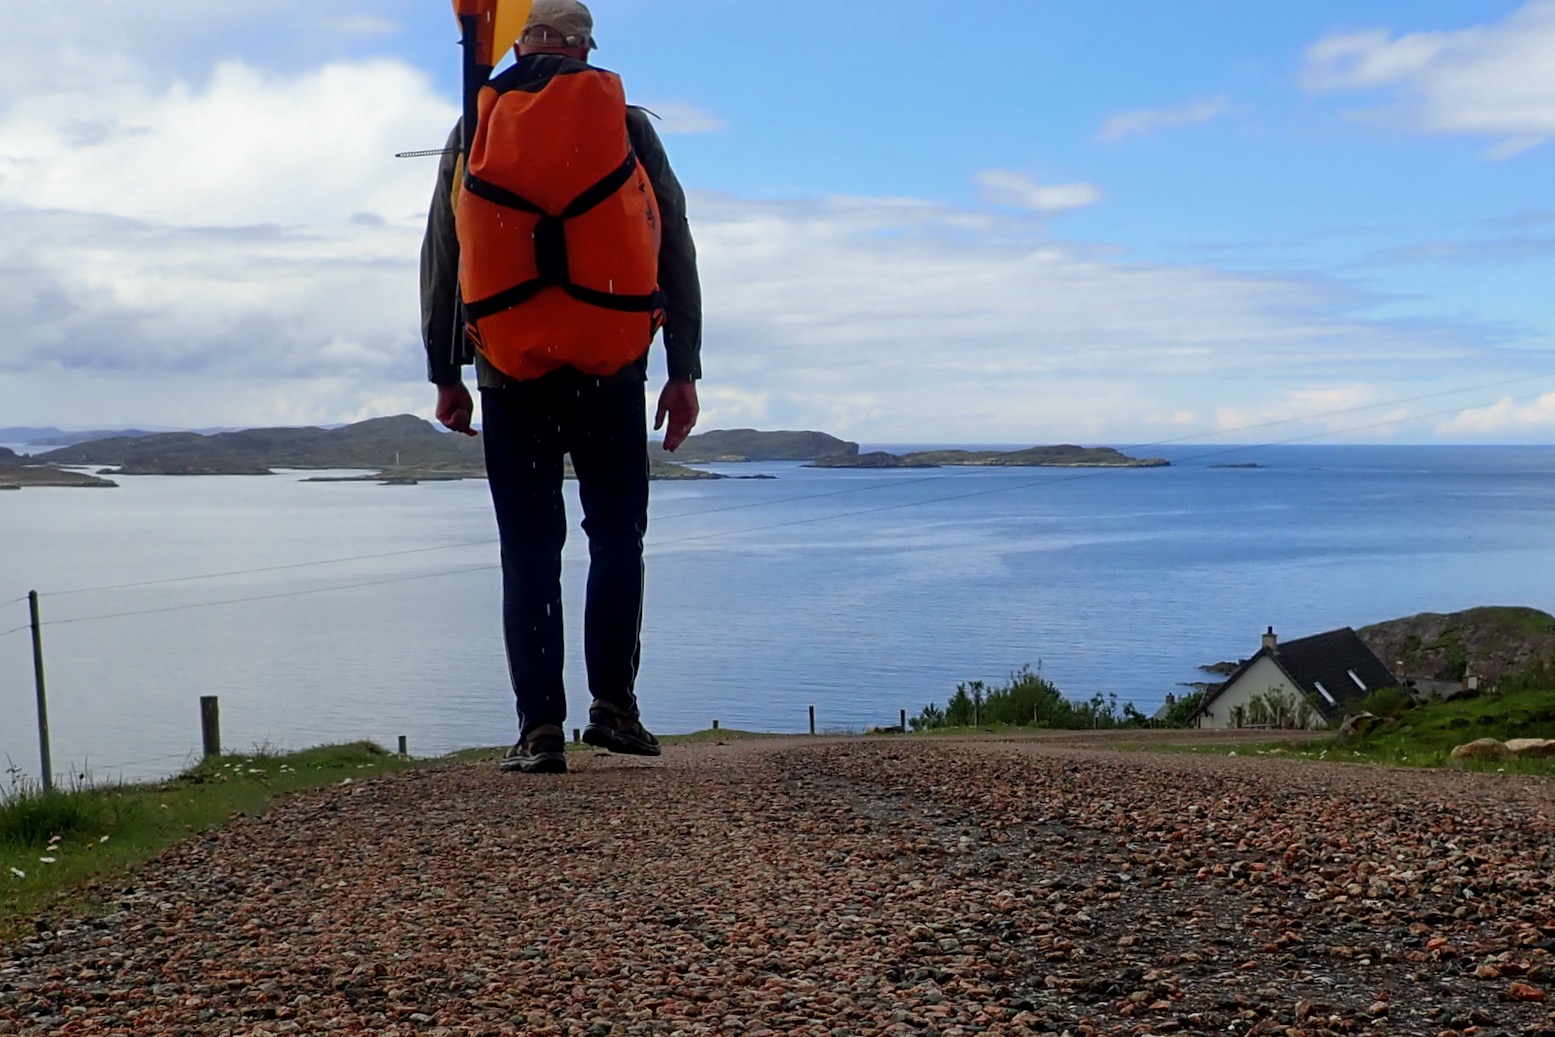
As the calendar flipped into June the crap May weather – worst for decades locals say – had finally broken, and northwestern Scotland sits under a High with cool, light winds and blue skies. After weeks of the opposite, it can all look a bit miraculous. The other day we climbed Ben Hope, Britain’s most northerly 3000-footer. It’s a short, steep climb, and coming back down I was sure pleased to lean on my packstaff (right).
Ben Hope and Britain’s north shore.
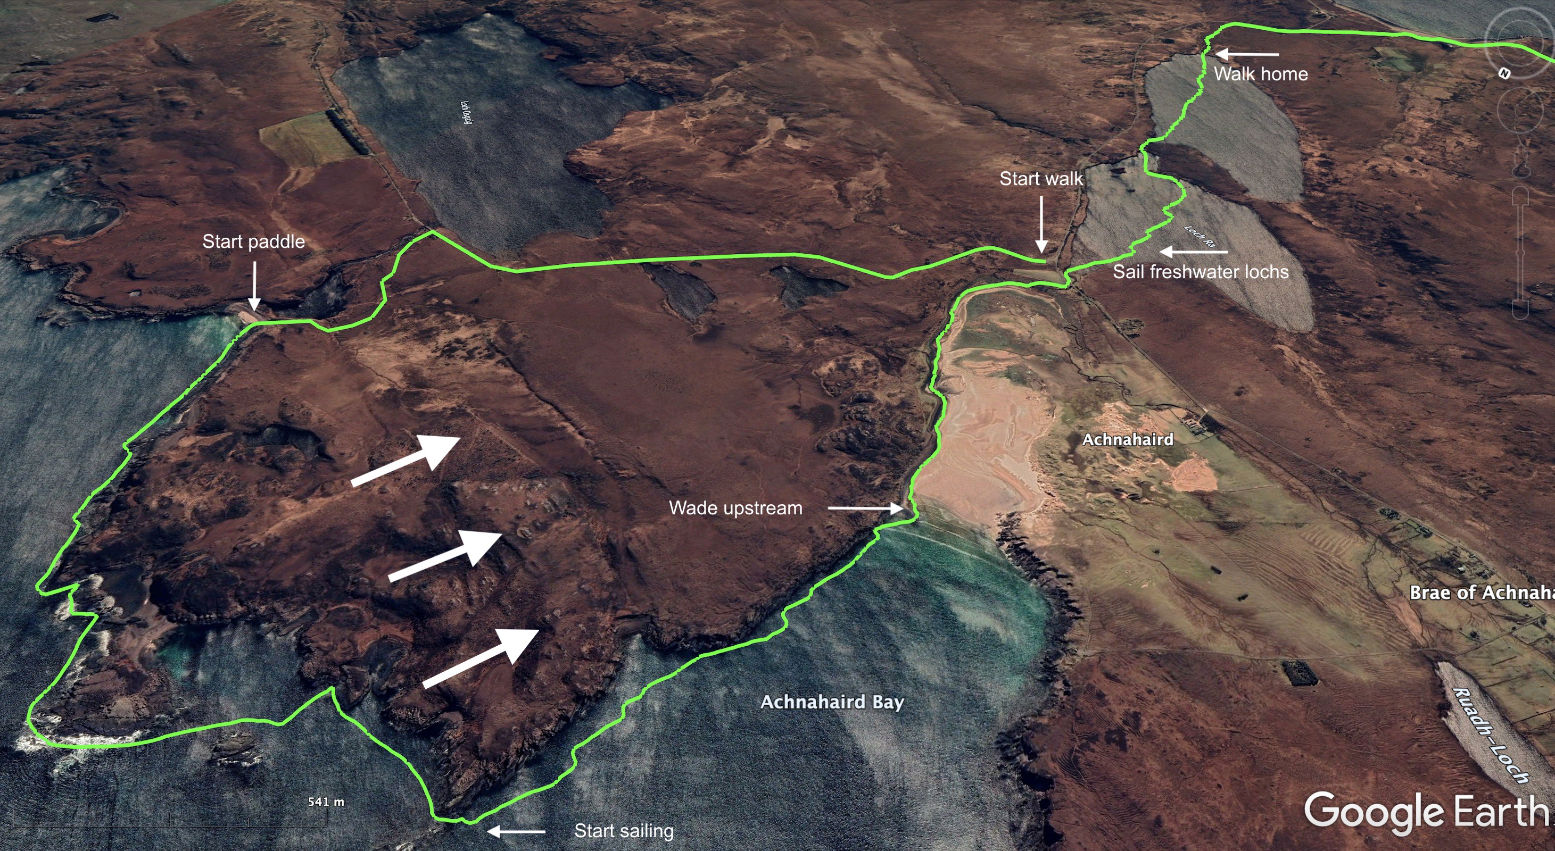
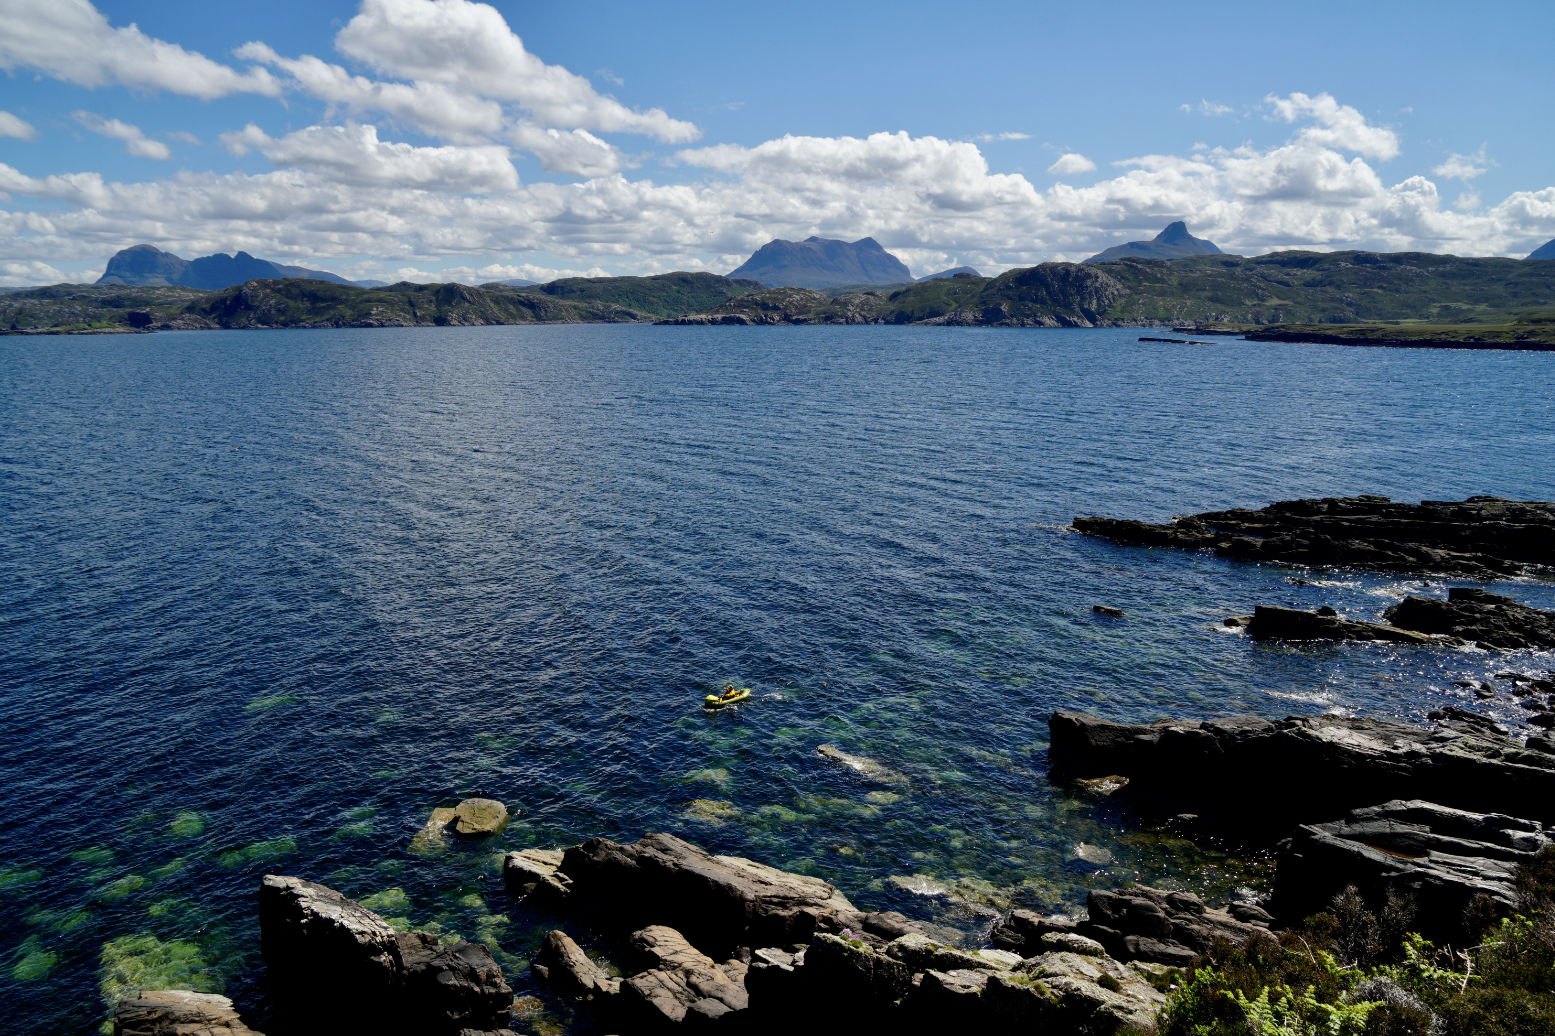
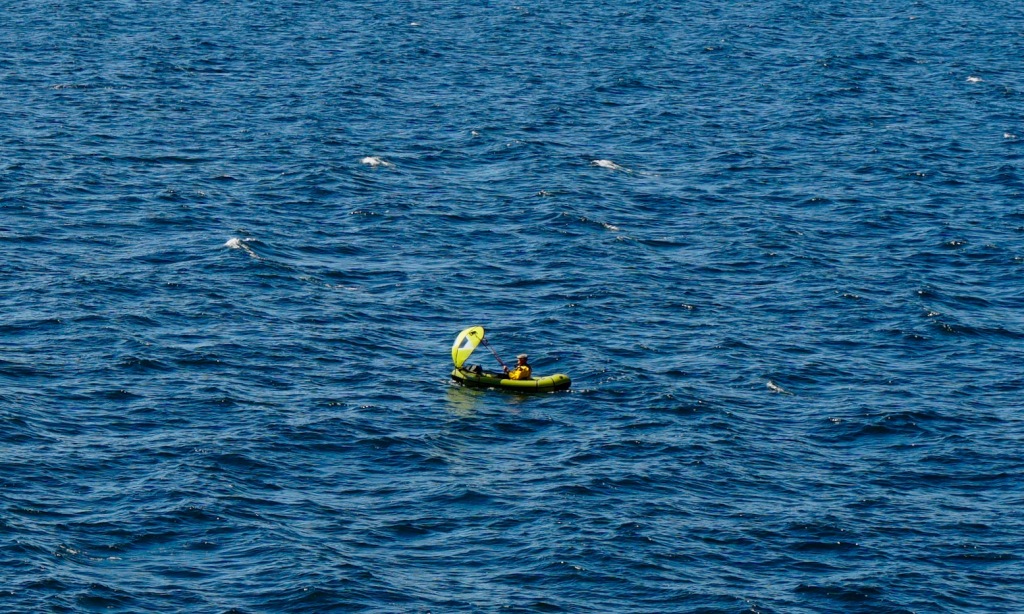
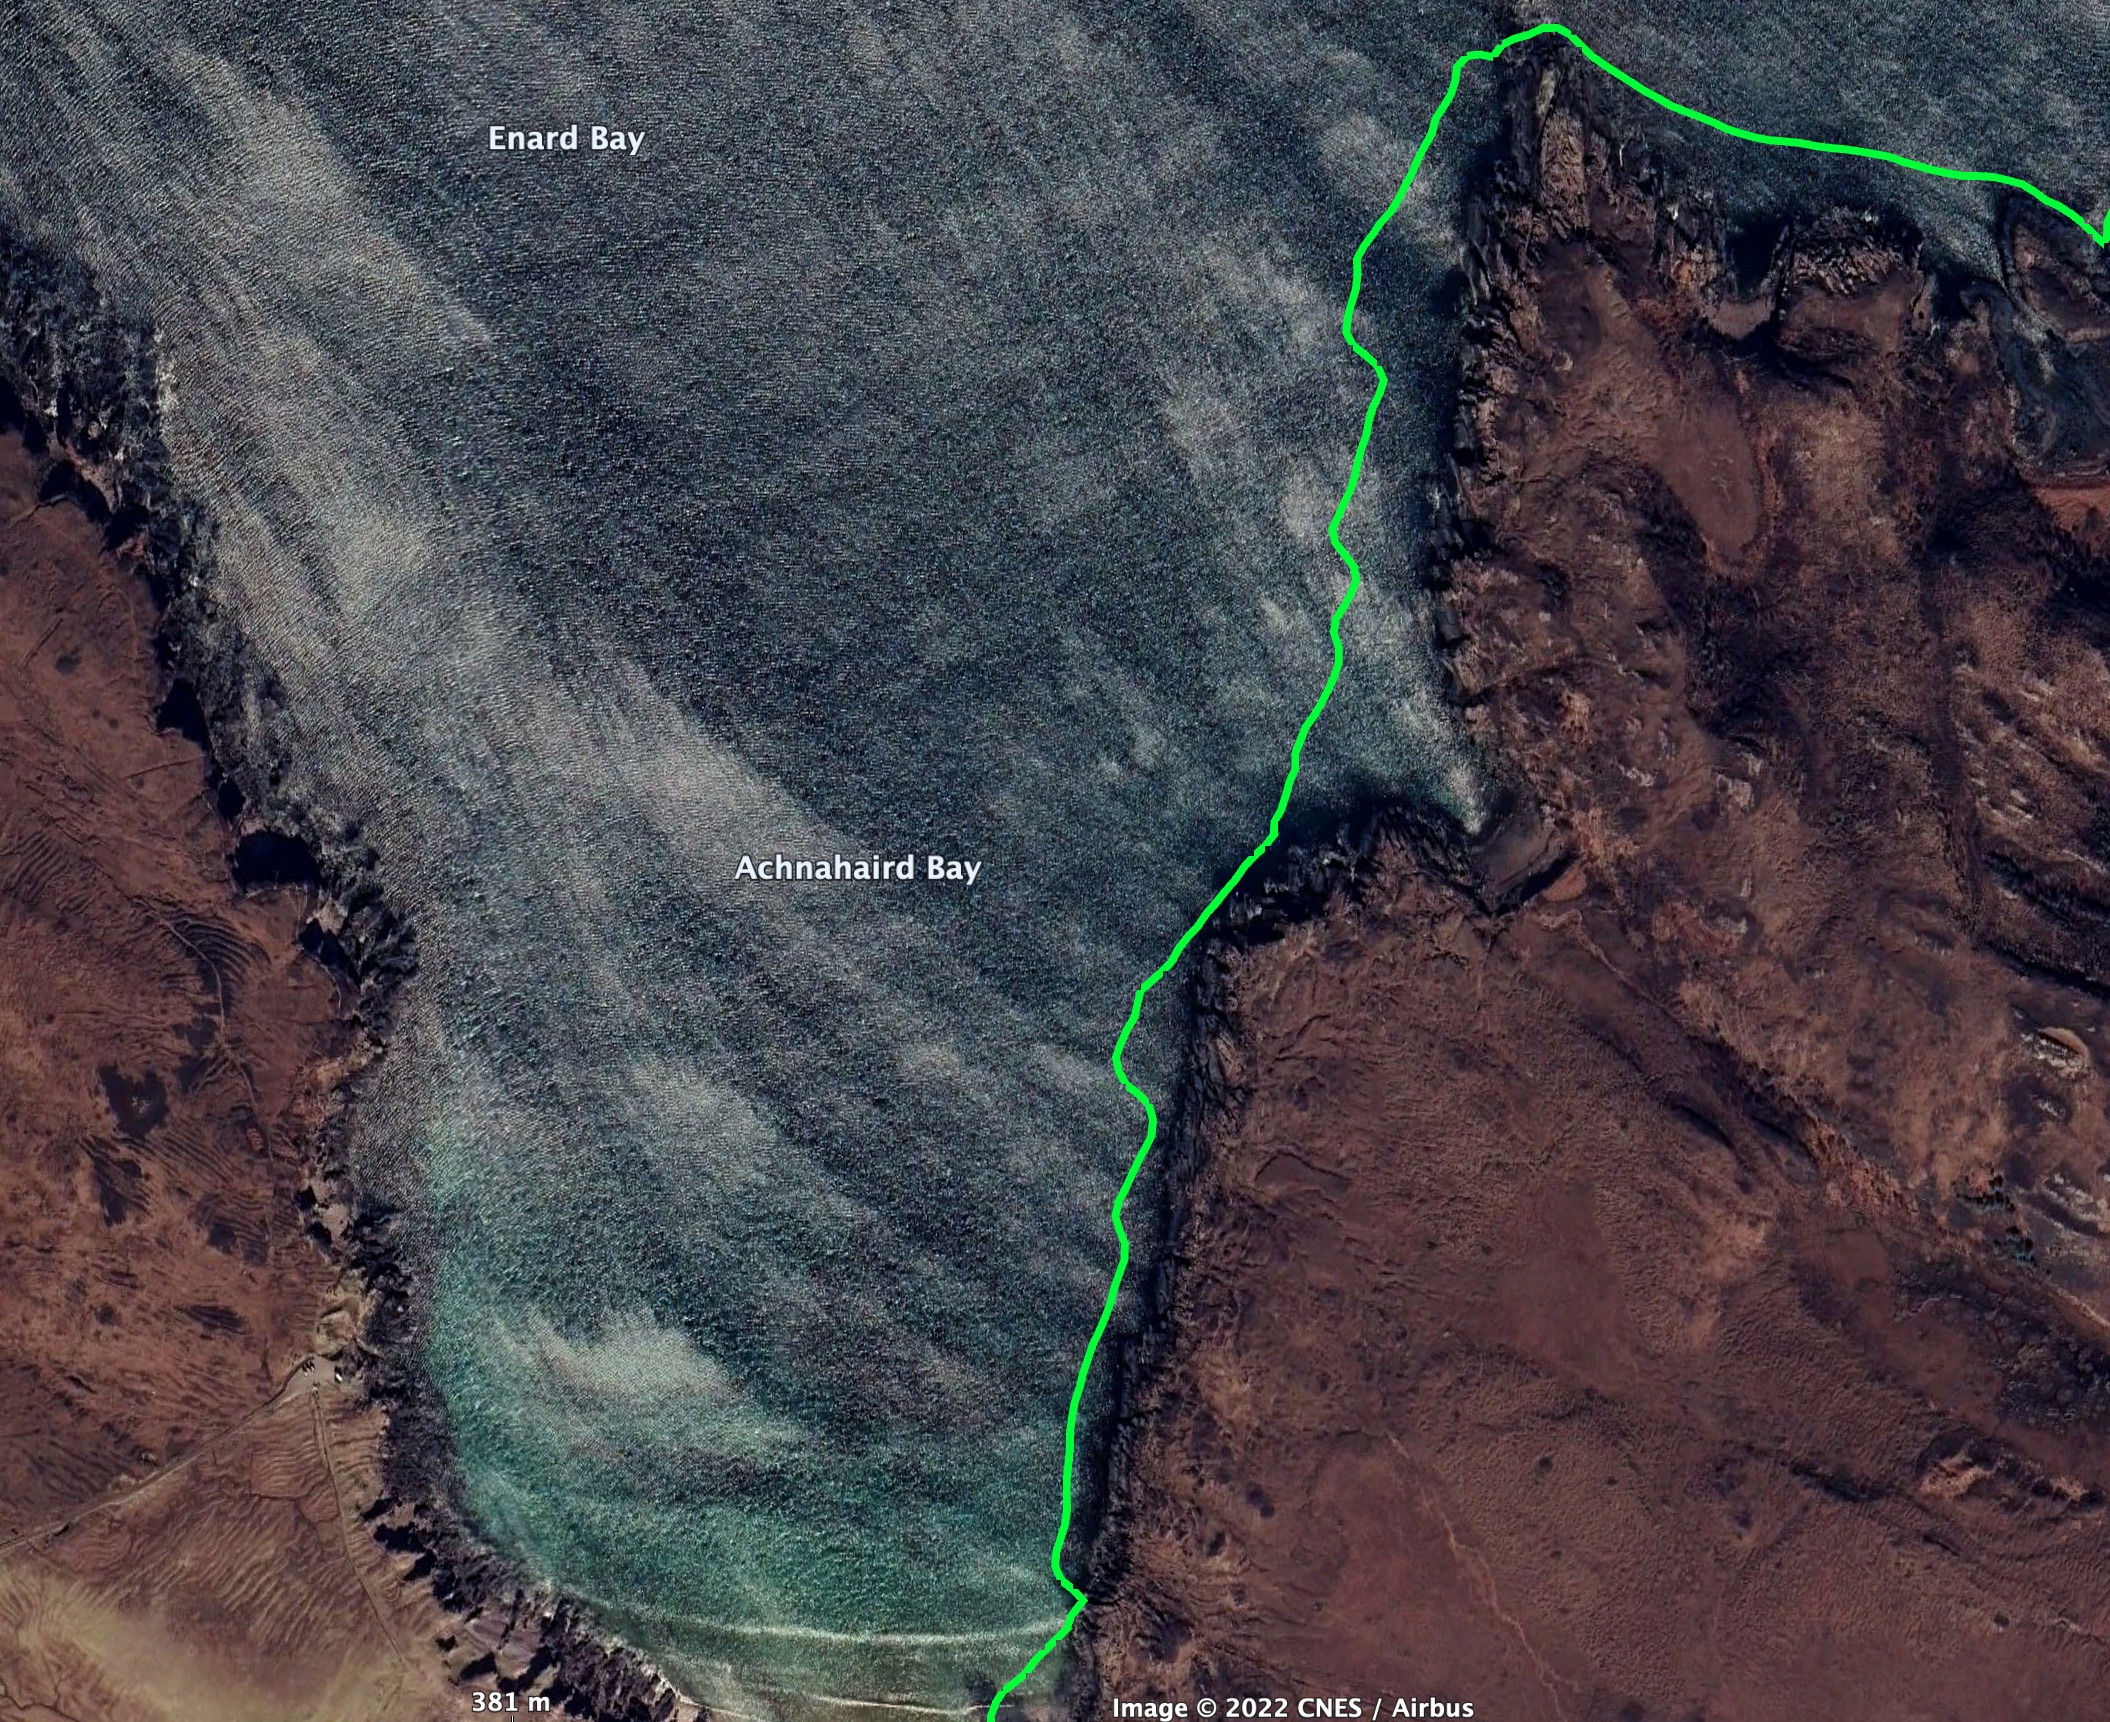
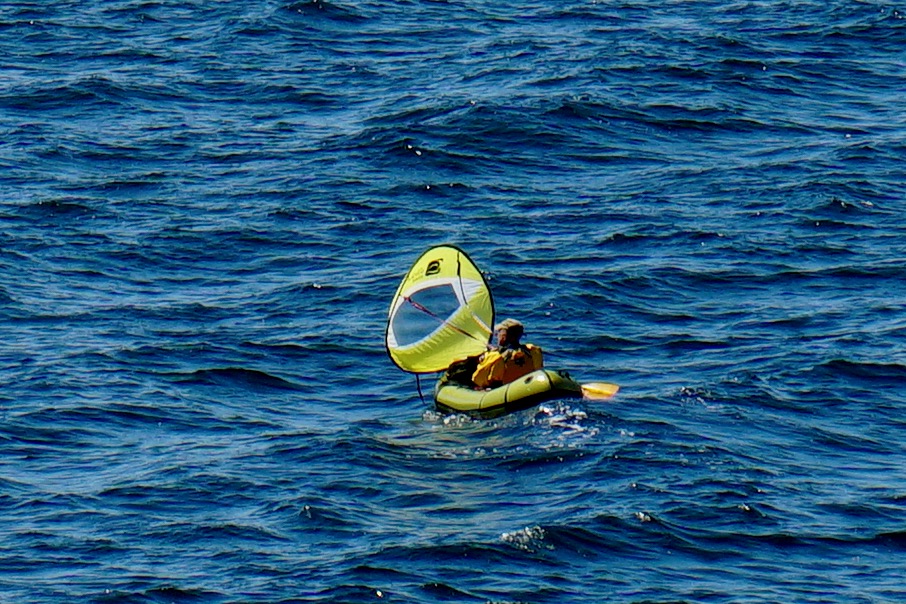
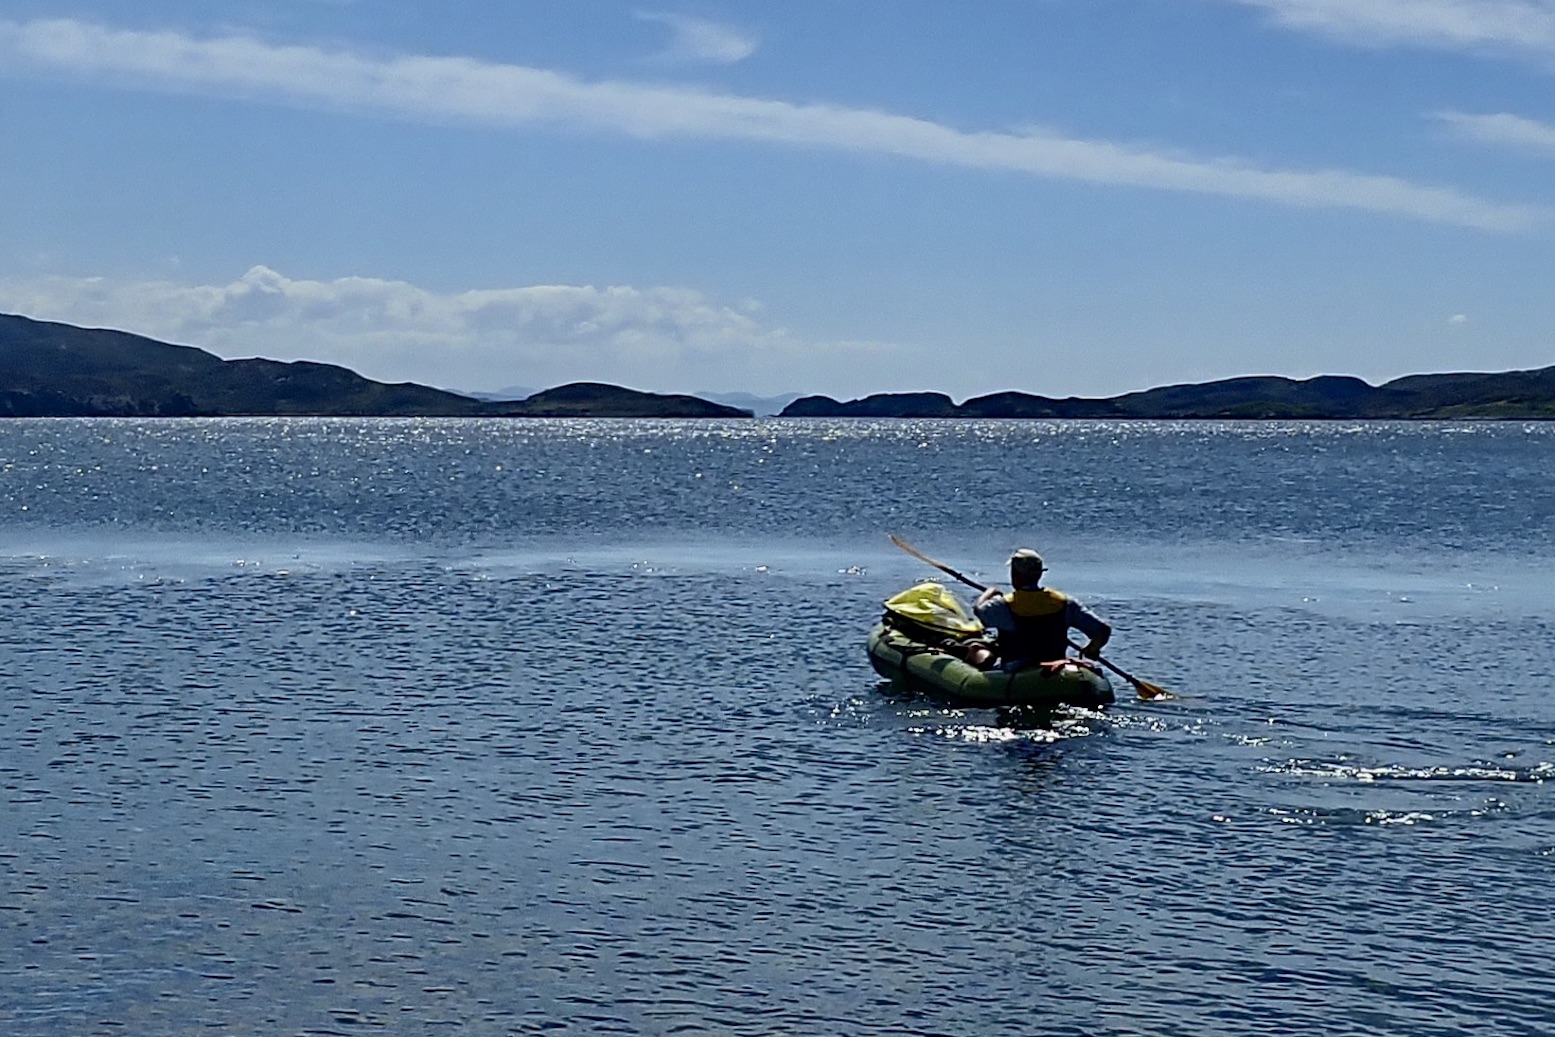
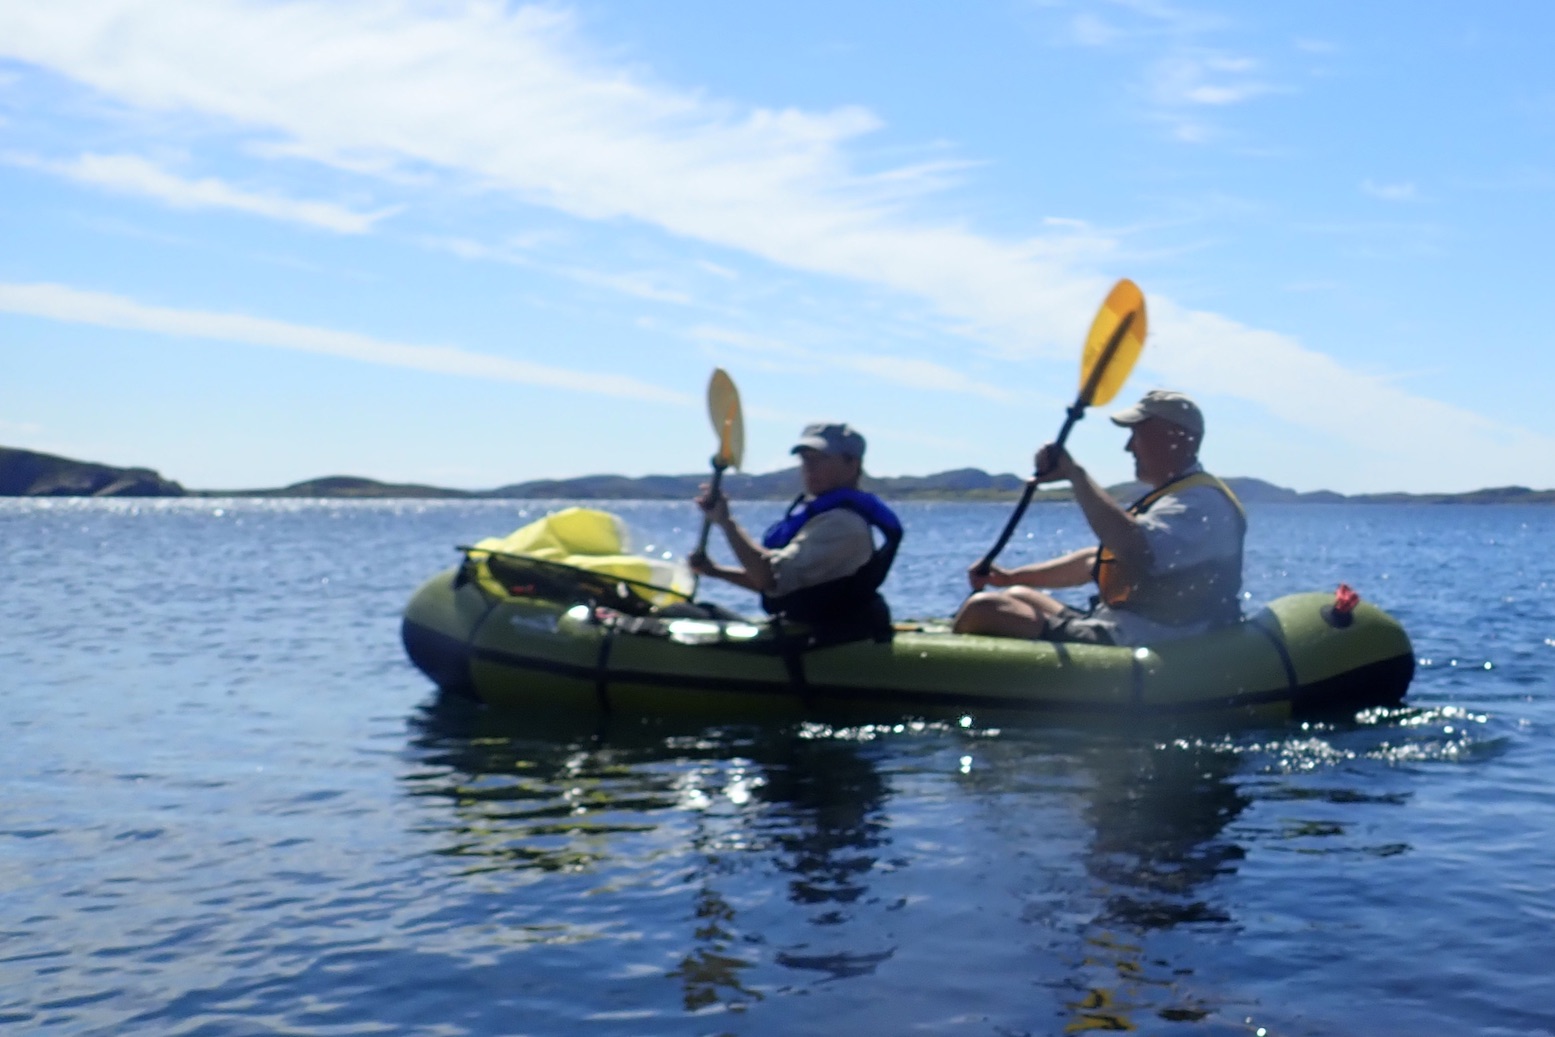
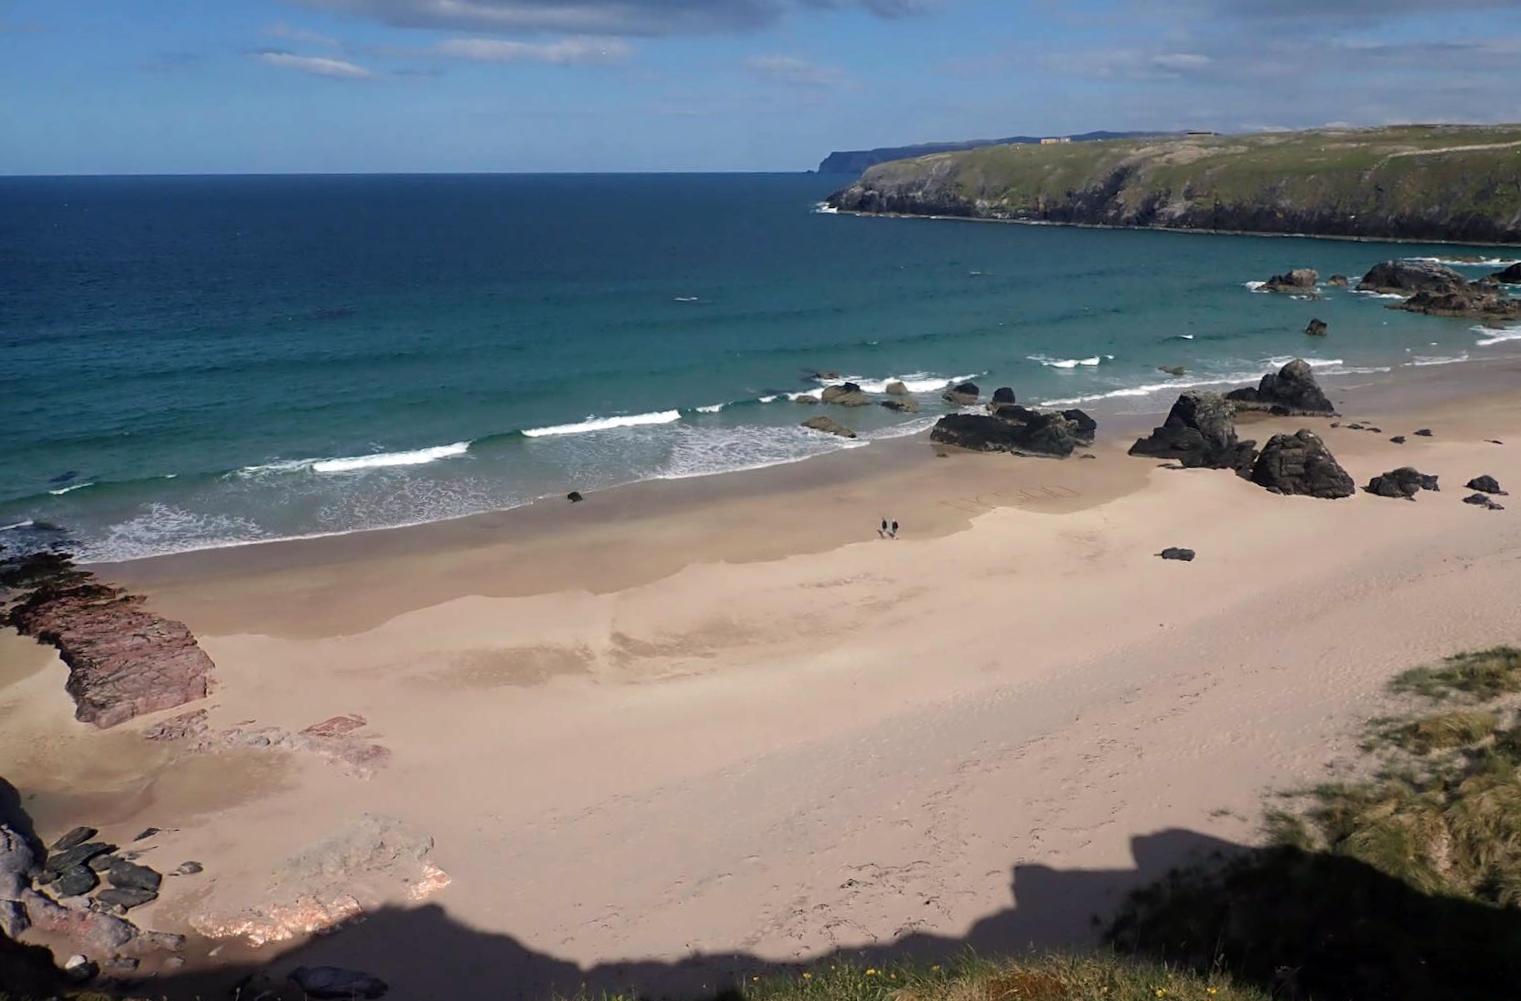
Back home, paddling the southern edge of Enard Bay in an arc from Garvie Bay around to Achnahaird beach (left) was another easily realised sea packrafting outing. It’s also our favourite local half-day walk and with today’s strengthening northerly breeze, I ought to be able to sail down into Achnahaird, wade up the stream to the twin freshwater lochs, and carry on sailing nearly all the way back to Badentarbet. All up that would be about 18 kms of paddling and walking.
IK portage to Garvie beach
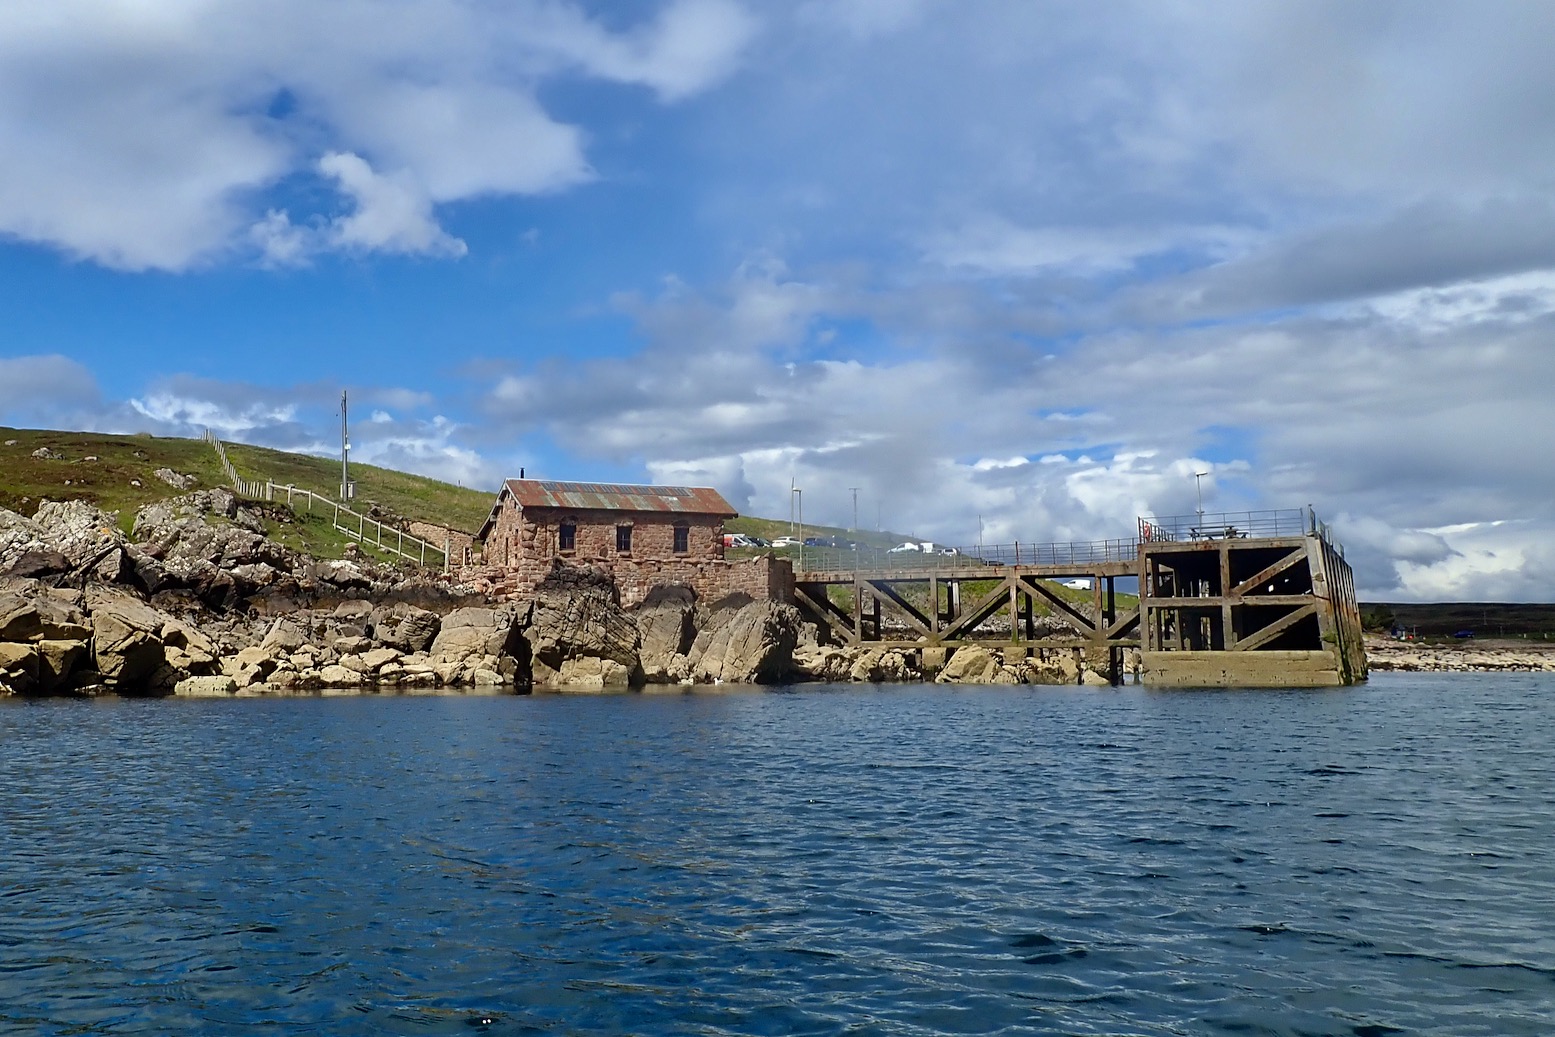
It’s a muddy kilometre’s walk from the road bridge down to Garvie beach which, unlike popular Achnahaird, is usually deserted. I did carry my old Grabner IK down on my head one time for a paddle to Lochinver, but a packraft in the pack is so much easier. This car-free and approach/portaging ease was part of the rationale in putting all my eggs in the TXL basket and flogging the Seawave.
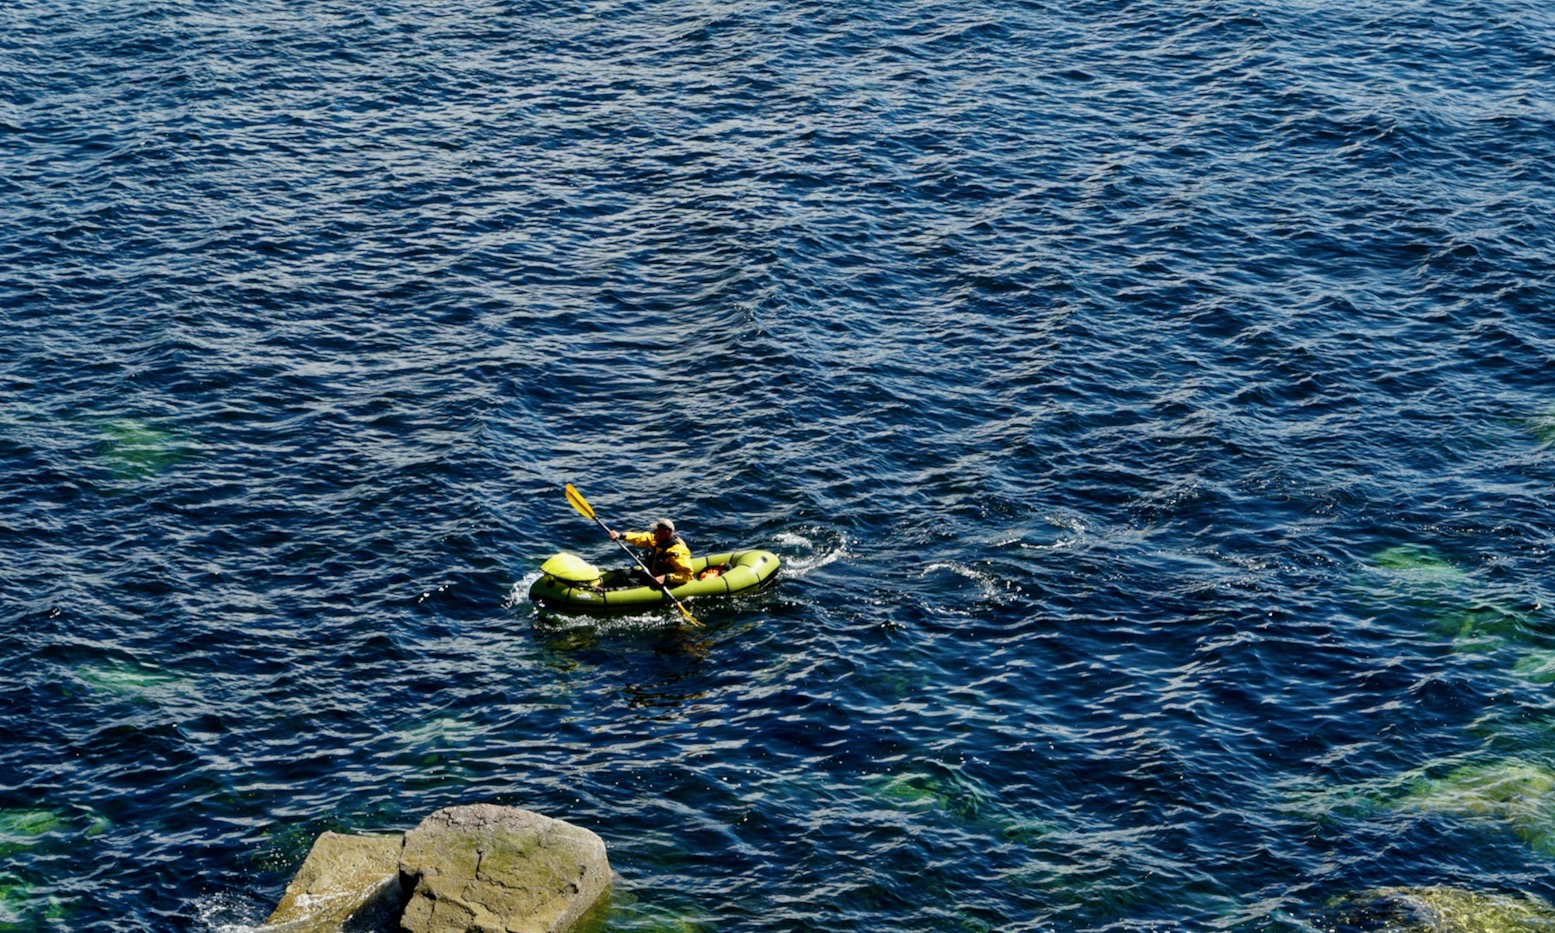
Even before I reached the shore it was clearly a bit windier than the predicted 6mph, but as long as white capped waves held off (the easily spotted warning sign for inflatables) it should be OK. The chilly northerly coming off the sea was steady; less gusty (or so the forecasts suggested) so I was glad I grabbed the dry-suit last minute. As you can see from the Google image above, the rough shoreline and reefs can kick up some breakers, but if it all got a bit much I knew plenty of take-outs to join the Mrs who was doing the walk and taking photos from above.
Garvie Bay with Suilven, Cul Mor and Stac Polly; mountains of the Assynt.
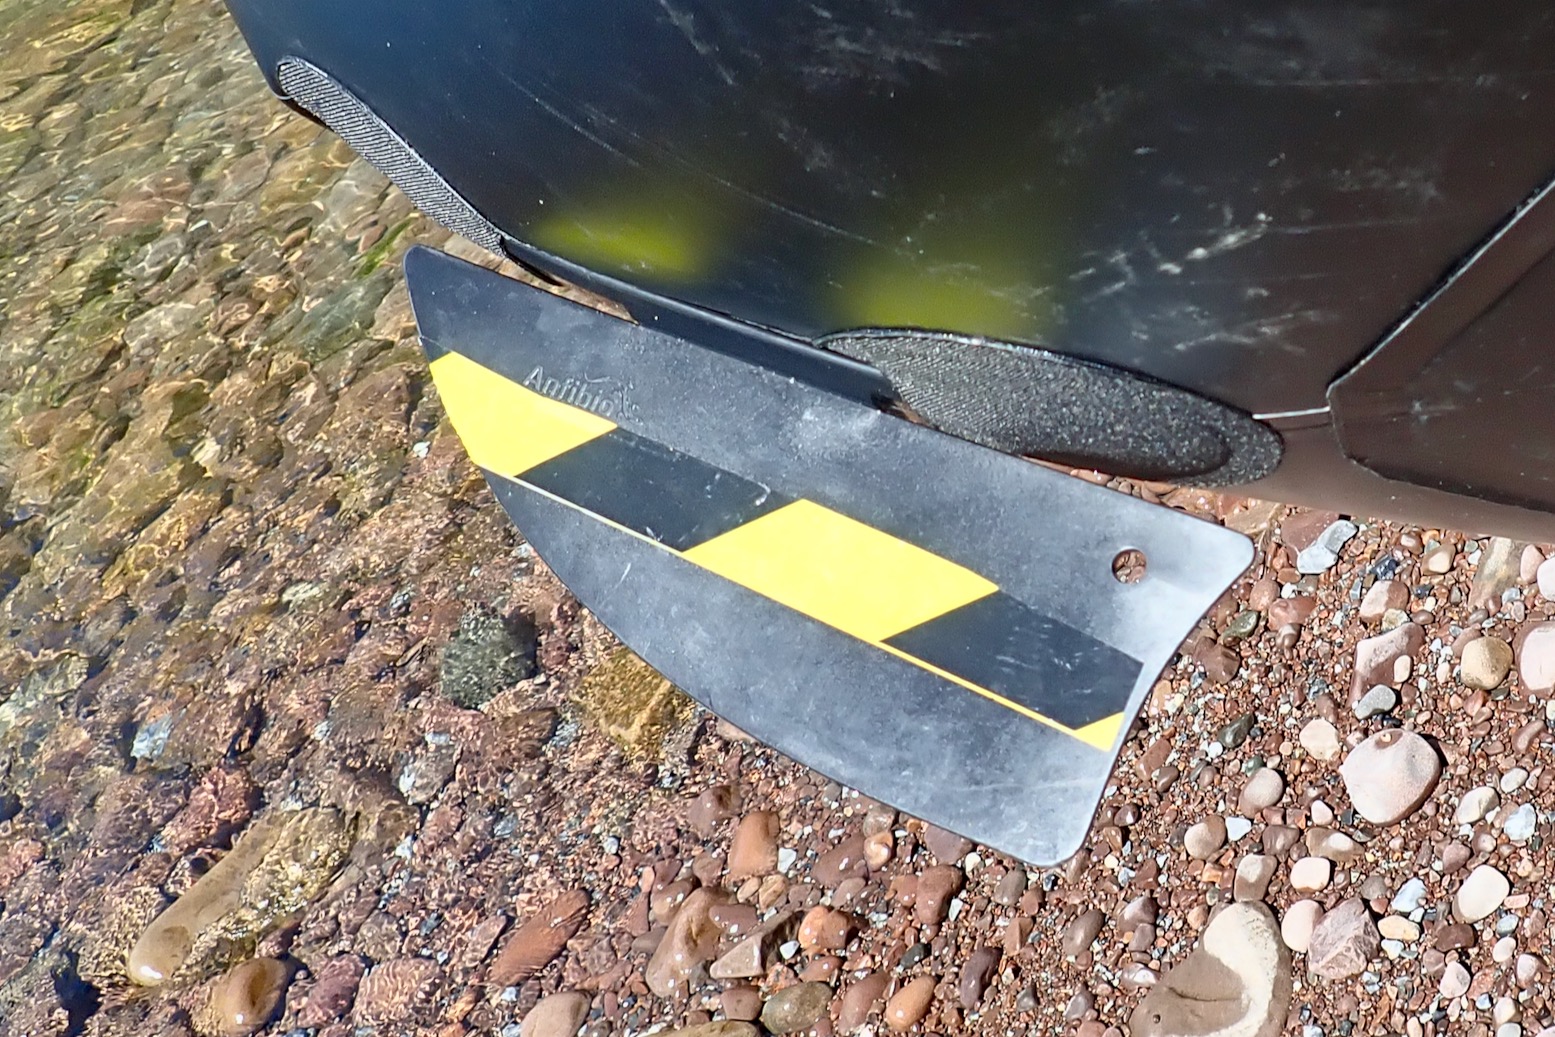
Skeg effectiveness Anfibios mount the skeg sloping down on the hull’s short stern. Selfies I’ve taken on previous TXL paddles show the skeg halfway out of the water, unless the boat is very heavily loaded. The air floor lifts the boat higher still. This was not an issue in my rear-weighted Rebel 2K single seater where I pushed the back end down. On the level-trimmed and more buoyant TXL, the skeg is ill positioned or too small.
Stock skeg back to frontMove skeg to the floor?
Fitting the skeg backwards puts more in the water, but sticking another mounting patch at the back of floor sheet like an IK (above right) is fully effective. People ask: would the lack of inflated skeg support be that bad without the firm backing of the air-floor or a rear paddler’s seat? No; and the long, low stock Anfibio skeg is just the right shape.
The original MRS Nomad used a iSUP-style slot mount and, with a longer stern, means it’s nearer horizontal and fully submerged.Similar Gumotex skeg on TXL
Mounting another skeg patch on the floor is a bit time consuming is what I ended up trying so I can keep the stock skeg. Today I’m trying a spare Gumotex skeg (right) whose slip-in mount system the Anfibio skeg copies, but which has a deeper profile putting more plastic in the water. It’s only less than half a hand’s worth, but is worth a go before fabricating a skeg extension or repositioning it.
Today I’m also trying my longer, smaller-bladed, 230-mm Camaro sea-kayaking paddle more suited to steady cruising into the wind than the over-sized, white-water Corryvreckan I’ve been using so far. Initially I can feel the paddle’s extra weight, but that’s soon forgotten which suggests the slimmer blades are just right. Progress is a bit sluggish into the northerly, but I’m getting the feeling it’s always like this with the bloaty TXL until the arms warm up.
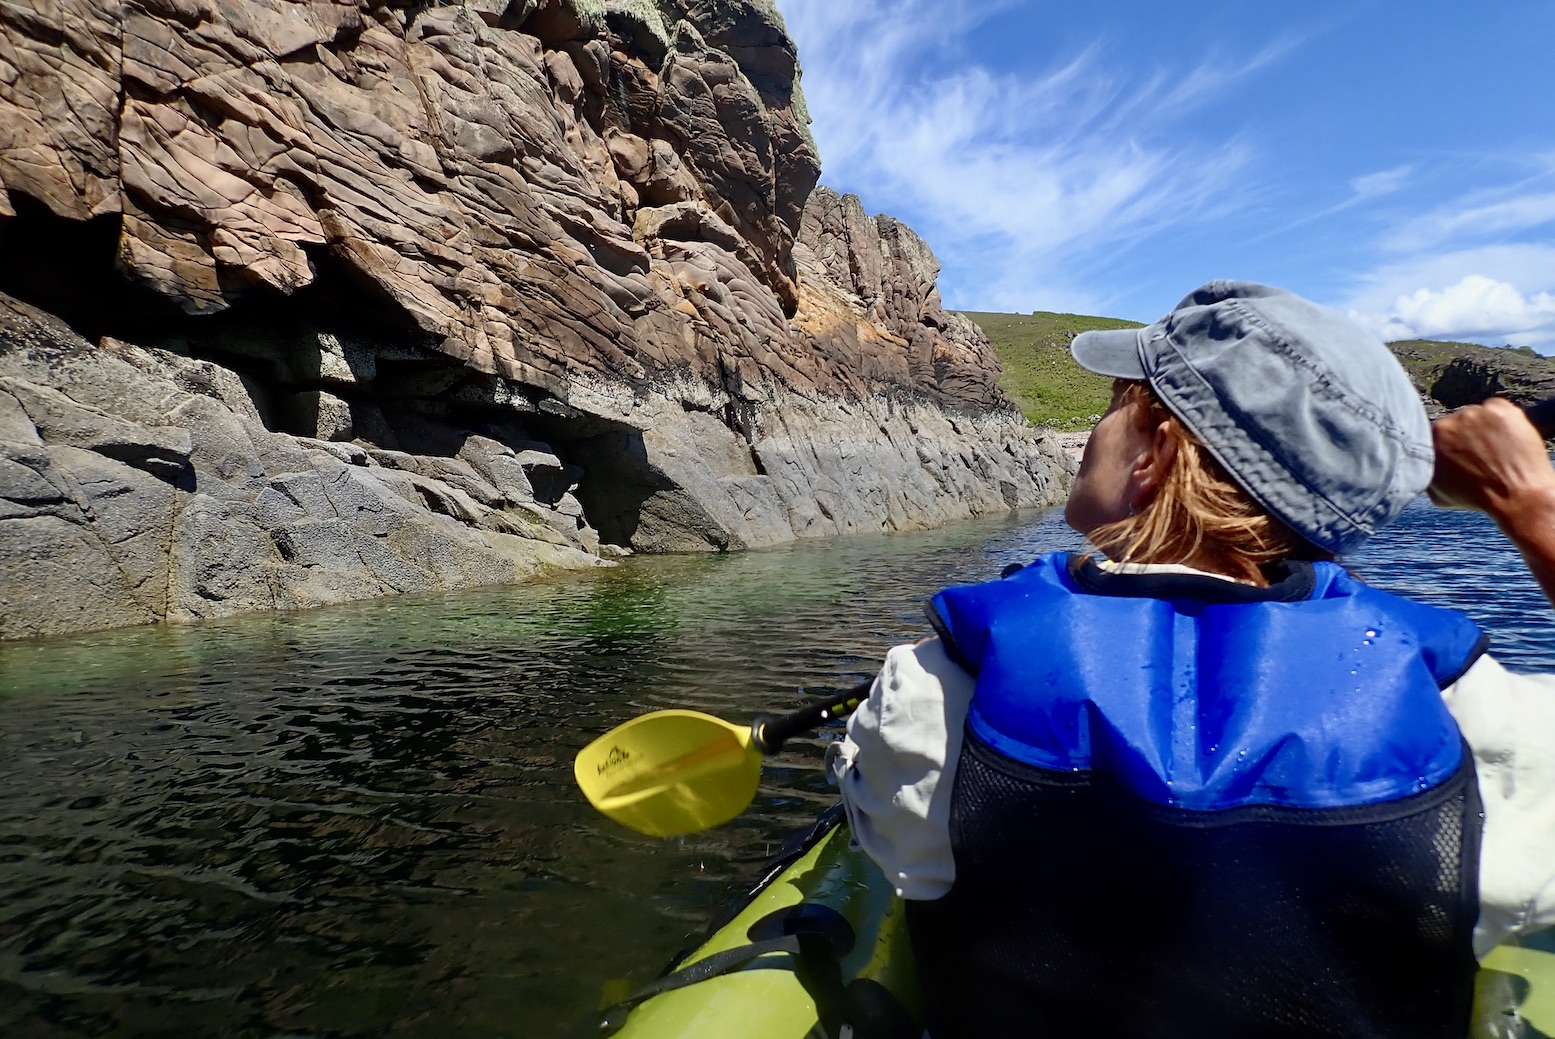
I wonder if coming round the point and turning west into Camas a Bhothain (‘bothy bay’) may get a bit lively, but the TXL takes it all in it’s stride. It’s easy to spot where waves break over reefs and, sat low on the broad, 15-cm-thick seatbase, stability is never an issue and for a packraft, the TXL tracks well across the side wind and waves, perhaps helped by the Gumboat skeg and my masterful technique.
It’s only 4km beach to beach and soon I’m threading through the western Rubha Beag skerries and turning south with the wind for Achnahaird.
Out here in the open the waves are bigger with the odd white cap rolling past, but incredibly the boat feels fine. In a normal solo packraft I suspect I’d be a bit freaked out. The bigger boat makes you feel less vulnerable and the high sides keep the splash out and don’t seem that affected by ~10mph side winds (something I discovered on my first sea outing in Dorset).
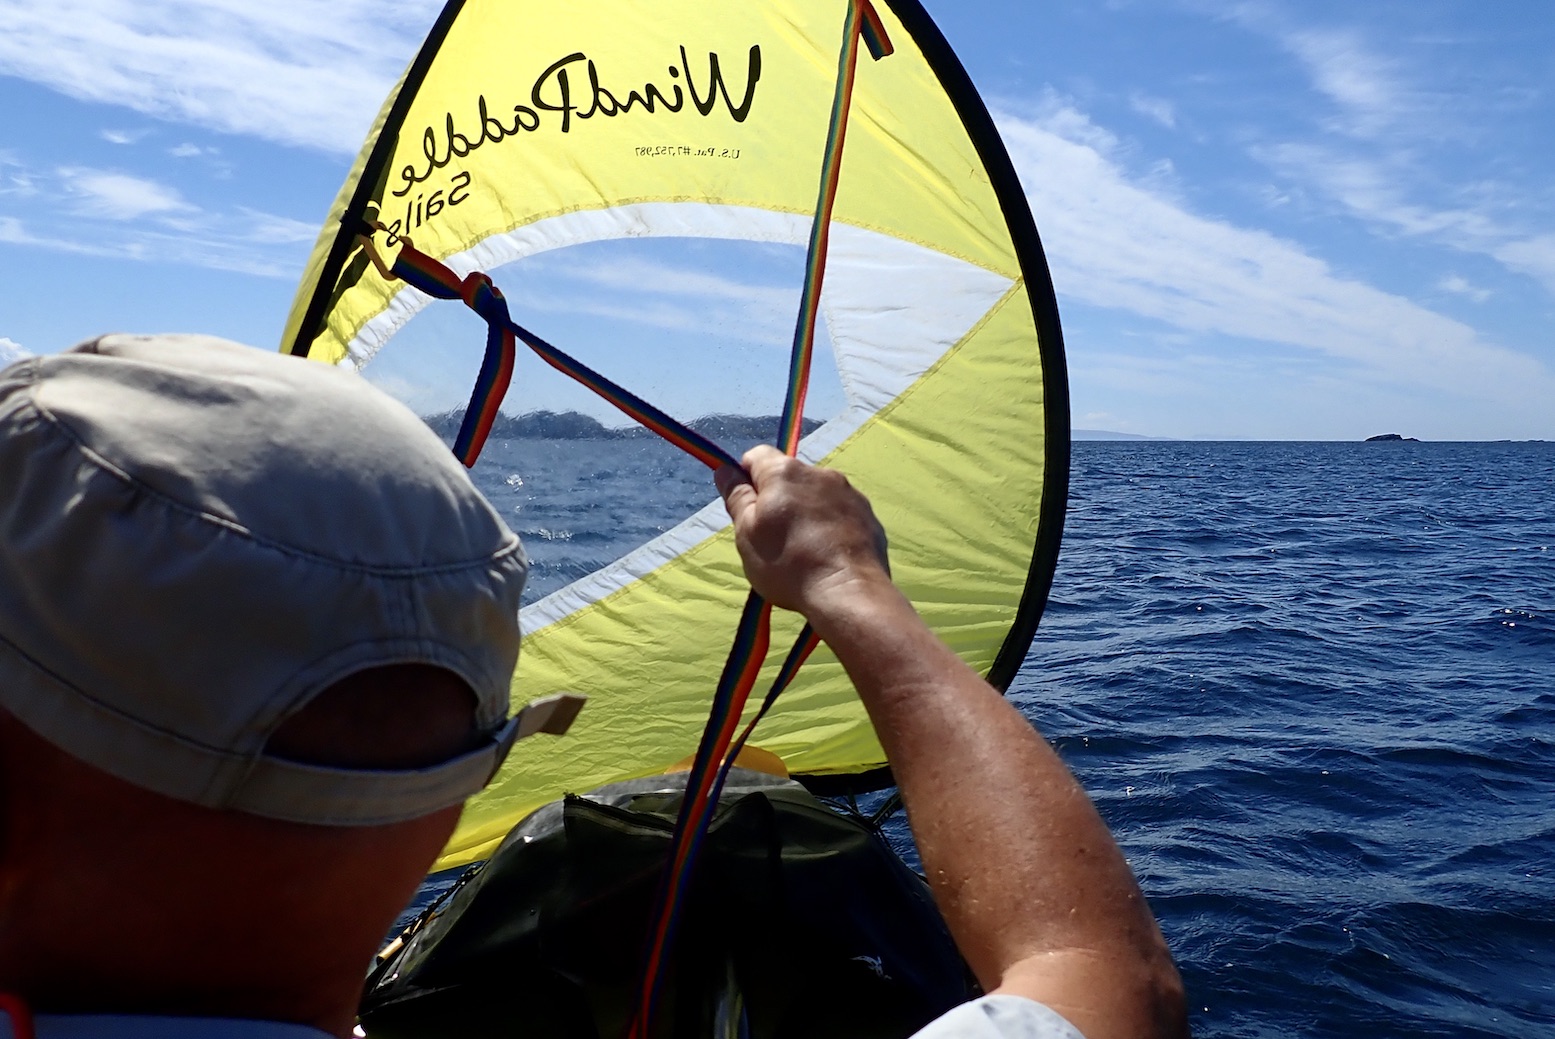
I paddled out into Achnahaird Bay (or so I thought) to get a straight run for the beach, then flipped out the WindPaddle. Only things don’t go so well. Just like the other day when I blamed the front skeg, the TXL is weathercocking (back coming round, below). This time I blamed a too shallow skeg lifting out on wave crests at which point the wind pushes the untethered stern around – the boat pivoting around the sail’s ‘mast’ on the bow. I’ve had this before sailing a IK on Ningaloo Reef in northwest Australia (tall-sided Ik and too short a rudder for the winds). In the TXL my central ‘kayak’ rather than rearward ‘packraft’ seating position doesn’t help. The (loaded) Rebel 2K sailed fine in similar conditions; so did my unloaded Nomad S1 one time, as well as Barry’s loaded Nomad last year in Knoydart. With its skeg on, the MRS Nomad sailed well, with or without a load. Along with its pointy ends, I put that down to its fully submerged skeg.
Meanwhile in the TXL you can see my annoying zigzagging track on the left. Hoping to slice across the bay like a blue-fin tuna, it was all a bit frustrating, but I inched in the right direction quicker than it felt and was pretty sure weight distribution and skeg depth were the culprits. And in fact I saw later the GPS was logging a steady 6kph, it just wasn’t the steady linear progress I’ve had sailing other packrafts.
Trying to pull the bow round into the wind
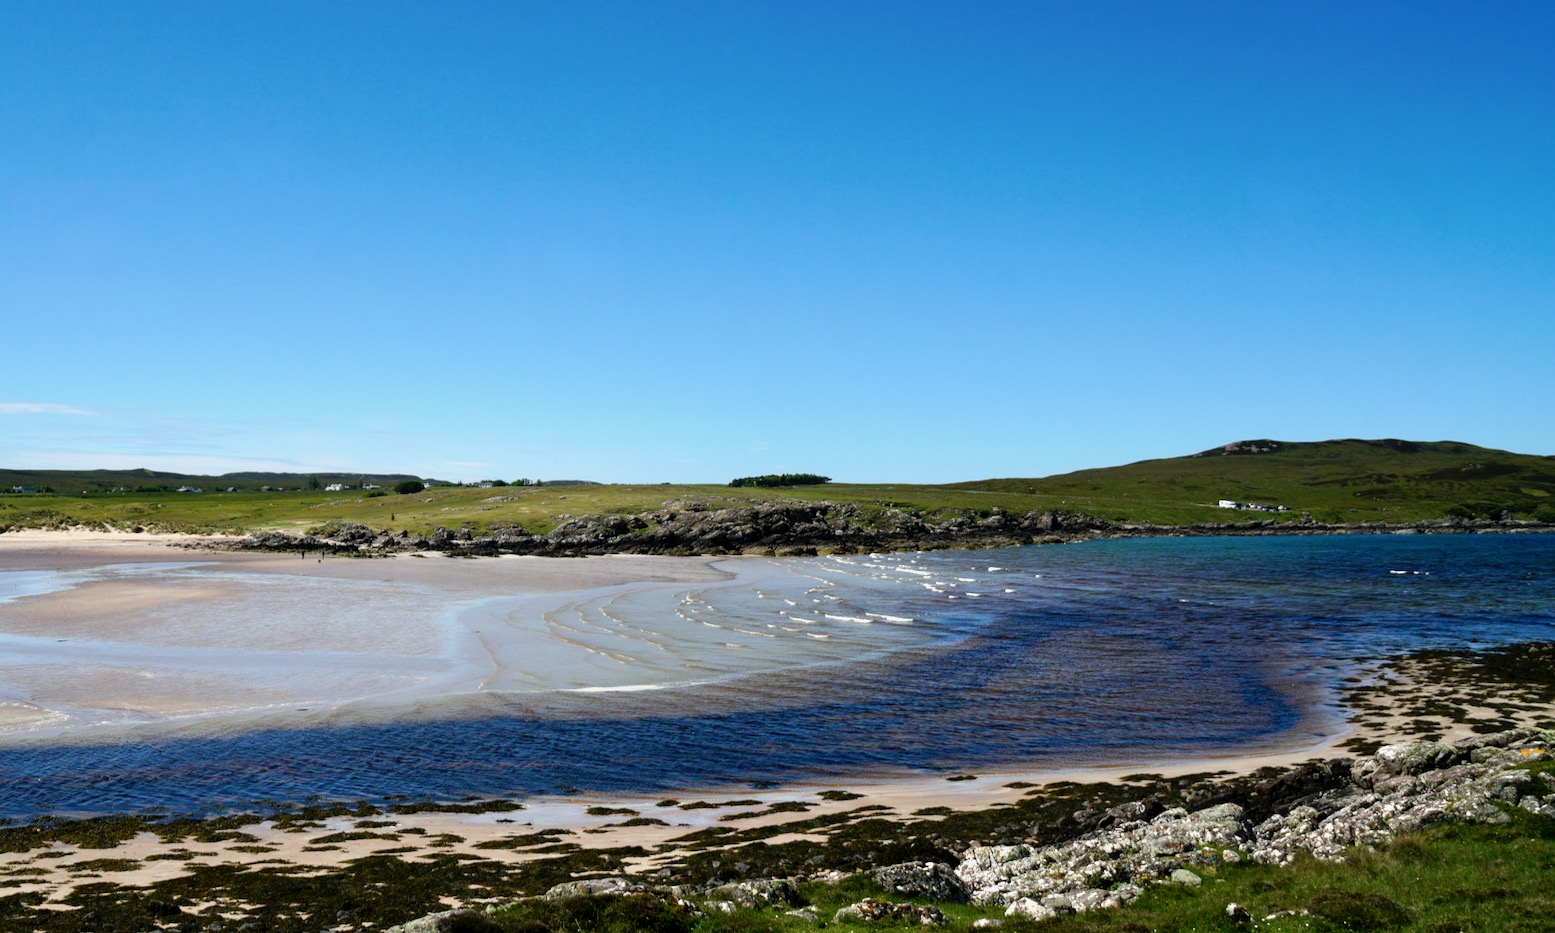
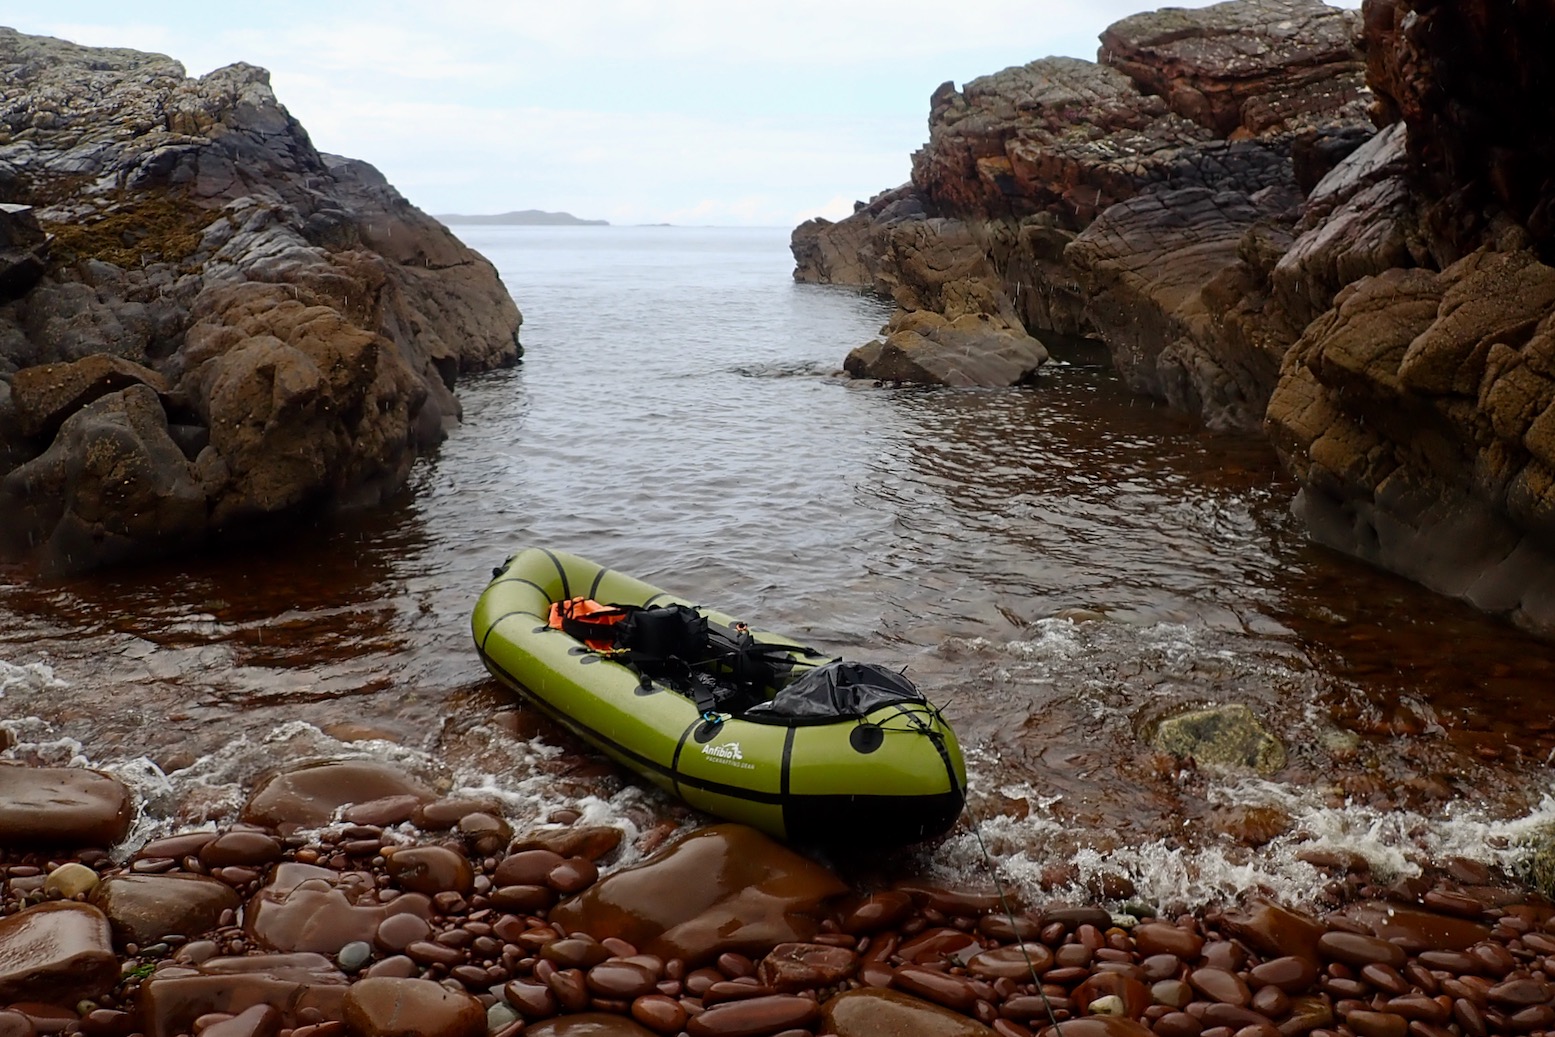
Once at Achnahaird I paddled as far as I could up the burn running alongside the beach, then hopped out and waded upstream – easier than carrying the boat in the wind.
Achnahaird BeachWade upriver
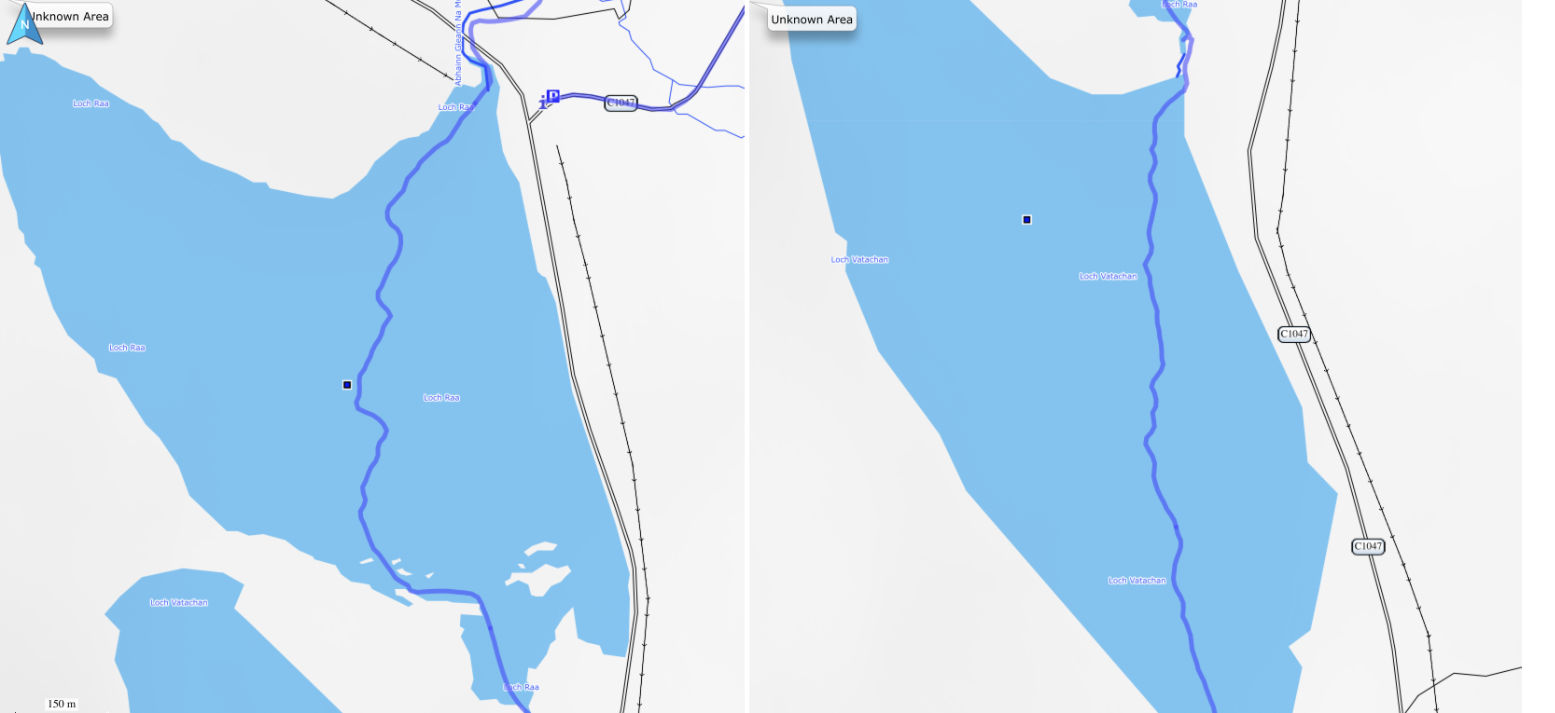
Near the road junction it’s a 2-minute carry over to freshwater Loch Raa where I hoped the lower waves would give the skeg some traction. But it was the same zigzagging progress. Waves combined with a shallow skeg were not causing the weathercocking (as they had in the Bay). So the problem had to be weight distribution. I remembered a canoeing adage: “sit up front into a headwind; sit at the back downwind“. You are the flagpole from which the boat should trail downwind. After a short portage over into Loch Vatachan, I sat right at the back and progress did seem a bit straighter, as the GPS tracklogs below show. I was no faster: 6kph downwind and 5ph on the ‘off-wind’ zags, but there was less zigzagging.
Left: sailing sat centrally. Right: sat at the back. With a bigger skeg I’m hoping for a straight line.
By the time I reached the south end of Loch Vatachan to pack up, the wind was fairly brisk (left). Packraft sailing should be better than this but moving to the back of the boat to enable reliable tracking under sail is not so practical. The answer must be a bigger or repositioned skeg.
A couple of days later we went for a short paddle in a reasonable sailing wind. The stock skeg was on back to front (right) and with the Mrs’ added ballast I hoped it might bite under sail. Unfortunately it was the same story of the stern coming round even if the speeds were again OK. On a beach we went for a wander and found a nice bit of broken plastic fish crate. We’re gonna need a bigger skeg.
During the stop I took the TXL out for a spin sat in the back. Of course the bow was up in the air and yawing like a giraffe, but it was quite a revelation to have a spacious boat extending out in front of me like a kayak. My front seatbase made a spacious footrest and I could lean on the back like a normal sized packraft. Sat in the back, as a way of touring or bikerafting, a bike over the bow and baggage in the front would correct the trim a little. And with the 200 litres of dry storage capacity inside the TubeBags, you could probably move house with the TXL.
We paddled the last mile to Badentarbet with me in the back. Again this felt much more comfortable for me – it must be the ability to lean on the stern. Meanwhile the Mrs said she felt no more cramped than the back. Yes the trim was still off (left), but so it always was on my 2K and I got around in that with no problems. That’s the great thing with the TXL: there are all sorts of ways of using it.
There were two things I wanted to try out while paddling the Sigma TXL solo: • whether the inflatable Multimat floor pad made a noticeable difference to speed • what effect fitting a front skeg along with the usual back one might have on handling. Would it shapen the tracking to sea kayak levels?
I put in at a handy little slot a mile or so from the house and set off with the usual rear skeg and the floor pumped up and with the nozzle accessible at my feet. All was flat calm in the lee of the light northerly until I turned north at Fox Point into a headbreeze up to Old Dornie harbour. As before, paddling along I can’t say the boat felt responsive or glided better – it’s a packraft! – but looking later, the GPS record showed I was moving along at a steady 5kph – as good as I’d expect from a boat like this. I wasn’t sure which way the dropping tide flows through the narrows at Old Dornie (they dry up into an isthmus linking Isle Ristol as very low tides), but now saw it was southbound – against me but barely noticeable.
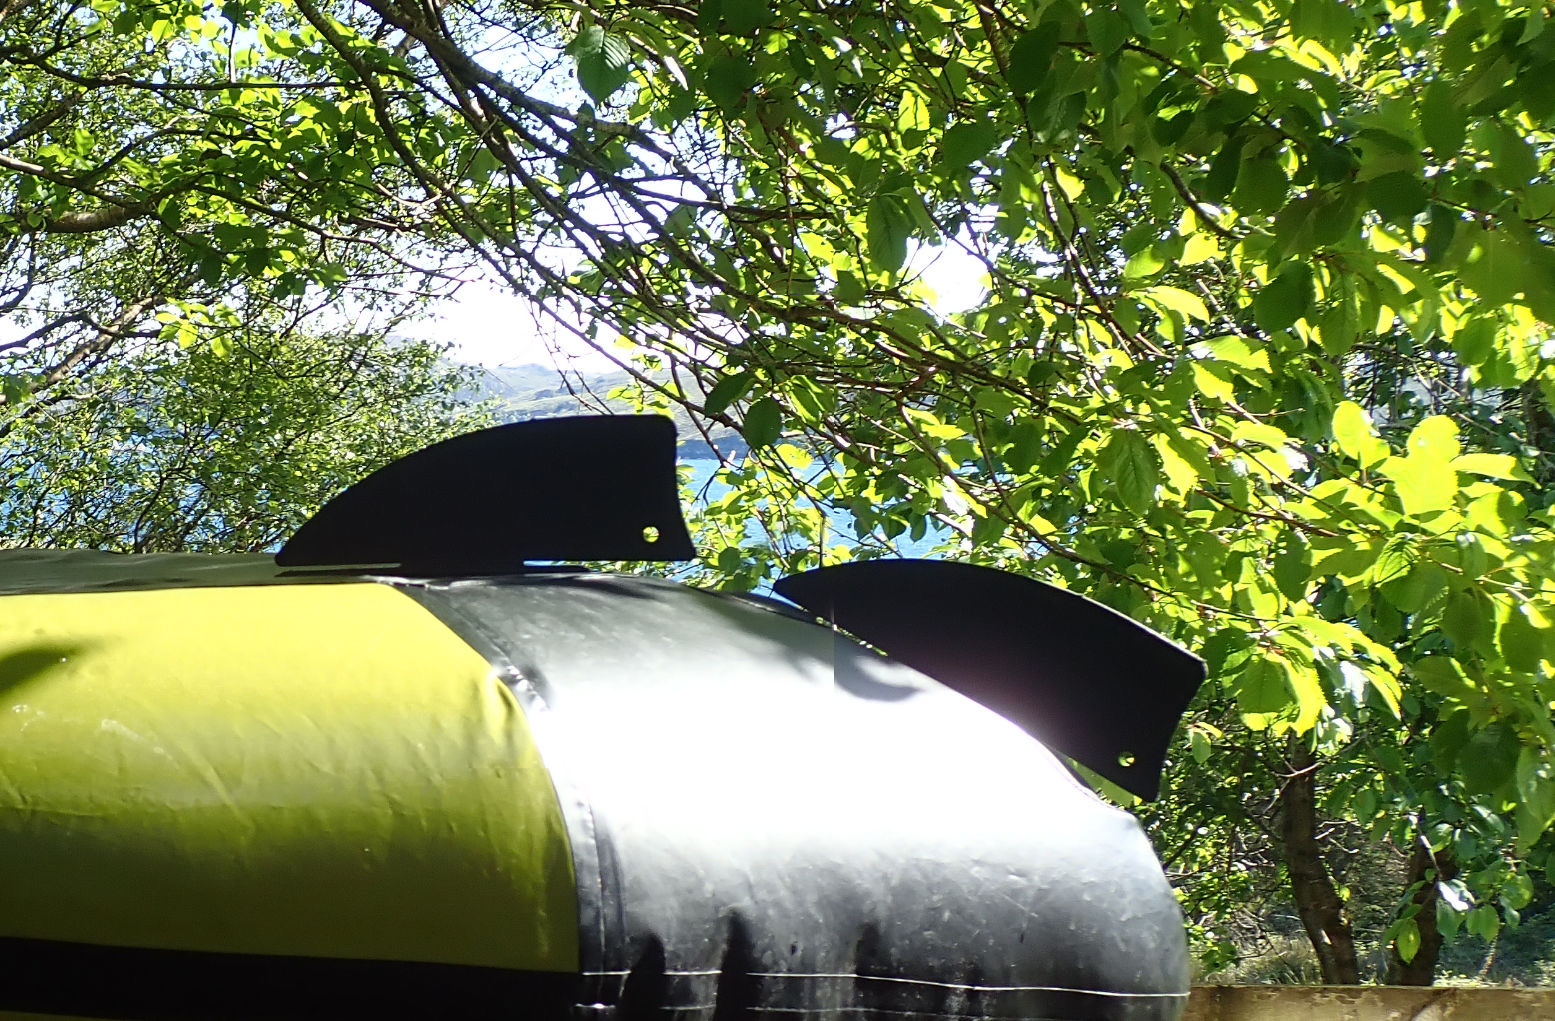
Once through, it was a bit more wavy and at Ristol beach I hopped out to fit the front skeg, curved edge forward, as well as the WindPaddle sail on the off chance the breeze might pick up. Then I gave the floor and boat a top-up until it was all pinging like a drum. Had I looked more closely at the skegs on the upturned boat (below), I may have guessed what the problem was going to be. The TXL’s bow and stern are symmetrical, fyi, and both patches are glued in identical positions.
Double skegging
Turning the spit on north Ristol. Choppier water ahead
Setting off into the wind to carry on round the spit and down the back of Isle Ristol, tracking felt a bit worse, then really became a handful once I turned southwest across the small bay filled with clapotis bouncing off the cliffs. Here I couldn’t pull two strokes without having to correct, as if I was stuck in some odd current or in an IK with no skegs at all. The wind wasn’t that strong and the tide was nearing slack, but forward progress seemed agonisingly negligible. Barely in control, I couldn’t put my finger on it, and at one point had that unnerving feeling of a swimmer caught in a riptide. I’ve noticed odd conditions on this corner of Ristol before, so decided to just keep paddling south in the hope of getting out of the bouncing waves.
Photo before things got sketchy: front skeg bites deeper than the back. Not good for tracking.
If I could have easily got ashore to remove the front skeg I’d have done so right there, but knew of an inlet 500m further on when I could do just that. With the wind behind me, I thought I might sail my way out or trouble, but lifting the sail the boat just pulled itself sideways to the wind. Very odd. I could not get the boat to point down wind and catch the breeze.
By now the water had settled down a bit and with relief, I slipped into the inlet and pulled off the wretched front skeg (left), then went for a wander and a sip from the burn. Looking at the pictures later, it’s clear the front skeg digs deeper than the rear, even if both are halfway out with the Multimat floor fitted (lifting the boat out of the water). You could say the front neutralised the effect of the back skeg so the boat paddled as if it had no skegs. But that wouldn’t have made it so hard to handle. It was the fact that the front bit deeper than the back – the last thing you want.
Little did I realise that the TXL was in fact moving through the clapotis at 6kph, and even hit 7kph just before I turned into the inlet. It just goes to show how misleading the impression of forward progress can be, even if the shore seems to be barely inching by. Despite my floundering around with the paddle, I was zipping along.
Back on the water normal rear-skeg service was resumed with a few inches of yawing from the bow. I came across a sea kayaking group who, like last year near here, seemed to be drifting around like they were killing time, when they had all these amazing islands to explore. Put your backs into it!
I eased past them in a packraft half as long and more than twice as wide, and set off for the straight, 5-km run to Badentarbet pier. By now my paddling cadence had found a good, steady rhythm. About half way, opposite Fox Point, I let down the floor and fully inflated my seat. Positioning the big, unattached seat can be a tight fit between the side tubes, but I’ve learned to lift myself on the side tubes and kick it backwards with my heel. You want to be sat in the middle of the cushion, not falling off either edge. As we found last week near Skye, de-flooring makes the hull go a bit soft, as if the sagging floor was bending the hull a bit (the floor certainly makes the boat feel more rigid). In future, better to prioritise hull pressure over the floor.
Speeds up to 7kph with a backbreeze.
Did I notice any drag from the deformed floor sheet sagging under my weight? Not really, but after a while the cruise dropped to 5kph. This wasn’t a conclusive test in identical conditions; that might be better done there and back with floor/no floor on a freshwater loch. But I do now believe a Multimat does add a kph to paddling speeds. It also occured to me that doing sea paddles like this in a single, 0.5mm chamber boat, there is some benefit to the back-up buoyancy from the Multimat floor pad (and up to a point the Tube Bags, when full). It was something I used to worry about much more when I first started packrafting; unsure if these unproven boats might go pop. Time has shown that that does not happen; at worst you might get a slow leak. But out here better to wear a proper foam pfd than a skimpy Buoy Boy.
The new owner of Tanera has built a lovely sandstone coffee bar/waiting room alongside the repaired pier. I’m not sure who it’s for.
Watch out for those sharp-edged mussels
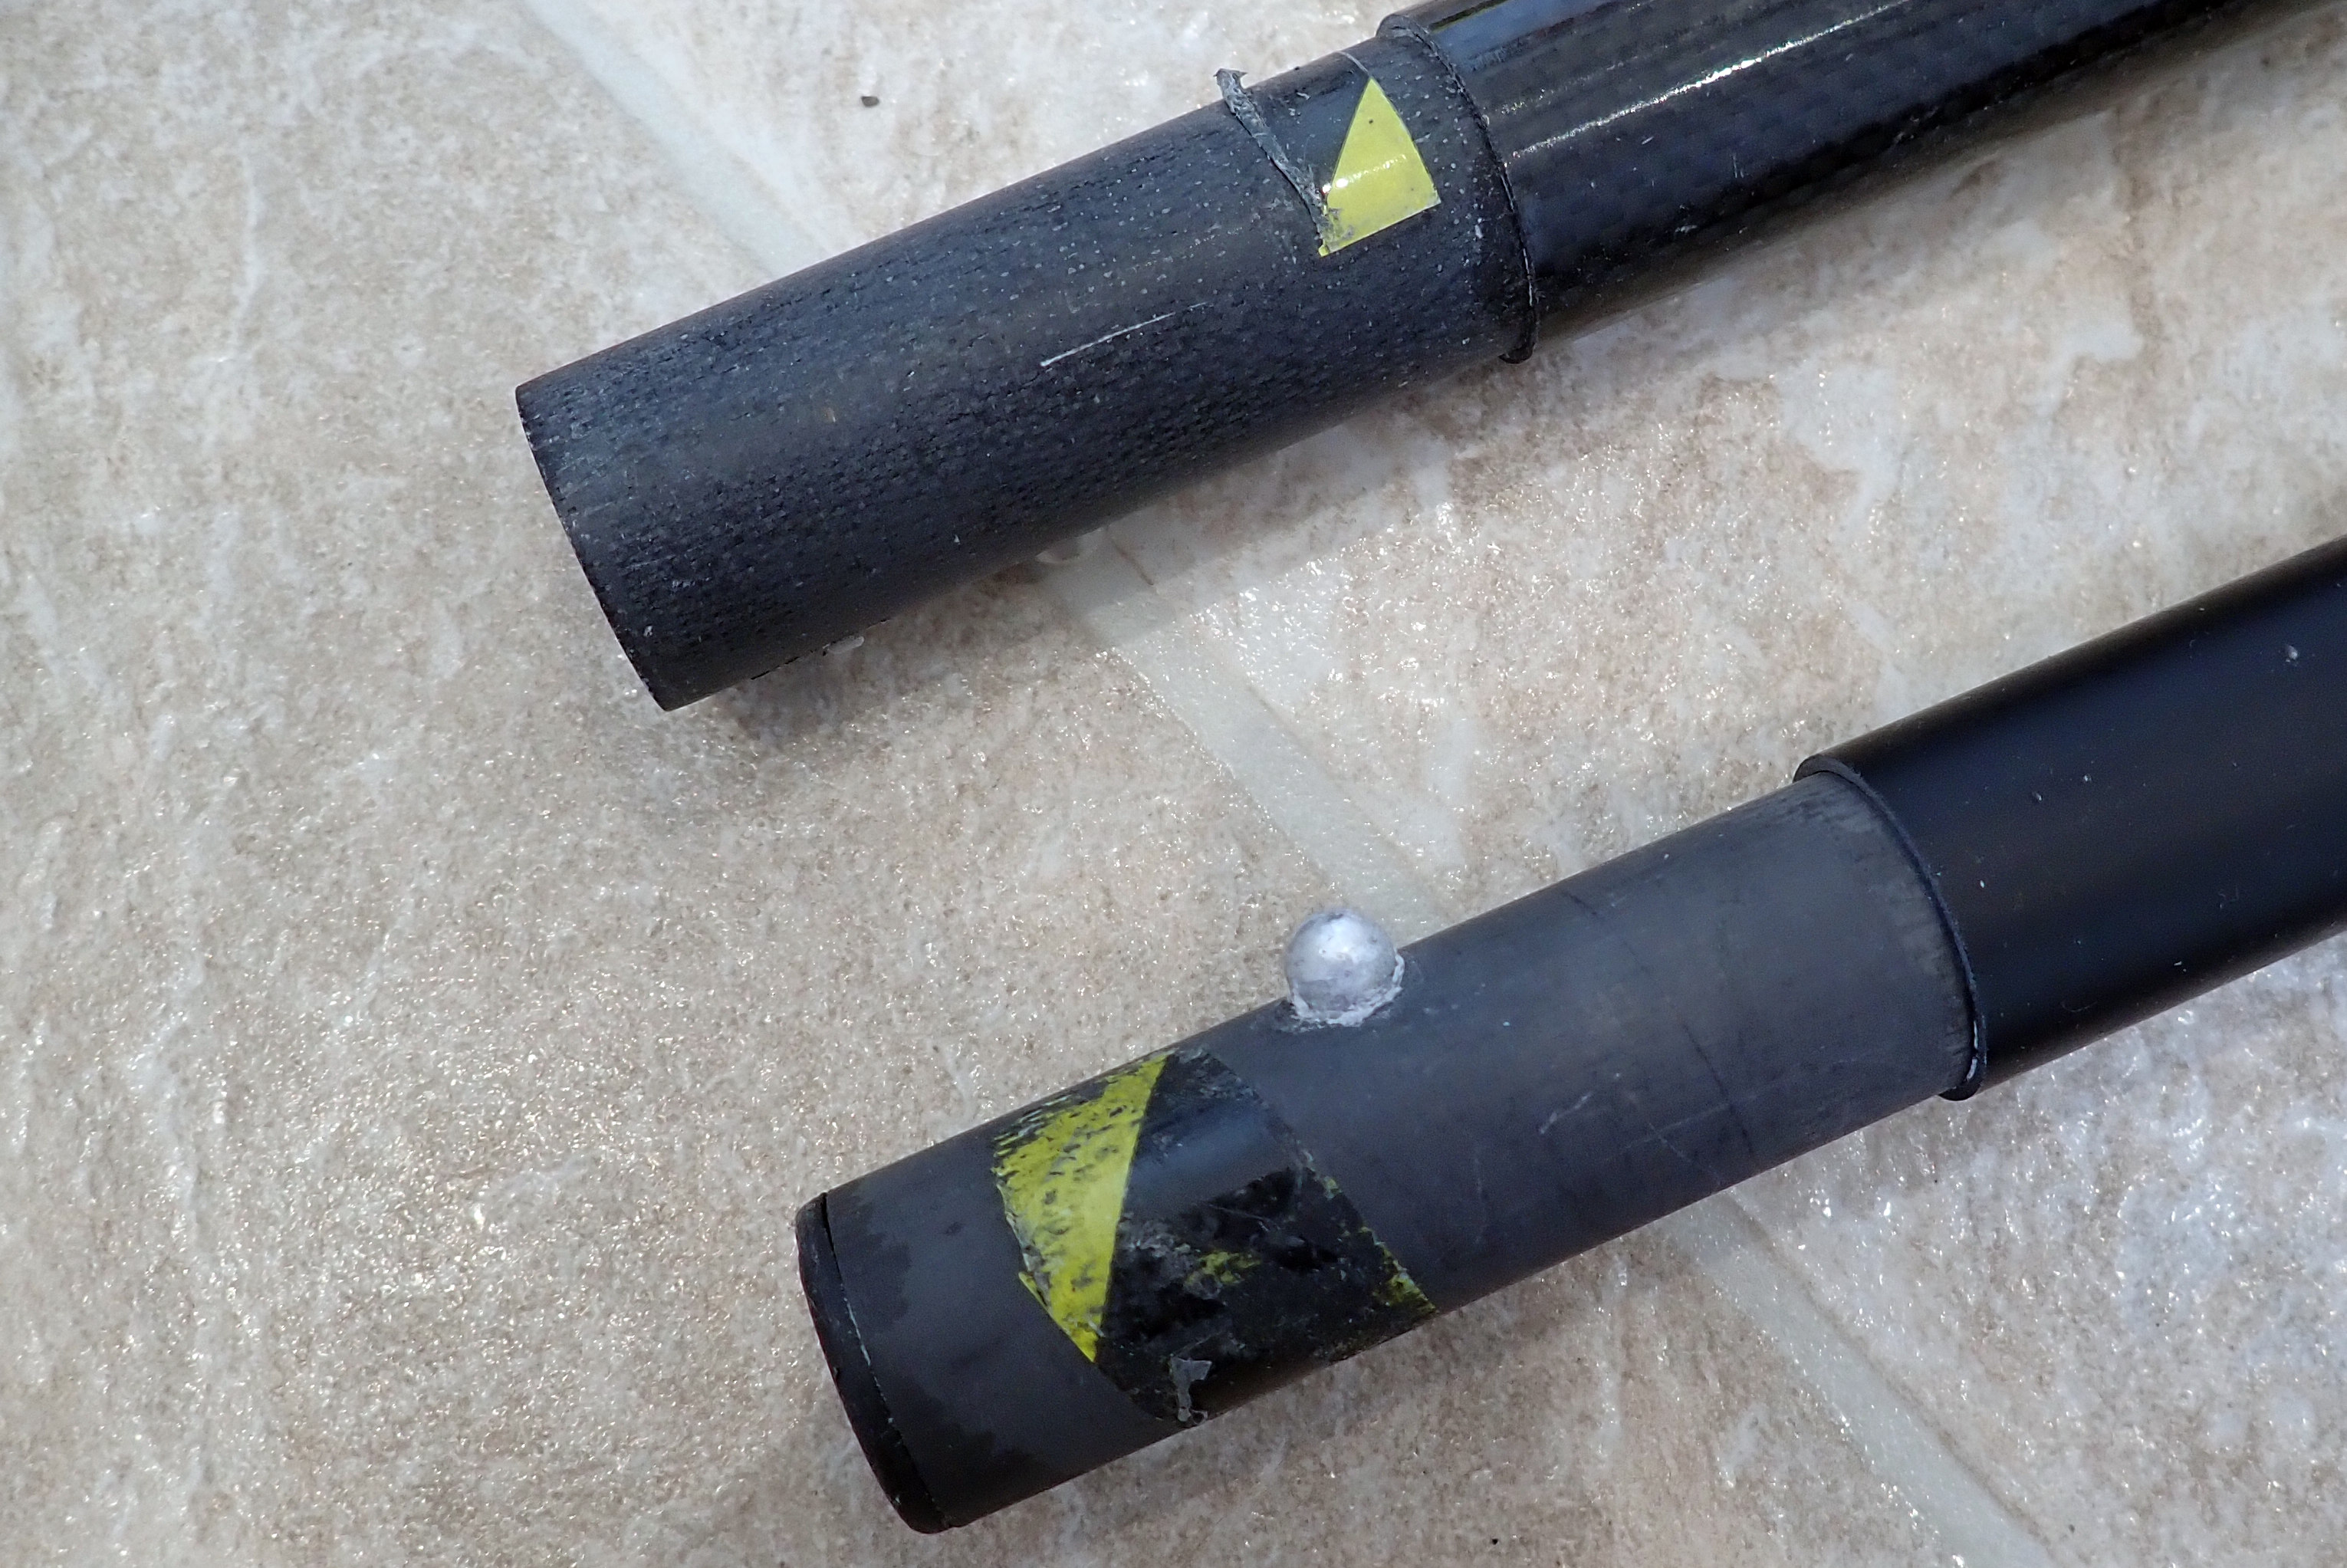
But I’m definitely in no hurry to use a front skeg again, though fitting it back to front might put less in the water (matching the back), and doing so with no air-floor might put both an inch deeper in the water. I might try the back skeg on backwards next time, too. More snag-prone but puts more plastic in the water. Anfibio ought to offer a deeper ‘sea skeg’, (easy enough to make). A while later I repositioned the rear skeg to the floor (below). Anfibio now position the skeg further forward on TXLs.
Next time I’ll try an a Gumotex skeg on the backFits the same and sits more in the water
Anyway, now we know: rear skeg helps for sure but combined with front skeg, not so good; inflatable Multimat floor feels marginal but does add glide. Either way, this 11-km paddle isn’t something I’d ever have tackled in any of my previous solo packrafts, except perhaps the similar Nomad S1. And considering I’ve not paddled this far alone since last year, I didn’t feel any more tired dragging a yard-wide packrafts than hauling my old IK at four times the weight. And of course I was able to follow the newly ratified Packraft Protocol: never take-out where you put in ;-)
Years ago I remember when the value of fitting packraft rear skegs was debated. Then, the now common longer sterns were introduced by Alpacka and positioned the paddler more centrally which greatly reduced excessive bow yawing. The problem was largely solved. On a packraft you’d think a skeg under the bow would eliminate the yawing endemic to short, wide rafts while compromising turning agility. In fact, I wonder whether a packraft might yaw nearly as much at the back but you never notice. Like one of those Turkish dervishes, you’re actually pivoting from the middle of the paddle shaft, or perhaps a bit behind, at the centre of mass (left).
Rear skegs certainly improve tracking on IKs; you can manage without, but with a skeg you can paddle harder without constant micro-correctioning. On rivers I’ve found solo packrafts paddle fine without a rear skeg; or they’re too short to demonstrate noticeable improvements. There’s a bit of nodding as you move off which soon settles down with some momentum and a steady cadence. Even my symmetrical Rebel 2K (left; stern identical to bow, not extended) paddled fine down the Wye without a skeg. But when getting pushed around by a swell or on sea lochs (especially when sailing) fitting a skeg was worthwhile. Either way, rear skegs are a thing now with packrafts even if you don’t have to fit them every time. Certainly on my longer TXL I like to think the stock rear skeg aids coastal paddles; though we found a brief stint with no skeg was only slightly noticeable, paddling into the wind in a sheltered loch (no swell). Anyway, I’ve been curious to see what effect a frontal skeg has, so on buying my TXL I ordered a spare skeg and patch which Anfibio also sell separately for €21 + €6.
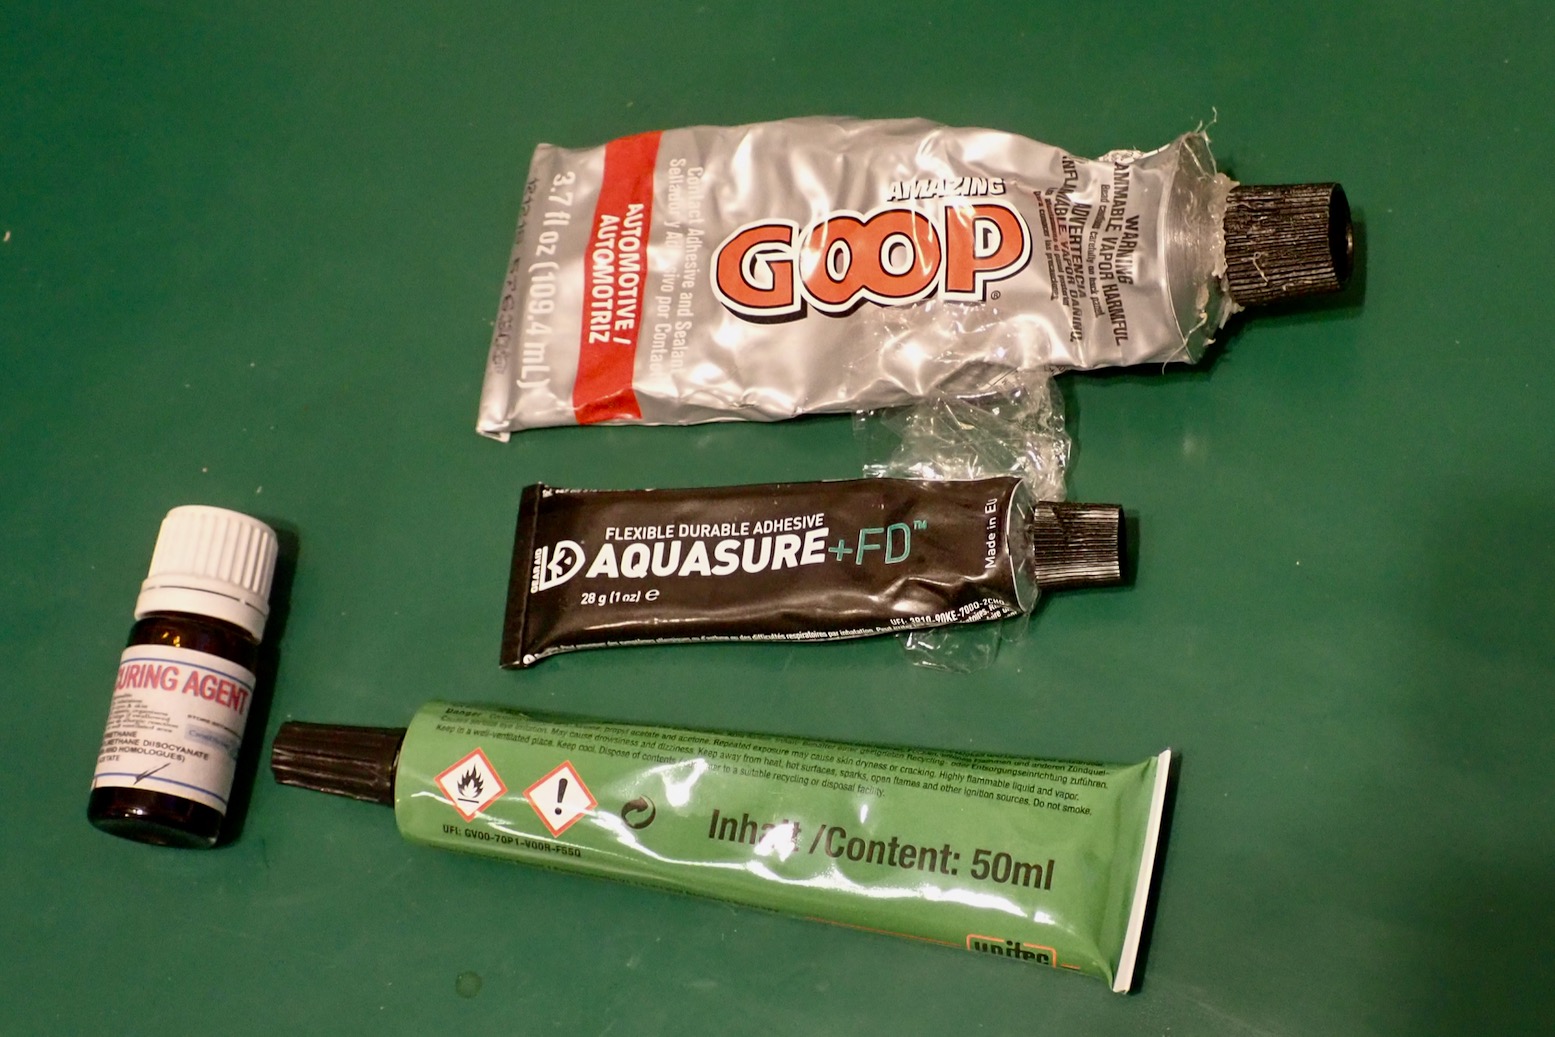
Goop no good; Aquasure OK; Helaplast better
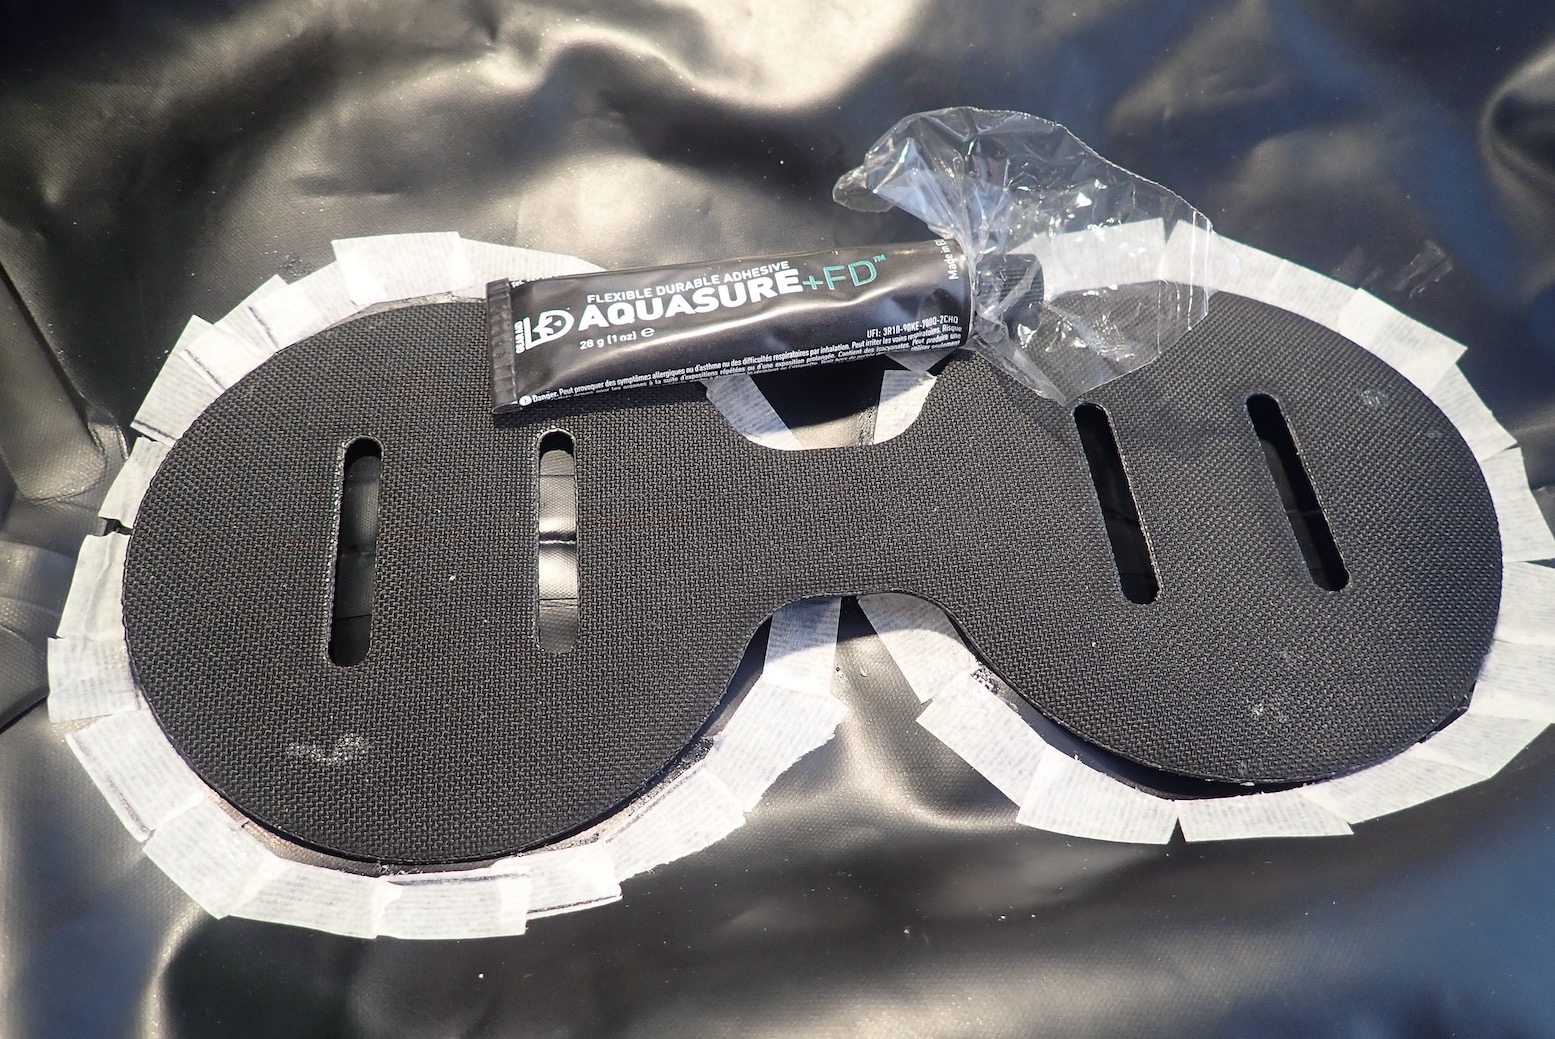
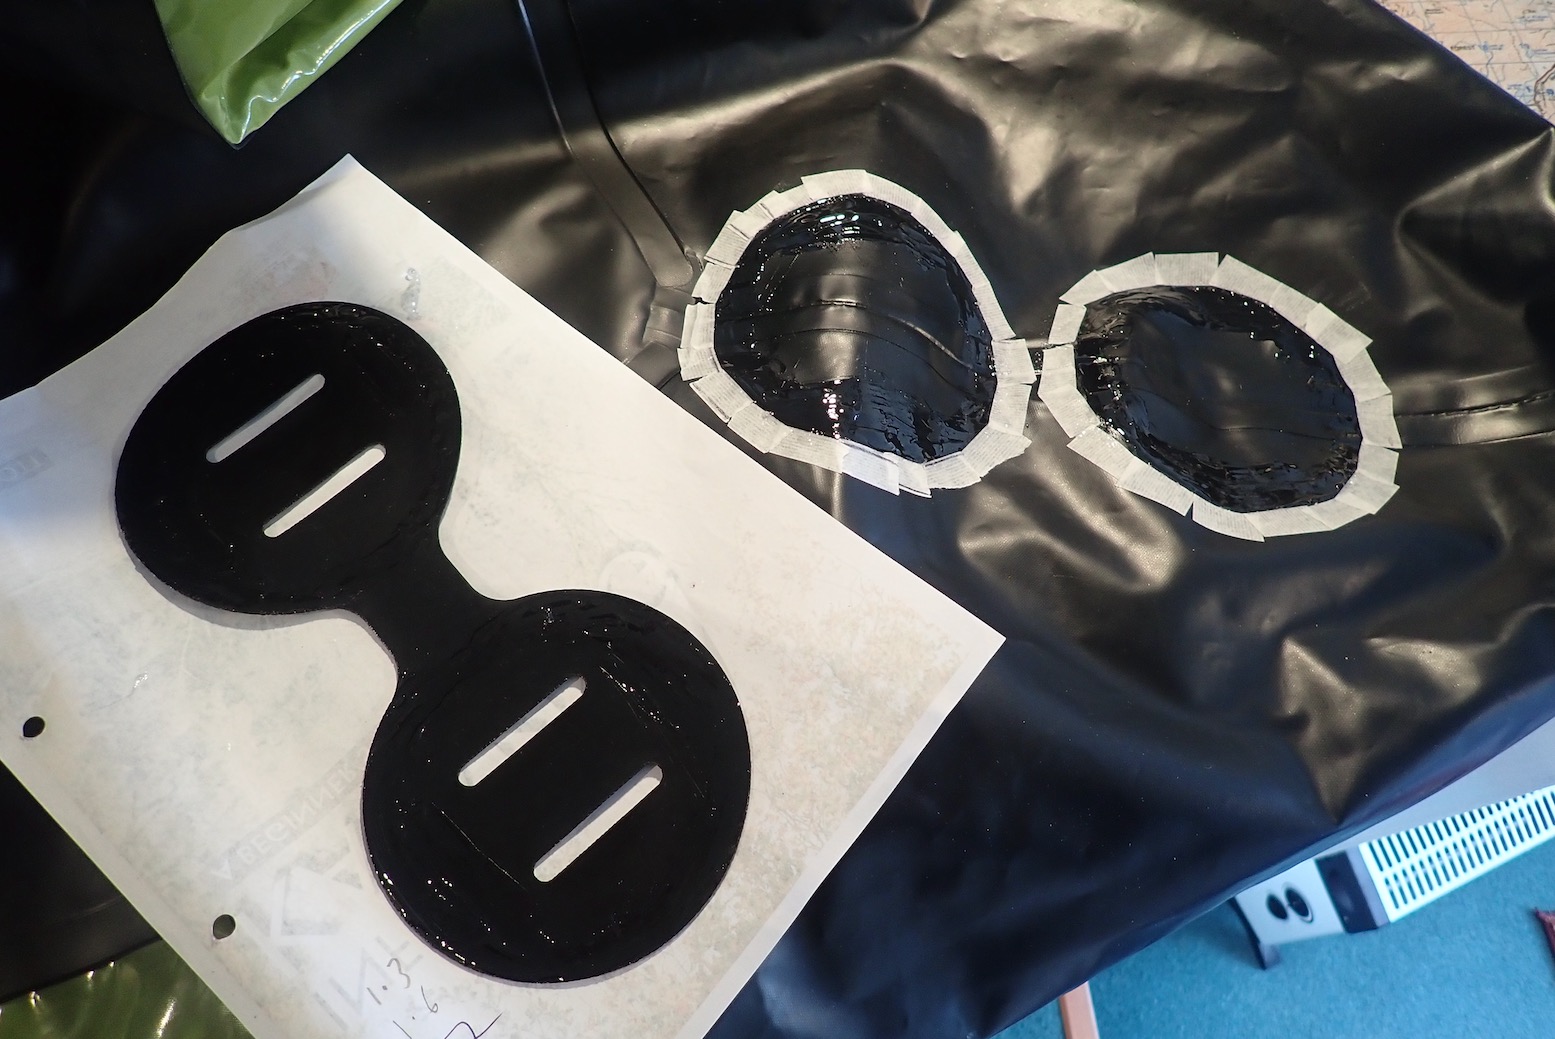
Gluing on a skeg patch As stick-ons go, this is not a mission critical job but you want to line it up dead straight which I now see is better done with the boat inflated. I just used the rear seam, hoping it was along the middle line. Anfibio recommend Helaplast which they can’t post outside of Germany, but which you can buy on ebay.uk (from Germany…) for €7 for 50ml. There must be something similar in the UK, but the problem is identifying it against something that provenly works. I had some Goop contact adhesive, but whatever their ‘Automotive’ variant is, it did not stick at all. So I decided to try some Aquasure+FD, leaving it to cure for half an hour before sending in the roller. That seems to have worked.
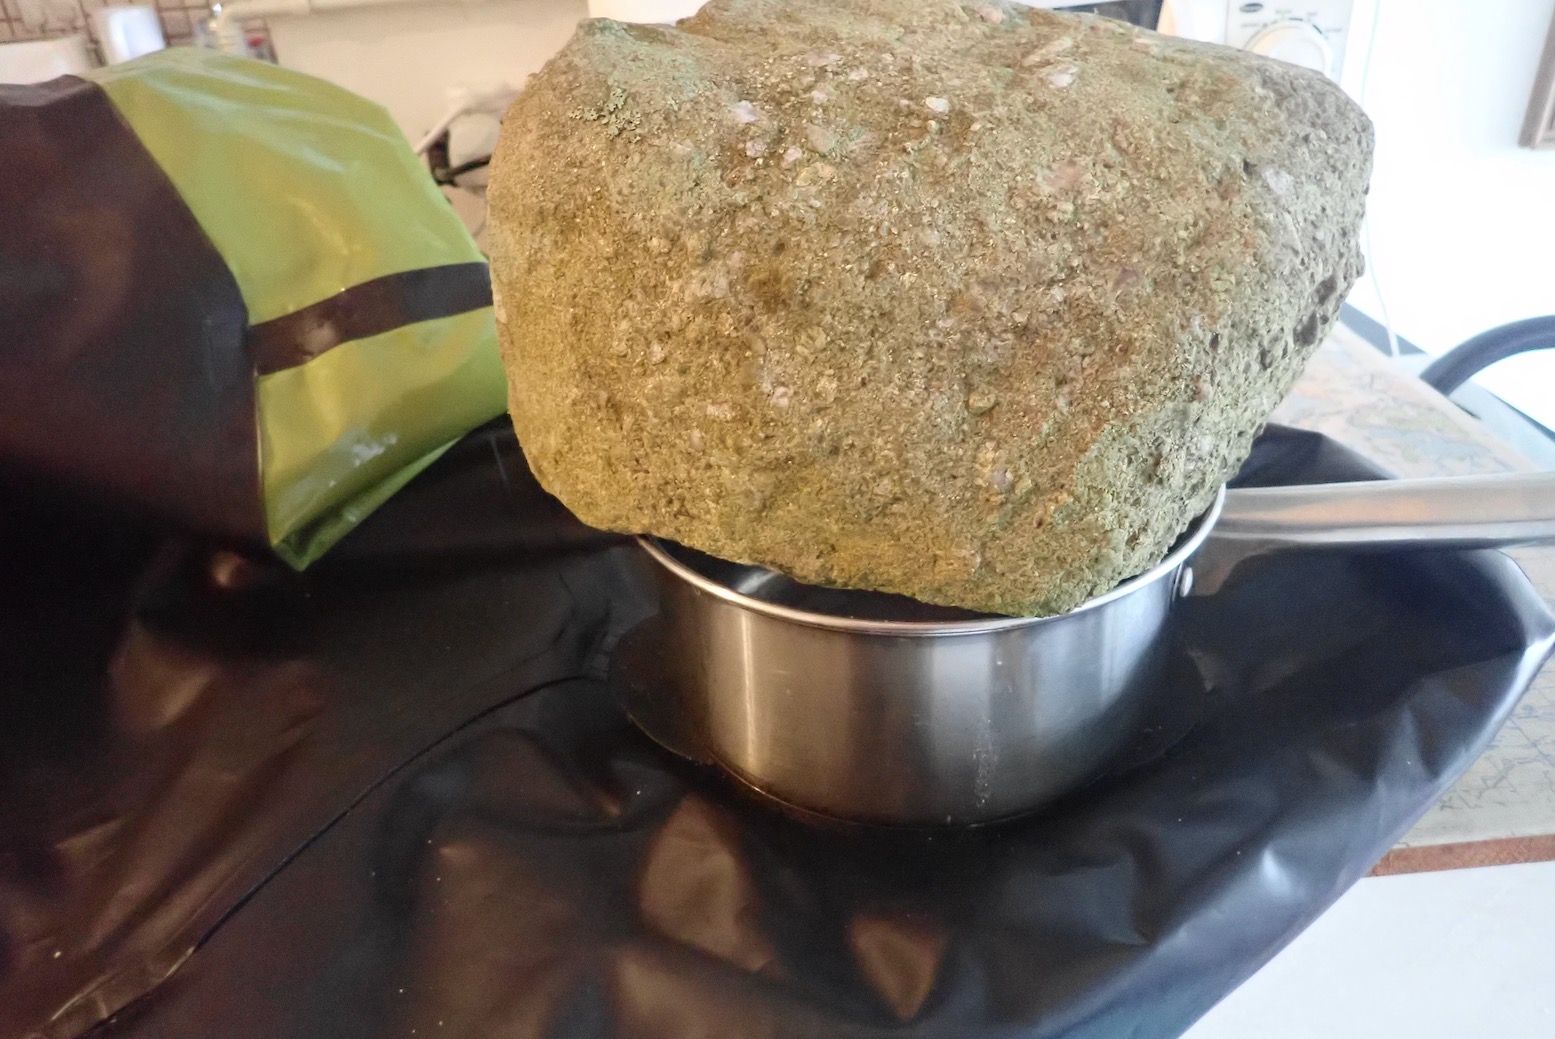
Make sure you don’t glue the middle down!Thin layer of FD on both; wait 30 minsPosition and press down hard with a rollerA piece of drystone wall for good measure
Using stock TXL mounts sort of works
Knee straps Part of me likes to think I’ll be using my nippy TXL the way I use my IK: fair weather, open-water sea paddles rarely more than a mile from shore. As this might require sustained periods of paddling I figured some knee straps would help, as they do in my IKs. It’s not so much for hardcore bracing or even rolling, the way they’re used in white water, but just to lock-out the legs so the core is more connected and you get good drive.
Anfibio sent me their latest 5-point thigh straps which I tried and liked on the Revo (left). But to make full use of them would require gluing on up to 8 extra patches (if not ideally the ladder patch; left).
I decided my old Anfibio 3P straps which I’ve used for years in my IK would be OK for my low-tension, flatwater use. They require adding just two pairs of attachment straps. I could have got away with the unused flat patch by the seat, but the direction on tension was off centre and would eventually wear, stretch and maybe break. These small patches are not really designed for such loads and now my Helaplast has arrived, I decided to try it. An old post on the Anfibio blog explains how to use Helaplast:
mark off area on hull
mix hardener 20:1
clean surfaces with solvent
apply a thin layer to both surfaces and wait 30 minutes
apply another thin layer and wait another 10 minutes
Position patch; it won’t adhere properly
Heat with hair dryer to reactivate glue and press down hard with roller. It’s better if the boat is deflated to do this on a hard surface.
Helaplast and hardener 20:1Thin layer on patch and hull, then waitAfter 2nd coat, wait, apply patch, heat and rollJob done, I hope
The heat reactivation trick was not one I’ve heard of before with glues (except to loosen stuff), but you could see it worked. Where the positioned patch was lamely stuck to the boat, a bit of heat saw it bond down well with some added rolling. You can tell when something looks well glued and this feels like it, though I’m sure glad I didn’t have to do that another six times.
Update Having paddled about with the straps a bit, they work OK, but the front mounts need to be lower to hook well over the knees without using the cross-link strap to pull each strap inward (not what they were intended for – entrapment hazard!). I did this a few days later. Knee straps also make a good set of handles for moving the boat about like a giant holdall.
Thigh strap attachment points are better off set low at the front.
Broadly speaking, 3-panel FDS IKs are assembled by gluing the three DS planks into a wrap-around envelope of more PVC which holds the panels in a boat-like shape. Some floors areremovable, a bit like a footbed slips into a shoe. This makes the hull skin’s inner floor accessible for easy cleaning, rinsing and drying before storage: an important part of IK care. Not everyone may see drying as the deal breaker I make it out to be. Much depends on where you live in terms of climate and storage space.
Fixed DS floor sealed to the side with tapeBut not all the way, so water and debris get channelled down in the cavities either side
Unless a glued-in floor is fully sealed along the sides, water and grit will collect in the side cavities. But for deflation reasons, this cavity cannot be sealed off.
Less goodbut almost universal with three-panels is a DS floor permanently glued to the floor skin but not fully sealed to the side panels. See the two images above: at the bow and stern where the tape stops, water and debris run down into the side cavities. A drain valve helps water to run out when flushing before deflating. Some boats feature several capped drains along the sides, which is either odd or a ‘more-looks-better’ marketing gimmick. After all, unless you’re an oligarch, your bath has only one plug hole. Don’t mistake these multiple drains as self-bailing ports, no matter what clueless vendors may claim or owners may think. Open the drains when afloat and the boat will part-fill with water. Until I realised this, I was baffled by these drains. So it seems were actual owners.
Floor drains on a GliderDrains on TomahawkStern drain on Yakkair HP
Such a boat is nearly as much of a pain to dry properly as the bladdered IKs I go on about. There will always be moisture in the long, inaccessible side cavities along the floor edge which you’ll struggle to dry properly. Proper rinsing and drying matter if you want your IK to last a long time, especially after you’ve been at sea when sand and other debris can get in the boat. Seawater causes mildew, staining, slime and odours. So does trapped organic matter, while in the long term, trapped grit might rub unseen against the soft PVC until it wears right through (this will probably take years).
‘Wallpaper’ over the end ‘cracks’ (shown in green) to seal off the cavities. You’ll then need to fit a plug to allow the cavity to deflate properly when rolling up. Then the FDS would be dead easy to dry, just like a tubeless boat (below left).
Tubeless rubber IK: dead easy to dry
A theoretical way to eliminate these issues is by fully sealing or ‘wallpapering over’ the floor gaps the bow and the stern as shown in green above. To drain and dry such fully sealed boats, you simply flip them over to shed the excess water, then deflate, spread out and wipe dry, just like the round-tube Grabner on the left. A boat modified like this would have no crud-trapping, moisture-retaining cavities. The flaw with this idea would be the air trapped in this sealed-off cavity would make the boat impossible to pack compactly: like trying to roll up a partially deflated inner tube. It needs a breather hole: a simple plug would work. Pull out the plug when deflating, plug up once inflated to keep water out. Fyi: this is all hypothetical but an Italian chap with a BIC FDS told me he had just this problem: gravel and grit collecting in the cavities. One solution of his was to stuff the openings each end with a dense sponge. Water may still get in but bigger grit won’t. Good idea. For the moment it seems most manufacturers are happy to settle on fitted floors with drains, just as some buyers are either oblivious to- or not bothered by this issue.
Protracted KXone cavity drying instructions using what seems to be a hidden floor drain valve (6, 7).
Actually there is a worse option: supposedly ‘self-bailing’ 3-panel FDS IKs which have little side cavities on the edge of the fitted floor and simple drain holes in the outer skin. There are no closable drain valves. A tellingly unused and unbranded FDS IK (left) I saw on eBay was like this. I had to check with the seller as there were no photos of the floor. Within an hour it sold for £700, but once on the water the new owner will find their boat filling up from below. It may only be a couple of inches, but that water will slosh back and forth as you paddle along, adding several kilos of weight and upsetting stability. You could easily tape up the holes in the outer skin, but this is why what look like FDS bargains come unbranded, badly designed and without guarantees. As said above: not everyone may see drying as the deal breaker I make it out to be. Much depends on where you live in terms of climate and storage space.
The other day we paddled the Seawave off Durness beach where the surf was bigger than I’m used to. Hitting a breaking wave as we paddled out didn’t help; the swamped boat needed tipping out at the next beach. It was a bit too offshore windy to roam, but it was still a thrill to be paddling on the very top of Britain, just 2175 miles from the North Pole (about the same distance south to the Canaries). After the paddle I took care to dry, wipe down and roll the boat up on a sand-free rock bench, but lacking a hose back at the house, I had to rinse one bucket at time – not ideal. When I pumped up, the floor soon went flat: sand was in the seal of the floor’s PRV (what’s a PRV). It’s a thing that happens but in nearly 20 years of Gumotexing it’s never happened to me. Today was my day.
Seawave PRV
The design of the valve means that if the boat swamps in the surf, water laden with grit can enter via the six vents and pool in the valve body right above the seal. The next time it purges, sand grains can slip down onto the soft rubber seal surface and stay there, letting air leak out. Because the chances of this are high, with a leaking floor PRVs are the usual culprit, not the nearby inflation valve with its sealed valve cap, or less still, a puncture. But don’t rule either out (the cleaning procedure for an inflation valve will be the same).
Fixing a PRV Much of what follows is my take on Polishman Marcin S’s translated post linked above. It’s not how I actually did it, it’s how I would do it next time after quite a lot of trial, error and better ideas or procedures though up along the way.
Before disassembly, first try giving the PRV a darn good blow-through by pumping like billy-o and letting it purge. It will help to prise off the vent cap with a small flat screwdriver so grains blow away, not bounce back in. Pump up and see what happens. Chances are it won’t work.
Next I suggest putting the boat on a slope (to save water and weight) and flood the stern to establish the pace of the leak from the PRV. You will do it again at the end to see if there is any change. By dragging the boat around 180°, you can let the water slosh down to the bow while you remove the PRV at the stern at the high end.
Don’t try this; manometer leaking
Small bubbles rising from the PRV
Don’t plug in a manometer to try monitor the leak over a period of time; it cost me a few hours and a disassembly or two before the flooding idea proved my manometer was leaking from the base faster than the PRV. As we know, pressure gauges are plugged in briefly to get a reading, then as quickly removed. To test for a leak, water is best.
Six splines below the vent cap
Buy one now
You now know for sure the PRV is leaking so will have to remove and clean it. Flicking off the vent cap exposes the valve body’s six splines. Fit your Gumotex valve tool(or eBay clones from £6) and unscrew the PRV. As Marcin says: the plastic one will do; you don’t need the expensive metal one Gumotex also sell. Expect the PRV to be very tight. Marcin pre-lubed his, I didn’t but it undid easily enough. My boat is less than a year old.
What a tool
Don’t let the backing nut fall away (or the o-ring)
It’s easier to start unscrewing the PRV with the boat fully inflated, but separate the two parts of the valve only once fully deflated so there’s less chance of the backing nut inside the hull rolling away out of reach. Same with the loose o-ring on the valve body base; don’t let it drop into the abyss.
PRV with black o-ring
Rinsing; worth a shot
With the PRV in hand, you can see how it works: a spring-loaded valve opens upward when pressure from within reaches a pre-set level – on a Seawave supposedly 0.25 bar or 3.5 psi (but it might close as low as 0.20). As pressure drops it seals shut. At this point you might try rinsing under a tap while pushing the valve open, but you’re going to have to disassemble it anyway to check the state of the seal.
Set the o-ring aside and unscrew the 6mm locknut on the valve stem. Press on the sprung valve from the other side to stop it spinning as you unscrew the nut. But before you do this, count the number of threads or take a photo (above), as the position of the nut regulates the purge pressure; the more you screw down the nut the higher the purge pressure. I notice Marcin’s nut on his Solar was much less screwed in than mine (lower purge pressure). (At one point I tried screwing in my nut an extra turn to improve sealing, but it didn’t seem to make much difference; still closing around 0.2. Maybe a few more turns are needed, but of course you don’t want to go too far and compromise the floor.
Left: pliers to undo the nut; magnifying glass and torch to closely inspect the rubber seal. Right: the disassembled PRV. From top left: valve body, o-ring, valve stem with rubber seal, spring, spring cross-washer, 6mm lock nut.
Ooo-er, quite a lot of fine Durness beach on there.
I chose to clean the rubber seal with an ear stick and toluene solvent. (I tried, but decided not to remove the rubber seal from the stem). After carefully wiping off the grains on, around and under the seal, I dipped the whole thing in the toluene bottle cap (not too long as toluene is strong stuff on plastic; it dissolved the orange marker dot). Don’t forget to inspect and wipe the inside of the plastic valve body too.
A lovely, clean PRV seal. Reassemble and carefully screw down the metal nut onto the soft plastic valve stem to where it was – or what you prefer.
Grit-catching foam filter
Marcin suggests sticking some sponge under the vent cap to catch grains in future. Sounds like a good idea. These are easily removed/rinsed/dried or replaced by flipping off the vent cap.
Edge caught in thread
Tooling on
Clip on the cap
A quick Hail Mary to Saint Columba and you’re now ready to refit the valve. You shouldn’t need any lube other than a bit of water for things to reassemble smoothly, though I decided to lube the o-ring with some TiZip silicon grease. I found as you start screwing in by hand it feels like it’s cross threading. It isn’t: the edge of the fabric is getting caught in the thread. Back up and jiggle the valve body and loose fabric around to make sure the body has slotted and centred its flange into the fabric hole. Pump back up, tighten the PRV down some more, but probably don’t clip on the vent cap just yet as you may be going back to square one, as I did (partly because the fitted manometer was leading me astray).
Now flip the stern back downhill and let the water slosh back over the Seawave’s valves. I found the PRV purged for about a minute, then abruptly stopped with an odd underwater squawk … but carried on leaking slowly. Another removal and check and refit and there’s still a very slow leak – a 2mm bubble every 2-3 seconds, but with the floor now lying in the warm afternoon sunshine, that may be normal purging. I decide it’s as fixed as it can be. A few hours later, all was normal again and we are all much the wiser.
Moral of the story: if you think sand-laden seawater may have pooled in your PRV (most likely from crashing beach surf, not normal, deep-water paddle-splash), back on shore flip the vent cap off and rinse the PRV cavity with fresh water, ideally flipping the boat upside down, so any grains flush out.