Category Archives: Tech

Packboat Fabrics & Construction

Sunny Mk1 kayak ~ adapting seat and footrest

Sunny main page
More on packboat seats

The Aire Cheetah seat (left) turned out to be no worse than the inflatable original, but was a bit lighter – even though it weighs just over 2kg. I’ve also set it up so I clip the seat to the boat’s seat mounts (which originally used a knotted bit of rope) so I can take it out at camps or to dry/clean the boat. Plus, along with the box for a footrest (below), it’s one less thing to pump up.

Firm backresting was a problem with the OE seat; or to be precise, fitting points to hold the back of the seat upright as you push back with your feet. Because the support strap is attached from the seat top to the front seat base, as you lean bank it just pivots rather than supports. The 410C is much better in this respect. To cut a long story short, I imitated them by gluing mounts to the hull’s side tubes to attach to the seat top. This way the pulling force is in a better line and the seat doesn’t pull down. Some say though that the old-style seat have better back support than the plain Mk2/3 style Sunny seats.
Since fitting on the side tube mounts (the real answer to this problem) I don’t think about the seat now which must mean it works. The Aire seat is still a bit heavy though.

Footrest
The OE inflatable footrest pillow was non-adjustable (on the 410C it is) and always too far away to be effective, even for me at 6′ 1″, so I replaced it with a 5010 Otter box (left), which of course has uses to store stuff on the water.

However I then noticed the strain of me pushing back off the box was tearing the lower seat mount tabs glued to the hull (where the rope used to be). The box is now attached directly to the seat with adjustable slings. This way I now push inside a ‘closed loop’ made up of the seat and box, so only straining the sling and clip joins which make up the loop – and not the boat mounts. Of course this does mean there’s some energy-absorbing slack between me and the boat, but it’s a gumboat not a K1 racer alas, so will have to do.

Although I find I’m happy to paddle with my legs lying flat, when you want to go for it a firm foot brace and a bent knee are much better, but require a fairly solid seat to push against. The long box-to-seat strap loop seems to work OK and I discovered a side benefit; the straps can be pulled over my knees to make thigh braces (right); another possibly handy feature when the going gets rough. It’s not like bracing directly off the hull or anywhere near as good as with a SinK’s ‘underdeck’; it’s more to achieve good paddle thrust using the core not the arms which they keep telling you to do. And anyway, even in the roughest rapids I’ve done, the Sunny feels stable enough without thigh braces and if anything I prefer having my legs free to stick out to steady myself (or fall out neatly). The Sunny usually swamps long before things get hairy enough to tip it over.

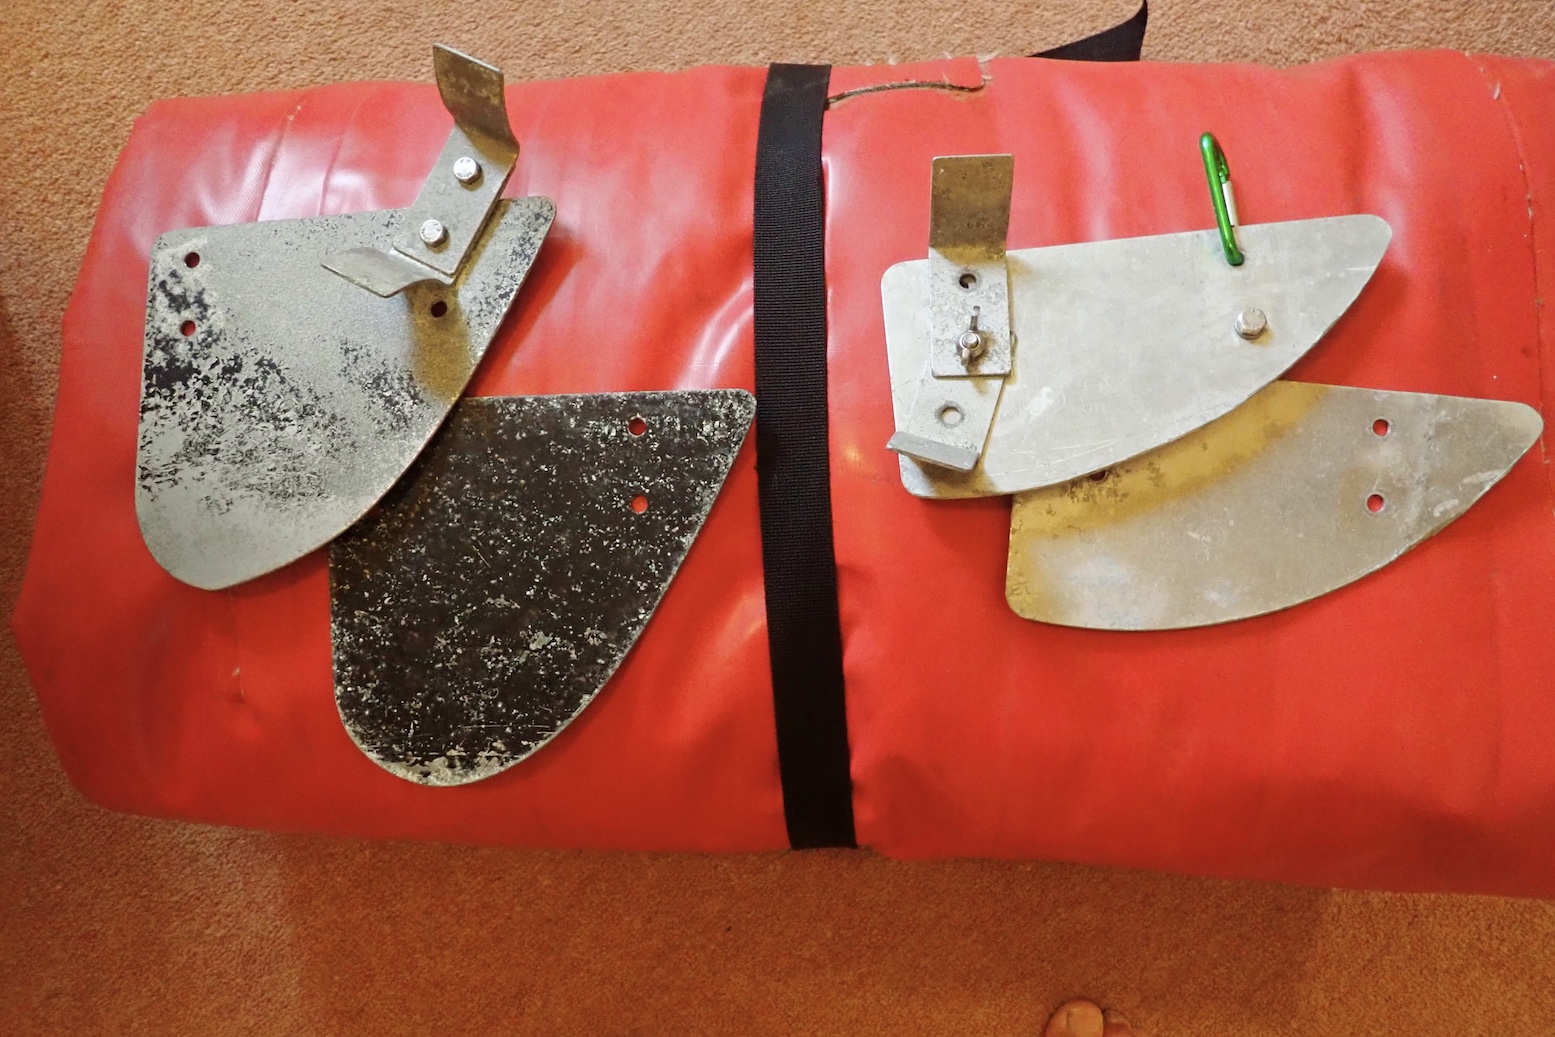
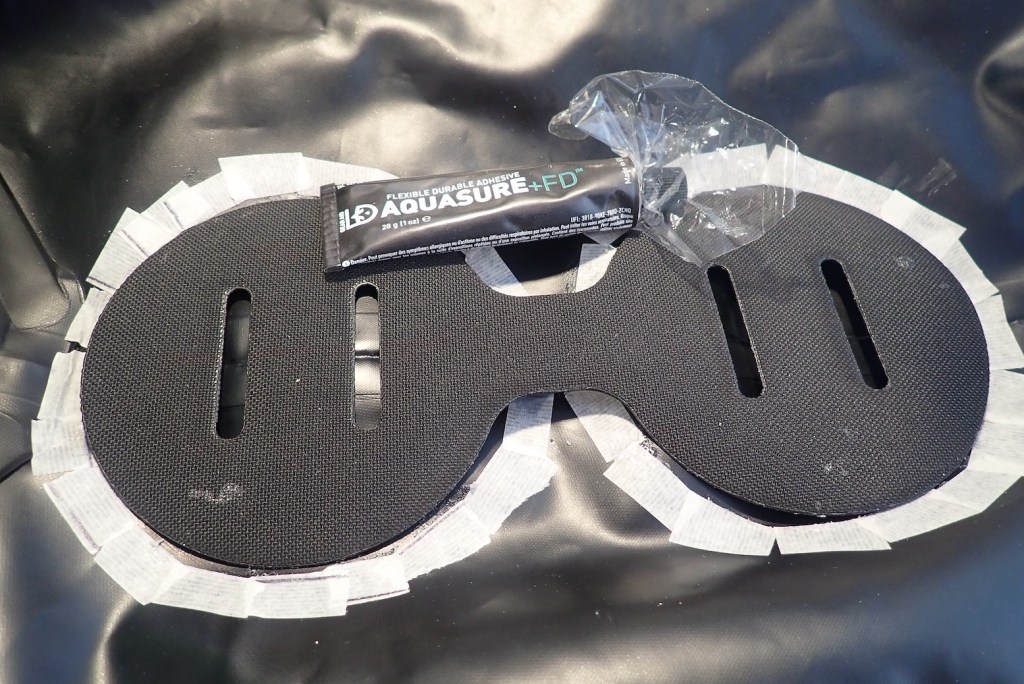
As mentioned above, sometimes I feel with the Cheetah seat that my butt ought to be a bit higher. It’s also pretty heavy at 2 kilos (4.5 lbs). Now I’ve inherited a spare new-style  Alpacka packraft seat (left), I may try and adapt it to fit the Sunny. The Alpacka seat is not half as robust as the OE Gumo Nitrilon seat so it needs to be supported in a way that won’t wreck it. I haven’t worked out how to do that is yet; maybe a stick across the hull like a Grabner, but that requires gluing. This seat will be higher than the Aire which is an important feature with kayaks: butt higher than heels is much more sustainable, comfortable and efficient for paddling, so you want to set a seat as high as you feel safe, bearing in mind CoG and stability as discussed here.
The Alpacka seat also weighs just 220 grams (half a pound), saving nearly 1.5 kilos, or nearly 10% of a Sunny, and a bit of bulk… (but I got rid of the Sunny before I had a chance to work this one out).

Old Alpacka Llama mods

My OE seat burst at the heat-welded seam inside the ‘U’ while bumping through the shallows in France. I re-heat-sealed it to the full seam width with an iron and it’s lasted since then, though Alpacka say it will fail eventually. There was a rash of failing seats and they sent me a replacement a few weeks later. On the original there was only a 5-8mm heat-welded band; the new seat base is yellow (less prone to sun-heat expansion-bursting) and has an even 8-10mm wide heat-welded seam all around.

One annoyance is that the seat backrest always flops down just as you’re staggering about on the rocks trying to re-enter and get set up before the next rapid. It needs holding back somehow; easily done with an elastic to one of the back lashing points, though I’ve since realised this won’t work with the skirt zipped up, so maybe a velcro patch then, inside at the back below the skirt zip.
In a bid to make the seat easily removable for drying and camp use, I removed the seat holding laces, tried some electrical wire instead for a while (as left), was going to velcro it in and finally decided just to attach it to the tabs in the hull with another couple of mini-krabs.


They say using an air mat is better for the floor, reducing high points of impact and also keeping your legs warm in cold water. I have a Thermarest (left, on right) which fits pretty well and is light, or an Exped (orange, left) which is much better to sleep on and fills out the back of the seat too. More weight forward is better, especially unloaded in white water with a strong headwind! Again, you wonder if inside the boat, gritty boot soles may cause excess abrasion when jammed in around the front end, so mats are best.


An Alpacka comes in a pretty basic form which allows you to customise it to your needs. Some mods I’ve made include attaching a clip and some bright tape to the main inflation cap – don’t want to lose that. I’ve also added a bit of garden hose to the spray skirt release tab to make it easier to find and grab in a panic. I still have a phobia about skirts, but am already learning to appreciate it in rapids. A 12-kg load sits very securely across the four bow lashing points using Alpacka’s Packtach quick release system. They say if you flip over with a pack on board you want to release it fast to make it easier to flip and drain the boat, if necessary. I’ve yet to try this but I’d imagine it would be quite easy to flip stern over bow, pivoting on the load. The load would also make getting pack in easier (though I have not tried that, either). I’ve improvised a toggle (inset left, pink) onto the Q/R buckle to make it easier to find and grab to release a bag, if needed.


I’ve also added mini carabiners – a blue one at the bottom below) to clip the thin Packtach chords to the 4 mounting points on the hull; it’s bad form having chord rubbing on nylon web under tension, plus it makes the whole Packtach system easy to remove without undoing fiddly knots.
As you can see I’ve also added a 3-metre lead (yellow/green tape) for towing and tying off. I’ve since changed that to a piece of paracord. ‘Painter’ I believe is the correct boating term, but I’ve become aware that whatever you call it, needs to be hooked carefully out of the way for faster rivers. I find threaded across the two mounting tabs can be done and undone fairly quickly.
I’ve glued another tab mount to the middle of the floor inside with Aquaseal and clipped a krab in to hold a day bag. These mini-krabs are my new thing and I’m using them for all sorts of things on the boat, the pfd and elsewhere.

Inflatable kayaks and packrafts: do you need a skeg (Tracking Fin)?

Updated Summer 2025

See also:
About rudders
About decks

Skeg-wheel trolley!

Short answer: IKs: yes. Packrafts: helps away from white water

Generic, over-tall skeg. Snap-prone but trimable.

A skeg is like a fixed ‘rudder’ under the back of the boat which makes it easier to go straight (track). Only the very cheapest single-skin vinyl IKs don’t have skegs (Grabner, one of the most expensive IKs, is an exception; though it’s an optional add on). If you’re IK doesn’t come with one, it’s easy to glue one on (see below).

grabgumskeg

Some flat-floored IKS have up to three (imo, a gimmick), and many skegs on Chinese-made IKs are unnecessarily tall (too deep) which makes them snap-prone. Just about all skegs can be easily removed by hand, because in shallow rivers you might want to do so to avoid grounding. You can as easily buy a spare and trim it with a hacksaw.

Original over-sized Gumotex alloy skeg on the left. Later smaller; now tough plastic.

Years ago Gumotex introduced a slip-on, black plastic tracking fin (skeg, above) which was near identical in shape to one I’d had made to replace the old-style oversized alloy skeg (left). A smaller skeg made better clearance and still tracked fine. But metal bends; tough plastic is much better and that’s what all their boats come with now.
I’ve fitted these plastic skegs to older Gumotex IKs and other IKs. The kit is about £25 + glue, and the plastic skeg is pretty much unbreakable. Just make sure you glue the mounting patch on really well; it helps if your boat is made from a matching rubber fabric as the supplied Nitrilon patch or make your own patch from same fabric. But I have glued PVC to rubber successfully – use good two-part glue. The pictures below help you see where to position a skeg.

I fitted the Gumotex plastic skeg to my Grabner Amigo IK (above) and at sea used it all the time. But on the shallow River Spey (below) this boat didn’t handle at all well without a skeg, possibly because the tailwind pushed the kicked-up stern around. It was really quite annoying because a few years earlier my broadly similar Sunny managed the Spey just fine without a skeg, so skeg-free tracking clearly varies from boat to boat.

spey1304

Paddling without a skeg
If you’re an experienced paddler you’ll have acquired the knack of going straight without a skeg – handy for paddling shallow rivers where the skeg would ground. A little more paddling finesse and constant small corrections are required, especially if powering on.
It’s good to learn this technique before you need to: fix your eyes on a tree or marker on a distant bank and paddle as gently as you like towards it, not looking away and keeping the nose of the boat in line with the marker. By using very light strokes you’ll see it can be done if it’s not too windy when again, a skeg helps with tracking (going straight).

cezesolar
Gumo Solar with no skeg

I even found I could paddle a ten-foot Solar 300 (above) without a skeg. Once you know you can go straight without a skeg, it’s just a matter of adopting the same finesse but with a bit more power. Only when you attempt the speeds of a Viking longship will bow deflection or yawing get too much because to paddle faster and still go straight you need a skeg. Out at sea or on busier rivers, I always use a skeg.

I’ve often thought a hinged retractable skeg would be a good idea: it would pivot backwards when dragging in shallows, then drop back down when there’s enough depth. It seems SUPs need skegs and in the US, FrogFish have made such a thing for boards, but you hear the spring can be a weak point.
If your kayak has a rudder mount (or you can make one), another way of doing it is fitting a swing-down skeg similar to kayak rudders. It works the same way as a rudder with a looped cord swinging the skeg up over the stern, or down into the water. The pivot skeg shown top right is made by Advanced Elements for their AirFusion IK and costs about $/£80. Or have a look here.

Packrafts

On shorter, wider, slower solo packrafts the consensus used to be that skegs made little difference. Especially when unloaded and with a full-weight paddler, the bow yaws merrily left to right as your paddling pivots the boat from the back. Or so I used to think until I tried the skeg on my Rebel 2K. Up to then I’d been ambivalent about them – using the same boat fully loaded a few weeks earlier on a fast flowing river, yawing had not been an issue. But unloaded (and with my generous 95kg of ballast) yawing was notably reduced with a skeg. Speed however, was the same or was too small to measure.

Longer stern puts you more in the middle of the boat, like a kayak

One reason some packrafts may manage without a skeg is that way back in 2011 Alpacka invented the ingenious extended stern (right). It helped limit yawing much like a skeg, and effectively positioned the paddler more centrally, like a kayak, while also adding trim.
This idea has been widely copied by just about everyone since and it definitely works, compared to the original dumpy Alpackas. But as mentioned, once there’s a good load over the bow, yawing is reduced in any packraft. Anfibio sell a detachable shallow skeg and glue-on patch for €21. My Rebel 2K came with a skeg and I must admit I use it most of the time now. But it does not have a fully extended stern like the Alpacka above right. Then again, my longer Nomad tracked great without the skeg.

Frontal skeg?
Now I have a longer 2.8-m Anfibio Sigma TXL and I was curious to see if adding a frontal skeg would make a difference. Seated centrally or two-up, this boat does not yaw from the boat like an unloaded solo packraft, but it does wander a bit (track poorly), especially with the inflated floor pad). I decided a front skeg did not help much, though it might improve sailing.