Category Archives: Alpacka Yak

I owned 2 Yaks: yellow and yellow/blue

Book review: Rivières Nature en France by Laurent Nicolet

See also: Packboating in Southern France

For reasons of topography and size, France, particularly the south and west, has some great multi-day paddling rivers. Mountainous areas not immediately adjacent to the sea produce long rivers along which you can choose the gradient and the level of difficulty that suits your ability. And you can do so for days at a time. You can also add unfettered rights of way on the water, though that’s an unfortunate anomaly unique to England and Wales.

What they Say [translated]
RIVIERES NATURE EN FRANCE answers all these questions.
For each course, you will find:
• the level of difficulty (easy to intermediate), the length, the duration
• specific regulations for the course
• the minimum, maximum and ideal water levels, and how to know them
• access to water with their gps coordinates
• QR codes to map sites (access) and water level stations.
• the description of the navigation (km by km, focus on difficulties)
• short hikes to do from the river (canyons, caves, viewpoints, etc.)
• specific security advice
• useful addresses (campsites, visits, service providers)
• a detailed map with an IGN topographic background

In the introduction, practical advice will allow you to organize your descents… without traces. An index of routes by level of difficulty will make your choice easier. …with descriptions in German.

Rivières Nature en France is a similar if far more comprehensive title to the dozen Best Canoe Trips in the South of France (right) which I’ve used myself. This 416-page book compiled by Laurent Nicolet (distributer of Gumotex IKs and Nortik packrafts in France) lists no less than 100 routes over 63 rivers mostly in the south and west. It also includes parallel short summaries in German, is sold on amazon UK for under £25 and was delivered in a couple of days.
For years Nicolet has produced videos validating the utility of KGs – ‘kayak gonfables’ or IKs in French. The book has more images of IKs than have probably ever been printed in the UK – well, until my book came out ;-)

Listed by difficulty

All the great rivers of the south are here: Tarn, Ardeche, Dordogne (ideal for beginners), Verdon and the sportier Allier, as well as a whole lot you’ve never heard of. Up front you get a location map (above), after which each river is listed alphabetically and described over a few pages. The book ends with each route of the 100 routes listed by difficulty (left); 50 routes (1700km) are up to Class 2 and another 23 (423km) are Class 2-3. In other words, there are loads and loads of easy rivers to enjoy in a packboat without having to strap on a crash helmet.

Up front you get the usual advice on what gear to take and safety tips like never tying yourself to the boat or shooting weirs without checking first. That’s unless there is a portage-dodging canoe chute (left) – a common feature on French rivers which add greatly to the fun. There’s also an interesting rant against official censures against solo paddling “Imagine such restrictions on walking and skiing!’ Quite right, mon ami.
And this being France or anywhere bar the UK, the author covers the full range of kayaks and canoes, hardshell or inflatable and even packrafts – he’s proficient at paddling all of them. There follows the usual advice on ‘leave no trace’ including using Le Poop Tube when en sauvage, an explanation of Class 1-6, the vigicrues website for reading live river levels and which I discovered last time, and advice on organising shuttles – all much eased if not eliminated outright by using portable packboats.

I won’t pretend to have read this book cover to cover, were that even possible – I speak French a lot less badly than I read it. But as an example, I can concentrate on a river like the Tarn which I’ve done a couple of times both in a packraft and with IKs.

Tarn map. Fairly intuitive icons but no explanatory key and no campsites labelled.
Le Sabiliere – as hard as it gets on the Tarn

The Tarn description focuses on the most popular 57km section from Montbrun to Le Rozier. I have to say I made that 47km measured off Google Maps on my big Tarn map (which covers the full 84km run from Florac, 18km upstream from Montbrun, to the city of Millau, 19km after Le Rozier), Using public transport, I found both Florac and Millau better choices to start and end a Tarn paddle. Anyway…

Tarn summary

The first thing they advise is avoid the peak holiday period when the Tarn can become a logjam of hardshell rentals and yelping kids (left; actually the Ardeche below a busy campsite). While I’d certainly avoid the Tarn (and indeed France) in August, as a foreigner I found the occasional hullabaloo in July all part of the fun if you just paddle through it. Packed-out campsites along the stage described will be as bad as it gets. And they are packed out.

Tarn – Les Detroits

You then get a river summary: best time of year; regulations (if any); water levels with min, max and ideal levels, plus a QR code going direct to vigicrues – a good use of this idea; the best type of boat (Iks can get hung up in shallows); environmental protection (if any); wilderness and tranquility; off-river pedestrian excursions, and where to sleep but with only a selection of campsites including websites and a phone number. These could have been much more usefully added to the route’s map.
Selected put-ins/take outs have more QRs linked to waypoints which are also printed in old-style DMS (44° 56′ 15.5″ N…), followed by the much less error-prone decimal-degrees (DD: 44.9376297, 2.321622…) format. Google still uses both but the sooner we all get used to simpler DD the better.

Kayaker caught putting-in below the Soucy rock-jumble by the Google drone
St Chely

Next, the main route description KM0, KM22.7 and so on. ‘En aval‘ was a new expression on me: ‘downstream’. If you French is a bit ropey – or cordée – it would be worth translating page images in the planning stage so you don’t find yourself in l’eau chaud. Doing so you’ll learn handy expressions like en aval.

Tarn Route description
Allier below Monistrol: the boat is full of water…

The book goes on like this, river after river, with enough photos to help you identify what looks appealing. It celebrates a newly opened passage of the Allier from Naussac all the way to Brioude (114km), though you may want to miss the initial 22km of “no less than 55 distinct rapids [up to Class 4]” which end at Chapeauroux.

On the train line from from Brioude, it was from Chapeauroux one June that I blundered rather naively down the Allier in my early Sunny days, after having found the Dordogne a bit of a doddle the previous year.
As mentioned elsewhere, a dam up from Monistrol (30km below Chapeuroux) has by now been rebuilt and lowered to salmon-friendly levels so that the long taxi portage I had to do around the now non-existent reservoir from Alleyras is, from 2022, just a carry around the new dam at Poutes. (At the back of the book is an article entitled: ‘Hydro-electricity; the least renewable of renewables’). For the 12km from Monistrol to Prades (above left) you’ll again want a deck or self-bailing, otherwise you’ll find yourself as I did, pulling over to pour the water out of your boat. From Prades it’s all a less fraught and as enjoyable two days to Brioude.

You can have a lot of fun with the English guidebook – in some ways I find the basic design and layout a bit less dense. But once you’ve seen it and done it all, Rivières Nature has many more paddling suggestions in the fabulous south of France.

Book review: The Packraft Handbook by Luc Mehl

Are there really 450 pages to write about packrafting? Let’s find out!

In a line
You’ll learn more than you’ll ever use from this lavishly illustrated handbook, with loads of safety advice that focuses strongly on the author’s preference for whitewater.

• Presented with an engaging humility and humour which helps deliver important messages
Sarah Glaser’s vibrant graphics often work better than photos
• Goes from £20 on amazon
• Like the best handbooks, even the experienced will learn something new

• For a 450-page handbook on packrafting there are some odd omissions: no words or pictures about crossrafts or tandem paddling, sailing, bikerafting (bar one loading graphic), even packraft ski-ing which sounds fun and the author seems to have done.
• Like similar kayaking books I read ages ago, it can all feel a bit off-putting – which may be a good thing
• Inevitably, Alpacka and Alasko-centric, a magical if unforgiving wilderness with unique challenges.

What they say

The Packraft Handbook is a comprehensive guide to packrafting, with a strong emphasis on skill progression and safety. Readers will learn to maneuver through river features and open water, mitigate risk with trip planning and boat control, and how to react when things go wrong. Beginners will find everything they need to know to get started – from packraft care to proper paddling position as well as what to wear and how to communicate.
Illustrated for visual learners and featuring stunning photography, The Packraft Handbook has something to offer all packrafters and other whitewater sports enthusiasts.

* This review refers to the original 2021, Canada-printed edition self-published by the author, not the 2022 version published by Mountaineers in Seattle and printed in Korea. There may be small differences in content and print quality.

Two good books I read as a beginner

I recall reading Roman Dial’s Packrafting! (right) when I started out and thinking, Oh, there’s really not much to it provided you avoid churning whitewater. At that stage I’d been into IKs a few years and had read the basics in The Practical Guide to Kayaking and Canoeing, a huge, 256-pager by Brit, Bill Mattos. That book covered everything you can do in hardshells but, being more traveller than thrill-seeker, was instrumental in steering me away from the sort of high-adrenaline antics depicted on both covers.

Wisely, Luc Mehl, an environmental scientist and ‘swiftwater’ paddling instructor, opts for a serene front cover, even if he’s a skilled exponent of whitewater action. His blurb above states: “… packrafters and other whitewater sports enthusiasts” suggests he sees packrafts as whitewater boats you can easily travel with, rather than easily portable boats you can take anywhere. That’s an important distinction.
It was produced in response to the death of a fellow packrafting journeyman, as well as several other tragedies befalling close friends. The book’s tagline has been #CultureOfSafety, as in making it second nature to use the right gear, learn appropriate skills, pick the right conditions and make smart decisions, including scouting and if necessary, portaging sketchy situations.
Inside, The Packraft Handbook uses thick, glossy paper to help Sarah Glaser’s graphics jump off the page. As a result it weighs nearly a kilo and must have cost a fortune to print before Mountaineers picked it up in 2022.

Early on, there’s an aside which resonated with me. “Many topics in this book won’t seem relevant until you experience missteps. It is more important to know what is in the book than to understand it all.”
Having written similarly weighty handbooks on other subjects, that’s something I’ve frequently heard from readers: it’s only after having been there and done that, including bad decisions or choices, that they get what the book was telling them all along. This will doubtless be the case with The Packraft Handbook.

Tellingly, Luc Mehl found that kayaking whitewater in hardshells accelerated his skill development much faster than a packraft. Sure, a packraft feels stable but when it flips it does so with little warning, unlike a hardshell creekboat with far superior secondary (‘on edge’) stability. The point, of course, is a packraft is so much easier to carry overland for days at a time that the compromises are worth it. I skimmed over most of the technical whitewater paddle strokes which, as in Bill Mattos’ kayak book, is stuff with little application to the type of packrafting I did then or do now.

Even before you get to page 99, it becomes clear that both Luc Mehl and many of his intrepid contributors who supply pithy, lesson-learning asides, have had several close calls while ascending their packrafting learning curves, mostly in the unforgiving Alaskan wilderness.

Fall out? Me?

Then you take someone like me who’s never fallen out of a packraft, yet enjoys their amazing potential just the same. Aside from the fact that I live in the opposite of Alaska, one explanation may be the graph (below) featured in an interesting section on risk, ‘safety drift’ and ‘heuristic traps’. We learn that three often repeated words are key to assessing risk: Hazards, your Exposure and subsequent Vulnerability.

I was so old when I started packrafting I’m off the graph!

Having learned the basics in the Mattos book, I got a bit bogged down in the slightly over-technical How Rivers Work though it was interesting to read that bedrock rapids have a more dangerous character than silt riverbeds, perhaps because they resemble hard-edged, man-made wiers. And, along with the regular inclusion of snappy ‘Pro Tips’, I liked the ‘River as a series of conveyor belts’ graphic analogy – a novel way of explaining the complex flows of rapids.

I have to admit before I was even halfway through I was beginning to skim more and more river-running lore, while enjoying the boxed-out anecdotes which are the gravy in books like this. While I had a familiarly with what was being expounded, aspiring to master nifty river moves is just not what I do. My ability, such as it is, plateaued years ago while my risk tolerance drops by the second. Still, it all needs to be written down and explained in one authoritative source, and all the better from a specifically packrafting viewpoint building on many years experience.

The section on open-water crossings is based on the travels and subsequent material by Bretwood Higman and Erin McKittrick, whose record of their epic journey, A Long Trek Home I read soon after getting my first Alpacka.
I paid a bit more attention here as in Scotland it’s the most exposed packrafting I might do. That section includes the sobering account of a British bikerafter who drowned during a Patagonian lake crossing of just 2km, and where having his boat leashed to his paddle or himself – a massive whitewater no-no – may have saved him.
I’m reminded of another formative book I read ages ago: Sea Kayaking Deep Trouble; US-based analyses of sea padding fatalities and rescues, and crucially, what lessons can be learnt. Luc Mehl curates a webpage of known packraft fatalities which similarly hopes to inform packrafters on how to avoid getting in too deep.

As a result of reading most of this book, I finally did something about a couple of safety and entrapment issues that have been lightly bugging me for years: I ditched a cheap, heavy (and barely used) locking rescue knife for an as-heavy but quick-grab NRS Pilot Knife which at the same time can also replace my never used Benchmark rope-cutter. (Maybe I missed it but, despite the repeated dangers of entrapment, I saw no mention of such knives in the Handbook). And I got round to fixing a reusable ziptie to a bow attachment loop to retain my bunched-up mooring line when on the water. ‘Wayward Lanyard’ a mate called it last weekend. He has all his early LPs.

As things get more serious in When Things Go Wrong your attention span may falter in the face of elaborate river-rescue techniques, including rolling your capsized raft (depicted in a series of graphics that make the technique very clear – a first for me), as well as increasingly intricate shore-based rope recoveries which are probably better watched or practised than read about.

Equipment Repair and Modification is a valuable resource of proven recommendations and ideas for tapes, glues and what works best for just about every sort of eventuality. It’s bound to be of use to many. Similar content appears on Luc Mehl’s website.
Medical Emergencies underlines, among other things, the importance of understanding cold-water shock – the reflex which most commonly leads to drowning long before you’ve had a chance to catch hypothermia. Here I also learned something that’s puzzled me: why some drowning survivors still end up dying a few days later: pulmonary edema.
At one point Luc Mehl describes how shooting off waterfalls down in balmy Mexico gave him a new perspective on risk – as in things felt less dangerous in the tropics. I remember thinking the same thing while struggling to kayak along Australia’s Ningaloo Reef. The wind was howling, the waves were annoying, but it all felt a lot less scary than it could have because it was sunny and warm. No risk of cold-water shock here, just being swallowed by a whale shark.
The final two chapters about backpacking gear and trip planning were surprisingly skimpy; a sign of end-of-book syndrome? As it is, backpacking gear choices are highly subjective and are repeated all over the blogosphere (not least here!). The planning chapter felt very Alaska- and river centric (not much about the terrain in between which can be as challenging). But if you can pull off a successful backcountry trip in Alaska, you can probably do so anywhere.
The book ends with no less than 16 pages of glossary and an appendix listing sources and additional resources. Design-wise, I’d say it’s bad form to have short boxed asides rolling over the page – across a spread would have been better. And it’s a shame that all of Sarah Glaser’s graphics (mixed in with some of the author’s?) weren’t in vibrant colour; that would have made a stunning book as it’s a great look which vividly delivered the lessons.
Much as Bill Mattos’ hardshell book helped guide me towards my current packboat interests, a first-time packrafter with big ambitions is bound to value having the thrills and spills of whitewater packrafting laid out in The Packraft Handbook, all the better to decide what sort of packrafting appeals to them.

Fitzroy: Follow The River

I just dug out this story I wrote a few years ago about our packrafting adventure in northwest Australia. There’s more here, including vids. Originally published in Terra magazine 2011.

In the far northwest of Australia is a barely tamed region of spinifex-clad tablelands, big seasonal rivers and the world’s largest expanse of tropical savannah woodland. About the size of California but with a population of just 40,000, the Kimberley hosts marginal, million-acre cattle stations, tracts of land returned to local Aboriginal people, remote wildlife conservation ventures and undeveloped national parks. 

But the Kimberley might be better compared with Alaska, a wilderness that is under threat. Inaccessible by road for the rainy half a year, the Kimberley is such a relentlessly tough environment that unlike in the rest of Western Australia (WA), exploiting the valuable mineral resources known to be here only now become viable. WA itself is a state the size of India but with 3% of its population, and continues to thrive on a century-old mineral boom. The Kimberley is under pressure to join the party, but as a parallel environmental awareness to conserve Australia’s last tropical wilderness has grown, industrial development of the region has become controversial, not least with the current plans to turn the ochre cliffs of James Price Point 20 miles north of Broome into a vast LNG plant. No one wants to see the Kimberley end up like the Pilbara highlands, 600 miles to the southwest, criss-crossed with private railroads and pitted with huge iron ore excavations as hills are turned into holes to ship the ferrous rubble to resource-staved Far East. But the Kimberley one other abundant resource which the populated southern rim of Australia is crying out for: water.

Most visitors experience the same Kimberley; they transit the 450-mile Gibb River Road, a dirt track which bisects the region between the former cattle ports of Wyndham and Derby in the west. With a branch track leading north to Kalumburu on the coast, it’s the Kimberley’s only track, dotted with fern-clad gorges, waterfalls and swimming holes. It was an area I’d visit eagerly when updating an Australia travel guide, often spending too much time and fuel money researching out of the way spots that ended up as just a few lines in the finished book. But even then I knew I’d barely got beneath the Kimberley’s skin and my work there left me wanting to see more. Specialized trekking outfits used local contacts, helicopters and seaplanes to access outback areas, but charged several thousand dollars.

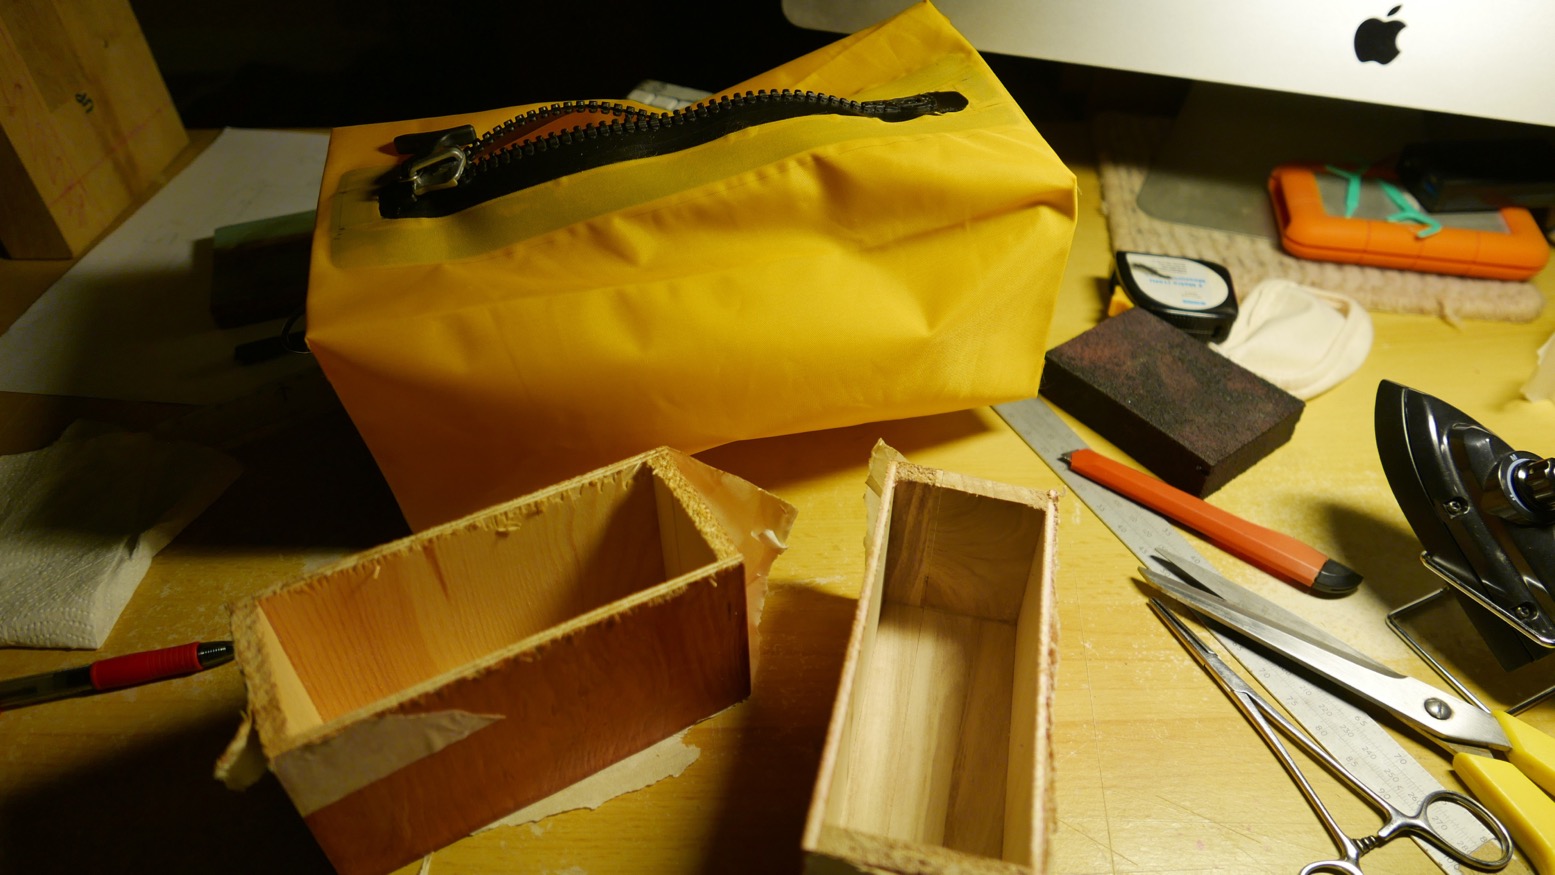
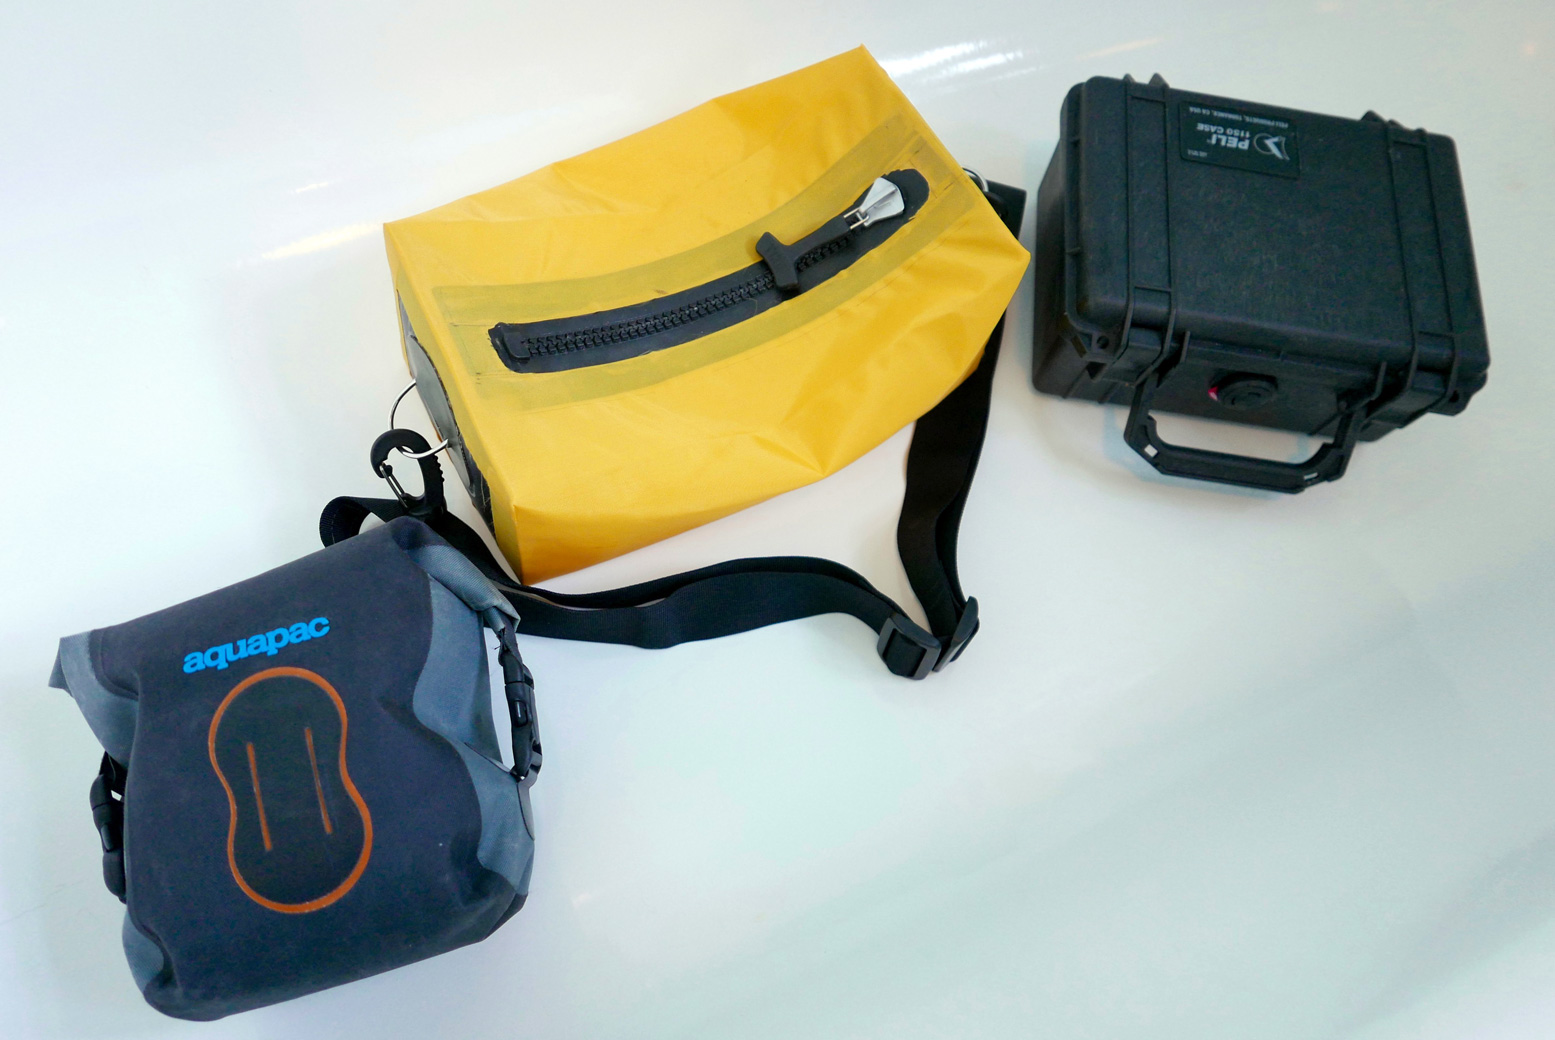
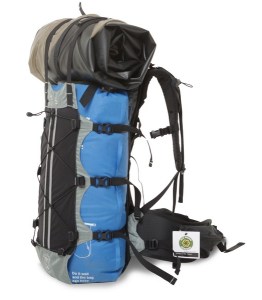
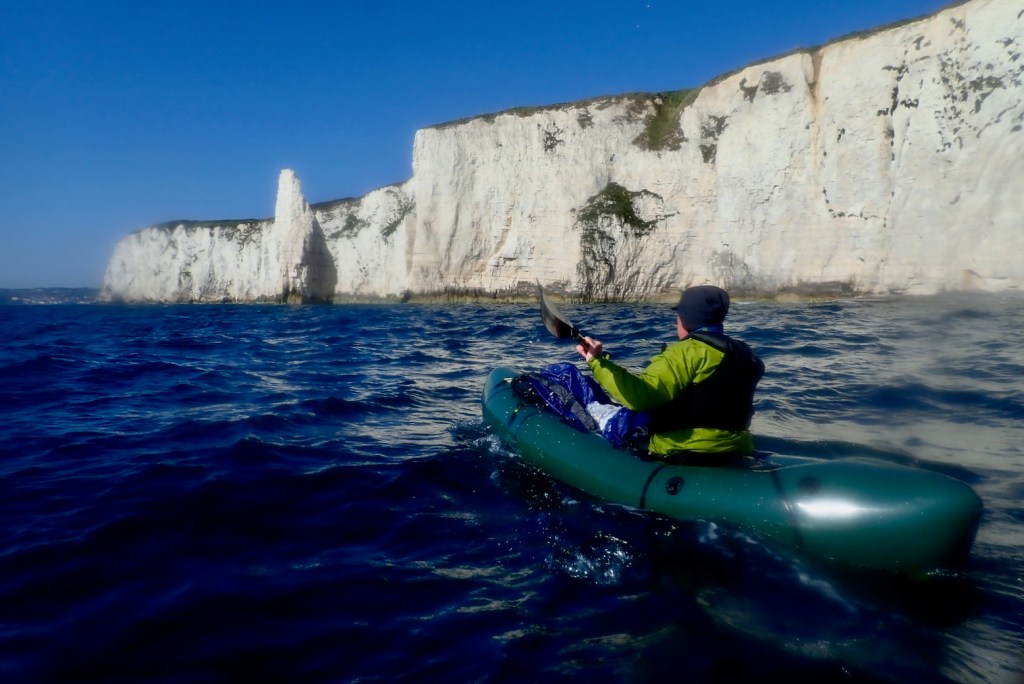
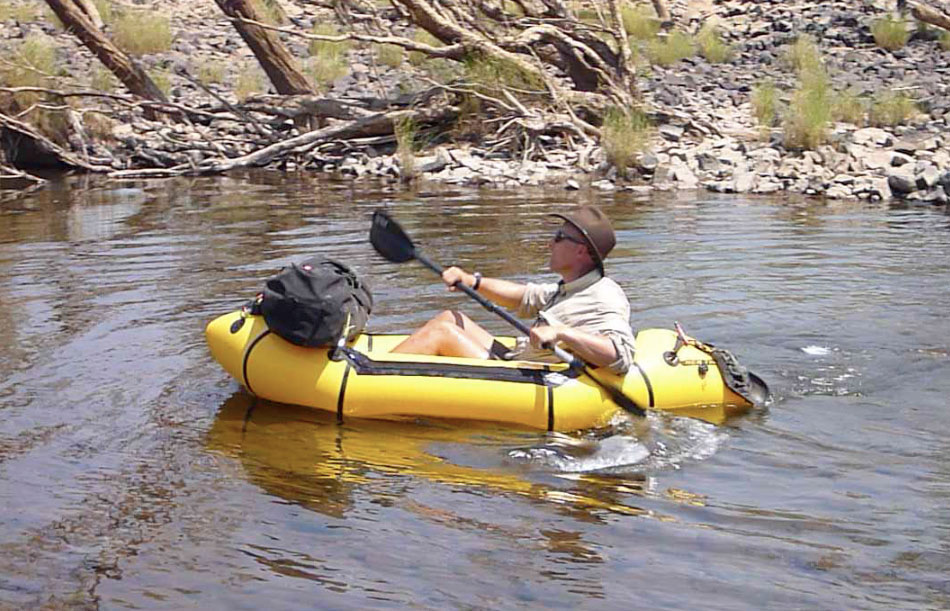
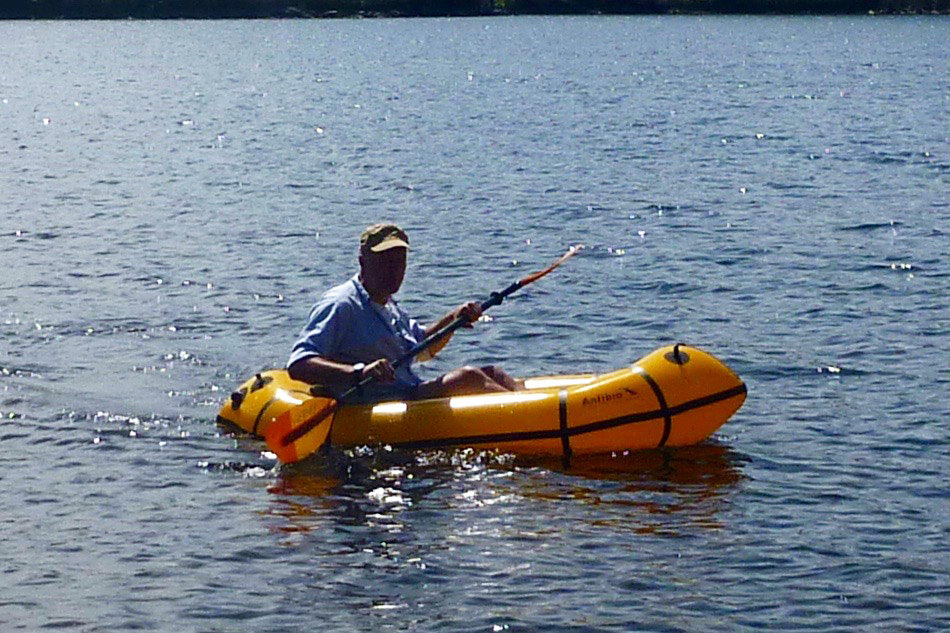
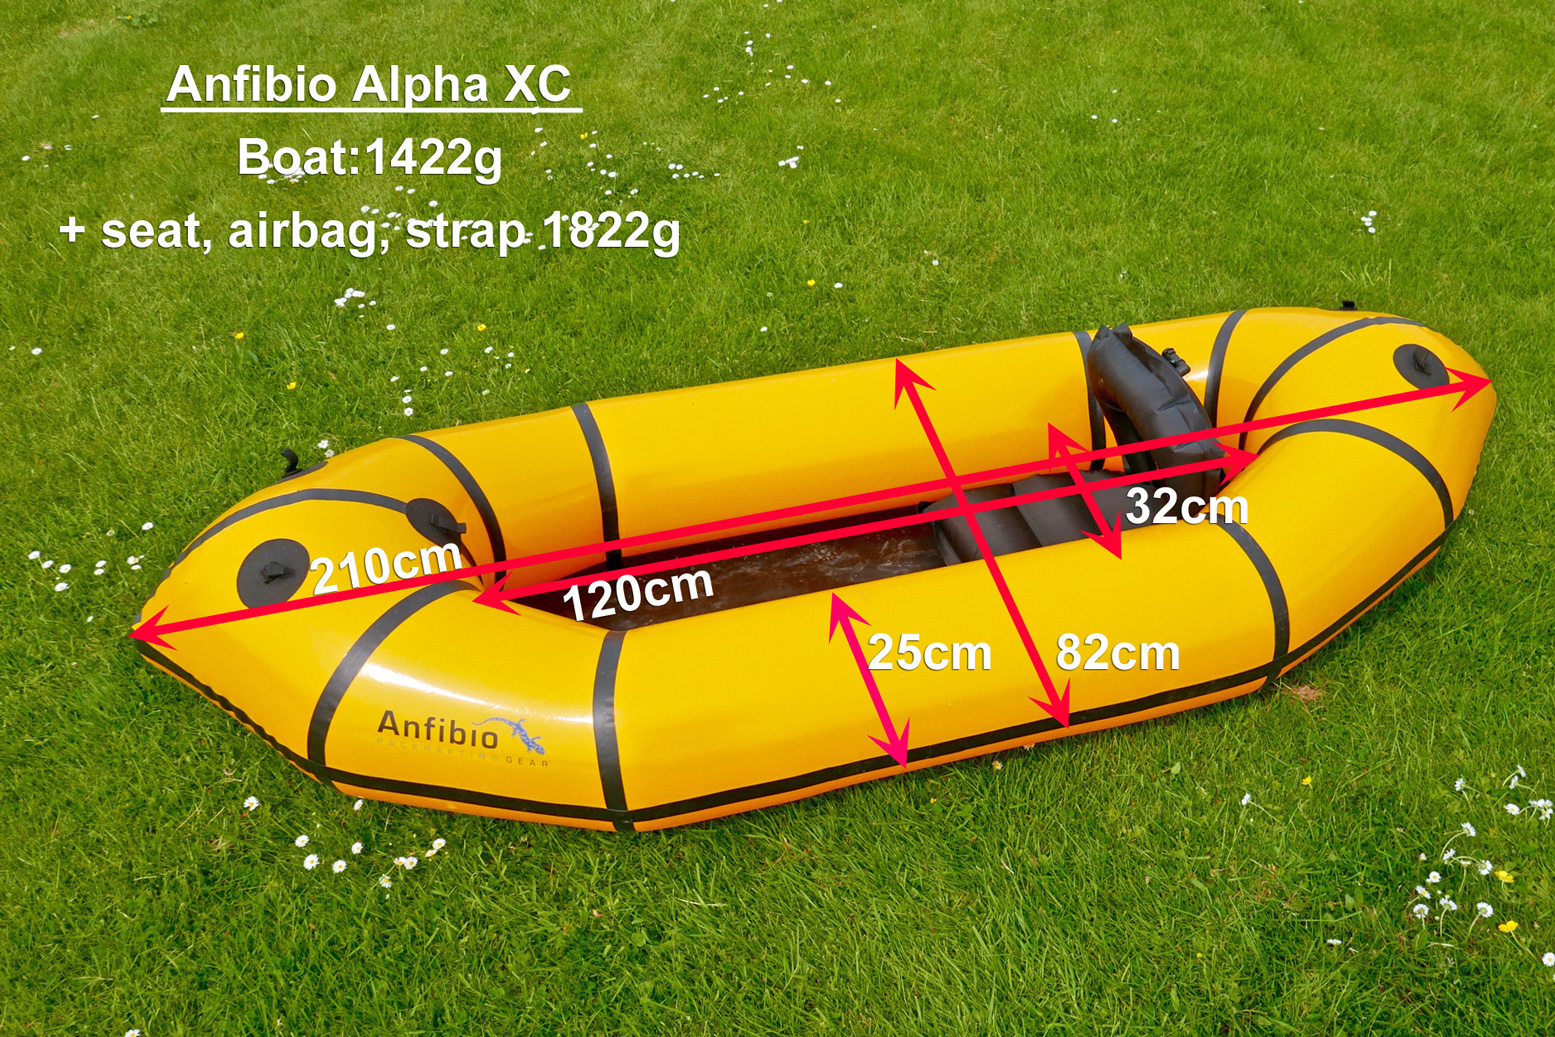
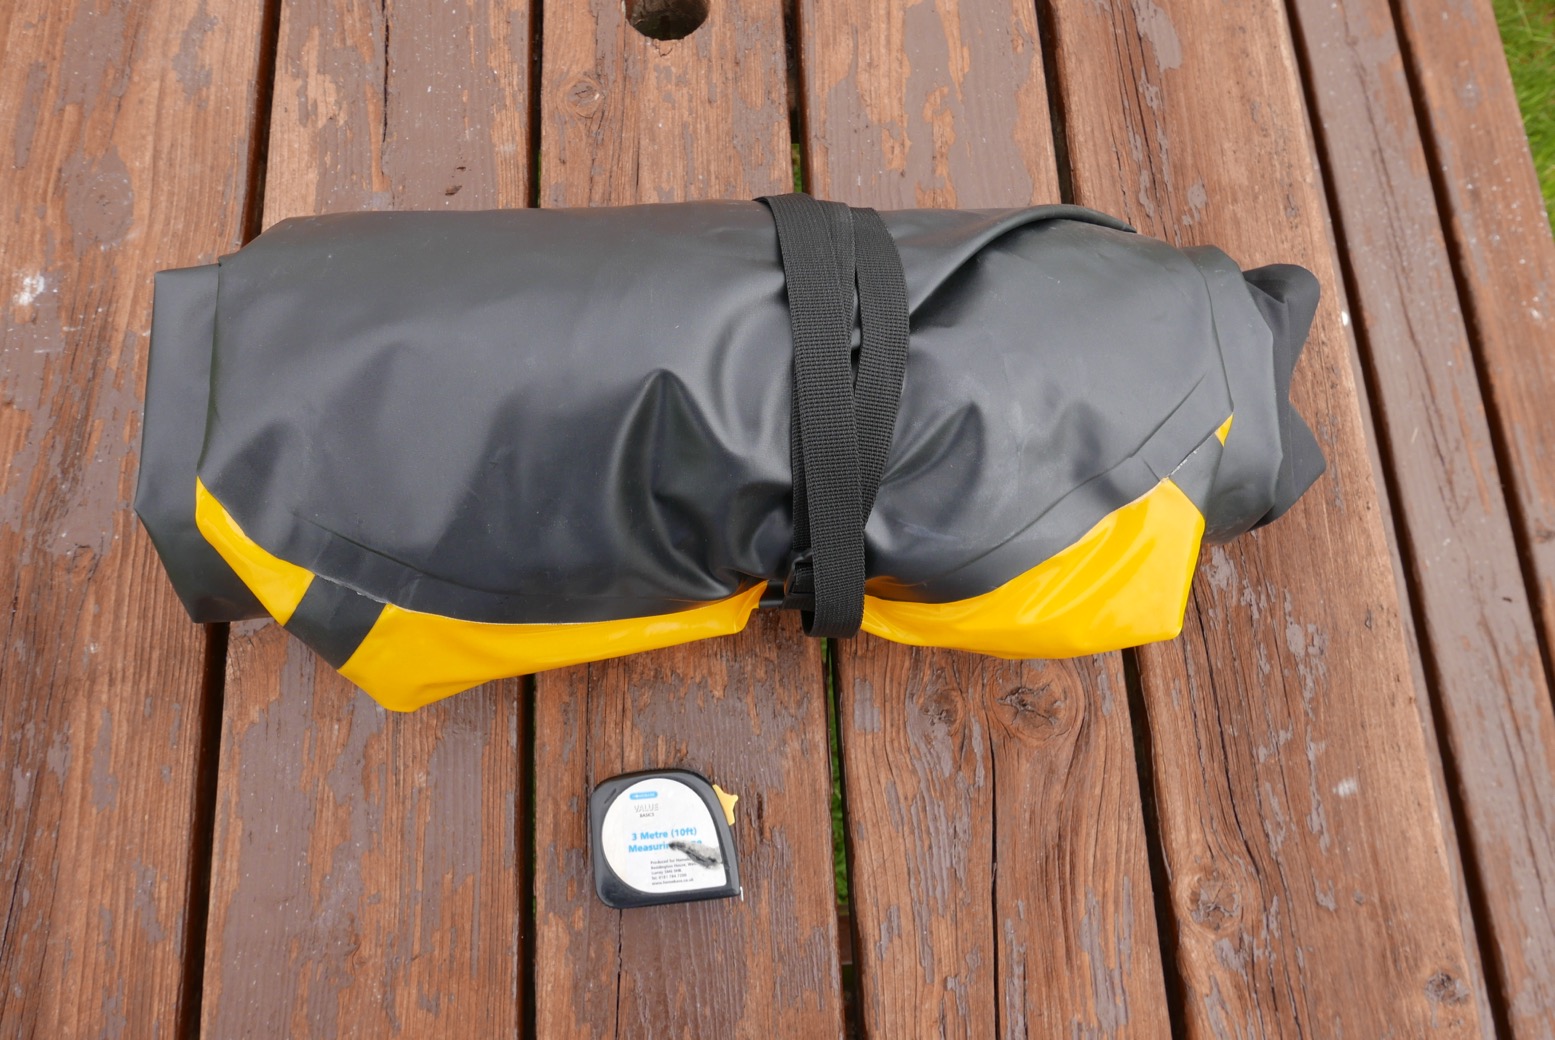
Follow a river – that was the way to do it. With high humidity and average daytime temperatures over 90°F, the constant need for water was solved, while the boat took the weight off feet and shoulders. I’d researched short trips with inner tubes or float bags, but they weren’t really sustainable. Then in 2010 I discovered Alpacka packrafts and knew I had a tough, lightweight craft with which to explore a Kimberley river. 

All that remained was to choose a river. Most of the big Kimberley rivers, the Durack, Drysdale and King Edward drained into the Timor Sea lapping an uninhabited and fjord-riddled coastline of 1500-miles on which the small Aboriginal outpost of Kalumburu was the only settlement. But up here the presence of estuarine or saltwater crocodiles as well as 35-foot tides heaving through rocky gaps to form ‘horizontal waterfalls’ made bobbing around in a tiny raft a risky idea.

Horizontal Falls, where the falling spring tide rushes back out of the lagoons through narrow gaps

The key for this visit was to pin down an amenable stretch of water with easy access and exit points and without the menace of saltwater crocodiles. I knew well that no matter how easy you made it – the coolest period, the flattest river – the harsh conditions in the Kimberley would take its toll. My mate Jeff and I didn’t want to be abseiling down ravines, hacking through snake-infested rainforest or looking twice at every passing bit of driftwood in case it slowly started swinging its tail from side to side. 

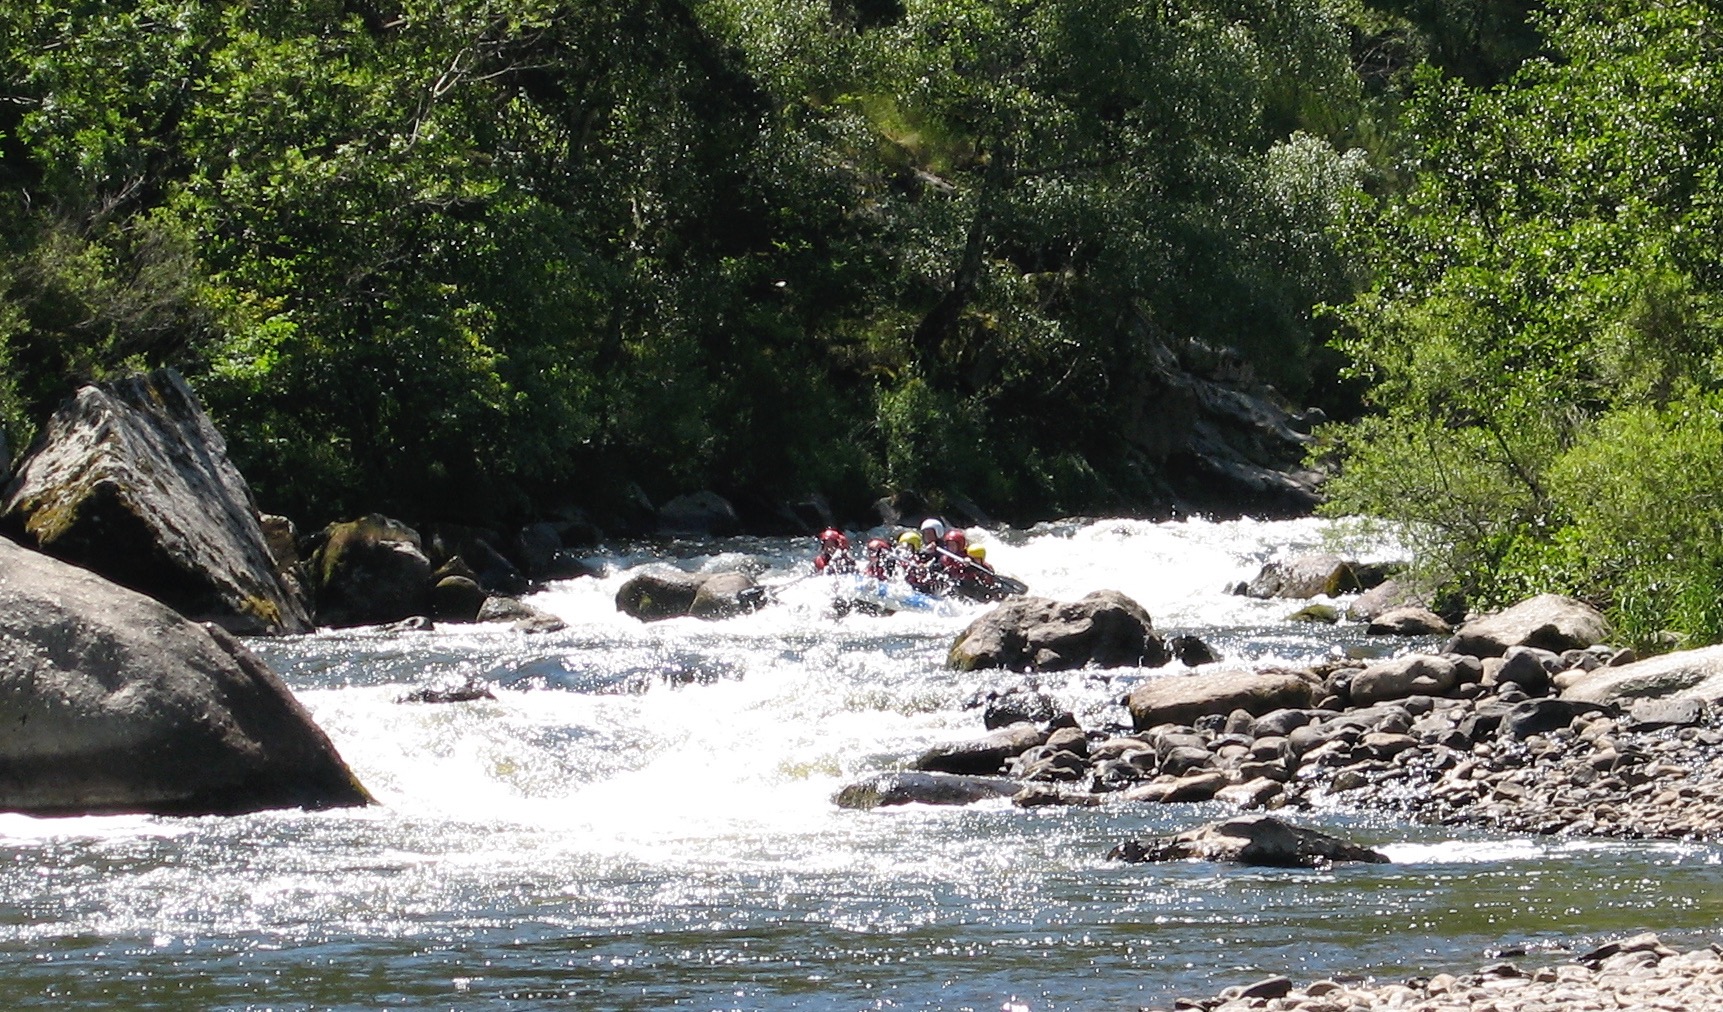
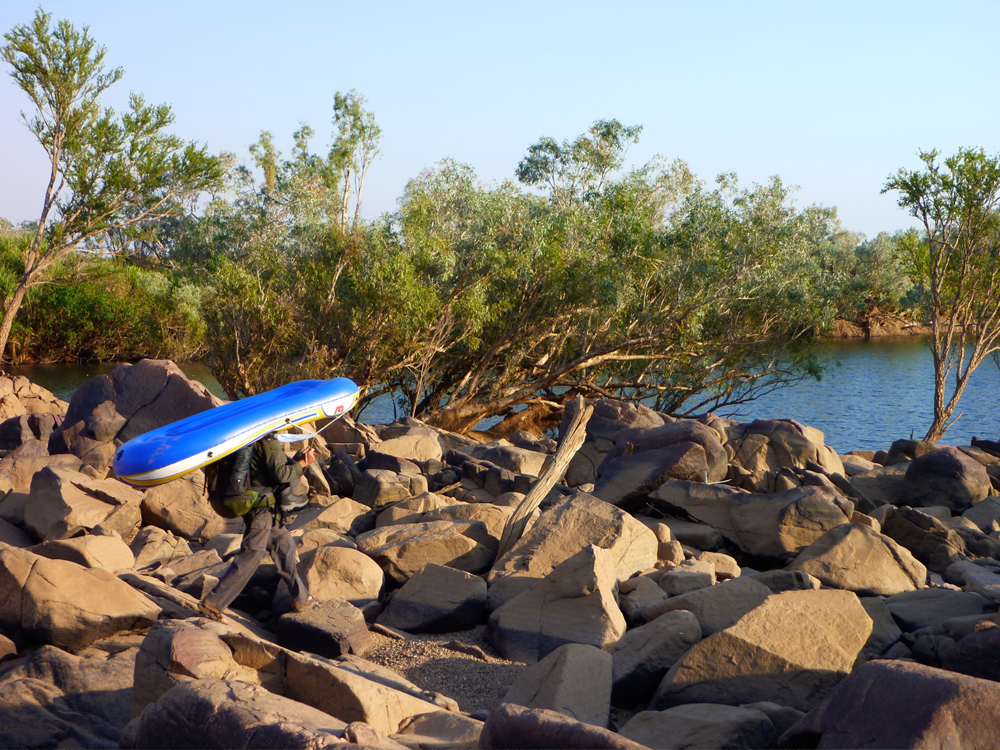
The most likely candidate was the Fitzroy, at 500 miles the Kimberley’s biggest river and in peak flood, the highest volume river in Australia, flowing at up to 30,000 cfs under the Highway 1 bridge at the town of Fitzroy Crossing. Running the churning Fitzroy in the unpredictable Wet sounded a little extreme for me. The good thing with packrafts is that extended portages are relatively effortless; the excess payload adds up to a 5lb raft and a 4-piece paddle. So Jeff and I decided September, the end of the dry season, would make an easier introduction; cooler and less humid just as long as we were prepared to walk between the pools. 

Mornington

The take out was obvious: the bridge at Fitzroy Crossing, the only town for a couple of hundred miles along Australia’s peripheral Highway 1. And some eighty miles upriver, Mornington Wilderness Camp seemed like the best place to start. A former cattle station spread across the King Leopold Ranges. I’d visited the Camp a decade or so earlier, soon after the Australia Wildlife Conservancy had taken it over and de-stocked it. It’s one of nearly two-dozen sanctuaries the AWC manages on the continent and at nearly 800,000 acres, one of the largest, with a range of unique ecosystems as well as high levels of biodiversity which included several rare and threatened species.

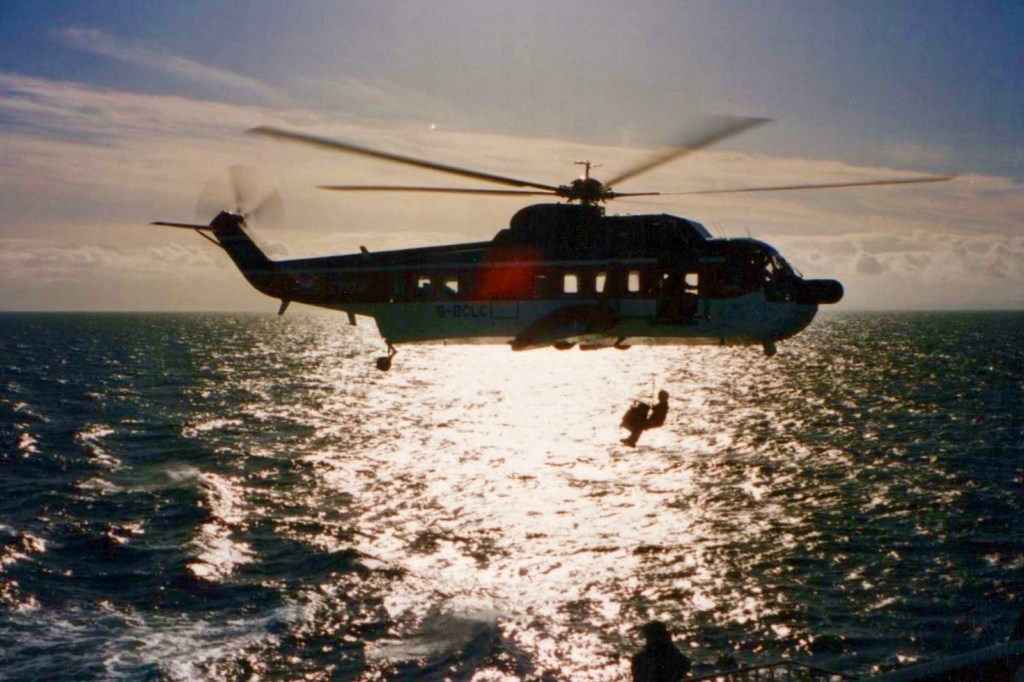
When we arrived at the Camp, following a 30-minute flight from Fitzroy Crossing, the Camp’s manager Diane was midway through a pre-dawn finch census lasting several days and assisted by volunteers from all over Australia. The ranges around Mornington are one of the preferred habitats of the stunningly colourful Gouldian Finch, an endangered passerine or ‘songbird’ whose breeding patterns and habitats have been disturbed by changes in the bushfire regime as well as introduced predators, topped by the feral cat – the scourge of indigenous birds right across Australia.

When I think of the Kimberley, it is above all the chorus of the largely unseen birds which evokes the spirit of northern Australia’s wild and remote corners. From just before dawn until sunset the bush resonates with avian chattering, from the strident squawks of the corellas, cockatoos and kookaburras, to the milder coo-ing of the crested pigeons. This would be the daily soundtrack for our five-day descent from the Mornington to the highway bridge. 

Dimond

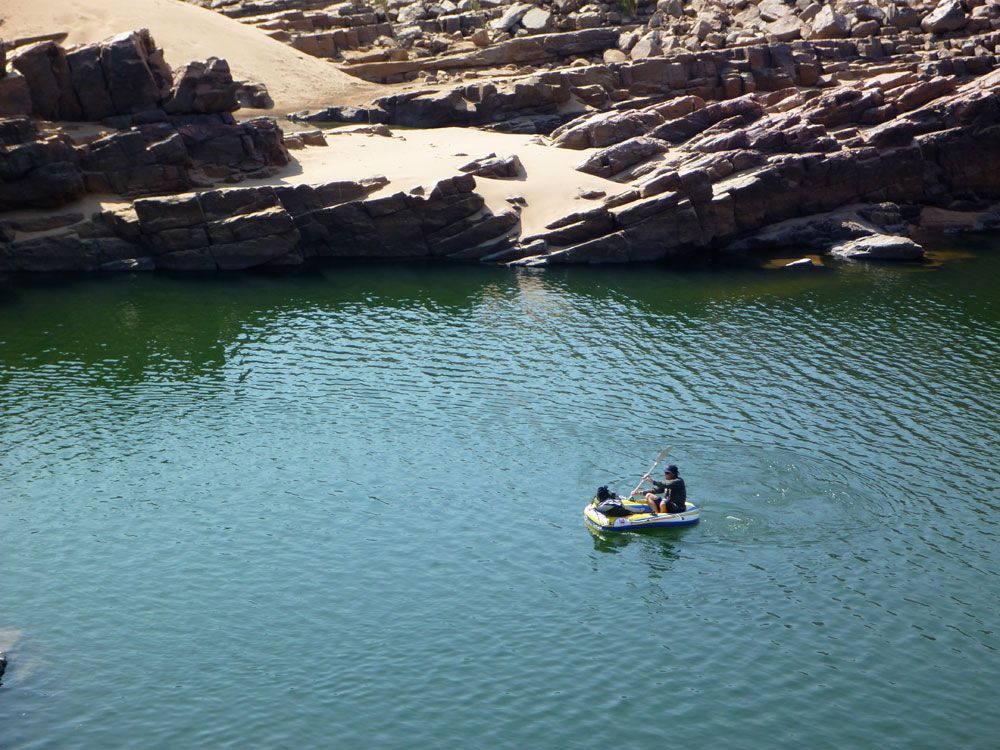
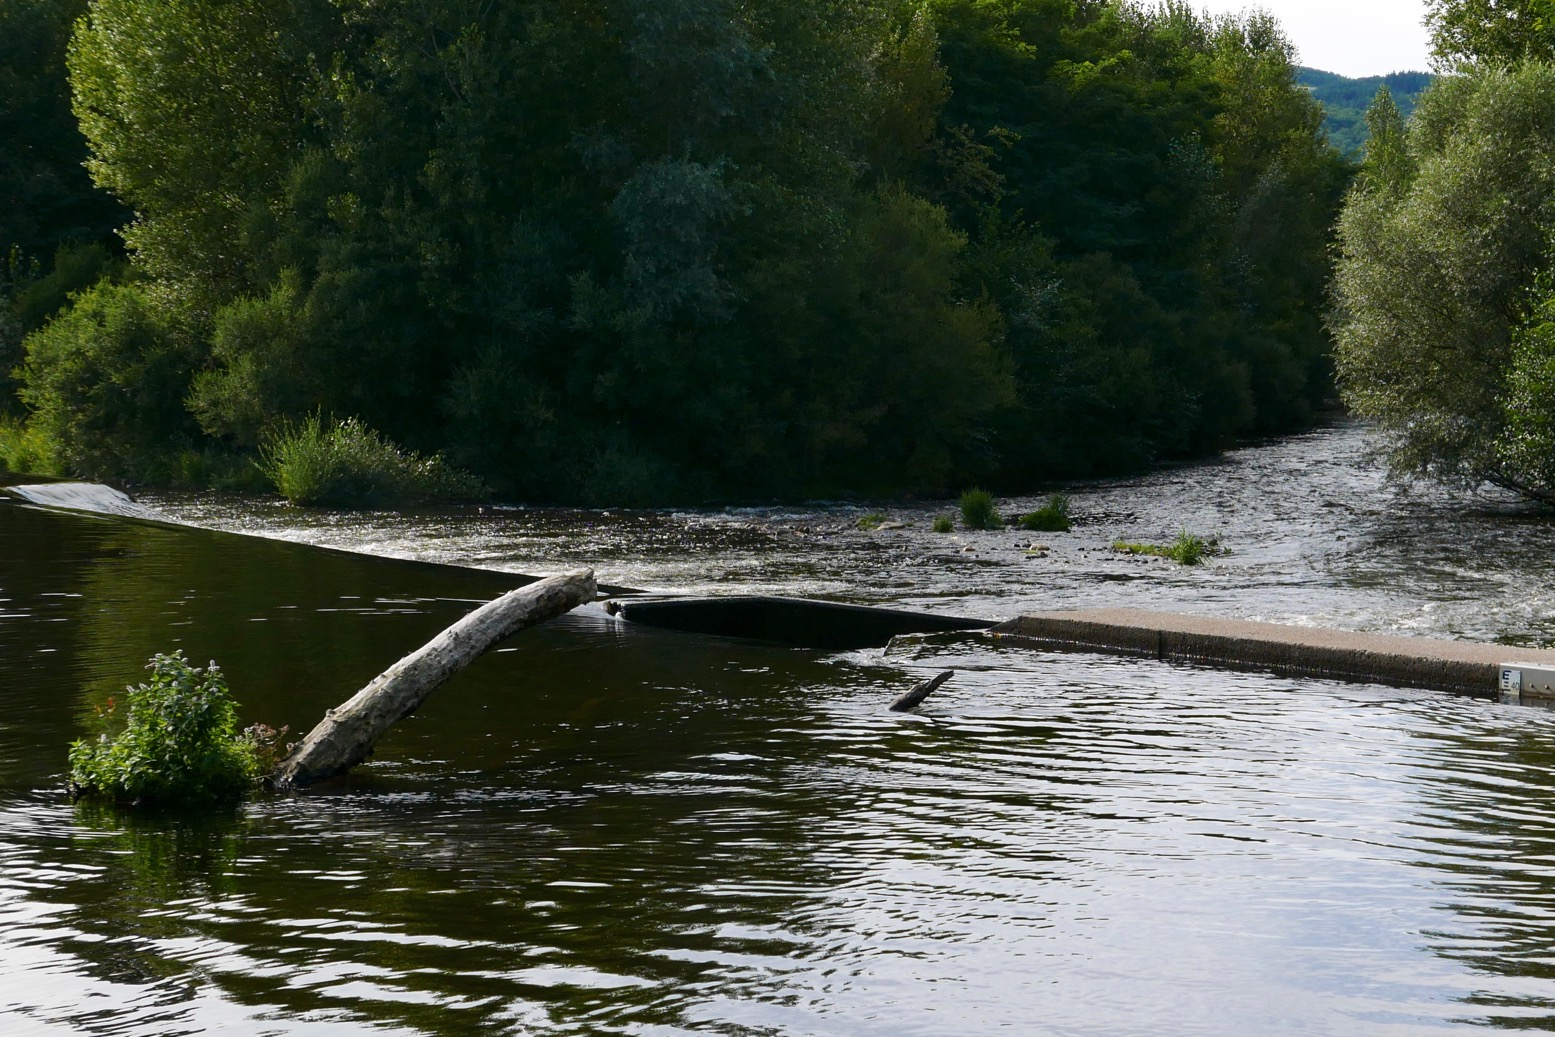
On the water soon after dawn, by the mid-morning of the second day we arrived at Dimond Gorge on the southern edge of the Ranges. Here the Fitzroy cuts back on itself as it pushes past the gorge walls, scoured smooth by the monsoonal torrent. At the southern exit where the gorge walls are just a few hundred feet apart, a dam had been proposed to match those on the Ord river in the eastern Kimberley. In 1960 the original dam enabled the development of the Ord River Irrigation Scheme (ORIS), the new town of Kununurra and with the much bigger Ord River dam completed in 1972, the 400-square-mile expanse of Lake Argyle was formed. But the ORIS has been slow to reach any potential. Thousands of kilometres from its domestic market, the produce, mostly sugar cane and high-value sandalwood, gets shipped to Asia and the power generated from the huge dam only supplies Kununurra and a nearby diamond mine.

Water has become an acute problem in the populated southeast of Australia where the steady depletion and raising salinity of the Murray-Darling basin which fills most of New South Wales and Victoria has led to water restrictions. Meanwhile, on the opposite side of the country, the Fitzroy’s wet season run-off spills into the Timor Sea at a rate of a ‘Sydney Harbour’ every nine minutes, or evaporates from the vast 1000 km² surface of Lake Argyle. This potential was anticipated in the 1980s ago when a 1200-mile pipeline to already drought-stricken Perth was proposed, until it transpired that the cost of securing and delivering water to be six times that of local desalination. And so by 2006 the world’s first desalination plant to powered by a nearby wind farm was opened just south of the city Perth, supplying nearly a fifth of the city’s needs.

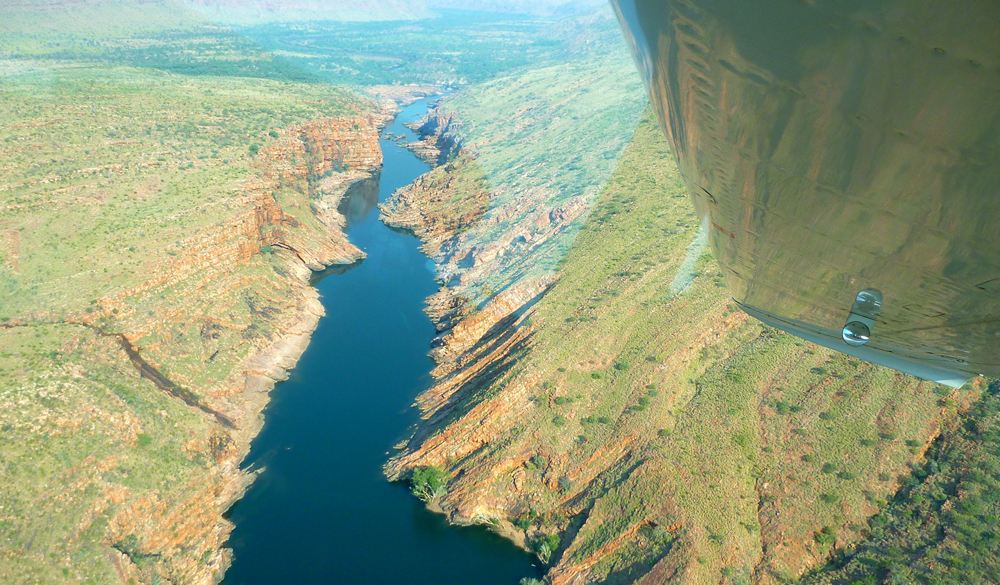
Emerging from the uplifted sandstone escarpments of the King Leopolds at lunchtime on the second day, we were having no such shortages. The preceding Wet had ended five months ago breaking all Kimberley records, and as we’d flown into Mornington a couple of days ago it was clear that, against our expectations, below us the Fitzroy was still flowing and four-fifths was open, paddleable water. There’d be a lot less walking than we’d anticipated.

Now, ahead of us lay the cattle country where we expected the river to lose its depth and definition as it meandered southwest among granite outcrops towards the highway. Sure enough, after lunch the flow soon dissipated into a jumbled rock bar with one particularly tough portage over huge boulders which left me croaking with thirst. Walking consumed so much more energy than paddling and we fully expected the stage across the cattle plains of Fossil Downs station to be tough, fly-ridden and with the menace of semi-feral stock. 

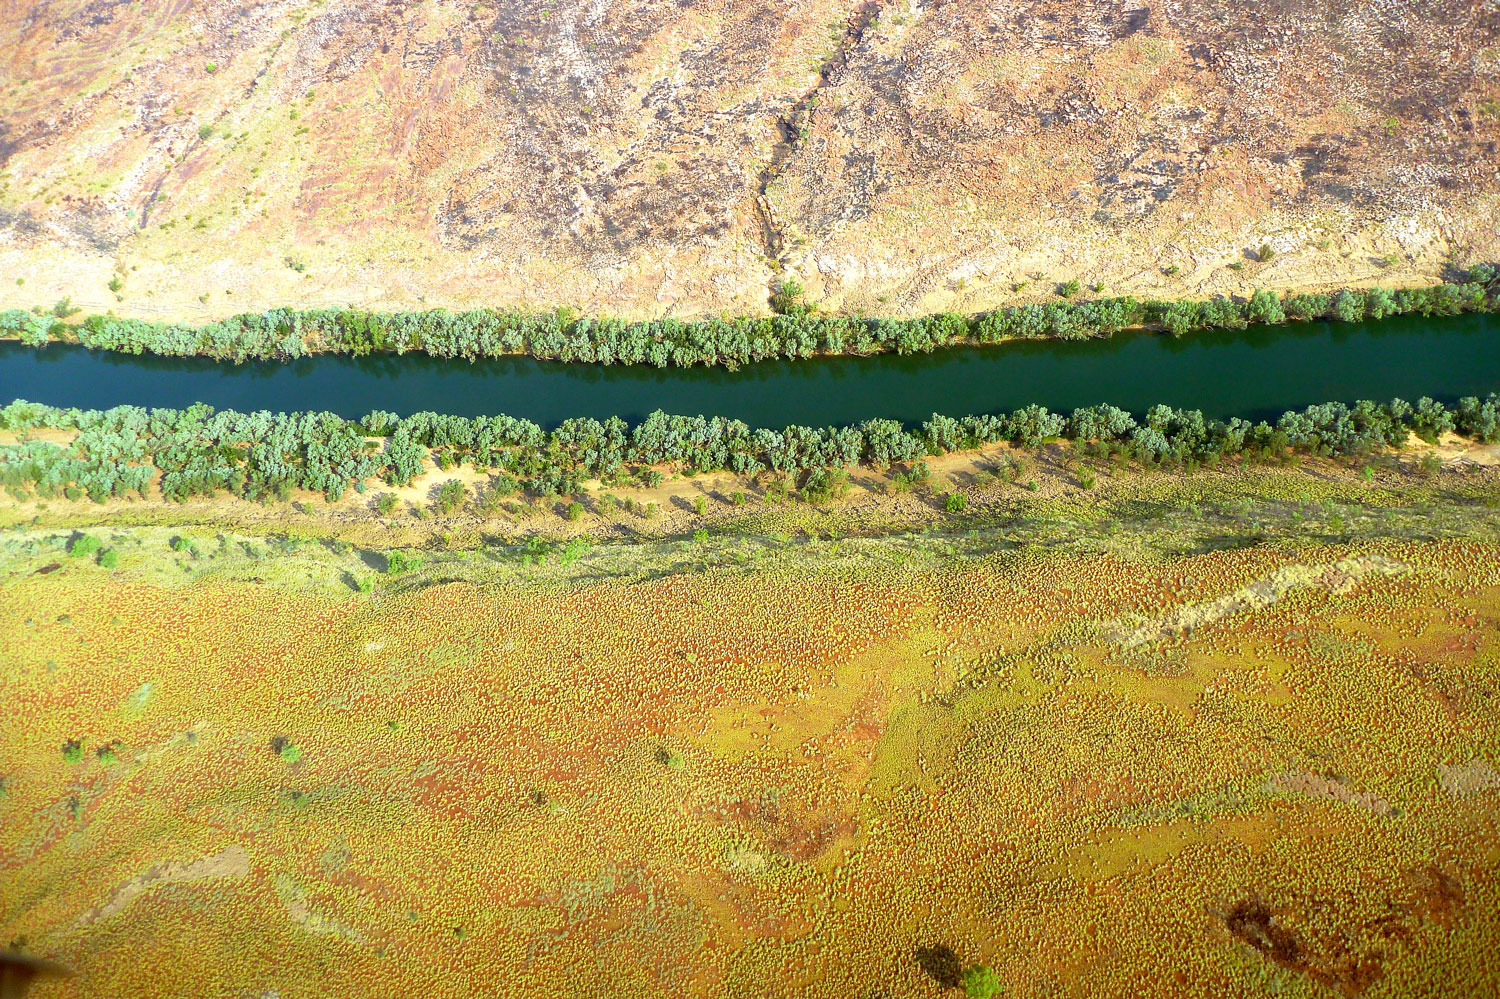
Although we’d end most days exhausted, it in fact turned out to be the highlight of our traverse. There were no more rock bars but periodically the river’s main channel became choked with flood-borne sand which diverted the remaining flow into the trees along the banks. Here, under a cool canopy of river gums replete with twittering of birds, we’d wade the sandy shallows for hours, towing our rafts like sleds. Occasionally we squeezed under- or climbed over a log jam, or sank to our hips in quicksands.

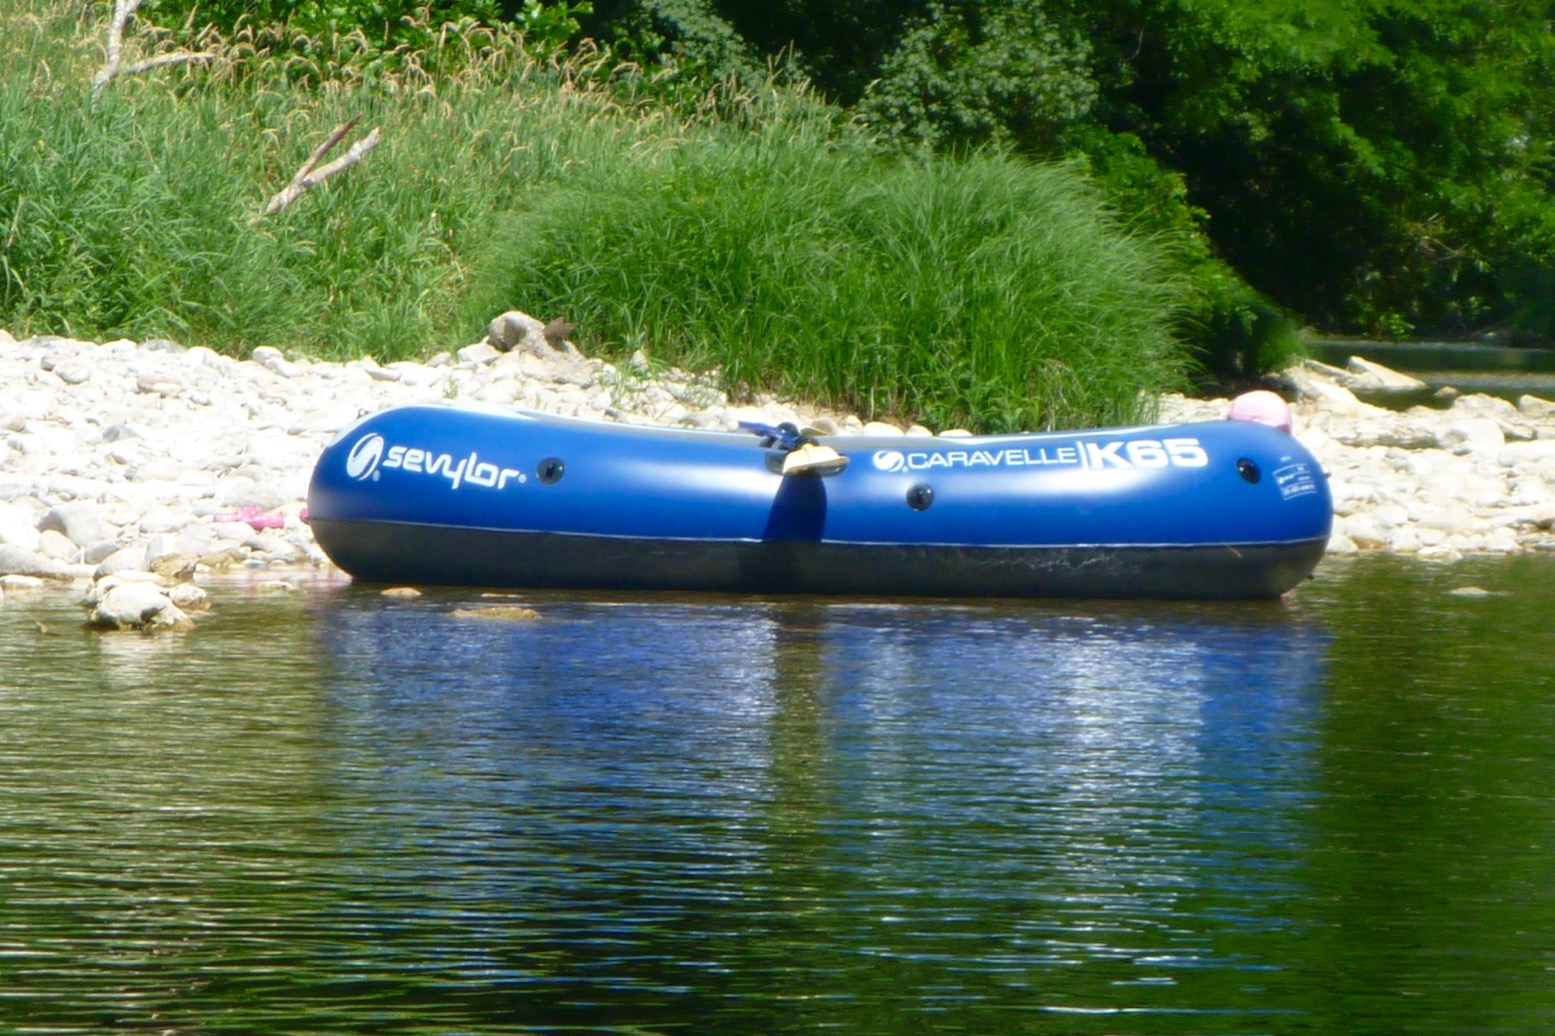
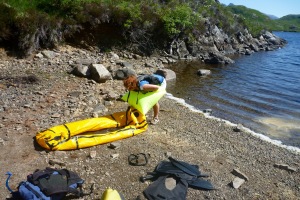
Jeff was using a $30 PVC pool toy rather than a fancy, $1000 Alpacka, so had to nurse the limp raft and repair punctures almost daily. The cattle and harmless freshwater crocs (a species unique to northern Australia) usually scuttled away or stared indifferently as we sploshed by. At one point the acrid reek of urea announced a huge colony of riverside bats which once agitated, took to the wing in their hundreds with a high-pitched screech. Come the evening, we’d spread out on a sandbank with plentiful firewood within arm’s reach, and set about steadily rehydrating ourselves from the day’s efforts.

By the fifth day we sighted the Geikie Ranges, the northern gateway to an unbroken, deep channel which flowed past the distinctive ramparts of Geikie Gorge National Park. Here, eons of flooding had eroded the former limestone reef into bizarre, scalloped forms. Freshwater crocs laid their eggs on the adjacent sun-baked sandbanks while out in the 100° heat, we paddled into the twilight to complete a marathon 12-hour, 20-mile day on the river. By the following lunchtime we crawled up the steep bank below the highway bridge at Fitzroy Crossing. Jeff could barely face another moment in his excrable pool toy, but like me, he’d followed the river. 

Coastal Packrafting

Rebel 2K main page

Around here the inshore sea paddling is exceptional, even if packrafting the inland lochs is also pretty good. Having done most of the latter routes, I thought I might try some coastal packrafting.
Garvie Bay arcing west to Achnahaird Bay looked like a good one and happens to parallel probably the best walk on the peninsula which we’ve done many times. That route could be a 20-km combination of cycling, walking and paddling, but as it was the last calm evening for a while, we thought we’d go out together in the kayak and I’d try the packraft on the way back. That way everyone got to play.

A light NW breeze blew onshore as we cut across Achnahaird Bay like a blue fin tuna. The approach of HW meant we slipped through the submerged skerries of Rubha Beag and into the crab’s claw inlet of Camas a Bhothain (Bothy Bay). This seemed a good spot to deploy the packraft with the aid of my exciting new gadget, a mini electric pump. I unrolled the boat over the water and let the pump buzz away for a couple of minutes, topped off with the hand pump, then clambered aboard.

Paddling away, I realised this was the first time I’ve paddled my Rebel 2K unloaded and I was a bit shocked by the bow yawing. Now fully back-heavy, one good swipe of the paddle and it could flip a 180°, just like my old 2010 Alpacka Llama.

Ah, but in my haste to launch the lifeboat I’d forgotten to fit the also-untried skeg which comes standard on the 2K. I waddled over towards Rubha a Choin beach and slipped it on easily, while the Mrs transferred to the Seawave’s front seat.

I’ve been ambivalent about the value of a skeg on a packraft, but now back on the water the yawing was notably reduced. If you think about it, a packraft actually pivots from a point around the middle of your swinging paddle, not from the stern, as it feels from the seat. The centre of mass behind the pivot point does make an unladen bow yaw more, but the stern will yaw too; just less and unnoticed.

On the Wye my 2K was fully loaded with the centre of mass moved forward and which minimised any yawing, even without a skeg. (With a heavy load over the bow a reduction in yawing is well known with packrafts). Now unloaded and with the bow riding high, swish-swosh yawing was exacerbated, but is actually happening at both ends of the boat. So any type of fin or extension of the stern (like the post-2011 Alpackas – right – and all subsequent copies) will constrain this, while not affecting steering. So, bottom line: skegs work on a packraft and are easy to retro-fit.

All the remains is a packraft’s agonisingly slow speed. These are not boats made to enjoy the sensation of flatwater paddling; they are boats to enjoy getting to out-of-the-way places easily. Any type of disturbance to progress, be it wind or current, may slow you to a stop, or worse. Something like the longer Nomad S1 I had would be better for this while still being packable. Still, in these ideal conditions it’s nice to float along observing the coastal features.

Paddling back down the east side of Achnahaird Bay, a back-breeze made progress feel achingly slow. Lately, I’ve come to value metres per second (m/s) as a metric of wind or paddling speeds. Something moving past you (or vice versa) at three metres per second is easy to visualise, though I suppose we can all visualise a 3mph walking pace, too. It’s what YR uses and is easily converted to ‘double + 10%’ for miles per hour (so 5 m/s = 11.18 mph). Or just double it and you nearly have knots (5 m/s = 9.8 kn), for what that’s worth. Crawling past the rocky coast it looked like I was doing 1 m/s at times. We had a race: diminutive Mrs in a big, long kayak; me in the packraft. Within ten seconds the Seawave streamed away while Bunter frothed up the water like a cappuccino machine.

Oh well, you’re as fast as you are. Like cycling in Tajikistan rather than Kazakhstan, for the best experience match your routes with your mobility and conditions. Next calm day I’ll do the full Garvie loop.

Tested: Anfibio DeckPack

See also: Packraft Deckbags

In a Line
Easily fitted, low-profile 22-litre bag with waterproof zip and works off the boat as a shoulder bag too.

Cost: 99 euro from Anfibio Packrafting Store (supplied free for editorial work)

Weight, Size & Volume
Bag: 224g; straps 11g each (verified)
59cm wide, 43 cm long and ~15 high when full. Volume: 22 litres.

Where tested
Northwest Scotland, Medway, Knoydart.

tik • Waterproof construction including IPX7 zip 
• Light
• Variety of attachment options, providing you have the mounts
• Four 58-cm straps included
• Works great on the trail as a shoulder bag too
• Handy Molle rim tapes
• You can easily tuck a once-folded WindPaddle underneath or even inside

cros • On the bow of my Nomad was a bit of to reach; better on the Rebel 2K and TXL
• Not convinced it works well as a floor bag
• Won’t stay up to be a pillow
• A white interior and external mesh pocket would be really good
• Drop the straps and use reusable zip ties – quicker and easier


What they say
Waterproof zippered packraft bow or stern bag for easily accessible essentials on the water. Fits any Packrafts (and a lot of other boats) by full perimeter daisy chain (for variable fastening).
With the Anfibio DeckPack you can transport your essentials safely and securely in all conditions. Splash-sensitive valuables like a camera, keys or documents as well as emergency equipment and spare clothing are always at hand on the bow, the stern or on the floor beneath your knees. The DeckPack can also be quickly converted into a daypack for excursions on land or the use as hand luggage on your journey.


Review
The problem with packrafts is there’s nowhere to put your stuff other than the bag it comes in, usually a backpack. I wrote more about it here, before making my own small Pakbag.

Otherwise, I like a 20-30L holdall, like my old Watershed Chattooga, or my current Ortlieb Travel Zip (right) with a handier TiZip and mesh-zip external pockets. These bags sit accessibly, but out of the way, under my knees, and on previous packrafts attached to a tab mount glued to the floor for when you flip.


Anfibio’s DeckPack is another way of doing it. It resembles Alpacka’s larger, 24-litre Bow Bag but costs 25% less at current $/€ rates. It’s a vaguely semi-circular, PU-coated bag of around 22 litres which, unlike the Bow Bag, has a perimeter of daisy-chains (continuous attachment loops, a bit like Molle). It fits most obviously on a packraft’s bow, as this is where most packrafts have four tabs and where the weight trims the boat best. But you could as easily mount it on flatter sterns (as on my Nomad) if you already have a big backpack up front. Anfibio also suggest it can go inside on the floor too. Using the supplied straps, I’ve also used the pack as a shoulder bag while on the trail.

On my Nomad it just so happened the bow mounting tabs where just right to fit the bag without using the supplied straps. Reusable zip ties (below) are best. But mounted on the bow it was a bit of a reach on my Nomad unless I shuffled off the seat.

In fact there were enough hull mounts on my Nomad to position it further back (above right) using two front straps. Here it acts as a splash guard extension and was much more accessible on the water without making getting in and out too awkward.

Another very handy aspect of a DeckPack is that a mounted WindPaddle (left) or similar can be quickly folded in half and tucked under the bag out of the way when you’re setting off or need to change direction and start paddling. In strong winds this stashing of the sail is an important thing to be able to do easily and quickly; without a deck you can jam it under your knees, but with a deck the DeckPack or similar enables reliable stashing. Then, when you’re ready to sail again, you just pull out the sail and it’s up in a jiffy.

I submerged the DeckPack in the bath and, pushed underwater (ie: under some pressure) air bubbles slowly leaked out via the zip head. But Anfibio tell me:

Please note, the zipper is one-way air penetrable, that means it will release air to the outside under some pressure along the zip, not only the head, but it remains watertight. It is actually rated IPX7. Under any circumstances, it can withstand submersion.

Without pressure, there may be no leakage and so the DeckPack doubles as a secondary buoyancy aid – always reassuring on single-chamber packrafts.

Once I realised it would work well on the IK, I ended up liking the Anfibio DeckPack a bit more than I expected, but here are a couple of suggestions:
• Drop the price and make the straps (right) optional. Most paddlers will have their own mounting means or ideas. I use four reusable zip ties.

OLYMPUS DIGITAL CAMERA

• A curved, meshed exterior zip pocket would be really handy for knick-knacks or having a GPS in a readable position. Or, run a line of daily-chains alongside the main zip, so you can DIY a mesh pocket to the outside without interfering with the main zip or bodging as I have done (left). It would make the DeckPack even more versatile and save over-working the waterproof zip to access stuff while on the water.


MYO Seatback Mesh Pouch
As mentioned above, zipped mesh pouches on exterior surfaces are dead handy. You can put stuff in them, they drain or dry fast and they enable handy access without digging into a main bag. It’s one of the things I like on my Ortlieb Travel Zip.

On eBay I found 9″ x 7″ zip mesh pouches for makeup at about 3 quid each and quite well made. I zip-tied one around the side hem to the buckles on the back of my packraft’s foam backrest (above and below). It’s a handy place to stash the inflation bag, some cord, snaplinks, zip ties and the top-up adapter for my K-Pump. I even fitted one to my Anfibio DeckPack.

DeckPack as shoulder bag

A Packboat in your Car

Overlanding with Packboats

Expedition Portal / April, 2019  

Packboat is my made-up word for easily portable boats that roll into a bag but deploy in minutes, in contrast with hardshell kayaks or canoes in aluminum, plastic, or composite. I’m here to suggest that if lugging a cumbersome hardshell on your overland rig isn’t for you, then a packboat weighing from 2 to 40 pounds and never bigger than a backpack might well be, while adding another great way to explore the outdoors…

Read the rest

2-up-fun-1500x1000

MYOG: TiZip Pakbag

See also:
Deck bags for packboats

FYI 2023: Not sure what or how but TiZip tell me the MasterSeal design has updated

As mentioned here, wafting down the Tarn Gorge one summer with a Watershed Chattooga drybag jammed under my knees gave me plenty of time to configure a ‘deckbag’ to better fit my needs.

bagbag2


Peli cases are too heavy and cumbersome for these sorts of trips, while dependably dunk-proof – or even submersible bags like the Chattooga are too big and too fiddly to seal easily (since replaced with an Ortlieb Travel Zip). All I needed a 5-litre bag to sit on the floor below my knees for my must-stay-dries.
Using state-of-the-art Adobe Crayon™ CAD software I came up with a design (above) and optimal dims of about 29cm x 15cm wide by 12cm deep giving about 5 litres volume. Part of the attraction of this project was learning to heat-weld TPU fabric with a small iron. It looks so much easier and less messy than glue. Or so I thought.

Before I got – quite literally – stuck in, I considered adapting some of the many heavy-duty SealLine PVC roll-top dry bags I have knocking about. All I needed to do was stick a zip in, then somehow cap one end with a round piece of something. I may well try that later but what I was actually aiming for was a stable box not a cylinder to sit securely on the floor of a boat.

Heat welding: important to understand
PVC plastic can’t be heat sealed with an iron because it’s double coated. With double-coated anything (TPU, PVC, etc) the hot iron will easily melt the coating and make a right mess. Done this way you need to use a heat gun and a roller (left) which requires three hands. Or use single-sided PVC seam tape. Or of course, use glue.

The body of my Pakbag could be made from single-coated yellow 210D packraft hull fabric, with the near-square end panels in ‘both-sides-coated’ 420D black packraft floor material. At 650g/sqm (27oz/sq yard) this stuff is good and thick. The thin yellow is 275g/sqm.

fabric

Half a metre minimum order of each cost €10 and €20 respectively from extremtextil in Germany; a very handy resource for the home fabrician. What you see left is what’s left over. Extrem were also one of the only places I found who’d sell a couple of 23-cm TiZip MasterSeal 10s for €23 each. Rolled delivery cost a bit more but avoided folds and was very fast. In the meantime I bought a used Prolux iron off ebay for 20 quid and already had some scissors, a table, a ruler and a knife.

bagbagtemp
edsiz

I’m not so skilled at home handicrafts so expected to make a right mess of things first time round, and was prepared to make a second bag. The next best thing I could do was think carefully before diving in like Edward Scissorhands at a confetti convention.
One smart decision I made was to use a wooden mould to form the bag around. I could have laboriously hand-sawn some kitchen-shelf leftovers down to size, but after more ebaying found a pair of hobbyist’s knick-knack balsa boxes which added up to 15 x 12 x 30 stacked.
As mentioned, you can’t iron on the coated side of TPU fabric; the coating will melt all over your iron before it bonds to whatever’s underneath. You can only directly heat an uncoated surface while pressing down the coated side which melts to the corresponding panel – coated or uncoated.

pablito

You can learn a lot from the DIY Packraft website. Lord knows how these guys manage to make packrafts from a roll of raw TPU. There can be no doubt that my attempt would end up looking like Picasso in an abattoir, but a dinky, curve-free pakbag ought to be within my abilities.

prolux

They mention the need for an iron with an adequate and consistent spread of heat up to around 220°C. Rated at 205°C, my cheapo Prolux was not in this category. I understand model makers find them ideal for applying thin transfers. For TPU work you need an iron with more poke, costing at least three times as much.
I practised joining 210D to 210D, but sealing was far from instantaneously miraculous. It took repeated ironing and pressing, as well as spot heating to get a full seal with virtually no air gaps or lifted edges. You could then peel it apart if you got an edge up, but you certainly couldn’t pull it apart. I thought maybe the coating may be too thin or once melted was gone for good, but it’s probably just my crap iron.

For the end panels you need to seal 210D on to the thick black 420D. The box mould really helped to make a neat-enough job. One interesting observation about joining fabrics by sewing or heat-welding is that millimetre-precise measurements aren’t critical as they are with wood or metal. I took more time than I needed cutting the exact forms and trying to get precisely perpendicular edges. A big metal set square may help, or you can find stuff round the house – in my case, some square glass bathroom scales. Another tip is arrange something sticky under your cutting edge ruler so it doesn’t slip as you slice hard to get a full, straight cut.

tizpper

The length of the bag is partly governed by the available zip size. The 23cm MS10 Tizip which extrem sell is presumably used as a relief zip on men’s drysuits, but for a bag has a minimally useful aperture of just 19cm. The next size they sell is a massive 71cm. They must make TiZip sizes in between (for example for packraft cargo hulls), but good luck tracking them down online.

dekbo1
First job was wrapping the bag body panel round the box mould and sealing it. Cue endless to and fro with the iron to try and get a complete seal before I gave up and accepted I’d glue up the gaps later.  Looking back, I should have made this join on the top of the bag, either side of the zip. Barely two inches of yellow to yellow sealing required here. Now I know.
dekbo2
I dropped a black end panel on to the end of the box mould.
dekbo3
and welded down the bits between the corners.
dekbo4
Then I made an incision at each corner, pressed the flaps down over each other and welded on. Good to know the 210 welds much better to the thicker coated black stuff.
dekbo5
Sealing wasn’t perfect but all along I expected to have to hand seal all joins, and certainly all corners with Seam Seal.
dekbo6
Before sealing the other end, I cut a slot for the zip.
dekbo7
Then ironed it down. Again, the thick coating on the broad zip sides made good adhesion easier to achieve.
dekbo8
I stuck a home-made D-ring on the finished end. I actually needed this to pull the bag off the tightly fitting box mould before doing the other end. This requires sawing an end off the box so it can be removed through the zip hole after butting up against the unfinished bag end to support firm heat welding.
dekbo9
Oh dear, look at the state of that floor seal inside the bag. I went over it again with the iron, then filled up the gaps with glue.
dekbo10
Then I stuck the zip cut-out over it for good measure. Once inverted, I did the same on the outside for more good measure. It’s not pretty but it ought to seal.
dekbo11
With the bag still inside out, I went round the yellow-to-black joins with Seam Seal. It’s like Aquasure/Aquaseal, but runnier and takes a long time to dry.
dekbo12
Beautifully sealed seams. I should get a job at Alpacka.
dekbo13
The bag turned right way out. I’m amazed that it looks less crap than I  expected. No need for stiffeners; as hoped, the 420 end panels retain the boxy shape. The box mould (sawn off bits in the foreground) helped greatly in making a tidy form.
dekbo14
Without the strap the bag weighs 158g or 5.5 oz.
pakbag
Completed Pakbag alongside the Aquapac and a Peli 1150.
pakbagfoamer
Pakbag, with a foam floor panel to keep above any moisture. A sachet of silica crystals may help humidity, as does TiZip silicon lube for the zip end. It passed the submersion sink test.

Several features are omitted from the Adobe Crayon blueprint at the top of the page:

• The overlap sleeve on the side to contain the shoulder strap to avoid entrapment. On rough water I’ll just unhook the shoulder strap and stash it

• Otherwise the full-length shoulder strap can adjust down to ‘handbag ‘length so there’s less is lying about

• No side net. Would still quite like this but not sure how to do it neatly

• TiZip is not diagonal – not important –dripbox but the arched stays idea underneath it may be. I noticed in France under the knees gets a lot of drips off the paddle (PSZ; right) which can get in when you open up.
Convex top would be good but a shake of the bag may thrown off excess drips before unzipping

• Need to find a way to attach it to the packraft floor. Velcro might be low profile but with the repeated force of pulling apart, I’m not sure the shiny-backed stuff I have will glue to the bag or the floor well enough, even with proper two-part glue. So Ill just clip one of the strap rings a D-ring glued on, mid-floor

A few months later… using the Pakbag

pakbagwairo

After paddling the Wairoa River in New Zealand as a day trip, I can boldly claim my MYO Pakbag is fit for purpose. It’s just the right size for a water bootle, camera, GPS and wallet, even if the easy-to-use zip is a tad short for easy access.
One thing I didn’t appreciate is that, slung over the shoulder while sat in the boat, the bag is still handy to access but keeps off a wet floor and is always attached to you. No need to think where it is.

nzt - 12
NZWH - 10

Sadly my glue or gluing skills are not so fit for purpose. I need to reglue the strap end-rings and a couple of corners. This time I’ll probably use 2-part glue which I know will tear off the coating from the fabric core before it separates from what it’s glued to.

What I’d really like is for someone to make this properly. The difficulty – as possibly mentioned above – seems to be that anything with TiZips requires the consent and approval of TiZip Inc before they supply a zip. It’s a way of ensuring a proper application to their tight specs is done so that their reputation is not harmed. Which is why many TiZip products, like my Ortlieb Travel Zip bag are unusually expensive. You’d think there must be alternative or knock-off TiZips around; I’m pretty sure I searched and searched.

nzt - 18

Kayaking and packrafting the Allier (France)

See also:
• Chassezac
Ardeche
Packboating in southern France
Tarn

allier-map
malgrey

In 2005 the Dordogne and nearby Vezere were my first multi-day rivers in my Sunny IK, all helped by the discovery of the inspiring White Water Massif Central guidebook. The Dordogne was a good choice but to be honest, a bit easy. Ready for something un peu plus sportif, I’d got it into my head from that book that the Ardeche was too hardcore, so I’d be better off on the less famous Allier between Chapeauroux and Brioude (big map, above).
In fact, as you can read here (admittedly at twice the normal summer flow; video too), parts of Allier can get tricky (see left; a plastic canoe folded against a rock). Even though a railway carves and tunnels right along the gorge, on the first two days from Chapeauroux there are places where the rapids come at you fast and with no easy way out of the gorge if you get in trouble. Over the years stranded paddlers have been rescued by helicopter.

al-5

Not fully comprehending all this, in June 2006 I set off from Chapeauroux in my Sunny, and at the very first bend was flapping about like a salmon with a seizure, trying to stay on track. It went on like that for a while, then eased up and actually got quite pleasant by the time I reached Alleyras for the night. This was more like it; a wild river rather than the broad Dordogne lined with droning pumps irrigating the adjacent farmland.

al-15

Next morning a taxi transported me past the then-closed section dodging the Poutes dam below Alleyras (more below) and dropped me at Monistrol. Here again I failed to fully appreciate the greater challenges immediately ahead, even if the guidebook was clear: great fun in a creekboat, but an open canoe will fill up on the longer rapids. And if I didn’t know it then, I sure do now: the white water abilities of open canoes and IKs are closely matched, while IKs might easier to control for beginners (like me).

al raftThis Monistrol stage is run by commercial rafting trips (above), also a telling sign about the nature of this part of the river. I scraped through that day, exiting a few rapids with a boat full of water, and on one ending up swimming alongside it. Looking back, I’m pretty sure this was the exit of ‘La Barraque au Ponnet‘ (KM3.5; more below) with that raft above coming through soon after I stopped. It was all a bit of a shock.

Unless you’re confident, I’d suggest not following my example in doing this section alone. Consider a recce in the commercial raft if there’s one going that day, or ask if you can tag along for safety.

A few kilometres before Prades (KM12 from Monistrol) it all becomes less of a white-knuckle ride, and what followed all the way to the Brioude take-out were fun, Grade 2 rapids and a couple of thought-provoking chutes or easy portages. All manageable in open packboats. As you approach Brioude on the last day, the paddling eases right up so that you start harking back for a bit of eaux vivants.

al18 - 3
al18 - 27

All along what they now call ‘one of Europe’s last wild rivers’ you’ll pass many striking outcrops of columnar basalt as well as pretty villages (like Chilac, below) with adjacent campsites, boulangeries, quaint hotels – and not a chain store to be seen.
Like the better known Ardeche and Tarn, the Allier is another Massif classic, still distinctively scenic but with non of the nose-to-tail traffic during busy holiday periods.

al18 - 31
allimap

Getting there
Although the daily trains aren’t frequent, with riverside stations at Brioude, Langeac, Monistrol, Alleyras and Chapeauroux, the Allier (left) is easy to get to with packboats. First, Easyjet yourself to Lyon, or Ryanair-it to Nimes or Clermont, two cities which are also linked by the scenic Ligne des Cévennes rail line (below). Brioude is an hour south of Clermont, and Chapeauroux is two hours over the hills from Nimes. Between them, Brioude and Chapeauroux span the scenic and paddleable 88-km section of the Allier.

al-rochpleur

One thing worth considering if you’re unsure about the half-day Grade 3+ Monistrol–Prades section, is coming up on the train from Brioude or Langeac. It passes right above the gorge where you get a good view of the Barraque au Ponnet and a few seconds later the ‘Roche qui Pleure’ drop a few hundred metres upstream (right; Gumotex Scout canoe). I’m sure glad I looked when I came back years later.

cevligne

al18 - 1

In 2018 I returned to the Allier, this time with a packraft. I flew to Lyon (cheaper and more frequent than last-minute Ryanair), caught the train via Clermont to Brioude (5hrs), and next day caught the first train to Monistrol (left).
I planned to miss out the Chapearoux–Alleyras stage to save time and the taxi faff around the dam**. It left me three days to cover about 70 paddling kilometres back to Brioude.

** In recent years (click ‘P5’, quite out of date) the long-closed section between Alleyras and Monistrol has reopened to paddlers, with a portage around the new Poutes dam (left), 3.5km from Alleyras station (the train line crosses the river right in front of it).
As part of the Allier resalmonification programme, the dam was substantially lowered and fitted with a ‘ladder’ to help the fish get upstream and propagate – plus give anglers something to do. Local environmentalists fought a long battle to get this done

al-brioweir

The train heading upstream passed right in front of the Brioude weir (left) where I’d be taking out in a couple of days. The line then rejoins the Allier at Langeac before heading for Monistrol. Soon it enters the wild gorge and looking down at the rapids below I thought… ‘Hang on a minute!’ which, a rapid or two later escalated to ‘WTjoF!?’.

al18 - 43

I recall being unnerved in 2006, but I’m sure they didn’t look this gnarly. I realised later that the first 100-m white plume was ‘Le Barraque au Ponnet’, easily recognisable on aerial maps, pictured on above in full winter spate. The other WTJ… was ‘La Roche Qui Pleure’ – two of the plus fruitif chutes on this stage (map below left).

p1290746

I got off at Monistrol, scoffed a petit dej at a deserted hotel and wandered around town wondering what to do. The river didn’t seem higher than normal; perhaps it was low back in June 2006 when I came through in the Gumboat?
Either way, thanks to my train preview this stage seemed a bit too ripe for me; the Yak would be spilling over long before I was halfway through ‘Le Ponnet’.

falsemem
al-monihydro

For a while I actually wondered if I was suffering from false memory syndrome from 2006 and might have cause to claim compensation if I could find the right lawyer. But I definitely recall the old Monistrol hydro plant (right) and my photo record shows I took the picture of the board below at 9.03 and arrived at Prades beach by 1pm, invigorated but not inordinately traumatised. River pictures were few back then in that pre-water camera era.

alli06-monis
al-monichut

Later, trying to work out what was different (other than my aged nerves), I wondered if I’d just glanced down on Le Ponnet during a particularly hearty pulse of dam-released water? Looking at the vigicrues website later, the flow graph for that day (at Prades) does show it was high as I passed by around 8am – before dropping six inches around midday.
I knew from the Tarn earlier this summer that following a stormy night, a six-inch rise makes a difference – it speeds up the flow but can also smother stony rapids and make them easier. The pulsed releases every 8 hours are the lumpy pattern you can see along the bottom of the graph below for the days before and after I came through. As you can tell, I am bending over backwards trying to find ways to rationalise my new-found timidity!
Above left: from the Eiffel bridge in town, you can see the first rapid (looking back upstream). Like the books says: if you don’t like how this or the next couple of runs look, turn back. Otherwise – strap in for the ride!

ali-pradesflowgraf.jpg

Annoyingly, my GPS with good maps was at the menders. I borrowed a look off a trekker’s map (Monistrol is on the GR65 Santiago trail) but at 1:100k, I was none the wiser. I’d have needed a 1:25k map to find any viable paths along the gorge.

al18-5
La Benne?
al18 - 6

In the end I decided to follow a path by the bridge on the right side of the river, signed: ‘Viaduct, 1 hr’. It might continue along or above the gorge to a point where I could put in with the worst behind me. If it didn’t I could turn back and hitch or bus – or if desperate, clamber uphill to the D301 backroad to Prades.
And that is what I did, but not without a huge amount of effort. Initially, the path followed the riverbank, passing a few Grade 3s (above, probably ‘La Benne’; KM1.8) which would have swamped my Yak like hot ‘creme anglais’ over a freshly baked rhubarb crumble.

al18-10

Some three hours later, high above the valley and heading for dehydration (33°C in Brioude that day), I gave up trying to follow a path. Fallen trees, brambles, scree slopes, an intermittent path and the 1:1 slope all took their toll. After a failed attempt climbing a loose cliff, I managed to hack my way uphill and emerged a sweaty mess on the D310 backroad, looking like I’d just escaped from a teenage slasher movie. Scratched, bitten, stung and grazed to buggery, I’d covered 3km in three hours.

al-sunf
al-monimap

I washed in a cattle trough and passed through the sunflower hamlets of Conaquet and Conac, before splitting left down a side track and path leading back downhill, hopefully to rejoin the river below any enraged torrents.
This it did, just before Pont Gilbert and just below ‘La Petite Grille’, by chance nearly the last (and easy-looking) rapid, 8 river-kms from Monistrol. Although it didn’t feel like it at the time, this turned out to be pretty darn good route-finding without a map (left).

al18 - 9

At one point earlier, while thrashing through the bush or teetering across scree slopes, I heard the telltale whoops of hyper-excited rafters far below. I realised that’s what I should have done: taken the fun option in a big-arsed raft as far as Pont Gilbert (if they’d take me, with baggage).
I’d seen signs for a rafting centre near Monistrol station, but the town was so quiet I assumed they’d closed for the season. It would have been a great way to punch through the big rapids without a care in the world. Picture above: the ‘Le Ponnet’ viaduct down below with the long ‘Barraque’ rapid starting just around the corner and ‘Roche qui Pleure’ laughing menacingly from behind the trees on the left.

floatdontwalk

Dropping the kit bag and setting up by the riverside below ‘La Petite Grille’, it had indeed become hot enough to grill a salmon, but once on the water it sure felt good to flop down and float away like a stray log. Just like in the wilds of northwest Scotland, if you have the choice: float, don’t walk.
Obviously part of me wondered if I could have managed the gnarly rapids upstream. After all, I’d clearly scraped through years ago in the Sunny (still hard to believe). But I’d followed my gut and felt happy with that.

al18 - 12

Watch Belgian packrafter Dzjow’s video below from 2014. He enjoyed the Monistrol stage so much he went back up on the train and did it again with GoPros rolling. Watching it, I’m glad I didn’t. From Monistrol starts at 1:57 and he shoots down ‘La ‘Roche qui Pleure’ (the image below) at 2:28, soon followed by ‘Barraque au Ponnet’ which starts at 2:34 (note the railway viaduct) and goes on for a while to the big rock (3:19) you’ll recognise on the left in the rafting pic, above. Dzjow was a hardcore adventuriste I’ve come across before. The following year he went on to do a self-admittedly tough and not so enjoyable trip in wild Patagonia. He hasn’t written about packrafting since.
Next time I’m here I’ll rent a bailing IK as wide as a bed and give it a go.

After about 4km I pulled into Prades beach (below left). I needed salt and I needed drink. And while I was at it, what harm would a handmade mini quiche, some bacon crisps and a tartes aux framboises do? None at all, mon brave.

al18 - 14

Now dizzyingly revived but still worn out by the morning’s commando course, I knew there was a bit of a drossage (great word) just around the corner, but it was all fun knowing a few others were playing around too, including SUPs. What is it with these SUPs? I’ve never seen them doing anything more than goof about in the shallows but rarely actually go anywhere, yet they are clearly ten times more popular than IKs and packrafts combined. What does that say about the state of post-industrial recreation in the developed world?

al18 - 15
al18 - 17

Unusually, I had a hotel booked at Reilhac, about 18km downriver, past Langeac. With just a couple of canoes on the water, the afternoon passed without drama, bar the odd wetting. But approaching Langeac, the din from the weir just before town was unusually intimidating. The canoe chute here (left) is well-known as being a bit of a drossage because it’s about 3 feet too short and so pumps a plume of water into a nasty backwave which not all boats can easily escape.

al18 - 16

And I do wish these Frenchies would mark the tops of their glissieres with two poles, indicating: ‘aim here’. Above, show me the chute entry point while wearing a pair of sweat-smudged specs! Maybe the idea is by not having clear markers, paddlers slow down and look carefully. I did just that above and portaged round off a little beach on the right. I could not be arsed with hitting the churning pile to get catapulted over the bow like a 40-kilo sack of dried beetroots. I felt that no matter how far back I leaned, my short, light boat would plough ‘n’ flip, unlike a longer IK. Back in the water, I paddled on through early evening Langeac and an hour or so later was slumped on my Reilhac hotel bed.

The next day was just what I wanted; a short, easy run of just 13km, ending at the UNESCO-overlooked village of Lavoute Chilac where the charming Hotel des Pecheurs tottered on the slender gooseneck bluff above the Allier.

al18 - 28

Three clicks downriver (6km from Langeac) was a double-drop weir-chute (below left). Easy enough providing you steer straight for the lower drop, but I walked it as I knew it would be a bailing job, and today was some 10 degrees cooler.

al18 - 29

Splish followed splosh followed splish down to Chillac (above, 11.5km from Langeac), another picture-perfect postcard village sat atop a striking basalt plug with dreamy views over the Auvergnois countryside from the terrace by the church.

Half a click downstream from Chilac is an easy, short chute (above left) on the far left. But once down it I realised the old weir passing below the mill on the right had pretty much been washed away, making the chute redundant and a fun ride down a long, shallow rapid. Clearly I was recovering my mojo if I was looking for some white water action again. Later, I read this weir has been flushed away for some years, but is another thing the new Canoe Trips, South of France guide had not updated.

al-44

Soon, the bluff of Lavoute Chilac rose into view. I pulled over left at the riverside park, let my gear dry, then walked into the village over the tall bridge (left).
Les Pecheurs (white building on the right, below) was still on siesta, so I left the Yak by the steps and walked over to Le Prieure, the other creaky-stair hotel in the village, for a mouth-watering  ‘Salade Auvergnate‘.

al18-35.jpg
al18 - 37
al-prior

Wandering around the old church and the imposing, 18th-century facade of the abandoned priory (right, due for luxury flat conversion), I was staggered to see a July 1866 flood marker at the church’s back door. In the photo left my hotel room would have been submerged by a few metres. Perhaps the river’s acute 180-degree turn causes floodwaters to back up.

It’s the last day of my packrafting mini-break and by my estimates, I had about 22km of paddling, plus a 4km walk to Brioude station to catch the 4:10 to Lyon. I didn’t want to miss that so set off briskly, passing a canoeing couple (the only other boat I saw all day) until I could estimate my pace against a landmark. Before 11am I’d reached the bridge at Villeneuve meaning I’d covered 9.5 clicks in 80 minutes which gave me plenty of time. This Allier flows quicker than it looks.

al18 - 38

The book talks of another old weir to ‘shoot’ at Villeneuve campsite, but there’s nothing here except a ford with poles marking the car crossing. Many of the book’s ‘shoot an old weir’ descriptions are out of date. There’s rarely anything more than a line of rounded boulders and a drop of a few inches, making you wonder: ‘was that it?’ But at Ville Brioude, just before the tall bridge, the book suggests you can shoot a modern concrete weir (above left). Good luck with that and those boulders lined along the base.

al-brioweir

Finally I was back at the public beach below La Bargesse campsite. Ahead was the big weir before the red brick rail bridge I’d crossed on the train a few days earlier (left). Here again the book now suggests ‘portage right’ and other convoluted options – perhaps a simple left/right mistake? Instead you simply take out at the grassy park, river left, walk over a little footbridge and put back in below the weir under the railway bridge and above a shallow rapid.

Once again, I’m amazed at the true amphibiousness of these packrafts, especially if not hauling camping gear on the trail. A long walk to dodge gnarly or closed stages is (potentially) easily done, even carrying an inappropriate kitbag.
With plenty of time to catch my train, I dried off, got changed and walked over to Brioude for a coffee and cake in the town square below the basilica’s decorated tower. In the hills all around the petrified volcanos and lush grassy valleys of the Auvergne countryside could easily withstand more exploring on foot, by pedal or with paddle.

al18 - 41

Six Packrafting Essentials

Packrafting Quick Guide
Packboat rescue and survival aids

fx-gear

The basic gear you need for packrafting adventures so you don’t end up as above, or simply just inconvenienced and wet.
For general camping kit (sleeping, eating, washing) you’ll find lists all over the internet and beyond. Mixing paddling with walking, I prefer a 1-kilo down bag, a compact tent, a thick, full-length air mat and a Pocket Rocket-like burner with a big Tatonka or MSR 500ml+ pot/cup and a Gimp stove for back-up
Below, I suggest cheap alternatives in green. A cheap alternative to a proper packraft is of course… a Slackraft but you’ll only every buy one once.

1. A pack for your raft

paragonnrs
nrsparagon01

Do you use a regular hiking backpack packed with your boat in or outside, or a purpose-made drybag pack with usually a rudimentary integrated harness, or use a separate packframe harness as pictured?

If you’re a first timer and own a regular hiking backpack, make do with that, but having tried both I prefer a harness. You’re on the water so (unless you can store in the hull, waterproofness trounces all-day carrying comfort. A submersible UDB duffle is tougher, as airtight as a packraft and provides high-volume back-up flotation should you get a flat on open water; exceedingly unlikely but important and reassuring.

For short approach walks like on the Tarn, or the Kimberley, I used my UDB’s basic integrated harness: just sewn-on straps. For Turkey which was mostly walking, I fitted it into NRS pack harness (above left; no longer made) whose load capacity easily exceeds its straps and your back.
In Germany Anfibio Packrafting now sell the more sophisticated US-branded Six Moon Flex Pack (left; new 2021 design), a ‘drybag hauling system’. You can lash anything that fits within the straps, including your rolled-up boat. ULA Epic is another one. In Europe such harnesses seems unknown.
Remember: with any big backpack the key to support and comfort is a stiff board or frame connecting the hip belt and shoulder strap mounts so the weight can be carried low on your hips, not hanging from your burning shoulders.

Cheap alternative: any old rucksack and a tough bin bag.

2. Four-piece paddle

pad-abmr

Get a paddle that breaks down into four pieces for easy transportation. A paddle like this may not be as stiff as a good two-piece, but the Aqua Bound Manta Ray left or the Anfibio Wave (right) will still be under a kilo and anyway, you’re in a slow packraft not a razor-thin surf ski. Some four-parters don’t like being left assembled when wet; don’t leave it out of the water more than a day or it may be very hard to separate.

feather

Even cheap alloy-and-plastic ‘shovels’ come with adjustable feathering; an ability to offset the blades. Flat (zero offset) works OK, but most find a bit of offset makes paddling more efficient. I’ve got used to 45° Right (ledt blade rotated 45° forward) over the years. Whitewaterists prefer 30°. Left handers will go the other way. The Anfibio Wave had infinite feathering and 10cm length adjustment.

Cheap alternative: A TPC 2-piece or similar.

3. PFD (‘personal flotation device’)

bbuey
499_1

A proper foam pfd is bulky in transit but is essential for remote solo paddles or whitewater (as is a helmet and a whole lot more if you’re really going for it).
For flatwater paddles and calm, warm conditions Anfibio’s lightweight inflatable Buoy Boy (left) has twin inflation chambers, rolls down to less than a litre in volume and comes with handy net pockets and a useful crotch strap to stop it riding up when you’re flailing around in the water. Aat any other time, you’ll barely know you’re wearing it. Note It does not claim to be a CE-rated buoyancy aid.

Cheap alternative: A used foam PFD.

tevafloater

4. Wet shoes
I’m on my second pair of Teva Omniums (left) which are do-it-all wet shoes that are OK for unloaded walking. If trekking the wilderness for days with a full pack over rough terrain, you’re better off with proper lace up trail shoes or boots, but bear in mind that anything with a breathable membrane takes ages to dry once soaked inside out. I use membrane-free desert boots. SealSkin socks are another solution, while they last. More here.

Cheap alternative: Old trainers or Crocs.

5. Day bag or case

P1290855
peli11

You want something light to carry your valuables when away from the boat in populated areas. Choose a bag or case which fits under your knees without getting in the way. Whatever it is, it will sit in water, get splashed or even submerged, so it needs an airtight seal. If it has handy external storage pouches or pockets, so much the better.

Recently in France I tried an Underwater Kinetics box (22cm x 16 x 8; 540g, above left) used on ebay for under a tenner. It’s about the size of a Peli 1150 but a bit less deep and took my Kindle Fire, camera, wallet and bits. It’s light enough to carry away from the boat and also happens to make a handy camera stand. 
But most of the time I use a 20-L Ortlieb Travel Zip (left) which zips open easily and stores loads. As for a camera? This is what you want.

Cheap alternative: large, clip-seal lunchbox and a plastic bag.

6. Repair kit

A couple of feet of Tyvec or similar tape and a small tube of Aquaseal is probably all you need for quick repairs. Something I’ve never had to do in all my years of packrafting.

Cheap alternative: Pieces of vinyl tape stuck to you spare repair patches.