Category Archives: Gluing & Repairs

Skinning the Sevylor slackraft

See also:
Slackraft river trials
Slackraft sea trials

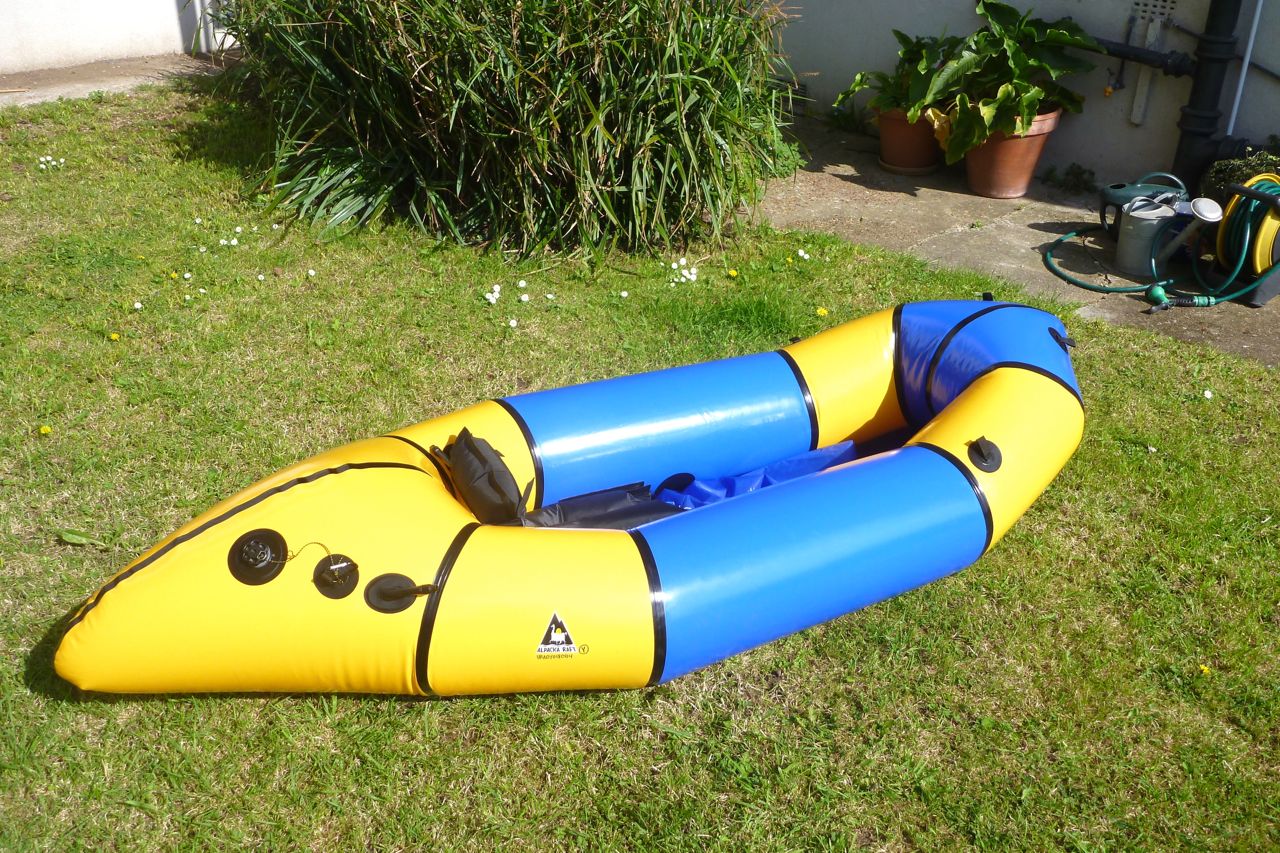
As promised, I’ve invested in a Sevylor Caravelle PVC dinghy. Cost: £34 delivered complete with pump, oars, repair kit, manual in ten languages and a box which is bound to come in useful one day. The heavy-duty Super Caravelle model, as modified by Narwhal, is out of stock in the UK until next summer, although an Intex Sea Hawk is the same thing and can be ‘skinned’ of its outer hull (as in the graphic, right) in the same way to make a lighter, narrower and nippier ‘PVC packraft’ – see bottom of the page. That’s the purpose of what is being done here, in case you’re wondering.

Pre-skinned and rolled up, the Sevy was about the size and weight of a proper Alpacka packraft, but awaft with that dizzying scent of PVC which takes you back to Mallorca in the late 1960s. Fully inflated, it’s too wide to take seriously, but it stayed like that long enough to enable the outer chamber to be surgically removed with a bread knife. Unfortunately, it’s on this outer chamber that the half-decent ‘high volume’ Boston valve is fitted – all the rest (2 floor chambers and the inner hull) get poxy, beach ball-style push-in valves which, in the latter case, take a while to inflate due to the pencil-thin aperture. Perhaps the Boston can be grafted onto the inner hull; what’s the worst that can happen? I’ll find out soon enough as it also took so long to deflate the remaining hull by squishing the push-in valve I decided to cut it out there and then and slap on the Boston valve from the trashed outer hull over the hole (above left). This was the first time I used MEK solvent to clean PVC. This stuff is pretty damn potent and ‘cleans’ the PVC a bit like paint stripper removes paint! Tellingly, it’s also known as polystyrene cement and has uses for welding too, so use it sparingly on PVC pool toys or they’ll dissolve before your eyes.

The squidgey little foot pump (right) is very light, but slow, especially when trying to get enough pressure into the main chamber for the slide-marker to move down and line up with the ‘A’ on the SevyScale™ (below left). This is a pressure guide so you don’t burst your new pool toy – easily done with thin, stretchy PVC and sharp words. But by chance the Sevy valve plug fits neatly onto the end of my K-Pump which is much quicker at inflating. The Alpacka air bag sort of screws into the Boston valve too, but you need a K-Pump to get max pressure.


Testing the newly glued on Boston valve, the boat was losing air, but it didn’t look like the glued-on valve was at fault. As it happens the bath was full so a check revealed a tiny, half mil hole near one of the seams underneath. I’m fairly sure I didn’t jab the boat with the knife while skinning it, so it must have come like that or my carpet is sharper than I think. Lesson: test all chambers in your cheap pool toy before running a coach and horses through the warranty by attacking it with a knife – that’s if you can be bothered to send it back instead of dab some glue on the hole, should it also be faulty.
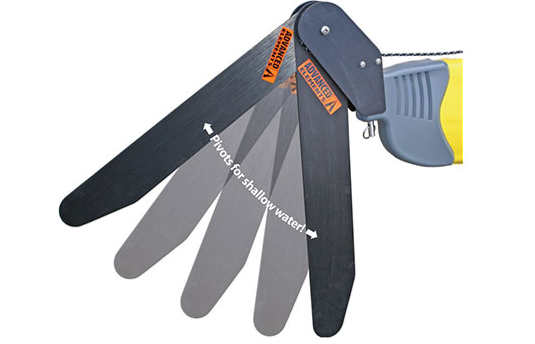
The oars are mere fly swatters as previously noted. It’s possible they could be joined together into a packrafting paddle, but why bother; there are decent Werners and Aqua Bounds under the bed so the oars can join the scrapped outer hull at the local dump.

It has to be said, once skinned it’s 36″ (91cm) wide, 60″(152cm) long, and no more than 12″ high at the bow, so there doesn’t look to be a heap of buoyancy left over for the likes of bloated boaters like me, but the floor also holds air unlike an Alpacka so a spell on a river will reveal all. As mentioned, if it’s enough to stop me sinking, I may invest in gluing a spare sheet of tough nylon onto the base. It may add weight but will make the Caravette unstoppable; that’s unless a sharp-clawed bird lands on the deck or it gets splashed with MEK.

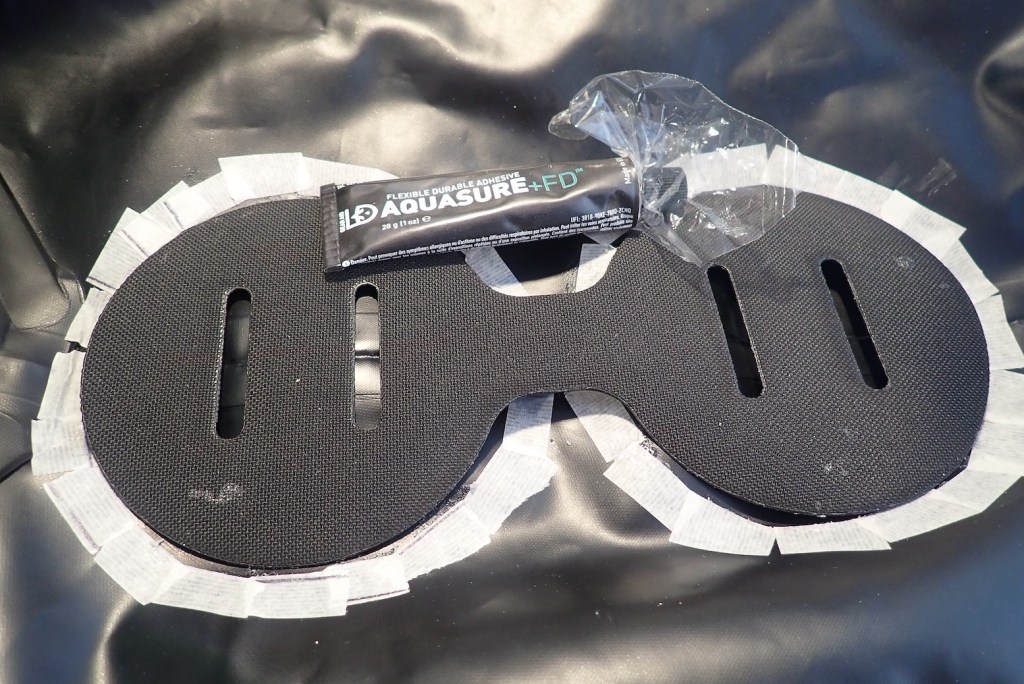
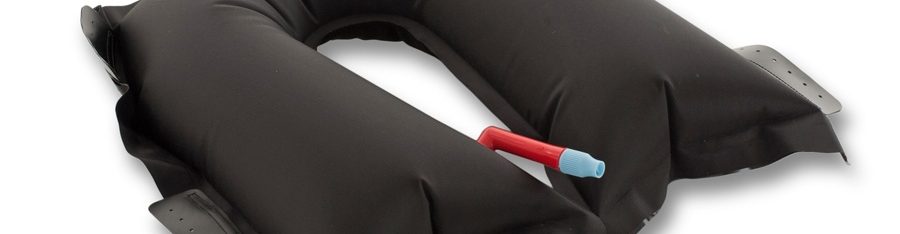
With half a dozen attachment points cannibalised from the outer hull and glued onto the stripped-down packboat with some Bostik 1782 (right), it now weighs 1550 grams; about half the weight of my current Alpacka Yak and about half the volume once rolled up. So compact, it could even make a flat-water towing platform for the Yak – for carrying a bike for example, as I’m not sure it would so easily fit on the bow, especially with camping gear.

River trials will follow shortly, or I may well head straight out to Rannoch Moor for an overnighter with Intex chum Jon who lives up there – see the vid above from last summer. He has also been inspired to skin his SeaHawk 1 bloat into a purposeful packslab. Might be good to take the Yak as a spare up there; if Loch Laidon freezes up round the edges the ice spikes might be too much for our pool toys.

Slackraft river trials
Slackraft sea trials

Sunny kayak ~ lashing points and trolley tech

Sunny main page

Lashing points and loading
One of the limitations of all old Sunnys is a lack of lashing points – something that an Aire Super Lynx or FC Java have plenty of. Early on, I tried to glue a few on with what I thought were the right materials and technique, but half have since peeled off. Now I’ve discovered Aquaseal or two-part glue I manage better.

Another IK limitation is that nearly half the actual width of the boat is taken up with air chambers, reducing the interior packing volume (if not necessarily payload) to less than a foot wide, especially with single side chamber boats like a Sunny (as opposed to twin-chamber bloats like Grabner H2s or Gumo Seakers). I have to say though, on the trips I’ve done – nearly a week along a tropical coast (above) with one resupply – the volume was adequate. It might not be the same story in a colder climate or when you need to carry more freshwater. The limits with the Sunny are weight as much as space; the freeboard is reduced and it swamps easily, which at sea can be a hassle if sharks are circling.

As is well known, the position of loads has an effect on what they call ‘trim’ – the level or balance of the boat. This also effects tracking (more critical without a skeg). In some pics you can see how my 95-kg weight sinks the boat in the middle. To counteract this I generally try to pack the heavy weights out at each end. Too heavy at the front is not so good for waves and rapids, but the Sunny swamps fast in these conditions anyway; it’s only on flat water that baggage positioning is noticeable.

I kept the cargo nets off my FC Java (left and above) and used those on the Spey river one time, a quick way of getting to your stuff which of course is one thing that IKs and SoTs do so much better than SinKs.

Trolley tech
The Gumotex backpack/drybag is a pretty basic sack with thin shoulder straps prone to tearing, and no hip belt. You wouldn’t want to carry the 16-kilo Sunny and say, 10kg of camping gear and paddling gear more than a couple of clicks.

A £10/1kg folding trolley is a handy way of transporting an IK around rail stations or airports. It folds up neatly and fits on the bow (right). In fact, with a bit of adaptation, I wonder if it could make an upside down set of wheels for portaging? It’s nice and light but the wheels on this black trolley are too close together, or the load platform is too high so the load tips easily on rough pavements. And you get what you pay for: the tubing and construction are pretty flimsy. Protracted gumboat trolleying over rough surfaces and tracks will eventually mangle such a lightweight trolley (my second) so it needs to be treated carefully.

On the Haute Allier river in France  I used a heavier-duty and wider trolley (4.2kg) that fitted well under the seat (left, with the old original Sunny seat). Where weight is not a limitation (on trains and buses), I’d use this one again, but with any trolley a wide wheel track is the way to go. It all depends how far you’re trolleying of course, and if it’s over rough ground.

Sometimes I wonder about an integrated backpack frame with wheels, or a wheeled bag with more handles. Part of the reason the OE gumbag is tearing is that when you trolley up to some stairs you can only yank it by the top clips or the backpack straps. It’s something to think about when your current gumbag rips to the point of no longer being a functional drybag. Even in good shape it’s not a serious dry bag, but what roll top is? There’s more on dry bags here.

Sunny Mk1 kayak ~ adapting seat and footrest

Sunny main page
More on packboat seats

The Aire Cheetah seat (left) turned out to be no worse than the inflatable original, but was a bit lighter – even though it weighs just over 2kg. I’ve also set it up so I clip the seat to the boat’s seat mounts (which originally used a knotted bit of rope) so I can take it out at camps or to dry/clean the boat. Plus, along with the box for a footrest (below), it’s one less thing to pump up.

Firm backresting was a problem with the OE seat; or to be precise, fitting points to hold the back of the seat upright as you push back with your feet. Because the support strap is attached from the seat top to the front seat base, as you lean bank it just pivots rather than supports. The 410C is much better in this respect. To cut a long story short, I imitated them by gluing mounts to the hull’s side tubes to attach to the seat top. This way the pulling force is in a better line and the seat doesn’t pull down. Some say though that the old-style seat have better back support than the plain Mk2/3 style Sunny seats.
Since fitting on the side tube mounts (the real answer to this problem) I don’t think about the seat now which must mean it works. The Aire seat is still a bit heavy though.

Footrest
The OE inflatable footrest pillow was non-adjustable (on the 410C it is) and always too far away to be effective, even for me at 6′ 1″, so I replaced it with a 5010 Otter box (left), which of course has uses to store stuff on the water.

However I then noticed the strain of me pushing back off the box was tearing the lower seat mount tabs glued to the hull (where the rope used to be). The box is now attached directly to the seat with adjustable slings. This way I now push inside a ‘closed loop’ made up of the seat and box, so only straining the sling and clip joins which make up the loop – and not the boat mounts. Of course this does mean there’s some energy-absorbing slack between me and the boat, but it’s a gumboat not a K1 racer alas, so will have to do.

Although I find I’m happy to paddle with my legs lying flat, when you want to go for it a firm foot brace and a bent knee are much better, but require a fairly solid seat to push against. The long box-to-seat strap loop seems to work OK and I discovered a side benefit; the straps can be pulled over my knees to make thigh braces (right); another possibly handy feature when the going gets rough. It’s not like bracing directly off the hull or anywhere near as good as with a SinK’s ‘underdeck’; it’s more to achieve good paddle thrust using the core not the arms which they keep telling you to do. And anyway, even in the roughest rapids I’ve done, the Sunny feels stable enough without thigh braces and if anything I prefer having my legs free to stick out to steady myself (or fall out neatly). The Sunny usually swamps long before things get hairy enough to tip it over.

As mentioned above, sometimes I feel with the Cheetah seat that my butt ought to be a bit higher. It’s also pretty heavy at 2 kilos (4.5 lbs). Now I’ve inherited a spare new-style  Alpacka packraft seat (left), I may try and adapt it to fit the Sunny. The Alpacka seat is not half as robust as the OE Gumo Nitrilon seat so it needs to be supported in a way that won’t wreck it. I haven’t worked out how to do that is yet; maybe a stick across the hull like a Grabner, but that requires gluing. This seat will be higher than the Aire which is an important feature with kayaks: butt higher than heels is much more sustainable, comfortable and efficient for paddling, so you want to set a seat as high as you feel safe, bearing in mind CoG and stability as discussed here.
The Alpacka seat also weighs just 220 grams (half a pound), saving nearly 1.5 kilos, or nearly 10% of a Sunny, and a bit of bulk… (but I got rid of the Sunny before I had a chance to work this one out).

Inflatable kayaks and packrafts: do you need a skeg (Tracking Fin)?

Updated Summer 2025

See also:
About rudders
About decks

Skeg-wheel trolley!

Short answer: IKs: yes. Packrafts: helps away from white water

Generic, over-tall skeg. Snap-prone but trimable.

A skeg is like a fixed ‘rudder’ under the back of the boat which makes it easier to go straight (track). Only the very cheapest single-skin vinyl IKs don’t have skegs (Grabner, one of the most expensive IKs, is an exception; though it’s an optional add on). If you’re IK doesn’t come with one, it’s easy to glue one on (see below).

grabgumskeg

Some flat-floored IKS have up to three (imo, a gimmick), and many skegs on Chinese-made IKs are unnecessarily tall (too deep) which makes them snap-prone. Just about all skegs can be easily removed by hand, because in shallow rivers you might want to do so to avoid grounding. You can as easily buy a spare and trim it with a hacksaw.

Original over-sized Gumotex alloy skeg on the left. Later smaller; now tough plastic.

Years ago Gumotex introduced a slip-on, black plastic tracking fin (skeg, above) which was near identical in shape to one I’d had made to replace the old-style oversized alloy skeg (left). A smaller skeg made better clearance and still tracked fine. But metal bends; tough plastic is much better and that’s what all their boats come with now.
I’ve fitted these plastic skegs to older Gumotex IKs and other IKs. The kit is about £25 + glue, and the plastic skeg is pretty much unbreakable. Just make sure you glue the mounting patch on really well; it helps if your boat is made from a matching rubber fabric as the supplied Nitrilon patch or make your own patch from same fabric. But I have glued PVC to rubber successfully – use good two-part glue. The pictures below help you see where to position a skeg.

I fitted the Gumotex plastic skeg to my Grabner Amigo IK (above) and at sea used it all the time. But on the shallow River Spey (below) this boat didn’t handle at all well without a skeg, possibly because the tailwind pushed the kicked-up stern around. It was really quite annoying because a few years earlier my broadly similar Sunny managed the Spey just fine without a skeg, so skeg-free tracking clearly varies from boat to boat.

spey1304

Paddling without a skeg
If you’re an experienced paddler you’ll have acquired the knack of going straight without a skeg – handy for paddling shallow rivers where the skeg would ground. A little more paddling finesse and constant small corrections are required, especially if powering on.
It’s good to learn this technique before you need to: fix your eyes on a tree or marker on a distant bank and paddle as gently as you like towards it, not looking away and keeping the nose of the boat in line with the marker. By using very light strokes you’ll see it can be done if it’s not too windy when again, a skeg helps with tracking (going straight).

cezesolar
Gumo Solar with no skeg

I even found I could paddle a ten-foot Solar 300 (above) without a skeg. Once you know you can go straight without a skeg, it’s just a matter of adopting the same finesse but with a bit more power. Only when you attempt the speeds of a Viking longship will bow deflection or yawing get too much because to paddle faster and still go straight you need a skeg. Out at sea or on busier rivers, I always use a skeg.

I’ve often thought a hinged retractable skeg would be a good idea: it would pivot backwards when dragging in shallows, then drop back down when there’s enough depth. It seems SUPs need skegs and in the US, FrogFish have made such a thing for boards, but you hear the spring can be a weak point.
If your kayak has a rudder mount (or you can make one), another way of doing it is fitting a swing-down skeg similar to kayak rudders. It works the same way as a rudder with a looped cord swinging the skeg up over the stern, or down into the water. The pivot skeg shown top right is made by Advanced Elements for their AirFusion IK and costs about $/£80. Or have a look here.

Packrafts

On shorter, wider, slower solo packrafts the consensus used to be that skegs made little difference. Especially when unloaded and with a full-weight paddler, the bow yaws merrily left to right as your paddling pivots the boat from the back. Or so I used to think until I tried the skeg on my Rebel 2K. Up to then I’d been ambivalent about them – using the same boat fully loaded a few weeks earlier on a fast flowing river, yawing had not been an issue. But unloaded (and with my generous 95kg of ballast) yawing was notably reduced with a skeg. Speed however, was the same or was too small to measure.

Longer stern puts you more in the middle of the boat, like a kayak

One reason some packrafts may manage without a skeg is that way back in 2011 Alpacka invented the ingenious extended stern (right). It helped limit yawing much like a skeg, and effectively positioned the paddler more centrally, like a kayak, while also adding trim.
This idea has been widely copied by just about everyone since and it definitely works, compared to the original dumpy Alpackas. But as mentioned, once there’s a good load over the bow, yawing is reduced in any packraft. Anfibio sell a detachable shallow skeg and glue-on patch for €21. My Rebel 2K came with a skeg and I must admit I use it most of the time now. But it does not have a fully extended stern like the Alpacka above right. Then again, my longer Nomad tracked great without the skeg.

Frontal skeg?
Now I have a longer 2.8-m Anfibio Sigma TXL and I was curious to see if adding a frontal skeg would make a difference. Seated centrally or two-up, this boat does not yaw from the boat like an unloaded solo packraft, but it does wander a bit (track poorly), especially with the inflated floor pad). I decided a front skeg did not help much, though it might improve sailing.