
See also
Rudder rationale discussed
Gumotex’s 2016 factory version
Making the Mk1 prototype rudder
Testing the Mk1
Mk2 rudder tested (gets to the point)
Mk3 rudder tested
Rather like sails where I Made My Own, lost interest, then returned with a proper WindPaddle, after five years I’ve come back to the idea of fitting a rudder to Seawave 2. Mostly, this was inspired by a much simpler pivoting footrest tube idea from fellow Seawaver Jules, replacing cumbersome and bulky foot pedals. A rudder ought to make the Seawave more useable in a slightly greater range of conditions, including sailing which I tried again recently.


I could have bought the Gumotex rudder kit for just £219, but as always it’s more fun to piss about for hours and days on the pretext of saving money and conjuring up small improvements. IKs sit higher than hardshell kayaks, so I coughed up 25 quid for the longest rudder mechanism I could find on ebay: 510mm. It weighs 550g.
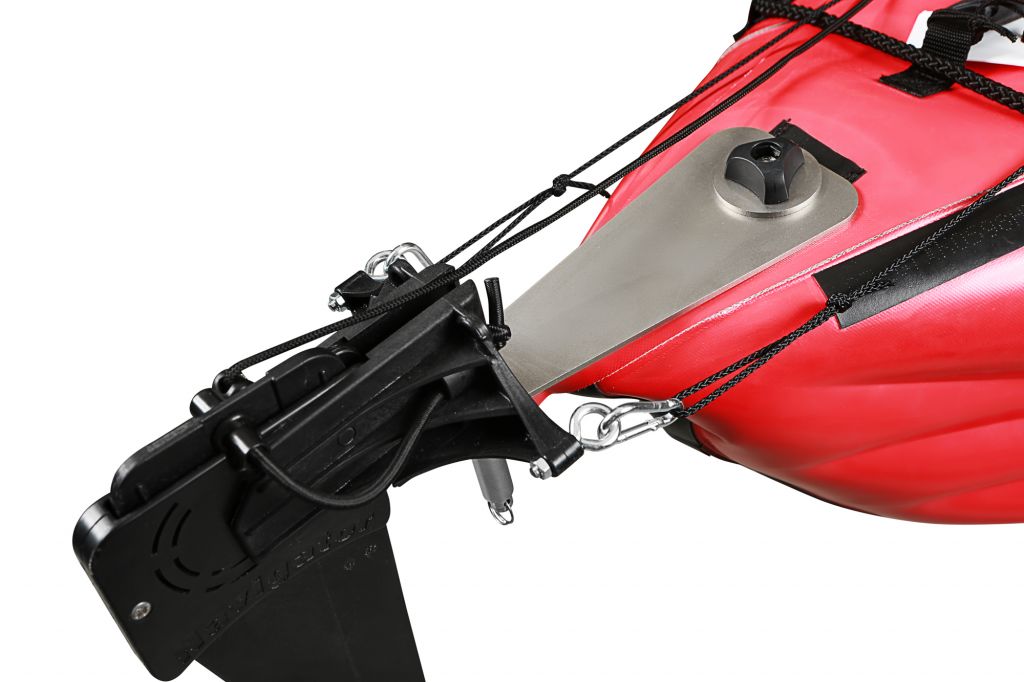
The stern-mounted rudder plate started as a slab of was a chopping board, then became an aluminium plate additionally located with velcro pads, as Jules and Gumotex use. I found secure clamping of the rudder mounting plate to be important to stop it turning on its axis. There is perhaps more torque on the mount than might be expected when a rudder blade tries to turn a 4.5-m boat. As you’ll see I ended up making a Mk 3.1 rudder mount in a mixture of soft and hard chopping board, as well as a Mk 3.2 in aluminium. There’s a 20g weight difference.
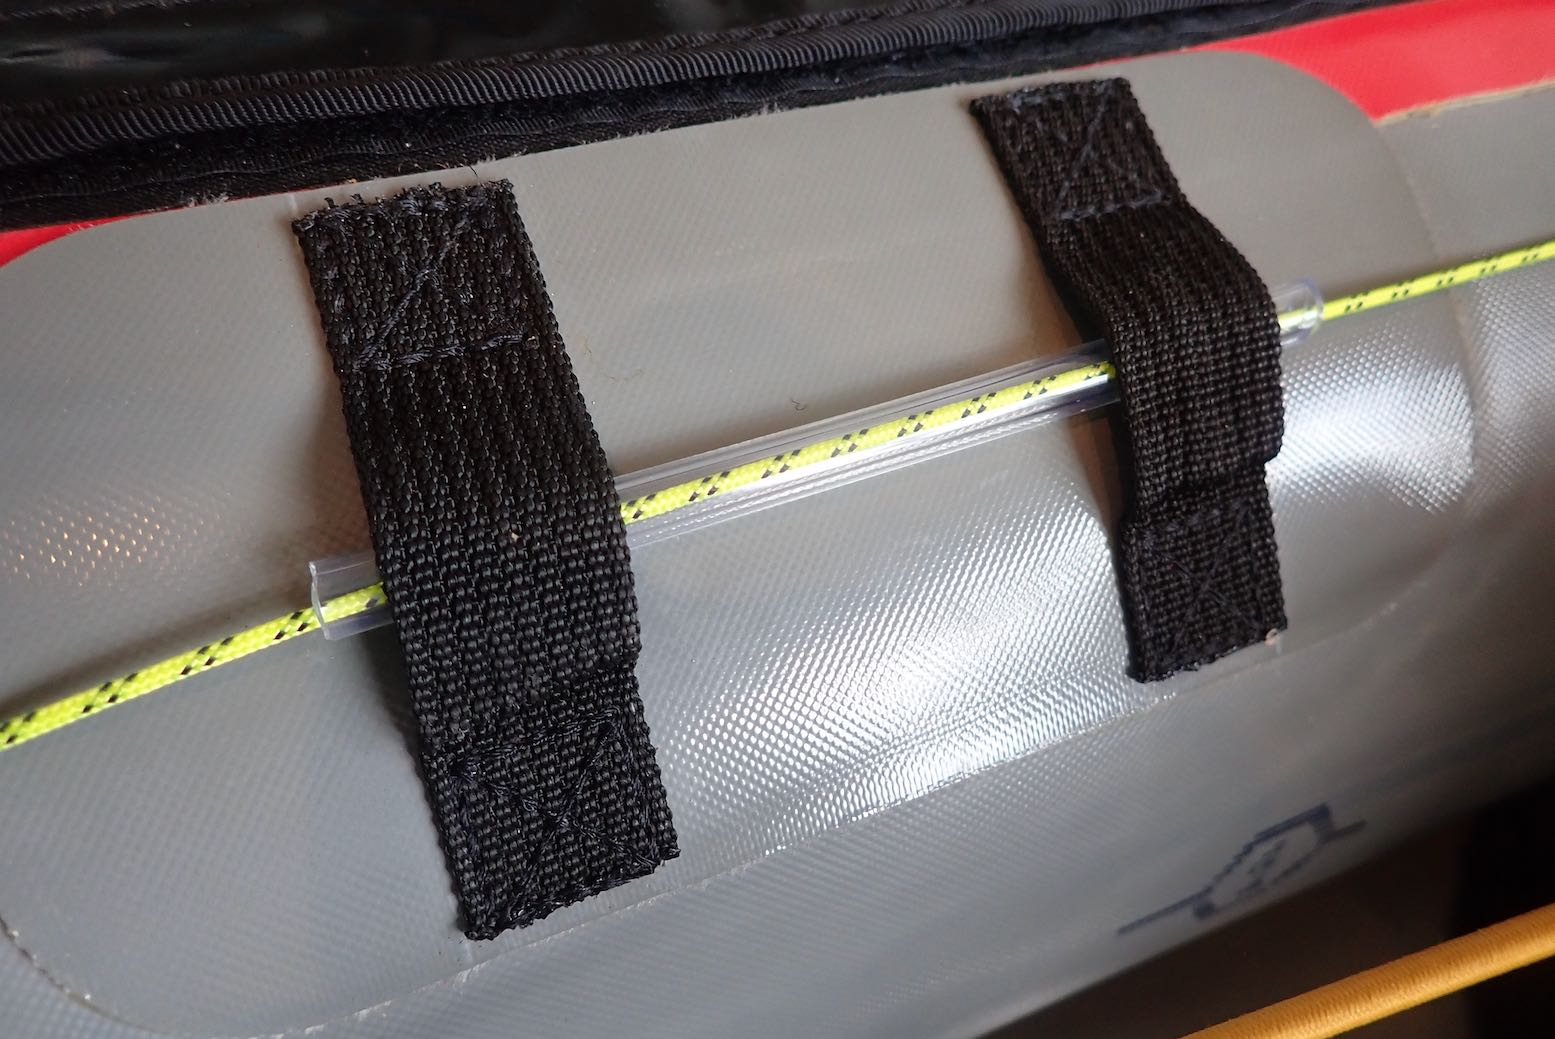
Another bright idea idea Jules had was running the rudder lines out of the way under the deck velcro flap and inside thin tubing. That largely eliminates any exposed lines. I also liked his idea of controlling the rudder by pivoting a drainpipe footrest tube from the centre, eliminating the need for cumbersome foot pedals. Overall the whole mechanism: rudder, mount and clamp (220g), cords and tube (50g), adds up to less than a kilo and under £50 (some bits I had already). Eliminating foot pedals was the main saving in weight and bulk.
Mk3 Rudder for Seawave 2
Items needed:
- Ebay rudder assembly from £20
- Piece of HDPE chopping board, 3mm x 400mm x 60mm, aluminium bar, or similar
- Stick-on velcro
- Hand clamping knob and nut
- 6 metres of PVC (or PTFE) pipe with 5mm internal diameter
- 11 metres of 2mm Dyneema cord
- 4-inch ø x 30cm plastic drainpipe footrest (if not used already)
- 2 metres of 25mm strap
- A few mini snaplinks, fish snaps or similar
You may also like:
- Knob for rudder lift, cinch locks and clamcleats
Footrest
I already use a drainpipe as a fixed footrest. At 25cm wide, another 5cm would still fit between the Seawave’s sidetubes and may give a bit more finesse and leverage to rudder steering. If this proves the case with mine, it’s an easy swap.
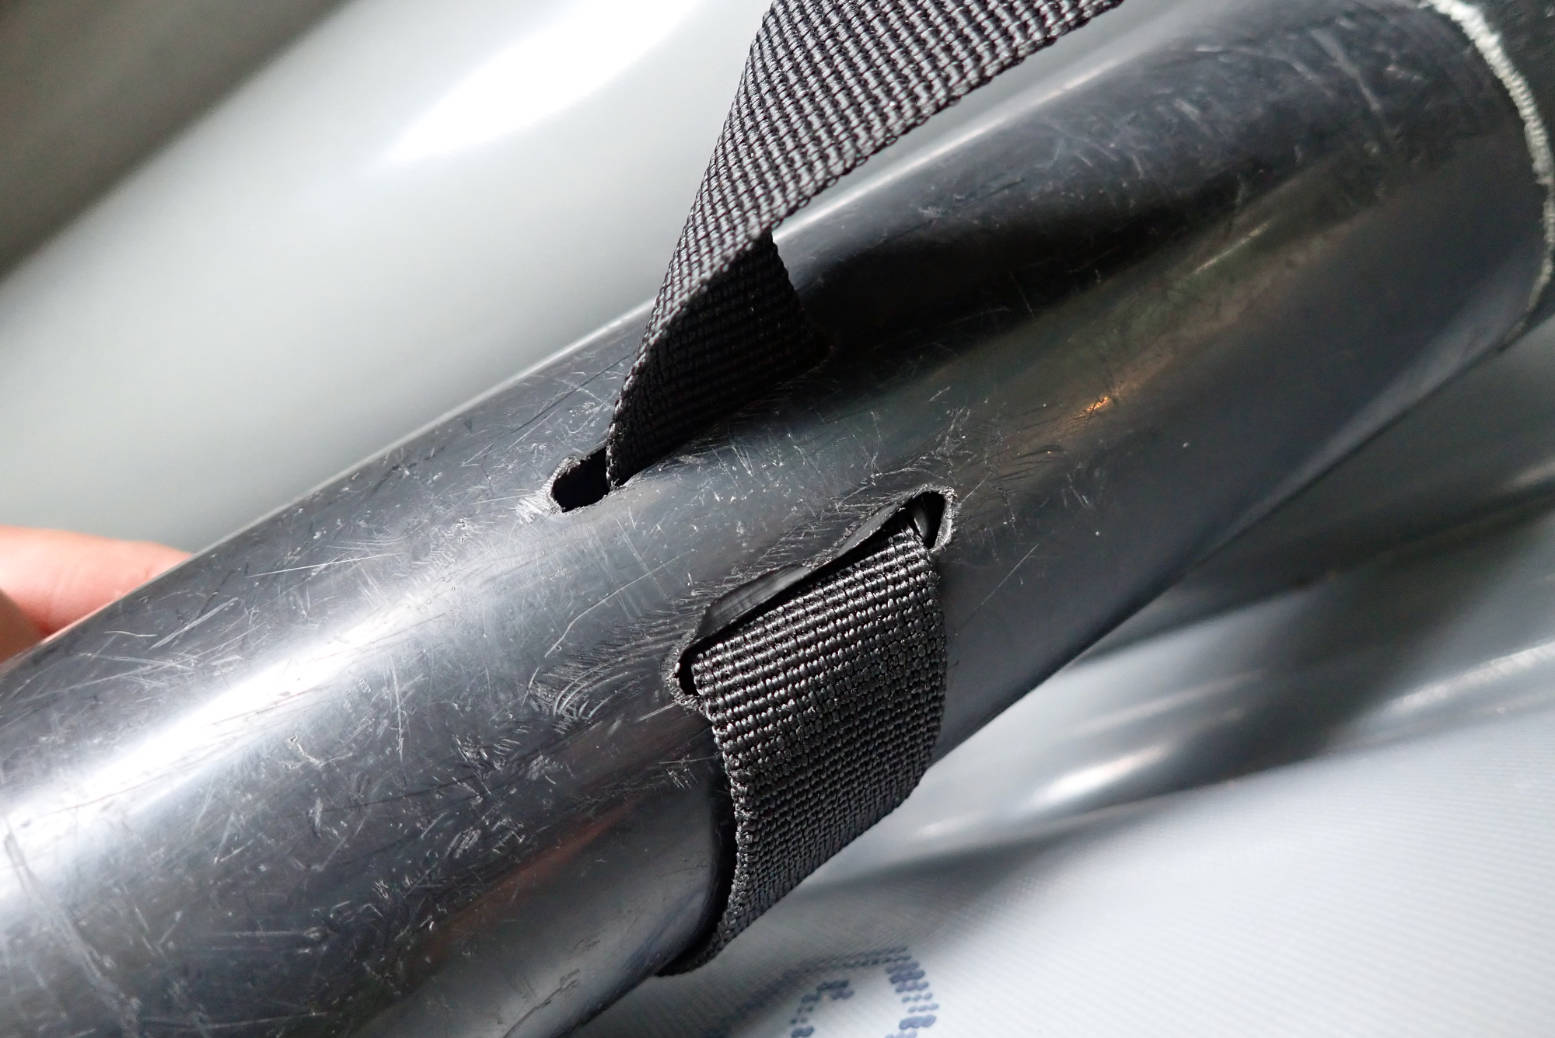
Drill and/or hot-knife in two adjacent slots in the middle and feed the strap through. You must fix the footrest to the strap so there’s no slippage. A big knot inside will do. Thread the strap’s loose ends through the stock footrest attachments buckles on the boat’s floor. You can now easily re-position the footrest tube forward or back for tandem or other sized paddlers. This is handy whether you use a rudder or not.
While fine in the straight line along the hull top, putting a bend in the soft PVC tubing down the insides of the hull caused too much drag on the lines. So to avoid wear on the grey Hypalon, I just chopped the PVC tube back and stuck on some tape. (As you can see I need to add another strip for the tandem position). It’s probable the harder PTFE tubing Jules used causes less stiction, but having the rudder line exposed near the footrest-pivot make adjusting clamcleats and cinch locks easier.


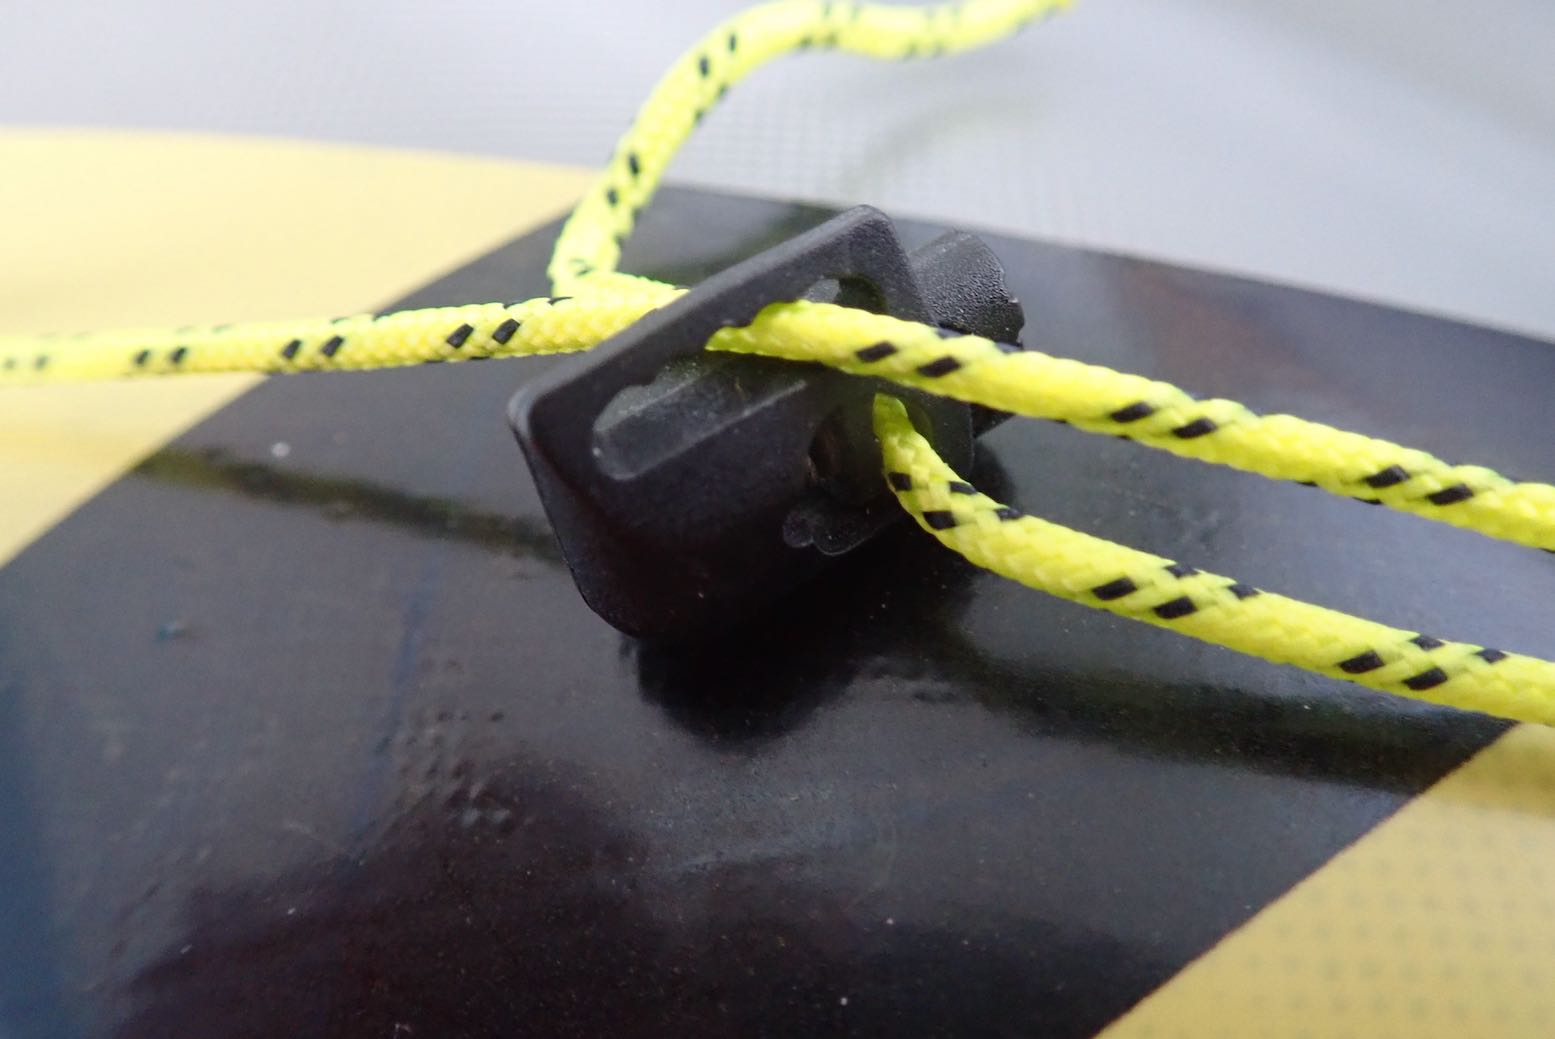
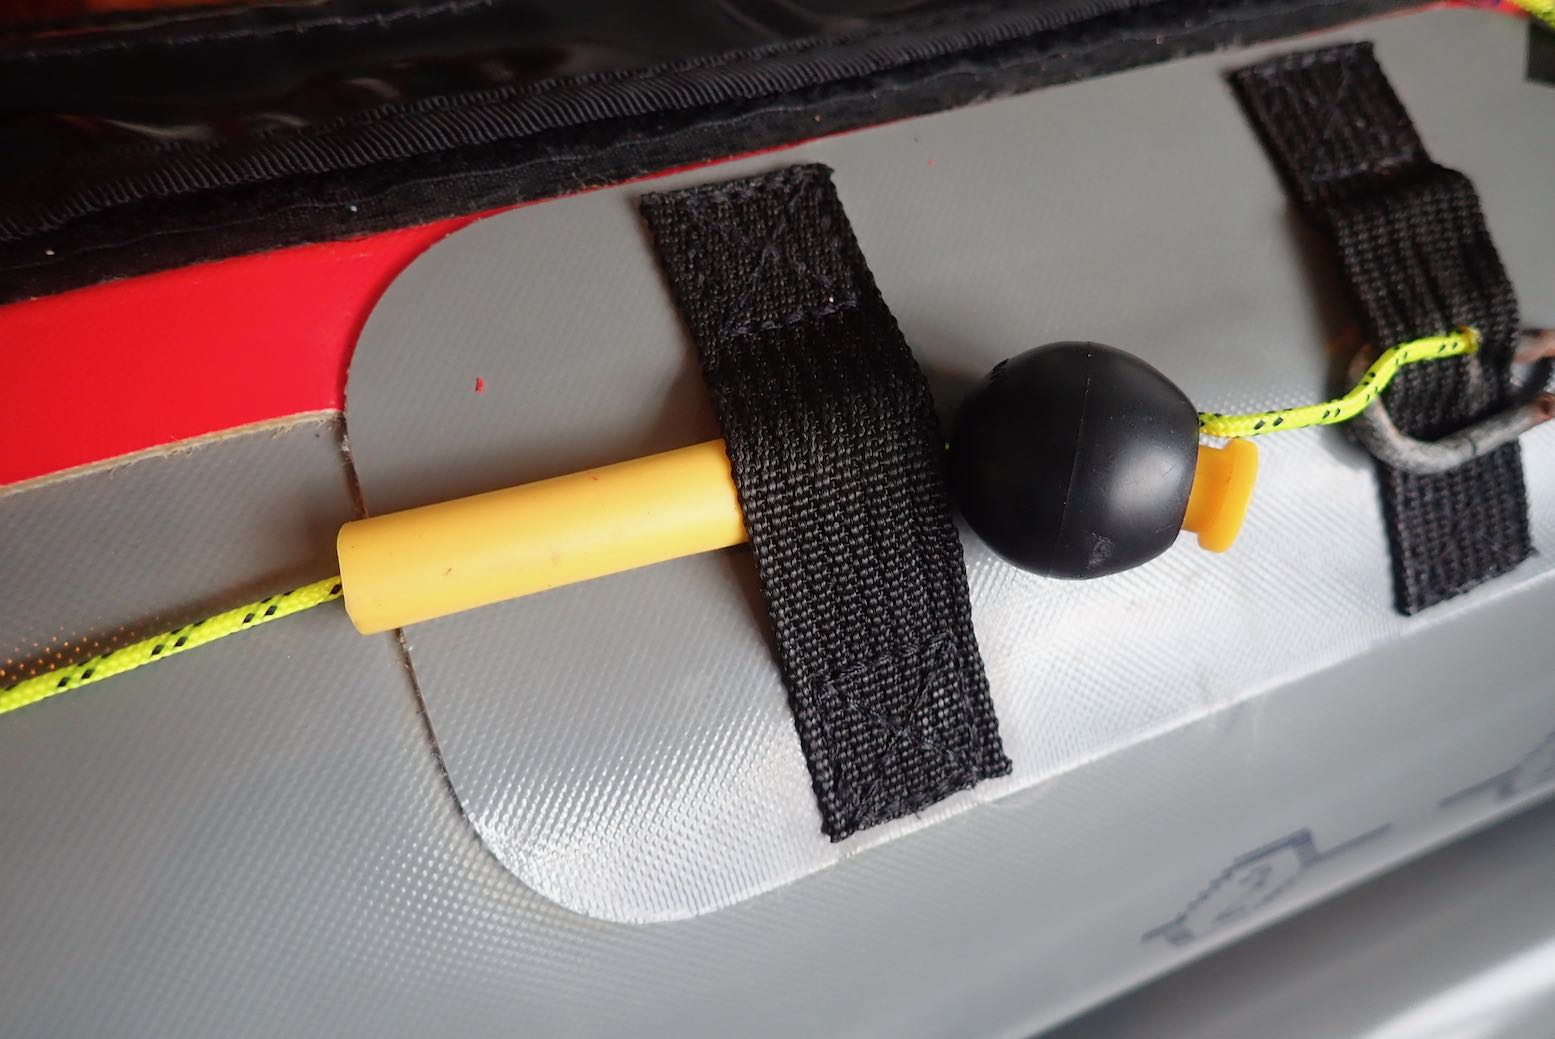
I stumbled on quite a fast and easy way to fine tune or readjust the footrest pedal tension: inline clam cleats (or cam cleats or rope locks) which I came across during my V-Sail experiments years ago. Feed the line through as shown below; centre both rudder and footrest, then cinch up and you should be good to go. Once you’ve established the right line length through the cleat for a certain fixed position, it can help to ‘memory mark‘ the cord (as I did in red). Though I bet once I get on the water and use the rudder a bit, they’ll go off alignment, so probably better to wait till then.


You need enough rudder line slack to slide the whole pedal-footrest forward about a foot when paddling two-up. Loose ends can be tidied away with cinch locks. Eleven metres of Dyneema cord is enough to do this job on a Seawave, including a single rudder lifting line. (To push and drop the rudder too you’ll need another 3m.)

Rudder mount plate
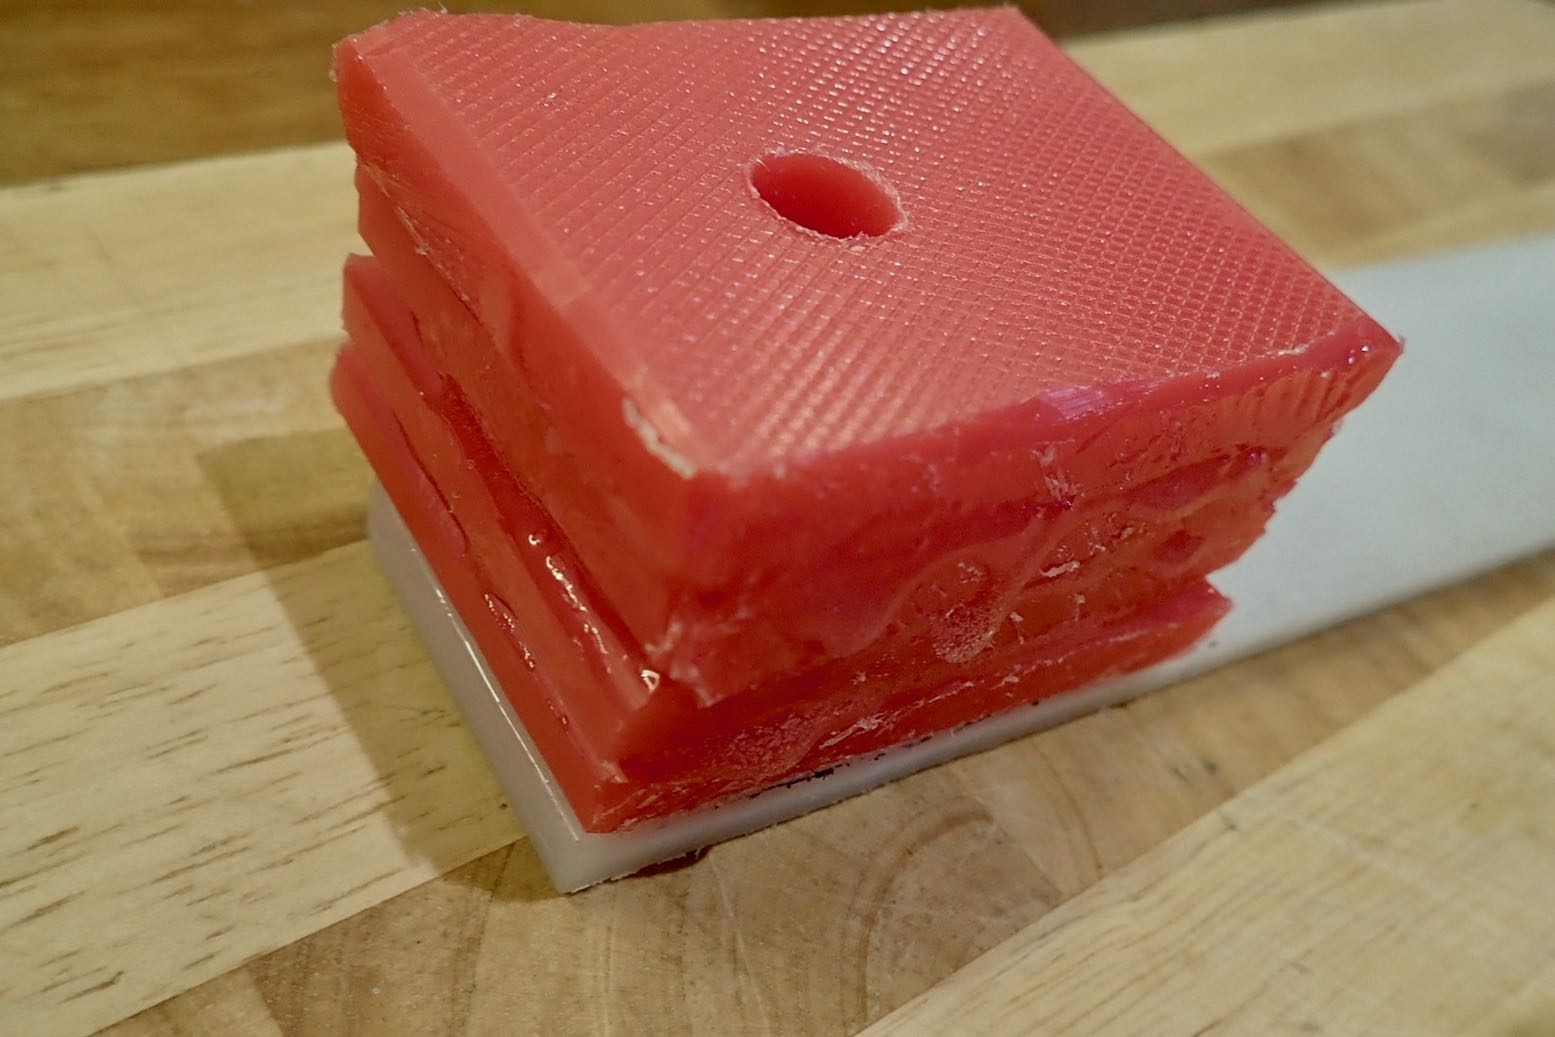
The 10mm red chopping board I bought was actually quite bendy (LDPE, not HDPE?) compared to other bits I realised I had all along. The less play in the rudder system the more responsive it will be; an IK’s stern mounting is mushy enough.
This time round I copied Gumotex’s idea of using small velcro pads to stop the rudder twisting on it’s pivot-clamp axis. Initially lacking stick-on velcro, I glued plain velcro, using the PU glue from the Gumotex repair kit. For one-part glue, it seemed to fix the velcro pretty well but if not, some sticky-back came in the post.

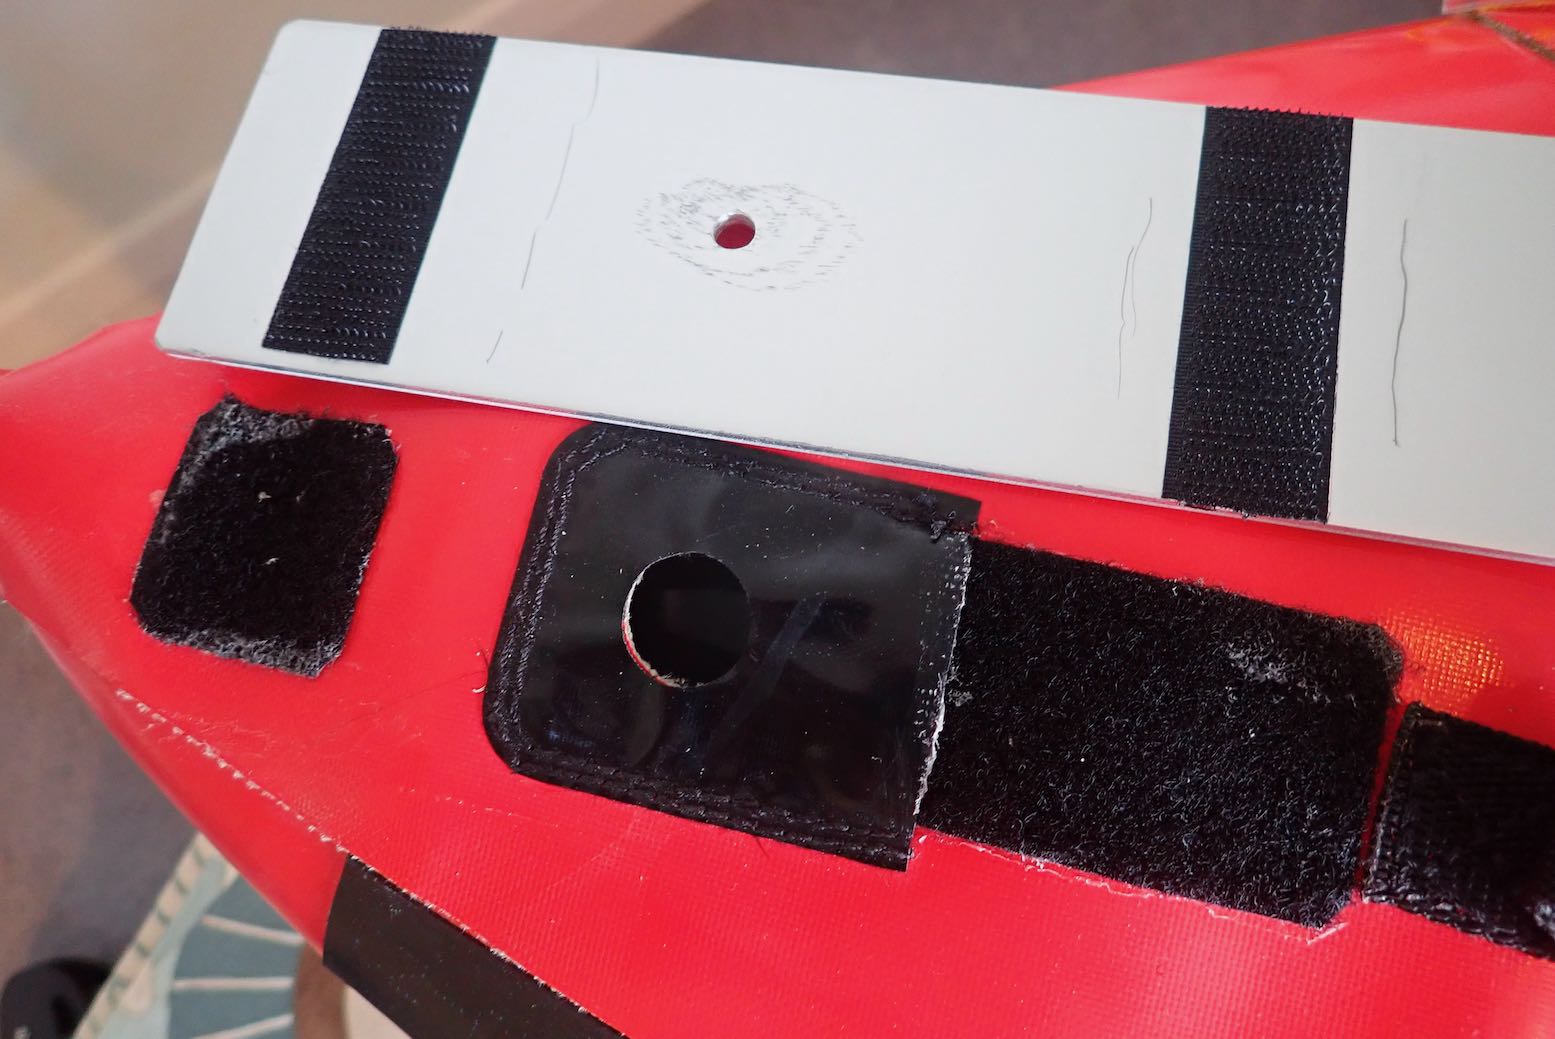
I knew from last time I made a rudder the under-plate shape helps eliminate pivoting of the mount, but you can draw out the truncated triangle by simply tracing the converging top seams at the stern, then make the under-plate from whatever you got. I used a bit of plywood: jam it in snugly, mark the point under the stock drain hole, remove and drill. I glued and taped a nut to the back of the ply and added a bit of string to help pull the under-plate out.


I would have rather made the rudder top mount plate from ally but with little more than a hacksaw and a kitchen stool, lacked the tools to do a neat job. Then, while waiting for parts to arrive, I realised it was possible to buy ‘aluminium bar off cuts’ on ebay (right). Using the word ‘bar’ was the key. This place, or others like it, sell various sizes, including 3mm x 400 x 60mm for 7 quid.

I’m pretty sure most kayak rudders come with a 48-mm pivot pin of 9mm ø. Or was it originally 3/8″s, which is 9.5mm? The pin slips into a 10mm gudgeon swivel sleeve/tube. Some hardshells have this tube moulded in the stern; on an IK it must be built into the rudder mount plate.
Above left, you can see Jules (as well as Gumotex) integrate a gudgeon swivel tube into the end of the mount plate; a tricky thing to do accurately with a just a hand drill, though Jules’ thick plate makes it a bit easier. On my Mark 3.1 white HDPE mount, I glued layers of the old red LDPE into a block of plastic, then drilled a 10mm hole which works OK.
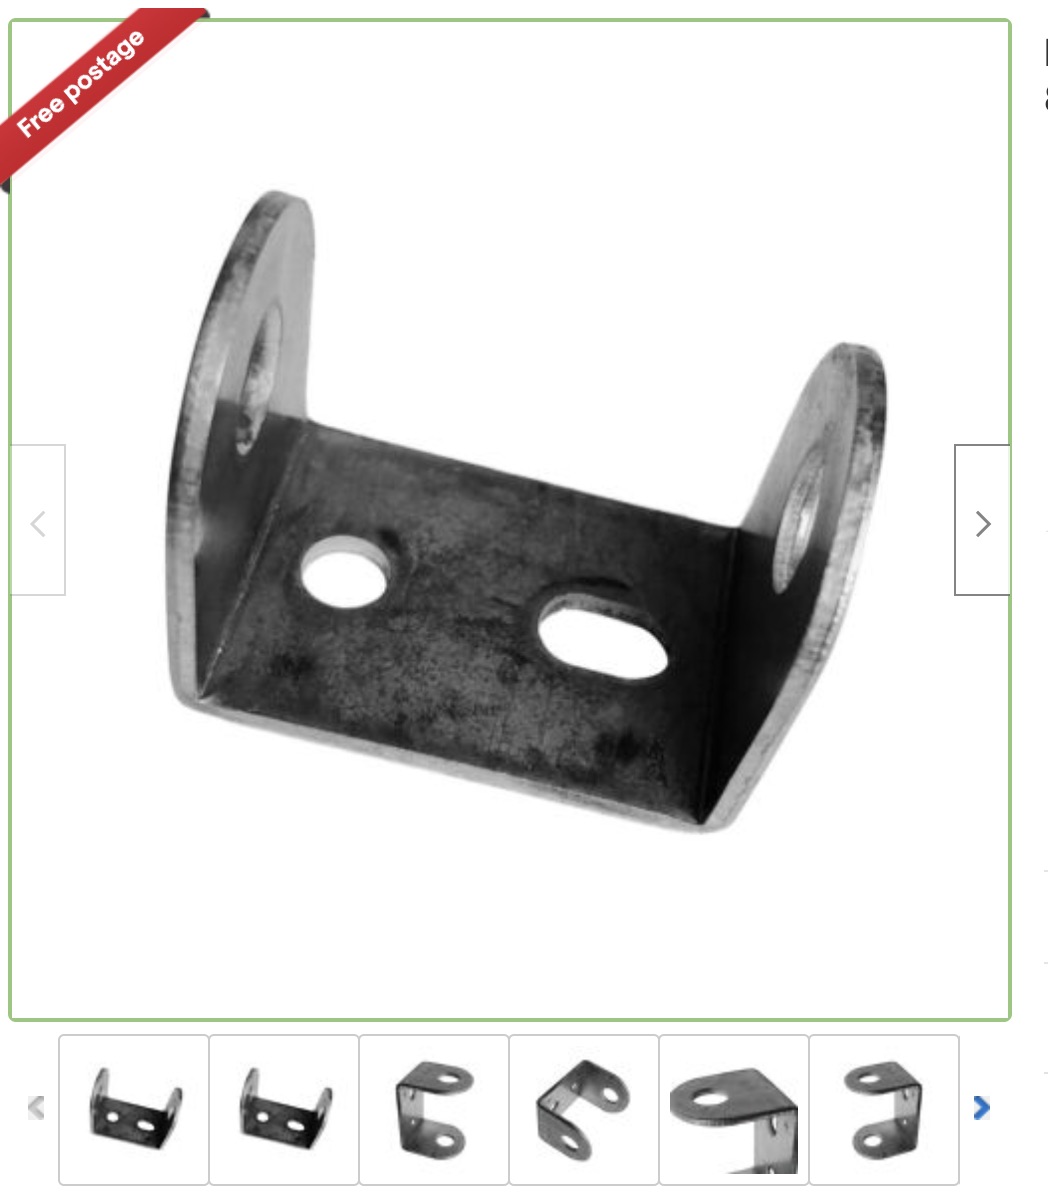


When it comes to an ally rudder mount, online you’ll find stainless steel kayak rudder pivot ‘C’ brackets for a fiver. They weigh 57g and are usually screwed to the vertical stern of a hardshell, replicating the gudgeon tube. Even though they’re only a fiver, it seems impossible to buy these from anywhere else but the Far East, and it would be more than a fiver’s work to fabricate that shape from hard stainless steel.
I bought a pair anyway; they arrived in a fortnight, but hole diameters (not stated in the advert) were 11mm, meaning 2mm of play with my rudder pin which feels too much. Oh China, your poor manufacturing tolerances let me down! So I glued on some 10mm washers to eliminate the slack. I’d have been better off making something after all.
It had occurred to me I could have bent my 400-mm piece of 3mm ally into a full ‘C’, either curved round a pole, or bent on an edge at two right angles, as up above left in cardboard. Tweak the alignment and precisely drill two 10mm holes and the rudder swivel mount and plate are all one piece. In fact, that 3mm alloy plate I bought was pretty stiff, so I settled on a simple L bend (and without a vice, even that wasn’t perfect), then glued and bolted on the Chinese ‘C’ bracket.


Rudder pulley
Rudder blades have a hole in the back so the pulley can lift and lower the rudder near a shore. For the moment I’ve decided to keep things simple and only use a single lift line, not a doubled-up line (another 3m of cord needed; 14m total) to lower the rudder as well. I intend to use the paddle to reach back and flip the rudder into the water. If that is a poor idea, I can easily add a two-way rudder line.
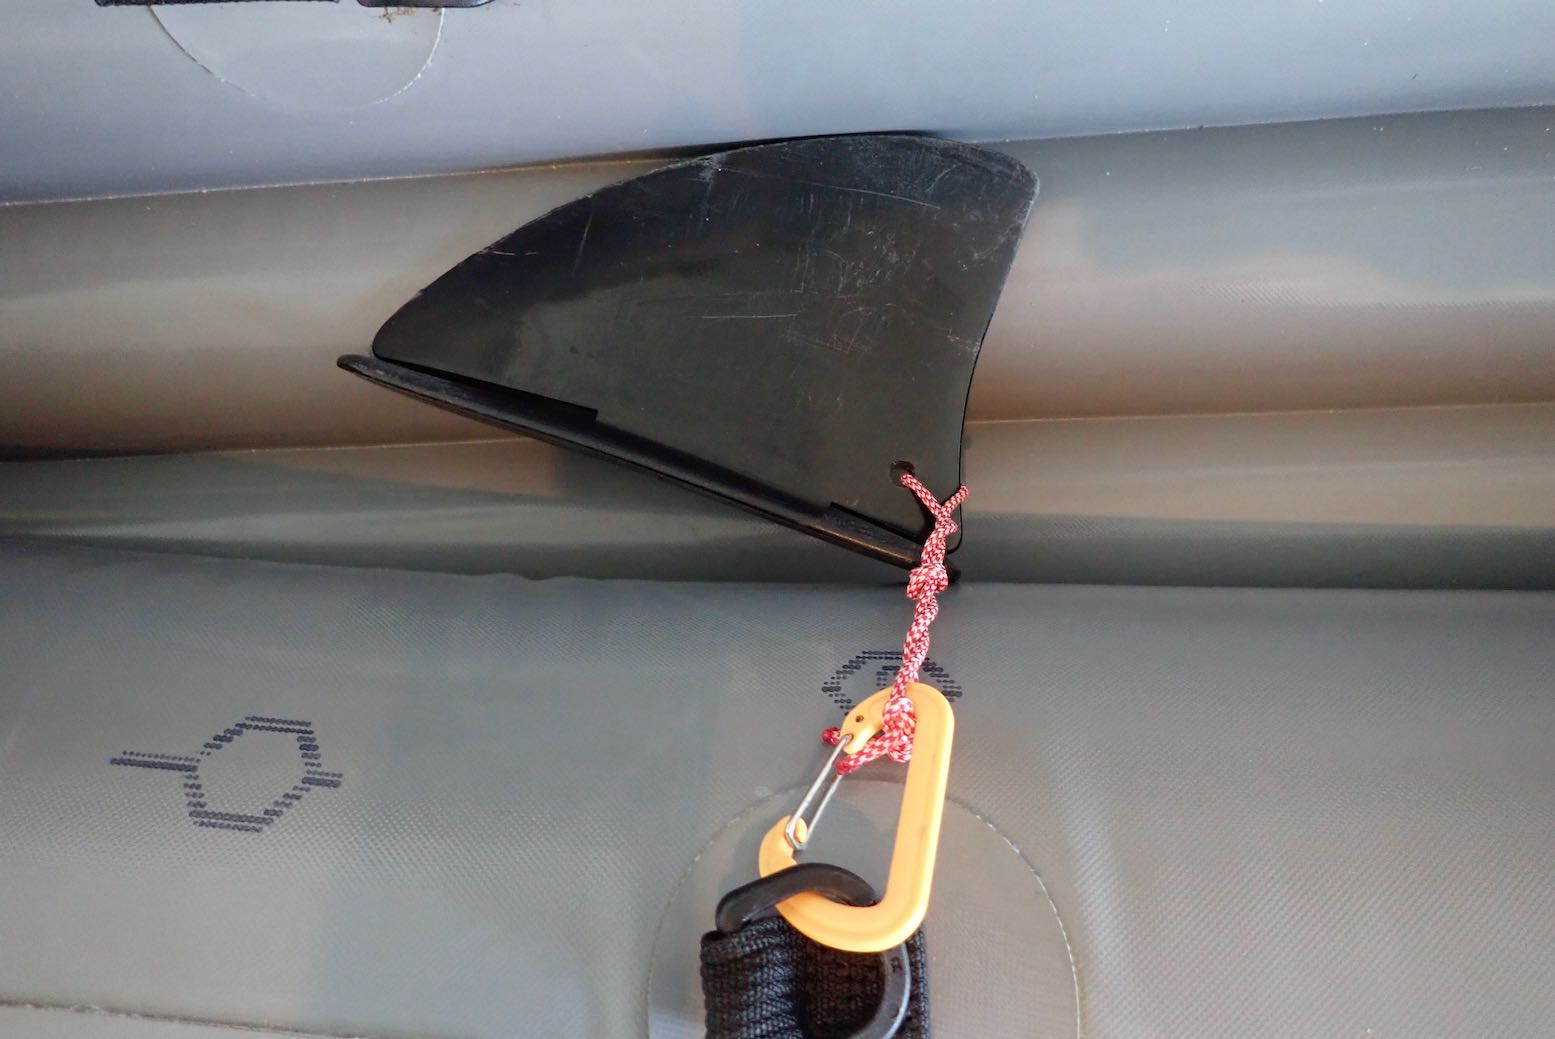
On packing up I realised this line needs to be in two sections if the rudder and plate are to be easily removable when rolling up the boat. The join can be at the back near the plate. As you can see I ran out of Dyneema and used an orange shoelace.


I fitted the lift line along the sides, using the deck support rib tabs and running through spare bits of tubing to avoid wear and aid smooth running. I fitted a tension-adjustable knob at the hand end of the lift line on the left, though anything will do. Pull forward six inches to lift the rudder. Flip the rudder back down with the paddle blade.
Does that flat, 4mm front edge of the rudder blade need chamfering to cut through the water, or am I other-thinking it? Who knows but watever you do, keep the skeg handy in case the rudder plays up.

Next job – see if it ruddy well works!


