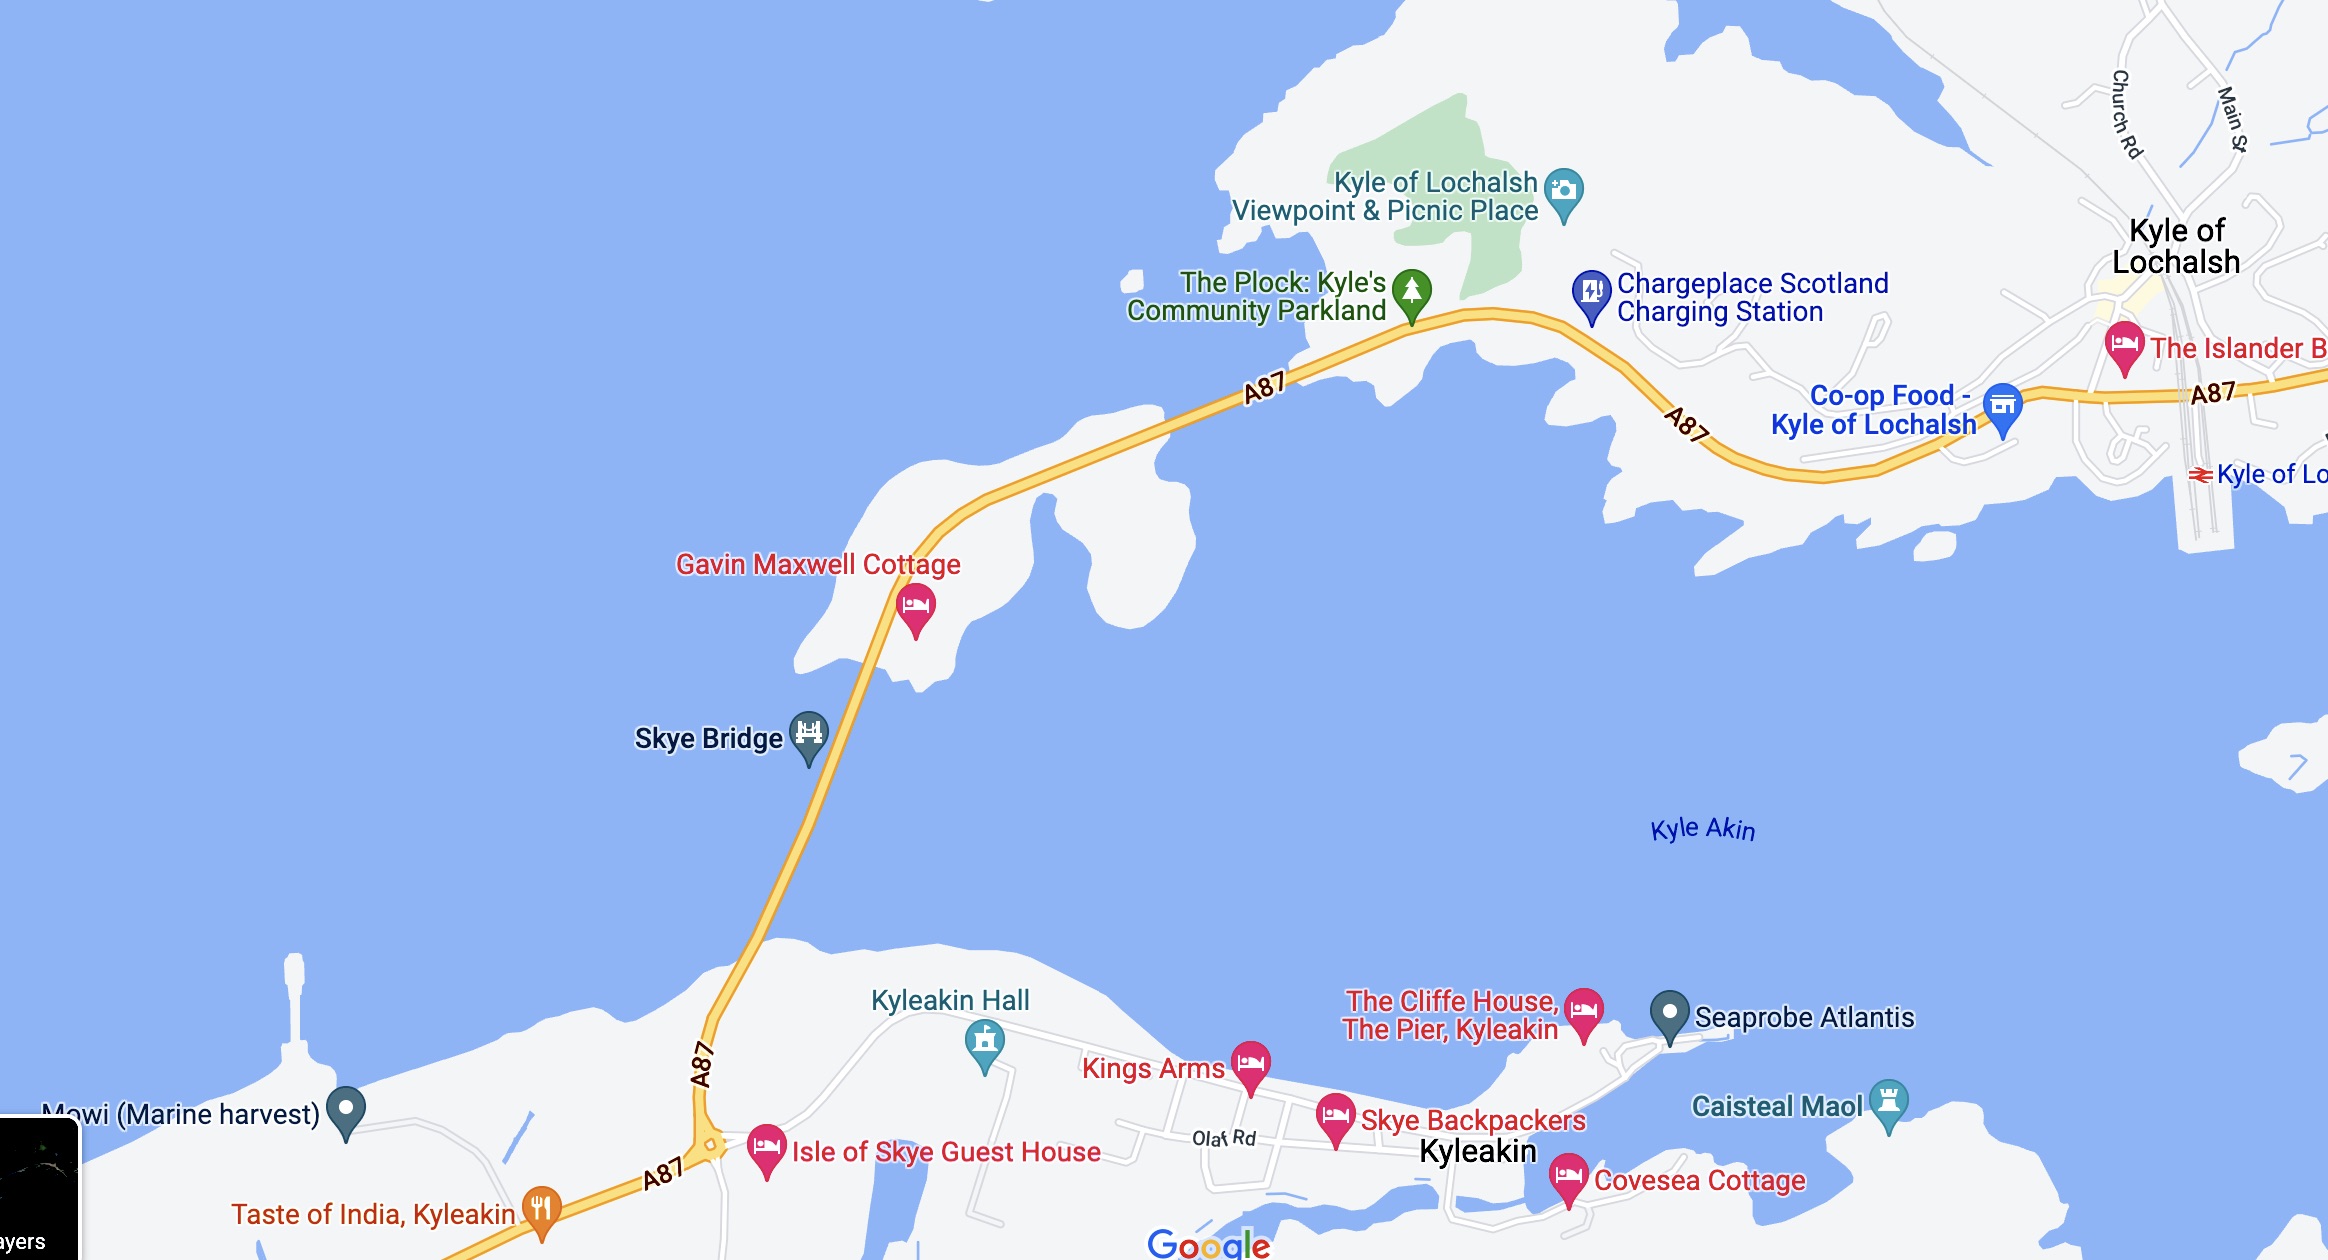
I remember plotting this IK excursion years ago. Set off with some wind and the tide from Kyle of Lochalsh by the Skye bridge, then wind among the skerries north and west into Loch Carron as far as Attadale station near the loch’s head. Once there, hop on a train 39 minutes back to Kyle. The line and single-carriage train comes down from Garve on the Inverness-Ullapool road before following the shore of Loch Carron with a couple of stations to Kyle where ferries served Skye before the bridge was built over the narrows in 1995.
Gumo gone
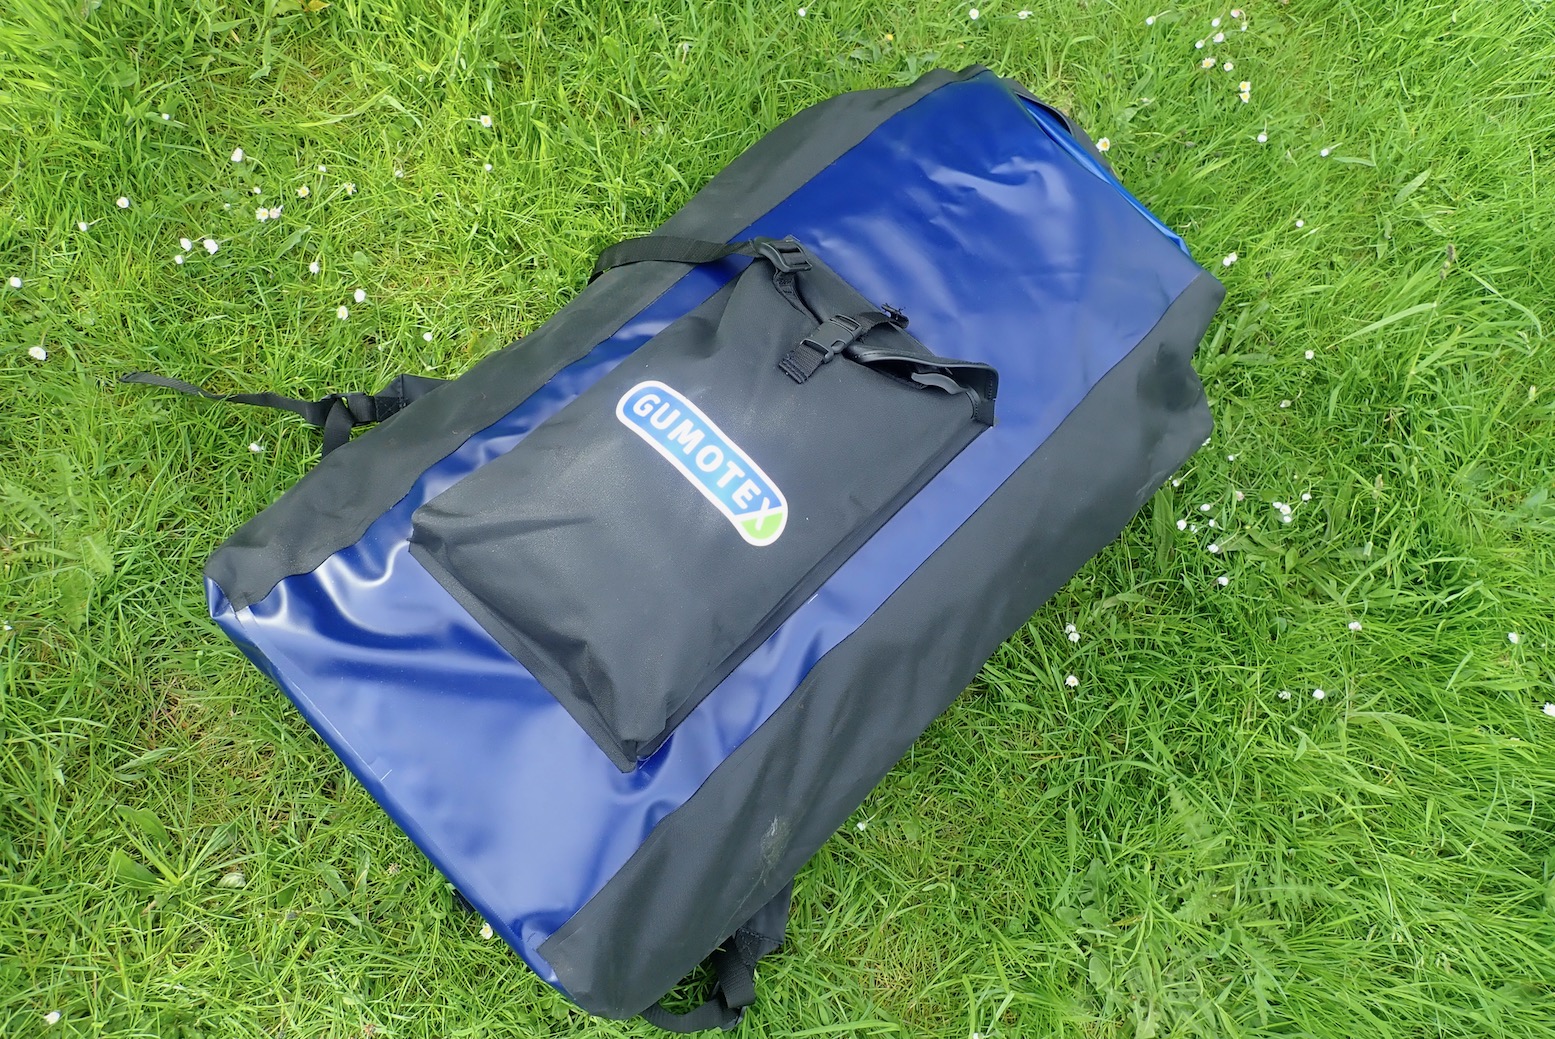
It’s over 100 miles from our place to Lochalsh but today everything lined up: a lull in the wind; a well-timed tide, and all subsidised by the delivery of my two-year-old Seawave 2 to its new owner at Kyleakin on Skye. I decided to sell my 4.5-m, 17-kilo Gumotex as I was becoming increasingly sure I could do most things in my new 2.8-m, 3.5-kilo Anfibio TXL, including paddling with the Mrs, packing or carrying multi-day loads and probably sailing too. I might lose some speed but could walk the boat to or from anywhere without difficulty.
The only midge in today’s ointment was Scotrail’s newly reduced timetable which now brought just two trains a day to the terminus at Kyle. We heard the 13.32 trundling past while on on the water; the other one was that evening after 8pm. No matter; we were in a packraft so decided to paddle 12km to Plockton – the more interesting part of the coast – then walk 8km back to Kyle along backroads.
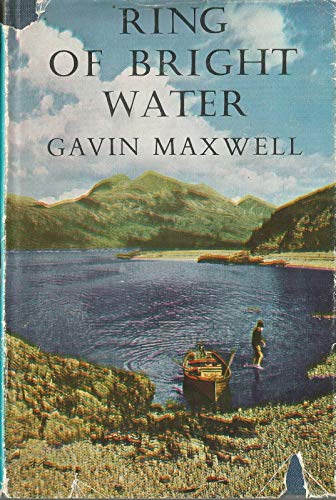
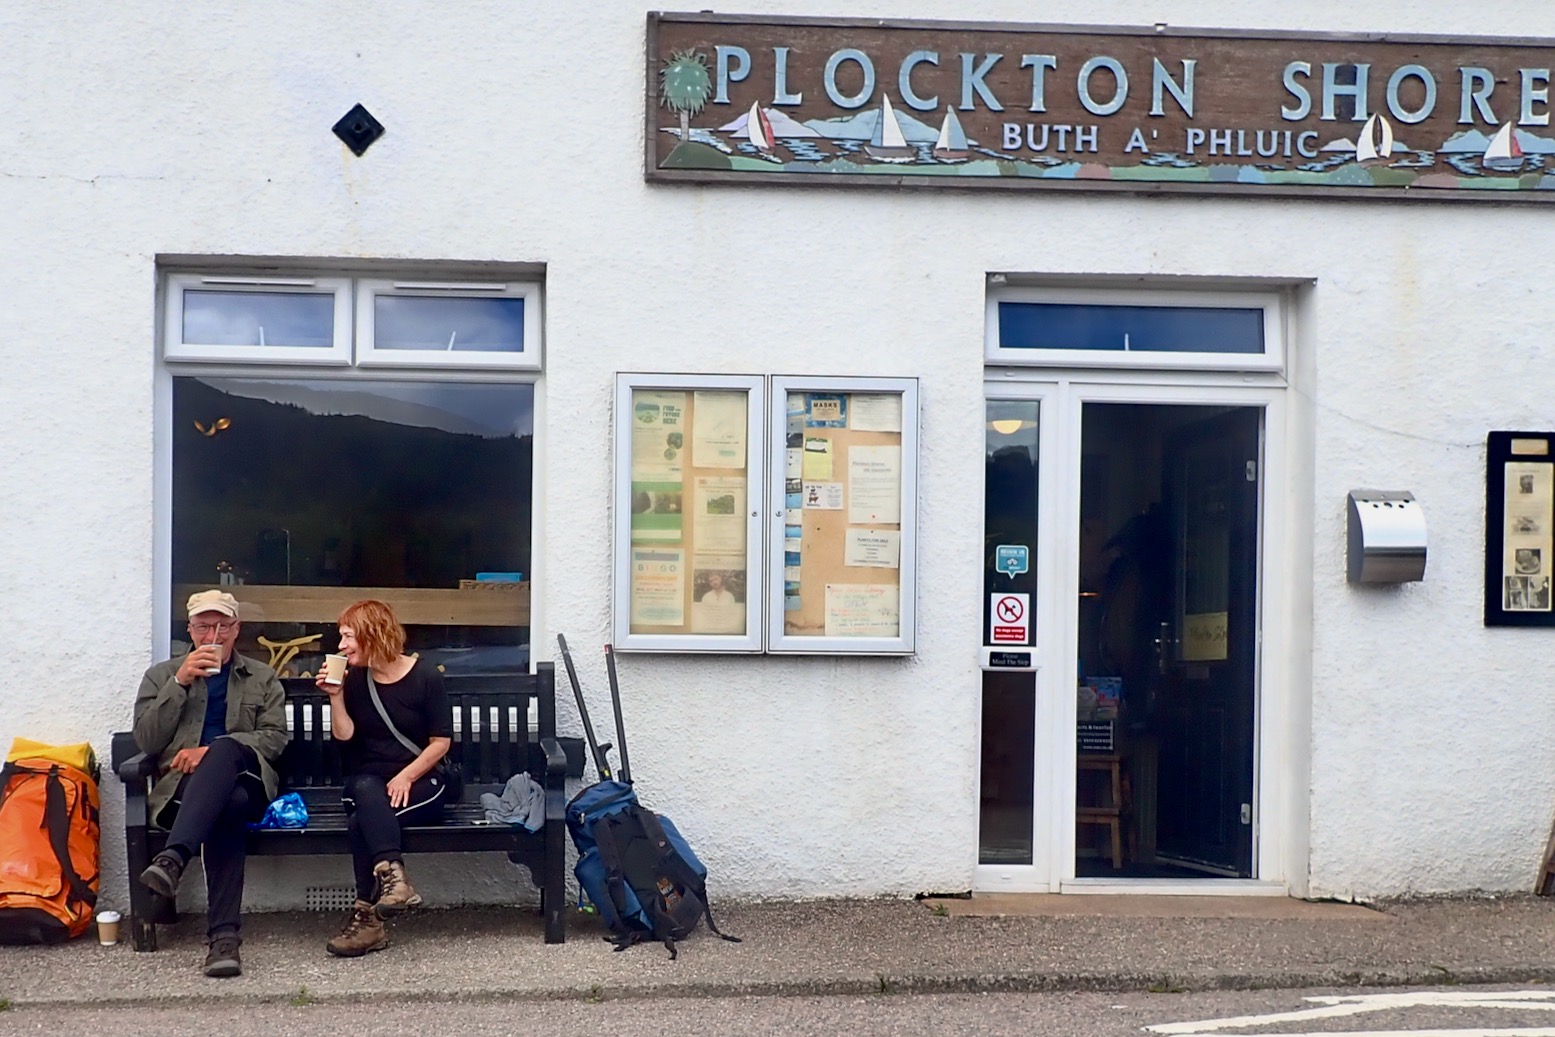
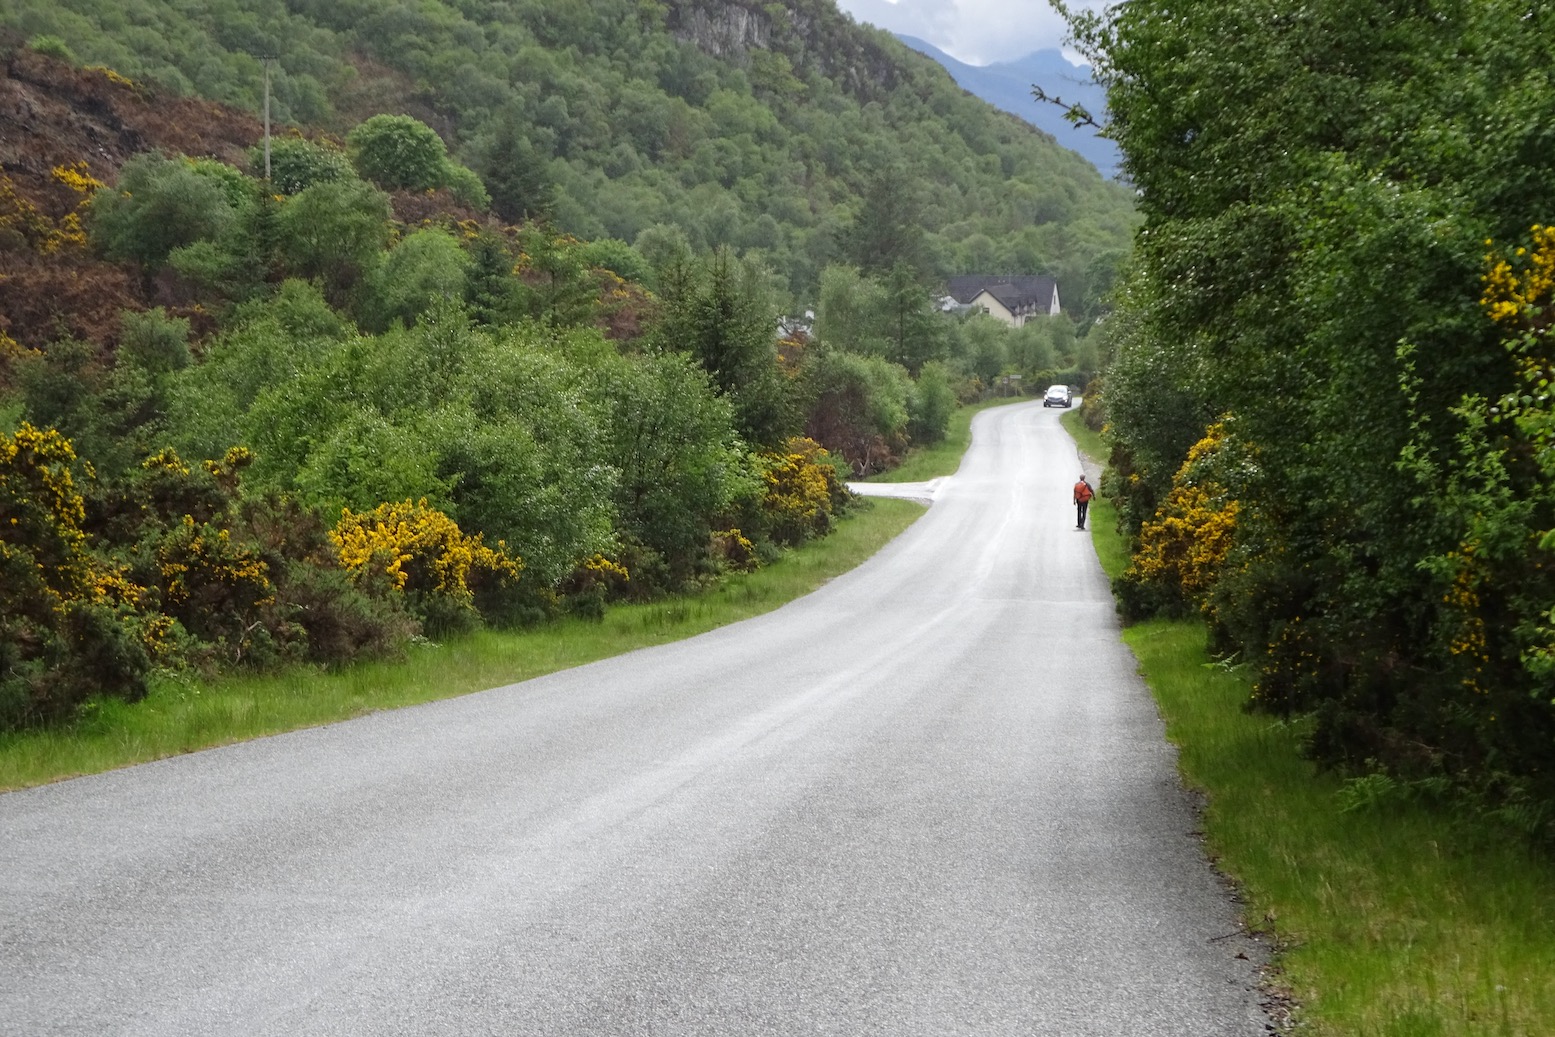
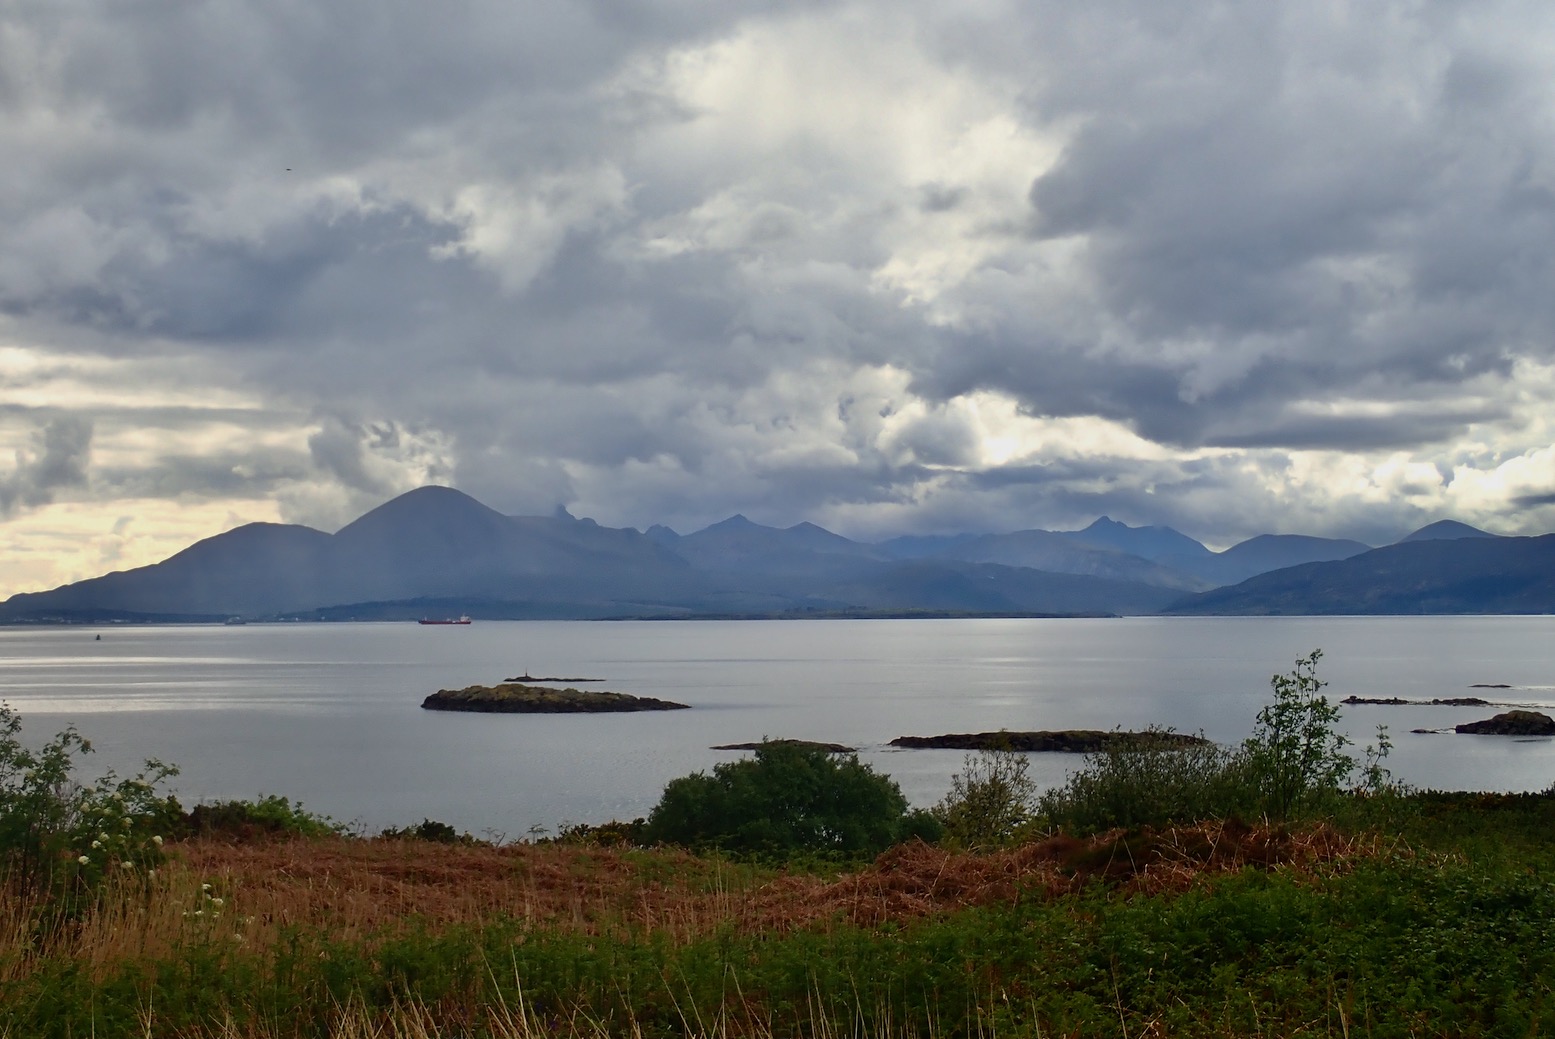
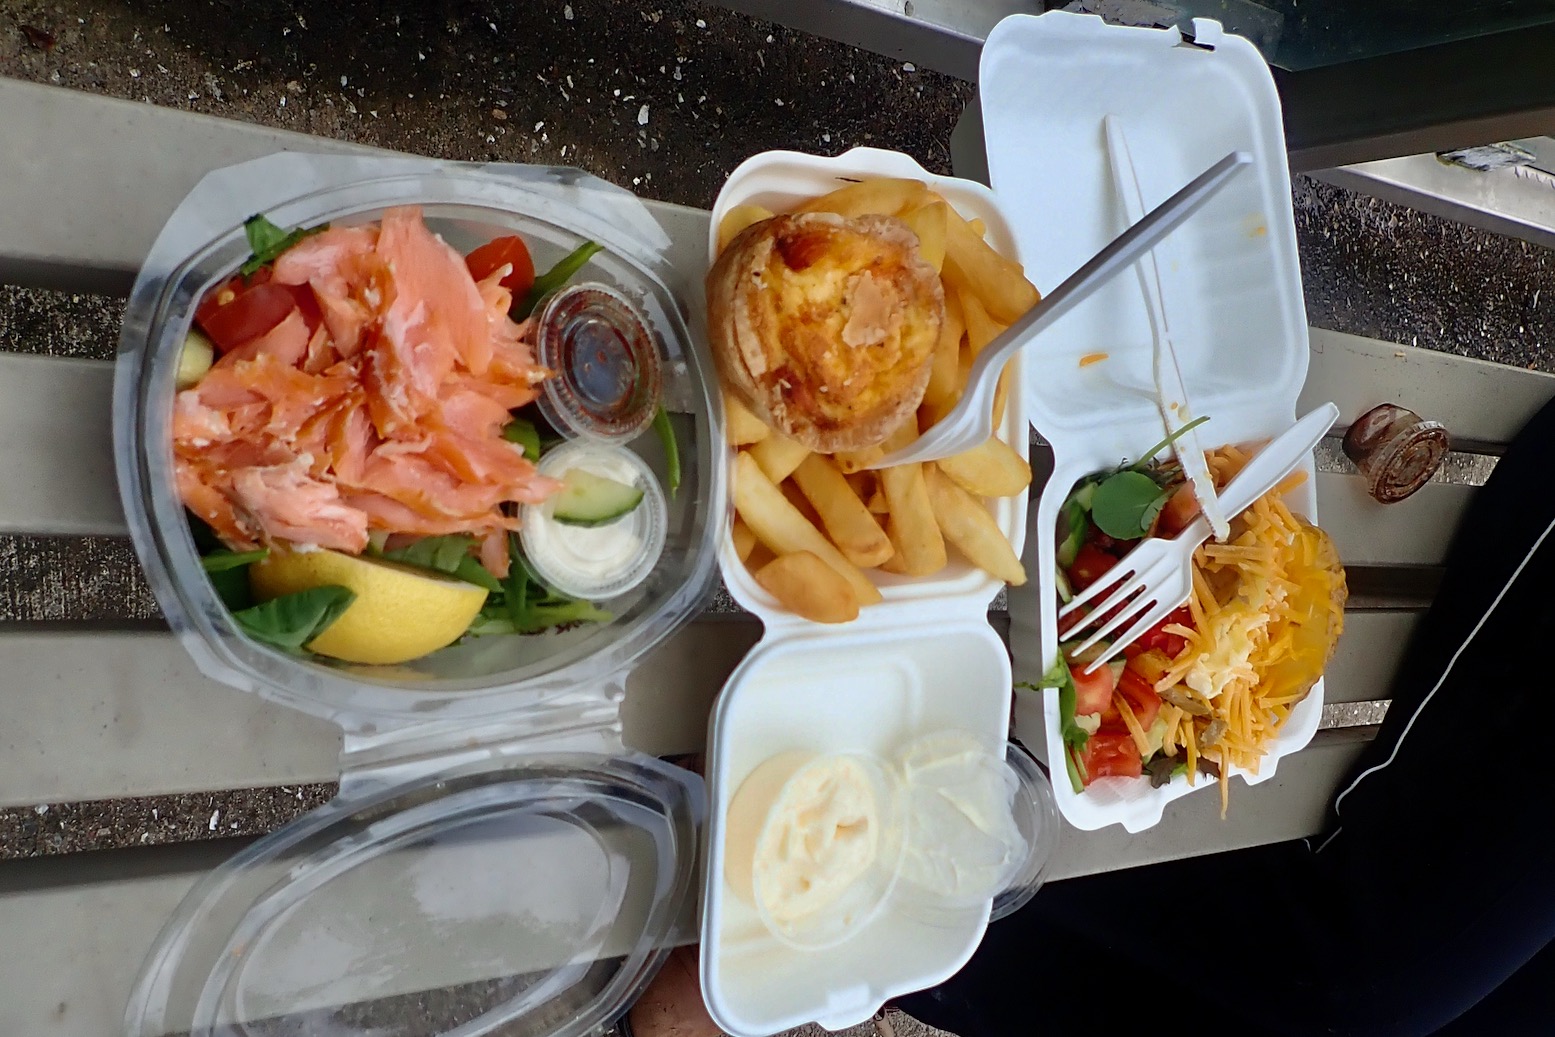
Seawave delivered, I admire the Plock of Kyle inlet, just a minute’s walk from a car park. Unfortunately this Footpath to the Shore appears to lead to the municipal sewage outlet.It’s nearly 8 miles so I try out the floor pad which ought to help the boat slip across the water. There is always something, and today’s Forgotten Item is the GPS. Shame, it would have been handy to weave among the isles more ambitiously. Instead we follow a less complicated seaward route, passing the outside of most islands.The floor doesn’t noticeably improve the glide and the boat skates a bit (rear skeg fitted). Worse still, with two in the boat the 10cm lift reduces interior space, end to end. And it isn’t helped by me giving the foam seatbase block one last try before consigning it to my private foam collection. After 45 minutes I can bear the agony no more and fit the inflatable seat instead. Much better, and it doesn’t wobble too much on the stiff floor, as it did on the Thames the other month.As we slip among the skerries we see a slinky otter. We are after all in Otter Country. Otterist, Gavin Maxwell lived just round the corner.His old cottage now props up the Skye bridgeThe cramped conditions provoke undisciplined outbursts from the crew.But actually we’re moving along fairly quickly and after 90 minutes are 5 miles in. Just 3 miles to go. I’m finding the hauling hard, though. Later I realise perhaps my large-bladed white-water Werner Corry paddle is ill-suited to tandem paddling. That’s almost IK speed if not IK comfort. I let the floor down and gain a couple of inches to stretch out the feet. Much better. I also try out my thigh braces which are OK; probably more effective for solo paddles.We turn towards the beach of Camas Dubh AirdAnd have lunchEven without a map you can tell it’s an isthmus. Sure enough it’s a 2-minute walk over a meadow to the other beach. Plockton village is actually less than a kilometre away, but round the headland is another 5km.As predicted, the wind picks up with the odd whitecap, but the TXL manages fine. We see some kayakers.The lighthouse on Eilean Chait marking the turn south into Plockton Bay.Annoyingly, I turn into the the wrong bay. I thought it didn’t look right.Never mind, it’s the edge of Plockton and pretty as a picture.Time to bag the boat…… and track down a coffee. It’s all a lot softer and twee round here, compared to the windswept, treeless Summer Isles.Double coffee while tourists shuffle purposelessly by.A chance to rest tired arms with a two-hour walk back to Kyle. How did that oil rig get there?It’s fun to pass through quaint villages at walking speed.And meet the hirsute locals.Full marks to Erbusaig for not going for grey pebble dash.Nearing Kyle. Look at all those trees!Unusual view of Skye bridge.The glowering mountains of Skye.Arrival in Kyle as the washes down our salty limbs.We find the Fisherman’s Kitchen down by Kyle harbour. Fifty Ways to Eat Your Salmon; just what was wanted!We tuck in in a bus shelter.A good day out. More like that please.
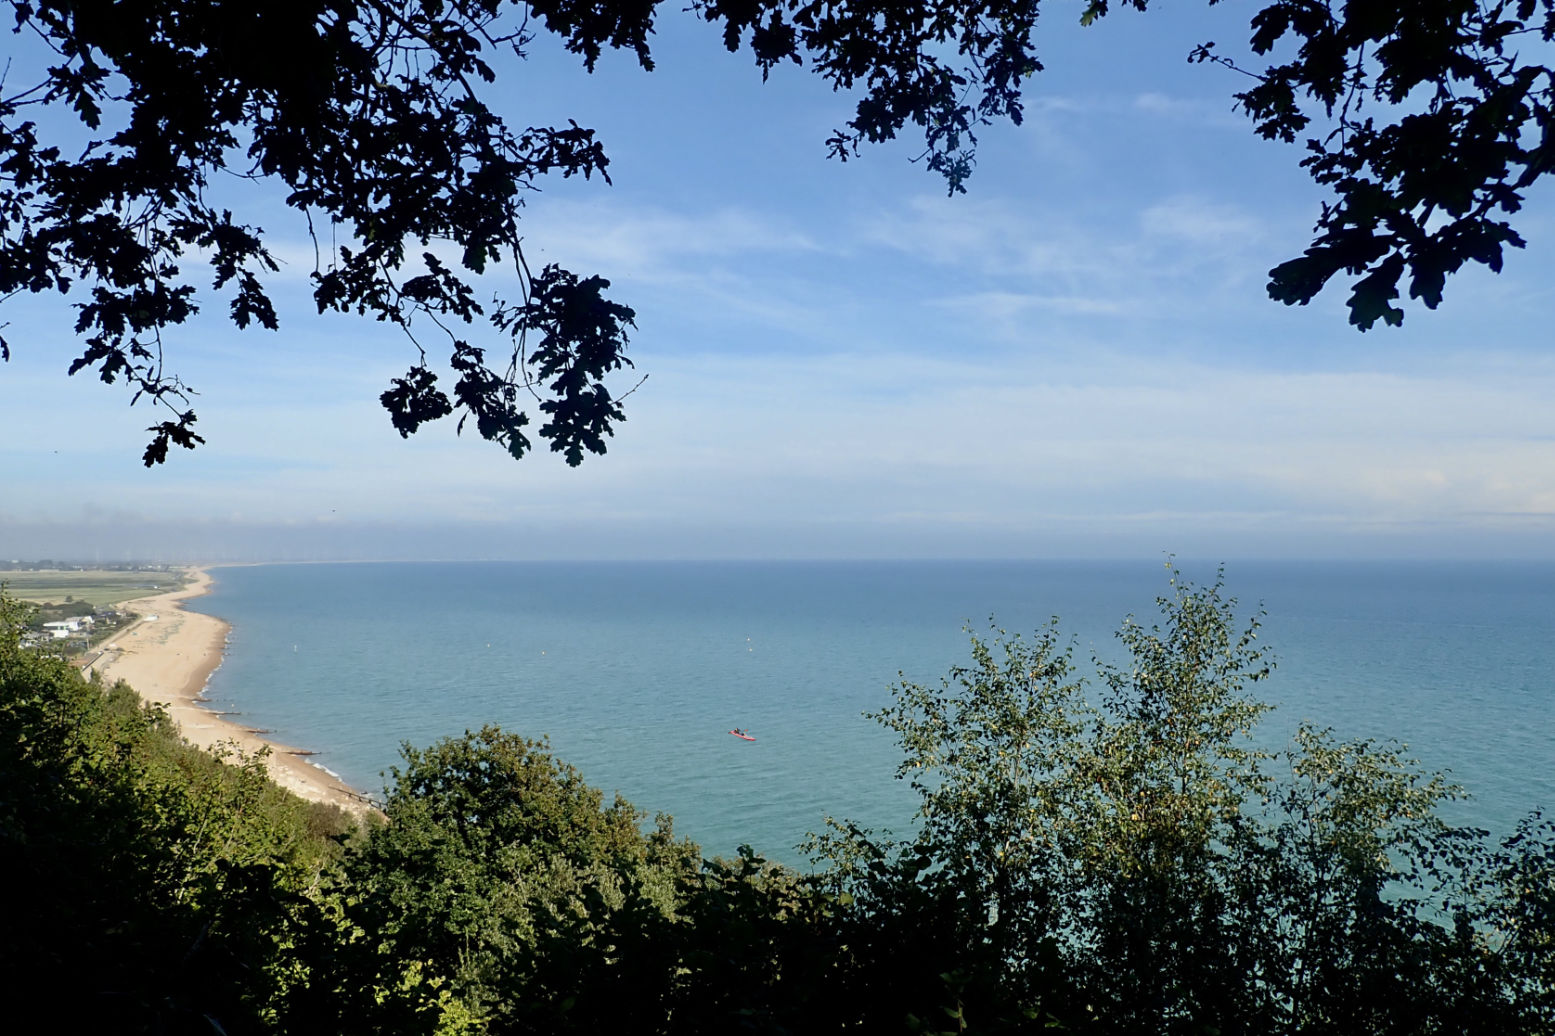
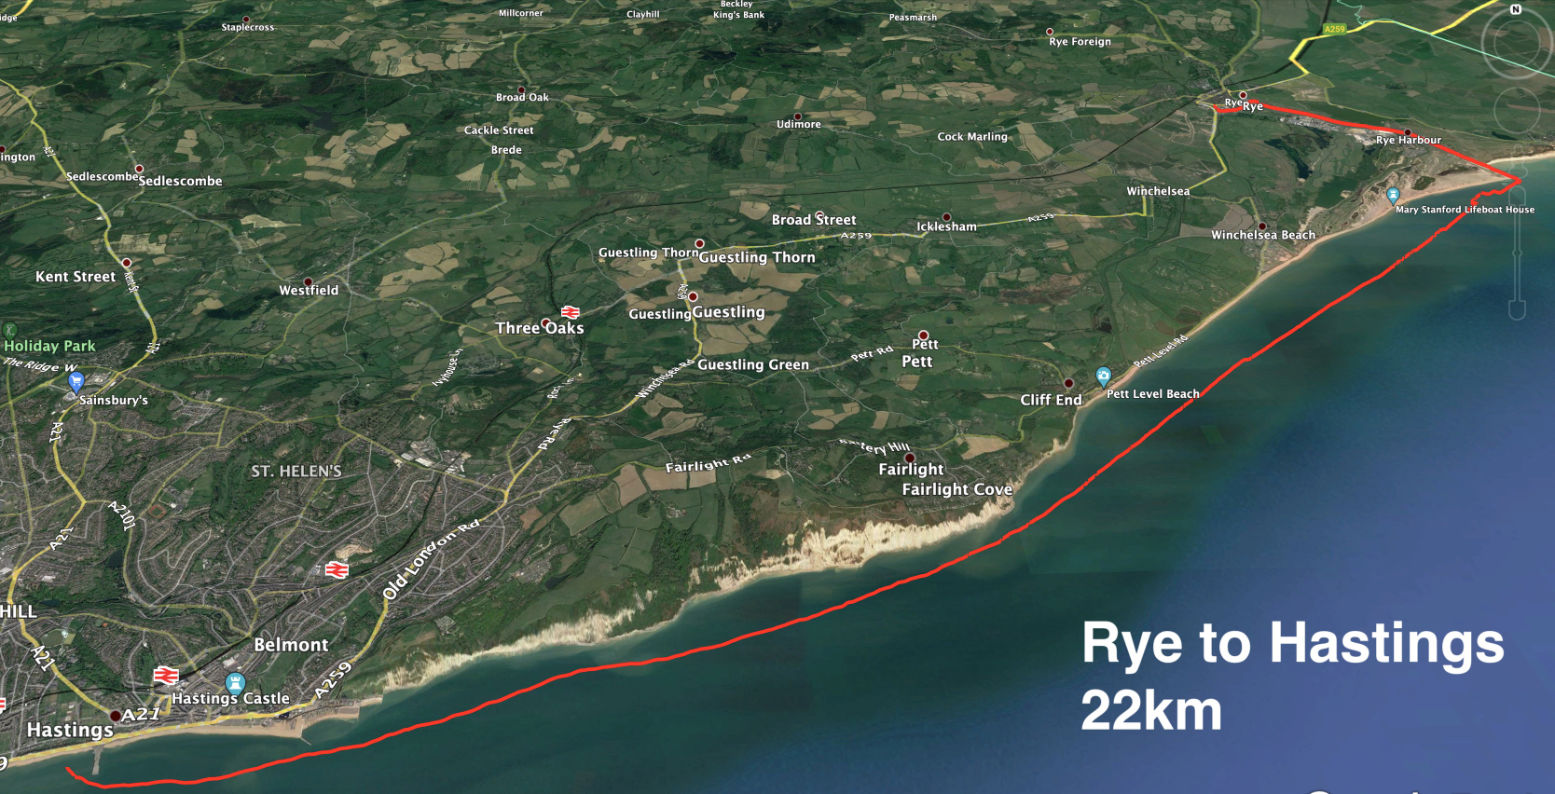
Once we were let out in the Covid summer of 2020, we did a very nice coastal walk from Hastings to Rye along the Sussex coast. Hot, but not so windy, it would have been just right for paddling. Today conditions were similar for a westbound transit from Rye back towards Hastings. High Water (and a spring tide too) was at a very reasonable noon in Rye, with a forecast of 8-14mph from the east and a bit of a kick at 3pm. I was hoping for the upper limit and a bit of splashy sport, so brought the WindPaddle I’d used on the packraft last month in Scotland in much stronger winds.
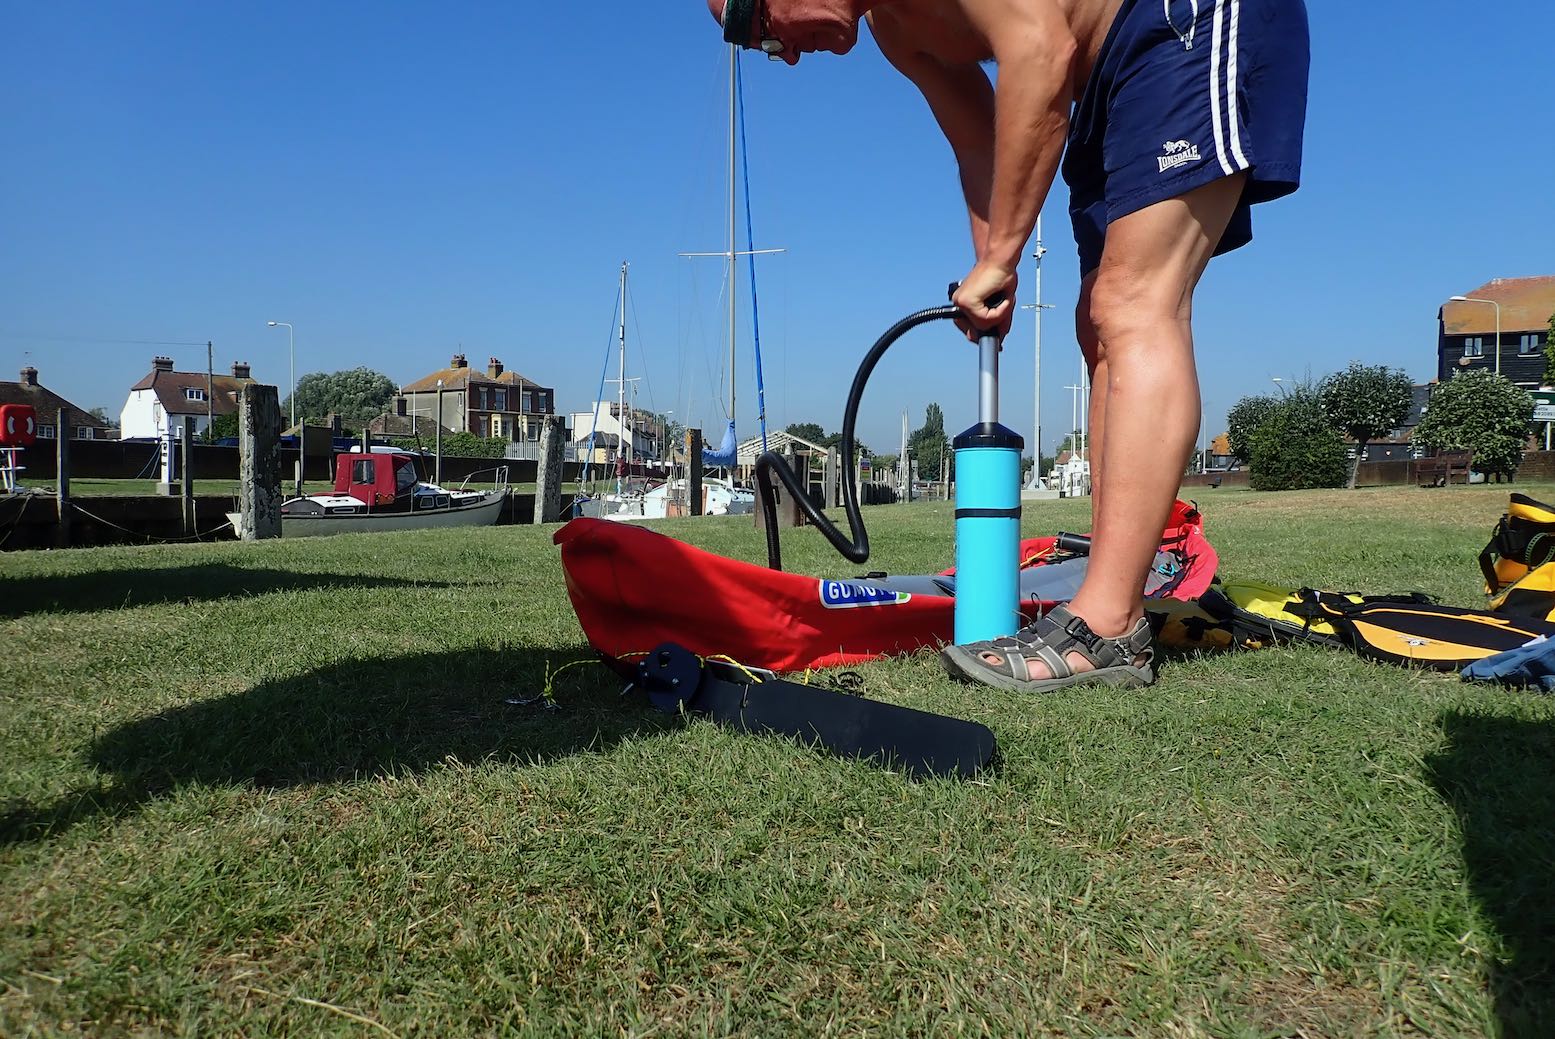
It’s only a 10-minute walk from Rye station to a boat ramp on the quay where the water was still inching up the concrete as I pumped up the Gumotex.
I was taking a gamble trying my untested new rudder set up. Because I expected it to play up, I fitted the stock skeg so I could lift a problematic rudder and carry on as normal without coming shore. To be without a rudder or skeg with a backwind at sea would not be ideal. Being the ever recirculating goldfish, I forgot to try out my sail stick mount idea.
Rye hasn’t been on the coast since 1287 or so when, along with gradual land reclamation, the biggest of a series of 13th-century storms filled the adjacent marshy inlet with silt and shingle which finished off semi-abandoned Old Winchelsea and radically redrew the low-lying coastline where the Kent and Sussex borders meet. It was the same in Pevensey to the west. The gif on the left from this interesting regional website shows how the coastline of southeast England was transformed in the late medieval era. Where the Rother river once flowed directly east to enter the sea at New Romney, the filled-in bay saw it diverted south below the old hill town of Rye, now stranded two miles from the sea. The then important port of Winchelsea was rebuilt on its present site in 1288, but eventual silting saw both it and Rye’s maritime importance decline. What this area may lack in epic spaces common to the north and west of Britain, it gains in fascinating history. 1066 and all that.
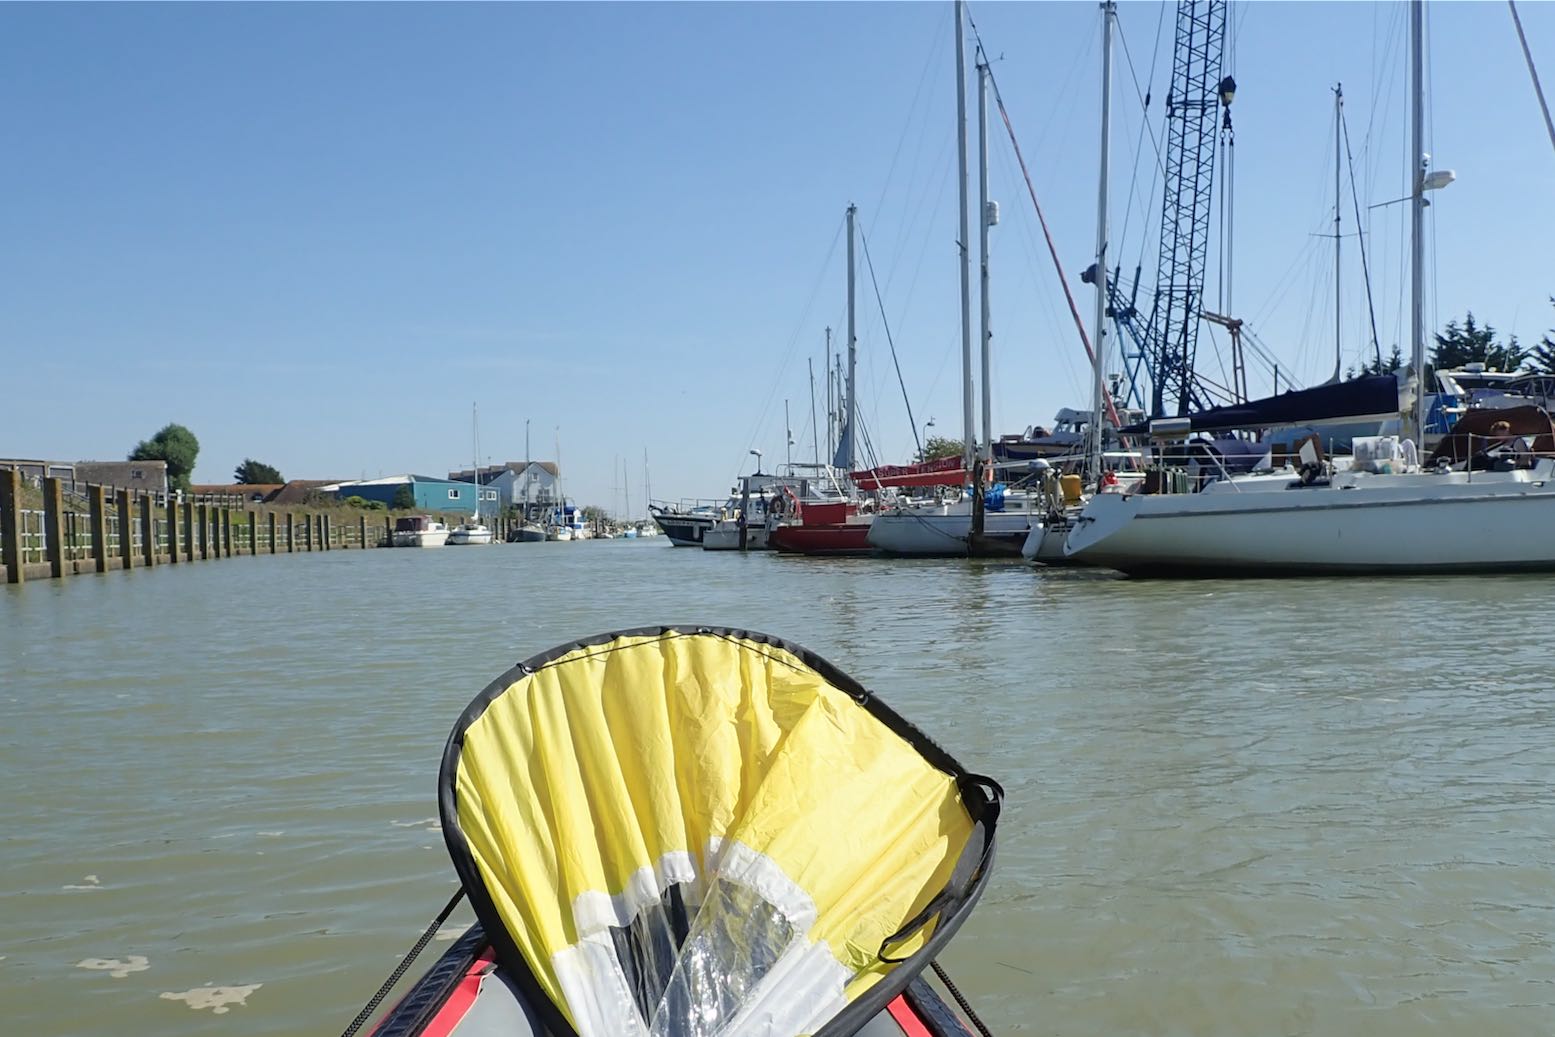
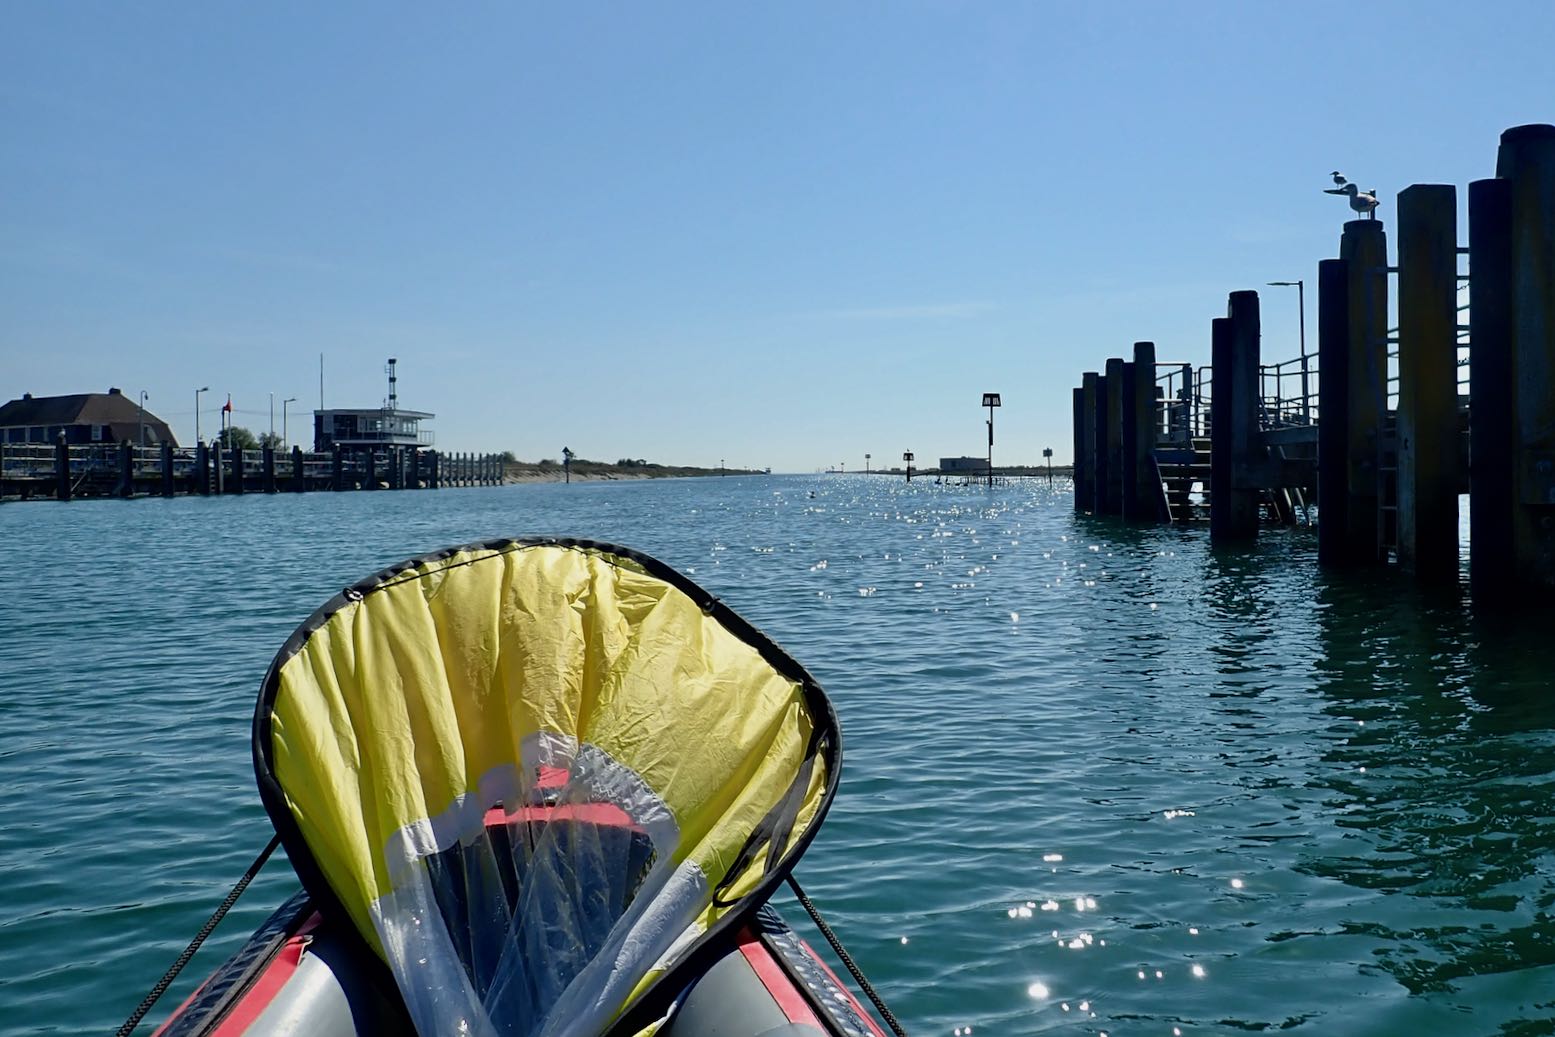
I set off along the River Brede which wraps around Rye’s south side like a moat, and soon joins the Rother. It’s about 5km to the open sea.
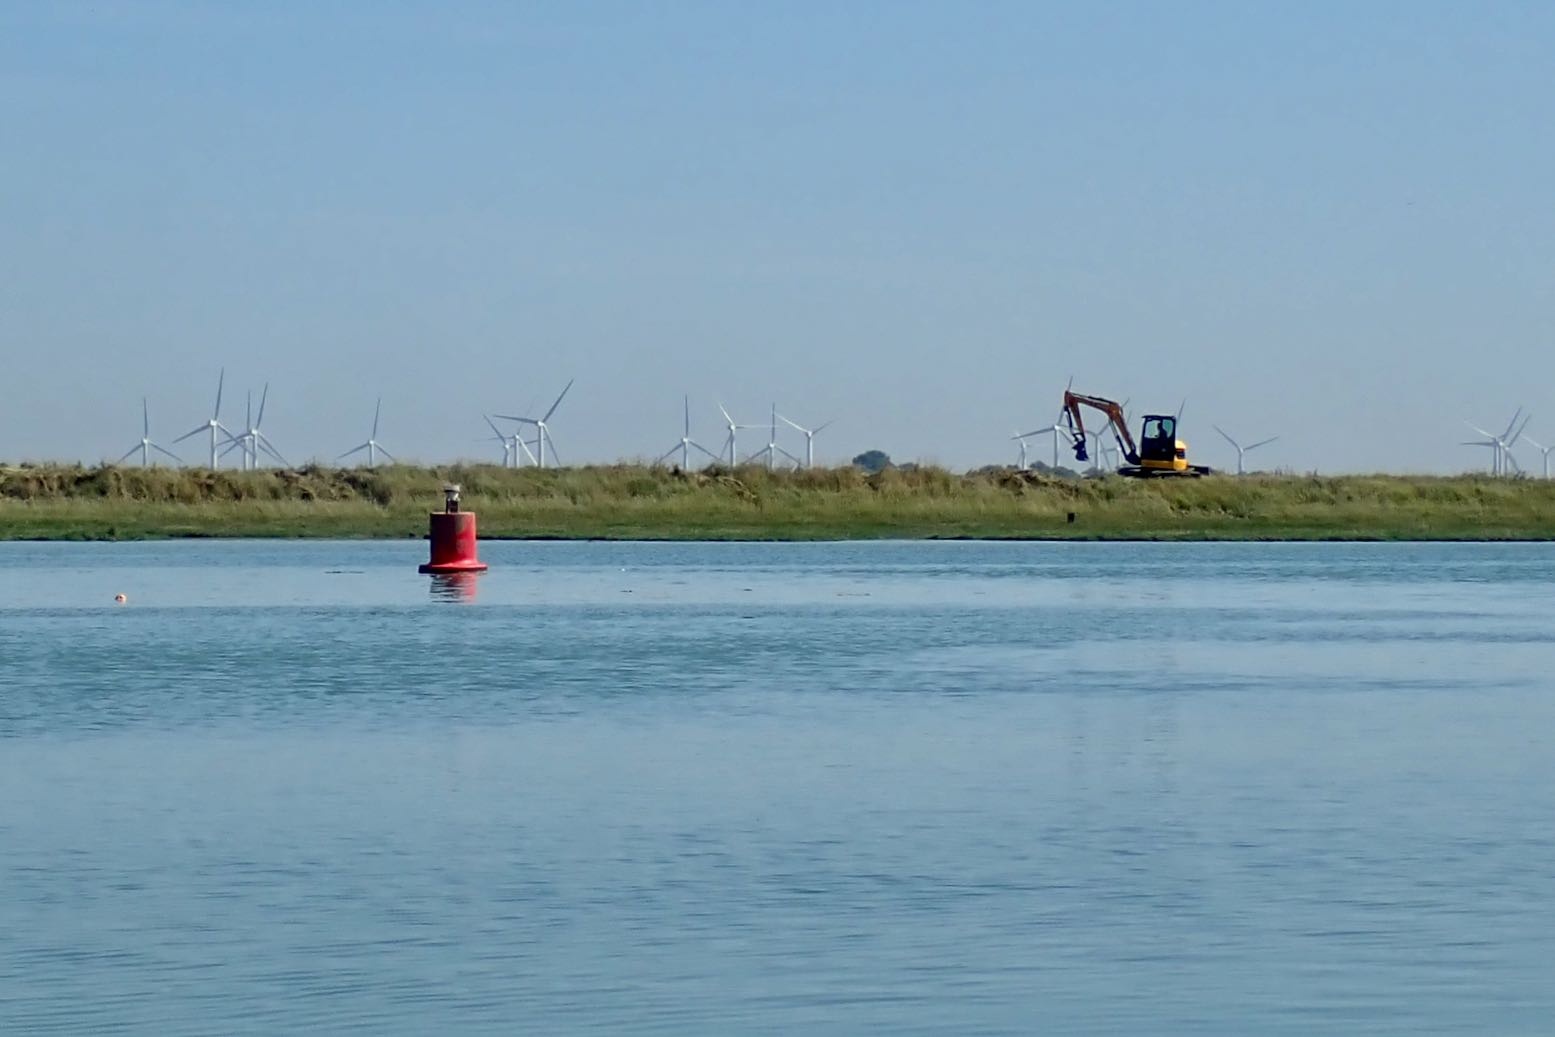
I’m into the wind but the grass banks are under water and the wind turbines are spinning merrily; all good signs.
Rye Harbour. The tide is high and I’m moving on.
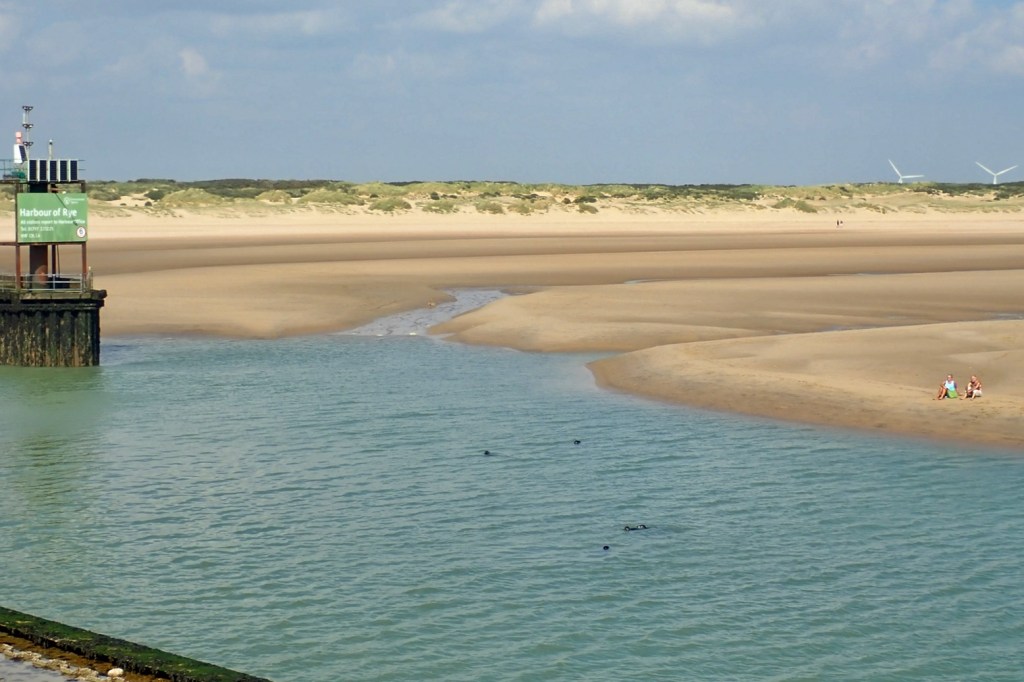
In 45 minutes I reach the old breakwater opposite Camber Sands where I recall bucket & spading as a child. The sea looks depressingly flat.
Seals at the river mouth (a few days later).
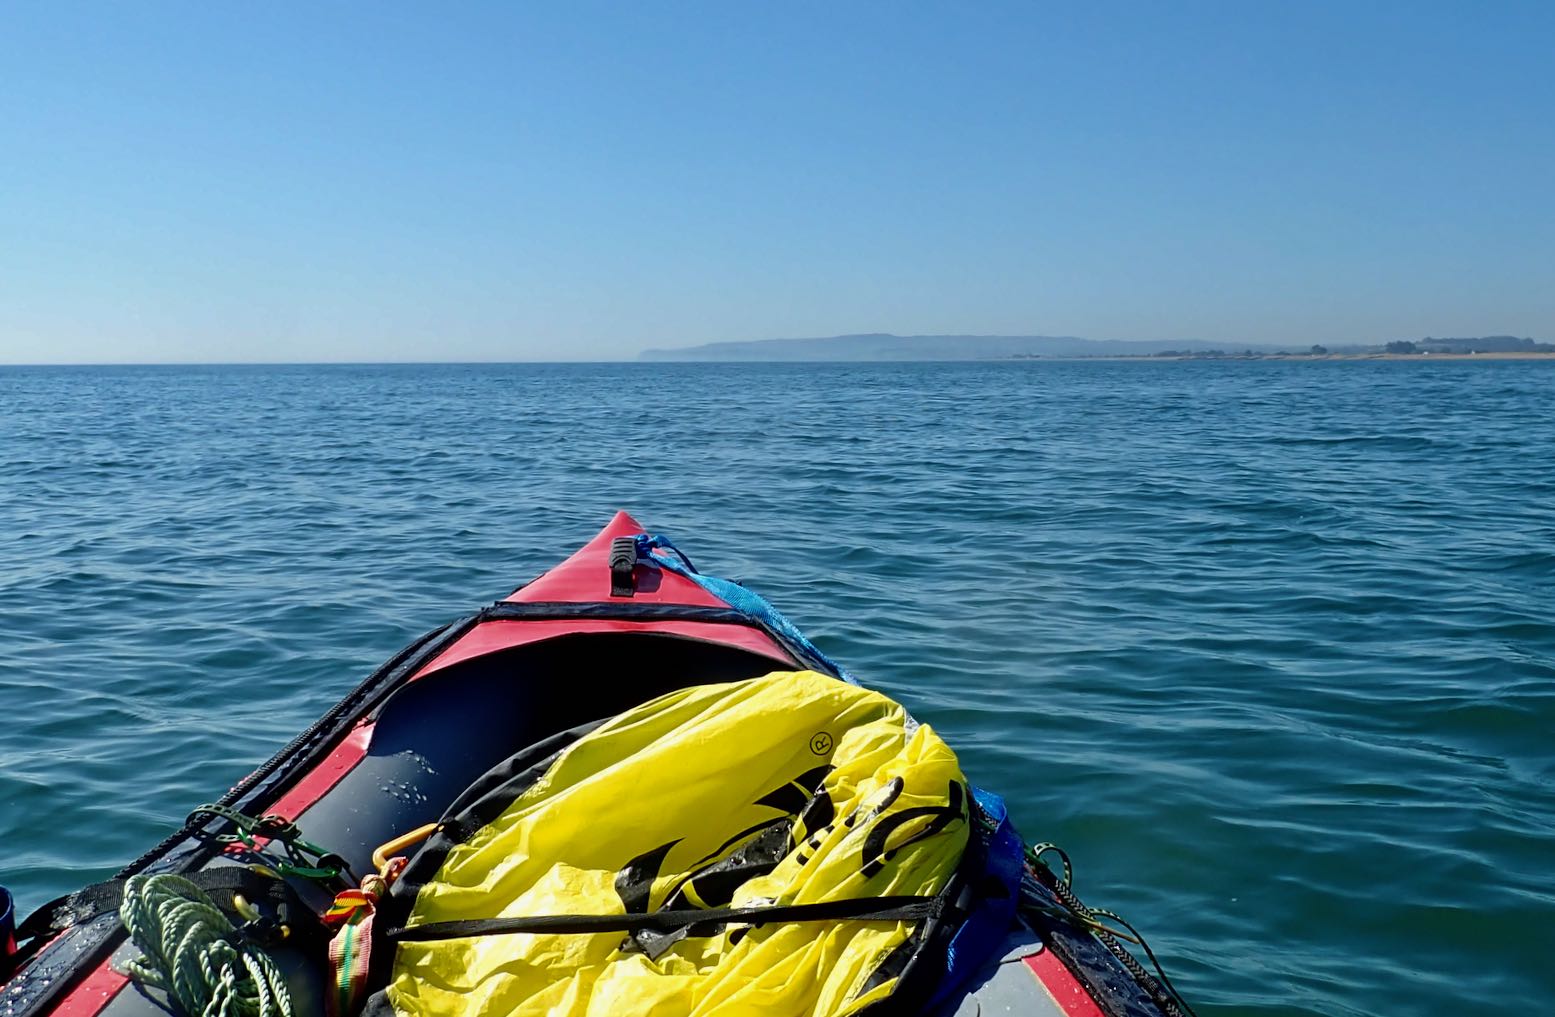
It’s nearly 10km to the distant cliffs, a two-hour haul. And with the breeze from behind, I’m soon streaming with sweat. I’m not sure my water will last.
Going with the Flow A few years ago while planning Newhaven to Brighton, I learned an odd thing about Sussex and Kent tides. For the last two hours of the incoming (eastbound) flood, the tide keeps rising but reverses westbound along the English coast as it backs up at the Straight of Dover and spills back down the sides. That makes HW is around the same time in Folkestone, and 140 miles to the west, past the Isle of Wight, but HW at all the places in between lags behind. Tidal steams are not that strong here – wind will have much more of a bearing on paddling – but this means you get only four hours eastboundflow with the flood tide and prevailing southwest winds. But if you time your run with a warm easterly off the continent and go westbound– as I did on this occasion – you get a much longer run with the tidal current; eight hours or more; maybe 45km all the way to Eastbourne. The question is: can you paddle that long.
A breeze picks up so I flick up the sail. I check my GPS and am doing 3-4kph, while I can paddle at around 5-6kph. Then the breeze drops away. I wasn’t really planning to paddle the full 30+ clicks to Cooden station, but I can always get off at Hastings, a few stops before.
At least the rudder seems to working as it should, though any quick response is dulled a little by the skeg. A rudder’s not really needed in these conditions, though it compensates for me being blown gradually onshore. I’m trying a rudder lift-line only, not a rudder lowering line as well. But once in the boat I find I can’t turn enough to even see the lifted rudder to flick it down with the paddle, so I’ll probably fit a drop-line later.
I creep along the expanse of Winchelsea Beach. It’s hot work in a backwind. Eventually I reach the start of the cliffs where the coast turns more east-west, putting the wind directly behind me. But paddling at effectively wind speed, there is no cooling effect. More familiar with paddling at the other end of Britain, I’m not used to 27°C.
Then, as predicted, around 3pm the breeze picks up and I can get the sail up.
Paddling half a mile from the shore, initially it was hard to know if I’m moving and at what speed. So waking up the GPS screen was a handy way of telling if the sailing speed was worthwhile. With the odd gust I reach nearly 7kph, but average less than 5kph, a bit slower than paddling, but I’m not dripping like a leaky tap or needing to drink. In fact I could nearly doze off.
Niblick (5b), Harrisons Rocks
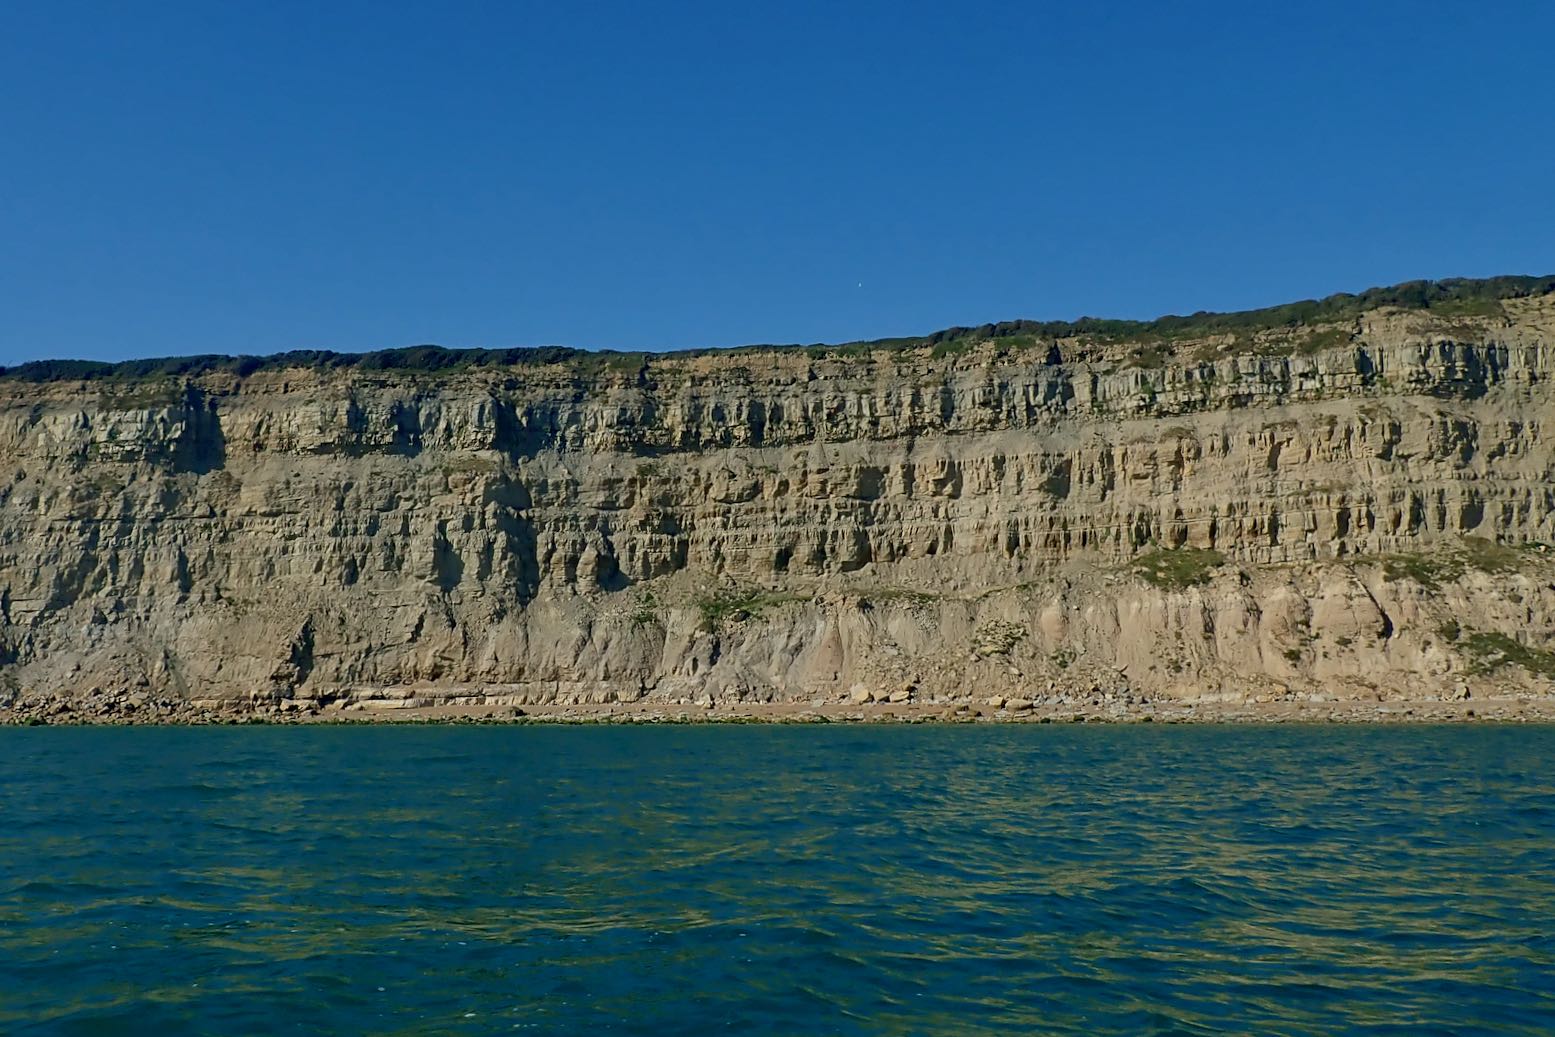
The cliffs inch by. This is the sea end of the Wealden sandstone formation, less high and steep than the better known chalky Seven Sisters to the west, or Dover’s white cliffs to the northeast. Both chalk cliffs are part of the same formation or bed, but when the land was squeezed and uplifted to the dome or hump was eroded away to expose the older sandstone below. This is what they call the Weald, and near Tunbridge Wells, East Grinstead and Frant, the weathered sandstone ridge produces small outcrops where I started rock climbing as a teenager (right).
There’s barely a sensation of movement; it’s not as bracing as I was hoping
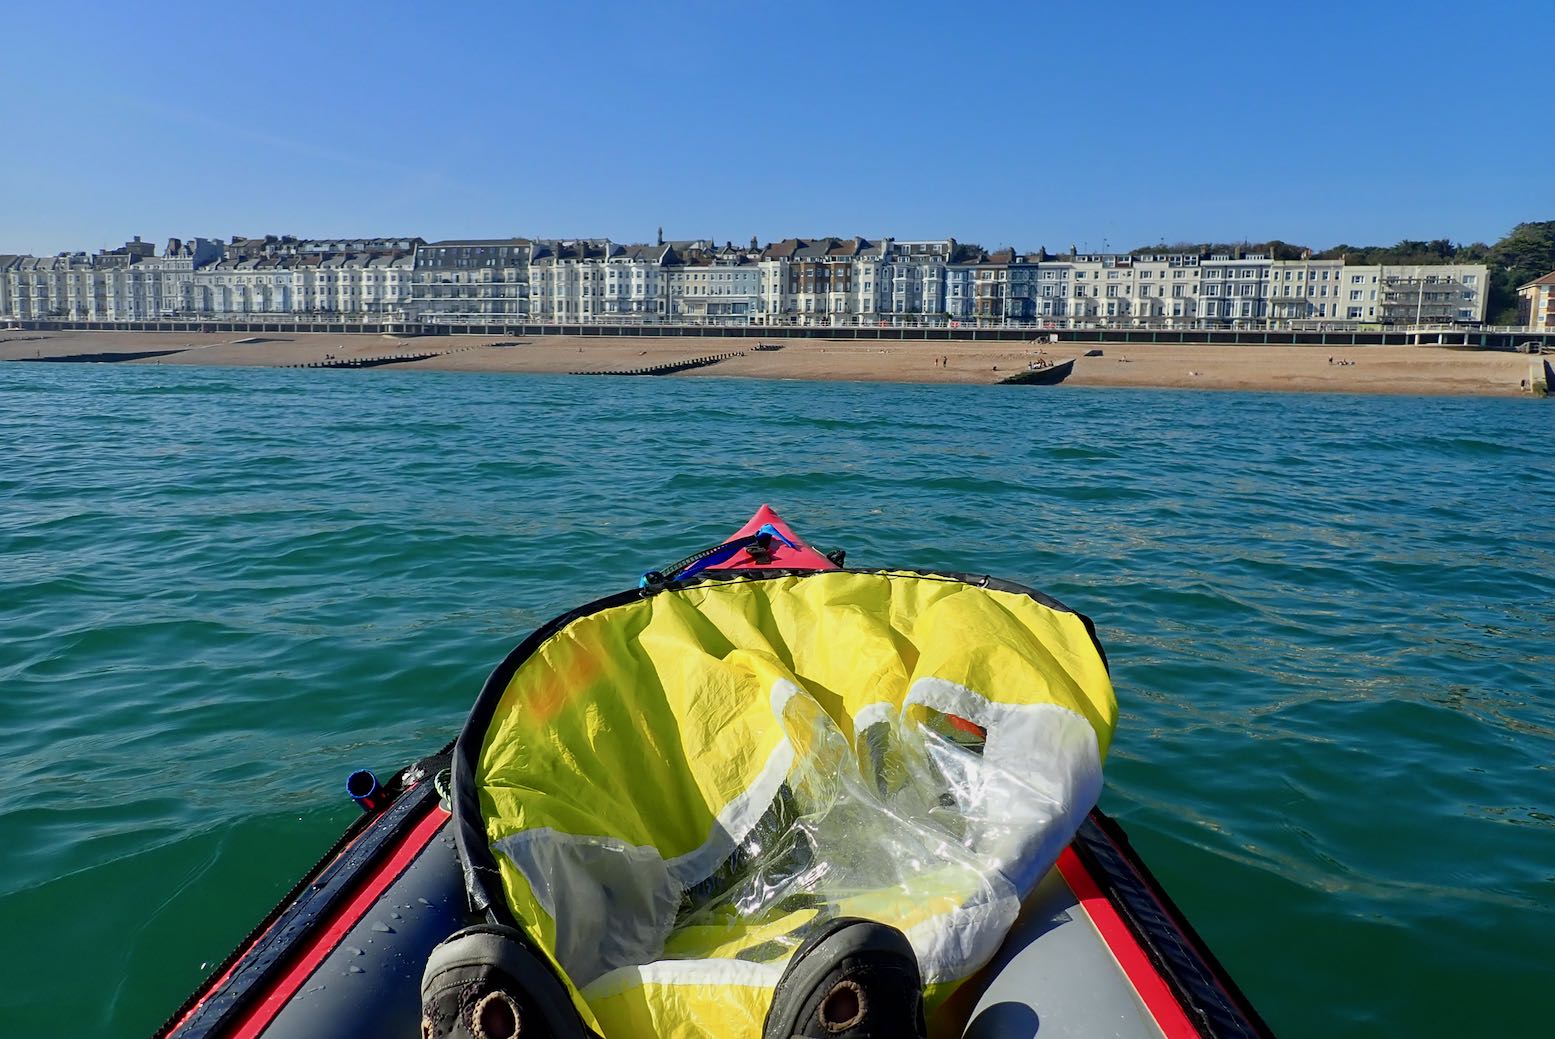
I pass the Stade, the east end of Hastings where the cliffs drop back down. A few souls are enjoying the last day of summer on the shingle beach.
I keep going to the pier and decide to have a leisurely take out there. It’s gone 4pm so another 10km to get the train 6.15 from Cooden would be a rush.
Landfall by Hastings pier. Compared to the fabulous Summer Isles, for me these southeast coast paddles lack drama and interest, but are easy to reach if tomorrow’s weather looks good. We walked Hastings to Rye again a day or two later; it took about the same time and was more enjoyable (though it was cooler). The rudder foot pivot worked fine, though needed a bit of re-tensioning at the pier. Next time I can confidently leave the skeg off, though I can see a rudder would only be needed when sailing or paddling in windier conditions. That is all I have to say for now.
Rather like sails where I Made My Own, lost interest, then returned with a proper WindPaddle, after five years I’ve come back to the idea of fitting a rudder to Seawave 2. Mostly, this was inspired by a much simpler pivoting footrest tube idea from fellow Seawaver Jules, replacing cumbersome and bulky foot pedals. A rudder ought to make the Seawave more useable in a slightly greater range of conditions, including sailing which I tried again recently.
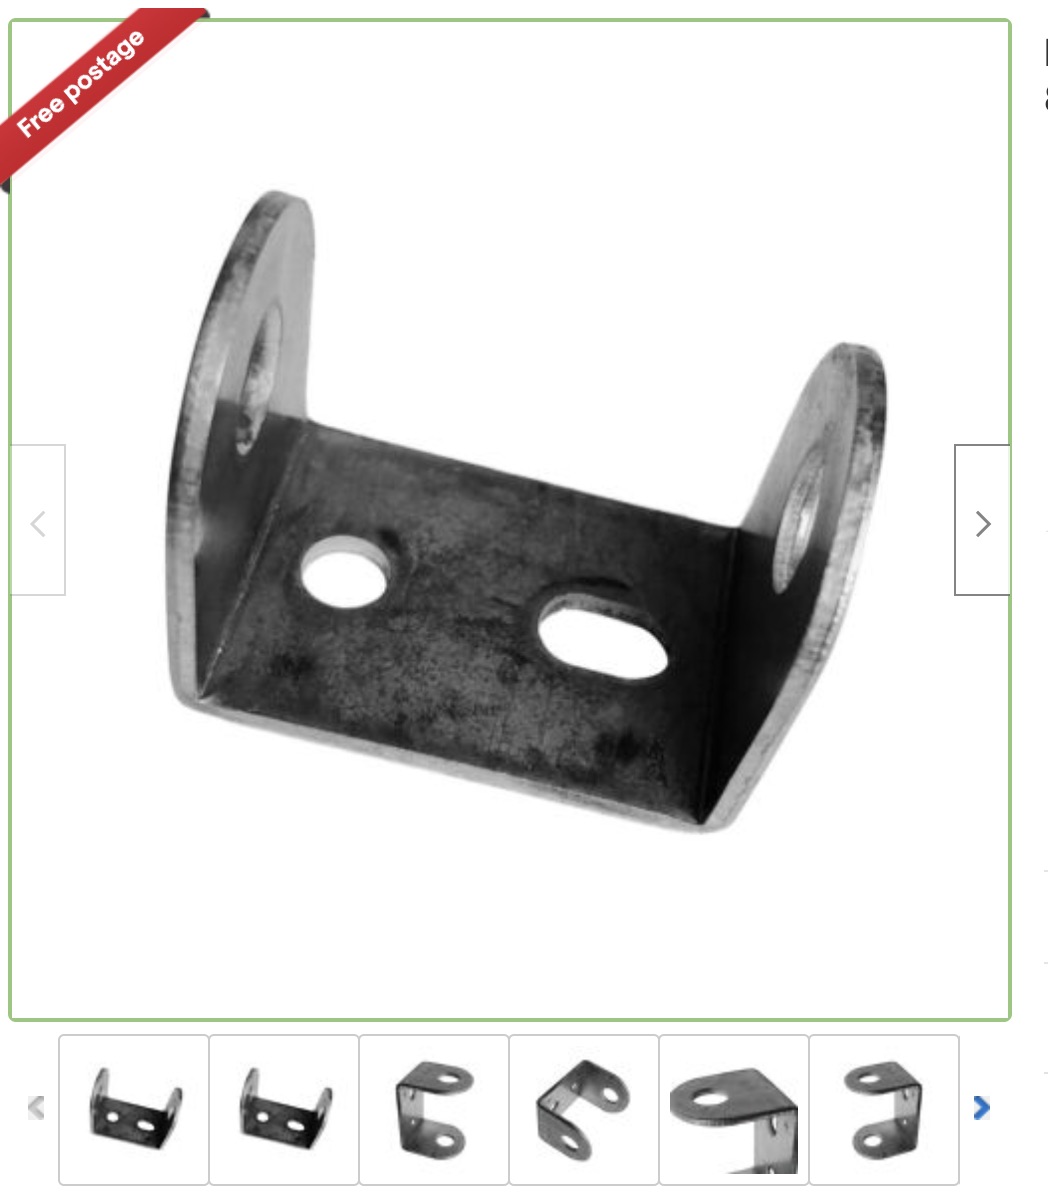
Gumotex’s £219 kitJules’ MYOEbay rudder mech: £25
Jules’ footrest pivot
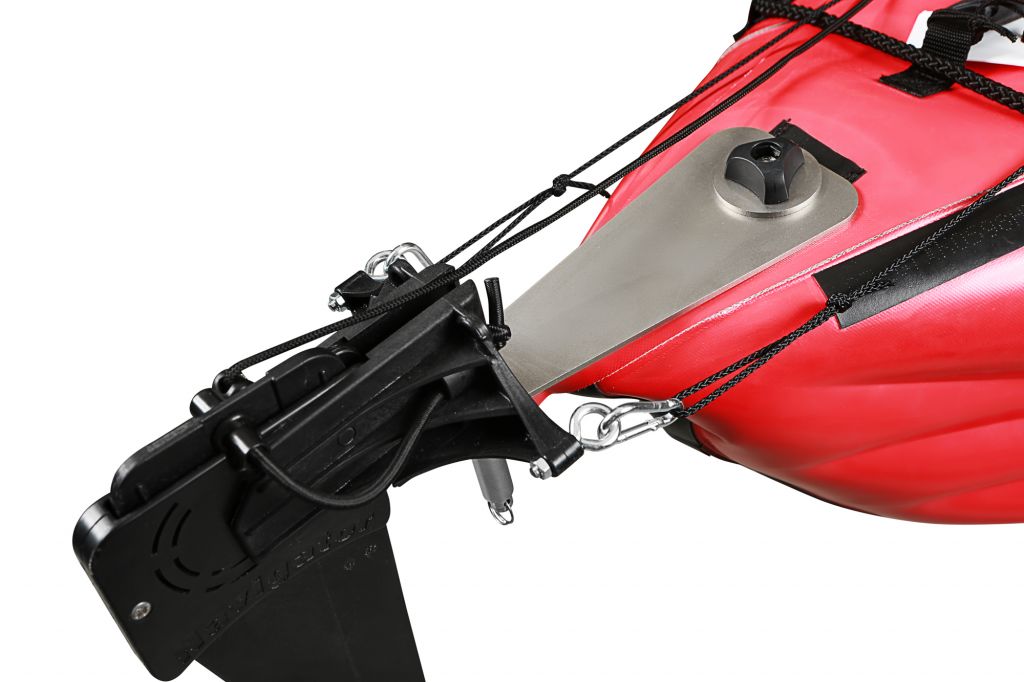
I could have bought the Gumotex rudder kit for just £219, but as always it’s more fun to piss about for hours and days on the pretext of saving money and conjuring up small improvements. IKs sit higher than hardshell kayaks, so I coughed up 25 quid for the longest rudder mechanism I could find on ebay: 510mm. It weighs 550g. The stern-mounted rudder plate started as a slab of was a chopping board, then became an aluminium plate additionally located with velcropads, as Jules and Gumotex use. I found secure clamping of the rudder mounting plate to be important to stop it turning on its axis. There is perhaps more torque on the mount than might be expected when a rudder blade tries to turn a 4.5-m boat. As you’ll see I ended up making a Mk 3.1 rudder mount in a mixture of soft and hard chopping board, as well as a Mk 3.2 in aluminium. There’s a 20g weight difference. Another bright idea idea Jules had was running the rudder lines out of the way under the deck velcroflap and inside thin tubing. That largely eliminates any exposed lines. I also liked his idea of controlling the rudder by pivoting a drainpipe footrest tube from the centre, eliminating the need for cumbersome foot pedals. Overall the whole mechanism: rudder, mount and clamp (220g), cords and tube (50g), adds up to less than a kilo and under £50 (some bits I had already). Eliminating foot pedals was the main saving in weight and bulk.
Mk3 Rudder for Seawave 2
Items needed:
Ebay rudder assembly from £20
Piece of HDPE chopping board, 3mm x 400mm x 60mm, aluminium bar, or similar
Stick-on velcro
Hand clamping knob and nut
6 metres of PVC (or PTFE) pipe with 5mm internal diameter
11 metres of 2mm Dyneema cord
4-inch ø x 30cm plastic drainpipefootrest (if not used already)
2 metres of 25mm strap
A few mini snaplinks, fish snaps or similar
You may also like:
Knob for rudder lift, cinch locks and clamcleats
Make 2 central slots, then attach the strap
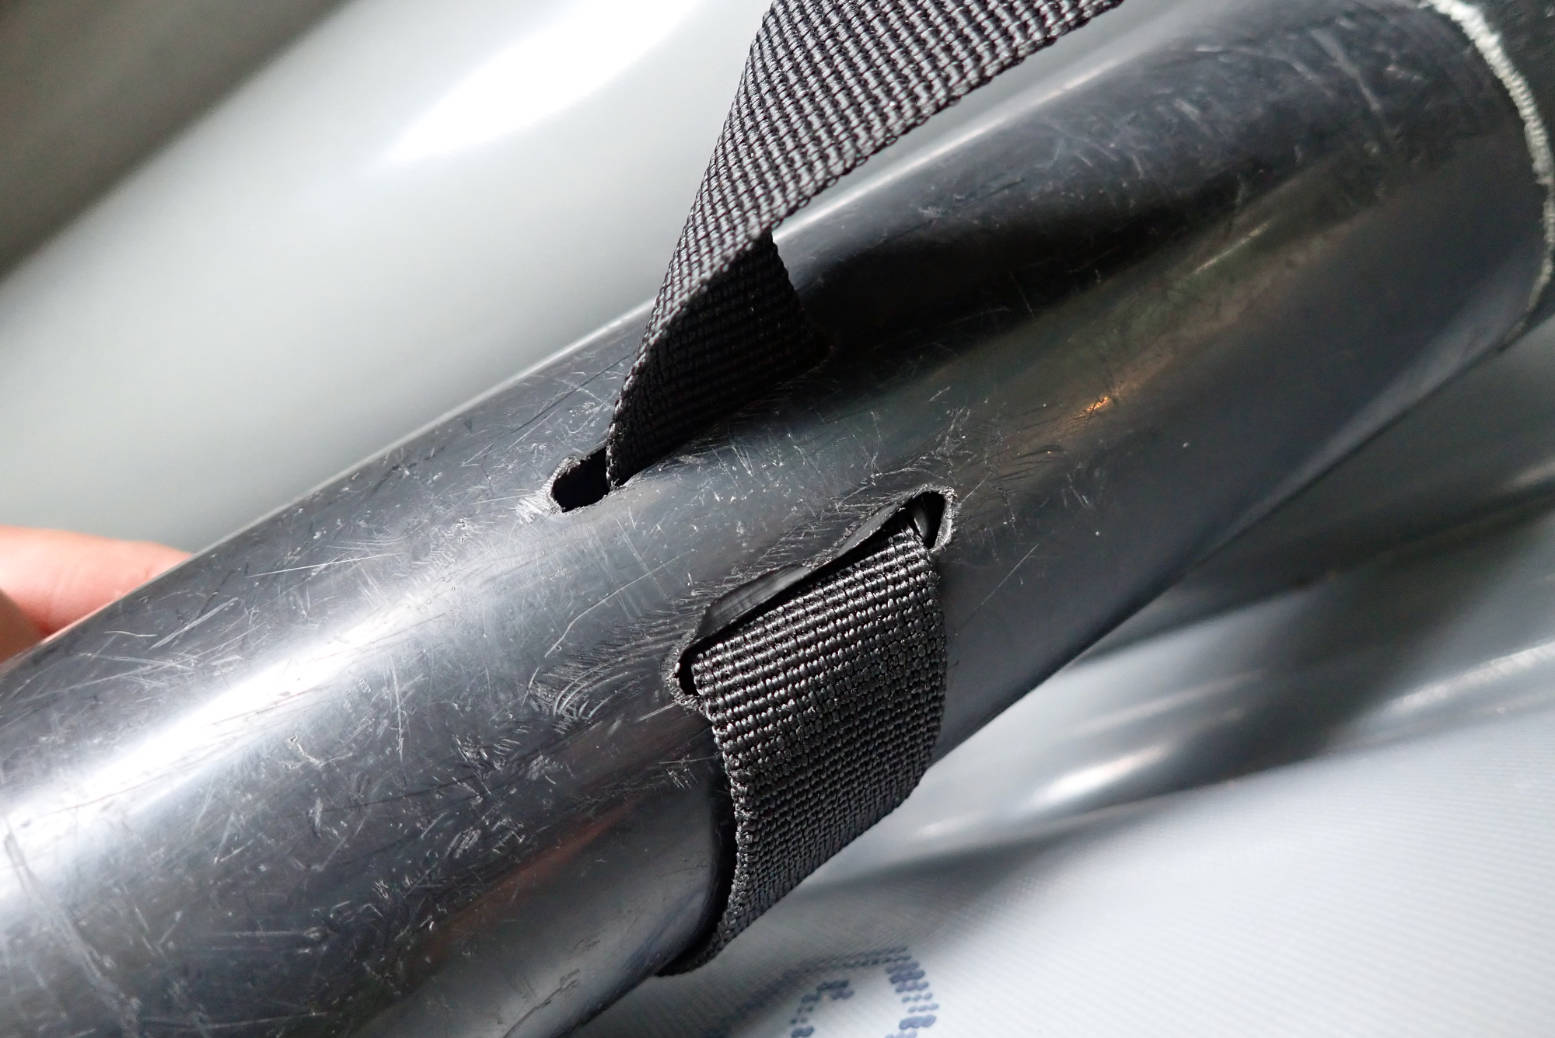
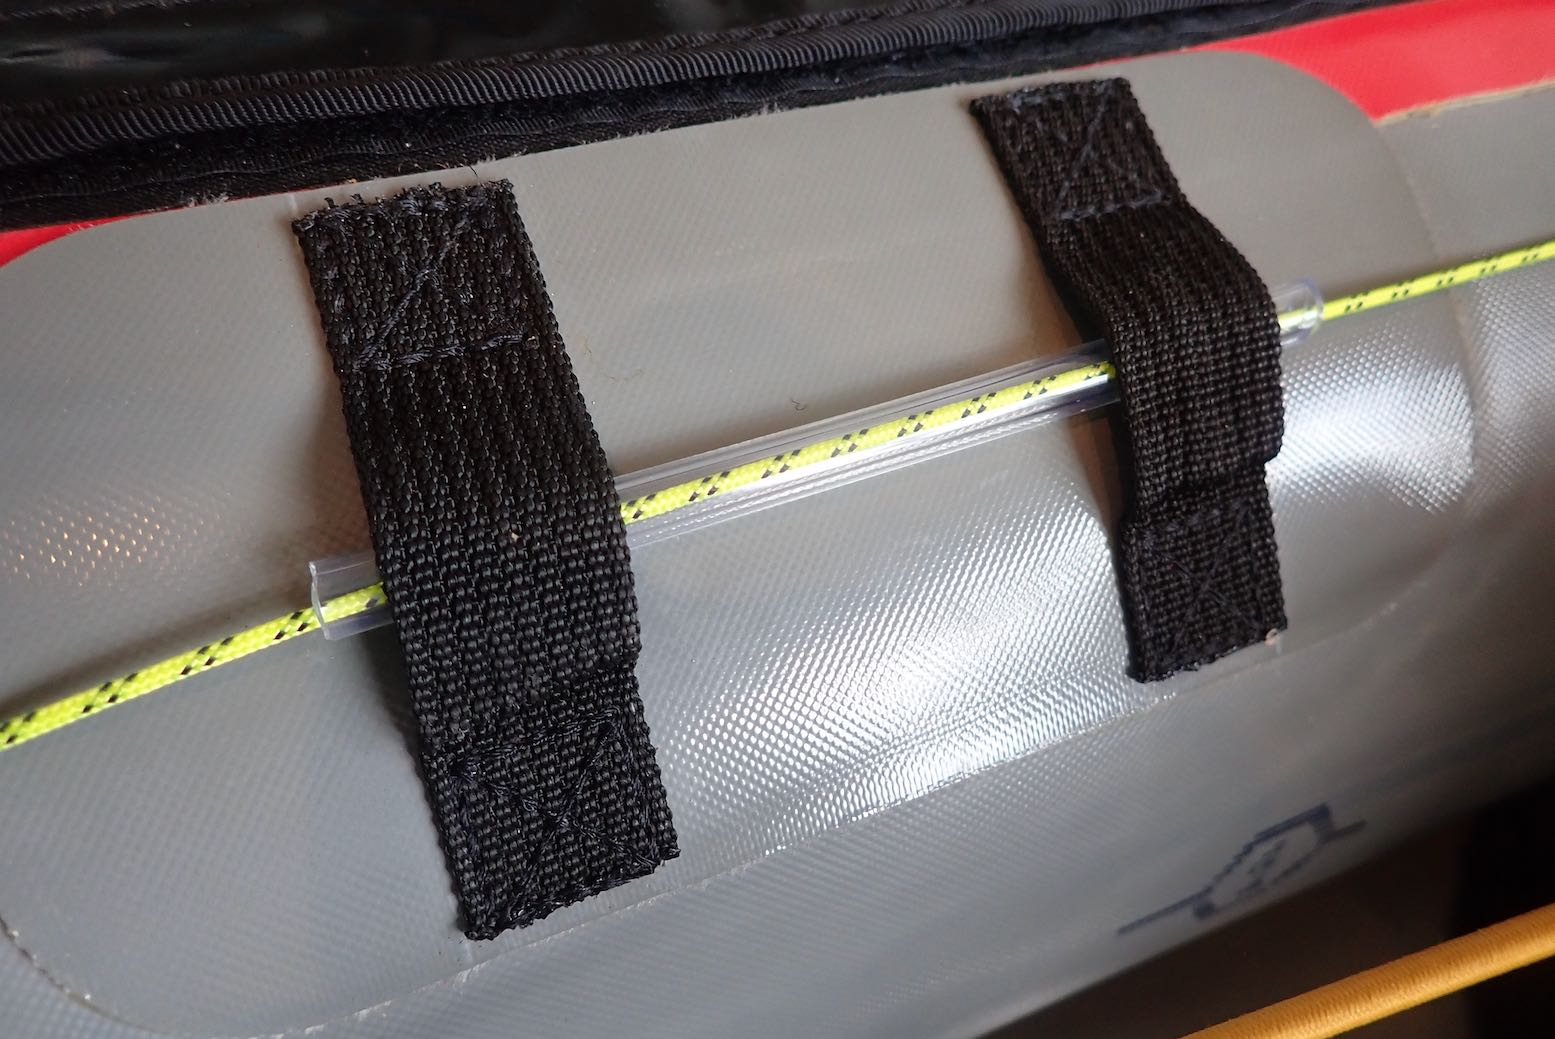
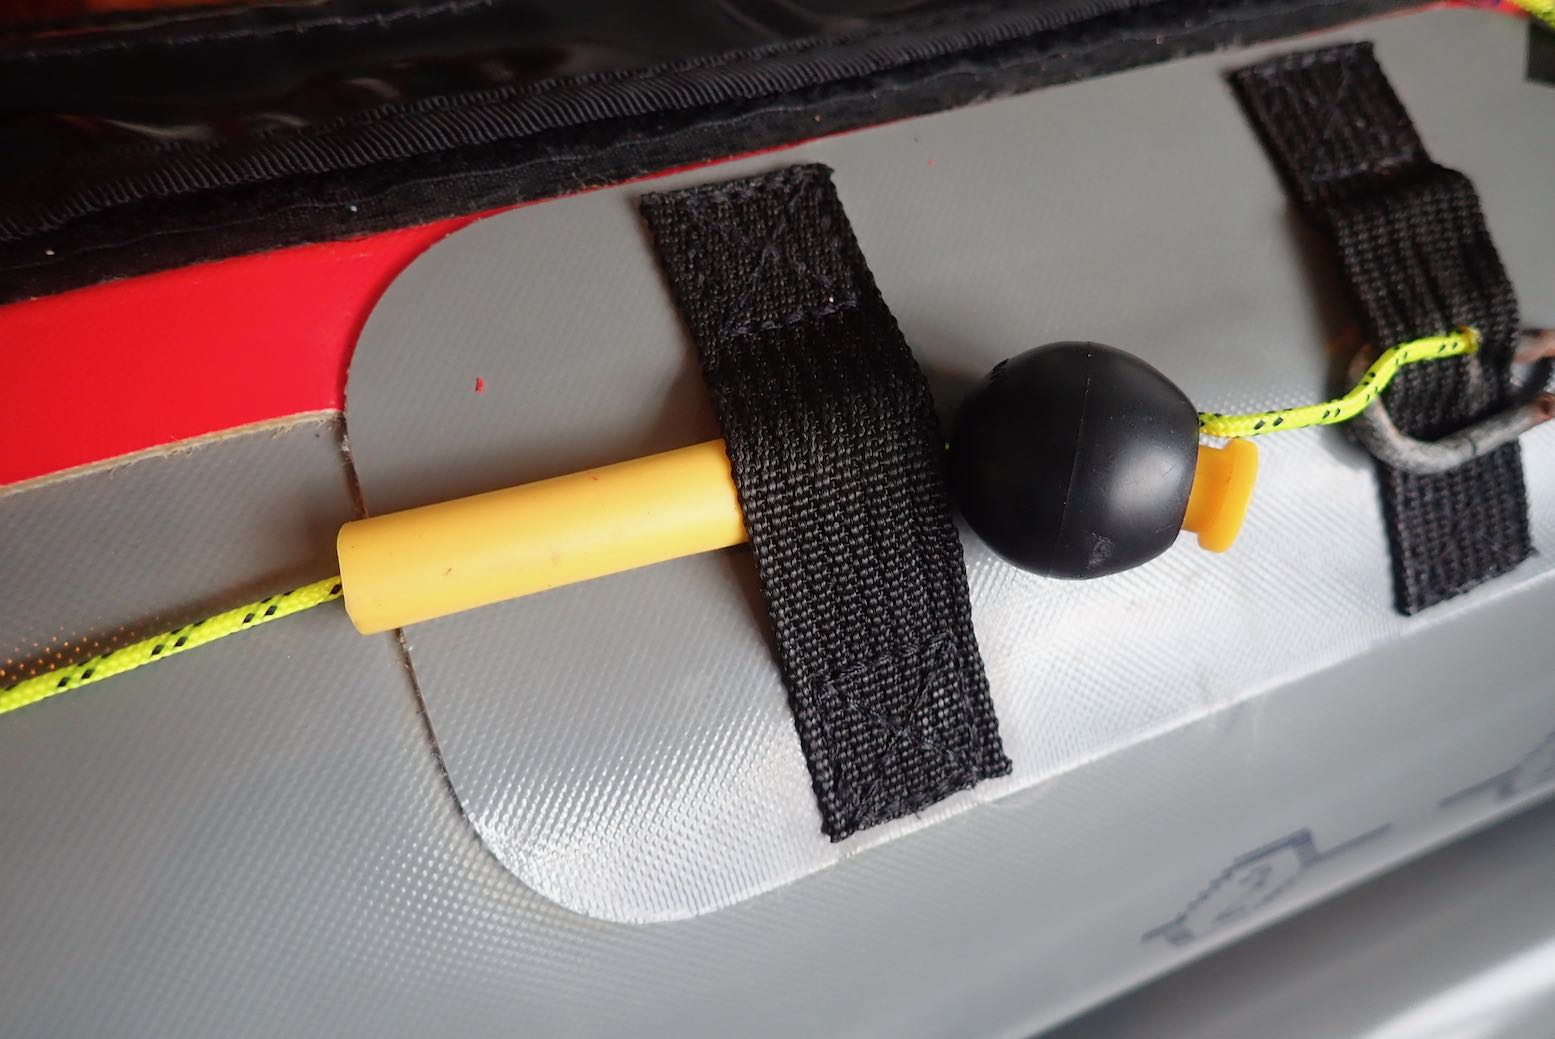
Footrest I already use a drainpipe as a fixed footrest. At 25cm wide, another 5cm would still fit between the Seawave’s sidetubes and may give a bit more finesse and leverage to rudder steering. If this proves the case with mine, it’s an easy swap. Drill and/or hot-knife in two adjacent slots in the middle and feed the strap through. You must fix the footrest to the strap so there’s no slippage. A big knot inside will do. Thread the strap’s loose ends through the stock footrest attachments buckles on the boat’s floor. You can now easily re-position the footrest tube forward or back for tandem or other sized paddlers. This is handy whether you use a rudder or not. While fine in the straight line along the hull top, putting a bend in the soft PVC tubing down the insides of the hull caused too much drag on the lines. So to avoid wear on the grey Hypalon, I just chopped the PVC tube back and stuck on some tape. (As you can see I need to add another strip for the tandem position). It’s probable the harder PTFE tubing Jules used causes less stiction, but having the rudder line exposed near the footrest-pivot make adjusting clamcleats and cinch locks easier.
Footrest-pedal in solo position. Tape avoids wear on hullTakes 1 minute to reposition for tandem paddling
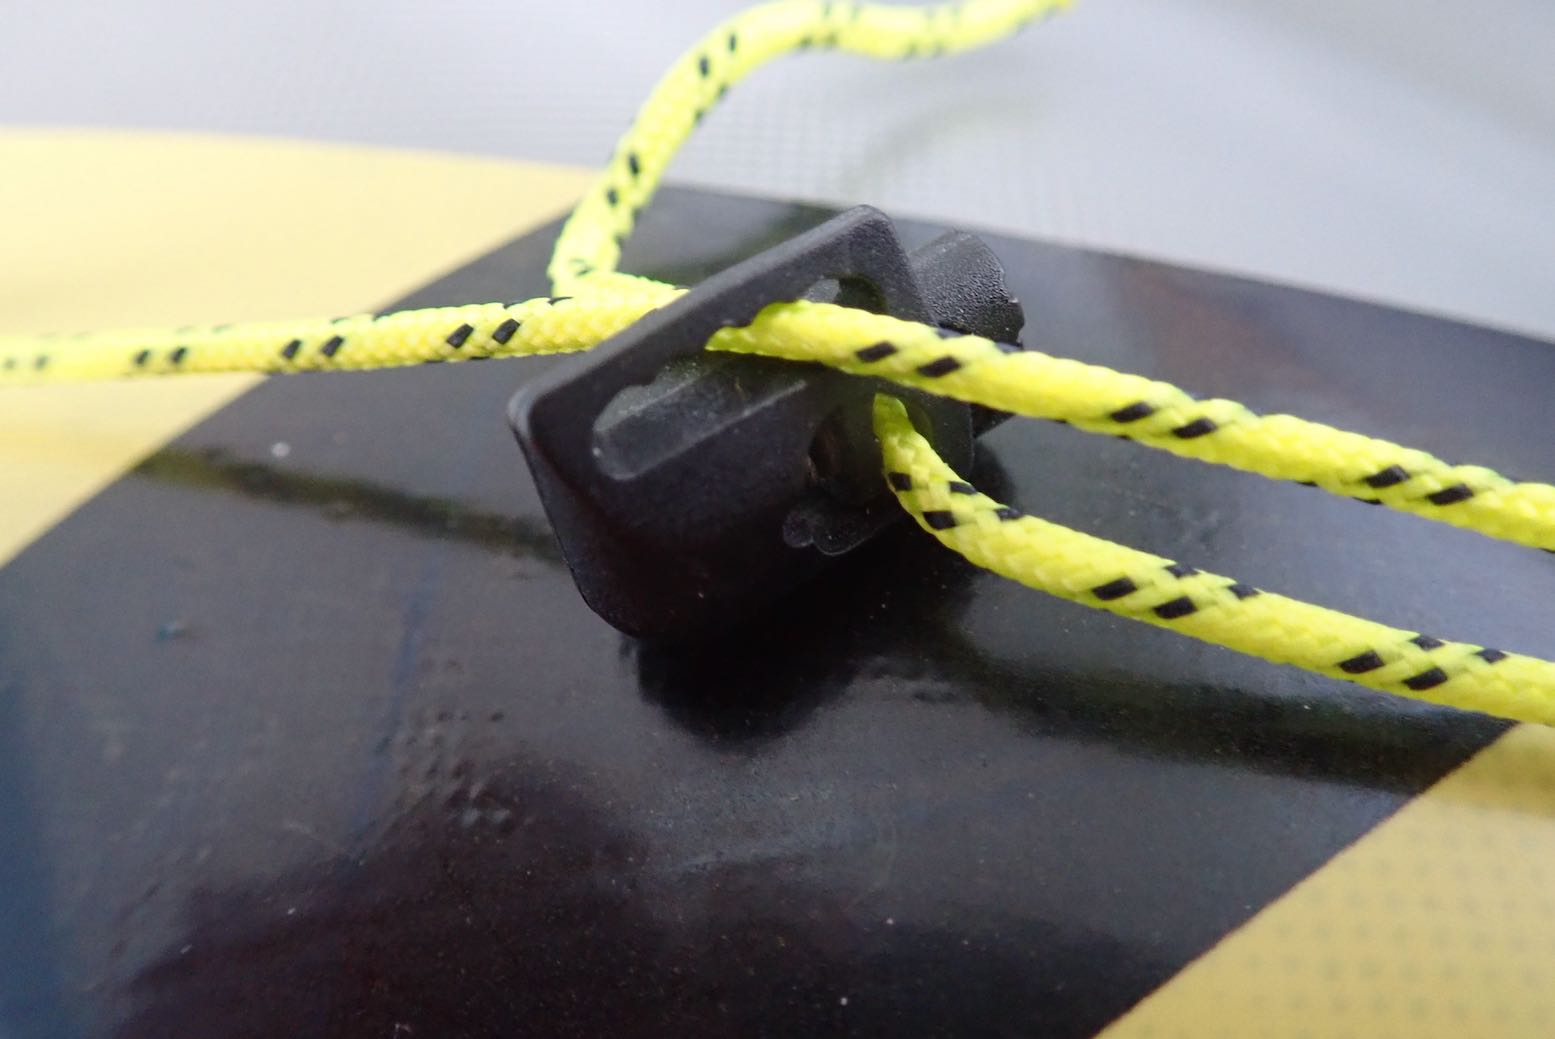
I stumbled on quite a fast and easy way to fine tune or readjust the footrest pedal tension: inline clam cleats (or cam cleats or rope locks) which I came across during my V-Sail experiments years ago. Feed the line through as shown below; centre both rudder and footrest, then cinch up and you should be good to go. Once you’ve established the right line length through the cleat for a certain fixed position, it can help to ‘memory mark‘ the cord (as I did in red). Though I bet once I get on the water and use the rudder a bit, they’ll go off alignment, so probably better to wait till then.
How to thread your clamcleat (rope lock)Inline clamcleat: fast adjustment & red memory markers
You need enough rudder line slack to slide the whole pedal-footrest forward about a foot when paddling two-up. Loose ends can be tidied away with cinch locks. Eleven metres of Dyneema cord is enough to do this job on a Seawave, including a single rudder lifting line. (To push and drop the rudder too you’ll need another 3m.)
Cinch lock tidies up loose endsAnd lifts rudder line a bit to reduce drag
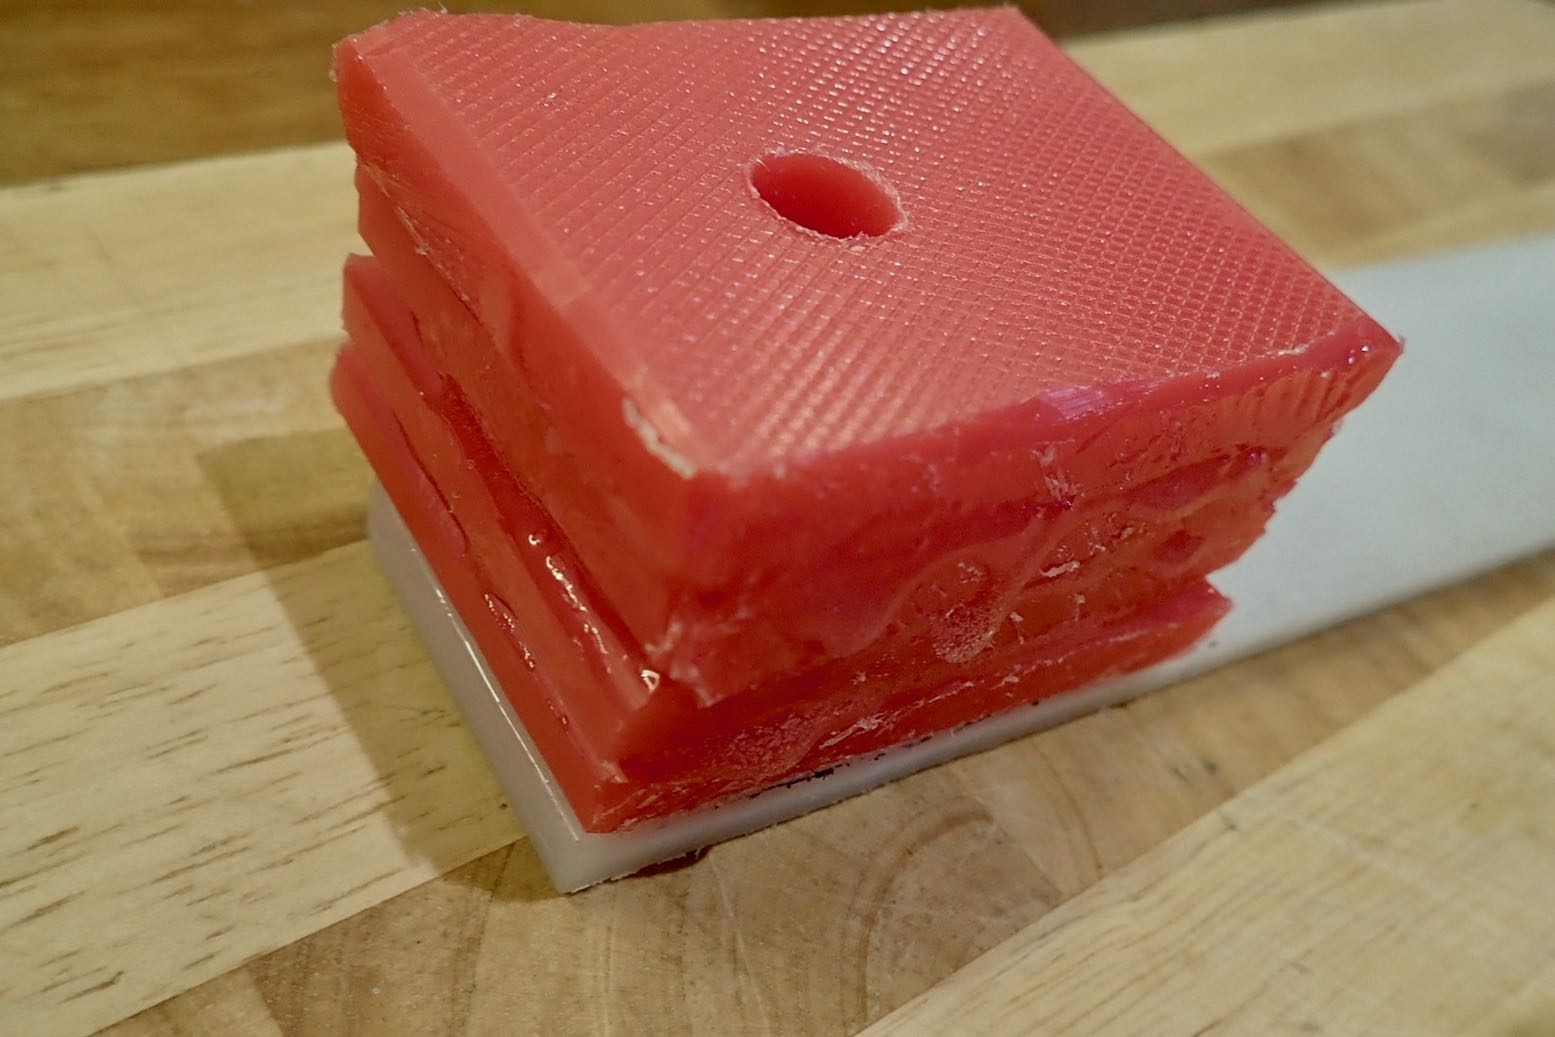
Rudder mountplate The 10mm red chopping board I bought was actually quite bendy (LDPE, not HDPE?) compared to other bits I realised I had all along. The less play in the rudder system the more responsive it will be; an IK’s stern mounting is mushy enough. This time round I copied Gumotex’s idea of using small velcro pads to stop the rudder twisting on it’s pivot-clamp axis. Initially lacking stick-on velcro, I glued plain velcro, using the PU glue from the Gumotex repair kit. For one-part glue, it seemed to fix the velcro pretty well but if not, some sticky-back came in the post.
Gumo glue seems surprisingly goodOn the ally plate I used stick-on
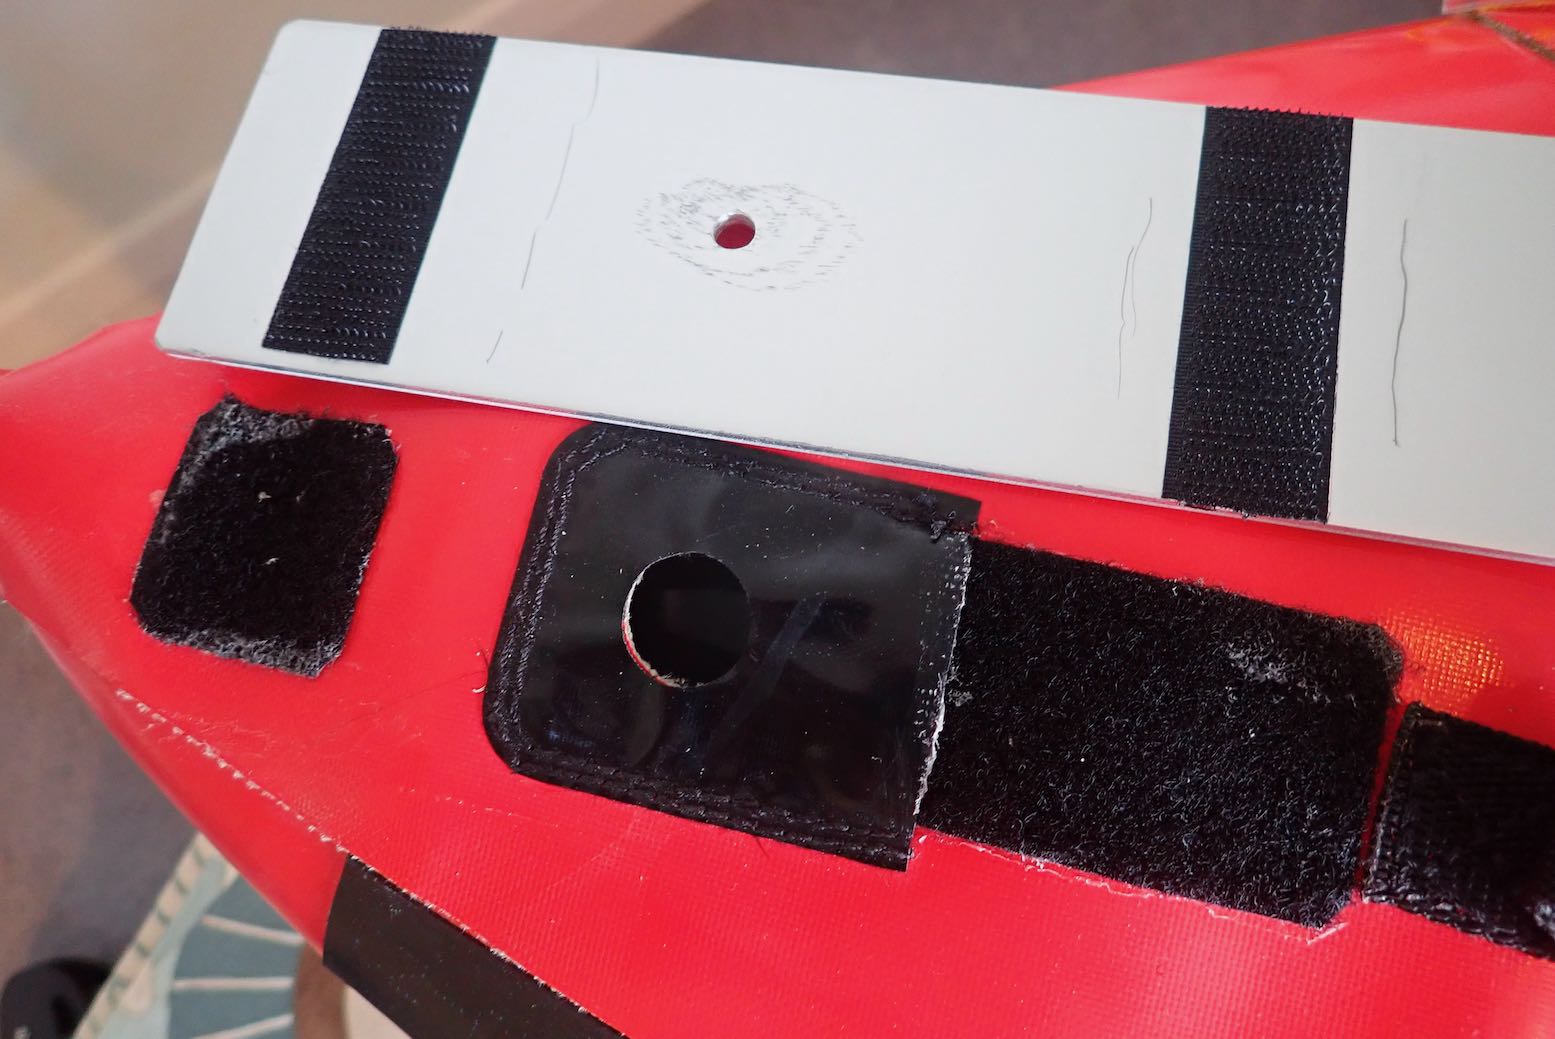
I knew from last time I made a rudder the under-plate shape helps eliminate pivoting of the mount, but you can draw out the truncated triangle by simply tracing the converging top seams at the stern, then make the under-plate from whatever you got. I used a bit of plywood: jam it in snugly, mark the point under the stock drain hole, remove and drill. I glued and taped a nut to the back of the ply and added a bit of string to help pull the under-plate out.
Triangular under-plate – importantJam it in, mark a hole and drill
I would have rather made the rudder top mount plate from ally but with little more than a hacksaw and a kitchen stool, lacked the tools to do a neat job. Then, while waiting for parts to arrive, I realised it was possible to buy ‘aluminium bar off cuts’ on ebay (right). Using the word ‘bar’ was the key. This place, or others like it, sell various sizes, including 3mm x 400 x 60mm for 7 quid.
Jules’ neat rudder mountNeeds a visit to a beautician’s but works the same
I’m pretty sure most kayak rudders come with a 48-mm pivot pin of 9mm ø. Or was it originally 3/8″s, which is 9.5mm? The pin slips into a 10mm gudgeon swivel sleeve/tube. Some hardshells have this tube moulded in the stern; on an IK it must be built into the rudder mount plate. Above left, you can see Jules (as well as Gumotex) integrate a gudgeon swivel tube into the end of the mount plate; a tricky thing to do accurately with a just a hand drill, though Jules’ thick plate makes it a bit easier. On my Mark 3.1 white HDPE mount, I glued layers of the old red LDPE into a block of plastic, then drilled a 10mm hole which works OK.
Bracket from China; hole ø 11mm10mm washer needed to reduce play
When it comes to an ally rudder mount, online you’ll find stainless steel kayak rudder pivot ‘C’ brackets for a fiver. They weigh 57g and are usually screwed to the vertical stern of a hardshell, replicating the gudgeon tube. Even though they’re only a fiver, it seems impossible to buy these from anywhere else but the Far East, and it would be more than a fiver’s work to fabricate that shape from hard stainless steel. I bought a pair anyway; they arrived in a fortnight, but hole diameters (not stated in the advert) were 11mm, meaning 2mm of play with my rudder pin which feels too much. Oh China, your poor manufacturing tolerances let me down! So I glued on some 10mm washers to eliminate the slack. I’d have been better off making something after all. It had occurred to me I could have bent my 400-mm piece of 3mm ally into a full ‘C’, either curved round a pole, or bent on an edge at two right angles, as up above left in cardboard. Tweak the alignment and precisely drill two 10mm holes and the rudder swivel mount and plate are all one piece. In fact, that 3mm alloy plate I bought was pretty stiff, so I settled on a simple L bend (and without a vice, even that wasn’t perfect), then glued and bolted on the Chinese ‘C’ bracket.
Not a perfect ‘L’ when bent in a metal gate frame
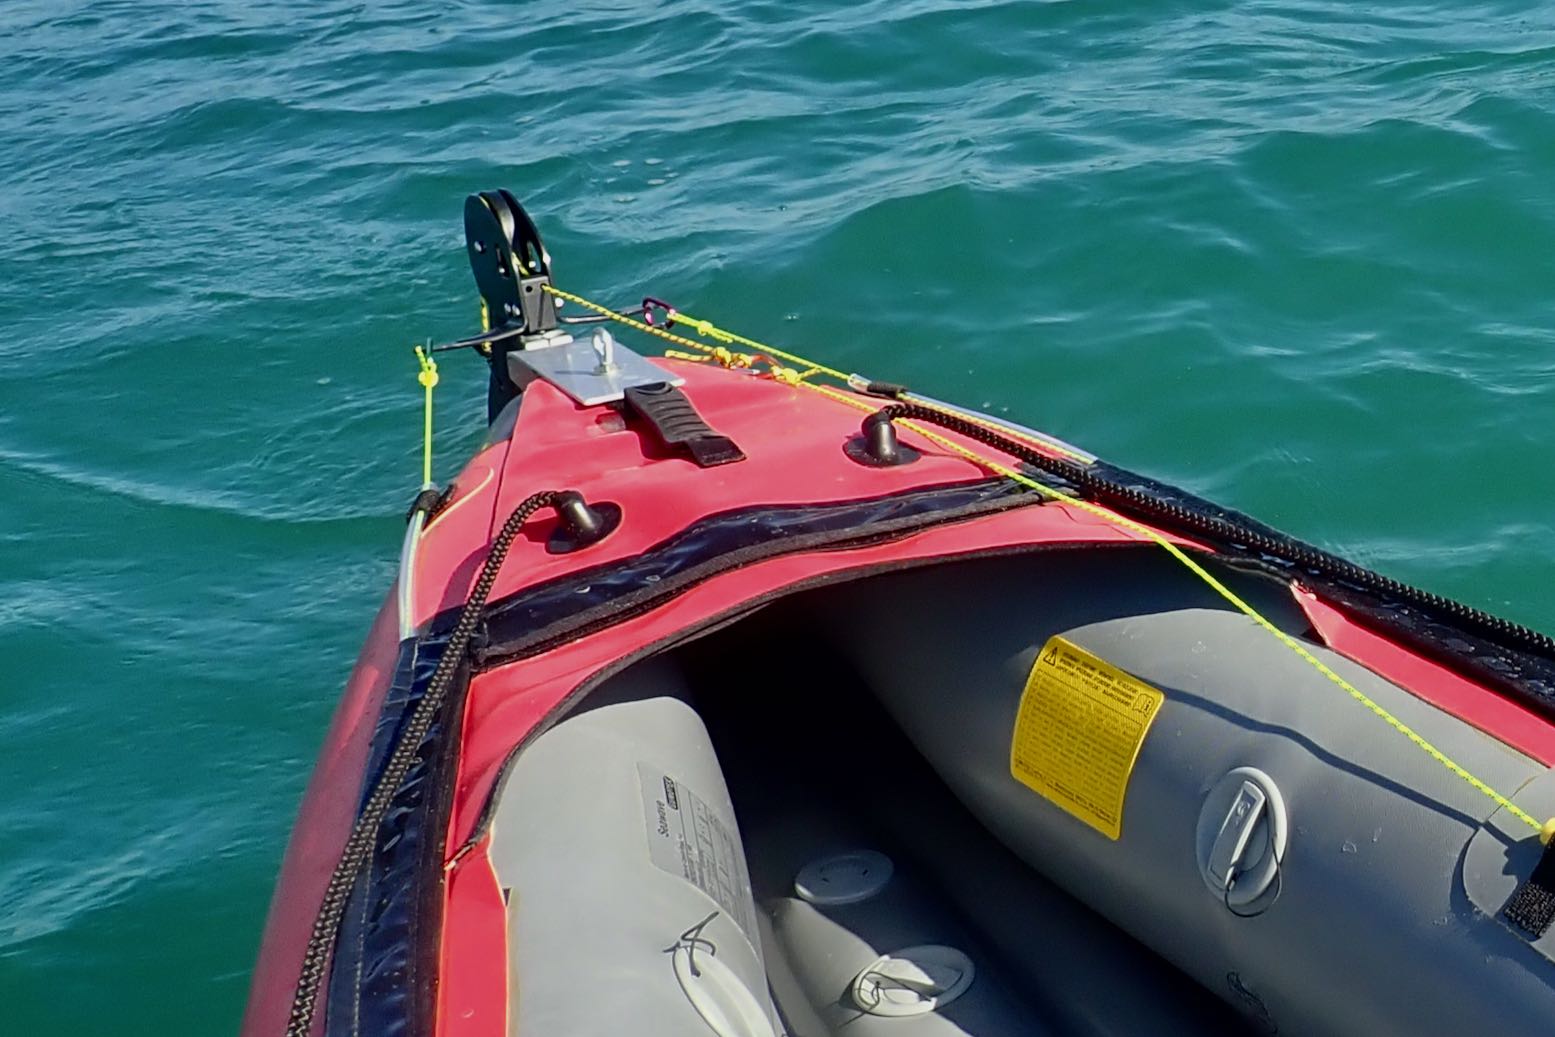
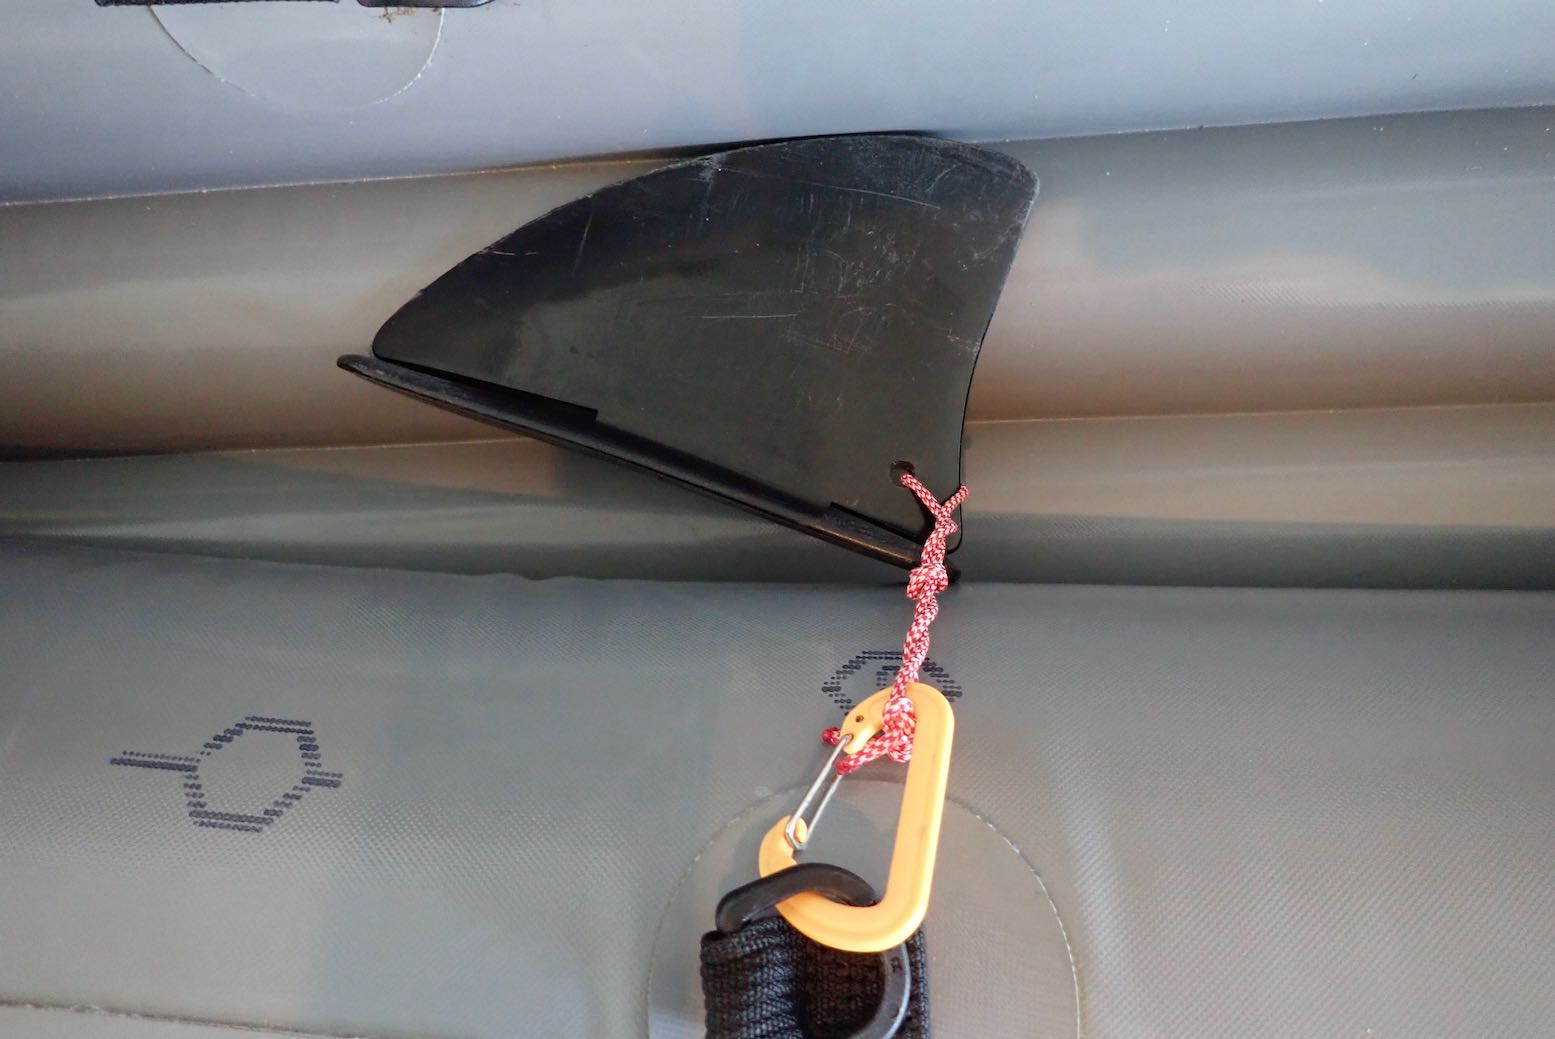
Rudder pulley Rudder blades have a hole in the back so the pulley can lift and lower the rudder near a shore. For the moment I’ve decided to keep things simple and only use a single lift line, not a doubled-up line (another 3m of cord needed; 14m total) to lower the rudder as well. I intend to use the paddle to reach back and flip the rudder into the water. If that is a poor idea, I can easily add a two-way rudder line. On packing up I realised this line needs to be in two sections if the rudder and plate are to be easily removable when rolling up the boat. The join can be at the back near the plate. As you can see I ran out of Dyneema and used an orange shoelace.
Separation needed to remove rudder but leave lineLoose lines hook up out of the way when rudder not used
I fitted the lift line along the sides, using the deck support rib tabs and running through spare bits of tubing to avoid wear and aid smooth running. I fitted a tension-adjustable knob at the hand end of the lift line on the left, though anything will do. Pull forward six inches to lift the rudder. Flip the rudder back down with the paddle blade.
Lift line runs through tubeTension adjustable lift knob
Does that flat, 4mm front edge of the rudder blade need chamfering to cut through the water, or am I other-thinking it? Who knows but watever you do, keep the skeg handy in case the rudder plays up.
Rudder blade could do with a sharp leading edgeKeep the skeg handy
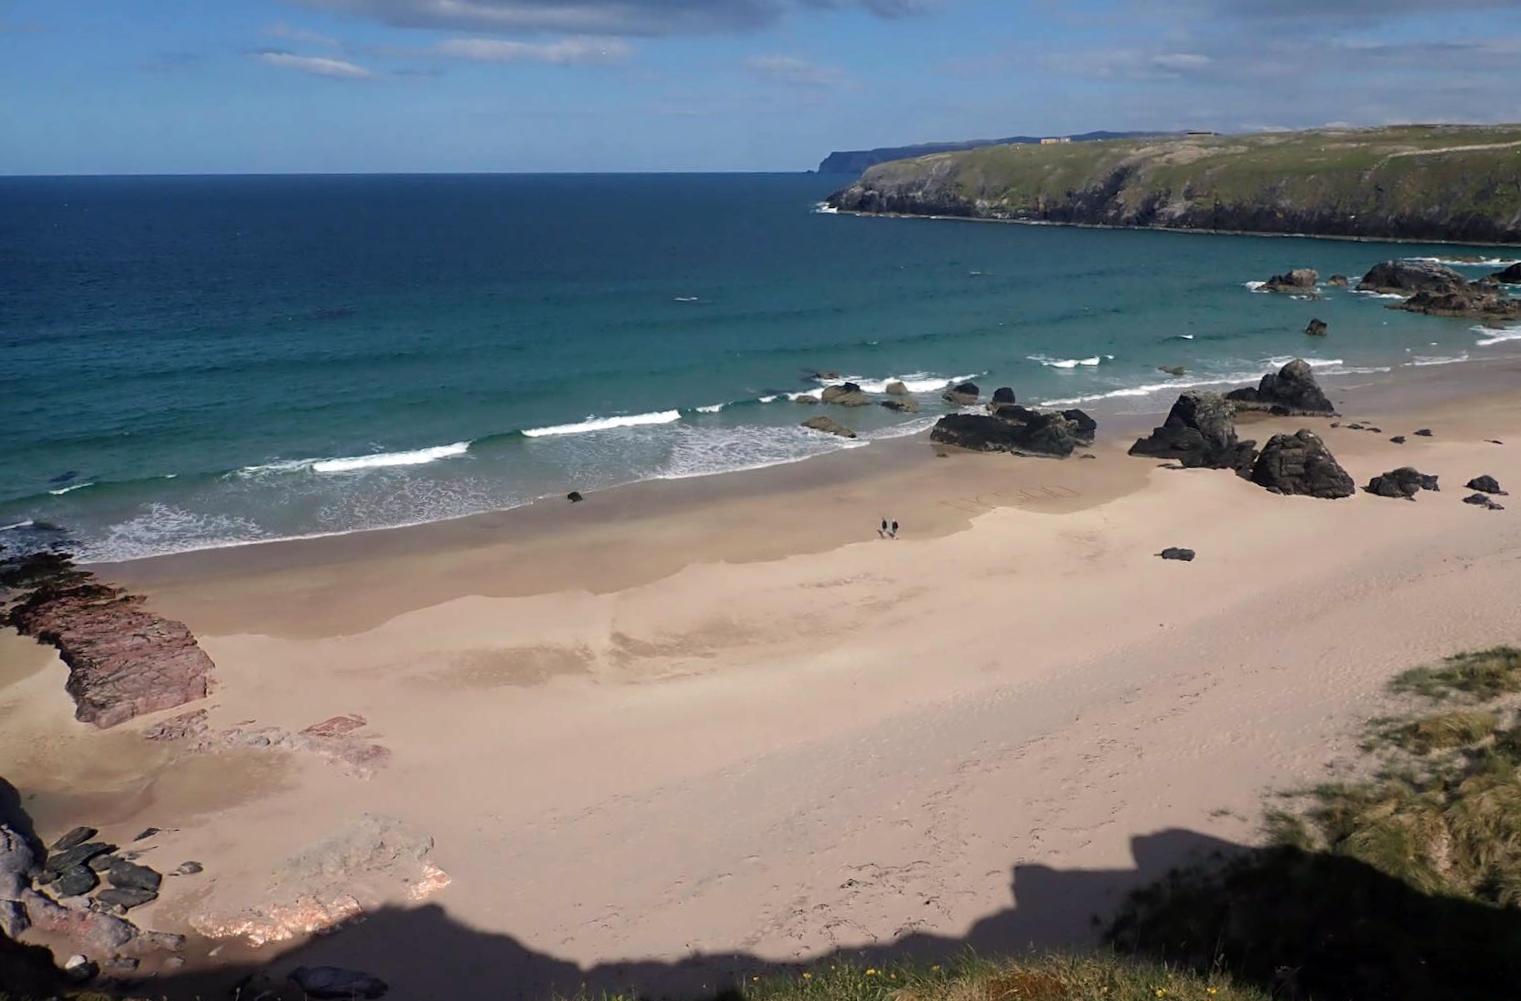
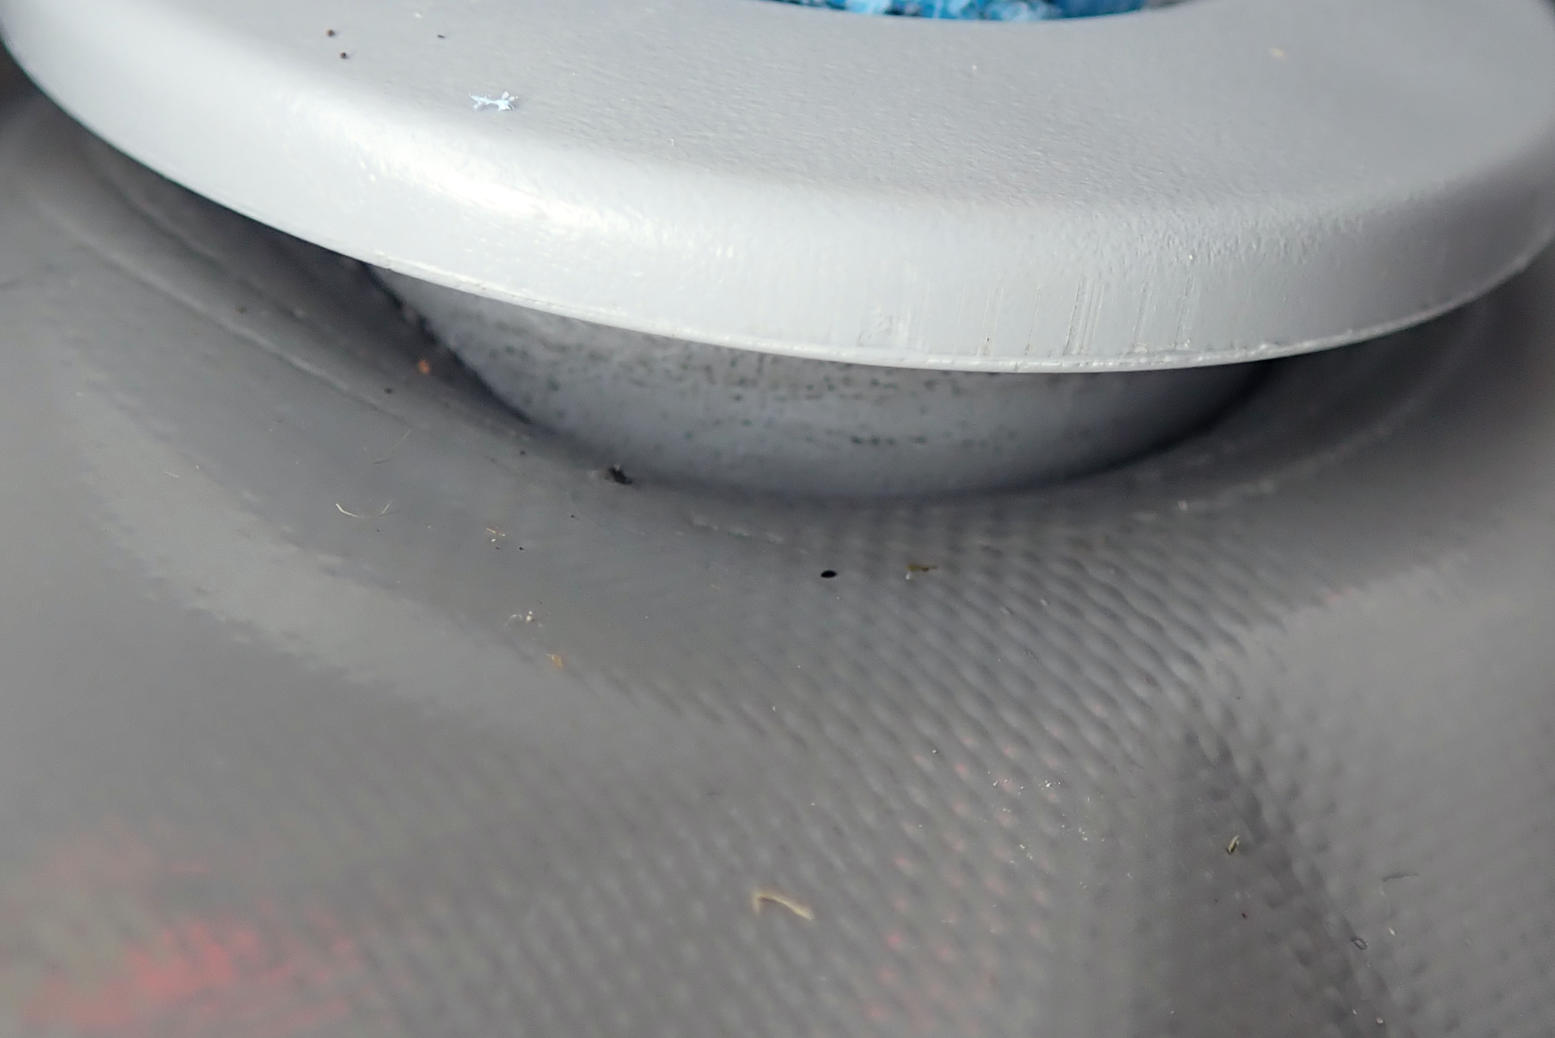
The other day we paddled the Seawave off Durness beach where the surf was bigger than I’m used to. Hitting a breaking wave as we paddled out didn’t help; the swamped boat needed tipping out at the next beach. It was a bit too offshore windy to roam, but it was still a thrill to be paddling on the very top of Britain, just 2175 miles from the North Pole (about the same distance south to the Canaries). After the paddle I took care to dry, wipe down and roll the boat up on a sand-free rock bench, but lacking a hose back at the house, I had to rinse one bucket at time – not ideal. When I pumped up, the floor soon went flat: sand was in the seal of the floor’s PRV (what’s a PRV). It’s a thing that happens but in nearly 20 years of Gumotexing it’s never happened to me. Today was my day.
Seawave PRV
The design of the valve means that if the boat swamps in the surf, water laden with grit can enter via the six vents and pool in the valve body right above the seal. The next time it purges, sand grains can slip down onto the soft rubber seal surface and stay there, letting air leak out. Because the chances of this are high, with a leaking floor PRVs are the usual culprit, not the nearby inflation valve with its sealed valve cap, or less still, a puncture. But don’t rule either out (the cleaning procedure for an inflation valve will be the same).
Fixing a PRV Much of what follows is my take on Polishman Marcin S’s translated post linked above. It’s not how I actually did it, it’s how I would do it next time after quite a lot of trial, error and better ideas or procedures though up along the way.
Before disassembly, first try giving the PRV a darn good blow-through by pumping like billy-o and letting it purge. It will help to prise off the vent cap with a small flat screwdriver so grains blow away, not bounce back in. Pump up and see what happens. Chances are it won’t work.
Next I suggest putting the boat on a slope (to save water and weight) and flood the stern to establish the pace of the leak from the PRV. You will do it again at the end to see if there is any change. By dragging the boat around 180°, you can let the water slosh down to the bow while you remove the PRV at the stern at the high end.
Don’t try this; manometer leaking
Small bubbles rising from the PRV
Don’t plug in a manometer to try monitor the leak over a period of time; it cost me a few hours and a disassembly or two before the flooding idea proved my manometer was leaking from the base faster than the PRV. As we know, pressure gauges are plugged in briefly to get a reading, then as quickly removed. To test for a leak, water is best.
Six splines below the vent cap
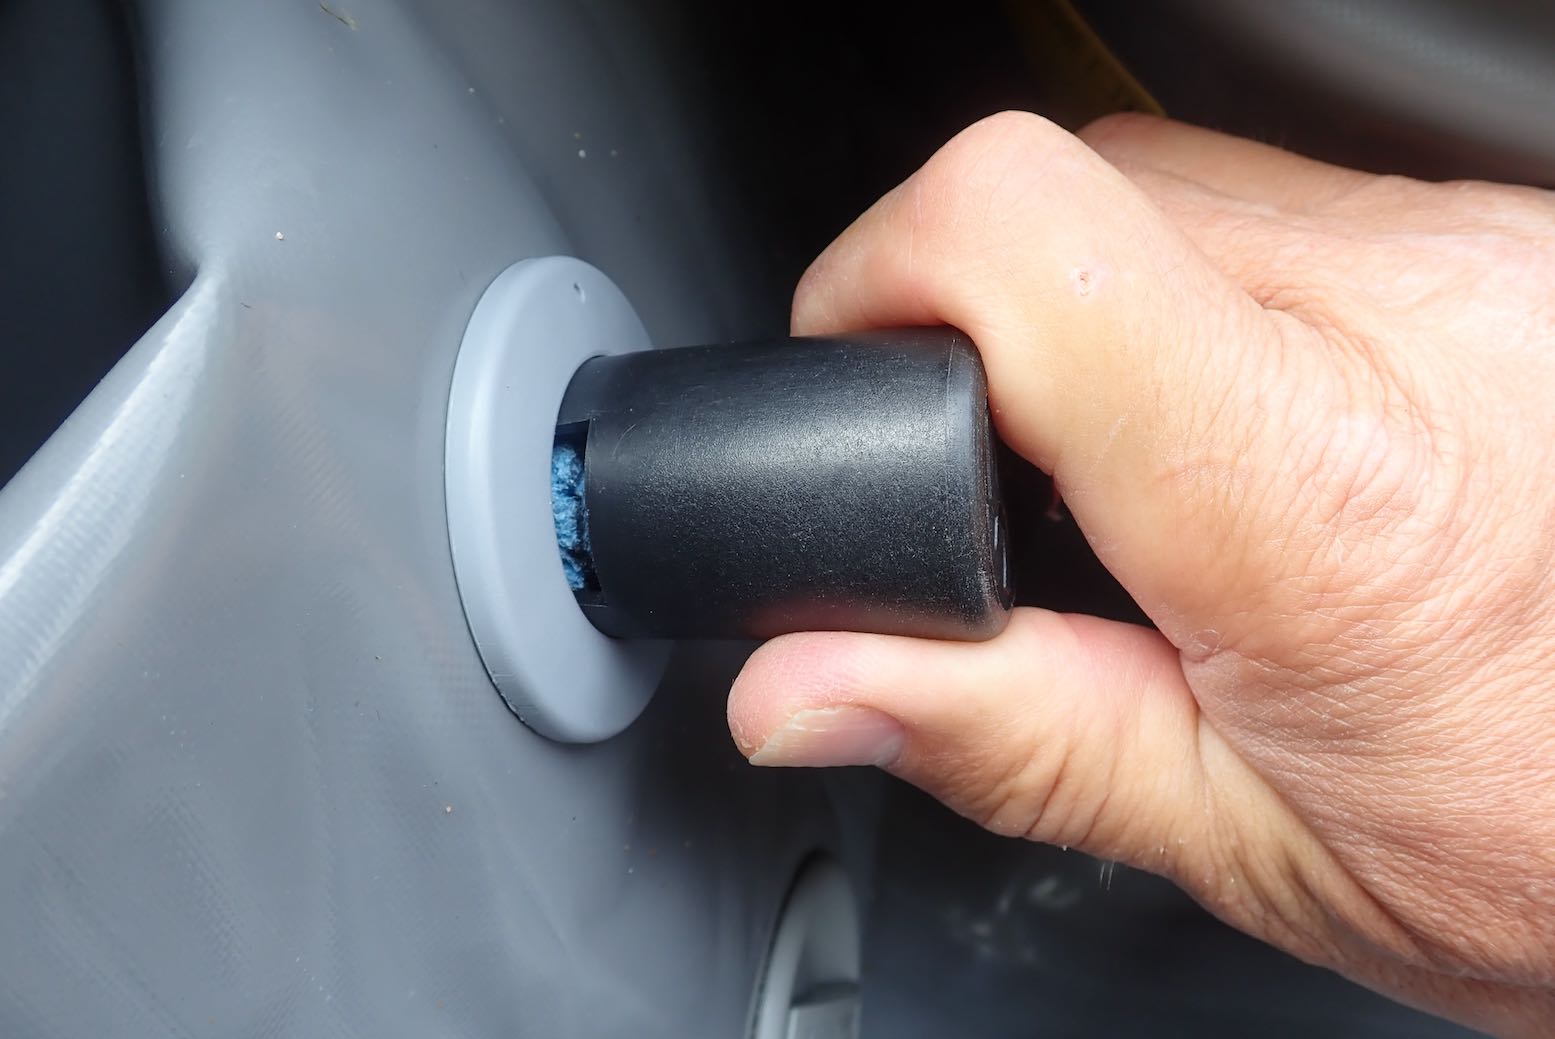
Buy one now
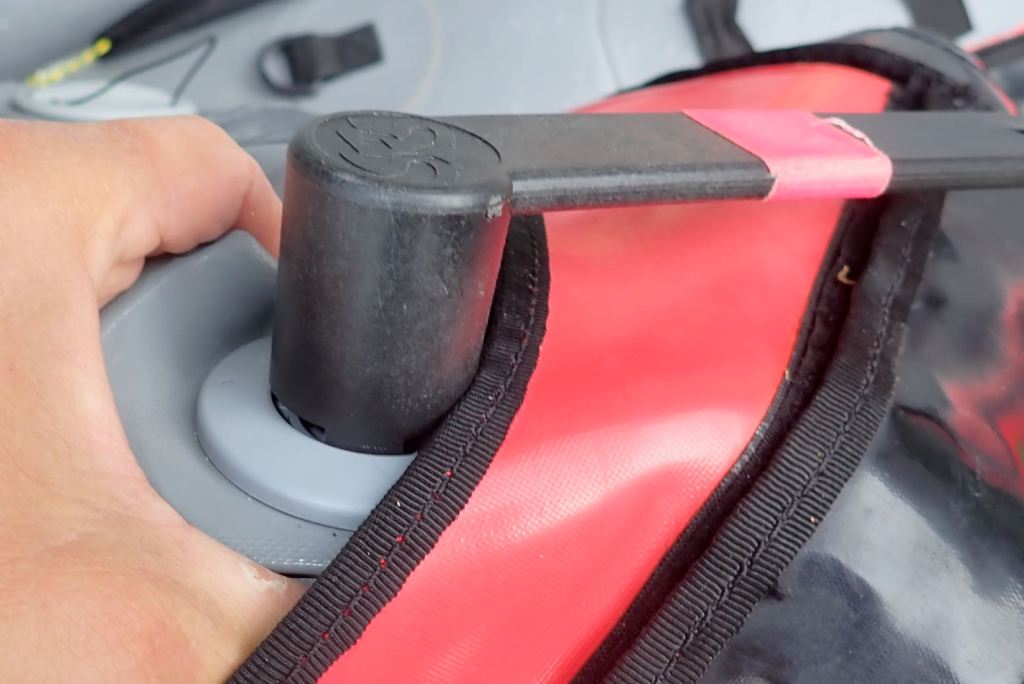
You now know for sure the PRV is leaking so will have to remove and clean it. Flicking off the vent cap exposes the valve body’s six splines. Fit your Gumotex valve tool(or eBay clones from £6) and unscrew the PRV. As Marcin says: the plastic one will do; you don’t need the expensive metal one Gumotex also sell. Expect the PRV to be very tight. Marcin pre-lubed his, I didn’t but it undid easily enough. My boat is less than a year old.
What a tool
Don’t let the backing nut fall away (or the o-ring)
It’s easier to start unscrewing the PRV with the boat fully inflated, but separate the two parts of the valve only once fully deflated so there’s less chance of the backing nut inside the hull rolling away out of reach. Same with the loose o-ring on the valve body base; don’t let it drop into the abyss.
PRV with black o-ring
Rinsing; worth a shot
With the PRV in hand, you can see how it works: a spring-loaded valve opens upward when pressure from within reaches a pre-set level – on a Seawave supposedly 0.25 bar or 3.5 psi (but it might close as low as 0.20). As pressure drops it seals shut. At this point you might try rinsing under a tap while pushing the valve open, but you’re going to have to disassemble it anyway to check the state of the seal.
Set the o-ring aside and unscrew the 6mm locknut on the valve stem. Press on the sprung valve from the other side to stop it spinning as you unscrew the nut. But before you do this, count the number of threads or take a photo (above), as the position of the nut regulates the purge pressure; the more you screw down the nut the higher the purge pressure. I notice Marcin’s nut on his Solar was much less screwed in than mine (lower purge pressure). (At one point I tried screwing in my nut an extra turn to improve sealing, but it didn’t seem to make much difference; still closing around 0.2. Maybe a few more turns are needed, but of course you don’t want to go too far and compromise the floor.
Left: pliers to undo the nut; magnifying glass and torch to closely inspect the rubber seal. Right: the disassembled PRV. From top left: valve body, o-ring, valve stem with rubber seal, spring, spring cross-washer, 6mm lock nut.
Ooo-er, quite a lot of fine Durness beach on there.
I chose to clean the rubber seal with an ear stick and toluene solvent. (I tried, but decided not to remove the rubber seal from the stem). After carefully wiping off the grains on, around and under the seal, I dipped the whole thing in the toluene bottle cap (not too long as toluene is strong stuff on plastic; it dissolved the orange marker dot). Don’t forget to inspect and wipe the inside of the plastic valve body too.
A lovely, clean PRV seal. Reassemble and carefully screw down the metal nut onto the soft plastic valve stem to where it was – or what you prefer.
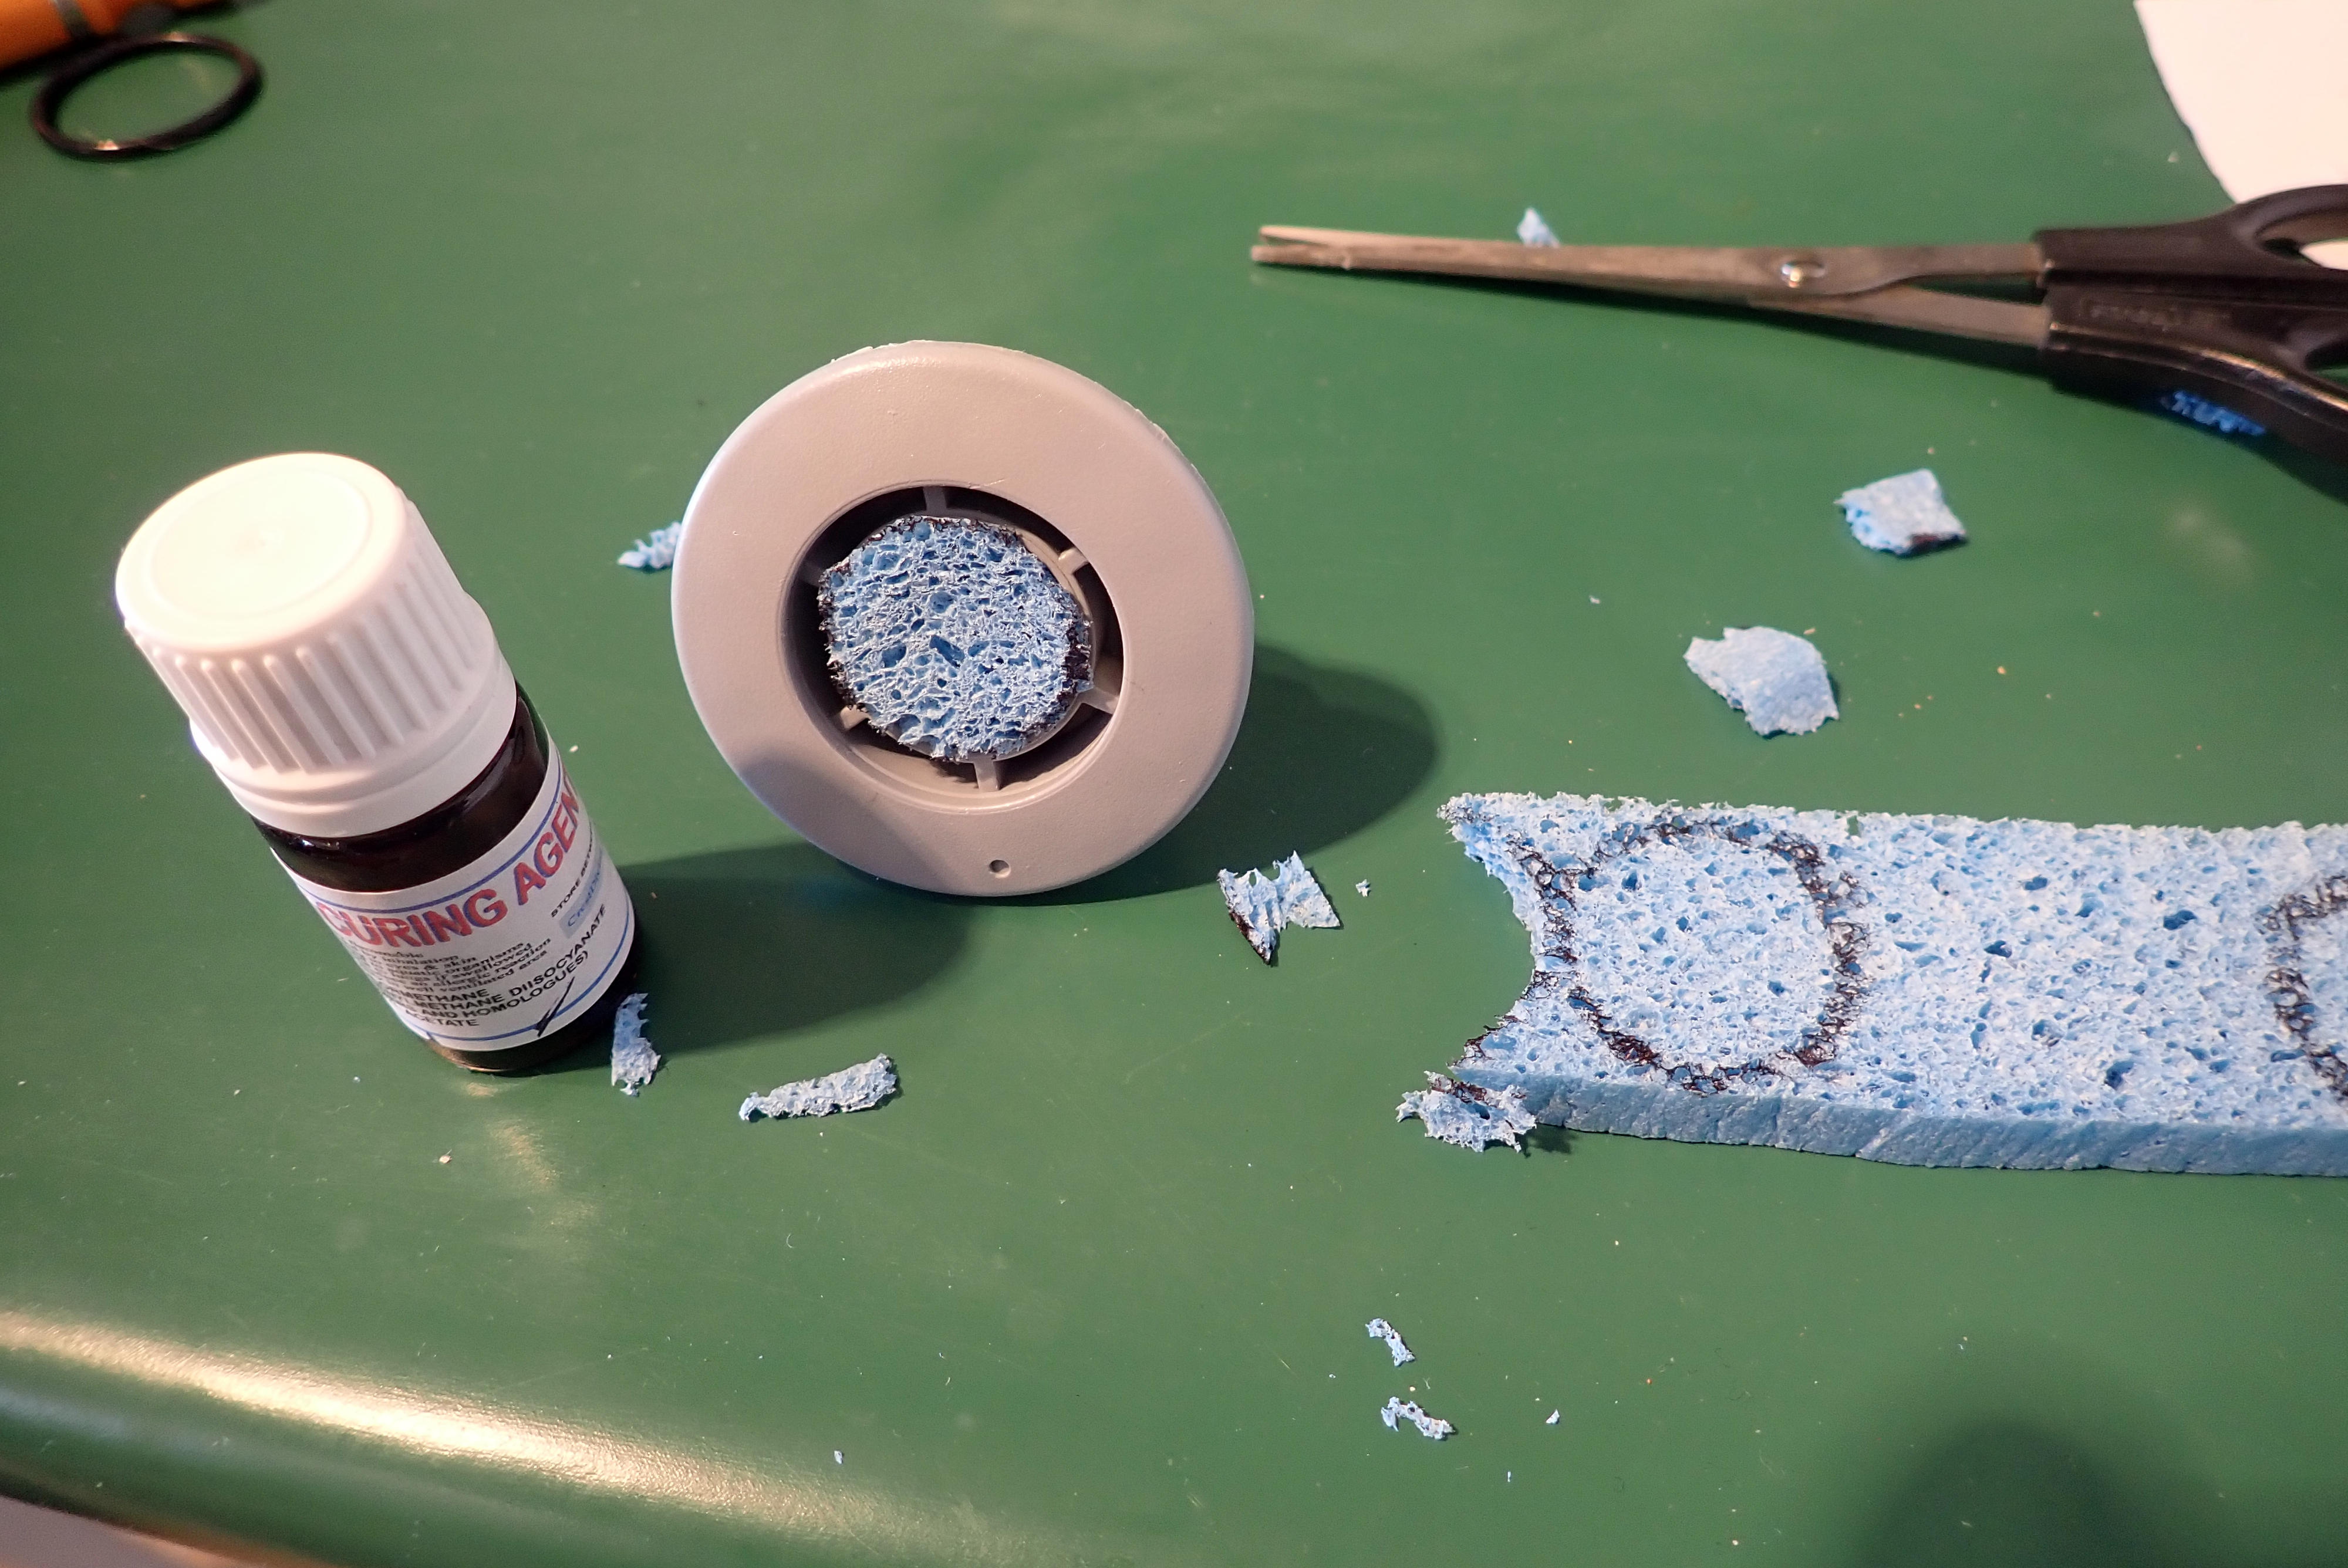
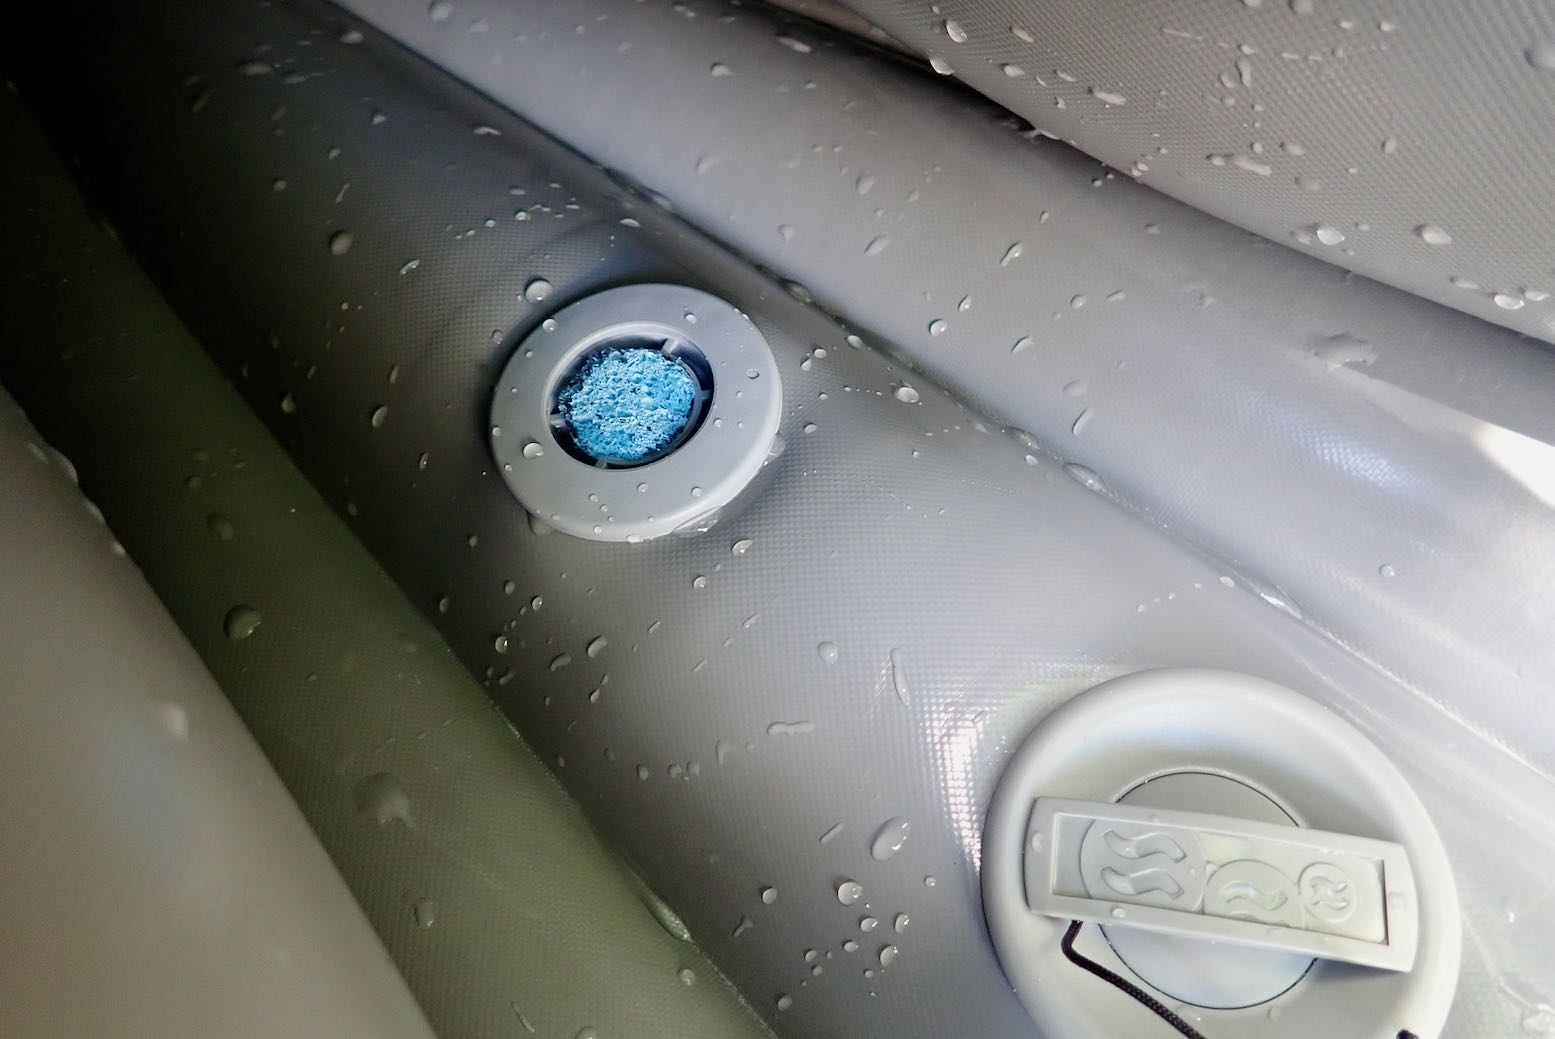
Grit-catching foam filter
Marcin suggests sticking some sponge under the vent cap to catch grains in future. Sounds like a good idea. These are easily removed/rinsed/dried or replaced by flipping off the vent cap.
Edge caught in thread
Tooling on
Clip on the cap
A quick Hail Mary to Saint Columba and you’re now ready to refit the valve. You shouldn’t need any lube other than a bit of water for things to reassemble smoothly, though I decided to lube the o-ring with some TiZip silicon grease. I found as you start screwing in by hand it feels like it’s cross threading. It isn’t: the edge of the fabric is getting caught in the thread. Back up and jiggle the valve body and loose fabric around to make sure the body has slotted and centred its flange into the fabric hole. Pump back up, tighten the PRV down some more, but probably don’t clip on the vent cap just yet as you may be going back to square one, as I did (partly because the fitted manometer was leading me astray).
Now flip the stern back downhill and let the water slosh back over the Seawave’s valves. I found the PRV purged for about a minute, then abruptly stopped with an odd underwater squawk … but carried on leaking slowly. Another removal and check and refit and there’s still a very slow leak – a 2mm bubble every 2-3 seconds, but with the floor now lying in the warm afternoon sunshine, that may be normal purging. I decide it’s as fixed as it can be. A few hours later, all was normal again and we are all much the wiser.
Moral of the story: if you think sand-laden seawater may have pooled in your PRV (most likely from crashing beach surf, not normal, deep-water paddle-splash), back on shore flip the vent cap off and rinse the PRV cavity with fresh water, ideally flipping the boat upside down, so any grains flush out.
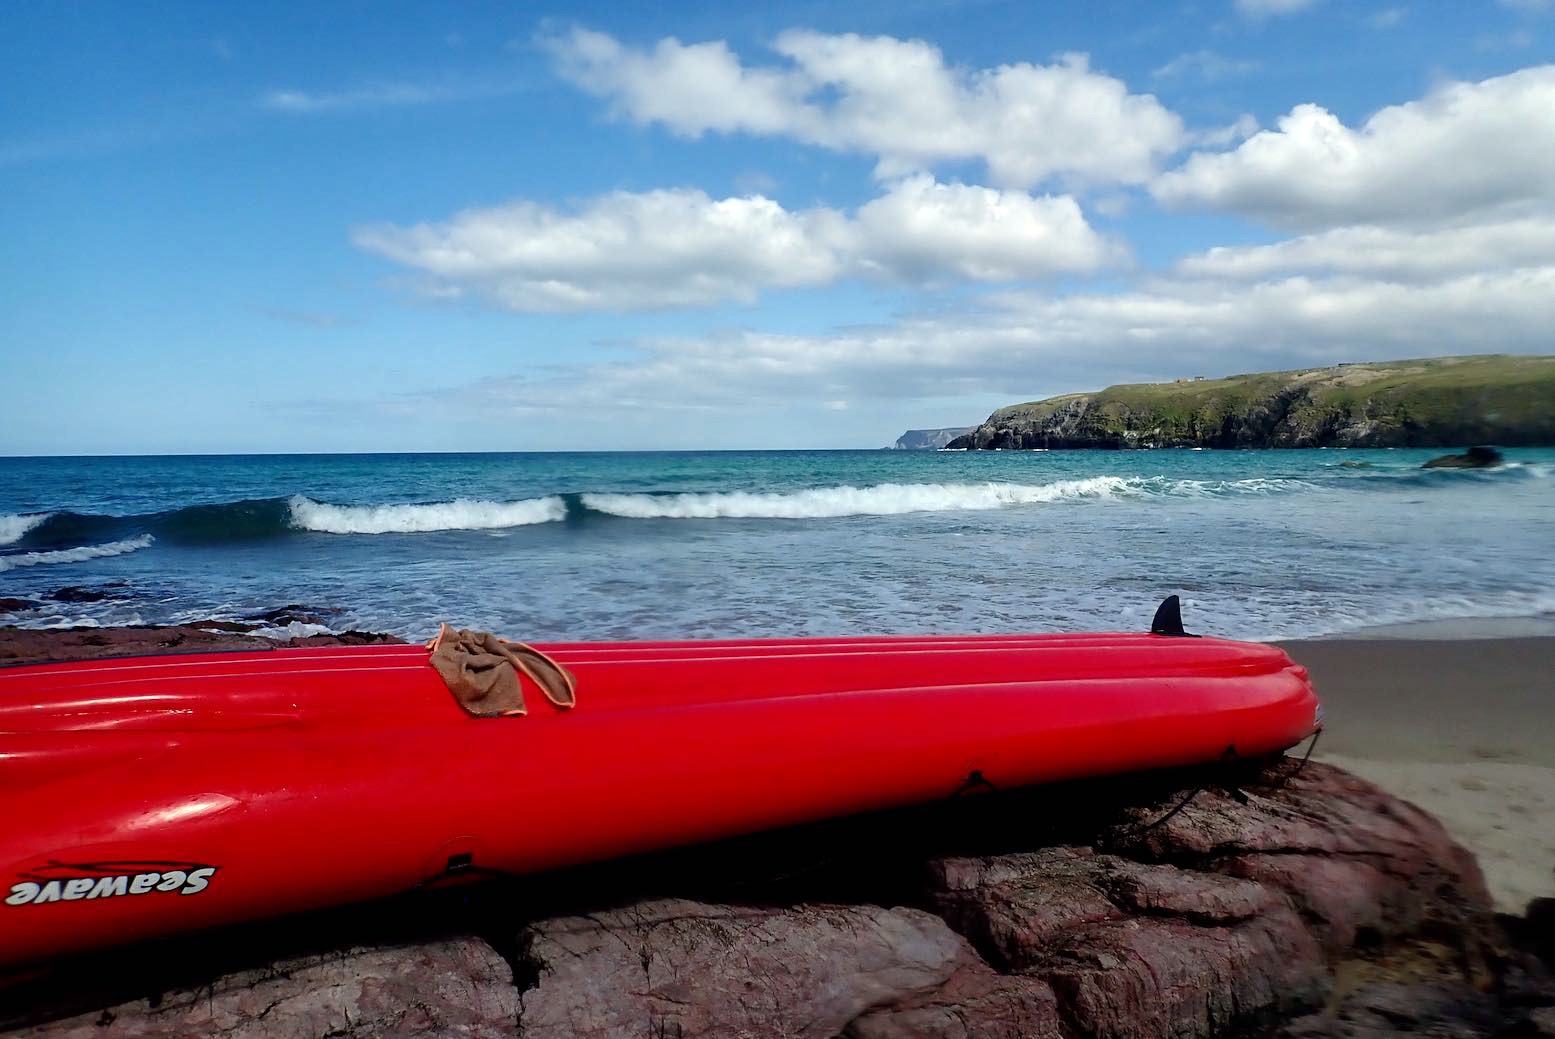
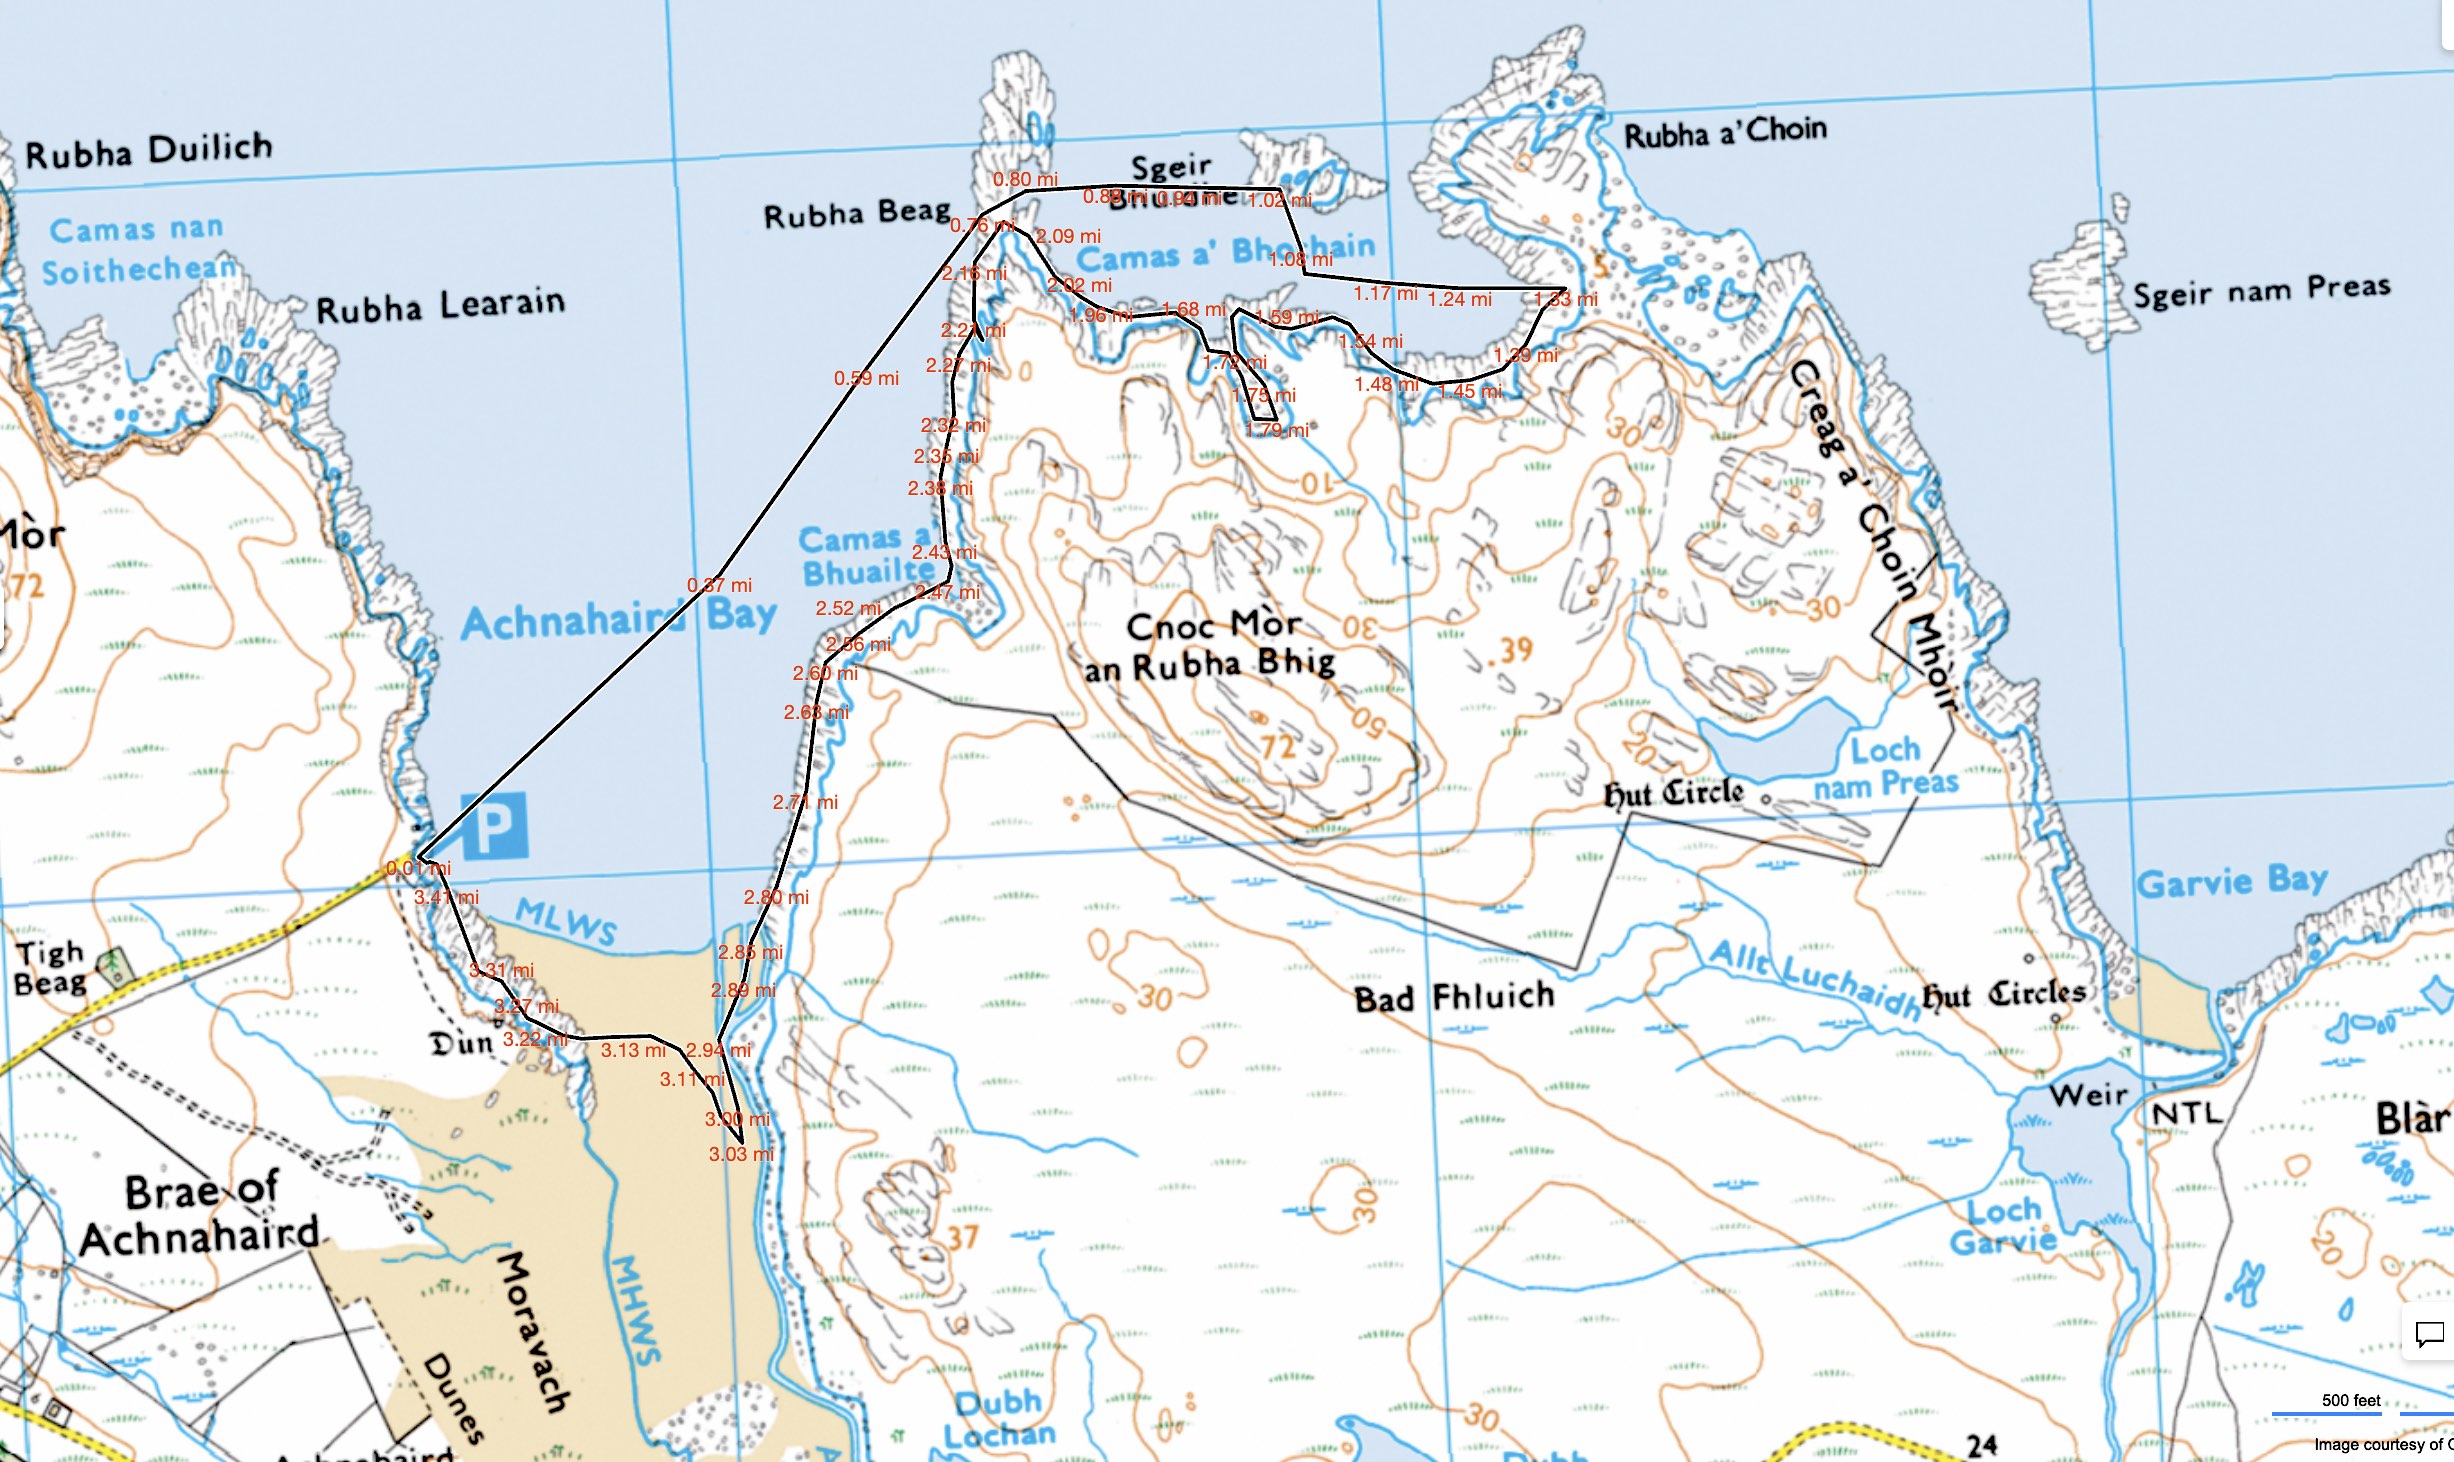
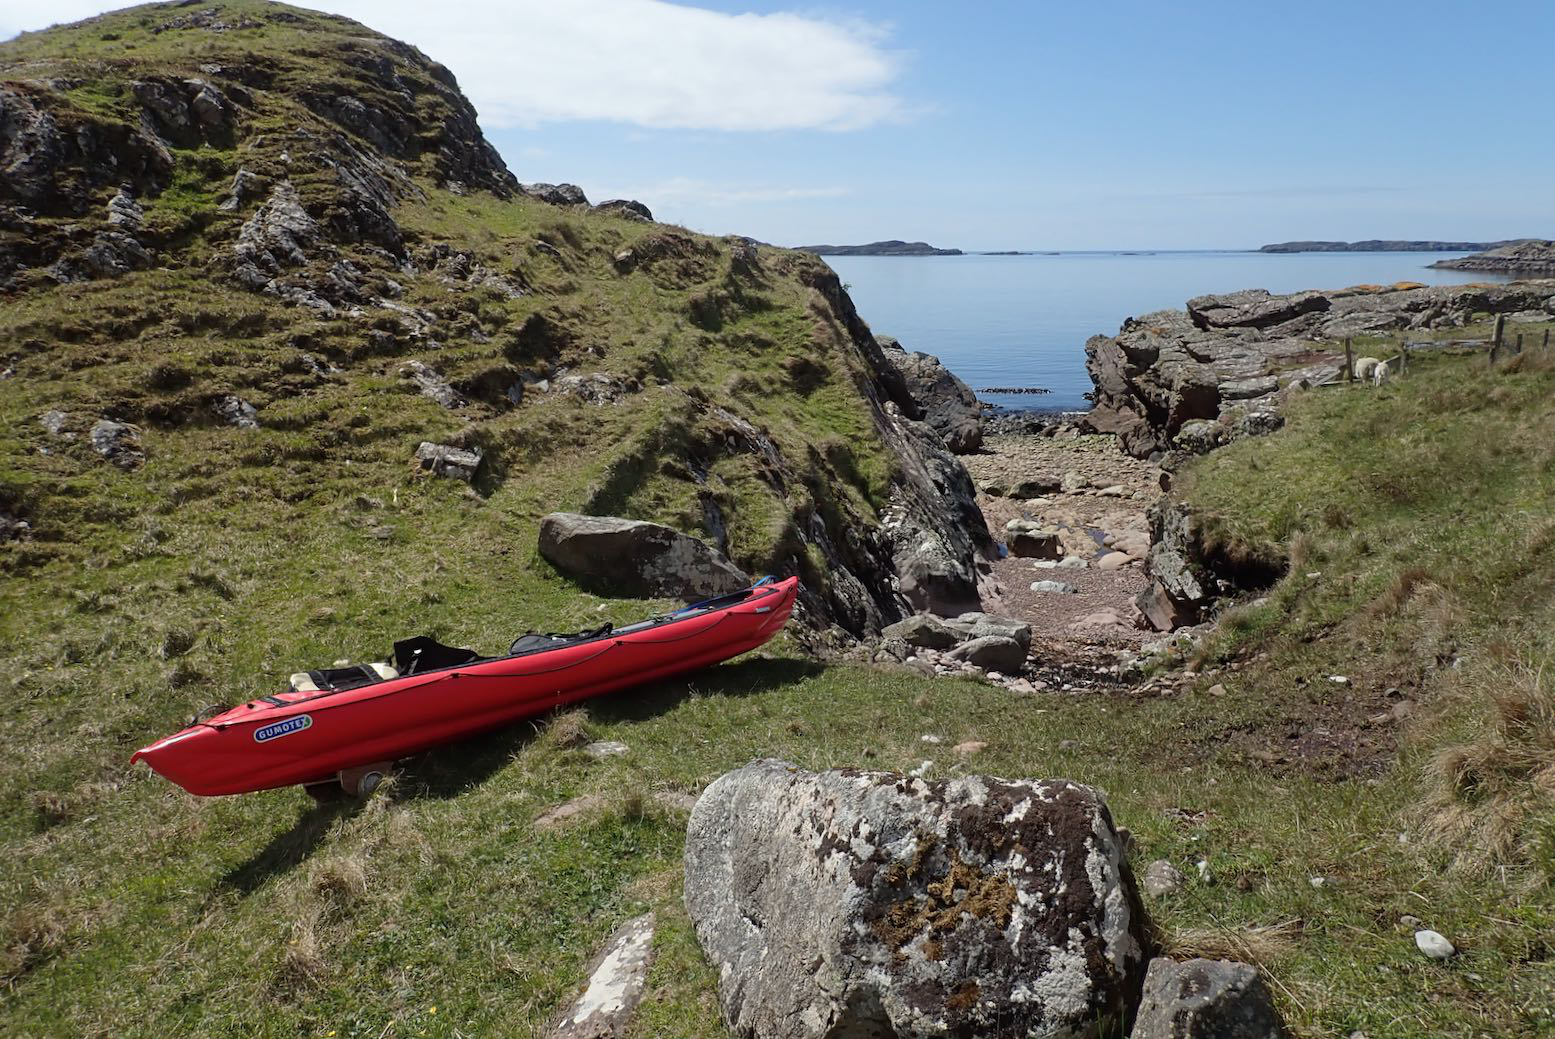
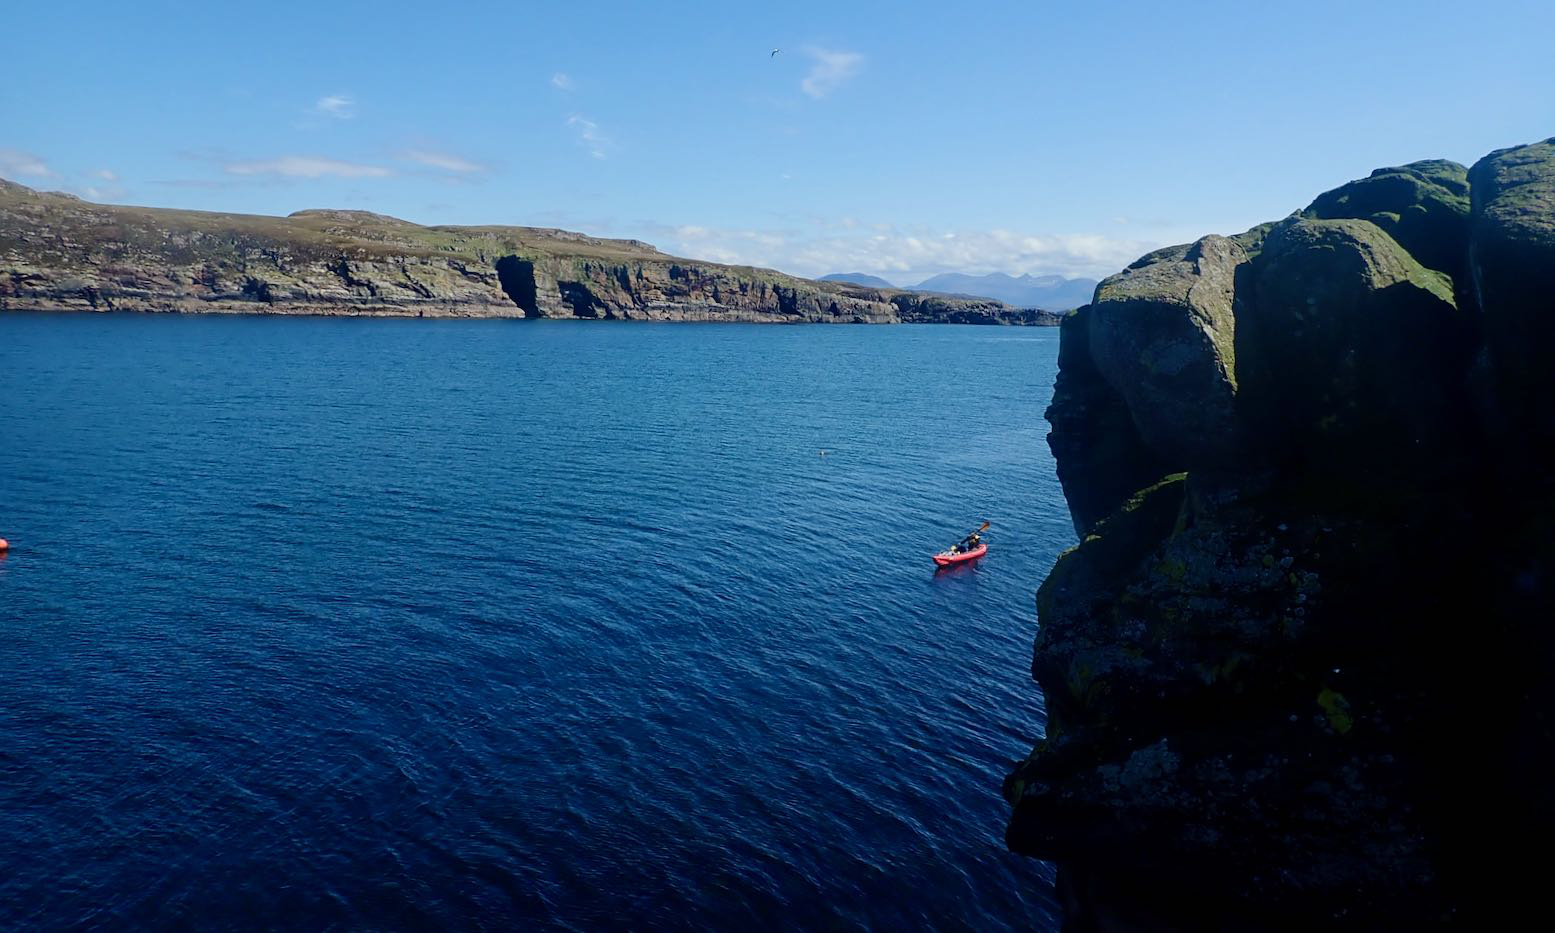
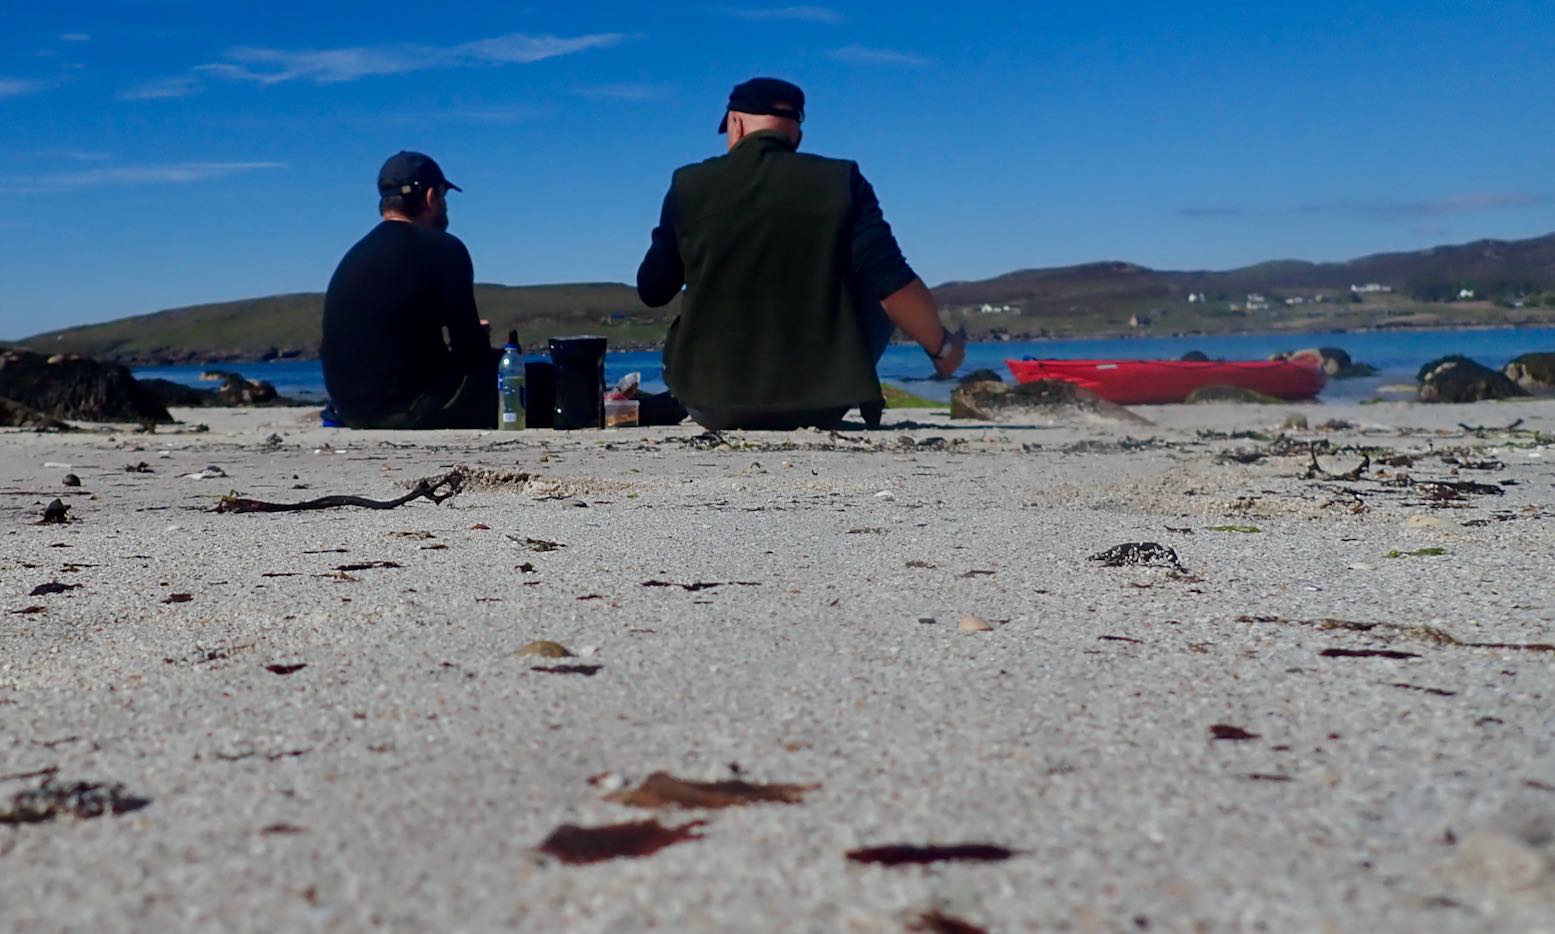
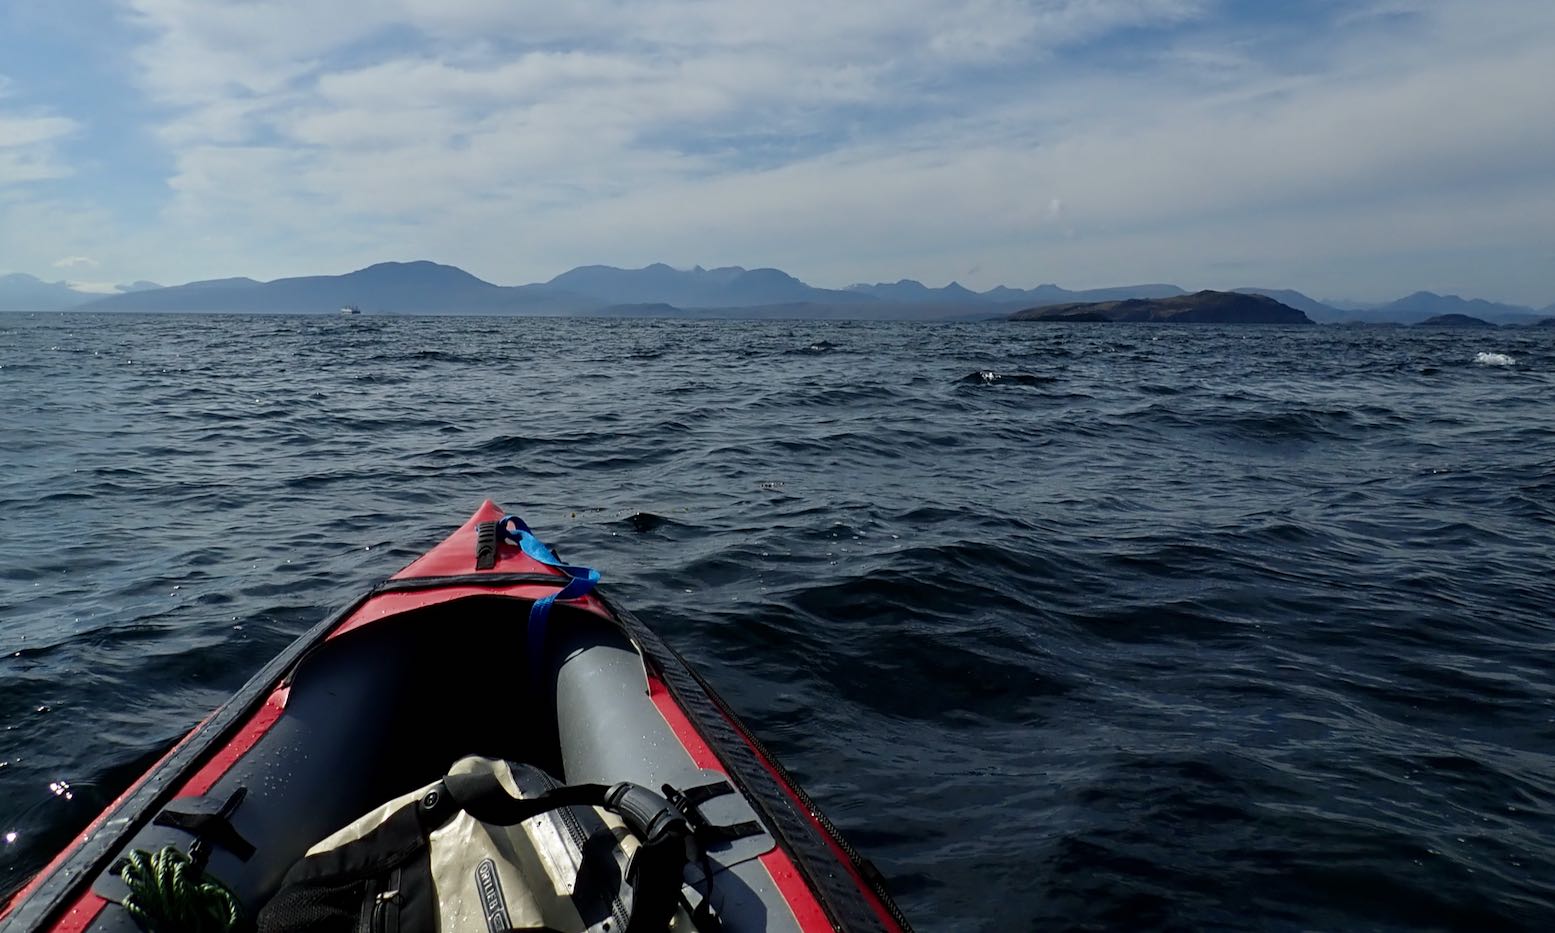
Around here the inshore sea paddling is exceptional, even if packrafting the inland lochs is also pretty good. Having done most of the latter routes, I thought I might try some coastal packrafting. Garvie Bay arcing west to Achnahaird Bay looked like a good one and happens to parallel probably the best walk on the peninsula which we’ve done many times. That route could be a 20-km combination of cycling, walking and paddling, but as it was the last calm evening for a while, we thought we’d go out together in the kayak and I’d try the packraft on the way back. That way everyone got to play.
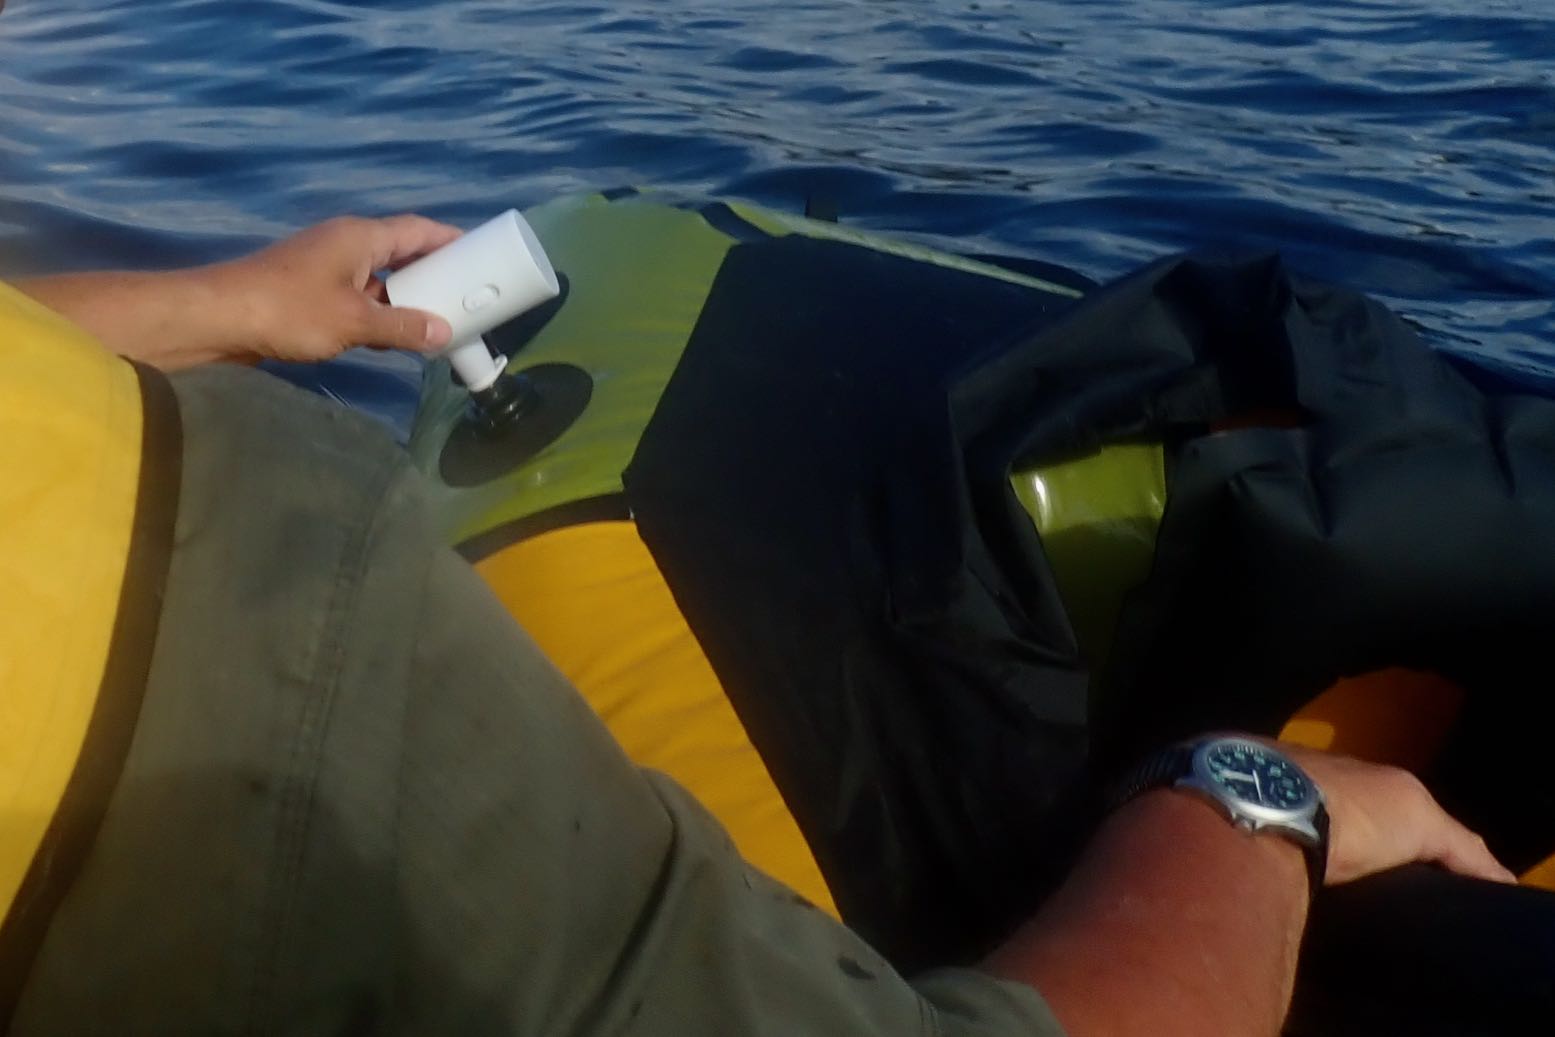
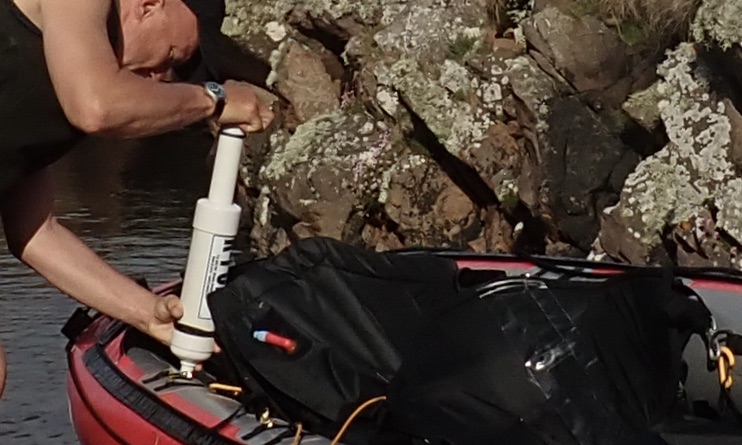
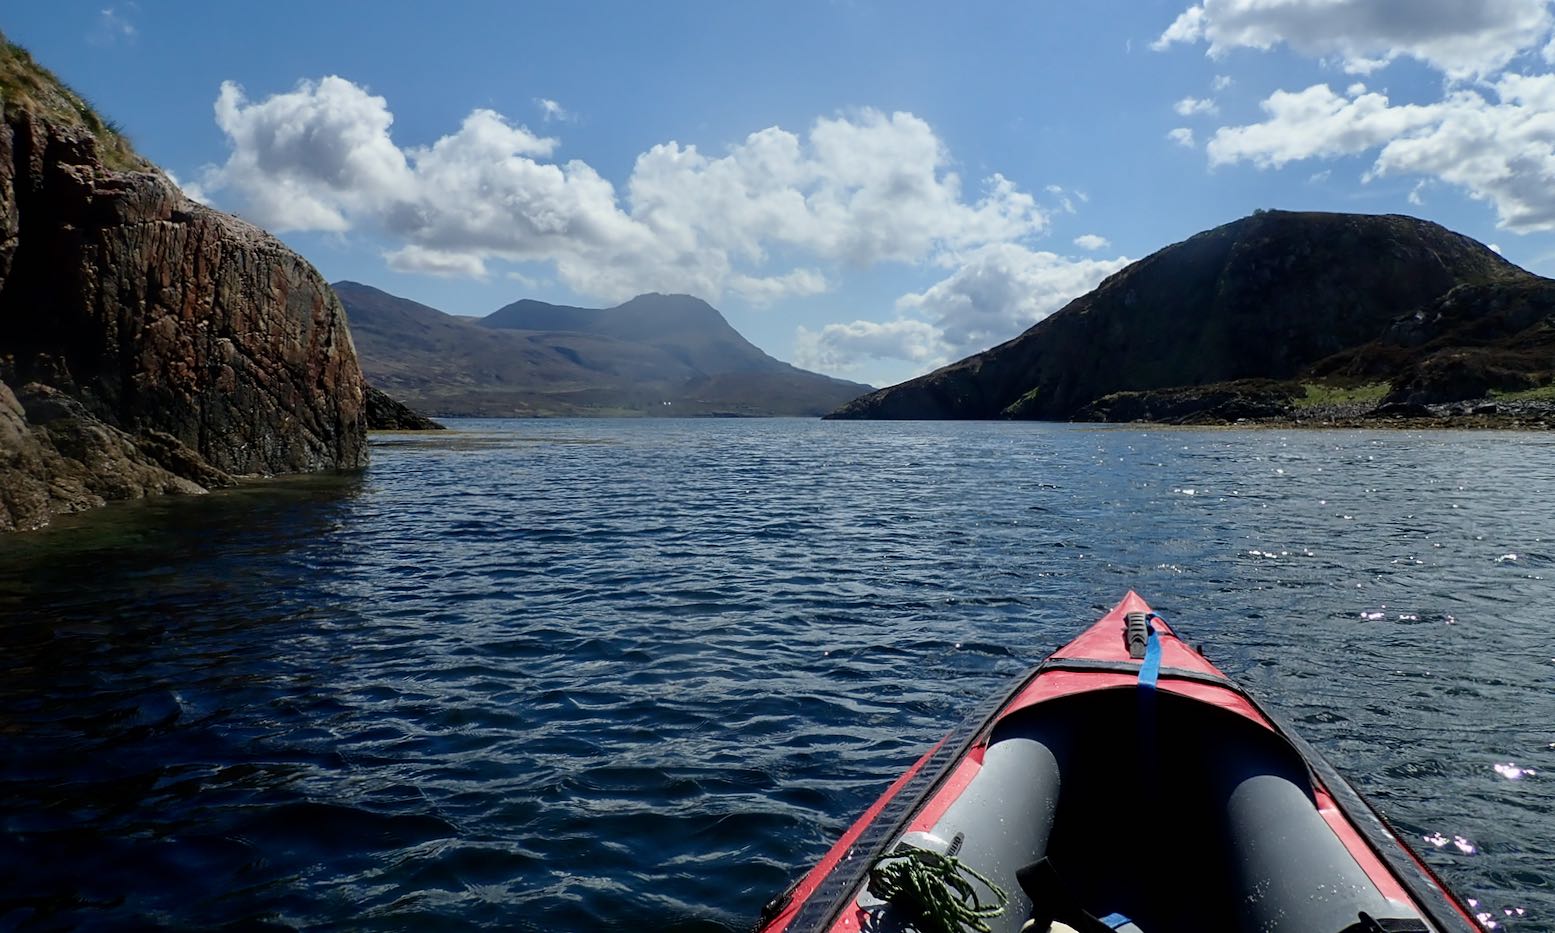
A light NW breeze blew onshore as we cut across Achnahaird Bay like a blue fin tuna. The approach of HW meant we slipped through the submerged skerries of Rubha Beag and into the crab’s claw inlet of Camas a Bhothain (Bothy Bay). This seemed a good spot to deploy the packraft with the aid of my exciting new gadget, a mini electric pump. I unrolled the boat over the water and let the pump buzz away for a couple of minutes, topped off with the hand pump, then clambered aboard.
Buzzing noise
Man the lifeboats!
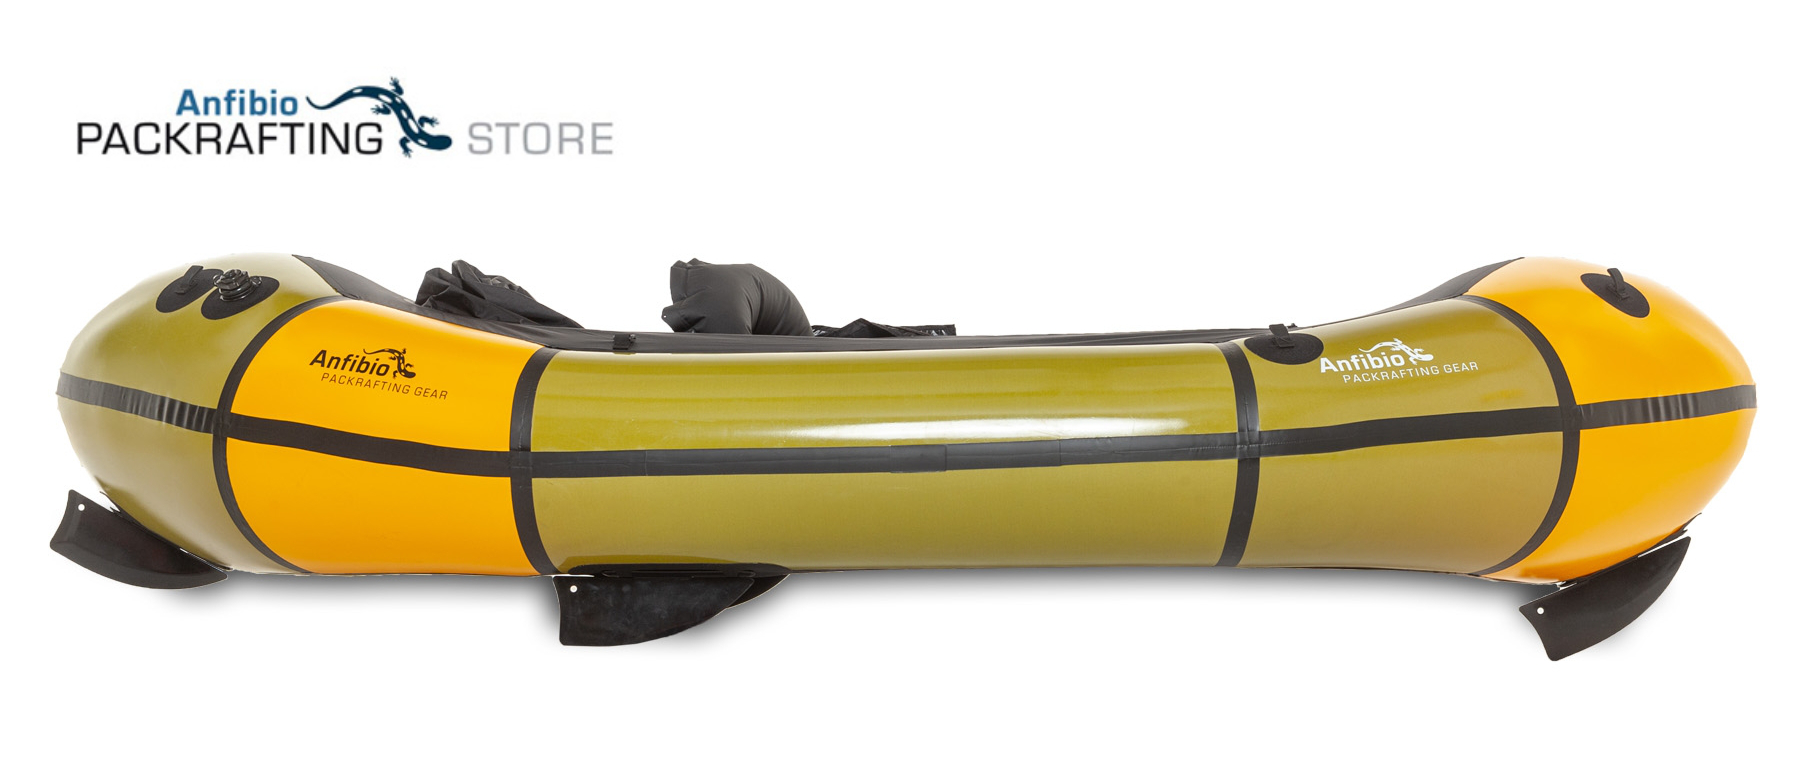
Paddling away, I realised this was the first time I’ve paddled my Rebel 2K unloaded and I was a bit shocked by the bow yawing. Now fully back-heavy, one good swipe of the paddle and it could flip a 180°, just like my old 2010 Alpacka Llama.
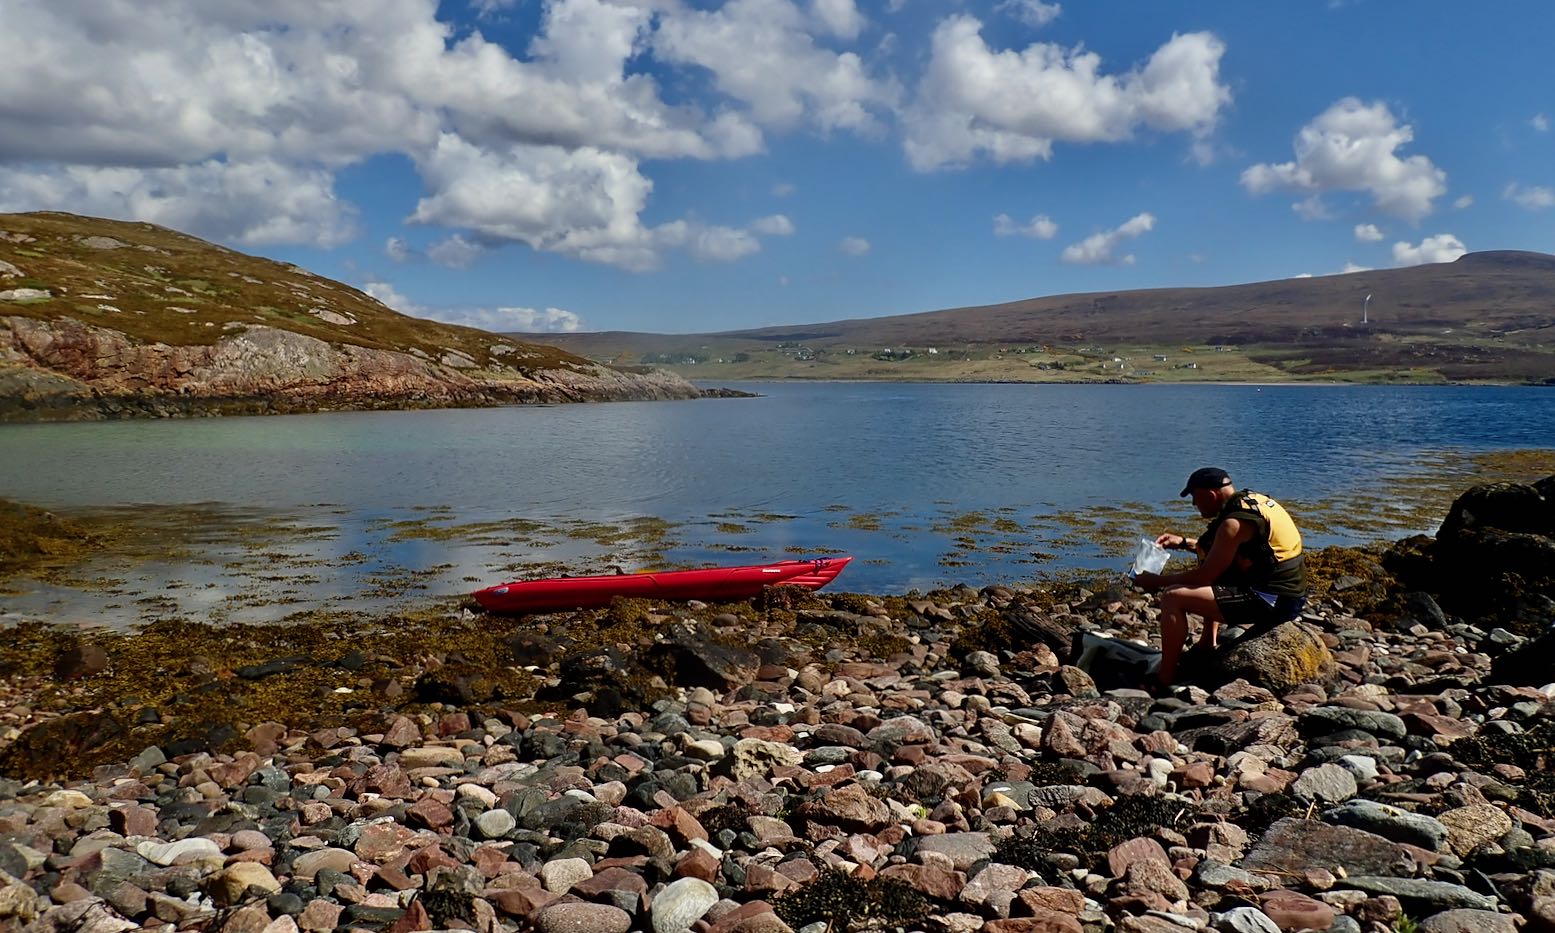
Ah, but in my haste to launch the lifeboat I’d forgotten to fit the also-untried skeg which comes standard on the 2K. I waddled over towards Rubha a Choin beach and slipped it on easily, while the Mrs transferred to the Seawave’s front seat.
I’ve been ambivalent about the value of a skeg on a packraft, but now back on the water the yawing was notably reduced. If you think about it, a packraft actually pivots from a point around the middle of your swinging paddle, not from the stern, as it feels from the seat. The centre of mass behind the pivot point does make an unladen bow yaw more, but the stern will yaw too; just less and unnoticed.
Skegging ‘eck!
On the Wye my 2K was fully loaded with the centre of mass moved forward and which minimised any yawing, even without a skeg. (With a heavy load over the bow a reduction in yawing is well known with packrafts). Now unloaded and with the bow riding high, swish-swosh yawing was exacerbated, but is actually happening at both ends of the boat. So any type of fin or extension of the stern (like the post-2011 Alpackas – right – and all subsequent copies) will constrain this, while not affecting steering. So, bottom line: skegs work on a packraft and are easy to retro-fit.
A short-but-wide packraft actually pivots from near the centre, not from the back as the impression suggests
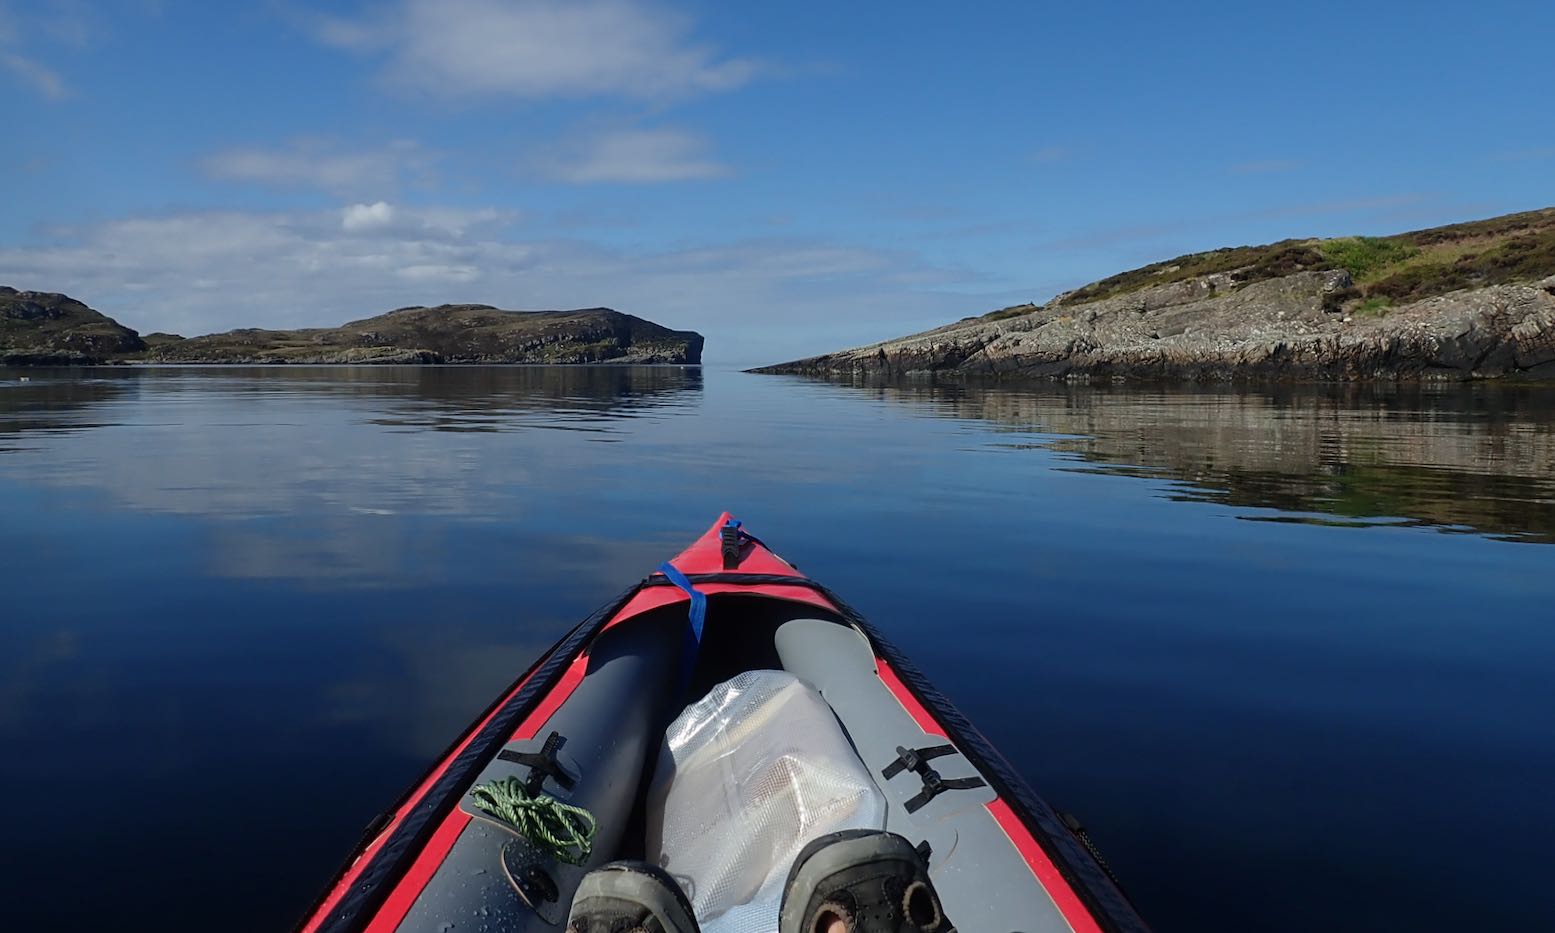
All the remains is a packraft’s agonisingly slow speed. These are not boats made to enjoy the sensation of flatwater paddling; they are boats to enjoy getting to out-of-the-way places easily. Any type of disturbance to progress, be it wind or current, may slow you to a stop, or worse. Something like the longer Nomad S1 I had would be better for this while still being packable. Still, in these ideal conditions it’s nice to float along observing the coastal features.
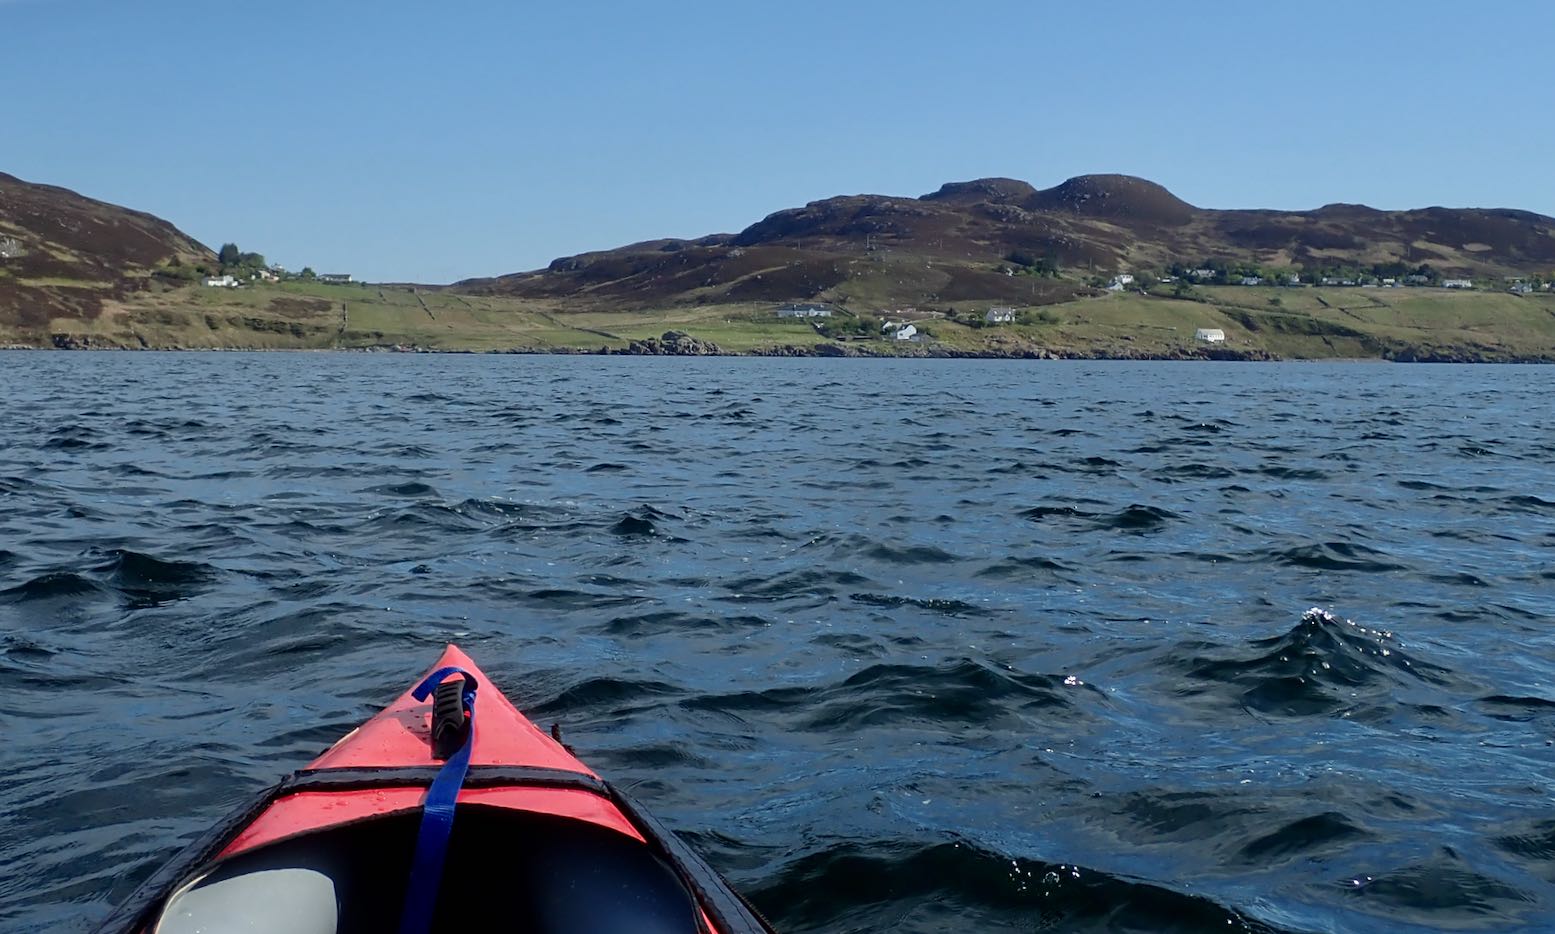
Paddling back down the east side of Achnahaird Bay, a back-breeze made progress feel achingly slow. Lately, I’ve come to value metres per second (m/s) as a metric of wind or paddling speeds. Something moving past you (or vice versa) at three metres per second is easy to visualise, though I suppose we can all visualise a 3mph walking pace, too. It’s what YR uses and is easily converted to ‘double + 10%’ for miles per hour (so 5 m/s = 11.18 mph). Or just double it and you nearly have knots (5 m/s = 9.8 kn), for what that’s worth. Crawling past the rocky coast it looked like I was doing 1 m/s at times. We had a race: diminutive Mrs in a big, long kayak; me in the packraft. Within ten seconds the Seawave streamed away while Bunter frothed up the water like a cappuccino machine.
Oh well, you’re as fast as you are. Like cycling in Tajikistan rather than Kazakhstan, for the best experience match your routes with your mobility and conditions. Next calm day I’ll do the full Garvie loop.
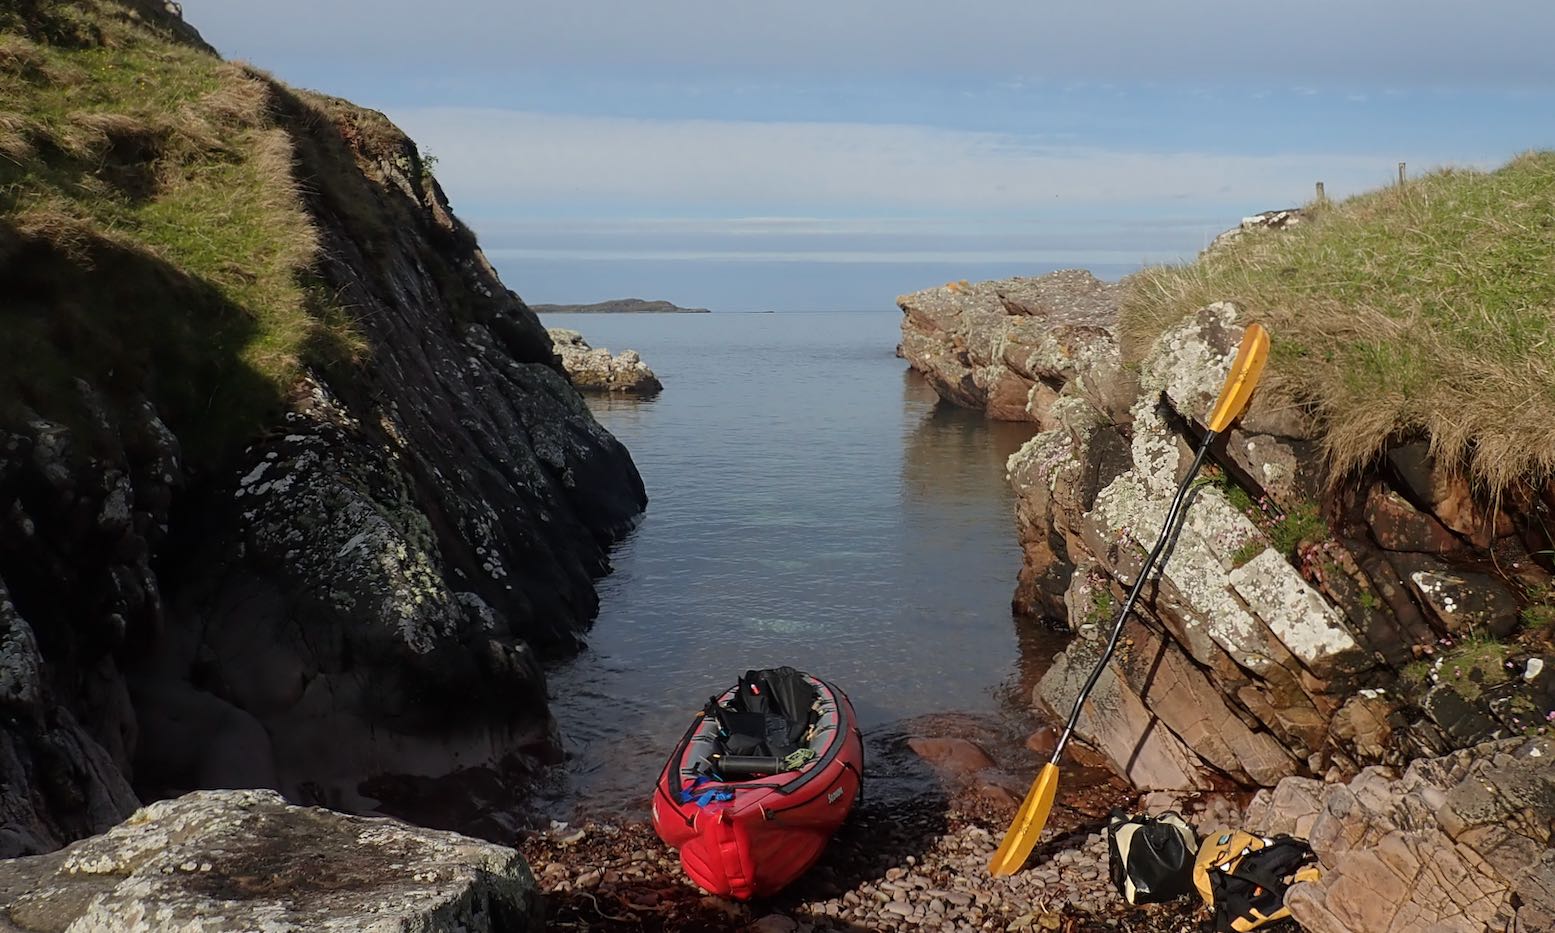
Another forecast of calm winds in the Summers. Or is it? The BBC and YR reports are contradictory: the former has too-strong-for-IK winds from the south; the latter shows light winds from the north. Others show light winds from the south. How can they all be so different? Maybe I should just look out across the water? All looks serene so let’s make paddle while the sun shines. I wheel back down to False Man’s Harbour and set off with two hours before high water.
No side PRVs? Am I missing not having added pressure release valves in my side tubes, as I did to my original Seawave? Not really. I am running 0.3+ bar in the sides (official: 0.25) but temperatures up here in NW Scotland are hardly tropical. I try and leave the boat in the shade at the house and de-air the side tubes for a couple of seconds after a paddle, effectively manually depressurising the sides to about 0.2 bar, rather than having fitted PRVs do it for me automatically. The more vulnerable stock PRV in the floor purges automatically at 0.25. On my next paddle I have to top up all three chambers with the K-Pump as I would have to do with all-round PRVs anyway. About 30 kpumps brings the sides back up to over 0.3 bar. The difference now is I use a manometer to check the sides are about right. Before I would just pump until the side PRVs purged. It’s about a minute’s more faffing. As with a lot of things I do to my IKs: sails, rudders, decks and now, trolleys and headwind weight transfer – it’s fun to experiment. But in the end they’re all largely over-shadowed by the simple enjoyment of paddling. With sides pumped to >0.3 bar I find I can cruise easily in the near-still conditions at 6kph.
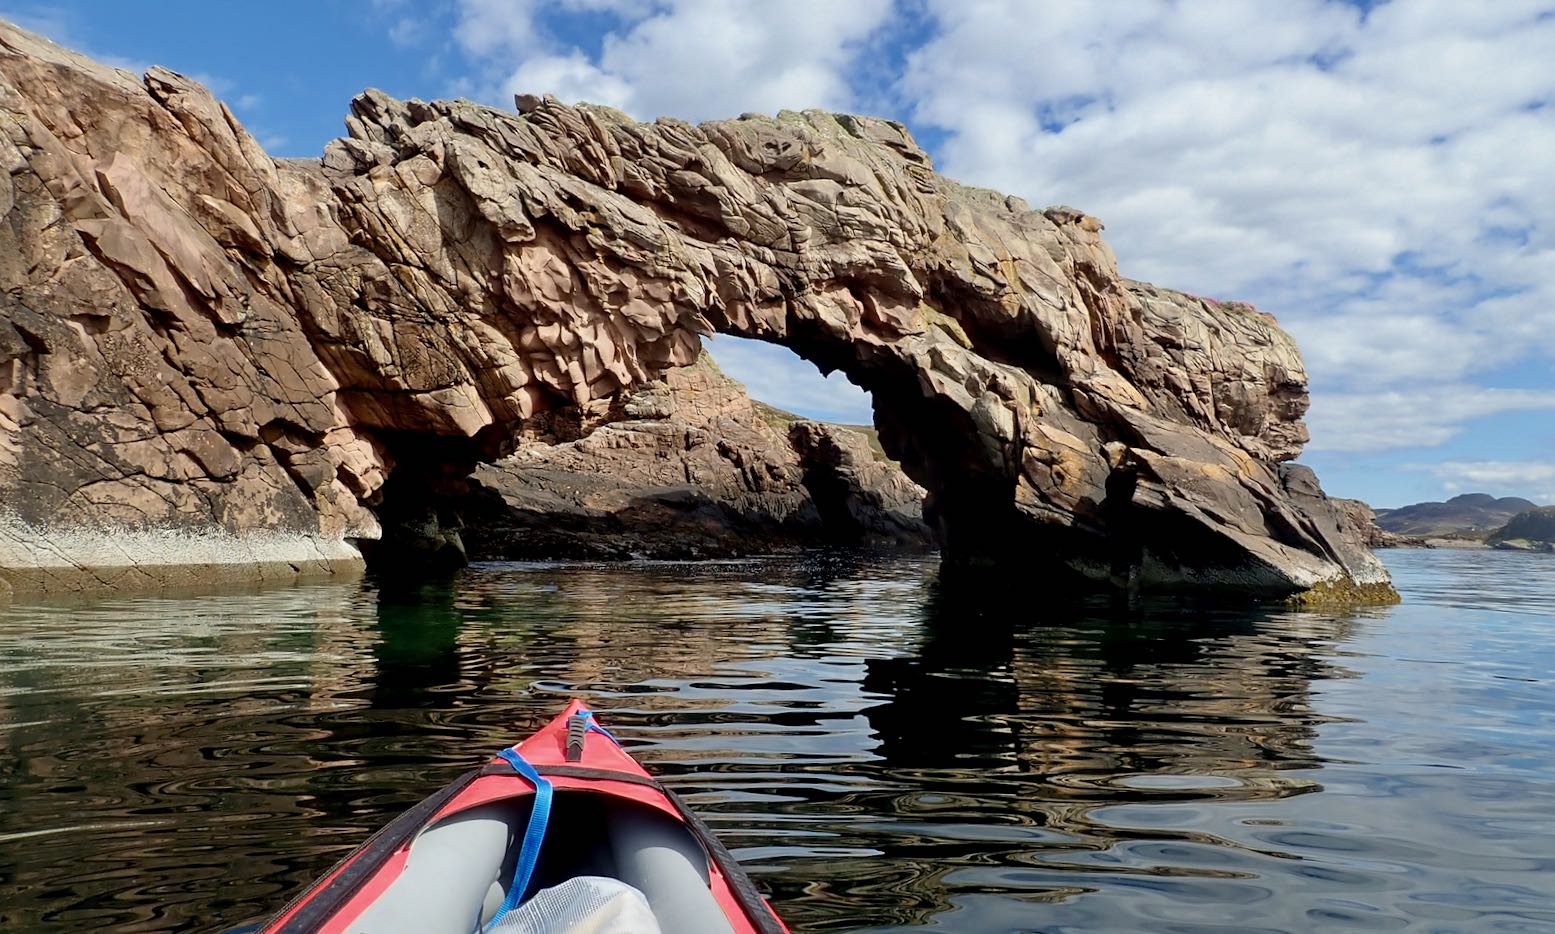
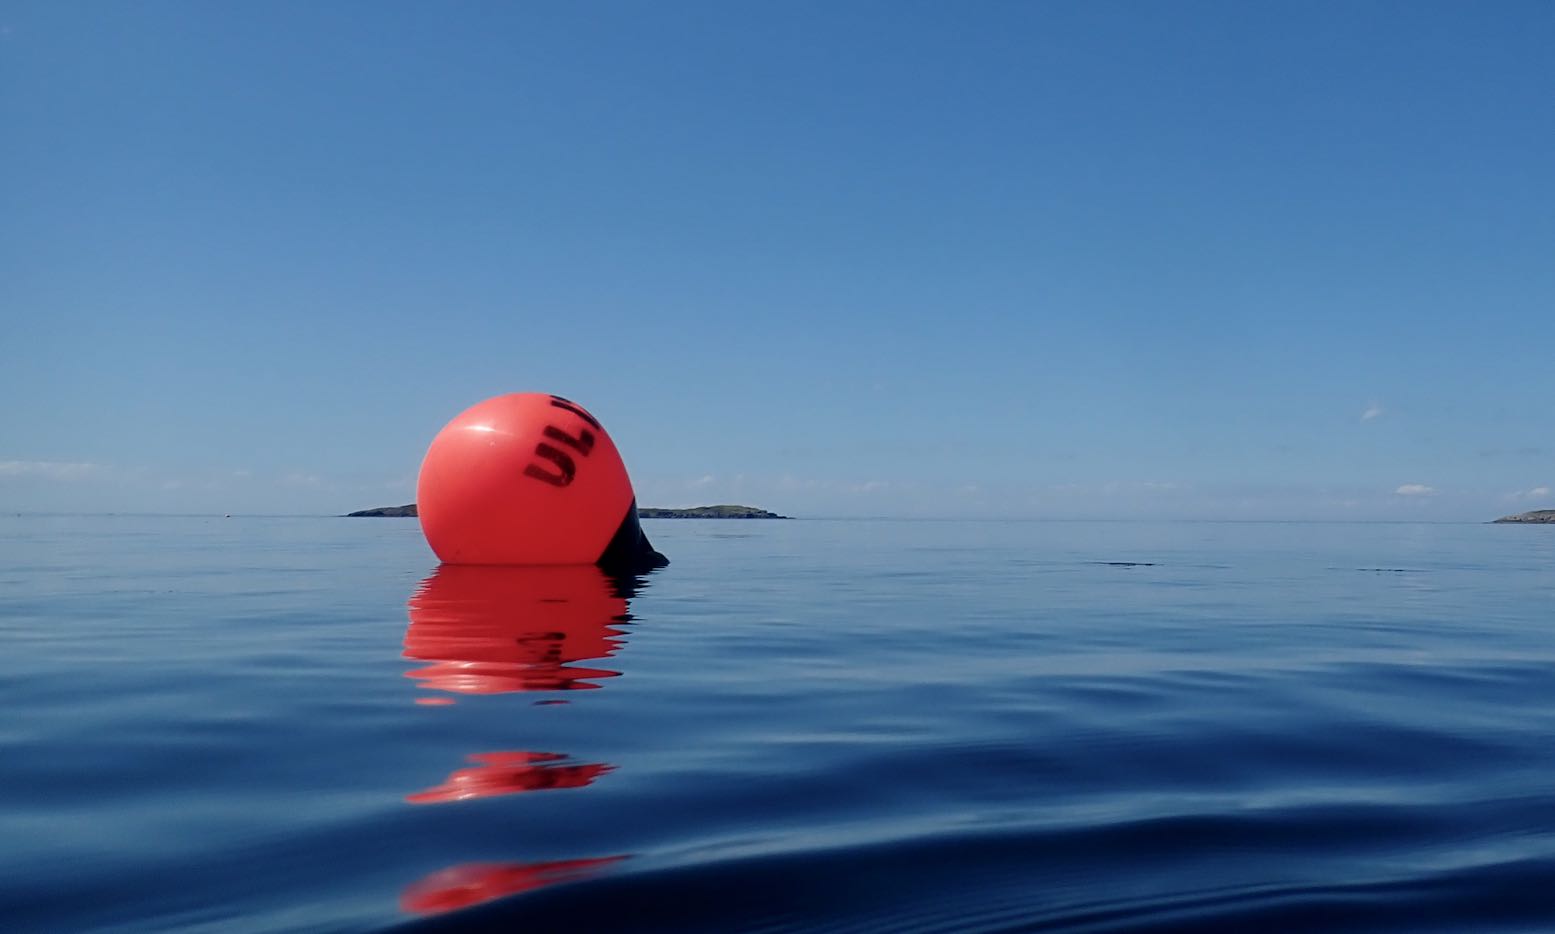
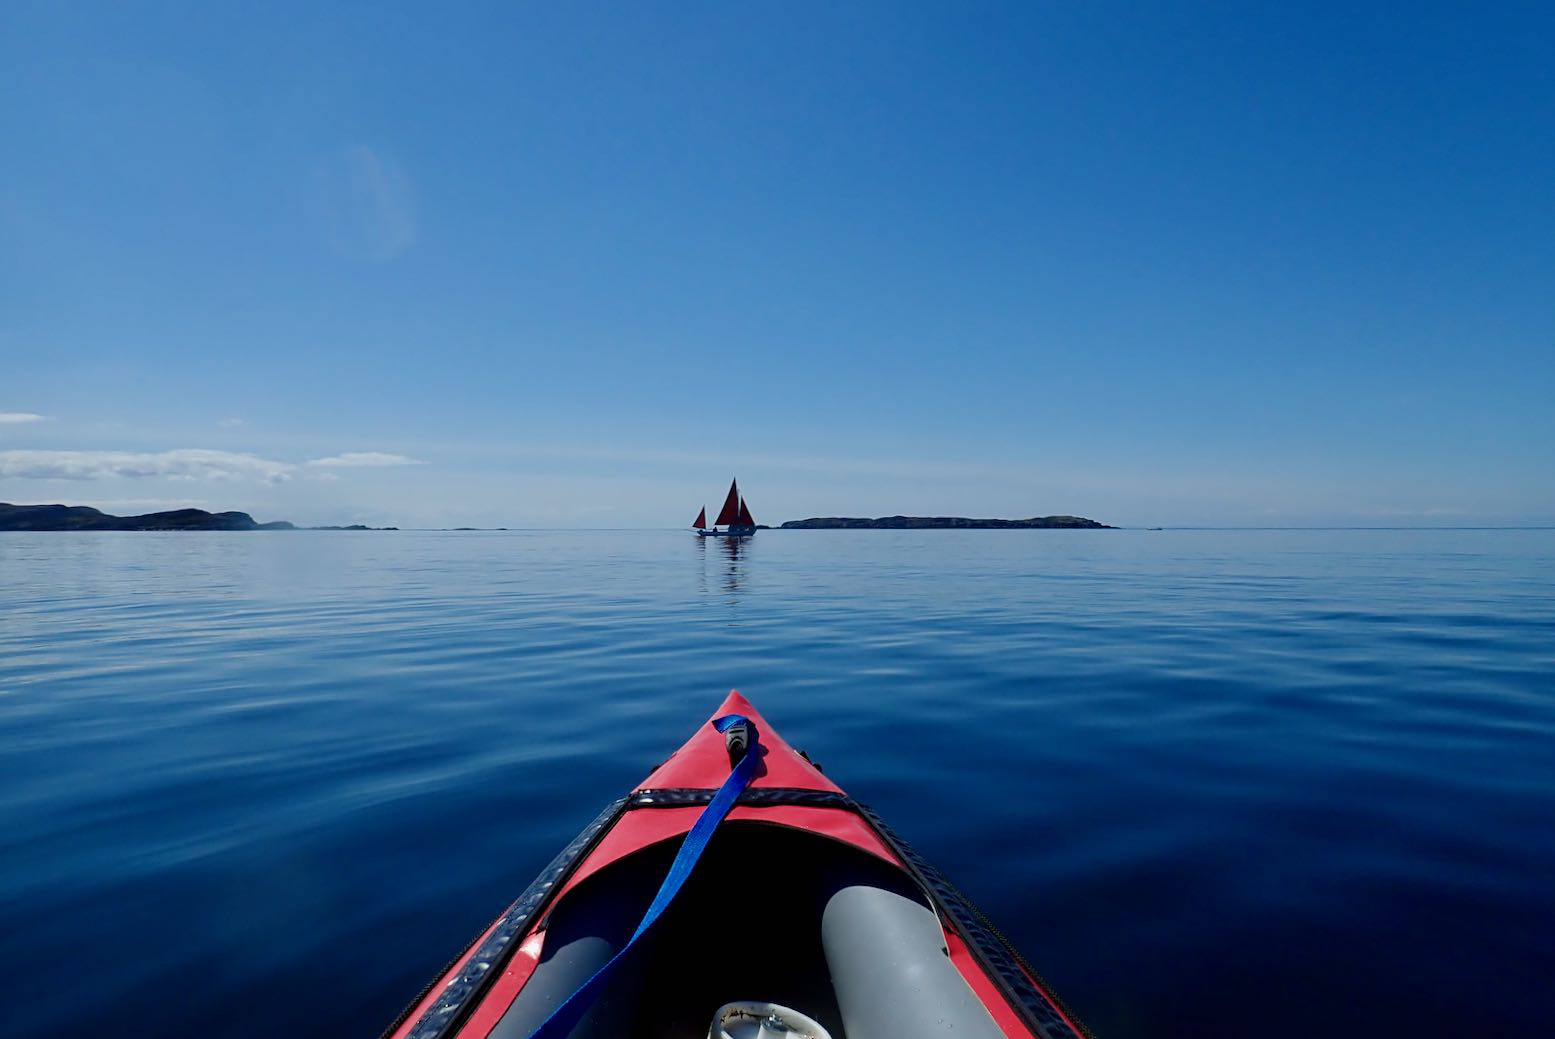
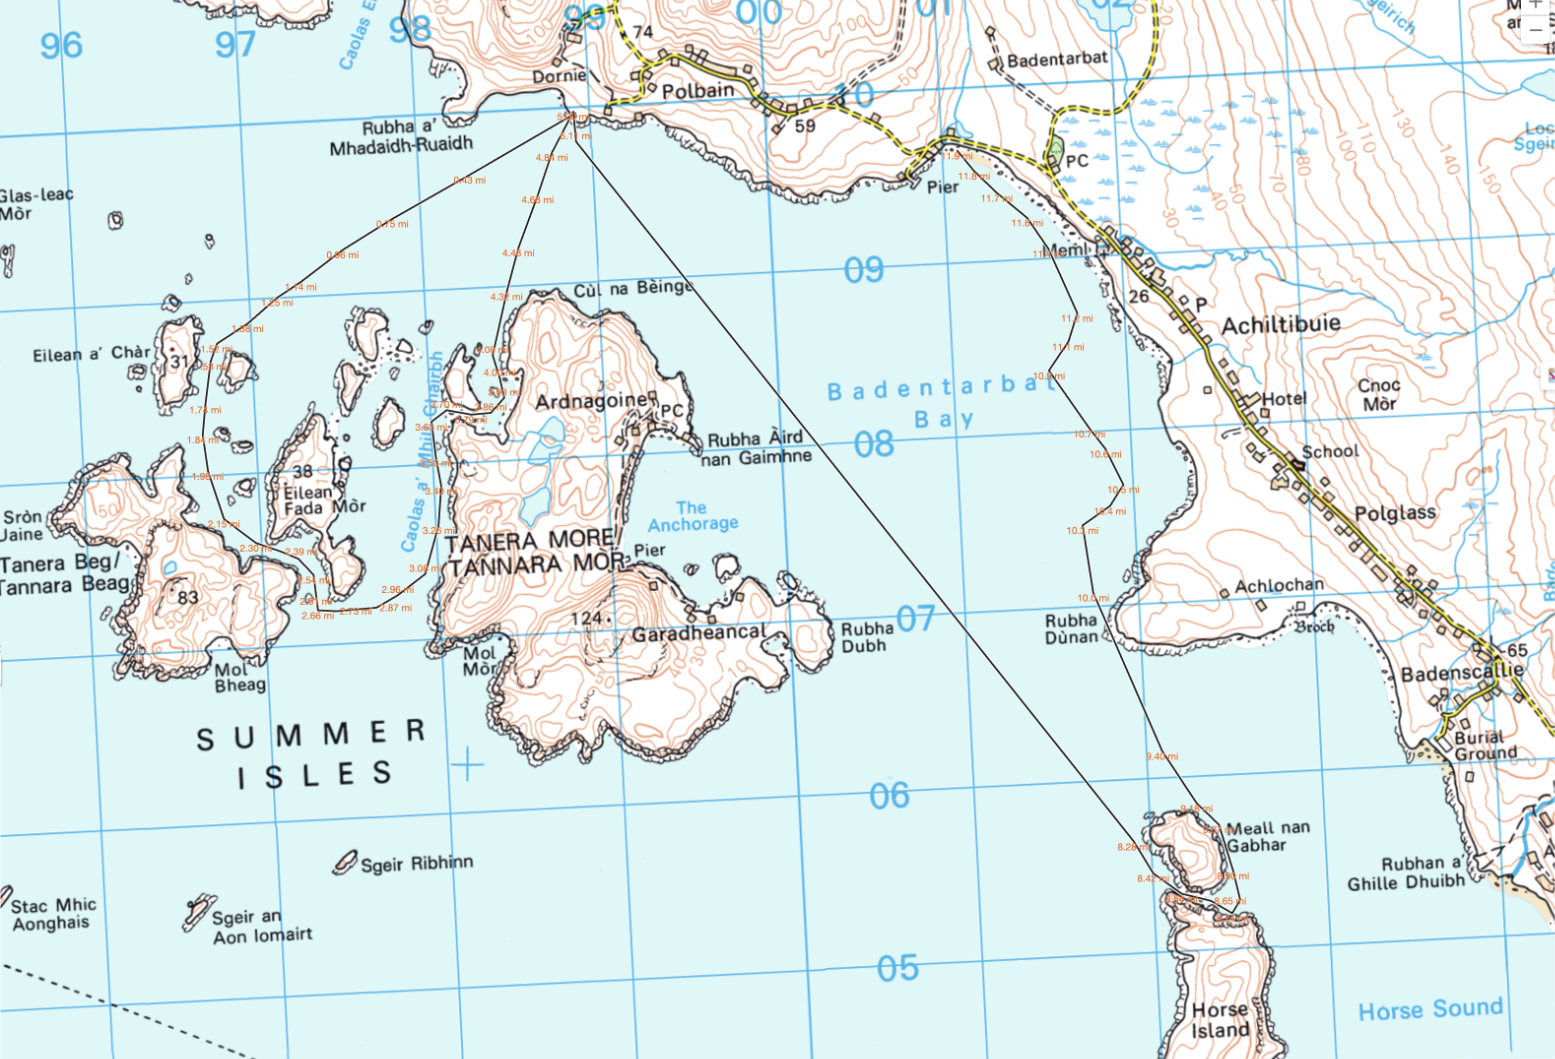
Let’s try and make the outside of Tanera Beg again. Two days ago I got blown off that idea.I fit a compass so I know which way the wind blowsAnd try out my deckbag GPS RAM mount so I can measure, not guess, distancesKayaking tour party mustering at the north cliff of T. Beg.But they seem to be dawdling, as if unsure whether to go ahead.I paddle past and on to the big cave on T. Beg’s south side. That crack at the back might be passable at max HW.The view out south towards the Wedge of Angus and Priest Island beyond.I slip through the popular arch at Tanera Beg’s southeast end.I notice a small second arch. The water is too high and gap too narrow to squeeze through with my Seawave, but it’s only a foot deep below, so the window of opportunity is as narrow as the arch. What would Freud have made of all this arch-threading.Being more exposed to the southwest, Tanera Beg has some deeply weathered sandstone cliffs.Midway through, I decide crossing over to Tanera Mor seems too easy. In the prevailing calm the three skerries to the south don’t look that far. It’s just over a kilometre to Sgeir Ribhinn (‘Stack C’) according to the GPS. That will take 11 minutes. Once there, I fail to notice the double-arched cave we found last time. But this is HW. A guard-bird observes.Over to the south side of Tanera Mor. The new owner is employing scores and spending millions here. New cottages here and there, plus tracks to isolated beaches (for building stones, I was told). They now ask you not to land in the more built-up Anchorage on the north side.There’s even a new house and other construction alongside the tidal lagoon of An Lochanach where I stop for a snack. Two kayakers pass by. Earlier, I could clearly hear them talking behind me across the flat water, long before I could see them.I cross the Bay and stop off on the mainland below our place to collect something.Looking west: a buoy with Glas Leac Mor behind. I recently read that a hazy horizon (Outer Hebrides not visible) means stability; warm, humid air. Good viz and crisp detail = cold air and wind. I head to Altandu, near the campervan-packed campsite.I drop-off and pick up a bucket. Coming back through Old Dornie harbour, a quarter headwind kicks up, pushing the bow left. I use the chance to load the bow with 10 litres of bucket-water. It does seem to make a difference: the bow bites better; no correctional paddling needed, unlike the other day. A good trick to know (I’d brought the drybag up front for that purpose).Another 13-mile day in the Summers, but I could have managed twice as far. How easy IK-ing is without wind. As is portaging with a trolley.
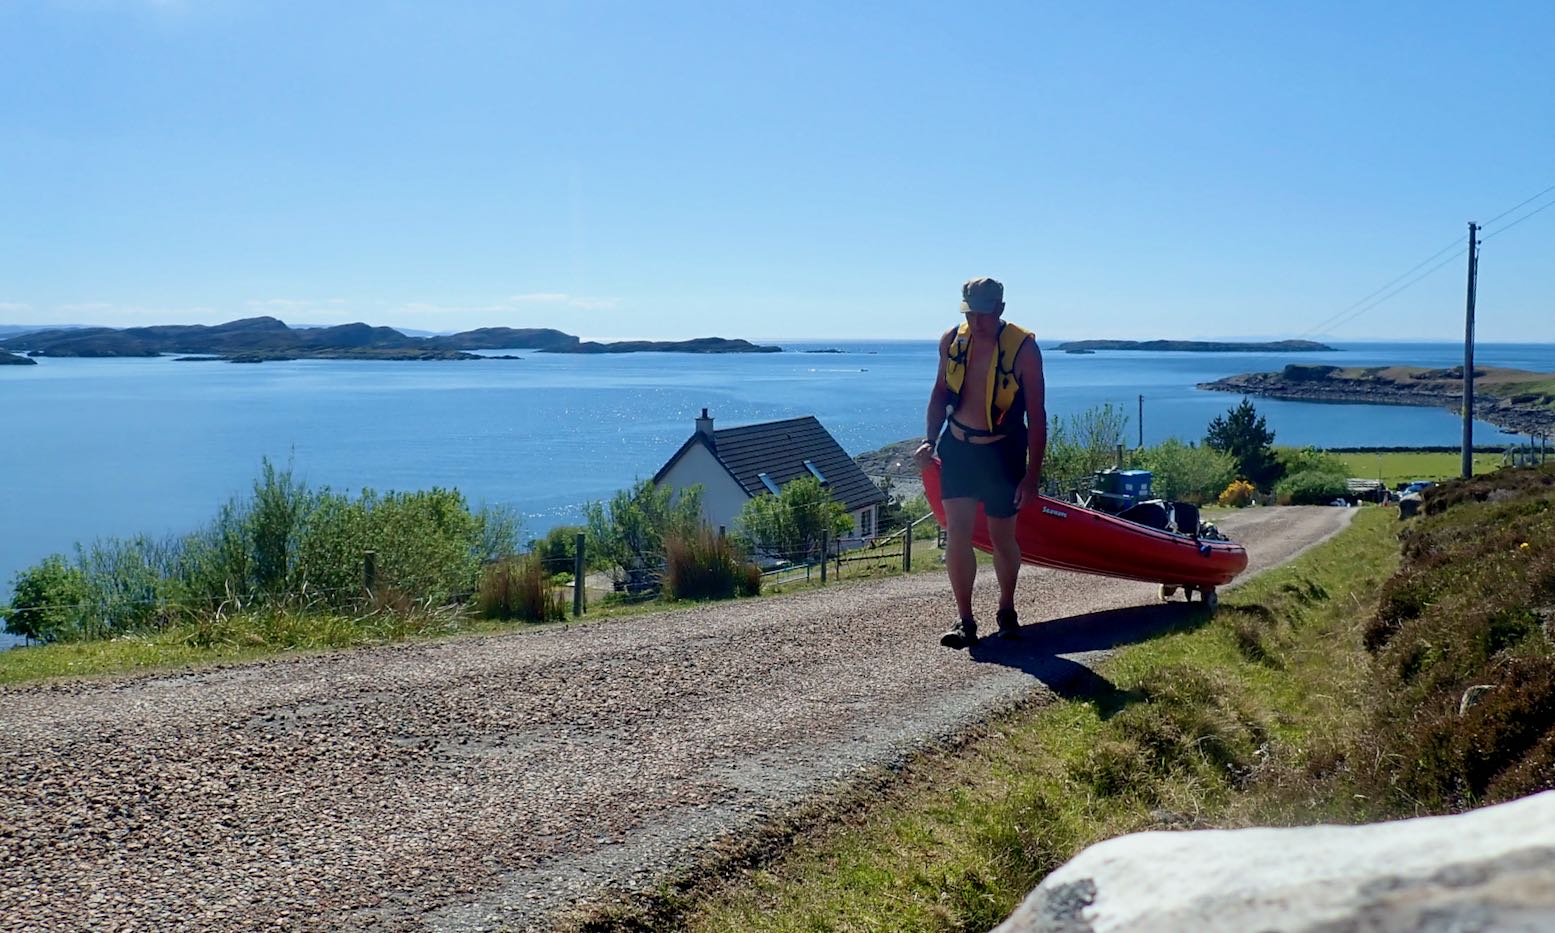
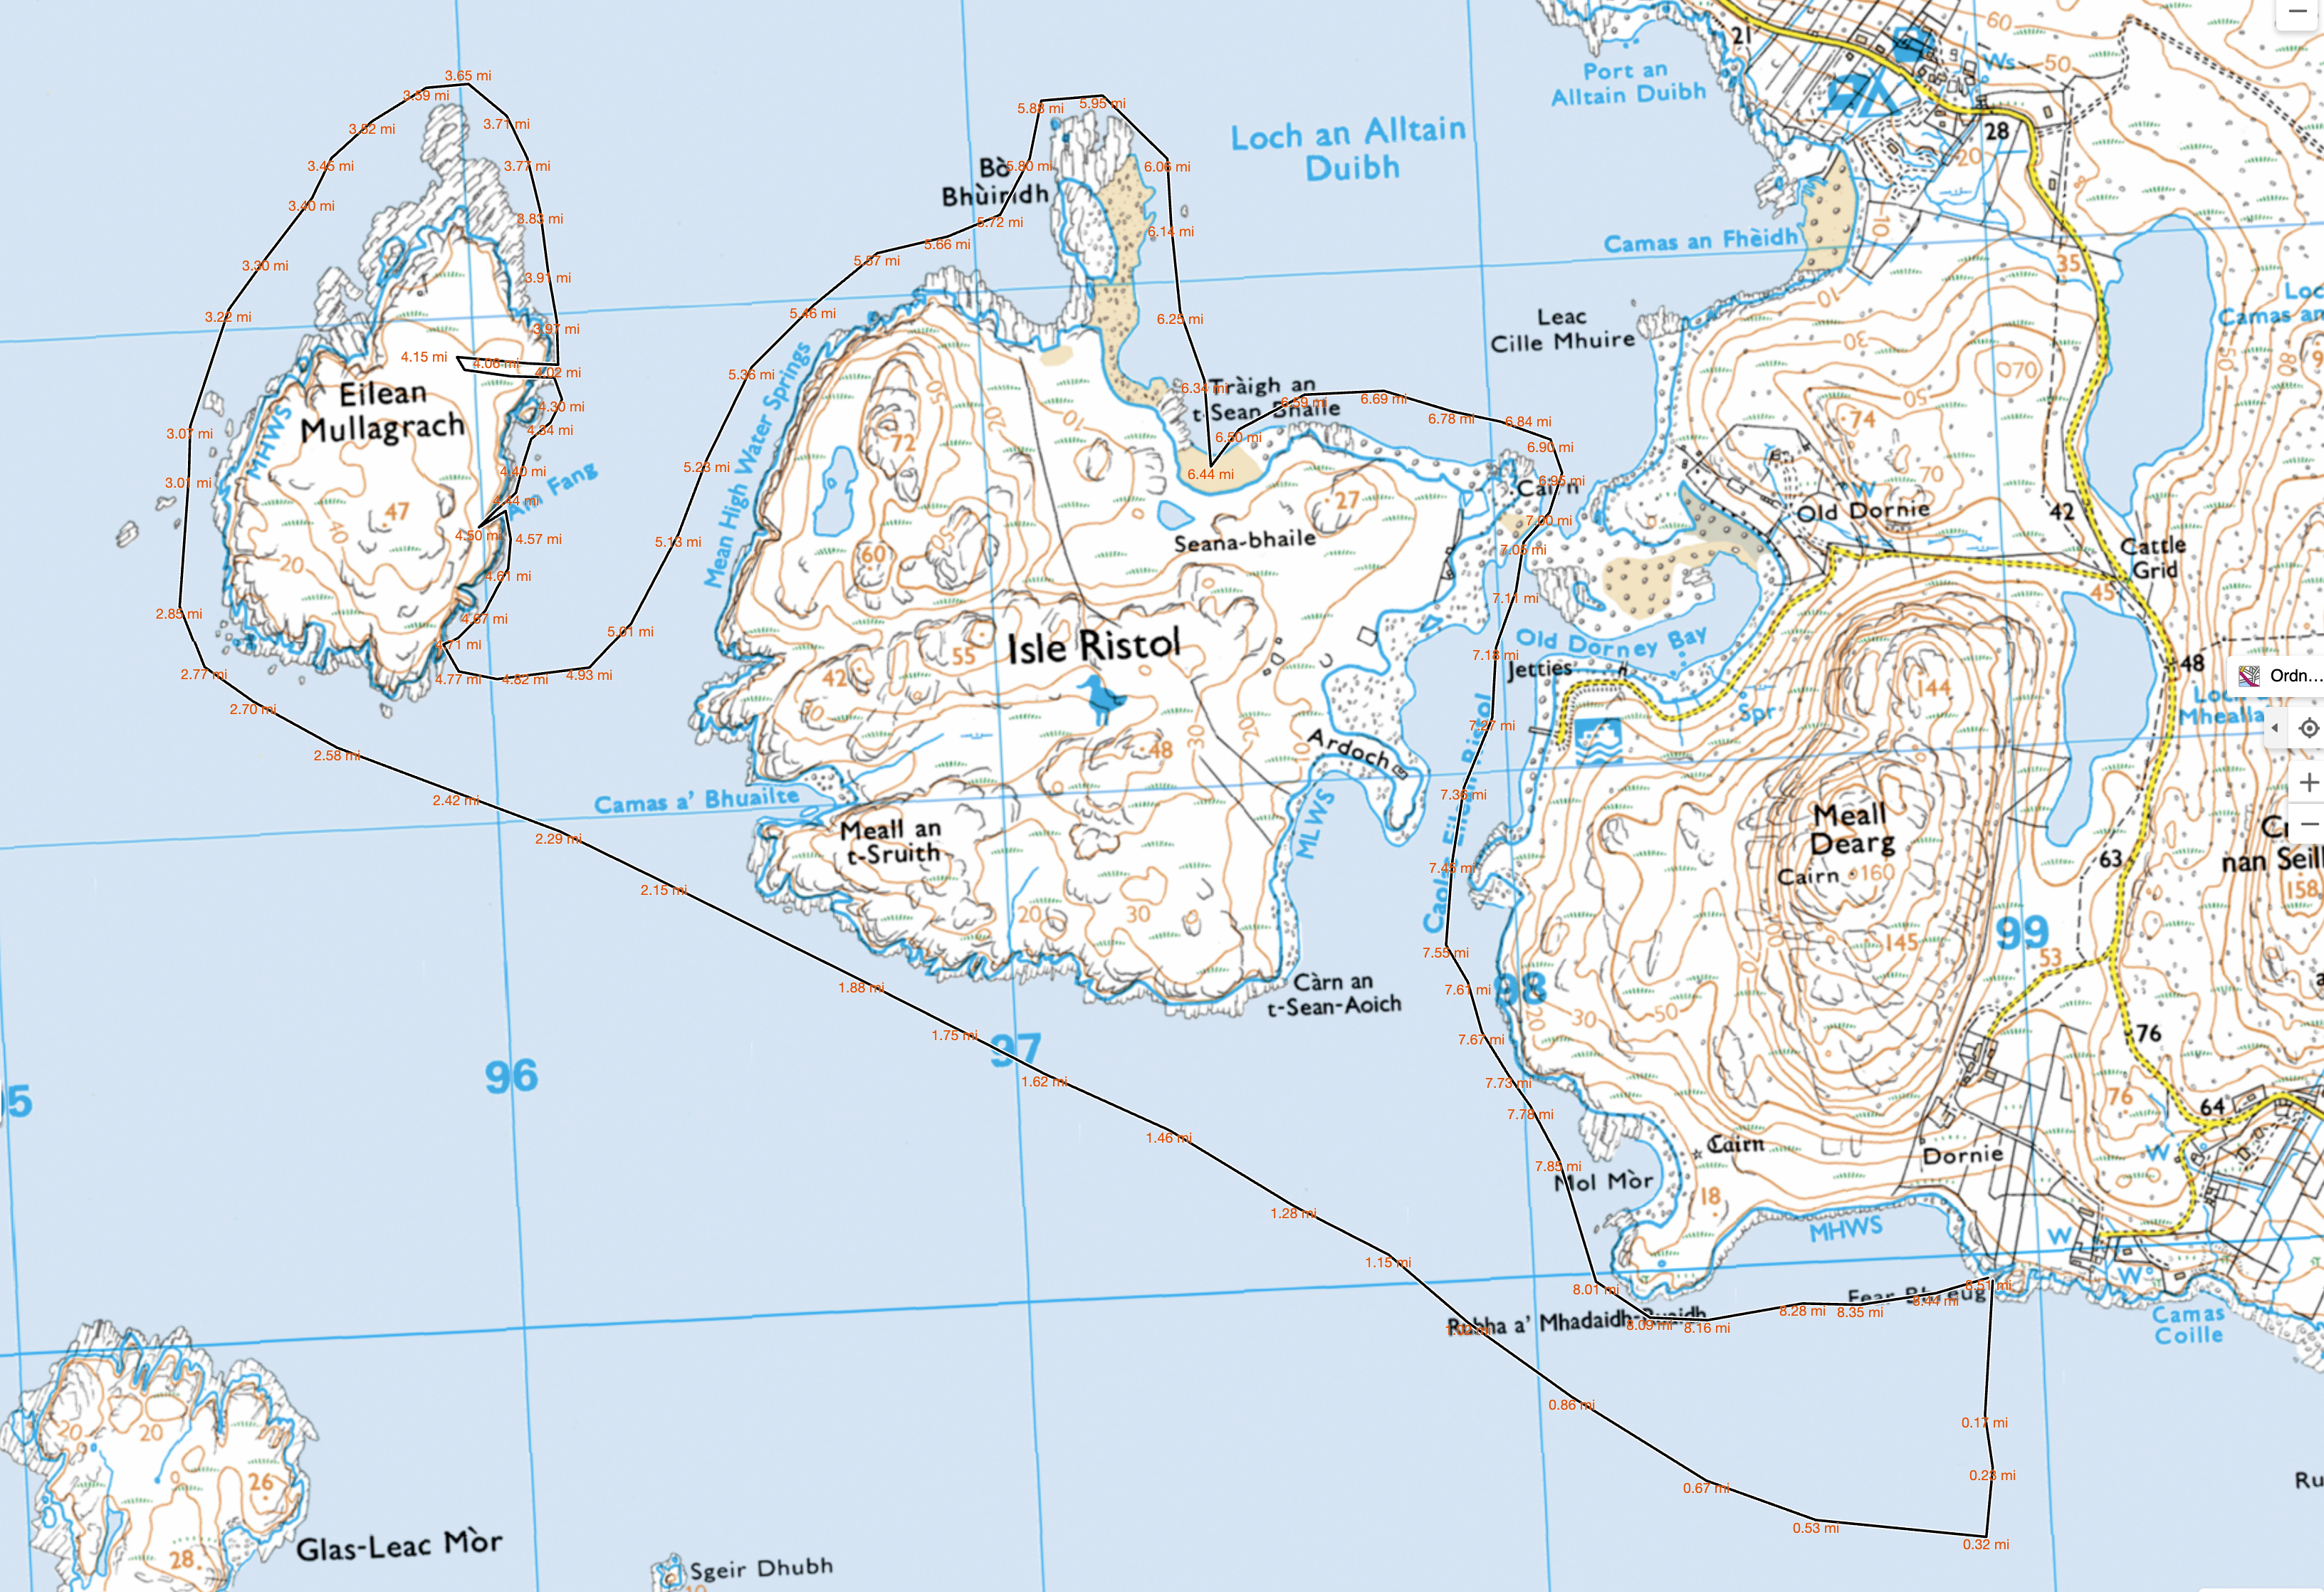
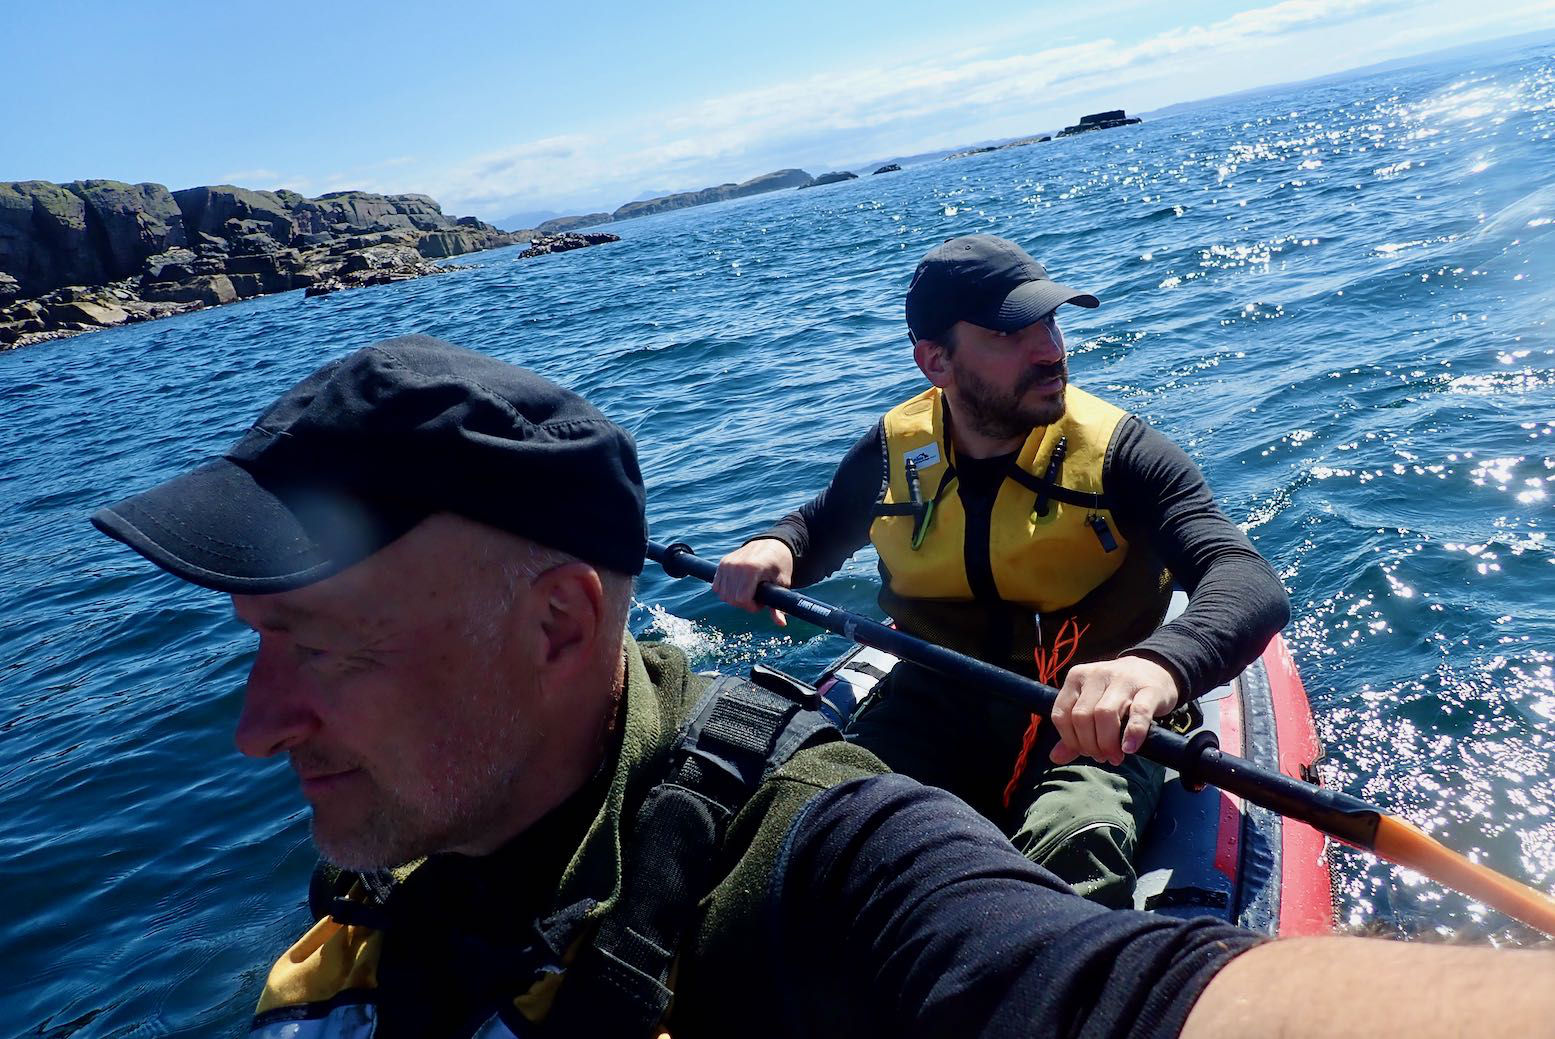
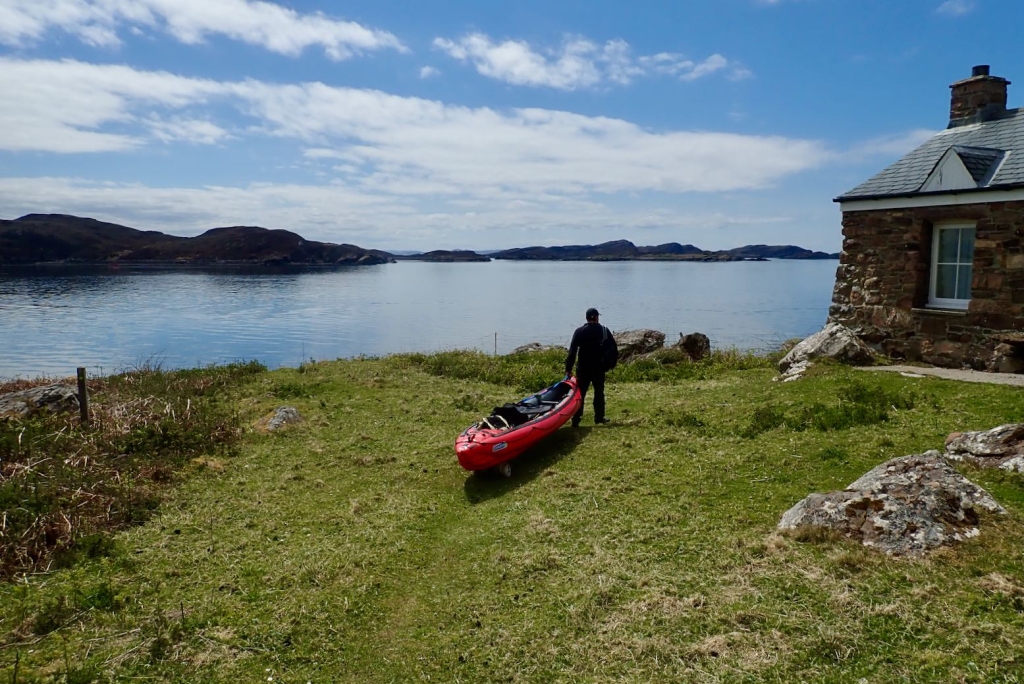
After a fortnight of chilly north winds and a diminishing woodpile, today was one of those rare days in the Summer Isles (far northwest Scotland) where you could paddle pretty much where you liked in an IK. It was also a chance for me to try out my new skeg-wheel trolley which Jon, who was staying down the road, had made for me. With no boat of his own this time, we set off in mine to see what we might see.
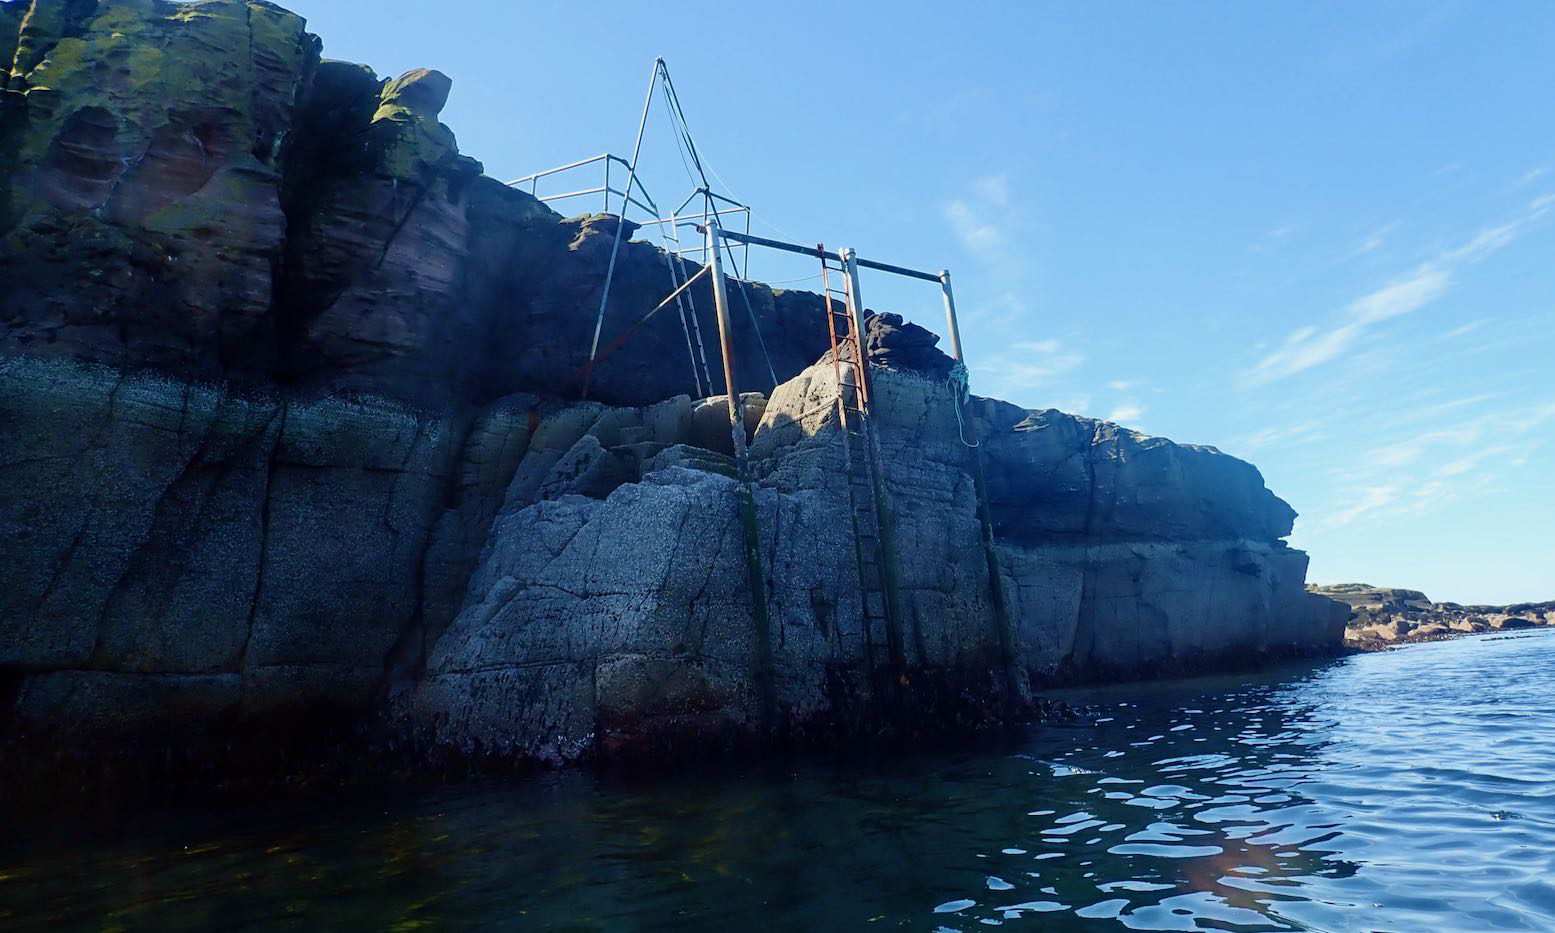
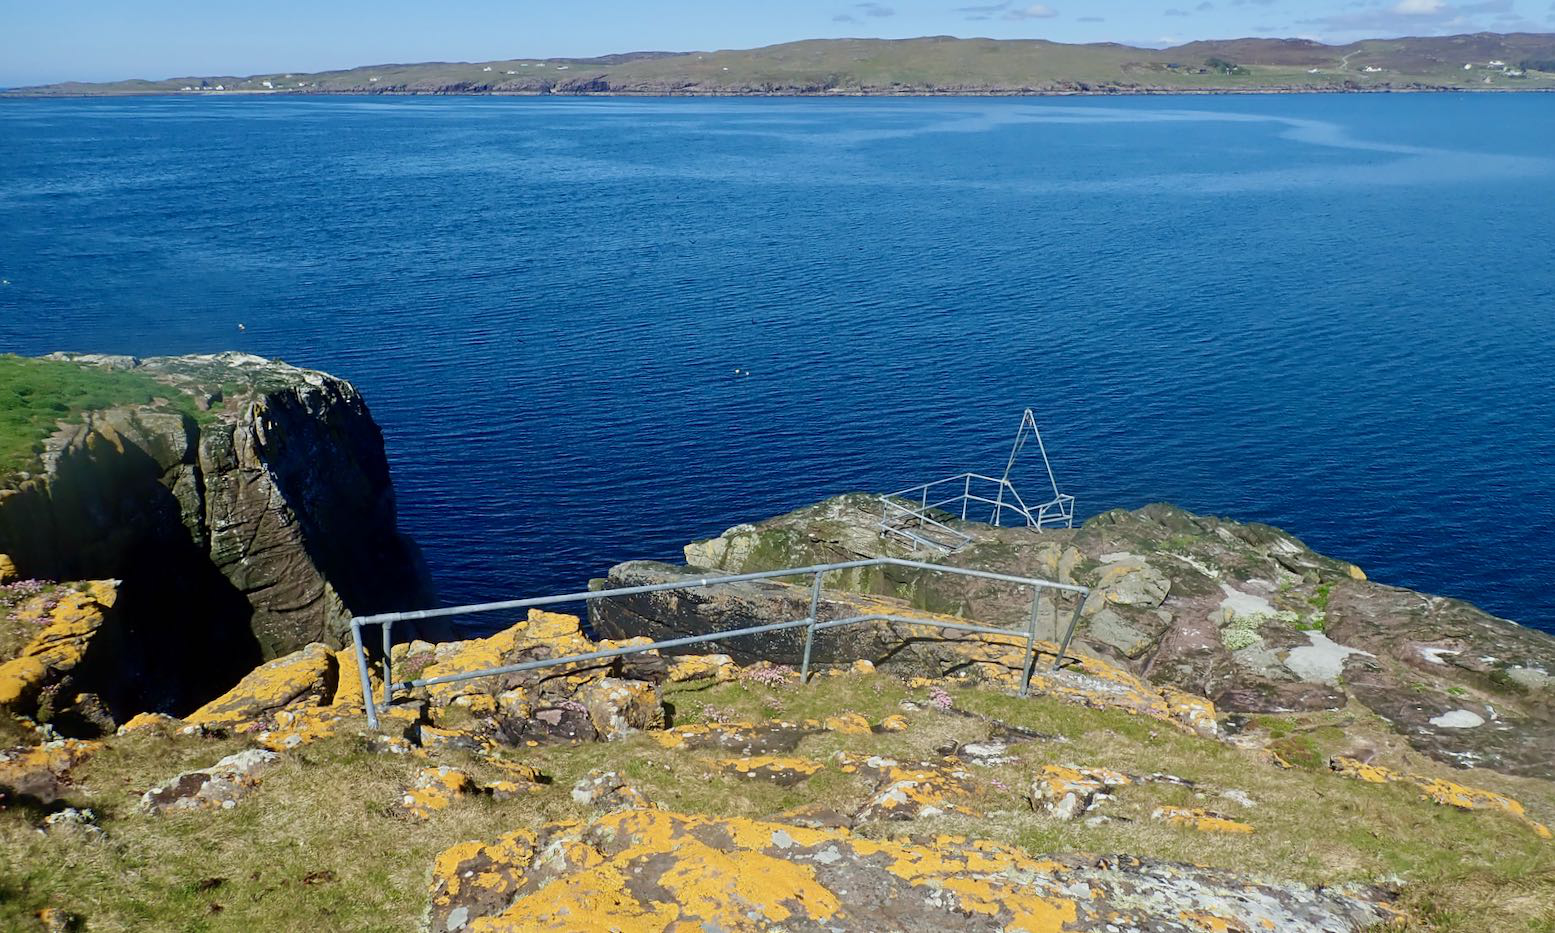
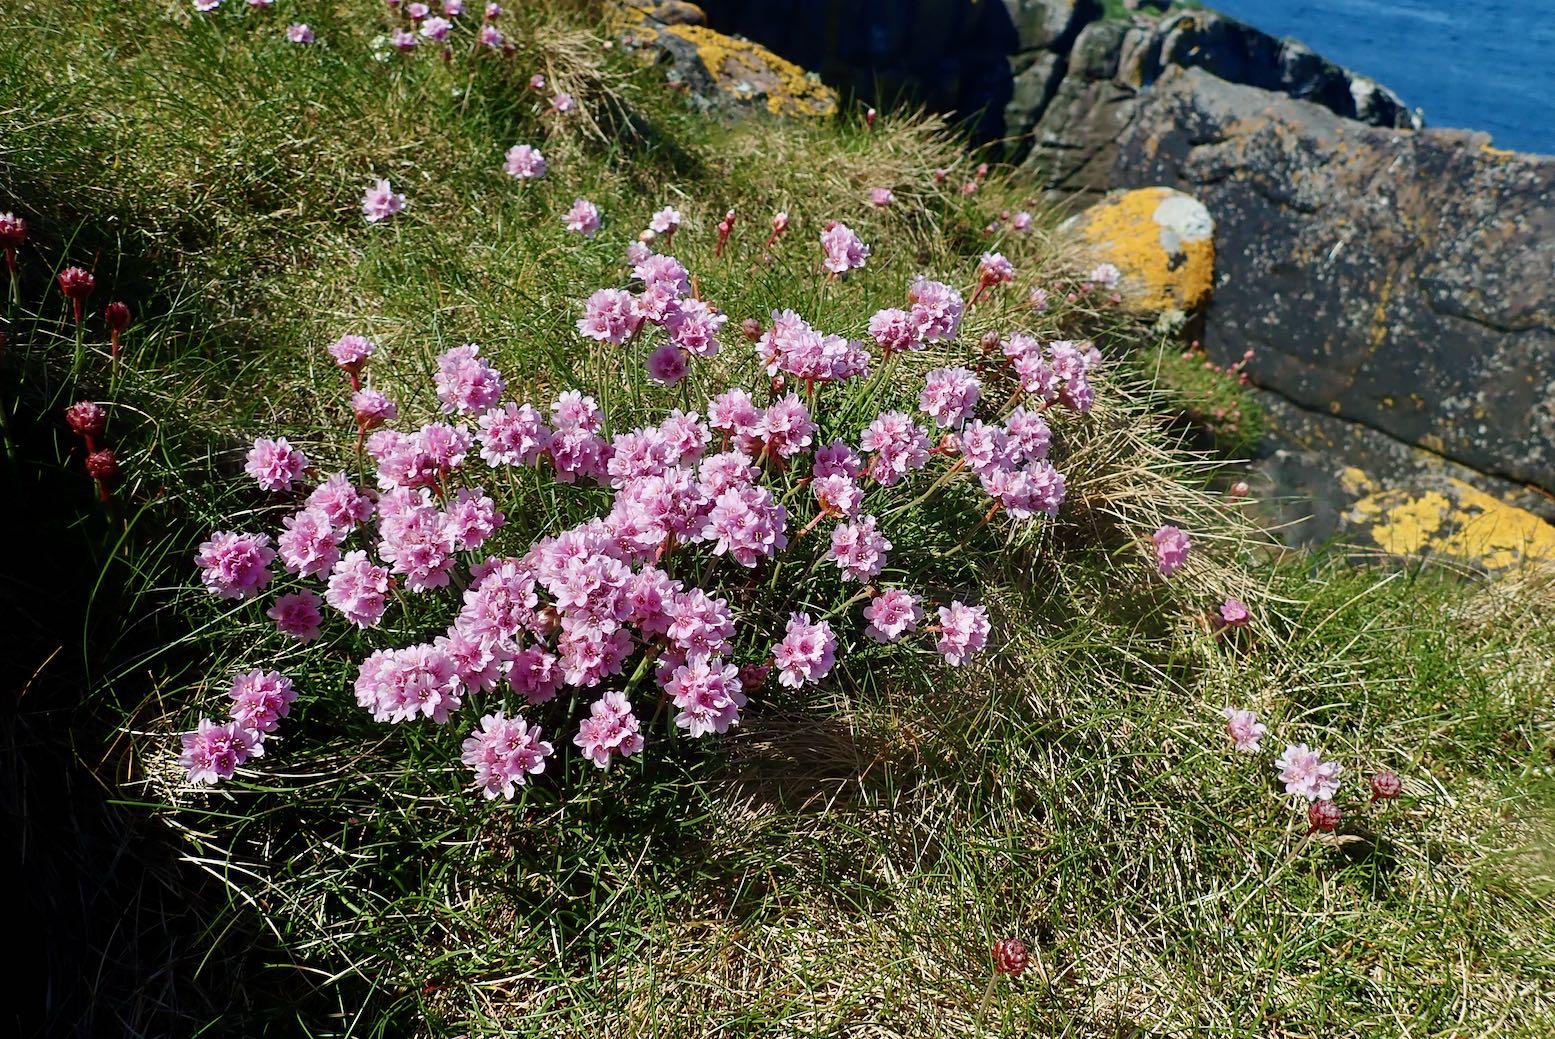
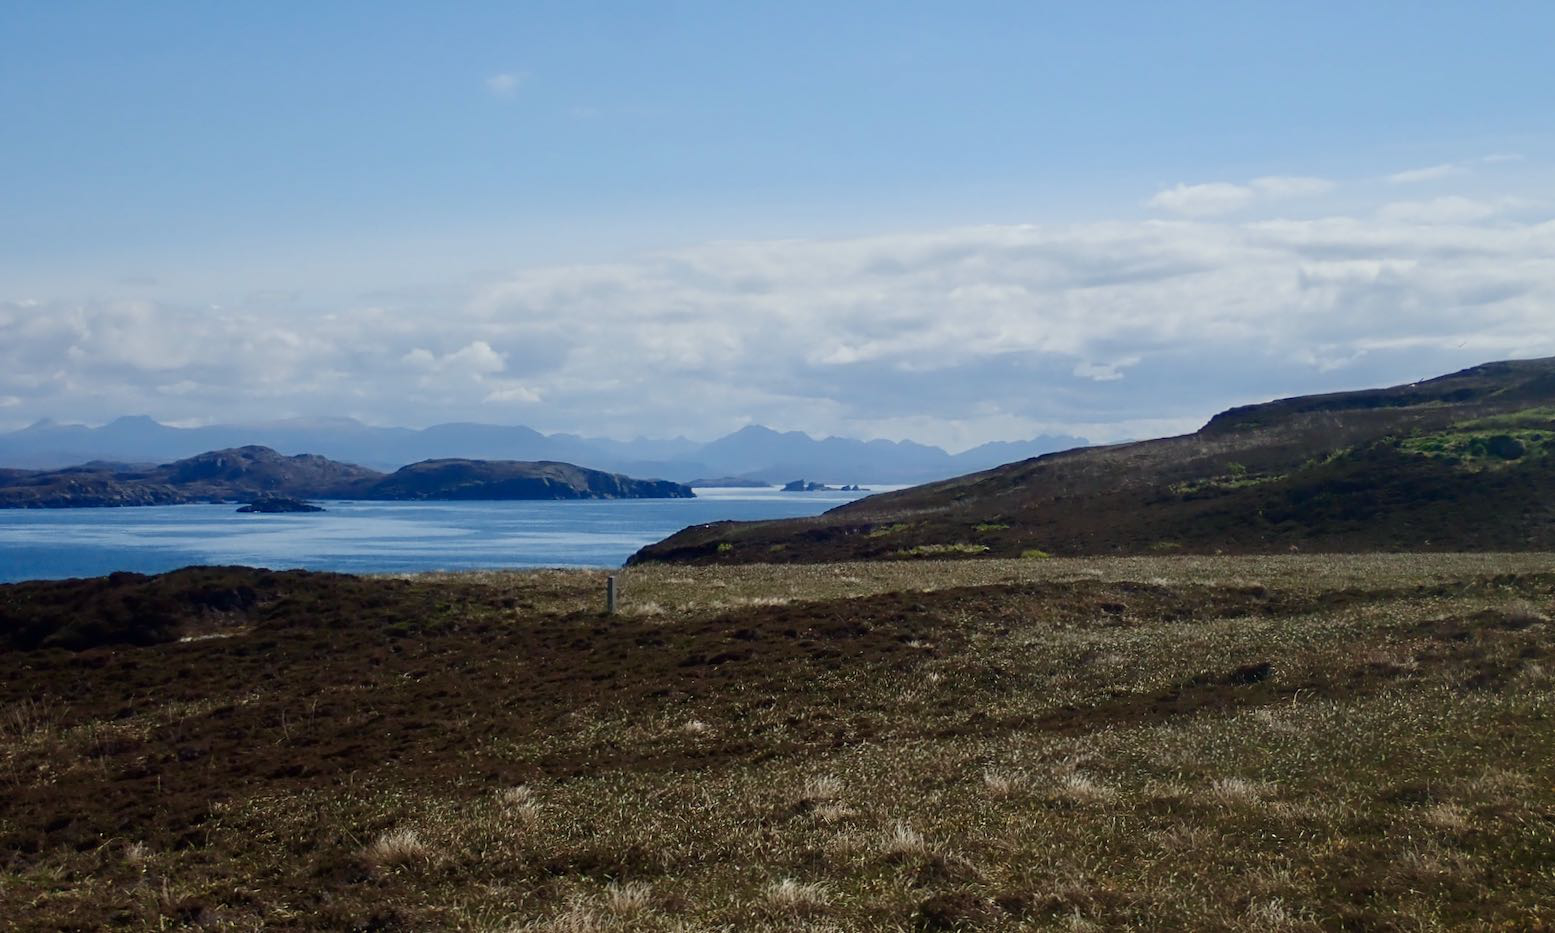
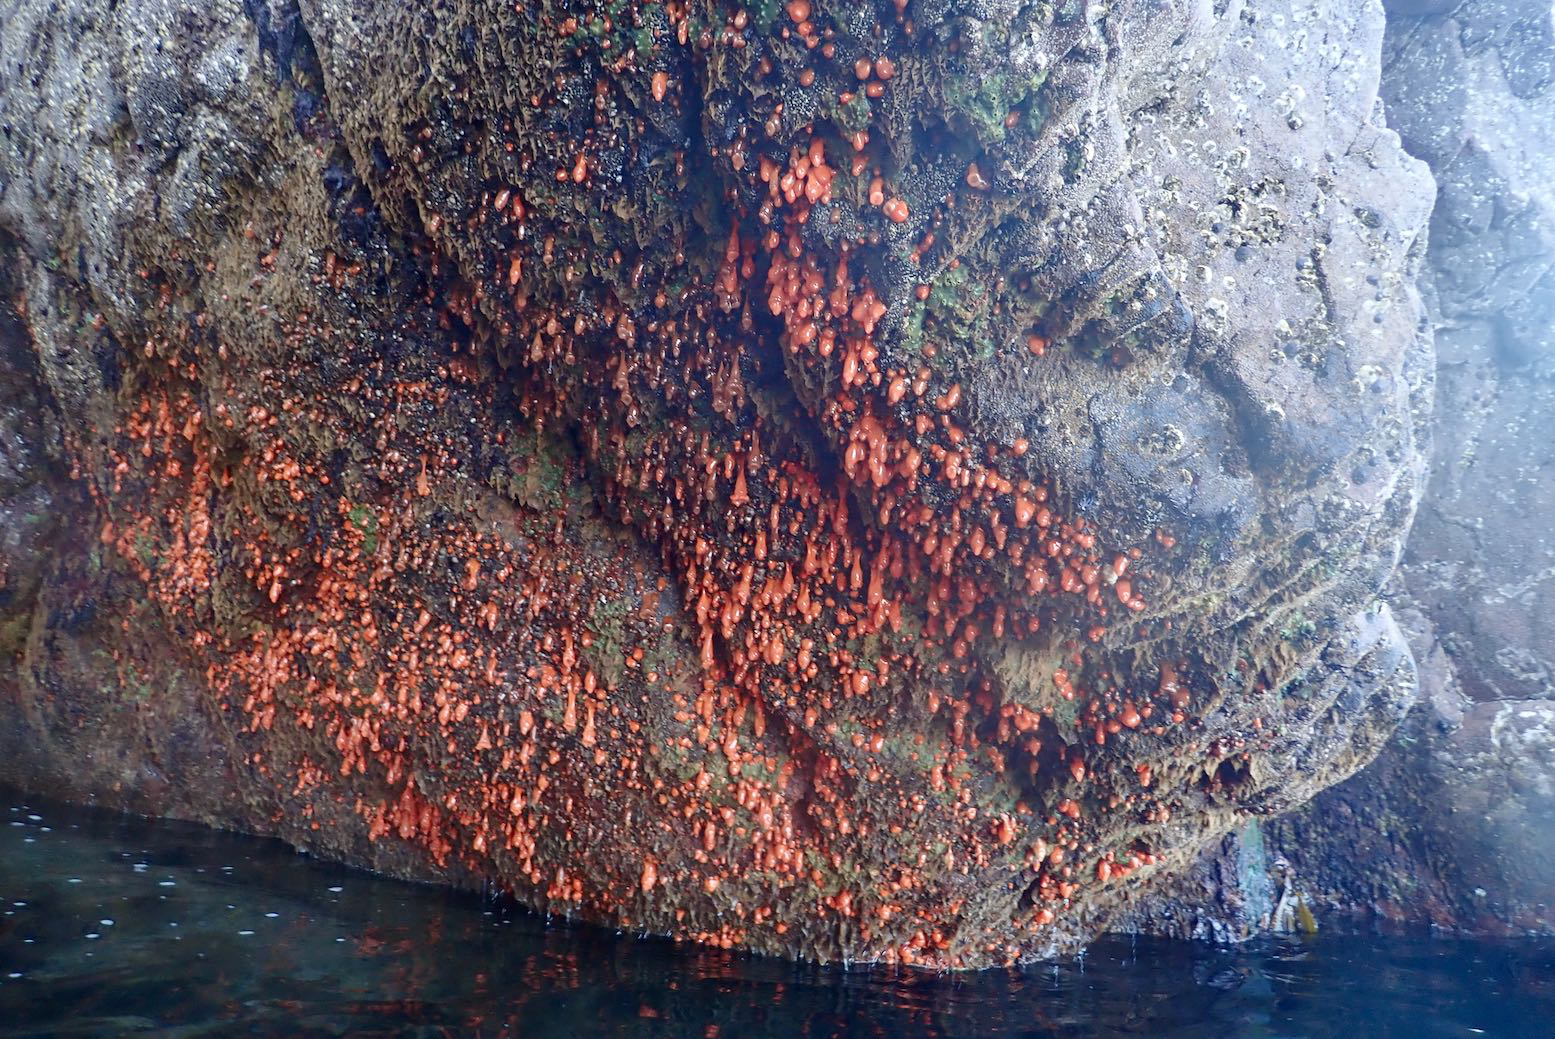
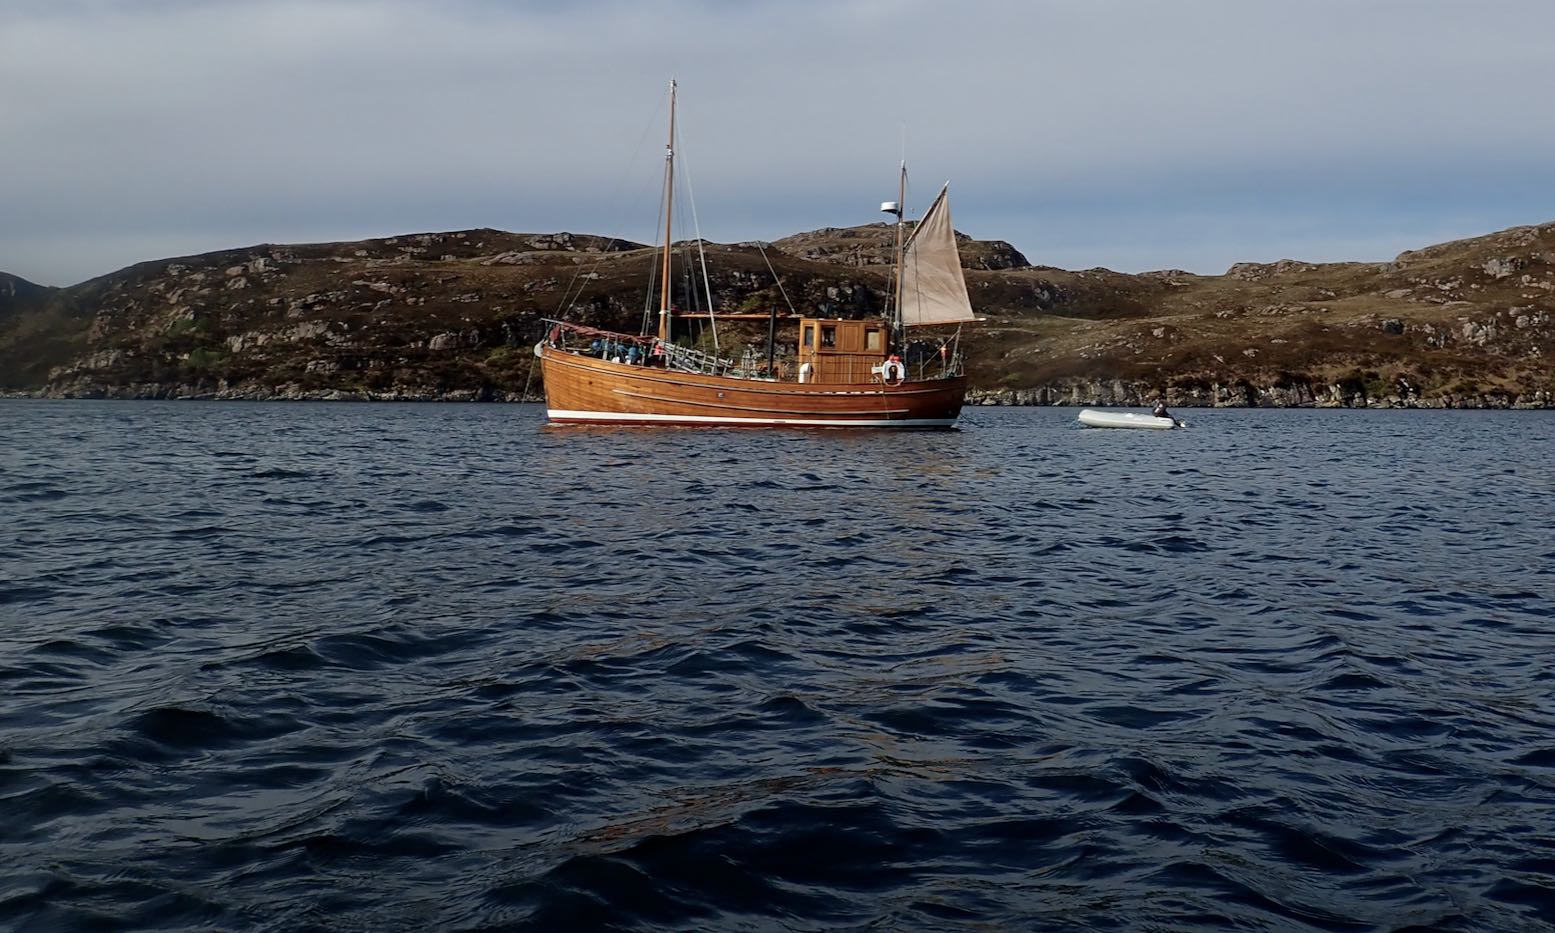
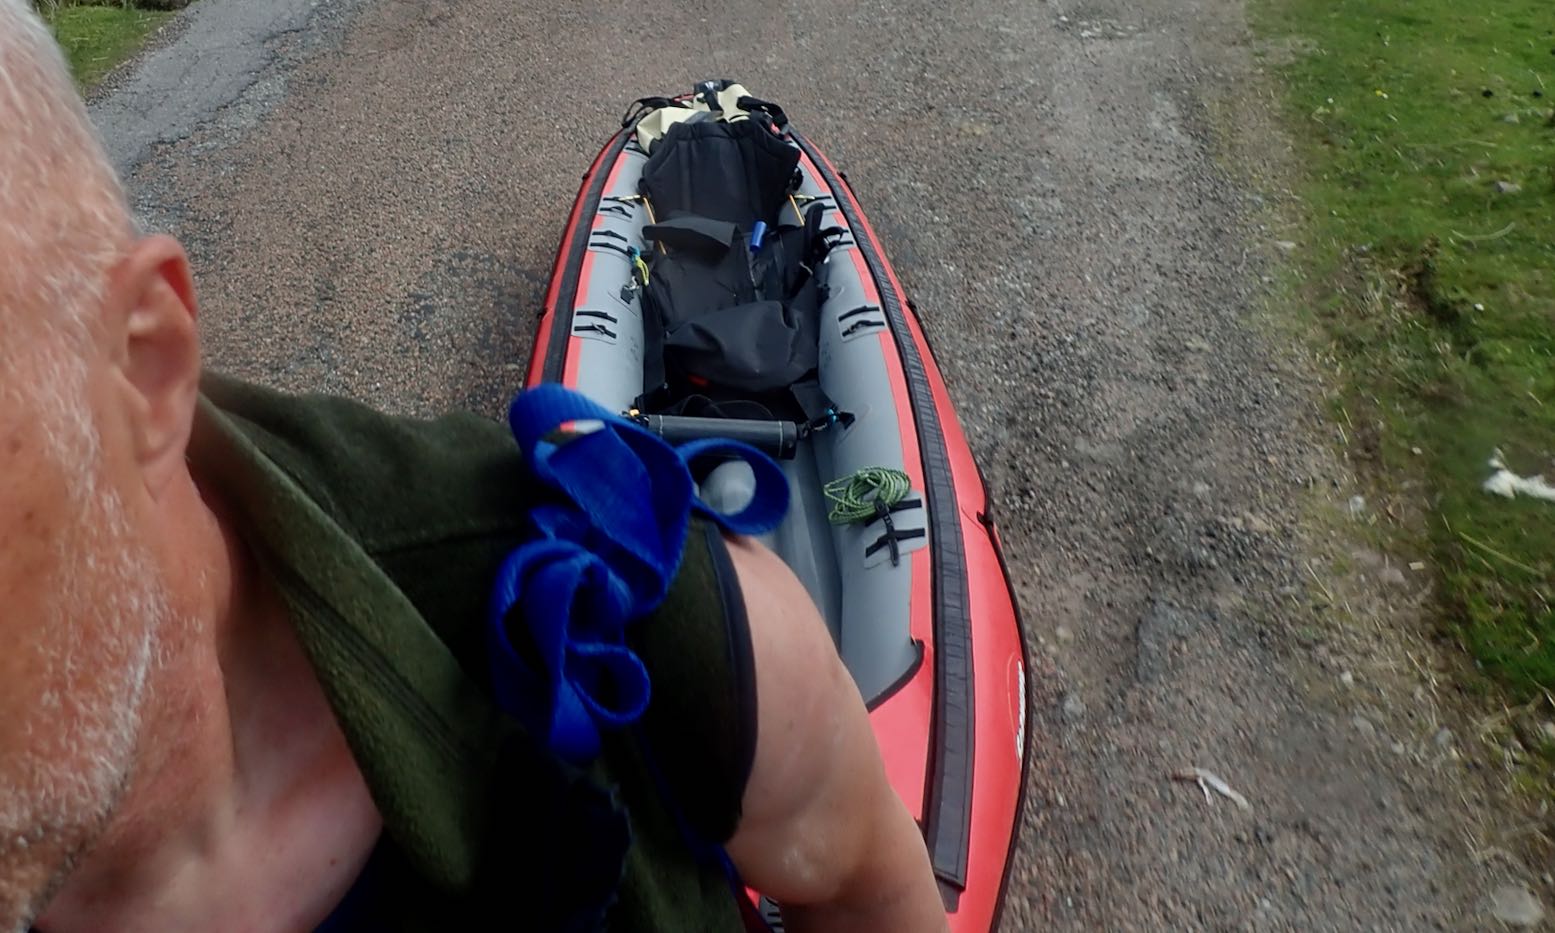
We rolled down the road to the Fox Point, the nearest and least effortful shore access from where I’m staying. Apart from the clatter of the solid wheels, the set up worked perfectly: stable and smooth.The spring tide had bottomed out so we looked for the least ankle-twisting put-in.Fear Bhreug (False Man) slot harbour looked just rightJust a few wet, slime-covered wet stones to negotiateWe have no plan so head towards the Ristol Islands across a glassy sea.With the calm, we take on the outside shore of Eilean Mullagrach; here the refracting northern after-swell makes it a bit choppier with some alarming waves breaking over reefs.Unless you’re a gannet, this is the only way to get onto Mullagrach, a gantry at the northeast tip. Usually alone, I’ve never done it, but with Jon to tend the boat, I climb up.With access so difficult, Eilean Mullagrach was never occupied or crofted. I think it’s now owned by a bird protection enterprise. Perhaps they built this guardrail and cut the steps. There’s what looks like a hut at the island’s south end, just past the (not very) high point.Nice to see sea pink and yellow lichen again. The former mostly found on the sheep-free islands and skerries.View south over the Summers to the Fisherfield mountains.The channel with Ristol behind. Better get back; the taxi’s meter is running.We visit the narrow twin-cave and nearby archPendulous sea growth emerges at very low tidesWe scoot back north out of the channel and take a break on Ristol beach before cutting through Old Dornie harbour back to False Man inlet. I leave my kayak overnight with a plan to come back for more tomorrow.Next morning I’m relieved to see my Seawave hasn’t floated off into the Minch. I top up and decide to head round the outside of Tanera Beg for starters.All is calmish as I cross Badentarbet Bay, but as I near T. Beg an unforecast southeasterly kicks up and keeps on kicking. The west side of Tanera Beg would be too exposed, so I divert into the Tanera Channel, using the lee of the smaller eileans.Nice looking wooden trawler.I’m hoping to at least visit the arch at the southeast end of T. Beg. It’s only 500m away but it’s quite lively and gusty now so I don’t risk it. Instead, I turn east to get into the lee of Tanera Mor, and take a diversion through the usually cut off pool of Acairseid Driseach (these Gaelic words just roll off the tongue).A bit disappointed, I head back to slot harbour but the wind seems less bad or may have passed. So I collect my trolley and strike out for Horse & Goat Island. I estimate it’s about 2 miles across Badentarbet Bay. The wind drops and even becomes a NW tail breeze.It’s actually more like 3.5 miles to the tidal channel between Horse & Goat. By now the spring tide is at full flow against me and I wonder if the two islands have joined up yet. I needn’t have worried; the NW breeze is stronger than any tidal current and there’s at least a foot of clearance.I pull over for a snack and a drink. Last time I was here was with my failed Semperit project. What a nice boat that could have been. I knew from here it would be a 2-mile into the wind hack to Badentarbet beach. Or even more annoyingly, a three-quarter headwind. It’s less than 10mph, but despite pushing hard with my left arm, the boat kept getting pushed right. Where is my rudder now?! I should have picked up some rocks to weight the bow at Horse Island to see if that trick works. Next time I’ll carry a waterbag to do the same; it’s something I’ve read of but never tried.From Badentarbet Beach it’s a stiff climb – 1st gear pushbike – back up the road to Polbain, but on the road the skeg-wheel trolley again makes for easy, hands free towing with the boat hanging from my shoulder via a knotted mooring line. I can walk at normal speed with loads less effort (and time) than carrying the deflated IK. Having a trolley like this makes the IK nearly as versatile as a packraft: a boat you can start here, end there and easily transport back across the difference.
So ends another great 12-mile day out in the Summer Isles whose configuration enables numerous ways to spin out a trip as pirates, winds and stamina allow, and all without getting too far out.
The effort of portaging the dozen locks of the River Wey the other month wore me out. On some portages you can drag the boat along harmlessly on lush grass. Others involved narrow gates, or crossing busy or narrow road bridges. It all got quite effortful, especially towards the end as my energy faded like a dying salmon.
I quickly worked out what was needed: a simple and easily deployed alternative to the typical strap-on canoe trolley, like the 60 quid Decathlon example (left) with identical examples on eBay for nearly half that price. A closer look at some images shows them to be needlessly high (unstable) and the clip-out joints don’t look that sturdy in the long run, though the tyres are nice and fat and clearance is great. With these trolleys I think the V of the alloy frame would sit better in line with the hull, not across it (with bends in the tubes). But crossways simplifies the wheel axle set up. My idea was to use the IK’s own weight with the skeg to locate and fix a trolley in place. Quick to use; no strapping needed.
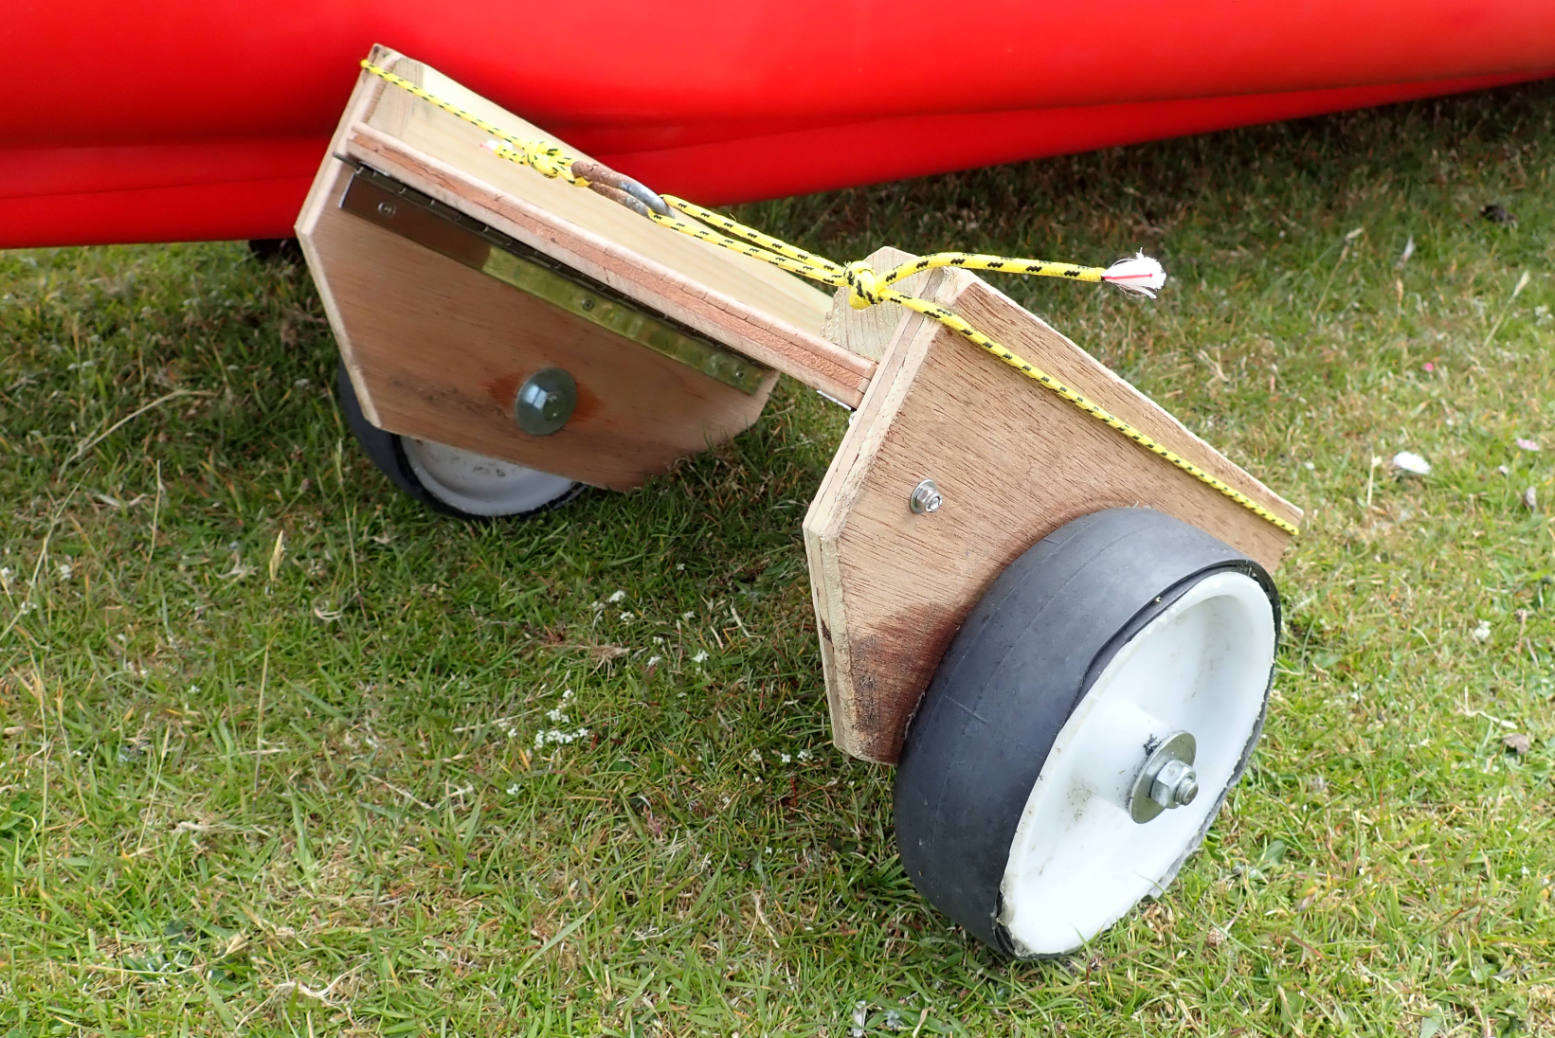
With workspace-and-tools mate Jon, we came up with a stable two-wheel folding platform with a drop-in skeg slot and hinged wheels which folded out to both roll and support the hull either side of the skeg. To portage, lower the boat’s skeg into the platform’s slot, pick up at the bow and roll it away.
On getting the trolley, the too-high sides were easily sawn down by an inch, and another inch got sawn off the bottom to improve ground clearance, as in the graphic. We hadn’t pinned down a way of stopping the hinged wheel plates folding inwards on the move. The trolley actually worked OK on smooth surfaces without any hinge lock, but eventually a bump would knock one side in. Until a neater idea springs to mind, the easiest way for me was stringing a loop of stretch-free Dyneema cord round the top to keep the wheel plates from folding in.
At 1.7kg it’s not that light, but as a prototype it was dead easy to make and the thing needs to be durable. Something similar out of alloy tubing (like the Decathlon trolley above) might be half the weight, but is less easy to fabricate in the front garden.
After a few miles… By chance, I was left car-less during a few days of great weather. In either direction it’s less than a mile and a 50-metre drop along a quiet road to the seashore: an ideal trolley testing scenario. What extra weight there is sits best over the wheels, and at the bow I tie a shoulder loop into the mooring line, leaving me hands-free to check my messages. Coming uphill for a mile from the beach, I could walk at normal speed with much less effort (and time) than carrying the deflated IK. It seems the width and height proportions are pretty good for stability, and the cord works well enough to keep the hinged sides up. A couple of times over rough stony ground the cord came off and the trolley folded up, or on steeper side slopes it just fell over. So maybe another 10-15cm of width would be good, but without much added height. And there must be a simple latch or lock idea for securing the sides.
Smooth on roadStable on grass
The solid plastic wheels (£12.50 for two pairs) make a racket or hard surfaces and will transfer shocks and eventual wear to the wheel mounts. Some near-identical rubber wheels cost about the same and ought to feel less harsh. But first, I may waste some time wrapping some spare motorbike inner tube around my current wheels.
Dom from Devon’s version 2022
Having a trolley makes an IK nearly as versatile as a packraft: a boat you can start here, end there and easily transport back across the difference.
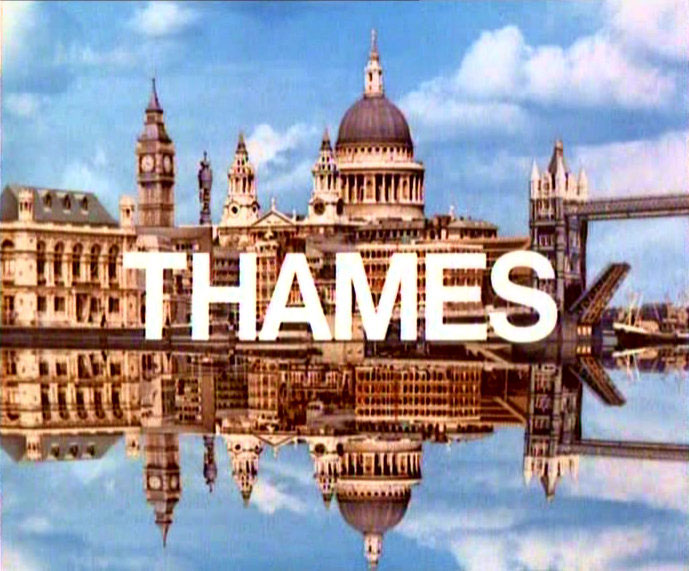
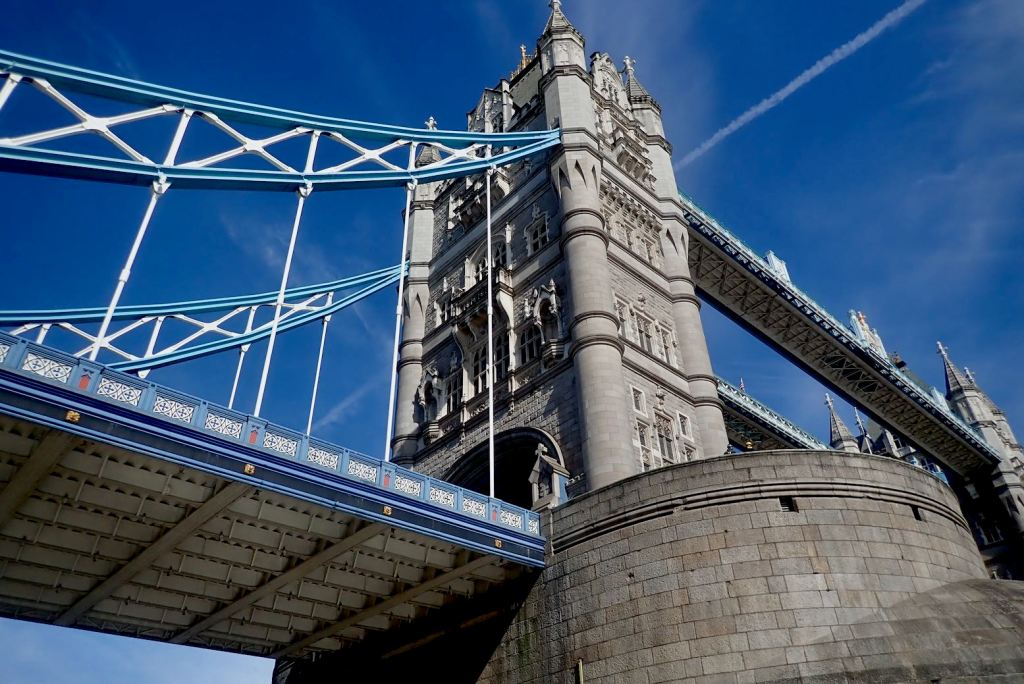
Right now [April 2021] it’s a great time to kayak the Thames through London. It’s only April but due to you-know-what the Westminster tourist barge scene is dormant, making that brief but lively stage a bit less fretful. Down at water level we paddlers may be hyper vigilant, but can the bloke doing a U-turn in his heaving tourist catamaran while doing a commentary see us fending off the standing waves and refracted wakes? As a barge-tourist in a Union Jack bowler hat asked me last time; ‘Is this allowed? Yes it is chum, but a kayak on this part of the Thames is still an incongruous sight. The congestion and the standing waves pushed up by some bridges at certain times can feel a bit like skateboarding in a gale on Runway 3 at Heathrow.
Demanding…
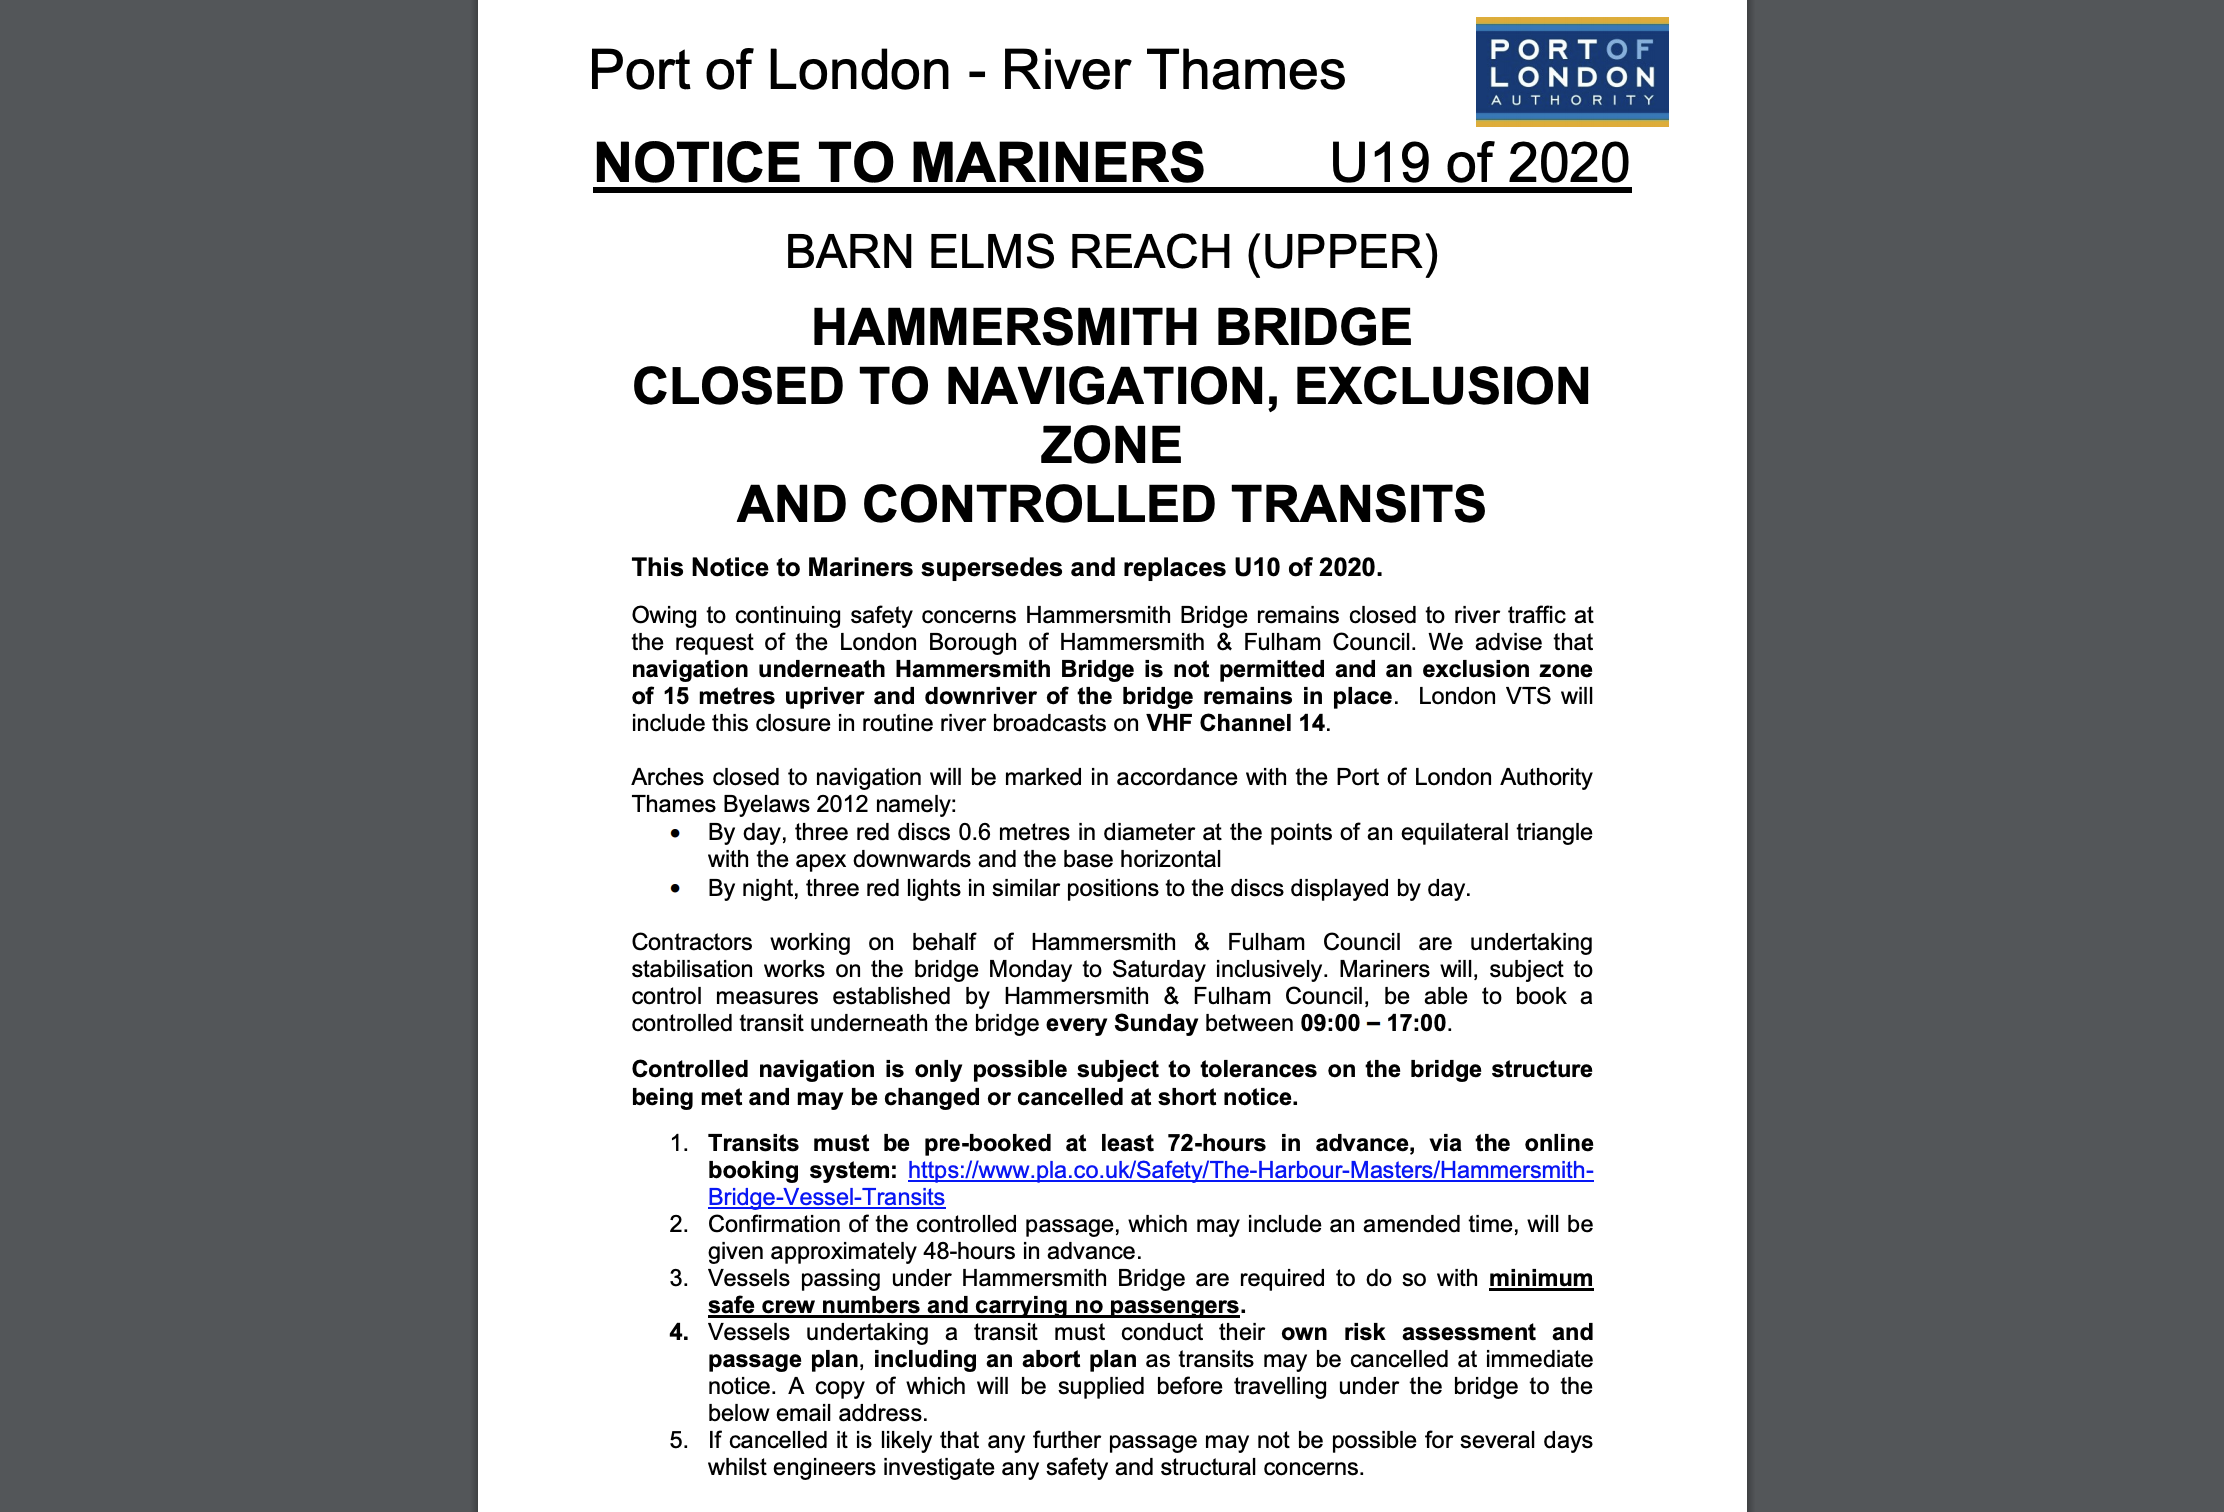
Downloading the PLA’s mammoth 130-pageTideway Code is enough to put anyone off, but I do believe this edition (dated October 2020) is less anti IK than a previous version I read. At the time I recall seeking clarification from the PLA’s media person and got an arsey corporate riposte. Has the Lockdown IK consumer surge turned the tide on the PLA’s prejudice? It’s the old problem of misconflating a clueless beginner in £49.95 Aldi bin bag with an alert and well-equipped paddler in a decent high-pressure hybrid. I say: pick your tide, keep right and be observant. For me the biggest peril was dodging the horizontal scythes of the Putney rowers who seem to go up and down across the whole width of the river as they please. They do need a lot of space.
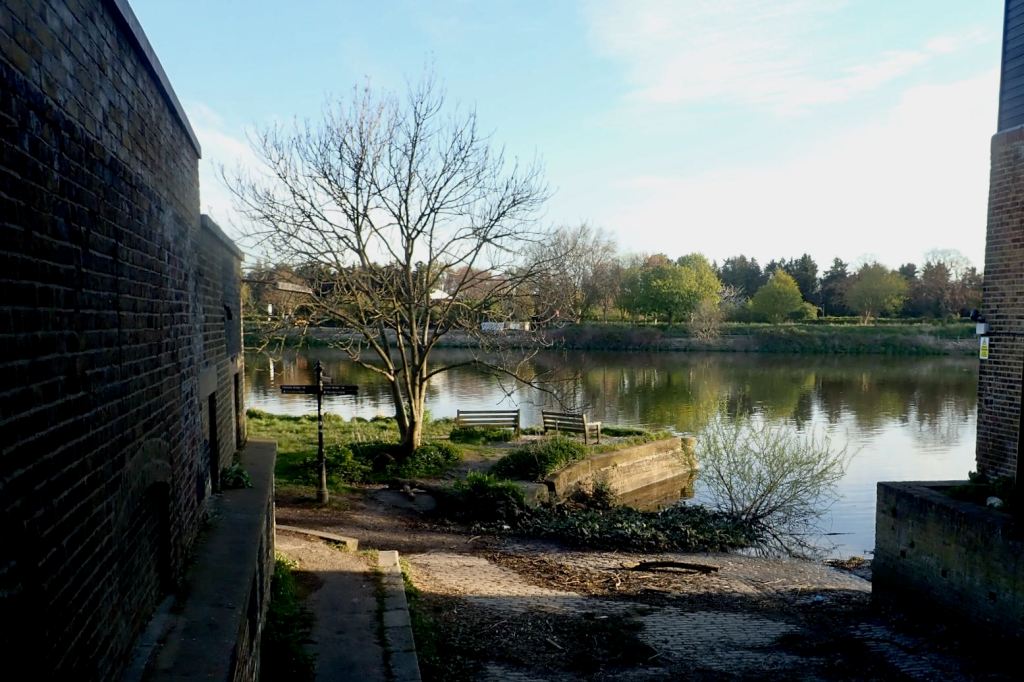
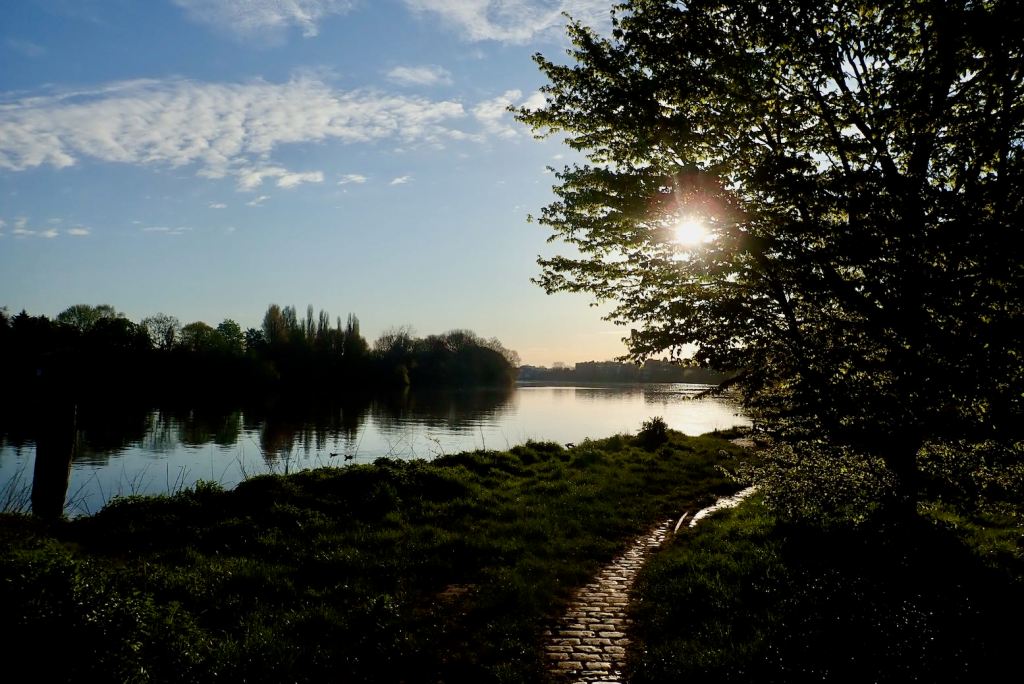
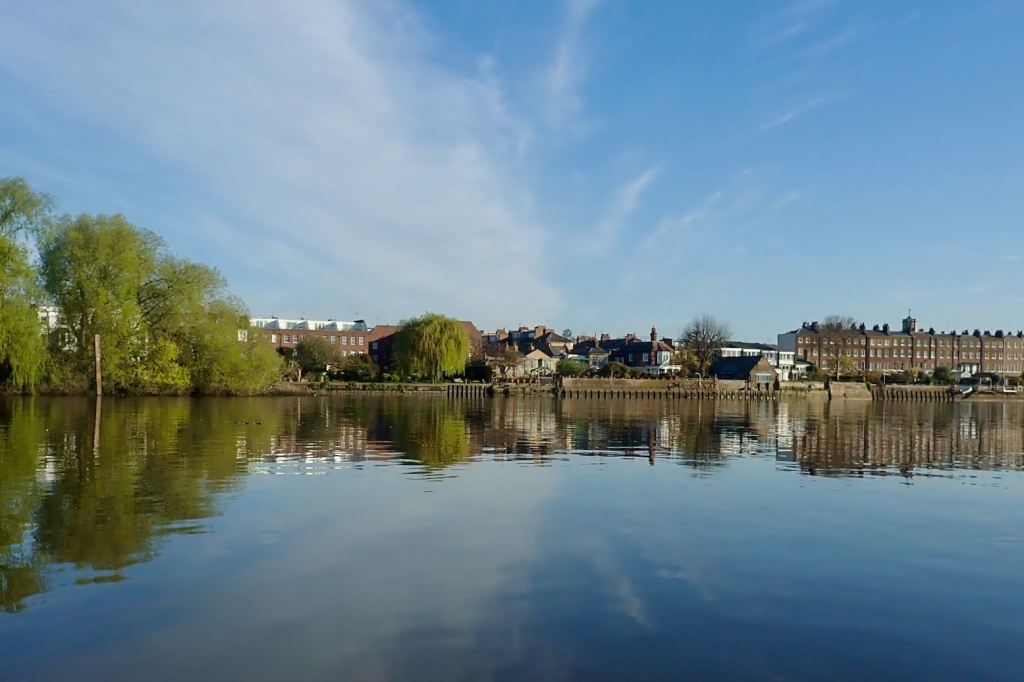
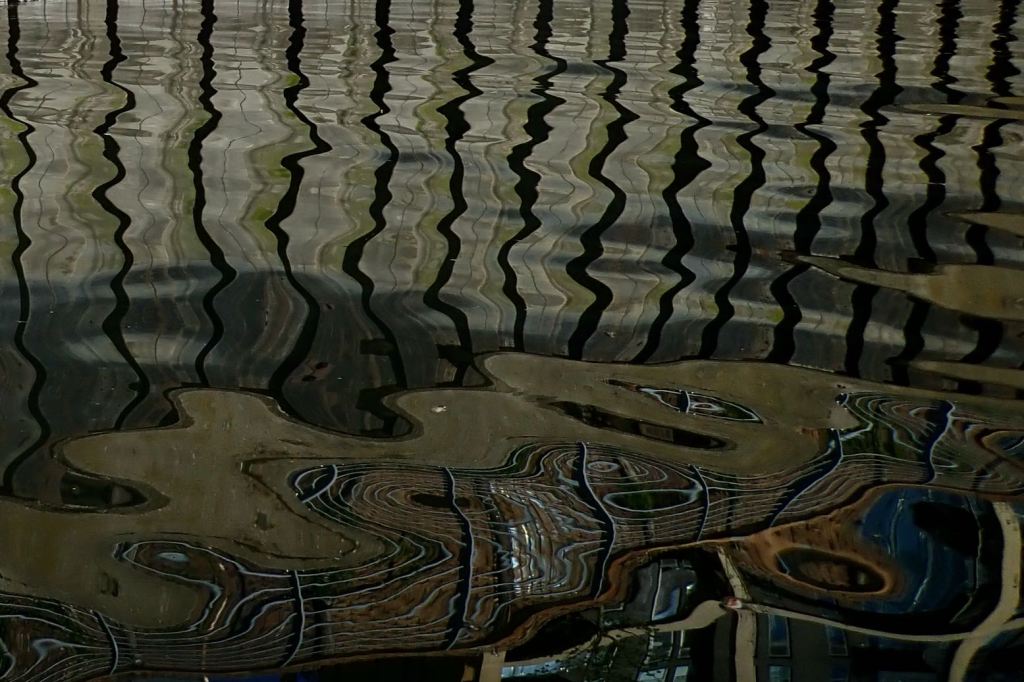
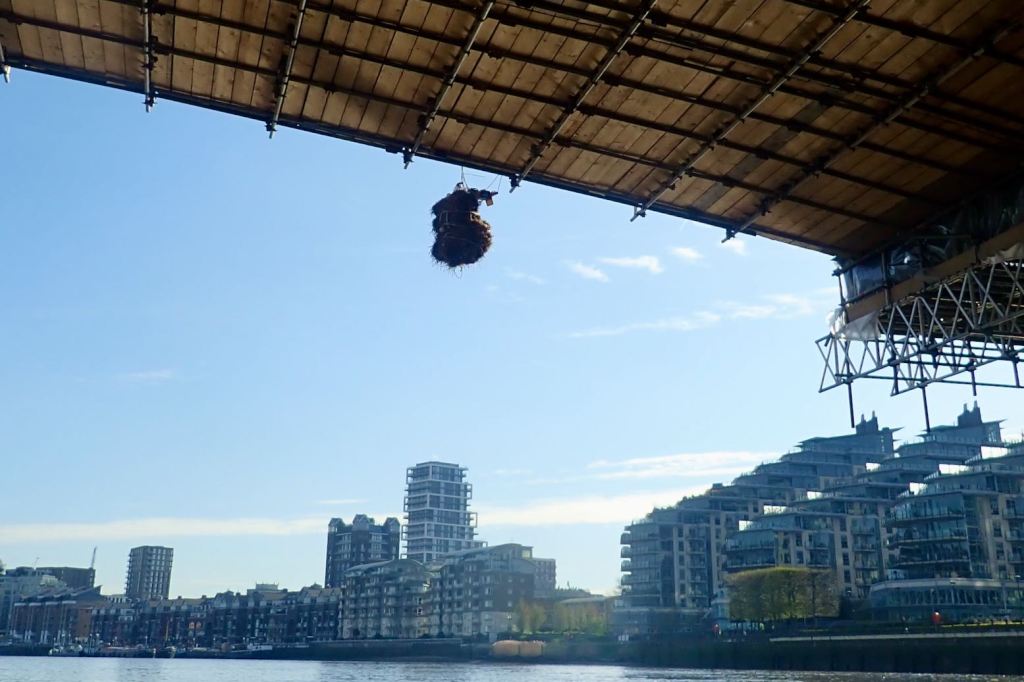
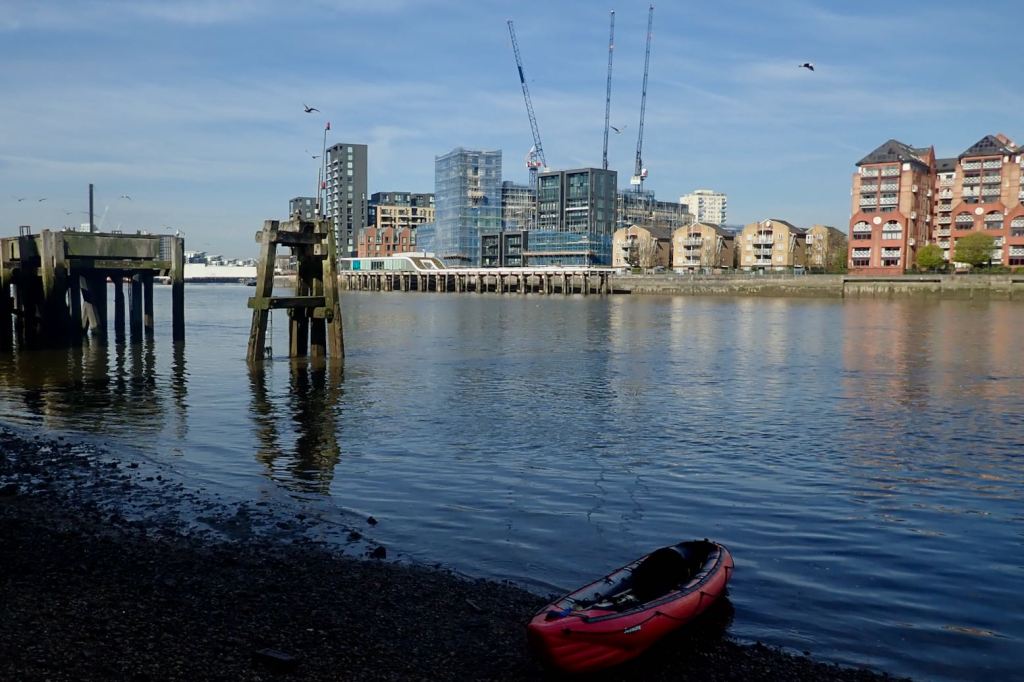
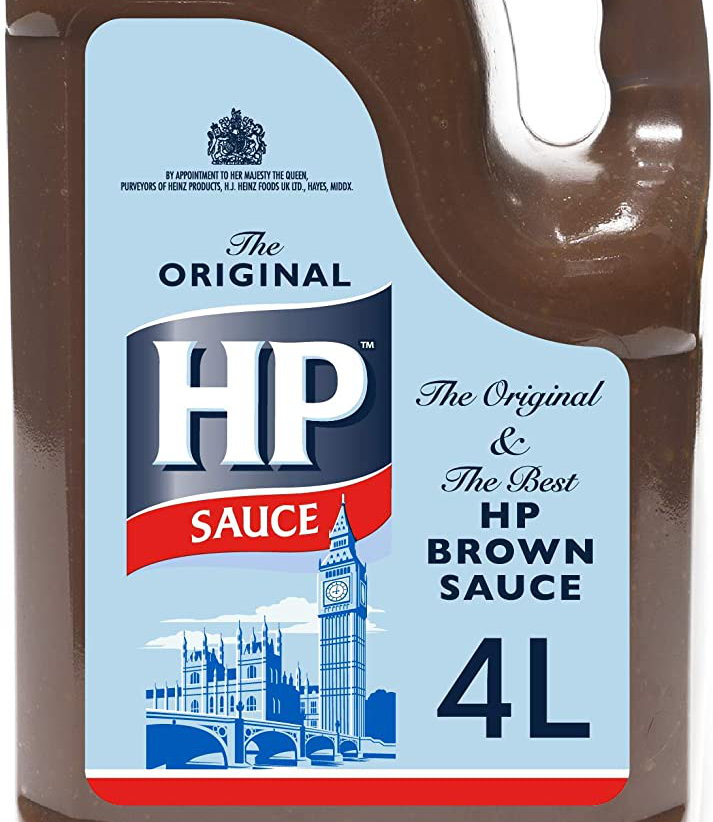
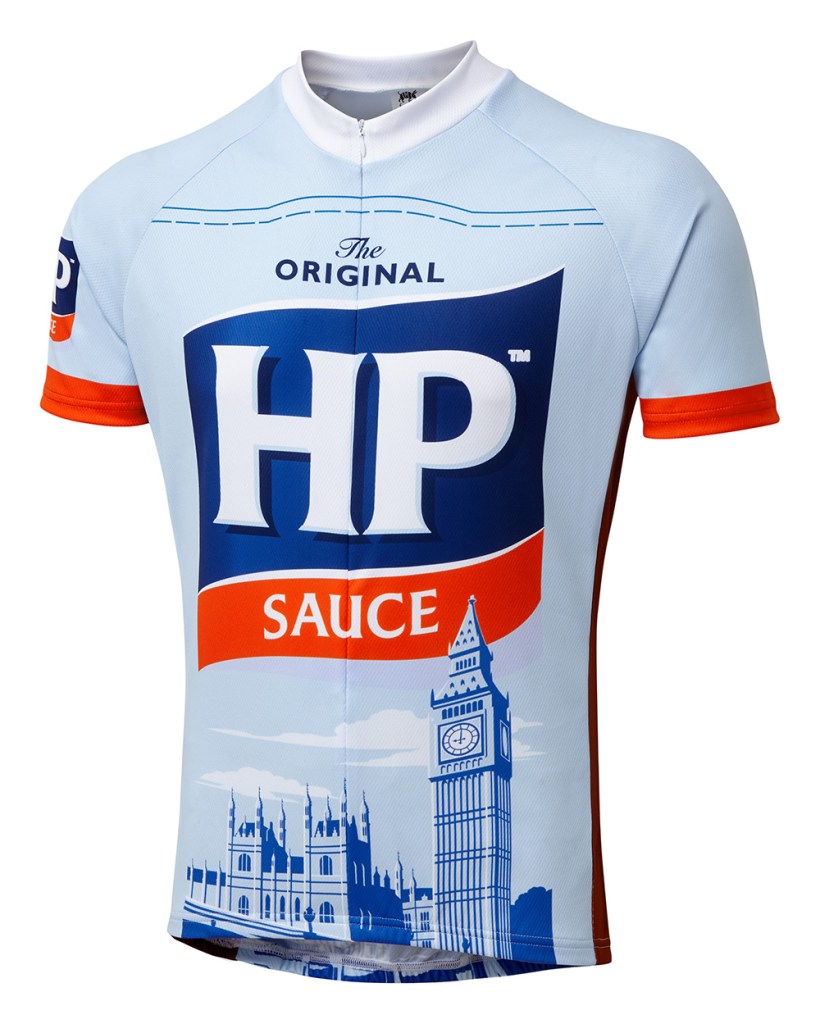
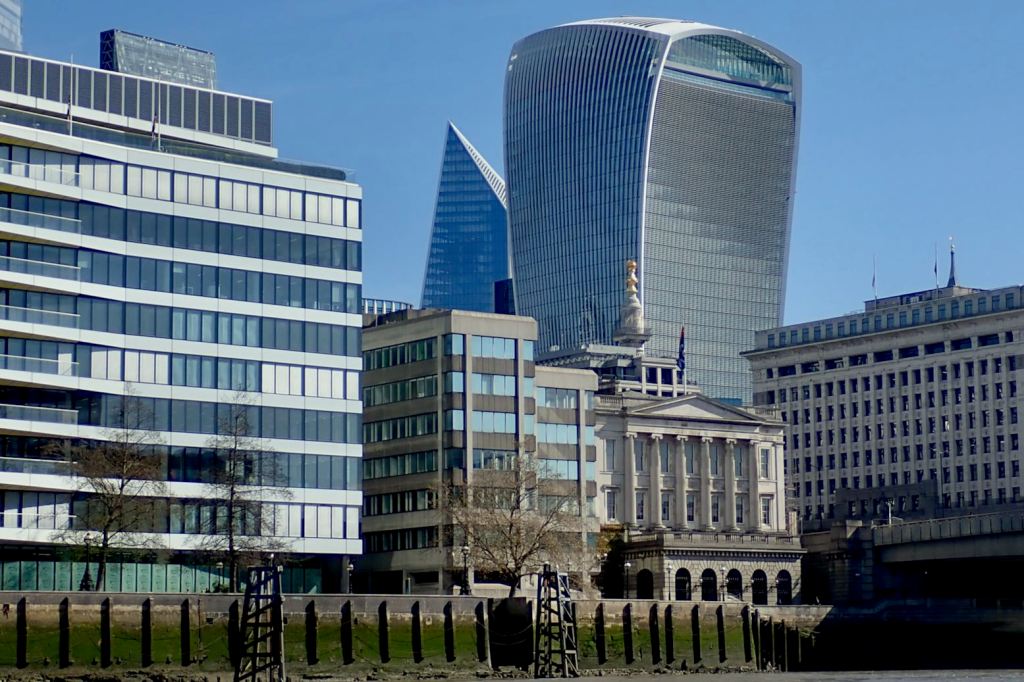
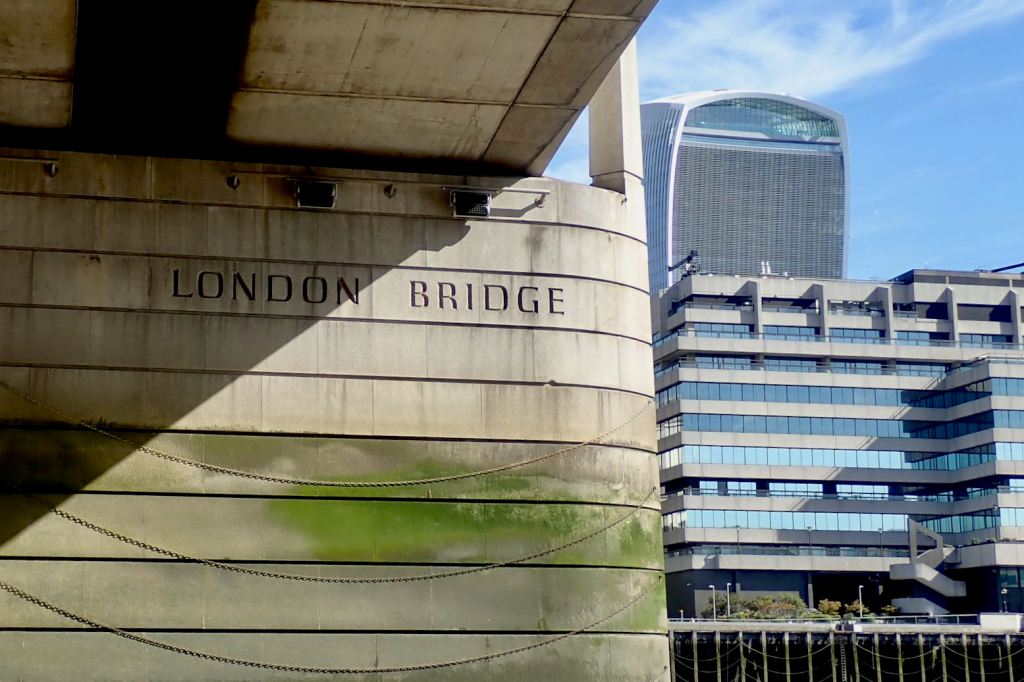
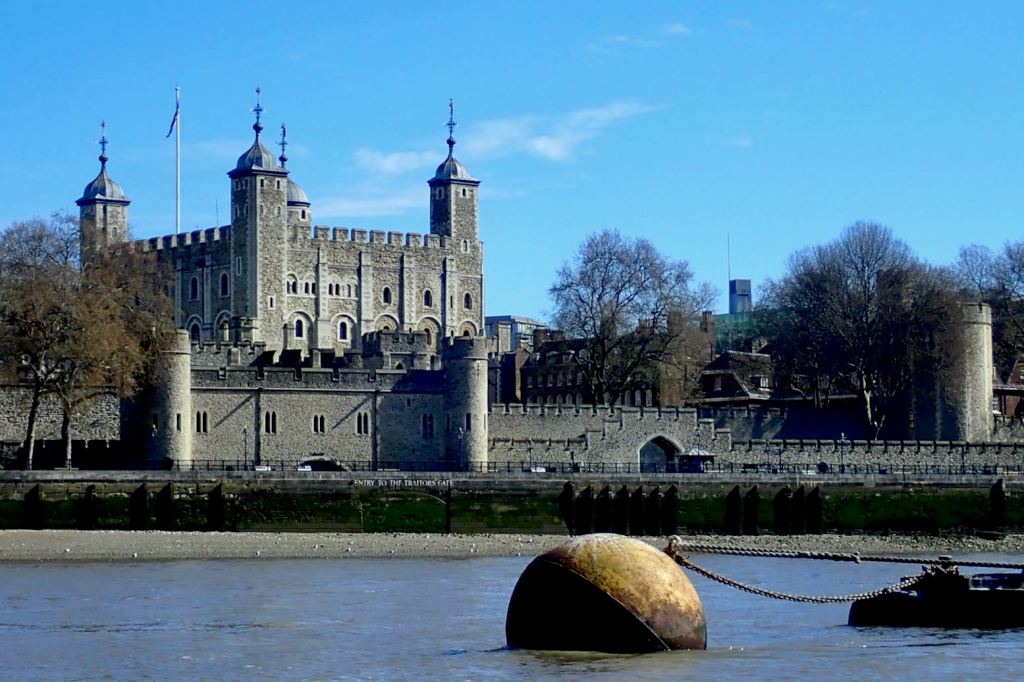
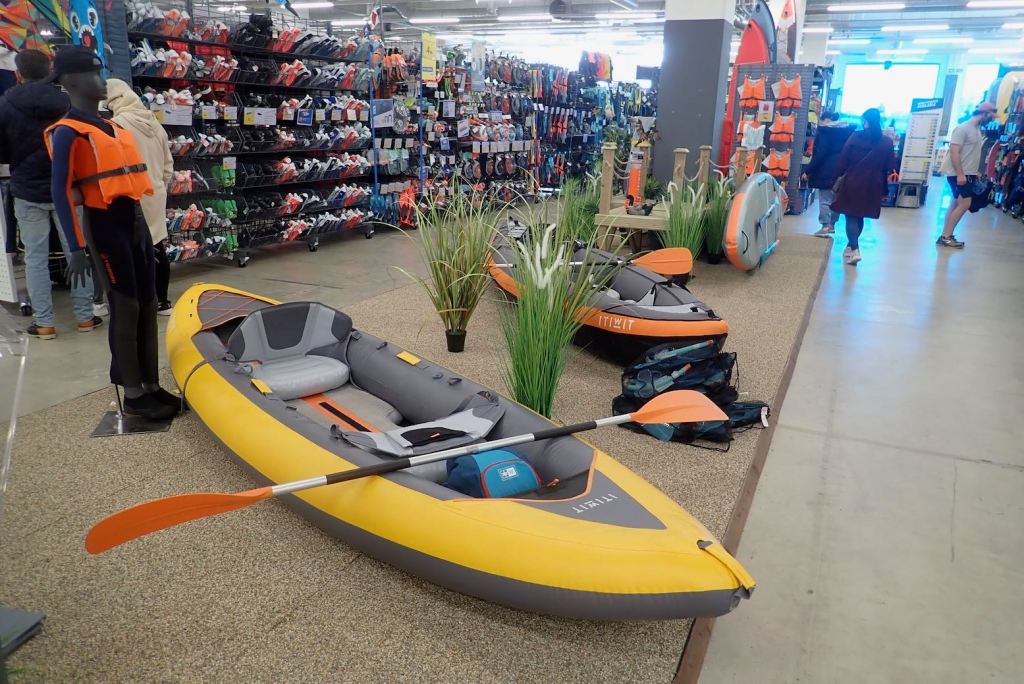
Mortlake to Mayflower (Rotherhithe) This 21-km (13-mile) stretch lined up well with 10-minute walks from stations at either end. By Rotherhithe the excitement, such as it is, is over. And skipping the five miles from Richmond gives an easy three hours on the river; a nice early morning or afternoon paddle with good light for great photos or views of the Thames’ bankside icons.It’s dawn and a Sunday, so it takes two buses and a train to get to MortlakeYadda, yadda…Spacious put-in at Bulls Alley off Mortlake High Street, complete with benches7.15am. All is calmA bit of early morning rumpy-pumpyHead buoyGenteel Georgian waterfront around ChiswickArseache! Hammersmith Bridge is Falling Down and closed to navigation. Ie: you can’t paddle under it in case it collapses on your head. But on the north bank there’s a handy jetty and this slipway (above) on the downriver side is a 5-minute carry
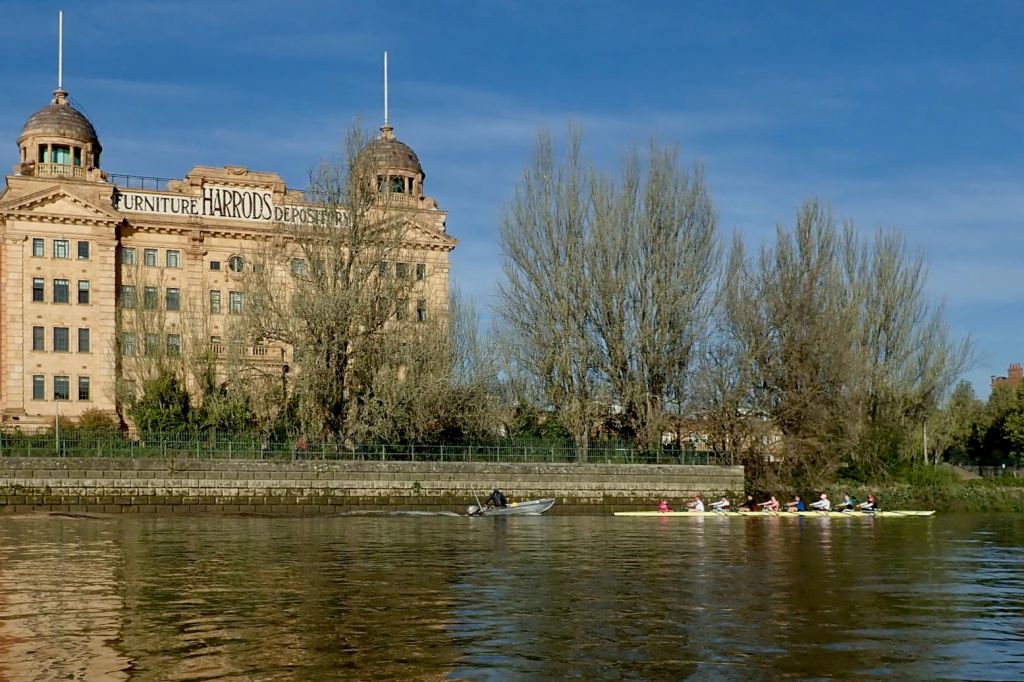
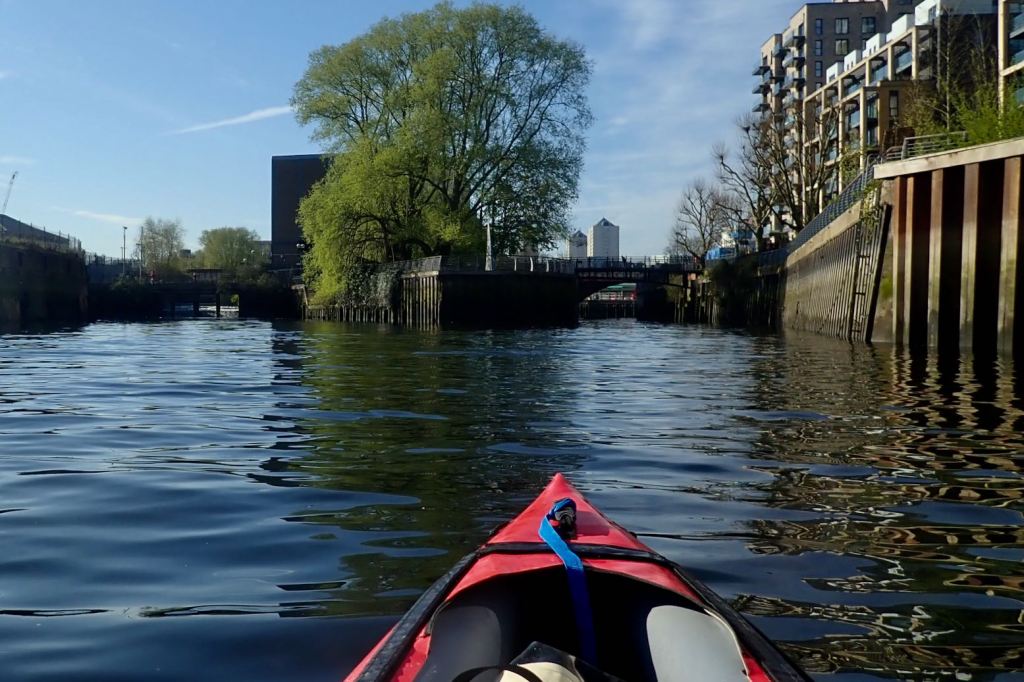
The Hammersmith’s brittle, ageing cast iron dates from 1887 and is suffering from micro-fractures. All together now: “Build it up with iron bars, iron bars, iron bars. Build it up with iron bars, my fair lady“You might try and book a controlled transit (Sunday’s only) with the PLA but I don’t think kayaks would qualify. It will be closed for years.Once a Harrods warehouse, how expensive flats9am. Putney rowers getting their oars on.At Wandsworth I nip up Bell Lane Creek where the Wandle comes in. Big weir drop to the left, and a bit further up on the right, another weir drop at all but HW. See: Wandle: An Urban Packrafting NightmareHanging hay bale? WTJoF? Explanation in the PLA Tideway CodeNo arcane signage here up Wandle creekIt’s chilly. Nature’s call cannot go unansweredRiver racers. My money’s on the YellowsHoly Mother of all Parliaments. The latest scandal? The ‘chumocracy’ of lobbying (there have been a whole load more sinceNamed after the famous HP sauceAlso available as lycra cyclewearIt gets a bit choppier just after Westminster Bridge as the current backs upLondon Eye still looks as amazing as ever. I wonder if they grease the axle and tension the spokes once in a whileRectilinear skyscrapers are just so last centuryA few years back sunlight reflected off the ‘Walkie Talkie’s’ concave face (20 Fenchurch St) and melted a car in the street belowNot falling down any time soon, but small standing waves soon after can make you thinkBy the HMS Belfast it settles down again. On a neap tide at least.‘Send him to the Tower!’This is what Hammersmith needsAfter Tower Bridge the river widens out and the powered craft can gun it A mile downriver, the Mayflower’s looking a bit shabby. Don’t people go to pubs any more? In 1620 the famous ship embarked from here for the New WorldTourists RIBs slalom up and and down the Pool of London like giant jet-skisMy modified seatback worked great. Just what was neededThree hours from Mortlake and plenty of space to dry out.Now that’s what I call a packboatGo west young man. And never come back!From the beach it’s a 10-minute walk to Canada Water station. I pop into Decathlon nearby to admire some Itiwits; quite possibly Britain’s most popular IK