
Seawave main page
General article covering PRVs
Unexplained Seawave failures ;-/
Testing unbranded PRVs
Servicing and troubleshooting PRVs
My Gumotex Seawave is a well spec’d IK for my sort of coast-hopping and occasional touring, especially as it was factory rated to run at a higher-than-usual 0.25bar or 3.6psi (Gumo normal is 0.2). That means greater rigidity which adds up to less longitudinal sag caused by paddler weight (who, me?!) . And of course a better g l i d e. My previous Amigo and Incept both ran an even higher 0.3 bar, and it’s said that this Gumotex can also be pushed to that sort of pressure on the side tubes without risking damage. Factory hull pressures are set on the conservative side to limit warranty claims.

Like all the Gumboats I’ve owned, the more vulnerable I-beam floor chamber has a factory-fitted PRV set at 0.25bar/3.6psi (confirmed below). PRVs are important here as if an IK gets hot (typically out of the water on a sunny day) internal air pressure can increase to the point where seams might rupture. If separation happens to an internal I-beam in the floor it will balloon up and becomes a very difficult repair. I would not meddle with the factory-set PRV on an I-beam floor.
As we all now know, the answer to I-beam floor limitations is drop-stitch technology – effectively zillions on ‘I-beams’ spreading the load over the entire area which enables much higher pressures.

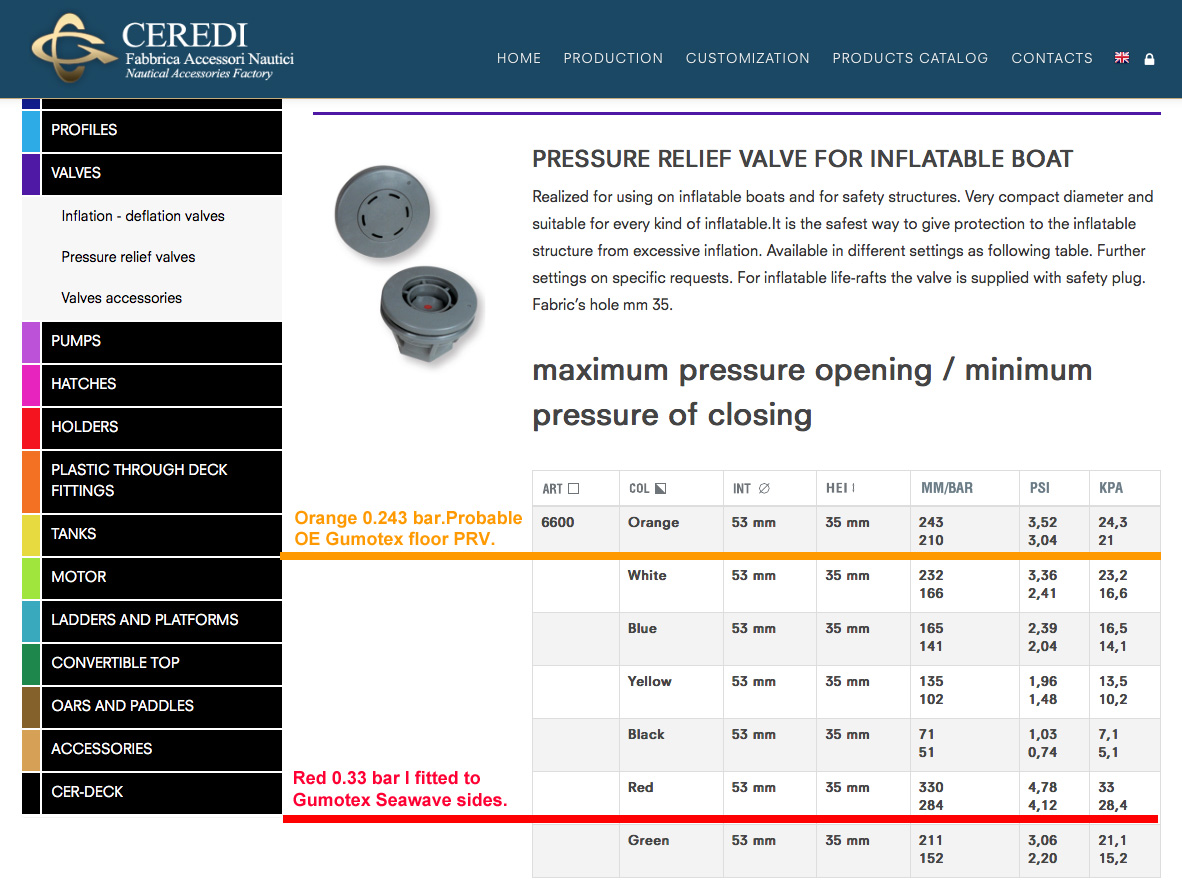
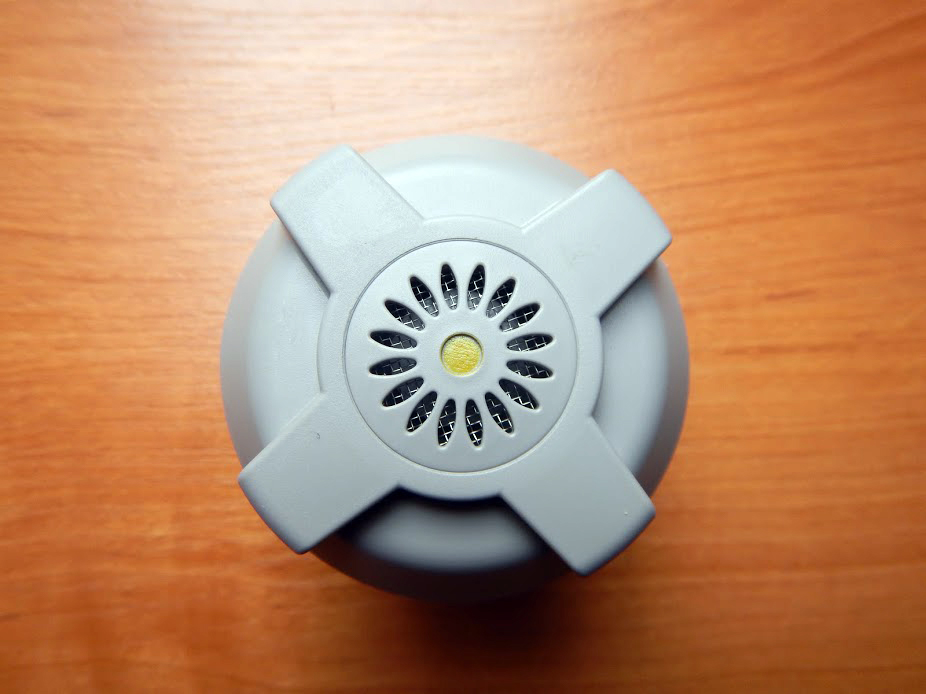
In a discussion with a French Gumtexer, he suggested that Gumotex use the same orange dot 0.243 PRVs in all their boats, irrespective of the stated official rating which is either ‘0.2’ like most – or ‘0.25’ on the Seawave. He sent me a photo of his 2016 Palava floor PRV (left) – orangey-pink, same as my Seawave and classified by Ceredi as 0.243.
Officially the Palava is a ‘normal pressure’ 0.2 bar canoe. Upshot? Your Gumboat’s floor may be rated at higher pressure than you think or is officially stated. You’d assume then that the tubed sides can easily handle at least as much pressure. Then again, in the table below, Ceredi state the orange PRV will open between 0.21 and 0.243 so perhaps 0.21 it is and we all just need to calm down a bit.

PRVs use springs set to purge air before pressures reach structure-damaging levels. Then again, my Amigo had no PRVs at all so you assume Grabner were confident their floor construction was solid enough to handle occasional neglect. But I’ve been caught out before and always try to ensure a boat remains in the cooling water when moored up on hot days – even getting up to splash the sides as they tighten up like a drum.
Like most IKs with single side tubes, my Seawave had no PRVs as the tubular profile can handle higher pressures better than the flat, ‘lilo’ floor. However, if you’re planning to run them over-pressure as I am suggesting, that could be risky.
The answer: fit PRVs in the side tubes – just like my old twin side tube Incept. That way you can safely leave you IK out of the water in the tropics, go and hike up a volcano (which might be described as ‘the planet’s PRVs’) knowing that all three chambers will harmlessly purge any excess pressure. Sure, when it all cools again back in the water the boat may be saggy, but better a quick top up with your K-Pump than pulling bits of shredded Nitrilon out of the palm trees.
Ideally I was looking for a PRV set at a reasonable 33.33% over the factory figure of 0.25 bar – i.e.: something around 0.33 bar or 4.8psi.
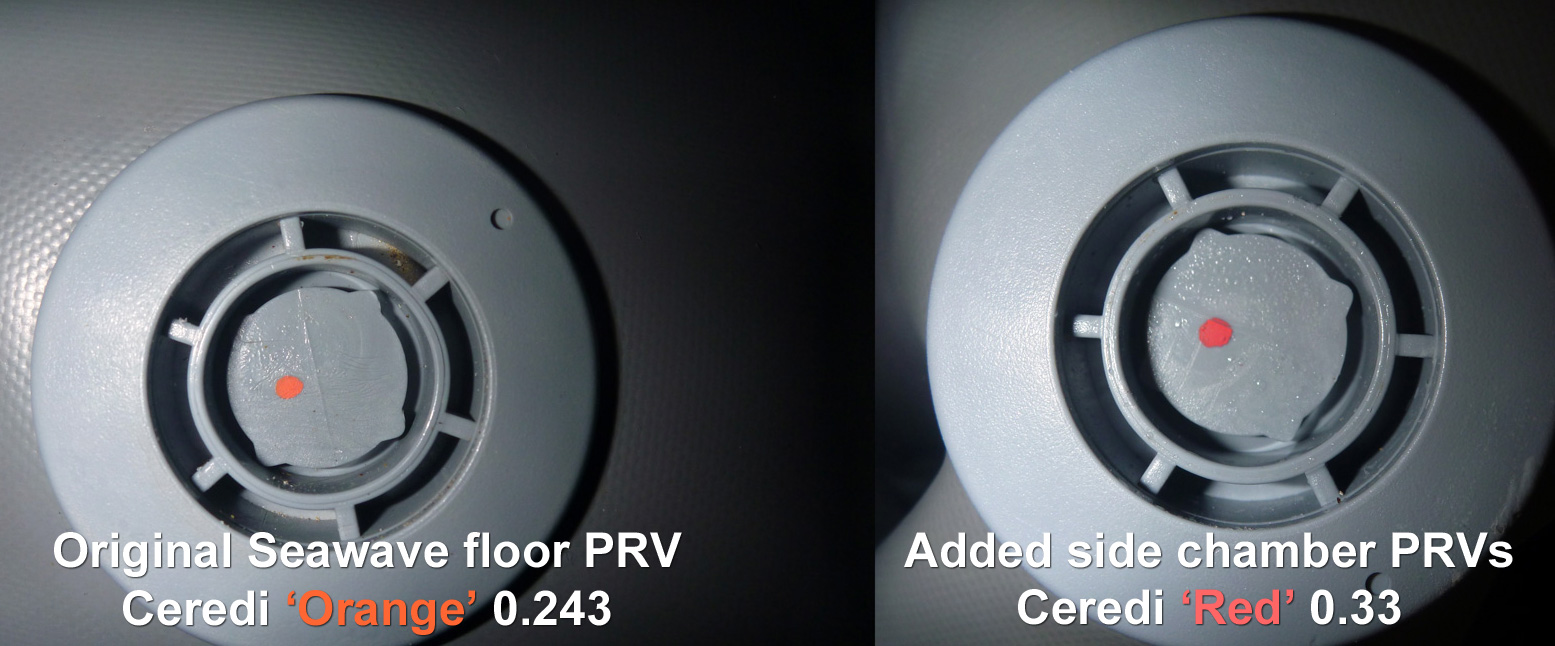
Well-known IK valve-makers Leafield and Halkey didn’t make anything matching my needs (or don’t sell to individuals). The Seawave’s valves are stamped ‘Ceredi Italy’ and once I managed to track them down online, I saw the same Ceredi 6600 PRV series came in options including Red 4.78 psi or 0.33 bar, (above right). In the UK they were a special order via IBS and cost £35 a pair posted.
Before you get too excited, scroll down to the bottom and read Nikola’s PRV nozzle idea.
Ceredi prices too steep for you? On eBay I bought unbranded ‘4psi‘ PRVs from China for about £4 a shot and delivered in less than 2 weeks.
Note these are smaller than your Ceredi and require only a 25mm hole. The back nut will easily fit through the inflation valve hole, once you remove that.
I pressure-tested the valves I received and they stood up to the claim: more here.
Search eBay: ‘Air Safety Release Valve Kayak’.
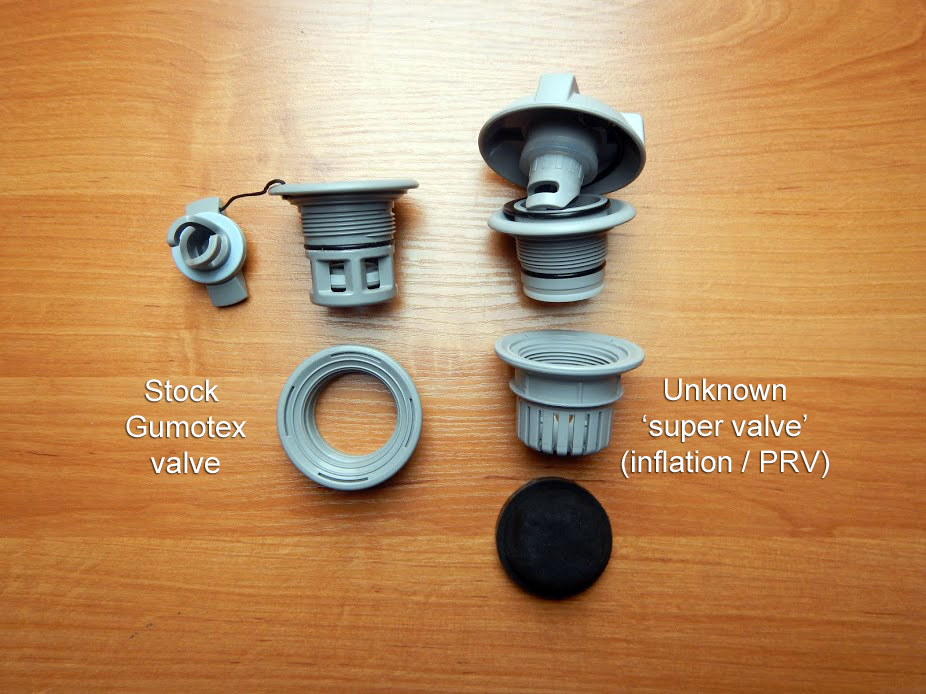
As you can read from Adam’s comment below, there is – or more probably was – a super valve which combined both inflation and pressure-release duties which means you simply replace the stock inflation-only valve. No need for extra holes to be cut. His link no longer works but I tracked it down to here; the Bravo Super Valve – that’s Bravo as in the Italian branded Chinese-made pumps we all know and love. But there is no mention of a super valve on their valve page anymore, nor in their catalog.

Fitting the Ceredi red dot PRVs
Tools and time needed
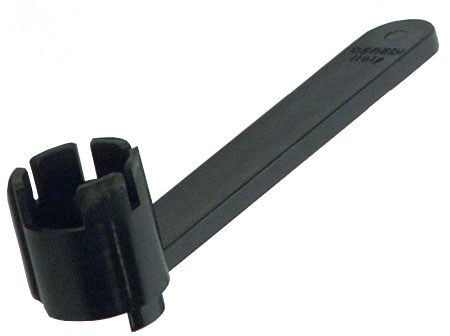
• Gumotex push-push valve removing tool (fits Ceredi PRVs also). Right; £12 on ebay
• Narrow-bladed knife or scalpel
• Water pump/lock channel pliers
• 30-60 mins
Short version
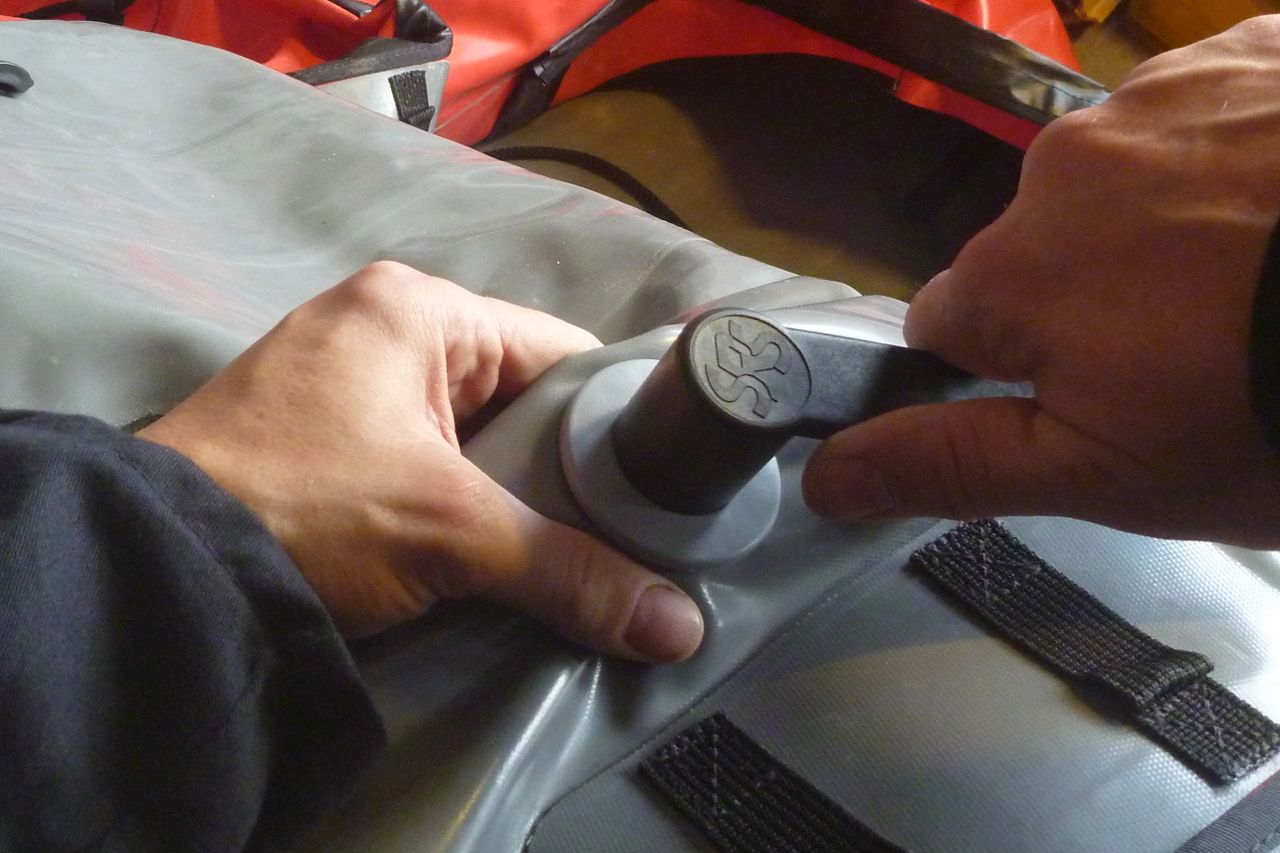
• First, remove the side chamber’s inflation valve with the tool. They can be extremely stiff. If you can’t undo it, maybe think twice before going ahead. Or try silicon spray grease of 303 protectorate to lube

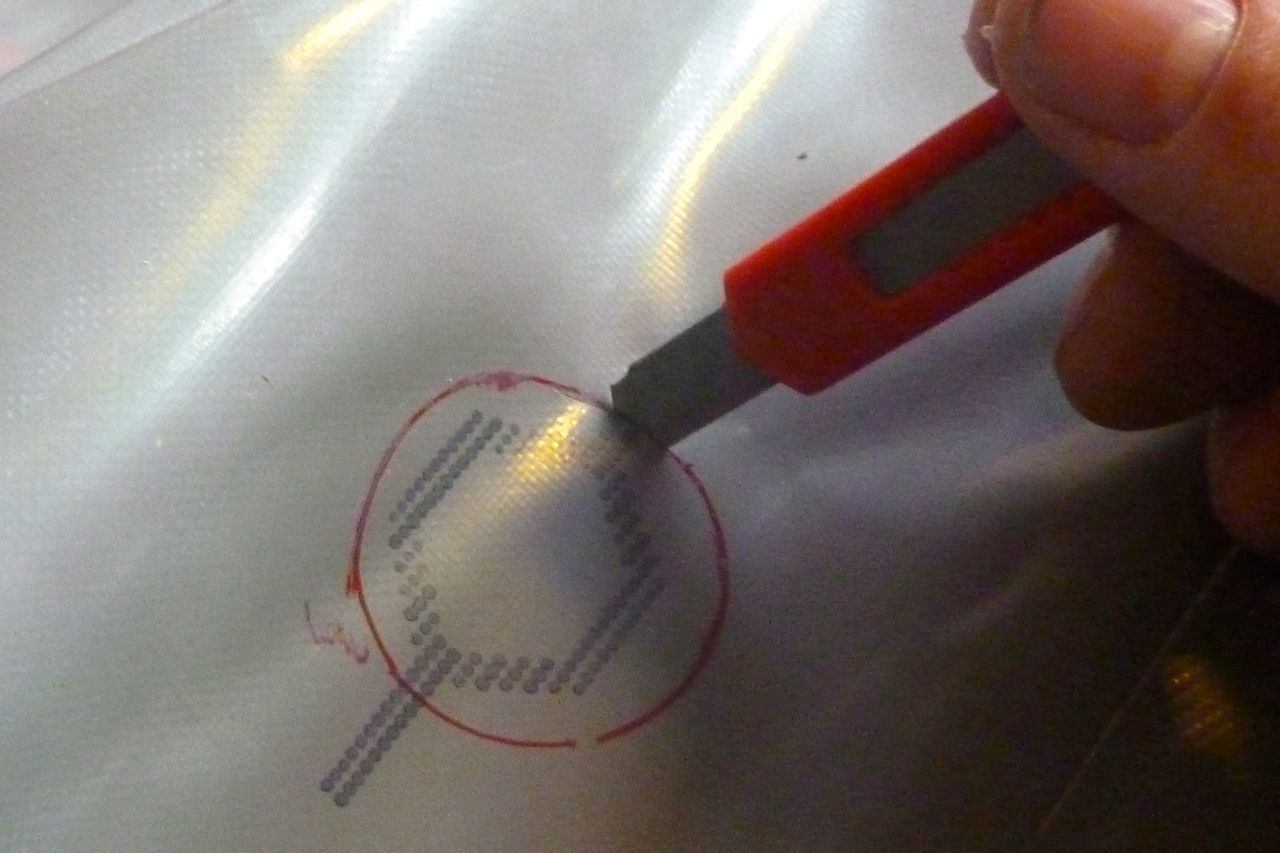
• Choose your spot, mark and then cut a 37mm hole in each side chamber. The Ceredi-suggested 35mm was not enough. Or fit the smaller, unbranded mini PRV (~25mm hole); see above.
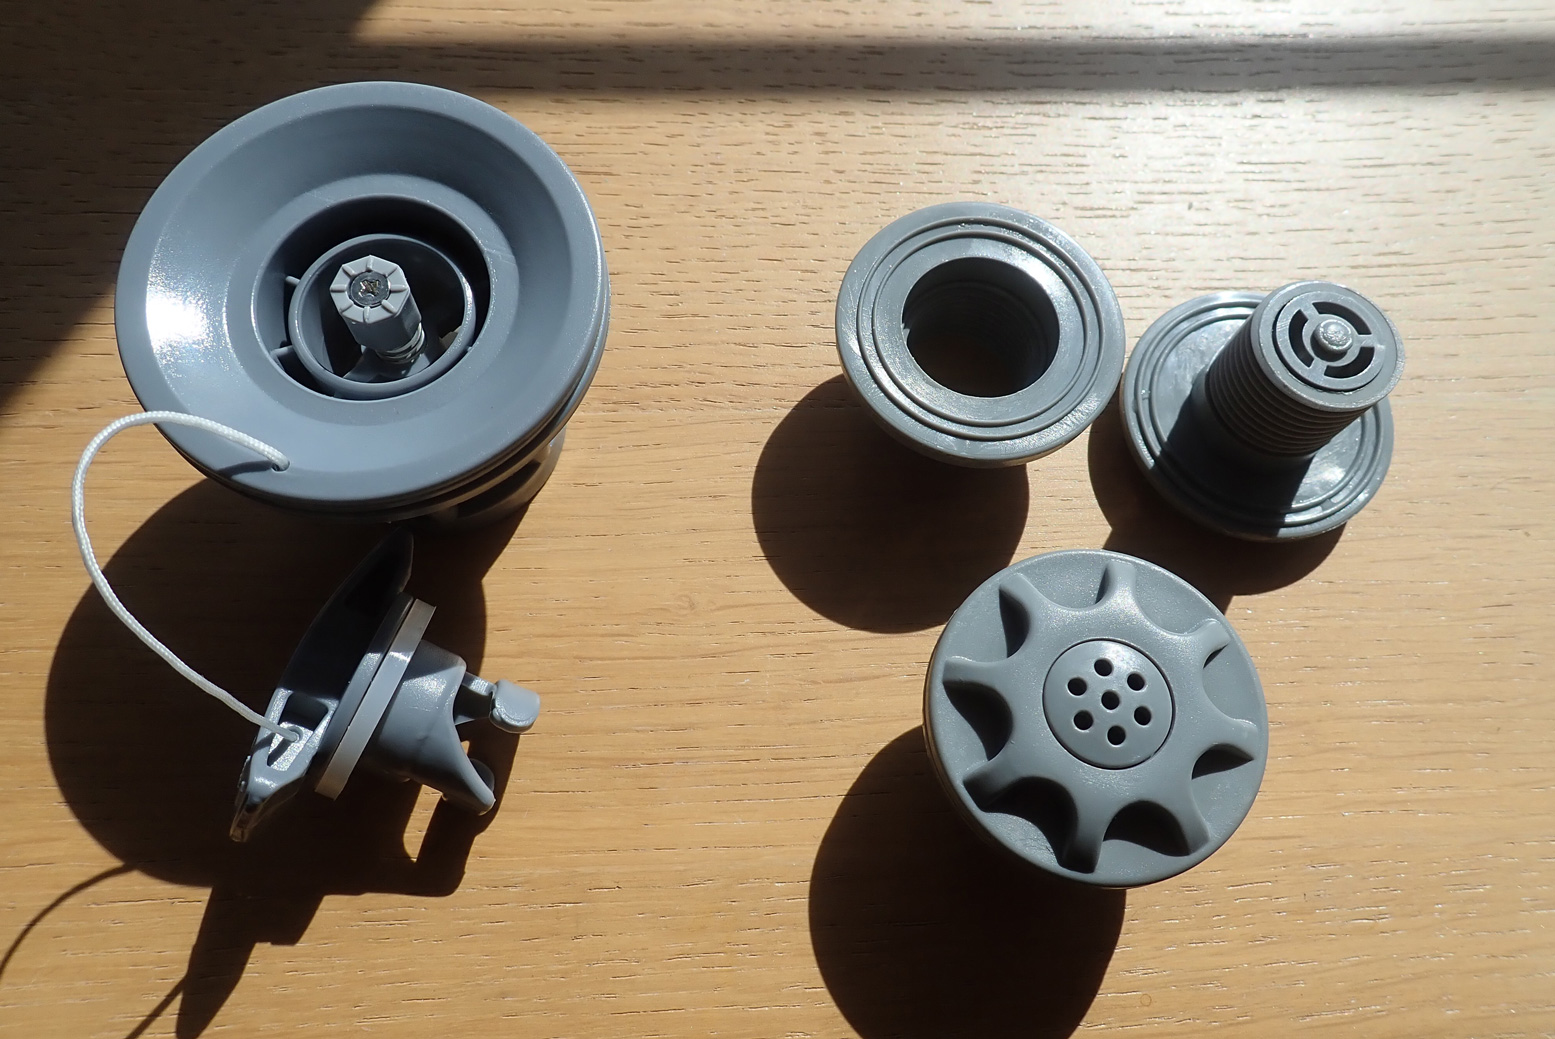
• Squeeze the PRV’s threaded back collar through the bigger inflation-valve hole, shuffle it over to the new PRV hole and loosely screw on the external part of the PRV by hand
• Reassemble the inflation valve and tighten both valves with the tool
• Fit push-on caps to the PRVs
• Pump up and check for leaks. Maybe retighten some valves with the tool


Long version
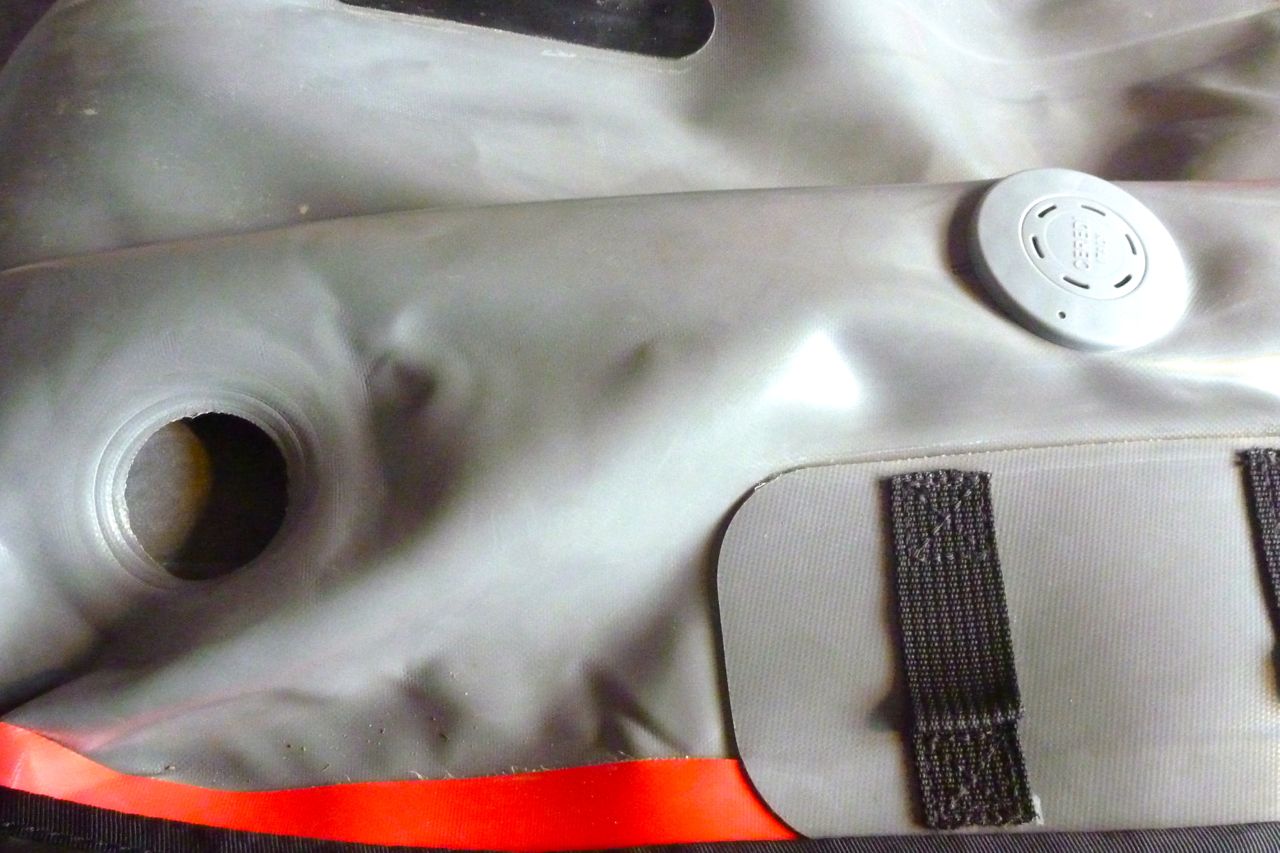
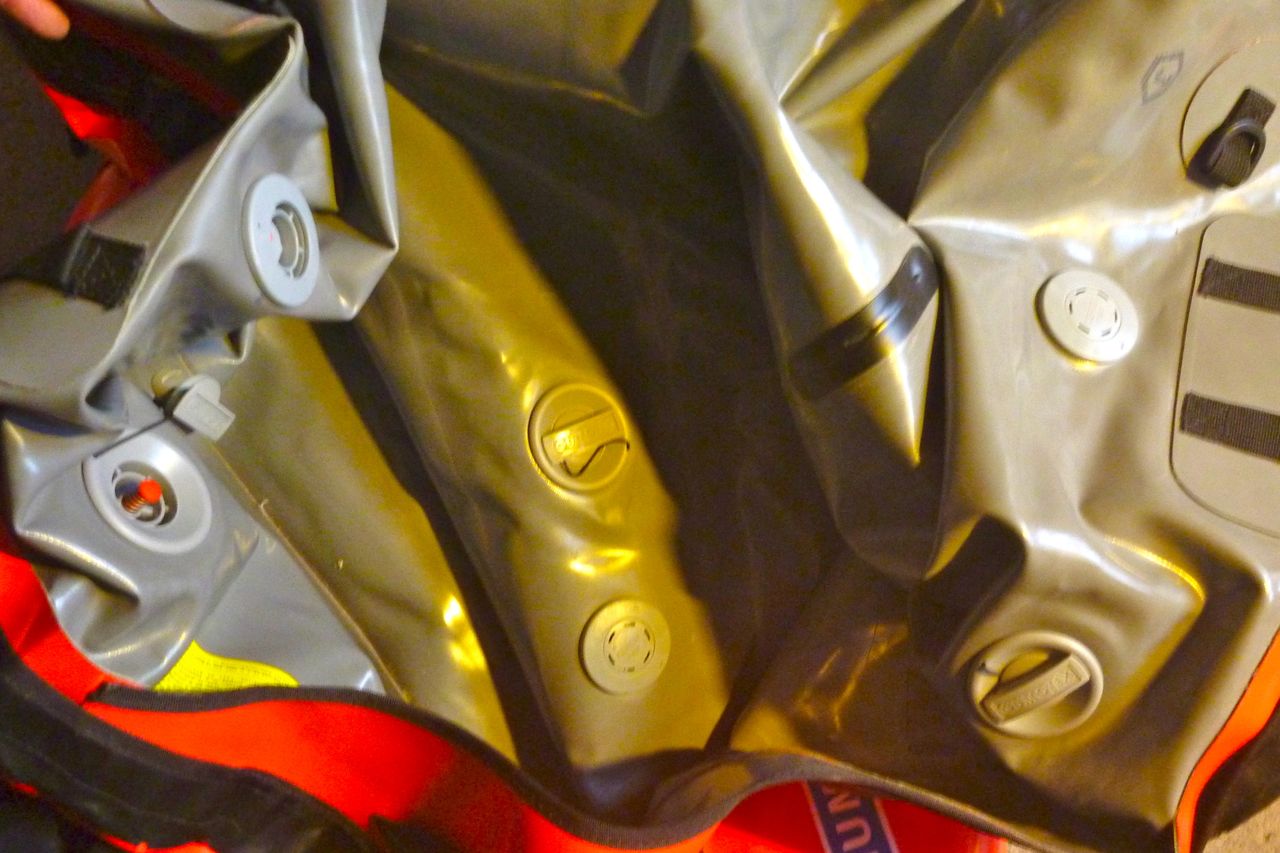
I chose to fit the PRVs close to the inflation valves and at about the same level. There are mysterious markings on the inside of the Seawave to aid symmetrical positioning (Pic 2, below). I used a narrow-bladed knife and of course took care to gather up the hull skin so I wouldn’t inadvertently puncture the other side of the side tube.
I assumed the 35mm hole would be big enough to take the back nut. When it wasn’t I was a bit flummoxed. Now I had a gaping hole in my boat, but no way of getting the back of the PRV inside the boat without performing a Caesarian on my Seawave. Luckily two brain cells dropped into my Hadron Collider and it occurred to me that once removed, the nearby main inflation valve’s hole might be bigger. And it was – just.
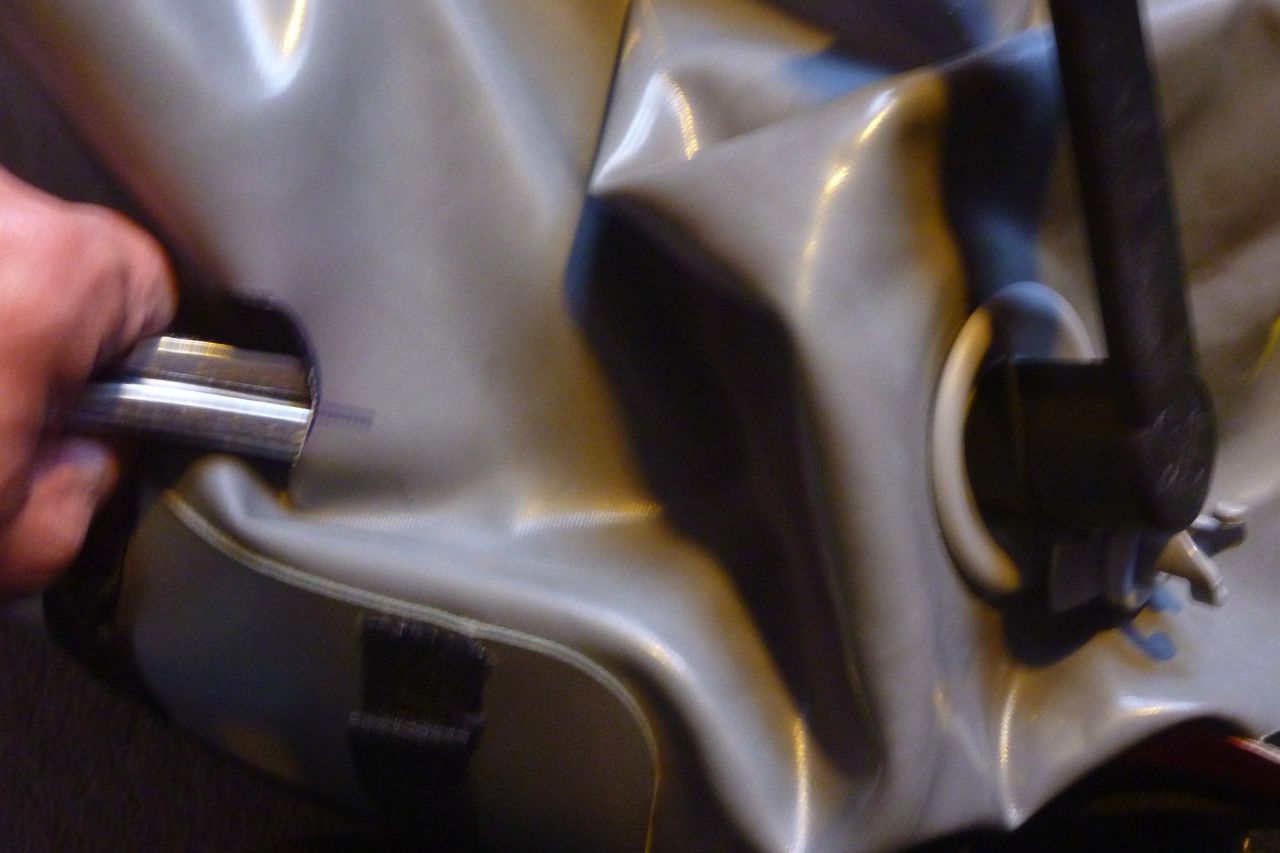
One stock push-push valve was extremely hard to undo. I wondered if it had been glued in or that the plastic valve removal tool would snap (you can buy a metal one for loads more). When the other side undid with less effort I knew it had to be possible.
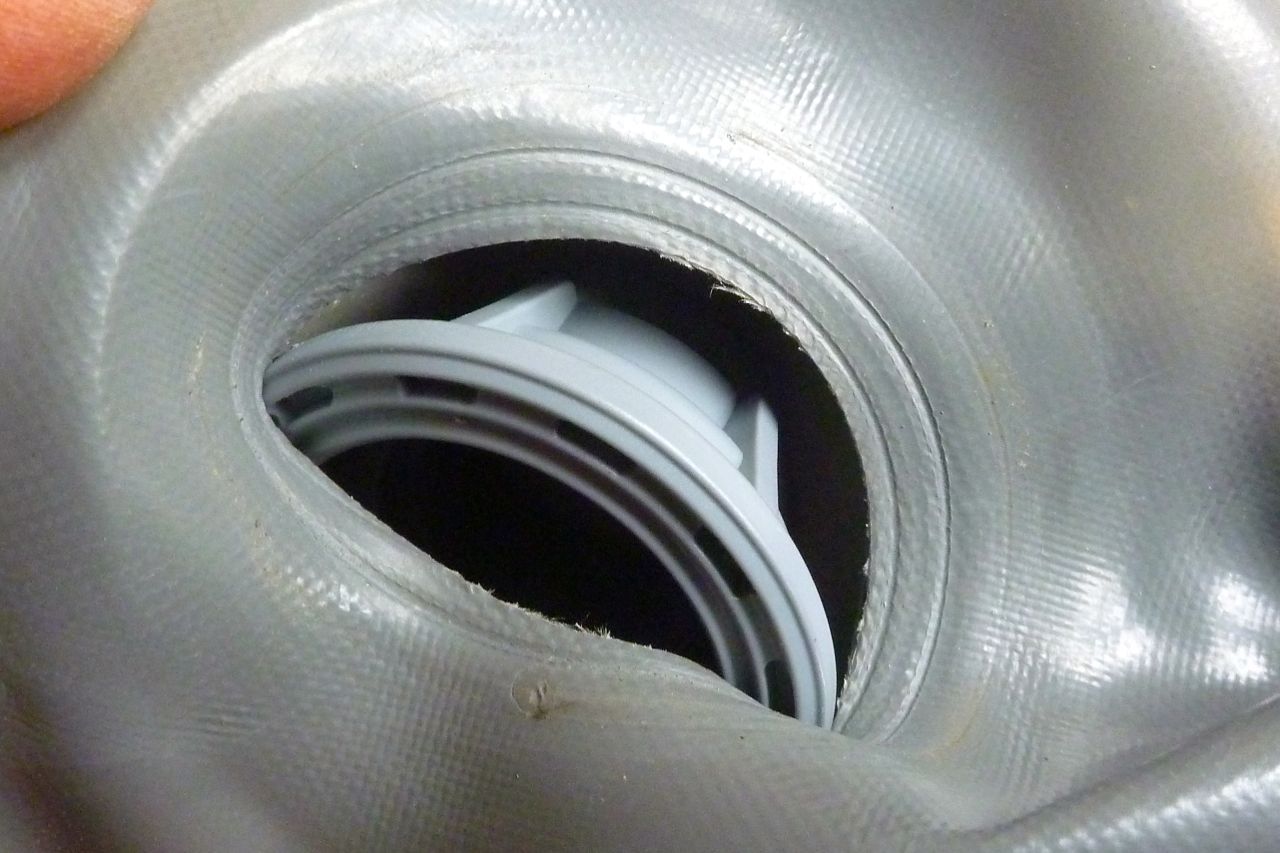
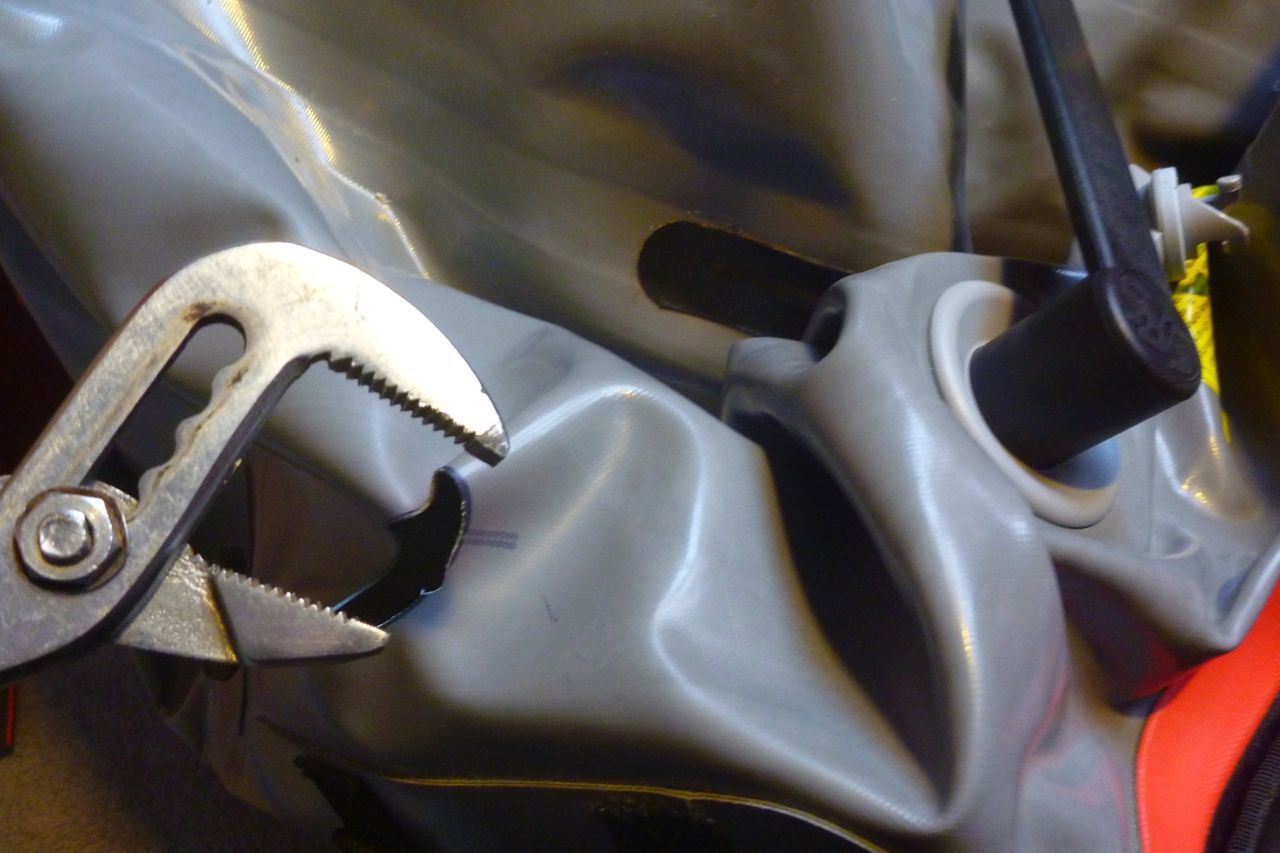
Another problem is that the internal collar or nut is only 10cm deep (pic 4, below) and so was hard to grab through the hull fabric. Until I realised this, I was grabbing the inside part of the outer valve body which screws through the collar from the outside. Trying to ‘unscrew’ the valve body from itself is like trying to pull you head off – eventually the valve tool would break. Another ‘Higgs boson’ moment came over me and I realised that by chance the two valve holes were close enough for me to get some water-pump pliers in there, grab the back collar and finish the job (pic 6, below). After that, no more problems.
One thing I noticed while doing all this was the unseen protective patch on the inside of the hull opposite the inflation valves to limit wear and rubbing between valve body and hull when the boat’s delated. Nice touch, Gumotex ;-)
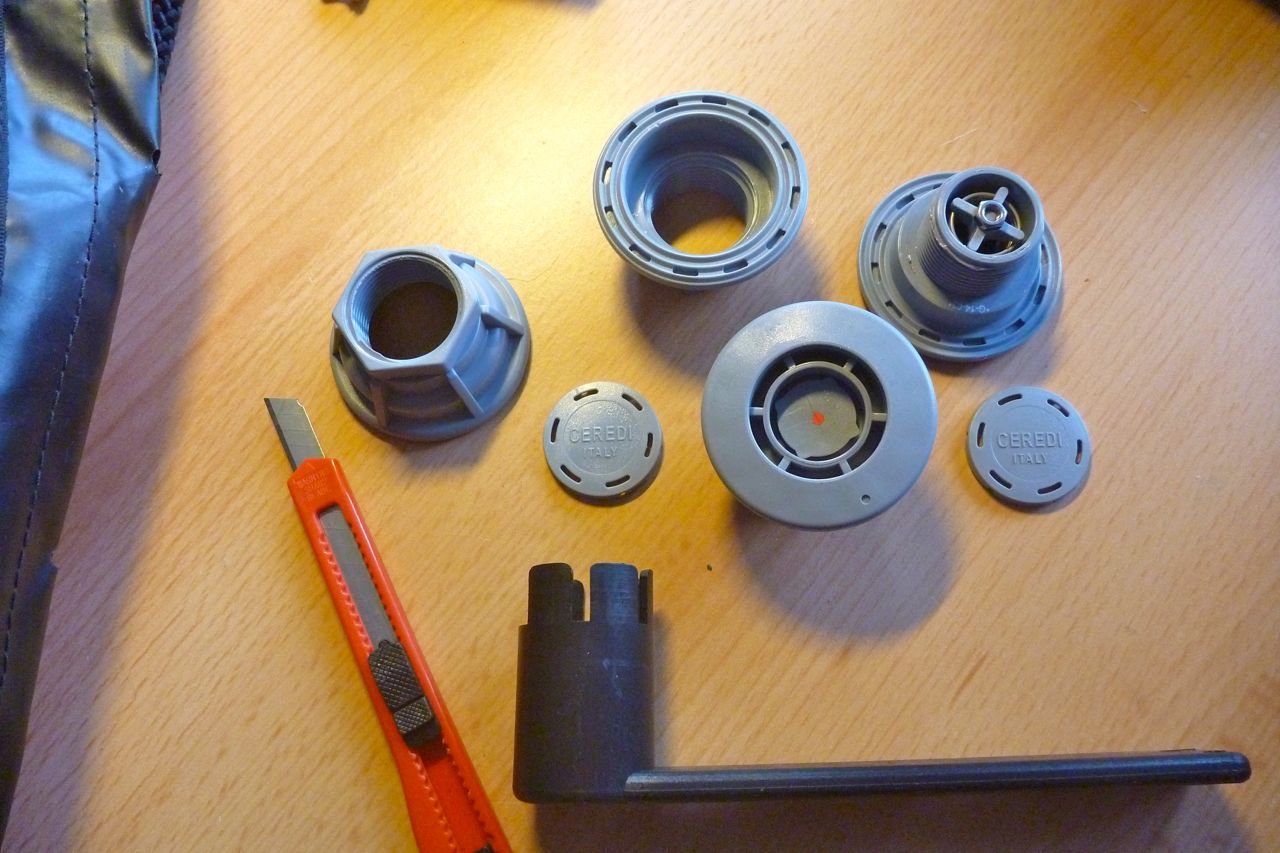
I did all the valves up as hard as possible with tool and hand, and in four more years had no problems. On a hot day in the sun I can hear the high-pressure side PRVs hissing away. The gallery below shows the job in chronological order.


Now it’ll be good know that should I doze off as the tide ebbs away, I won’t be rudely woken by an exploding boat. Another side benefit of doing this is that you’ll never need to use a manometer (pressure gauge) again. You simply pump up all three chambers until they hiss and you know they are at full operating pressure.


Nikola’s PRV nozzle idea
In the comments below you will see Nikola suggesting the idea of using capped off PRV nozzles you’d usually fit to the end of your inflation pump hose to fill up a boat to the correct pressure without referring to a manometer. The integrated PRV in the nozzle purges at a given pressure. No scalpels required.
You will need to block off the open end where the pump hose attaches. The €13 red Ceredi ones he found (left) are rated at more or less the same pressures as a Seawave: 0.25 bar/3.5 psi. I think if I was running a Seawave in a hot country I’d definitely fit some to protect (or not have to worry about) the sidetubes.
It might even be possible to adjust the spring inside the Ceredis (beneath the vented cap) to get a bit more pressure before they open, getting closer to the red-dot in-hull Ceredi PRVs I fitted of Seawave 1. Or fit the similar black Grabner inflation relief valve which is rated at a more promising 0.3 bar, but, like everything Grabner, is double the price of the Ceredis.
