What air pressure does a typical packraft run? 1 psi, 1.5, 2.5? Answer at the bottom of the page.
Air bagging. Air bagging. Oh isn’t it wild?
Most inflatable devices come with an air pressure rating at which they perform best, including inflatable kayaks which run from 2psi/0.14bar up to 10psi/0.7bar in drop stitch. On the cheapest vinyl Intex or Sevylor dinghies, as well as slackrafts there won’t be a number, instead you get a ‘stretch gauge‘ (left). With a Sevy you keep pumping until a sliding black tab settles between A and B; your squishy slackraft is probably now at less than 1psi but is good to go. Add a bit more air to try and make it feel less of a water sofa and the thing will burst a seam. It may do that anyway if you give it a week or two or look at it too long.
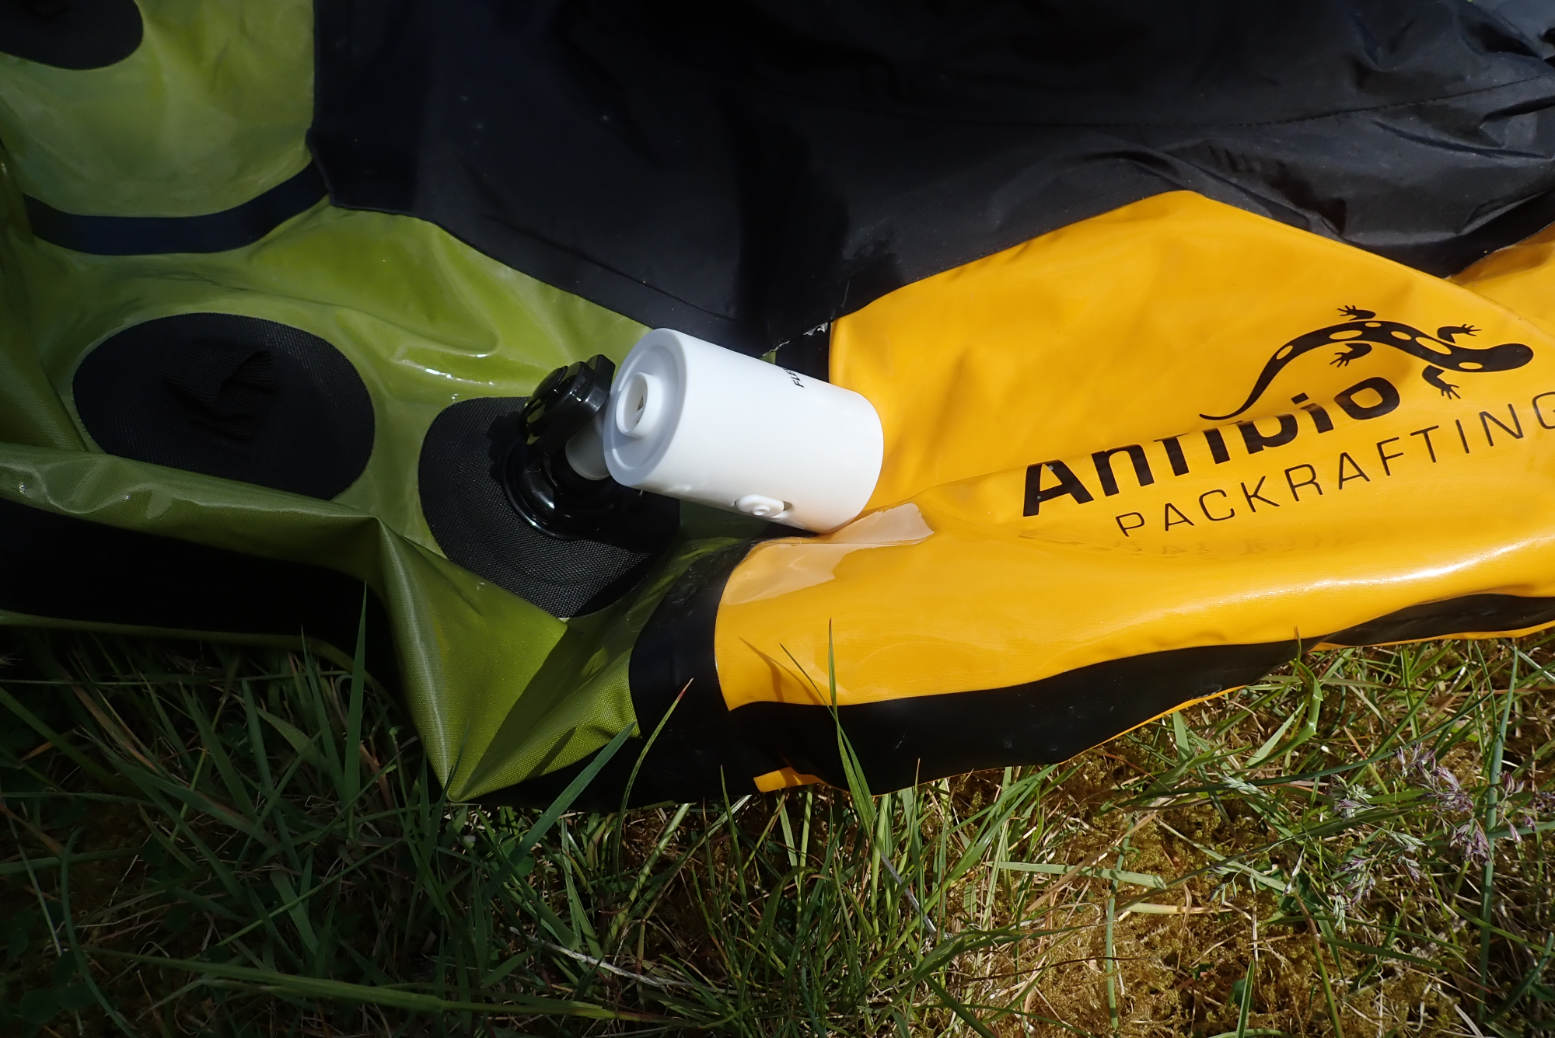
Right from the start packrafts never had air pressure ratings. You just aired it up with a flimsy nylon airbag (above) until you couldn’t get any more in. The airbag idea was surprisingly effective once you got the knack, and the bag weighed next to nothing. You then unscrewed it without trying to lose any air, quickly screwed on the cap, then topped off by mouth via the separate twist lock elbow valve (left) with all you had in your lungs. The more you blew the firmer you boat became – and that definitely made a difference to response on the water. It helped if you didn’t smoke and played lead trumpet in the local jazz band.
Once on the water all inflatable boats cool down and the hard-won air pressure inside drops a bit so you have to top it up again to get the boat firm. What was the air pressure? As much as possible but what did it matter as you couldn’t overdo it with your lungs. Stronger lunged paddlers and opera singers paddled firmer boats. And anyway, such very low pressure would be difficult to measure with a normal handheld manometer.
These days most packrafts use simple and effective one-way Boston-type valves (left) which screw off for a wide open ‘fast inflation’ port for airbagging, but have a one-way valve built into the cap for topping up, just like a car tyre. What goes in, stays in so you can build up pressure and get the boat good and firm. No more crumby twist-locks and undignified topping up by mouth.
Mini electric pump; ditch the airbagMini handpump to top up
Better still, inexpensive pocket electric inflators like Flextail (above left) do the job of airbagging while mini handpumps (above right; adapted from party balloon inflators) can do the important topping up without giving yourself a lung hernia. But what’s the air pressure!? Who cares, it’s better than it used to be provided you could pump the handpump with all you had – I find it takes 100 jabs. A Flextail or similar will burn out long before it can get close to a handpump’s final pressure.
Tip: all these pumps are handy but I always leave an airbag in my packraft’s storage pockets in case the Flextail packs up or I forget it. Otherwise it will be a lot of blowing or handpumping to air a boat up. And with a Boston-type valve as above, a short section of half inch garden hose makes inflating by mouth much easier should you’re topping-up handpump pack up too.
Kokopelli and French-made Mekong packrafts (and maybe others) feature a RIB-style Leafield D7 push-fit inflation valve. That’s push-fit as opposed to more secure bayonet fitting as on proper IKs and iSUP boards. It’s what Gumotex IKs used years ago and is actually not a bad idea on a packraft as the pump nozzle on the end of a hose will blow off the valve as pressure climbs, meaning you have to try hard to over-inflate the boat.
Black boat and Englishman
But these one-way valves have now made over-inflation a possibility, and we know how that can end. However, one thing we’ve learned with TPU packrafts over the last decade or two is that it’s virtually impossible to burst a well-made packraft using a human-powered pump, even a high-pressure iSUP barrel pump. You would really have to go at it or leave a fully inflated black boat out in the midday sun. The fabric and simple but strong sewn and heat-welded assembly spreads forces equally across the single chamber hull ring. So much so that MYO packrafts have become a thing for individuals with a big table and a sharp pair of scissors.
With a D7 valved packraft you could use a handheld manometer (left) with a push-fit adapter to read the boat’s pressure. Such manometers have a pin in their throat which pushes open the D7’s sprung valve stem just as the gauge body seals around the valve housing, so getting get a live pressure reading.
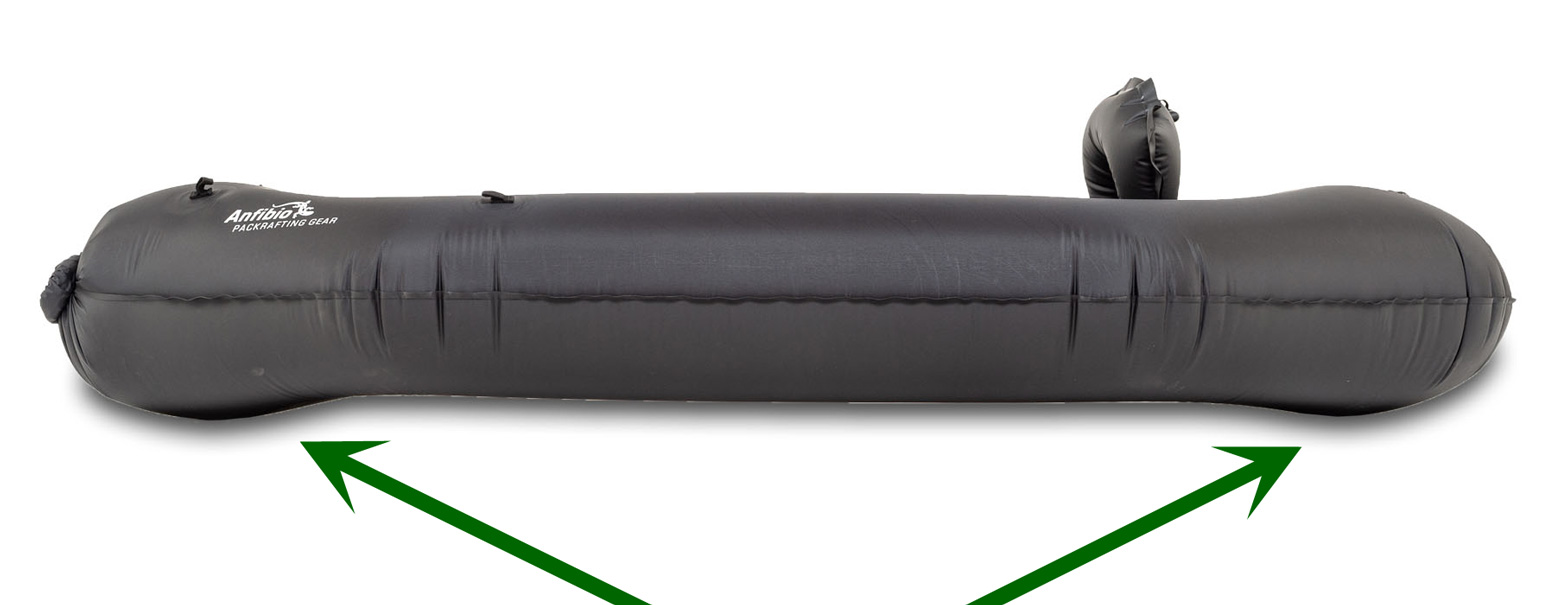
I don’t have a D7-equipped packraft at hand, but I do have a Bravo Alu 4 R.E.D barrel pump fitted with a 14.5psi/1 bar inline manometer (left). With an adapter jammed in the Boston’s threaded port I ought to be able to get a full-pressure reading off my Anfibio TXL.
I’m guessing about 2psi / 0.14bar to get a pinging firm TXL. It’s what my early Gumotex IKs used to run, using the now obsolete footpump. When the Seawave came out, rated at 3.6psi/ 0.25 bar, that was quite a revelation, though before that I ran a 4.3psi/ 0.3bar Grabner Amigo and you could have battered down a wall with that boat, proving that rigidity didn’t require drop stitch panels as long as the boat was solidly assembled. At Grabner prices, you’d expect that to be the case.
Back to the test. And the answer is…. just 0.1 bar or 1.4 psi. And this was with the TXL as tight as a drum such as I could never manage with the balloon handpump but might have with a K-Pump Mini. Now we know.
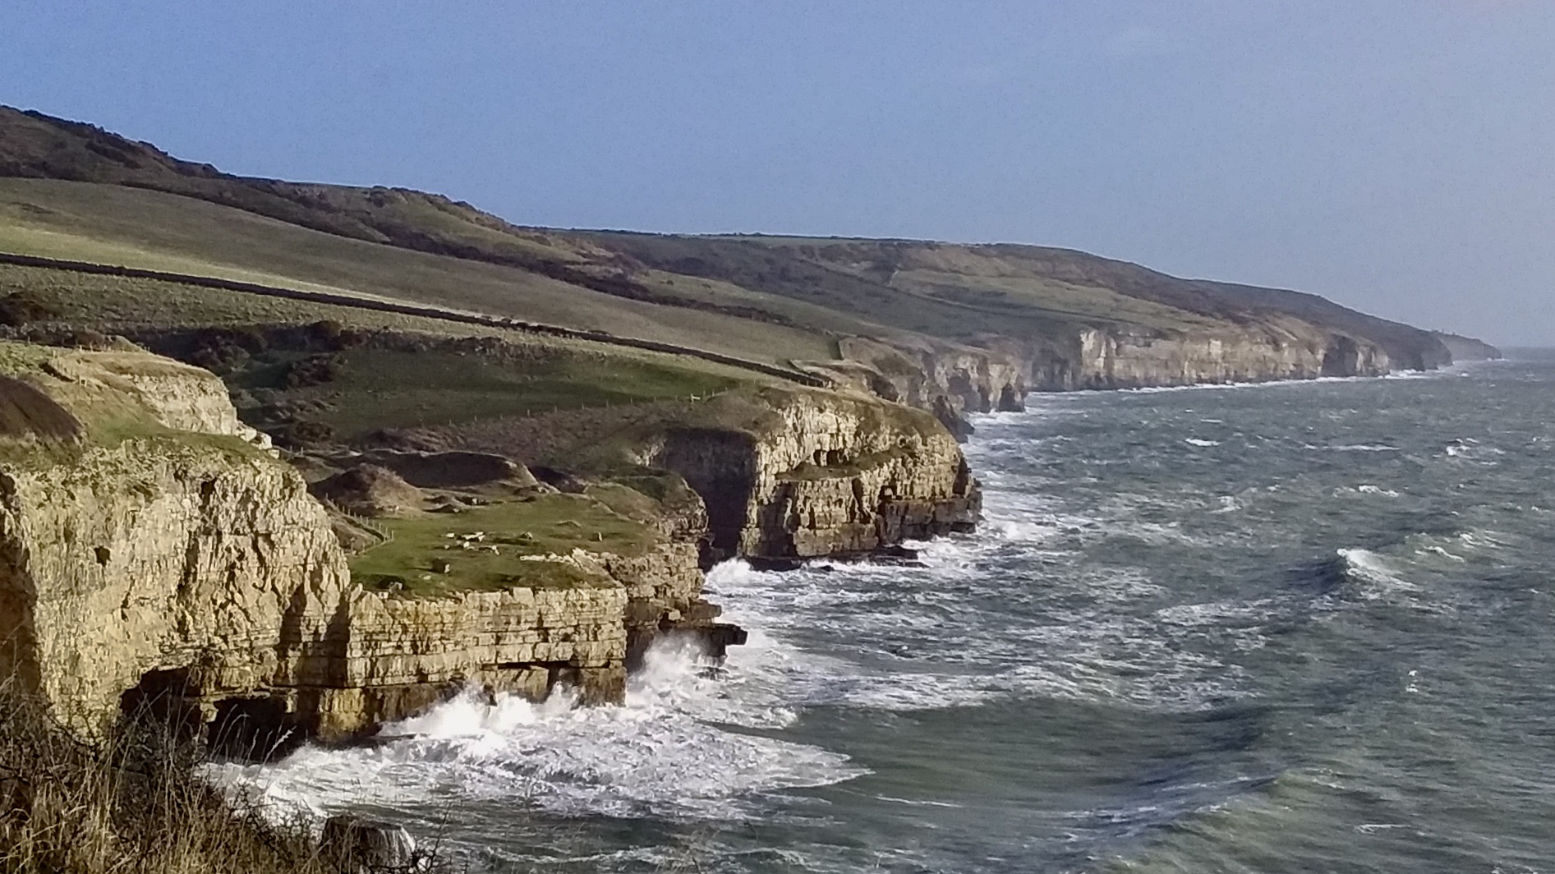
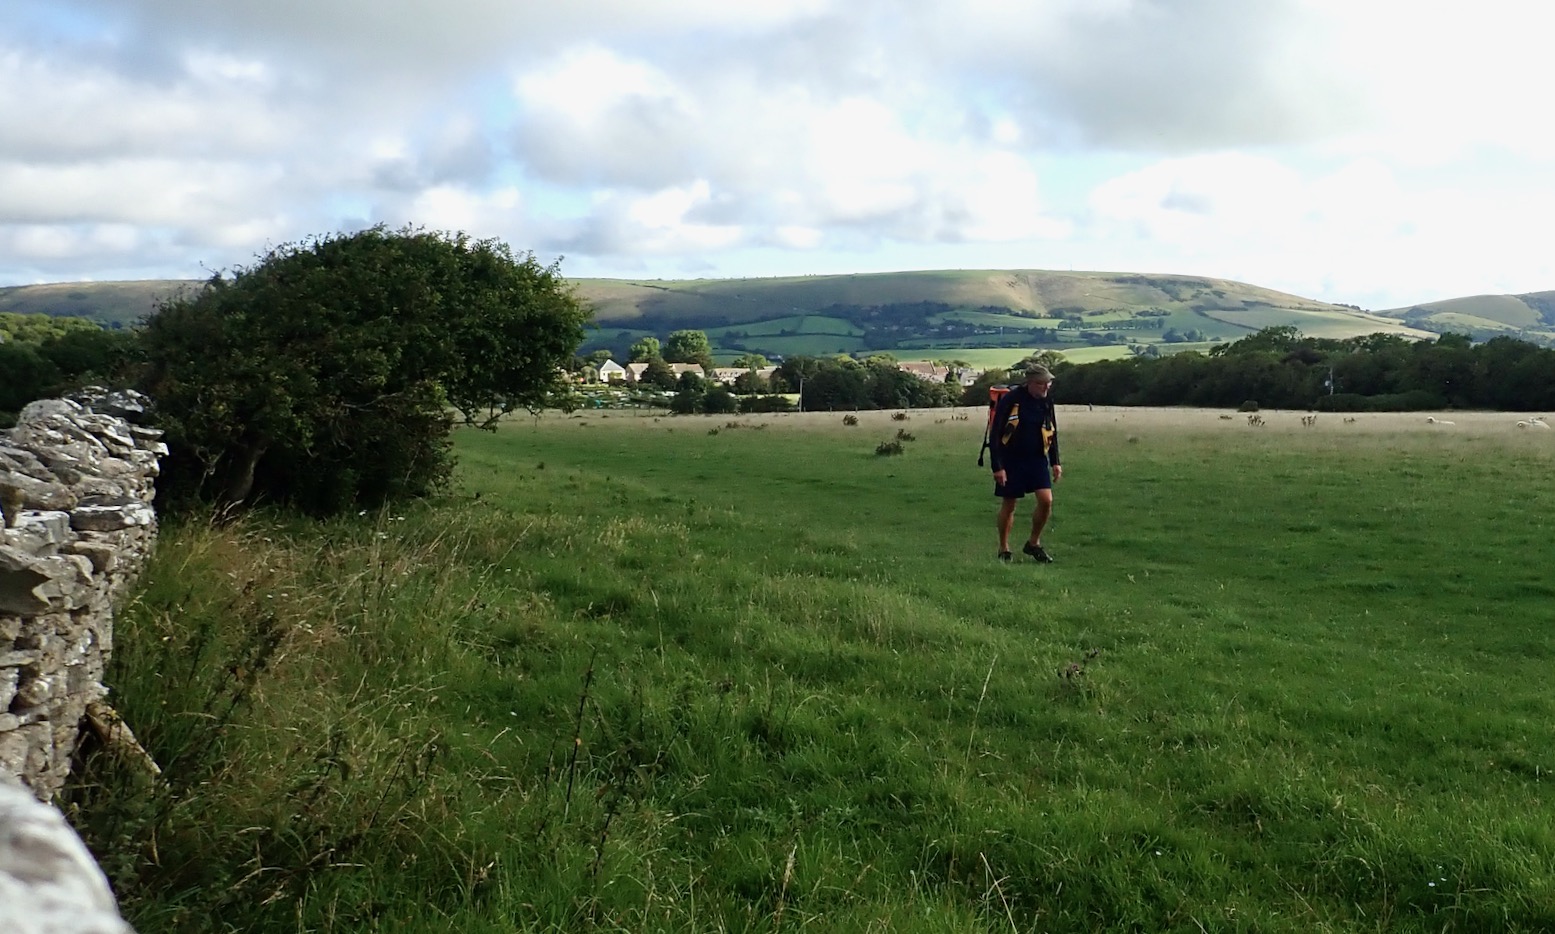
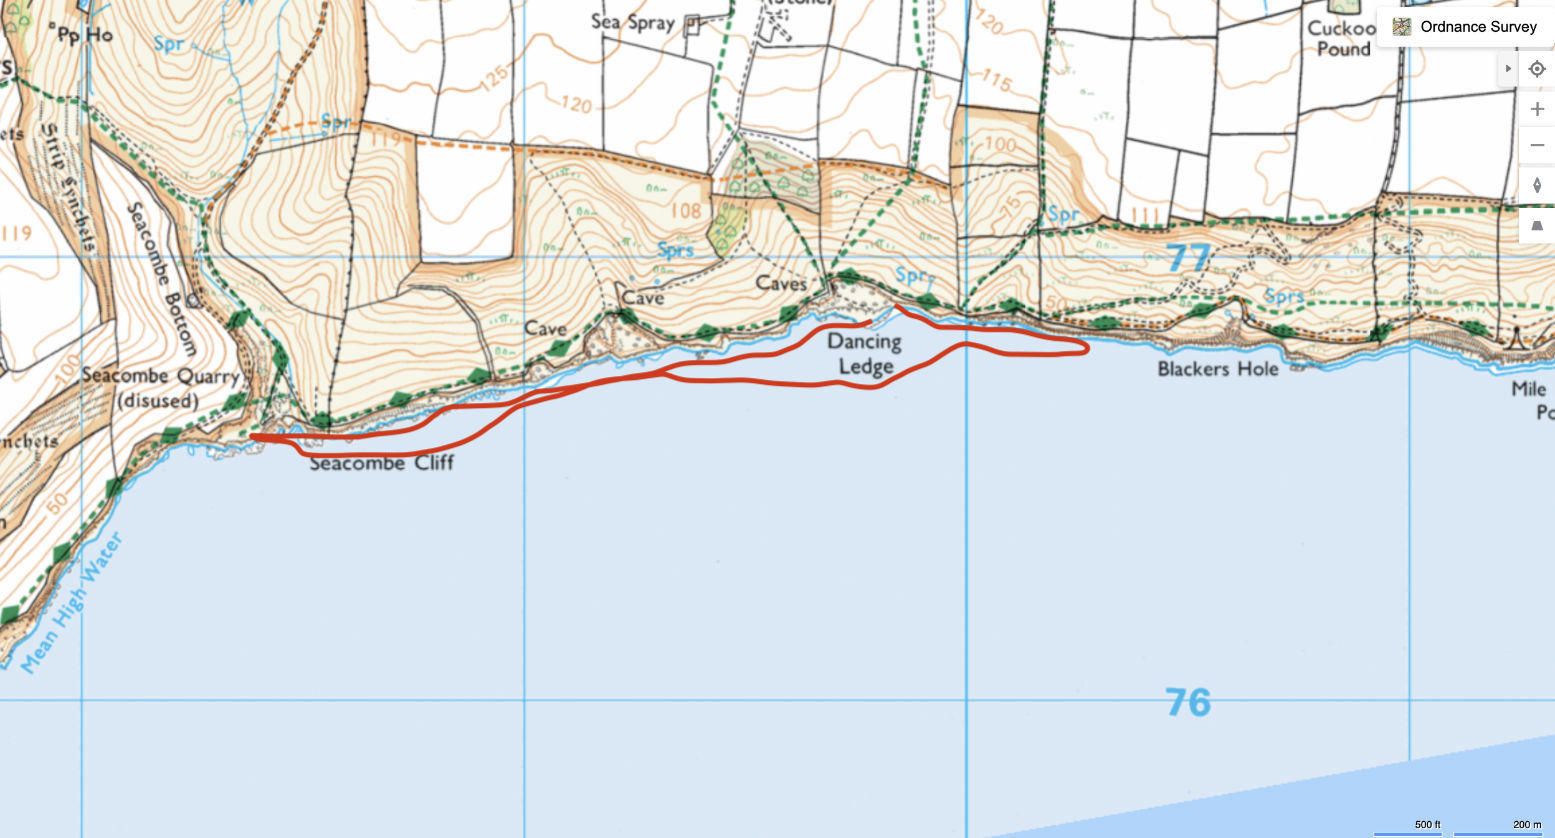
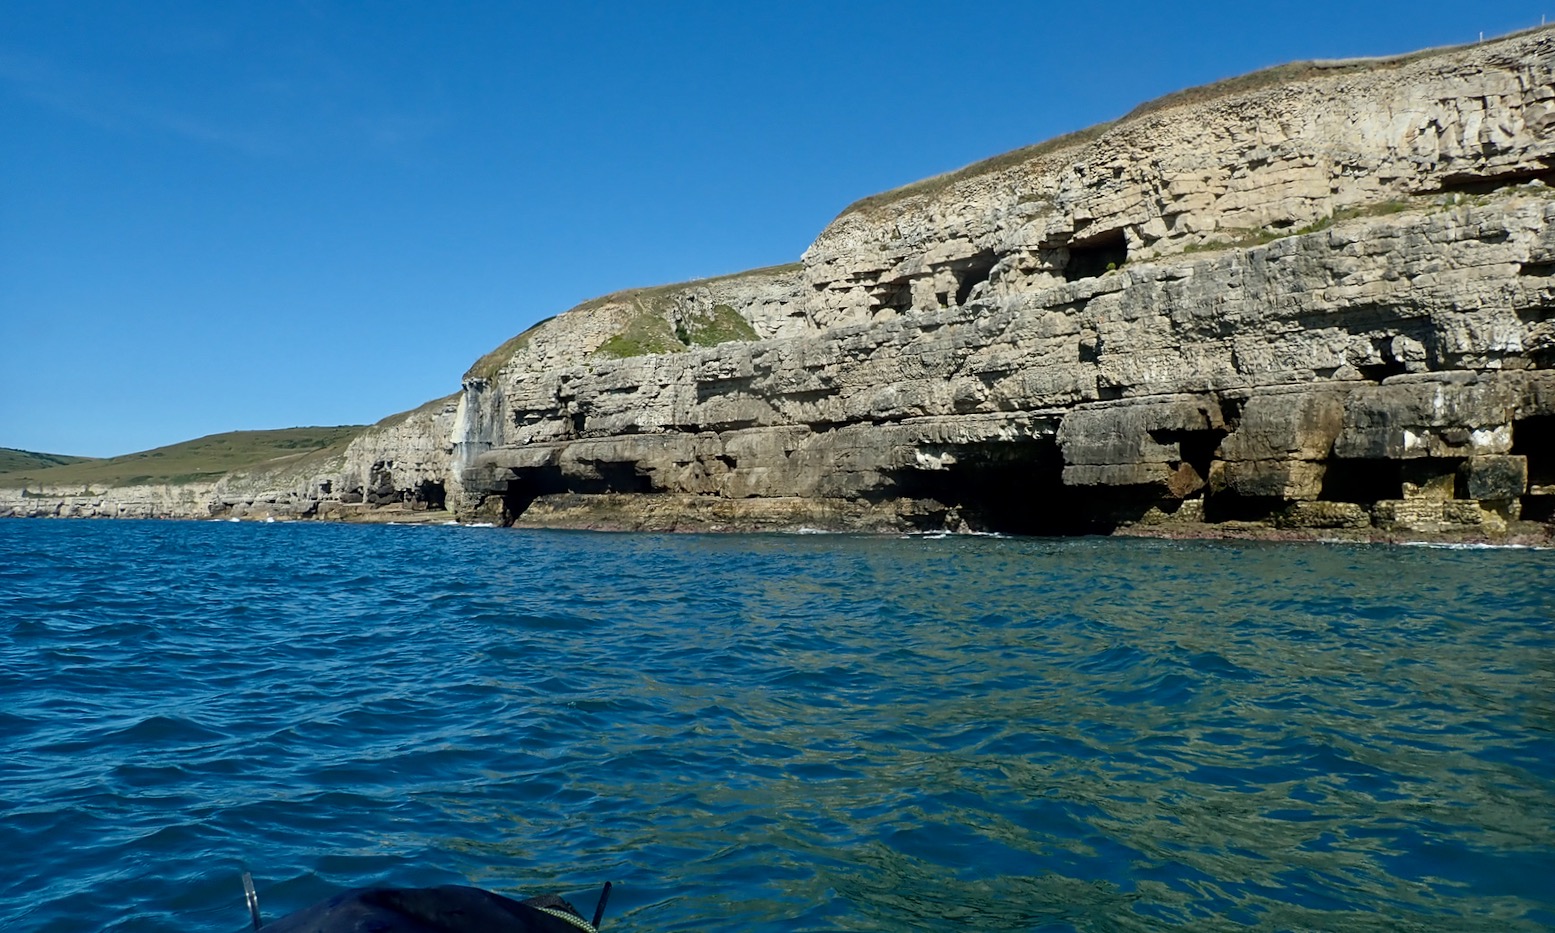
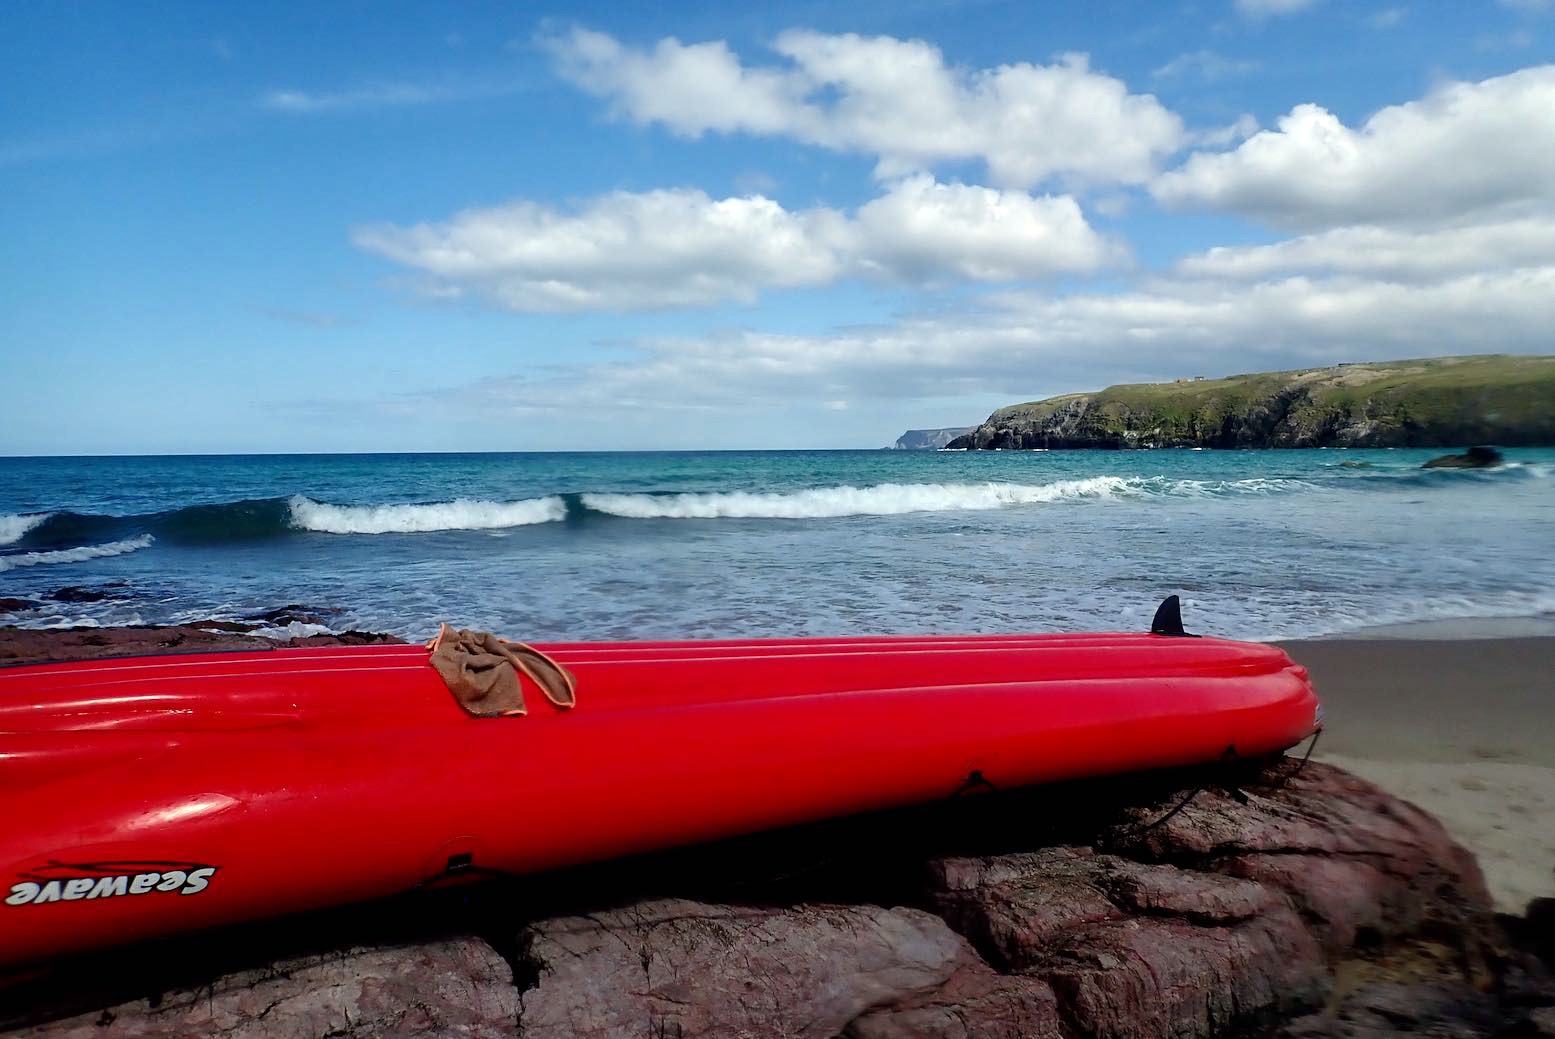
You wait weeks for a calm, sunny day to come along – and then one does. So in my back pocket I had a modest sea excursion planned for the TXL: the cliffs and caves west of Dancing Ledge. It’s a mile’s walk from Langton Matravers village across the fields to the coast where the downs drop steeply to the former Portland stone quarry. From Swanage, about four miles to the east, Dancing Ledge is the first of the few sea access points along this cliff-bound Jurassic Coast.
Approach to Dancing Ledge
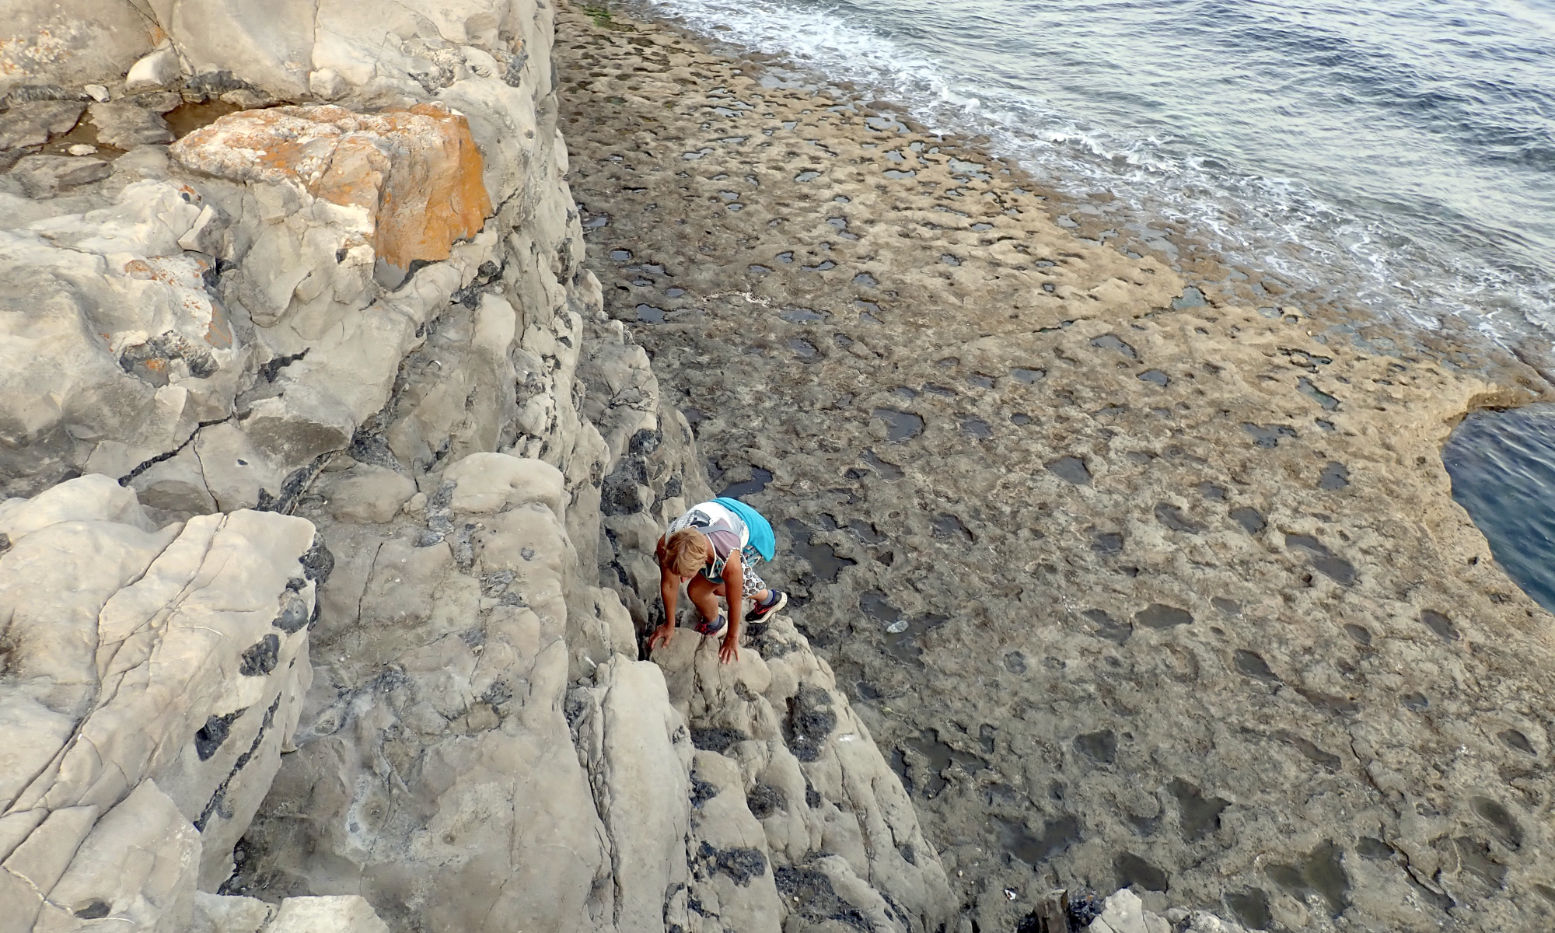
At low tide the lower, natural ledge is revealed, making getting in and out relatively easy. But to reach it you still have to scramble down a small cliff (below). It was easier to chuck the packraft backpack down before descending after it. Alone, rolled up or inflated, getting this far with an IK would be a struggle. This is why we like packrafts – and sea-going packrafts, so much the better.
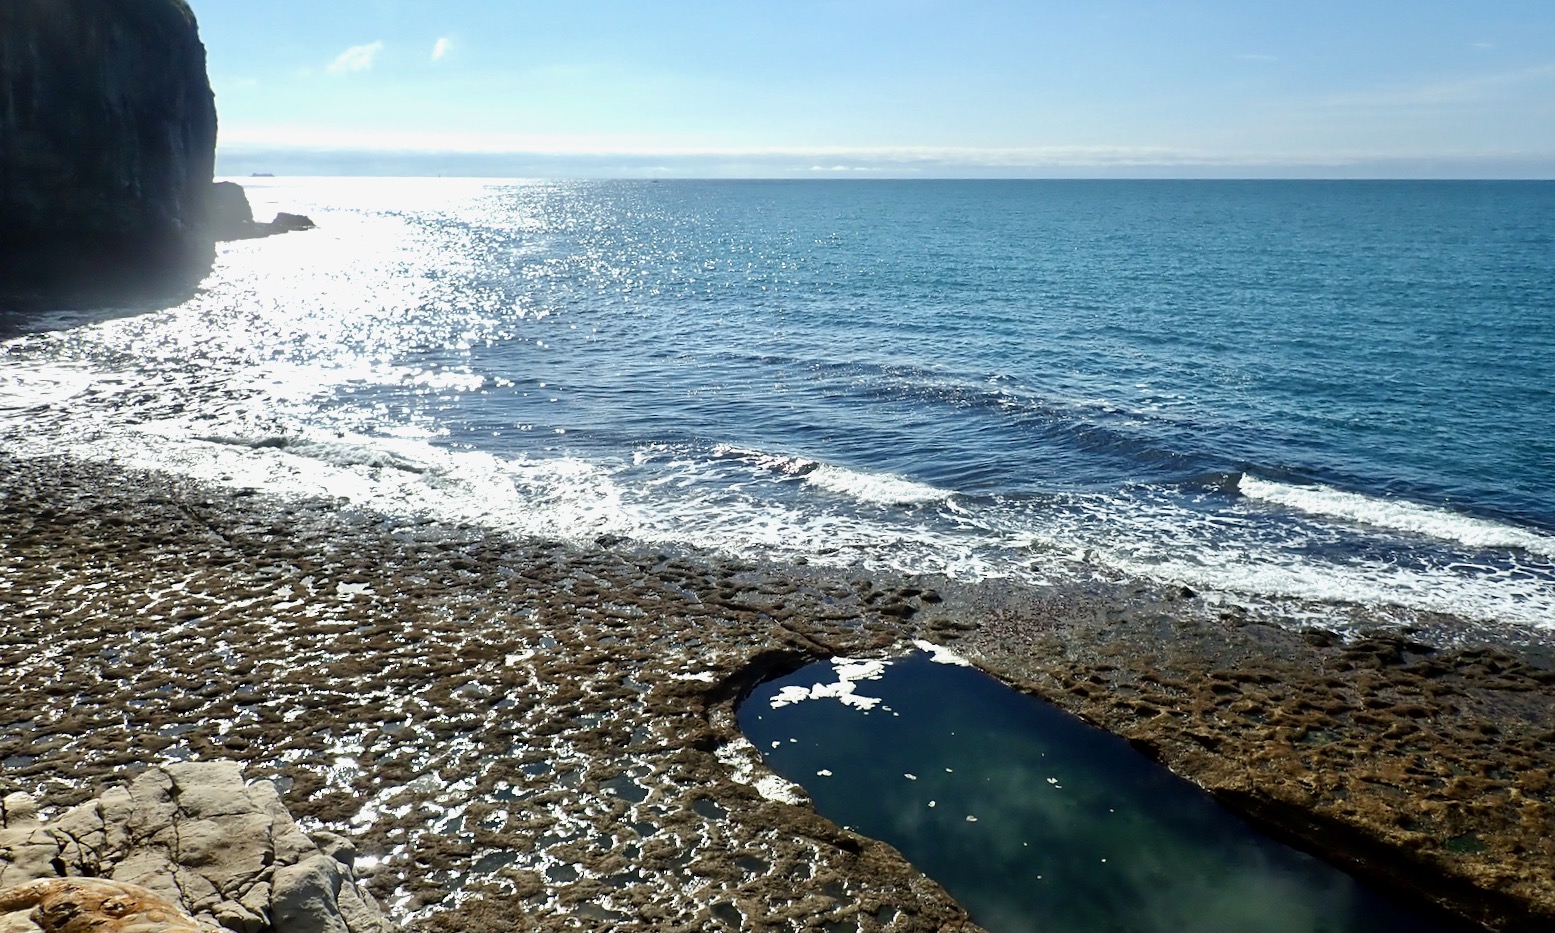
The point where you scramble down overlooks the Bathing Pool (below). It was blasted out of the rock in the late 1800s by the strict headmaster of the local Durnford school in Langton. Pupils then trotted off to the pool each morning for the character-building ritual of ‘strip and swim’, but with a now reduced risk of being swept out to sea. Decades later, James Bond author Ian Fleming attended the Durnford prep school and endured various torments before moving on to the more benign, towel-flicking environs of Eton. Unsurprisingly his Dorset years left a deep impression and later he named his 007 hero after a prominent Purbeck family, the Bonds of nearby Creech Grange. By 1999, when Bond 007 filmmakers had run out of Fleming’s dozen book titles, they chose ‘Non Sufficit Orbis’ or The World Is Not Enough, starring Pierce Brosnan. It was claimed as 007’s family coat of arms in On Her Majesty’s Secret Service, published in 1963, but was also the real Purbeck Bonds’ 16th-century motto. There’ll be a short exam later.
Back by the sea, even with wind speeds forecast at a lowly ‘4mph’ there was no balmy flat calm today, but that’s just the way it probably is with the wide open Atlantic to the west. Portland Bill or even nearby St Adhelm’s Head don’t do much to reduce the oceanic fetch driven by weeks of wind and squalls.
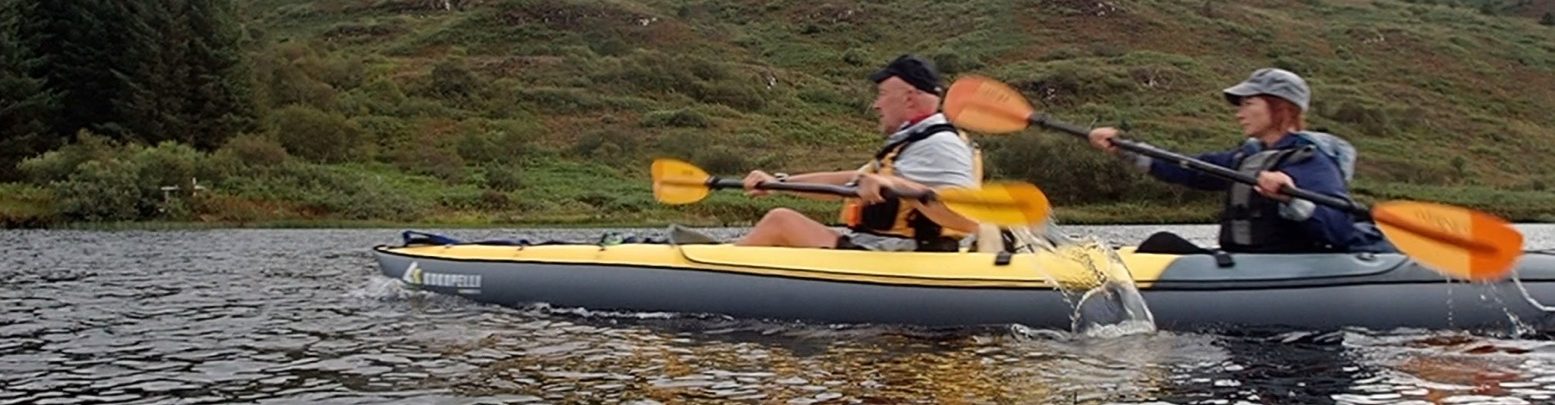
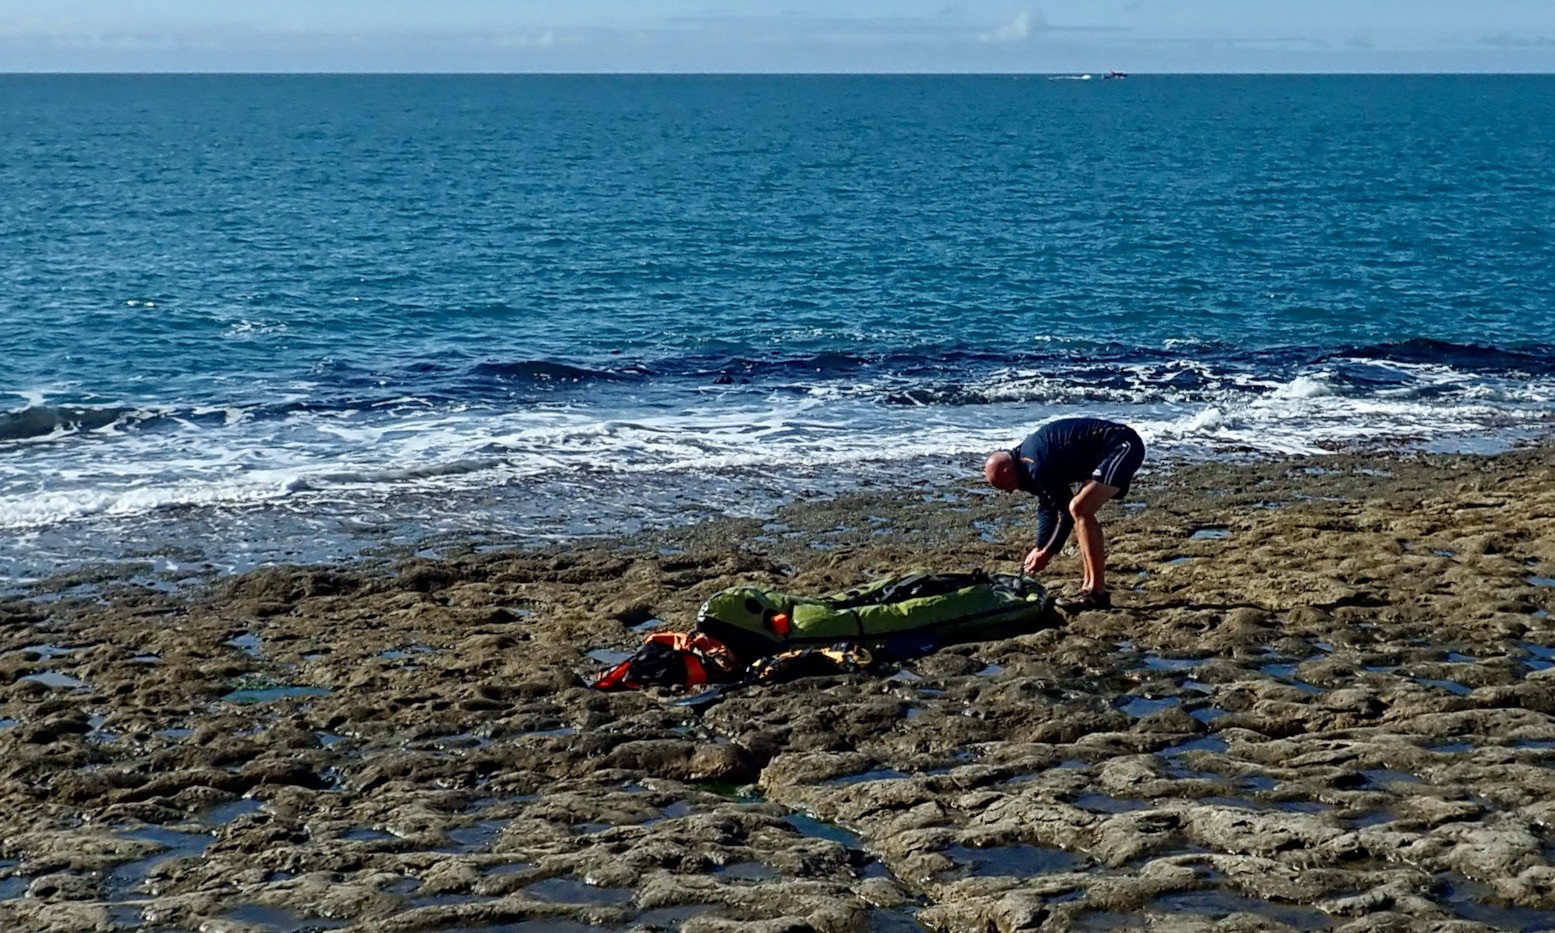
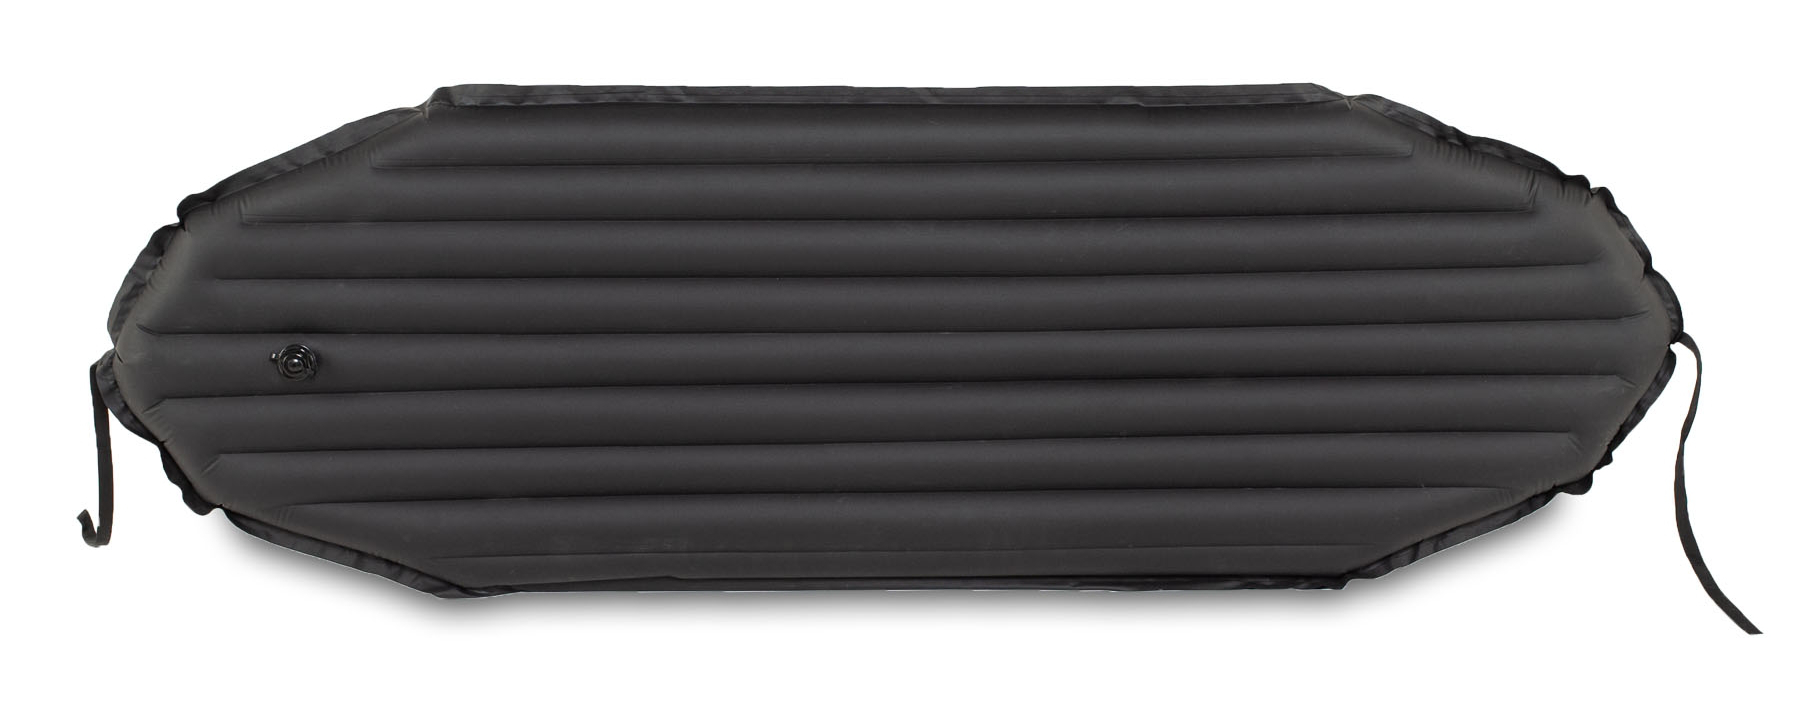
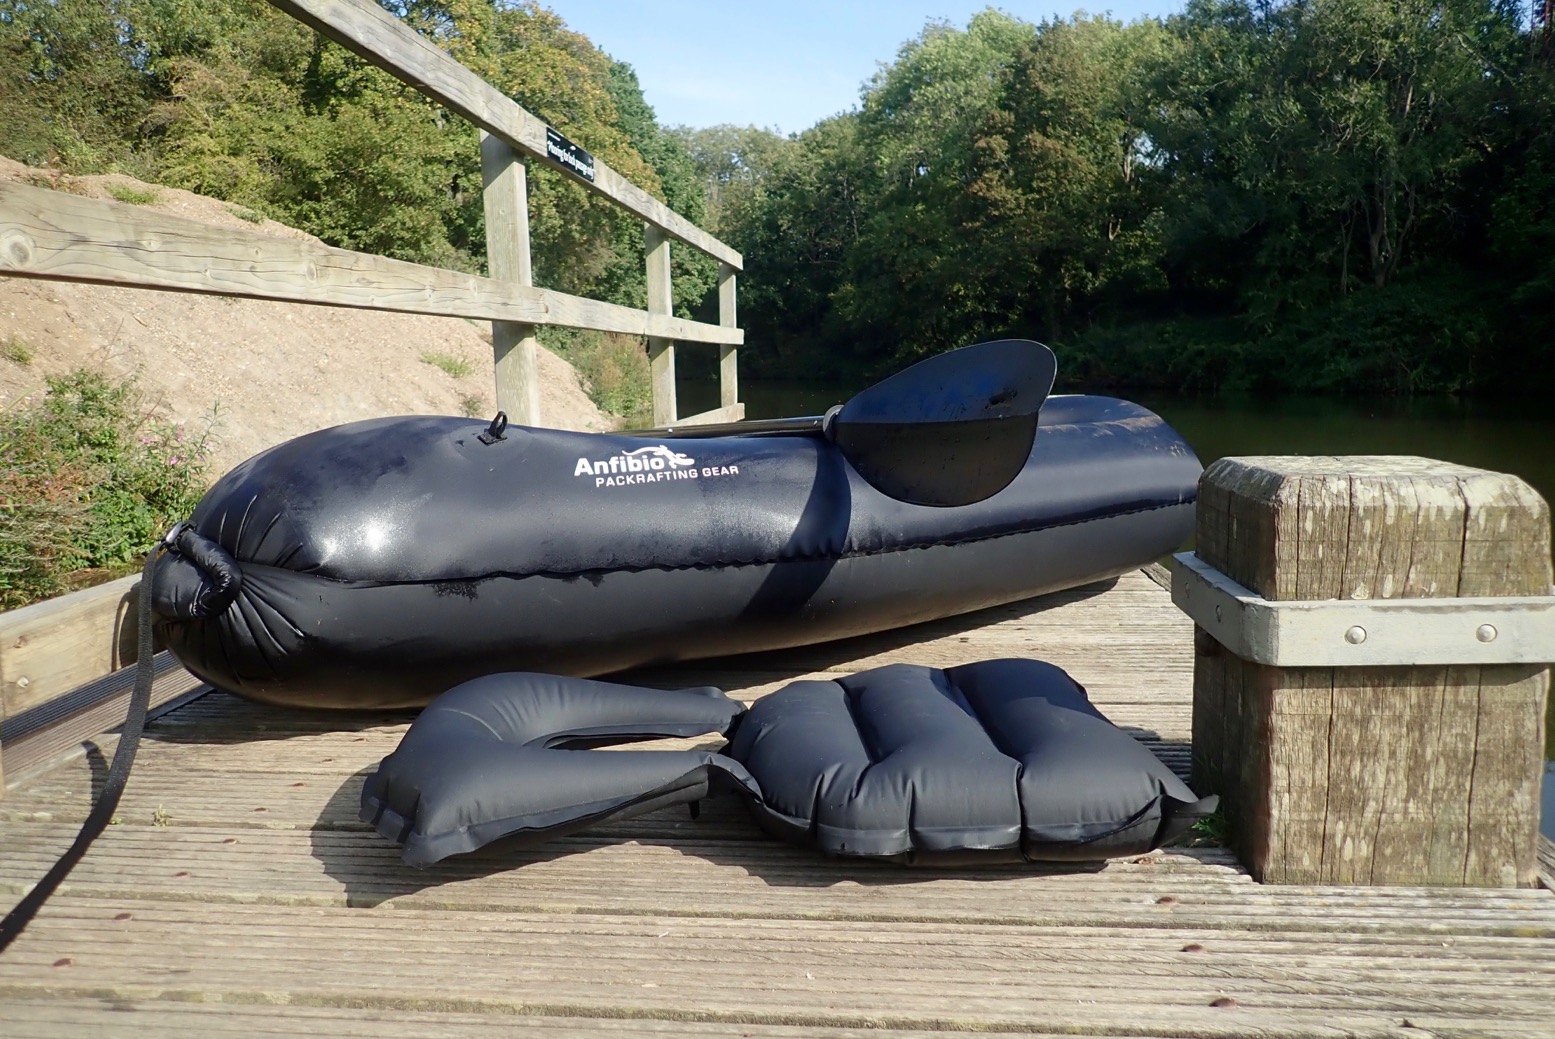
While setting the boat up I find today’s #ForgottenItem was the floor pad (left), which I was wanting to try again, despite being not entirely convinced. Two up, as we did near Skye last year, meant reduced legroom with the mat, but solo with my centrally positioned weight, I still like to think it will limit hull droop and floor sag to improve paddling response. (It does).
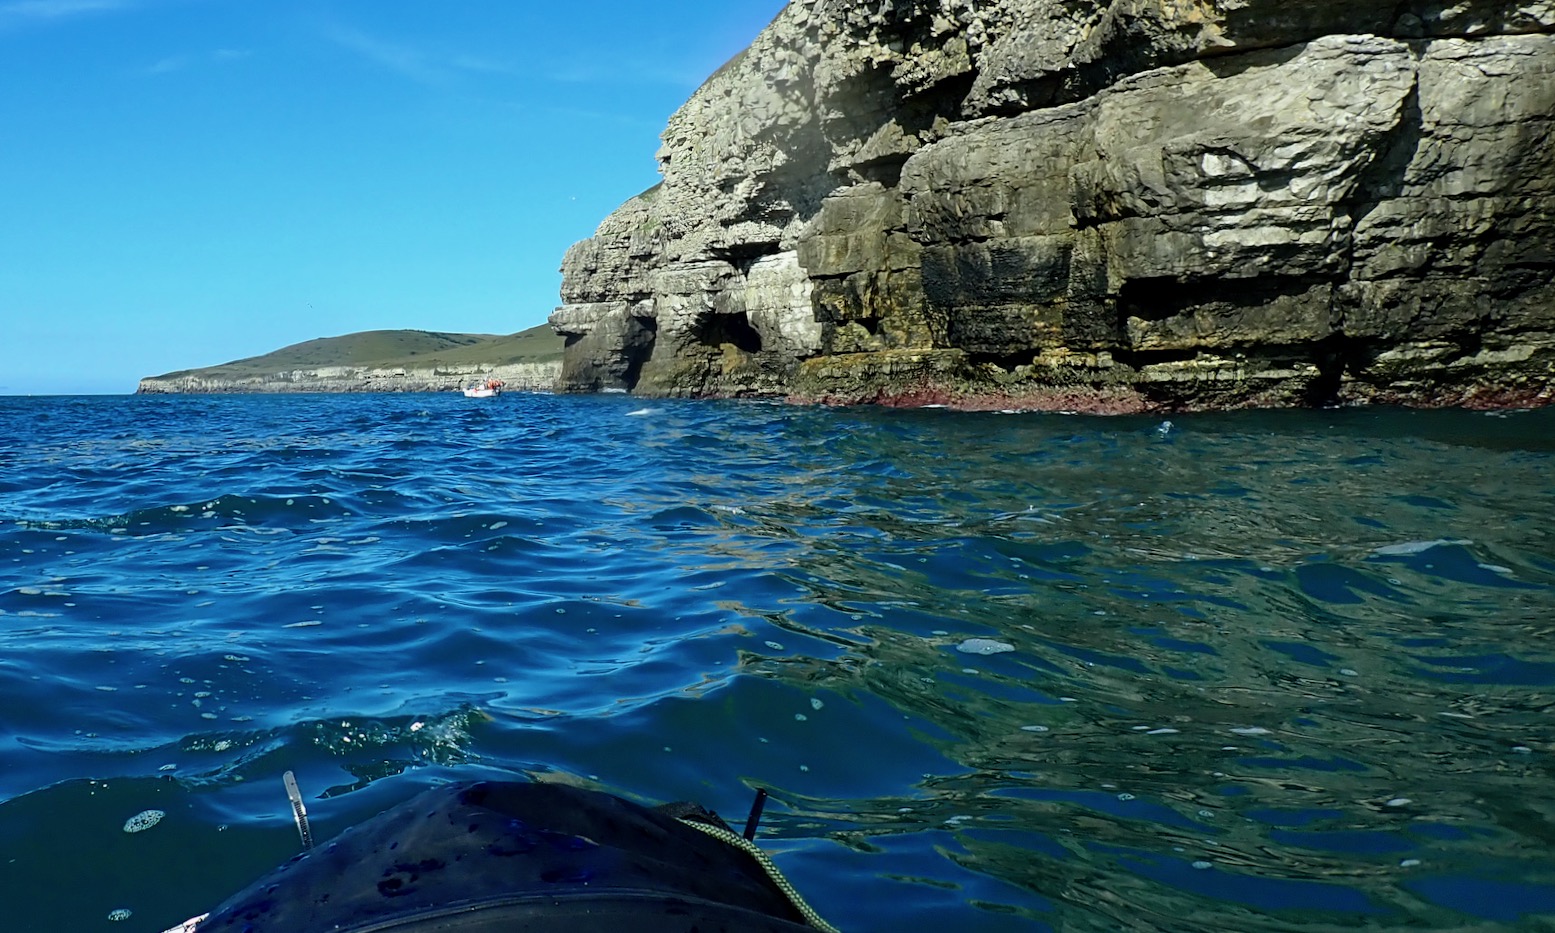
Alone, these exposed sea cliff paddles make me quite nervous, and a regular-sized packraft like my old Alpackas or Rebel would feel even more unnerving. The TXL’s healthy 2.8-metre length reduces that impression with less pitching, but I never fully relaxed today, so was happy it was only a mile to Seacombe inlet at which point I could get out and walk back if I wanted. Away from Dancing Ledge things calmed down a bit or I just get used to them, but elsewhere I needed to keep an eye seaward as bigger waves rose up.
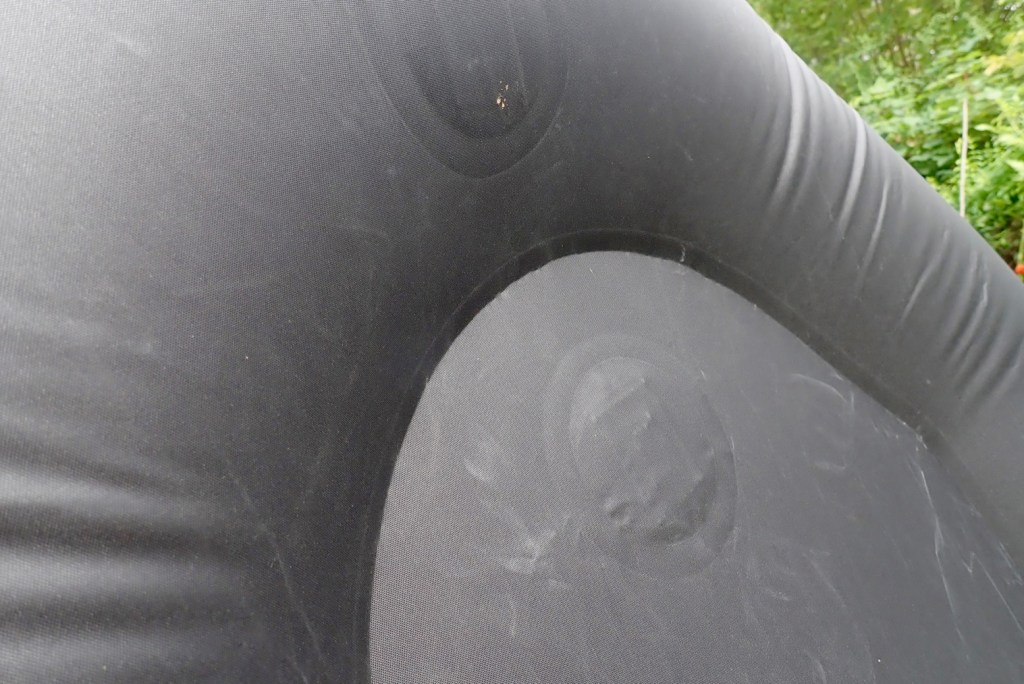
With my old MRS Nomad S1, I learned that with longer, high-volume packrafts like a TXL, no matter how hard you pump them up with warm, ambient air, after 10 minutes out on cooler water, a crease develops midway along the side tubes as the air in the hull cools and contracts and the boat effectively loses a few fractions of psi. Though beginners might worry they have a slow leak, this is normal with inflatables. Ashore, I made use of Bond’s Pool of Torment (said to be the next film title) to pre-cool the TXL but knew it wouldn’t really work. Flooding the inflated boat for a few minutes is probably the answer. A little hand pump can only pack in, say, 2 psi at 18°C. Any more air forced in may burst the pump or stress the boat’s seams if done too often. But once part submerged by my weight on 12°C sea water, the hull cools and drops to, say, 1.8psi. It won’t get any lower, but it’s enough to lose its edge and means the boat paddles less efficiently. We can’t be having that!
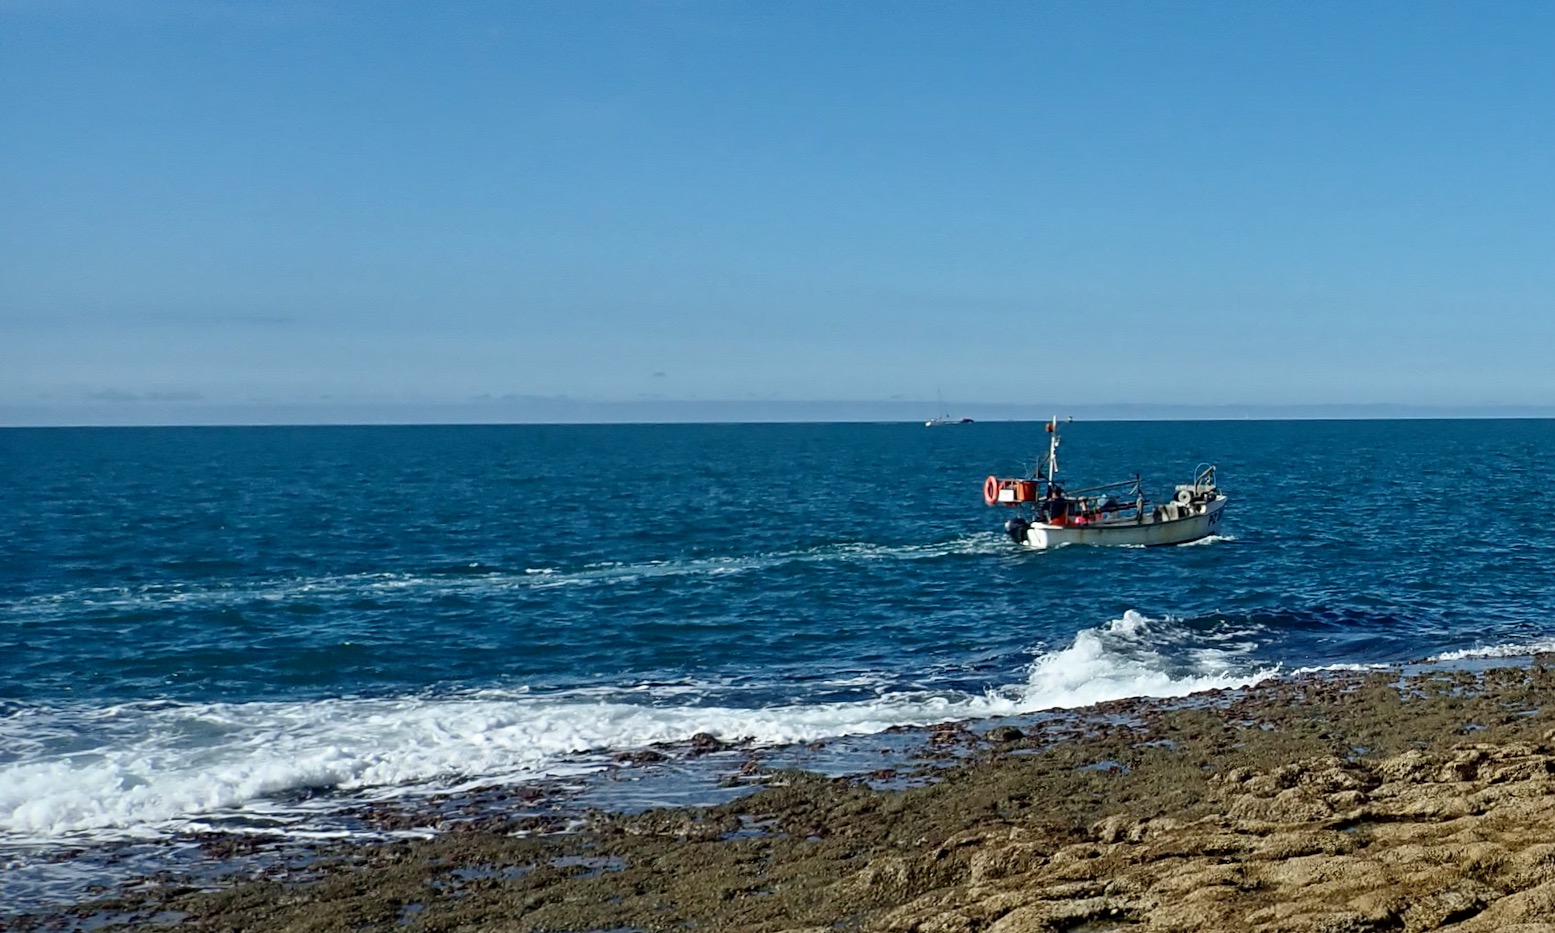
In my heightened state of anxiety at paddling a new, exposed locale, I was pleased to see a lobster boat passing my way (above). Later on I catch up and and meet the Chatty Fisherman. For a while I was worried the tide might turn before I got to drag myself away, but, Purbeck born and bred, he was a local quarryman who used his summer hols to snag a few lobsters and had lots to say about everything, including reduced catches of late. “We used to get hundreds [of lobsters] here before the seas got warmer. Now I barely get a handful.”
There was no place to hop off and top up the boat, though I could always flip round in the seat and do it on the water. That said, I wonder if longer packrafts like TXLs could benefit from repositioning the inflation valve closer to the central seat, like my old Incept K40 solo IK. The MRS Nomad had the valve on the bow, which was handy. I suppose this might make expelling the air on rolling up more difficult, but we now have mini pumps with suction settings, making valve position less important. With a passenger or another paddler alongside, on-water topping up is less of an issue, but had I thought it through before adding the second skeg patch, I could have glued it at the other end, as the TXL is symmetrical, but then is the bow bag tabs would be at the back. So halfway down one side would be better, Anfibio. Sorry, I did I say something?
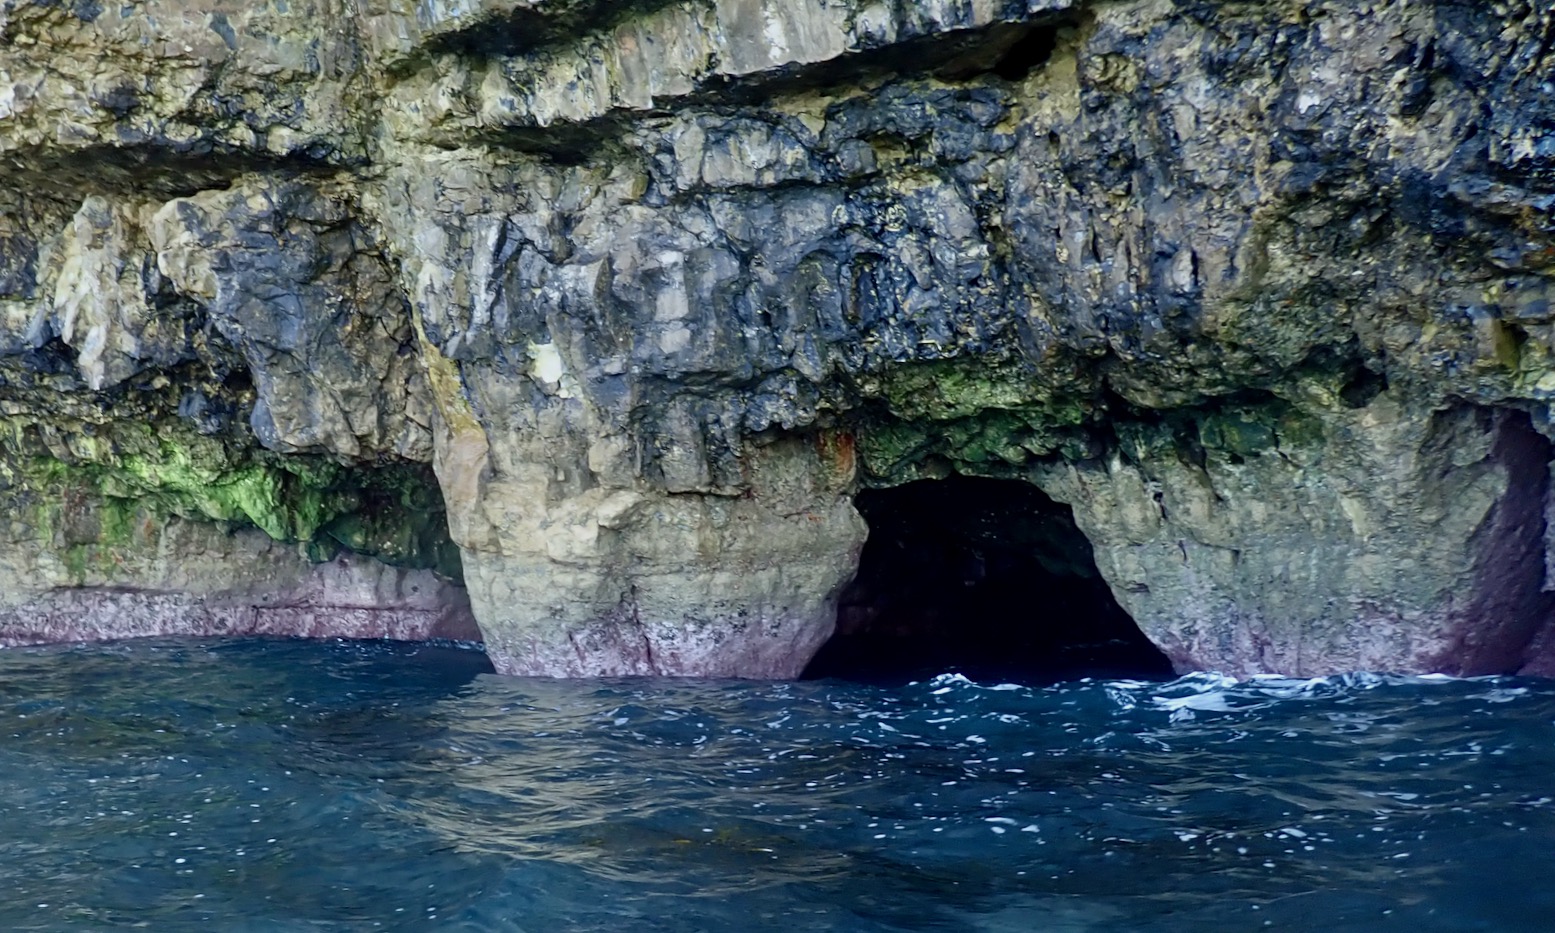
I paddle onward. Most of the caves have too much intermittent swell rolling in to get close, but one twin-mouthed cavern (above) looks like it could be safely threaded in the nippy TXL without me getting lifted by a sneaky swell and knocking myself out on the cave’s roof.
Inside the cave
Further west I see a few people wandering about on the foreshore ledges, announcing the inlet at Seacombe, another old quarry. As I get near, I line myself up to get lifted by a wave and dropped onto a ledge. It ought to be easy but ends up a bit of a bundle. Before I can climb out I get sucked backwards into another wave, which drops onto the boat. But though it looks ungainly, timing isn’t that crucial in a stable packraft that’s easy to hop out of quickly. Lord knows how a sea kayak would manage. Up on the ledge I drain the TXL before flipping it back over and giving it a few jabs of the handpump so it’s pinging firm again.
Seacombe cliffs
Putting back in, I’m alarmed to see my skeg lying on the rocks. My to-and-fro landing must have dislodged it. (It happened again on my next TXL; this is a fix). It is for moments like these (or, more commonly, distractions while packing up) that I wrapped it in hi-viz yellow and black tape. Had I lost it, the downwind paddle back would have been a bit squirrely, giving me something new to worry about until I realised the cause. Passing the twin-mouth cave I threaded earlier, the tide is already too high to repeat the stunt.
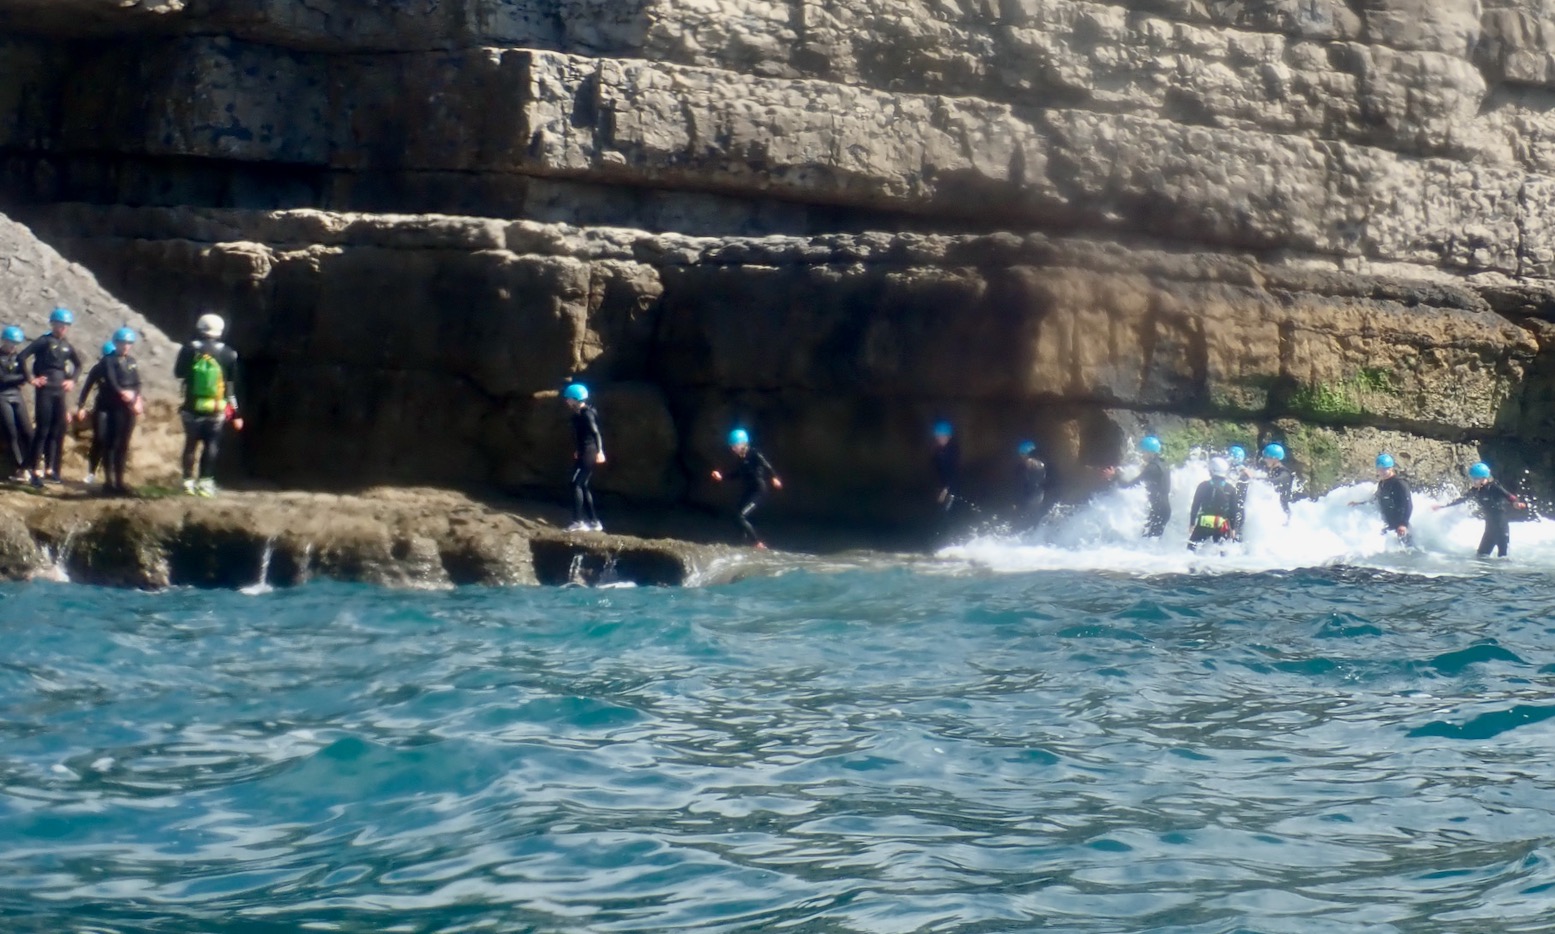
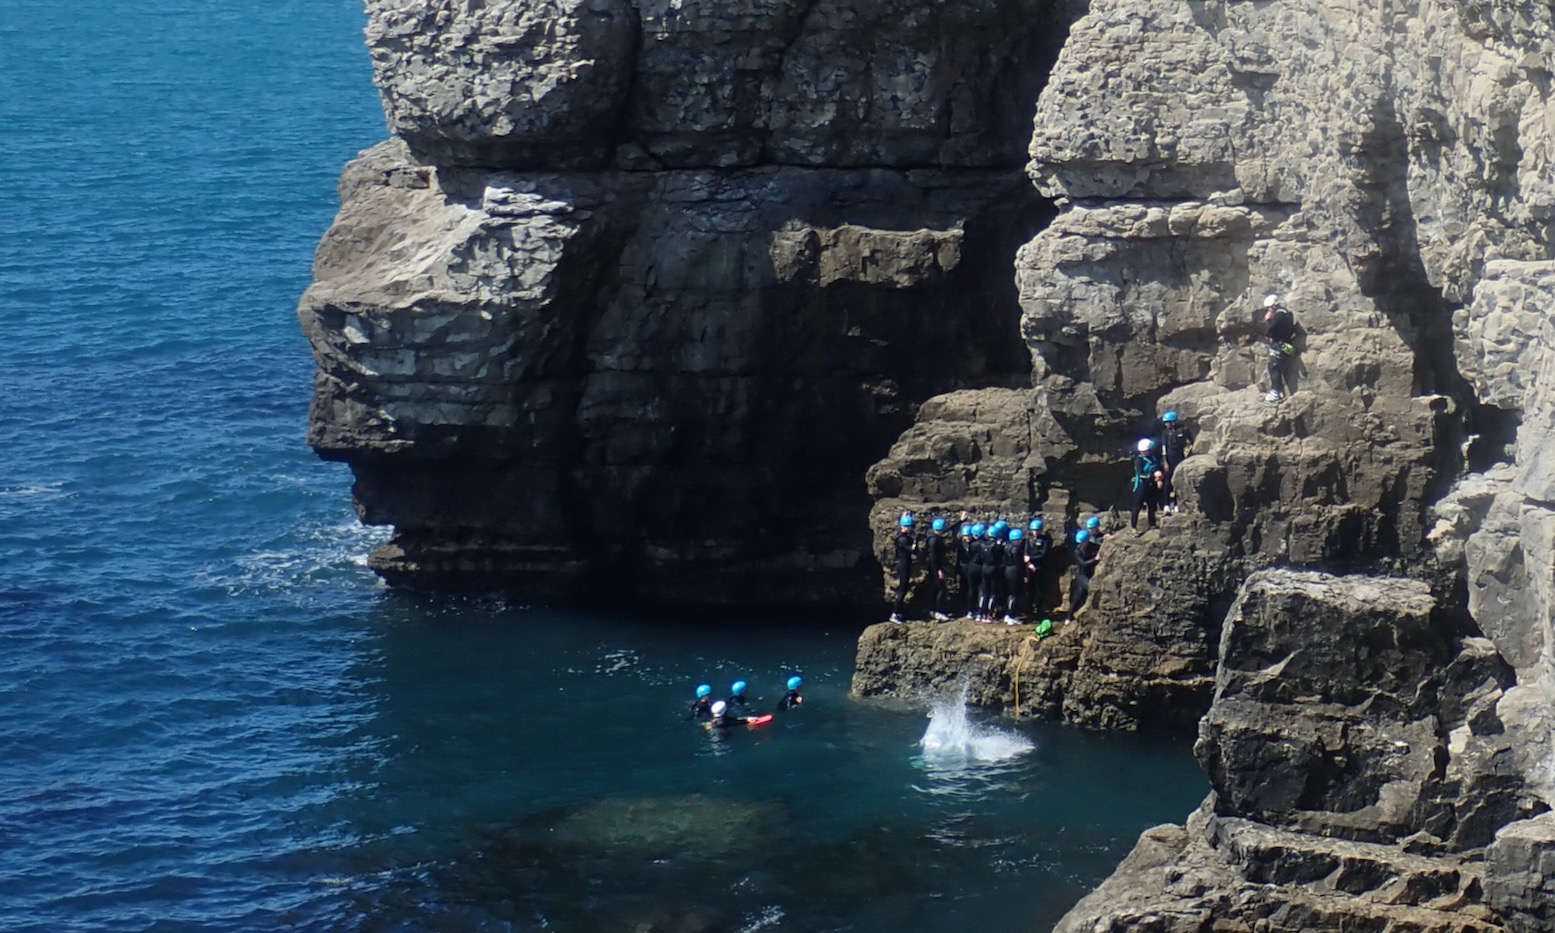
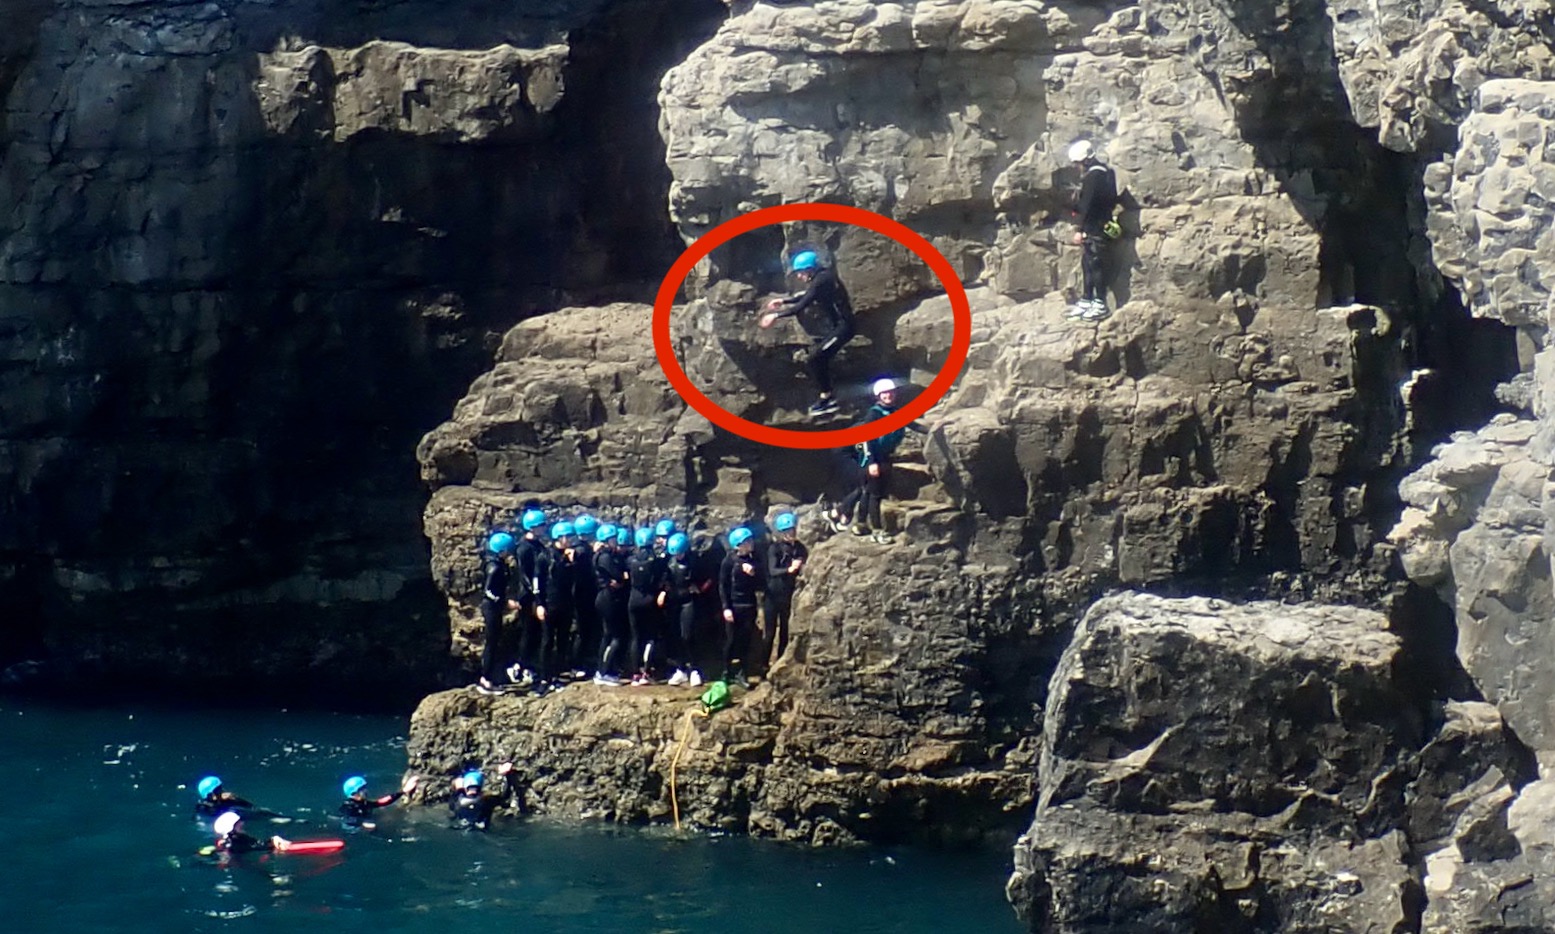
By the time I returned, Dancing Ledge was packed with day-trippers including groups of coasteering wetsuit-clad kids. They inched along the ledges, swam across cave mouths, and then clambered up to a narrow ledge to jump in. The next group was already lined up to follow so it all looked a bit sketchy and congested with just two guides for over a dozen kids (turns out it can be), but I bet they all loved it.
‘Beyonsaaaay! (or whatever kids shout these days).
As had happened so many times, a spell on the water without incident calmed the nerves. So I continue past the Dancing take-out and cast a wistful glance eastwards. It was only 2.5 miles, or an hour or so with the tide and wind and cliffs to the Isle of Purbeck’s southeast corner at Durlston Head, before a more sheltered turn northward to Swanage, another mile away over the Pevrill Ledge, the final hurdle into town. One for the next ‘calm’ day perhaps.
Looking east over Dancing Ledge
Anfibio Plus(+) fabric Checking out Anfibio’s TXL page later, I see they’re offering the option of the TXL and similar long/double models in chunkier Plus (+’) fabric. It’s only 17% heavier but 80% more tear-resistant, depending on how you measure that, but costs only €70 extra. It looks like it might be similar to floor fabric or comparable with Alpacka’s much more expensive Vectran option.
Anfibio don’t fully explain why they’re now offering thicker Plus(+) fabric; has the standard proved a bit less durable? I admit Anfibio do focus a bit too much on the ultra lightweight side of things which, alone in a single-skinned inflatable, is not where my priorities float. From my experience with stiffer PVC IKs versus more flexible rubber kayaks, I do wonder if a Plus(+) TXL or similar might be more rigid on the water without the need to pack it full of air. It may even exclude the need for the 900-g floor pad (it doesn’t). Along with what I estimate to be a <500g weight penalty, I imagine a Plus(+) TXL will roll up less compactly, but other than that it’s something worth looking into.
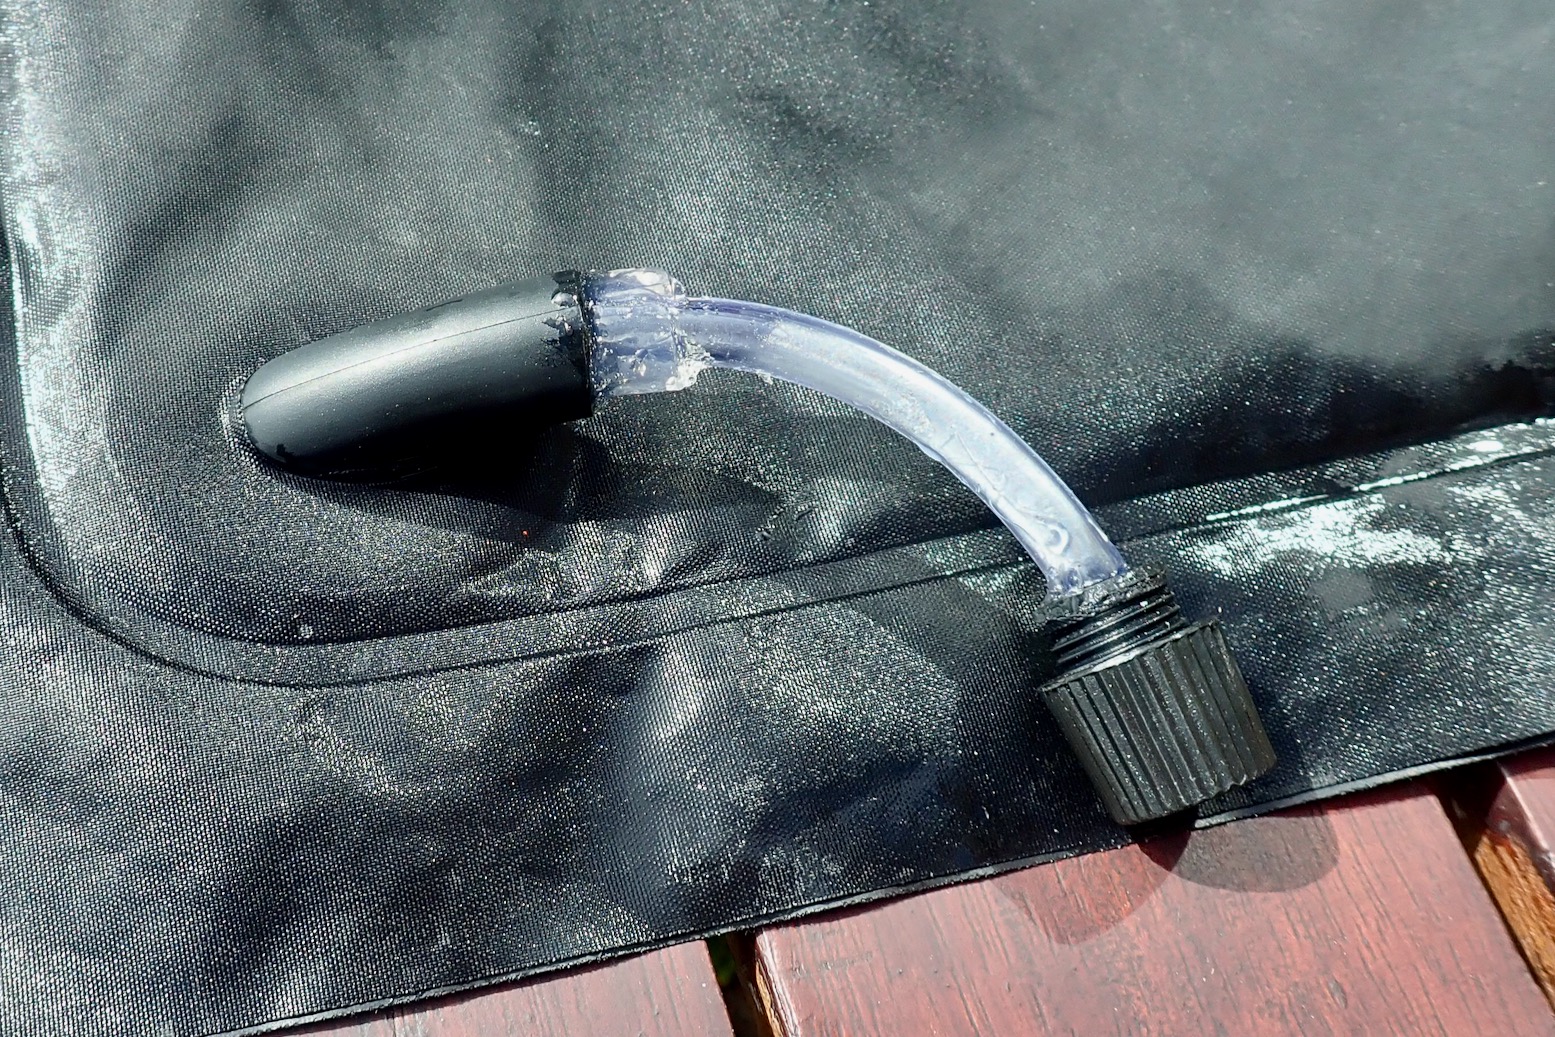
Quick-deflate seat While I was never a fan of the mushy, twist-lok stem valves on the early Alpackas, I’m not a huge fan of the sprung, one-way inflation valves Anfibio use on their seats and backrests. Great for easy inflation and holding high pressures, but a pain to deflate when packing up; you have to jam a fingernail in the valve and scrunch the seat while it ever so slowly deflates. At least with an old twist-loks you could suck the air out. And anyway, you don’t need full pressure in a seat. Far from it. There was talk of Anfibio modifying the seat valves for easy deflation but it’s not happened yet. Now the TXL is my sole packboat, I’m minded to set it up well. I failed to find anything other than Boston valves online. They’d work of course and will dump air really fast, but are a bit OTT and would need gluing in properly.
I had a spare dry bag with a neat twist lock valve a bit like Thermarest sleeping pad valves. But marrying it to the chopped off sprung one-way valve in the seat was tricky to do neatly. So I managed to do it not neatly (above left) with a bit of clear tube and lashings of Aquasure. Unfortunately the tube is narrow which slows things down or increases effort; win-lose. For the moment it works; I can unscrew the valve and roll up the huge seat, purging the air as I go. Looking back on this dramatic episode, next time I’ll just cut a hole and glue in a Boston valve (left) which are easily found online for under a tenner.
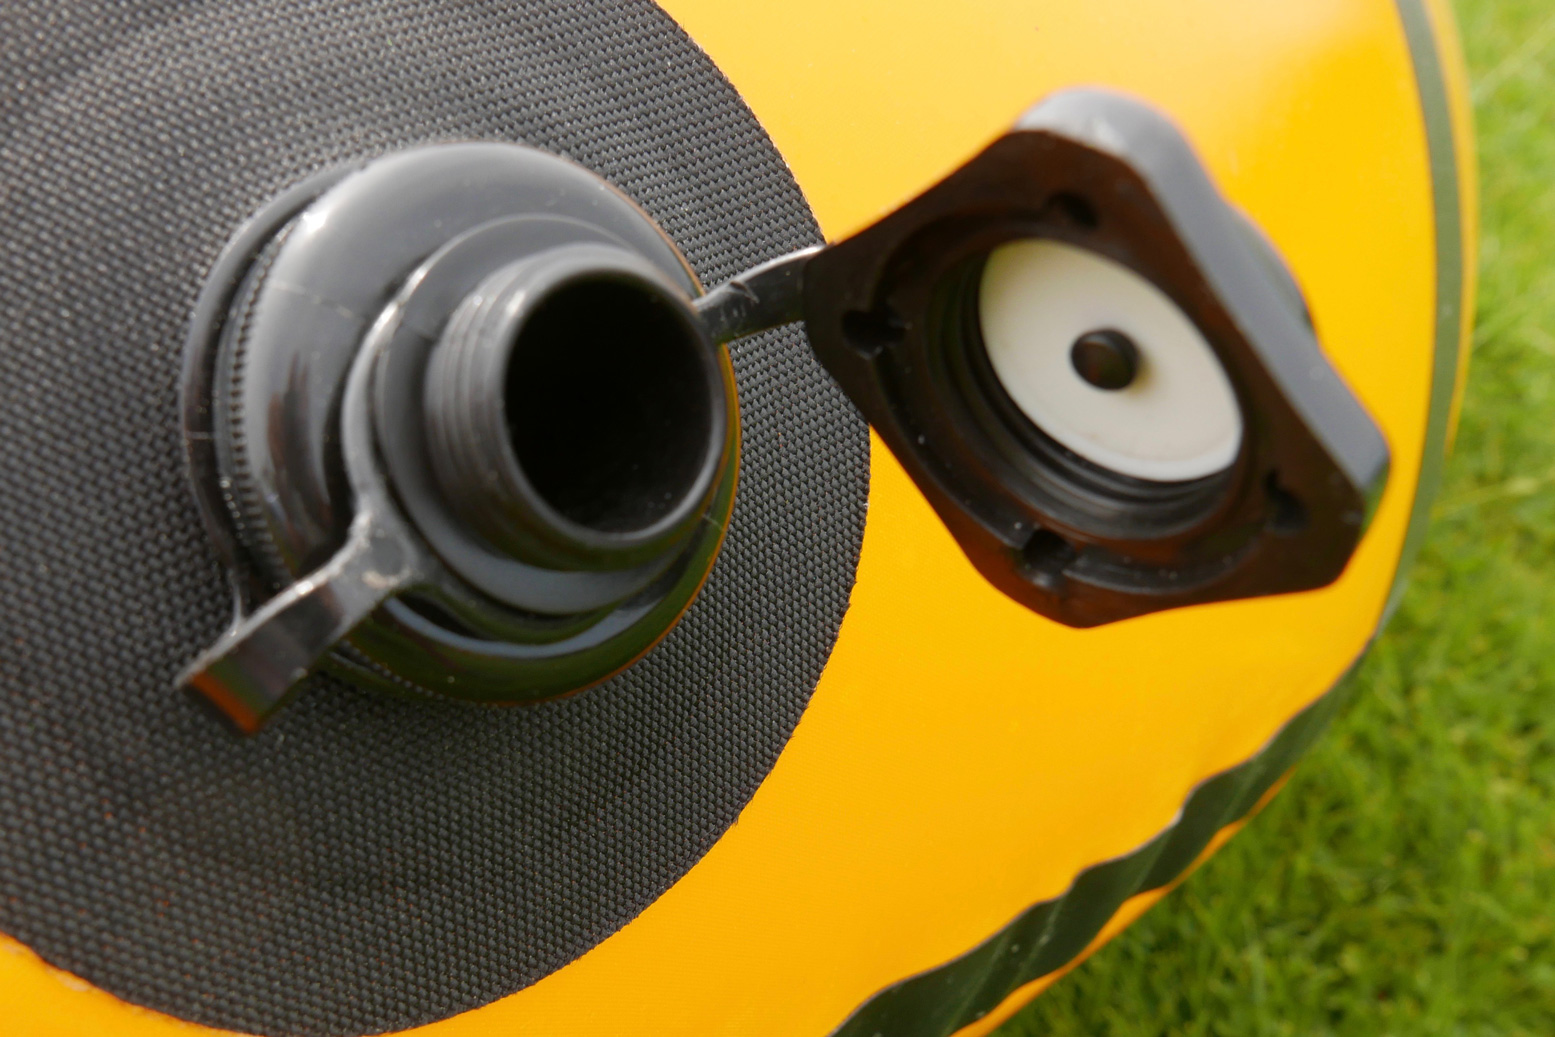
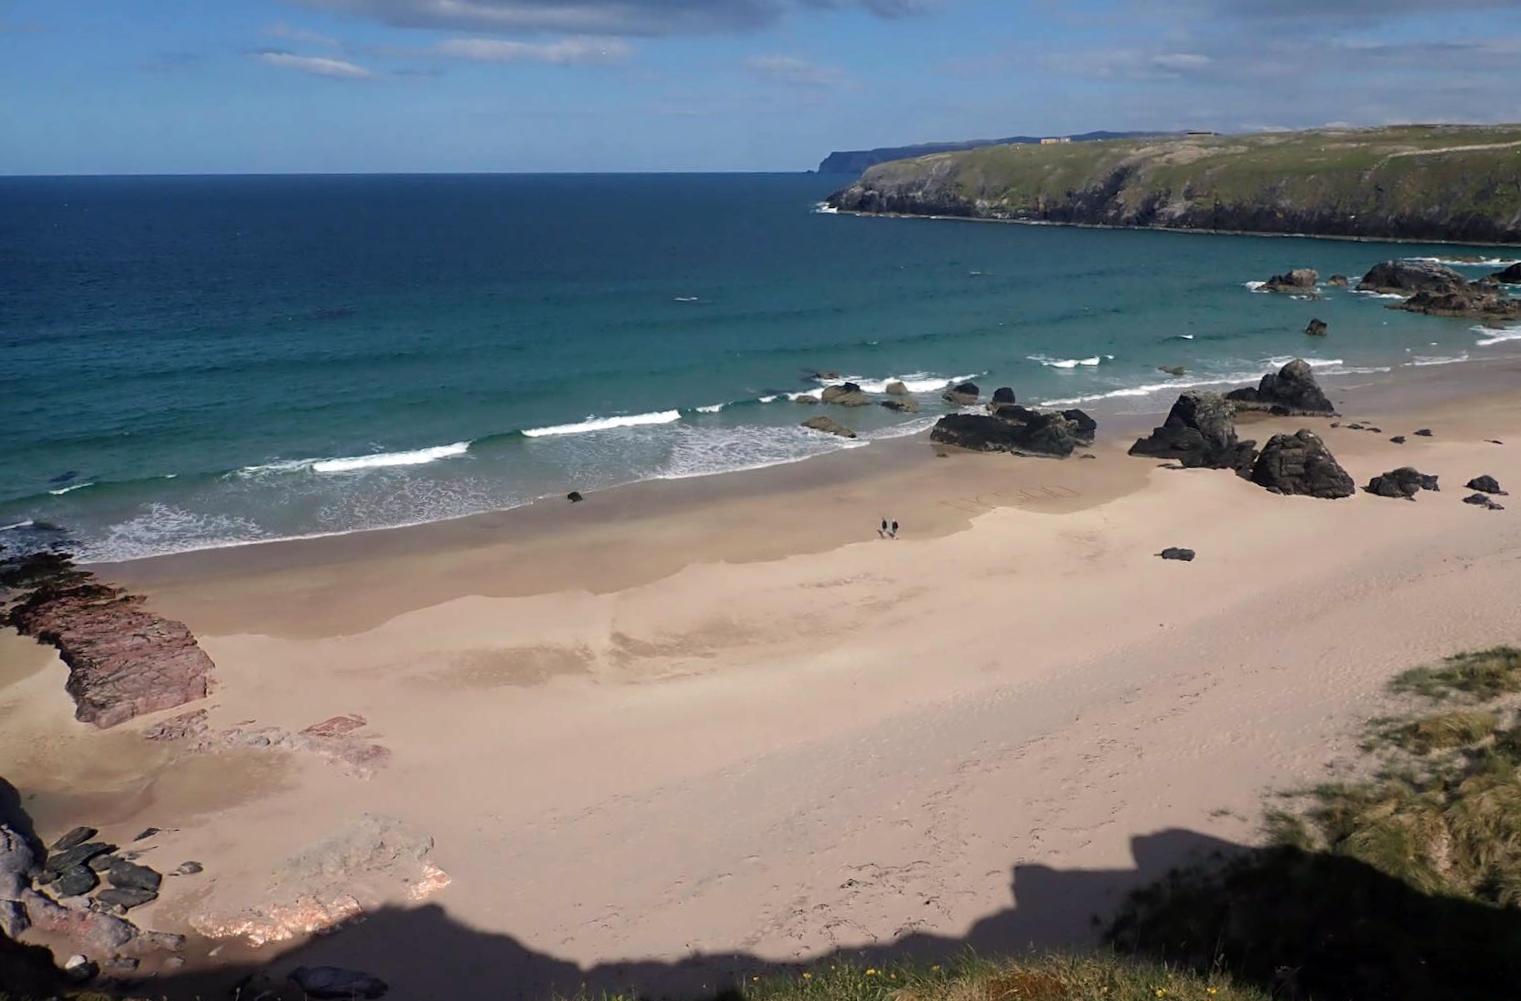
The other day we paddled the Seawave off Durness beach where the surf was bigger than I’m used to. Hitting a breaking wave as we paddled out didn’t help; the swamped boat needed tipping out at the next beach. It was a bit too offshore windy to roam, but it was still a thrill to be paddling on the very top of Britain, just 2175 miles from the North Pole (about the same distance south to the Canaries). After the paddle I took care to dry, wipe down and roll the boat up on a sand-free rock bench, but lacking a hose back at the house, I had to rinse one bucket at time – not ideal. When I pumped up, the floor soon went flat: sand was in the seal of the floor’s PRV (what’s a PRV). It’s a thing that happens but in nearly 20 years of Gumotexing it’s never happened to me. Today was my day.
Seawave PRV
The design of the valve means that if the boat swamps in the surf, water laden with grit can enter via the six vents and pool in the valve body right above the seal. The next time it purges, sand grains can slip down onto the soft rubber seal surface and stay there, letting air leak out. Because the chances of this are high, with a leaking floor PRVs are the usual culprit, not the nearby inflation valve with its sealed valve cap, or less still, a puncture. But don’t rule either out (the cleaning procedure for an inflation valve will be the same).
Fixing a PRV Much of what follows is my take on Polishman Marcin S’s translated post linked above. It’s not how I actually did it, it’s how I would do it next time after quite a lot of trial, error and better ideas or procedures though up along the way.
Before disassembly, first try giving the PRV a darn good blow-through by pumping like billy-o and letting it purge. It will help to prise off the vent cap with a small flat screwdriver so grains blow away, not bounce back in. Pump up and see what happens. Chances are it won’t work.
Next I suggest putting the boat on a slope (to save water and weight) and flood the stern to establish the pace of the leak from the PRV. You will do it again at the end to see if there is any change. By dragging the boat around 180°, you can let the water slosh down to the bow while you remove the PRV at the stern at the high end.
Don’t try this; manometer leaking
Small bubbles rising from the PRV
Don’t plug in a manometer to try monitor the leak over a period of time; it cost me a few hours and a disassembly or two before the flooding idea proved my manometer was leaking from the base faster than the PRV. As we know, pressure gauges are plugged in briefly to get a reading, then as quickly removed. To test for a leak, water is best.
Six splines below the vent cap
Buy one now
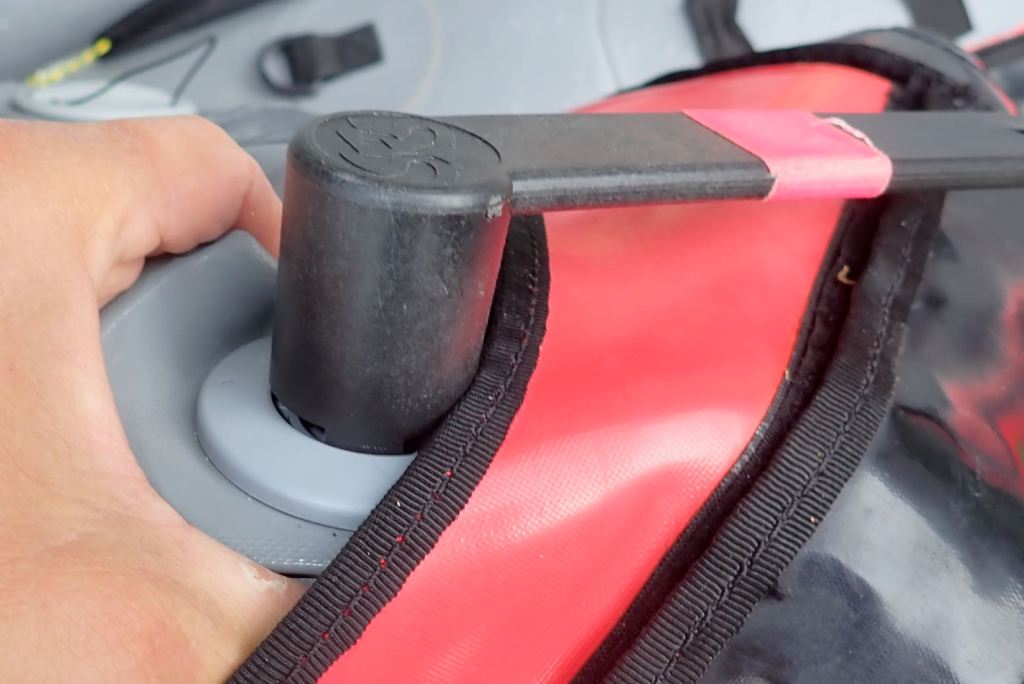
You now know for sure the PRV is leaking so will have to remove and clean it. Flicking off the vent cap exposes the valve body’s six splines. Fit your Gumotex valve tool(or eBay clones from £6) and unscrew the PRV. As Marcin says: the plastic one will do; you don’t need the expensive metal one Gumotex also sell. Expect the PRV to be very tight. Marcin pre-lubed his, I didn’t but it undid easily enough. My boat is less than a year old.
What a tool
Don’t let the backing nut fall away (or the o-ring)
It’s easier to start unscrewing the PRV with the boat fully inflated, but separate the two parts of the valve only once fully deflated so there’s less chance of the backing nut inside the hull rolling away out of reach. Same with the loose o-ring on the valve body base; don’t let it drop into the abyss.
PRV with black o-ring
Rinsing; worth a shot
With the PRV in hand, you can see how it works: a spring-loaded valve opens upward when pressure from within reaches a pre-set level – on a Seawave supposedly 0.25 bar or 3.5 psi (but it might close as low as 0.20). As pressure drops it seals shut. At this point you might try rinsing under a tap while pushing the valve open, but you’re going to have to disassemble it anyway to check the state of the seal.
Set the o-ring aside and unscrew the 6mm locknut on the valve stem. Press on the sprung valve from the other side to stop it spinning as you unscrew the nut. But before you do this, count the number of threads or take a photo (above), as the position of the nut regulates the purge pressure; the more you screw down the nut the higher the purge pressure. I notice Marcin’s nut on his Solar was much less screwed in than mine (lower purge pressure). (At one point I tried screwing in my nut an extra turn to improve sealing, but it didn’t seem to make much difference; still closing around 0.2. Maybe a few more turns are needed, but of course you don’t want to go too far and compromise the floor.
Left: pliers to undo the nut; magnifying glass and torch to closely inspect the rubber seal. Right: the disassembled PRV. From top left: valve body, o-ring, valve stem with rubber seal, spring, spring cross-washer, 6mm lock nut.
Ooo-er, quite a lot of fine Durness beach on there.
I chose to clean the rubber seal with an ear stick and toluene solvent. (I tried, but decided not to remove the rubber seal from the stem). After carefully wiping off the grains on, around and under the seal, I dipped the whole thing in the toluene bottle cap (not too long as toluene is strong stuff on plastic; it dissolved the orange marker dot). Don’t forget to inspect and wipe the inside of the plastic valve body too.
A lovely, clean PRV seal. Reassemble and carefully screw down the metal nut onto the soft plastic valve stem to where it was – or what you prefer.
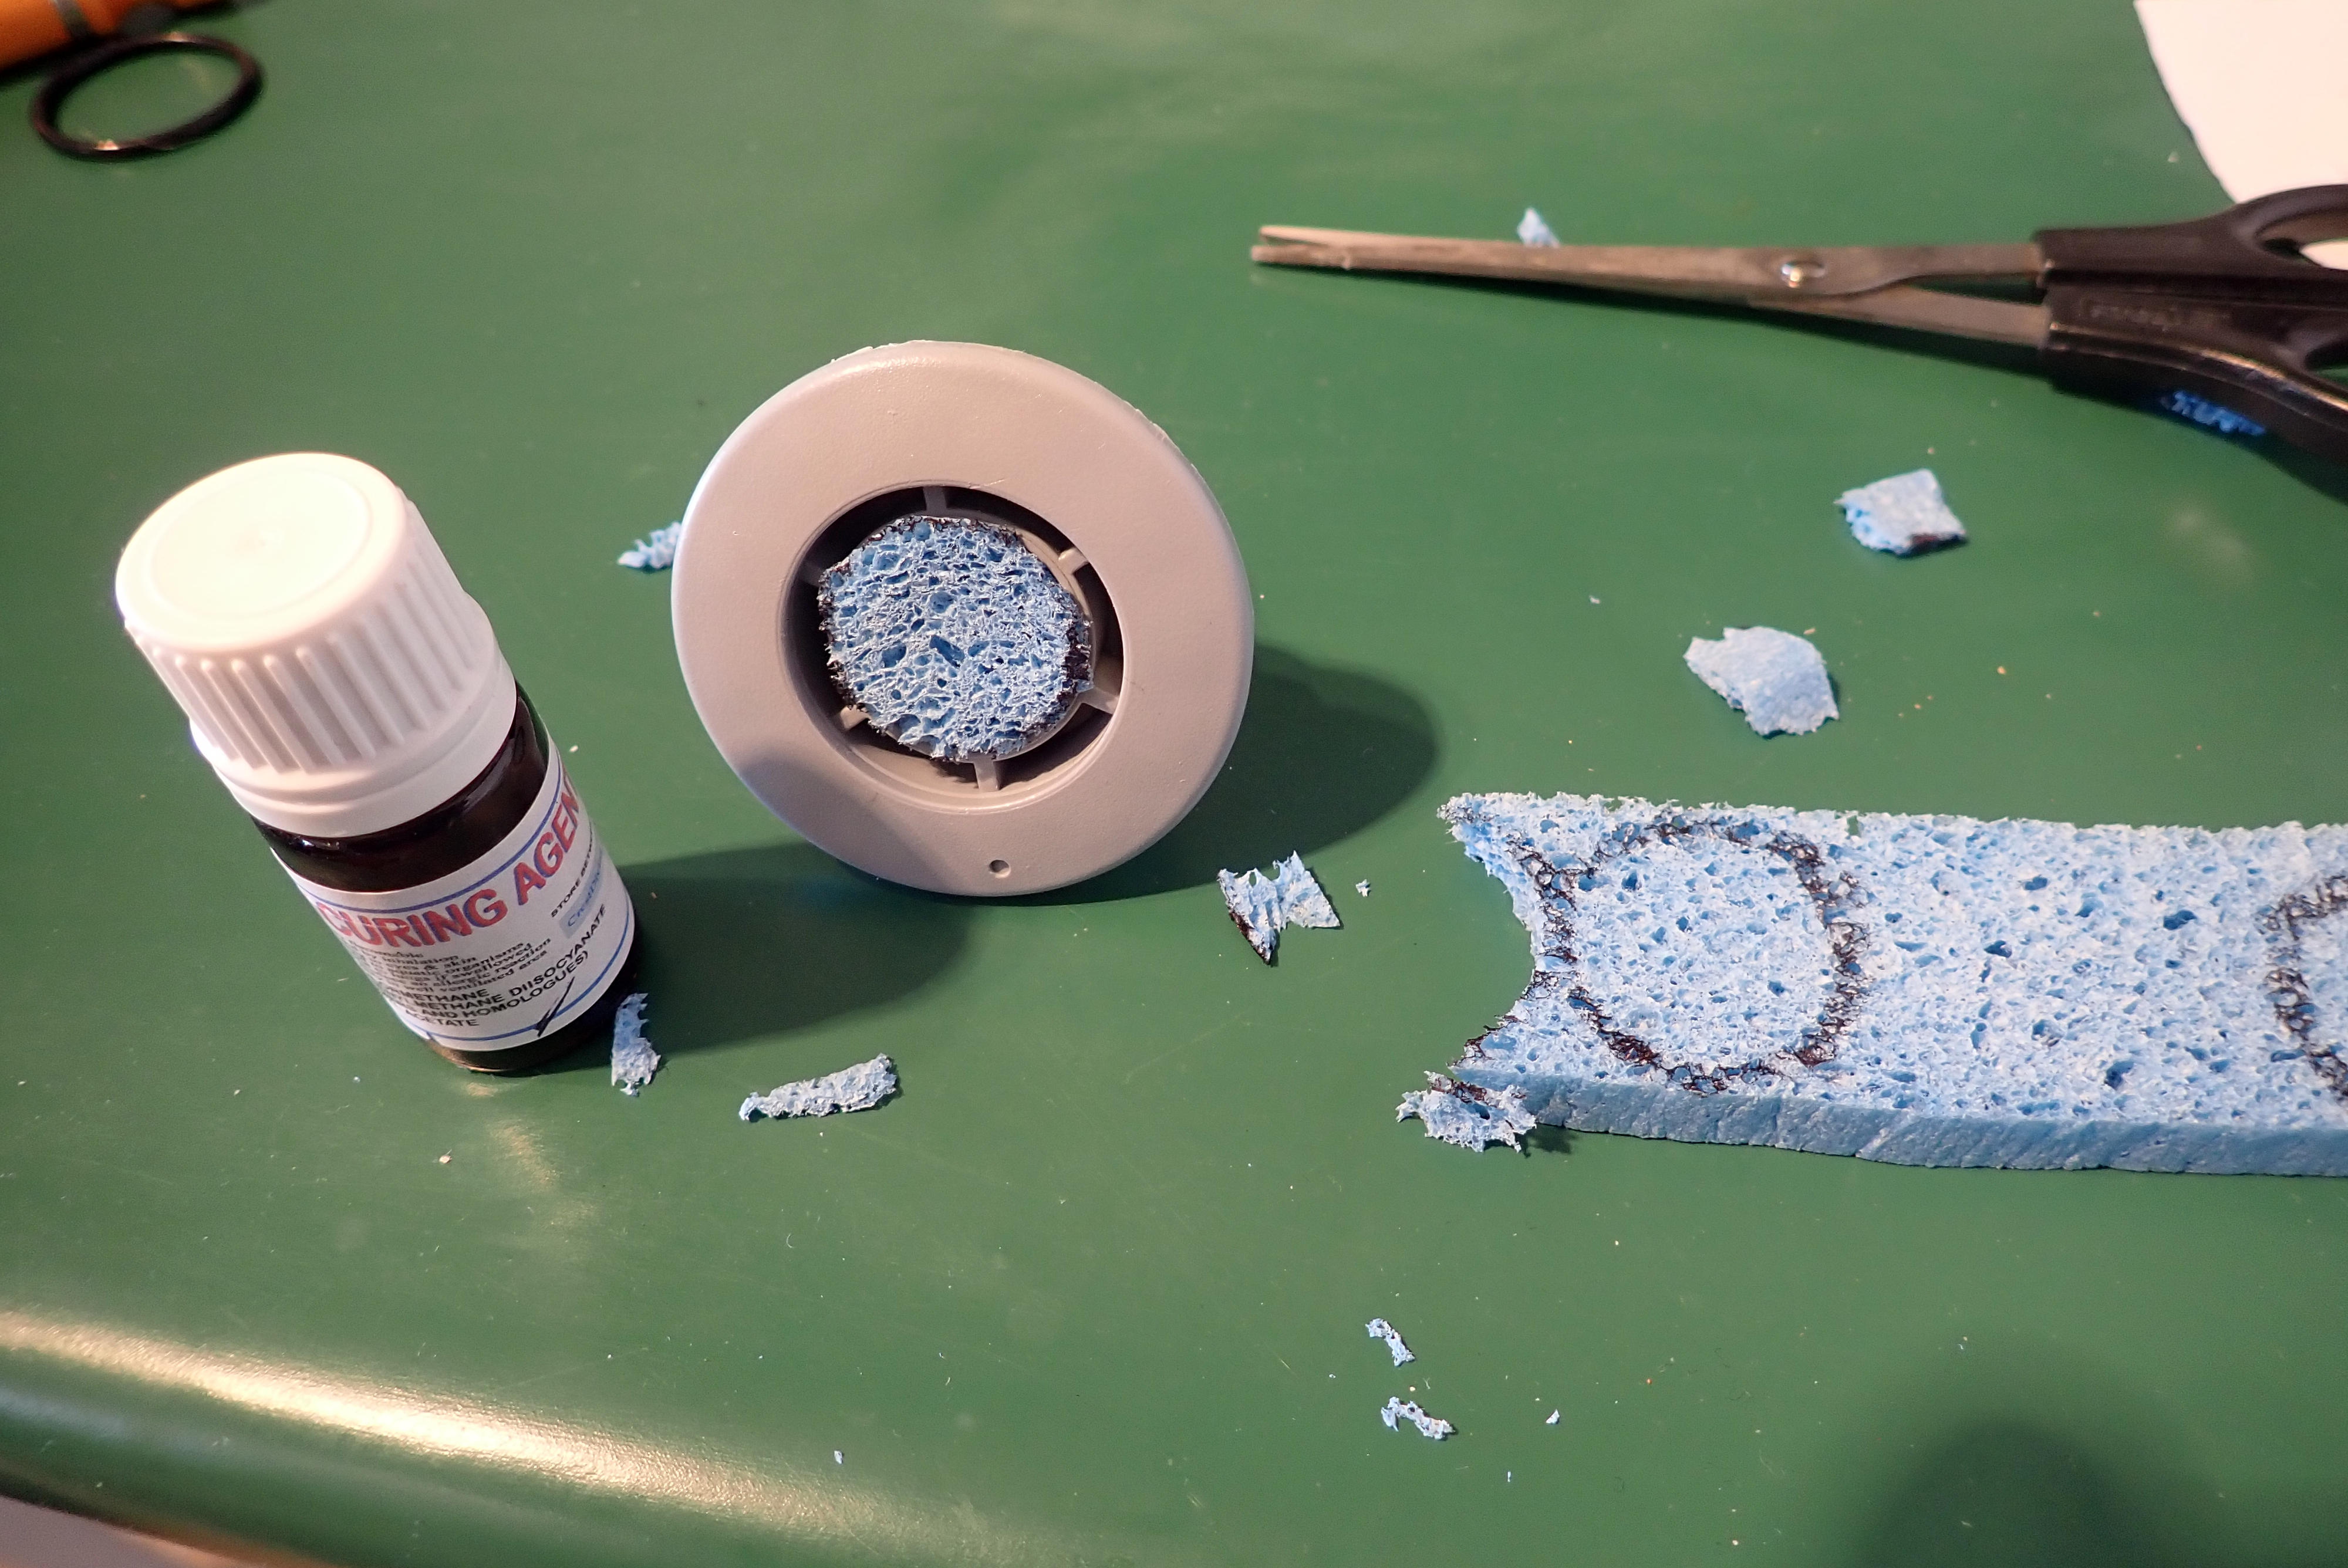
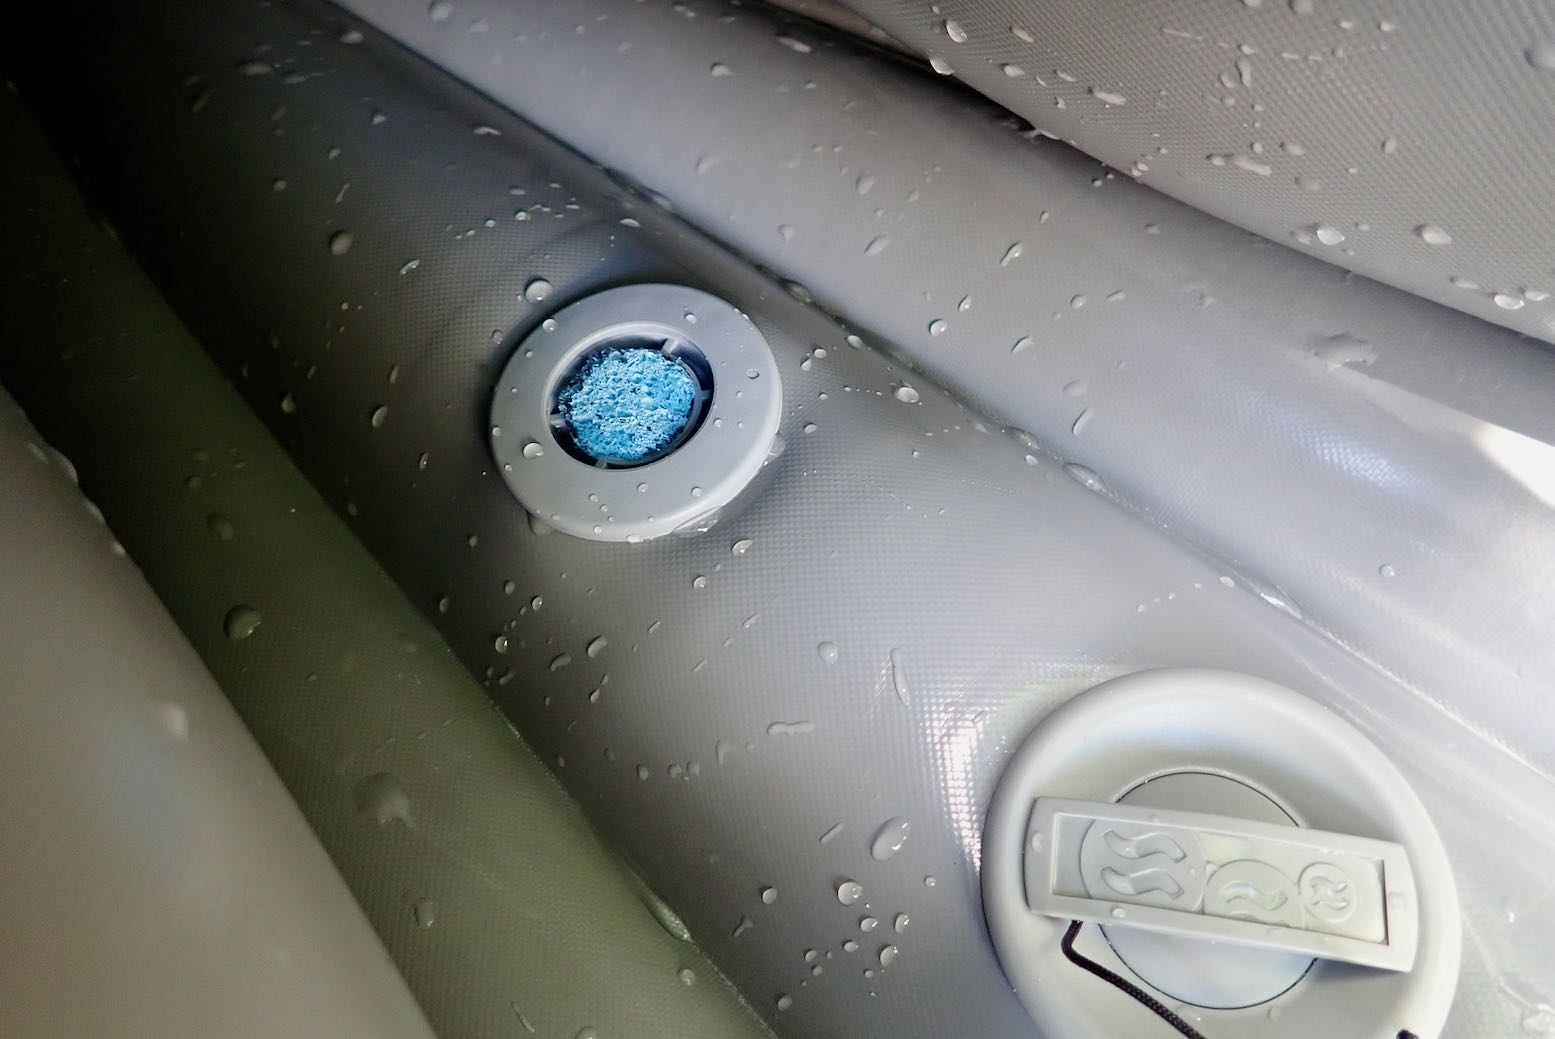
Grit-catching foam filter
Marcin suggests sticking some sponge under the vent cap to catch grains in future. Sounds like a good idea. These are easily removed/rinsed/dried or replaced by flipping off the vent cap.
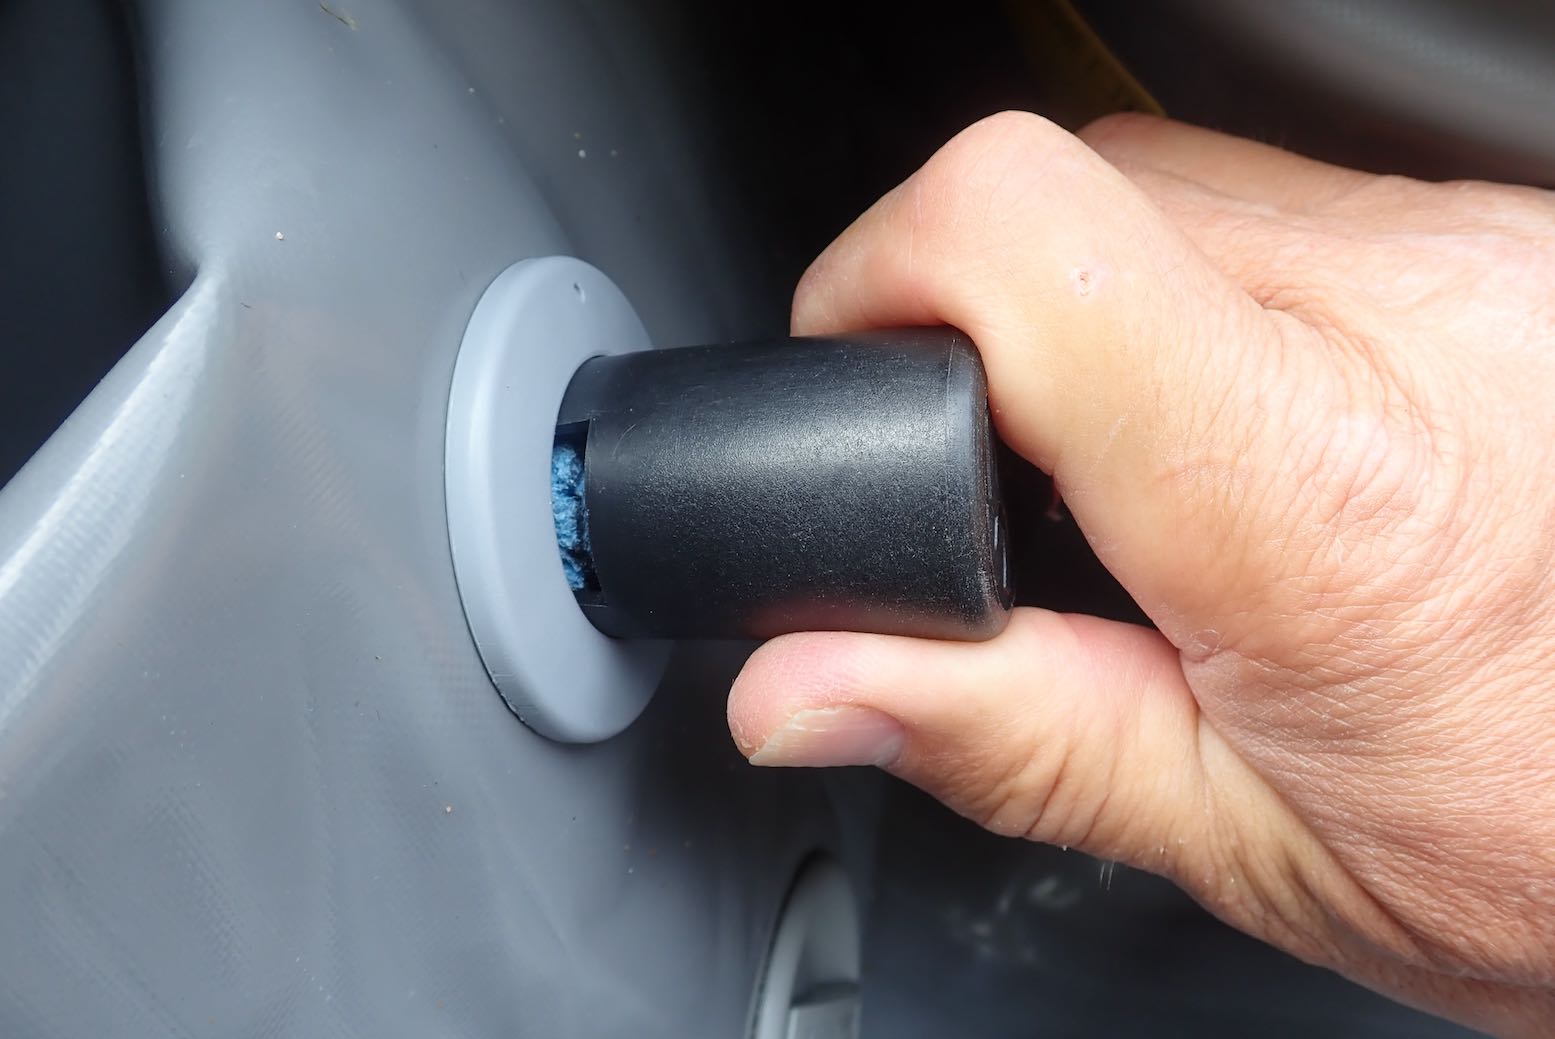
Edge caught in thread
Tooling on
Clip on the cap
A quick Hail Mary to Saint Columba and you’re now ready to refit the valve. You shouldn’t need any lube other than a bit of water for things to reassemble smoothly, though I decided to lube the o-ring with some TiZip silicon grease. I found as you start screwing in by hand it feels like it’s cross threading. It isn’t: the edge of the fabric is getting caught in the thread. Back up and jiggle the valve body and loose fabric around to make sure the body has slotted and centred its flange into the fabric hole. Pump back up, tighten the PRV down some more, but probably don’t clip on the vent cap just yet as you may be going back to square one, as I did (partly because the fitted manometer was leading me astray).
Now flip the stern back downhill and let the water slosh back over the Seawave’s valves. I found the PRV purged for about a minute, then abruptly stopped with an odd underwater squawk … but carried on leaking slowly. Another removal and check and refit and there’s still a very slow leak – a 2mm bubble every 2-3 seconds, but with the floor now lying in the warm afternoon sunshine, that may be normal purging. I decide it’s as fixed as it can be. A few hours later, all was normal again and we are all much the wiser.
Moral of the story: if you think sand-laden seawater may have pooled in your PRV (most likely from crashing beach surf, not normal, deep-water paddle-splash), back on shore flip the vent cap off and rinse the PRV cavity with fresh water, ideally flipping the boat upside down, so any grains flush out.
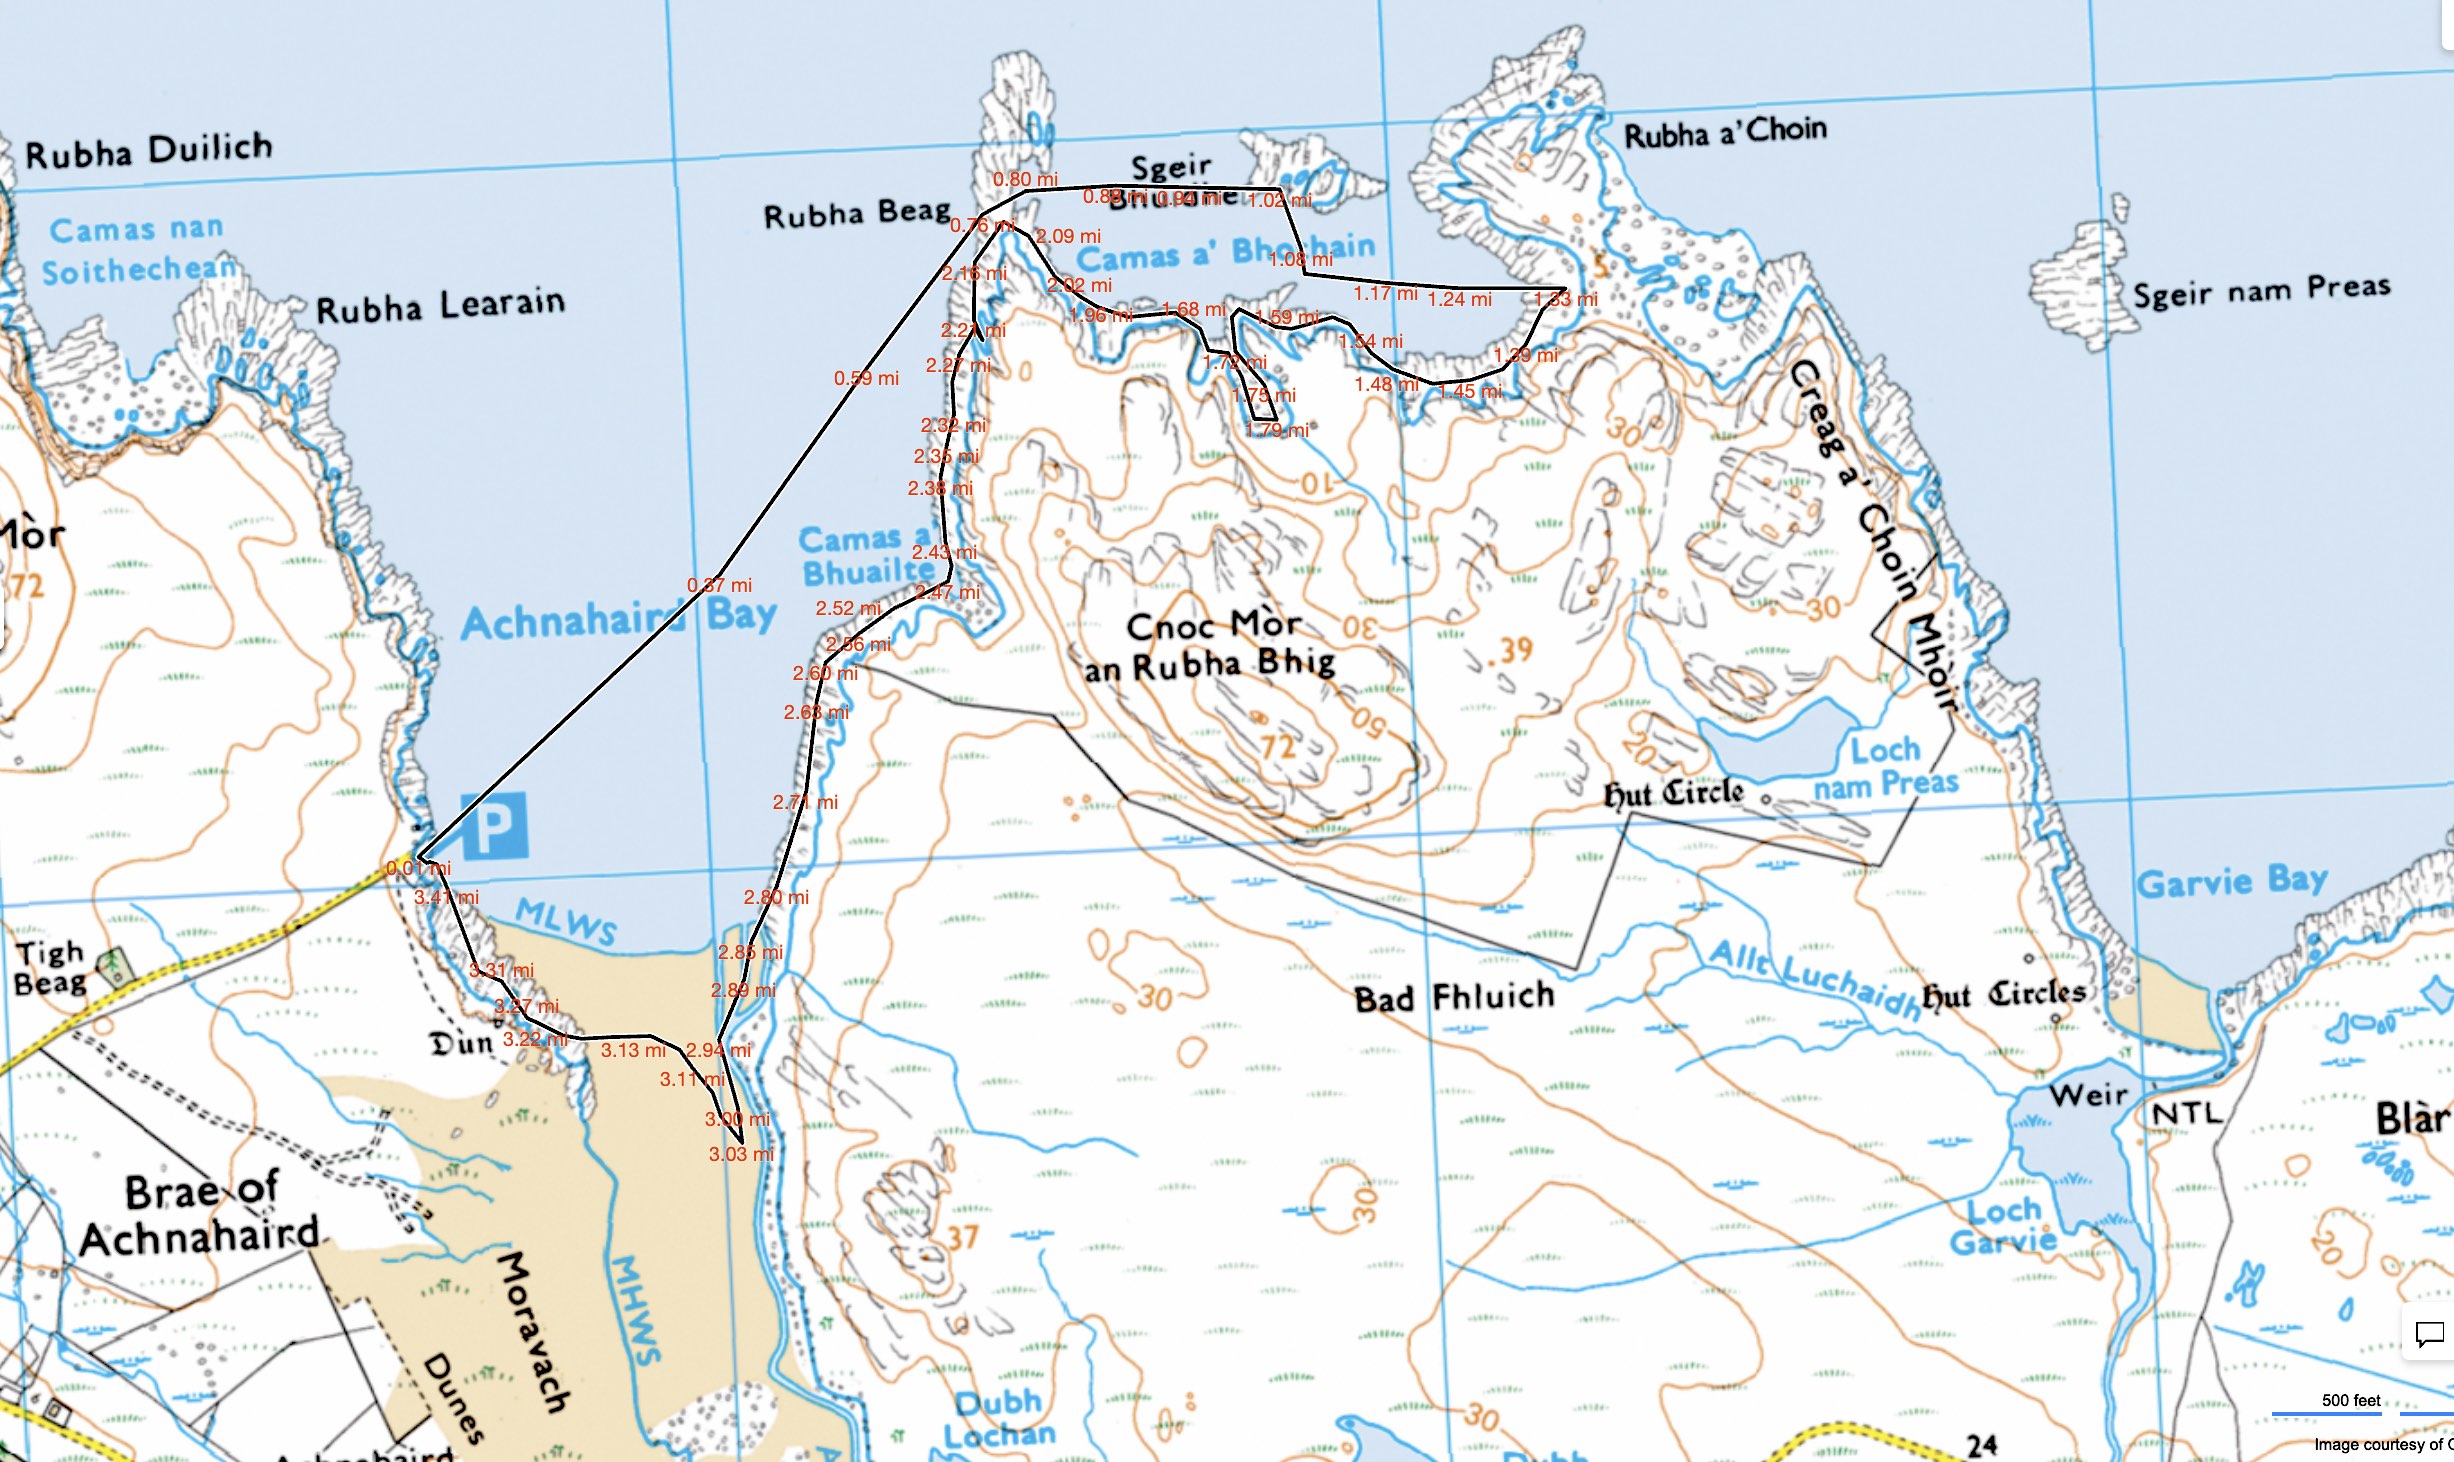
Around here the inshore sea paddling is exceptional, even if packrafting the inland lochs is also pretty good. Having done most of the latter routes, I thought I might try some coastal packrafting. Garvie Bay arcing west to Achnahaird Bay looked like a good one and happens to parallel probably the best walk on the peninsula which we’ve done many times. That route could be a 20-km combination of cycling, walking and paddling, but as it was the last calm evening for a while, we thought we’d go out together in the kayak and I’d try the packraft on the way back. That way everyone got to play.
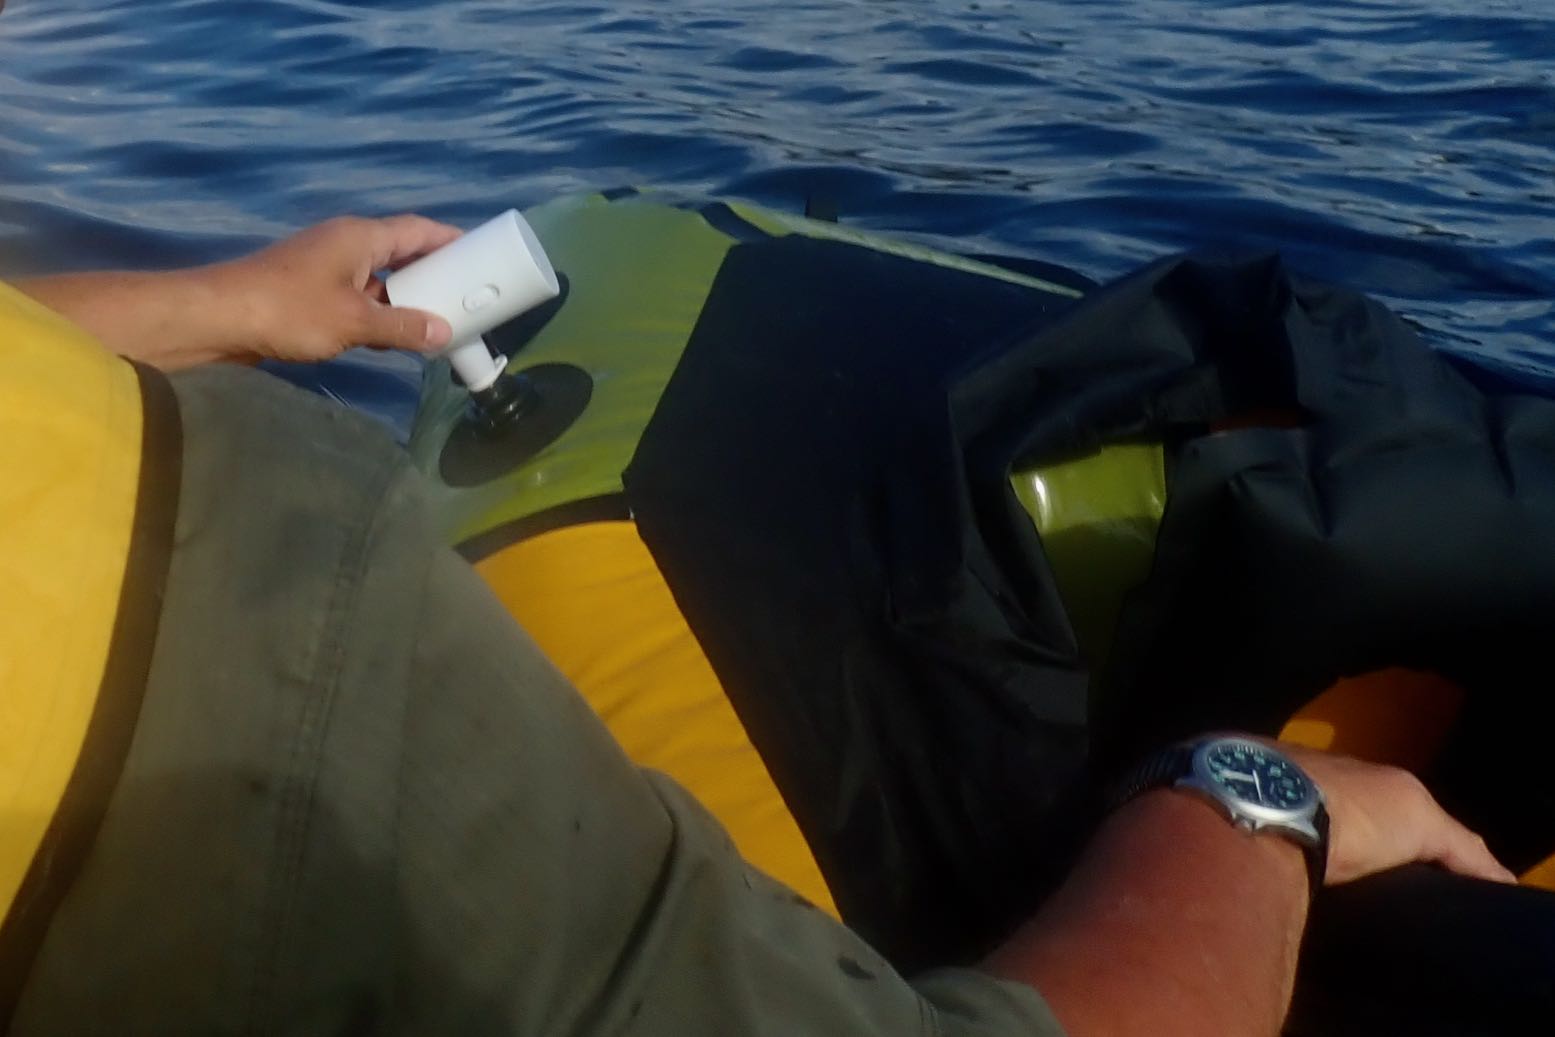
A light NW breeze blew onshore as we cut across Achnahaird Bay like a blue fin tuna. The approach of HW meant we slipped through the submerged skerries of Rubha Beag and into the crab’s claw inlet of Camas a Bhothain (Bothy Bay). This seemed a good spot to deploy the packraft with the aid of my exciting new gadget, a mini electric pump. I unrolled the boat over the water and let the pump buzz away for a couple of minutes, topped off with the hand pump, then clambered aboard.
Buzzing noise
Man the lifeboats!
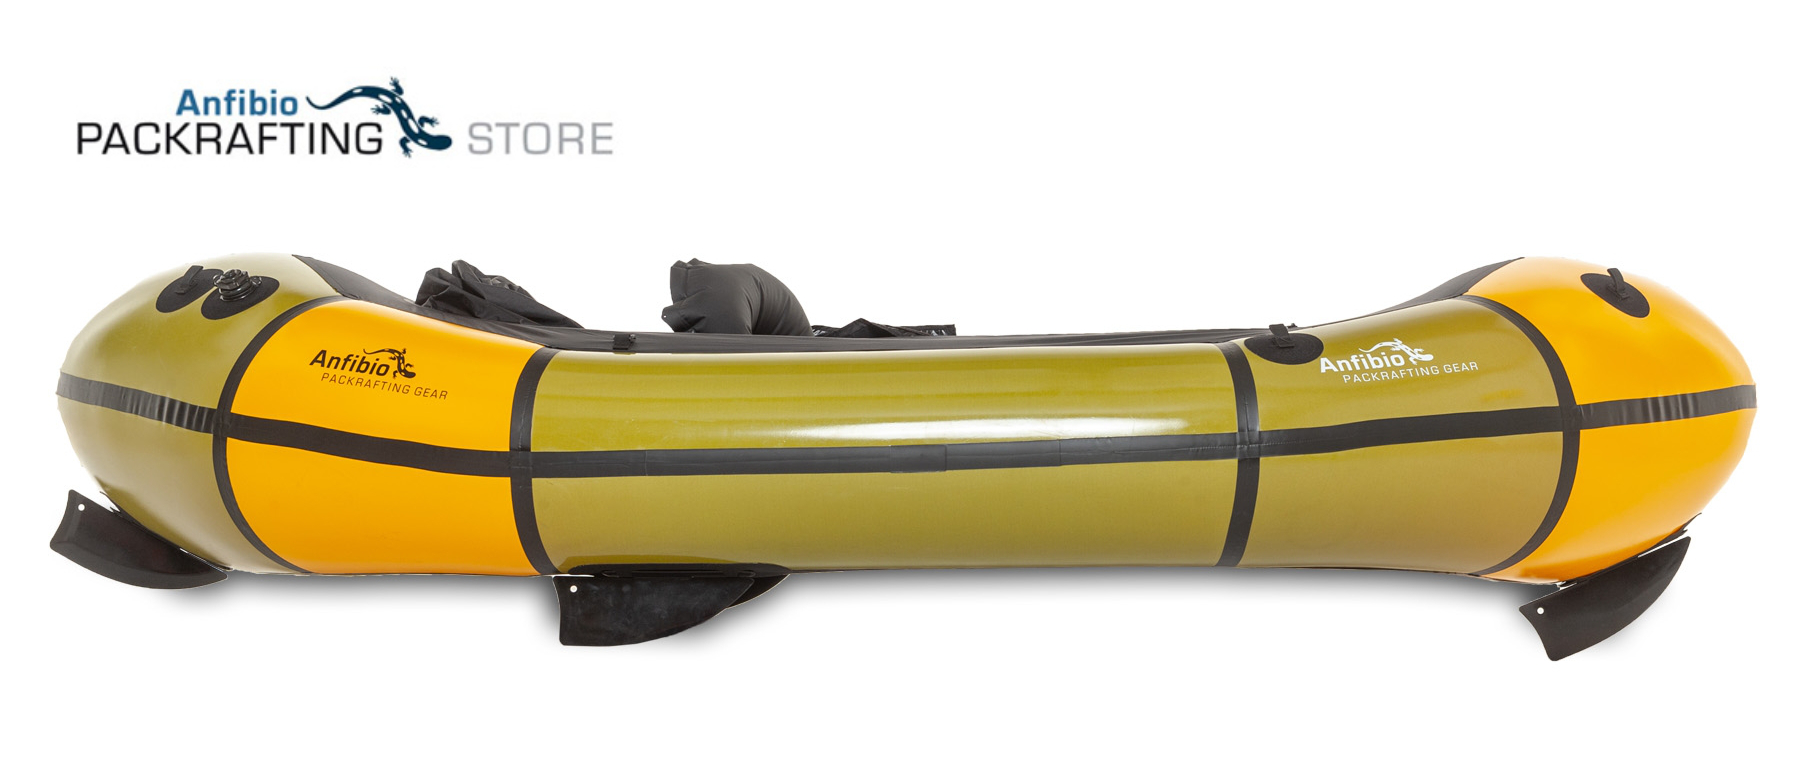
Paddling away, I realised this was the first time I’ve paddled my Rebel 2K unloaded and I was a bit shocked by the bow yawing. Now fully back-heavy, one good swipe of the paddle and it could flip a 180°, just like my old 2010 Alpacka Llama.
Ah, but in my haste to launch the lifeboat I’d forgotten to fit the also-untried skeg which comes standard on the 2K. I waddled over towards Rubha a Choin beach and slipped it on easily, while the Mrs transferred to the Seawave’s front seat.
I’ve been ambivalent about the value of a skeg on a packraft, but now back on the water the yawing was notably reduced. If you think about it, a packraft actually pivots from a point around the middle of your swinging paddle, not from the stern, as it feels from the seat. The centre of mass behind the pivot point does make an unladen bow yaw more, but the stern will yaw too; just less and unnoticed.
Skegging ‘eck!
On the Wye my 2K was fully loaded with the centre of mass moved forward and which minimised any yawing, even without a skeg. (With a heavy load over the bow a reduction in yawing is well known with packrafts). Now unloaded and with the bow riding high, swish-swosh yawing was exacerbated, but is actually happening at both ends of the boat. So any type of fin or extension of the stern (like the post-2011 Alpackas – right – and all subsequent copies) will constrain this, while not affecting steering. So, bottom line: skegs work on a packraft and are easy to retro-fit.
A short-but-wide packraft actually pivots from near the centre, not from the back as the impression suggests
All the remains is a packraft’s agonisingly slow speed. These are not boats made to enjoy the sensation of flatwater paddling; they are boats to enjoy getting to out-of-the-way places easily. Any type of disturbance to progress, be it wind or current, may slow you to a stop, or worse. Something like the longer Nomad S1 I had would be better for this while still being packable. Still, in these ideal conditions it’s nice to float along observing the coastal features.
Paddling back down the east side of Achnahaird Bay, a back-breeze made progress feel achingly slow. Lately, I’ve come to value metres per second (m/s) as a metric of wind or paddling speeds. Something moving past you (or vice versa) at three metres per second is easy to visualise, though I suppose we can all visualise a 3mph walking pace, too. It’s what YR uses and is easily converted to ‘double + 10%’ for miles per hour (so 5 m/s = 11.18 mph). Or just double it and you nearly have knots (5 m/s = 9.8 kn), for what that’s worth. Crawling past the rocky coast it looked like I was doing 1 m/s at times. We had a race: diminutive Mrs in a big, long kayak; me in the packraft. Within ten seconds the Seawave streamed away while Bunter frothed up the water like a cappuccino machine.
Oh well, you’re as fast as you are. Like cycling in Tajikistan rather than Kazakhstan, for the best experience match your routes with your mobility and conditions. Next calm day I’ll do the full Garvie loop.
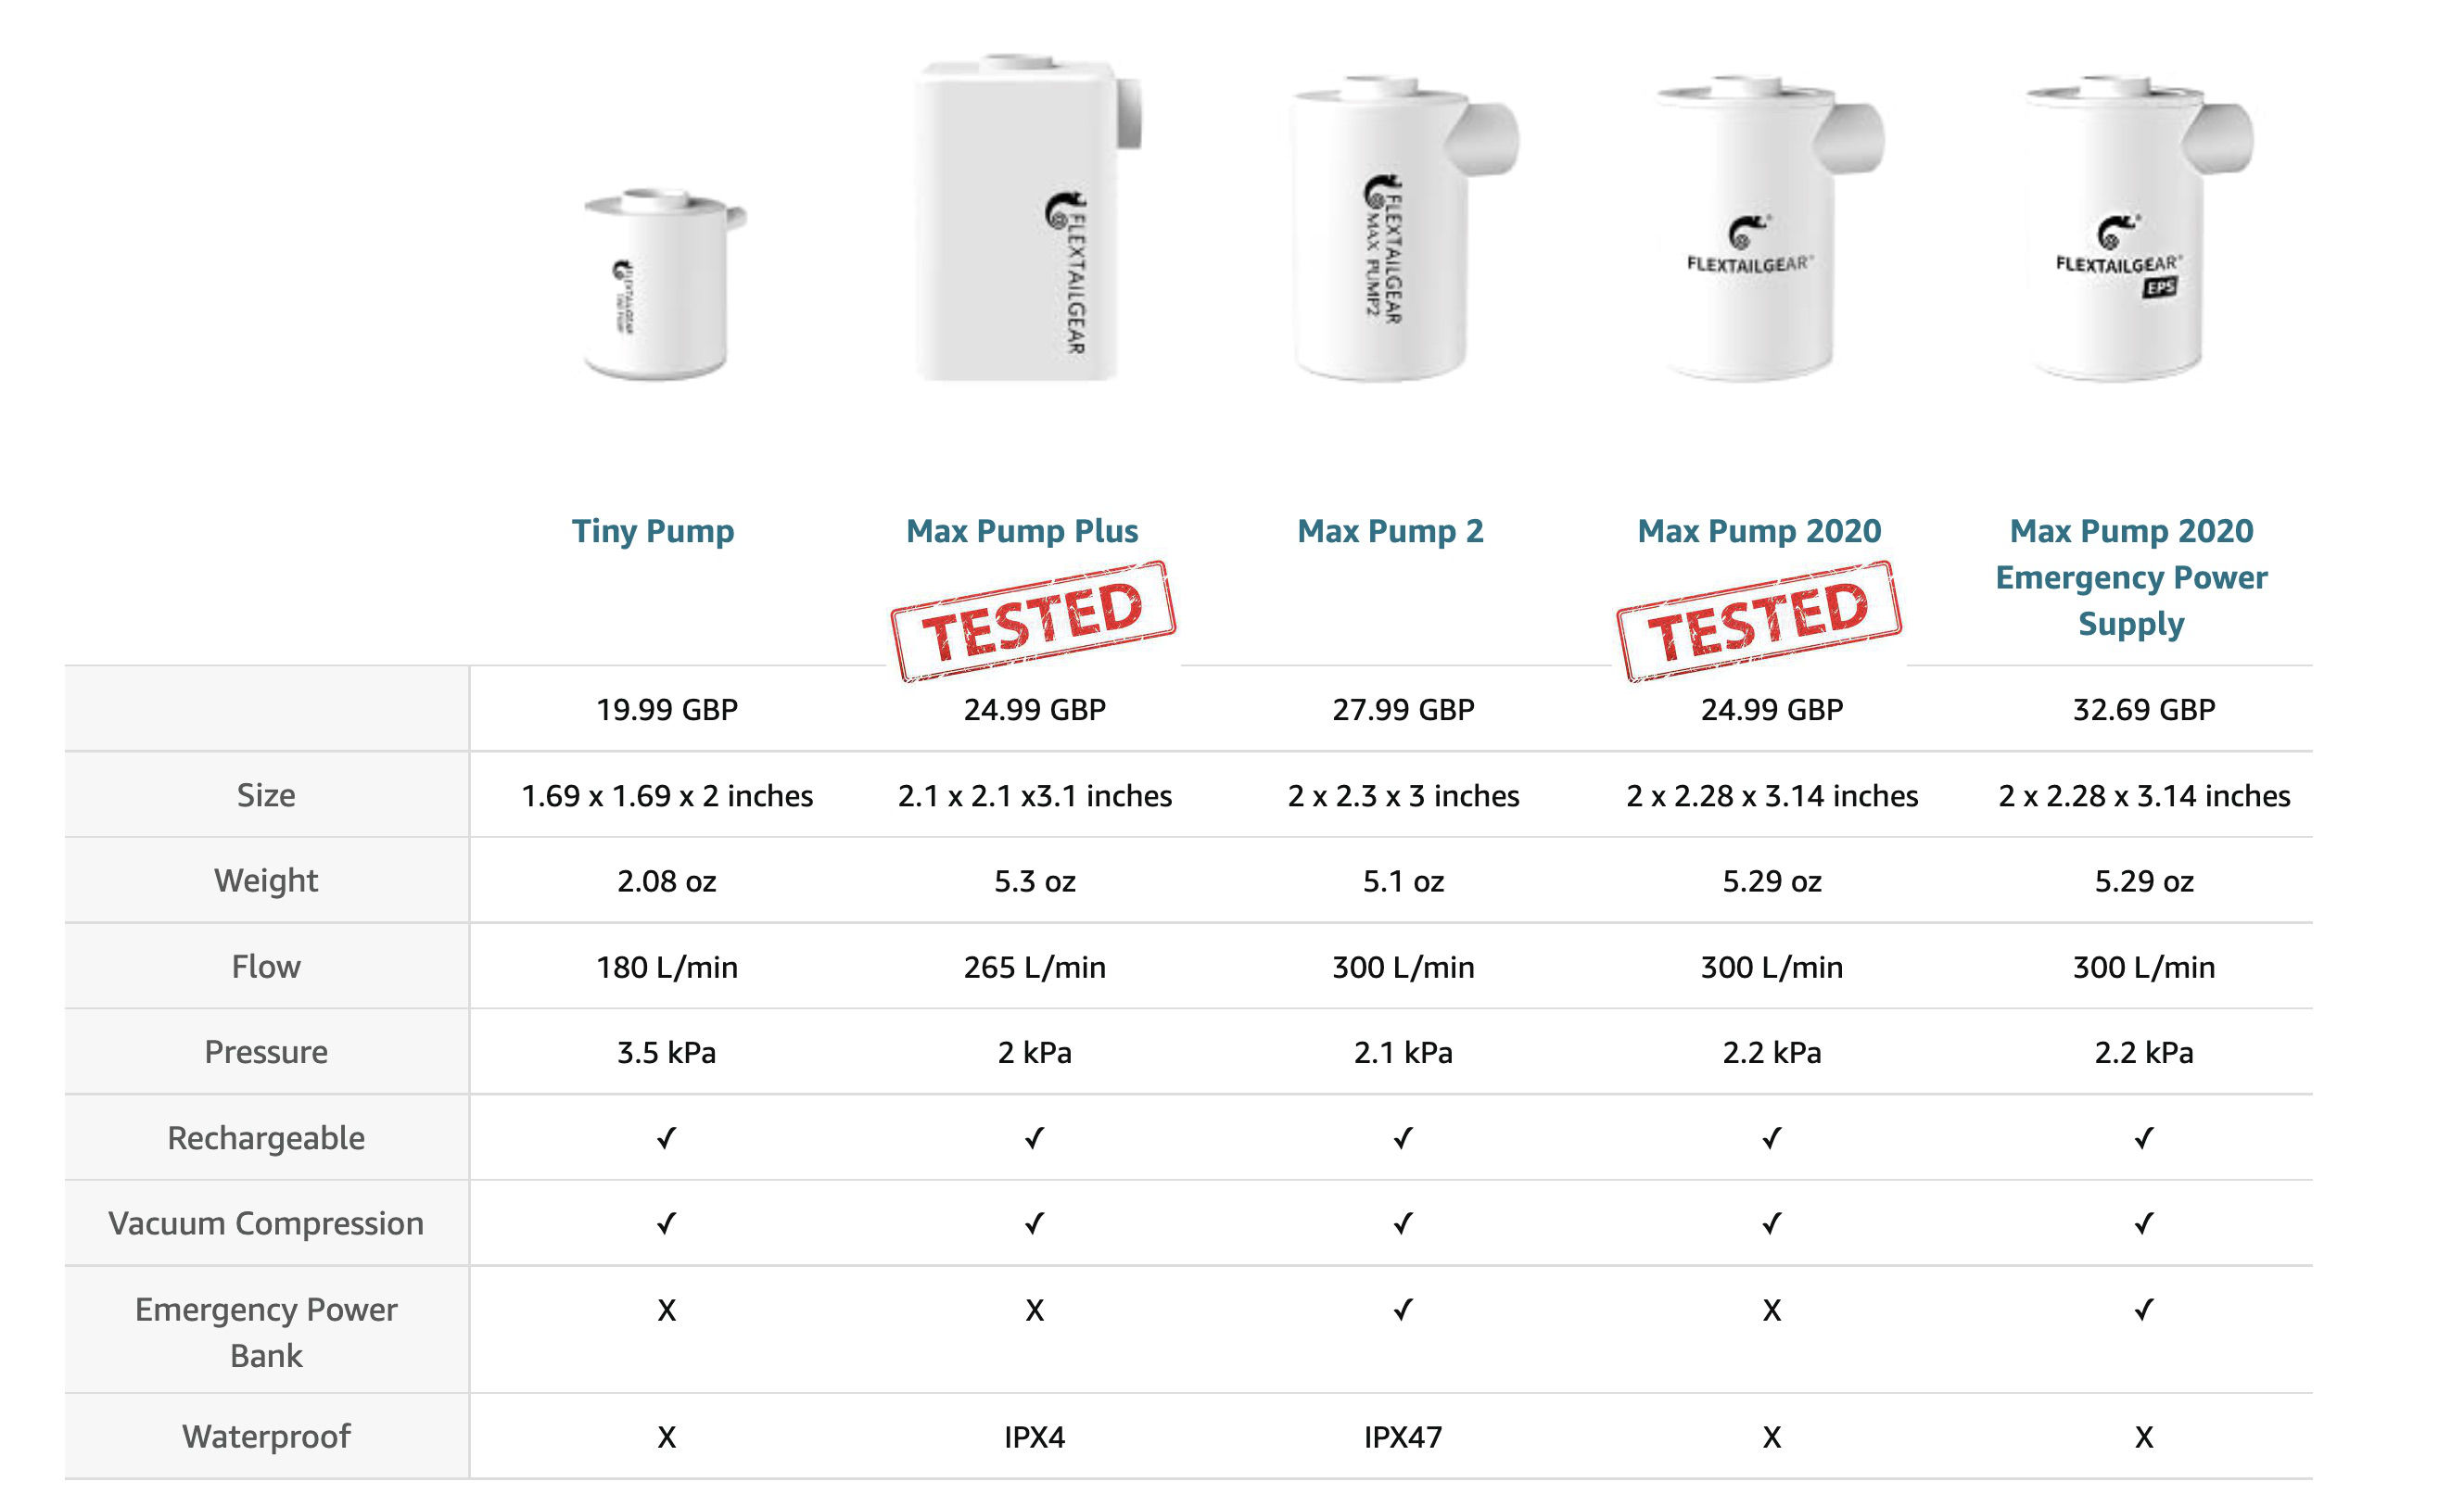
Update May 2022. Charged Max Pump packed up after a year/20 uses. Slide switch was off so not accidentally discharged. Plugged into computer; no charge light. Plugged into USB wall socket (as have done before): very bright light followed by smoke… Replaced with the boxy, orange, heavier, notionally waterproof Max Pump Plus for £23.
In a line Cheap, light, compact, USB rechargeable and fast, for when air-bagging is a faff or awkward.
Light, compact Faster than clumsy air-bagging – handy on a narrow bank/shore Can suck (vacuum) as well as inflate Ought to do > 15 fills Max Pump as a conventional stiff slide switch, not ‘touchy’ inductive switch on the newer Max 2 version. Max Pump Plus has a silicon covered press switch. Will do other stuff, like airbed mats and fire embers Newer models can be used as a power pack, have LED lights, are IPX7 rated and can be programmed to sing Waltzing Matilda.
None of the supplied nozzles with Max Pump jammed nicely into a Boston valve My Max Pump packed after less than a year and about 20 uses. Replaced with bulkier Max Pump Plus Only replaces air-bagging; still need to top up by mouth and/or hand pump Will discharge eventually, unlike manual methods, and will eventually die for good
What they say My name is Max Pump 2020. I can quickly inflate and deflate your swimming tube. air mattress. and other inflatables. With vacuum bags .I can create more capacity for your suitcase and wardrobe at home. When in outdoor.I can provide oxygen for your burning ovens. enabling you to enjoy your food more easily.
Apple, pump with nozzle and my Boston adapte
rMax PumpMax Pump Plus
Review An electric pump to save a couple of minutes’ packraft air-bagging? Do me a favour! That’s what I think when applied to bulkier IKs where a two-way barrel pump is fast and easy. But factor in cost, weight, size, USB rechargeability plus supplementary uses and, for a packraft, FlextailGear’s range of pumps (above) is worth a punt. Air-bagging is a clever idea to inflate a typical packraft, but on some days it’s not the most intuitive of actions, perched on seaweed covered boulders. Once a day is fine, but on a trip where you’re airing up and down a few times a day, the effortlessness of the Max Pump is welcome. A good case to point was my paddle on the Wye where accessing my Rebel 2K’s internal storage pockets to get to the camping gear each night meant re-inflating the boat every morning. The Flex pump would have made this less tiresome. Another example is getting back from a tiring sea paddle and wanting to reinflate the boat to rinse and dry properly. Plug in the Flexy and get on with other after-paddle chores.
Max Pump adapters but none fitted a Boston valve’s two ports just right
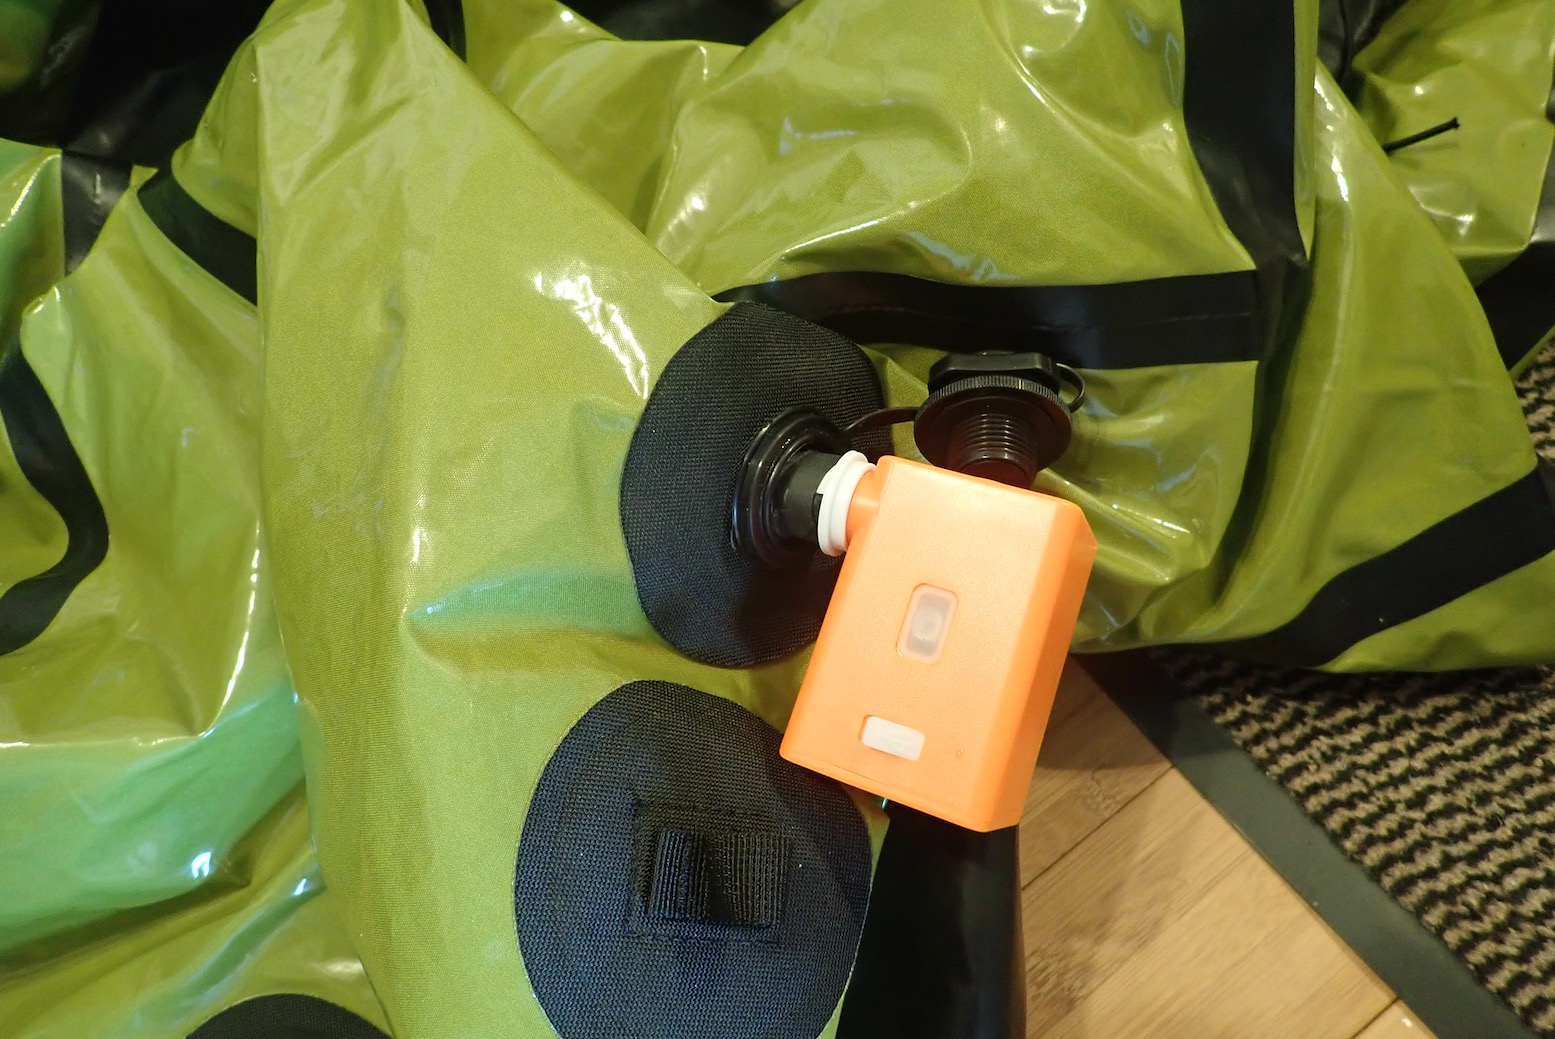
Actually the grey rubber nozzle (right) will push and seal into the main threaded port, and with my second Max Pump Plus, there was a hard plastic nozzle to fit a Boston’s mushroom valve (middle) too. But to reduce loose bits, I made a 2:1 adapter (left) to fit both ports, using tape to make a good seal.
Out of the box With Max Pump I got the pump, four nozzles, a short USB-A lead and a small bag. While one nozzle loosely fitted a Boston valve’s threaded airbag port / dump valve, nothing fitted the one-way valve body. You’d think with Boston valves so common on Chinese-made slackrafts, packrafts and cheaper IKs, this Chinese brand would include a Boston valve nozzle. Luckily, I’ve amassed loads of adaptors and nozzles, and one 16mm (5/8″) adaptor fitted the pump’s main nozzle and jammed into the Boston port. [The orange Max Pump Plus included a nozzle for the valved port].
The rubber bung adapter fitsWith added tape my combo fits both ports
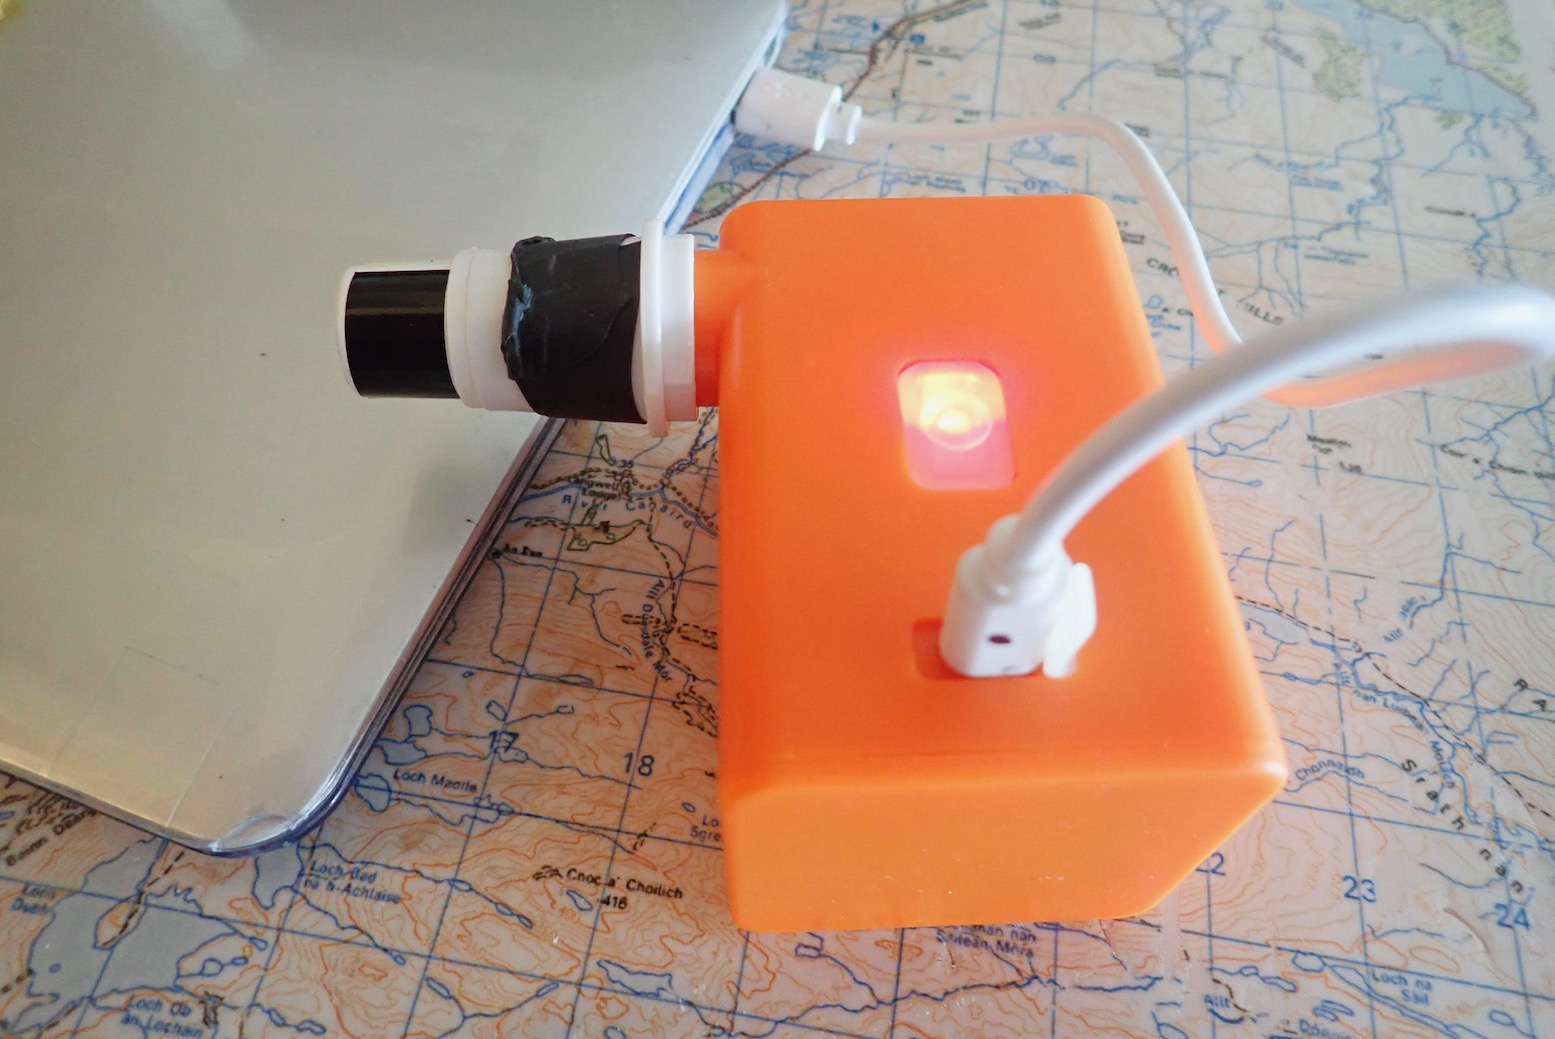
Off a laptop allow two hours to fully charge the pump out of the box. After just three fills (12 mins?), it took just hour or less to get the green light. Off the mains is faster.
Two-and-a-half minutes
I estimate the volume of my Rebel 2K was 240 litres, (12 jerricans) so at the claimed flow rate of 300 L/min (currently the highest in Flextailgear’s range of mini pumps), that ought to take less than a minute. In fact it took 2:30s to reach the equivalent of airbag pressure (full volume; above). But this was pushing through the one-way valve, (like a car tyre) not direct into the hull via the airbag port / dump valve which has no resistance. Now with a bigger TXL with a volume of around 350 litres, I inflate directly through the screw port into the hull: 2:20s and if you’re quick you don’t lose much air screwing the cap on. Then I Flex for another 30s via the valve (or do 20 breaths to save the battery) and finish off with the handpump. According to the Flextailgear table above, my heavier orange Max Pump Plus has 10% less power and max pressure than the Max Pump, but it’s hard to verify any of this data other than weight. The fact is, either pump does a packraft in a couple of minutes. Max Pump Plus: 170g + nozzles.
My comfy full-length Exped Synmat XP 9LW – which also needs air-bagging to avoid humid breath – inflates in just 25s. And as many will know, air-bagging a sleeping mat in a cramped tent when you’re worn out is not one of the joys of camping. The Max 2020’s 3600mAH lithium battery is claimed to run for 40 minutes, so that ought to do at least 10-15 raft fills plus a few mats, when camping. I imagine the Max Plus will be the same.
Deflating either of these items is of course as easy as rolling them up, but getting the last bit of air out can be tricky, even though it can save a lot of packed volume. Pump suction definitely works on my Seawave IK because the one-way valve can be pulled open with the bayonet nozzle. On the packraft and mat, you have to suck from the unvalved airbag port, and by the time you’ve plugged that, some air gets drawn back in. I find just rolling up, squeezing, then sucking the last of the air by mouth works best, as your hands are free to get to the valve cap fast.
Max Pump Plus will do my Anfibio TXL in under 3 mins
Last word to Sven from Anfibio: “Can’t live without one anymore. Cannot remember when I last used an inflation bag.” These young people, honestly.
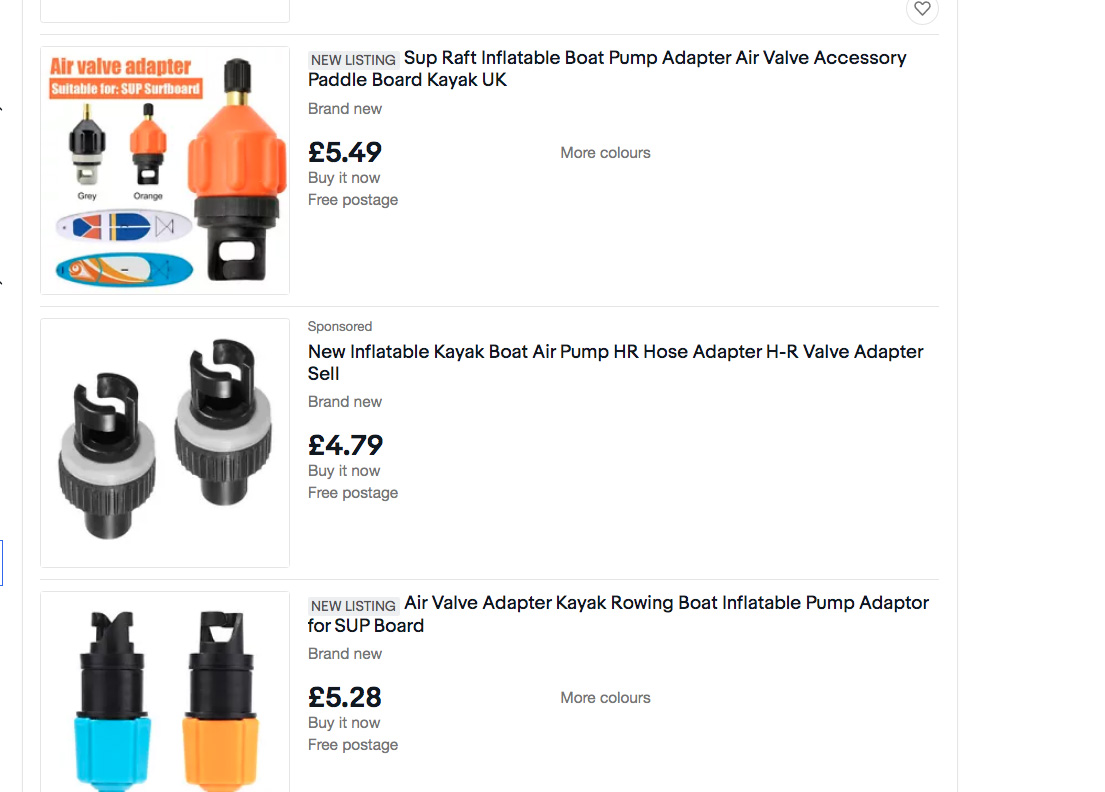
You may have seen these bayonet/car tyre adapters on eBay in recent months (left). The bayonet end clamps into your IK’s raft valve (won’t work on Boston valves). The other end is a regular Schrader valve like on your car/bike wheel. Attach that to your 12-volt Halfords tyre compressor and you can inflate your IK from your car battery. No more of that effortful, back-breaking pumping!
Me, I’ve never seen the value of electric pumps for IKs. (Packrafts are another matter). You can only use them near a power source, or the rechargeable battery will run out. And how hard and slow is inflating an IK with a good barrel pump anyway? As IKs catch on with more mainstream recreational users (whose cheap boats may come with a rubbish pump), some find manual pumping too tiring. What is this world coming too?!
The difference between tyres and IKs: • a car tyre is a low-volume, high-pressure vessel (~30 litres @ ~30psi) • an IK has high volume but runs low pressure (3 chambers of 50–160 litres @ ~3psi). Drop-stitch has less volume but runs much more pressure.
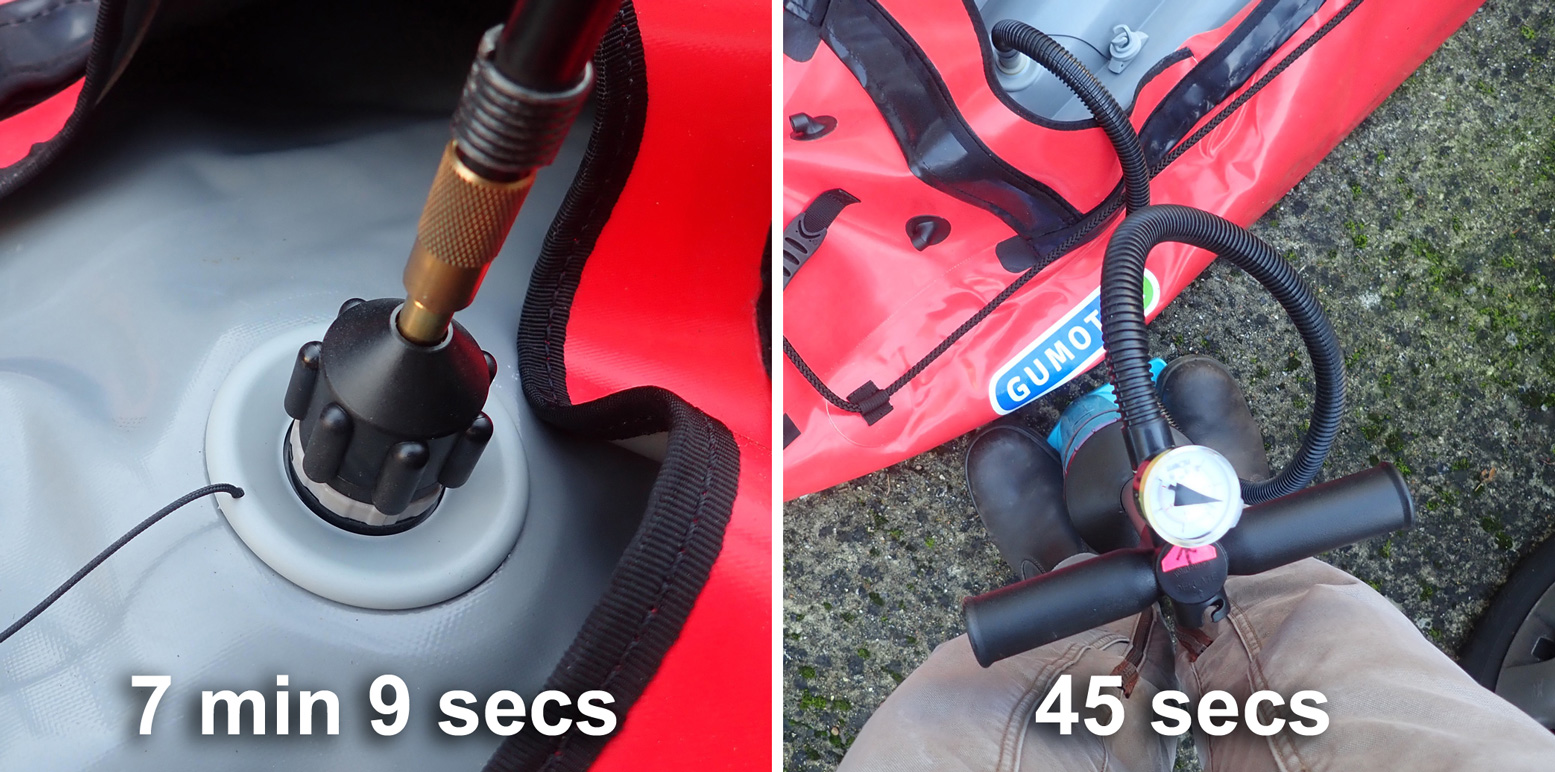
That’s up to five times more volume in an IK, but at a tenth of the pressure. I would guess the swept volume of my better-than-average car pump (left) is 3–5cc. My Bravo RED 4 barrel pump is 2 x 2000cc (it pumps on the up and the down strokes). Even if my 12-volt compressor whizzes along at 1001rpm, it will still take a long, long time to fill a 160-litre IK floor. But for a fiver, I thought I’d prove myself right.
The Test The easiest way was to pump up my Seawave’s floor to the point the PRV purged at about 3psi. The actual psi is immaterial but it’s consistent.
No surprise: it took less than a minute to pump up the 160-litre floor with the barrel. With my car tyre pump it took over 7 minutes. And if you want say 4psi in the sides, or a 10psi drop-stitch boat, the duration of the tyre pump (or effort with the barrel pump) rises exponentially. It will take forever with the car pump adapter and I think the tyre pump would auto shut-off or burn-out before it reached anywhere near 10psi.
Just a tenner on amazon
I looked into rechargable or D-cell battery or mains/car electric pumps like above. They go on amazon from just £9.99, or even less for mains only or 4 x D-cell battery. These may be great for pool toys, air beds and other low-pressure items like slackrafts which just need a shape, not rigidity. The Pumteck (left; £15) claims an obscure pressure rating of 4.5 kPa which sounds impressive but translates to just 0.65 psi or 0.045 bar. That is slackraft pressure; there is no worthwhile IK that runs such a low psi.
All these pumps do is save you the initial pumping which merely takes time (< 5 mins), not effort. The rechargeable ones will be spent in 10 minutes and then need hours of recharging. For a typical 3-psi IK you’ll still need some sort of manual pump to top offto full pressure; even more so a higher pressure DS IK. If your back can’t handle a barrel pump (taller pumps work better for taller folk), consider a Bravo foot pump, but with any dropstitch IK there is no getting round the need for a high-pressure barrel pump or a very expensive SUP electric pump.
In a line Super-light but sturdy packraft with a low-maintenance solution to in-hull storage.
Simple but well-detailed design 210-D fabric feels durable Optional mini-hand pump works very well and can be deployed on the water Holes easily sealed from the inside with a stick-on patch Compared to TiZips, RTC is a simpler, lower-maintenance way to achieve in-hull load carrying Raised floor lifts paddler, limits wear and may help limit yawingLike most short packrafts, it’s not a joy to paddle on flatwater for hours RTC will need care and may need practice to achieve a good seal Floor is same thickness as hull, not double-weight, as is usual.
What They Say Extremely light packraft with roll closure (RTC), which enables luggage to be stowed in the tube and thus offers higher transport capacity. Minimal pack size, 1kg light and robust enough for calm and tame waters allow combined adventures with increased payload. Price: from €335
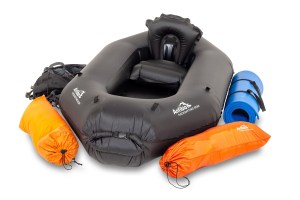
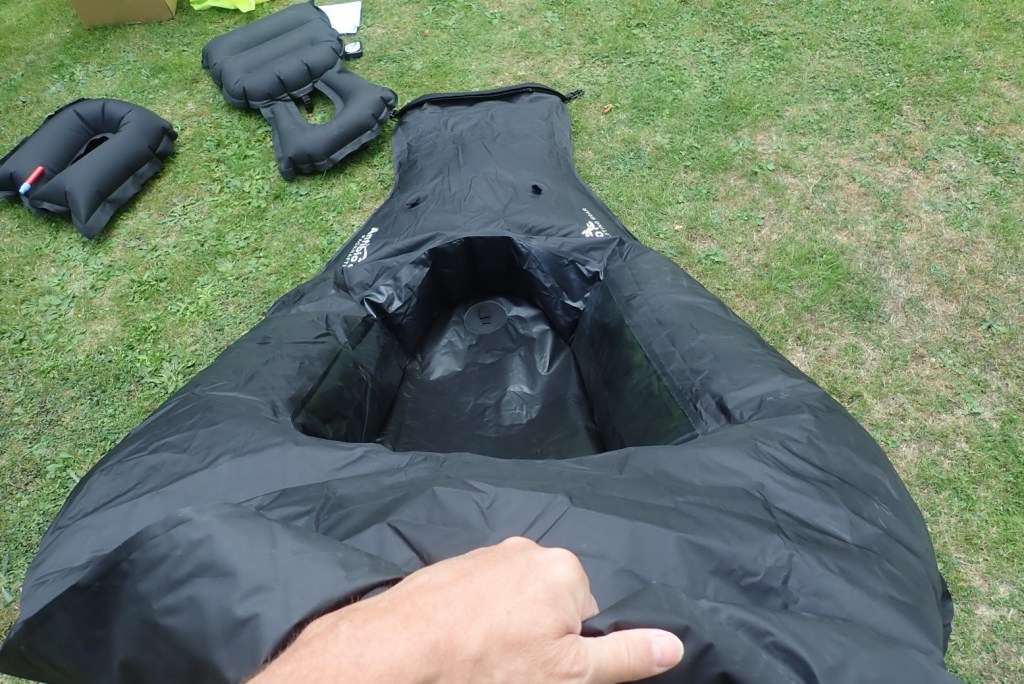
Out of the box This pre-used Anfibio Packrafting Nano RTC came with an optional backrest seat (€57), the airbag, an optional mini top-up hand pump (€10), a strap and 3 patches but no glue or instructions. The latter appear online. On the IK&P scales the boat alone came in at 1002g. The full seat adds another 237g with the horseshoe seat base weighing 135g. All the other dimensions in the image above closely match Anfibio Packrafting’s own data.
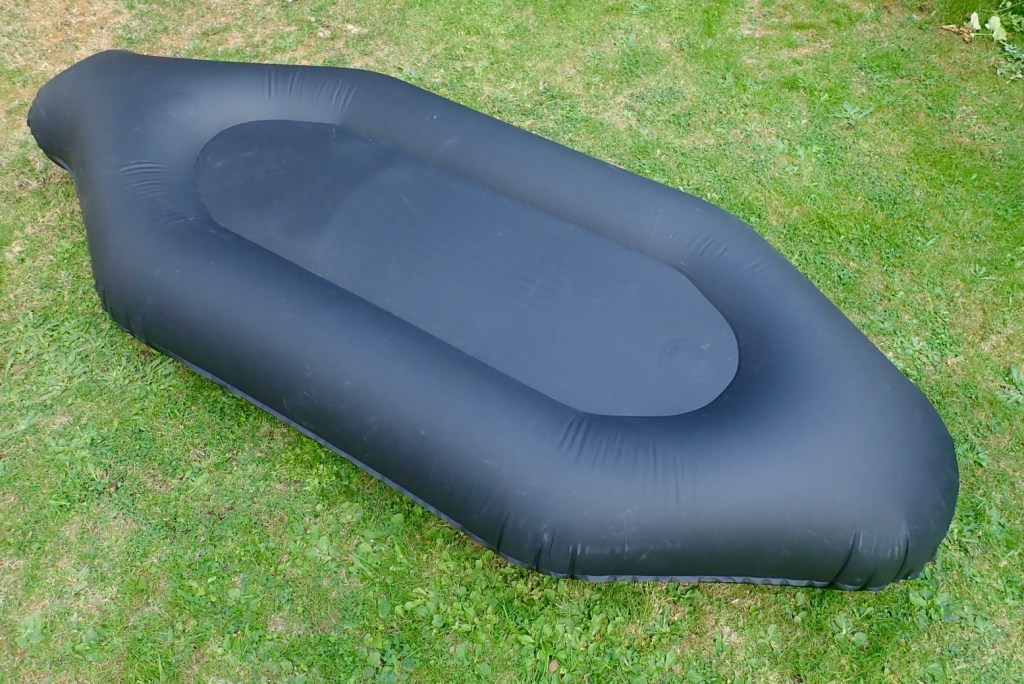
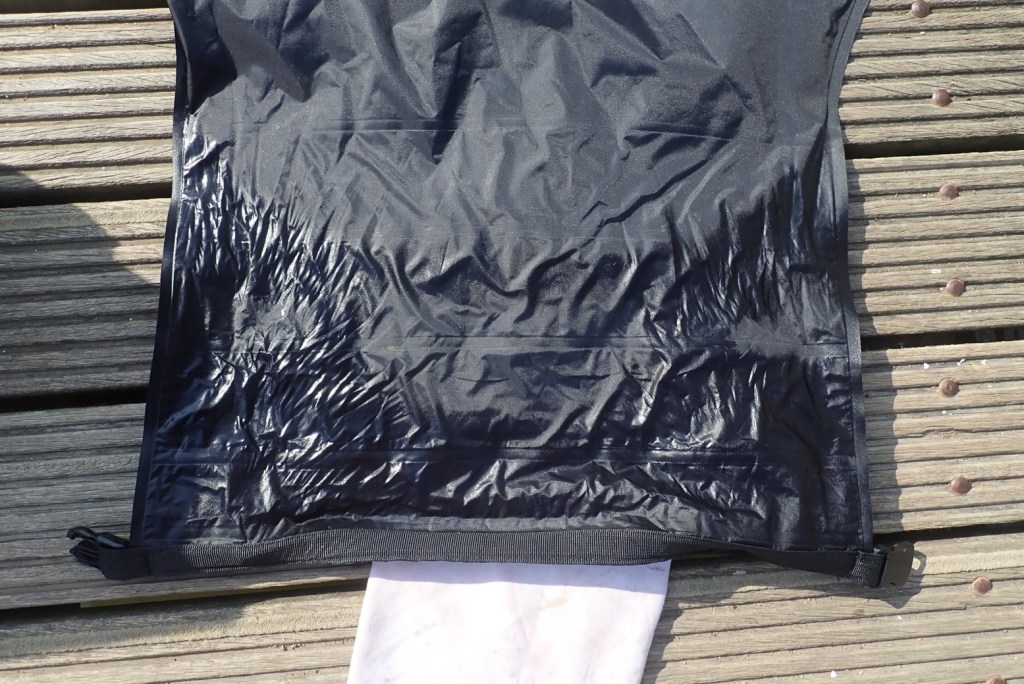
The rolled out Nano RTCThin TPU film layer to ensure a good seal
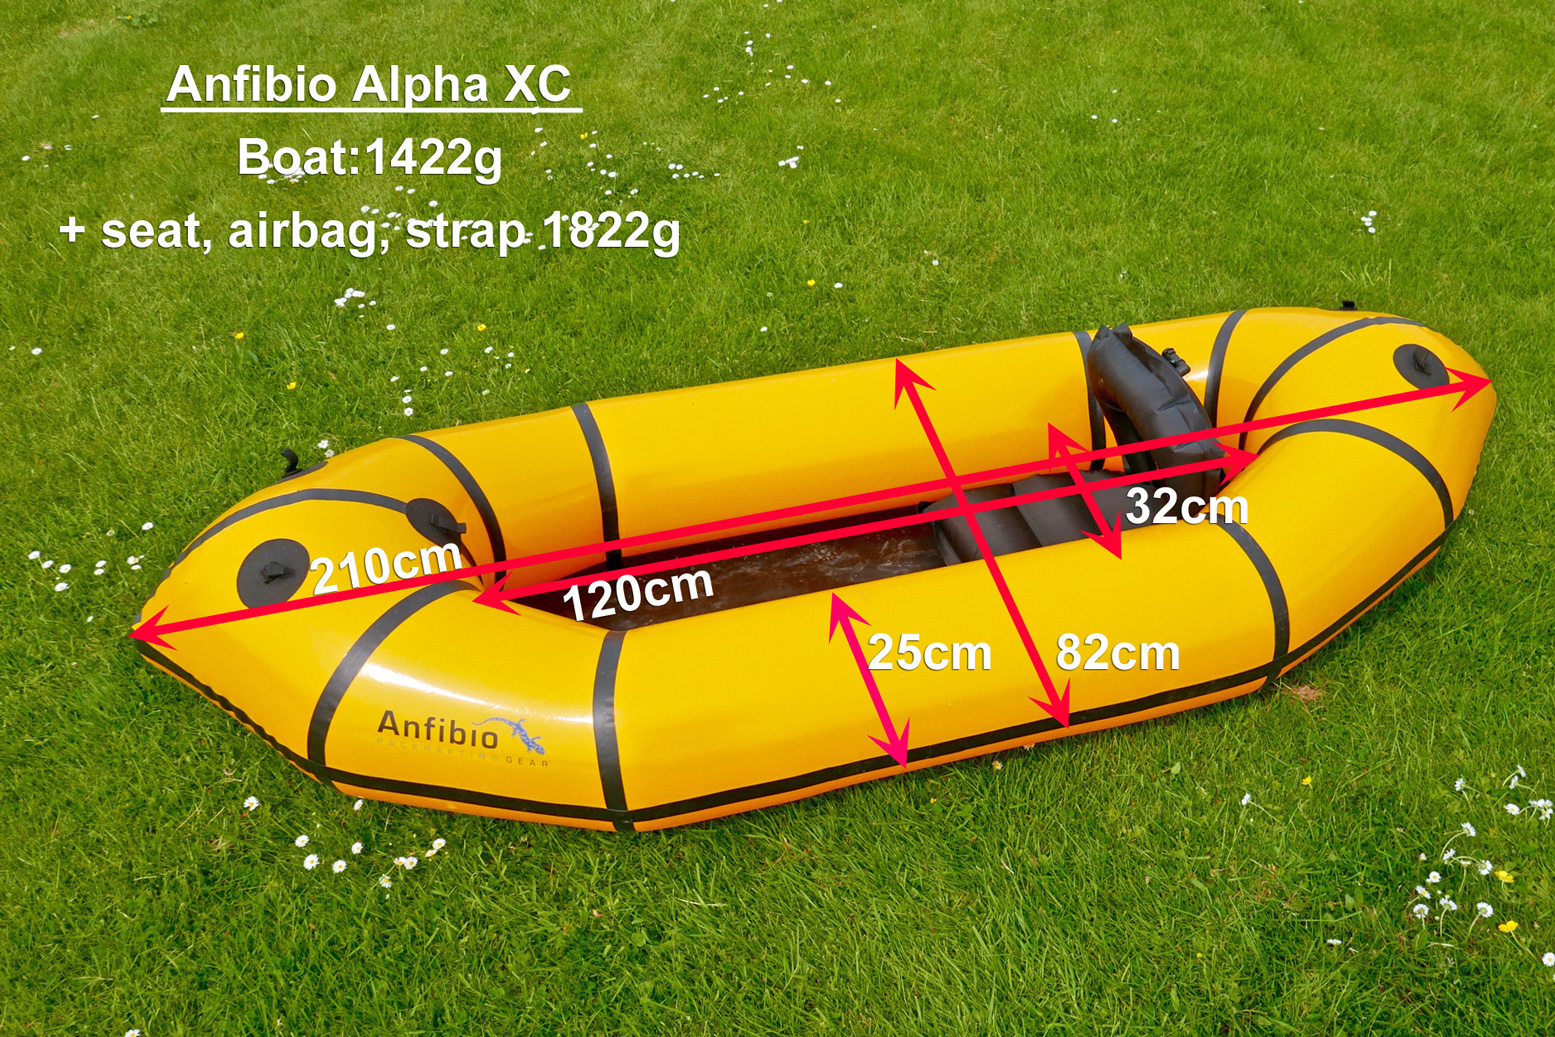
This is not your usual shiny-exterior packraft; the Nano’s coating is instead on the inside like the plain Nano SL model. The woven texture of the 210D nylon fabric still gives a sense of sturdiness which I can’t say I felt with the 75D Supai Flatwater and Matkat we tried a few years ago. Such perceptions are important when bobbing about in the middle of a breezy loch or tackling some light whitewater. Maybe it’s the black colour, but the Nano also managed to look bigger and tougher than the virtually same sized Alpha XC (left) we tried a year or two back.
The RTC is a new idea to Anfibio Packrafting, though the Rapid Raft in the US uses a similar closure. The Nano differs by being a more sophisticated design, with a hull made from just three pieces of fabric: hull top; lower hull and floor; inner ring. This adds up to just two long seams which ought to mean fewer chances of errors during assembly as well as less weight. You can have the closure up-front (normal) or at the back where, with just four folds rather than five, it creates an elongated stern which adds more buoyancy where most of the weight is and acts as a skeg to limit the side-to-side yawing endemic to short packrafts. Payload is 135kg.
The RTC has an extra TPUfilm bonded inside to ensure an airtight seal, as long as you roll it up tight with no wrinkles. Providing it works, as a way of enabling in-hull load-carrying, I’d sooner put my faith in this than a TiZip which must be kept lubed and clean and dried properly to work well. At the RTC-end you have four mounting tabs on the tube top. On this you can mount Anfibio’s DeckPack, as pictured below. Bigger exterior loads may also be more convenient here if your route includes many awkward portages where carrying the otherwise heavily loaded and inflated boat may be tricky. Otherwise, there’s a tab inside the hull to secure loads and keep them towards the RTC end. You get seat mount buckles at both ends too, though I found the fully inflated seats jammed in well by themselves. There will be the age-old annoyance of the backrest flopping forward as you get in, but used RTC-sternward you can hook it upright to one of the tabs. This backrest design hasn’t changed since I had my first Alpacka Denali over 10 years ago. What is actually wanted is lumber support which is best achieved from strap-braced backrests, as in my Nomad, but that gets complicated.
Boston valve – ideal for packraftsHorseshoe seat optionClean seams all round
No you can’t inflate it by opening the RTC to the wind unless there’s a gale on, but it helps to fluff the boat out, and using the usual airbag, 5-7 scoops fills the boat, after which you top up the one-way Boston valve or by mouth. If you find the latter a bit awkward, I find a section of half-inch garden hose works as a ‘blow-straw’. Or use the top-up handpump (137g) to get maximum firmness. On the Nano it worked very well and for only €10 I’d say is a worthwhile addition for any Boston-valved packraft.
“The RTC cannot be compared to the usual roll closures of simple pack sacks [dry bags]!” proclaims the website, and I can believe them. We all know that Ortlieb-like roll-top dry bags don’t have a proper seal; water will seep through and air will leak out. But the multiple rolling of the film layer, as well as the fact they’ve dared use RTC on a packraft, gives a sense of confidence. Time to get paddling and see if that confidence is warranted.
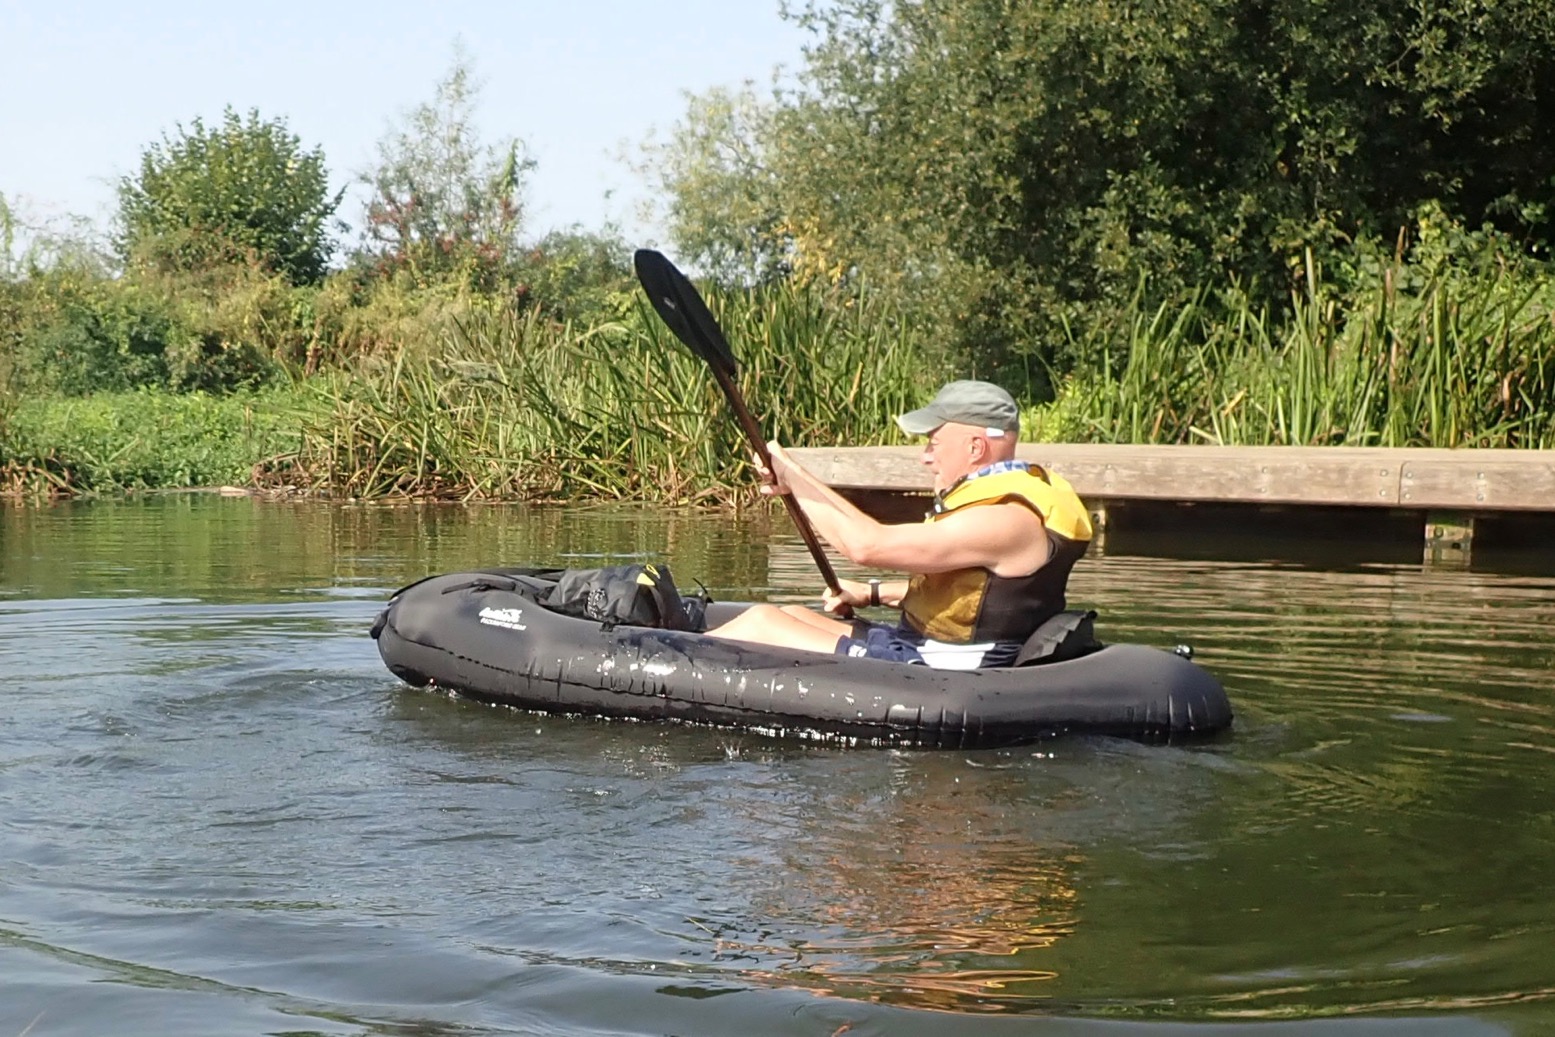
Nano on the water Mid-September and it’s nearly 30°C: too good to pass by so I head for a short run up and down the Medway. Airing up at Sluice Weir Lock, I had a good feeling about the Nano, even if at 95kg I expected to be on the limit, as I was on the Alpha XC. The extra 6 centimetres all round looked enough to make a difference, and one way to help the trim (level) would be to run the RTC at the stern and as long as possible (four folds) while perched forward on the backrest seat option. In the end I didn’t feel the need to do this.
Once inflated by bag and topped up by mouth, I knew the Nano would need a damn good tempering today. A boat firmly inflated by hot ambient air will go soft once cooled in the water. Sure enough, after some splashing the Nano went as limp as a stunned trout. While doing this I was reminded of the indispensability of a bow line to manage a boat at the water’s edge. I hooked the metre-long strap through the RTC (left); better than nothing. Back on the jetty I tried the two-way hand pump: 20 pumps firmed it up. After over a decade of proven hull integrity, it’s become the norm to top-up packrafts with mini-pumps and not by lung, raising pressures up to 2psi or more. This added tautness is what differentiates packrafts from slackrafts and has a huge benefit on paddling efficiency and satisfaction.
They say don’t overdo the pumping but how are you to know? A well-made packraft may well handle a massive 0.5 bar or more before it blows a seam, but assuming the Boston one-way valve can handle it, I think the mini PRVs I tested the other day would be a useful addition to packrafts. They cost only 4 quid and you just keep pumping away until they hiss, knowing the boat’s reached the valve’s purge pressure which cannot be exceeded. It’s like an in-built pressure gauge. Fitting one to the open-ended Nano (or any TiZip packraft) would be especially easy. I decided to try RTC bow first (it made using the DeckPack easier). Once in the boat I felt fine, though from the pictures it’s clear the trim looks nearly as back-heavy as on the Alpha. Too many pies! But on these ‘calm waters’ that didn’t seem a problem.
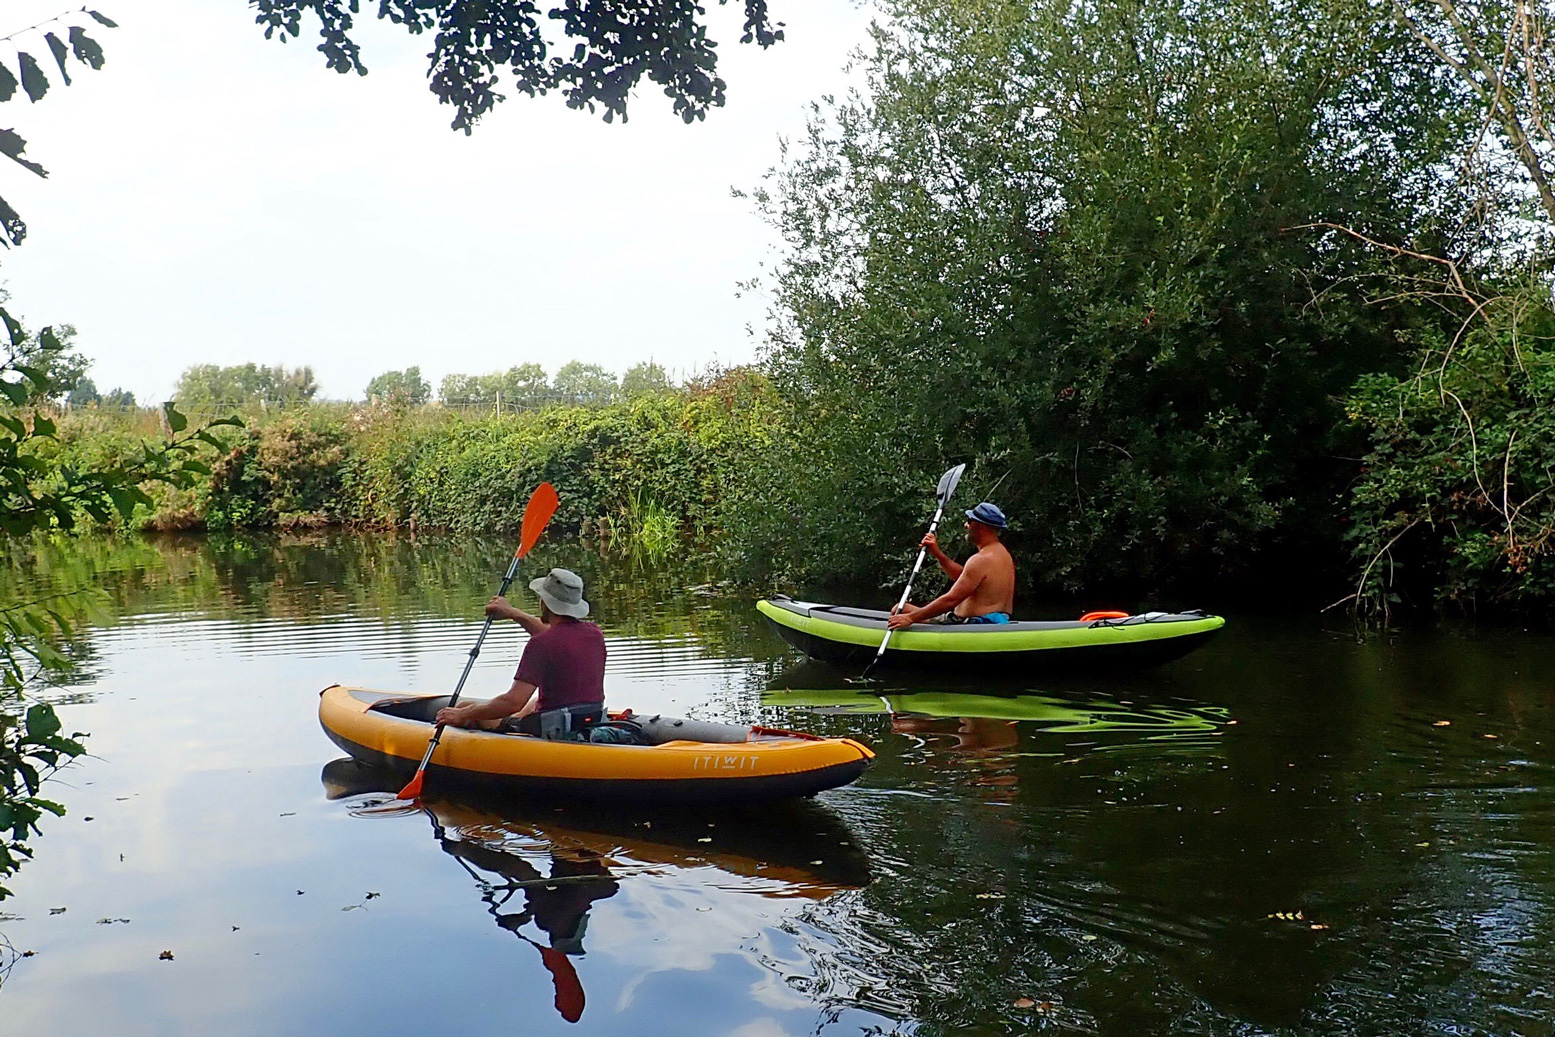
Confident I wouldn’t wet myself, I set off 2km up river for Oak Weir Lock, passing some happy Itwiters on the way (left). Those things are everywhere these days! Good on Decathlon for satisfying the huge demand. Within a few minutes it became clear the Nano had cooled further and needed another 50 pumps off a handy concrete slab below the steep riverbank. I also remembered that, unlike my IKs, low-floored/high-sided packrafts want the seat base pumped right up to give height so as to get the paddle over the fat sides.
Back on the move, speed and response increased dramatically, but not having paddled a normal-sized packraft for a while, I’ve forgotten how slow they are, topping out at maybe 2.5mph/4kph. Riverside walkers were outpacing me; normally it’s the other way round on the Medway, albeit heading downstream. Where noticeable, the current here is about half a mile an hour. I took off to explore some mysterious side creeks which I’d normally shoot past on my downstream burn-ups, careful to avoid the many brambles which line the river here. There’s a perception that the Nano’s textured woven surface could snag a bramble more easily than a smooth one, but should that happen it would be easy to open the RTC and slap a stick-on patch on the inside: the best place for such a repair. The heat and dense, overhanging vegetation reminded me of a boat trip I took years ago up the remote Roper River in Australia’s Top End.
Back out on the main channel and heading upstream, after a while it took some effort to move the Nano along, with the tell-tale bobbing of a soggy slackraft. A squidge of the sides showed they were soft again. More tempering needed or a slow leak, probably from the inexpertly sealed RTC? I hacked on and at Oak Weir jetty got my weight over the bow to push the RT closure underwater. A couple of tiny bubbles popped up occasionally, but they may have been just trapped air escaping the folds.
The picture above makes it appear worse than it was, and being a hot day on cold water, I felt one more tempering may do the trick. I often have to do this with my bigger Nomad; which takes a good few minutes on the water to fully cool on a hot day. I did my best to check for tell-tale bubbles elsewhere, but anything easily spotted would have seen the boat droop in minutes.
I realised the seemingly redundant hand pump hose was actually ideal for topping up on the water. I reached behind and carefully undid the upper cap of the Boston valve (you don’t want to undo the main valve…), pushed on the pump hose nozzle and gave it another 50 jabs + 10 for luck (about 8-9 litres). With the Nano taught again, I couldn’t resist hopping out and sliding back down the shallow Oak Weir canoe chute which the Nano took in its stride. This boat could easily manage river riffles; the caveat would be too much scraping in the shallows. The exposed fibres can probably take some rubbing but it’s the coating inside that counts. I wonder if spraying a slippery coating (303 Protectorant springs to mind) on the undersides may help reduce possible wear.
I’d asked for the backrest seat option to push my bulk forward off the overloaded stern, but comfort, or a relaxed all-day paddling posture, will take some experimenting. With the unusual raised floor and seat base pumped right up, the now higher backrest had less to lean against so I tipped backwards. I should have tried deflating the seat base a bit. Even at my height (1.82m) I can still stretch my barefoot legs flat out, when in fact a bent leg is better for paddling. So you might want to fit Antibio’s footrest (as I use on my Nomad), shove a bag or shoes up there, or better still (for trim), put something behind you to act as a thicker backrest and centralise your weight (as we did on the Alpha). However you achieve it, a solid back–to-foot brace improves paddling efficiency which means it takes longer to get tired.
Trim not too bad
Running back downstream to Sluice Weir felt like it took half the time, and I got there with the boat still firm. I do wonder if wetting the inner film surface provides a better seal, just as licking a suction cup before sticking it to glass. One to try next time. I also noticed that for a short, wide raft, the Nano barely yaws left to right. Besides my fine technique honed over the years, the profile of the raised floor may help the side tubes ‘bite’, like ice skate blades. Or it may be the subtle protrusions (below) under each end of the boat which my 2.9-m Nomad also has and which are said to have a skeg/keel effect.
Either way, I was confident I’d survive the sporty Sluice Weir chute, catching only a cupful of water as I hit the frothing base. With that ticked off, I paddled over to the portage jetty, crawled out and aired down. Being a black boat on a hot day, the Nano dried itself off in no time.
Packing the boat up, I checked for seepage into the RTC when it had been submerged for a minute or two. As expected, water crept along the textured outer nylon surface but the inner film was dry, though as Gore Tex will tell you, air can pass where water can’t. If that was the issue, not just heat, I’m sure getting a good seal is a knack that can be acquired.
=
Conclusion Providing they can handle the added pressure of a hand-pump, I wouldn’t be surprised to see RTC-type closures becoming more common on packrafts. Using zippers for such a critical seal always seemed a bit dodgy to me, though I’ve only read of them playing up. Besides that novelty, the sturdy 210-D Nano makes a great crossraft at a price that’s competitive with the thinner Supai boats. It’s very light, compact (3 litres rolled up), comes fitted with enough useful tabs and can be paddled RTC-stern to level off the trim, if needed. Seats are quite a lot extra, but you can sit on your gear, and for a tenner, the little handpump is a no-brainer to get the most from your boat. And if the Nano’s RTC arrangement is not for you, choose the conventional Nano SL costing about 15% less. Either could make a great entry-level packraft or an ultra-light crossraft.
I fitted over-rated 4.8psi Ceredi PRVs to my Seawave’s side tubes a few years back. I like the idea of not having to worry about the boat getting hot in the sun (and exploding), just as much as gaining some extra rigidity by fitting PRVs rated a little higher than recommended side tube pressures.
I bought a pair of unbranded Chinese PRVs off eBay (<£9 posted – about 30% of Ceredi/Leafield prices) to consider for my next IK. Some sold on eBay don’t even mention the purge pressure! These ones did: 4psi or 0.27bar, just a bit over the 0.25 of the boat I have in mind.
Out of the bag, the quality of the molding looked no worse than a Ceredi. I was a bit surprised they’re smaller than usual PRVs, (the listing gave these dimensions), but what does it matter as long as they work. I worked out a way of testing them by removing the backing ‘nut’ and screwing the ‘male’ PRV housing onto a rubber motorcycle throttle grip. The other end of the grip I jubileed to the barrel pump nozzle. Pumping the pump, the pressure built up and PRV ‘burped’ suddenly at an indicated 0.4 bar. But as my manometer needle zeros at 0.1 bar and not zero, we can probably subtract that 0.1 and call that 0.3 bar which is 4.34psi. Close enough to 4psi. Now I can fit these PRVs with confidence.
The hole which must be cut in the boat to fit this valve is 24mm ø, but to get the back nut inside the hull you’ll need to go in via the larger inflation valve aperture. So cut the PRV hole close to the inflation valve. Once loosely screwed together, the knurled outer housing can be tightened with some wrench or another.
Accounting for manometer error, the PRV burped at 10% more than claimed, which is pretty good.