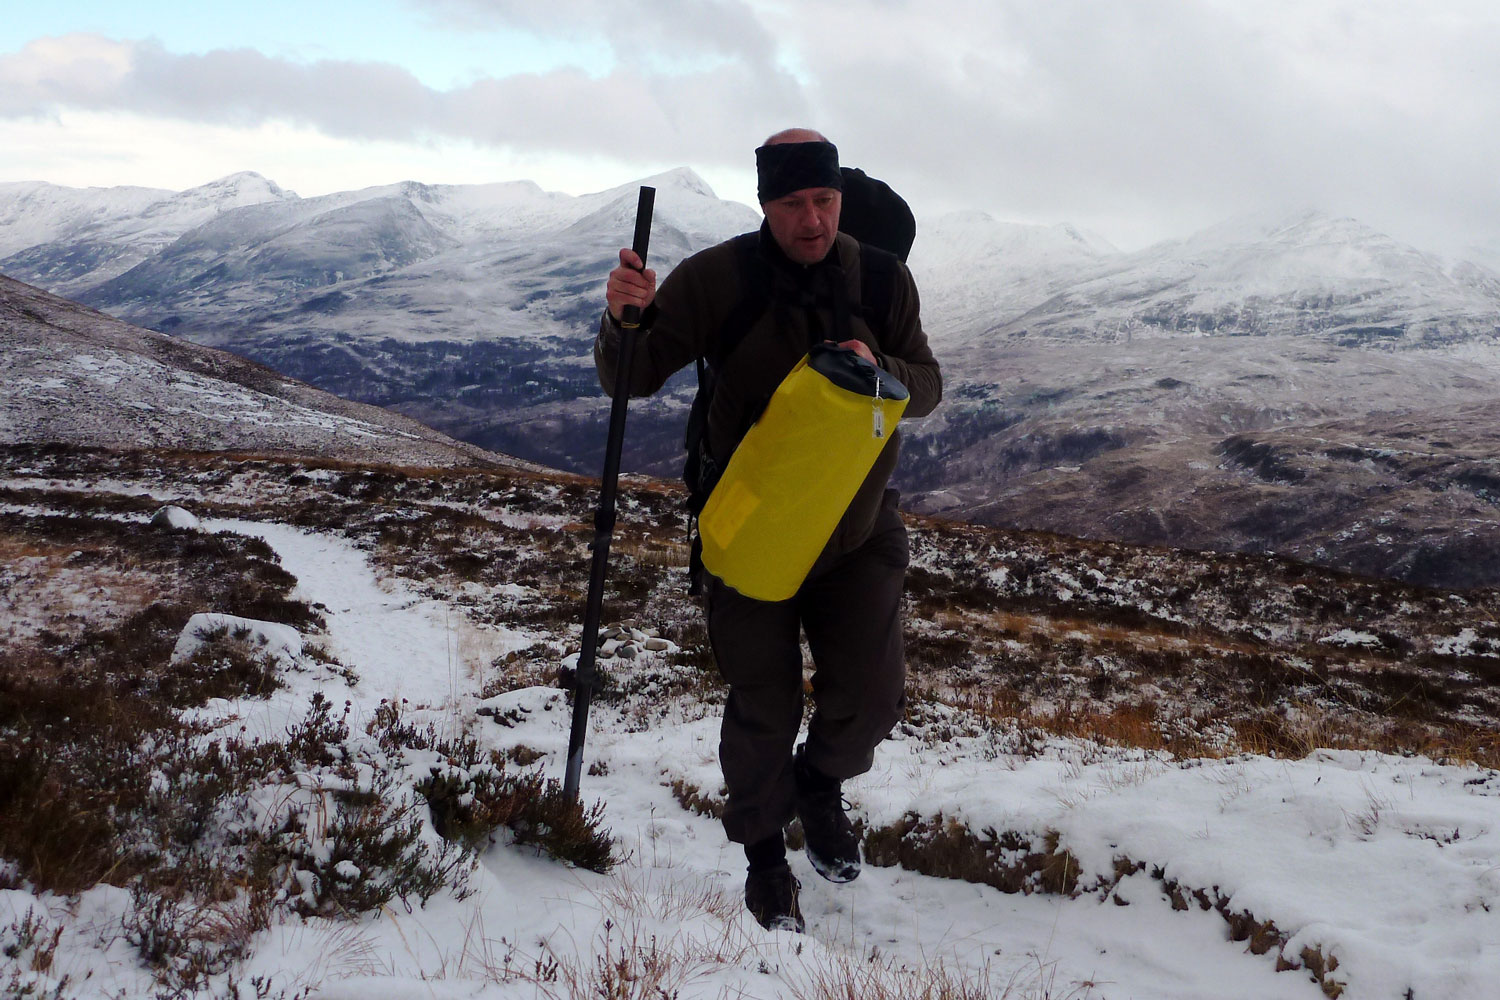
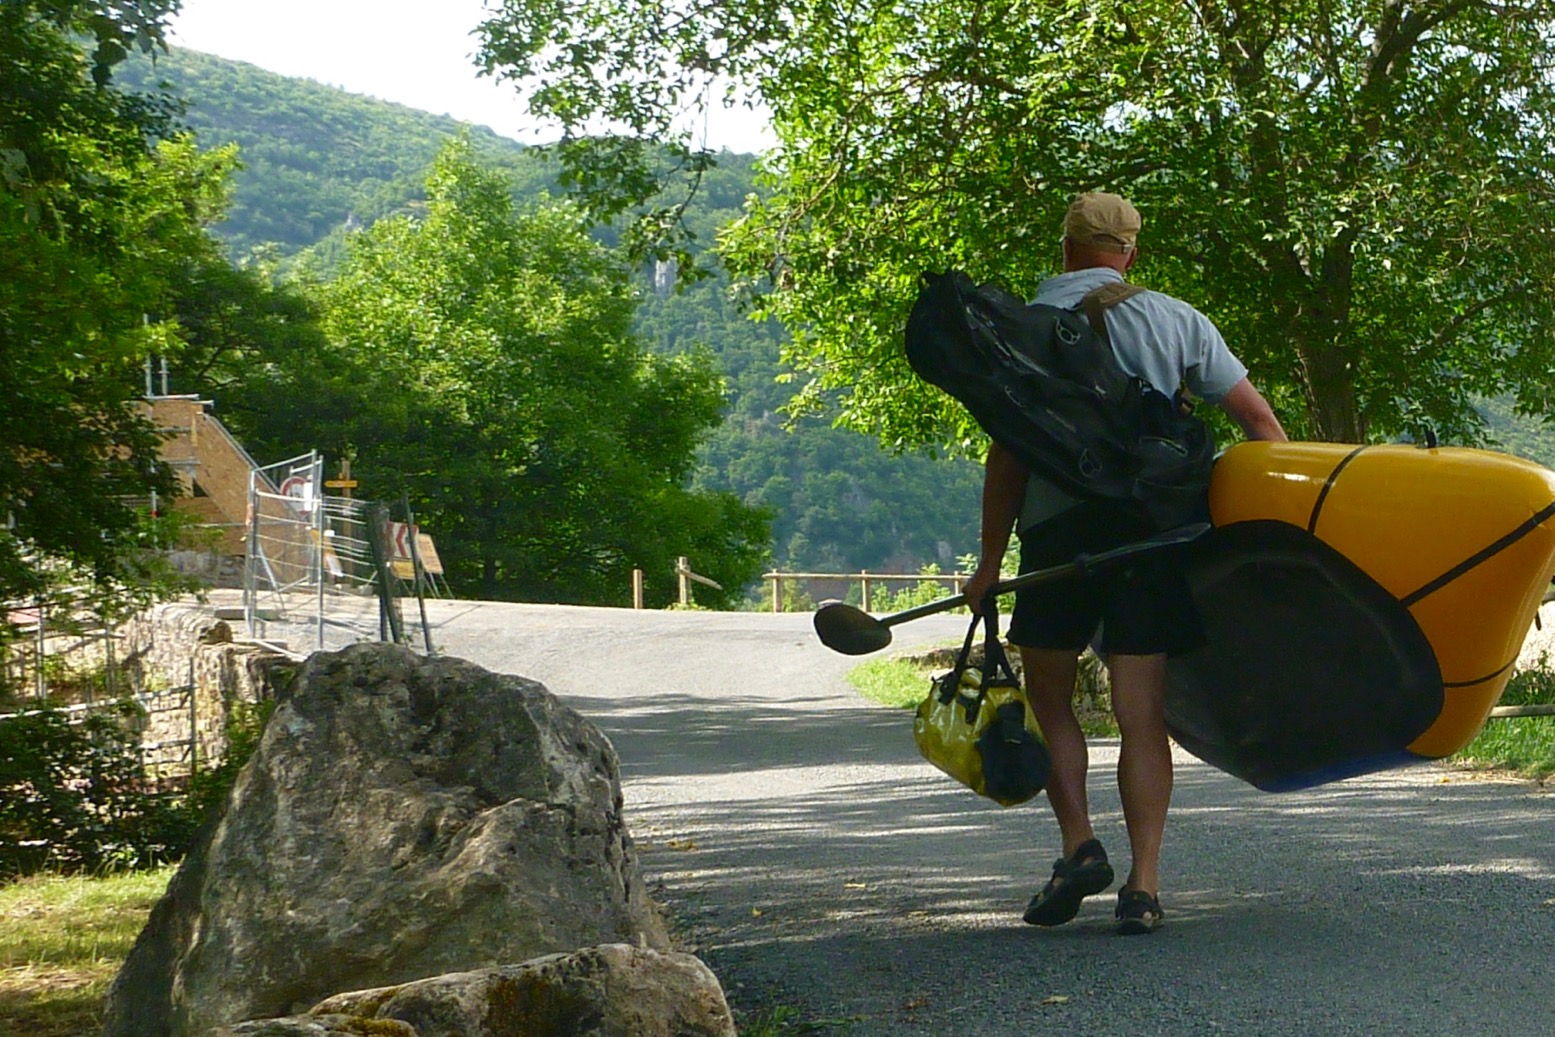
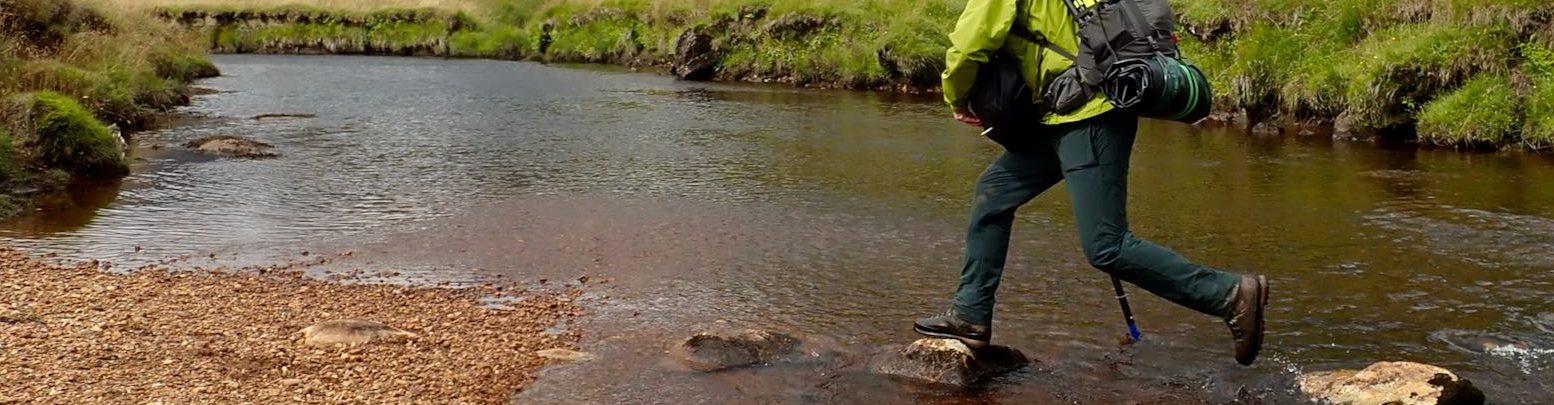
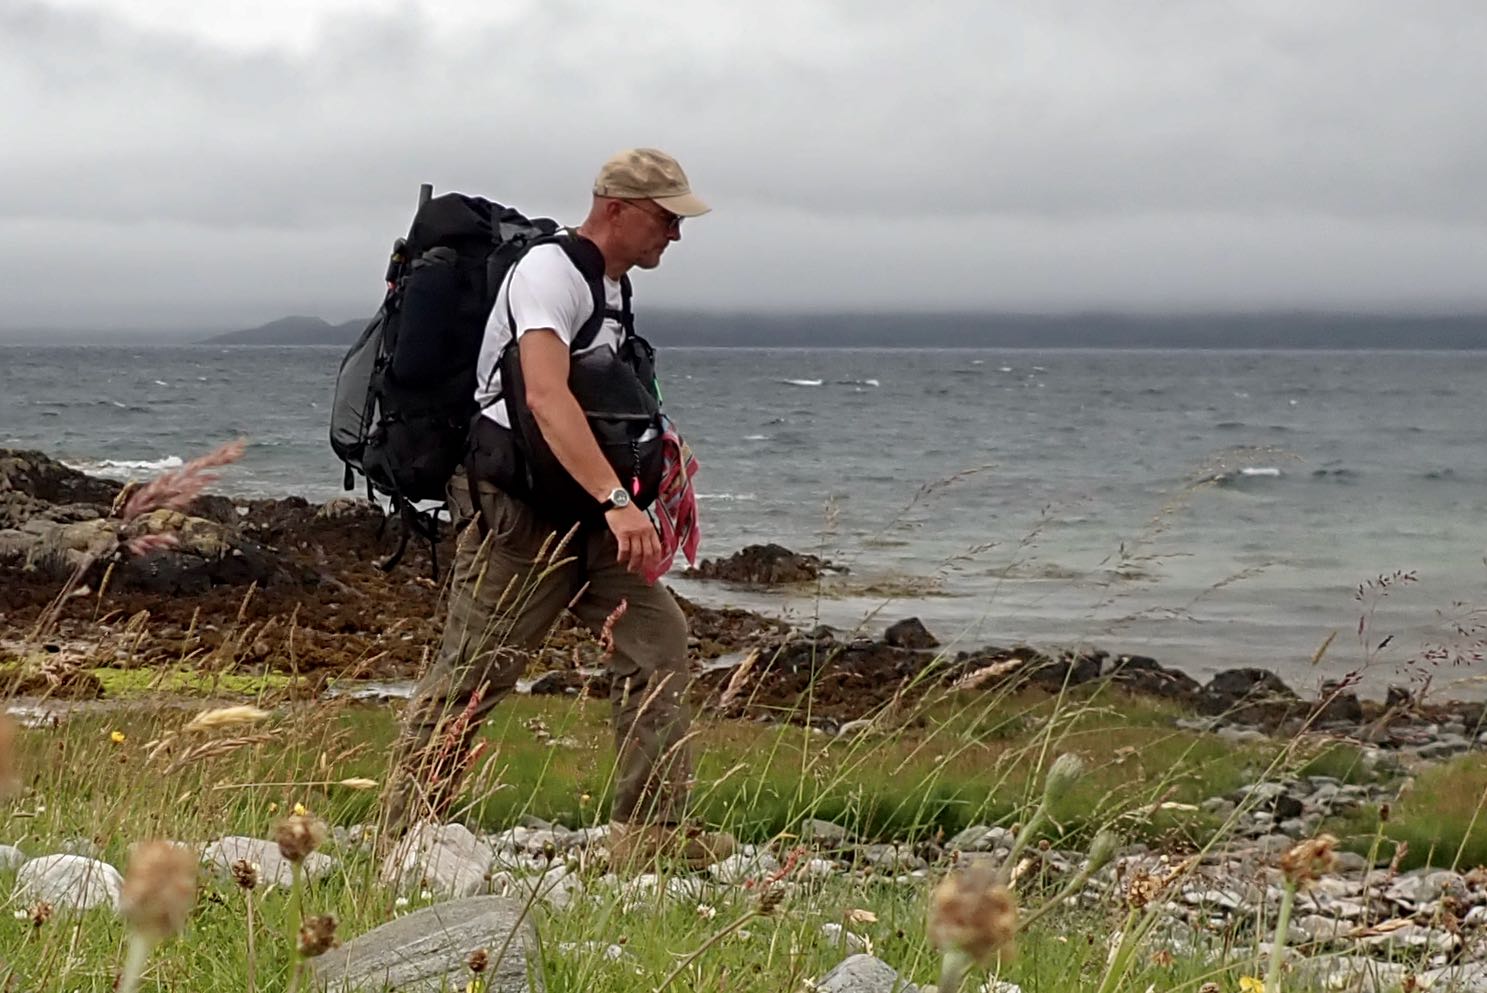
Walking back four miles along the Jurassic Coast the other evening (left) was a lot more tiring and took longer than paddling nearly the same distance to get there. That’s not so surprising. A steady paddle on a calm day with only your arms is a lot less effort than walking 340 metres of elevation gain, carrying the boat on your back.
NouadhiWhat? Hello?
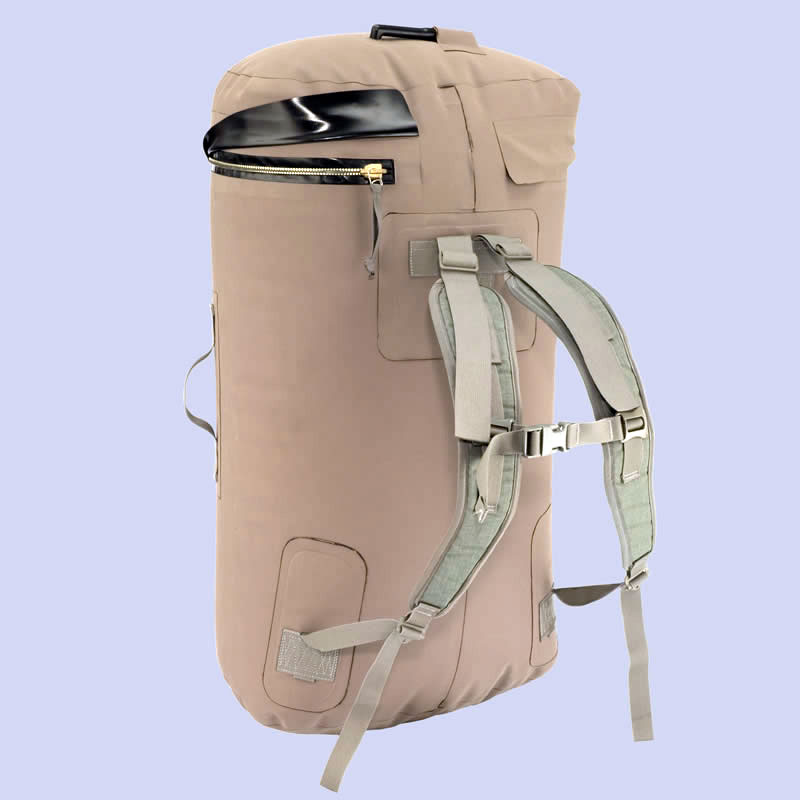
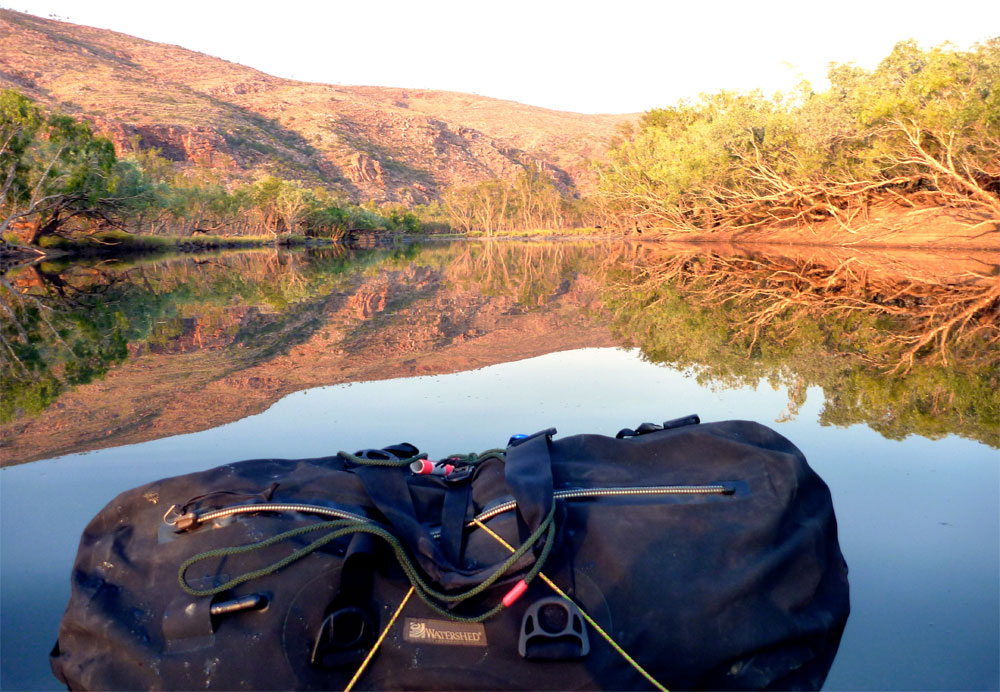
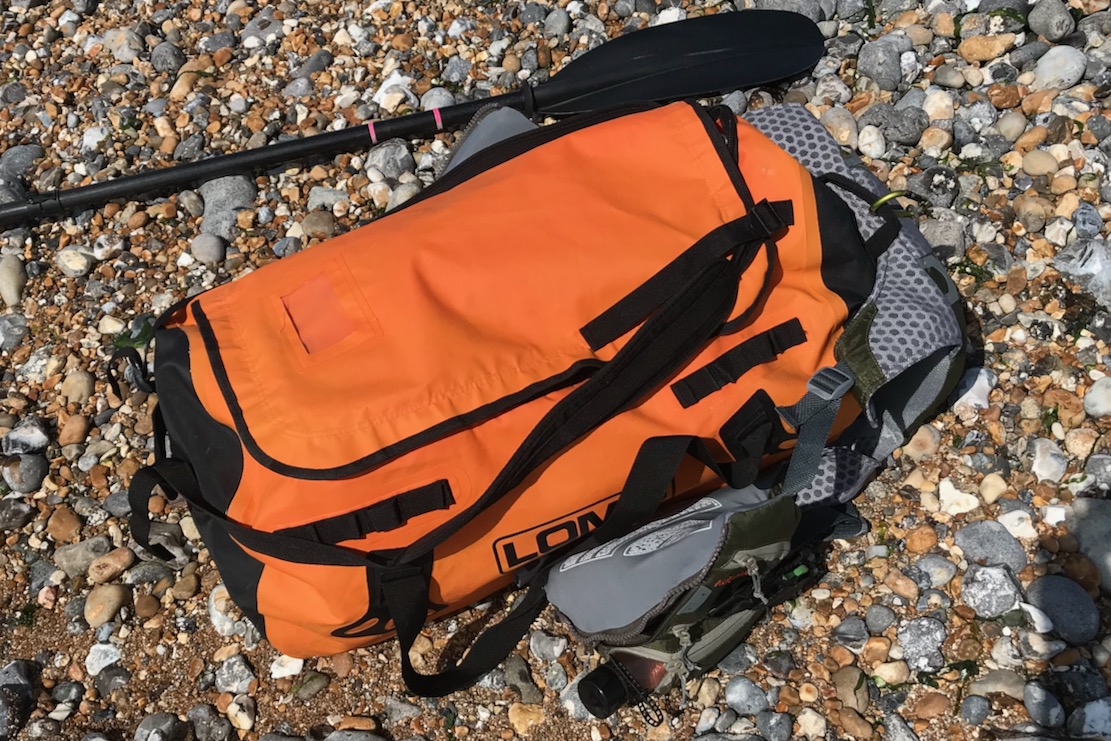
It wasn’t helped by the fact that the TXL was in my Lomo Blaze, a holdall with basic backpack straps, so the whole weight was hanging from my shoulders. I like my Lomo; unlike a rucksack the bag is made from heat-welded PVC which is waterproof. Yes it may have a regular zip for the lid, but it cost 40 quid and is a lot easier to load, access and see what I’ve forgotten this time. I’ve even used it as a ditch bag on desert trips (left; sadly I needed to ditch that time). But Lomo is not a great backpack for long. As I neared Kimmeridge, mesmerised by the setting sun, I had a vision of a Better Way…
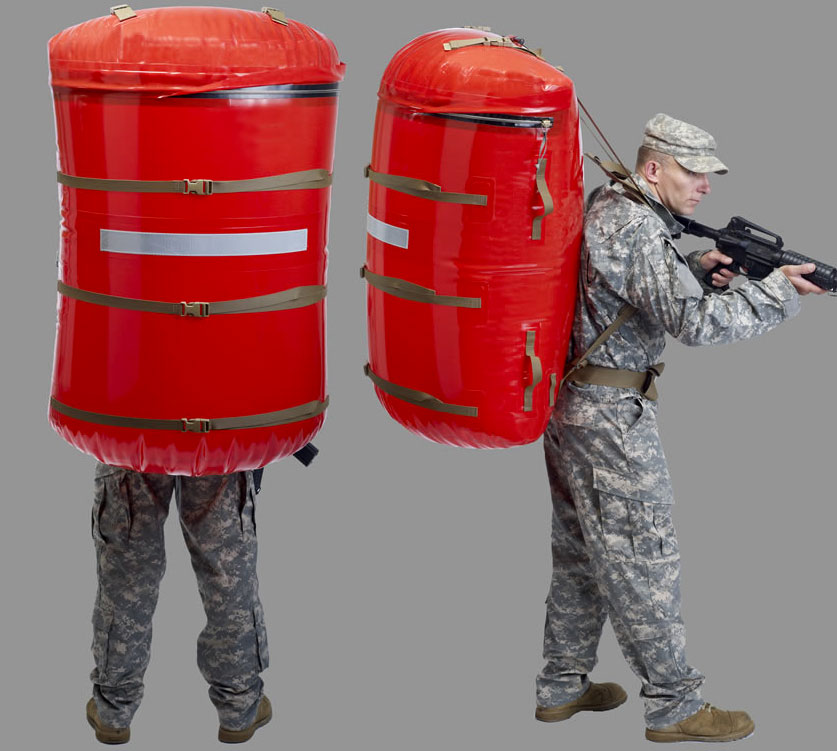
I’ve been through this all before …how to carry the boat and gear sustainably over land and water. Besides trolleys for train trips, there are packframes like the Lastenkraxe fit to carry a well-fed moose calf, pack harnesses like the NRS Paragon and Six Moons Flex PR which wrap around anything. Even my huge, airtight Mk1 Watershed UDB sausage bag became semi rigid when ‘pressurised’, but had a rubbish, ill-placed ‘harness’ (so needed an NRS). The wheeled Ortlieb 140 could also be backpacked – but not long term.
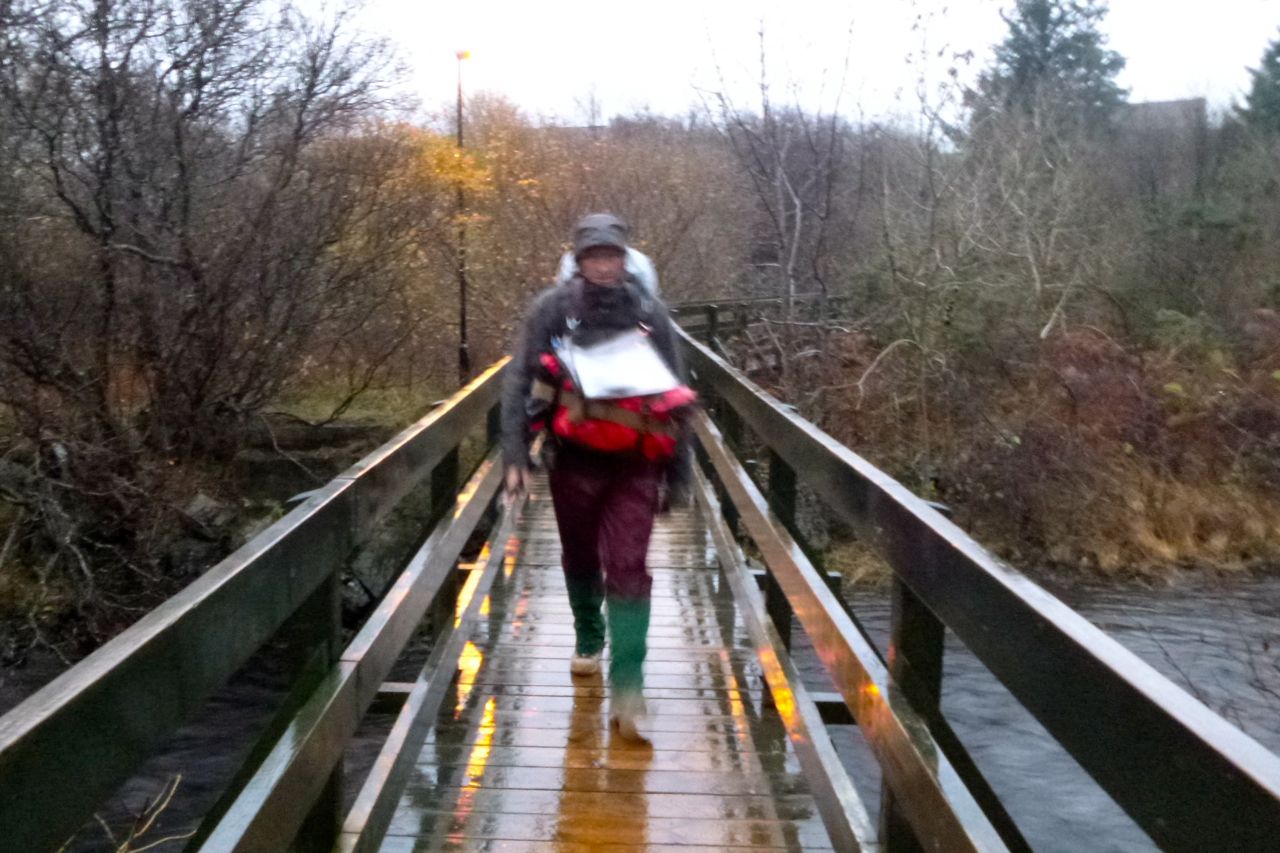
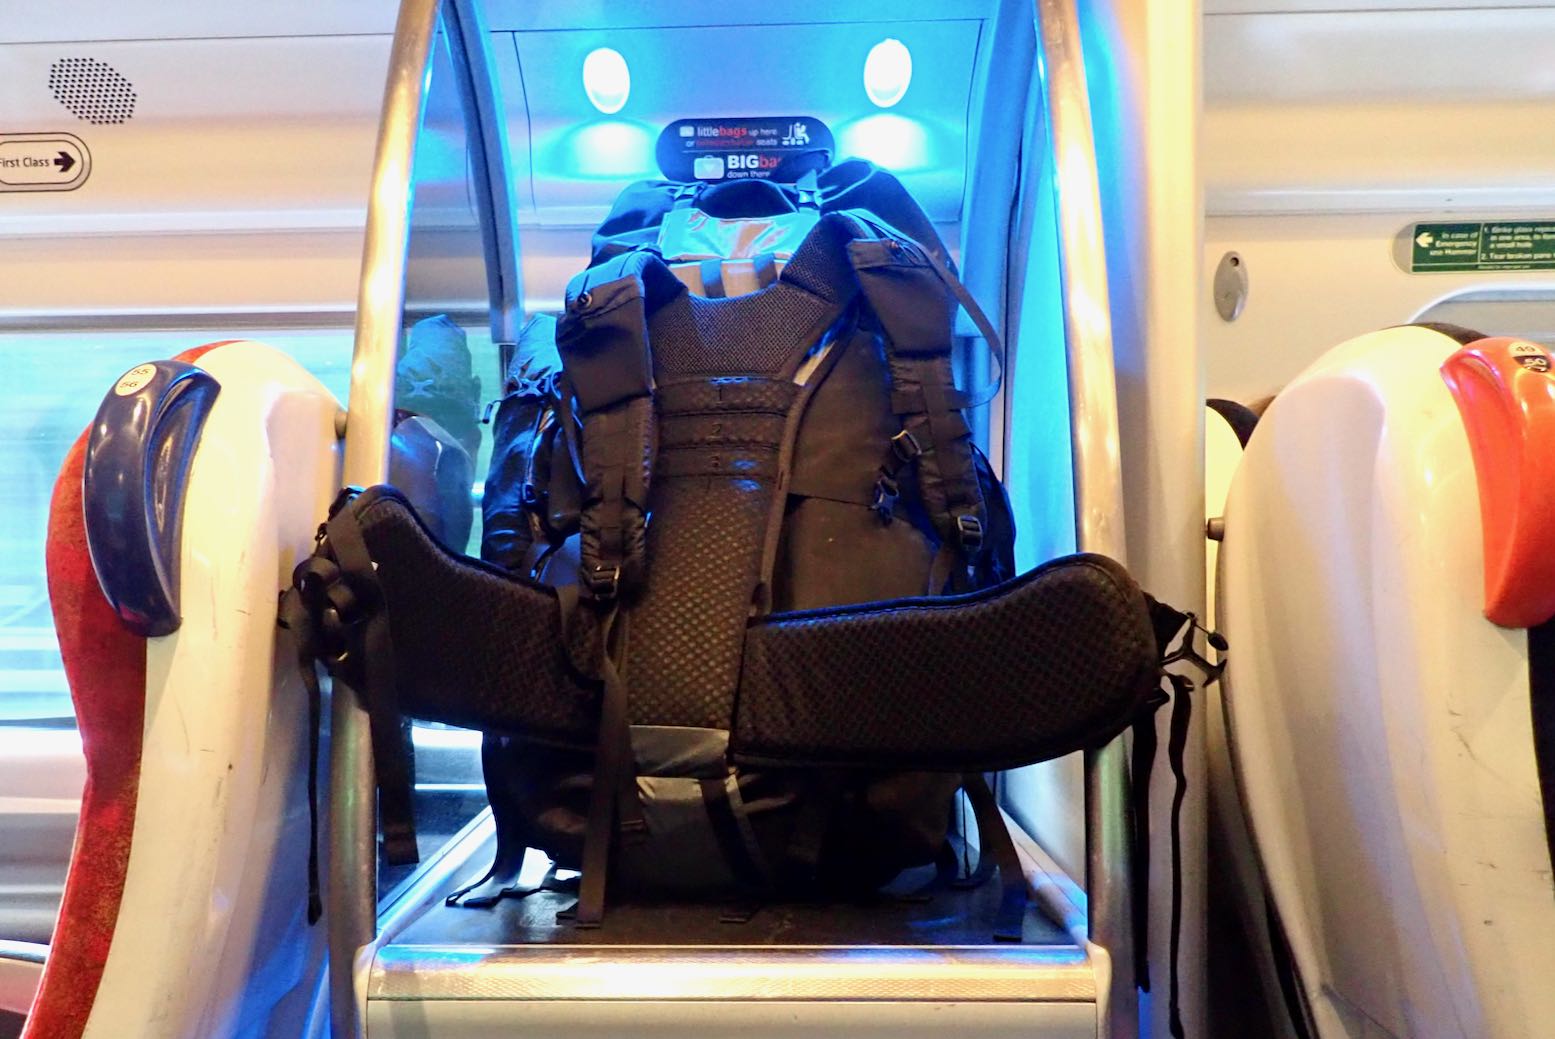
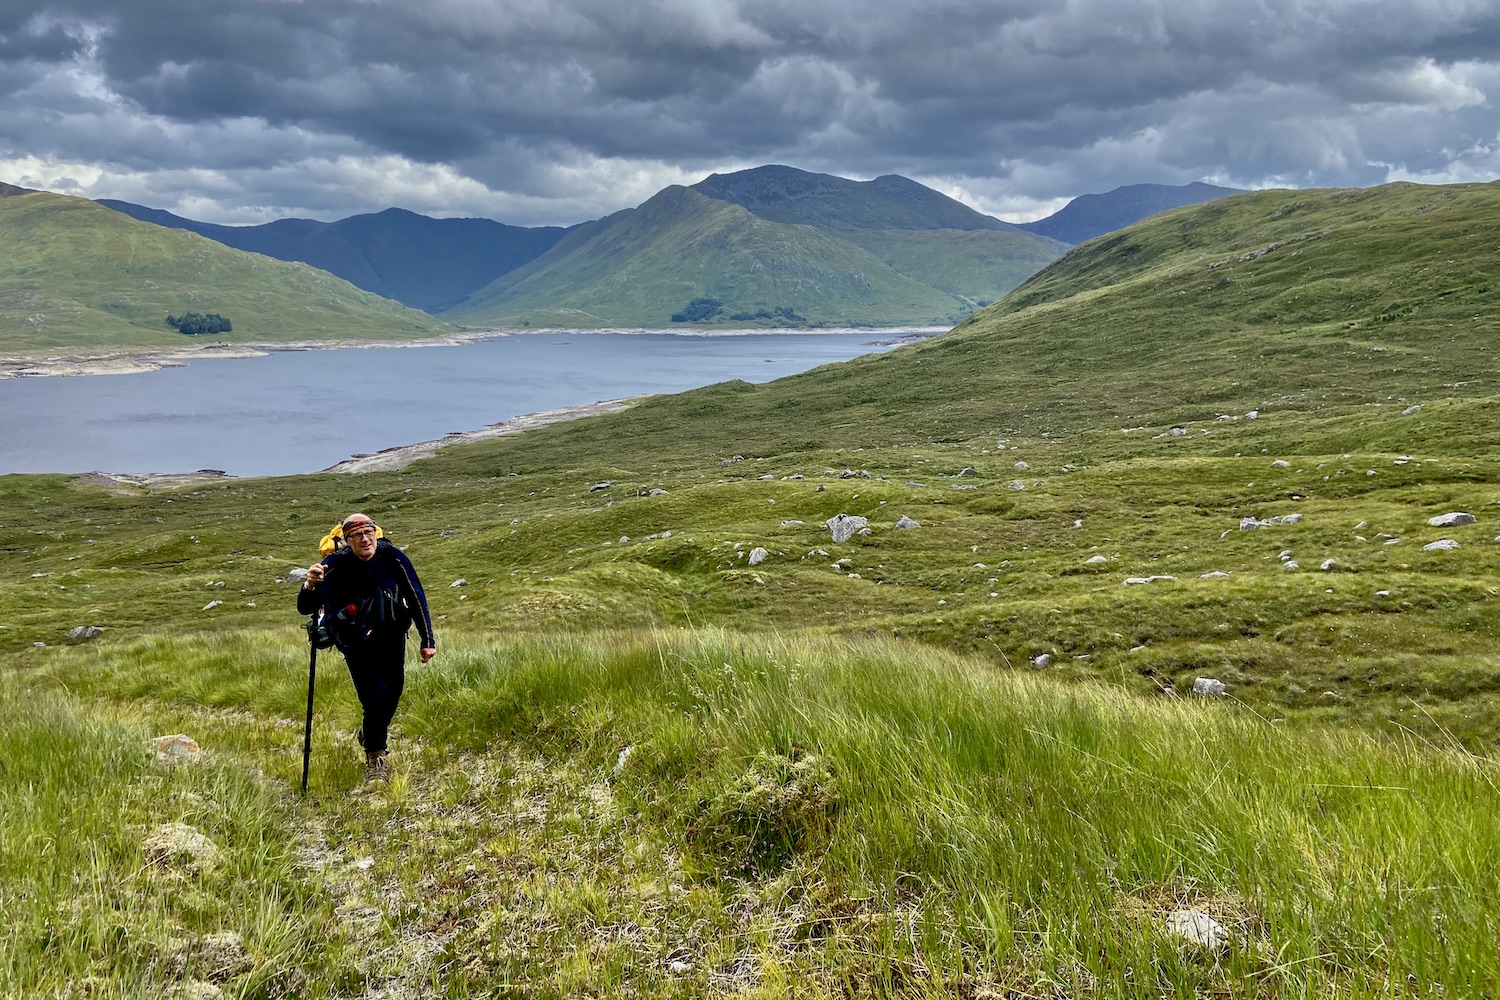
You want a stable, well-supported pack on terrain like this: ie; a proper backpack or harness with chest strap and hip belt
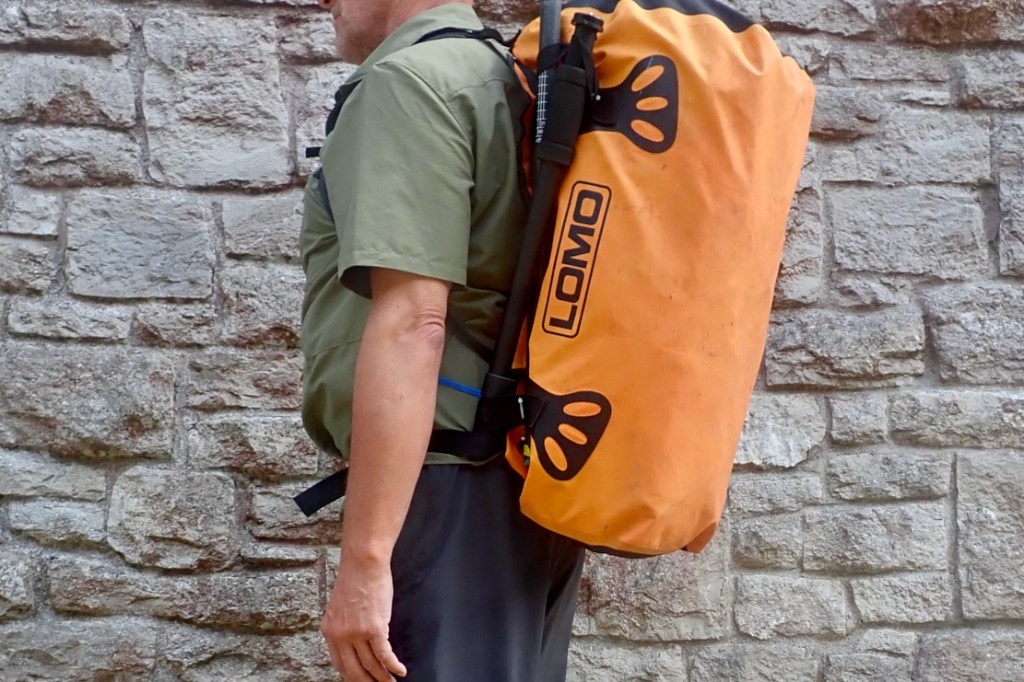
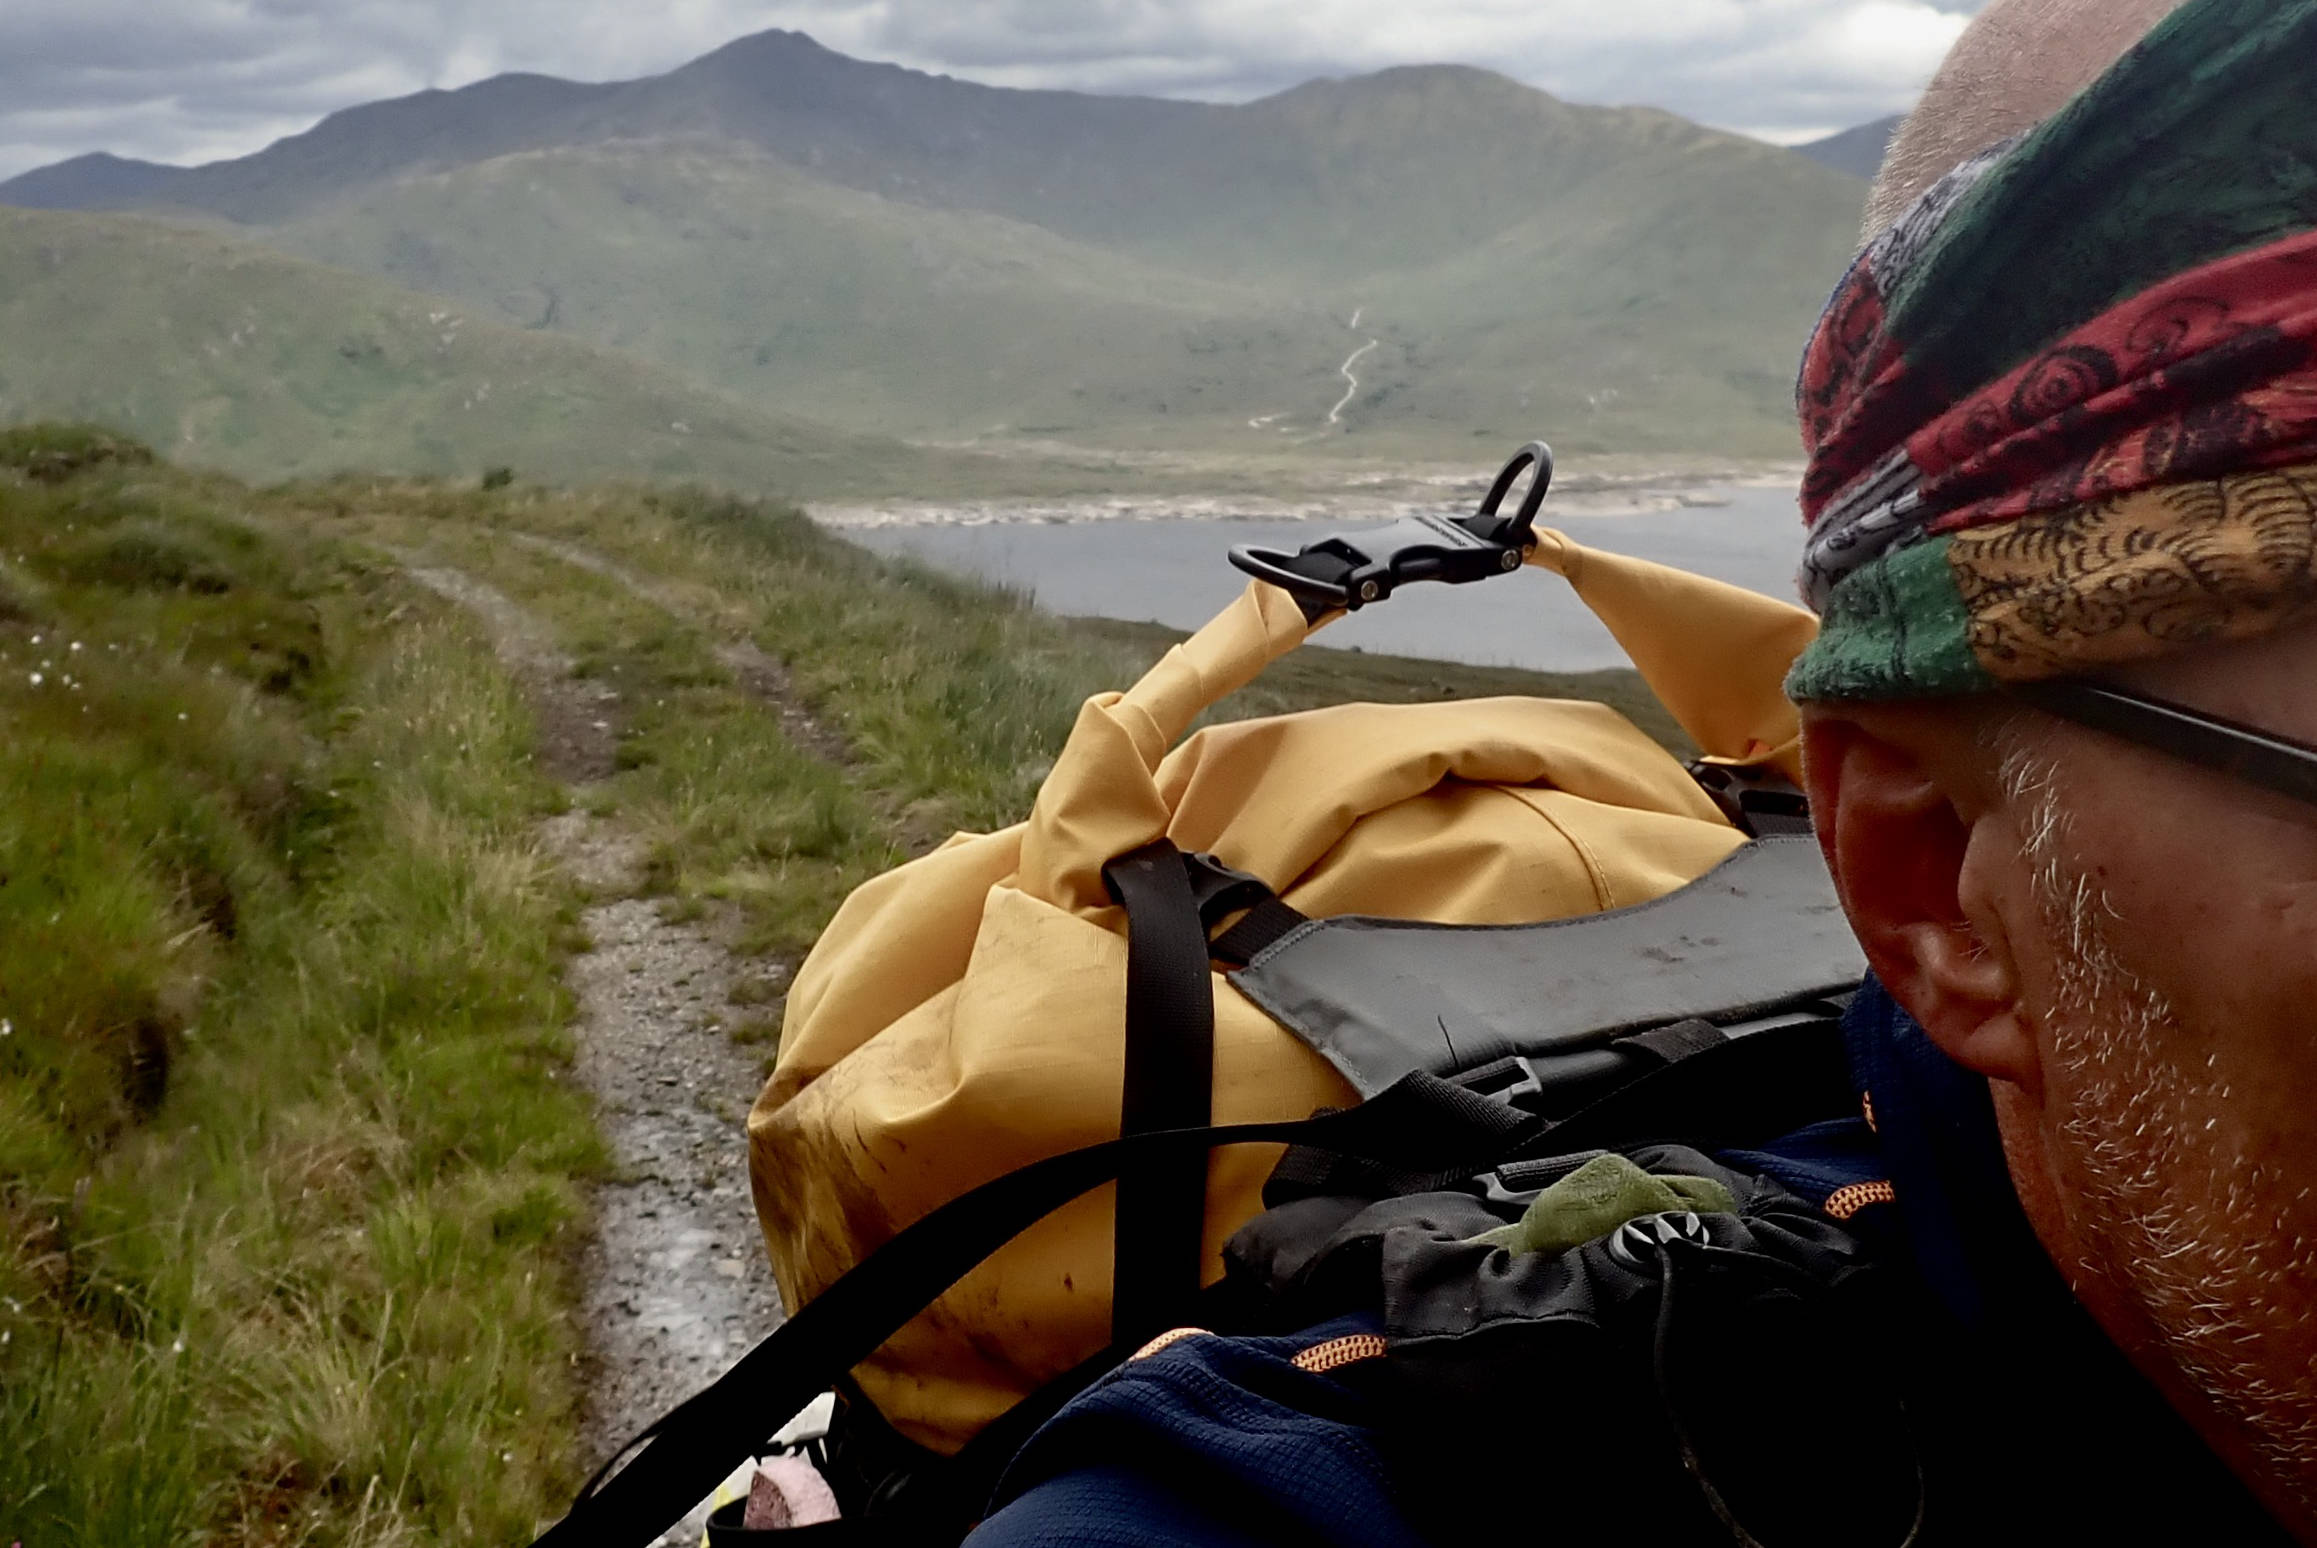
For a multi-day trip, mixing walking and paddling (aka ‘packrafting‘), like we did in Knoydart (above), packframes or just a proper rucksack make sense. But for day paddles they’re overkill and awkward to stash or keep dry on the water. My brainwave was using the paddle shafts as an external packframe to create a rigid rod from the top of my holdall to the waist (below).
Paddle shafts twisted into the Molle on the left (top of pack; not load), and then ziptied to the Molle (right) where the weight will rest on the paddle’s collar.
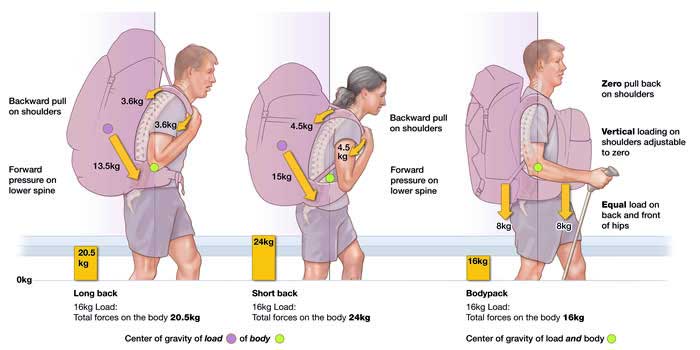
As we should all know by now: for longer walks over rough ground weight supported low on you waist is more sustainable than hanging high from your shoulders. It makes you less sore and much more stable which adds up to less fatigue. That’s why both the heavy hauling Lastenkraxe (below left) and Six Moons Flex come with such generously padded hip belts: it’s where most of the weight is carried.
PaddedMolle
The Lomo 60 Blaze is just a holdall with backpack straps and handy grab handles at each end; it doesn’t have a hip belt but it does have a run of Molle webbing lashing points (above right) to which I sometimes strap my paddles. The shafts from a 4-part paddle could be lashed to the Molle each side (or even a whole 2-part paddle), with the lower sticks hooking into any waist strap or belt. Though it would be nice, for a couple of hours with 8 kilos there’s no need for a fully padded belt with pockets and an SOS ripcord.
Paddle shaft zips to the bag’s Molle loops then tucks in behind any belt, even the one holding up your trousers. Minimal and reversible adaption: the bodger’s Holy Grail ;-)
The shafts are zip tied (blue) to the Molle at the lower end, so the weight rests on the shaft’s collar (above). The shaft then tucks behind a belt and the weight should at least partially be spread onto the hips, not all hanging from the shoulders. While I was at it, I decided to cut off the Lomo’s redundant carry handles. They get in the way when groping around for the backpack straps which can perform the same carrying function. I ‘zip-sewed’ the loose ends into loops (left) to take a half paddle or two on each side.
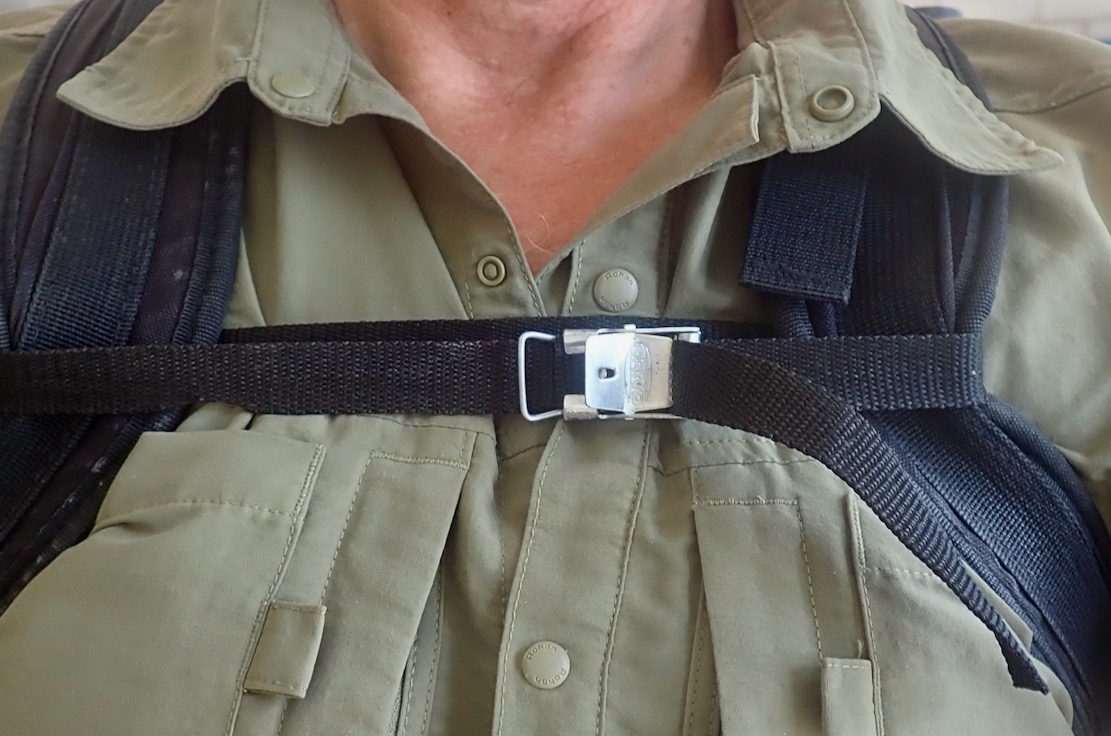
With belt and chest strap; pulls in close, weight part carried low. Better mass distribution and centralisation.Hanging from the shoulders; OK for short, flat walks
All that was needed was a chest strap (left and above left) to pull the weight in close. This alone makes a big difference to stability, I find. Tested outside with the Lomo loaded for a day paddle, it felt pretty good considering the minimal effort involved. Best of all a belt doesn’t have to be attached to the bag in any way and could even be your trouser belt. Just tuck in the shaft ends, tighten up and jog forth. The advantage is that for a day paddle ending in a walk of a couple of hours, no extra gear is needed, bar a belt or strap. In the boat the near empty holdall and belt are rolled up out of the way or stuffed in the Deckpack. Assuming you’ve not repurposed your paddle as a packstaff, your day-paddling outfit ought to be a lots easier to carry, especially over rough or steep terrain.
Weight (verified): 1525g in Large (shoulder straps 212g; hip belt 376g; back panel 937g). Used with Sea to Summit 60L dryback; 316g. Usable total 1840g.
Where used Four-day packrafting recce on Knoydart, covering about 50 miles, and another 3 days packrafting there (about 25 land miles).
The Flex PR was supplied free for testing and review by Six Moons and Anfibio
• Carries heavy loads like a proper rucksack • Includes no less than nine pockets • Four-strap adjustable hip belt • The price dropped by 25% around 2025
• Loads of black buckles with very long black straps on the black back panel (a 1-star review on the 6M website also mentioned this). • Fixed shoulder-strap mini-pockets too small and too high for me. • Wide outer panel means too much slack to cinch down the side straps fully • Refitting once back on land takes more time and buckling about than just shoving it all in a regular backpack.
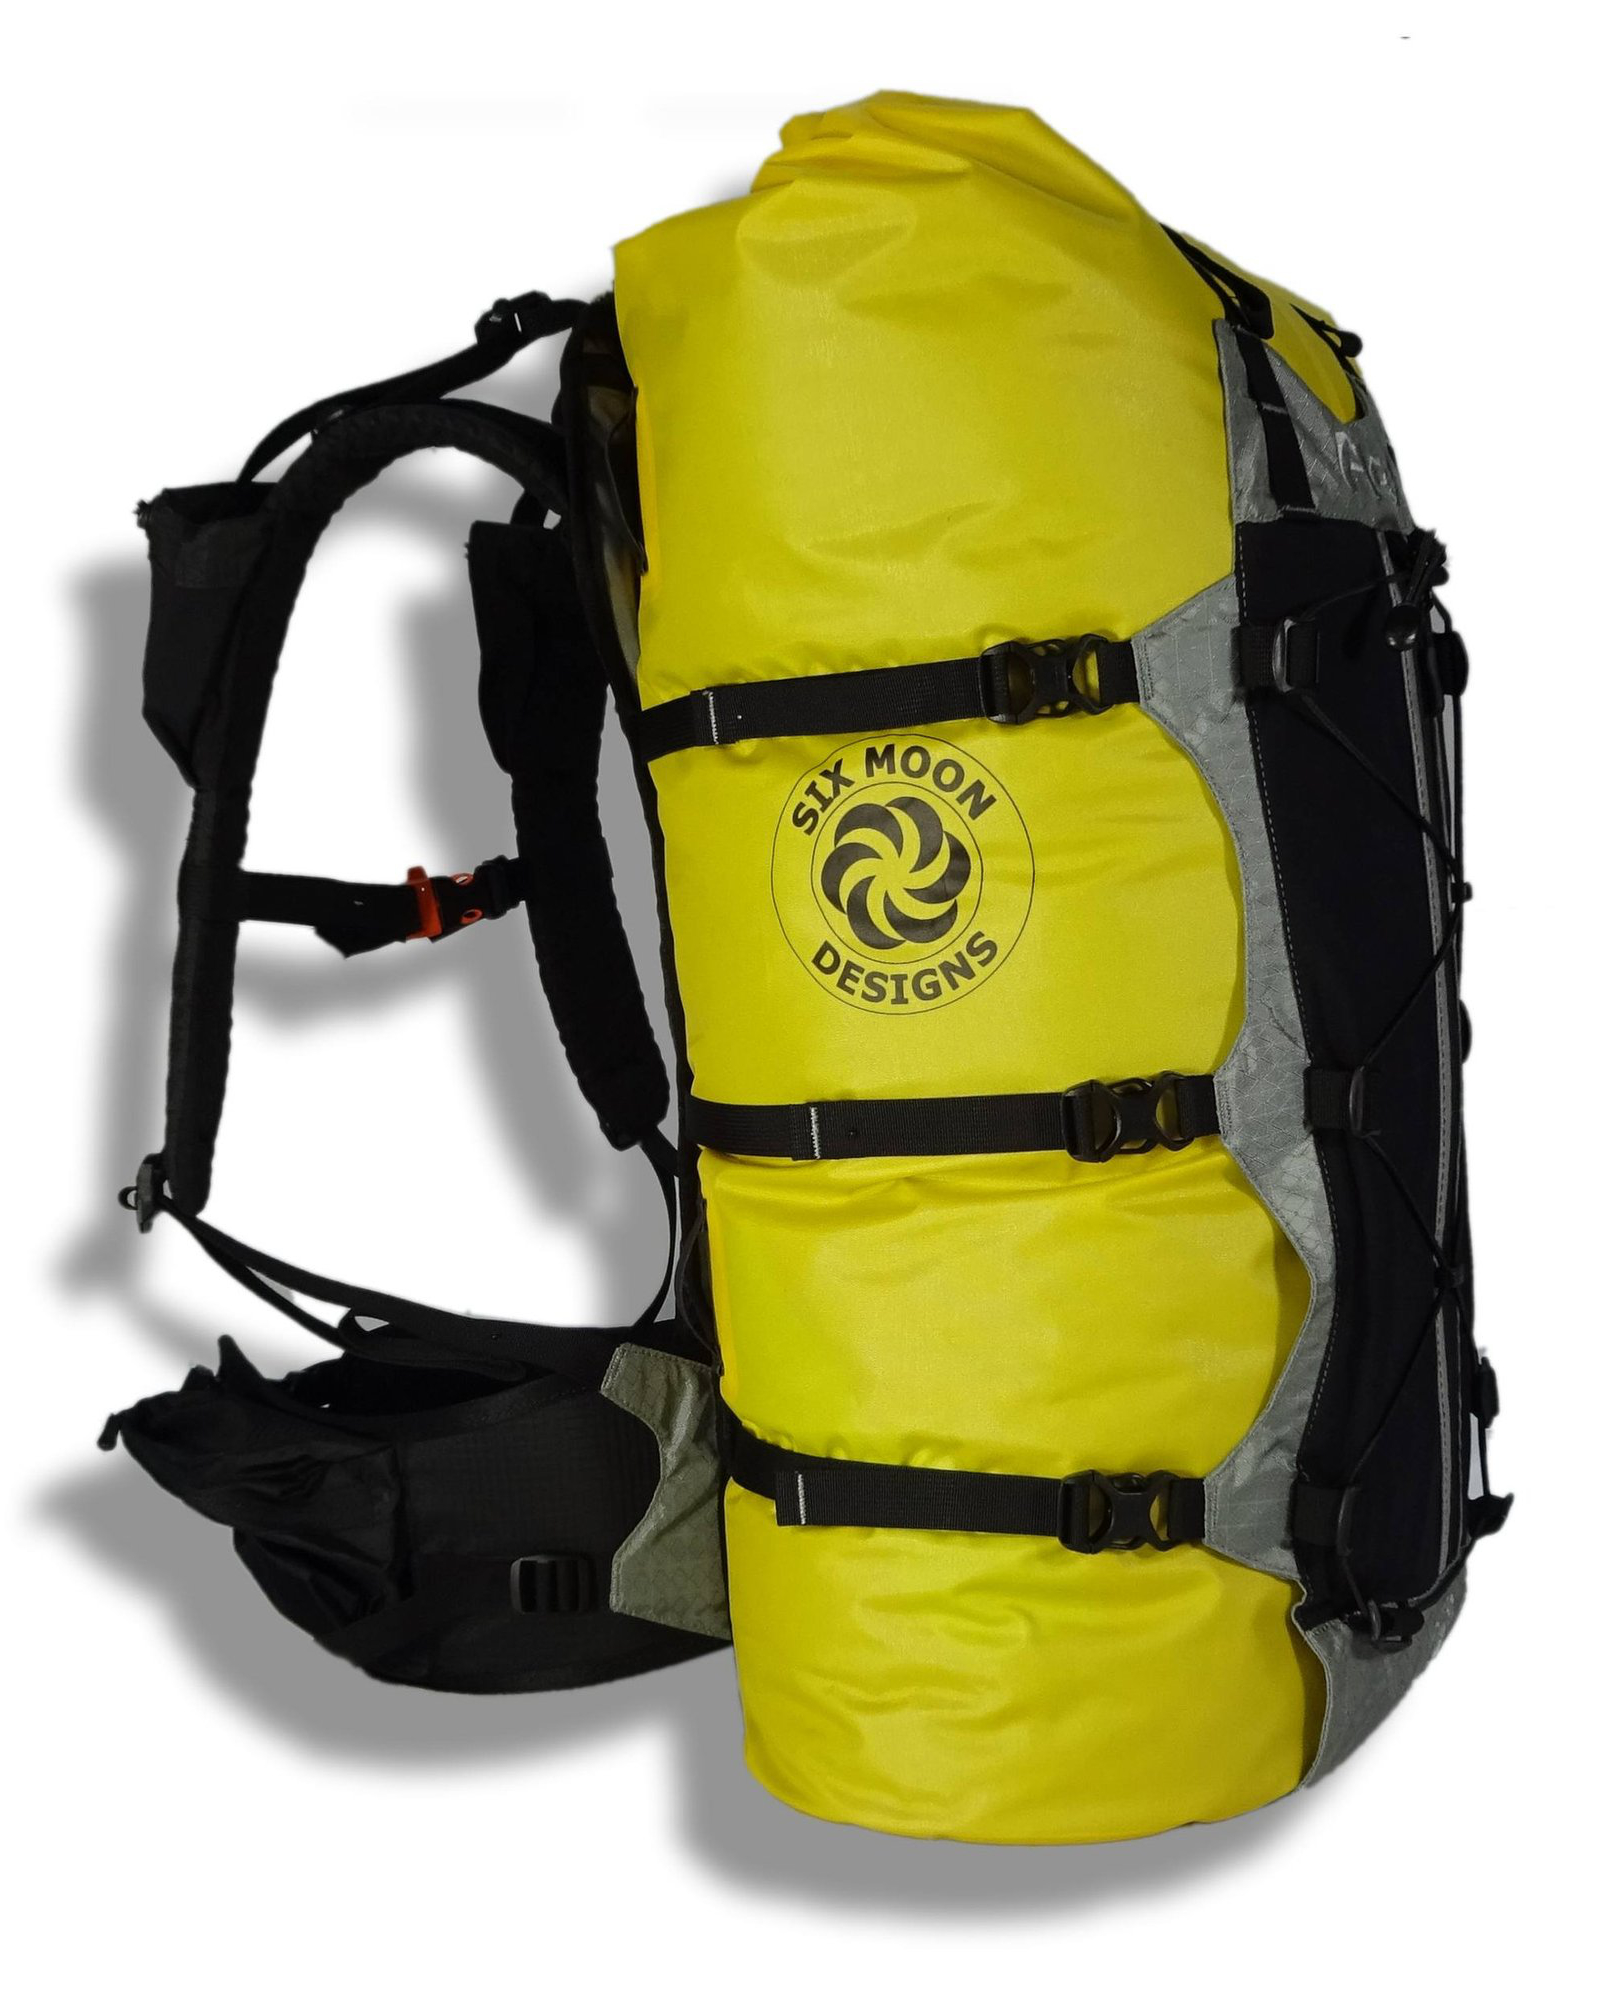
What They Say The [new for 2021] Flex PR is a multi-use pack specifically designed for pack rafters. The Flex PR is a 50L dry bag with a removable suspension system designed for carry heavy loads in comfort. Whether you are portaging on a canoe trip, hunting in the backcountry, or doing trail maintenance, the Flex PR will keep your gear dry, your accessories handy, and your back comfortable.
I’m on the TRAYNE!!
Review I’ve long been a fan of pack harnesses as I call them; aka: portage packs or multi-use packs. Once combined with a bombproof dry bag like my aged Watershed UDB, your packrafting load-carrying needs on land and water are solved for under 2kg. Lash all you needs to the harness and hit the hills.
It took me years of experimenting with ex-military and hunting-focussed metal-framed versions before I discovered backpacking-oriented ‘soft’ harnesses like my NRS Paragon. No longer made, the Paragon was a basic 100-dollar harness and a bit on the small side for me. The fully adjustable Six Moon Flex PR is up there with the best hiking load-carriers.
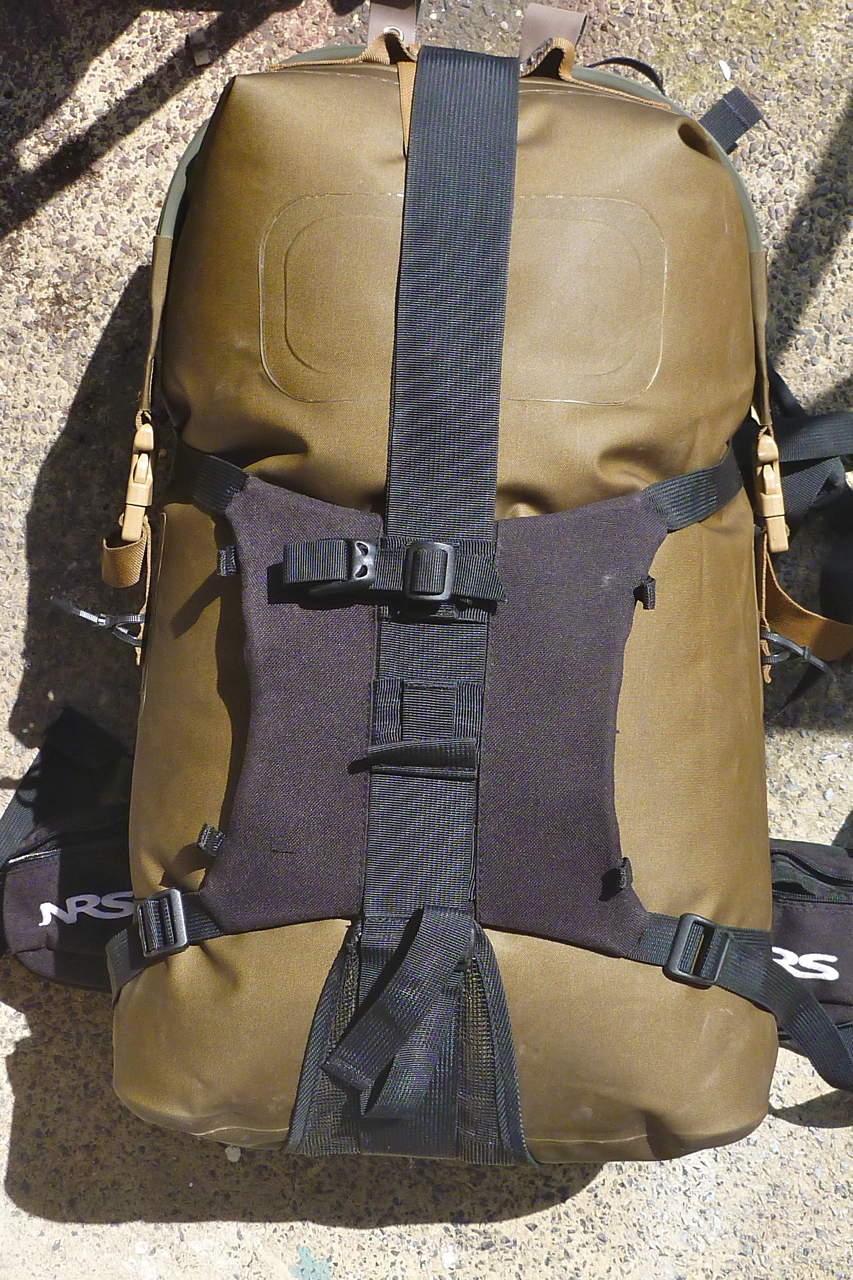
NRS Bags: just a roll-top dry bag with shoulder straps; not a long hauler
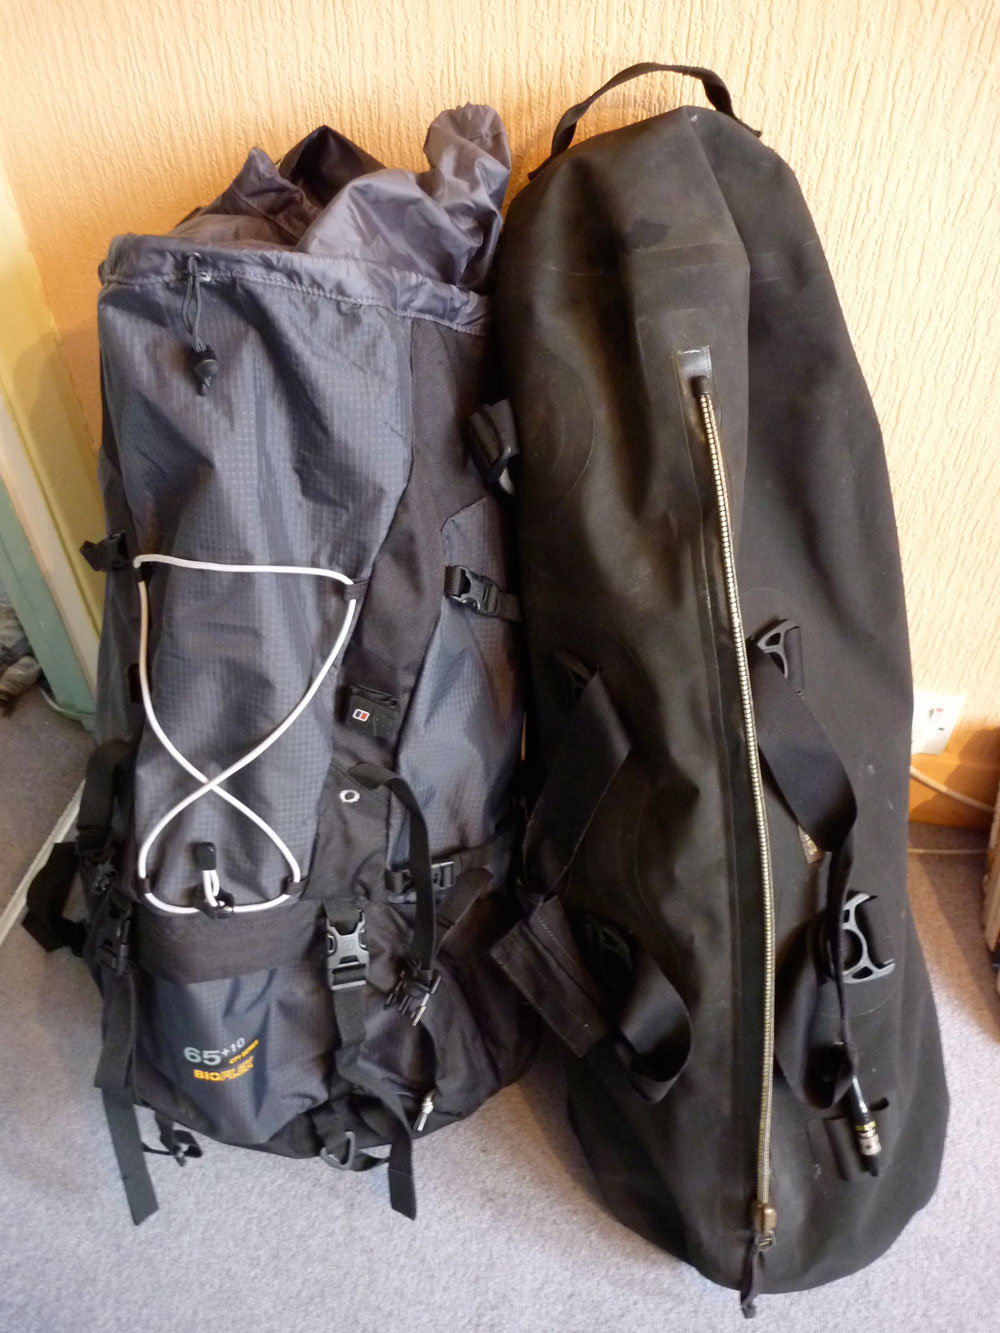
What’s wrong with a regular rucksack? Well, they’re not waterproof like a PVC dry bag can be, and if you have a proper dry bag likje NRS above, you’ve less need for a backpack which is just more bulk. Plus, once you account of 4-5kg of rafting clobber, it won’t all fit in a normal hiking rucksack and on the water you may end up with a soaking backpack, or one which is hard to cram into hull storage. I tried this on my very first multi-day packrafting adventure from Morar to Rannoch Moor way back in 2010 with my Alpacka Llama, carrying a huge roll-top vinyl dry bag (left; like the NRS bags). I was stronger then and it sort of worked, but once you get into it, a dry bag lashed to a pack harness works best. Wet things are separated or more accessible.
I jumped in the deep end with my Flex PR, carrying an initial load of 18kg on a four-day tour of the Knoydart peninsula with my Rebel 2K. My plan was rather over ambitious for a new area, so it turned out to be more walking than paddling. I came back to do it better a couple of weeks later so the Flex PR got a week’s heavy hauling, covering about 70 miles.
Back Packing, Back Packing, Oh isn’t it wild?Pull-out ribbed and curved alloy stiffening rod
Out of the box the Flex PR comes in three sections: the load-carrying back panel incorporating the fabric strap-down flap which wraps up and around your dry bag and then cinches down at the sides. The lumbar panel is supported by a removable, pre-bent ribbed alloy stiffening rod which you want to take care not to bend. The wide hip belt slips in through a sleeve at the base of the back panel and velcros in place. And the shoulder harness slips down into another velcro sleeve with various adjustment marks. At 6′ 1″ (1.85m) and after some experimenting, I settled on the longest setting, as below left.
The back pad and big sleeve and outer pocket (right)Inside of the harness which wraps round a drybag
I do wonder how securely velcro will hold the weight after a while, but it’s not like you’re undoing it several times a day, and most of the weight rests on the hip belt with velcro on both surfaces. The PR has loads and loads of straps: six on the hip belt; twelve plus a bungie on the back panel, and three on the shoulder harness. With your own dry bag it will take a while to configure the PR to your liking, but after that you can leave it be. You may also be tempted to snip off the excess on the straps, but initially it’s better to knot them up or try and tuck them out of the way until you know for sure which ones are really too long. Better too long than too short. (The foot-long shoulder-top tensioning straps are primary candidates for the snip.) After a day or two, in an effort to reduce strap overload I detached the removable stabiliser ‘Z’ straps. Six side straps and two over the top ought to do the job. These Z-straps had some interesting removable buckles (above right) I’ve not seen before.
Dangling straps keep the flies awayUDB was too slim and sausagey for the Flex PR
6MD 50L dry bag with purge valve
You’ll need a rugged and dependable dry bag to handle prolonged rain, persistent waves and rough handling, although with my Rebel 2K I’ve lately joined the ranks of packrafters stowing baggage inside the hull, not out on the bow, so on the water a submersible-grade dry bag becomes less critical. The Flex PR is designed to be used with 6MD’s 50-litre, 227g (8oz) roll-topdry bag (another $45; left) which includes four side loops which match up with the harness’s side straps. (I didn’t ask for, or use this bag.) What it’s made from or coated with is not stated on the link above, but one review listed ‘210D TPU-coated Nylon’, which sounds the same as a lightweight packraft hull. It includes a purge valve which will release any air after the bag is rolled up for packing and as you cinch down. Nice touch.
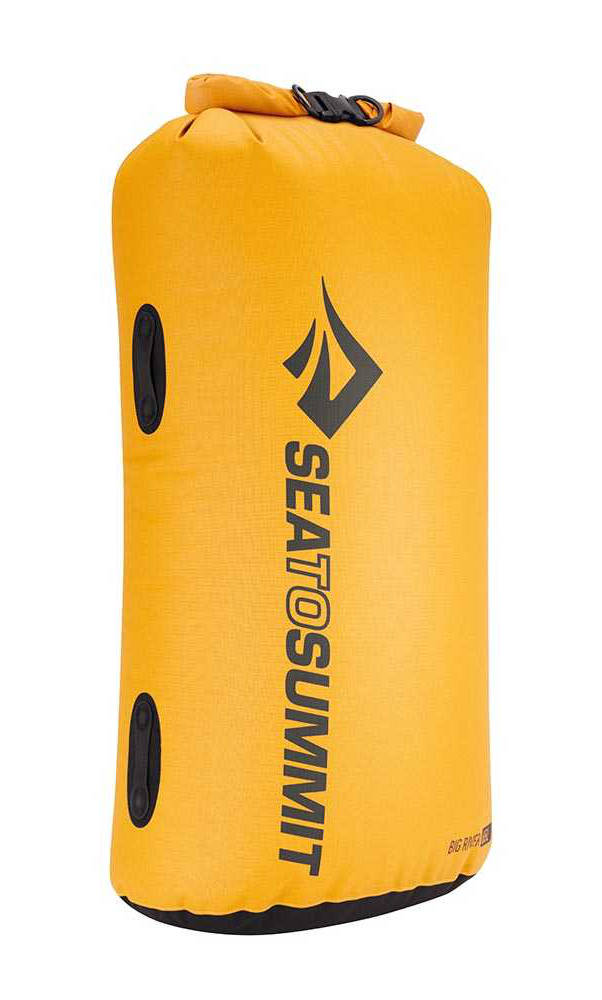
Sea to Summit Big River 65L
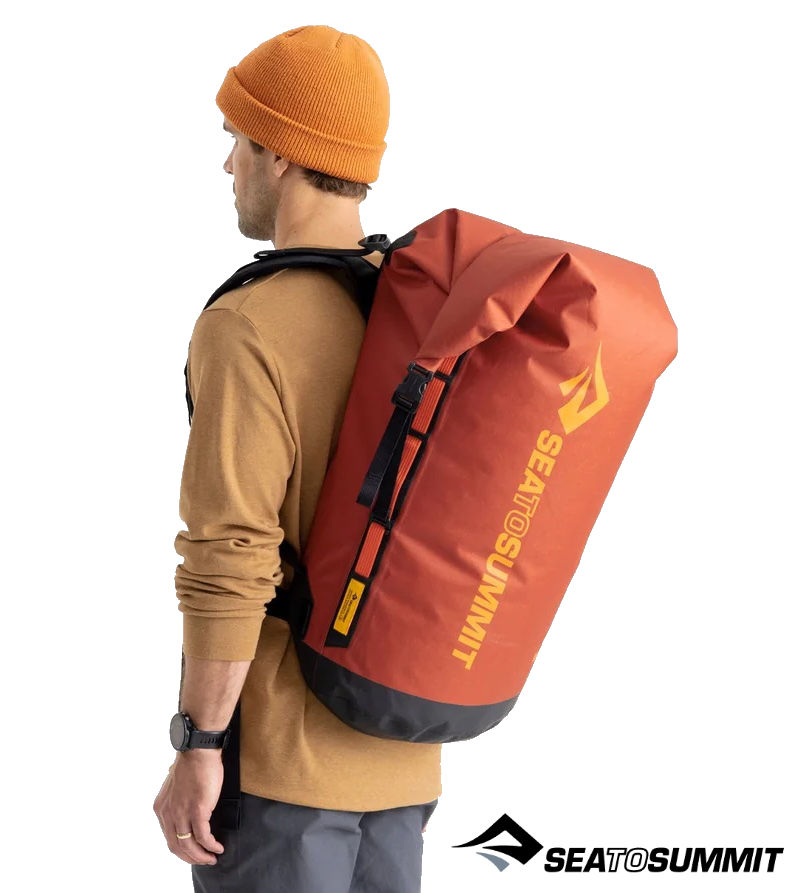
Although the Flex PR has generous external storage and additional lashing options, I do feel that 50-litres is aminimum for a few days out in the back country. Better a larger bag and add another couple of rolls of the closure. Something like the ovalised Australian Sea to SummitBig River65-litre TPU roll-top (left). This is TPU laminated on 420D nylon with a white lining and a textured, ripstop exterior. It weighs 315g (verified) and has hypalon side loops which more or less line up with the Flex’s side straps. It now costs £80. Compare it to S2S’s 75-litre Big River Dry Backpack for £150 of less, with a thin hip belt.
It took the first Knoydart recce trip to realise my large, sausage-like UDB duffle wasn’t suited to the Flex. And much as I prefer a top loading holdall-style bag, every morning I had to re-lash my black UDB into the harness, made harder by everything being black. When bothered by swarms of midges or rain, you don’t want to have to think about re-lashing the pack correctly each time, and there were times my long, thin load felt lopsided because the tall bag lacked girth.
Don’t mention the B-word
I’ve since tried to tidy up the set-up by tucking in unneeded loose ends and tying coloured ribbons to the important cinch straps, just like better tents have colour-coded markers for poles, but I couldn’t tighten the UDB down properly so it was often lopsided. So I bought myself the S2S Big River 65 dry bag, top-loading, like a rucksack. As mentioned, the Rebel 2K’s massive 140-litre in-hull storage capacity now makes a bombproof, over-the-bow dry bag like my trusty UDB redundant.
triple dry bag test
Back home, I dummy rigged three dry dry bags (above), but I can see it might still be a faff lashing on each time, just with added colour. However, one benefit of this multi-bag idea would be they pop straight into the 2K’s capacious TubeBags with no emptying and repacking. That would be handy on a trip where you’re switching between walking and rafting more than once a day.
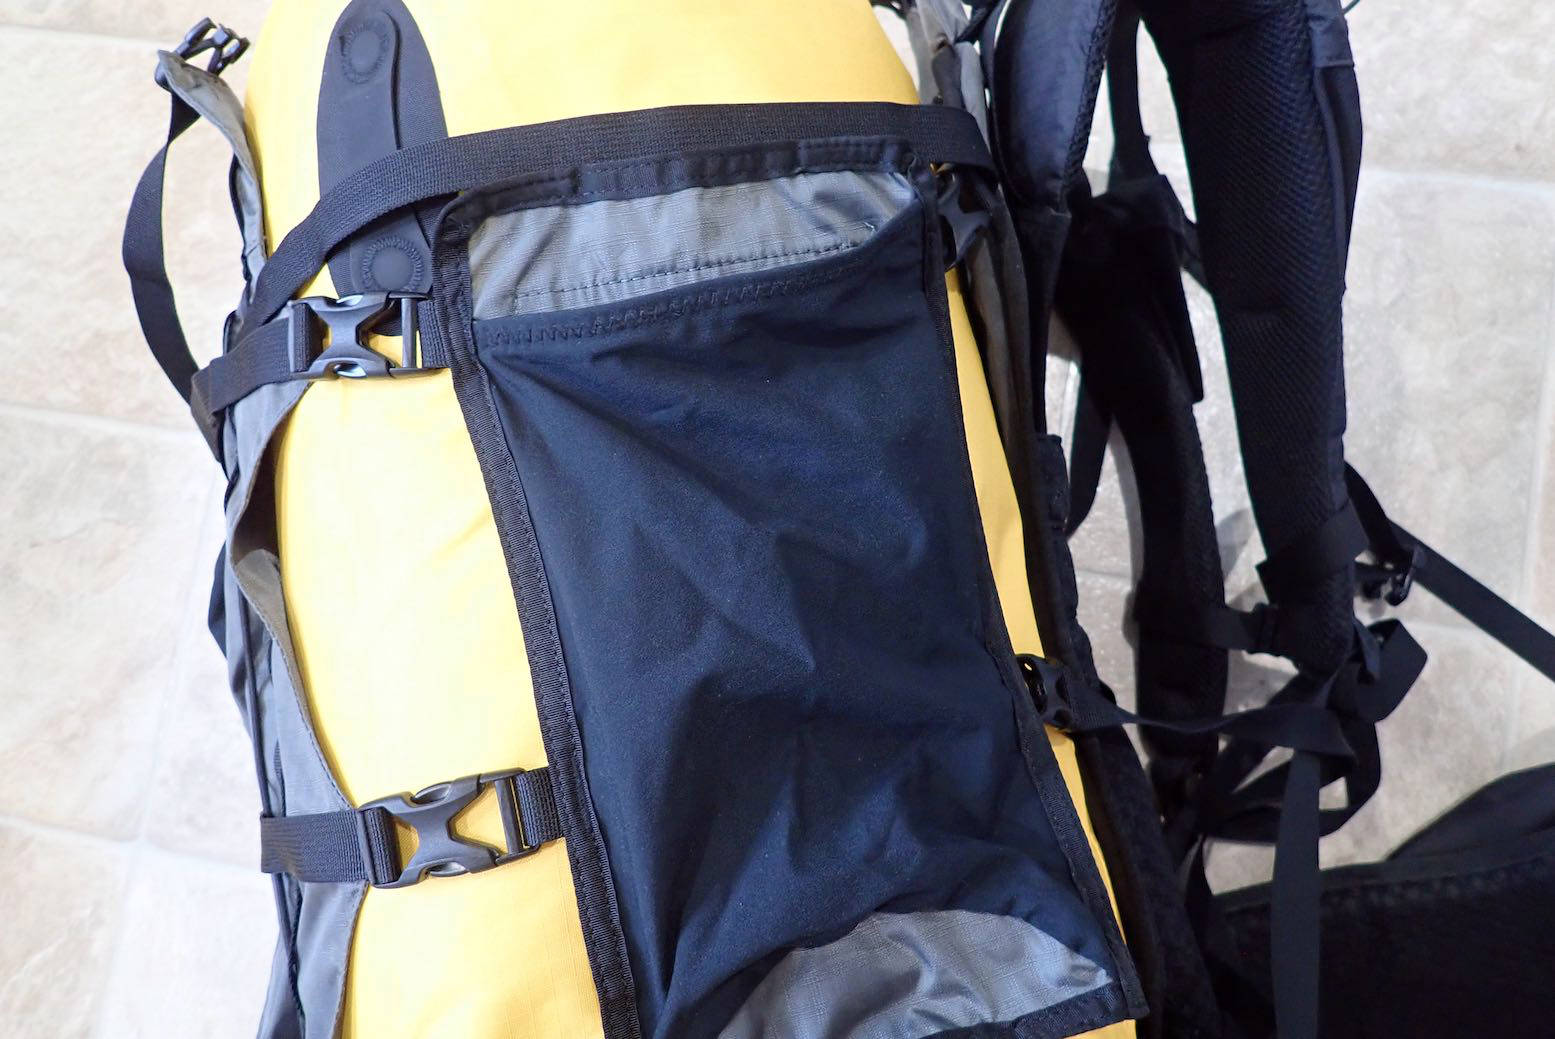
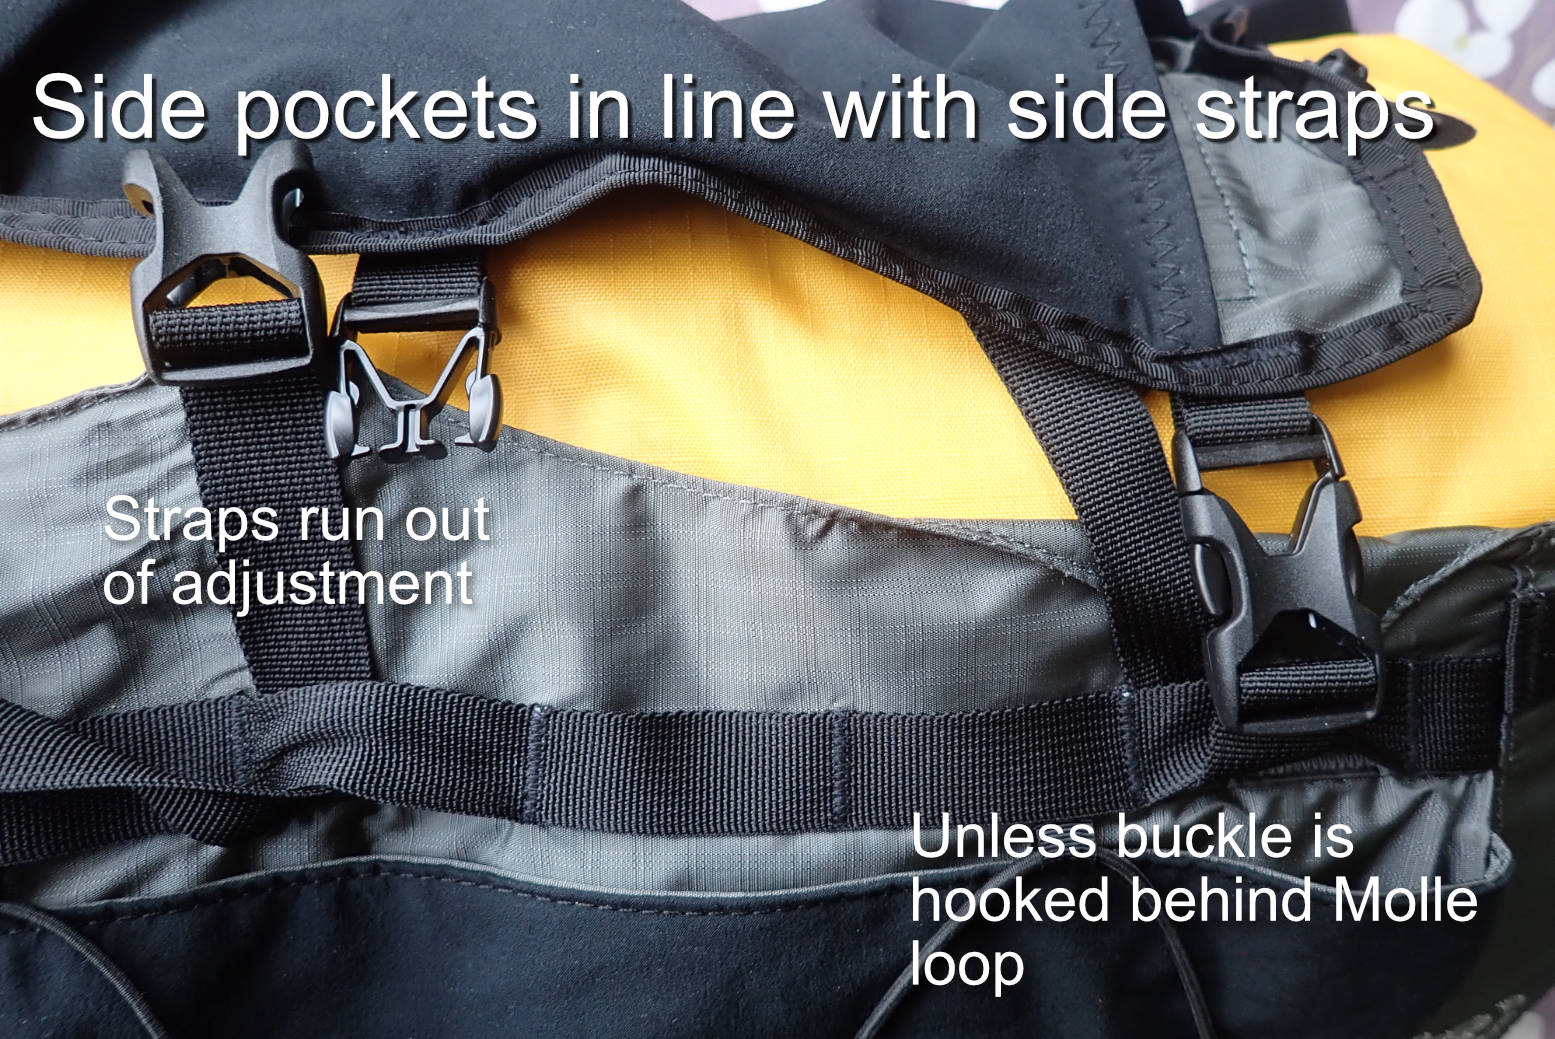
Pockets One of the best things about the PR are the numerous pockets which do their best to replicate a regular backpack, adding to convenience on the trail, something I missed on the Paragon. There’s a small hidden zipped pocket inside the back panel, two big fist-sized zip-ups on the hip belt and two detachable side pockets. With a stretchy outer fabric, these will easily each take a 1.5 litre water bottle or a rolled up cag. They can clip in line with the side cinch straps (below left), or can be Molle’d (daisy chained) from behind. Attaching them in line would make tensioning easier, but unless your load has a massive girth, the width of the pockets combined with the wide back panel makes it difficult to fully tension a normal sized pack properly before you run out of adjustment. Maybe my Sea to Summit bag was an odd shape, but it’s 30% bigger than the 6MD dry bag. Setting the rear panel buckles two inches further towards the centre would do the trick. One way round this might be to slip you paddles down the sides to add girth.
Side pockets clipped in line; too much slack for cinching
Next, you have stretchy cinch-up pockets sewn to the shoulder straps but, as others have noted, they’re too small to secure anything bigger than a Garmin InReach or maybe a midge net, and are set oddly high. On me they were level with the tops of my shoulders. Although they have to dodge the chest strap which can be Molle’d up or down in five positions. It would be better if the pockets were Molle-backed too. As it is, it’s easy to buy accessory shoulder-strap pockets for your bigger items. Not done get. The wide outer cover has a big open sleeve which swallows a four-part paddle, and in front is a long stretchy, gusseted zip pocket for more of whatever you’ve got. On top of that is a criss-cross elastic cord which I used to attach a WindPaddle.
Removable 2-litre side pocketsAdjustable lumbar support
My walk was quite hard: 18 miles on day one, followed by a tough crossing from sea level up to 1500 feet and back down to sea level. While I got a few initial aches from old injuries initially carrying over 18kg, at no time did my shoulders get sore which proves the stiff harness panel was taking the weight at the hip belt (and from there down to the hard-pressed feet). And the hip belt is particularly good: the pockets aren’t waterproof but are a useful size (unlike the Paragon), and the twin straps each side mean you can cinch it in snugly, whatever your hip shape. I’d have preferred a bigger hip belt buckle and in fact found all the Flex’s clip buckles oddly hard to link; they didn’t readily clip together, possibly due to relatively soft, bendy plastic.
Packraft underneath is vulnerable to scuffs but lower CoG.
On the way back to the Inverie ferry I decided to take the packraft out of the UDB and strap it underneath (above), using the fitted straps for this purpose. Surprise, surprise, the lowered load carried much better. Hung outside and quite wide but out of sight. But the rolled-up boat is vulnerable to getting snagged on barbed wire fences, farm gate latches, or when being hauled about in transit.
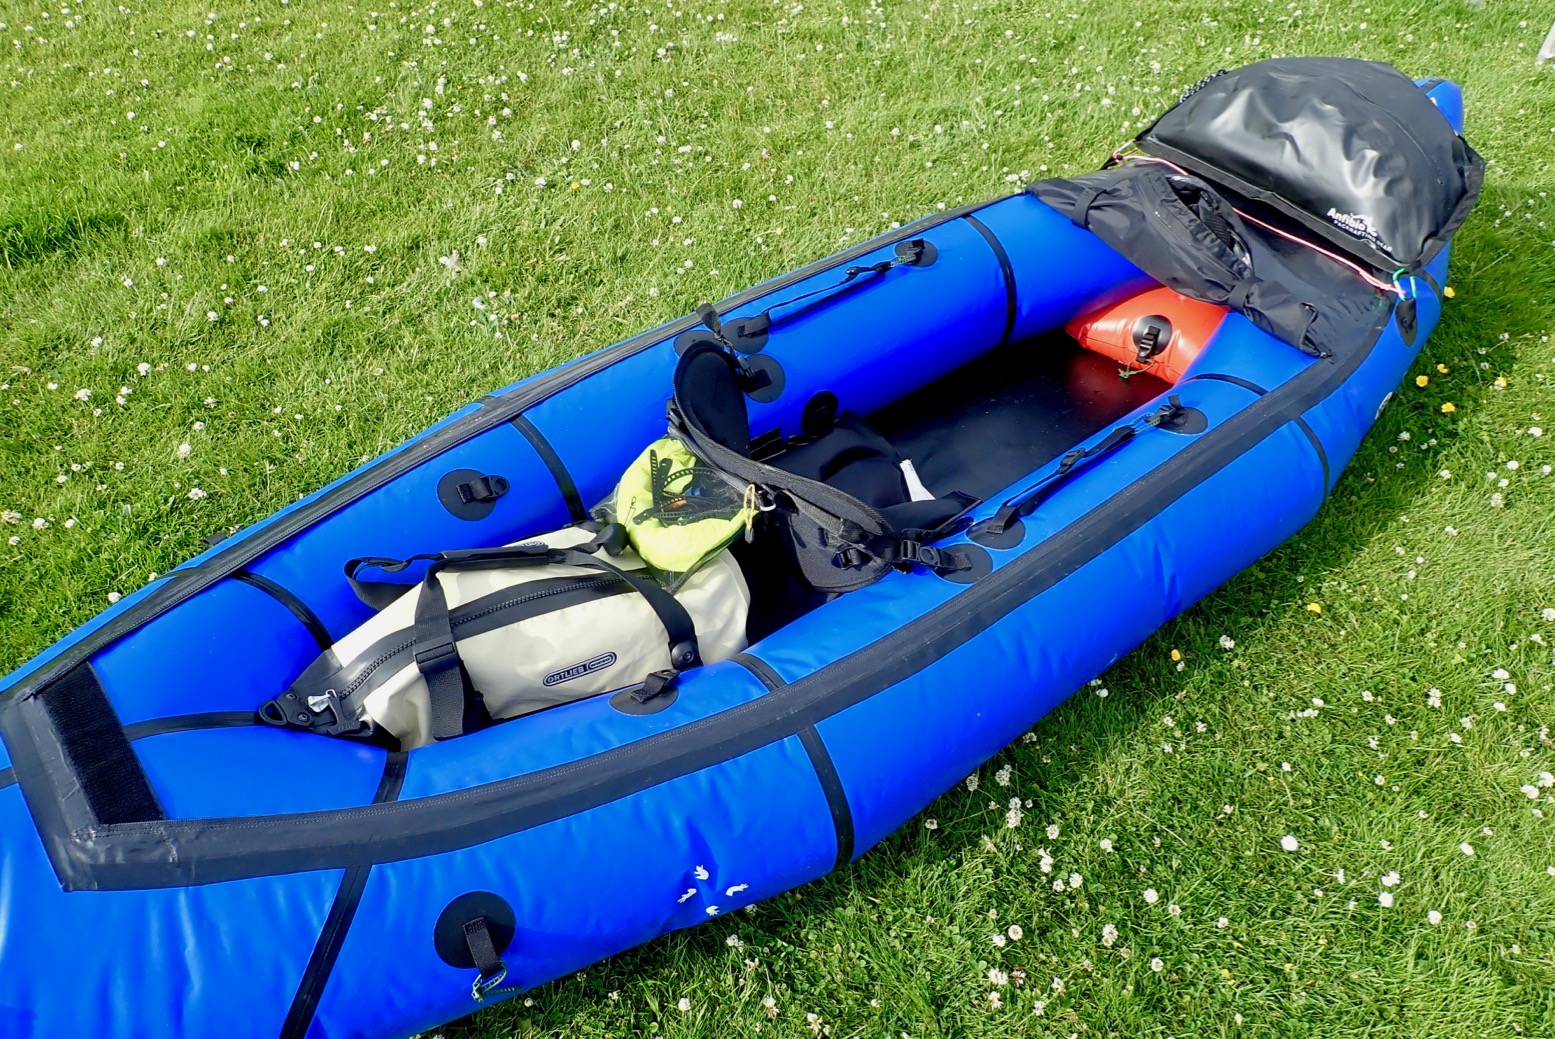
Knoydart Trip Two I returned to Knoydart with a chum and the 65-litre S2S Big River (below). Left attached in the harness’ side straps, this made the Flex work as intended like a regular rucksack; no need to re-lash or adjust too much every morning or when swapping from walking to paddling.
Sea to Summit 65-L Big River dry bag. That’s more like it
Roll top closure may seep through eventually; a cover could be easily tucked under the straps
Using the 65-litre bag, I did wonder if 50 might well be adequate, but this was with minimal and compact camping kit. Any warm- or spare clothing or a dry suit would soon need more volume in the dry bag. We had two half-days of lashing rain; my mate fitted a shower cap over his regular rucksack and I found the water had seeped only a little way through the rolled folds of the Big River., as it does with most roll tops. The bigger your bag the more tight rolls you can make on the closure, but actually in pouring rain it would be fairly easy to tuck a cover over the closed dry bag rolls to stop any rain getting there.
Boat dry bag as foot matFlex PR under the knees with handy pocket access
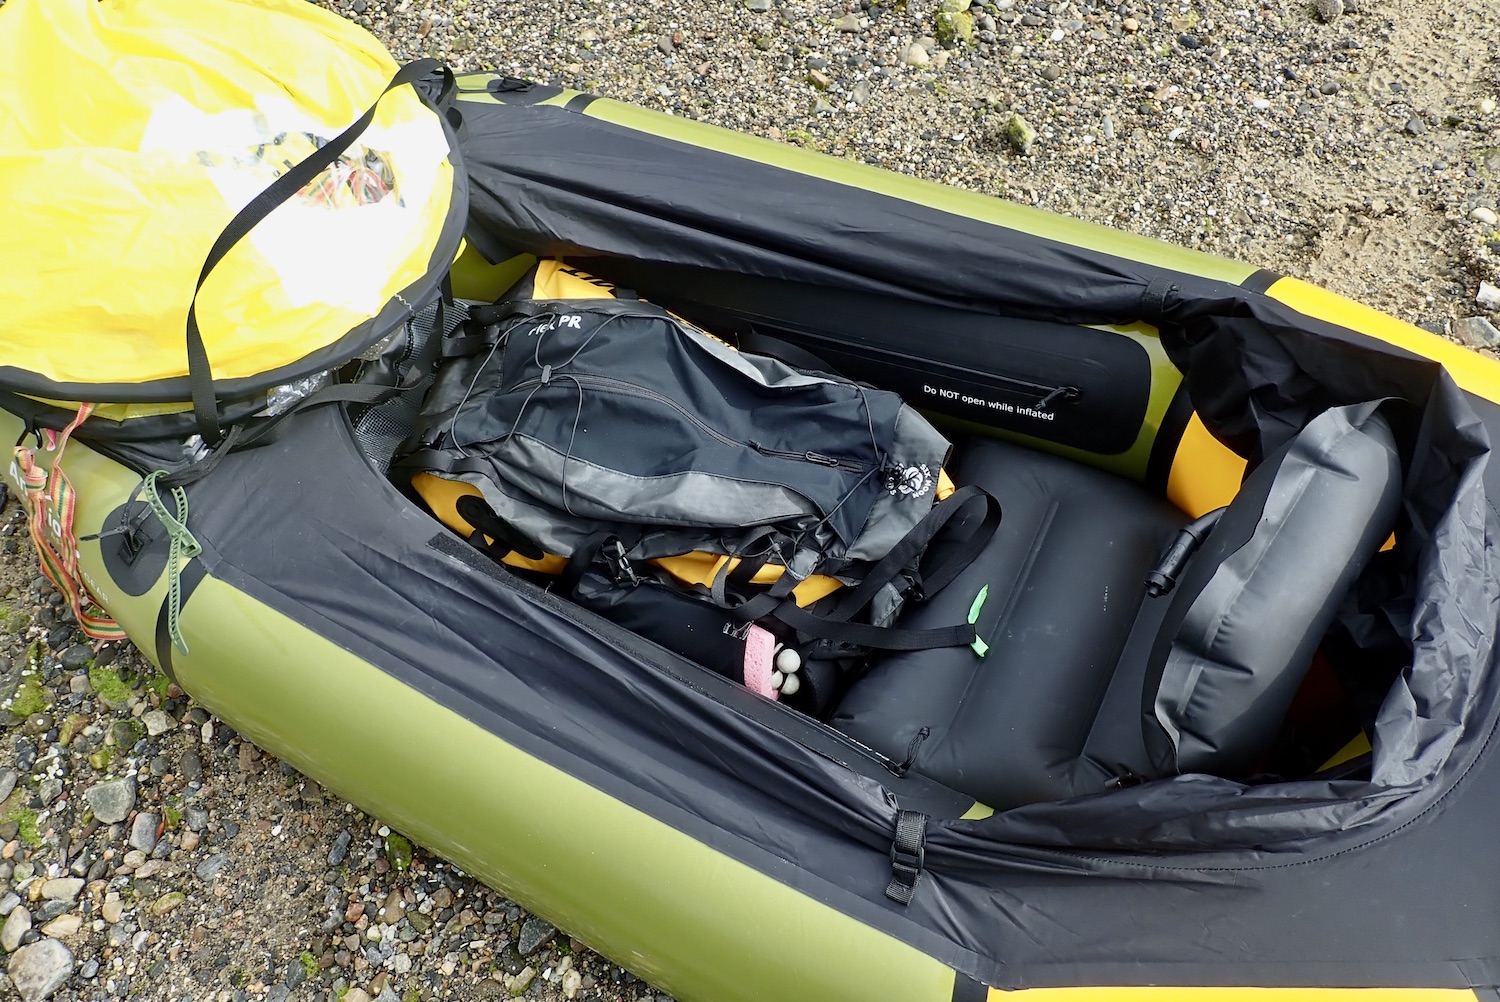
With everything within the pack loaded into six bags, it took just a minute to transfer them into the Rebel 2K’s hull and zip it up. I then used the chunky Gumotex dry bag which held the packraft as a footpad on the packrafts’s floor (to stop gritty boot heels prematurely chewing up the boat’s floor) and found I could easily shove the empty harness under my knees and zip up the deck. This made repacking the Flex at the shore relatively quick easy, though it always takes 20-30 minutes to get going.
The Flex PR now carries its load as well as can be expected and the S2S Big River added capacity for cold weather gear or a dry suit. I must say I didn’t really miss the lack of a purge valve; you burp the bag in the usual way then roll it down. Any spare air will be squashed out by the compression of the straps. The combination now offers reliable waterproofing on foot, while the pack would work OK on the bow, though in-hull storage (if it fits) and harness under the knees is more secure all round.
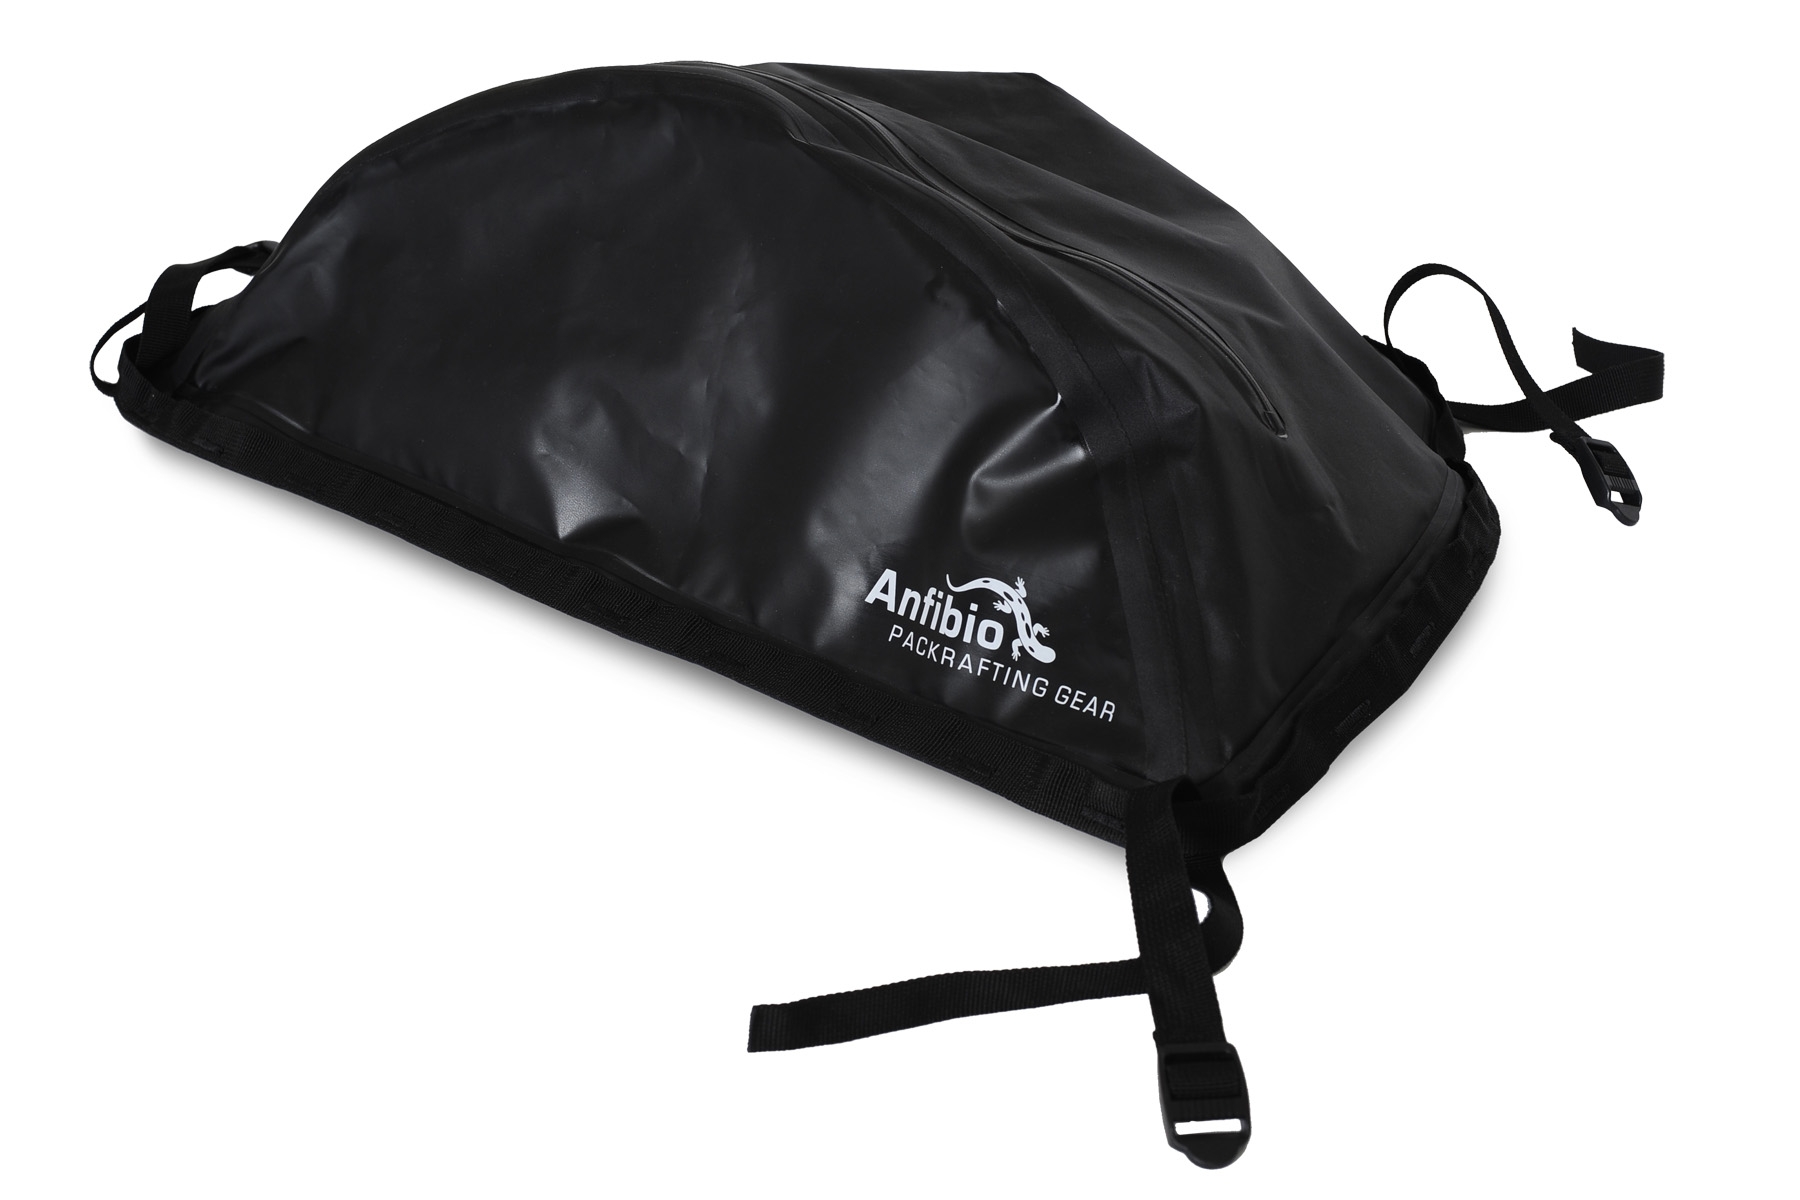
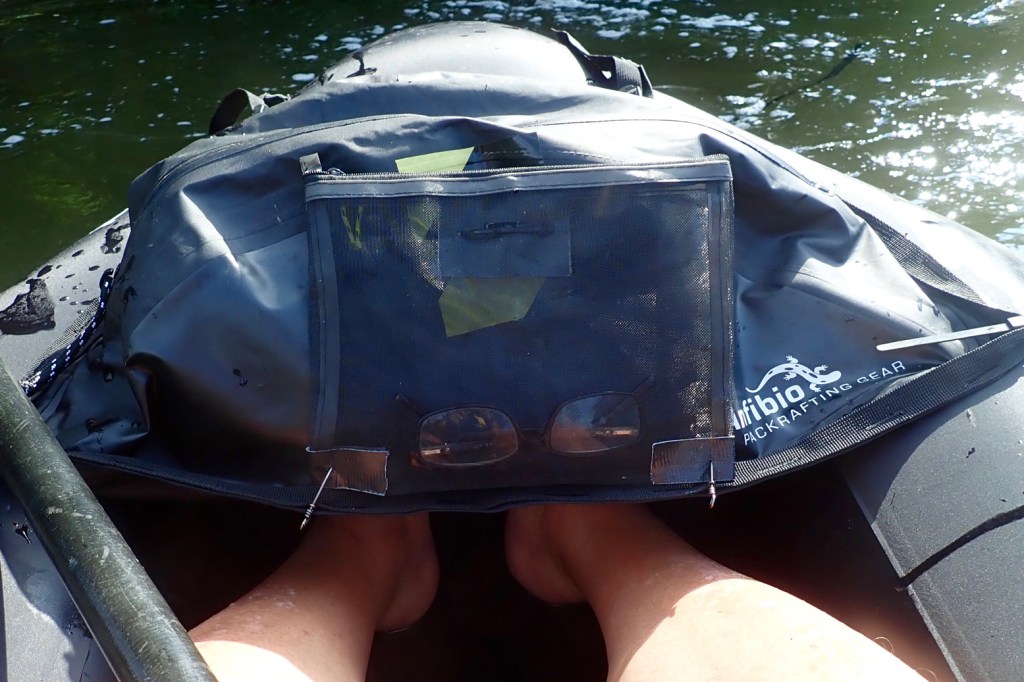
PS: On both trips I used my roomy 20-litre Anfibio DeckPack (below) as a handy day pack for which it worked very well. The stuff inside is behind a waterproof zip, is easily accessible on the move and up to a point, keeps the lashing rain from wetting out your cag.
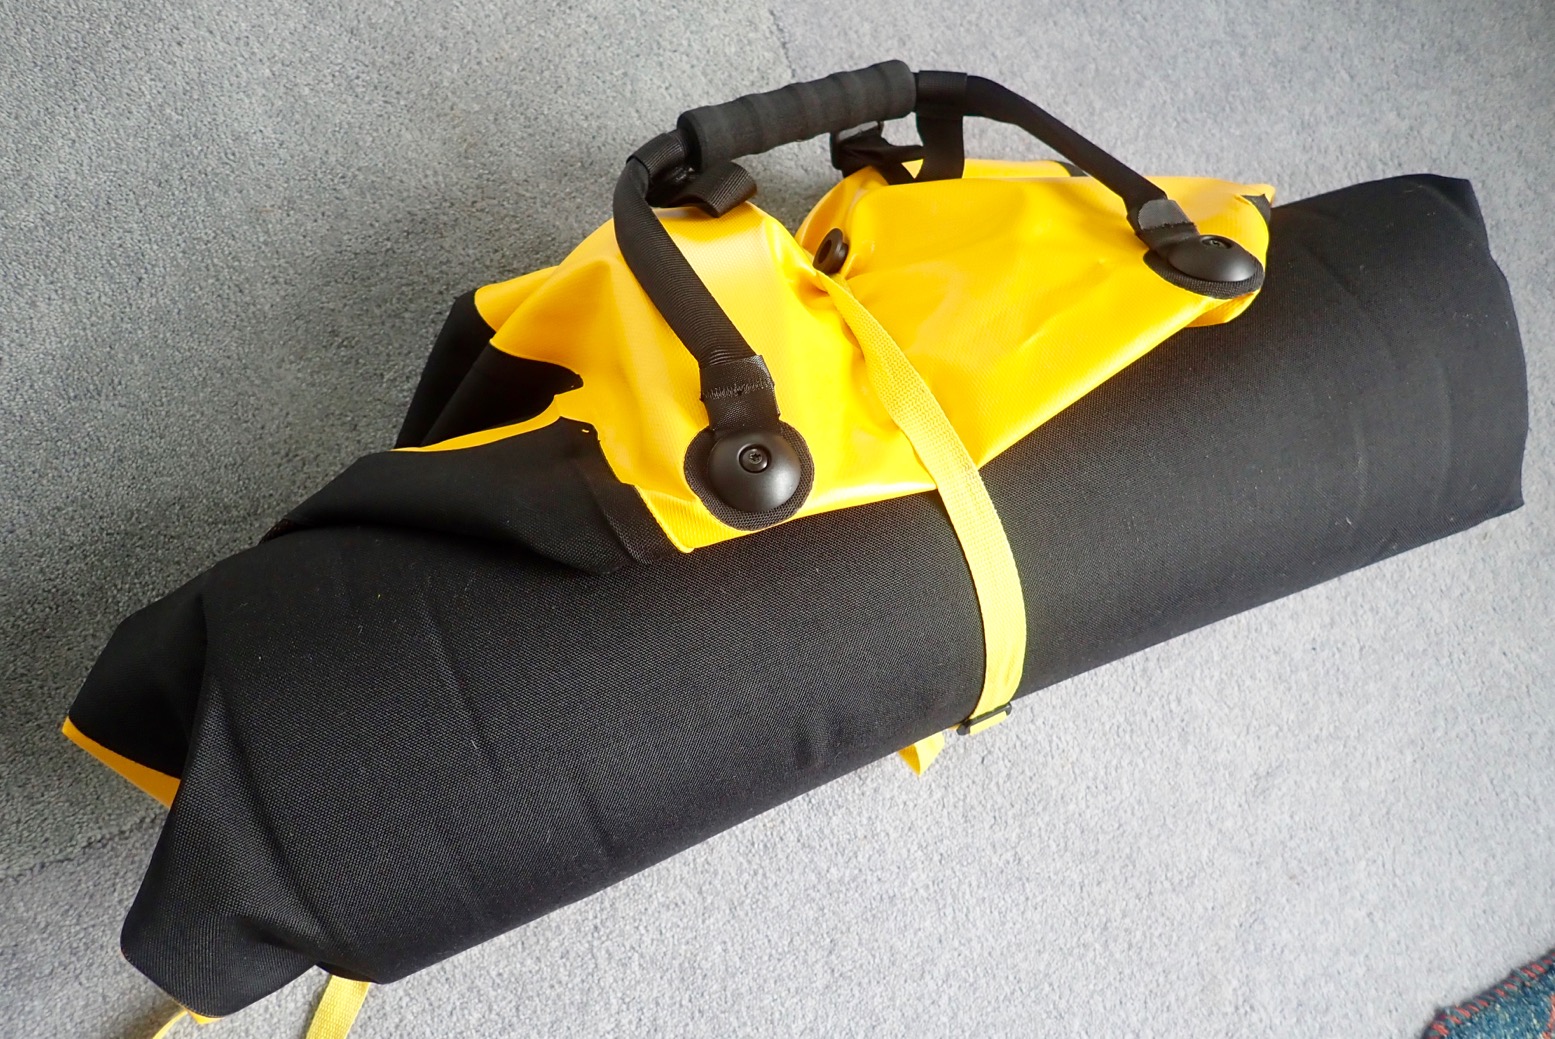
In a line: Huge IP67 submersible roll duffle/backpack with integrated ‘trolley’.
Cost: £180 (shops seen from £185, typically £230).
Weight: 3170g (verified).
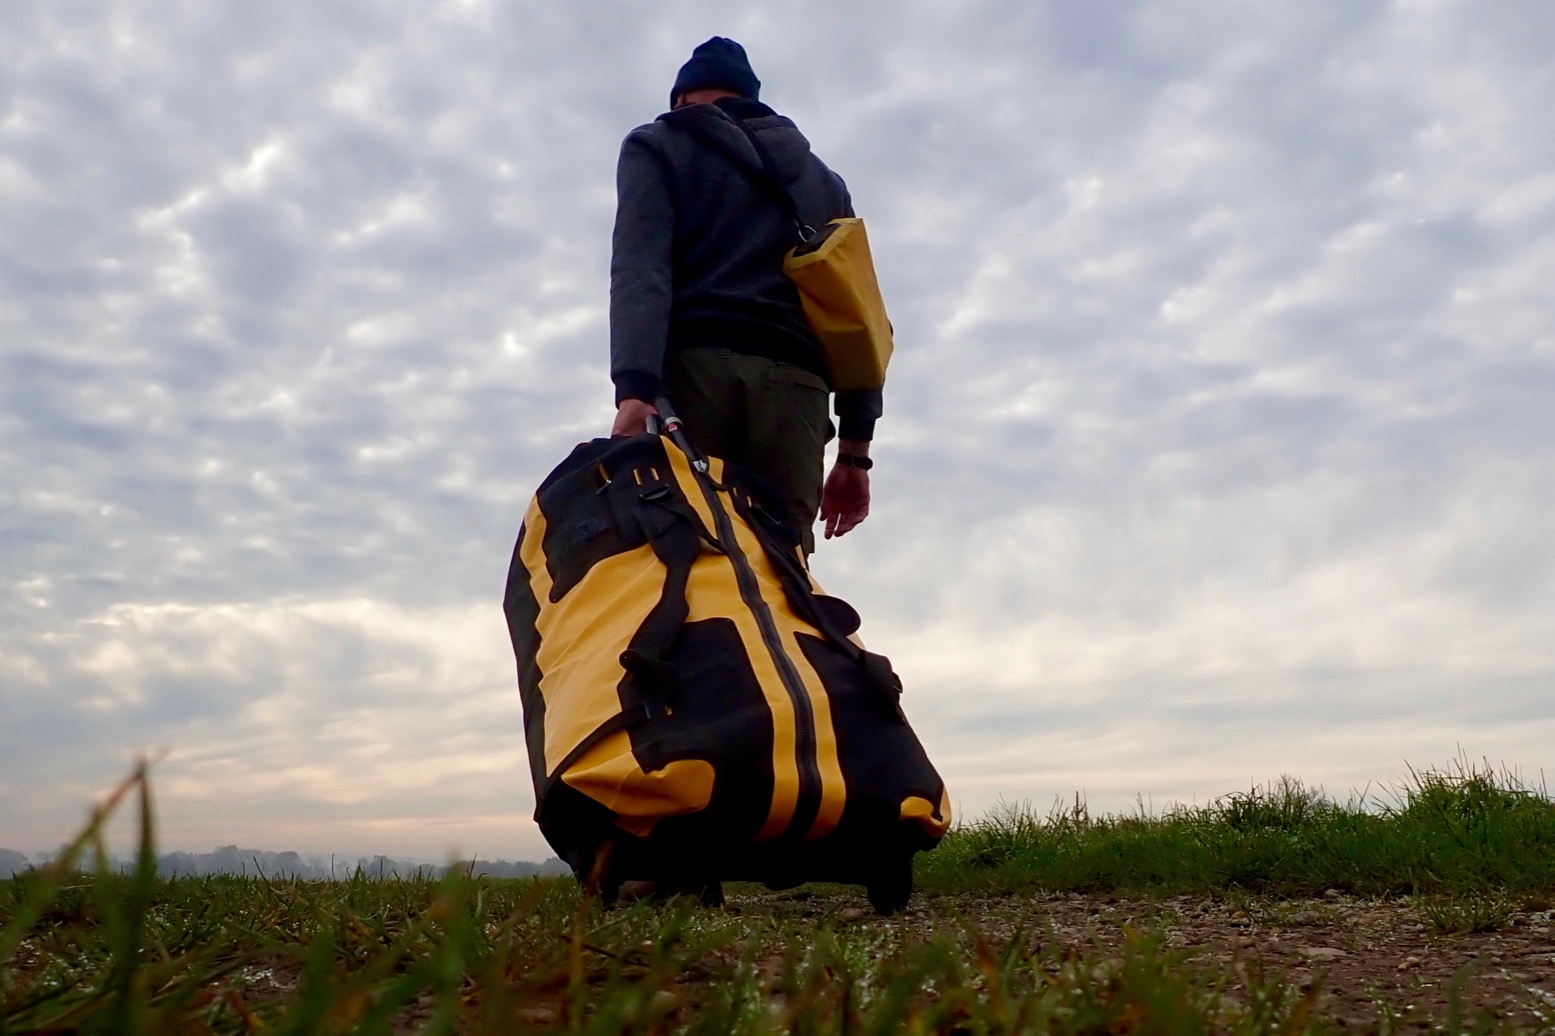
Where tested: A mile’s walk to a river on road, track and path.
• Durable wheel design • Rolls up • Waterproof TiZip • Non-rigid design less prone to damage • Lockable main zip • Exterior mesh pocket • Detachable backpack harness • Rigid handle eliminates bobbing • Easy to remove wheels
• Costs a lot, but so do they all in this size • PVC feels a bit thin • Little mud clearance for wheels
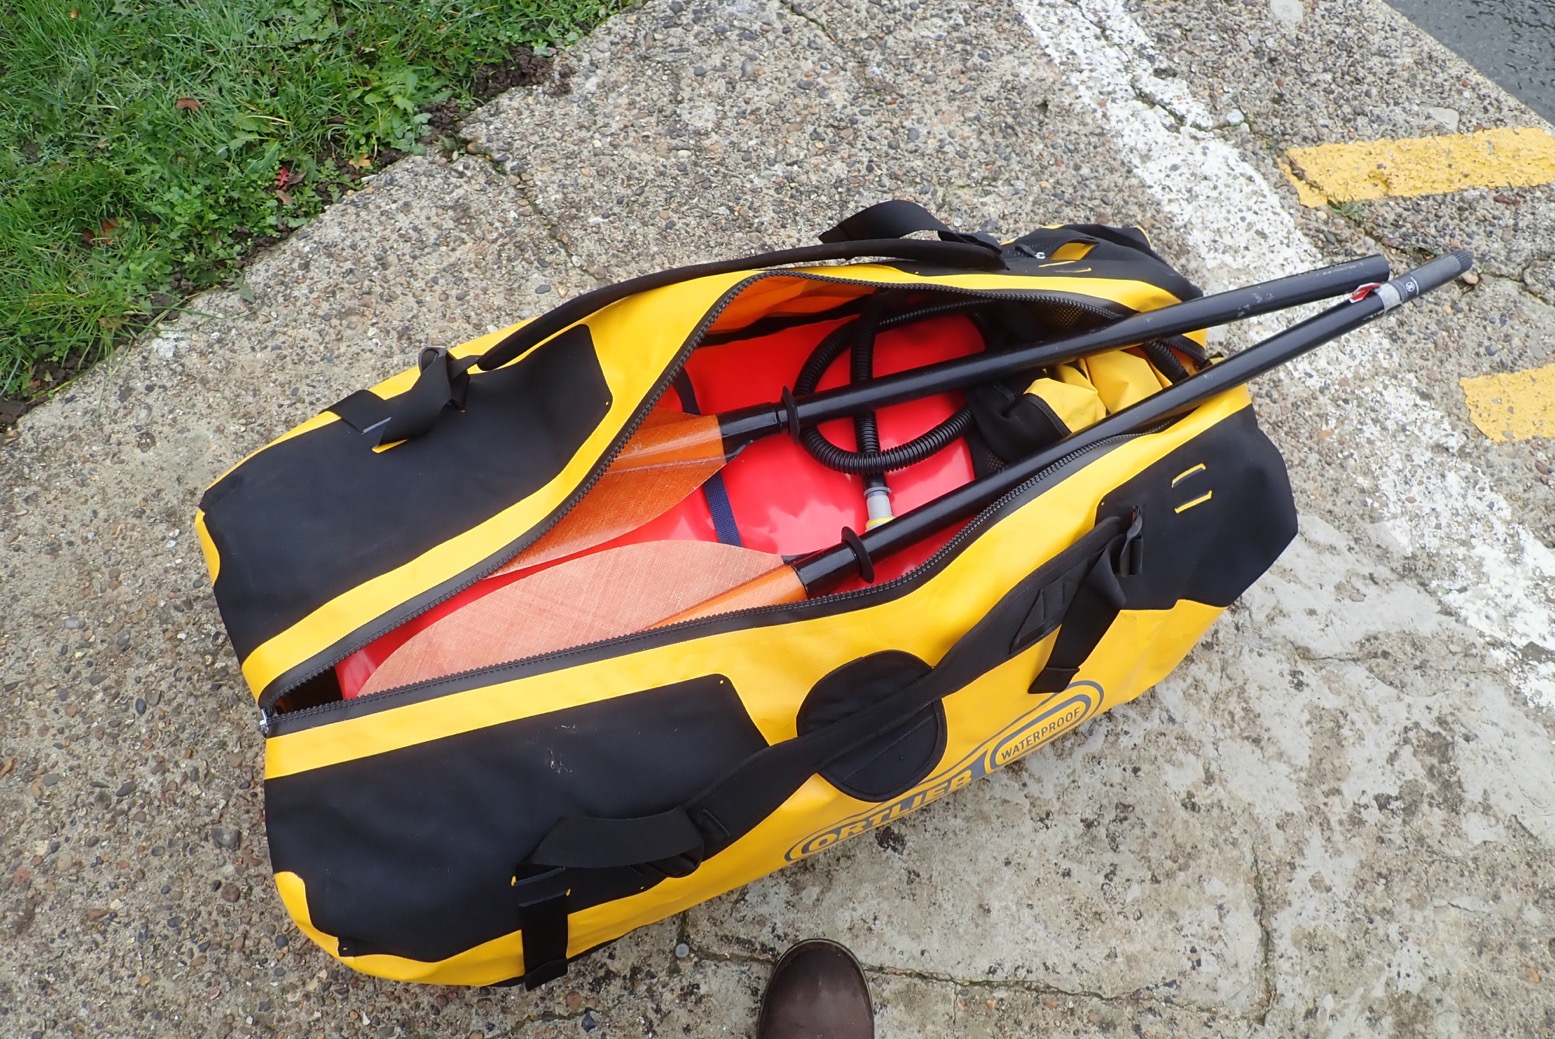
What they say … the Duffle RS is made to withstand the rigours of the most adventurous of expeditions while at the same time offering a high degree of travel comfort. The bag’s heavy-duty wheel system is connected to the body of the bag in a waterproof manner. The 100 mm wheels and the rigid floor plate made of contoured aluminium offer increased floor clearance – ideal for both airport terminals and rugged outdoor terrain. And given the importance of lightweight luggage, especially when travelling by plane, the bag’s designers opted for an adjustable grip that guarantees plenty of leg clearance and comfortable towing instead of a heavy telescopic towing frame. The foam padding at the base of the bag offers enhanced stability when the bag is fully loaded and the watertight zipper that runs across the whole length of the bag gives you quick access to your gear. The zipper can also be locked using the integrated wire loop and a small cable lock (not included).
Review
In need of a replacement for NZ, I chopped down a cheap folding trolley and lashed it to my trusty 96-litre UDB sausage bag (left). It was unstable but worked pretty well and all weighed in at just 2.7kg. With airline baggage limits at 22kg or so, luggage weight becomes important, but luggage must also be robust enough to withstand rough treatment, not least by baggage-weary baggage handlers. This bodge was a valiant attempt at not splashing out on Ortlieb’s RS140 Duffle which I’s been eyeing up for months and fitted my needs: a stable and submersible roll bag with good clearance and integrated wheels. A few months later an unused, RS popped up on eBay about 20% cheaper than the shops and, like the feeble consumer I am, I fell for it. More gear, sigh…
Orlieb does two types of wheeled duffles: the RG (‘riGid’) series in 34-, 60 and 85 litres with a rigid floorplate or frame supporting an extendable aluminium handle (right), like regular wheeled luggage. And the more unusual frame-free ‘roll-able’ RS (‘Saggy’) series in 85, 100 and 140 litres.
Wheeled duffles are nothing new: all the major outdoor outfitters do models up to 140 litres. But like the Ortleib RGs, they all use rigid frames for the telescoping handles which sees weights exceed 5 kilos. None claim any level of IP-rated submergibility and few have a backpack harness which, at huge capacities, is more realistic than a shoulder or holdall straps.
In a kayak and especially a packraft, a rigid bag is a nuisance. Only the Ortlieb RS can be rolled up (below left) and only the 140 is big enough to easily swallow a big IK and gear (below right).
rolls up…… fills up
With wheeled bags intended for rugged terrain, large 100mm ø wheels roll over irregularities better and can give better clearance. What’s important is a solid mounting as the bearings or axles get a hammering when loaded up on rough ground. The RS’s wheels have a smooth solid feel and have replaceable bearings and the solid alloy plate – effectively part of the axle – also takes the knocks from stones. The wheels are also easily removable with a 3mm hex key. Handy if a stone gets jammed in there or mud clogs then up
It’s the full-length TiZip which makes this bag special; IP67 rated which will do me. Because it’s long, getting my Seawave in there was easy and left 30 litres for camping and paddling clobber. If you just want a day transporter for a solo IK, the RS 100 may do you. When closed, the zip end hooks on to a stud and you can slip a padlock under an embedded cable to lock it in place (above right). On the water, the idea is that, once you’ve deployed the boat, the bag carries the rest of your camping stuff in a more compressed form, plus with a guarantee that it won’t get wet inside. This makes the RS a truly do-it-all big-hauler on land and sea.
At the other end the two-part handle has a rigid bar and an adjustable strap for length and I found the bag rolled along better than my UDB lash-up. It didn’t bob because of the rigid handle, and it didn’t catch my walking legs either. Finally, a comfy roll bag.
Inside, a 20mm-thick foam base is glued in to protect the floor from sharp impacts; the floor gets an additional layer of Cordura on the outside too. And the compression straps incorporate a zipped document pocket. The backpack straps are thin and basic – good for stairs but not really fit for the north face of the Matterhorn. But the whole frameless soft bag sags nicely across the back and is surprisingly comfortable at 20kg all up. You’ll want to carry it on paths as below as the mud soon clogs up the narrow gap around the wheels.
The backpack straps join up with velcro to make a carry handle and there’s another handy grab handle at the wheeled end. The backpack straps are removable so could easily be replaced with something cushier, but it’s a big load to carry on the shoulders for long. Four bag-top tabs (not really ‘daisy chains‘) allow you to lash on yet more gear, like paddles. There’s also a small zipped mesh pocket (left). The PVC is the same thickness as regular Ortlieb roll bags. For something able to carry such heavy loads and getting knocked about in and out of airports, I’d have preferred something more durable. That would of course add weight, and one good thing with this stuff is that it’s dead easy to repair, either with tape or a dab of Aquasure.
My 100-L Gumotex Seawave backpack has been rolled up from new and is stashed for when the boat gets sold. The RS is now the Seawave’s spacious travel bag. It rolls along just as well as you’d expect: nice and stable (unlike my UDB trolley set up), has good clearance and protection, (although the Cordura picks up the dirt and mud) and sits surprisingly well on the back for a frameless backpack. My 4-part Manta Ray paddle fits right in, along with a foam PFD, barrel pump and all the other day-out knick-knacks. Full camping gear with Seawave may require an extra bag.
Adding an oral inflation/suction valve
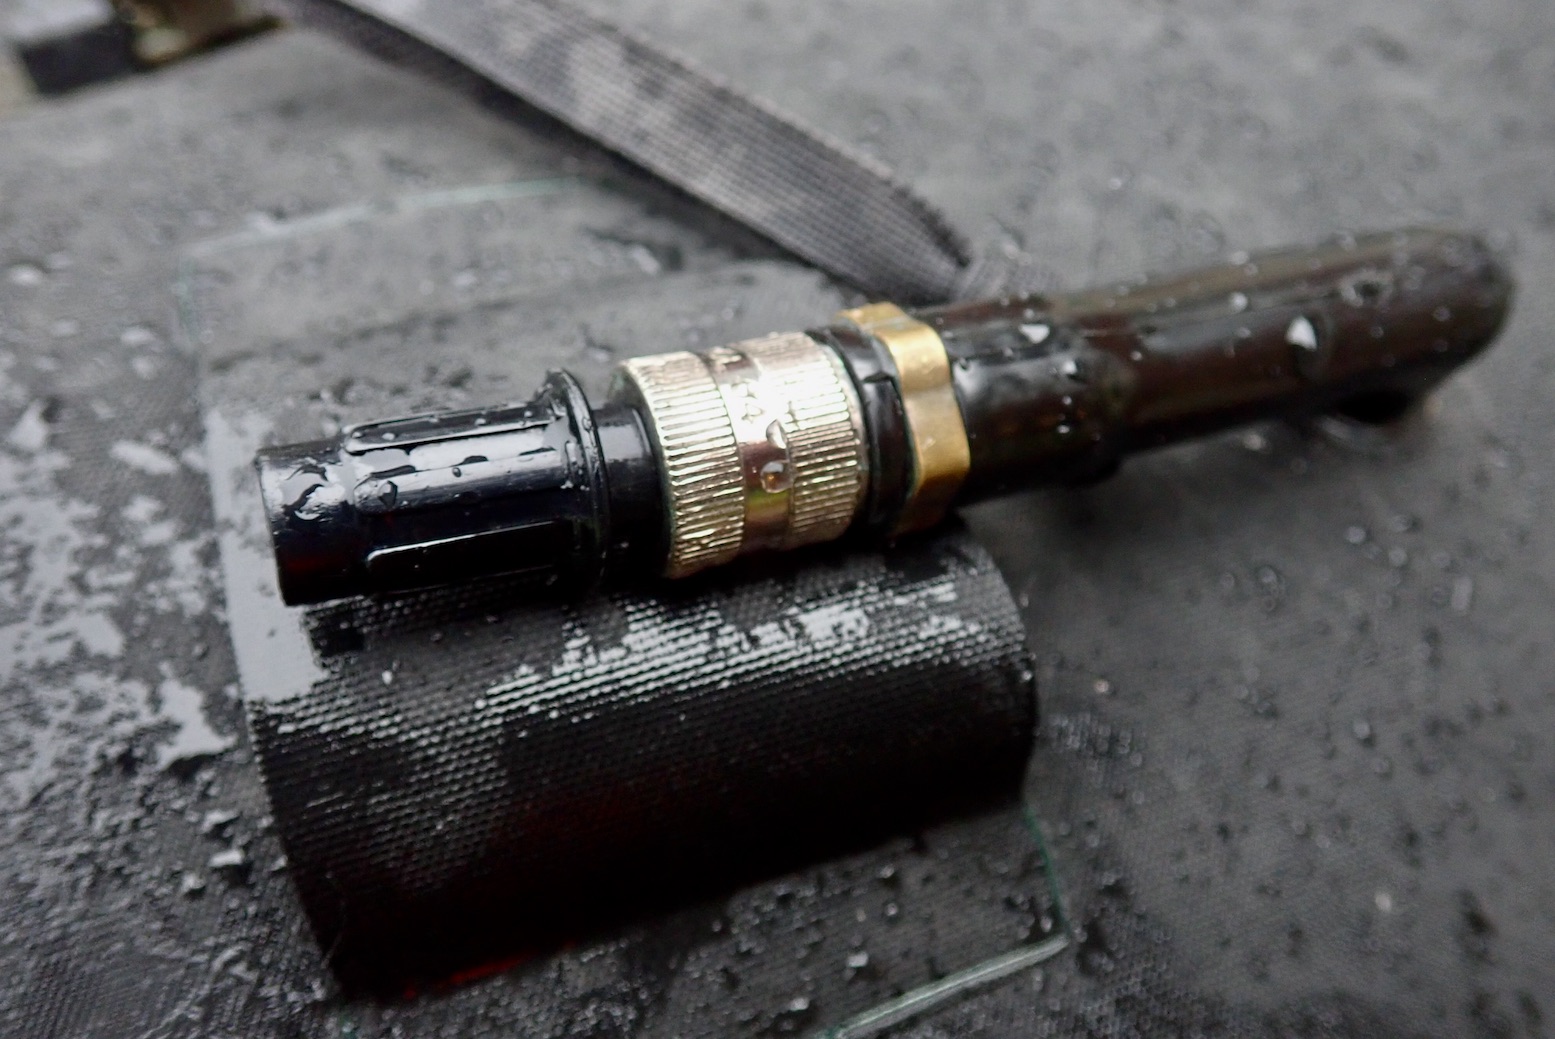
Some reviewers say the RS is saggy to roll when not packed full. I suppose that may be true. But because the RS should be airtight, fully inflated or vacuum sealed, it ought to hold that form and be less of a wheeled sack. Yes you can squish it down and do up the zip, quick. Or you can fit an oral inflation valve protected inside the exterior mesh pocket (left). They’re hard to find online; try here or here. Now I can suck the bag down, much like I would a boat using the pump in reverse to get it compact. Do it to RS and the bag becomes ‘vacuum sealed’ and much stiffer. There’s less chance of the belly dragging on rough ground and you’d like to think less chance of snags from loose folds. Fully inflating would not be quite as effective as I find the bag cab be into an annoying bob as you walk because the air can compress. Sucked down it’s as stiff as a board. Another good reason for a valve on a bag like this that you can blow it right up as a buoyancy aid to cross a narrow but deep river, or to get ashore after a razorbill puffin bites your boat. Either way, for wheeling rigidity or emergency buoyancy, an oral inflation valve is handy when using such a bag for paddling.
Sealed bags on planes Whenever I checked in my UDB for a flight I always opened the zip a bit so it wouldn’t burst or strain the seams in the decompressed hold. Turns out I was over-thinking it. Cargo holds are pressurised at the same level as the rest of the craft; a tubular fuselage shape (right) requires it to spread stresses evenly. Yes, it is reduced to 20% less than sea level pressure. That’s why some containers occasionally leak a little,
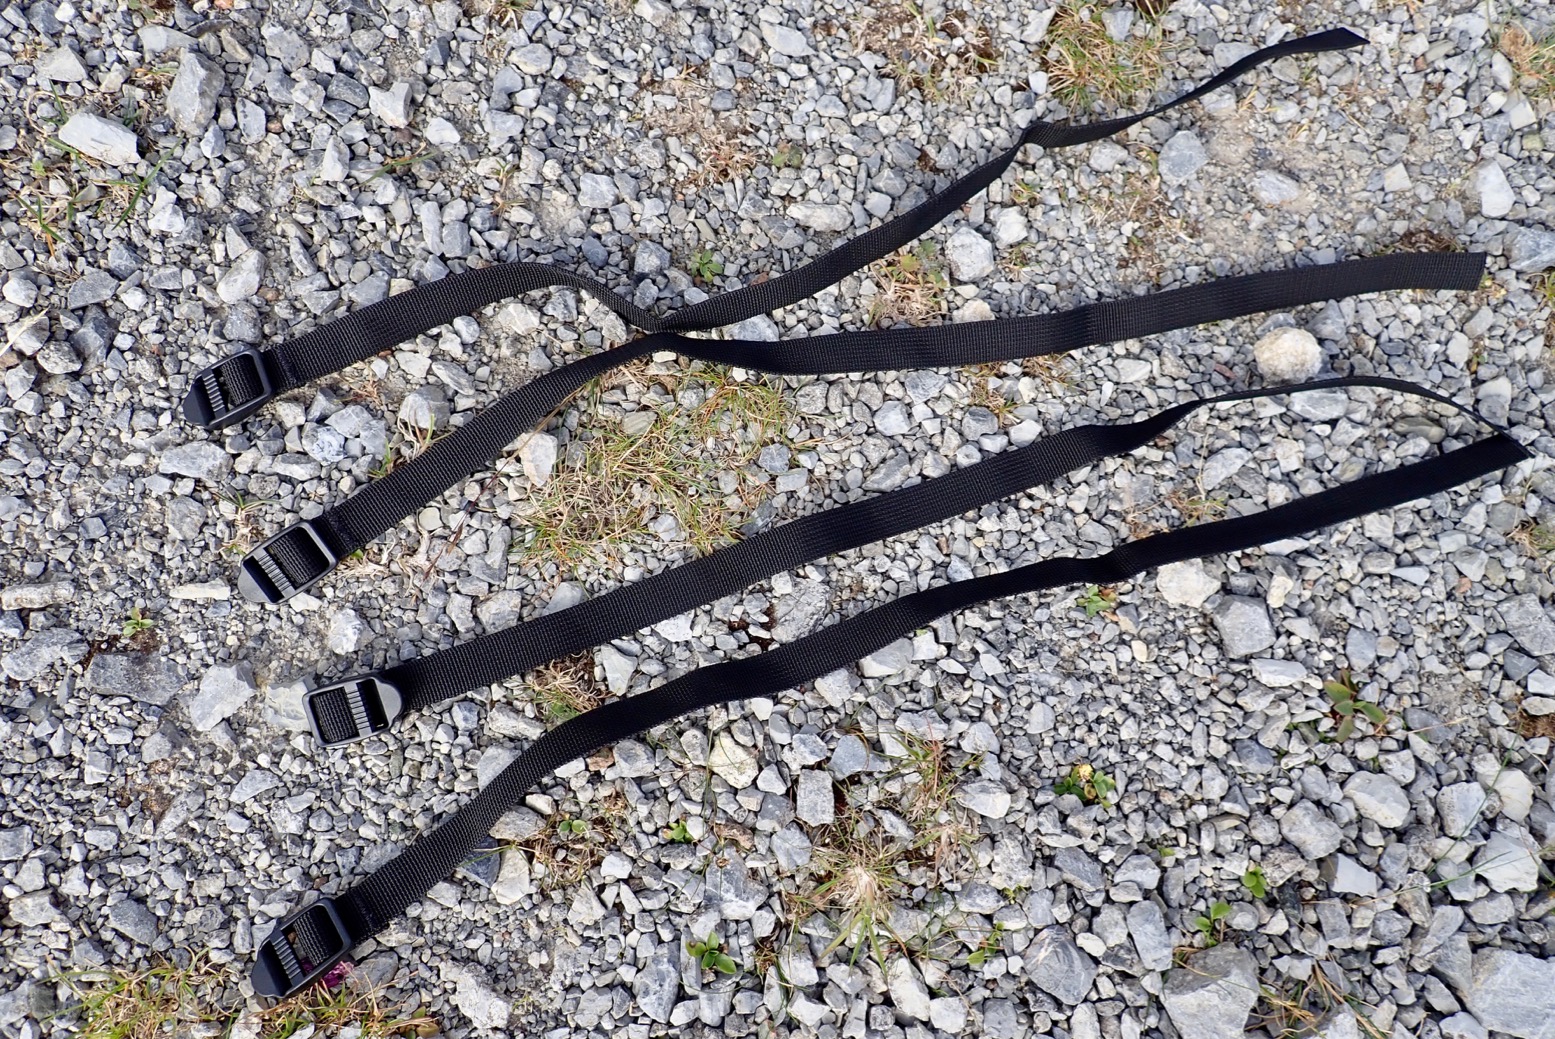
Weight, Size & Volume Bag: 224g; straps 11g each (verified) 59cm wide, 43 cm long and ~15 high when full. Volume: 22 litres.
Where tested Northwest Scotland, Medway, Knoydart, Jurassic Coast
• Waterproof construction including IPX7 zip • Light • Variety of attachment options, providing you have the mounts • Four 58-cm straps included • Works great on the trail as a shoulder bag too • Handy Molle rim tapes • You can easily tuck a once-folded WindPaddle underneath or even inside
• On the bow of my Nomad was a bit of to reach; better on the Rebel 2K and TXL • Not convinced it works well as a floor bag • Won’t stay up to be a pillow • A white interior and external mesh pocket would be really good • Drop the straps and use reusable zip ties – quicker and easier
What they say Waterproof zippered packraft bow or stern bag for easily accessible essentials on the water. Fits any Packrafts (and a lot of other boats) by full perimeter daisy chain (for variable fastening). With the Anfibio DeckPack you can transport your essentials safely and securely in all conditions. Splash-sensitive valuables like a camera, keys or documents as well as emergency equipment and spare clothing are always at hand on the bow, the stern or on the floor beneath your knees. The DeckPack can also be quickly converted into a daypack for excursions on land or the use as hand luggage on your journey.
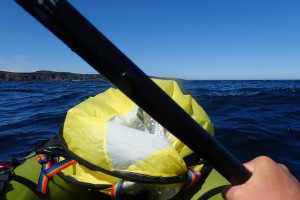
One great side benefit of a DeckPack is that a WindPaddle sail easily folds down and half tucks under the bag securely in seconds. A paddle can also tuck in under the bag securely while sailing.
Review The problem with packrafts is there’s nowhere to put your stuff other than the bag it comes in, usually a backpack. I wrote more about it here, before making my own small Pakbag.
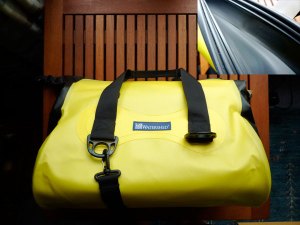
Otherwise, I like a 20-30L holdall, like my old Watershed Chattooga, or my current Ortlieb Travel Zip (right) with a handier TiZip and mesh-zip external pockets. These bags sit accessibly, but out of the way, under my knees, and on previous packrafts attached to a tab mount glued to the floor for when you flip.
Anfibio DeckPack with added mesh outer pocket
Anfibio’s DeckPack is another way of doing it. It resembles Alpacka’s larger, 24-litre Bow Bag but costs 25% less at current $/€ rates. It’s a vaguely semi-circular, PU-coated bag of around 22 litres which, unlike the Bow Bag, has a perimeter of daisy-chains (continuous attachment loops, a bit like Molle). It fits most obviously on a packraft’s bow, as this is where most packrafts have four tabs and where the weight trims the boat best. But you could as easily mount it on flatter sterns (as on my Nomad) if you already have a big backpack up front. Anfibio also suggest it can go inside on the floor too. Using the supplied straps, I’ve also used the pack as a shoulder bag while on the trail.
On my Nomad it just so happened the bow mounting tabs where just right to fit the bag without using the supplied straps. Reusable zip ties (below) are best. But mounted on the bow it was a bit of a reach on my Nomad unless I shuffled off the seat.
Too far forwardMore better
In fact there were enough hull mounts on my Nomad to position it further back (above right) using two front straps. Here it acts as a splash guard extension and was much more accessible on the water without making getting in and out too awkward.
Another very handy aspect of a DeckPack is that a mounted WindPaddle (left) or similar can be quickly folded in half and tucked under the bag out of the way when you’re setting off or need to change direction and start paddling. In strong winds this stashing of the sail is an important thing to be able to do easily and quickly; without a deck you can jam it under your knees, but with a deck the DeckPack or similar enables reliable stashing. Then, when you’re ready to sail again, you just pull out the sail and it’s up in a jiffy.
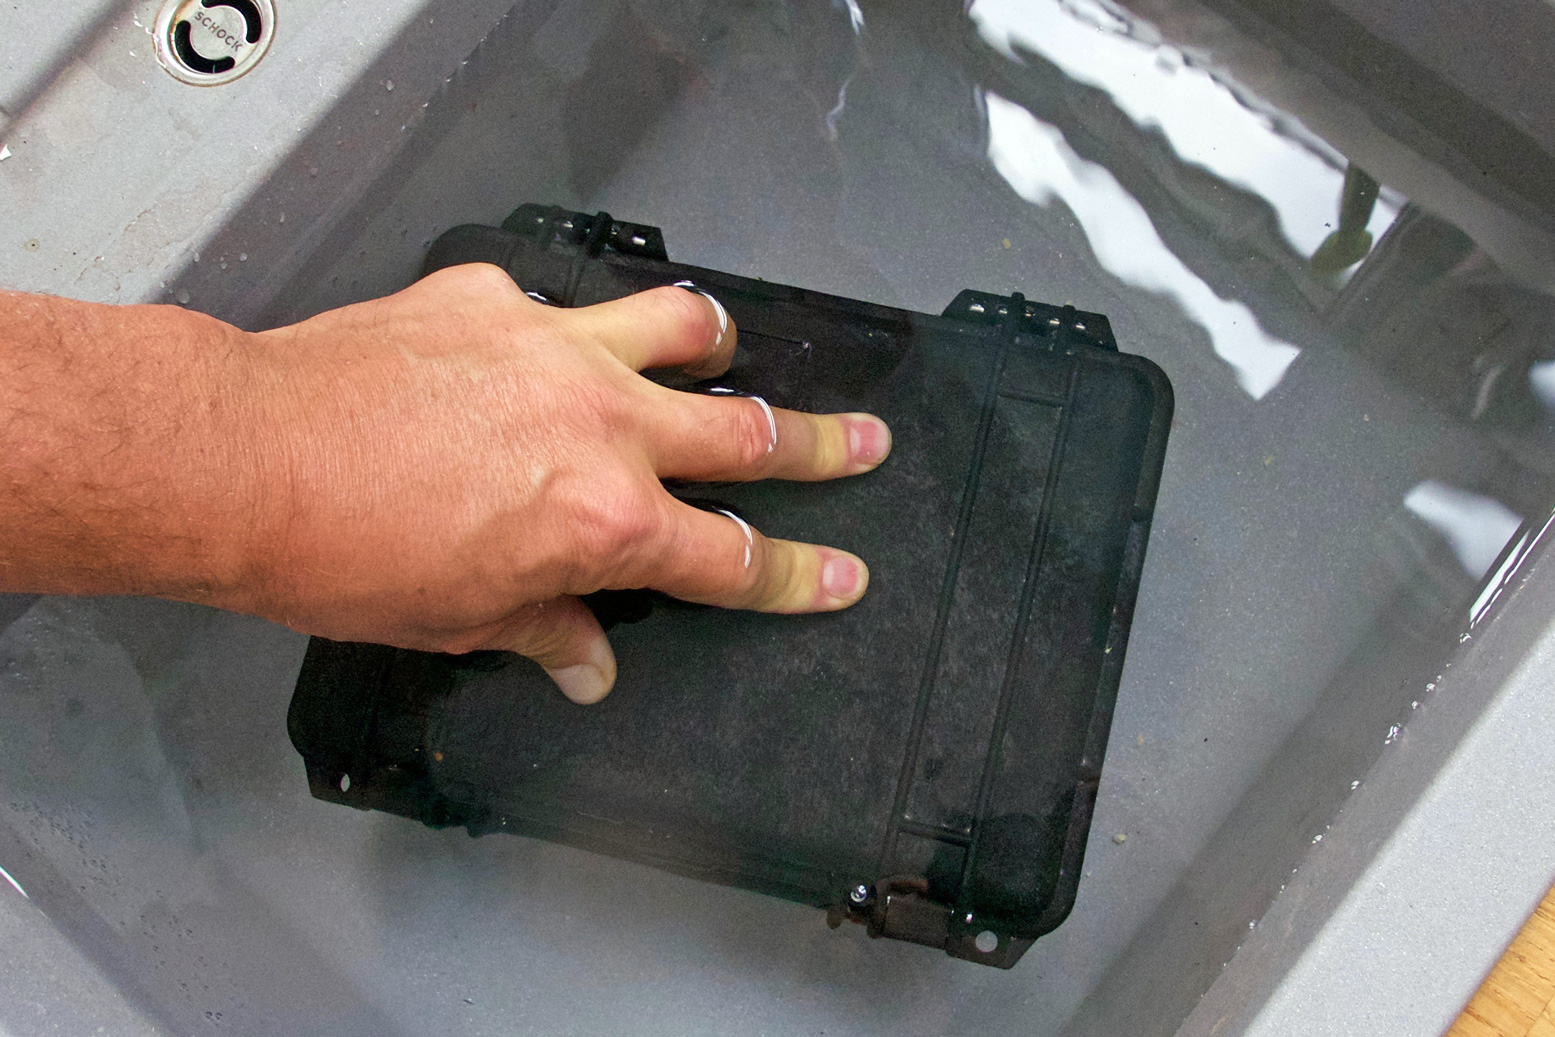
I submerged the DeckPack in the bath and, pushed underwater (ie: under some pressure) air bubbles slowly leaked out via the zip head. But Anfibio tell me:
Please note, the zipper is one-way air penetrable, that means it will release air to the outside under some pressure along the zip, not only the head, but it remains watertight. It is actually rated IPX7. Under any circumstances, it can withstand submersion.
Without pressure, there may be no leakage and so the DeckPack doubles as a secondary buoyancy aid – always reassuring on single-chamber packrafts.
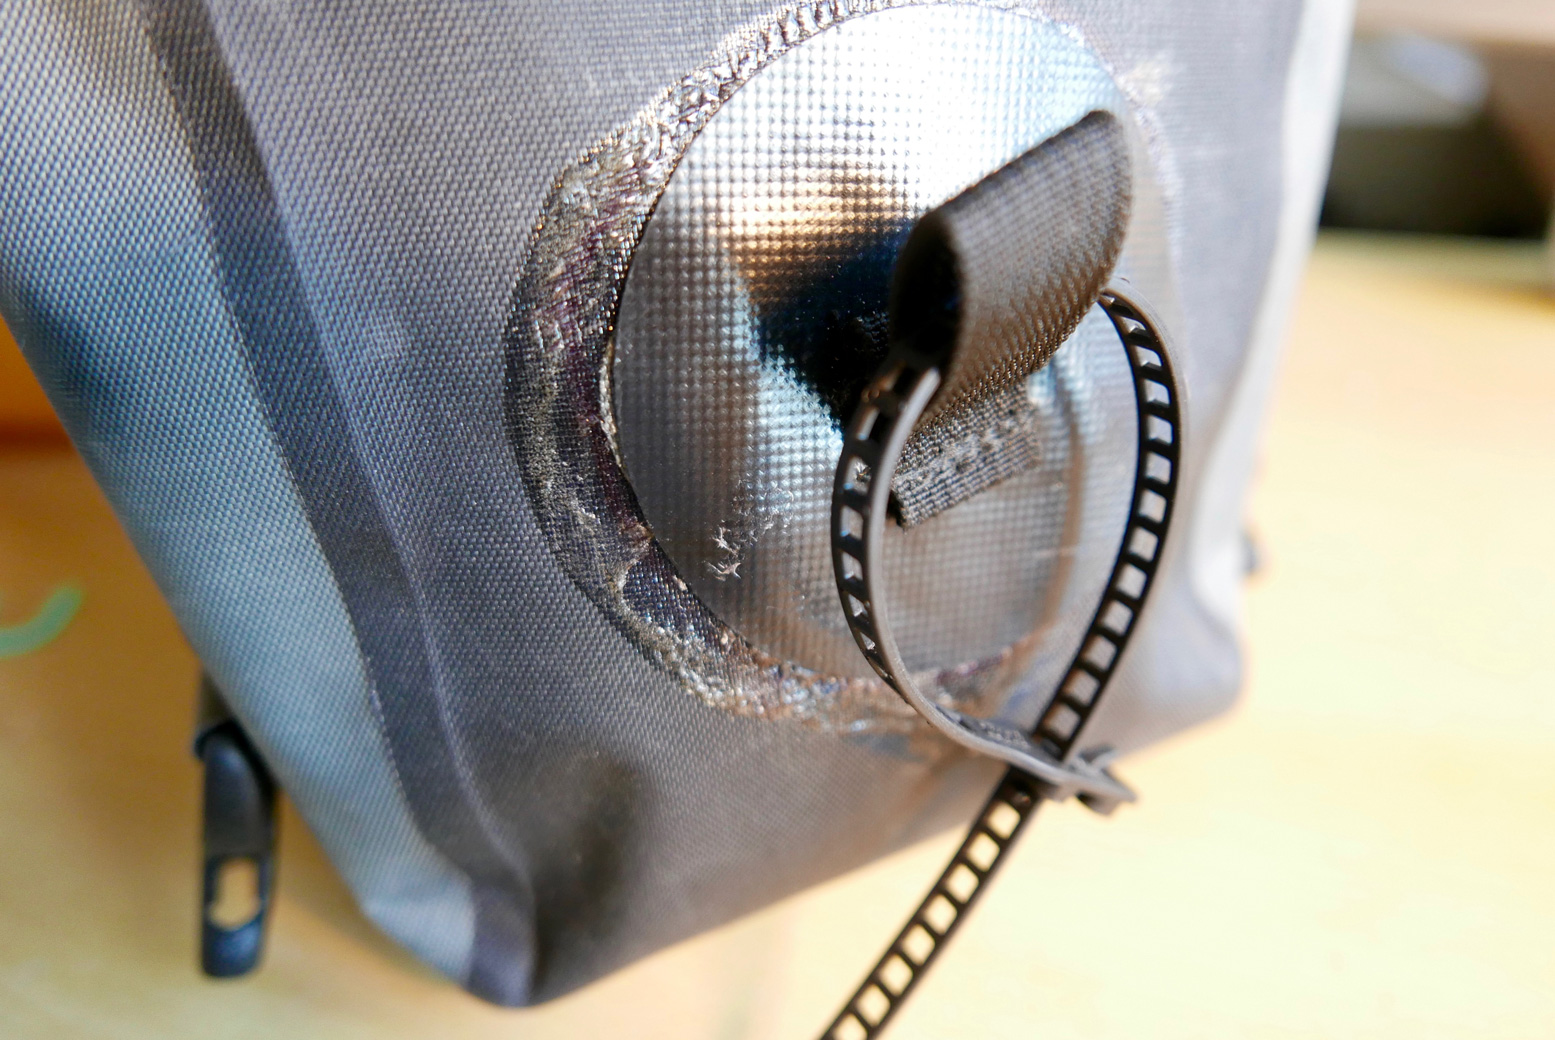
Once I realised it would work well on the IK, I ended up liking the Anfibio DeckPack a bit more than I expected, but here are a couple of suggestions: • Drop the price and make the straps (right) optional. Most paddlers will have their own mounting means or ideas. I use four reusable zip ties.
• A curved, meshed exterior zip pocket would be really handy for knick-knacks or having a GPS in a readable position. Or, run a line of daily-chains alongside the main zip, so you can DIY a mesh pocket to the outside without interfering with the main zip or bodging as I have done (left). It would make the DeckPack even more versatile and save over-working the waterproof zip to access stuff while on the water.
MYO Seatback Mesh Pouch As mentioned above, zipped mesh pouches on exterior surfaces are dead handy. You can put stuff in them, they drain or dry fast and they enable handy access without digging into a main bag. It’s one of the things I like on my Ortlieb Travel Zip.
On eBay I found 9″ x 7″ zip mesh pouches for makeup at about 3 quid each and quite well made. I zip-tied one around the side hem to the buckles on the back of my packraft’s foam backrest (above and below). It’s a handy place to stash the inflation bag, some cord, snaplinks, zip ties and the top-up adapter for my K-Pump. I even fitted one to my Anfibio DeckPack.
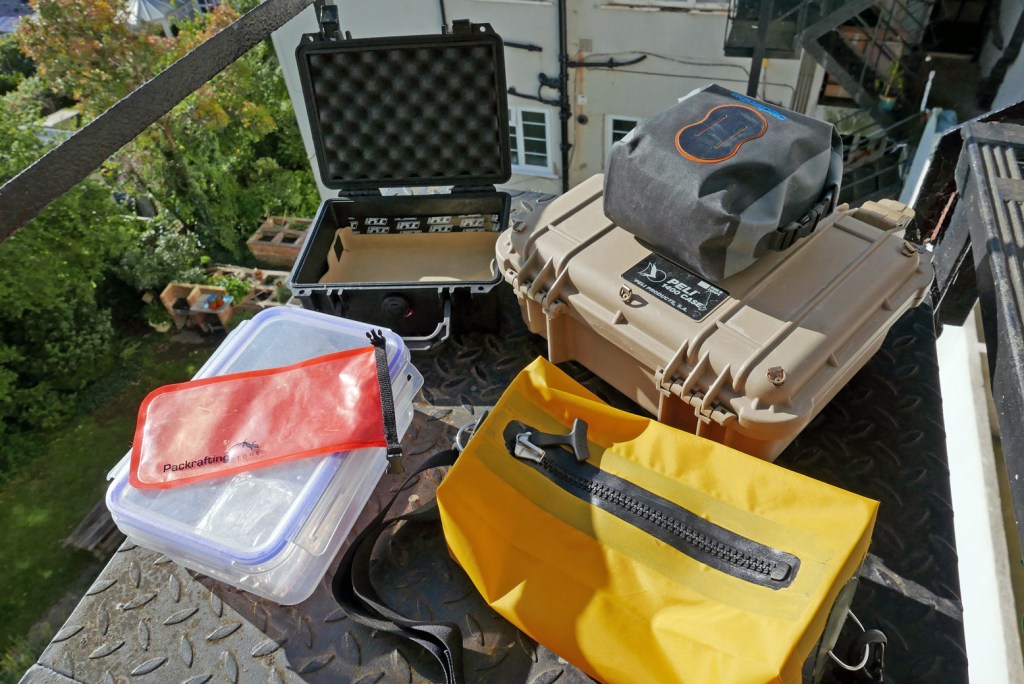
Clockwise from top left: Peli 1150, Peli 1400 with Aquapac camera bag on top, my yellow Pakbag; roll-top phone pouch; four-clip food container.
Whether on day trips or overnighters, how do you organise easy access to regularly used items and valuables, including stuff you want to carry when away from your packboat? I’m talking something capable of handling less than flat water, rated at least IP65 (right) to stash the wallet, phone, tablet, camera, travel docs, ammo and snacks. Stuff you want to keep dry in case of swamping or capsize, as well as being easy to get to on the water.
For walking or cycling, a daypack does the trick but that doesn’t really work in a paddle boat. The pockets and pouches in your pfd (right) have their uses, but they’re not waterproof. You want something that’s airtight when briefly submerged while easy to access on the water and portable off it. It’s actually quite a tall order.
Anfibio smartphone case. Submersible and keypad works through the plastic
Things like paper maps and nav aids (GPS, compass) I keep in a separate waterproof pouch like the SealLine (left) with a double ziploc seal, even if this is yet more clutter knocking about around your legs. Since I took that photo I’ve mounted a compass on the side of my Seawave IK – very handy as it’s always there at a glance. And I now use a IPX7-rated Garmin Montana with loads of mapping space, though I prefer to keep salty seawater off it where possible.
Waterproof waist bags A small, roll-top waterproof waistpack actually ticks many boxes as long as you don’t mind being attached to yet more clobber. There are quite a few out there between 2 and 6 litres, from OverBoard (2 sizes) to Aquapac and the bigger SealLine. The good thing is a waistpack sits up on your lap, out of the water and the paddle splash zone (PSZ), but well within reach.
The bad thing is they’re a faff to roll up and clip down quickly and reliably, and if you’re bobbing around in the water swimming after your boat you can be sure they’ll slowly leak. Read reviews and you’ll come across disgruntled accounts of ruined cameras or phones following a quick dip or even too much splashing. The problem, as usual, is the roll top; it needs to be tightly rolled down 2 or 3 times, then tightly clipped and even cinched down to the sides to make a good, dunk-proof seal. I believe a lot also depends on the nature of those sealing surfaces. As long as you avoid creases, smooth, shiny vinyl or PU pressing against the same will make a better seal than anything textured, like Cordura.
Hard cases For years the obvious solution seemed to be small ABS or polypropylene hard cases commonly used for camera gear. I started years ago with a 9-litre Otterbox in my Gumotex Sunny days (left). The Otter was lighter and cheaper than the well-known Peli cases, and with either, you know the box will be airtight, access quick enough and boxes make a handy solid footrest in an IK as well as a seat or raised surface on a beach.
After some years I changed to a Peli 1400, a bit less volume than the Otter, but a bit wider and flatter. Adding some retaining straps my Macbook Air fits neatly inside the lid (right), and below there’s room for everything I need in a day.
The only thing that spoils the Peli and similar boxes are the clamps which are hard to open or close effortlessly. Some sort of lever-arch mechanism would be better. Because of this I use the box less often than I would during a paddle. On top of that, a shoulder strap for hands-free carrying is awkward unless attachment rings are added. And at 2 kilos the 1400 is a bit hefty.
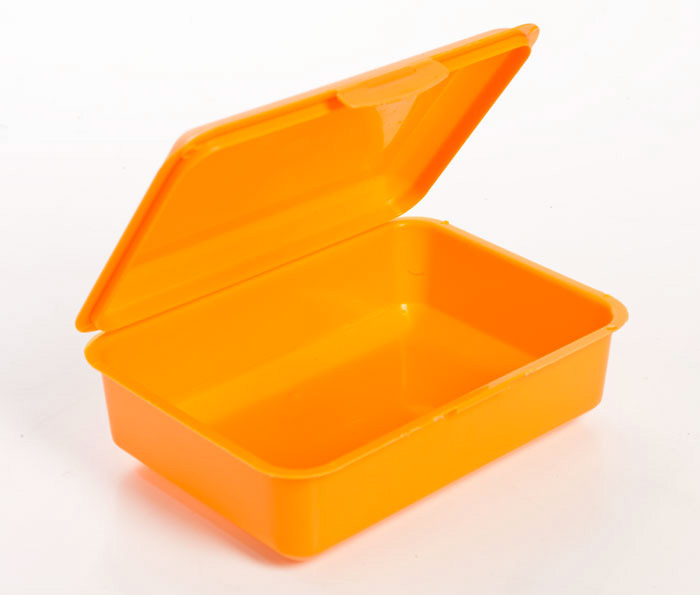
I really don’t need a PeliCase’s crush-proof ruggedness. All I want is submersion-proof airtightness up IP65 for which a lunchbox (right) or food storage box might do as well, as long as the durability and seal could be relied on.
Around the same time I got into packrafts I discovered Watershed dry bags. Most of them use an oversized rubbery zip-loc seal which is submersion-proof and therefore miles better than roll-tops. The yellow, 30-litre Chattooga (left) was also more chuckable than a hard case, made a good pillow, and for me had secondary uses for biking. It fits under the knees just about, but as many find, can be difficult to open and close. To operate smoothly and seal quickly the big seal needs lubing with 404 or silicon grease.
I finally got tired of my Chattooga’s tedious seal-closure and got a (now discontinued) Ortlieb Travel Zip (below left) for £100. It has has proved to be a perfect daybag, also at 30 litres. I’ve used this packrafting in New Zealand, motorbiking in Morocco and paddling in Sardinia. The TiZip sees to immersions and two outside mesh-zip pockets make easy access to things that can get wet. Inside are a couple of zip pockets and the carry straps come together with the clever and comfortable hard plastic handle. Add a comfy shoulder strap with a pad and you’re good to go. They seem to replaced it with a ‘40L‘ version (right) with backpack straps, but it seems to have the same dimensions as mine and so will be as good.
Camera Bags If you’re serious about paddling photos, get the best waterproof camera you can afford, like the Lumix FT7 – right – £400, or an Olympus TG5 Tough (left). You need a good one because the tiny lens must work within the housing so low-end ones are only OK while the light is good. Occasionally they’ll expose perfectly, but don’t bother the optical zoom beyond halfway unless it’s Elvis galloping on a unicorn. Any shots on this website from 2019 on, like this story, are shot with the Olympus. You can see the difference. Get one of these cameras and the whole section below on waterproof camera bags becomes irrelevant.
With a regular camera which I’ve also used, you need reliable water protection. I bought a used Aquapac camera bag (left). They’re just your usual roll down and clip jobbies, but inside the lid is a ziploc seal (right) which makes the bag much more dunk-proof than regular roll tops. Testing in a sink, bubbles only escape very slowly, but treading water with it attached to your waist might not end so well.
One flaw with these Aquapac camera bags are the flimsy belt loops. On mine I glued over one with a big tabbed patch (right). But really it’s too bulky to hang off a belt; I ziptie mine into one of the net pouches of my Anfibio Buoy Boy pdf, but only fold over and clip down when at sea. To properly close the seal is too much faffing and usually unnecessary – until it is.
Doing a sink submersion test (right) reminds you of the difference between hard cases and sealed bags. A rigid box is unaffected by the increased pressure of light submersion. If anything, the pressure forces the lid down on the seal even more. With a bag it’s the opposite: even a few inches underwater compresses the bag, forcing the air out through any weak point, usually the closure. This is why submarines are made of steel, not PVC fabric.
On the Tarn I found the Chattooga under my knees too big in general, and too big to exit the boat easily (or in a rush). But I sure didn’t miss lugging the hefty Peli 1400 around. I thought a lot about my needs and for the Allier came up with an interim solution: a smaller 1150-like hardcase (left) of about 2 litres volume for my essentials, including the LX. It worked OK, bar the usual easy opening issues. I knew from the Tarn what I really wanted was a smallwaterproof under-knee ‘deckbag’ with a waterproof zip closure. The zip eliminates the bulk as well as dunking unreliability of roll-tops, while the bag weighs much less than a box and carries effortlessly and comfortably on a shoulder strap. I had the dimensions and design all jotted down in my head and eventually made one because…
Waterproof TiZip bags A lot of Googling later I realised no one makes such a thing. There are plenty of TiZip daypacks like the Lowepro Dryzone range, or larger, watersports-oriented duffles from the likes of Ortlieb or Aire (Frodo; right) or SealLine, which resemble my own YKK-zipped Watershed UDB – one of my favourite bags. But none of the above are smaller than my 30-litre Chattooga.
The closest candidates I’ve found include the IP67-rated Ortlieb Trunk Bag (right and left). At 8 litres it’s a bit on the big side (add up the claimed dims and it’s more like 11 litres). And these days it only comes with a fitting mechanism to lock it to a bike rack. Very clever but this all helps raise the weight to over a kilo and price up to £98. The fabric is also not your usual pliant and mildly carcinogenic Ortlieb PVC, but resembles Heavalon (with its distinctive hexagon patterning) which Gumotex use as decking on some boats.
The Trunk-Bag could suit a lot of paddlers but as it’s made for bikes, you do wonder if it’s actually dunk-proof. Tellingly, the product description says underwater resistance: ‘lower edge of product, duration: 30 mins‘. As well all know, it’s common to be paddling a packraft with a little water swilling around the floor, so unless you slaver the base of your Trunk-Bag in Aquaseal, water will slowly seep through. Not good.
You’d imaginefly fishing waist bags, are ready for dunking. But they’re so large they often came with an added shoulder or neck harness to help take the weight. Plus it seems fly fishing gear may be to outdoor gear like smoked salmon is to fish fingers – prices are nuts. Patagonia make the Stormfront (left), a 10-litre waistpack with an added shoulder strap – yours for as little as £180! It’s just a dunking PVC handbag with a zip!
You’ll find any number of other fly fishing roll-top bags at twice the price of hiking or SUPing examples pictured above. Note that many find waterproof zips like the plastic TiZip or brass YKK stiff to operate, just as they are on a dry suit. Ideally, you need a good T-toggle and some sort of tab to pull against. And I do wonder if incorporating TiZips to the required standards explains the high prices for gear using them. The full range of TiZips is not readily sold to consumers, only to manufacturers for products which use them. Anyway, long story long, I decided it might be fun to make my own TiZip deck bag. Read about that here.
Size (fully ‘inflated’) 90cm long x 38cm wide. Circumference 120cm
Features Grab handles at each end; holdall handles; basic backpack harness; small zipped mesh inside pocket; one-way inflation/purge valve
Fabric: Don’t know exactly, a tough, abrasion-proof nylon fabric with a glossy coating on the inside
Cost About £120 in 2011. No longer made
I’ve been using this big holdall for ten years on kayak and packraft trips in France, Australia, Turkey, the US and in the UK, as well as a side bag on my motorbike. As it’s among my favourites it gets its own page. ‘One dry bag to rule them all’ I wrote back then and my UDB still ticks that box. Your typical roll-top dry bags aren’t submersion proof, yet in paddle sports submersion is a likely scenario. Using roll-tops I found myself packing drybags inside dry bags to keep important things like clothes and down bags dry. With the UBD you can just chuck it in and zip it up.
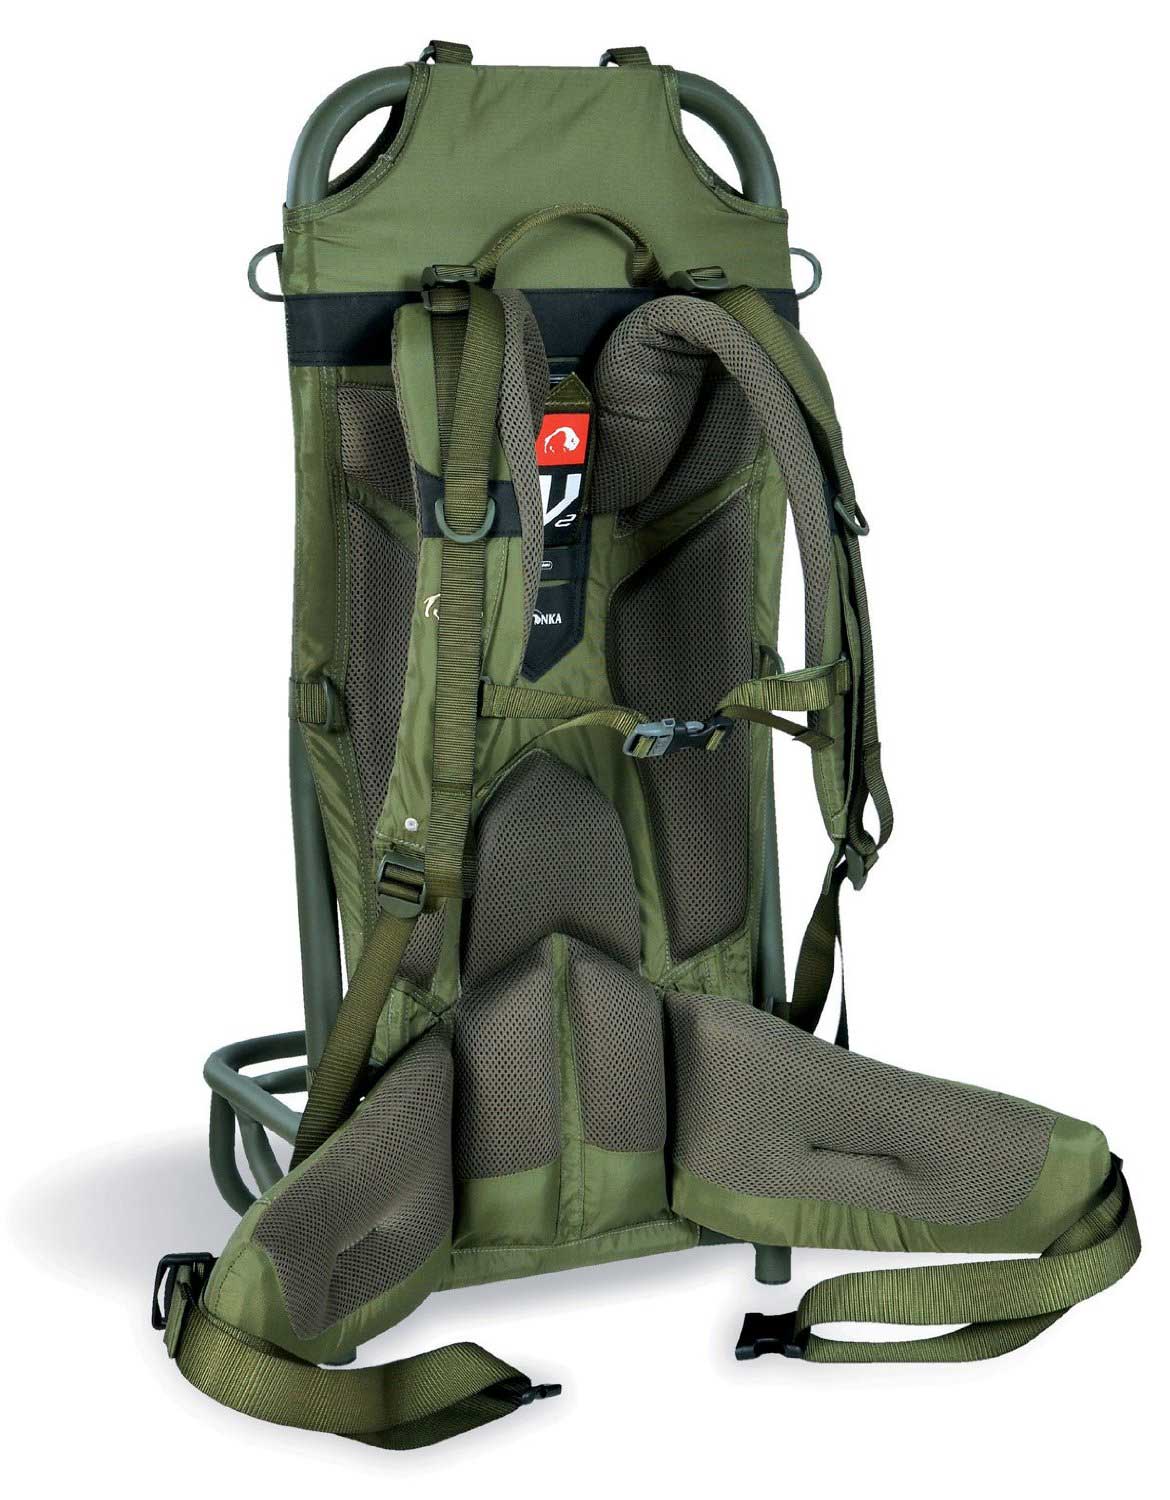
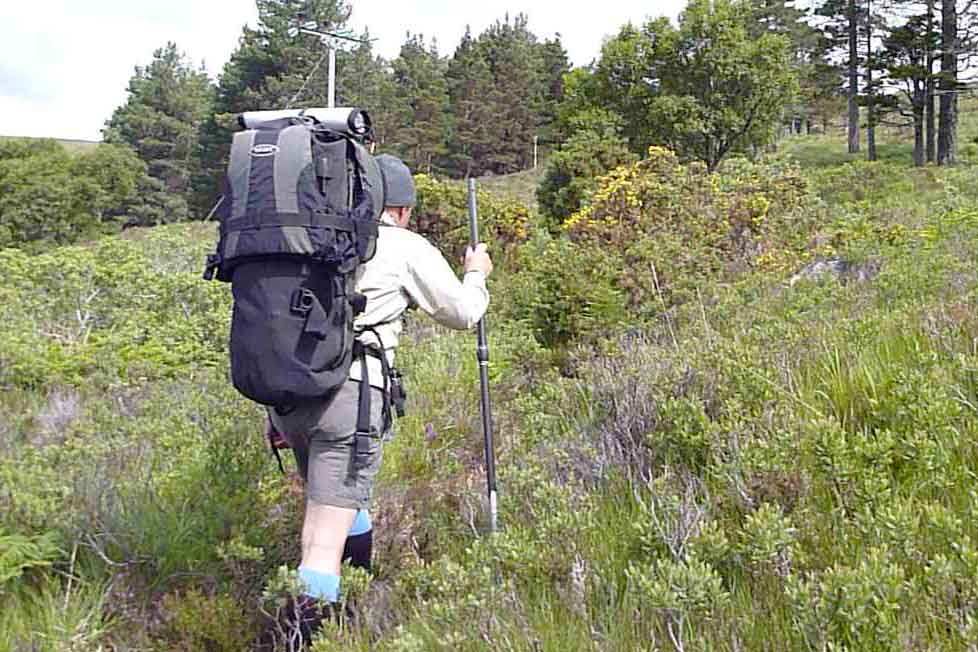
Initially, I tried using the UDB as a backpack (left) but, like trying to do that with any holdall, it’s only a short term solution that puts a huge strain on your shoulders. Plus I found the harness was poorly positioned so the pack sat high on my back, further increasing the centre of gravity, but running the shoulder straps loose (as left) didn’t work either. It became clear the included harness was not intended for anything more than short hauls. What was needed was a frame of some sort, or a better harness. You can read a summary of my experiments here. In the end the NRS Paragon pack harness and later Six Moons suited my needs best.
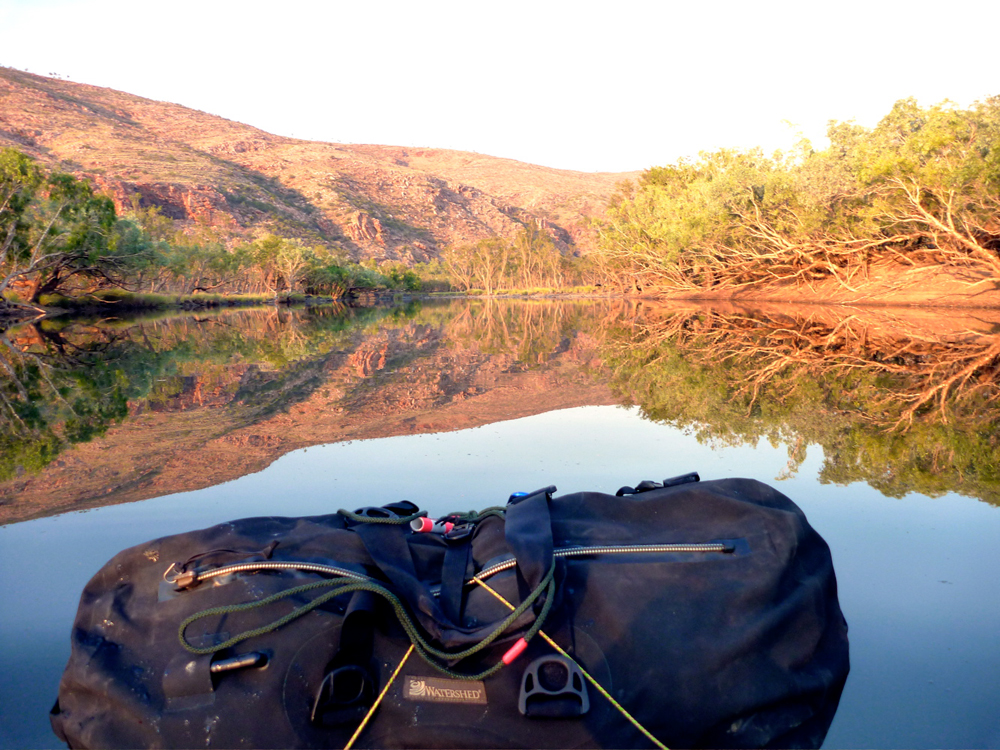
What I like about my UDB is that it’s a simple, rugged and basic big-ass bag with handy handles and a reliably submersion-proof closure. There are no gimmicks unless you count the purge valve. On the water it eliminates any worries about stuff getting wet and of course it’s something to hold on to if your boat get shot out from under you by a dozy spearfisherman.
Watershed still make bags with drysuit zips – see the gallery below or the website. But they’re either huge or or are priced for military procurement departments only. I also used Watershed’s 80-litre Westwater (above – more like 70L) for packrafting day trips, but pushed it a bit hard on one cross-country MTB ride which ripped out one of the strap fixtures.
Like their handy 30-litre Chattooga day holdall (left, yellow), the Westwater has their slick watershedding fabric which is tough for sure but less agreeable or grippy when pressed against your back all day. And like the UDB the straps have the legal minimum paddling (though are easily replaced). Both use their chunky giant fold-over zip-lock closure which I’m sure works as well as a drysuit zip. But if it had to be one bag it’s my UDB – ‘One dry bag to rule them all’.
What more is there to say about the Watershed UDB? How about that in 2019 I adapted it with a cheap, chopped-down lightweight, big-wheeled folding trolley (right) from previous packboating trips to carry my packraft to Australia and New Zealand. With zip ties and straps, the trolley frame lashed securely to the rugged UDB’s harness tabs and I could roll it with the top handle. It weighed in at 2.7kg. Interestingly, the rigidity provided by the UDB once fully inflated (as above) helped make it more comfortable to wheel and less of a sack on wheels. But one thing I did notice is that without a full-length telescopic metal frame the set up tends to bob up and down annoyingly as you walk.
The thinking was that once packrafting a river for a few days (I never made it), the UDB trolley would still be more compact than a regular wheeled travel bag, while enabling wheeling along paths and long gravel roads to get to the river. It was all an attempt at not blithely splashing out the huge but pricey Ortlieb Duffle RS 140 (left) which I’d been eyeing up. A few months later I eventually did buy a used RS140 for the Seawave but can still see plenty of years use in the UDB.
Update 2022: Using it in Morocco as a general holdall I noticed a separated seam where the body fabric attached to the zip, with another lifting a bit nearby. An easy repair with Aquaseal one-part sealant.
In a line Surprisingly effective and well-featured carry-all pack harness.
Cost $100 from NRS but no longer made. The Six Moon Flex Pak is similar and a bit more sophisticated. I’ll be testing one of those shortly.
Weight 1340g.
Capacity Vertical strap adjusts out to 1.96m; horizontal straps up to 1.8m. That’s a pack volume of some 200 litres but I imagine anything more than 25kg will be hard carrying. For that you’d want a Lastenkraxe.
Features Padded hip belt with small zip pockets, chest strap, fully adjustable 3-belt pack harness, padded plastic backboard; ice axe loop; padded pouch with elasticated cord on the back.
Where used On a 200-km walk with packraft along SW Turkey’s Lycian Way. Walking in Umbria carrying a holdall. Day trips with packraft.
Q/d clips make getting to the pack easy. More comfortable than you’d think Fully adjustable Capacity for bigger loads than you can probably lift. Pouches could easily be added to the side straps.
Zip pockets on hip belt too small and awkward to get to. Not made anymore. Padding a bit lean over a long day on rugged terrain.
What they [used to] say The NRS Paragon Pack is the epitome of versatility. Rather than buying an entirely new dry bag, the Paragon™ Pack allows you to retrofit your existing bags into the ideal portage pack.
What’s wrong with a normal backpack? It took me a long time to find NRS’s Paragon was just what I needed for travelling with a paddle in my pack. It then took another year to get round to testing it properly on a long walk with a small boat. I admit a decent conventional backpack is better suited to walking long distances over rough terrain with heavy loads. I tried that on my first packrafting trip in Scotland, carrying a giant PVC drybag for my TNF Terra 65 while on the water. Although it’s not happened yet, the problem would be capsizing at which point the roll-top ‘drybag’ couldn’t be expected to seal for long. Because of that, everything inside that mattered needed its own drybag, neither of which would also last a prolonged immersion. All that bagging makes access a faff.
Then in 2010 I got myself my still brilliant Watershed UDB – a 1.1-kilo, 96-litre holdall made from a bombproof fabric and with a chunky drysuit zip – that is drysuit-dry not roll-top ‘drybag’-dry. I like my Mk1 UDB (also no longer made) because it’s a genuine immersion bag so doesn’t require back-up drybagging of the contents. Zip up the heavy seal and it’s as airtight as your pack boat and good to go. What’s more – especially on a packraft – a bag like this provides 96-litres of reassuring secondary buoyancy should my single-chamber packraft boat go flat on the water.
The UDB came with a rudimentary backpacking harness which, like the handles, were sewn to the bag. As we all know, a load-carrying backpack needs some kind of rigid frame or plate linking the waist belt and the shoulder straps so the weight can rest low on the hips, not hang high from the shoulders. When walking for days with typical 18-kilo loads, that makes a big difference to comfort and stability. The UDB’s token harness wasn’t designed for this and anyway, was poorly positioned on the bag.
As you can read here, I did the usual searches for ex-mil packframes and thought of cutting up a regular used backpack, but not before buying a Tatonka Lastenkraxe (left). That system, based on hunter’s L-frame packframes I’d seen in the US, can certainly carry a load but even with its huge padded straps and belts, at 2.7kg is a bit OTT and clanky for packraft travels. I think these sort of packframes are more suited to man-hauling very heavy loads or relatively easy terrain and then doubling up as a camp stool.
On the Trail At Gatwick check-in the Paragon slipped easily inside my UDB, avoiding the problem of stray straps getting caught in conveyors or landing gear. At the other end, fitting it took 10 minutes and I was out of the airport on the 3-km walk to the nearest hotel. I had concerns that the rigidity of the backboard (or ‘lumber support system’) wouldn’t be up to it, but of course once any pack is solidly strapped to a bendy board it can flex with the body but will maintain the rigid distance between the hip and shoulder belts. Only the strap mounting arrangements can come adrift under the load and for me, they didn’t.
My load was around 17-kilos + water and other bits in a small waist bag. That’s one flaw in running a UDB: there are no handy side- or mesh pockets to use, far less a slot to take a 3-litre water bladder. I was planning to rig something up between pack and harness but never got round to it. Early on, the Lycian Way was initially well provided with gushing springs, wells and cisterns meaning I could get by on just a half-litre bottle. Later, I needed another bottle but even then was often parched as the weather warmed up and usable cisterns got strung out.
Once something works OK I tend not to fiddle. I might have tried extending the back length to drive the weight more to the hips. The strap and back padding is not in the plush Lastenkraxe league. While I did have problems managing my balance on the gnarly and awkward coastal paths, in the end I can’t blame that on the Paragon, just the load, the terrain and me.
The lightweight NRS Paragon could easily take my current Seawave IK rolled up for short cross-country portages to and from the water. It will worked well with my other Watershed backpack – the 70-litre Westwater (left). Like the UDB, that bag came with rudimentary shoulder straps but became all the more useful and comfortable as a backpack once strapped to the Paragon. The pictures show a little more clearly how the pack wraps around a bag.
Now I know it works I may look into fitting fatter shoulder straps on the Paragon’s straps and other minor mods. Or maybe I’ll just leave it as it is.
I thought I liked the idea of packframes for pack boating – a rigid rucksack harness and frame without the bag element. The boat, paddles plus dry bags are all lashed to a frame, alongside a drybag.
In the US one time I saw some packframes at a hunting outfitters in Flagstaff (left) that were much better than anything I’ve seen in the UK and going from just $80.They had hinged L-sections to support loads, and looked like an ideal carrier for the UDB and boats. As it stands, my UDB is still my preferred haul bag for overnight pack boating activities. Good analysis, history and list of packframes
Tatonka Lastenkraxe review Lastenkraxe? A Nordic nutcracker? An uncredited evil troll out of Harry Potter? Tatonka is a German company who produce some crafty and functional stuff, such as their pot/cup. A little research reveals that Lasten + kraxeadds up to ‘load bearer’ + ‘rucksack. Vorsprung durch kraknik.
The Lax differs from the hinged hunters’ frames by having a well triangulated, rigid platform. A bit over the top for load bearing perhaps and it certainly won’t slip under the bed so easily. But besides being rated at an eye-watering 50kg, the platform provides the unexpected benefit of standing up straight when placed on flat ground and being a ready-made camp seat.
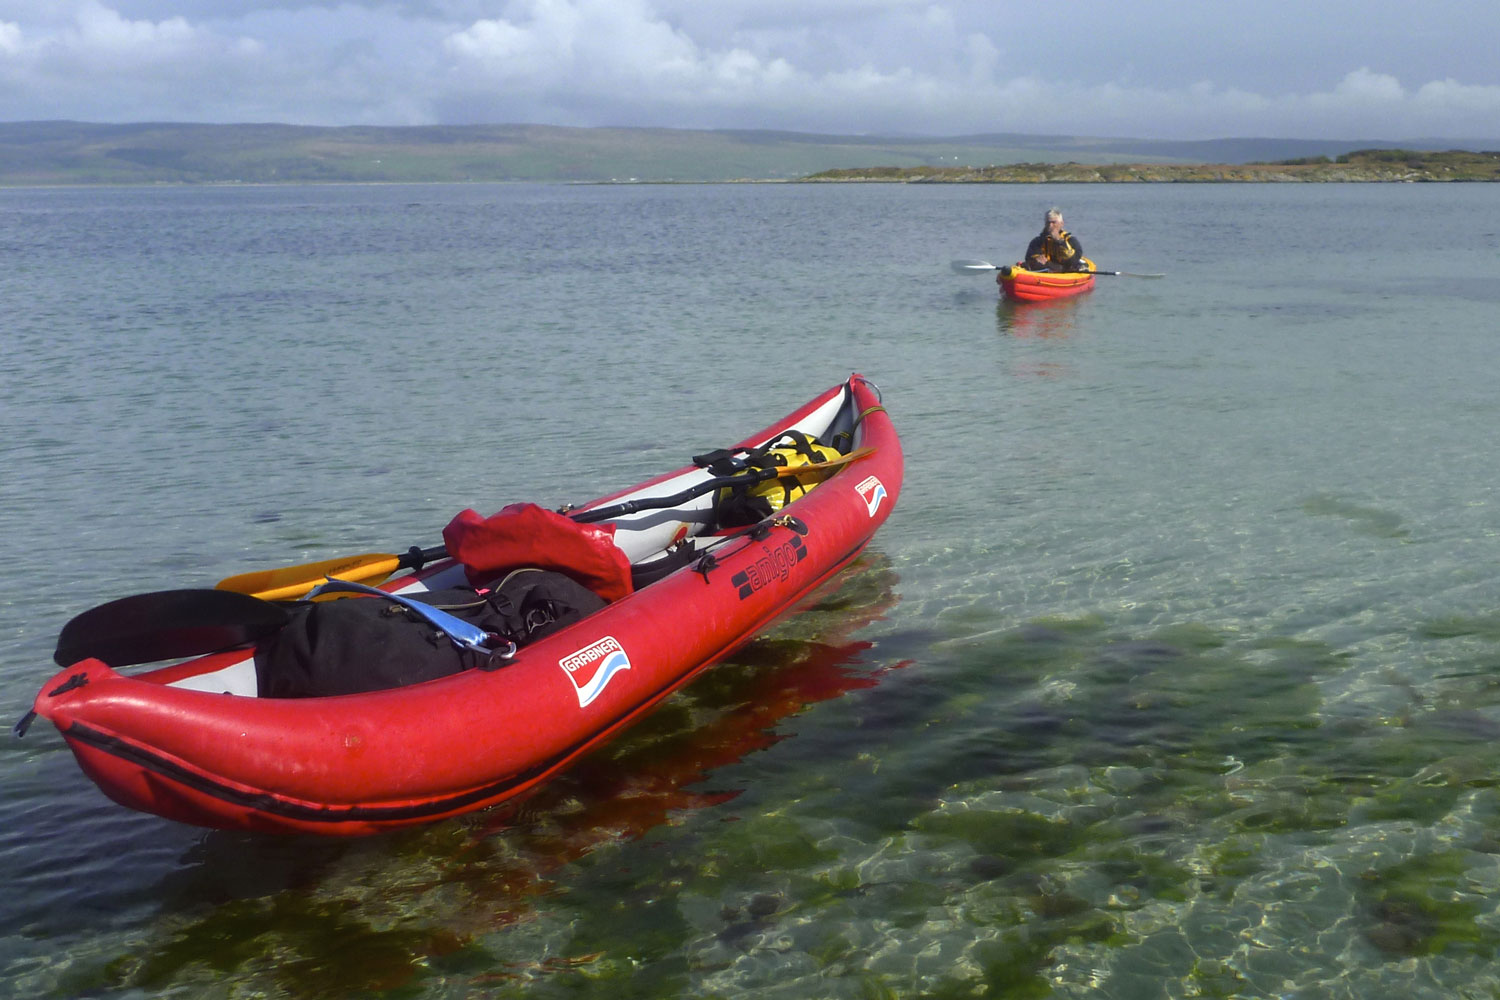
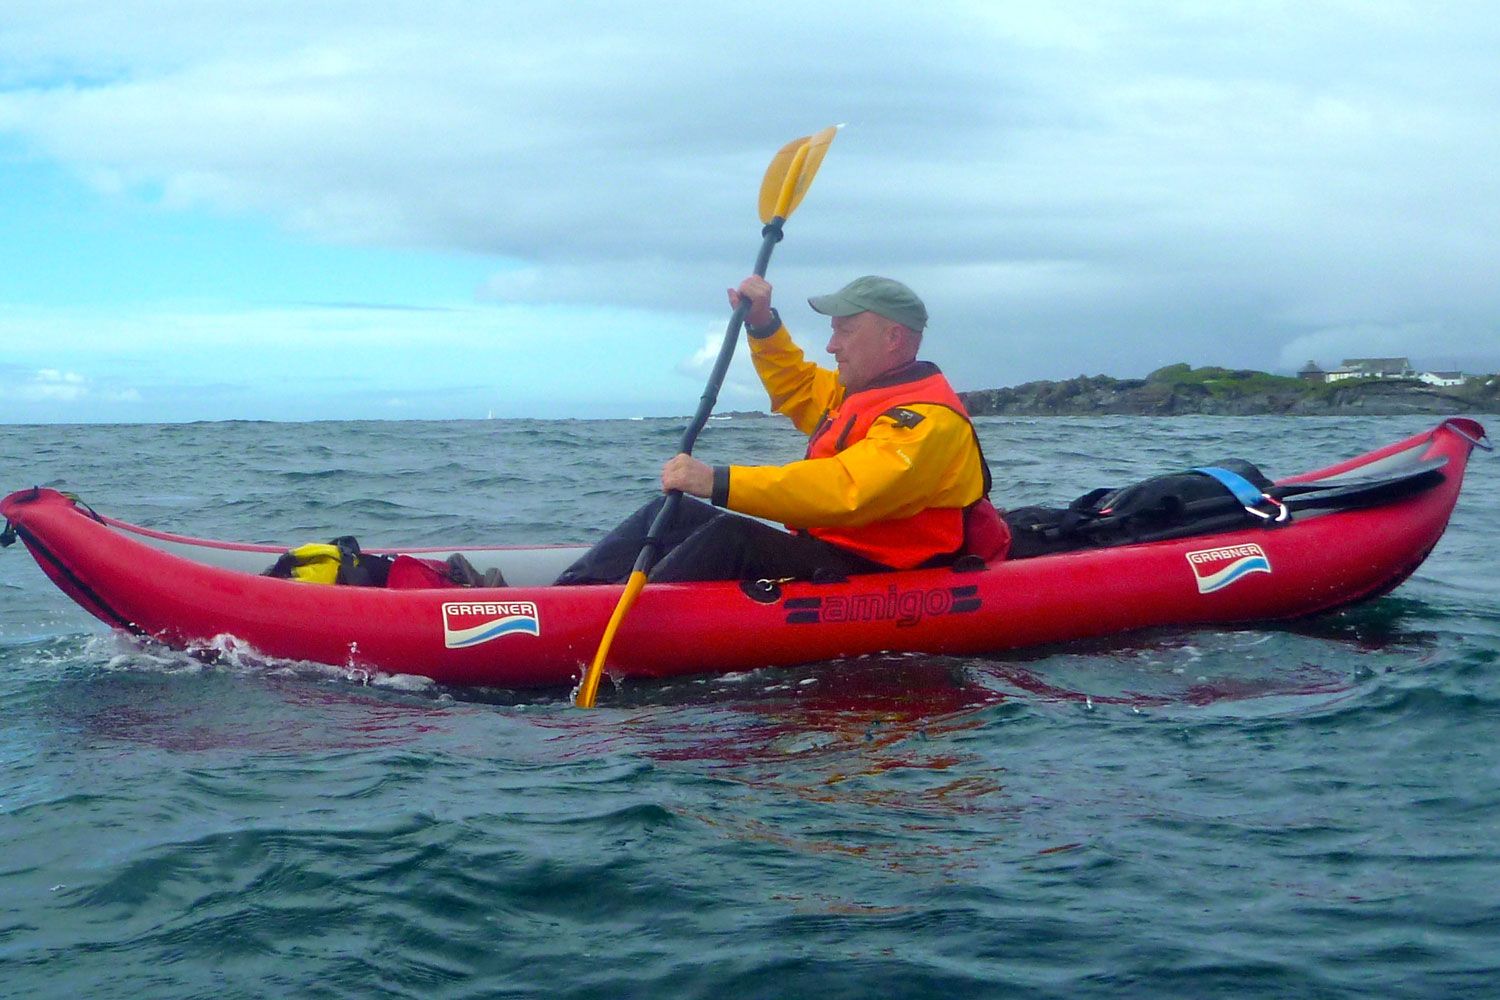
It weighs 2.7kg but feels lighter for the amount of alloy in there. And like all modern packs, you can adjust the harness to suit your back length, as well as do the usual micro-adjusting to the chunky hip belt and shoulder straps and the all important, non-elasticated, sternum strap. The Lax will obviously work fine for packraft expeditioning, plus kayak day trips where a trolley can’t be used, but I wanted to see if carrying my Amigo IK was a viable option for camping too. The Amigo weighs about 15kg ready to go, and as you can see, takes up much of the packframe when strapped on vertically. Horizontally would make more space above, but having walked about five miles on road, track as well as very rough hillside, treating the Amigo like a packraft will be a tall order.
I recall the Terra backpack on my first packrafting trip in 2010 weighed 18kg with a few days’ food and a drysuit. The Amigo is at least 12kg heavier than a packraft so that’s 30 kilos. I was walking around with about 20kg which felt like plenty. As said, the Lax is rated at up to 50kg which is hard to believe; the stitching alone would be under immense strain.
Realistically, camping with the kayak would work best where there was more water between short and fairly easy walks (few bogs and steep inclines – so not really Scotland then). Of course, having a kayak as opposed to a packraft makes lone coastal paddling and sea loch crossings less intimidating.
Comfort is as good as can be expected with a 20-kg load, but I think it’s safe to say a rigid frame is less compliant than a modern frameless backpack like my Berghaus C71 (2.6kg). On one stage the lower frame was digging into my hips through the hip belt, although on the next walk I must have adjusted it better and it was fine over terrain that at times was barely walkable. I wasn’t using a packstaff this time, but off-piste that would be a great help.
Early days yet, but quality of construction seems good. I like the lift handle and generous padding. One thing I’d like to see on any harness like this is a pocket or two on the padded hip belt, or even just a bit of tucking mesh. The platform construction looks solid and as well as being a pack stand, with a some cushioning would also make a solid camp seat when unloaded. This is a much discussed and under-rated item, and one on which you could even lean back on, just like you weren’t supposed to do in school. The solidity of this structure also opens up the possibility of adding that nirvana of urban packboat portaging: trolley wheels. More about that if I get round to it. Rrp in Germany for the Tatonka Lastenkraxe is €170. My green one cost £95 off amazon. Black ones were another 20 quid.
In my packframe investigations I discovered that in the Tatra mountains of eastern Europe there’s a local ‘iron man’ sport of ‘Nosicsky’ (‘portaging’): carrying massive loads on wooden L-packframes. Perhaps it was once a way of resupplying mountain refuges when the mules were on strike. As you can see, over 200kg was a record one time, but it proves that L-frames were the original do-it-all packframe, long before modern backpacks found frameless alternatives that kept the weight closer to your back.
I also came across the Kiwi Aarn website which showcases a frontal load ‘FlowMo Bodypack’ to help improve you posture and balance weight distribution. They’ve designed two pockets for the front straps to carry dense but compact items (like water) while still being able to see where to put your feet. Sounds like a good idea but many of us, like Jeff on the left in the Kimberley (with my old Terra 65), have come up with a similar solution intuitively, when needing to carry a day pack as well as a backpack. Still, it’s an idea worth considering when you have a 15-kilo boat on your back.
Since I wrote this I did try a similar idea on our CWT recce, well at least carrying the packraft on my chest. It did feel good on regular ground: better posture, less stooping – but on gnarly terrain the bulk got in the way of the ground at my feet which got dangerous in the places we were walking. To be fair, Aarn acknowledge this limitation.
Roll-top dry bags (right) – even the best ones – aren’t really submersion proof, are they. That’s fine for a SinK with hatches (unless they get flooded), but no so good for an IK, packraft or any open boat on rough water or in crap weather. When I pack for either packrafting or IK I find myself putting roll bags within roll bags to make sure important things stay dry while hoping I don’t flip as I know they’ll not resist a couple of minutes submersion.
A year or two ago I came across Watershed Dry Bags from the US which seal with a big rubber Zip-Lok like seal (see image below) – ZipDry they call it. They’re expensive, but were available in the UK. In an effort to get one dry bag to you-know-what, I’ve got myself a 30-litre Chattooga ‘day bag’ duffel (below left) and by chance, on eBay an ex-demo Watershed Ultimate Ditch Bag turned up at 20% off (still £130). So that’s actually two bags.
The Chattooga is not quite the rich yellow of the brochures, but a bit translucent which actually makes seeing inside easier when the foam and fleece liner is not used. That’s another £18, but it may absorb ‘high point’ knocks to the outer skin as well as protect what’s within, though I’ve never used it as it takes up space. The shell plastic is a hard, slippery polyurethane rather than the soft rubbery vinyl of something like a SealLine Baja bag. It’s all RF welded and very solidly built. With the bag top rolled down as it is with a roll bag (not actually necessary) I’ve found this is submersion-proof. Once in a while a spray of 303 as a moisturiser along the seal grooves helps it seal readily. The bag sits fixed to the mid-floor lashing point in my packraft between my legs for easy on-the-water access, and it fits neatly in the front of my IK and on the back of my bike. I’ve also divined that if things get desperate the Chattooga can work as a paddle float (left). My Chattooga got nicked in 2012 and I’ve since replaced it with another which seems a little thinner and shinier material, but otherwise seals the same. I replaced the Chattooga with an Ortlieb Travel Zip.
The since superseded Mk 1 Ultimate Ditch Bag (UDB; left) was unique to Watershed; a plain, big 96-litre duffel with basic detachable backpack straps, handy grab handles on each end and accessed by a single tough, dry suit-style waterproof zip, rather than the press-together ZipDry closure as with the rest of the ‘civilian’ Watershed range. My experience with dry suits is that amazingly, these zips actually work long after the material delaminates. Ortlieb have lately brought out similar bags in their usual soft fabric, but using what they call a TIZIP which looks like an ordinary YKK wetsuit zip to me and is only rated to the IPx7 standard (explained in the image right). I spent a couple of hours floating about in my Crewsaver drysuit the other weekend and nothing leaked; the UDB would manage the same while keeping the contents dry, and the fabric is much tougher than Ortlieb’s PVC. You could classify a UDB as ‘IPx∞’.
The UDB also has a complex, chunky inflation/purge valve for compression packing once the zip is done up or even to inflate the bag as a buoyancy aid if you’re in really dire straights and your boat loses air. This is reassuring when paddling a relatively flimsy packraft through a school of agitated swordfish or sea porcupines. If the boat goes flat you have a huge buoyancy aid to keep you out of the water and slow down hypothermia. And it can be used empty as an effective float bag inside a hardshell, folder or decked IK hull to limit the bailing required after capsizing or swamping.
Apart from my down sleeping bag which might be too much of a risk, I’m now able to simply pack and access things normally in the yellow Chattooga and the UD Bag and so can downsize my collection of dry bags which were gradually taking over the room. The UDB has proved itself as a functional packrafting backpack for the walking stages – more below, sea kayaking in Australia and remote river packrafting out there too. The good thing is the detachable straps can be modified or replaced with something better, although the UDB lacks any rigidity to carry its weight on a hip belt and as I say below, the shoulder straps’ position is too central. Plus you don’t want to strain those ‘probably-not-for-hiking’ harness fittings and risk tearing them off the bag (although they’re sewn to a patch as left, which is glued to the body, so not much chance of that rupturing the bag – unlike a Gumotex IK bag).
2013: Watershed redesigned the UDB as a smaller, 78-litre duffel now made from their tough, glossy PU-coated fabric, but still with the dry suit zip and purge valve. Or check out their pricier military range of packs, below. IMO while not perfect, harness wise, the original UDB was a better bag. The canvas textured fabric gripped better, didn’t wet out, and the size and shape were just right to slip into a slim kayak or across a packraft’s bow.
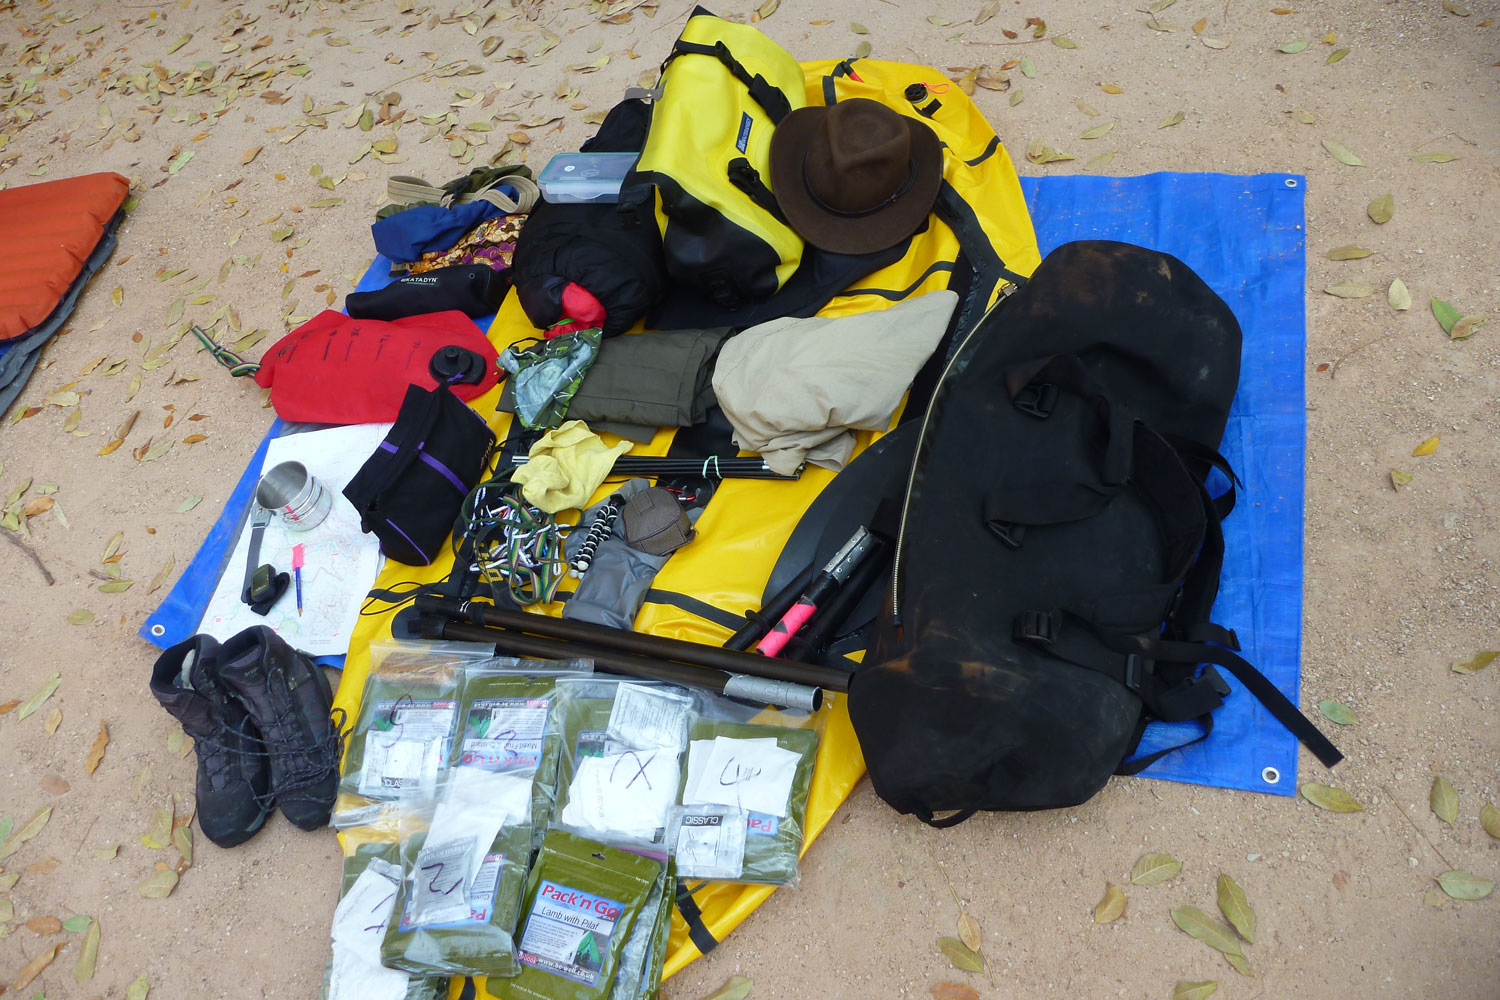
The 96-litre UDB is big enough to take the raft, a dry suit, paddle blades, tent, sleeping bag and 2 days food
Walking with the UDB As a backpack the UDB has been surprisingly good at carrying a load in Scotland for up to 3 days (40 miles). Part of the reason for the tolerable comfort was that the UDB’s relatively rough fabric and frameless ‘coal sack’ form grips right across the entire back like weak velcro and so helps spread the load. The chest strap helps greatly too, though I’ve half a mind to try the chunky, wide clip-on thigh straps from my kayak as shoulder straps to get two uses from one thing. It does lack exterior pockets like a conventional rucsac, but that can be got around by having pockets in your jacket or a using a waist bag.
Having used the UDB again in Utah and overnight in Scotland, I’ve reconcluded that the shoulder straps are located too much towards the centre of the pack which means that the pack sits too high on your back (see walking pic, top right), making you unstable at times. Loosening the straps to make the pack sit lower but isn’t the same thing as it’ll just be loose. Up to a point you could pack heavy stuff low and anyway, it’s clearly not designed as a full-time pack, but I must say that’s how I’ve used it when packrafting. It’s so convenient to just use it as a waterproof/submersible holdall: chuck stuff in, zip it up and get on the water. Occasionally I run beeswax along the zipper; a bar of soap will do the same and smells nicer. I’ve since got myself a packframe (left) but decided an NRS Paragon pack harness was the best solution to portaging. I used the UDB like this in Turkey.
Watershed Westwater Recently I walked and cycled the Coast to Coast with an ’80’-litre Westwater pack featuring a regular ZipDry seal, thin shoulder straps with chest and an added hip strap. (They now claim it to be 65L) The load was only about 12kg but I found myself unstable in the hills as, with no proper hip belt, the weight was hanging high from the shoulders. On the Lakes stage it was very hot and the back was very sweaty, but it carried OK. Once I got on a bike and the weather broke, the pressure on my butt became exceedingly painful (no surprise there).
The pack is handy in that in dry weather you can simply roll the top over and clip it down, not using the ZipDry seal (as above left) and so easy day access. While sealed up in the wet you know the insides will keep dry. Again, I can see the Westwater working well lashed to a Lastenkraxe packframe with the packraft rolled up beneath it, or in a harness like the NRS Paragon or Flex PR. The only drawback is the slippery texture and shortness doesn’t sit so well on the bow of a packraft (left) compared to the UDB.


 • Durable wheel design
 • Costs a lot, but so do they all in this size