Category Archives: Tech

Packboat Fabrics & Construction

Drysuits for kayaks: Anfibio Packsuit drysuit review

For my sort of paddling integrated latex socks, latex wrists, neoprene at the neck plus a front entry zip and a relief zip add up to the best all-round combination.

Anfibiodry-6

About Drysuits
Even in summer the benefits of a drysuit for northern British paddling are worthwhile. Like wearing overalls to get stuck into a messy job, you know you’re covered. You can wade in as deep as you like and take all the splash that’s going without risking getting chilled should your underclothes get soaked when a waist or limb seal leaks. And for me, nervous of the deep and often paddling alone in the northwest (even if it’s rarely more than a mile from shore), it’s an added layer of security.

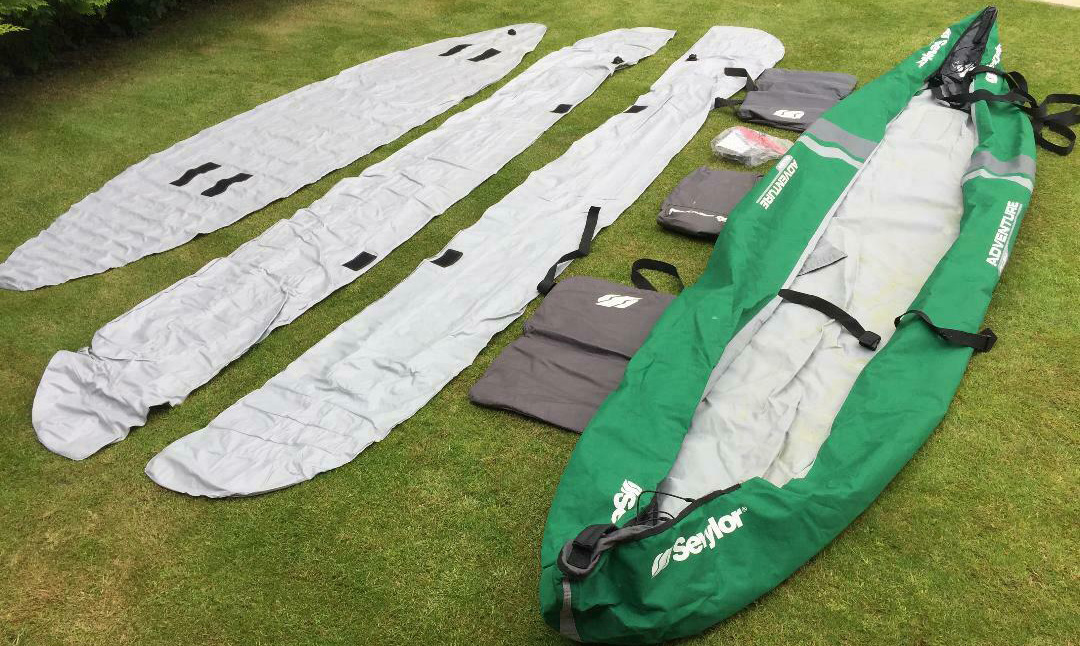
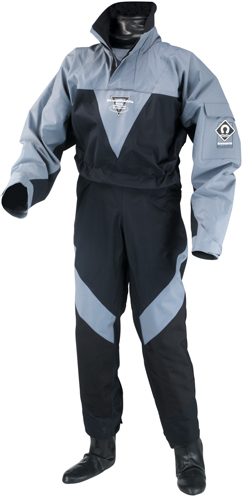
My chunky old Crewsaver Hyperpro drysuit (left) cost only £180 and did the job amazingly well. But even at 2kg, it was heavy enough to need internal braces and was often too hot and sweaty for active paddling. I don’t tend to get cold easily but wonder do if it was more of a sailing suit less well suited to energetic paddling.

Anfibiodry-1
gul

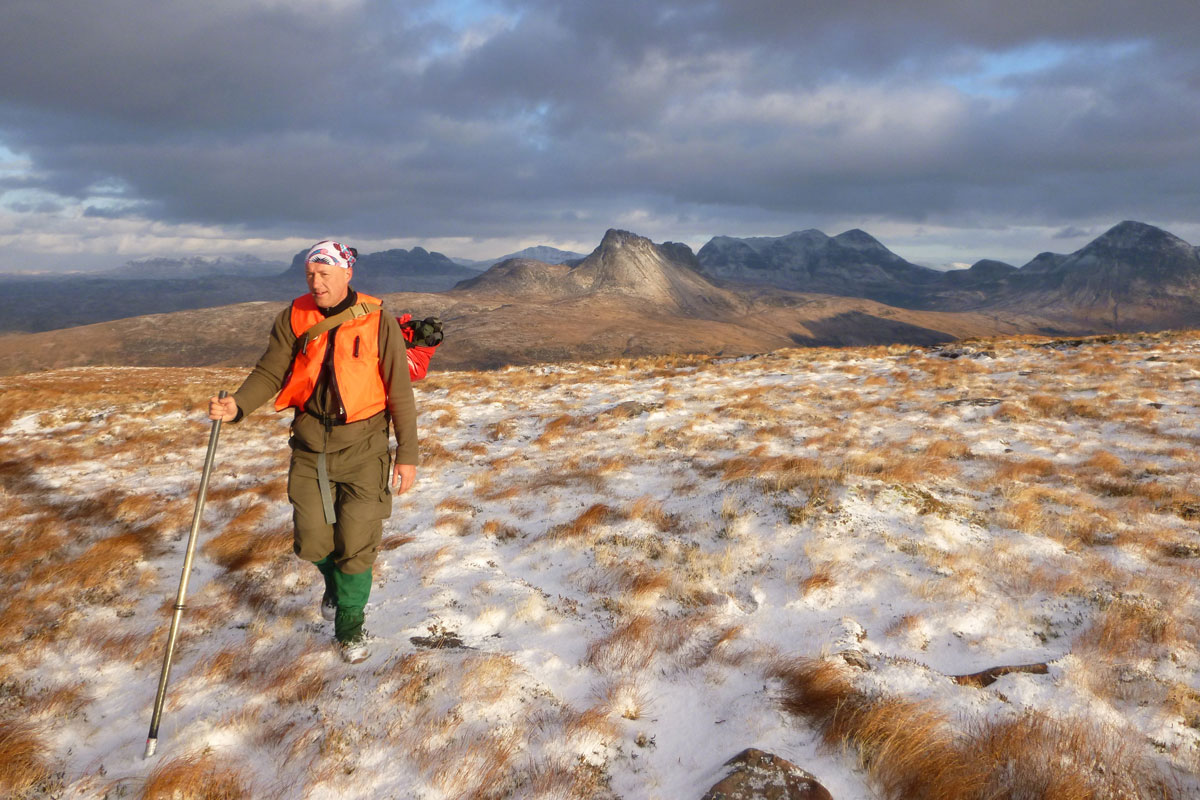
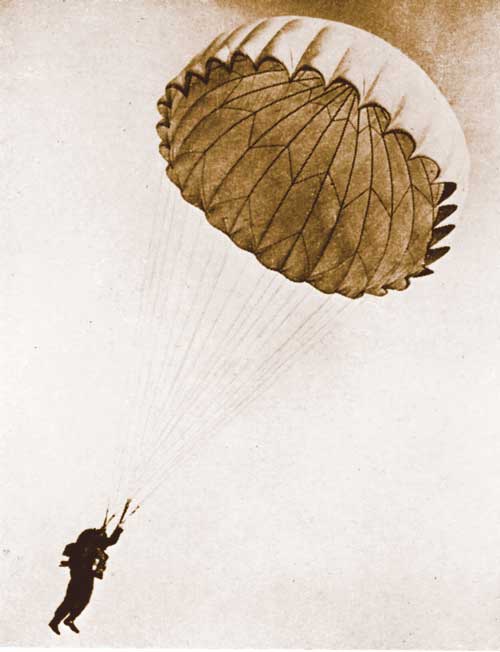
When it comes to exposure, should you fall in, being wet from trapped sweat is nearly as bad as getting wet from seawater. Once pressed against your body by water pressure, I’m told the actual benefits of a drysuit in slowing down hypothermia are only measured in a few extra minutes. To be agile enough for paddling, drysuits are not immersion or survival suits (above right) made to snuggly bob around for hours until the RNLI find you. In such a scenario it’s the fleece underneath that can make a difference, and I have a Gul one-piece (left) for those chilly days. At anything above single-digit temps, it’s just too warm, but if anyone remembers romper suits from their toddling days, they know how comfy it is to wear a onesie over their nappies. They go for about £25 and many outlets throw them in for free with the drysuit.

Re-entry training and drysuit testing

Whatever membrane fabric the Crewsaver used, like many sub-Goretex fabrics it was more waterproof than breathable. As it is, I’ve never experienced the true magic of breathable membranes which work under a much narrower set of parameters than we imagine (temperature gradients, fabric saturation, and cleanliness), even if they’re surely better than being wrapped in bin bags and duct tape.

Before the Hyperpro I briefly owned a much lighter Kokatat Tropos (below) which I sold in haste and which closely resembles my Anfibio Packsuit. Kokatat are known for their high-end Goretex expedition kayaking drysuits, but they don’t use two-layer ‘Tropos’ membrane fabric anymore so maybe it’s just as well I flogged it. The closest thing Kokatat now sell is the better breathing three-layer Hydrus 3.0 Swift Entry which goes for over £700 in the UK.

tropos
Relief zipper: don’t even hesitate; it’s chilly out there. Might work for women using a SheWee, too

Semi drysuit
I’d often wondered what exactly a semi-drysuit was – a half-arsed fabric that sort of keeps water out? Sven at Packrafting Store explained: it’s a drysuit with a comfier neoprene rather than a latex neck seal. Latex (as on my Hyperpro) seals very well but worn all day gets uncomfortable. I recall reading about some guys who paddled South Georgia in the South Atlantic fitting ‘venting hoops’ into the latex neck seals of their top-of the range Kokatats during less stormy episodes to stop them choking or boiling over. Unless you expect to be frequently immersed in storm- or whitewater conditions, you may prefer a neoprene neck seal. The rationale is that because the head and neck are usually above the water when wearing a buoyancy aid, the seal here is less critical than on submerged wrists or ankles/feet.

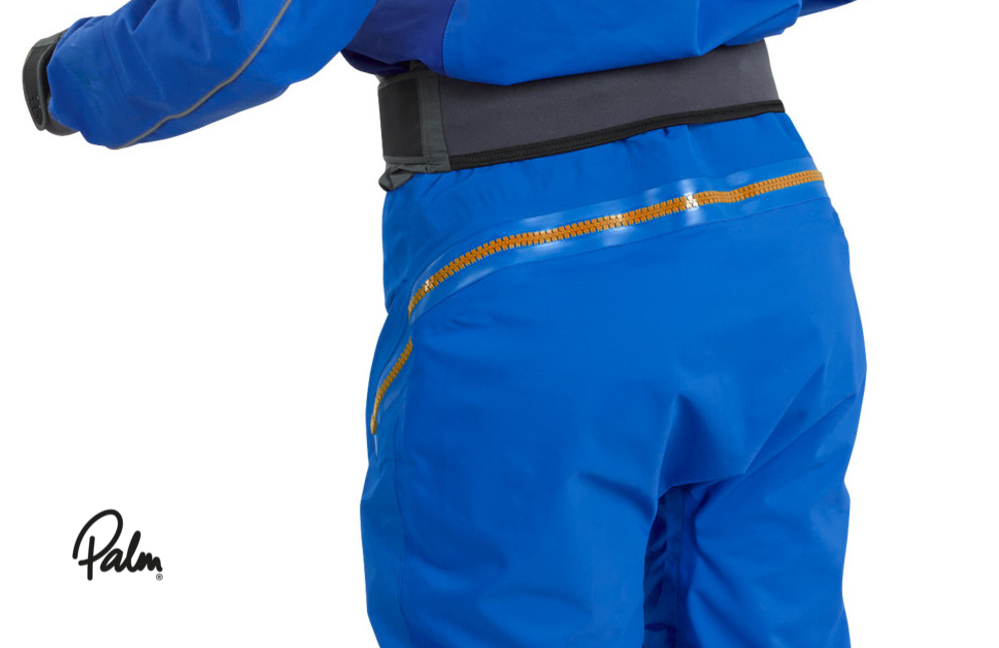
Relief zips; responding to Nature’s call
Presumably you won’t be paddling the tropics in a drysuit so, at the very least, the need for a slash can become paramount, especially as the years pile on. Get a suit with a relief zipper or, as I did with the Tropos, pay an extra 100 quid to have one fitted later. A woman could use a front relief zip with a SheWee, otherwise women-specific drysuits feature a dropseat zip across the back of the hips for the same purpose. note the waist drawcord or seal too; also helpful to retain body heat.

Integrated socks or ankle seal?
It’s a drysuit so you want to be dry, and that includes your feet. Far better to have integrated socks than ankle seals and then find another way of keeping your feet dry or at least, warm. Looking at drysuits again recently, I see that nearly all come with integrated feet laboriously made of sewn and taped membrane fabric, yet the benefits of any breathability in the feet are minimal, while the membrane will eventually fail and be difficult or expensive to repair or replace.
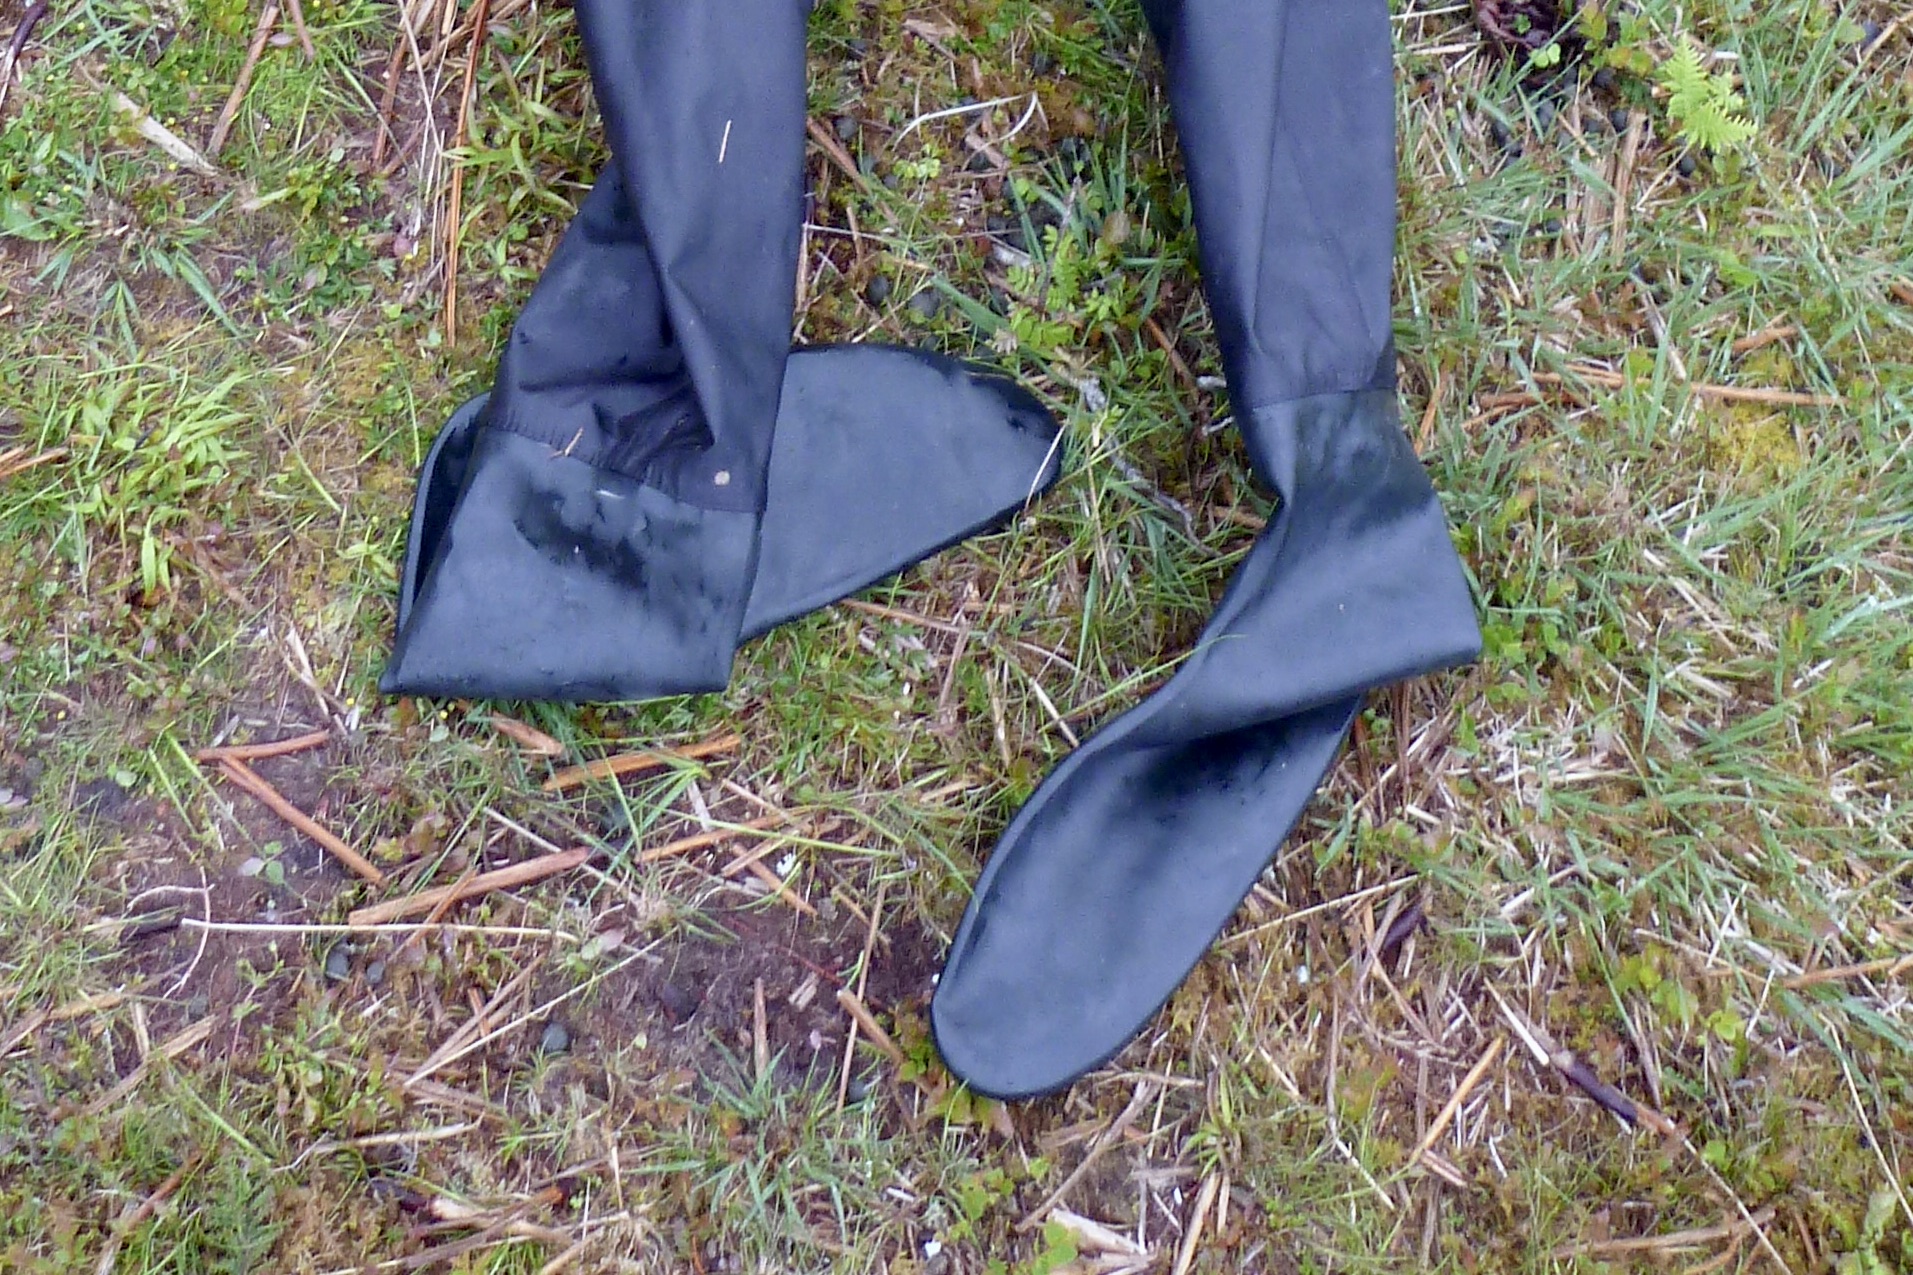
Sven at Anfibio confirmed what I felt: integral latex rubber socks are the way to go; they may be heavier than membrane versions but are much easier to repair, more robust for walking as well as reliable. Wear some thick socks and a pair of wet shoes on top and the feet will be dry and warm.
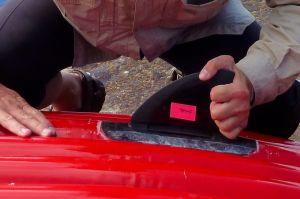
crewsaver-hyperdry
Anfibiodry-8

Drysuit zips
The Crewsaver had a horizontal back zip, the Tropos was front diagonal while the Anfibio is front horizontal. The back zip may look neat (right) but when tired or cold, I found the articulation required to unzip myself was quite an effort. It does mean you can open it on the water to vent off while guarding against frontal splash, but it would be hard to zip up in a hurry. Front diagonal doesn’t seal so well with spray skirts they say (not an issue with IK&Ps) and so it’s hard to find fault with the front horizontal format.

Anfibio Packsuit
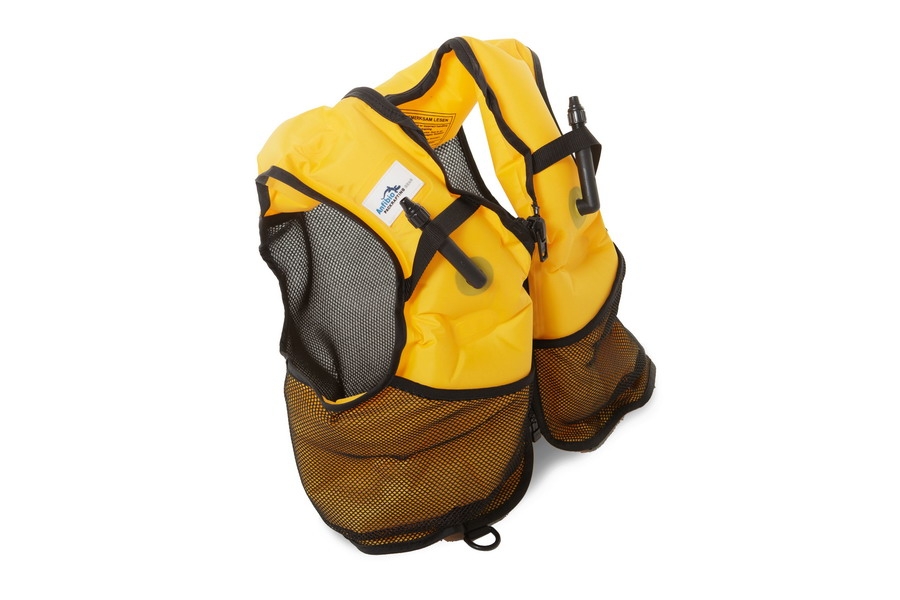
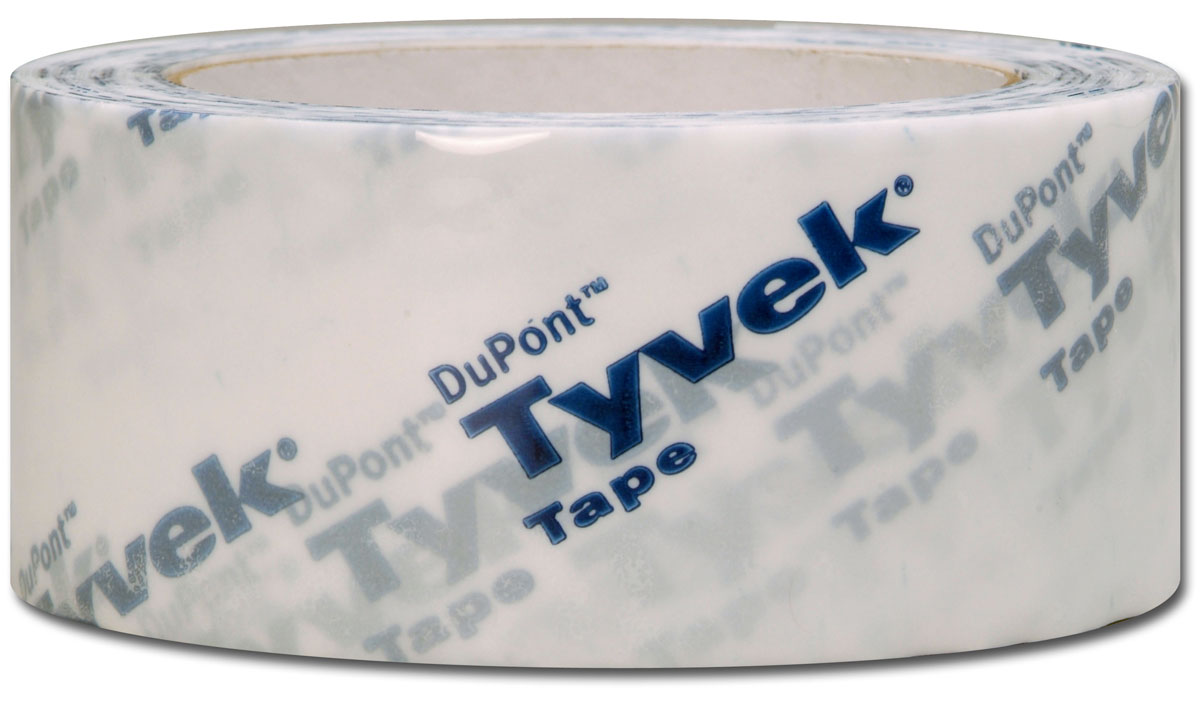
I found the Anfibio Packsuit easy to get into, light enough not to sag and the zip easy to work and check that that you’ve sealed it properly. The Anfibio suit uses a plastic TiZip Masterseal dry zip (top of the page) that’s lighter and easier to slide than old-style brass YKKs. Wax or silicon spray is all the TiZip needs, as with YKKs.

Anfibio’s Packsuit can weigh as little as 800g in smaller sizes. My XL version was custom tailored and with the latex socks and the relief zip options at 1332g and rolls up to about half the volume of my old Hyperpro. Weight is saved with no cuffs covering the latex parts which are said to be vulnerable to UV. A regular dose of 303 Protectorant (right) should see to that. There are also no pockets or other features, just what you need to keep you dry.

Anfibiodry-5
Anfibiodry-4

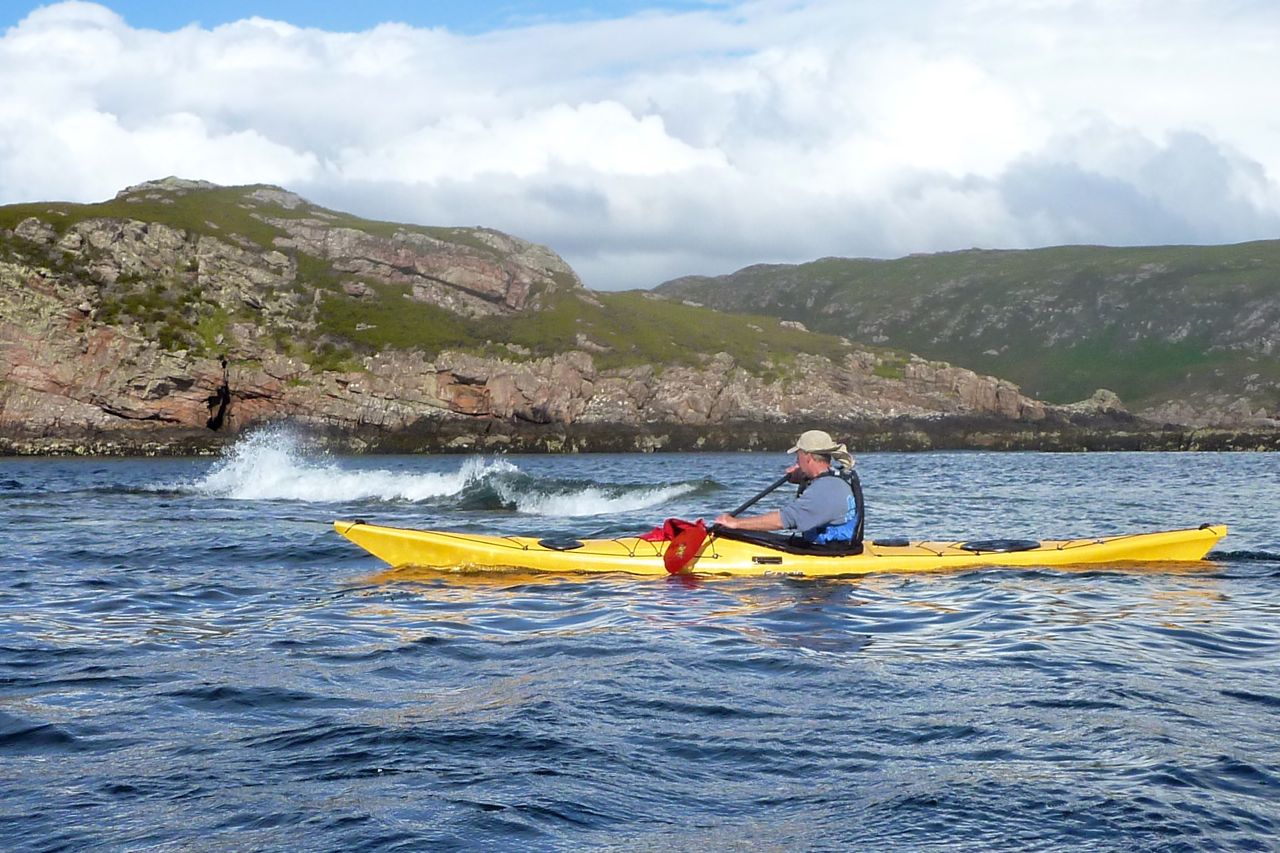
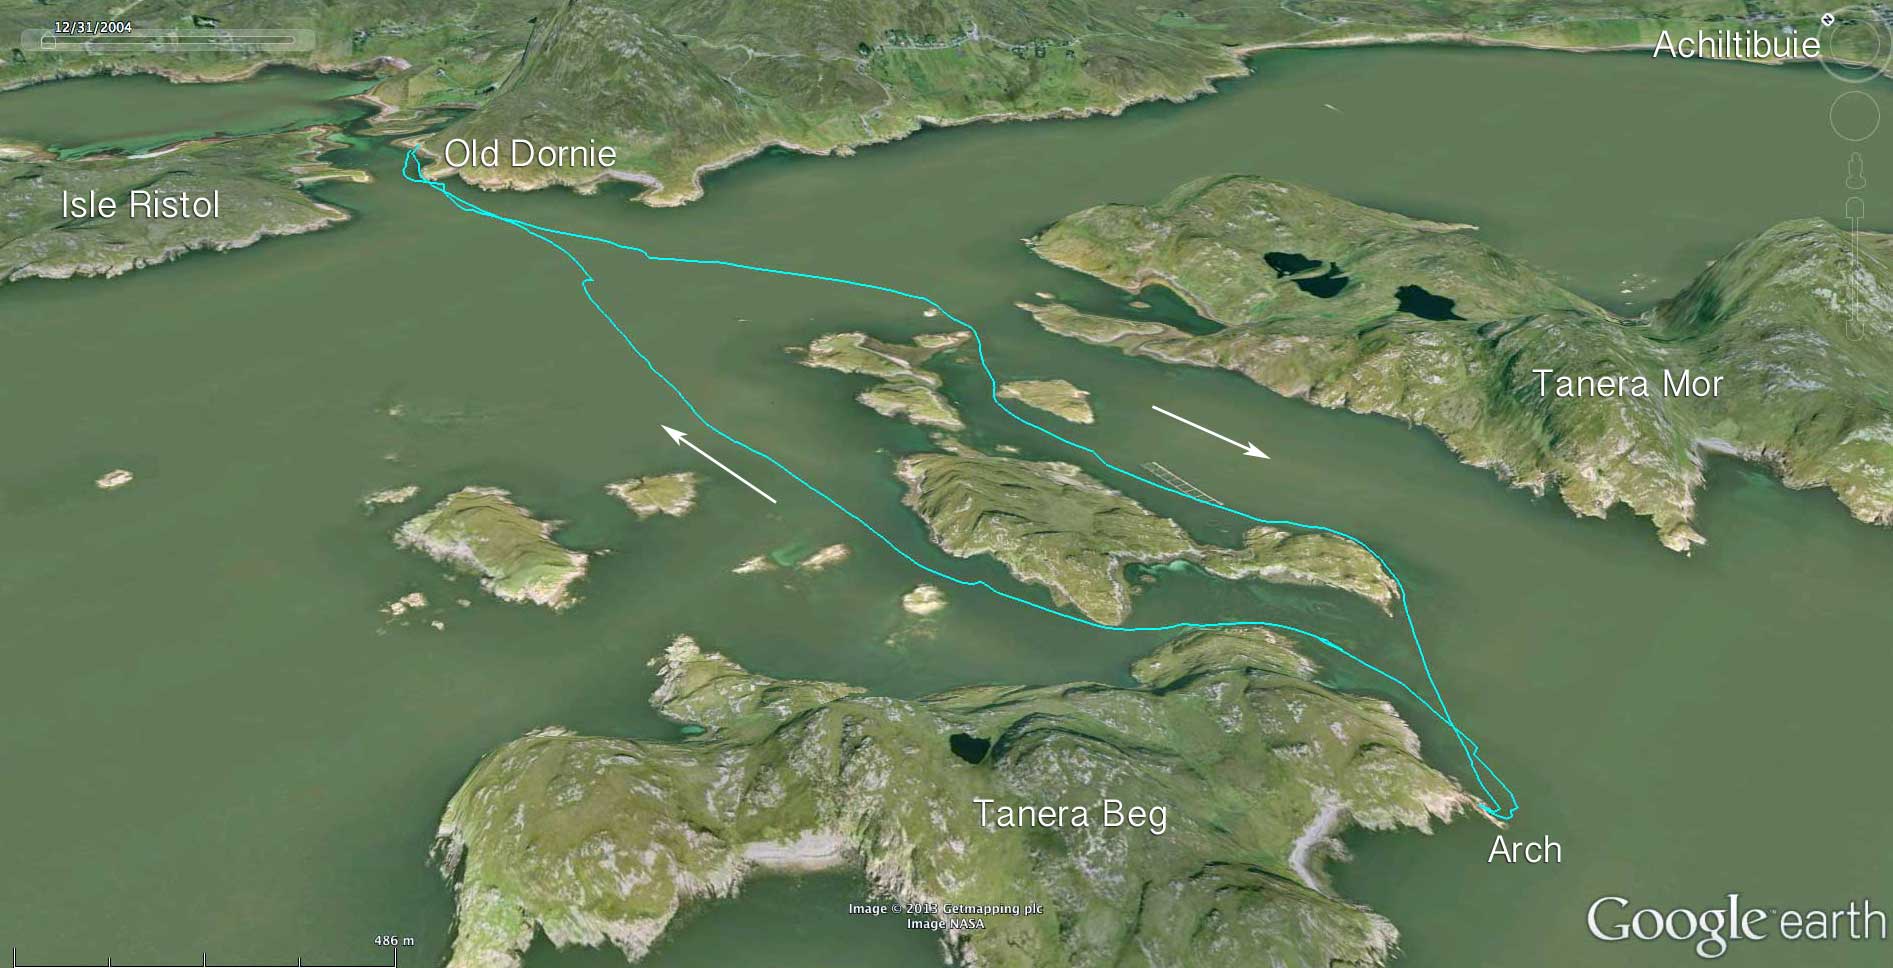
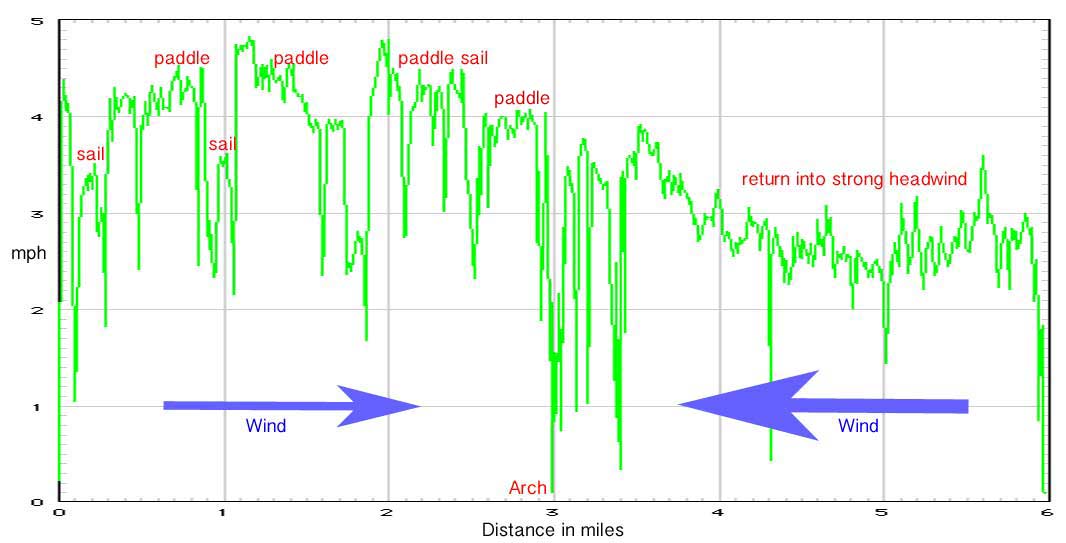
Best of all, on our four-day paddle around the Slate Islands I found the Packsuit unobtrusive to wear. Unlike previous drysuits, I rarely felt the need to peel off at the slightest stopover, and the relief zip is a no brainer, enabling on-water ‘defuelling’, if necessary, just like a B52 on a long-range mission. Wearing just a shirt and runner’s leggings, I never felt hot on the water nor got chilled, and during a downpour on land one evening, was happy to wear it right up to the point we scurried for our tents.

packrafting_store_logo

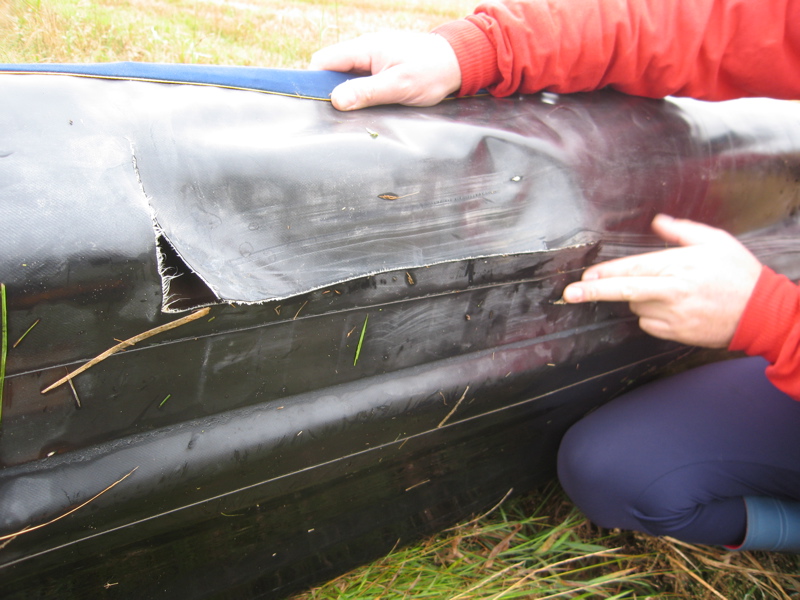
I’ve yet to do an immersion test but have found that stretching made the inside coating peel off the neoprene neck seal but don’t know what this coating is actually for. It’s certainly not waterproofing so doesn’t really matter. Other than that, no issues.

I received the Packsuit in return for editorial work on the Anfibio Packrafting Store website. It costs from €419 with tax and in my custom spec would have cost €550.

Good drysuit Q&A

P1040386

Anfibio Buoy Boy inflatable packrafting vest

Updated May 2018 – see bottom of page

bbboy

Back in 2015 the Packrafting Store in Germany sold us a couple of pre-production Anfibio inflatable packrafting vests to try out. These came without the big mesh pockets, unlike the current production item, left.
Called a Buoy Boy, an ‘inflatable jacket’ or buoyancy aid is all they claim to be, not a PFD, far less life jackets. They don’t even claim to have the rescue/harness elements suited to white water recoveries, as found on better PFDs. A warning label inside spells it all out. Instead, your Buoy Boy bad boy is just a compact, unobtrusive buoyancy aid that’s well suited to sedate packraft touring.

bouybo
lj55

You clip the waist clip and hook the strap under the crotch to stop it riding up, as can happen with a regular PFD, then zip up the front. Our prototypes had two ‘push and blow’ valve tubes inflating the two chambers (three breaths each). These chambers don’t cover the lower back which is composed of a thick, stretchy mesh below the inflated collar (left), so avoiding that inelegant ‘pushed-up PFD’ look in your packraft. The rear collar around the neck might even float you unconscious, face up, like a proper life jacket, but that would be a happy coincidence and despite the appearance, it is not a design element.

lj44

We weren’t even planning to take our regular PFDs on this mid-winter trip, so a compact option came in welcome, especially when a late-night boat ride required them.
Best thing: it’s unobtrusive to wear deflated, doubling up as a high-viz vest whose benefits we also appreciated when road walking in the Scottish  mid-winter gloom. We even inflated them while walking in freezing conditions to act as extra insulation, while at other times the Buoy Boy will be less hot than a 
regular PFD; another problem I’ve found when foam PFDs and paddling in 25°C+.

packrafting_store_logo
lj2

Weight is from 340g to 400g for a Med/Large. My ‘M/L’ was a snug fit once fully inflated over all my mid-winter clobber (I’m normally 42″ chest). A great bit of kit that I can see becoming my regular day-tripping BA, especially when I have to wear one due to regs rather than need to due to conditions.

499_1

Update.
I used my orange BBoy proto just about all the time as most of my paddling is flatwater and it’s great not to feel cluttered. I bought myself a larger L/XL with horizontal valve straps and very handy large frontal mesh pouches just what was needed. Unfortunately it was black – I prefer brighter colours for safety and photos.
Now in 2018 colours are blue (S), yellow (M/L) and black or yellow (L/XL) – hooray! A roomy Large on me weighs 450g with crotch strapPrice is €99. More details and photos here.

boyboy

IKs & Packrafts: glue & repairs

See also:
Repairing a Gumotex Seawave
Repairing a huge rip
MYO D-rings
MYO alternative to D-rings
Gluing a TPU packraft
Gluing PVC patches to Gumotex Solar

gluerepairs

It’s understandable to worry that something like an inflatable boat is a bit of a liability when out in the middle of a deep lake, hairing down some white-water or when far out to sea. This is especially pertinent if your only experience is a beach toy made of a thin and stretchy PVC film.

I’ve owned over a dozen inflatable boats and have only had one tiny thorn pinprick in the Inceptage-related fabric perforation on an ancient Semperit and a hole worn through careless transportation in my Seawave.

rep-hull

Once on the actual water it’s hard to think of anything actually puncturing my full Nitrilon Gumotex IKs or the old Grabner. What more often happens is some kind of accidental wear or rubbing when not paddling or during transportation, like the trolley wheels which wore a hole in my Seawave, or the windy tree branch which rubbed (but did not puncture) my Grabner (left). I also snagged my packraft’s uninflated floor on submerged concrete once, then added protection to the outside and padding on the inside to stop that happening again.

I’ve also travelled with cheap slackrafts that have got ruined within minutes and punctured every other day. You do get what you pay for. So when it comes to glue I’ve learned that preparation and application are vital to getting a good repair: rough it up; wipe it down with solvent, apply the right glue to both surfaces, wait, then slap on the patch and press down hard with roller to achieve a long-lasting bond. More below.

pvc-or-hypalon

Is your boat plastic or rubber?
As explained here, broadly speaking IKs are made of either rubber- or PVC-coated fabrics. Rubber-based Hypalon, EDPM or Nitrilon is much less used now and most with the tubeless construction method.
On a boat like this, rough up the surface, clean with solvent (see below), apply the right glue and a same-material patch, all which needs to be done well as the patch is vulnerable on the outside. Or, you can just dab some Aquaseal directly onto a small hole in the hull to protect it from wear, as shown above left (not an actual puncture).

One-part glues
I’ve succeeded in gluing on non-critical D-rings onto Gumotex Nitrilon and Grabner EDPM (Grabner), as well as PVC to Nitrilon using single-part Aquasure urethane sealant/adhesive (‘Aquaseal
‘ in North America). Allowing Aquasure or similar to half-cure in air for 30 minutes, then sticking together and letting it ‘seal’ to itself is a way of bonding anything – even non-compatible rubber-based Nitrilon to PVC, as I did here. SeamGrip is a runnier version of Aquasure to get into cracks and seams. Though I’ve not tried it yet, British-made Stormsure is the same thing.
Apply a thin film of Aquasure to both surfaces; wait half an hour, then bond with all you’ve got.

In the UK you can buy Aqausure in 28g tubes from £6, or 250g for around £24. Unless you have a lot to glue/seal jobs, be wary of saving money with the big, 250-g tube. Give it a chance and it’ll split and harden before you get to use it all, even if it’s effectively over half price. Alternatively, I’m told a good tip is to store it in the freezer once opened.

sempoe

The other one-part glue I used on my PU/PVC Incept IK, Slackrafts and used recently on an old hypalon Semperit is Bostik 1782, not least because it once went real cheap on ebay.

glue-dring

I can’t say it worked that well on my Incept; two-part adhesive is always better. Even on the slackraft the Bostik softened and shrivelled the thin PVC. But on non-critical applications (D-rings and none-huge tears), 1782 seems to work well on hypalons (rubber is always easier to glue than plastic PVC) and at £10 for 100ml was good value. Plus it’s a nitrile rubber/resin-based solution and I’ve found won’t go off and harden in the tube like Aquaseal often does. It’s my favourite, do-it-all, one-part glue.

For years Gumotex supplied rubbish Chemopren Universal gluing in their repair kits. It looked like the brown rubber solution you’d use on a bicycle inner tube. I tried to use it on my Gumotex Sunny years ago and found it was crap. Back then it may have been me, but I tried to use Chemopren again recently on my hypalon Semperit and it wouldn’t even adhere to a roughed up, MEK’d surface! To be fair, it might have been many years old, but so are my other glues.

The glue that came with my second Seawave in 2020 was a small tube of Elastick (left). It looks like a generic polyurethane do-it-all glue, like Aquasure. It will probably remain unused with the boat until it turns solid. I’d sooner rely on Nirtile-based 1782 or Aquasure for field repairs.
Tbe problem with these urethane glues is once you open them or the alloy casing cracks they dry up and harden.

Two-part glue

For important jobs use much stronger two-part adhesives suited to actually assembling air boats as well as making more permanent fittings and bomb-proof repairs.
At about £15 posted for a 250-mil tin, PolyMarine 2990 Hypalon adhesive is much cheaper per ml than Aquaseal or Bostik 1782. In the UK Ribstore and Ribright sell similar stuff, and Bostik 2402 is the same but prices vary wildly. Just make sure you buy for Hypalon or PVC. I’ve used it to glue D-rings onto my Grabner (more here), floor patches to my Alpacka, latex socks to my dry trousers and patches as well as repairs to my Nitrilon Seawave and Sunny. It sticks like shit to a s***el.

The trick is to measure out the correct quantity. Above: the small bowl about half full of glue and hardener – about 10cc or 2 tablespoons? – was enough to fit two 80mm D-rings. Each surface: the back of the Ds and the hull, need two applications half an hour apart.

sempauto - 11

In 2017 when I dismembered an old IK, I was easily able to pull off recent patches glued on with Bostik by hand. But I could only pull off Polymarined patches with a pair of Knipex hydraulic trench pliers and even then, the patch coating pulled away from it’s core (lighter exposed weave below) or the patch remained stuck to the boat and instead pulled off the dead’s boat’s hypalon coating revealing the fabric’s yellowed core or scrim. The two recently glued surfaces could not be separated. They say the mixing of the two components causes a chemical ‘vulcanisation’ and molecular cross-linking which creates a very strong bond. Mixing and applying two-part is a pain, but it works.

semp-glue

Get a good roller

sealey

Single or two-part, once you apply your patch, roll it very hard with something like the classic Baltic-pine handled Sealey TST15 stitch roller (left) aka: tyre repair roller used for innertube and tyre repairs. The knurled metal wheel set in a solid handle applies much greater pressure than a wide plastic roller I used to use, and they’re only about a fiver on eBay. Buy one now so you’re ready.

glu-tyvec

Bladder boat and packraft repairs
With smooth-skinned packrafts use two-inch wide Tyvec tape produced by DuPont. Just peel off the back and apply a section to pricks or small tears once the surface has been cleaned and dried. No need for roughing up, but a quick wipe with solvent won’t do any harm. Larger tears can be sewn then taped. Tyvec will work on urethane IK bladders or use ultra tacky Gorilla Patch & Go tape for deep floor scratches and cuts. It will remain impermeable even once immersed.

Aire-style bladder boat repairs are actually easy. According to Aire’s youtube vid, you unzip the hull shell, slap on a bit of Tyvec on the split, tape up the inner side of the hull shell gash to keep out grit, reflate and off you go. You can glue up in the usual way later, if necessary. I had the feeling that on my Feathercraft Java the urethane-coated sponsons made of thin ripstop nylon fabric (like tent flysheet material) couldn’t have been securely repaired with tape. In fact, it would be difficult to bond anything well to the slippery nylon fabric compared to smooth urethane plastic or hypalon-like surfaces, but perhaps once inflated the seal would have been fine.

On this Sevylor it was the green envelope which ripped a metre long on the second outing! The owned may have over-inflated on a hot day – it only runs 1-1.5psi. The envelope is just a nylon fabric shell so would be an easily sewn repair. Usually it’s the inserted bladders which go. They can be patched.

Good article on how adhesives work

Cleaning solvents

foamdandingblock

Once you’ve done your roughing up (sandpaper or a foam abrasive sanding block, left) you need to clean off the residue as well as any oil or grease present. Anything will do in a pinch; alcohol and spirits, after-shave or nail polish remover (acetone), lighter fluid, white gas or petrol of course, but not oilier diesel, aviation fuel or Nivea for Men. Bleaching agents aren’t the same thing. In the end just use water to remove the dusty, post-roughing residue, and on a cold day it can help to warm up the damaged surface to cure the glue more quickly.

toluene
Tri Nitro Toluene (TNT)

For a travel repair kit a tin of lighter fluid (same as white gas) or nail polish remover (acetone) are easy to buy and handy to pack. Back at home I’ve found MEK (Methyl Ethyl Ketone) is inexpensive at £9/ltr and hideously effective. Acetone is even cheaper and perhaps less extreme – all we’re really talking about is cleaning off any grease and the dust after sanding.
They say MEK is for PVC boats rather than Hypalon, but on a thin plastic slackraft the PVC will shrivel up before your eyes once MEK’d. Even on rubber-based coatings use MEK or similar toluene sparingly. Expect some colour to come away on the cloth and the coating to soften at bit: good for adhesion. Note the NRS video above specifically recommends toluene (the second ‘T’ in ‘TNT’ explosive, fyi) for hypalon. On ebay uk it’s the same £9/ltr but they won’t post this stuff around the USA.

Huge tears and bear bites

semp- - 3

If you have a huge gash, as in the folding Klepper’s hull below, sewing is the only way to contain the tear when applied to an IK. Then apply a huge patch with adhesive, as normal. The boat below caught a cut-down metal fence stake buried in a shallow river bed and was actually sent back to Klepper for professional repair. It’s tempting to think an IK’s pressurised hull would have skimmed over the stake rather than snagged it. The smaller 1-inch L-tear on the left was glued with a 5-inch patch but the 30-year-old IK proved to be totalled.

Inflatable Kayaks: Hull Forms and Rigidity

Page moved here

splashmatter

Trying a cheap disc sail

The IK & packraft sail Index Page

Unbranded windsail update 2016: the 3mm-thick glass fibre rod snapped. I bought another length for a tenner. It felt more flexible but within a couple of days that broke in two places too. If I run 3mm rod doubled up I presume the bending forces will be the same, but if I run thicker rod I presume it won’t fold down three times to the compact 30cm diametre disc.
Looking again at the original WindPaddle, it does seem much of the cost is explained by the ‘proprietary’ composite rod they use, and there seem few easily found online reports of breakages. Prices seem to have dropped quite a lot too (as they have for the ebay knock offs). Could it be you get what you pay for after all? It’s a lesson so often learned here at IK&P!

sai01
sai-disc

The other evening I hooked my old home-made disc sail onto the Grabner’s bow (left and above) and took it out on a loch to remind myself that it wasn’t really that good. As before, I found it difficult to get a good run before it flapped out or otherwise lost its drive.
My Pacific Action V-sail will work better, but fitting that to the Amigo may require more D-rings. I like the compactness and simplicity of a disc sail, but it was suggested that dishing like a bowl was the key to holding the wind and maintaining steady progress, even if it may be less effective tacking across the wind.

Parachutai

Sounds plausible and WindPaddles are clearly made like that for a reason. Since then it occurred to me that’s why classic ‘descending’ parachutes (‘reverse’ sails) are bowls and not flatter discs which would shoot across the sky. Before I set about recutting my disc into a bowl shape I checked WP prices on ebay and spotted what looked like a knock-off: ‘Canoe sail kayak sail wind sail‘, now just £15 delivered. Cheaper than sewing and at 115cm deployed, it was midway in size between WP’s Adventure which at the time was selling for no less than £155 in the UK (now about half that). Someone assure me that a WindPaddle costs even a fiver to make in China, but see top of the page.

And better still, the no-name windbag folds down into three hoops of just over a foot in diameter (above left). Plus there’s an elastic hoop to keep it like that and a carry bag for the long walk back to the van. Out of that bag, the only changes I made were to replace the too-short control strings with my tape off the red sail which I find easier to handle. I reassigned a sling to hook the sail’s base to a floor D-ring back from the bow (above left). That was already fitted and was the only adaption I needed to mount the sail to the Grabner.

sai03

The day before, with the visiting Nimbus family we’d paddled round the Ristol isles. Over lunch on Ristol beach I took my new sail for a burn up. First time out, not bad at all. I got a steady run and up to 3.9 mph on a breeze of no more than 15 mph and with very little faffing. The prospects were good. More wind was needed.

sai12

Incidentally, on the beach I noticed how very, very much unlike a sea kayak the Amigo really is. Alongside my old Incept, let alone the lethal Scorchio HV (right), the red boat looked like one of those inflatable kayaks you read about, except it happened to be made from bomb-proof hypalon and pumped up like a basketball.

sai-mulla

Earlier on, coming round the southwest corner of Eilean Mullagrach, (left), the swell bouncing off the cliffs and crashing over outer reefs looked intimidating. Though we all managed fine, it was everyone for themselves. With heads bent to the task, the comparative speeds of our four boats was clear to see. Way out ahead and longer than your average four-door car: the cheddar-coloured P&H cheese cutter. No far behind, 12-year-old Boy Nimbus darted along in his 12-foot Carolina (later I GPS’d him at 6mph, same as the P&H). Further back Mama Nimbus and little Nima in the K40, all hands on deck. And out back the Grabner hypalon clog – splish-splosh, splish-splosh Slap. Checking the GPS data the speeds weren’t so bad, it’s just that in the rough the hardshells cut through some 30% quicker.

sai-2bots

A few days later the Solar was stacked on the Amigo (right) and I realised it was only a foot or so longer than the Gumotex. In that case the Grabner does pretty well for a 12-foot four-, 31-inch kayak that hauls two paddlers.
Back to the sailing. Next day winds were forecast at over 25 mph (right) but as it was warm and only a 5-minute drive to a Loch Vatachan, it was worth a crack.

sai-splasher

A short pre-paddle suggested my cheapo windsail would probably get ripped off and blown away, or else see me roll off the back of the kayak as it shot away from under me liked a snatched tablecloth. Upwind I couldn’t exceed 2 mph (left), but skimmed downwind at up to 5.5 mph providing I kept the stern right on the wind. And while I was out here, side-on to the one-foot fetch the Amigo felt secure, so not a completely wasted outing. I’d never set out to paddle in such conditions normally (actually I did once), let alone try sailing (actually I had once) so I called it off. Later, Ardmair weather station confirmed the wind had been howling at a steady 35 and gusting to nearly 50 mph.

sai-boats

We all ‘yaked over to Tanera Mor one afternoon; three IKs and two SinKs. I realised I’d never actually walked up to the 124-m summit of Tanera Mor for a look around.
Up on top a string of islets lead to the twin humps of Priest Island, 4.5 miles in a straight line (right). It was a ten-mile round trip I’ve mentioned earlier but may be beyond reach this time round.

sai-tansouth


Paddling back from the island, Mama Nim found my old Incept had picked up another pin-prick hole in the side. Wtf is happening to the K40? It’s a lot better than the armchair -wide Sevy they were borrowing before, but three holes in four outings? And it gets worse. On leaving the island the wind dropped to nothing so sailing was off. Instead, we were plagued by sea midges which rise from their lairs as soon as the wind turns its back.
Another day and a healthy northerly forecast at 10mph on the BBC which might mean 15 in real terms. I set off with Nimbus in his Scorpio ‘PK’ (plastic coffin) for a look at Tanera Beg’s arch he’d missed on previous visits. It’s a nice arch; we passed it a couple of weeks back, two-up in the Amigo.

sai-keens


Once clear of Old Dornie I threw the sail out and trotted along at 3.5 mph which won’t be giving me any nosebleeds but I suppose must be classified as progress. At least I found a good way of stashing the sail. Seeing as it’s right out on the bow, refolding it down to three hoops isn’t practical on the water without help or taking risks. But I could just pull it back and tuck the squidged sail under my feet and between my legs (above). Down here there’s little risk of it self-deploying and jumping overboard to become a most unwelcome sea anchor, but it can be thrown up in a jiffy to catch a breeze, just as with the PA.

sai-padd

Once we got to the two Taneras’ In-Between islands the wind remained but the waves were blocked so I threw out the air bag and trickled along again at about 3.5mph again. Then it occurred to me I could hold the sail leash in my teeth and paddle. That worked well too, getting on for 5 mph but without the paddling effort to make that speed unaided. Plus it felt better than having the sail hooked to my pfd and stopped me talking unnecessarily.

sai-archers
sai-calmacer

Once past the In Betweens we crossed over to the arch but found we were a metre short of water. Still, high or low water it’s a great mini-destination some three miles out of Old Dornie.
The easy part was over; it was going to be a solid old hack back into the wind for Old Dornie. As we turned we were a little perturbed by what looked like the  Stornoway ferry heading right at us. I’m sure it never came this far north, was the captain asleep at the wheel or taking a deeper channel on the spring tide?

sai-breaker

At the last minute the CalMac turned away and a calamity was averted. A few minutes later its wake rolled in, breaking a couple of feet high just as we  passed a reef. It looked like a good picture so I sent Nimbus back for a shot (above) but by then the best of the surf had passed. If that was the swell kicked up by the ferry from a mile away and before it hit full speed in the Minch then I’m glad we keep our distance.

blofie

Time to put the camera away and knuckle down for an hour’s bow slapping to Old Dornie. As I’ve observed before in such conditions, Nimbus in his SinK paddled like he was stroking his favourite cat, gliding through the waves in a seemingly relaxed procession. Me? I was loading 16 tons and what did I get? Slipping back further and deeper in bilge.
Still, not alone for a change was less unnerving and I quite like a good work-out on familiar terrain. You dial in the effort you know you can sustain for the duration and progress at whatever speed that delivers. From the graph below that added up to about 2.5 with occasional surges to 3 mph when my technique briefly hit form. The P&H PK seemed to hold a steady 3+mph without trying.

sai-splarsh


The wind had failed to live up to the forecast promise of dropping around 6pm and out in the mid-channel a few white tops developed; for me a warning sign it’s approaching IK limits. I will speculate that I shipped less water than I would have in the Sunny which is a similar type of IK. Partly because of the Amigo’s upswept bow that front or rear, doesn’t seem to be as much of a wind catcher as it looks. And perhaps too because the boat doesn’t bend with the swell.

In fact it was fun slapping the fat bow against the oncoming waves as I slowly hauled my way closer to Dornie. Old Man Nimbus can read wind speeds like a Tubu hunter reads the sands. He estimated it was blowing at 8m/sec which in English translates to 20mph. I’d have guessed a bit less, as with the spring tide at full flow against it, it didn’t seem too much in an IK (as long as land appeared close by). As we neared the harbour a couple of other SinKs slinked by, tucked right under the shore, out of the wind. Get out here you cowards!

angleferry

No Name wind sail
My conclusion of the no-name wind sail? It’s a WindPaddle at the right price. Easy to fit to my boat and doubtless many others, easy to temporarily stash on the move and probably easy to repair. And easy to steer too; pull left to go left, usually. With the window pane it’s much better than my home-made flat disc, plus it’s less bulky and complex than a V-sail, even if a V will give you nearly 90° reach either side of the wind.

ferryspd


Surprisingly I haven’t found the lack of a rudder an impediment with the Grabner. Though there’s a bit less directional control, at the typical sub-4 mph speeds you can drag a hand or a paddle blade to bring the nose around. And interestingly, providing you’re close to the wind and holding a steady course, the sail worked pretty well when paddling with the leash in my teeth like the 3.30 line up at Cheltenham. I can’t say I ever managed paddling with the Pacific Action on the Incept for long before it flapped out. Plus there’s plenty of scope for hooking up some self-jamming cleats (more here) like I ran on the Incept.
Above all, the no-name air scoop is great value for money for the performance it delivers. For thirty quid it wouldn’t be worth making your own. Next job: see how the little Alpacka handles when yanked along by the wind sail.

See update, top of the page.

Eskimo rolling inflatable kayak videos

animush

It can be done with thigh straps and technique. A calm pool helps too. Here are a few vids I dug up years ago. Some look pretty ancient; perhaps the mastery of IK rolling has become a lost art.
Of course the fact is most IKs are usually so wide that falling out takes some effort (left). Getting back in to an IK is usually as easy as crawling drunk onto a sofa. But that’s not so entertaining to watch.

First up. The IK in the old video below from theboatpeople is a self bailing Aire Lynx (right); 32lbs (14.5kg), and no less than 37 inches wide (94cm).

Here’s another. Don’t know what it is but it looks even wider – perhaps a small raft? The guy gives it a go but eventually separates from the boat. Nul point. As the lone youtube comment says: “Nice briefs, bro”.

One more? A Gumotex Safari with a long lever roll. At 28 inches wide it’s narrow for an IK and probably the easiest one to roll (not that I’ve ever done it, mind).

And another. Tahiti is a Sevylor IK, I do believe. Nice execution.

Another Aire – looks like a 36-inch Force river runner. He gets there in the end.

More pixels here than Disney, but no long levering required in a vintage Spreu Boote Guppy. What is it with these European IK names?

And finally the Packmaster, Roman Dial and chums demonstrating packraft rolling with and without skirts. There are plenty more packrolls like this on youtube.

The A to Z of Inflatable Kayaks

a2zik

halforts
lidl

Inflatable kayaks are a bit like mountain bikes. You can buy a blinged-up piece of overweight junk with ‘full suspension’ from a superstore for under a hundred quid. Or, if you’re serious about your cycling fun you can buy something decent that’ll be a joy to own and ride.

Continue reading…

Grabner Amigo kayak modifications

Amigo main page

amigomods

ami-data

Unlike my previous new IKs, out of the bag you don’t get much with a Grabner Amigo. In fact you don’t even get a bag. With Grabner IKs just about everything except the repair kit and air you pump in is an extra which undermines the otherwise striking 14kg weight. To make up for this dearth of equipment, in the catalogue they even list the specification label (right) as among the boat’s standard features!
So my Amigo added up to the bare boat with carry loops at each end and two backrest bars. No seat, skeg, pump, lashing points (D-rings). On purchase, I ordered half a dozen D-rings and a pressure gauge. The rest I’ll work out myself. Having learned what’s needed over the years, that suits me fine.

View Post

Manometer

grabguage

With the high pressures an Amigo runs it’s great to finally have a pressure gauge that’s easy to use (left). There are no pressure release valves (PRVs) to stop an Amigo splitting a seam if left out in the hot sun, so it’ll be a quick way of keeping tabs on the boat’s pressure or ascertain it’s at full charge. I’ve added a marker in pink to easily line up with the Grabner’s rating of 0.3 bar (4.3 psi) – not 4.3 bar as I mistakenly did once (the old eyes are going…).

Fitting a tracking fin

gumonewskeg

Before the Amigo even got wet I glued on a Gumotex skeg patch (left, £12) and thick plastic Gumo skeg (another £12). All up cheaper and stronger than Grabner’s similar slip-on €60 alloy version. I took a chance using MEK to wipe and one-part Aquasure to glue the Nitrilon patch to the Grabner EPDM hull as I didn’t have proper two-part adhesive to hand. I figured it would work OK as a skeg isn’t under great strain like thigh- or footrest D-rings, for example. Years later, no problems. Apply a thin film of Aquasure to both surfaces; wait half an hour, then press down with all you’ve got.

A skeg is a pain in the shallows or when dragging a heavy-laden boat over the heather; that’s one thing I liked about the Incept’s hinged rudder, but I can’t think how to make an effective hinged skeg except the way Feathercraft do it on their self-bailing Java (it slips up and down through a slot in the self-bailing floor).

A slip-in skeg can’t be slipped off a fully pumped up boat, at least one like a high-pressure Amigo, though actually after a couple of months it’s less tight and can be done. Being able to do that is very handy for portages or grass-dragging, though the skeg itself looks pretty tough. Of course, an IK works without a skeg, but on coastal waters they’re a good idea. More on that topic here.

Pump

ami-barrel

The Amigo uses more secure bayonet inflation valves which with the right adaptor (see inset below left) don’t pop out at the high pressures (0.3 bar/4.3psi) this boat requires.).
Pump hose-end bayonet adaptors are easily bought in the UK from RIB suppliers on ebay. Inset left, the black one is what Grabner sell with a fitted fibre sealing ring and steps in the bayonet to suit different valve depths. The ‘butterfly’ finger tabs make this easy to twist in place, too. The green one uses plastic spacers held in place behind a black rubber washer to get a good seal. You wouldn’t want to lose these push-on seals and it’s hard to twist in place, so for the moment I’d say the Grabner one is better. Write that down, quick!

A now almost extinct yellow-hosed Bravo foot pump that suits some Gumotex can’t manage Grabner pressures, at least not my aged Bravo which hisses from various leaks before you can get a full charge. I’m amazed it’s lasted as long as it has. I got myself a bulky 2-litre barrel pump (above left, £20) rated at over 11psi. As you can imagine, on a low-volume IK this works fast, not least because it pumps on up and down strokes. Like Bravo foot pumps, it also has a second port to suck out ever last dram of air – handy for compact packing at the end of a tour.

kpumpmini

The Bravo barrel is bulky so I’ve got a K-Pump Mini (right, review here) from i-canoe in Ireland who can import anything from the NRS catalog in the US, and without a huge mark up too (€80 delivered, not sold in the UK). My longer K-Pump 100 worked surprisingly well inflating the Incept; we’ll see how the Mini model performs on the Amigo. If nothing else it will be a handy top-up pump; Grabner cover themselves very comfortably by claiming that anything under a 20% pressure loss over a 24-hour period is not a warranty claim, though I’ve never owned an IK that lost that much air in weeks let alone a day. K-Pumps can’t suck out air like Bravo pumps, but using a loose hose with the bayonet fitting it can be done by lung.

Additional D-rings

ami-dee

Next, I glued on my half-dozen D-rings (left). Front and rear will hold down gear; the other four locate my cut down packraft seat as well as an adjustable footrest tube similar to what I made for the Solar last year. The seat and foot rings will also double up as thigh strap location points.
I’ve not always been that successful at gluing on previous boats, so this time did it by the book: roughen with sandpaper, wipe clean with MEK or alcohol, apply glue to both surfaces thinly and wait half an hour, glue again and wait less, then apply and press down hard with the roller.

ami-poly

Doing this I had a feeling the two-part Polymarine 2990 adhesive (right) was more effective than whatever I used doing the same job on the slipperier PVC-U Incept a year or two ago. I suspect Hypalon/Nitrilon is easier to glue; ‘plastic’ PVC-U is more effectively heat welded.

Thigh straps

ami-th2
ami-log

Over the years I never really got into using the thigh straps on my Incept or Java – perhaps the need for ruddering the Incept made them more tricky to use, or perhaps I’m just an idle paddler. But with the  Amigo, I want to have that option to help it shift. In any case, it’s worth persevering with thigh straps as this is one of the main things that separates IKs from hardshell kayaks in terms of boat control in rough conditions and optimal torso-centered paddling efficiency. Straps are not quite as effective as bracing your knees under the top deck of a hardshell, but they’re all you can do with an IK. Otherwise, you’re just sitting in a canoe or on a floating log. I’ve now got fully used to the straps on the Amigo and use them without thinking, just like I feel much more secure with the toe clips on my bike’s pedals.

Footrest

ami-th3

In my opinion, you need some kind of footrest too, if a braced body is to make an efficient paddle sweep – it’s probably more important than thigh braces. Last year I improved this on the old Gumo Solar that’s occasionally used by the g-friend. The Gumotex footrest cushion (same as my old Sunny) was too far away for the 5-foot Mrs to use effectively and is squidgy at best. On the Amigo I was able to use the front thigh strap D-rings to hook up the 4-inch footrest pipe (above left) with an adjustable strap looped through. It works fine.

Seat

ami-th1

At the other end I’ve separated the toilet-like seat base of my old Alpacka Denali packraft from the backrest section. It clips to the rear thigh strap hardware with mini snaplinks (left). This ultralight seat has already been repaired once by re-heat sealing the flat seam and another hard bounce may pop it again. It’s lasted the summer but if that happens I’ll come up with something better; any inflatable pad or IK seat base will do. The Incept seat was pretty good, so was the firm-backed Feathercraft Java seat which didn’t fold under strain. Right now, at about 50 grams, the cut-down Alpacka seat base is about as light as a kayak seat can be.

The hard plastic Grabner backrest was comfortable enough to lean on once I added a bit of karrimat, though it kept coming adrift from the lug holes when the bar pivoted down, usually when manhandling the boat, but occasionally on the water too. At sea it’s quite awkward to refit the bar into the black rubber lugs as the hull sides push apart. The only way I found was to face backwards in the boat, swing the legs out into the water and squeeze them against the hulls to repeg the seat bar.

To keep the bar in place while retaining a tool-free, quick detach element I hammered out the outer brass peg and replaced it with an R clip (above left). But that didn’t last too long – one clip bent and fell out and, as expected with footrests, the alloy bar was bending against the strain. I tried a blue seat strap instead (right), but hooking that to the rubber seatrest lugs looked like it put too much strain and distort them. Ripping those lugs off would be a pain. No way round it but to glue on another two D-rings as I did on the Solar; a 4.5-inch patch has four or five times the glued surface area of the seatbar lugs so ought to take the strain. D-ring prices seem high so I settled on what I knew – chunky Grabner items at €15 each (right). Grabner deliver fast from Austria.

grabner-D-rings

The seat strap was a crude solution so I figured I may as well try a proper, full-height backrest off an SoT. On ebay the ‘heavy-duty‘ item (left) with long adjustment straps and even a back pocket went for £24 – less than the two D-rings which hold it in place. As far as I can tell the rear straps’ only purpose is to hold the backrest upright, but it’s proved very comfortable – like a proper seat and with no inflation required. I’ll keep the original seat bar for less frequent two-up paddling where I don’t have a footrest to put a strain on it.
So after a couple of months use I have optimised my Amigo by completing the adaptions listed here, making a comfortable and more practical boat for coast hopping and river touring. The cost has been six D-rings £80; seat £24, glue £15, seat base and straps already had; Gumo skeg and patch £24, and two pumps, gauge and adapters £110.

sai14

Whitewater test: Packraft vs Gumotex IK

A two-minute vid, possibly a bit too long…

Don’t get excited, we’re talking a few hundred metres of Class 1.1, but that’s as good as it gets around here.
We’ve had a lot of rain in the last week, enough to make the only paddleable river – the short Osgaig – worth a poke with a paddle. I was here with the Yak last year at slightly lower levels, so this time was expecting a smoother run in the Solar (now with an improved seat-foot set up), followed immediately by a comparison run in the Alpacka Yak.

Gumotex Solar IK
The good thing with the Solar is it’s old, worth next to nothing but tough, so can be dragged like a hardshell with the Yak in the back. I considered jury rigging some thigh straps; it could be done now through the new footrest pipe and around the seat mounts, but looking at the river as I drove up, it wasn’t really worth it. Thigh straps are what makes any deckless boat – air-filled or hard-shelled – much more controllable when things get choppy. Even WW packrafters insist straps are the way to go.

With the skeg off, it’s easy to seal launch off a grassy bank and into the scrum just below the waterfall which looks a bit complicated so was no less inviting this year.  As I spilled over the first little step I tried surfing like people do. But the Solar wasn’t especially dynamic or there wasn’t a strong enough recirculation going on to make it feel interesting. So I swung round and set off. Even at full flow, the Osgaig is a shallow, bony river better suited to an injection-molded TNP ‘spaddle’, not 220 quid’s worth of carbon-light Werner Corry which was picking up new scrapes as I jabbed at the water to keep the boat on line. It was really quite effortful with the Solar, at 3m or nearly 10 feet it’s perhaps a bit long for this sort of thing. I hit the one or two rapids full face, kicking up a satisfying splash and remembering that ‘bring it on’ exhilaration when trying an IK and white watering for the very first time on the Salmon River in Idaho all those years ago.


The river branched near the Loch; left looked all froth but too shallow so I swung right but again scrapped and shoved from one bar to the next. I was hoping to make it all the way to Loch Osgaig but up ahead I saw the tree strainer I recalled from last year so, stuck on another rock and by now steaming out of the ears in my heavy drysuit, I stepped out and walked back upriver.

Alpacka Yak Packraft
A few minutes later I hopped into the snug Yak, spun round and slipped over the first drop. Spinning back, I tried to surf as I’d just done in the Sunny but it wasn’t happening. I guess the Yak is just too wide, light and too much drag to fight the flow.
Off I went downstream, trying to avoid getting snagged while lining up to take the peak of what waves there were. Jammed in the yellow tub, sat lower and with higher sides, it felt much more responsive than the longer Solar and so was less effort to ride. Perhaps part of it was that a good line is less vital; most of the rapids I could have taken backwards and that added up to more fun.
So there it is: a tight-fitting packraft is more fun on easy white water than a 3-metre IK. When I got snagged towards the end, I just stepped out, threw the boat ashore, and staggered out over the slimy boulders.