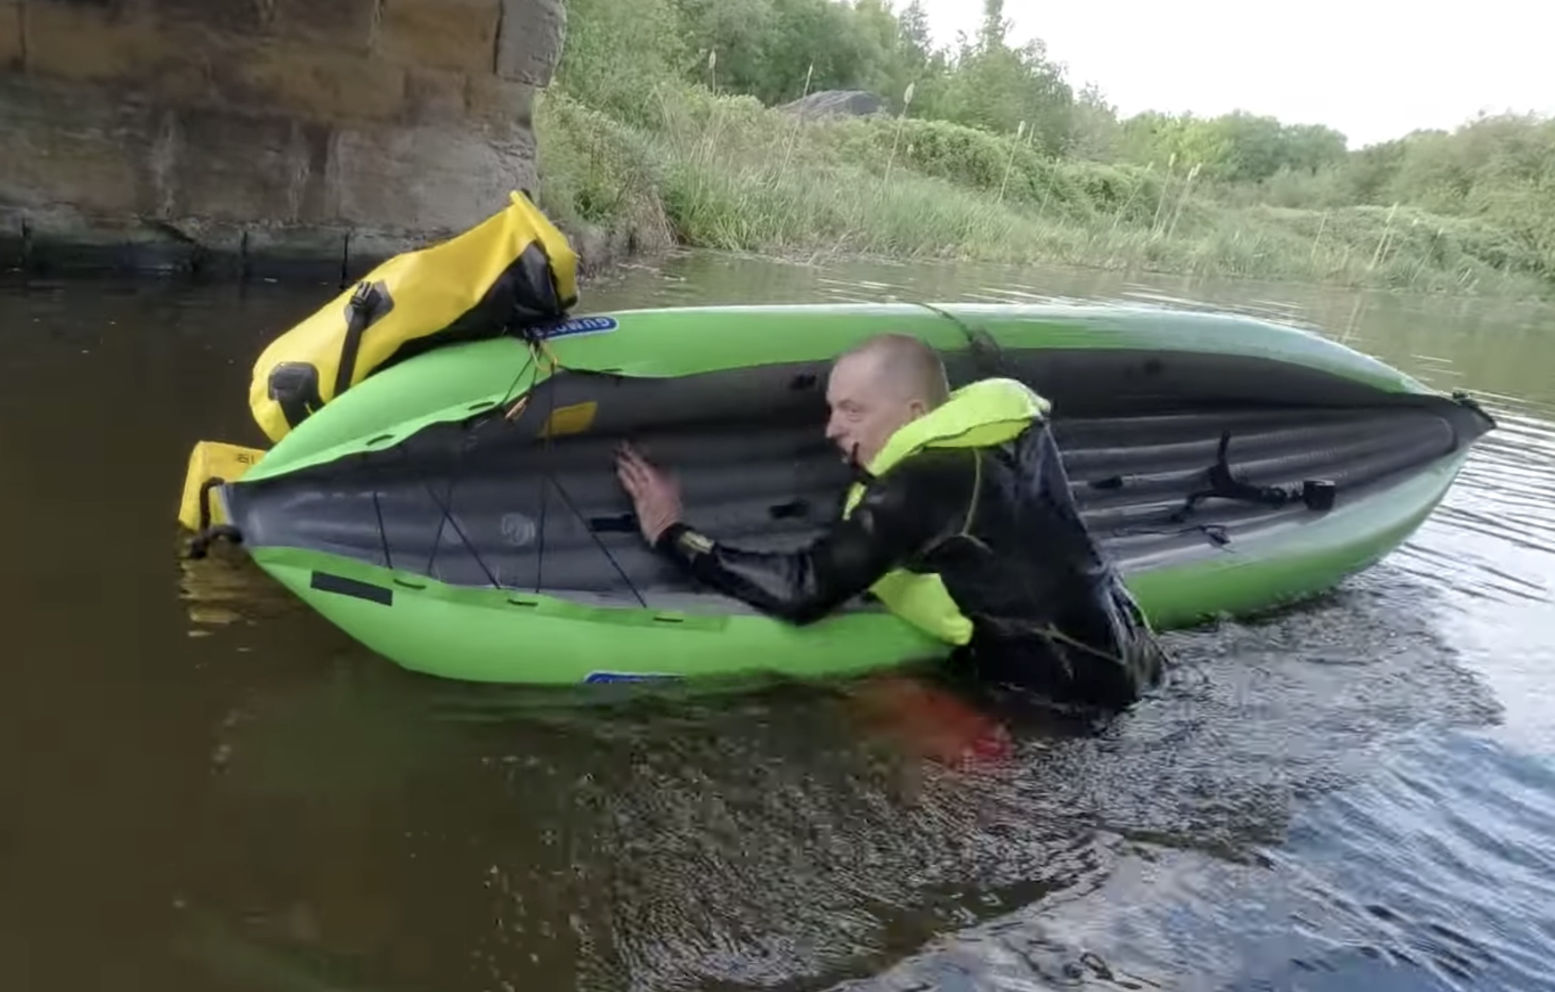
We can all chuckle about IK vlogger Karl’s repeated attempts in practicing re-entering his IKs from a deep canal, but it is definitely something you should try to master before heading out onto open water in a new boat. And note, this means deep water: ie, not being able to stand on the bottom.
Karl is practising in benign, controlled circumstances: calm water and conditions; mate and banks at arm’s reach, warm and buoyant wetsuit. Even so, you can see how the effort and cold water soon wears him down, even in a small canal. Falling out in deep water too far from the shore usually happens in rougher more intimidating conditions.
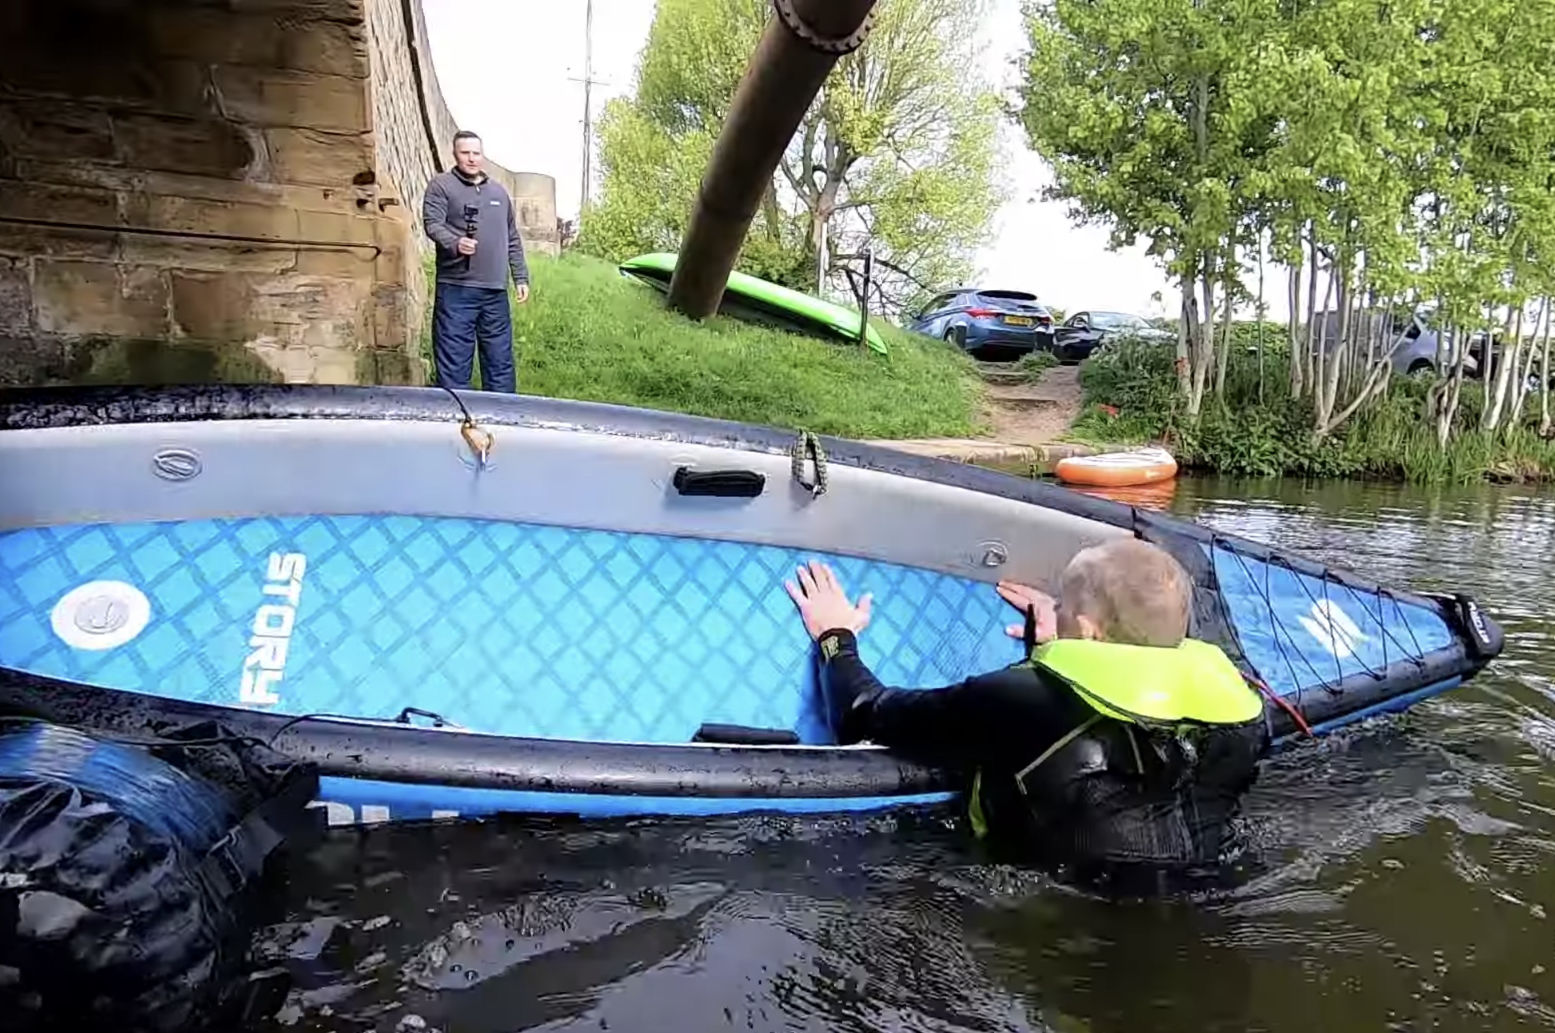
Re-entering a decked IK…… is darned tricky
In the video he tries two different IKs: his Gumotex Twist 2 and Story FDS – and reminds me of me when I was keen to learn new skills in my early years. I’m not at all surprised he found it impossible to re-enter the boxy, high-sided Story FDS. As I’ve seen done with hardshell sea kayaks, crawling up over the bow or stern can work, but good luck with that in choppy waters that just tipped you out.
One solution is a handily accessible paddle float: a blow up bag you slip and inflate over your paddle blade, a bit like water wings. This makes your paddle into a stable outrigger to remount the IK. With no float bag use a suitable drybag (left) or your pdf if desperate. This also needs practising if you’ve found you can’t re-enter you IK normally.
With his non-dropstitch Twist Karl nearly makes it. I found years ago in a similar Sunny that dipping down then launching up and over the side like a breaching salmon works, kicking hard as you go. You need that extra drive from your paddling legs to lift you up and over.
He notes his buoyant, wetsuit-clad legs get pulled under the boat. Too much buoyancy can make moving around difficult in the water. Lying flat on his front with legs behind and driving in from the side might work better. Swim in hard from the side and launch yourself across the boat like a Roman siege galleon. As with many athletic moves, once you get the knack it becomes easier because you know you’ve done it before. Of course, with someone else around to hold the far side of the boat or using their bow for added support, the whole drama becomes easier. In dodgy conditions not going out alone is the biggest lesson of all, but this is not always possible so we need to learn how to self rescue.
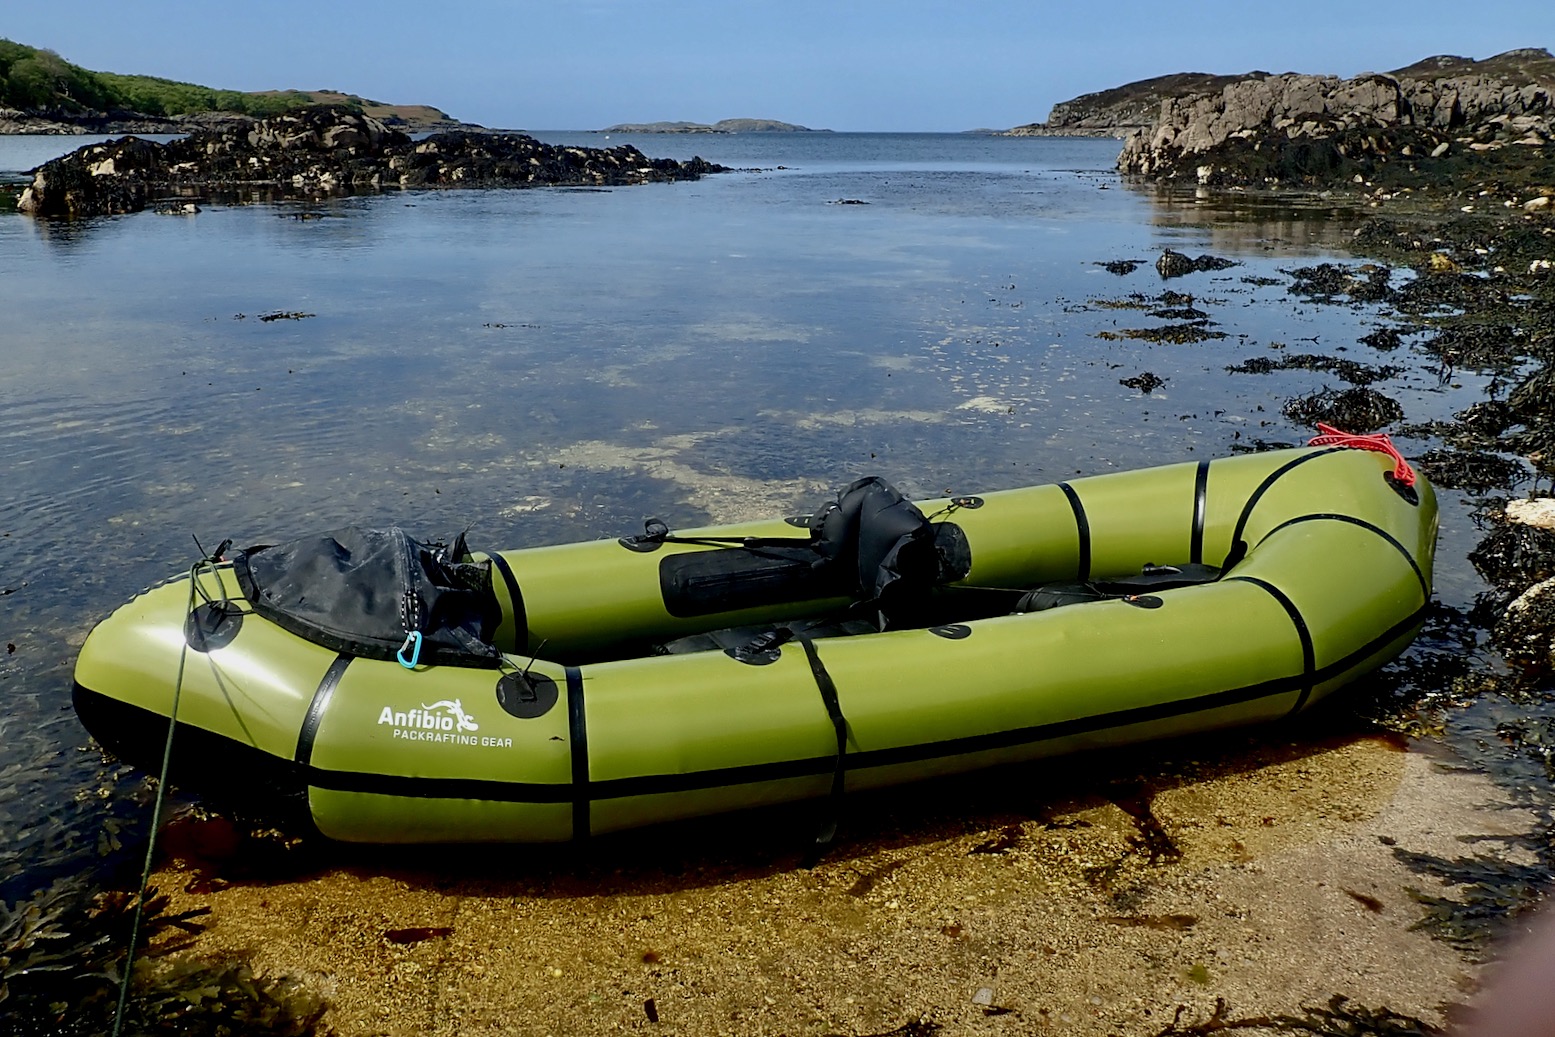
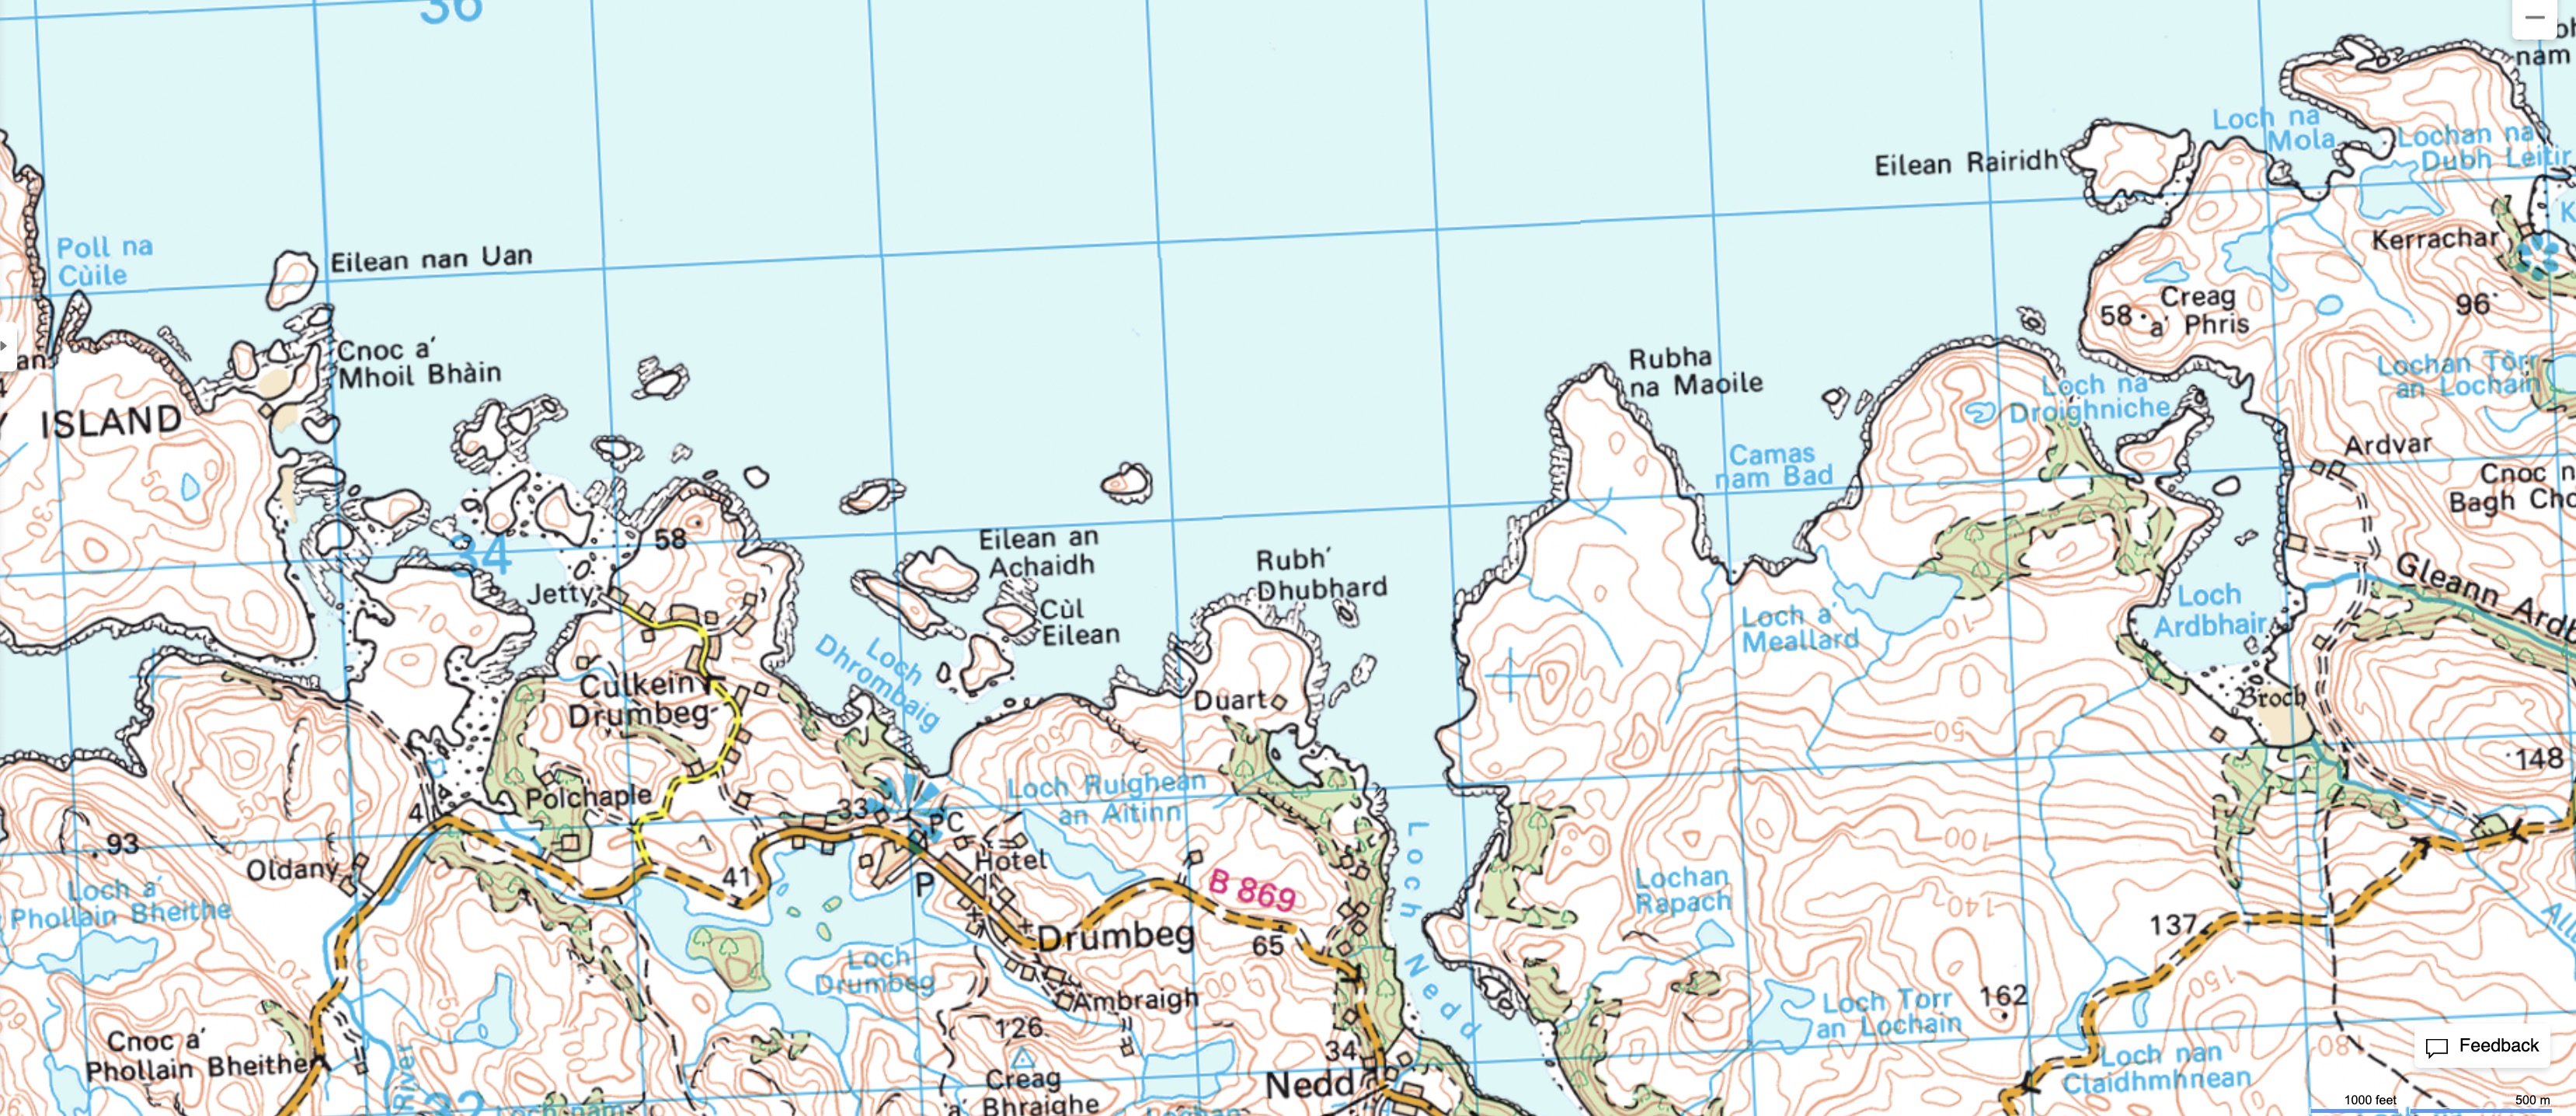
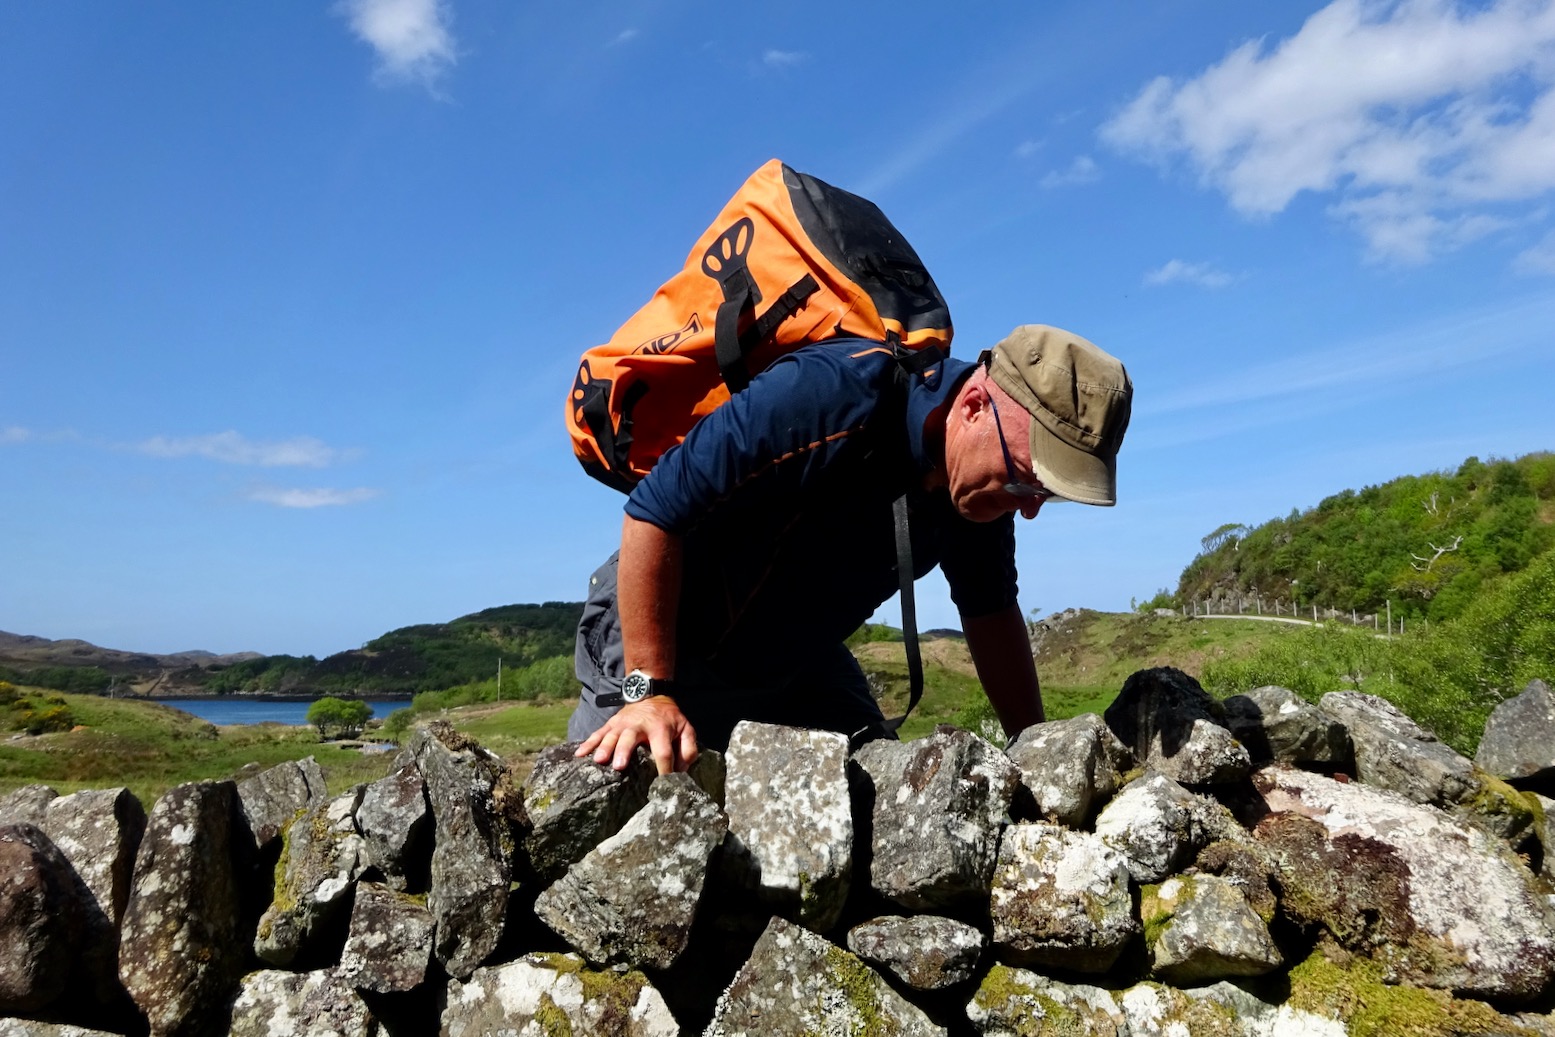
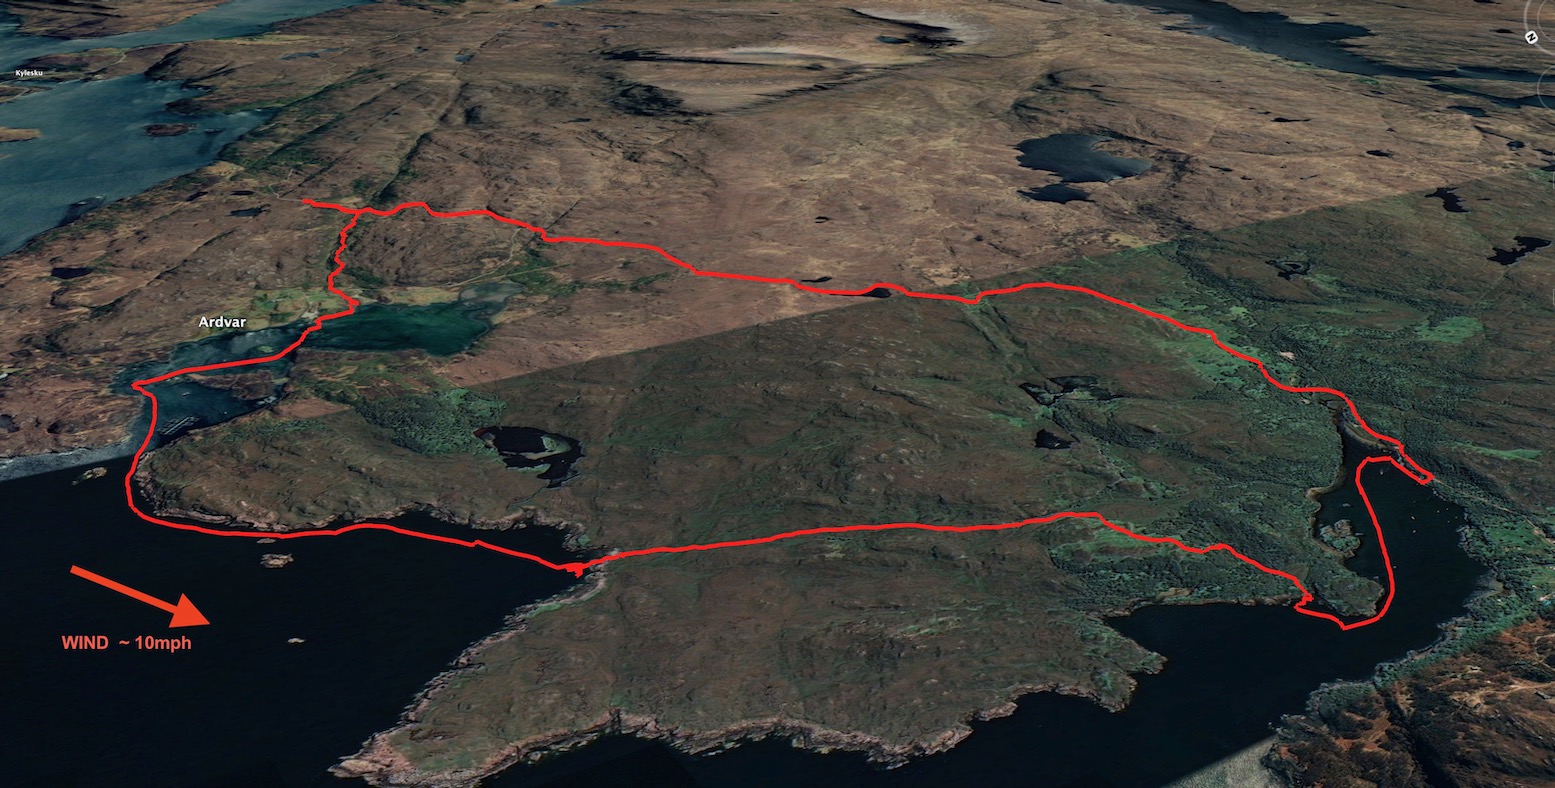
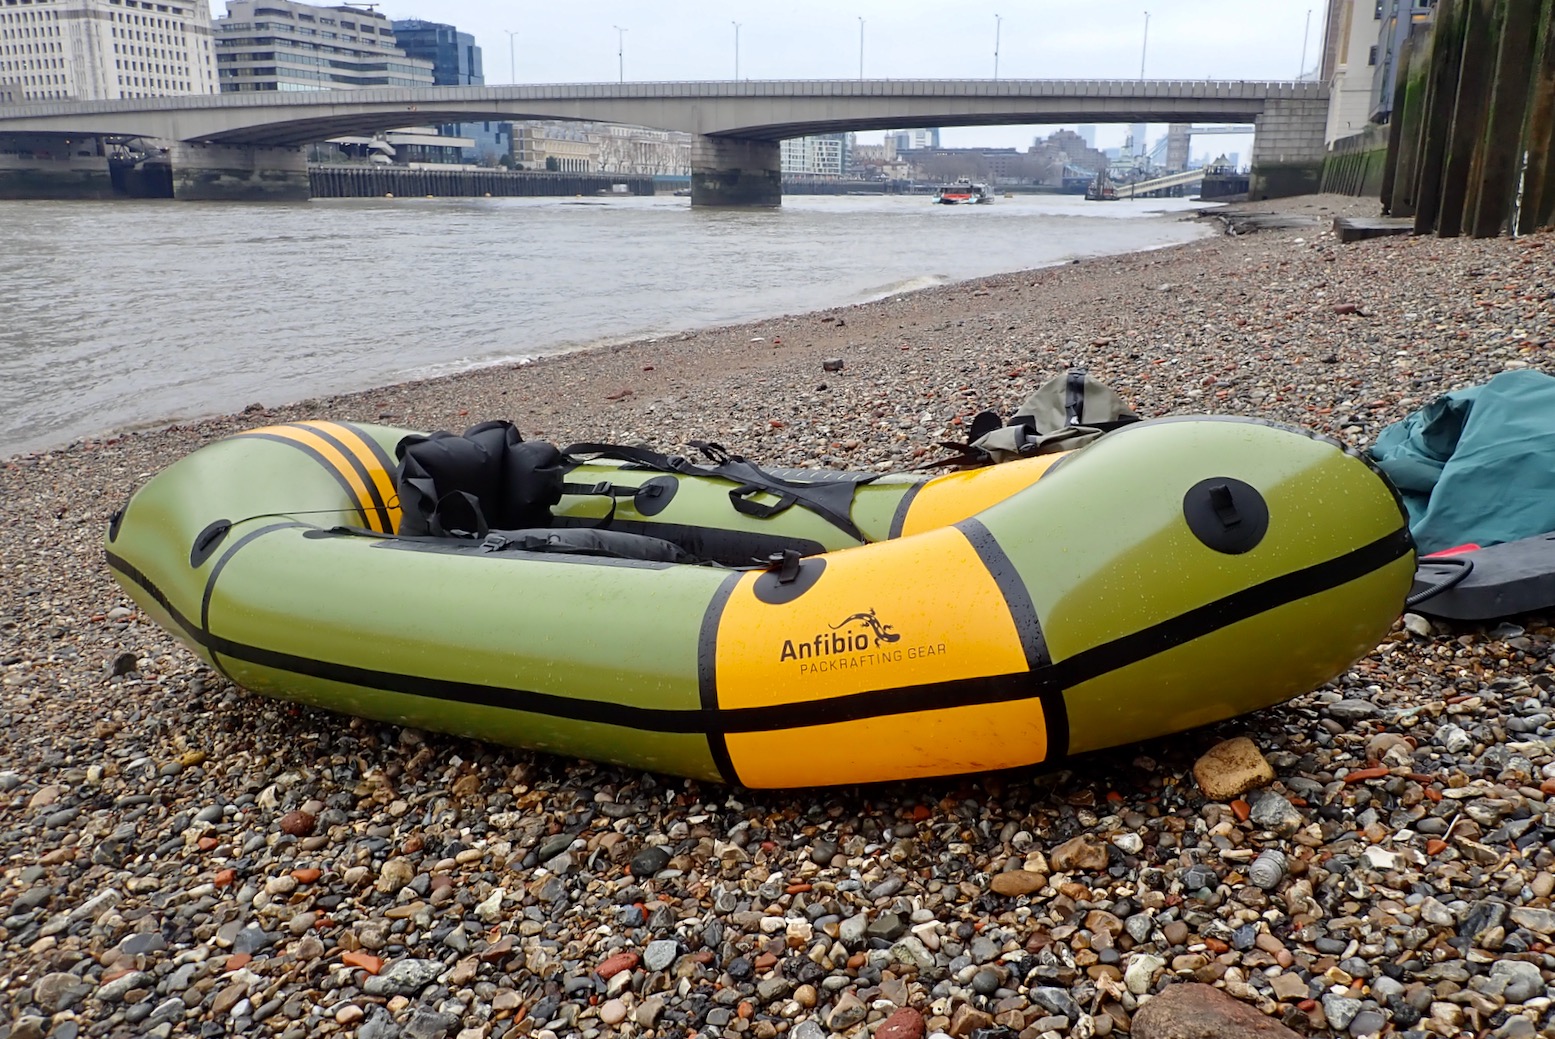
Up in northwest Scotland’s Summer Isles we are having a one-day break from the wind and rain – a chance to try the TXL in tandem mode. We could have gone somewhere familiar, like just outside, but decided to explore the coastline of Eddrachillis Bay near Drumbeg, an hour or two away. We planned to cross from one inlet-loch to the next. On the day winds were 10mph but building, and the tides were nearly 4.5 metres (14-feet) springs (there was a rare blood moon / eclipse that night), so in the packraft we had to pick our moment.
Full of northern promise: the isle and inlet riddled south shore of Eddrachillis Bay around Drumbeg
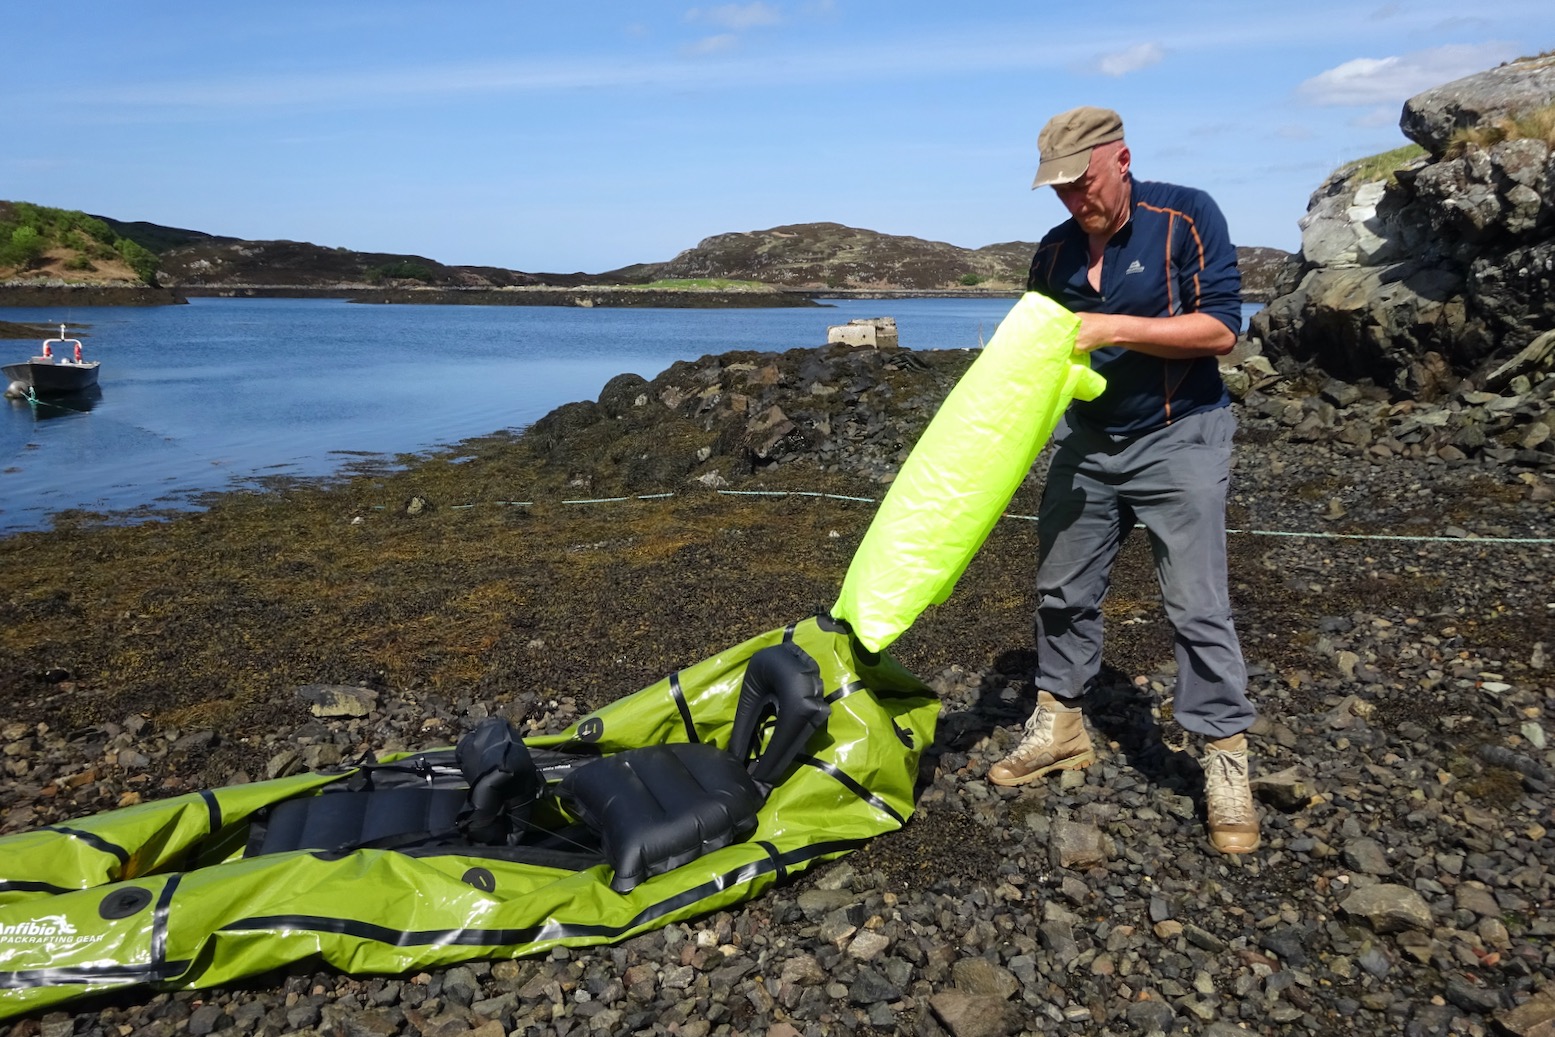
The great thing with the TXL or any packraft, as opposed to my IK, is it weighs 80% less, so walking cross-country to the water and getting off pretty much anywhere is easily done. With the longer hull you get at least 80% of an IK’s speed, but the reassurance of a larger boat compared to a most of my previous solo packrafts. I already knew from the recent Dorset run that the long TXL was better in choppy seas than I expected, even without the stiffening floor airmat. It remained to be seen how we’d both manage in the boat on the wilder northwest shores.
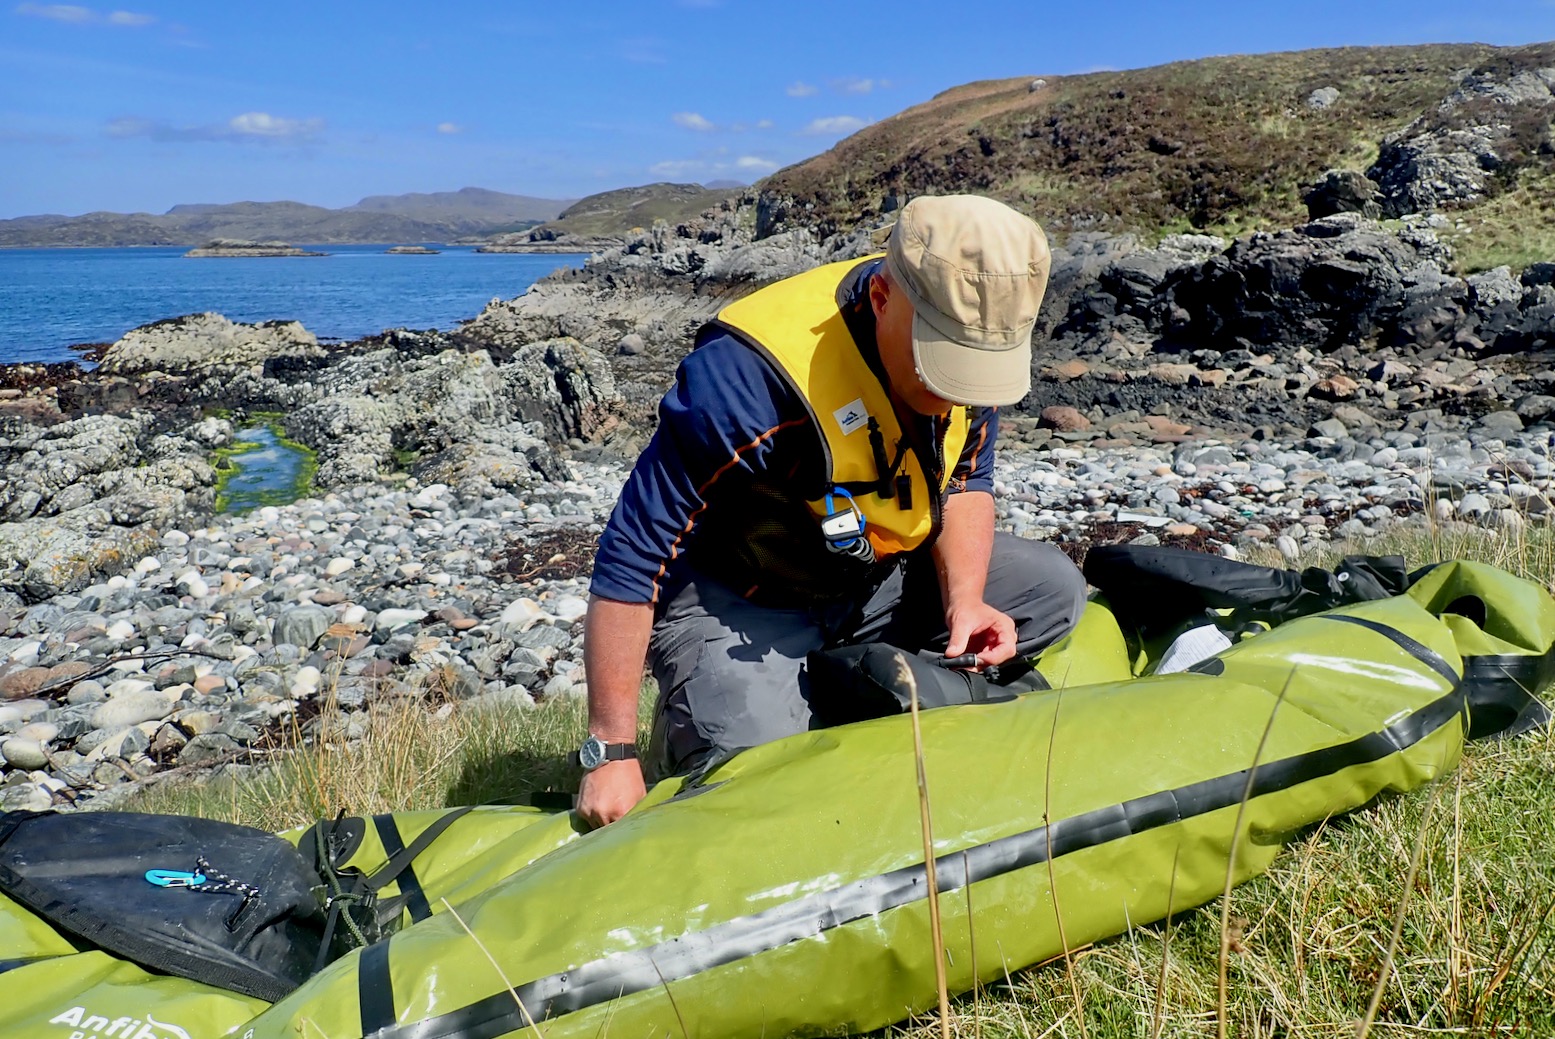
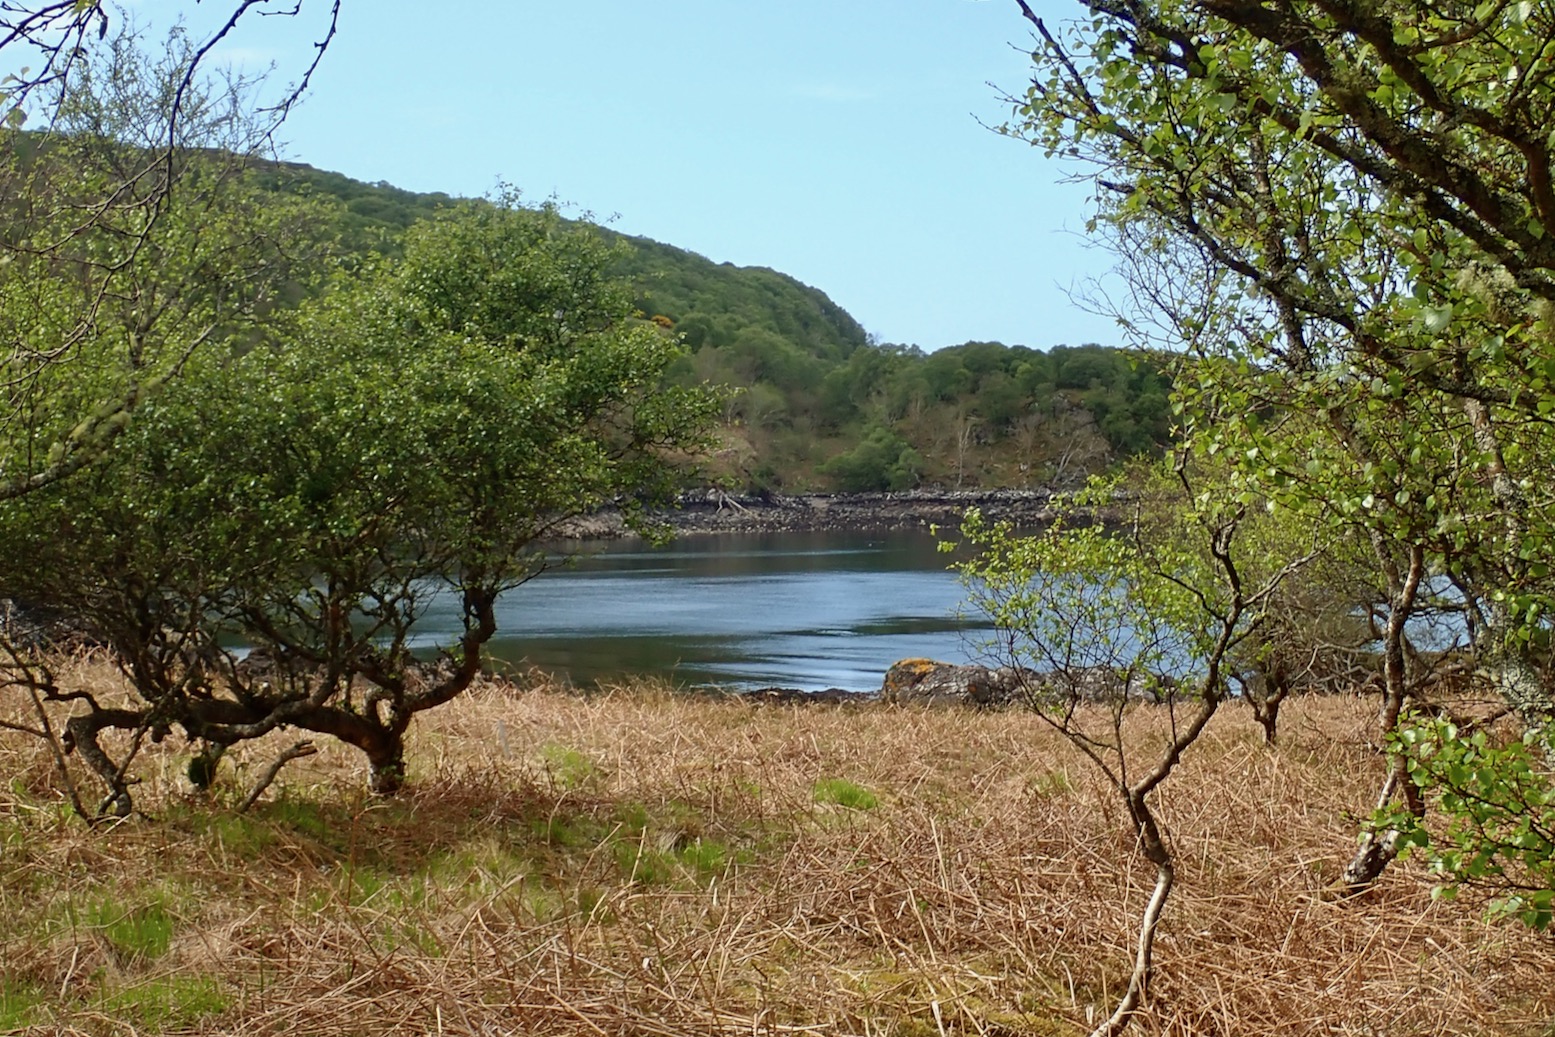
We size the boat up in the kitchen; looks like we’ll fitThe roller-coaster single-track road to Drumbeg. Turn right at the bridge into the woodsWe follow a faint path and animal trails west along the Gleann Ardbhair to Loch ArdbhairNice to be in some native woodland; not a lot of it in the northwestNarrow trail above the stream; I should have deployed my packstaffFirst sight of Loch ArdbhairA path on the map does not mean a way of crossing any dry stone walls at the end A herd of 20 deer scattered just as we got hereMy Flextail electric mini-pump packed up after just a year so it’s back to old-school airbaggingJust 30 mins before low water a lethal sea-rapid still rips out through Loch Ardbhair narrowsOut in Eddrachillis Bay it’s choppy but manageable. The boat feels a little sluggish and soft so we’re paddling hard. Like the high-volume MRS Nomad, it needs a second top-up once on the water In fact we’re doing 6-7kph with the wind at near slack water which makes things appear deceptively slowI decide we’d left it too late to get round the spikey headland of Rubha na Maoile (left of pic) Who knows what the turning tide does around thereSo we turn into the in-between-bay of Camas nam Bad and make for the far shore There’s still too much of a swell to rest the gorillapod on a rock for a passing selfieFaster than we feltIn Camas nam Bad the Mrs nips ashore and I go for a little scoot-about. Feels nippier solo, but no faster.Need to watch out for spiny sea urchins exposed at very low tidesAwkward scramble to the grass to deflate in comfortI know they’re better than twist locks, but sometimes I wish these seats had a fast dump valveIt’s an easy mile’s walk to a point on Loch Nedd where I could be sure access was easyThis time I pack the gear in the side tubes for more roomAnd this time I remember to re-top-up once on the water a few minutes The boat now feels more responsive but we’re into a headwind now so only do about 4.5kph with the tideLoch Nedd was a bit boring or over too soon. We should have put in further up after all Next time it might be fun to leave from here at HW and head west to the isle-filled bay of Loch DrumbegA long hike back to the car At the back, Quinaig mountain, 809mOn Quinaig one time, looking back towards Drumbeg, Oldney Island and Point of StoerNeed to do a bit more floating next time
Good to see an FDS being used on a multi-day sea trip. The Needles look like a good day out; the same chalk formation as Dorset’s Swanage stacks, 15 miles to the west. My review of the same model ArrowStream here.
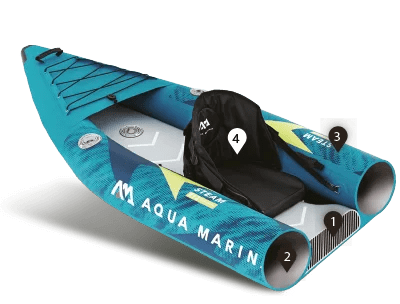
At under £450 on amazon UK, the bold graphics on the Aqua Marina Steam 412 hybrid (DS-F) does seem a lot of IK for your money in the longer, solo/double category we’re into here at IK&P. Fyi: a ‘hybrid’ is an IK with a stiff, flat drop-stitch floor (DS-F; ideally removable), but with conventional, lower pressure round side tubes (right). In my limited experience it’s a better solution than most FDS, all-dropstich IKs. *experimental affiliate link
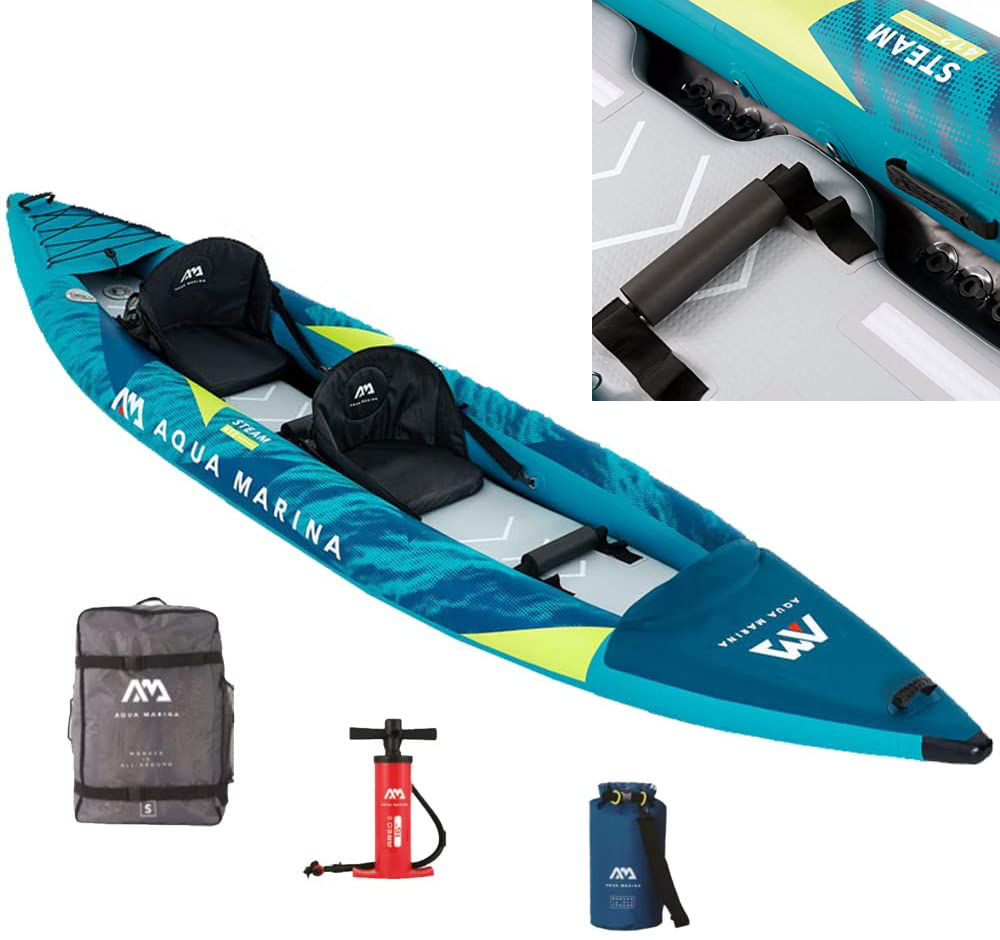
What they say The STEAM series is one of the best inflatable touring kayaks on the market. The combination of superior hull speed, outstanding durability and tracking capabilities make this kayak best in class. Both STEAM-312 and STEAM-412 mix Aqua Marina super-tough reinforced PVC material and rigid drop-stitched DWF floor. These ultra-stiff materials in the STEAM’s construction make a portable air-kayak so rigid that performs just as good as a traditional hard shell kayak. A perfect choice for long distance adventures and mild river running.
Length is – you guessed it – a spacious and potentially nippy 4.12 metres or 13.6′; width is a reasonable 90cm or 34″, plus a claimed 15.5kg (34.2 lbs) for the boat in the bag with a stated payload of 180 kilos.
High pressure raft valves for 1.4psi?
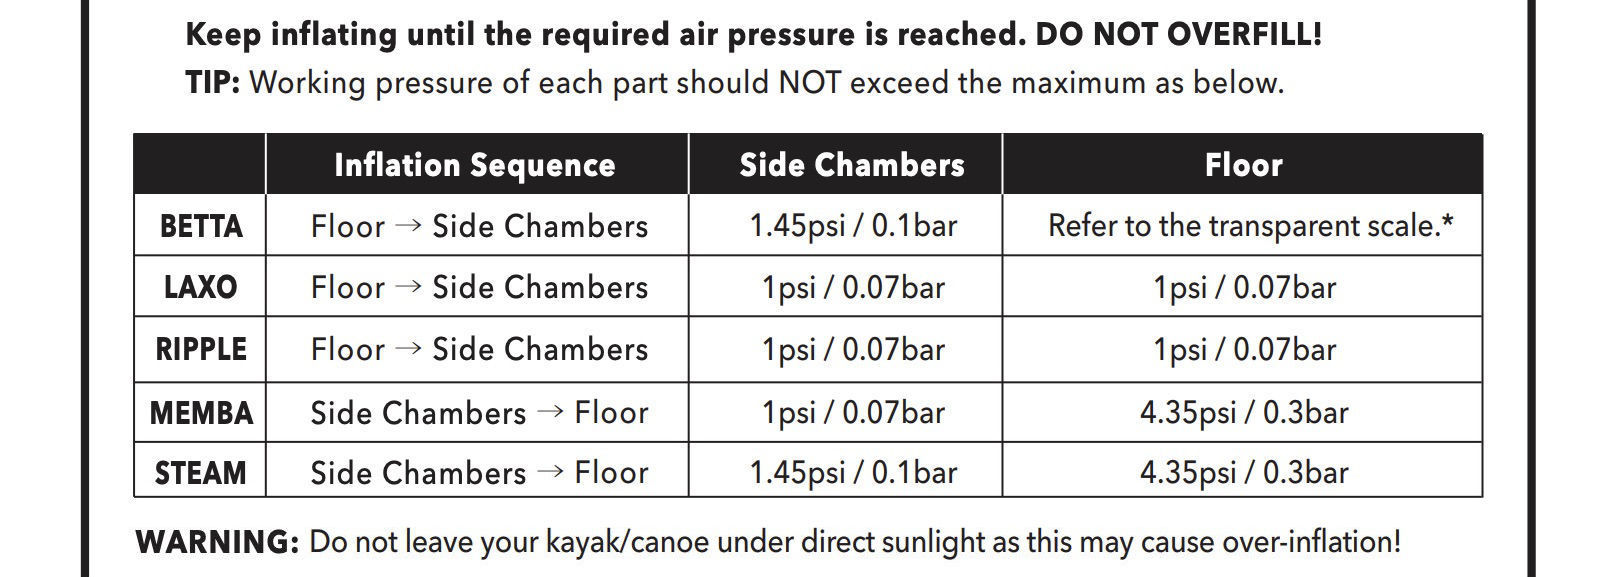
Oddly, the stated pressures of 1.4 psi (0.01 bar) for the side tubes are barely more than a vinyl Intex or Sevy cheapie (or lower end Aqua M IKs). The 4.3psi (0.3 bar) in the 7cm DS floor (AM call it a ‘deck’) is also about as low as DS can be – a Grabner all-tube IK will run the same psi. I wondered if they meant 0.14 bar / 2 psi? It seems not according to the official website and the Steam product manual (snapshot below). It makes you think the construction may not be up to it, or that they’ve stated hyper-conservative/warranty covering values in case users over-inflate. After all, the sidetubes have proper ‘raft’ or iSUP valves capable of ten times that figure. Oh well, PVC fabric is inherently stiff so you’d hope that ought to make a reasonably rigid boat.
It has to be said the so-called “… Inflatable V-shape keel design…” is not evident in any online imagery that I could find (left, last year’s model) or in the video below. The floor looks as flat as a iSUP board (which Aqua M also make) with two, mid-positioned skegs. Most IKs manage with one at the back, but you can remove them or use just one. A V-shaped keel (like the Optimal FDS) would eliminate the need for skegs, so it could all be just marketing babble.
Best of all, this is not another shell & bladder but a ‘tubeless’ IK, so with the removable floor, cleaning and quick drying ought to be as easy as it gets on an IK. Many IK-ers soon learn the value of this.
The foam footrest tubes have a couple of positions, with the seats positioned on velcro strips. And the closeable bailing ports (see inset above) mean you can take a bit of wave splash over sides without swamping the boat, as the video below demonstrates. But two heavier persons plus gear could also mean you end up sitting in (or hauling) water as the floor is only 7cm thick. Paddling would reveal all, but the ports are closeable.
All in all those ports, the length and tubeless build for four-fifty quid could be a great way of getting into IKs. It comes with a pump, carry sack and a spare dry bag. Add paddles and some water. At worst you open it up on delivery, pump it up in the sitting and realise you’ve made a terrible, terrible mistake. Amazon returns are dead easy.
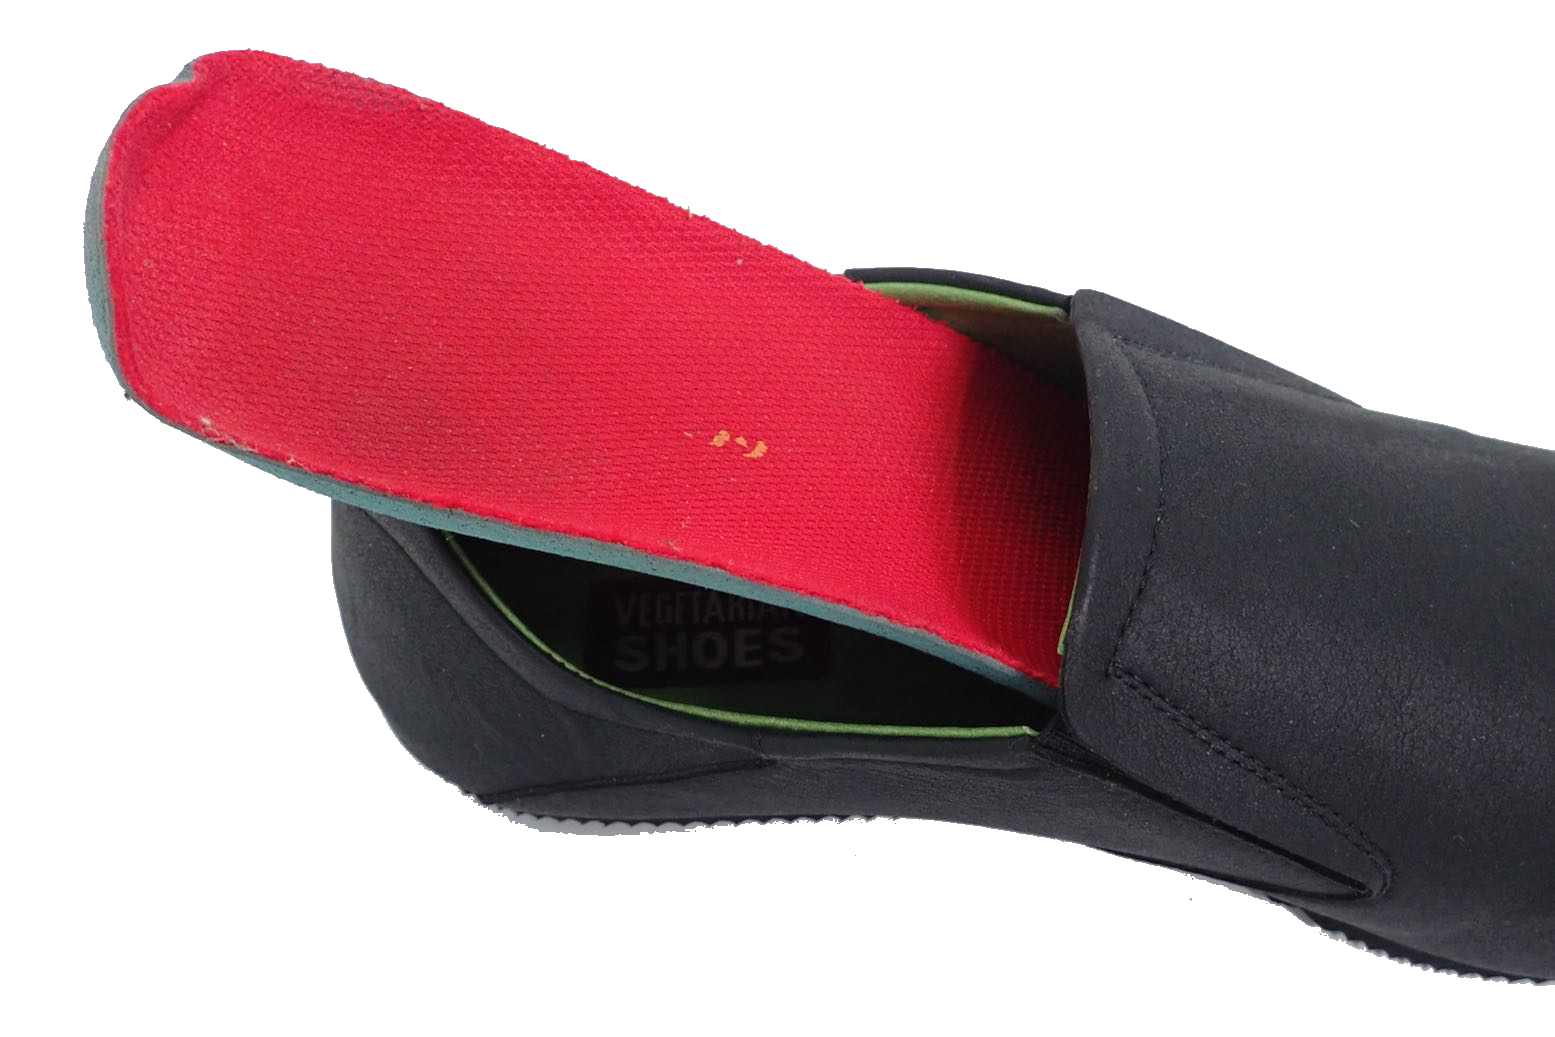
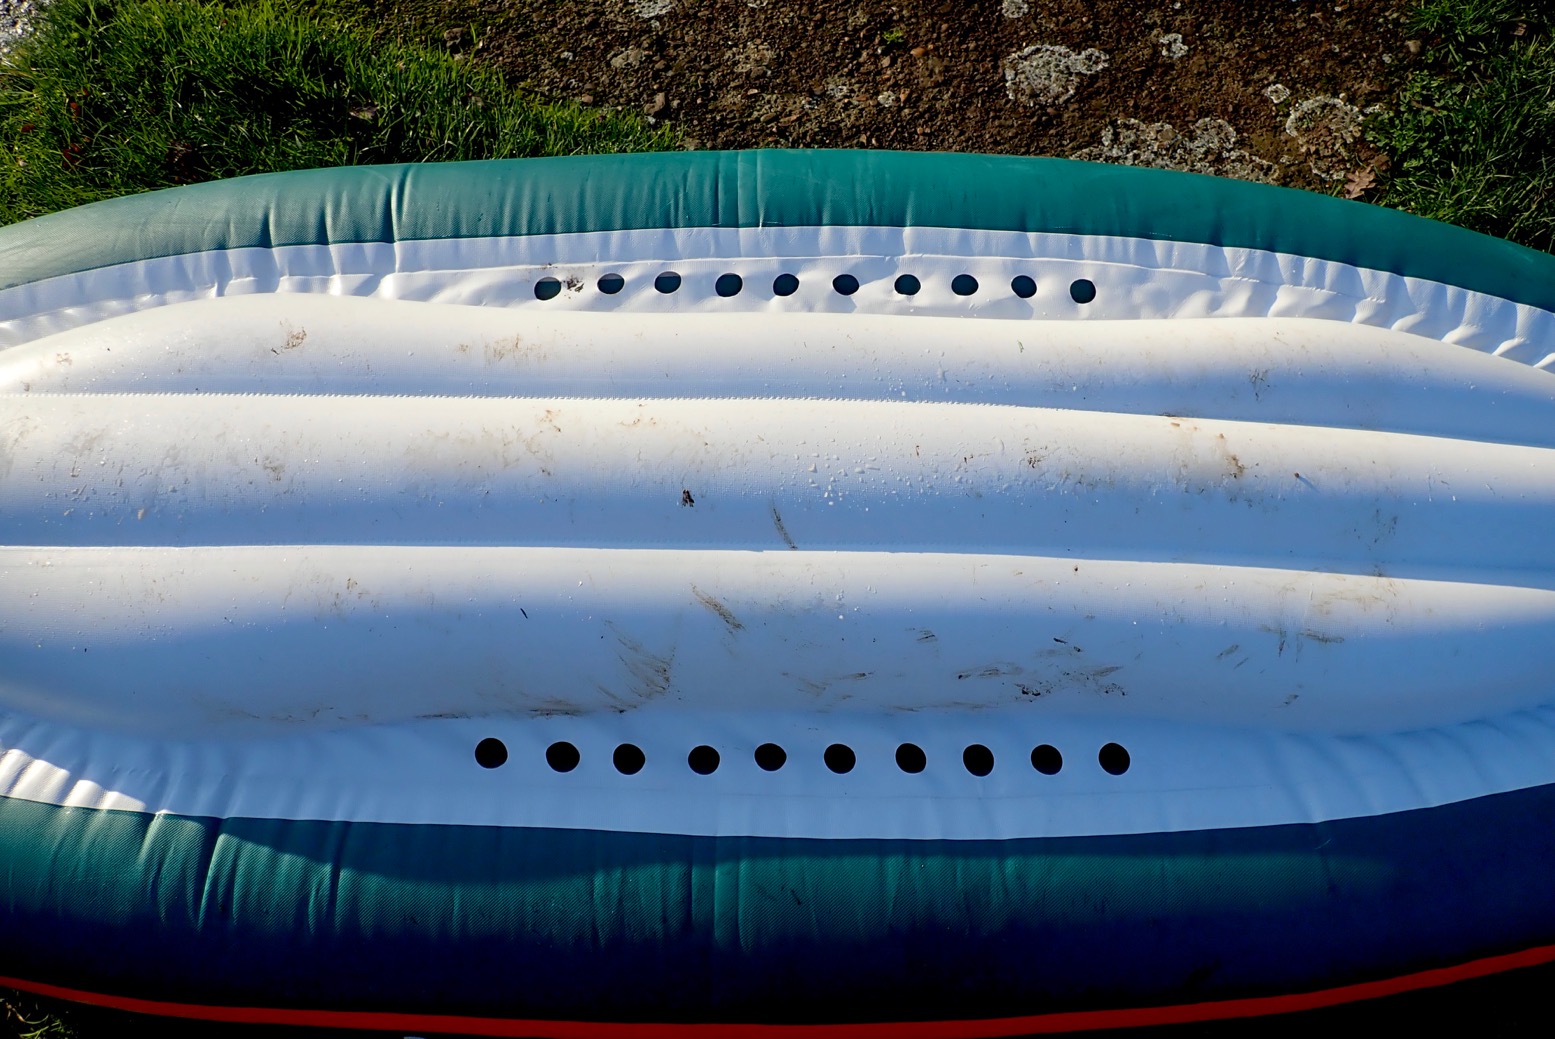
Broadly speaking, 3-panel FDS IKs are assembled by gluing the three DS planks into a wrap-around envelope of more PVC which holds the panels in a boat-like shape. Some floors areremovable, a bit like a footbed slips into a shoe. This makes the hull skin’s inner floor accessible for easy cleaning, rinsing and drying before storage: an important part of IK care. Not everyone may see drying as the deal breaker I make it out to be. Much depends on where you live in terms of climate and storage space.
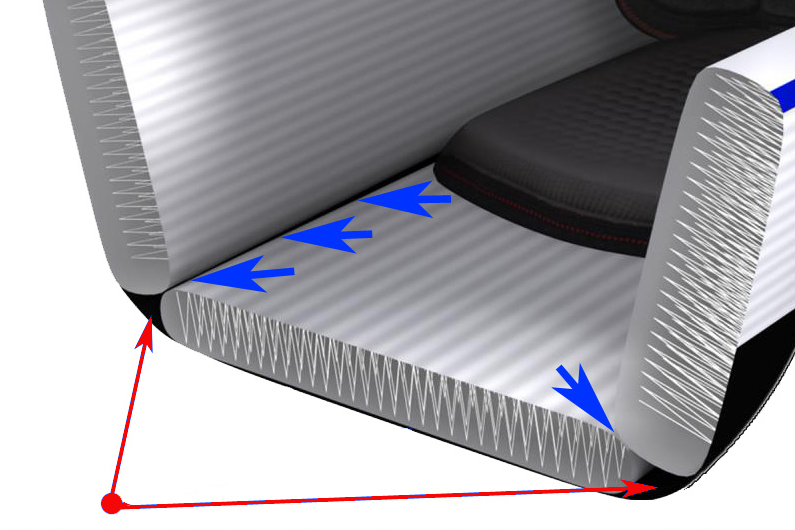
Fixed DS floor sealed to the side with tapeBut not all the way, so water and debris get channelled down in the cavities either side
Unless a glued-in floor is fully sealed along the sides, water and grit will collect in the side cavities. But for deflation reasons, this cavity cannot be sealed off.
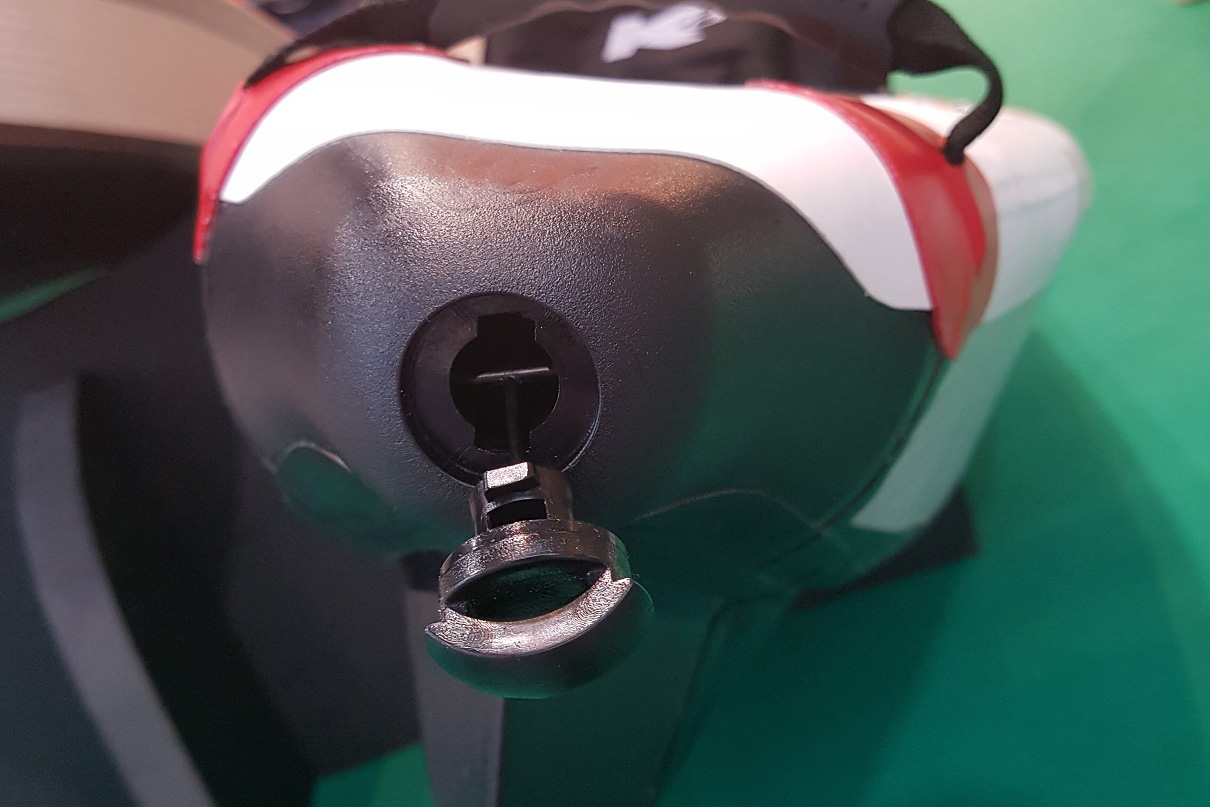
Less goodbut almost universal with three-panels is a DS floor permanently glued to the floor skin but not fully sealed to the side panels. See the two images above: at the bow and stern where the tape stops, water and debris run down into the side cavities. A drain valve helps water to run out when flushing before deflating. Some boats feature several capped drains along the sides, which is either odd or a ‘more-looks-better’ marketing gimmick. After all, unless you’re an oligarch, your bath has only one plug hole. Don’t mistake these multiple drains as self-bailing ports, no matter what clueless vendors may claim or owners may think. Open the drains when afloat and the boat will part-fill with water. Until I realised this, I was baffled by these drains. So it seems were actual owners.
Floor drains on a GliderDrains on TomahawkStern drain on Yakkair HP
Such a boat is nearly as much of a pain to dry properly as the bladdered IKs I go on about. There will always be moisture in the long, inaccessible side cavities along the floor edge which you’ll struggle to dry properly. Proper rinsing and drying matter if you want your IK to last a long time, especially after you’ve been at sea when sand and other debris can get in the boat. Seawater causes mildew, staining, slime and odours. So does trapped organic matter, while in the long term, trapped grit might rub unseen against the soft PVC until it wears right through (this will probably take years).
‘Wallpaper’ over the end ‘cracks’ (shown in green) to seal off the cavities. You’ll then need to fit a plug to allow the cavity to deflate properly when rolling up. Then the FDS would be dead easy to dry, just like a tubeless boat (below left).
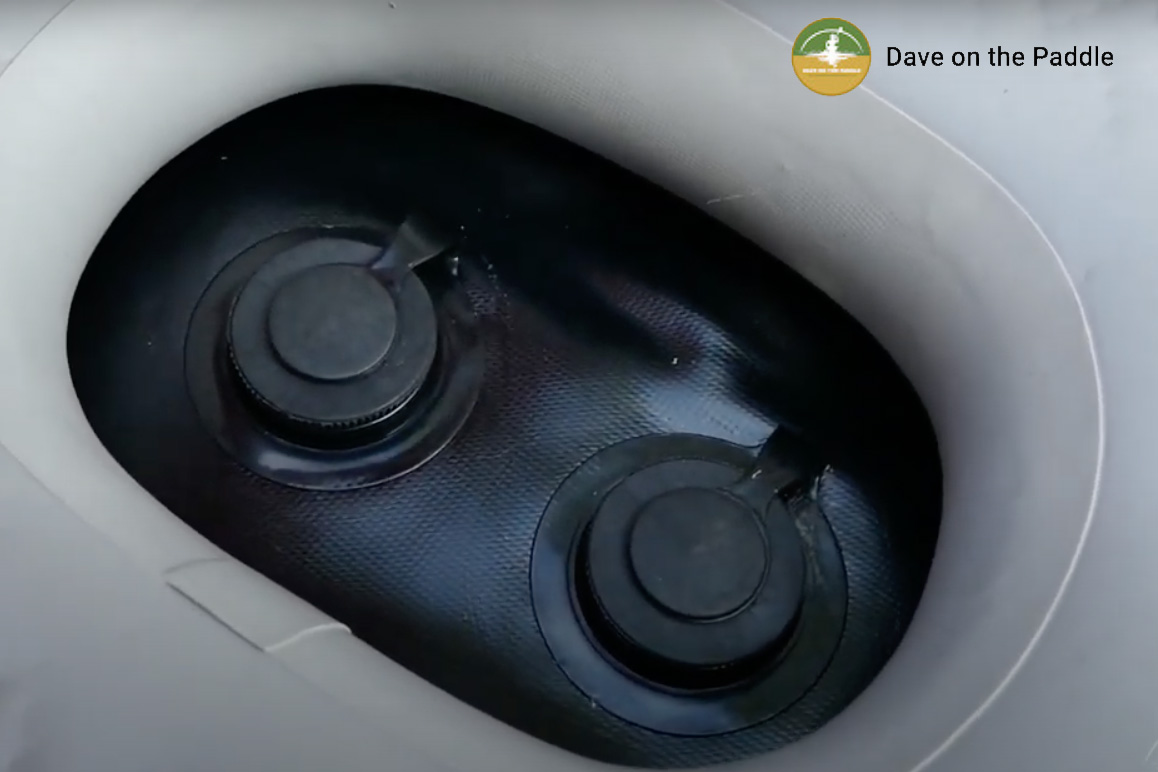
Tubeless rubber IK: dead easy to dry
A theoretical way to eliminate these issues is by fully sealing or ‘wallpapering over’ the floor gaps the bow and the stern as shown in green above. To drain and dry such fully sealed boats, you simply flip them over to shed the excess water, then deflate, spread out and wipe dry, just like the round-tube Grabner on the left. A boat modified like this would have no crud-trapping, moisture-retaining cavities. The flaw with this idea would be the air trapped in this sealed-off cavity would make the boat impossible to pack compactly: like trying to roll up a partially deflated inner tube. It needs a breather hole: a simple plug would work. Pull out the plug when deflating, plug up once inflated to keep water out. Fyi: this is all hypothetical but an Italian chap with a BIC FDS told me he had just this problem: gravel and grit collecting in the cavities. One solution of his was to stuff the openings each end with a dense sponge. Water may still get in but bigger grit won’t. Good idea. For the moment it seems most manufacturers are happy to settle on fitted floors with drains, just as some buyers are either oblivious to- or not bothered by this issue.
Protracted KXone cavity drying instructions using what seems to be a hidden floor drain valve (6, 7).
Actually there is a worse option: supposedly ‘self-bailing’ 3-panel FDS IKs which have little side cavities on the edge of the fitted floor and simple drain holes in the outer skin. There are no closable drain valves. A tellingly unused and unbranded FDS IK (left) I saw on eBay was like this. I had to check with the seller as there were no photos of the floor. Within an hour it sold for £700, but once on the water the new owner will find their boat filling up from below. It may only be a couple of inches, but that water will slosh back and forth as you paddle along, adding several kilos of weight and upsetting stability. You could easily tape up the holes in the outer skin, but this is why what look like FDS bargains come unbranded, badly designed and without guarantees. As said above: not everyone may see drying as the deal breaker I make it out to be. Much depends on where you live in terms of climate and storage space.
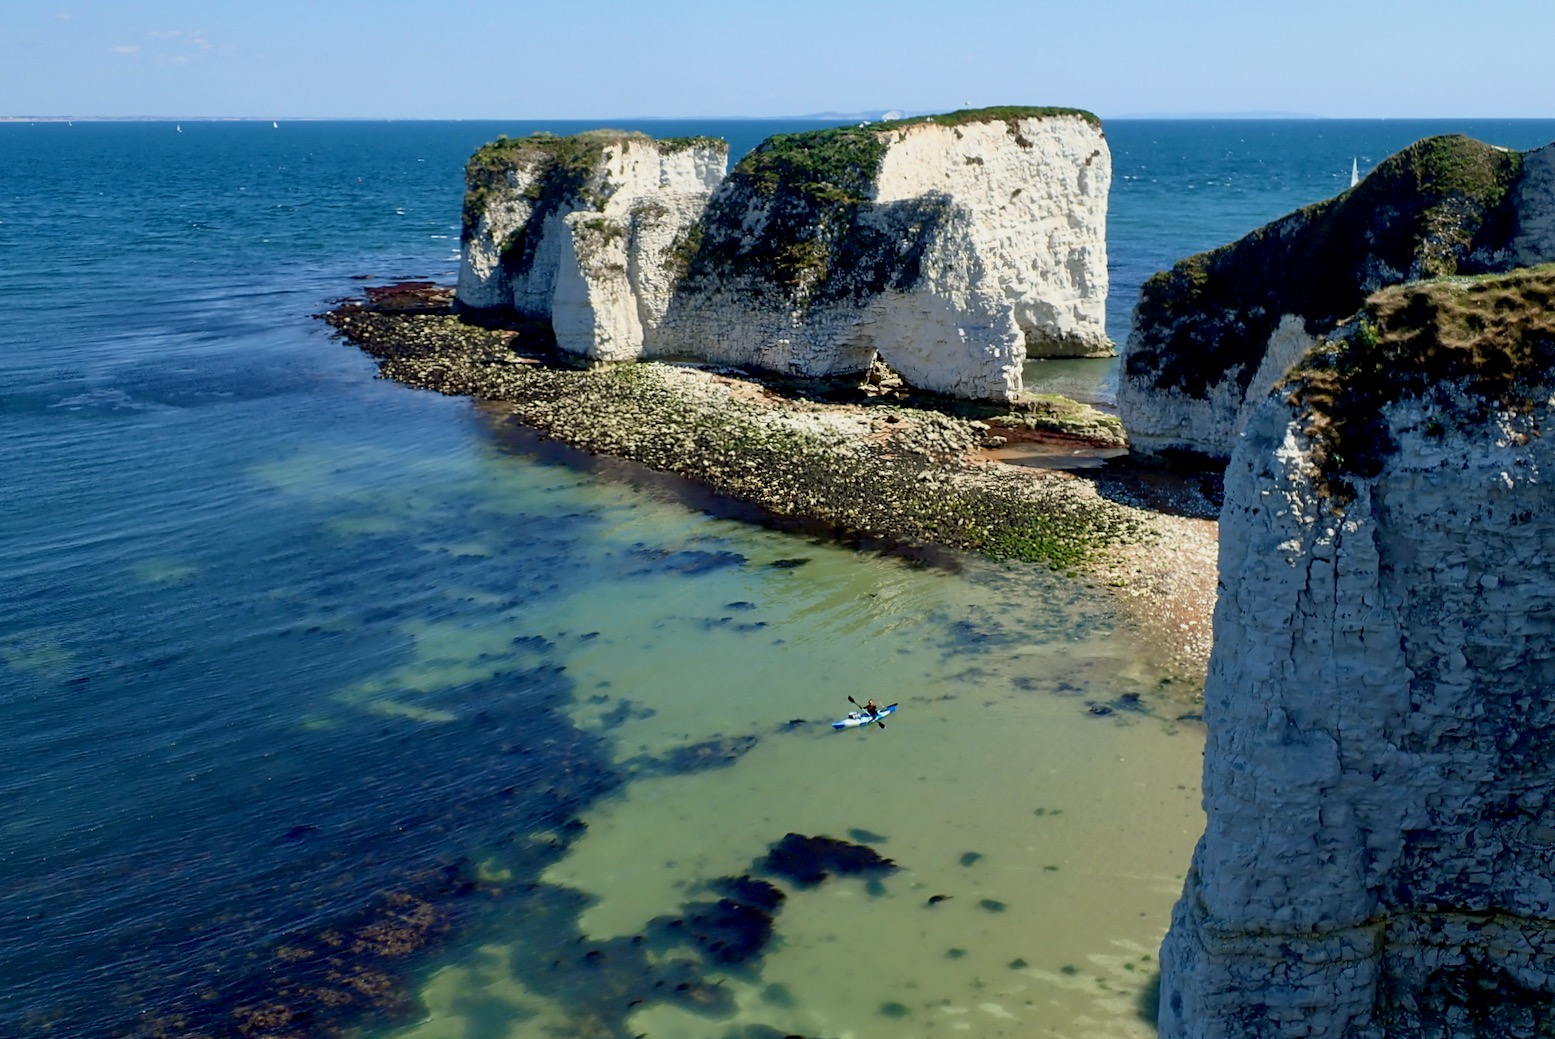
Chalk pinnacles and arches. Studland on the right; Swanage back left.
I’ve been looking forward to getting back to Dorset’s amazing chalk pinnacles near Studland which we paddled in the Seawave one calm morning back in 2019. Today the tide was right and the sun was out; it was just a bit chilly and on the windy side; a good day to see how my Sigma TXL might perform at sea.
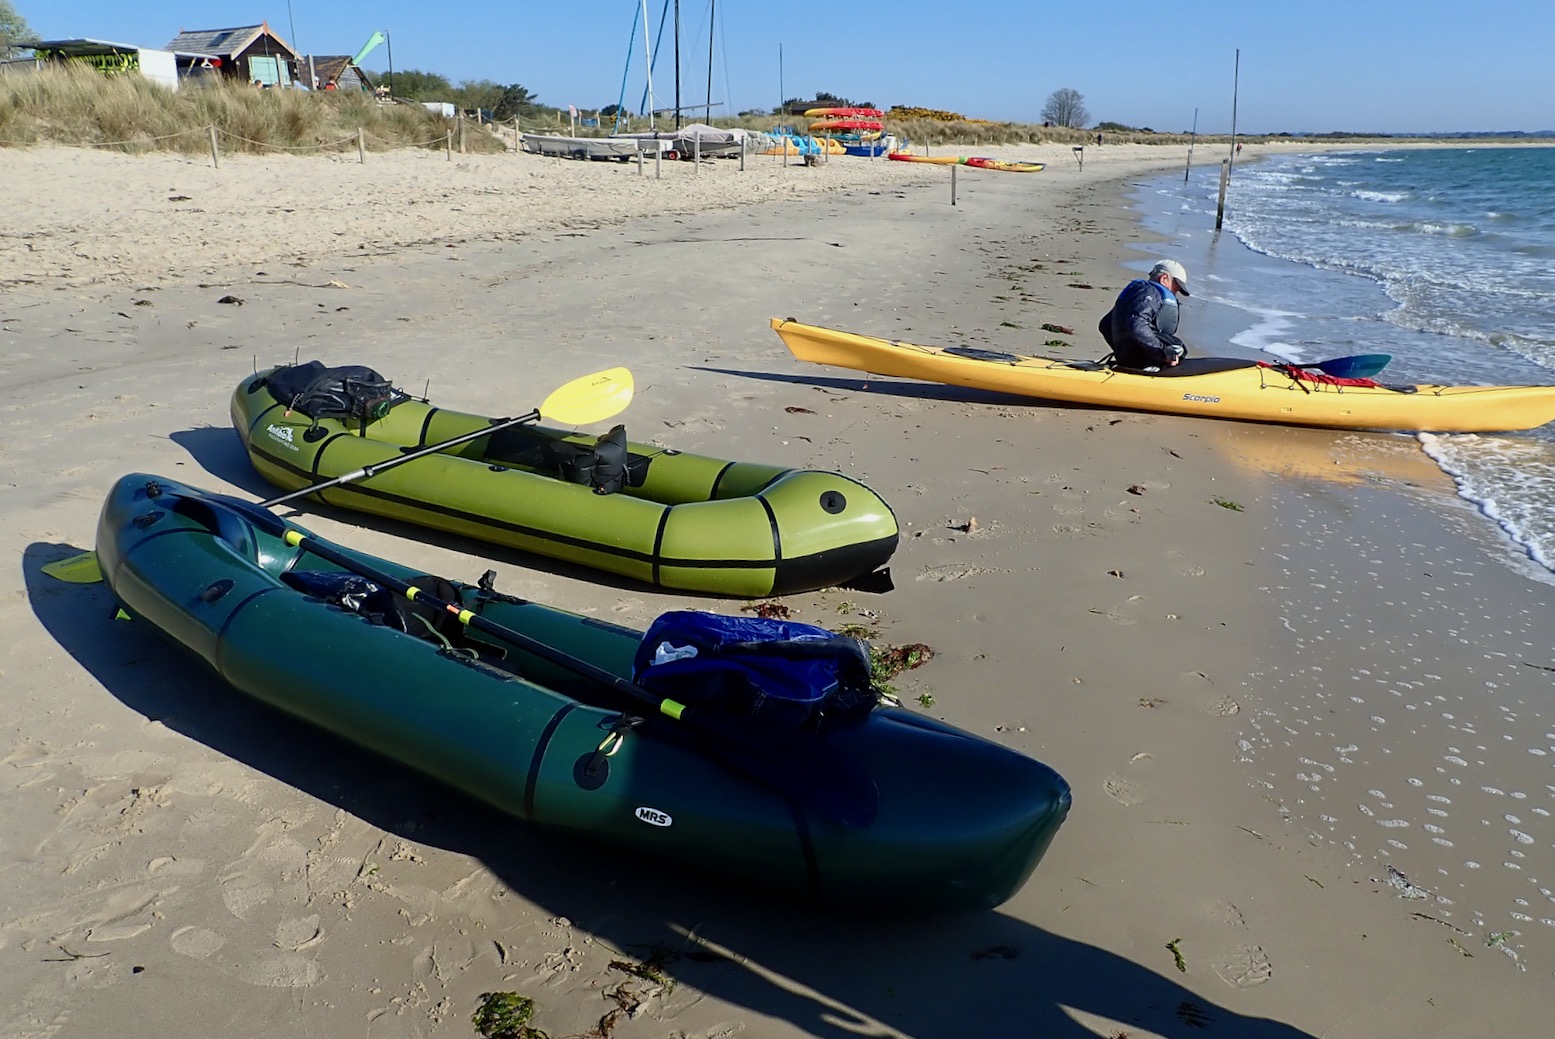
A couple of paddlechums were also up for a pre-dawn departure; Barry rode down with his similar MRS Nomad S1, while Nimbus – yet to fully embrace inflatable paddlecraft – brought his 17-foot, plastic P&H Scorpio sea kayak (left). Even at ~30 kilos, it was a proper boat for the conditions and we imagined he’d run rings round our packrafts.
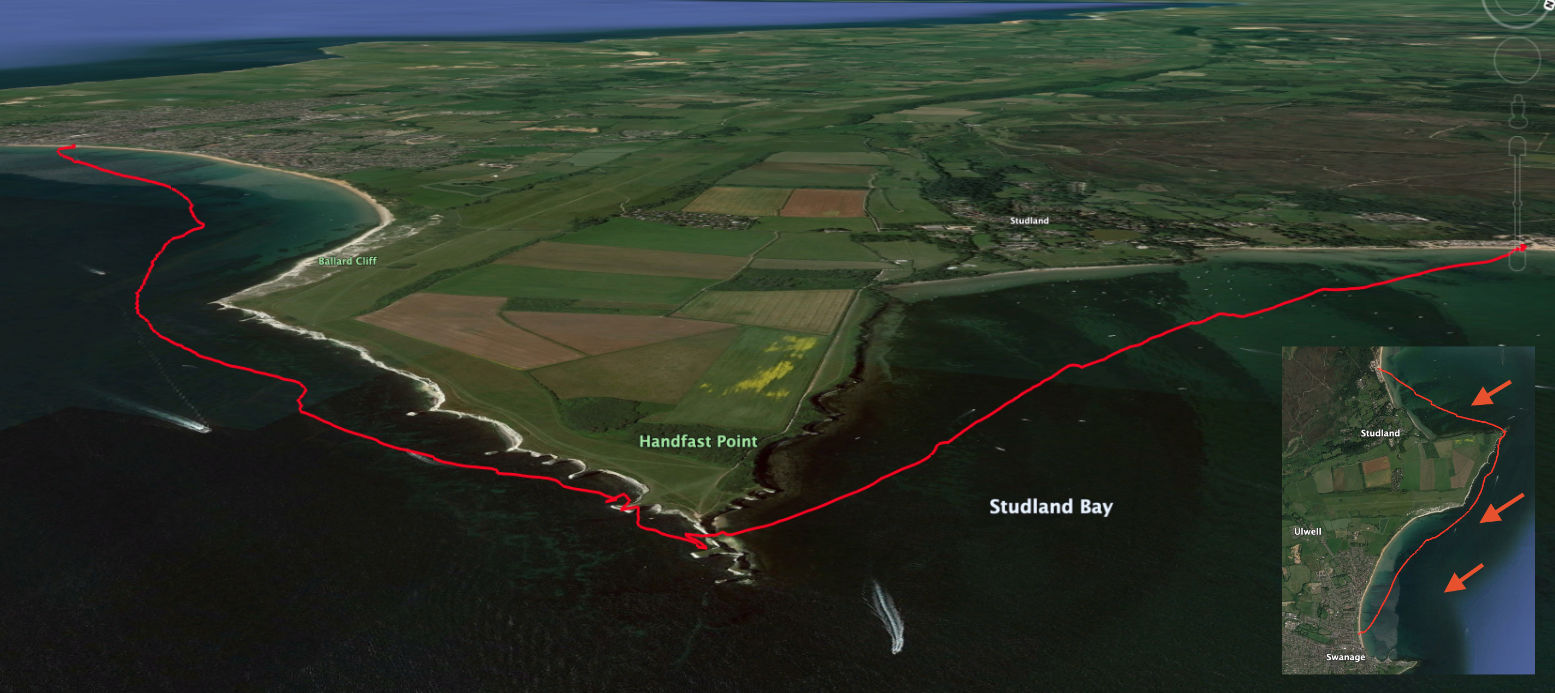
The plan was to paddle the four miles from Studland beach to Swanage town, leave the kayak somewhere then retrace the route over the downs to the vehicles.
Half the length, over twice the width, but a tenth of the weight of a sea kayak.
Early all-day parking is a problem at Studland as the car parks don’t officially open till 9am and anywhere else you’ll get towed and Twitter-shamed. But we slipped into Knoll Beach parking at 8 and were on the water before 9am. By this time a one-metre tide was about 90 minutes after HW, and we set off into a steady onshore 12-mph northeasterly which would stop Barry and me running away with ourselves. By the time we turned the right angle at the Point for the run SSW along the cliffs, we ought to be able to put up our sails to catch up with Nimbus, except I forgot my WindPaddle. Oh well, I’d just have to paddle the full four miles and get medevaced out.
Swanage tides
The tides at Swanage aren’t the classic sine wave. Every other tide rises and falls normally, but in between is a mini low and high. Who knows how or why but I suppose the reservoir of Poole Harbour, plus the English Channel funnel have something to do with dampening every other surge. Either way, the range was only a metre today and is hardly ever more than two down here; not enough volume to raise any strong currents. Nimbus later calculated a southerly flow of around 1mph which may help explain our higher than expected packraft speeds.
2.8 metre TXL – a good sea packraft? We shall see
Nimbus sets off for the Point, far right. Could the packrafts keep up?
Part of the reason I got the longer TXL was to try more coastal packrafting, even if the extra bulk and weight (actually only 450g more than my previous Rebel 2K) might set me back on overnighters. This is not a paddle I’d have attempted in my backheavy 2K, even with a deck; it’s just too slow to be enjoyable. But having owned a 2.9-m Nomad S1 like Barry’s, I was fairly sure the TXL’s near identical length, buoyancy and similar ‘footprint’ would make a difference. There is something about sitting in the middle, not the back end of a boat, that makes it feel more reassuring. Unlike my Thames paddle a week earlier, I decided not to fit the TXL’s inflatable floor pad in search of a better glide. As things were, in today’s wind and chop the stability from a lower seating position would be more important.
ScorpioMRS Nomad S1Anfibio TXL
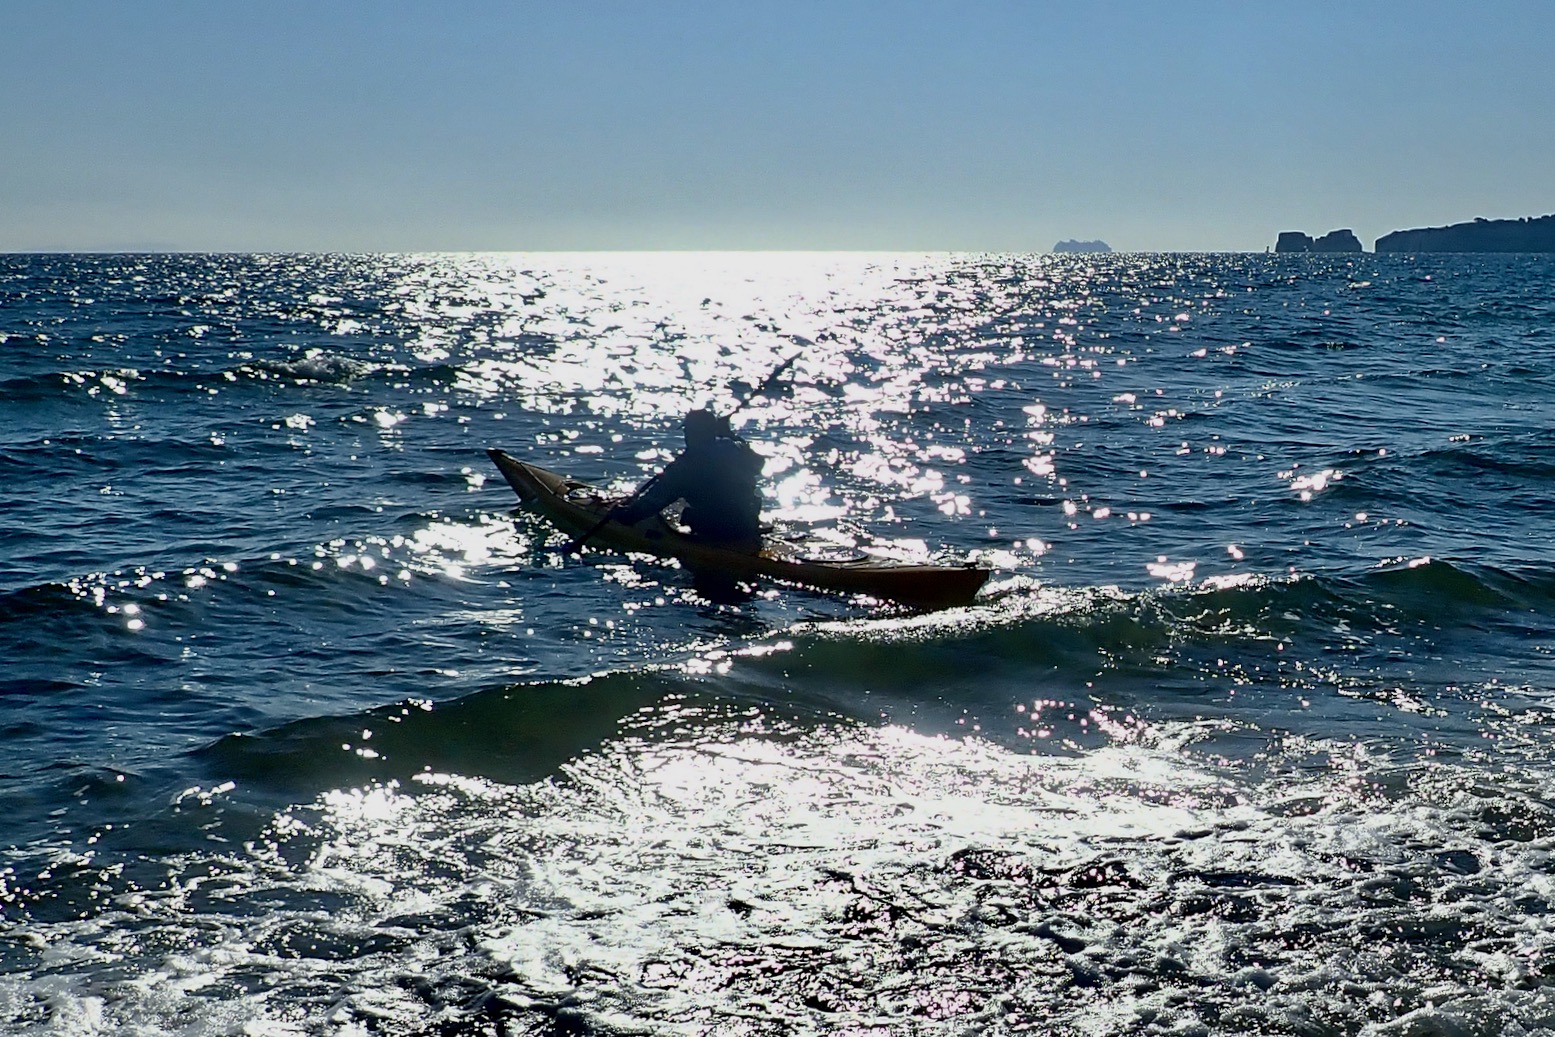
It was about 1.5 miles to the arches at Old Harry’s headland, so I set off directly across the bay, hoping for flatter conditions further out. That wasn’t the case; the odd wave was breaking, but the TXL moved across the water purposefully. Sure, it rolled, pitched and yawed in the side waves, but sat down low I felt completely at ease, maybe even more than in my Seawave IK? Barry was clearly having the same bouncy fun in his MRS and I’d assumed the P&H would have raced off, if for no other reason than to maintain stability. But later Nimbus said the Scorpio felt a little on edge in the high-frequency chop and couldn’t have gone much faster than us on this stage.
You’d think the two long, light packrafts’ would have been blown about, but the central, kayak-like position and added buoyancy made them easy to control (with skegs fitted) and the high sides kept most of the water out. I picked up maybe a litre over a mile and a half and didn’t miss a deck at all (though I did appreciate the drysuit).
Inching towards the Point.
Swanage Bay sets off a tidal eddy
Even with photo faffing, we reached the stacks of Old Harry in about half an hour, and it hadn’t felt like any more of a struggle than in an IK. It was really quite a revelation how well the TXL (and Nomad) were performing with just an extra 50cm or 20% in the waterline over a regula packraft. The lightness of the boats must have something to do with it. Round the outside of the Point the wind and tide were fighting it out in a tidal race. It made me realise how well timed our visit in the Seawave had been three years ago. We’d arrived here in much calmer conditions but also around mid-tide with a less nasty looking race. Going round the outside today may well have been doable but set aside unpredictable currents, waves can also stand up and break out of nowhere. It was more fun to slip through on the remnants of the outgoing tide between the mainland and Old Harry’s stack. Next time I come here, I’ll make sure to arrive at the top half of the tide so all the arches can be threaded.
View from above about three hours later. Low water but still a bit of a race off the point.
After a bit of promo filming for the new book, we turned 120° to the southwest and expected to have the wind behind us, but it remained a case of dealing with sidewaves plus cliff rebounds, so we kept out to sea. Despite the packrafts jigging about like popcorn in a hot pan, we managed to make progress south along the cliffs, the Scorpio now edging ahead.
After being jostled around, Barry decided to air up his AirSail, but even with two of us, pumping it up properly in the chop proved too tricky. For easy deployment on the water, the sprung-hooped Packsail (like the old WindPaddle) is a much better idea, even if it’s more bulky to carry.
We rounded Ballard Point where the cliffs turned into Swanage Bay, and with the wind now on our backs, the GPS recorded 6kph (see graph below). As usual though, it didn’t feel that fast as the boat squirrelled around from the stern. I thought about moving myself further back (relatively easily done in the TXL unlike the fixed solo Nomad) so the lightened bow trailed downwind, but it wasn’t really that bad, it just felt sloppy. Sailor Barry was now keeping up with Nim until we all rolled up on Swanage Beach, aired down the packboats and made a beeline for the cafe for a superb Full Swanage Breakfast.
The cafe let us leave the boat among their bins out back, but I was overruled on walking the four miles back over Ballard Downs back to Knoll Beach. Barry clearly had a liking for taxis which I consider more of an emergency service. “It is not the Packrafting Way!” I squealed as he put a bag over my head and shoved me in the back. Nimbus kept a diplomatic silence. Back at Knoll Beach, Barry roared off on his motorbike while Nim and I wandered back the way we’d paddled to check out at Old Harry’s from above. The tide was now at its extended low period and the wind had swung to the southeast, sheltering Studland Bay. Down below, a lone kayaker was just setting off. “That looks fun, a. We should try that sometime.”
Judging by this outing, the TXL has proved to be just what I’d hoped: a dependably agile coastal cruiser with all the other benefits of a packraft. More sea paddles to come.
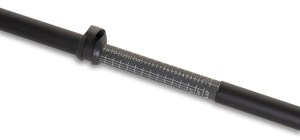
In a Line Four-piece paddle 890g in kayak format with 15cm of length adjustment, fully variable feathering and includes T-handles to make a pair of canoe paddles, a long SUP paddle, a tarp pole or even an MYO packstaff.
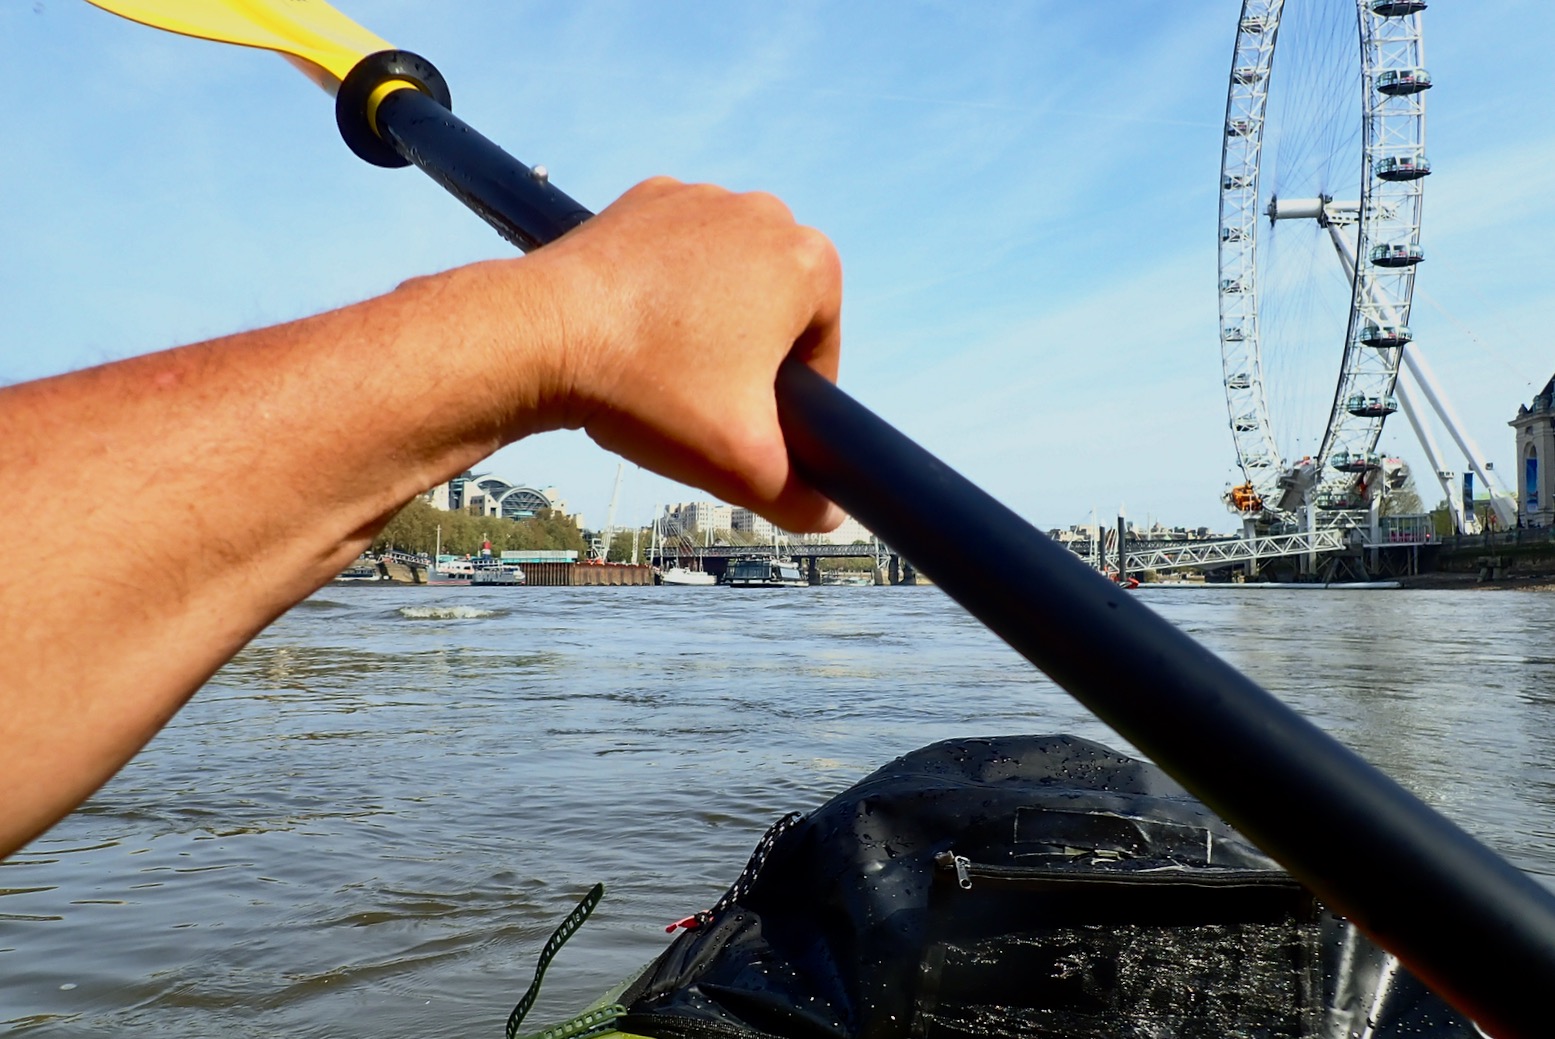
Where used? Paddles on the Thames, Dorset coast, Wey and in northwest Scotland in my Sigma TXL.
What they say Revised, redesigned paddle combination for two-person packrafts, usable alone or in pairs. The very light fiberglass double paddle can be transformed into two paddles and even into a SUP paddle using two extenders. Continuously adjustable in angle and length (210cm to 225cm). Price: €175
Good value, light 4-parter Variable length and feathering Two canoe or a SUP paddle included Max 63cm length 29mm shaft will suit smaller hands Get a Vertex Tour for €125 if you just want a packraft paddle
Blades a bit loose; fixed with bits of tape No index mark to set feathering angle 29mm shaft narrower than the 32mm I’m used to Smoothish fibreglass surface is a bit slipperier than my other paddles
This paddle was supplied free in exchange for editorial work on the Anfibio website
Review A quality two-piece like my ageing Werners is usually my first choice for a day out, but for travelling with a packraft, especially on public transport, a 4-piece paddle makes sense. You won’t go any slower or get more tired; it just won’t feel as efficient and solid as a good two-parter – and feeling efficient can give you confidence, even if there’s nothing in it. Now sold, my Aqua Bound Manta Ray carbon shaft was at least ten years old and still hanging in there, and that was my second one after selling the first to an envious mate. It wasn’t as stiff as my Werner but it got me across the water all over the world, while doubling up as a packstaff.
Anfibio’s Vertex Multi Tour really does try to cover everything: kayak paddle, two canoe paddles and even a SUP board paddle – if you own all those it could be what you need. I don’t, so used the canoe handle extenders to make a Mk2 packstaff. Did I mention packstaffs yet? I did notice the spring-button blade connection was a little slack; a matter of a fraction of millimeter clearance and fixed by a bit of tape, easily removed. Maybe the paddle will swell into a tighter fit once repeatedly wetted? (The Manta Ray blades tightened up over the years). It took a while to notice the Vertex also has a slightly thinner 29mm shaft – less comfortable to grip for me. Smaller handed persons will prefer this. It’s also smoother which makes me think a little texture aids grip without raising blisters on long outings.
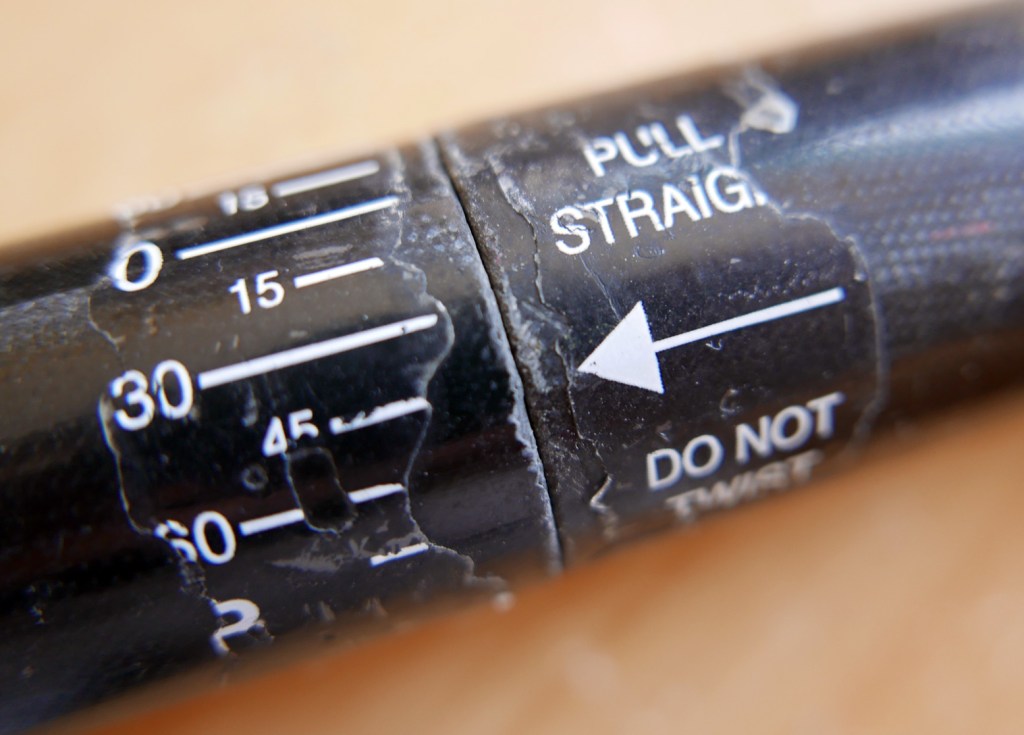
Length adjustment is something new on me and I like to think is not a gimmick. On our windy Dorset paddle I ran the paddle short (210cm) into the wind, and longer (220 or so) downwind; a bit like low and high gearing, using a higher cadence on the short length when working into the wind. I need to try this a few more times to see if it really makes a difference, or I just think it does. With the lever clamp, you can adjust in a couple of seconds.
Like most paddlers I am right handed and paddle with the left blade rotated forward: 45° R. But unlike my Werners (below left), there is no sticker or other index alignment marker to set your feathering angle on the Vertex. It seems this was a production oversight and current Vertex paddles have an alignment marker – make sure yours has.
Remains of Werner indexingOn Vertex a bit of tape does the job
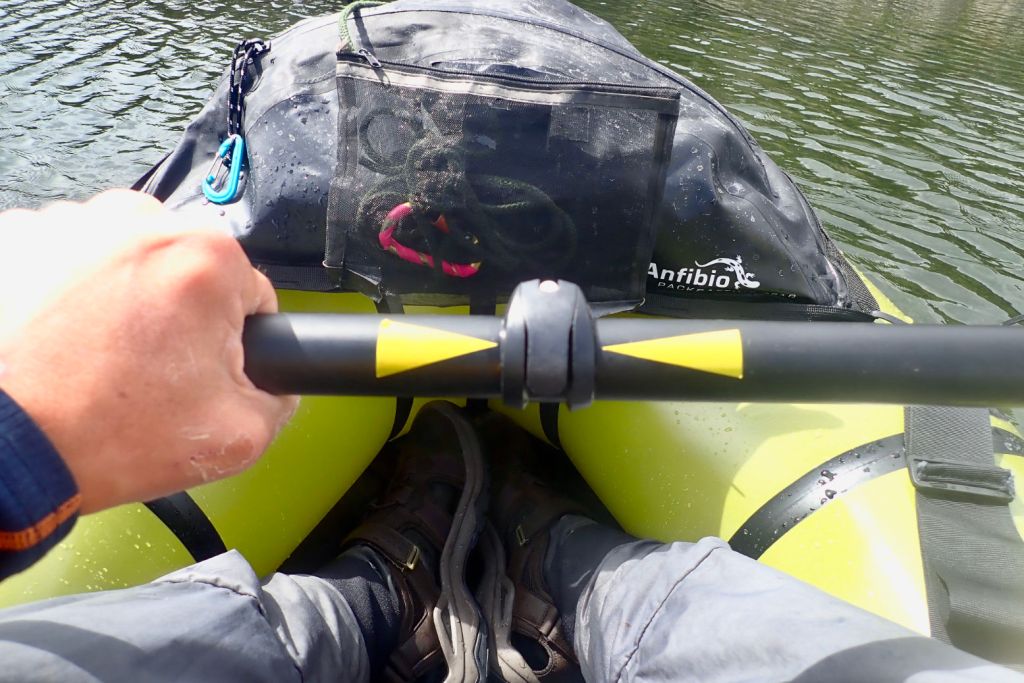
I also realised it matters which blade you attach to which shaft for your shaft feathering alignment sticker to have consistency. After sticking on some yellow alignment arrows (as I’ve done to my older Werner’s where stickers peeled off), I added more tape on the left blade and the section of shaft with the lever clamp. Match yellow to yellow and you are good to go.
Left: Werner Corry (700cm3); Vertex a bit lessThinner shaft suits smaller hands
The Vertex’s blade looks like a fairly standard 650cm2 and should take the usual beating of being pushed off rocks and so on. Once you’re paddling the finer points of paddle response fall by the wayside; if you’re moving into the wind and waves and current at the end of a long or hard session you will feel tired. But once you add some stickers, for the price and weight and versatility the Vertex Multi Tour does it all, and is in stock in Europe right now, unlike many American-branded paddles.
29mm shaft for smaller handsMk2 packstaffTape eliminates slackBlade about 650cm2Variable lengthLength and angle gridPulled fine on choppy seas4 bits – a paddleinyourpack
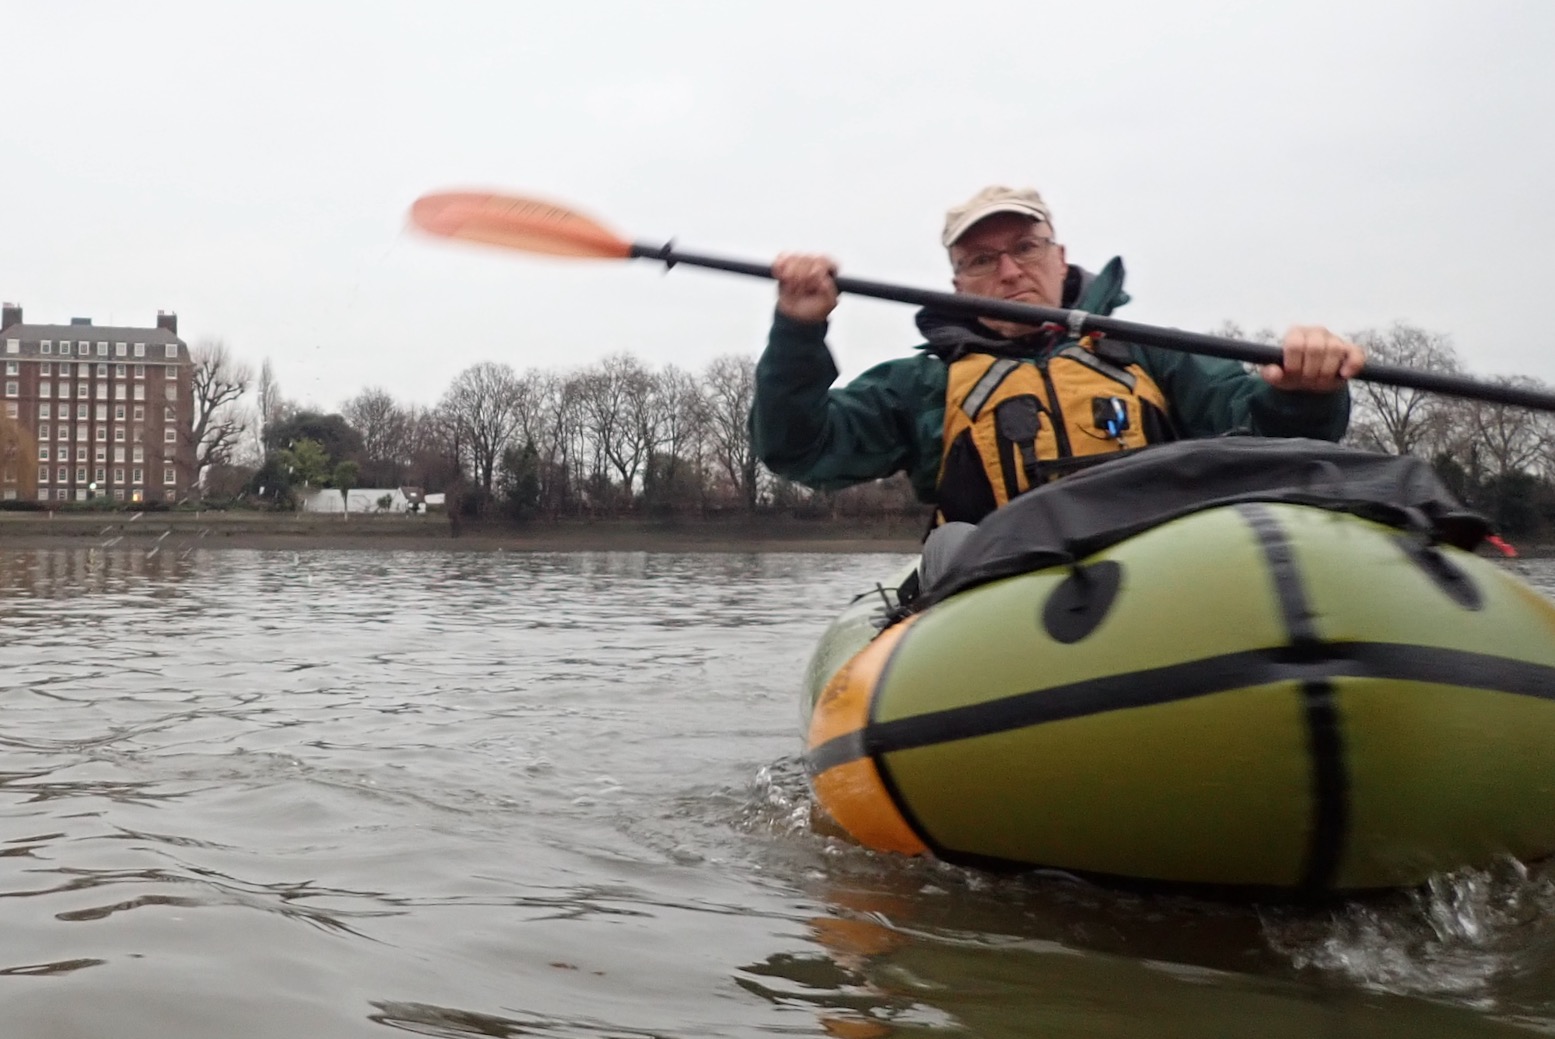
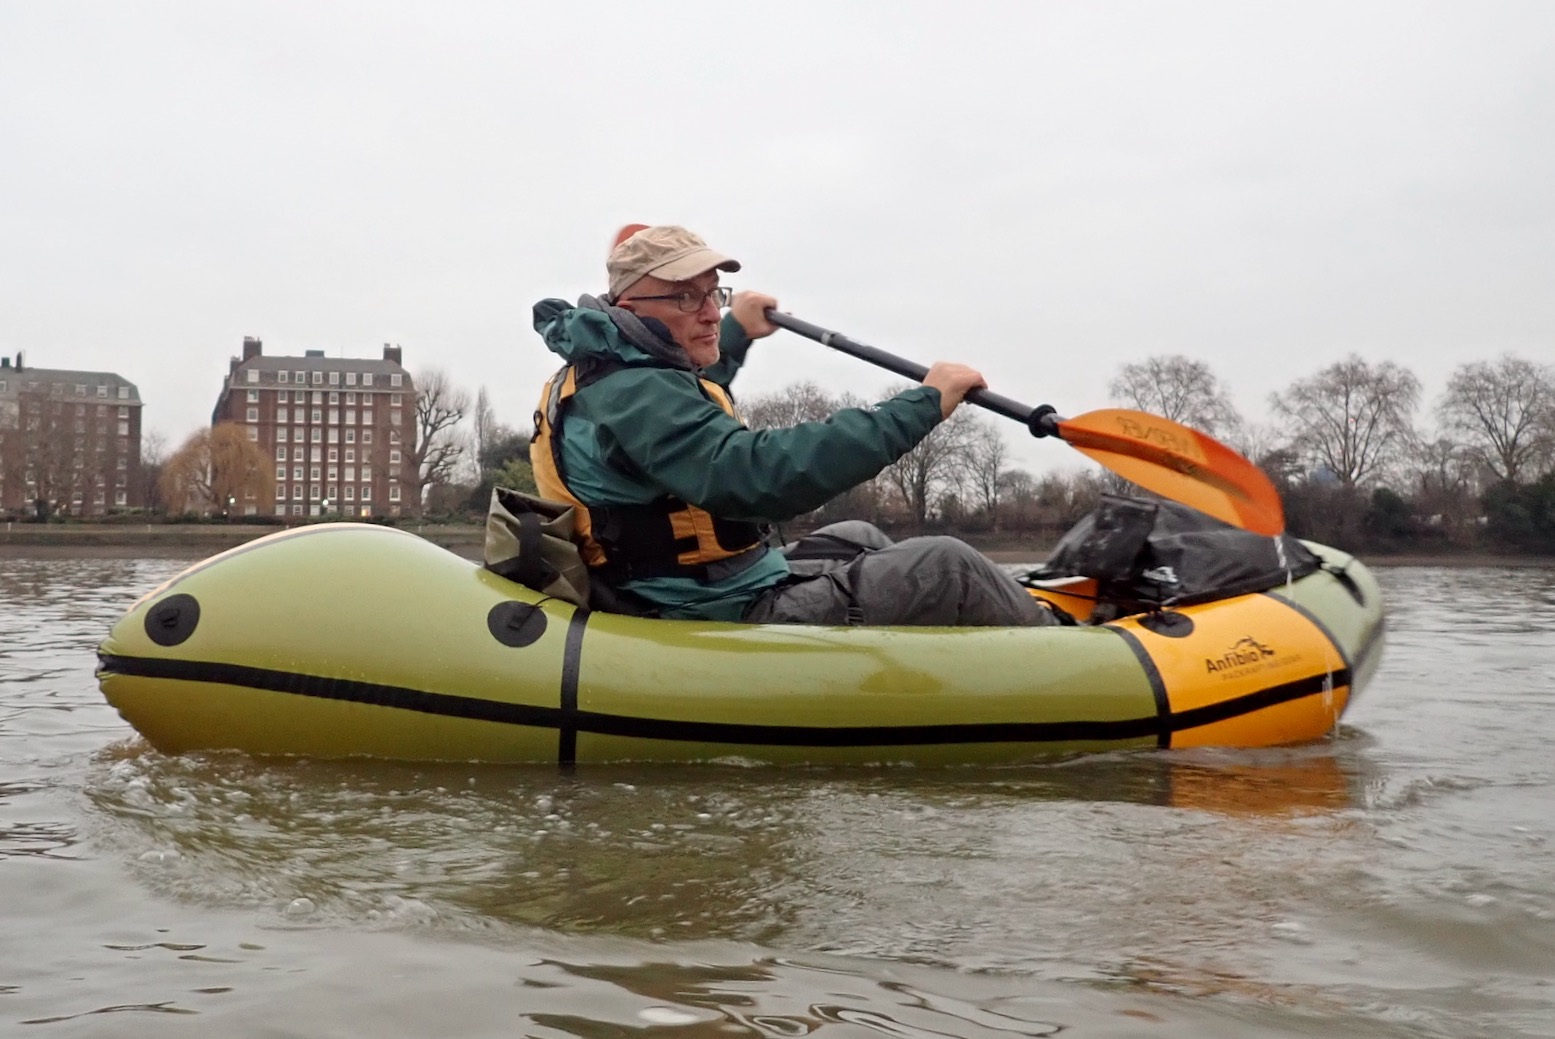
Miraculously, a sunny spell spanned the Easter bank holiday weekend so I took the new TXL down the Thames for its maiden voyage. At Putney I caught the remains of a spring tide but dithered too much so only had a hour until it turned at London Bridge and pushed back up the river. Nevermind, I’ll get as far as I get and hop out anywhere there are some steps or a ladder. With a packraft it’s easily done.
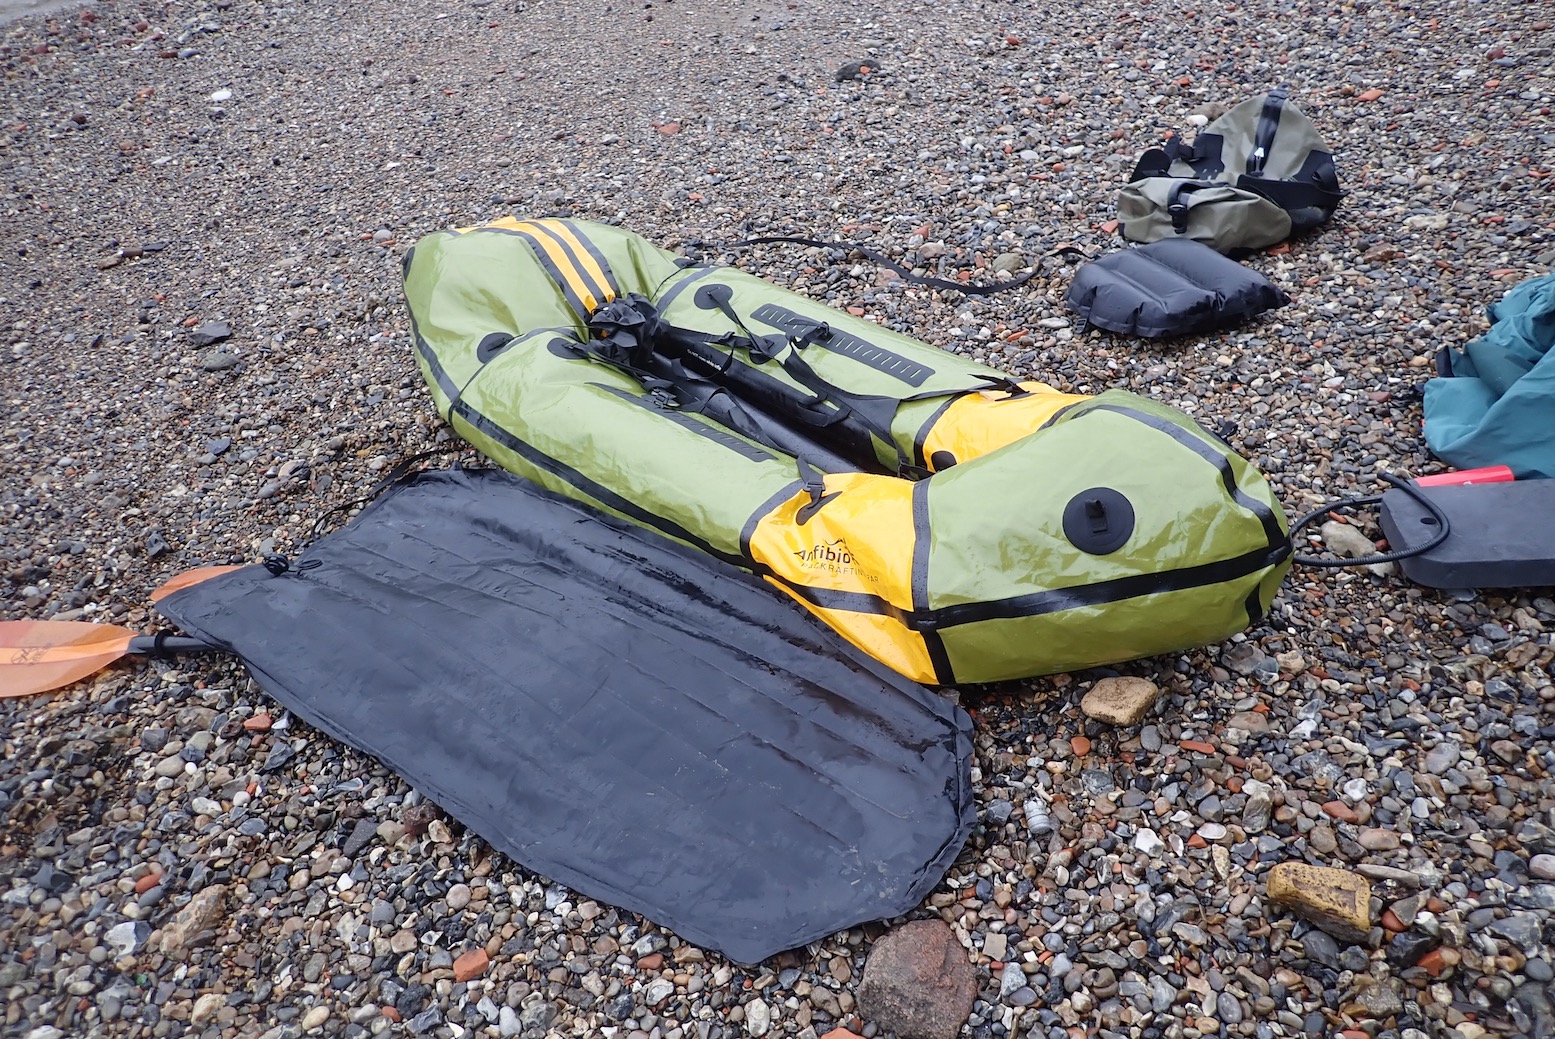
Skeg half out but does the job. One thing I like about longer, centrally positioned packrafts is the the trim is level, not back-heavy as in a conventionally sized rear-sat packraft like my 2K, (unless you are light or it has a hugely voluminous stern, like a Revo)
Floor pad and skeg This is a similar run I did a couple of months ago in the dead of the Covid winter with the Revo, but this time I remembered to air up the floor pad good and hard. I’m expecting the 2.8-m long, hard-floored TXL to be nippy, and so it is. Setting off the boat skates across the water so that you can ‘paddle – pause/glide – paddle’ like in a kayak, not spin like a food mixer to keep moving. I fit the skeg but notice from the pix that most of it is out of the water. Don’t think the 2K was like that, but it’s submerged enough to track well. I did wonder why it wasn’t on the flat of the floor for full effect. Perhaps, as with the Nomad S1, it’s not strictly necessary. Something to try next time. As mentioned, I do plan to fit a second skeg on the front to see how that affects crosswinds and sailing.
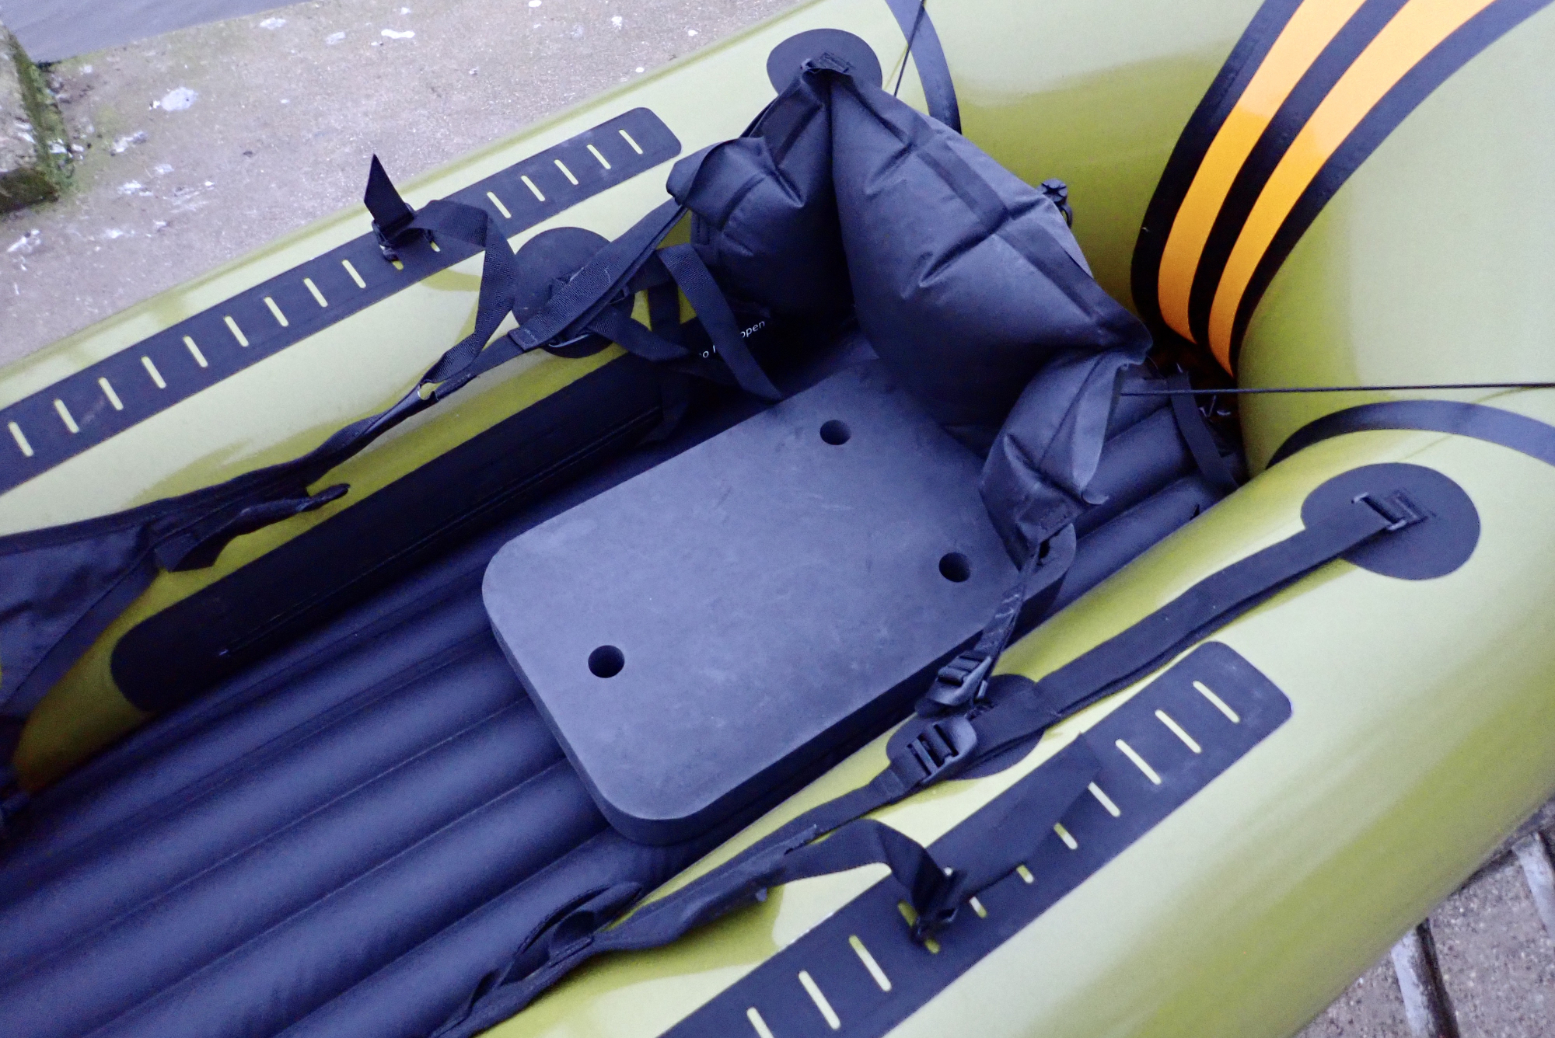
Seat They advise using the foam seat block with the floor pad. It feels a bit of an afterthought, adds packed bulk and, as others have reported, is not so comfortable. After 20 minutes I was getting a sore coccyx which was only going to get worse.
More seats than the O2 Arena
Mid-river I shuffled over the twice-as-large inflatable seatbase but soon found it wobbled around on the hard floor pad (like trying to stand on a soft football) in a way these seats don’t when sat on regular packraft floors. This must be why the block seatbase is supplied but the foam is too hard for flatwater cruising. I aired the seatbase right down (easily done in situ) until I was nearly sitting on the floor, but in rougher waters there would still be a wobble and anyway, by then your butt and heels are nearly level like sitting on an iSup board; not an ideal paddling posture.
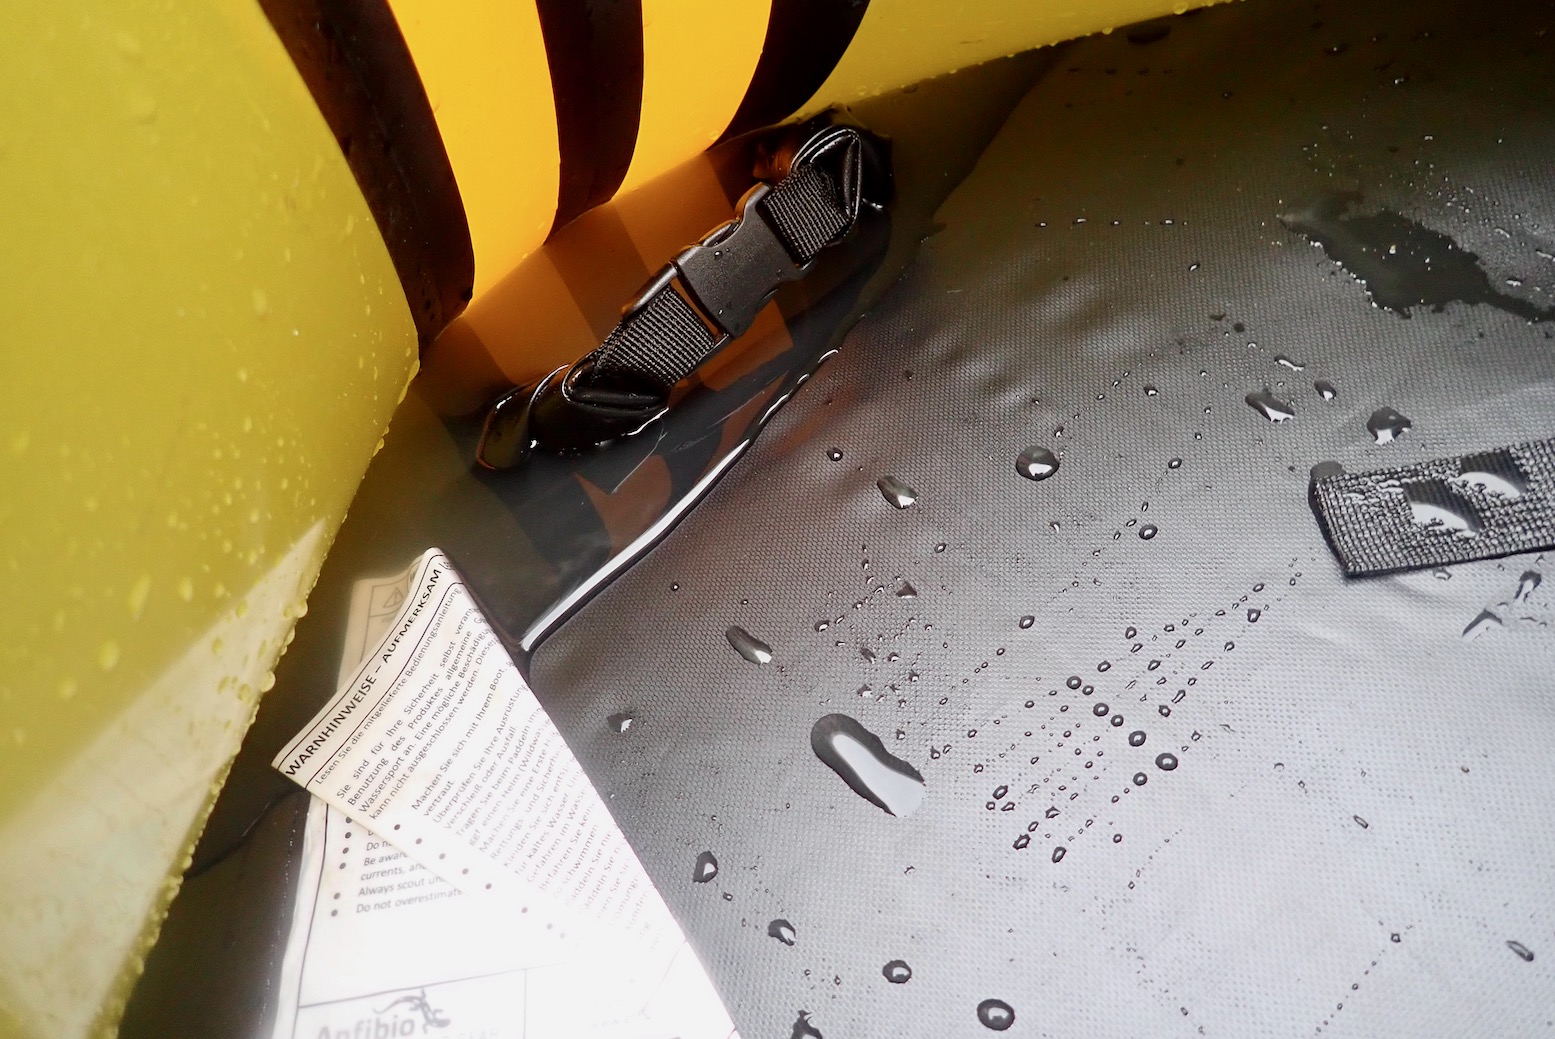
OMG – non-locking krabs! (fear not, a solution is at hand)
Overall, the raised position on the floor pad does aid good paddling as you can clear the fat sidetubes with the paddle more easily. Sat higher, I would expect stability in rougher water to suffer; at that time you’d want either thigh straps – or just sit yourself lower by easily airing down the floor pad. The backrest is easily adjusted in the boat too, and is held up by thin bungies so it’s easy to shift it up your back if it slips.
For the moment I feel the seat set up in MRS Nomad was a better affair. Partly because I felt it was part suspended/supported from tabs halfway up the side tubes like a hammock, not sat directly on the floor. That means your body weight is spread broadly along on the side tubes, not pressing down solely into the floor, created sagging. And also the flat foam backrest if fitted was better *and I may do the same with TXL). But, at around half-a-metre square, the TXL seat base is much bigger than previous packraft seatbases I’ve used. Without the floor pad, this broad base may nearly replicate the advantageous load-spreading effect of a Nomad-style side-tab suspended seatbase. An underwater picture will tell all, but I like to think the TXL may be as functional and not much slower without the floor. After all the floor-less Nomad was nippy enough. Since then I think the TXL works well without the floor – or I’ve yet to detect unambiguous advantages.
The TXL’s raised floor jams you less well into the boat sides which is 4cm wider than the Nomad. I quite like a jammed-in feeling but recognise that with a floor pad, added height requires a bit more boat width to maintain stability. Meanwhile, up front there’s plenty of room for feet side by side, unlike in the pointy ended Nomad.
There are a few more evaluations to do with the TXL but it looks promising. Comfortable, supportive seating I know can be an issue with IKs so using the floor pad I’m confident I will either get used to it, find a better seatbase and backrest or find that the pad is not essential for shorter paddles. Fyi, I have now become very used to using the Flextail electric pump to air up the boat (and the floor), before finishing off with the handpump. It can vacuum shrink the boat too, for compact packing, but rolling up is as quick. As you can see the handy BowBag fits on like it should, too.
Anfibio Vertex Tour paddle Anfibio sent me their new, four-part, multi-adjustable Vertex Tour paddle to try. It weighs just 890g on my scales, same as my old carbon Aqua Bound Manta Ray, with same-sized blades. A simple lever clamp allows you to set any offset the carbon shaft left or right, as well as vary the length 15cm between 210 and 225cm which is something new to me. Theoretically I can see using the full length with a backwind or a strong current and a short paddle for battling into the wind in ‘low gear’.
Each piece is 63cm long. The all-round shaft felt a bit thinner than normal, and sure enough, measured up around 29mm ø compared to my 32mm Werners which suit my hands better. Smaller handed persons will prefer the Vertex. The middle clamps up firmly but there was a bit of slack at the paddles; we’re talking less than half a millimetre here but it’s enough to rattle and be noticeable as you release the pressure on lifting the blade out. Does it make difference to non-competitive propulsion? Not really and better too loose than too tight. I wrapped some thin, smooth tape round the ends to eliminate the slack. The Vertex costs €125 – that’s a lot of light and fully adjustable paddle for your money. More here.
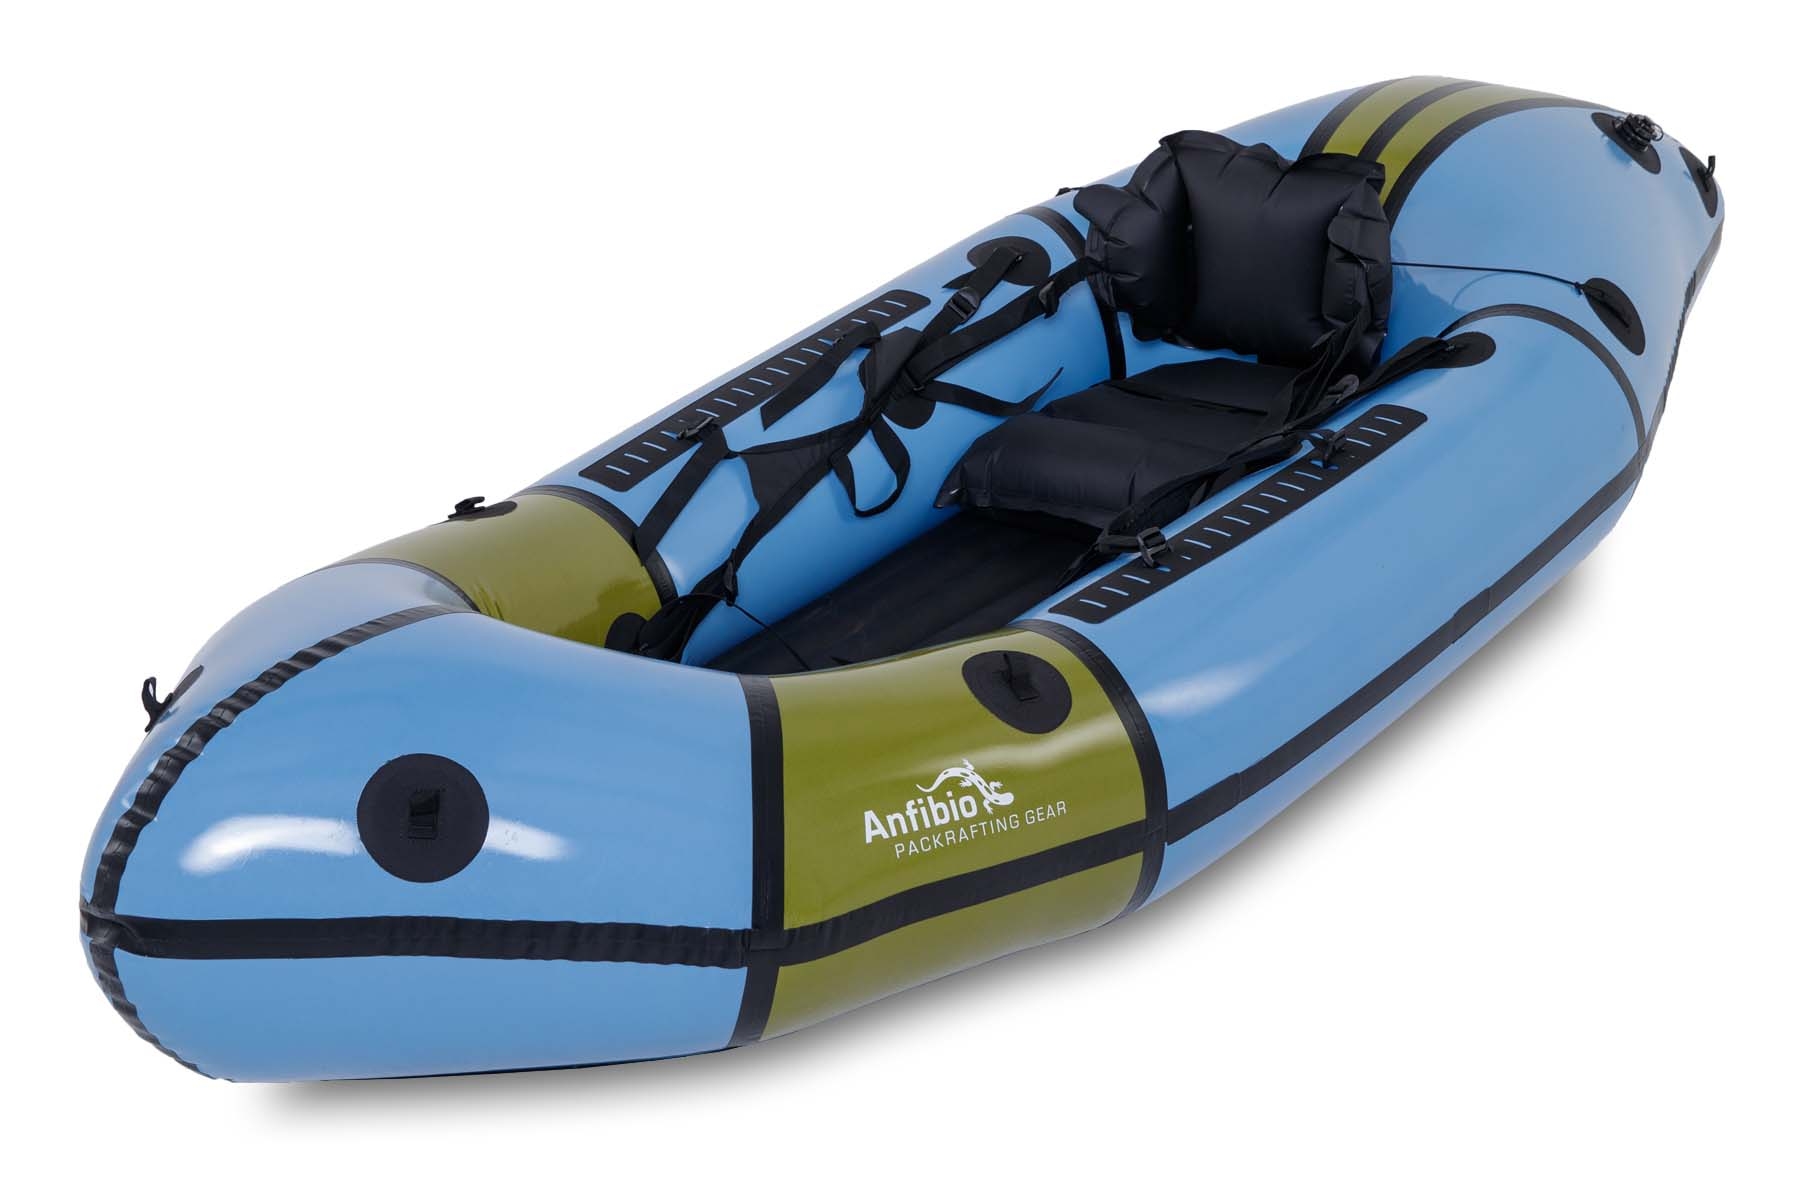
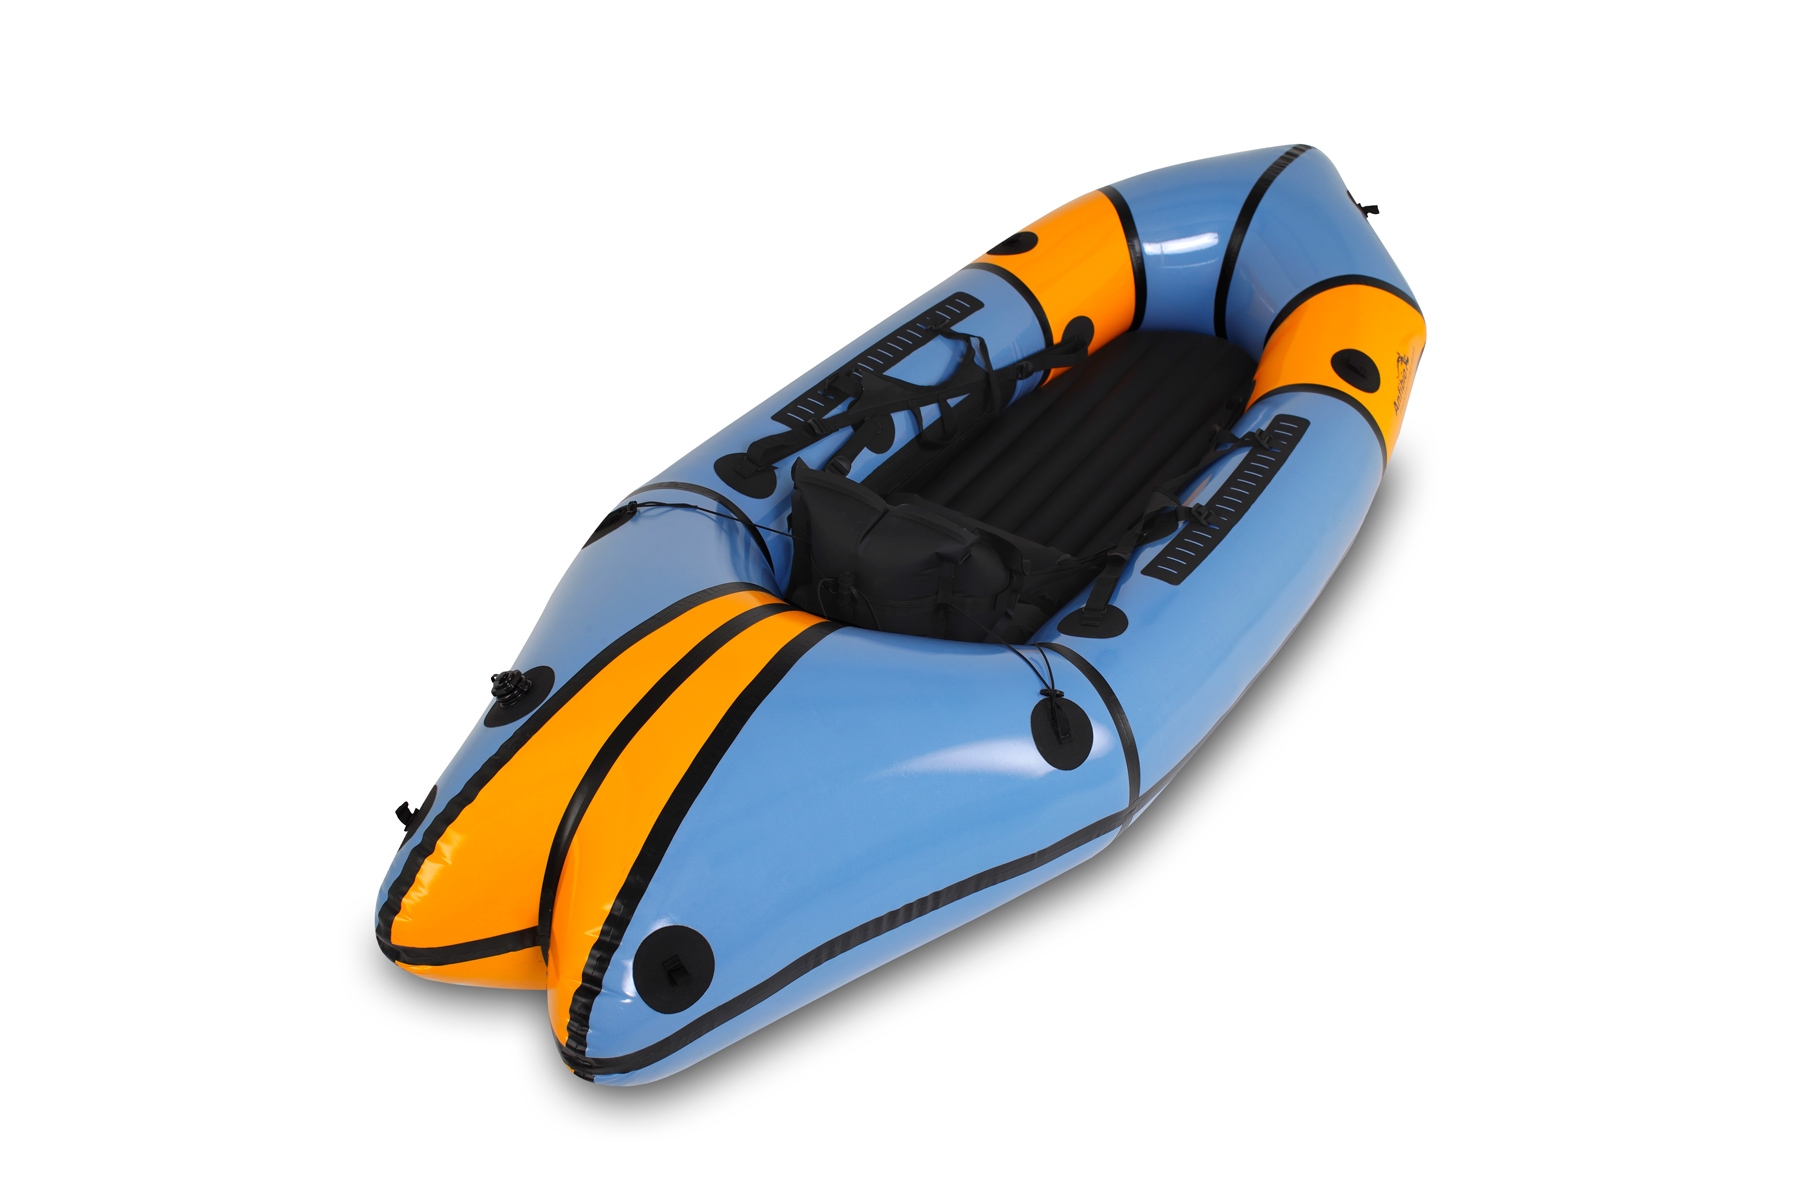
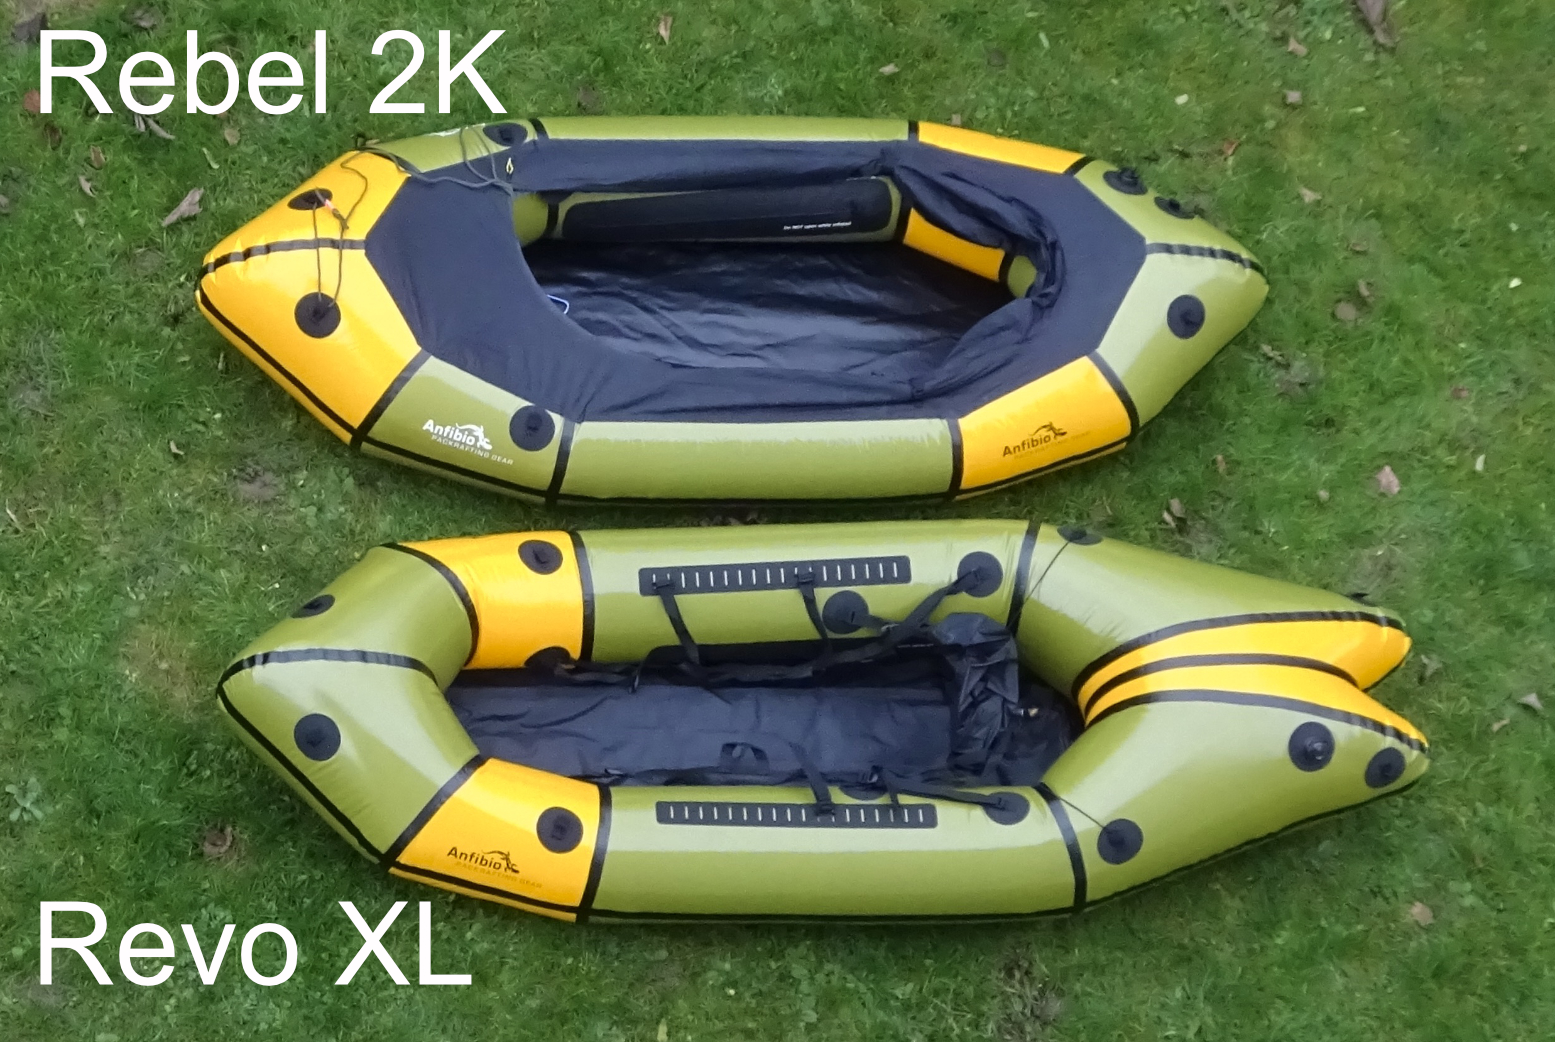
Early in 2022, as the UK’s Omicron surge peaked, I had a chance to try out a pre-production prototype of Anfibio’s RevoXLpackraft. Along with its distinctive forked stern, the Revo introduces a new idea to self-bailing packrafts: a single ~15cm drain funnel under the seat which can be pulled into the boat then rolled up and sealed, like a drybag. I tried the XL version with a 135cm inner length and 28cm sidetubes. The smaller RevoCL is 10cm shorter all round and has 27cm sidetubes. As you can see my test boat came in lemon and olive. The production boats are cornflower blue and olive for the CL which costs from just €759. That’s a bargain and may fit taller folk better than they think. The Revo XL which I tried costs €999, but in-hull storage TubeBags come as standard. I think the lemon and cornflower is also a better colour combo. Both models come standard with inflatable floor mats to help displace any water inside, as well as 4-point knee braces. The sides are 210D, the floor is a thick 840D which wraps generously up the sidetubes for WW protection, and it’s all assembled by heat welding and sewing; no glue.
What they say (Revo CL here) The Revo XL is part of the Revos concept – a combination of (closeable) self-drainage, profiled floor and the new TwinTail . Thanks to bilge (spray water runs out through the floor), the boats come without a spray deck and can also be configured as a light, minimalist boats. This results in a unique range of uses from whitewater to touring. The particular construction is similar to the smaller Revo CL: VenturiTube – the closable bilge hose TwinTail TM – the W-shaped double tail of a surfboard Comfort BackBand – the combination of back strap and rest 5P Thigh Straps – ergonomically adjustable thigh straps Firm floor mat – for a stiff, profiled hull The structure of the boat with and without a floor mat and the various (seat) configurations are the same as in the Revo CL or can be found in the supplied operating instructions. Revo XL/CL Differences The XL variant uses a larger outline. It is 10 cm longer, which creates space and speed. It has 28cm side tubes for increased buoyancy and stability. [The CL runs 27cm. And the XL has yellow contrast panels; the CL has olive]. TubeBags* are standard in the Revo XL, which ensures sufficient payload. In addition, a stronger base is used, which is appropriate for potentially high loads. The boat is a good choice, especially for tall and heavy paddlers, multi-day tours or if extra comfort is required. In the XL variant, tall people with a load of up to 120 kg can sit directly on the mat without a seat.
Revo CLRevo XL
About self-bailing In a packraft there are two ways of dealing with getting swamped: seal the boat with a deck and spray skirt like a kayak (below left), or let the water drain out via holes in the floor, like a commercial whitewater raft (below right) or a hardshell sit-on top. The latter method has the advantage of being immune to water ingress while also making exiting the deck-free boat faster. The weight of carried water and a perforated floor are said to slow a self-bailer down a bit on flatwater.
Sealed deckSelf-bailing drain holesROBfin draining holes and integrated floorTaping the drain holes (on an old IK)MRS Alligator with valve flaps
With self-bailing, a thick floor rising above the waterline displaces water carried in the boat, and a seat on top of that means the paddler isn’t sitting in water, even if they may be soaked from waves. Among others, packrafts like MRS, Kokopelli, Mekong and RobFin [link] (more of a small IK) use a line of holes in the floor. You can seal those with some tape, and MRS use valve flaps to smooth the profile and reduce infress. But for the moment only the Revo uses a retractable drain funnel or Venturi Tube, potentially giving you the best of both worlds. They work like similar devices on surf-skis [link]: the movement of the boat over water creates a low pressure zone which sucks water out of the boat provided you keep moving. When you stop the level may rise a bit.
What pours inDrains out (see video below)
Review: Anfibio Revo XL
Along with a voluminous ‘whitewater’ stern, the Revo has a distinctive and trademarked TwinTail which is said to help the back end bite into the water or catch back surf, like the somersaulting playboat below right. Because using a skeg on whitewater is a bad idea, I can see how the forked stern might replicate a similar digging-in effect, but won’t pretend to know what I’m talking about here. I have seen similar designs on surfboards where it’s called a fishtail.
Fish Tail surf boardsFlippin’ ‘eck
Either way, a long stern positions you centrally like a kayak, and the high stern volume ought to stop the boat flipping backwards as you exit small waterfalls. Because of the back’s huge buoyancy, I thought I detected a slightly tipped forward aspect to the trim, even with my hibernating 93kg.
Unfortunately, where I live there are no small waterfalls for miles. Were that the case my whole paddling background might be different. So I wasn’t able to test the self-bailing function or the stern’s finely tuned handling characteristics. I suspect there isn’t much more than aesthetics to the Twin Tales design; a cool, 50s Cadillac look, but whitewaterists will have the final say on that.
The seat uses a suspended inflatable backrest, but as this was the XL version, there was not much adjustment left to move the backrest forward enough for me, even at 6′ 1″. At the back I’d have preferred counter tensioning straps like on the Kokopelli, rather than the thin elastic which makes the backrest wobble about, but you can always use the long packing strap for that. (In fact, the same backrest came with my Sigma TXL which I eventually replaced with a firm backrest and rear straps). The loose seatbase can attach to a strap over the floor pad which is well jammed in. The boat also comes with a hard foam seat base; I didn’t try it on the Revo but did on my own TXL a couple of months later on the Thames and again two-up off the Skye coast: it was soon uncomfortable. I’ve since learned it’s designed to allow bilge water to flow freely to the back of the boat and drain away (the regular air seat would block the flow).
Sat quite high but nice level trim, unlike me in the conventional Rebel 2K
The fitted, Boston-valved floor pad eliminates floor sag and adds overall stiffness to the hull for better response and speed. Sat higher on the pad I thought the Revo might be a bit tippy; not normally a problem with a packraft. On the Thames I soon got used to it; in whitewater not so sure, but too low a centre of gravity can reduce agility.
The four-point knee straps are key to this and I also soon got used to them. Even on flatwater they help your posture and drive by fixing your lower body to the boat. Again, on the XL the mounts were a bit off for me; I ended up using the front tabs, not the daily-chain ladder rungs along the top of the sidetubes.
At nearly 2.5-m long, the Revo looks huge but is actually only 17cm (6.7″) longer than my 2K (left) while having a flatter trim with me in it due to the longer stern adding up to a central seating position. With the stiffer floor, I thought it might have felt faster; perhaps it was but I didn’t notice on the strong outgoing Thames tide. I pulled over and fitted my skeg which reduced some yawing, but realised later I should have topped up the floor mat, as well as the boat, once it had cooled on the water a minute or two.
There’s nothing to stop you using the Revo without the floor pad with drain funnel closed (less bulk when travelling). The backrest might end up a bit high, but you’ll be sat nice and low. I was told the drain funnel’s roll-top closure would be improved on production versions, but after going out of my way to make a really tight roll and clip, only a cup had seeped in over an hour, which is barely more than paddle splash. With the drain tube sealed and with no floor pad but just a seatbase, I don’t think you’ll be swilling around in water seeping up from the funnel. I forgot to try paddling with the funnel open, but all that would have done on the Thames is possibly slow the boat down.
So the Revo: a packraft with a hull-stiffening floor pad, optional self-bailing and knee straps. It ticks all the boxes for playing around in whitewater and sea surf, but with the huge TubeBag storage pockets installed in the hull sides (€140 option on the CL; well worth it), the XL is set up for overnight trips too, with the load providing added stability in the rough stuff or when bombing along under sail. I knew before I saw it that a Revo wasn’t really a packraft suited to my kind of use. I don’t do challenging whitewater nor sea surf, so can live without self bailing (though I appreciated the deck on the Rebel 2K). Soon after trying the Revo I bought a more conventional Sigma TXL solo/tandem (also with TubeBags and an inflatable floor pad) and so far am very pleased with it on inshore paddles. I’ve fitted some knee straps, but am not sure about the floorpad and did not get on with the inflatable front backrest or the foam seat block.