Here in the Summer Isles the reliable May sunny spell is about to end. It’s been great for solar panels with strong afternoon easterlies, not so good for day-long IK-ing. Suilven mountain even caught fire. Yesterday, before it picked up we nipped out in the Seawave to Eilean Fada Beag (below) and listened to the birds. By the afternoon it was blowing hard.
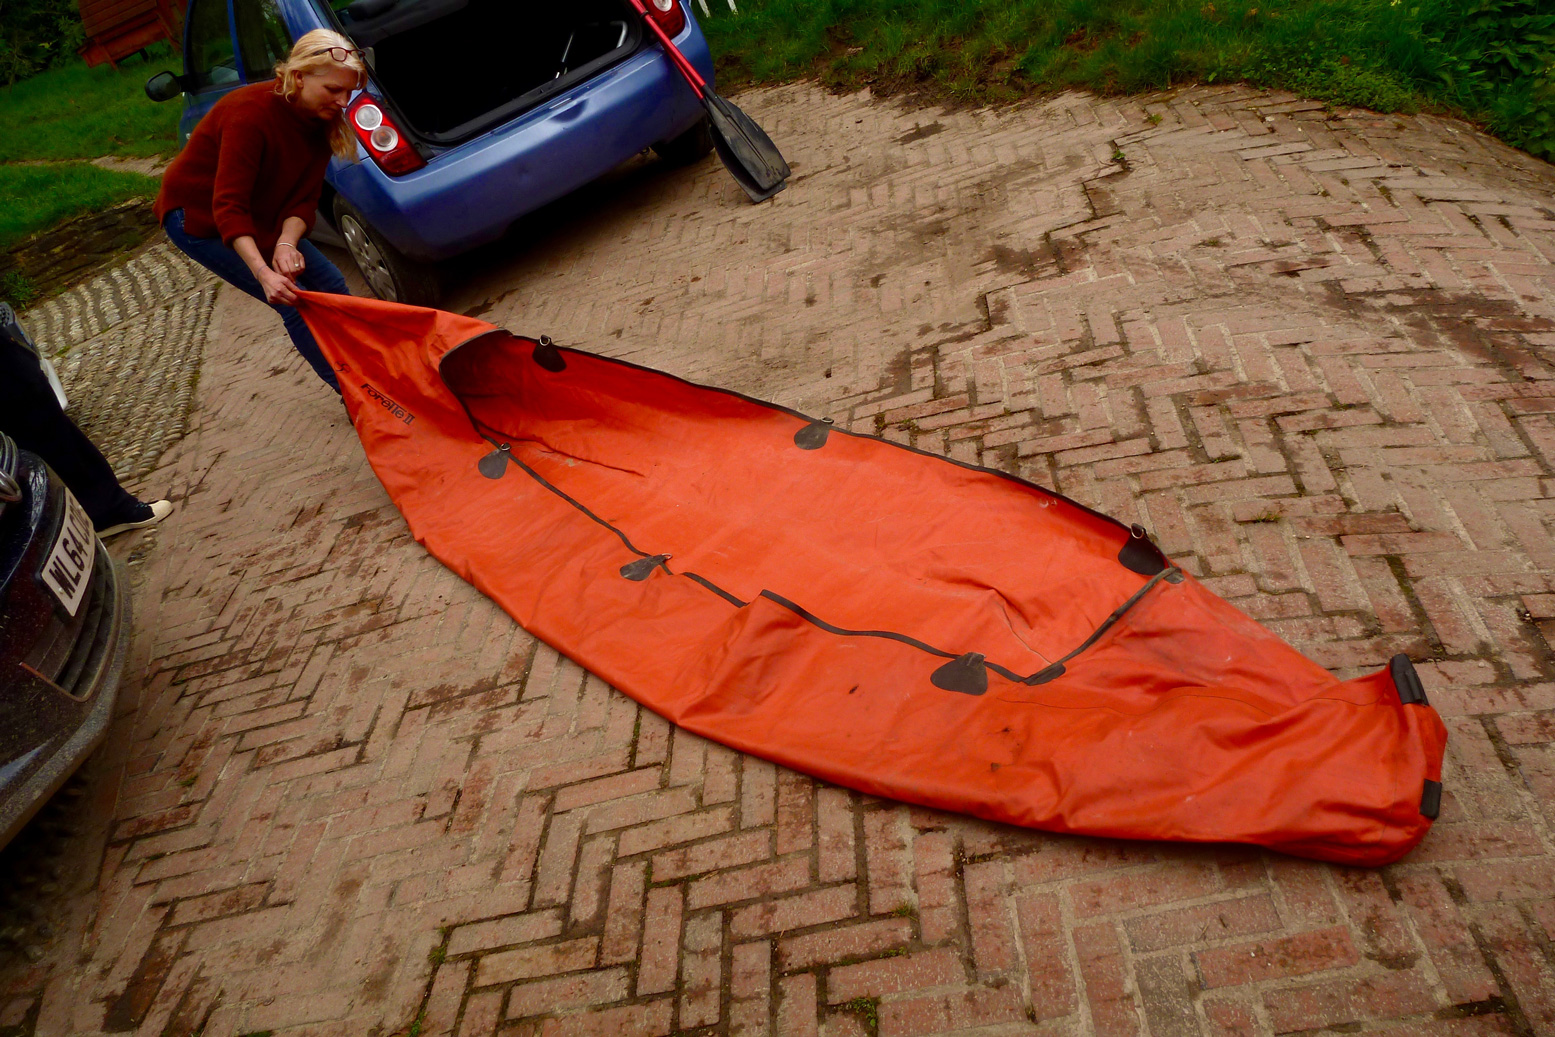
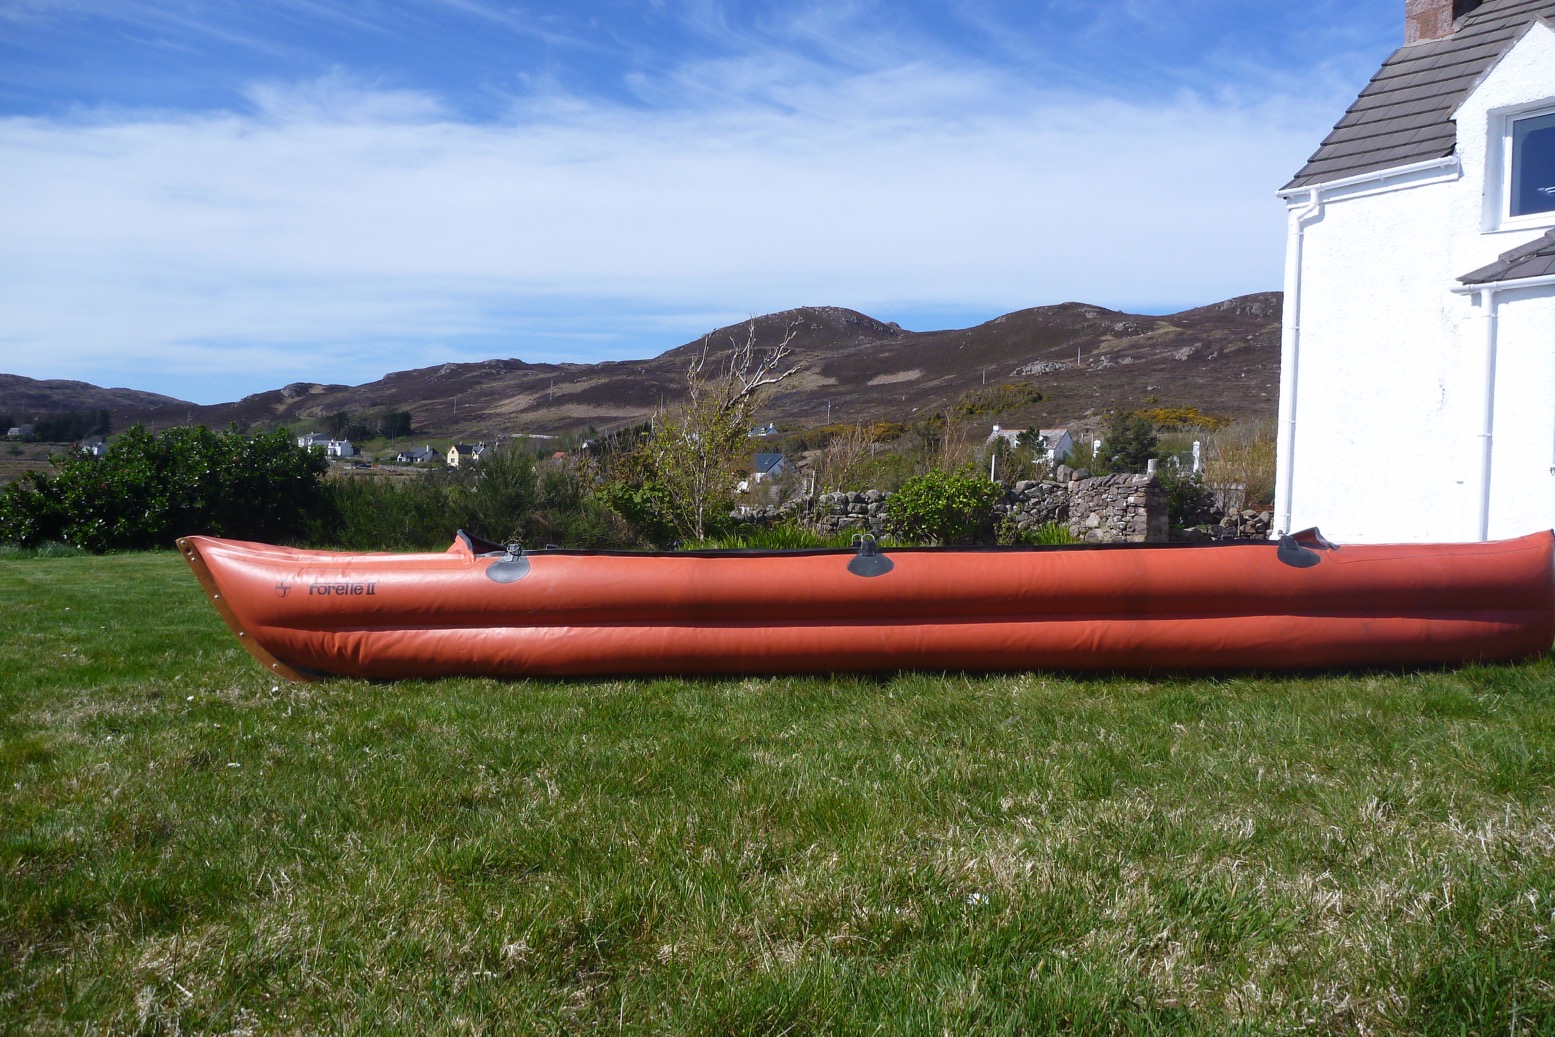
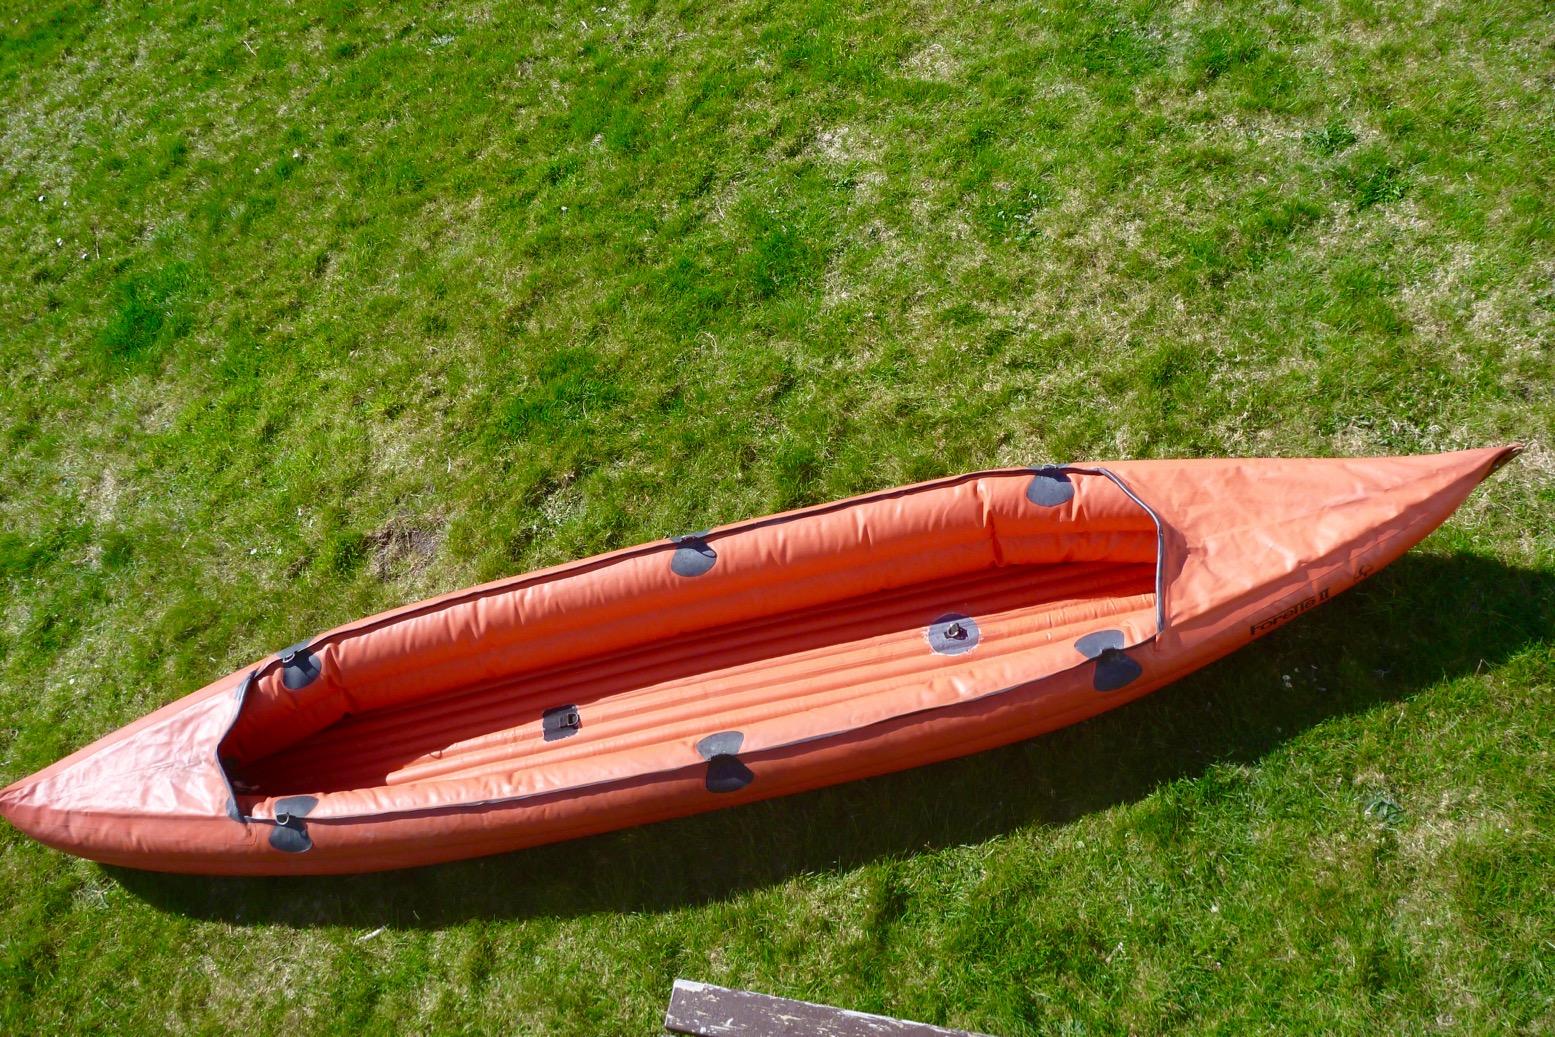
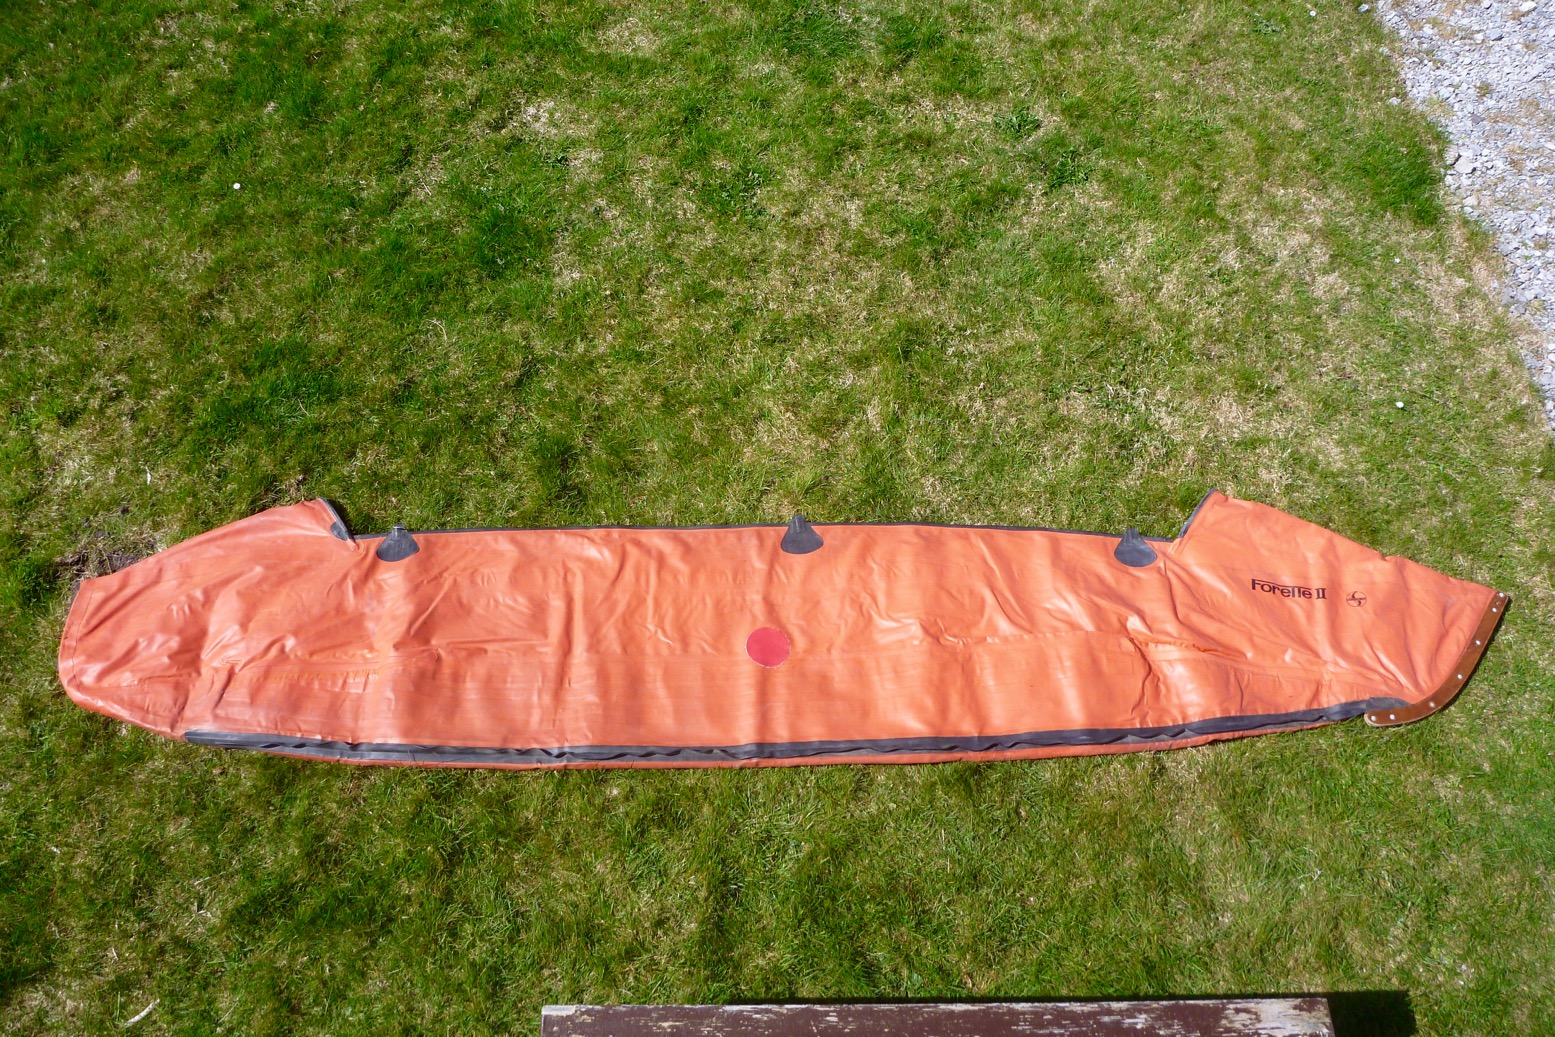
High time to patch up my latest IK: an old Semperit Forelle 2 I picked up in Cornwall. The boat was sold with some classic paddles which went straight in the bin, as well as a big tear in the side (right). Plan is to patch that hole, then see if it still holds air.
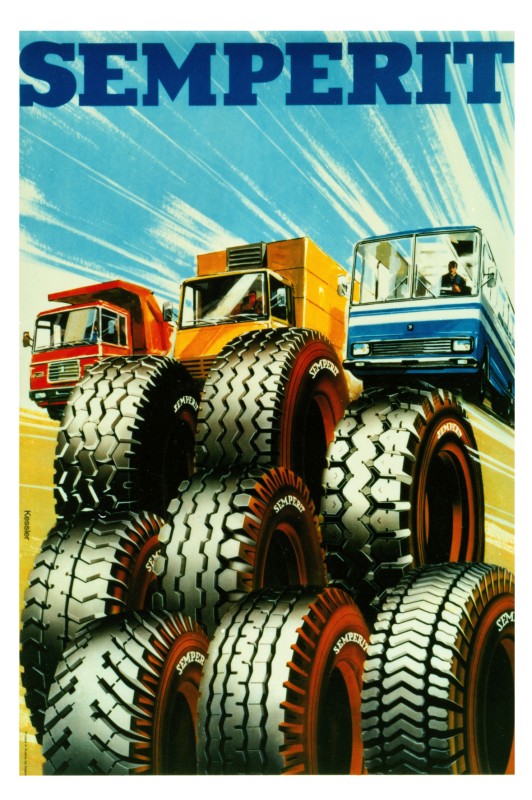
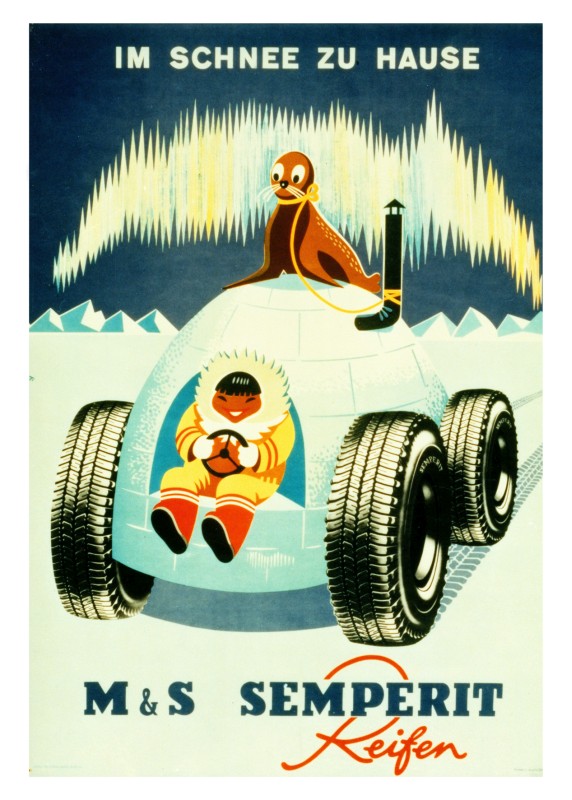
Semperit is an Austrian tyre manufacturer who’s still in business. Afaik, their IKs were a bit of a short-lived rubbery diversion in the 1960s. If my 40-year-old boat has no other more awkward leaks, I’ll rig it up and take it for a spin. But first, I scrubbed off a couple of decades of crud and let it dry.
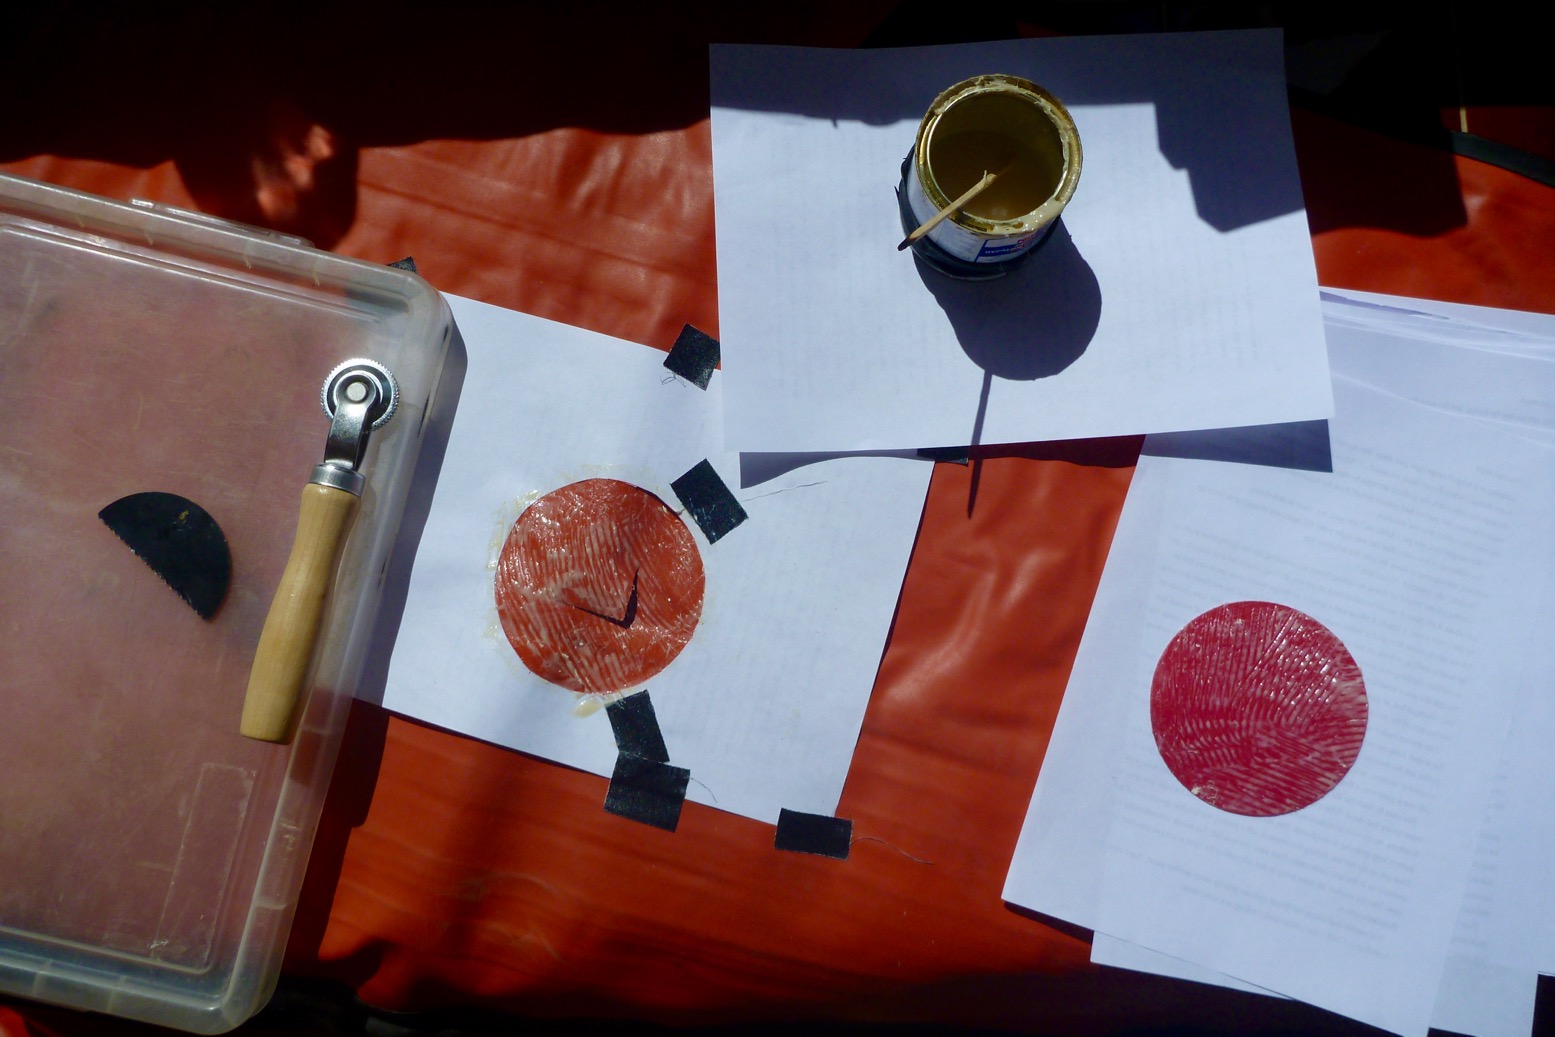
I wondered about sewing up that L-tear before patching it – the Forelle’s hypalon seems pretty thin, but decided to just slap on a 5-incher. I’ve glued on loads of accessory patches but have never actually had to repair a hole in a hypalon IK in all these years. So I took note of the NRS repair video here: rough up hole and patch: wipe clean with solvent; apply two coats of glue and when knuckle dry apply the patch and roller the living daylights out of it.
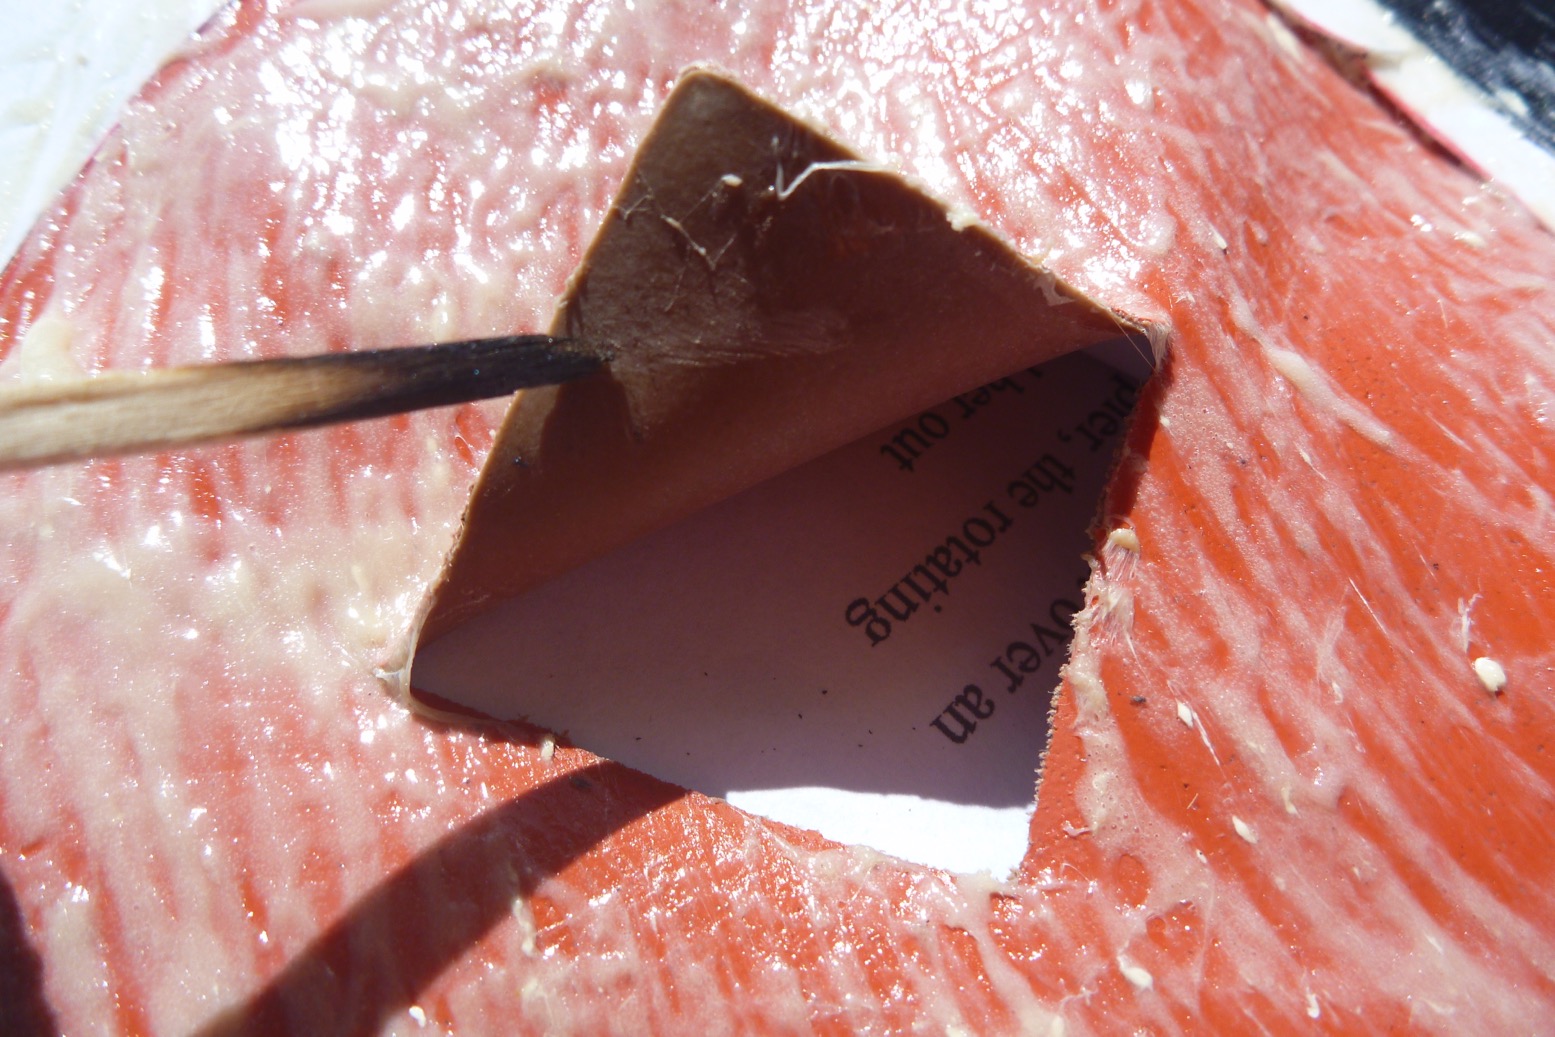
Watching that vid, I saw they used a much better tool for pressing down patches; an ash-handled Sealey TST15 tyre patch roller, unless I’m very much mistaken. The knurled metal wheel embedded in the wooden handle can lay down much more pressure than the wide plastic lino roller I’ve been using. Just before I did that, it occurred to me stray glue may squeeze through the tear and glue the insides together. Don’t want that nein danke so, with no better ideas, I stuck a bit of paper in there. Seems to have worked.
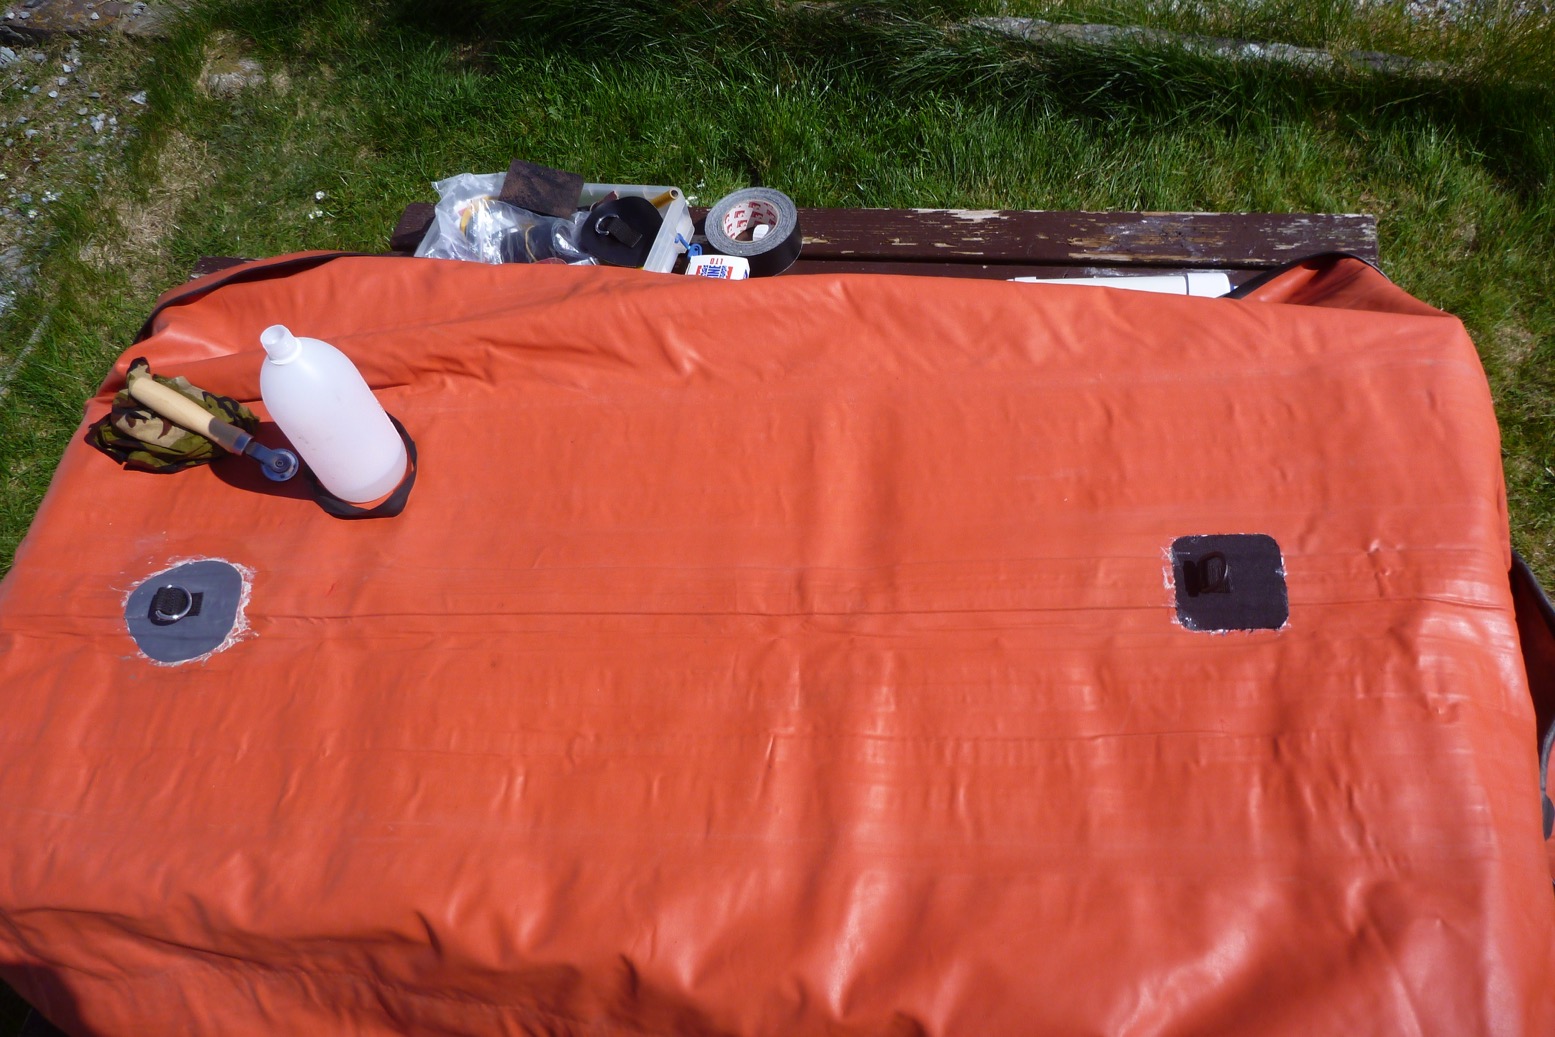
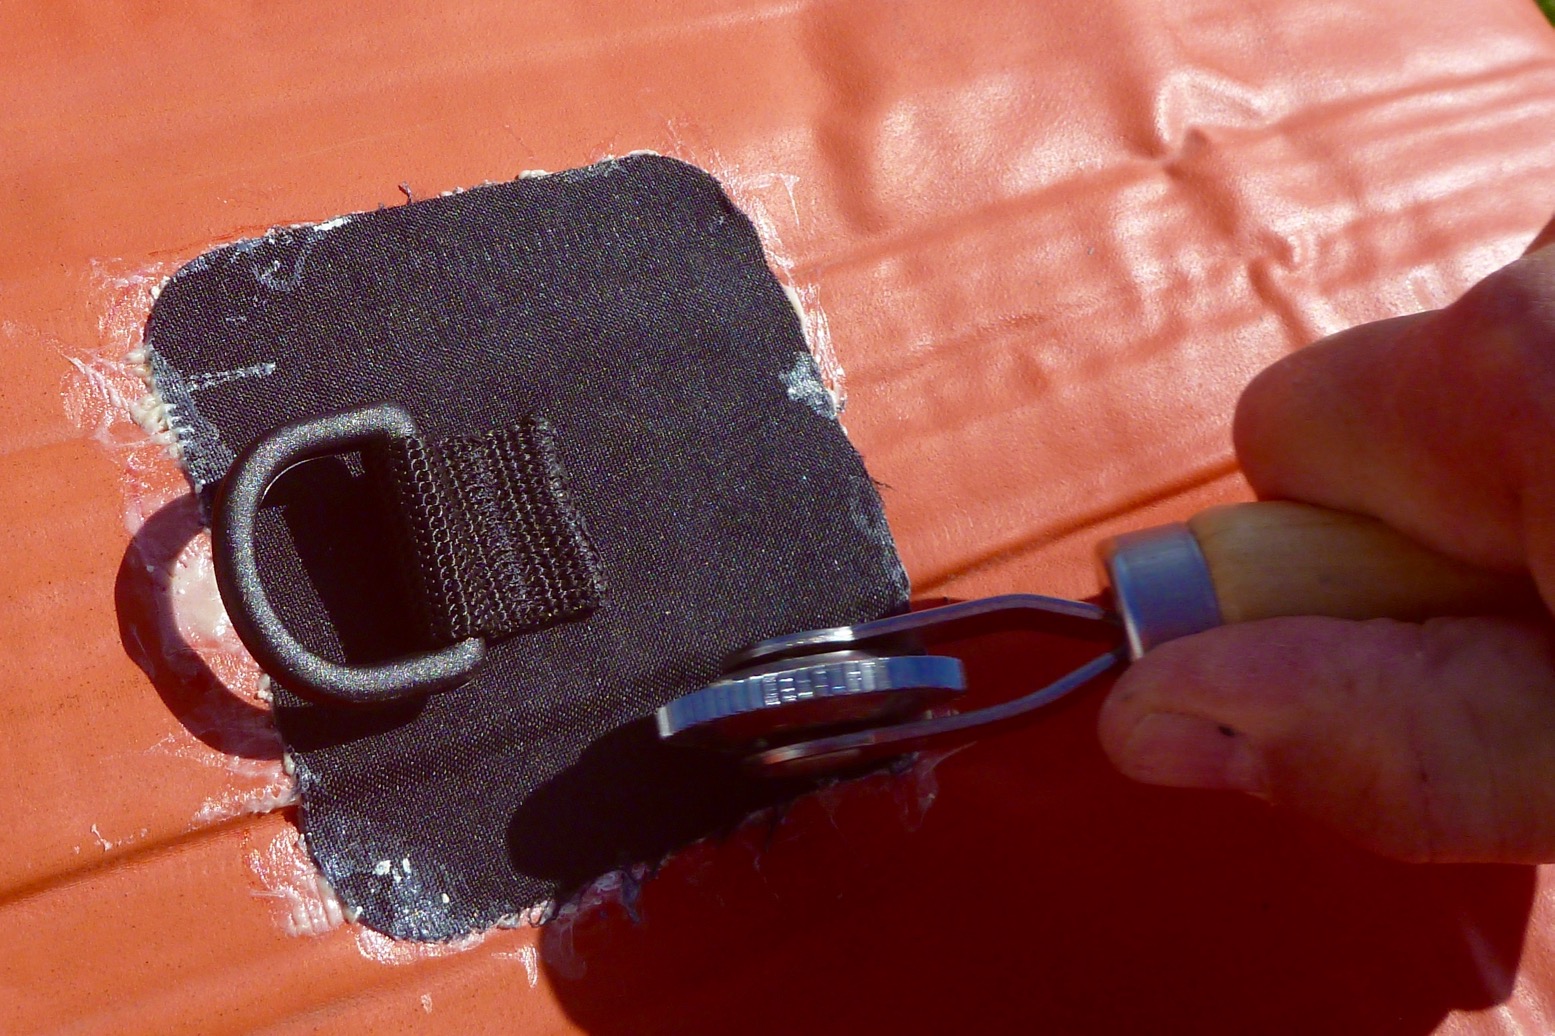
With glue left over, I thought I may as well stick on couple of floor patches for a seat base and a footrest tube. As these are non-critical fittings I used any old D-rings I had: a woven nylon one and probably a PVC. I’ve glued PVC to hypalon before for other fittings.
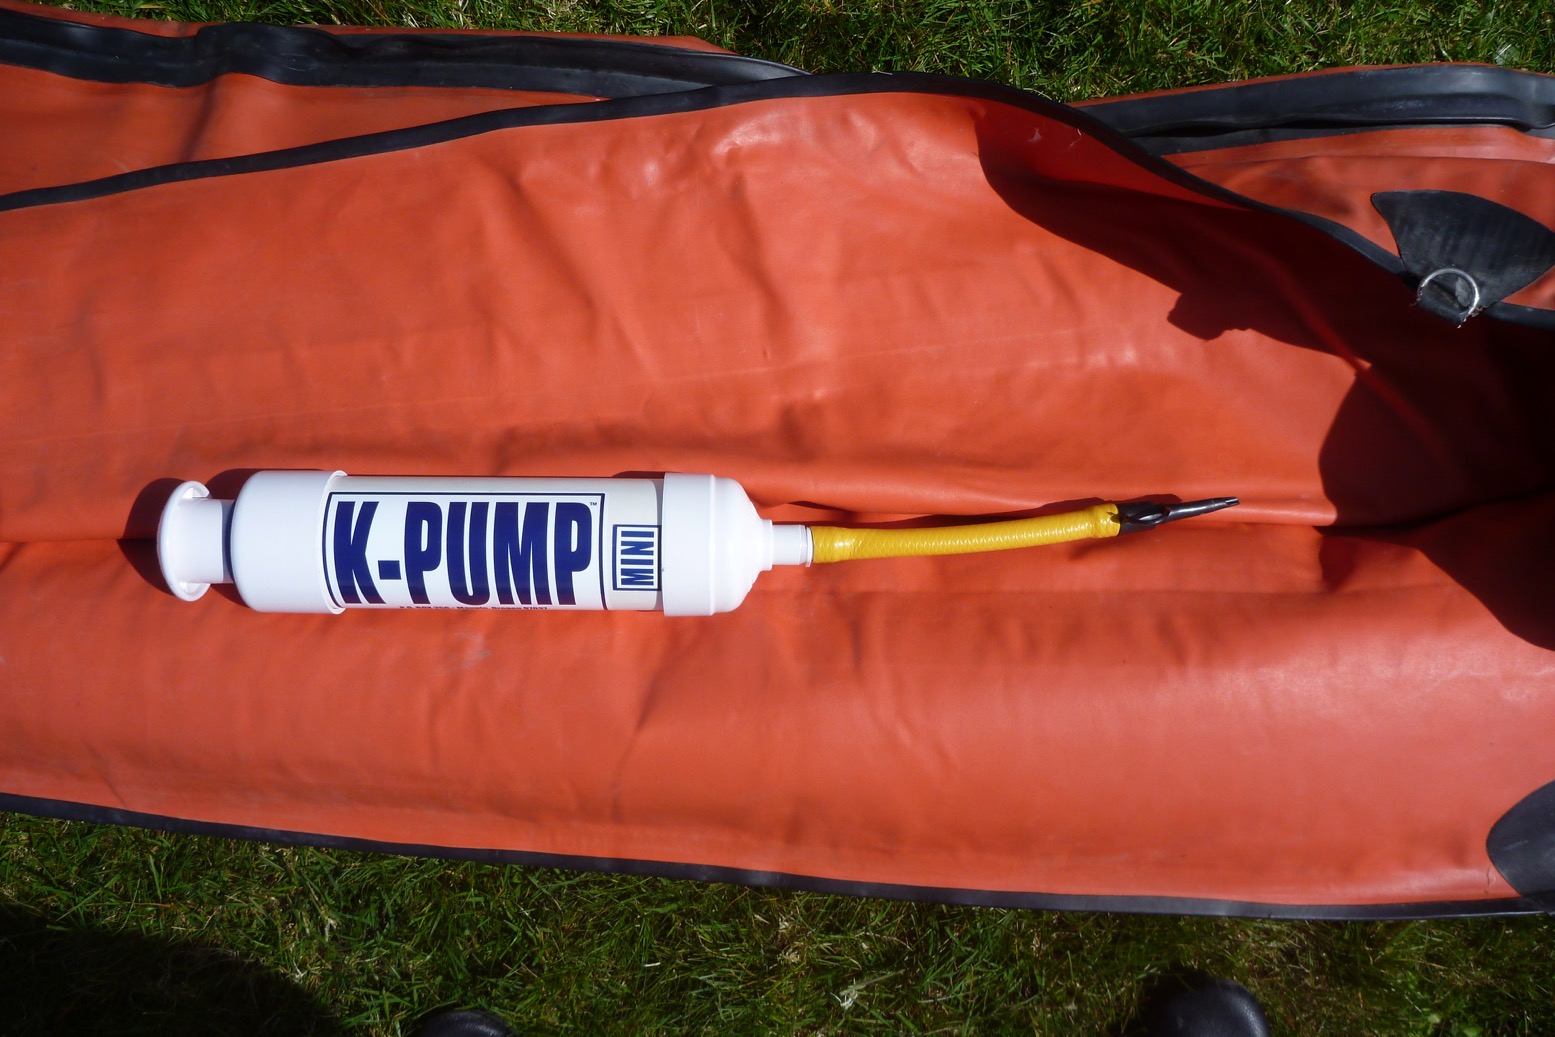
With them in place I couldn’t resist rigging up the old Trout with a rope-and-pipe-lagging backrest, an old Alpacka packraft seatbase; a drainpipe footrest tube and a lead. All stuff I happened to have in my IK box of bits or found in the barn among the rat droppings. I jury-rigged the K-Pump for nozzeling but haven’t pumped it right up to 2psi as I’m letting that big patch cure for a bit.
Looking round the repaired boat I see it has rudder mounts; not sure I’ll need one on a 3.56m boat. There are six D-rings on top of the double side tubes but they don’t look like they’ll take the backwards strain of a fabric backrest Forelles came with wooden backrest bars, (like Grabners who took over Semperit) and which I’ve found prone to bending when used with a firm footrest tube.
There’s also a squished up full-length keel strip along the bottom. If it works for tracking it will be nice not to have the usual skeg-grounding aggro in shallows or on land. But maybe that keel will slow down turning which is why they have the rudder attachment? We shall see. With twin side tubes the Forelle is just 70cm wide – that’s <28″. But with a thin floor and me sat low in the high sides I’m sure it will be stable enough. Gumotex still use them for their seats, but the ‘lilo plugs‘ on the three chambers are a bit of a faff for getting a good charge of air.
If the Semp proves viable, I may replace them with proper IK valves. Or I may just leave them as they are. Three £15 Gumotex valves + a £20 PRV will cost the same as the boat, and the lilo plugs can be regarded as their own ‘total loss’ PRVs – when the boat gets too hot they pop! And anyway, there’s no room to fit a big IK valve in the floor as the tubes are too close together. Knock-off Halkey valves go for 7 quid; I might stick a couple in the sides and leave the lilo plug in the floor.
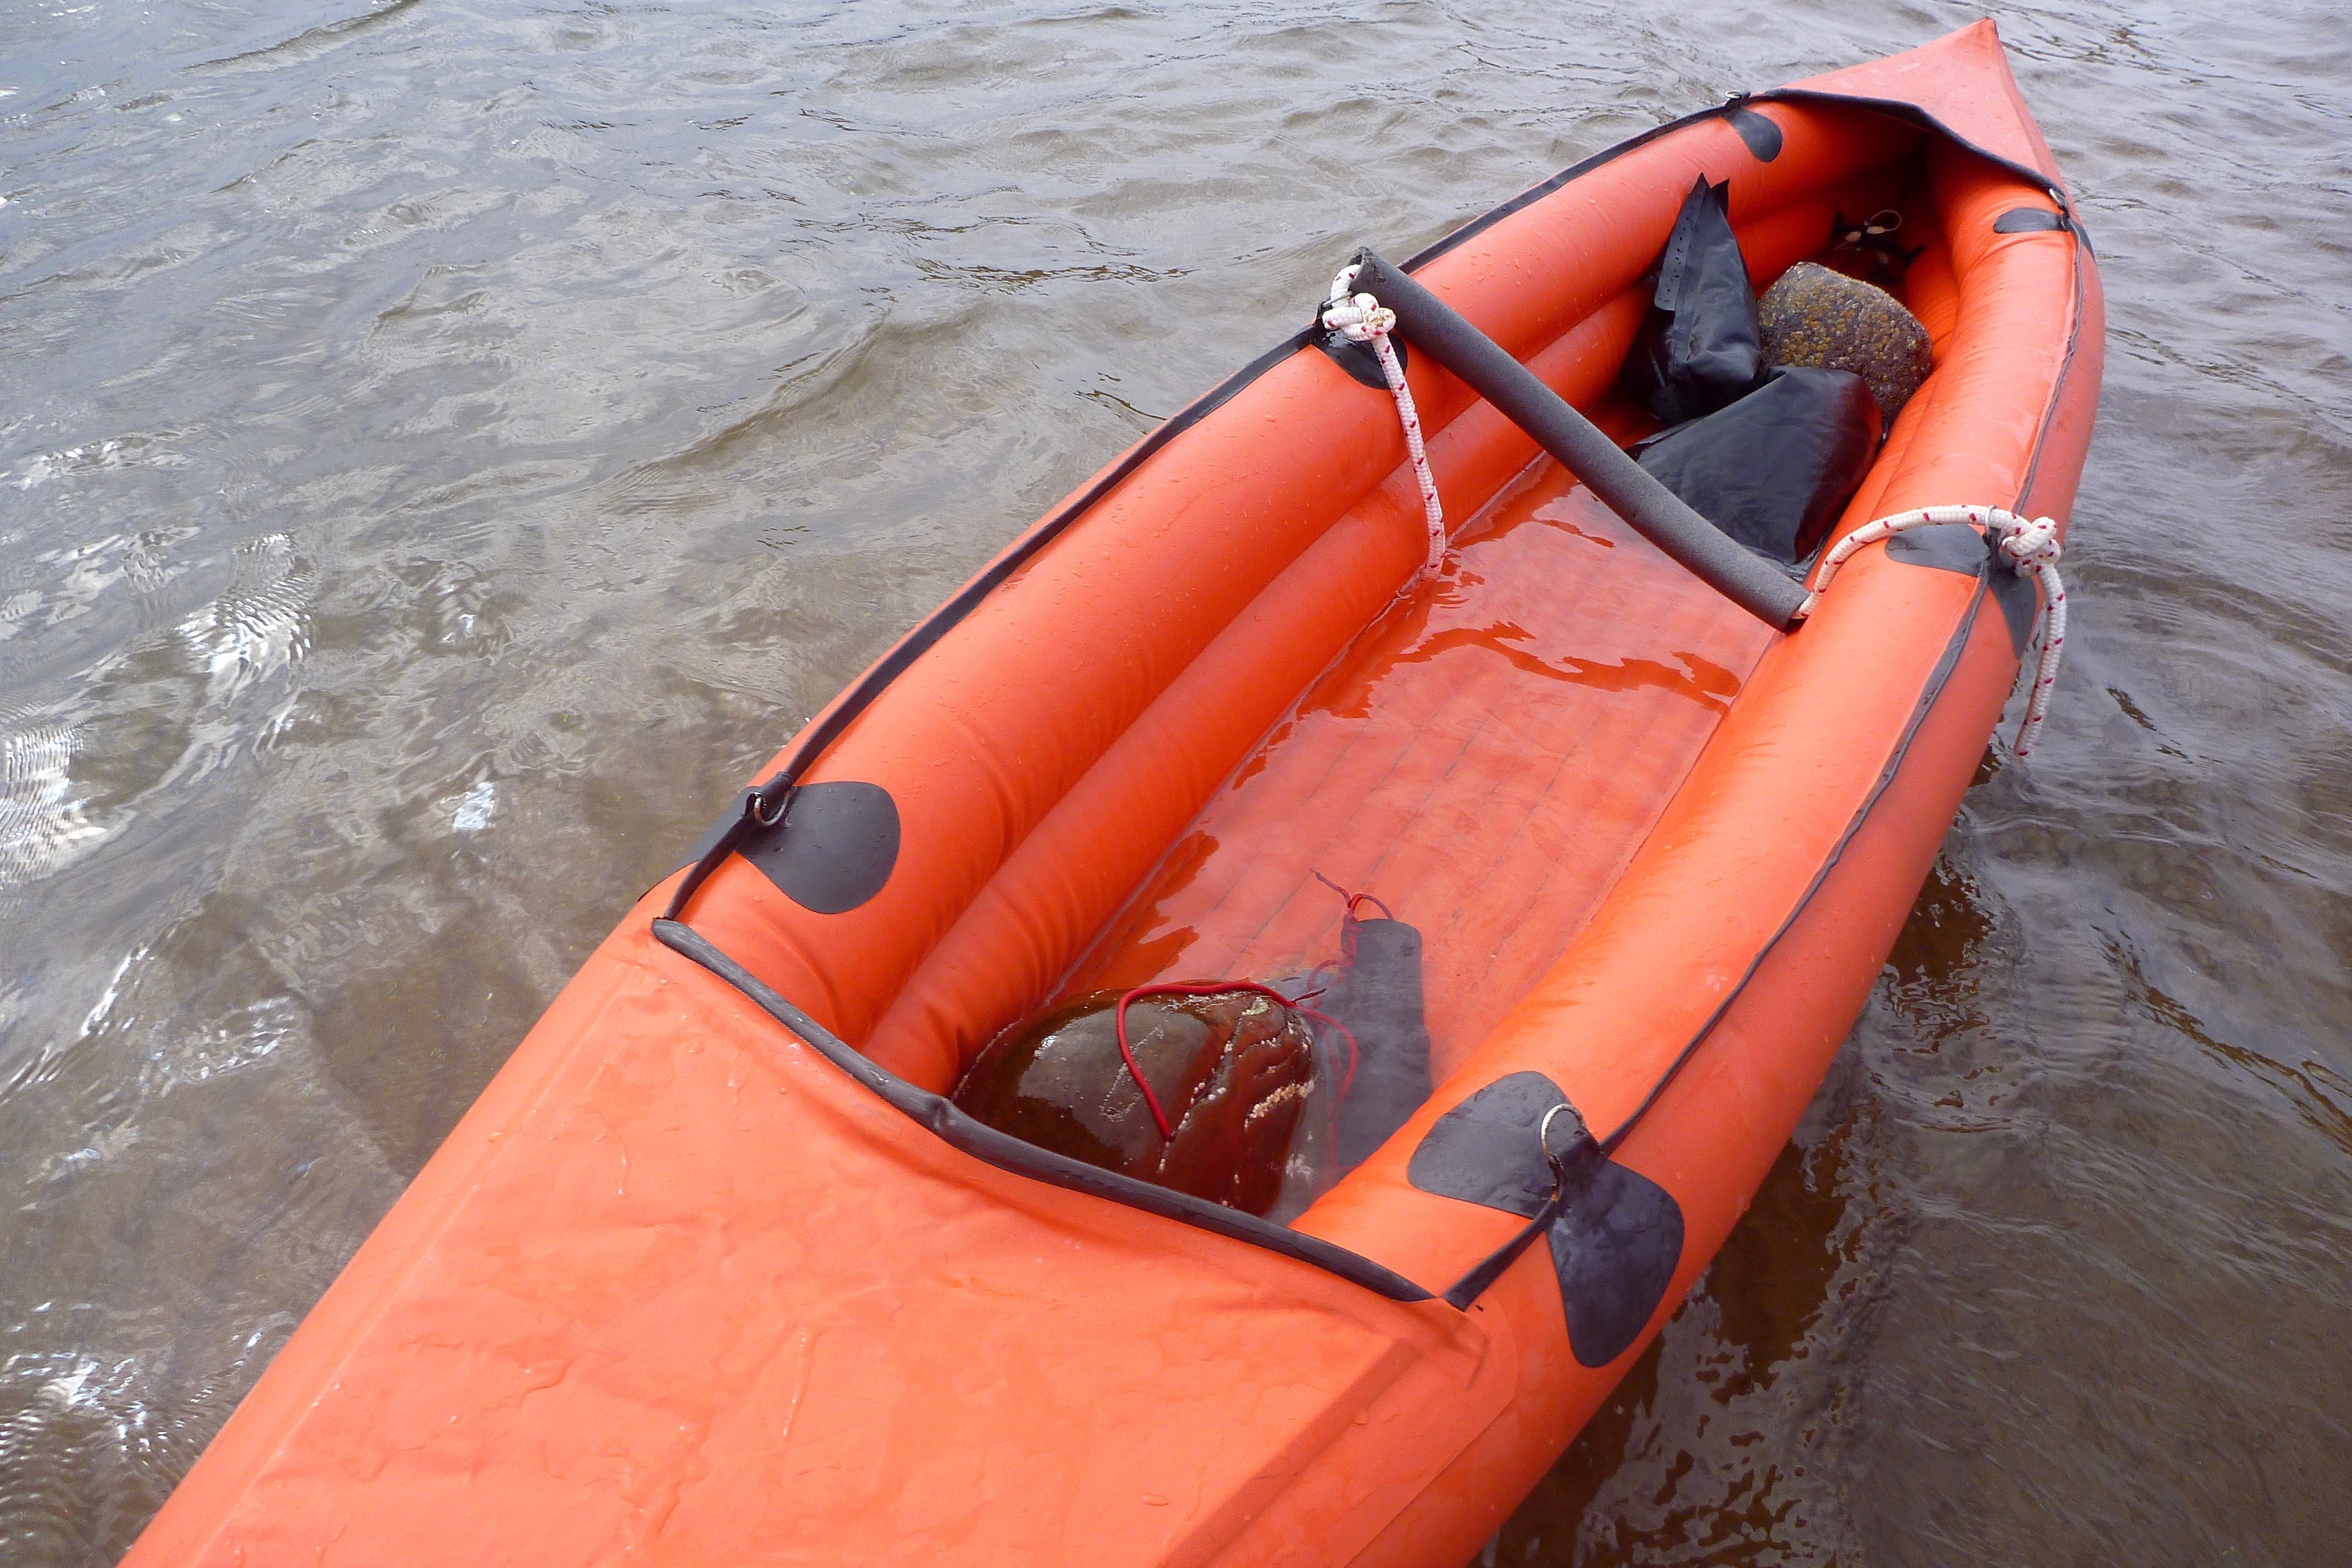
I put it back in the barn with my other restoration project for a couple of days. When I came back it was limp but not draped over that cabinet like a wet pizza. I pumped up and it stayed firm enough, though I’ve forgotten how mushy an 0.2 bar IK feels. It reminds me why I seriously took the idea of trying to increase the rigidity of my old Sunny before getting other IKs. At the beach I filled it with water and stones – no obvious leaks, (or so I thought). A testament to 40-year-old hypalon and glue.
Have to say too, once pumped up, for an IK the old trout is not bad looking. I think the discreet upsweep of the bow, that plywood ice breaker and slender twin tubes make it look a lot less of a bloat than some. Sea trials to follow.
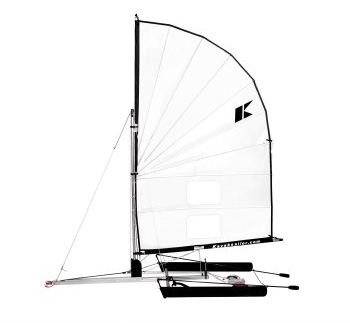
Spring is here, time to sharpen our paddles! While you’re doing that, here’s a Seawave sailing vid with a sail kit (right) from kayaksailor.com. With the lee boards it all looks a bit complicated for me, but perhaps that explains how they manage without a rudder. Notice the hull folding up from 1:40. Don’t know if that’s down to the breakneck speed under sail, or he needs some uprated side chamber PRVs. For more sail posts, see the IK sailing category somewhere on the right.
Tuesday was set to be a scorcher – no less than 30°C predicted in mid-September (in the end over 34°C, the hottest Septemberday for over a century; the new normal). No excuses then to try my first south coast paddle if the winds and tides lined up. It could be my last paddle this year. With bands of chalk cliffs and the Atlantic getting funnelled in, the Sussex coast feels a bit exposed compared to northwest Scotland where I usually sea kayak. With little of interest, it’s not exactly a sea kayaking mecca, even though it’s highly populated. At least if you have a shipwreck, it won’t be far to a road or even a bus and I bet a mobile works everywhere. Wind direction for Tuesday was ESE – an ideal onshore-ish backwind, if a bit breezy (for a lone IK) at 13mph. And by chance the tide was just right too: high at a handy 9am with a moderate 3.5m drop. (good tide times website). In five days time the spring tide would be nearly twice that. Clearly this was shaping into a westbound day. Anyway, that was academic as wind and tide made Newhaven west to Brighton and beyond the way to go. With lots of rail stations, I could go as far as the arms lasted.
I learned an interesting thing about Sussex and Kent tides while planning this run earlier in the summer. For the last two hours of the incoming (eastbound) flow, the tide keeps rising but reverses westbound along the English coast as it backs up at the Straits of Dover and spills back down the sides. This makes a more usual easterly run with the prevailing SW winds a bit tricky (or short) on an incoming tide. The nearer the Straits the more skewed the tides. At Dover it falls for nearly 8 hours, but fills in less than five. At Brighton, where the Channel is four times wider, ebb and flow are equal but you still get that 2-3 hour backwash at the end of a high.
The Newhaven train took me over and along the South Downs where sheep nibbled in the early morning sunshine. It sure was nice to get out, even in southeast England which isn’t exactly terra incognita to me. On the steep shingle beach below Newhaven fort, the tide was topping out as I topped off the Seawave and the Dieppe ferry backed out of the harbour. These shingle beaches have steep ramps bashed out by stormy seas. At high tides this terracing kicks up the surf and means wading in can quickly put you out of your depth, as I recall well from childhood holidays on the Southeast’s shingle beaches. But probably more by chance, I timed my put-in on a lull, hopped in and PLF’d out of the surf zone. As usual, alone on a new shore after a couple of months off, the first few minutes or more required managing an agoraphobic anxiety. I reassured myself the wind was blowing me along- and towards the shore, and the dropping tide would gradually expose beaches below the cliffs if I needed a break. On the beach I’d inadvertently pumped the seat right up, and in trying to deflate it on the water, the annoying sticky twist valve stuck and I was soon sat flat on the floor. Oh well, it will make me more stable if it all gets rough. I’d forgotten my rudder too, but wasn’t too bothered about that. One less thing to concentrate on.
The trouble with backwinds is they give no impression of movement and soon I was dripping like a dewy fern at dawn. As you’d expect out here, the seas were jaunty, with occasional swells rolling by that looked higher than me. But there were no tell-tale whitecaps, the stern wasn’t pushed about, and half an hour in, a long concrete ledge/seawall below Peacehaven cliffs offered a way out if needed. That would have to be in extremis though, as at times the swell slapped hard against the walls and there were only steps to get out.
No need for that yet. We were moving along probably faster than I felt. I tried to keep away from the shore so as not to get caught by a rogue swell – I saw one break up ahead way off the shore and steered well behind that point. There seemed to be no pattern to these choppier episodes. Was it a set coming through or just seabed related? Later, looking at an OS map and what the sat map below shows too, a wave-cut sub-sea platform of the soft chalky cliffs extends quite far out. Where the jade green sea turns blue is where it drops off? Who knows, perhaps it’s just the sea, but it created an uneven rhythm considering the linear nature of the paddle. Another thing I noticed was that I drifted out to sea if I didn’t concentrate. It was probably the tide which not only ebbs westwards but goes out too. Hence the well-known expression and phenomenon: ‘the tide is going out’. Every once in a while a quick spurt inshore (but not too far inshore) put me right.
A few miles ahead I could see the whitewashed conurbation of Brighton, but without a seatbase the old backside was now beginning to feel the strain. I passed by a couple of serious-looking sea swimmers heading upwind, then put in between some groynes at Saltdean, where another cliff-protecting concrete walkway ran all the way to Brighton; a fun cycle or hoverboard, I dare say. I timed my landing well enough, but after pumping the seat and a rest, re-entry required flipping the swamped boat a couple of times. Probably because getting back out between the surf can’t be done as briskly as coming in.
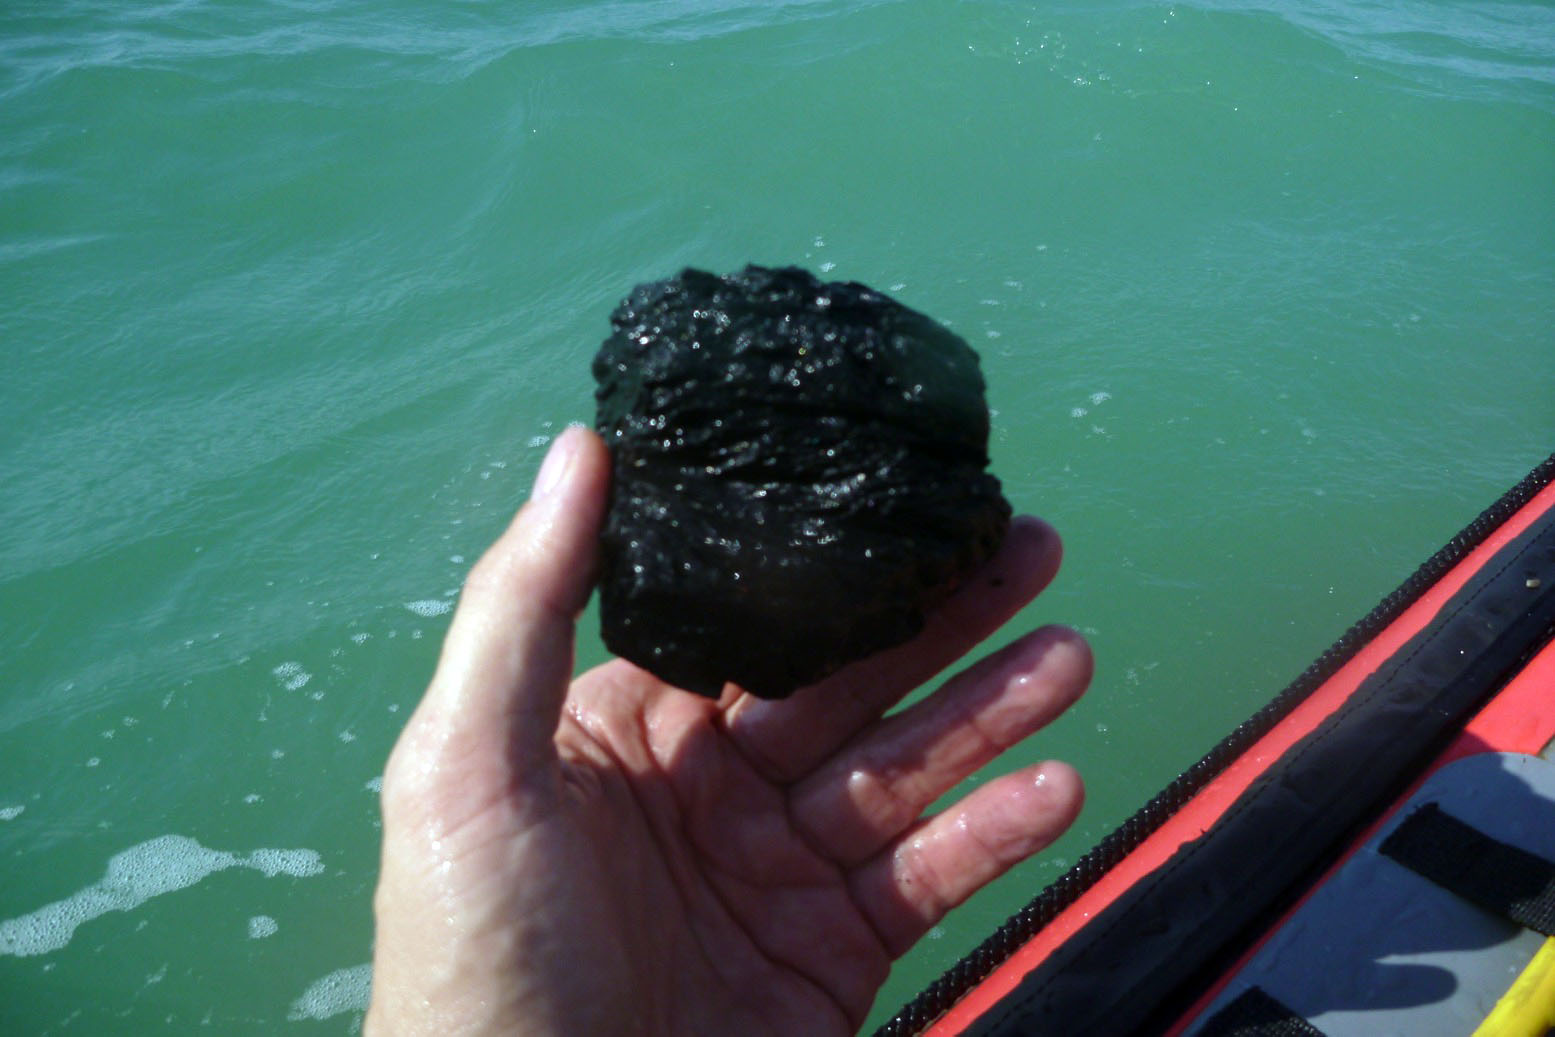
Next obstacle: getting round Brighton marina where the seas really felt quite lively. The southeasterly swell was bouncing off the marina walls like Brighton revellers on legal highs. Nothing for it but to PLF; at least the wind was helping. Round the back of the breakwater all was calm, bar the odd oversized swell. I found a piece of coal and a child’s wet shoe. It was a good omen: follow the shoe!
Up ahead lay Brighton pier and the effort and early tension of only a couple of hours was starting to show. I hacked away towards the pier, then decided I must pass underneath it with my new shoe if I was to reach salvation. SUPers were gliding by and wetbikers were gunning about, making a grating, aggressive din. A surfy beach landing was performed ‘with aplomb‘ in front of the basking crowds. I recall an apocryphal American’s view of Brighton Beach ‘Beach? Where’s the saynd? It’s all stones!’. GPS check: ten miles at 4mph average, peak 6.5mph. Quite fast really. Time to pull the plugs.
In case you don’t know, Brighton is an unusually groovy and arsty enclave by English south coast standards; ‘London by Sea’ some call it. I met up with a young entrepreneur who was hoping to start-up an innovative coffee-by-drone delivery service. So far the response had been excellent and the odd sunbather who’d got a scalding espresso shower merely thought it was an amusing prank. If coffee-by-drone could work anywhere in the UK, Brighton would be the place. Apparently he’s idea is on an upcoming Dragon’s Den.
As for the paddle. It’s good to get a salty tan while exercising, but the run was as ordinary as I expected, not like the wilds of the northwest or even the rural southwest, and without much intriguing geographic detail to explore. I bet looking down on the passing Seawave from the clifftops was a lot more alluring.
West beyond Brighton it’s built up pretty much all the way to Selsey Bill before the Solent. In the other direction Cuckmere Haven around the much bigger cliffs of Seven Sisters and Beachy Head to Eastbourne pier (8 miles) would be a good one on a calm day. You can’t get lost – just follow the shoe.
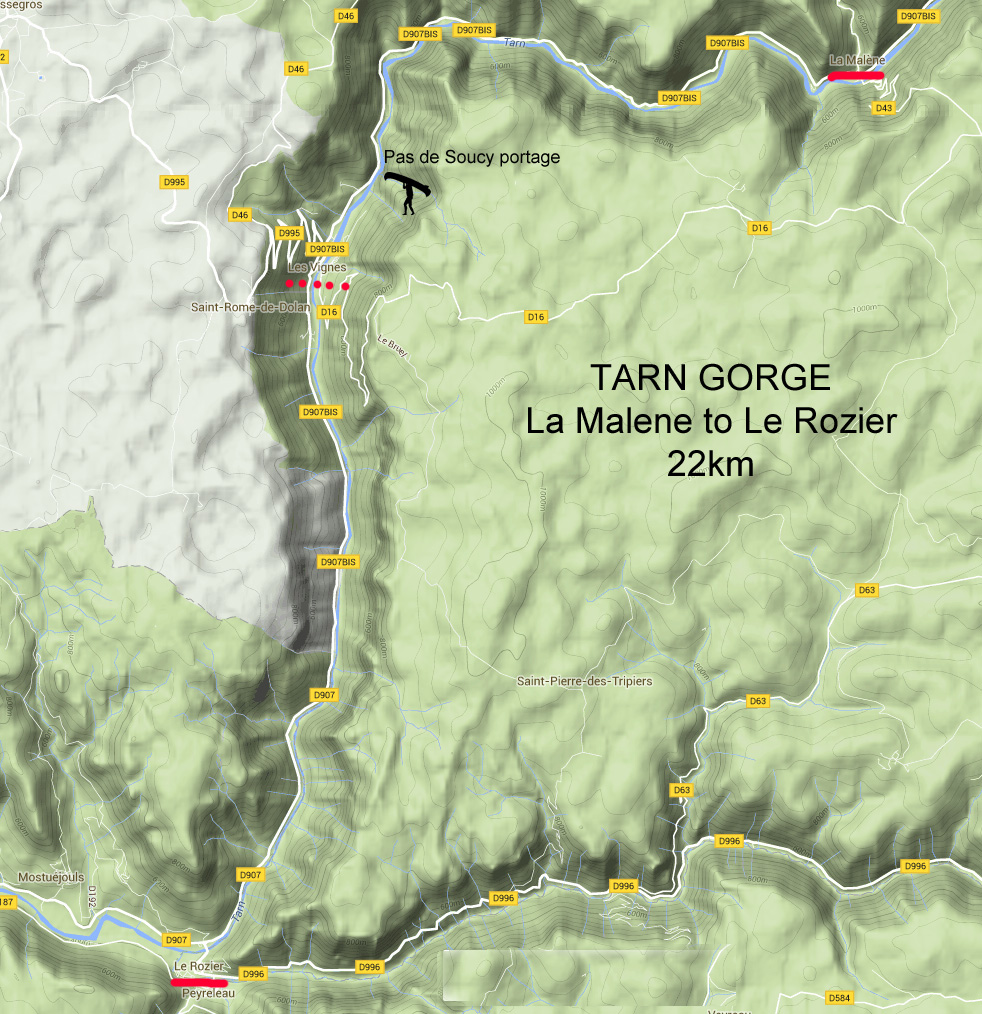
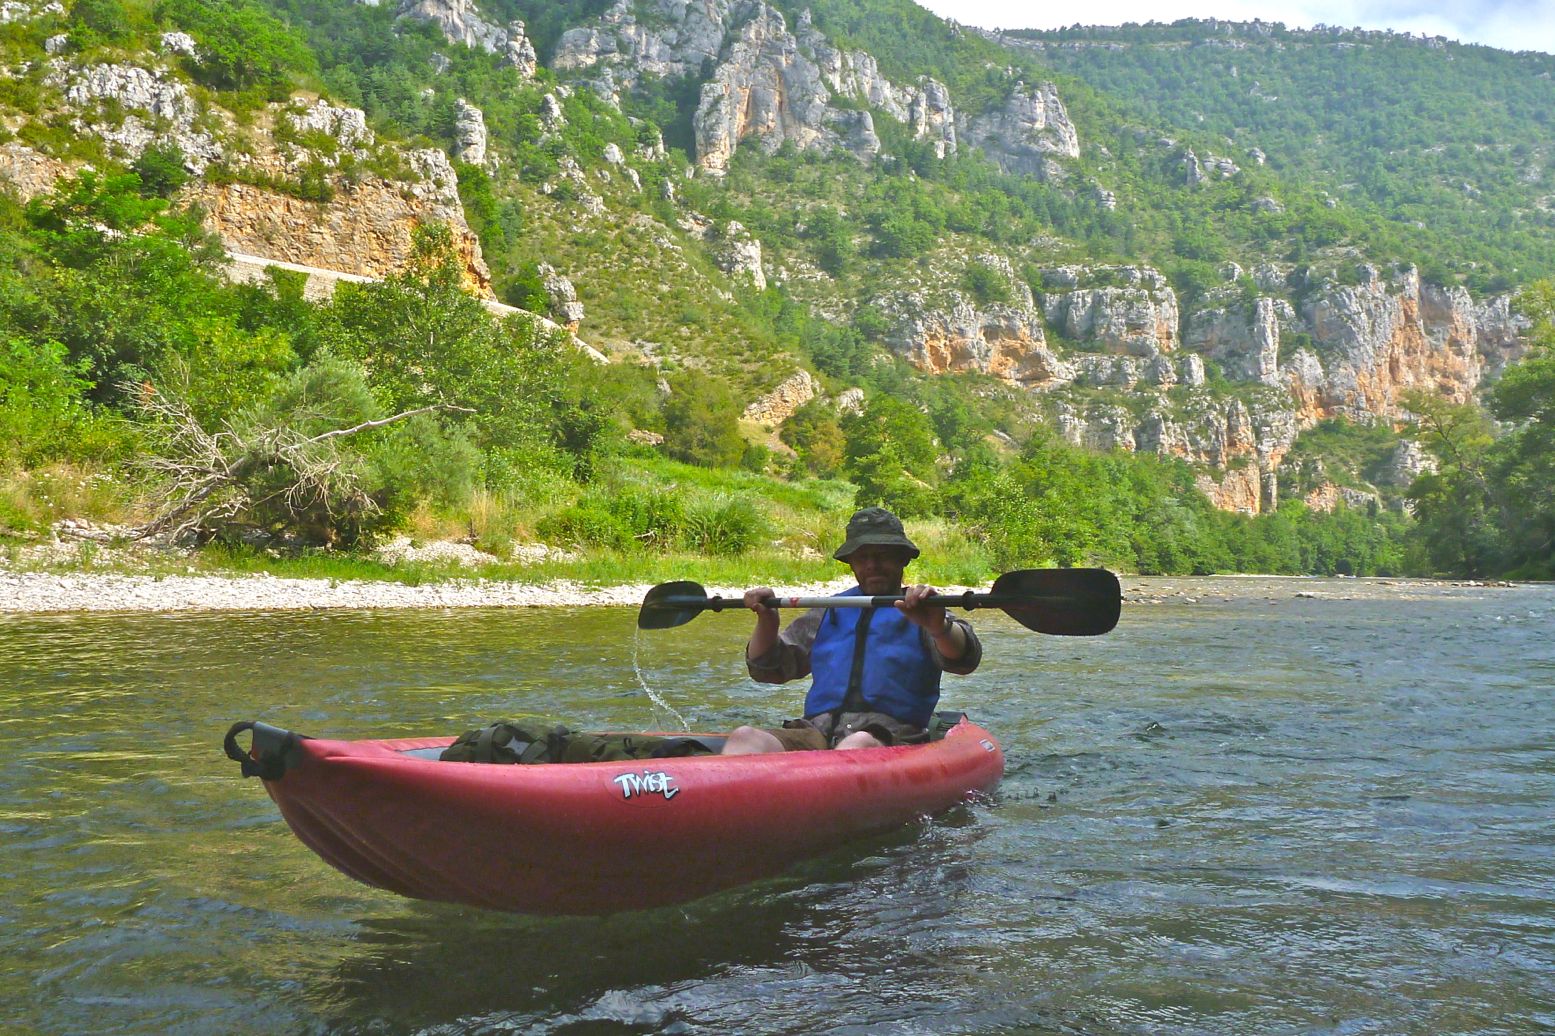
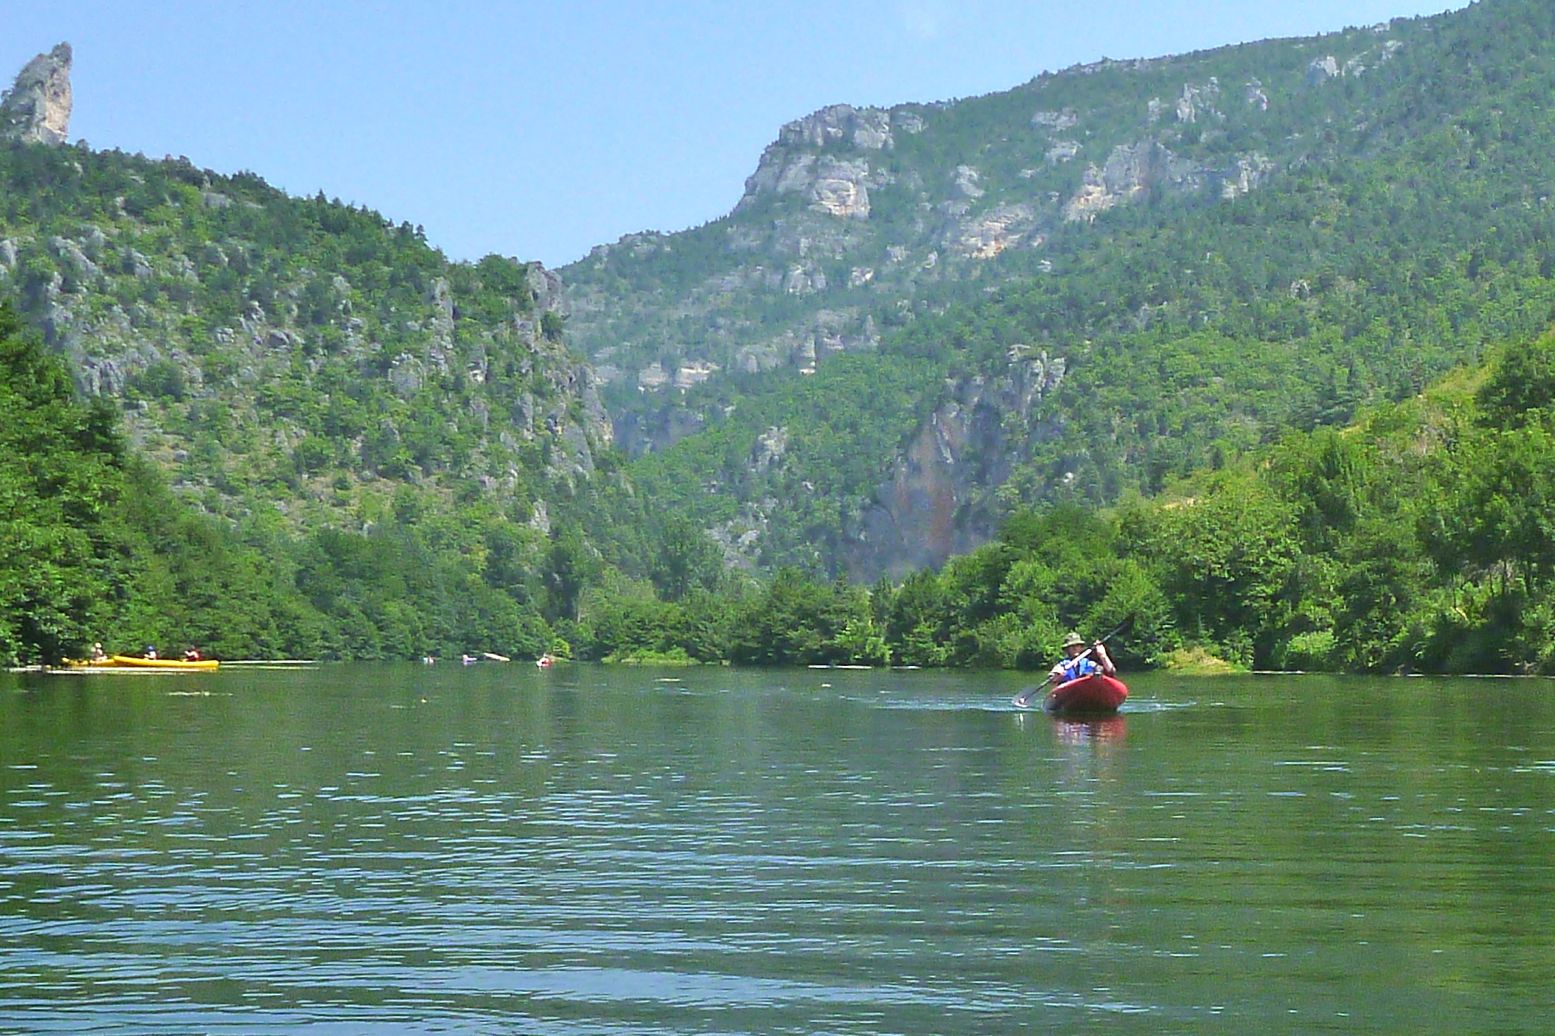
On the way back from some riding in the Pyrenees I persuaded my lift that a day’s paddling along southern France’s famous Tarn Gorge would be a good use of our time. The 22 kms between La Malene and Le Rozier via Les Vignes (see map, left) is about as good a day in the gorge as you’ll get. We last did the full 75km from Florac to Le Cresse in 2007 with a Solar and the Sunny and had a great time as near total newbs. Since this trip I re-did it the full 86km from Florac to Millau in my Alpacka.
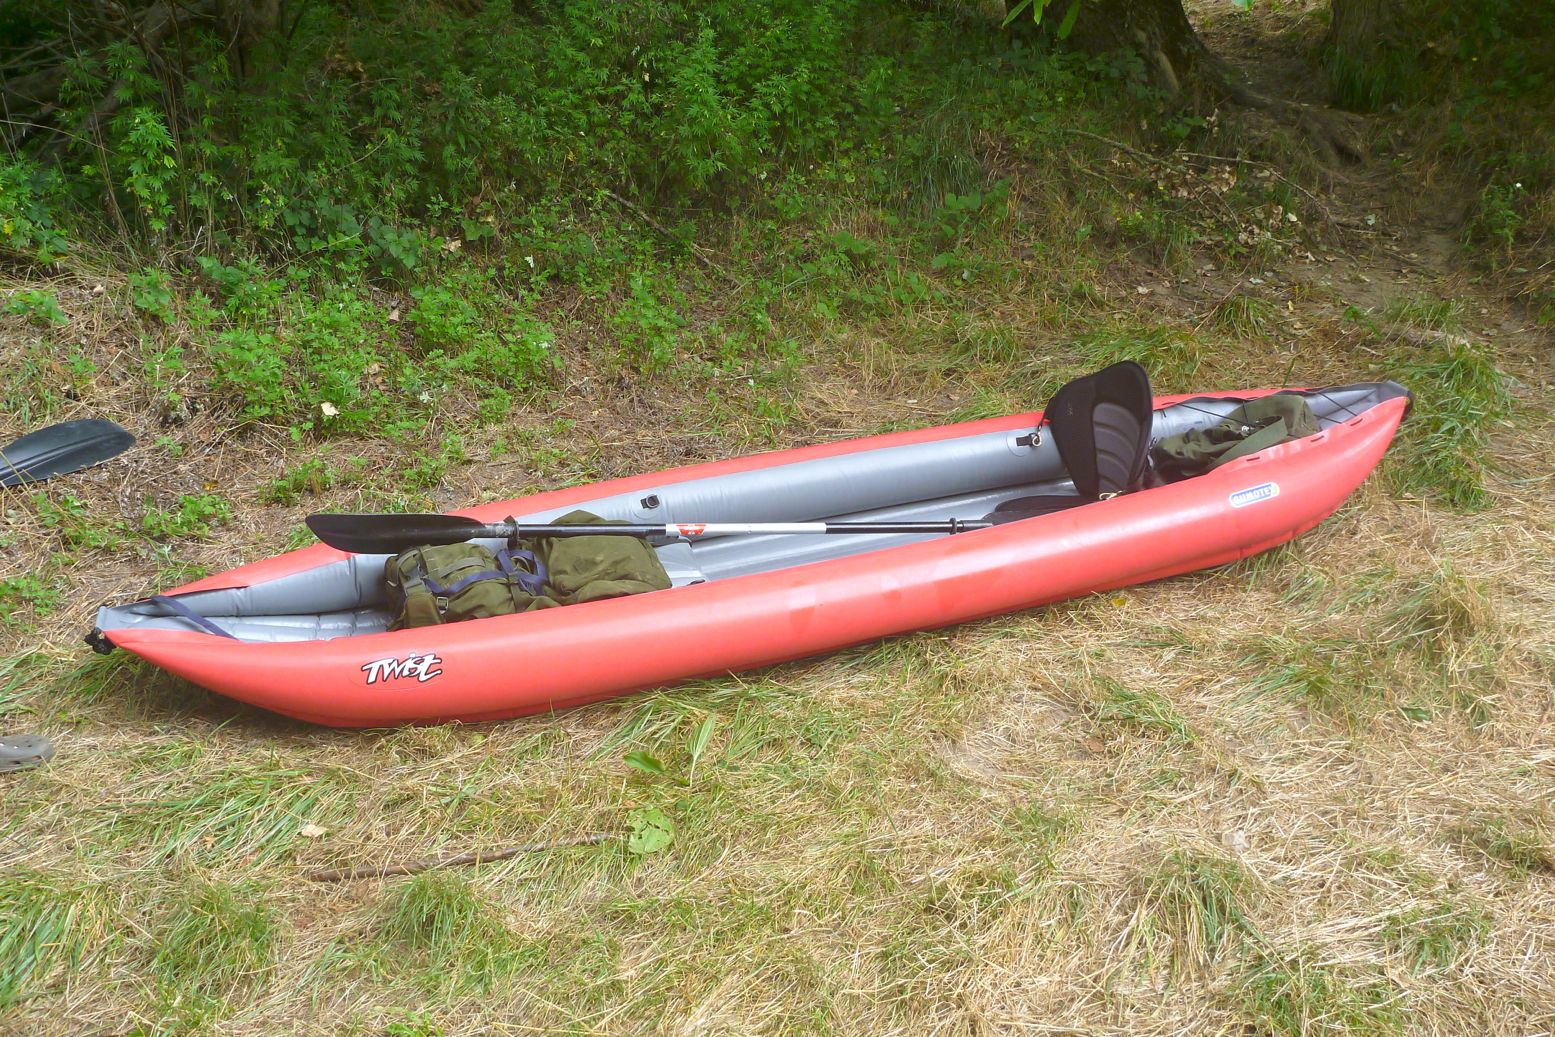
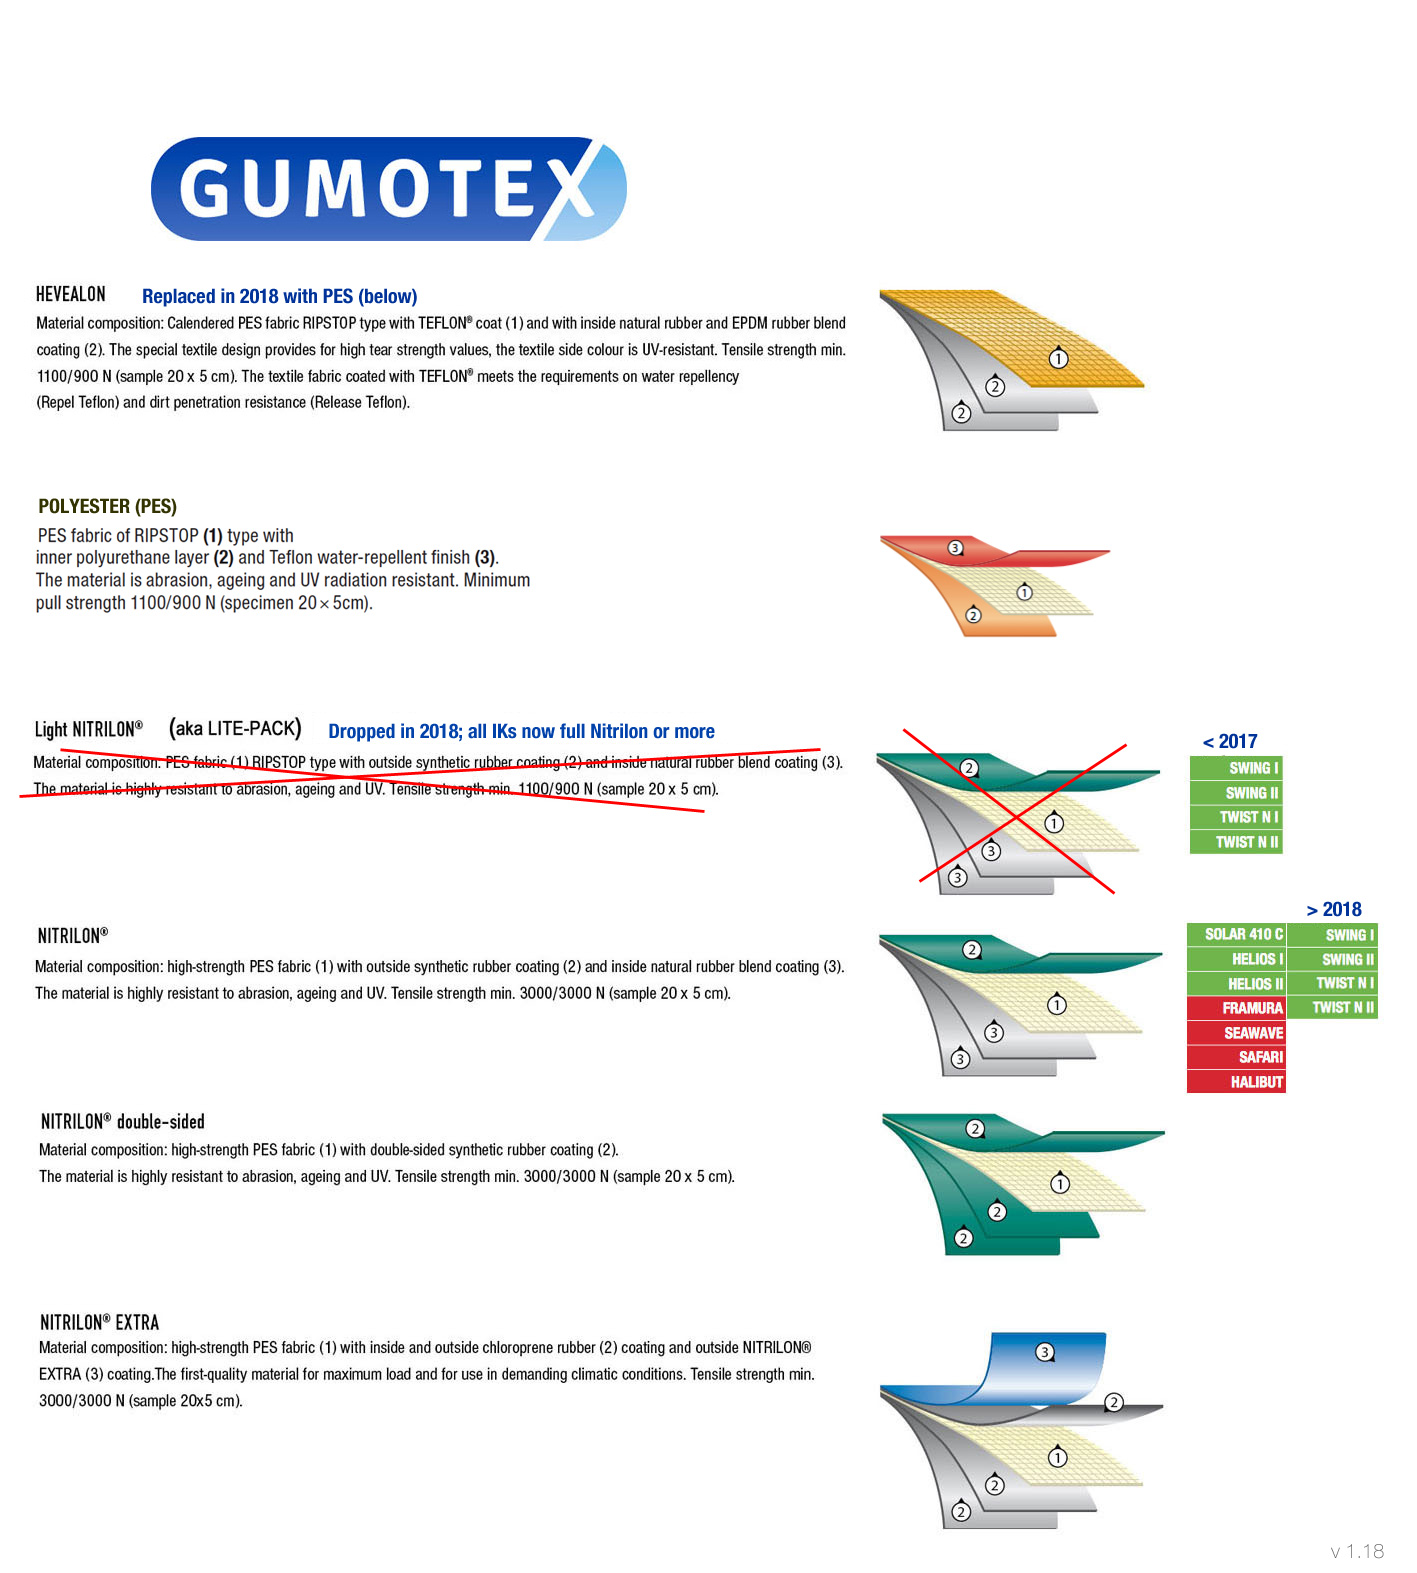
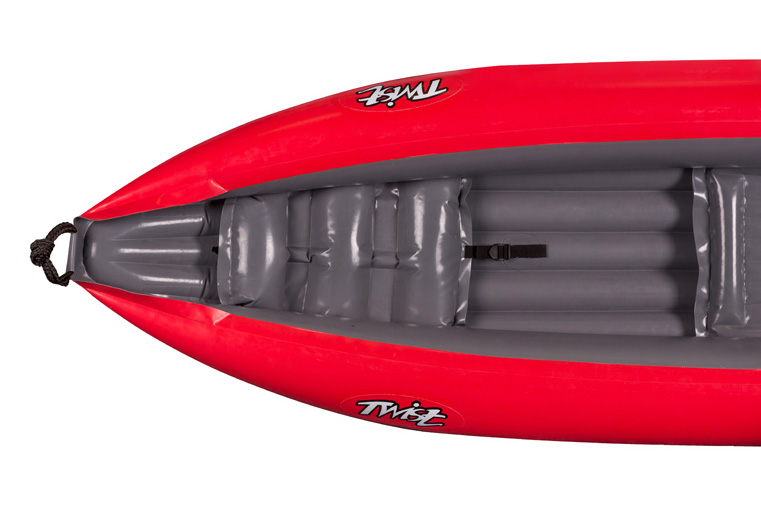
On this occasion IKing chum Robin was baptising his new Gumotex Twist 2, an entry-level IK which in the MkII version has gone back to shiny Nitrilon Light inside and out. I do read here that one unhappy customer found out it was ‘70% less strong and only 30% lighter’ than the regular Nitrilon as used on Seawaves, 410C, Helios and so on. His boat flipped in the wind and punctured on a stick which does sound like a gale combined with an exceedingly sharp stick. But then again, one time Robin lent his Twist to a pal who managed to catch some spike under a jetty and blow a half-metre rip in the side.
According to the Gumotex graphic (left) it appears like Nitrilon Light uses the same layering as the Nitrilon in the higher spec Gumboats, but due to a lower-strength fabric core, Nitrilon Lighthas about a third of the tensile strength. As a reminder the T2 is 3.6m long, a generous and stable 83cm wide and weighs 11kg (2kg more than the old model). Payload is said to be 180kg. Robin has the original Lite Pack Twists but found they weren’t so practical or robust, at least not on the submerged light industrial detritus found in his neighbourhood. However, Nitrilon Lite was dropped from the Gumotex lineup in 2018 and since then all Twists are made from the same Nitrilon you’ll get in the bigger and pricier Gumoboats. That also means a post-2018 Twist weighs 13kg.
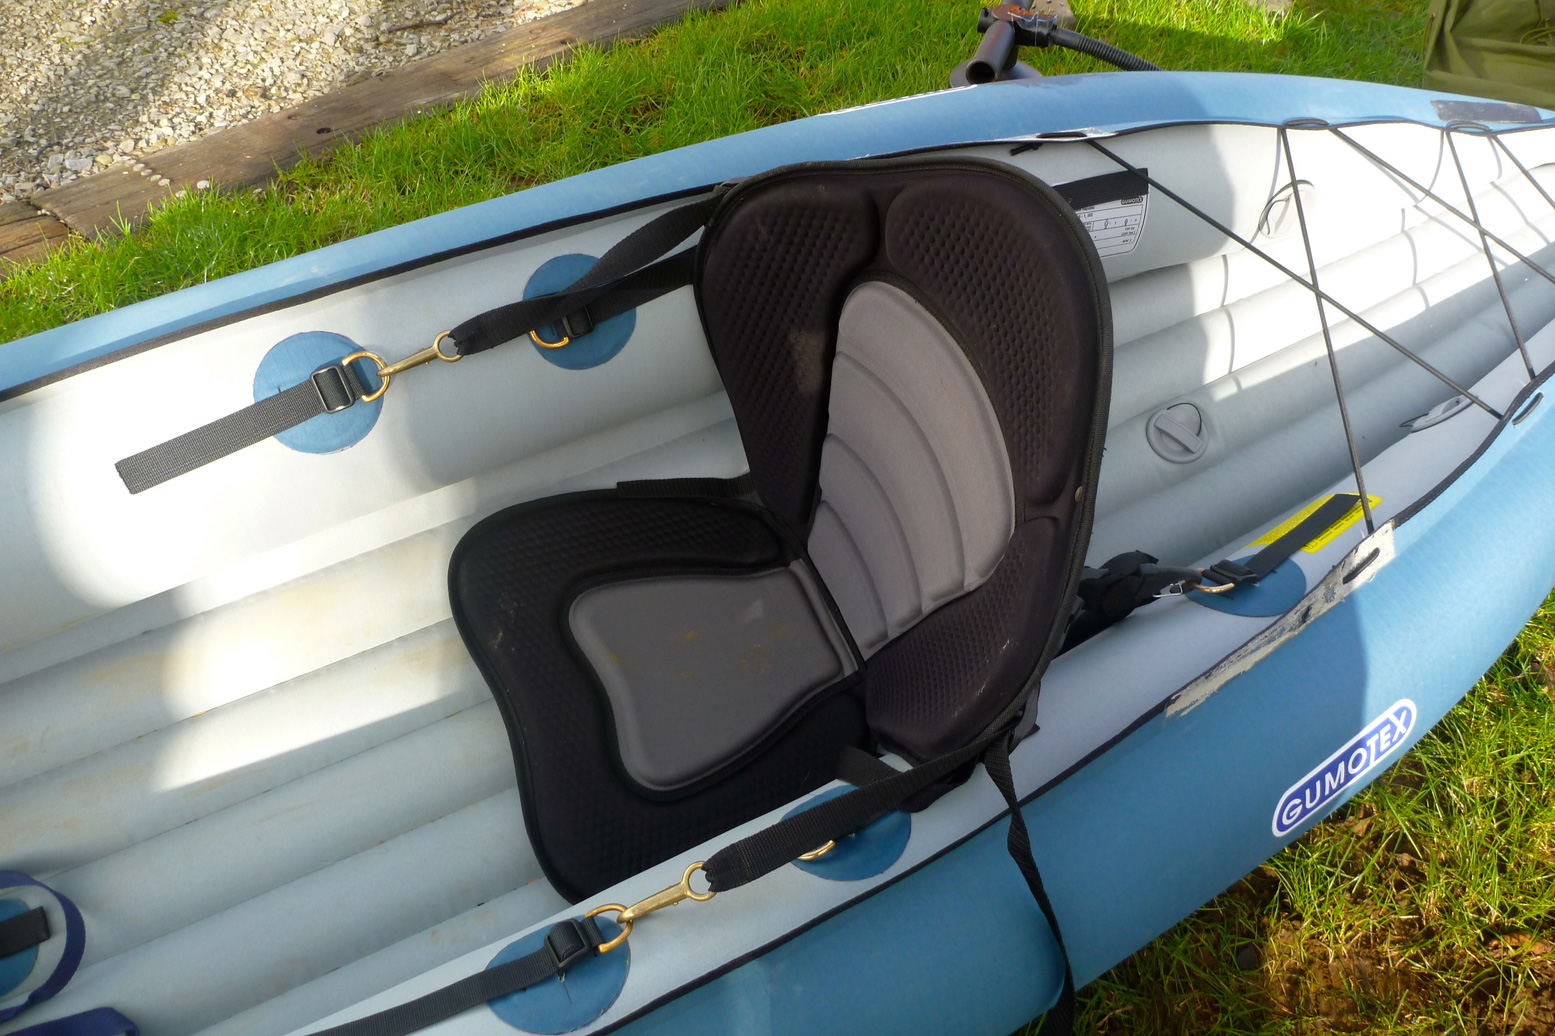
These MkII Twists also have detachable and adjustable seats – a big improvement (or return to former practices) because it means they can be easily replaced with something a lot better. There’s nothing wrong with the blow-up seat base but the inflatable back section lacks support. Robin’s fitted some sort of SoT seat pad (above, in his T1). Another improvement on the MkIIs is making the top seam on the side tubes overlapping flat, not just pressed together which maybe simplifies assembly in the factory but looks cheap. There’s a mushy inflatable footrest for the front paddler; the back paddler adjusts their seat to use the back of the front seat as a footrest. And there’s now also a PRV in the floor chamber which the Lite Pack Twists didn’t have. We like PRVs here at IK&P. We even like PRVs all round.
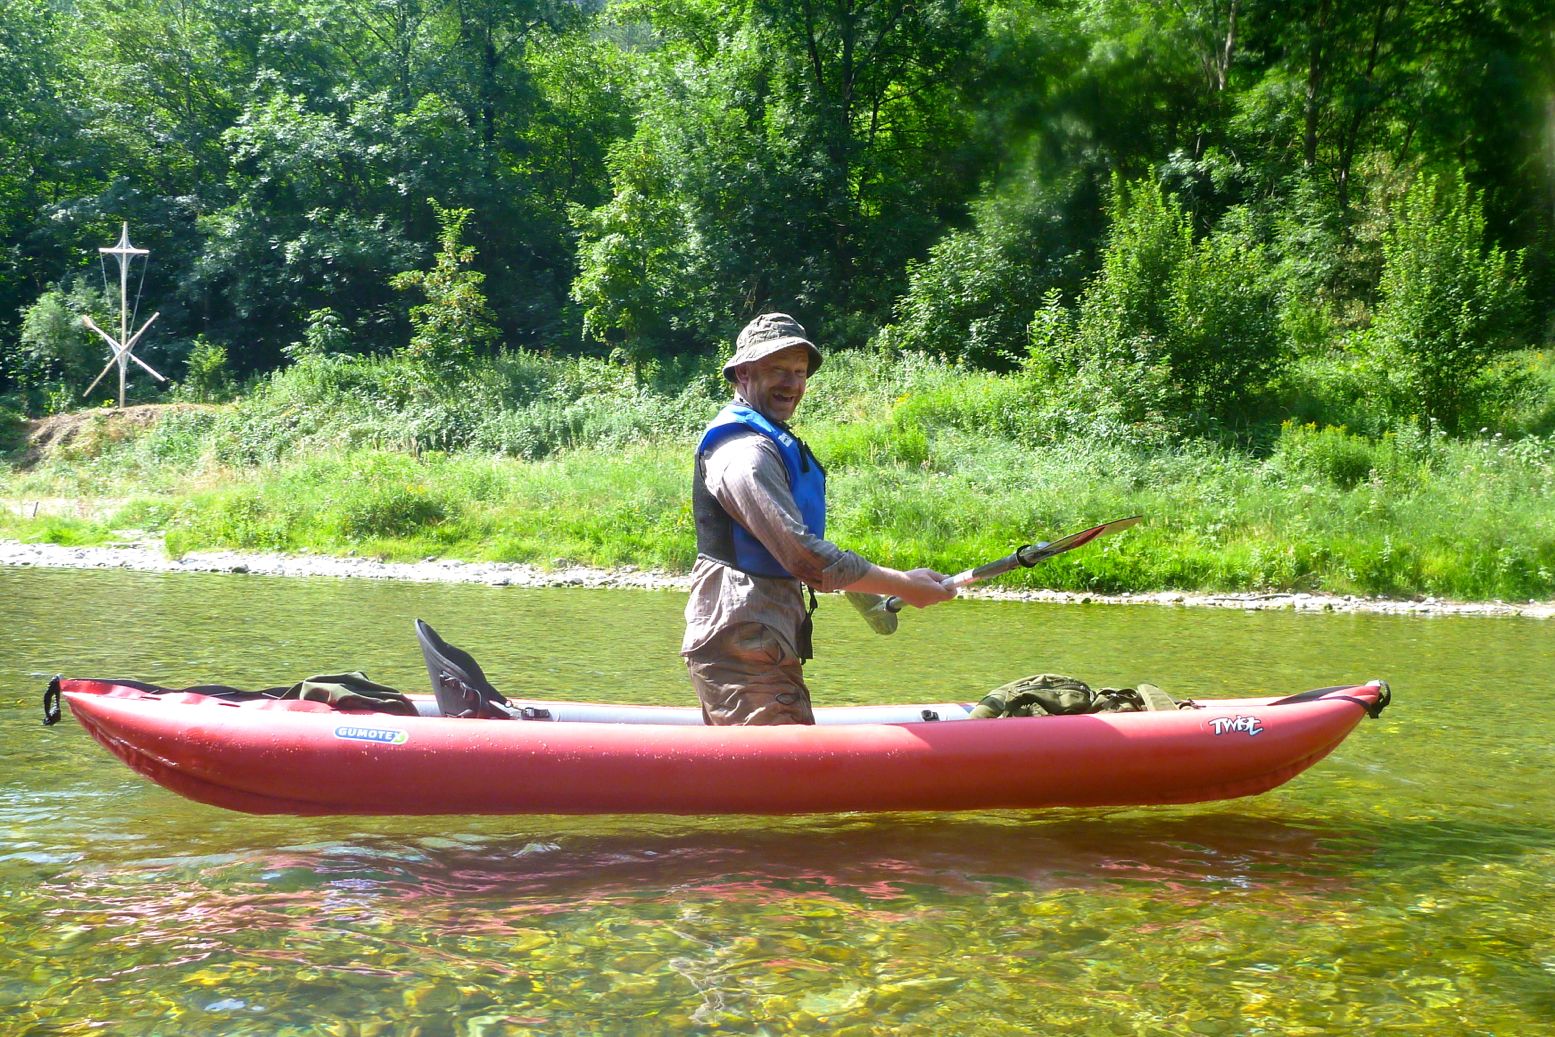
The £350 T2 could actually be a good lightweight alternative to the 60cm longer 410C (later the Solar 2) which at the time costs £200 more (in the UK), as it still has a useful length for a solo touring paddler. Problem is, using just the back seat tips the weight back and the bow up unless there’s a hefty counterbalancing load on the front. The boat paddles OK like this and probably turns quicker, but yawed more than my packraft so seemed slower and just looked wrong. For a while Robin knelt canoe-style which looked more balanced but isn’t a really a sustainable way of paddling without a bench. The post 2018 models have a third pair of D-rings in the middle to position a solo seat in the right place.
We set off from La Malene, me assuming my Alpacka would be a lot slower, but Robin likes to bimble along, waving his bow around. The Tarn was shallow and so his skeg took quite a beating, made worse by his rearward seating prefs. They’re pretty much unbreakable but I’d have removed it, even if the tracking may have suffered.
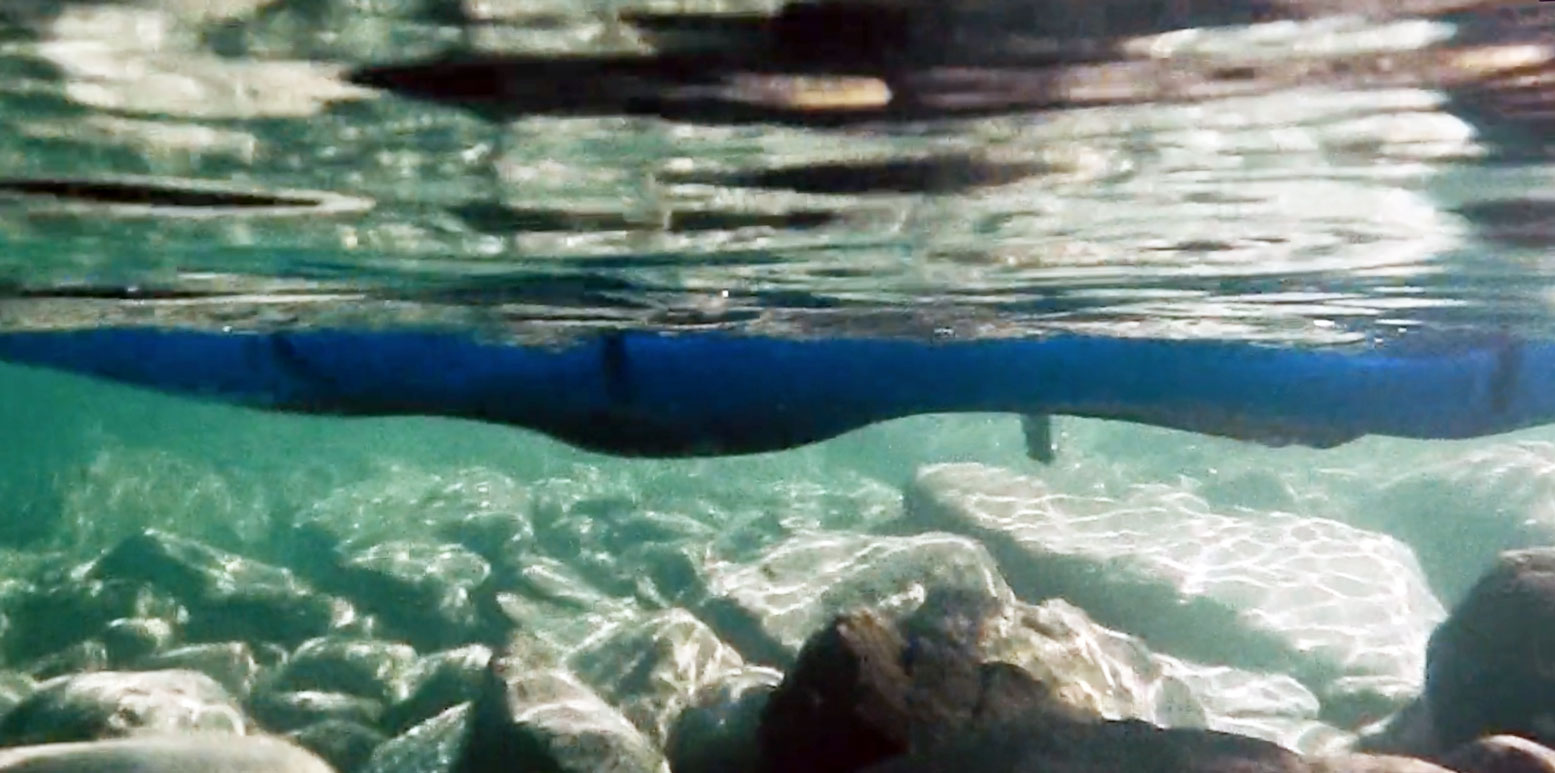
With careful scanning the Alpacka just about scraped through the shallows, with me occasionally resorting to ‘back planking’ where you lift your butt by leaning back on the stern to improve clearance. As you can see right, the backside is the lowest point which is why I glued on a butt patch. On the Twist, Robin could only shove forward or get out and pull. By the end the Twist’s skeg patch was a little torn which takes some doing.
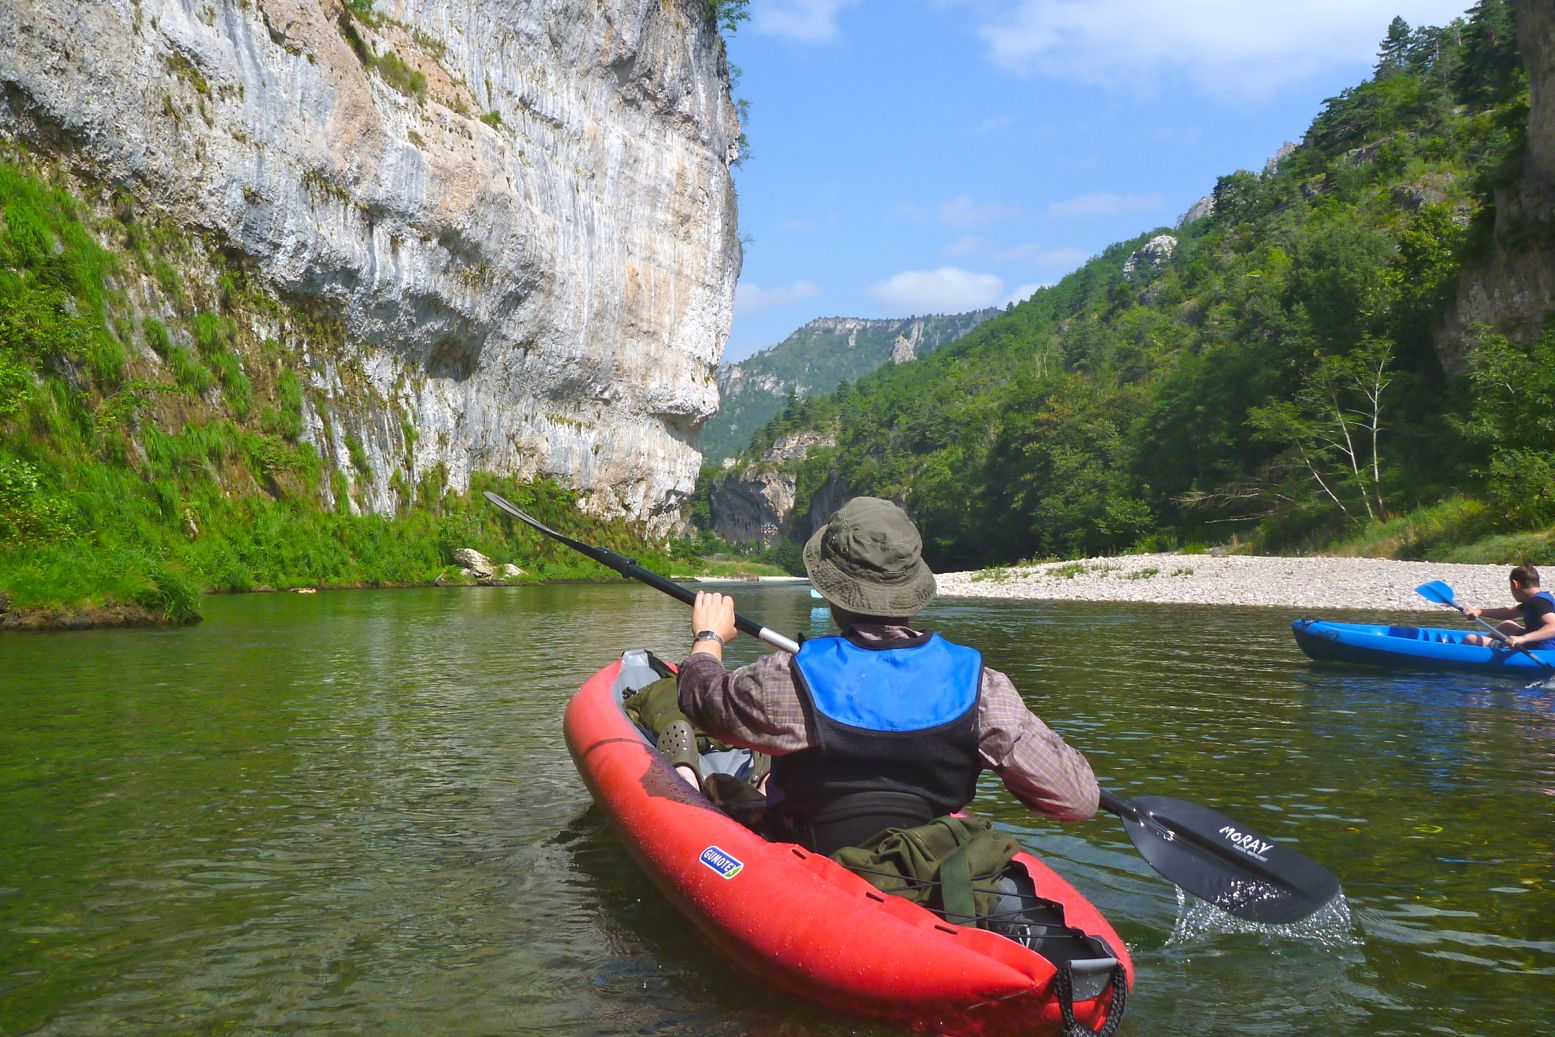
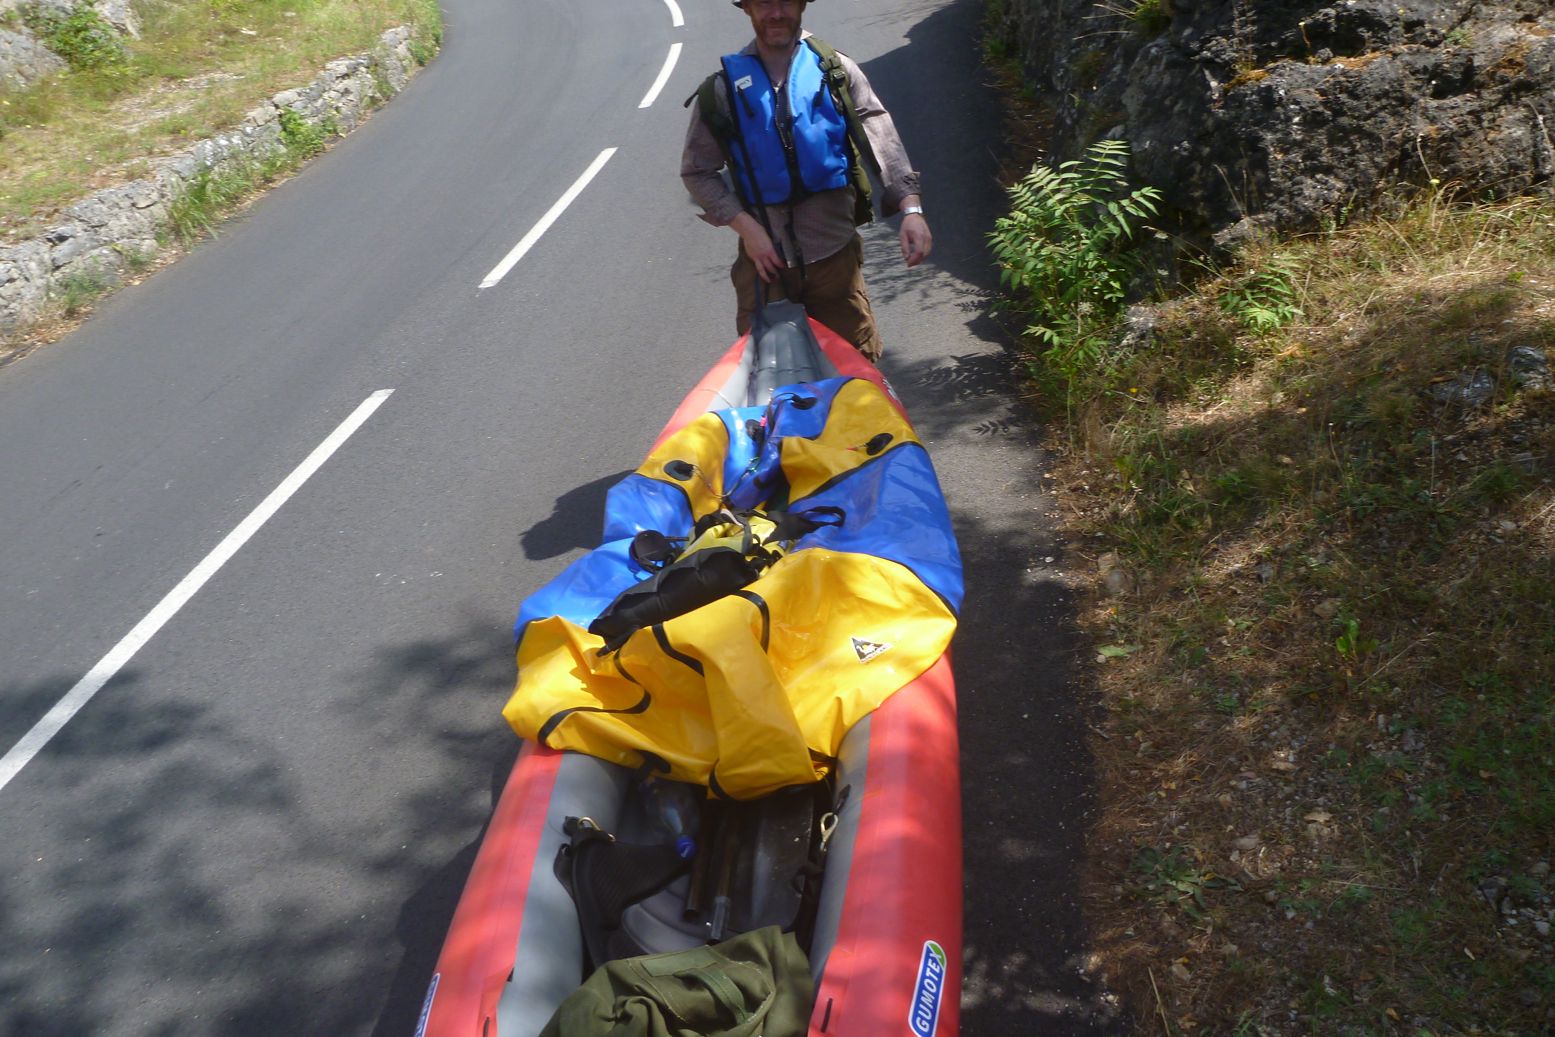
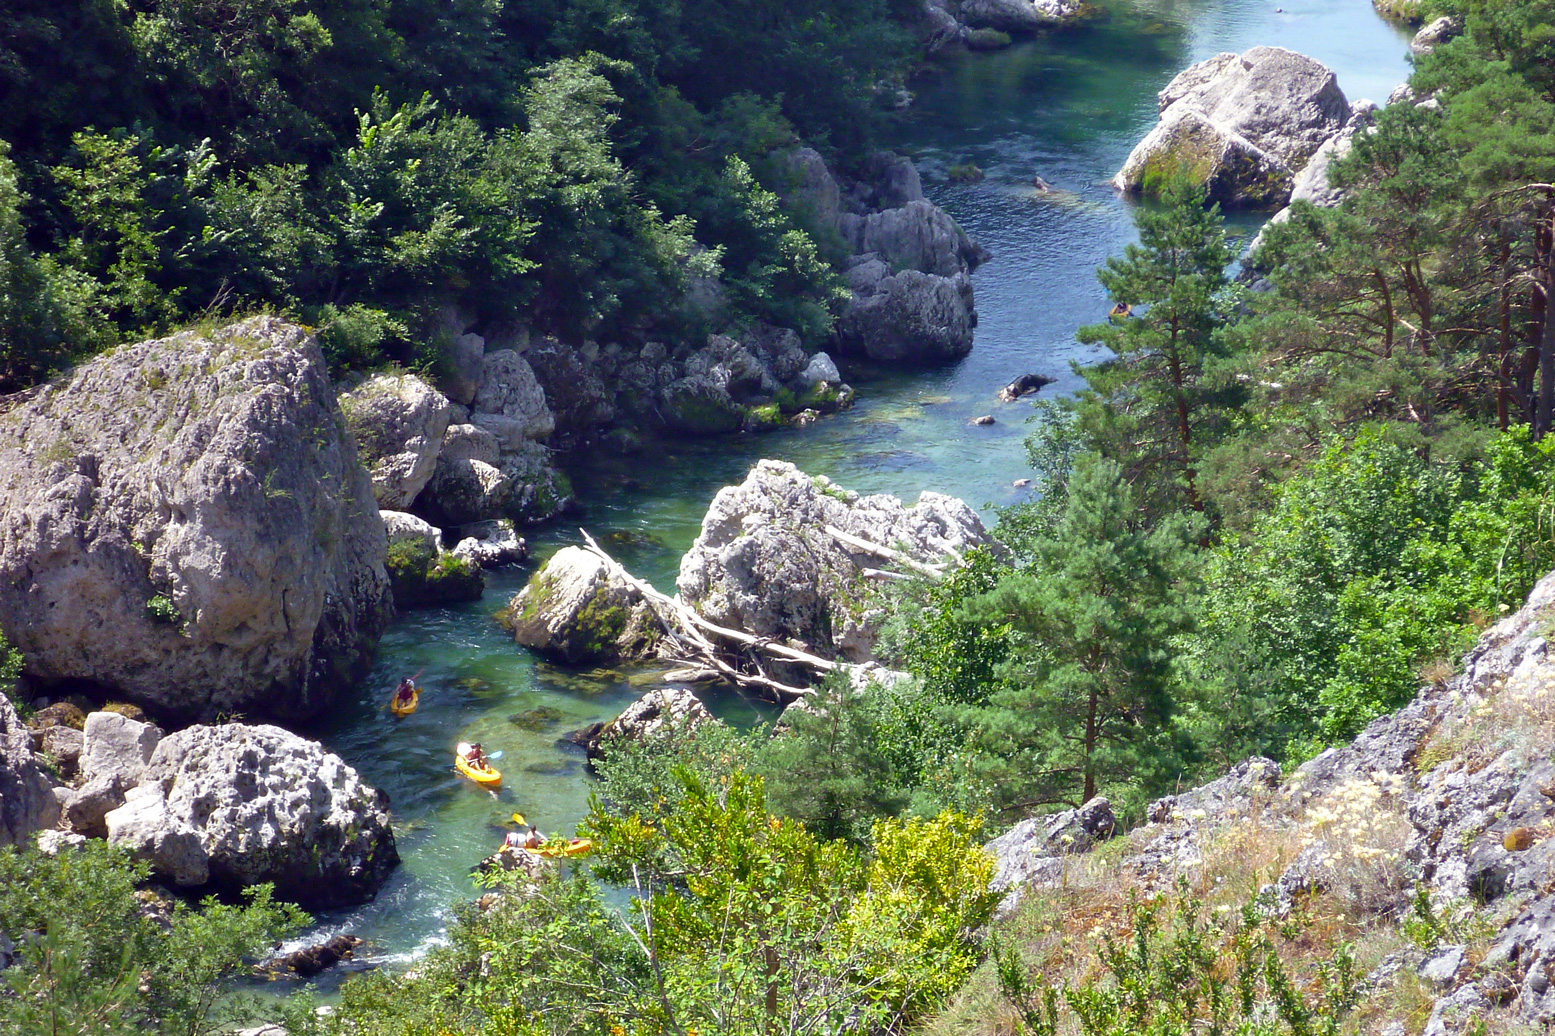
It took 90 minutes to cover the 9km of Grade 1 riffles to the Pas de Soucy where a rockfall blocks the river (left) and makes some very nasty strainers. Midway en portage we nipped up to the lookout for the view then had lunch and put back in for the 12km stage to Le Rozier and the van.
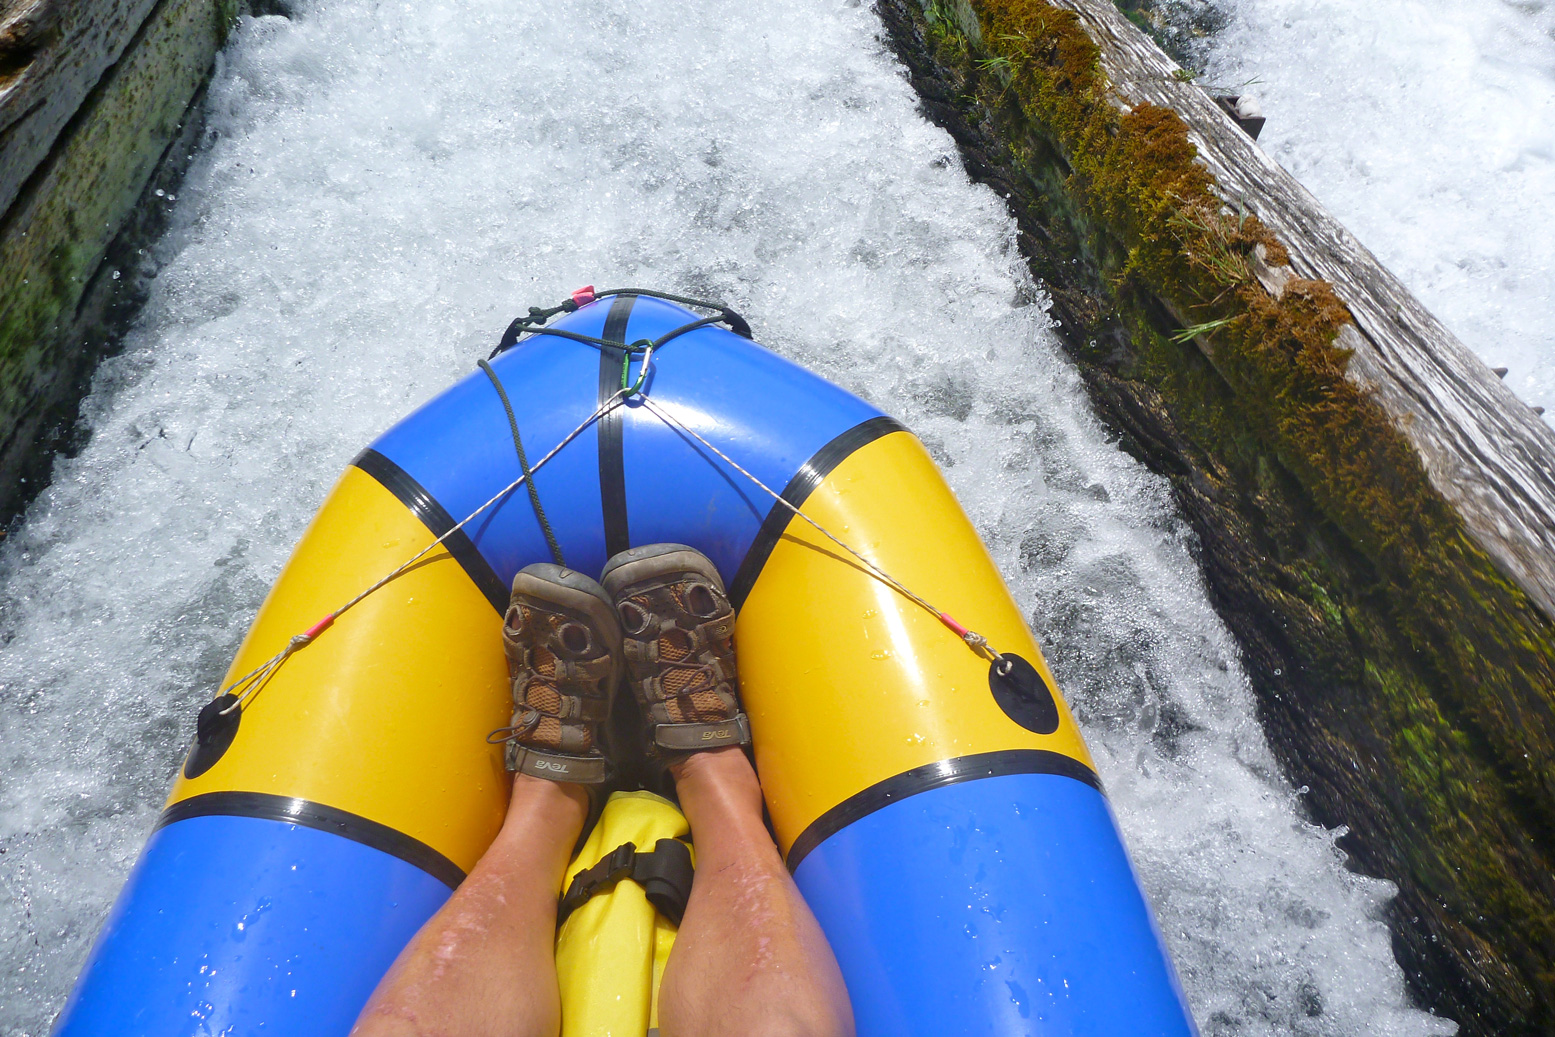
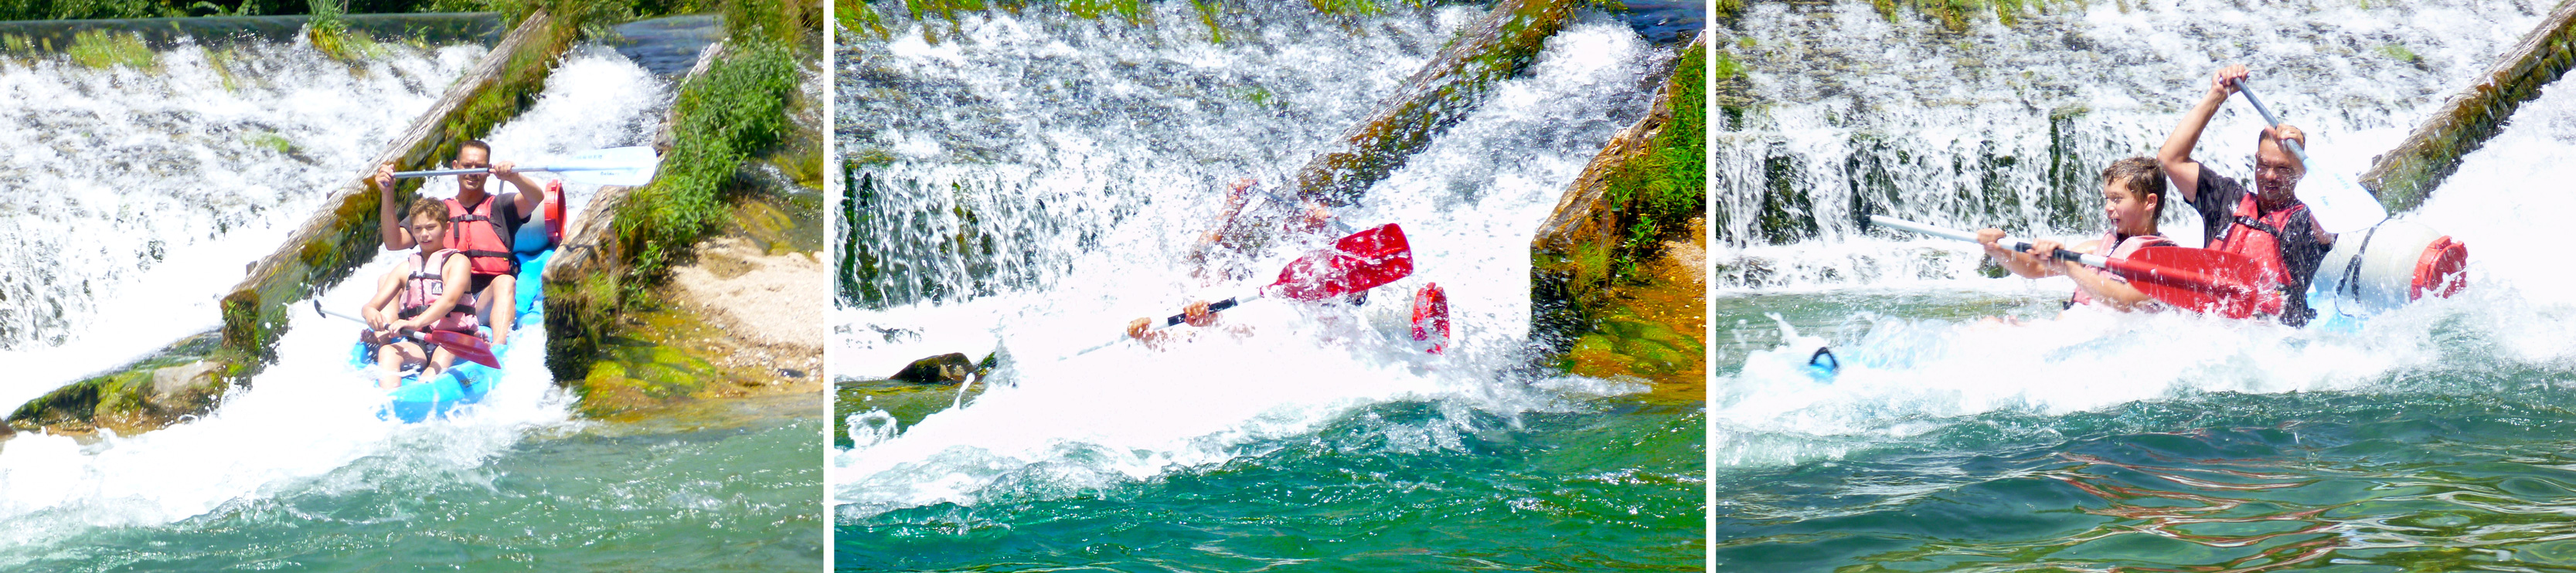
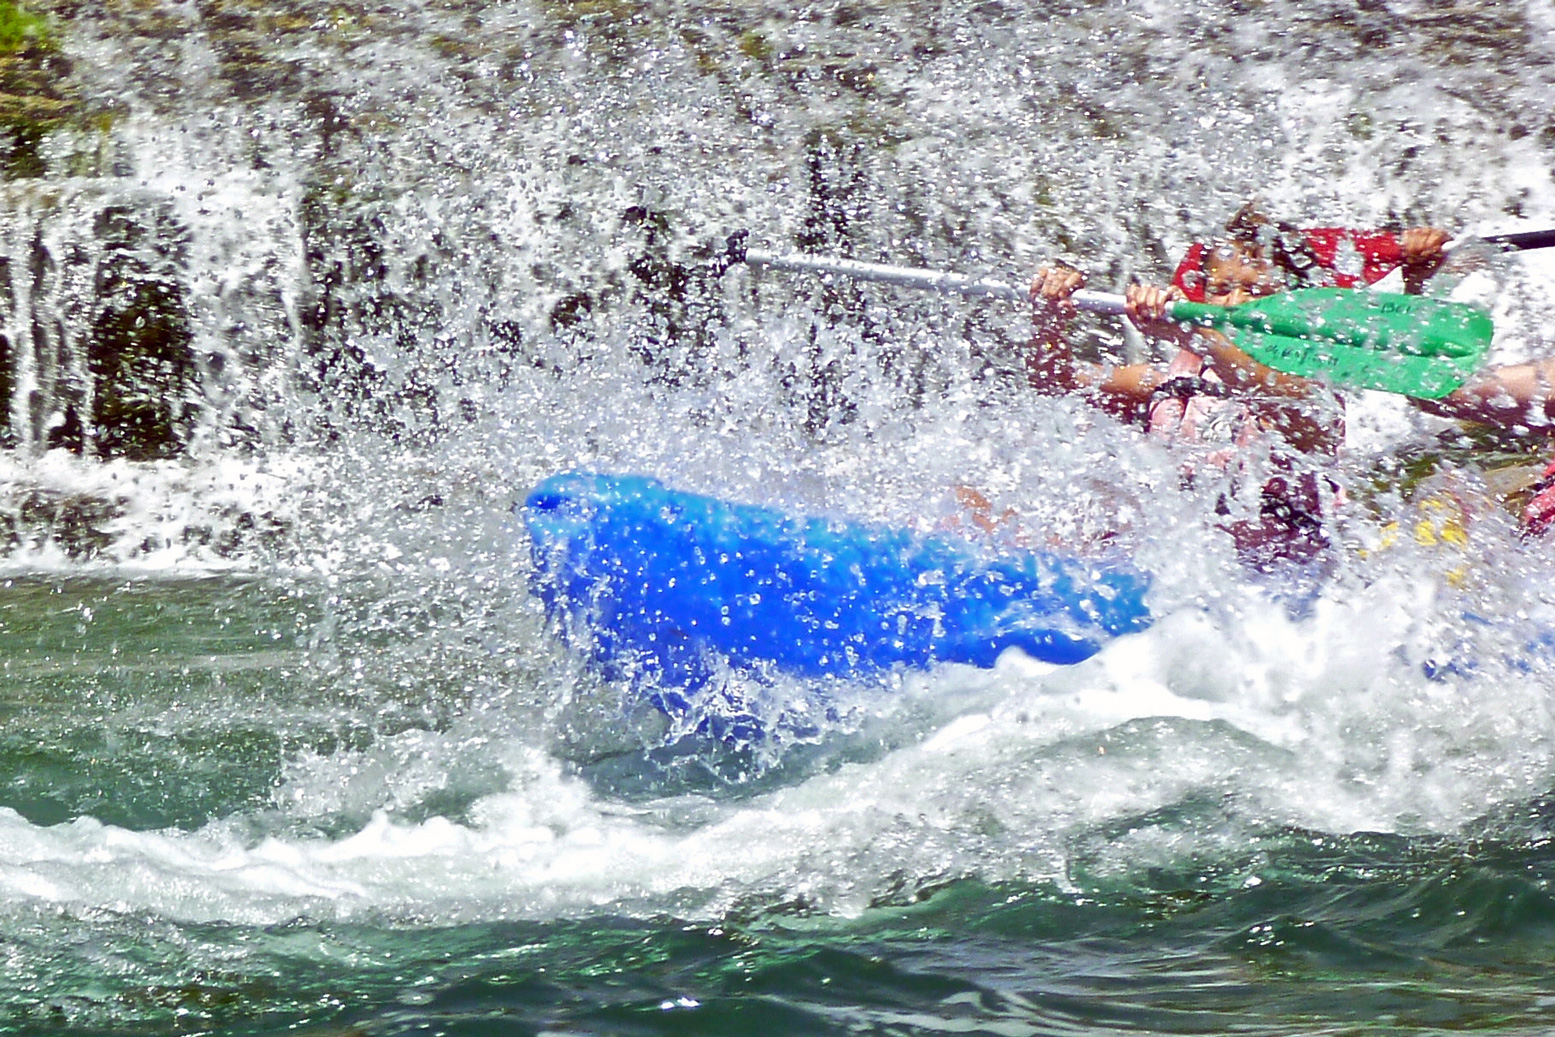
Soon after Pas de Soucy is the chute or glissade at Les Vignes where a typical indestructible plastic rental brick tends to plough in at the bottom, while an airy inflatable surfs over the pile. The missing fourth frame in the pictures below is the blue SoT flipping over. ‘Prends pas le photo!’ No harm done on a 30°C day in sunny France.
This section of the gorge has some juicier rapids, but it’s still nothing that would freak out a first timer; that’s what makes the Tarn such a classic paddle: great scenery, some white water action, easy camping and the fun of splashing about among the flotillas of SoT rentals. There are several campings below the road right by the river, though this time of year they’re all packed out. On arrival we got the last pitch between two noisy young groups at Le Rozier and a free lift next morning up to La Malene from the kayak rental agency next door. There’s also a shuttle bus running up and down the gorge. Read more about southern France paddling here then hop on the TGV with your packboat.
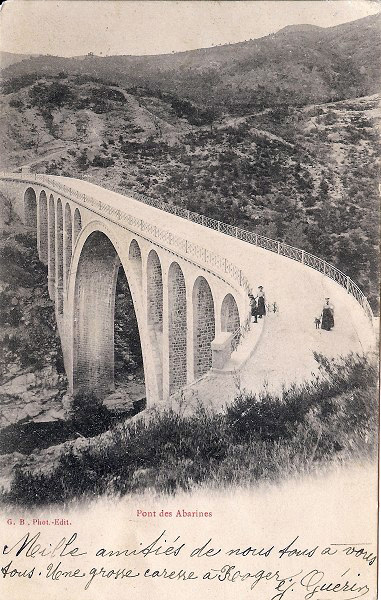
An old Gumotex Solar 1 passes under Le Pont des Abarines on the Gardon de Mialet near St Jean du Gard in the southern Cevennes. The bridge is 116 years old this week.
Whatever you read here, as much as anything, choosing an IK with a deck is more about personal preference than function.
Most inflatable kayaks are like canoes and have no deck. A few like the Gumotex Framura and Swing, or the Grabner Explorer and Decathlon X500 and some Advanced Elements have fixed decks. Others like the Kokopelli Moki or Gumotex Seawave (flashing above) have optional zip-back or velcro decks.
Above, a yellow Incept K40 with a zip-back deck, the one and only time I used it like that. And later, when I bought my Seawave (above left and below) I got the optional fully removable deck thinking it might be handy. I tried it once, took some pictures, never used it again and sold it.
Other optional deck IKers have said the same: nice to have the option but never actually use it. Both these boats needed fibreglass or alloy spars to support the deck from below and keep it convex to make water run off. It all just adds to more stuff and set-up time.
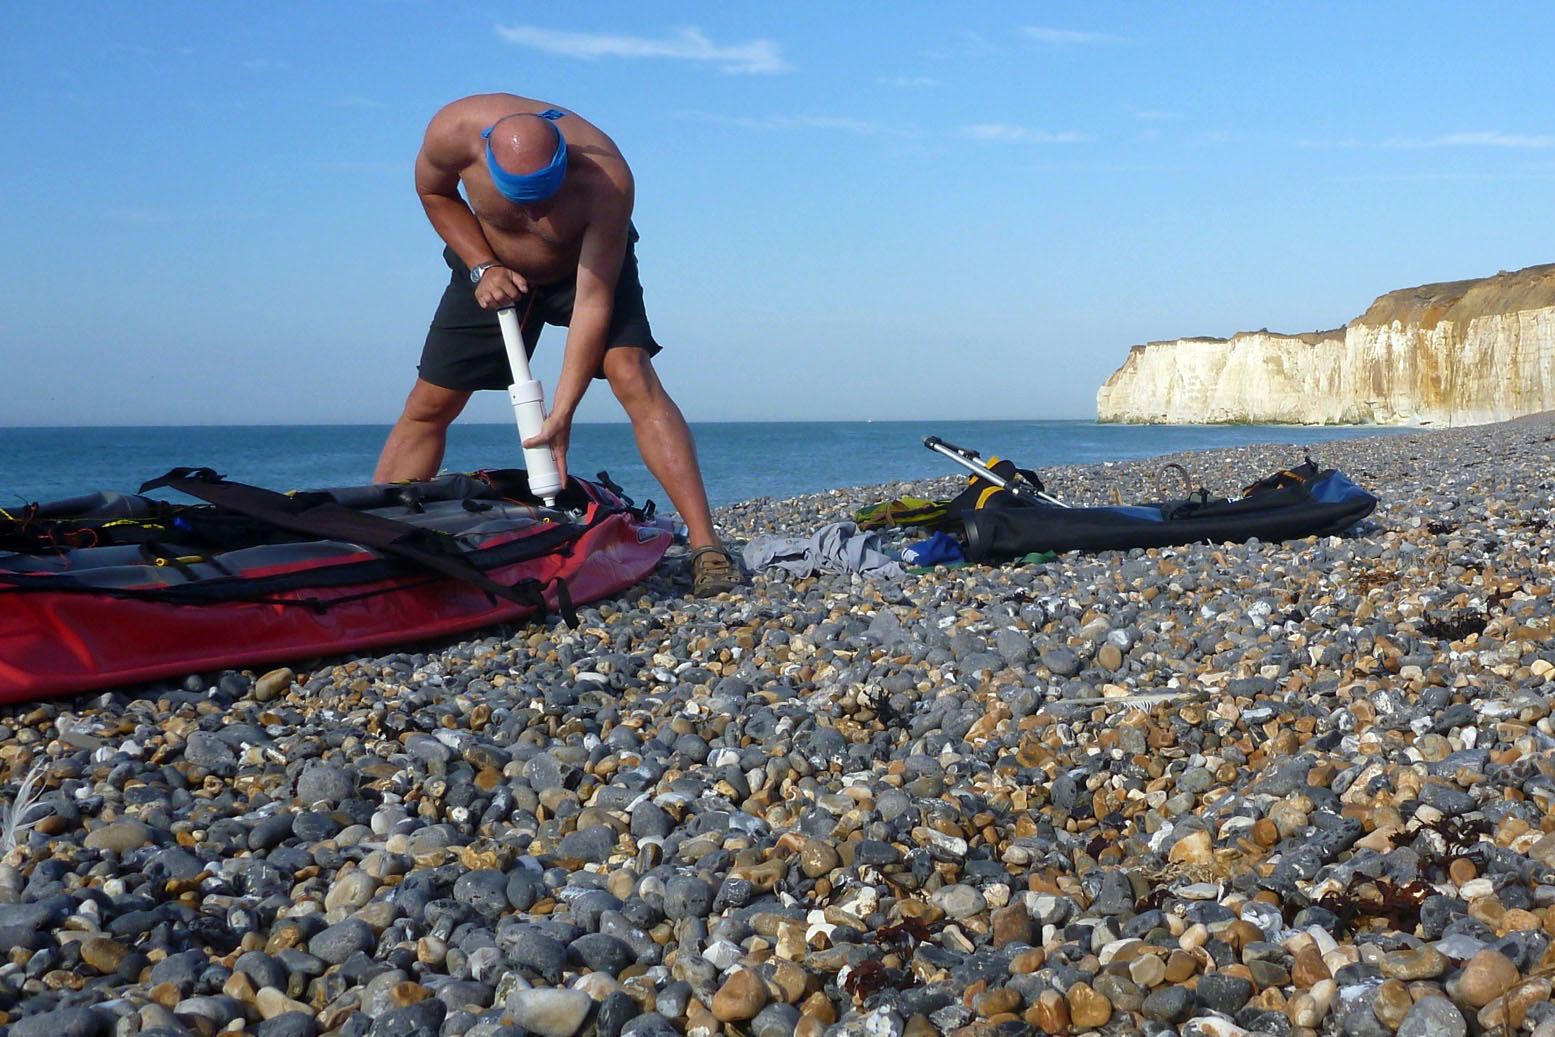
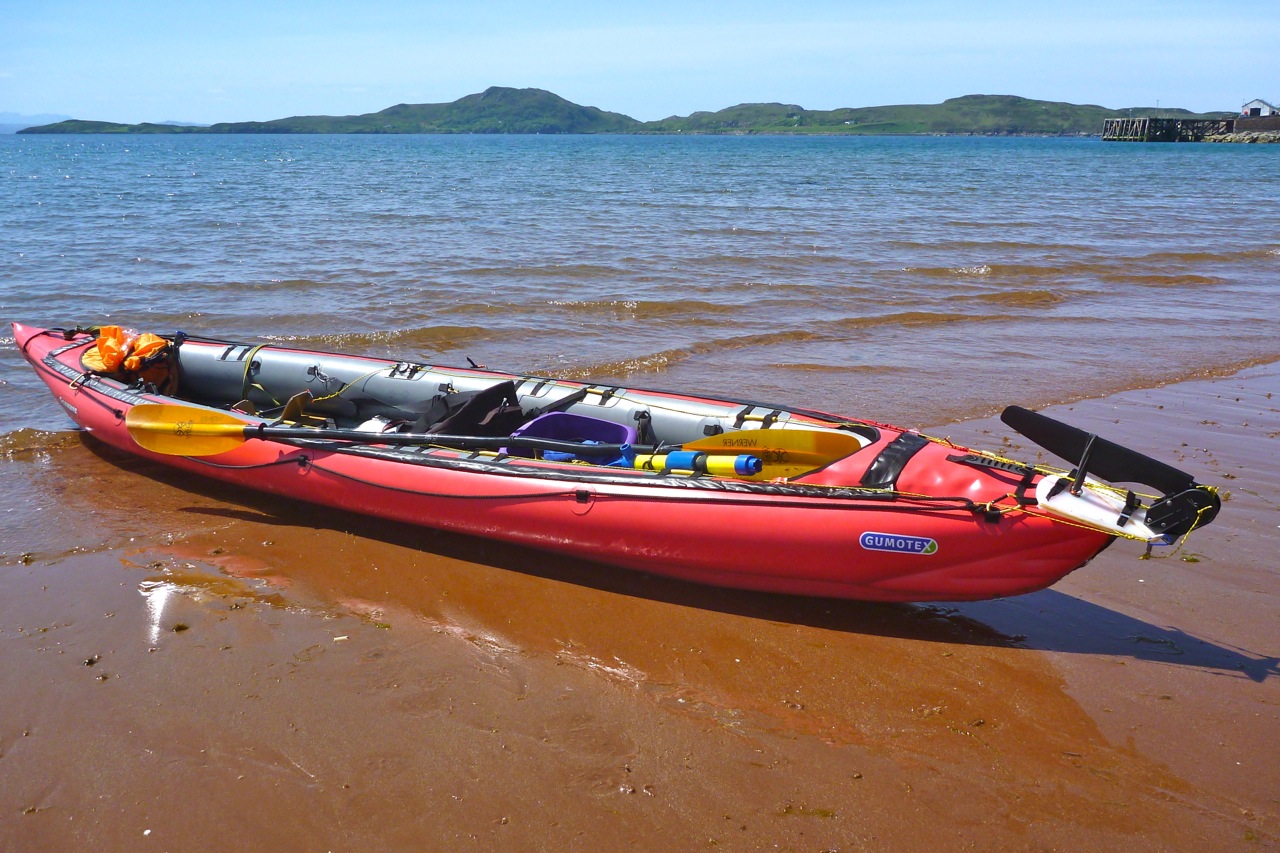
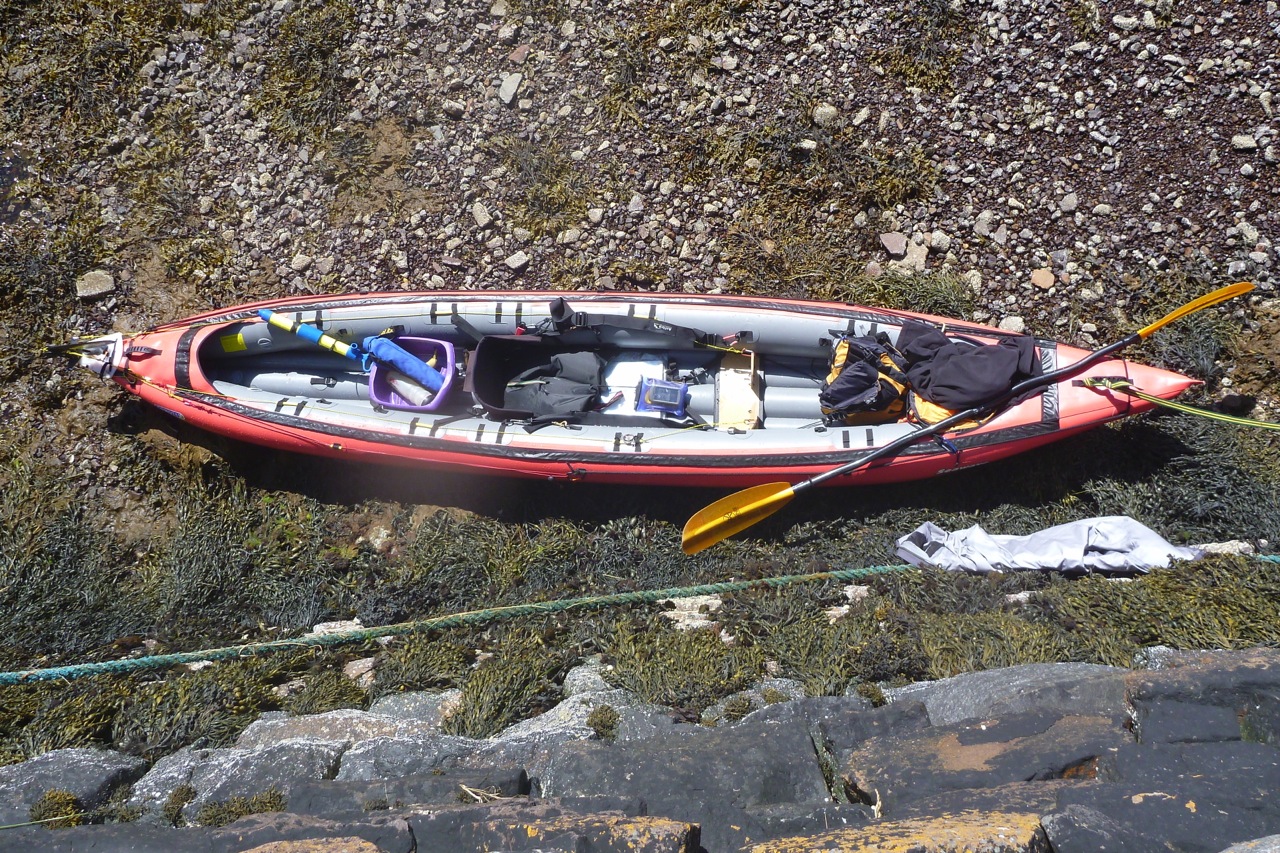
For me, one of the big attractions of an open IK is it’s so much easier to hop inand out – even from deep water you can easily crawl back abroad which makes it safer. It’s easier to pack or unload the boat (below), as well as dry, clean or work on it. Any touring luggage will surely be in dry bags anyway and better touring IKs have plenty of attachment points. Best of all there’s no need to faff about with spray skirts and cags to match, and I find it’s so much more agreeable to paddle in the open air and not feel hemmed in. If it’s cold or inclement, I wear a drysuit.
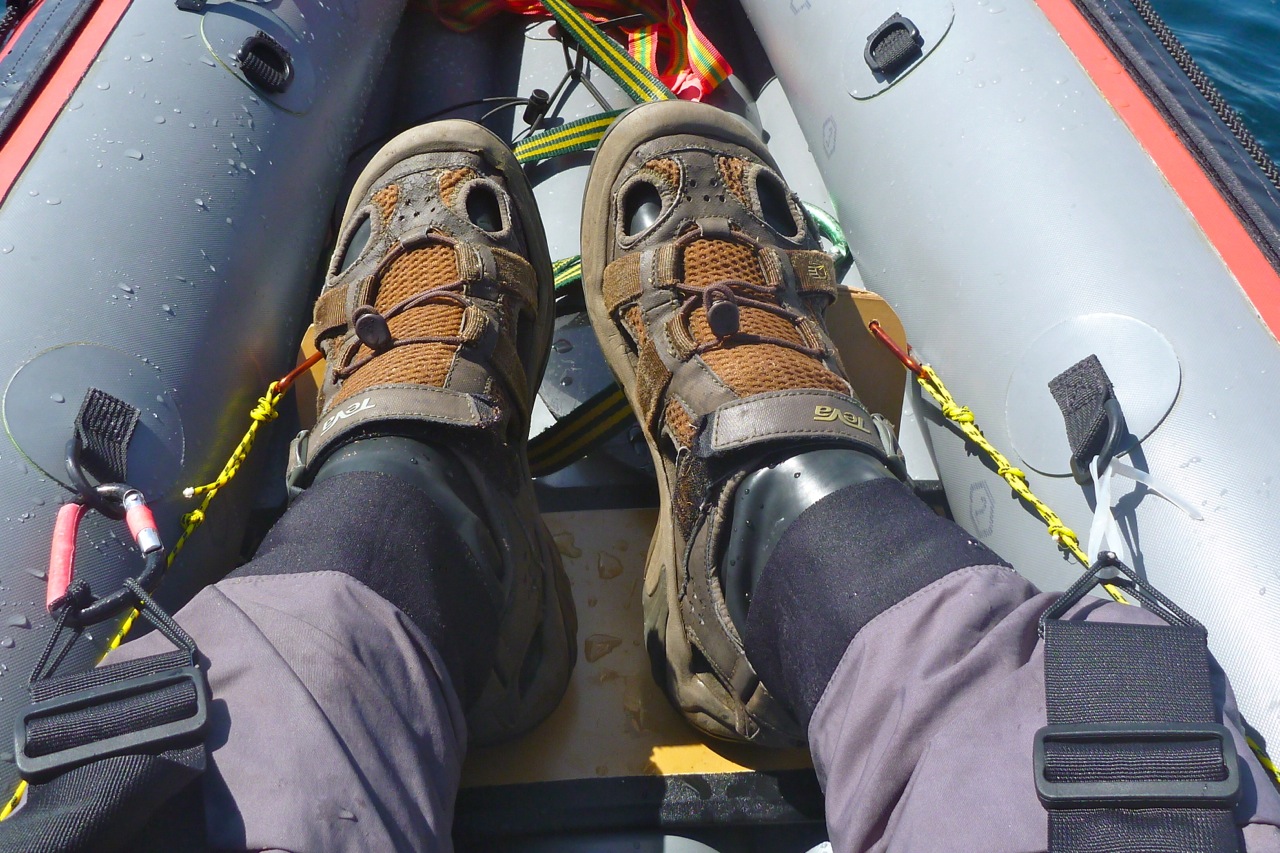
If you come from hardshell or folding kayaks you might think a deck’s a good idea, but length-for-length hardshells are heavier, less stable and less buoyant than IKs. All that means they slice through waves better and sit much lower in the water so need to allow water to wash over the decks. Also, with a hardshell, knee blocks on the underside of the front deck are crucial in the way the paddler interacts with their boat, creating a solid connection for bracing or pivoting against the swell. For better or worse, raft-like IKs are wider and less tippy. Using thigh braces and a solid footrest (below) is about as close as it gets to improving that ‘sat on a log’ IK feeling; you can’t realistically brace your knees under an IK’s fabric deck.
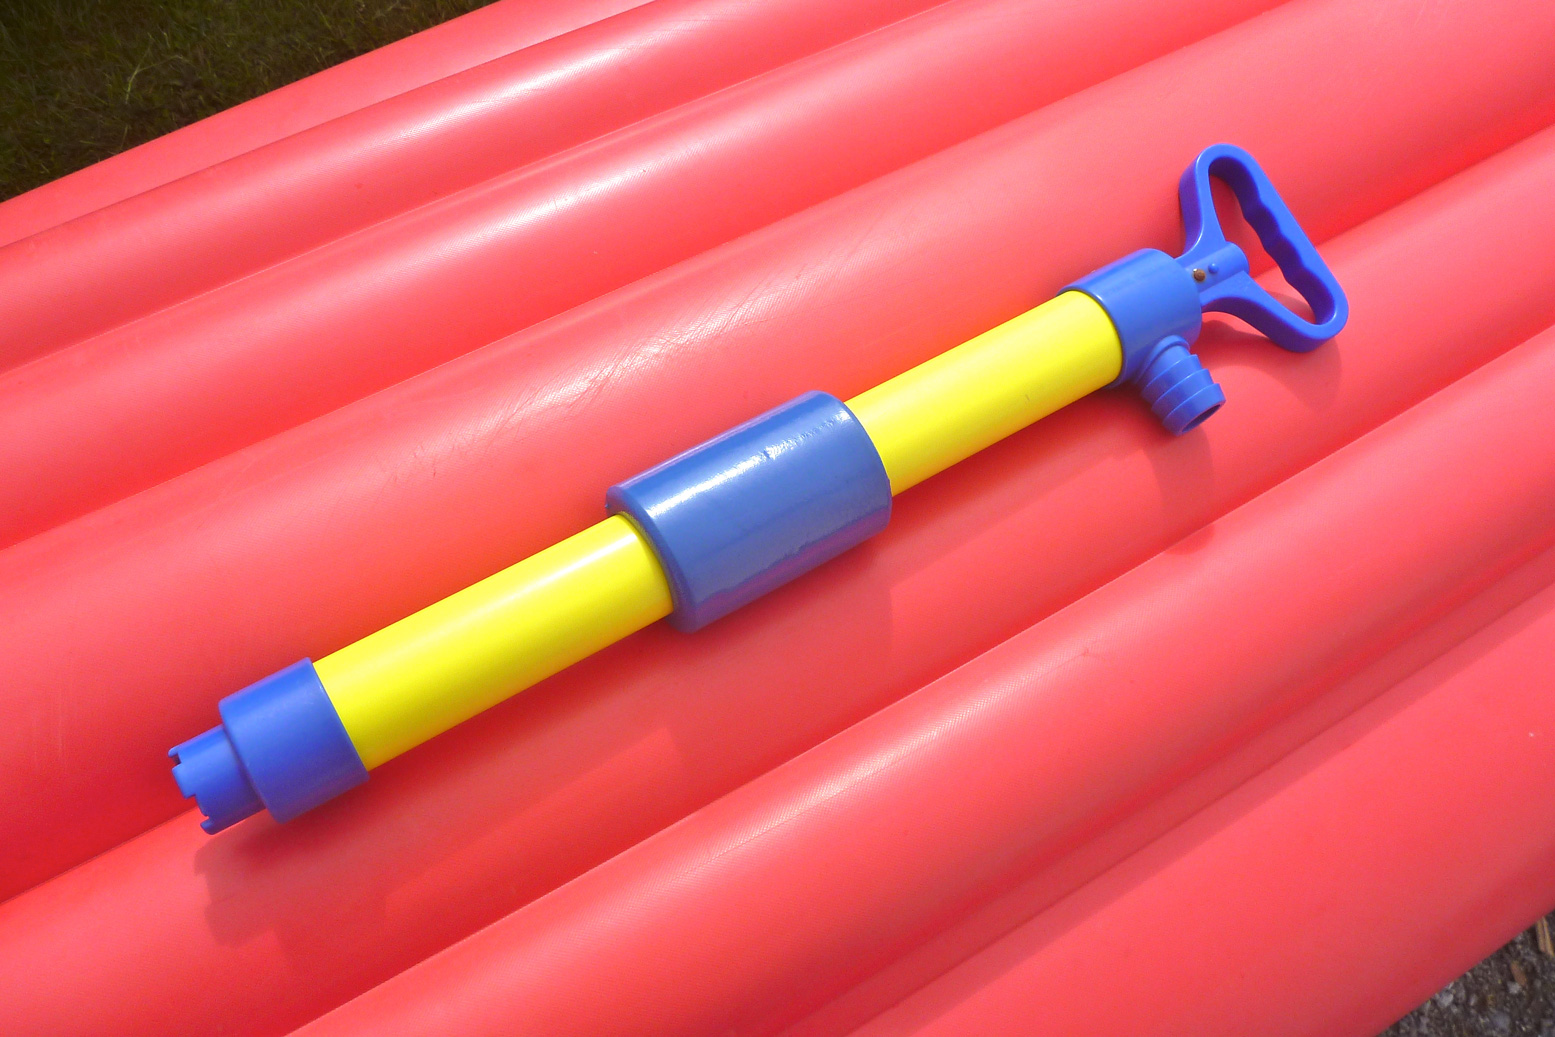
IKs sit higher in the water than a hardshell and swamping only occurs in rough seas or white water, especially in less stiff, low-pressure boats, as I found with my Sunny in Western Australia (below). Rough seas aren’t really suited to IKs, at least not alone, and full-on white-water IKs like the Gumotex Safari, Hyside Padillac or the NRS MaverIK have self-bailing floors so what comes over the sides drains away. But even an unbailing IK will still float when full of water (as I also found in WA), so a bailing pump (left) or more simply, a sawn-off plastic bottle scoop (left) are handy things to carry if out at sea for a while.
The ability to roll is an important skill if using a hardshell in rough water, but you’ll need taut thigh straps and quite a hip flick to roll a typically wider IK, with or without a deck. In an IK, if you capsize you just fall out then flip the boat back over if necessary and crawl back on. With a fixed deck IK that becomes much more awkward (below), just as it is in a hardshell without help, as we found one wet weekend. Solo, a paddle float is essential. Without one I couldn’t do it – and that was practicing in nice calm conditions (below). In dire straits I’d have unzipped the K40’s deck to get back in. About the only thing I do miss with a deck is somewhere handy to mount nav aids, cameras and other useful stuff in front of you. I get round that with a pfd with pockets and Peli box or a waterproof packbag between my knees.
Update 2019: I’ve not used my MYO rudder since I made it in 2016 and sold it with the boat in 2020. Partly because I’ve only done day trips predicated on nice weather, but also it’s all just more faff and clutter, not least the lines and footboard. As explained earlier, for multi-day trips you must deal with the winds you’re given so a rudder is a good idea. But even then, you only notice your relative lack of speed (due to sidewind paddling correction) alongside others. Alone, you’re as fast as you are [grasshopper]. Rudders are not about steering as they are on powered boats; in a kayak they’re about enabling efficient, balanced paddling on both arms by compensating for the boat’s deflection by side winds.
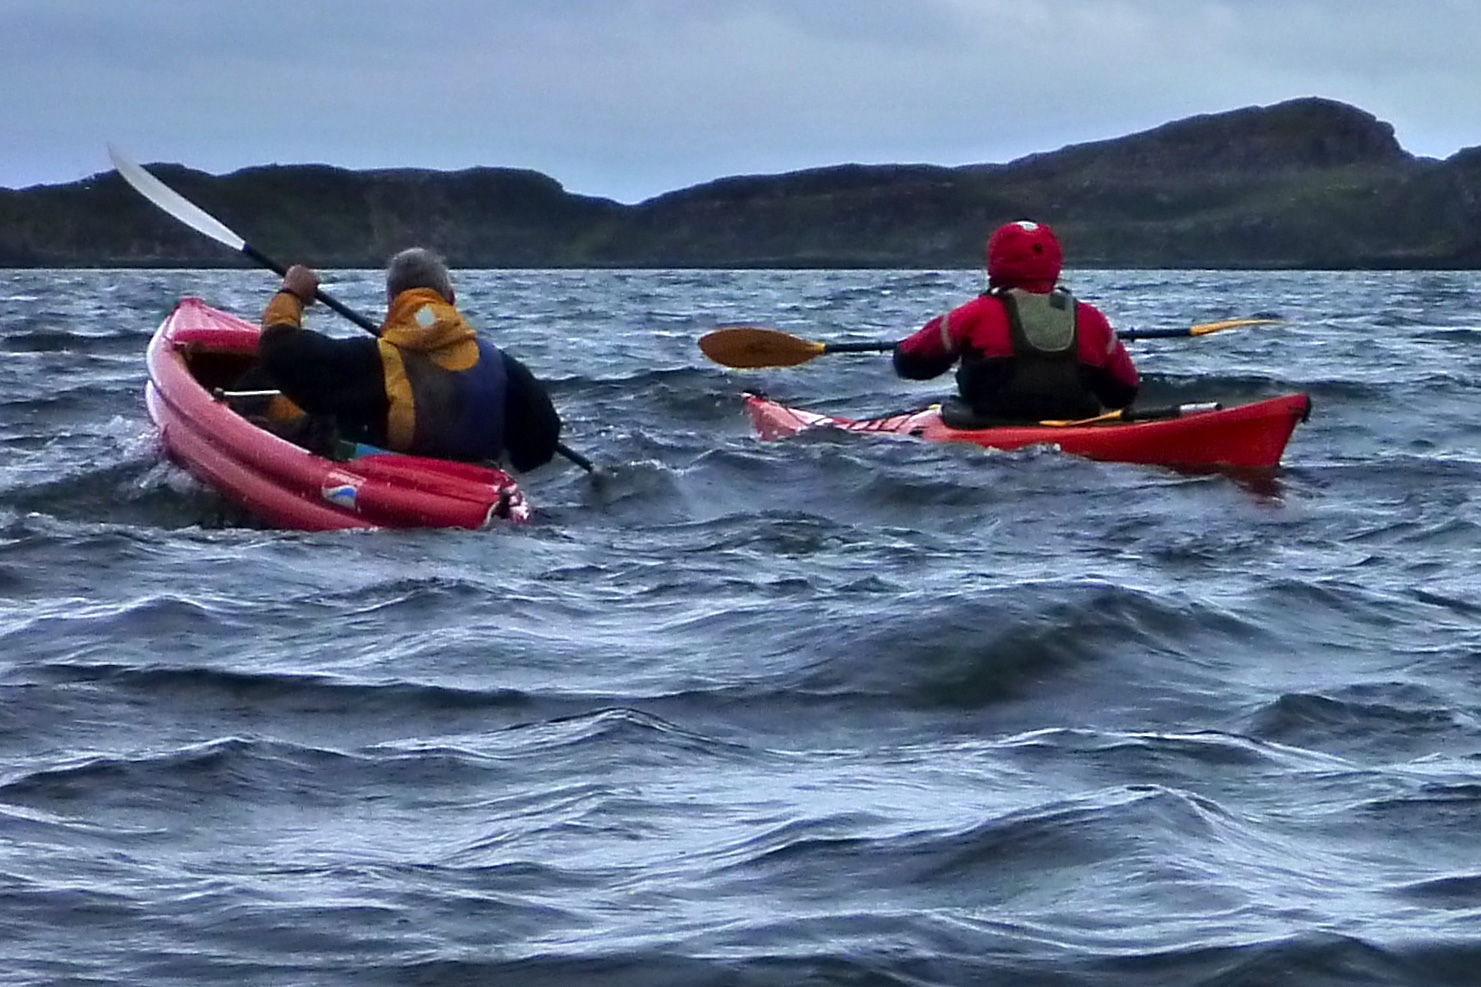
While waiting for rudder bits to turn up, we went out for an evening paddle round Eilean Mullagrach. It was pretty calm but at no point did I think, ‘Darn, I wish I had a rudder’. When it came to turning corners we just paddled hard or dragged a blade and round we came. But the Seawave rudder project carries on like a supertanker with a jammed… rudder, if for no other reason than it’s fun to experiment and a rudder can also work as an articulated skeg when locked out – something I may look into when it’s all done.
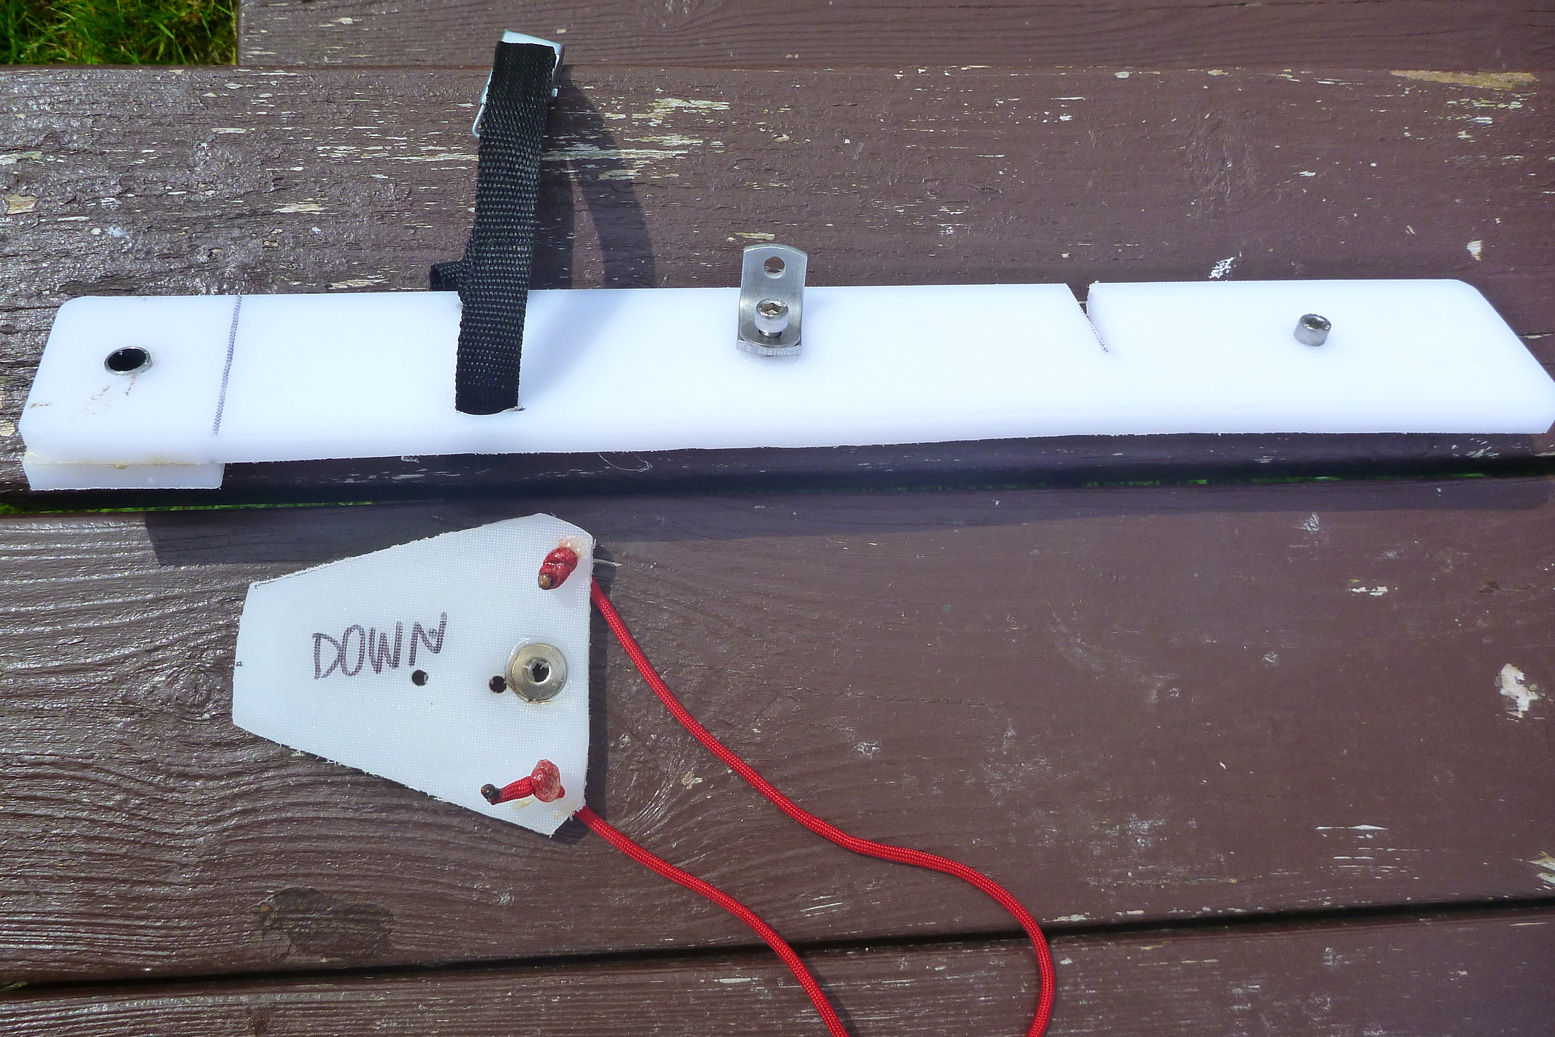
Ironing out the flaws with the prototype added up to attaching it more securely at the back and making the pedal board out of something more responsive and durable. By coincidence, all these components can be sawn from a single piece of 450 x 300 x 12mm LDPE chopping board (above) which costs from £8 on eBay in a range of colours. This is 50% thicker than the smaller board I used on the prototype plate so doesn’t need doubling up and gluing to make it rigid.
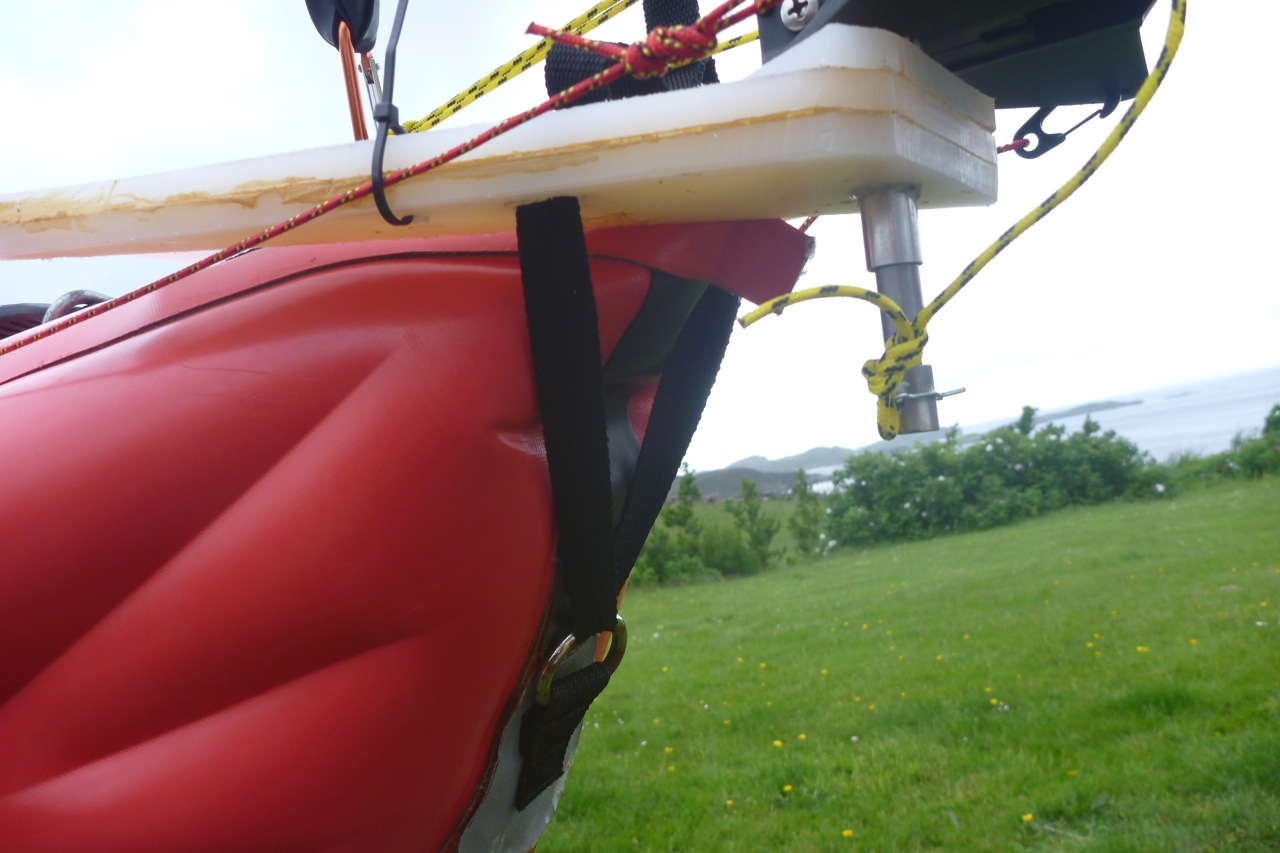
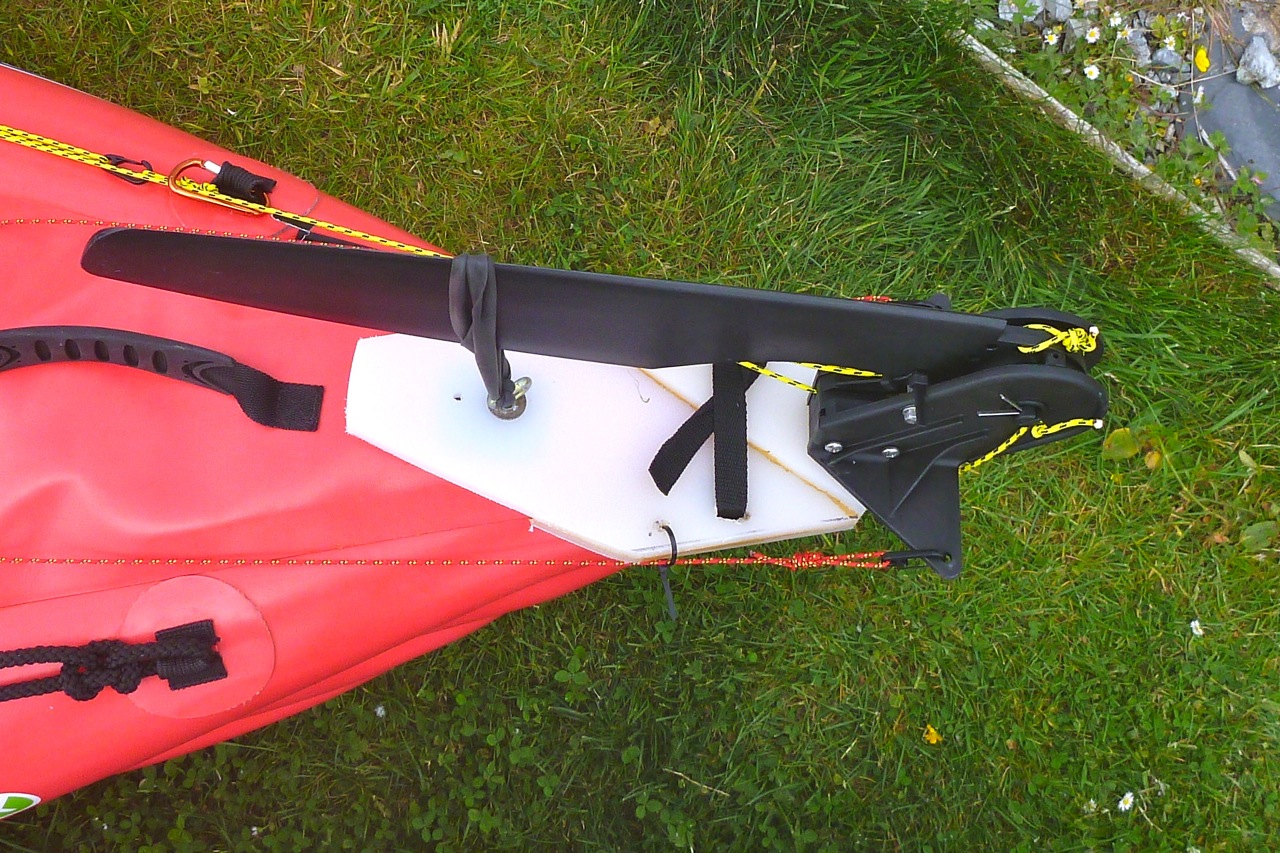
At the back I slimmed the rudder plate right down to a simple strip of 65mm x 450mm, glued a block on the end to better support the gudgeon swivel pivot sleeve and added the crucial second fixing under the portaging handle (above left). I also added a triangularish screw plate underneath (left, with red cord) so it all sits snug in the stern. With the hardware and saddle strap that now adds up to 306g (the rudder unit weighs 450g with its running lines). Even though it’s slimmer than the proto plate, it weighs about the same because it’s now 12 mil. But looks a whole lot neater.
The pedal board is from the same slab but uses stainless hinges, not zip ties. I’m reminded, you’re constantly making small adjustments as you paddle so pedals need to be as taut and responsive as possible. Once I’d trimmed the board and pedals a bit (left), with hinges it came in at 660g. The board and maybe the pedals could have been made from 8mm if there was some to spare – but an 8mm board wants to be ~450mm wide to sit snugly in the boat’s side channels. Like the rudder, the pedal board will be subject to strong forces in heavy seas so also needs to be solidly jammed in. Meanwhile, I noticed the floor-laminate prototype board (right) gained nearly 15% in weight after getting wet – a sign it won’t last long. Still, it made a good template.
I do wonder if something like the Grabner rudder pedal bar (left, similar to Gael’s old H2) would be much lighter, as solid and as effective as my board. It costs €70 plus €30 for a pair of Zoelzer pedals. I can’t really see how I could replicate that alloy footrest bar – out of copper tube filled with resin perhaps (like this motorbike rack)? It’s held securely in place without fittings by being jammed in the channel cavity between the floor and the sides (like my board), but a check with Gael advised me against it. As it happened, I’d pretty much decided the same mid-test run (below). A sliding ally bar plus seawater isn’t a great combination and might bend or break, or the pedals snap. I know the ally backrest bar on my Amigo wasn’t up to it and Gael’s backrest broke (though it was ancient). My plastic version may weigh double but should be solid. Interestingly, just as a bag of clam cleats turned up to make a quicker way of fine-tuning the rudder pedal lines from the cockpit, I see left that Grabner use them – a good sign.
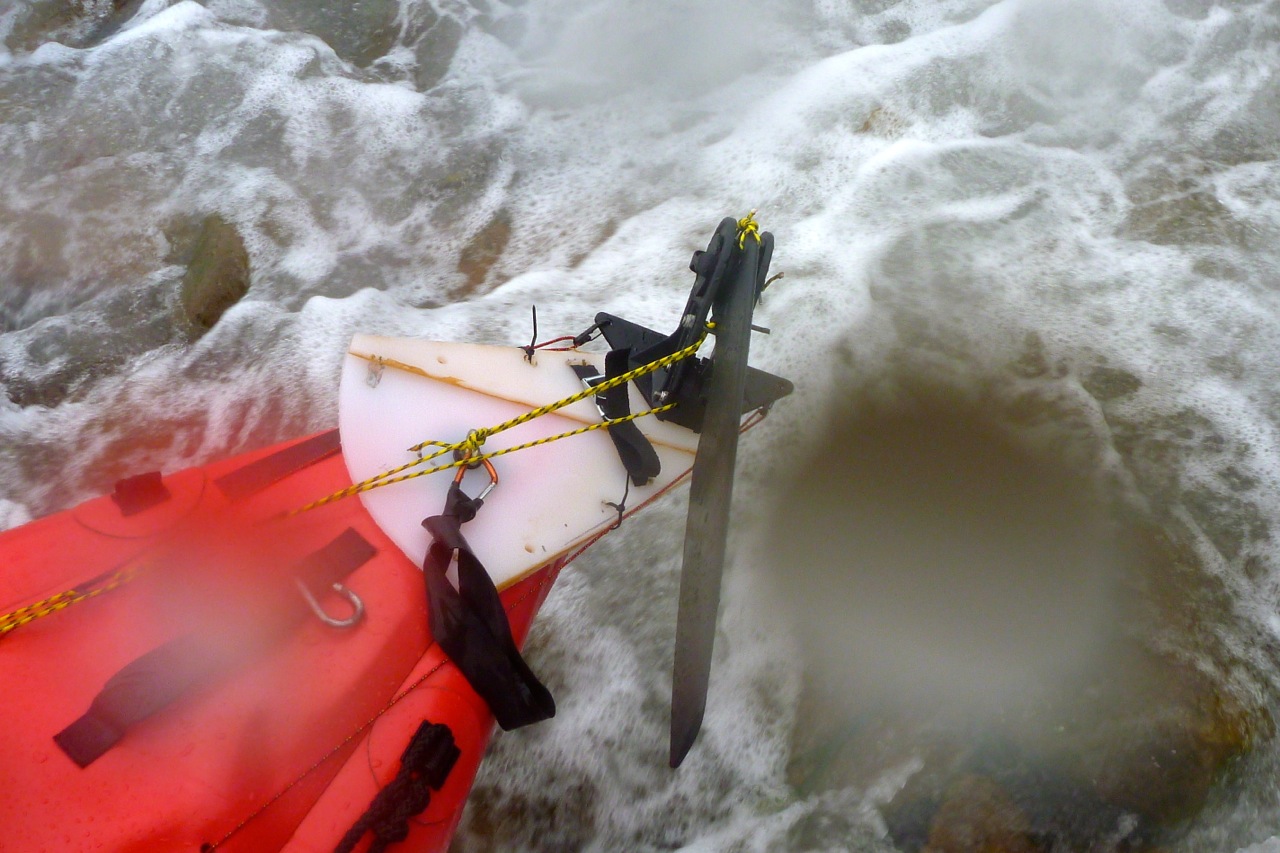
The weather here’s about to crack and then we’re moving south, so in a rush I took the revised rudder plate out for a test with the creaky waterlogged pedal board. Heading towards Horse Island tidal passage, I didn’t need a weatherman to know which way the wind blew: from the WNW at about 12mph.
Initially, the boat needed constant small corrections to maintain a course, and there was some stiction, hopefully down to the zip ties on the soggy pedal board. I tried a few tight turns and marvelled at the control and how sharply the boat swung round like a pedalo. The rudder plate is now as rock solid as anything fitted to an IK can be. Again, I consciously tried not to correct with my arms, just my feet, which were twitching regularly.
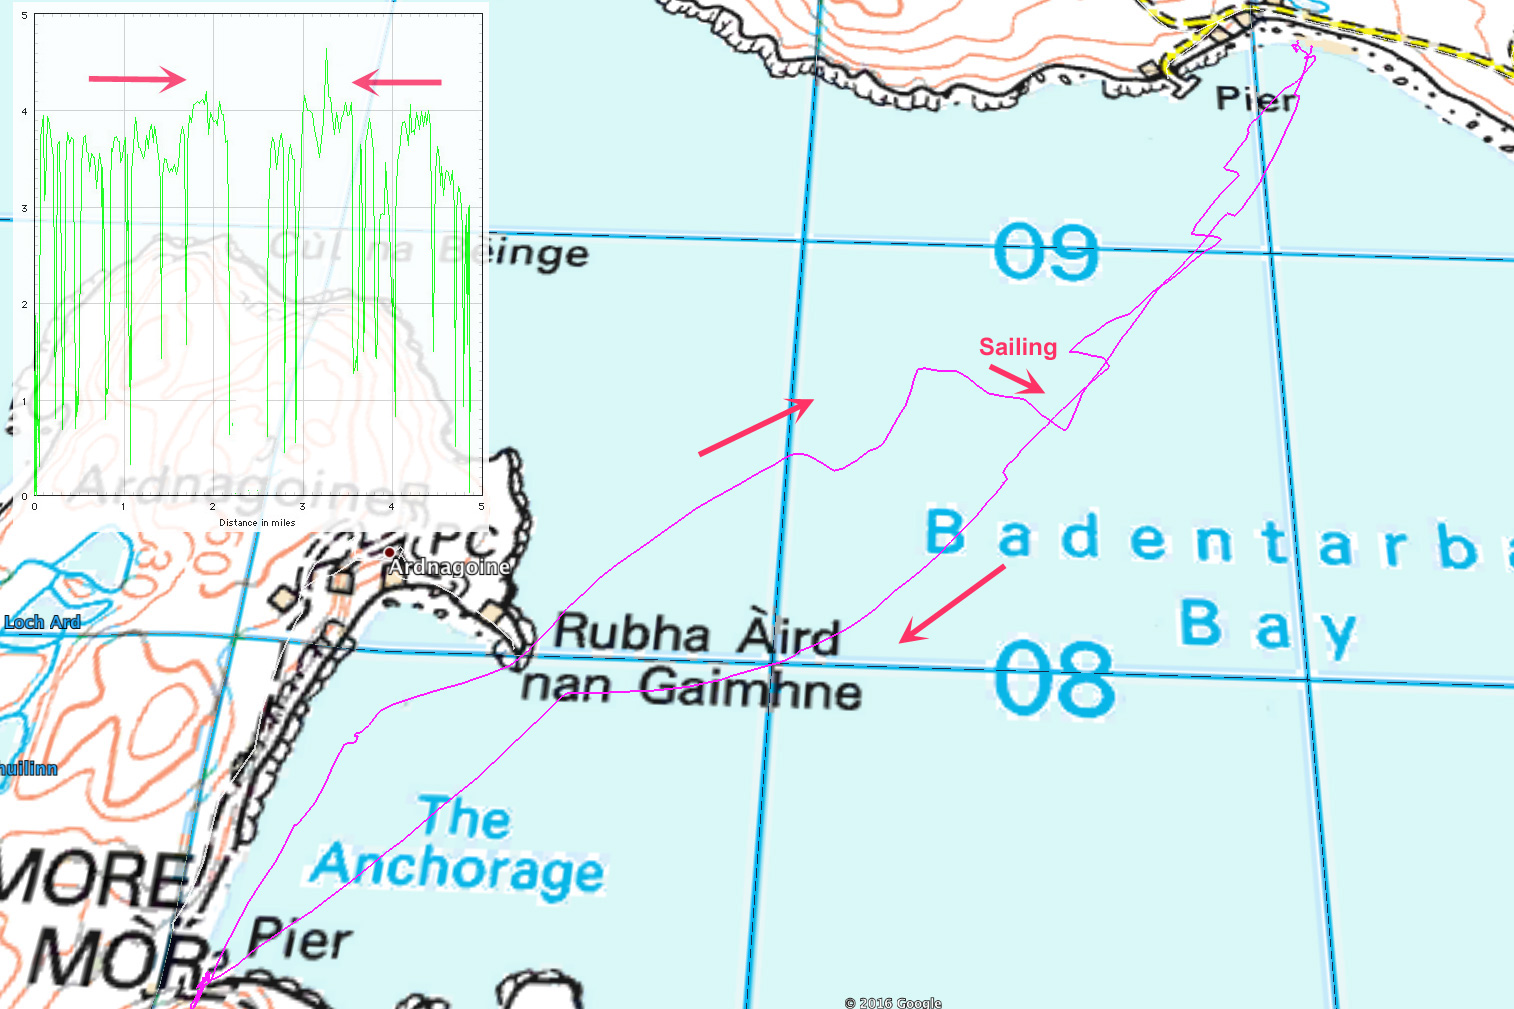
At Horse Island I was way too early to pass through the passage, but as it was probably my last paddle here till next year, I decided to head for Badentarbet. Turning north, closer into the wind the micro corrections were no longer needed and the boat ran as if on a skeg, but without arm corrections. I’m pretty sure paddling 20–30° off the wind would have required arm steering, but I just hacked away towards Rubha Dunan on the mainland as the wind increased. When I tried a bit of downwinding, protracted rudder juggling was needed to keep the back-end in line.
I passed through a channel on the headland and the NW wind got steadily stronger so crossing the bay to the beach seemed to take ages of effort. By now the small corrections I’d been making were no longer necessary, perhaps something had bedded in, the knots had tightened up or, like riding a bike, I’d just got the knack of minimal rudder movement to keep the boat on track. But upwind paddling is comparatively easy so I tried across the wind, now running over 15mph, and a bit more downwinding which gave me that unsettling Ningaloo feeling. This must be the weak point of a buoyant, windprone IK (especially when unloaded), and maybe all kayaks and canoes too. The chop was only a foot high but were there a swell of a metre or more, the rudder would be briefly lifting and the stern sliding. I wonder if in such conditions a combination of rudder and skeg (which is always submerged) might be a way of limiting weathercocking? Or perhaps just more practice is required. There’s also another solution that might arrive here in time to try out.
As I neared the beach the wind was hard in my face but I realised I was actually on good form, unlike on the Tanera run with the prototype. So I hammered away with all I had until my strake hissed onto the sands. Paddling hard is all helped by my brilliant, bent-shaft Werner Camano paddle, no less than ten years old this summer. It still clips together with a satisfyingly ‘clunk’ and has very little play. If it ever got lost or abducted by aliens I’d buy another without hesitation.I was glad I’d got stuck into a longer test run than planned, and am now confident my MYO Seawave rudder is in the ballpark. Hopefully, the new pedal board will complete the job.
Total weight: 300g rudder plate + 450g rudder + 660g pedal board + ~100g rigging = 1.51kg (3.3lbs), or < 10% of the boat’s weight
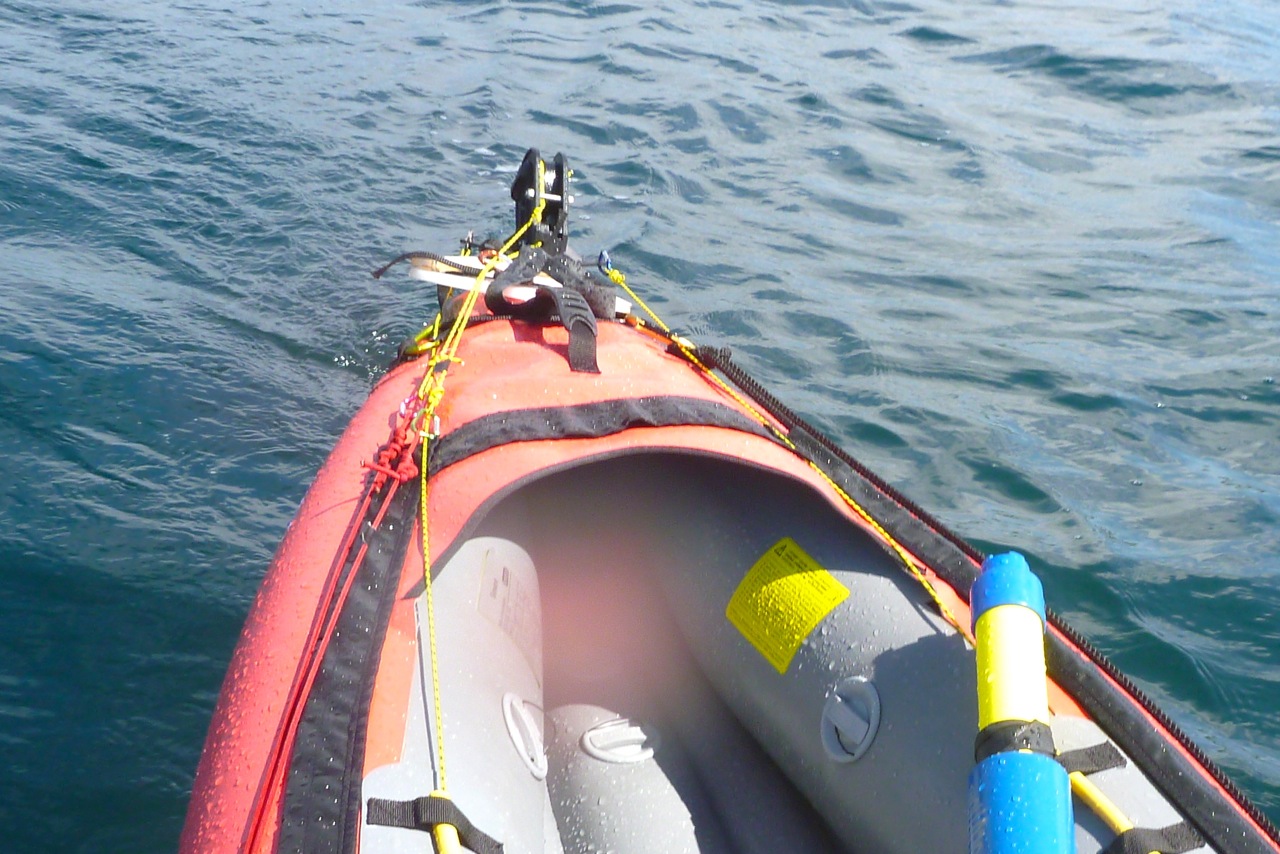
For about £200 posted I could have installed a 2016 Seawave rudder kit, but from all the images I could find at the time it was unclear exactly how it secured at the back – there must be their version of an unseen triangular underplate, but even then it’s still a stressed-out single point attachment. My additional under-handle fixture eliminates any chance of pivoting.
And the plywood Gumotex footboard (right) appears to sit loose and seemingly will also pivot on that single strap. Production versions may differ and let’s not forget that adding all this complexity also adds a risk of breakage or damage. The simplest solution is usually the best, but the 160-g skeg will always be clipped in the boat as a back-up and a Seawave is controllable (if much slower) with no tracking aids at all. It’s worth remembering: a rudder isn’t about day-to-day tracking, it’s about maintaining a course when the boat gets pushed about in stronger winds. In such conditions a skeg is essential and a rudder is an improvement, as explained here.
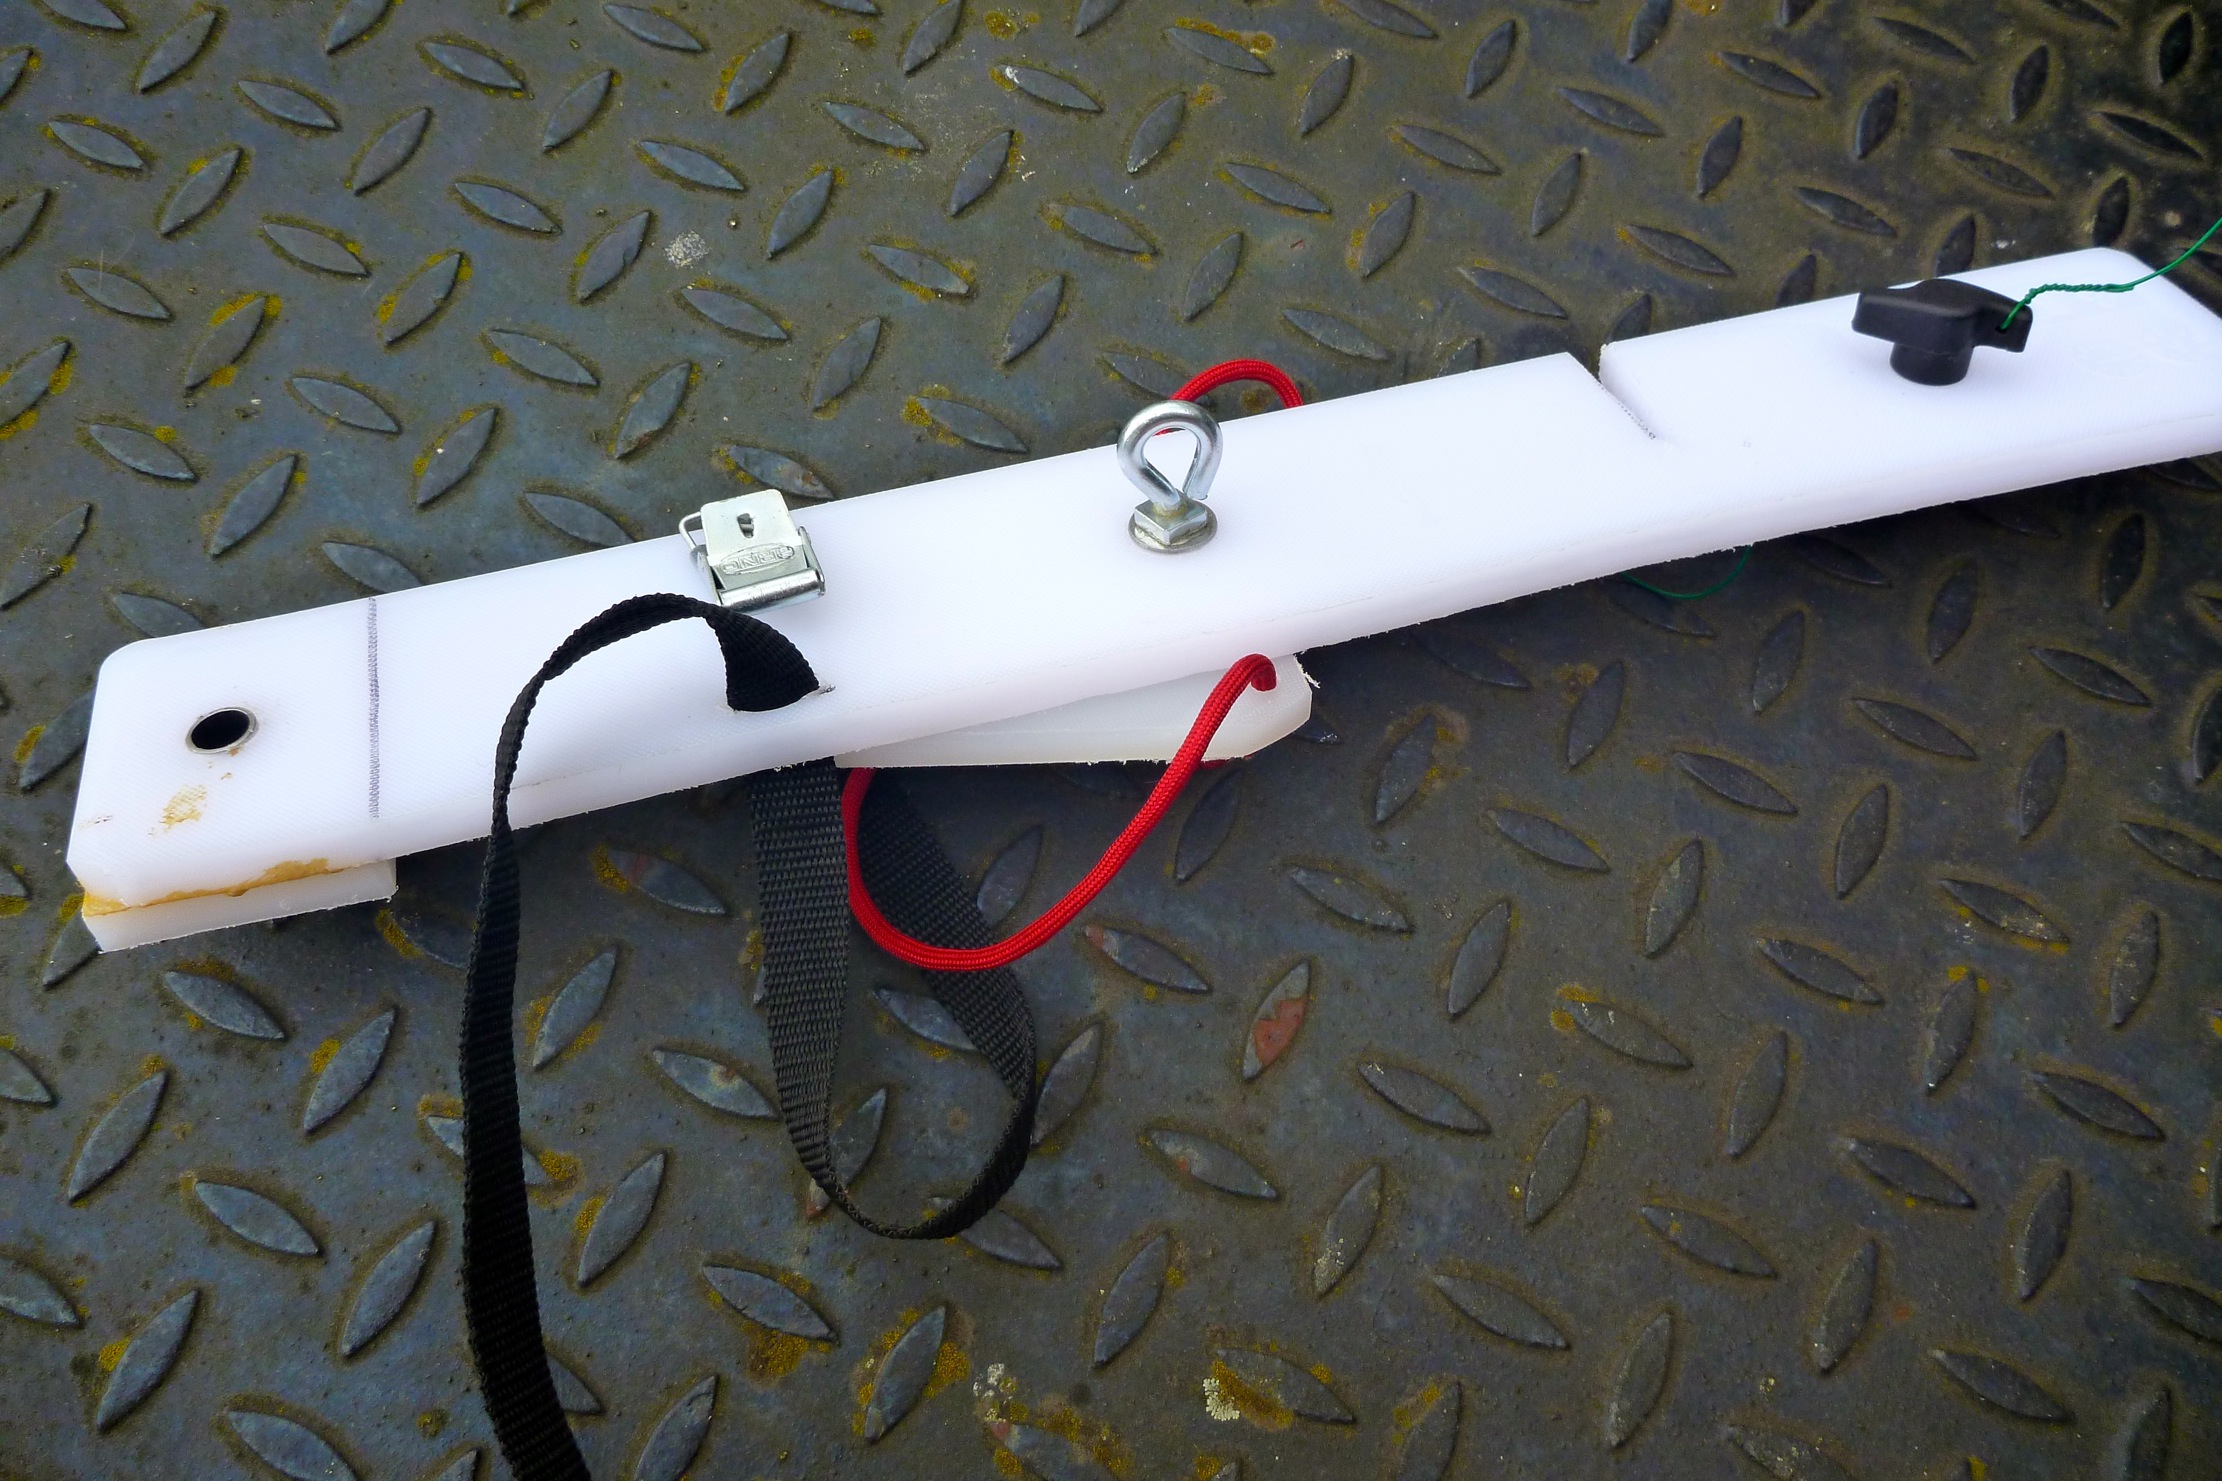
On the beach, prior to lugging the boat over seaweed-clad boulders, it took only 30 seconds to unclip the rudder mechanism from the plate to pre-empt stumbling and damaging it. Since then I changed the rudder plate mounts with tool-free knobs and an eyelet (above). When rolling the boat up it was best to pivot the rudder plate around the drain hole 90° to pack better.
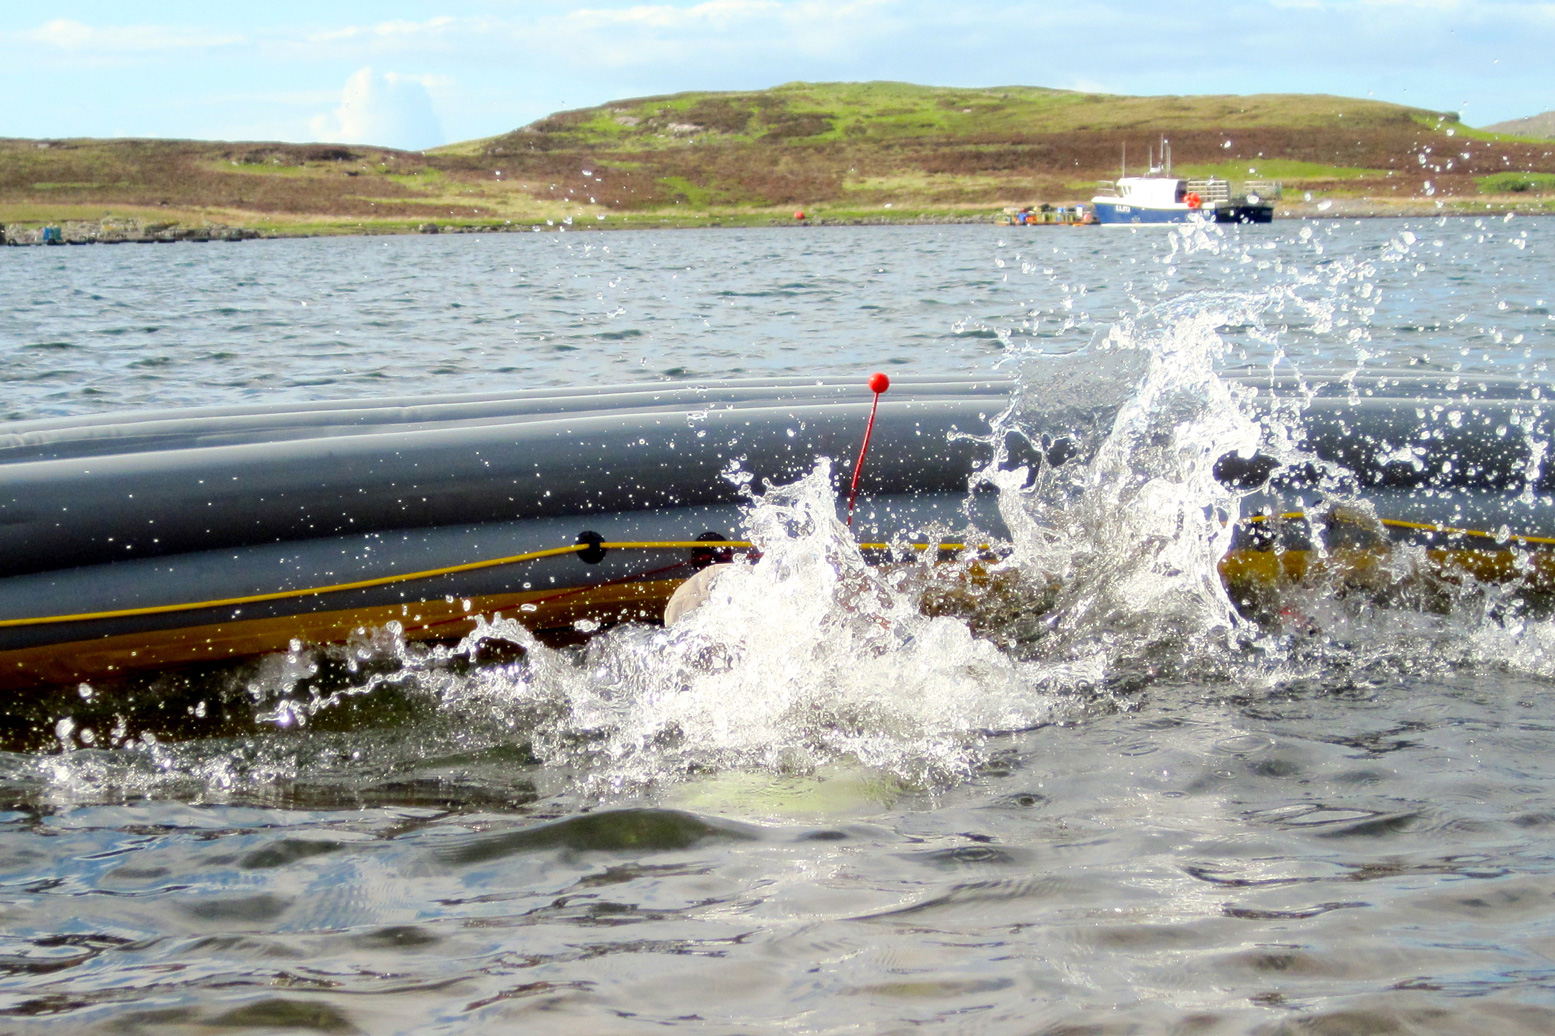
The other year while leaning over on a salmon pen platform, my cherished six-year-old Benchmade Griptilian slipped out of the pfd and down into the briny depths. We ummed and ahhed about diving down to retrieve it, but I’m told these pens are 20-metres deep and can hold no less than 80,000 fish.
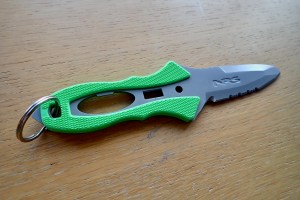
It was a bitter loss, all the worse when I saw what a replacement cost new. Long story short, I replaced it with a similarly anti-stealth orange PBK EMT Rescue Knife for a few quid (left). Like they said “you won’t worry too much if you drop it off your lifeboat and [it] sinks into the depths.” No I won’t.
At 150g it’s heavy but locks out with one of those cheap ‘liner’ locks and has a window-smashing stud, should I ever find myself in the nightmarish scenario of being trapped in a sealed aquarium. You also get a pocket clip, plus a handy line cutter – a good idea when your packboat begins to acquire too many lines and straps all adding up to an entrapment risk when expelled from the boat in lively water.
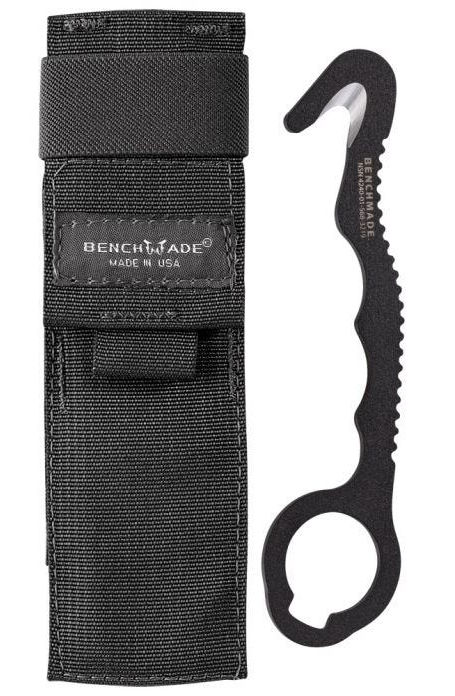
As it is, I’ve long had a quick-grab Benchmade #8 Rescue Hook permanently attached to my main pfd (below). With no sharp point, it’s a good thing on an inflatable and rusts quietly away.
NRS Pilot knife
Then the other day I decided I could streamline things by ditching the somewhat illegal PBK EMT with a proper, quick-grab kayaking rescue knife. NRS’s blunt-tipped Pilot Knife seems the main one available in the UK at around £44. The RRK is another with a hooked tip. The NRS’ locking mechanism wasn’t the smoothest from new, especially when reattaching. I gave it some WD40, but as it is the blade exposed in the shealth looks too ‘knifey’ when strolling into Greggs wearing the PFD after a peckish paddle. So I managed to elongate the Benchmark’s fabric sheath and the NRS slips in there unseen, while still being quickly grabable.
Once you’ve cut yourself free from your boat, the next thing is to alert others of your distress. Some sort of pea in a whistle body gives it a more punchy warble. Look up referee whistles on ebay from Fox or Acme. The piecing blast it puts out will be hard to ignore.
Phone, knife, whistle
Practice self-recovery before you need to. With IKs, getting back in alone from deep water is easy compared to a hardshell. Same with a packraft. That’s part of the appeal.
Seriously: the best way to dodge dangerous situations is to avoid them in the first place. That’s not as glib as it sounds. For me, who’s written and talked (and even won awards) about adventure travel for over four decades, paddling is one of the more potentially risky things I do these days. Or at least one where I’m aware of my limitations paddling mostly alone. I got the whitewater thing out of my system some time ago and have settled on Grade 2 or portaging. At sea, I mostly do day trips in fine weather, which in the UK can mean days or weeks staring out the window. But I’ve yet to have a ‘moment’ nor come close to falling out of my sea kayak. On rivers, I’ve not been tipped out of an IK since my Sunny days and never in a packraft. That’s how boring my boating is! I’ve managed that by avoiding the high-adrenaline side of things: technical whitewater, pounding surf, gale-force winds, as well as being ready to portage or change plans mid-trip. I’ve had my fair share of dramas doing other stuff. For me the adventure with paddling is quietly exploring wild places with packboats. I leave the appalling fascination of this sort of thing to others ;-)
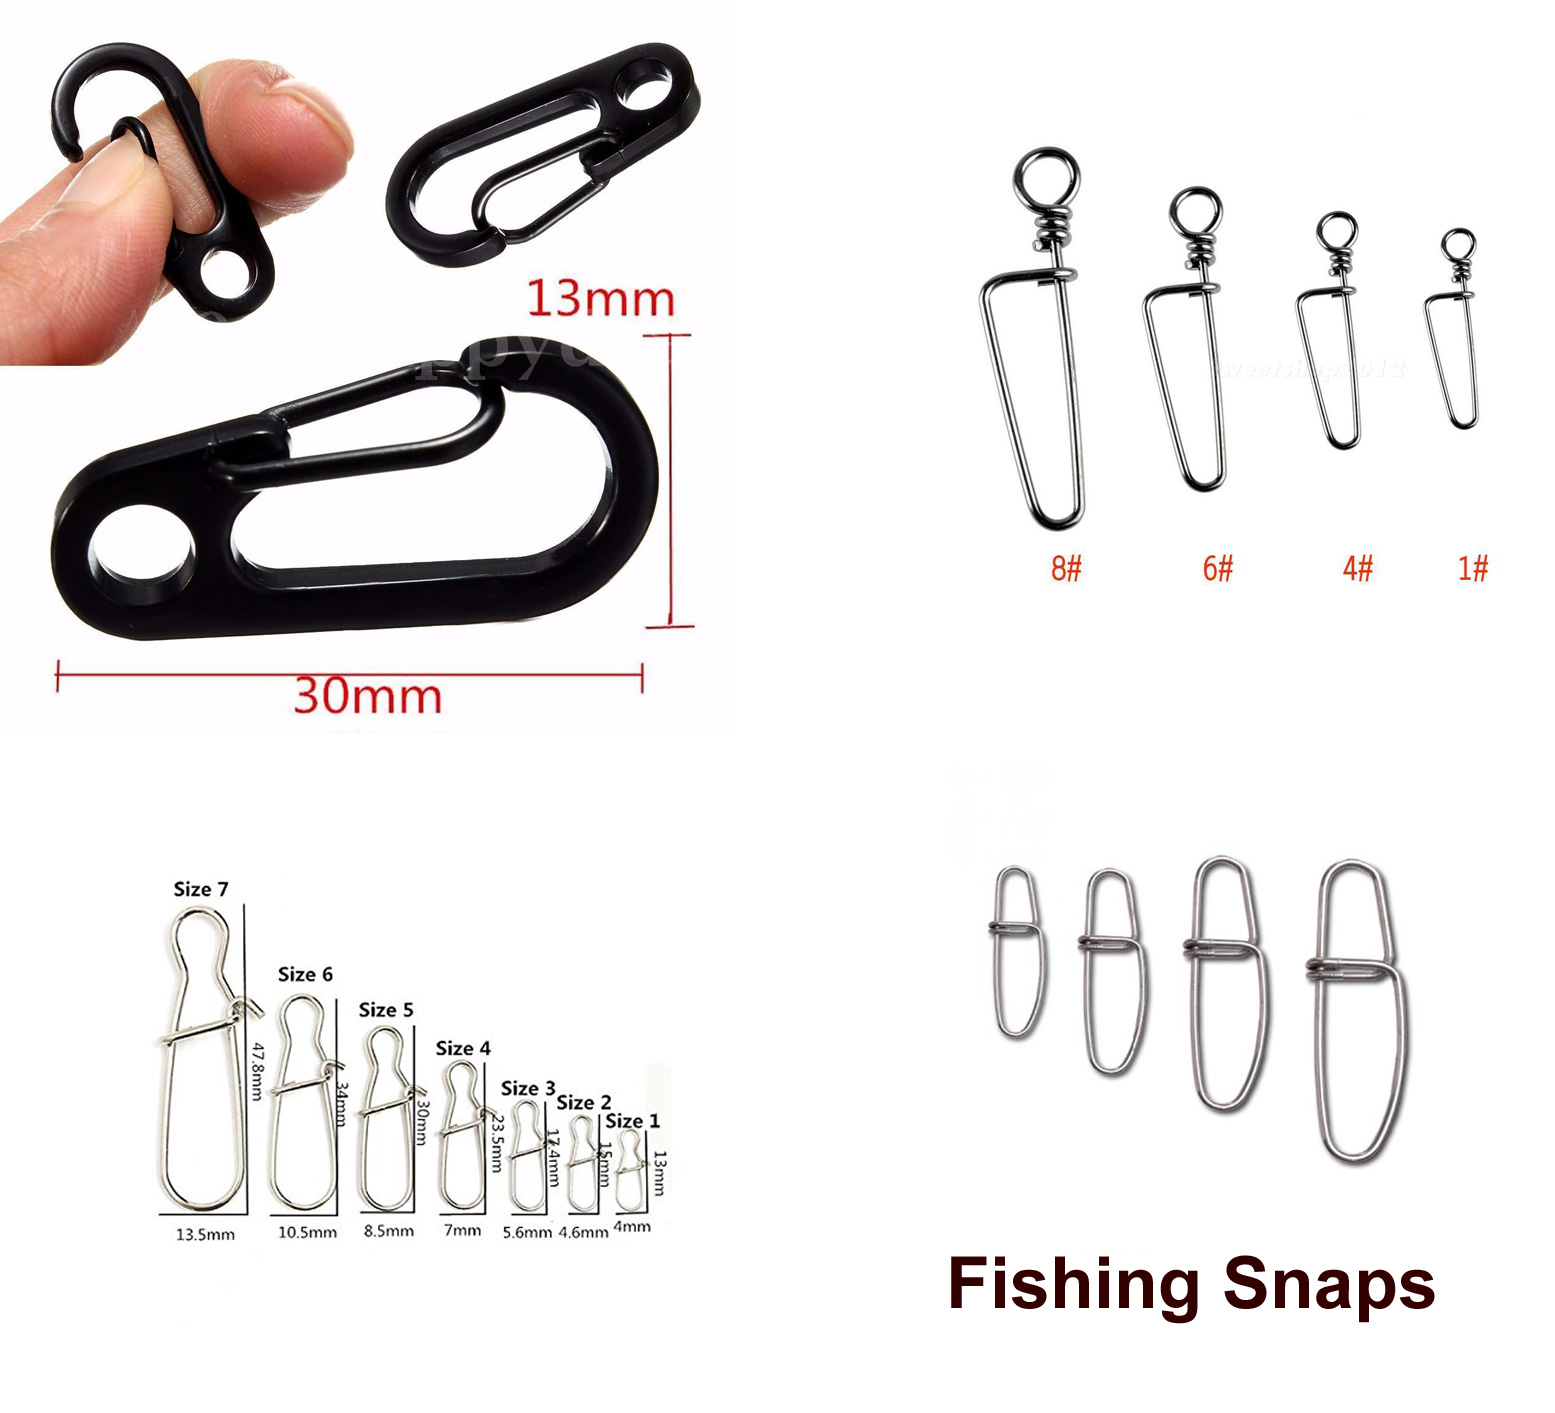
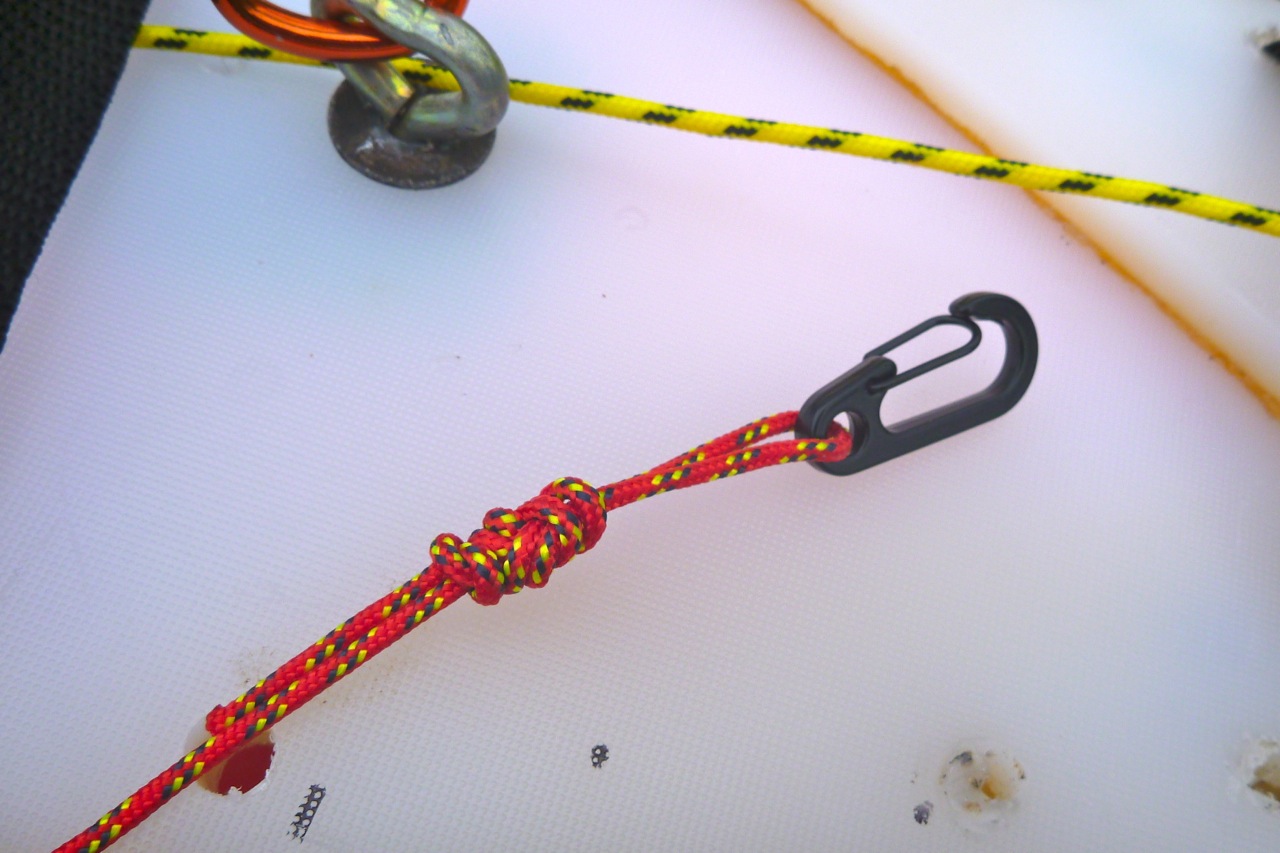
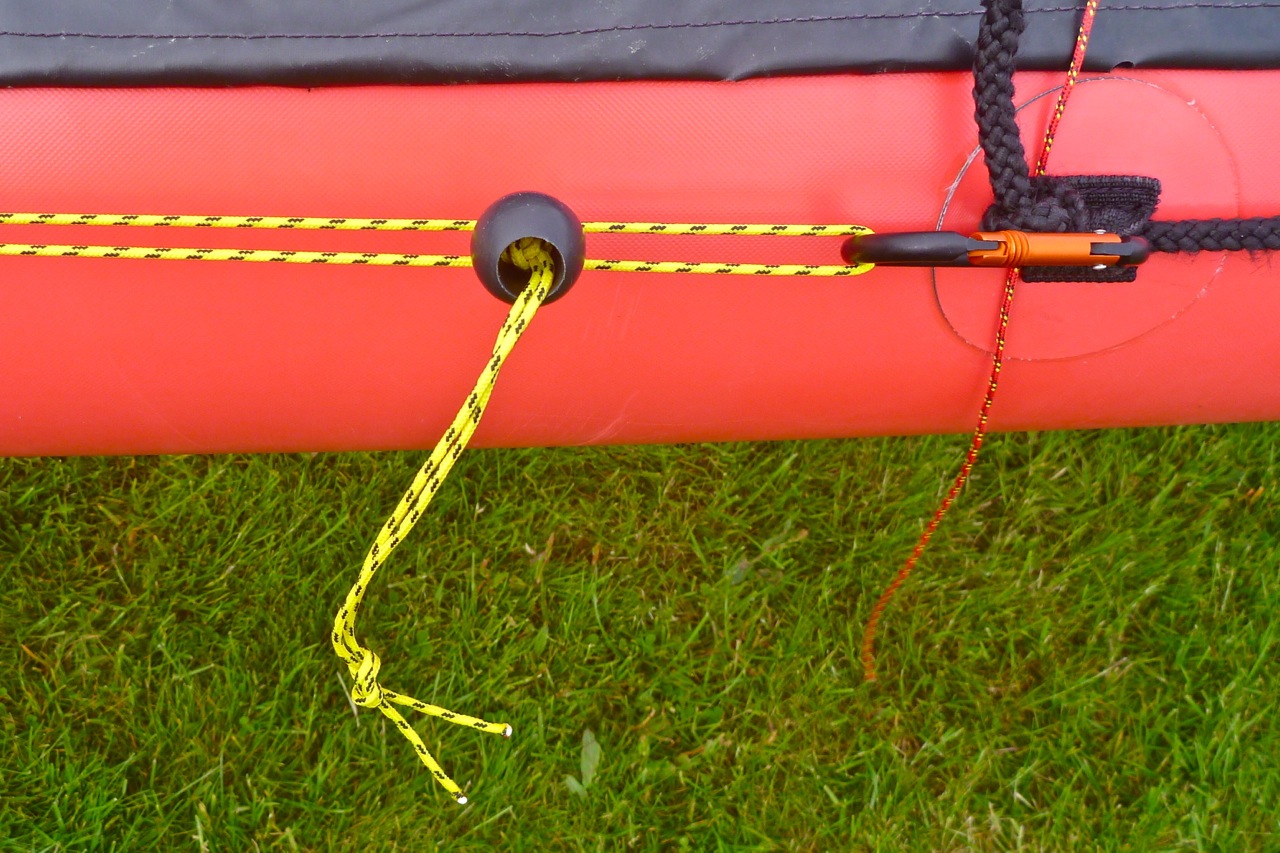
Within hours of finishing my prototype rudder I set about finishing it properly, and after a test run to Tanera Mor, made further improvements before trying it again. The whole set-up wants to be mountable/removable without any tools or knots to untie. I used mini karabiners to attach the various lines but realised snaplinks with a ring are better, as they’re permanently attached so won’t get lost. I recall the fine wire clips on my Incept rudder and after hours of webbery found out they’re called fishing snaps (right). Let me tell you, you can spend a lot of time online trying to figure out if size 00 is bigger than size 8 and still end up buying ones so small you need tweezers to open them. Moving on, some ringed karabiners (black, right) now do the job.
I only know two knots from my climbing days and still regularly use the Figure of Eight, (right and left) a quick way to put a loop on the end of a line that’s easy to undo. If you want to feed an Fo8 into a fixed ring (like the black krabs, above), just knot a loose ‘8’ near the end of the line, then feed the loose end back in and around the Fo8 all the way out again. And add a lock knot for good measure.
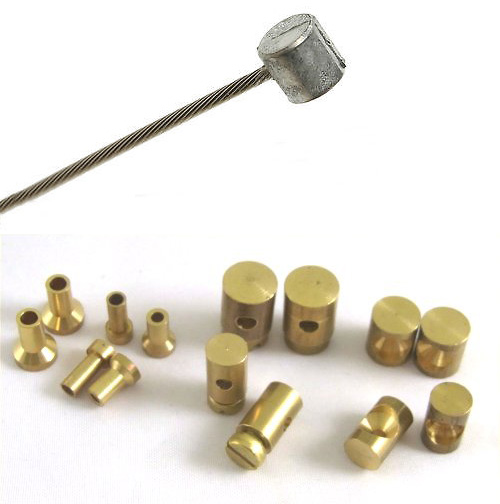
Lines shouldn’t be knotted directly to a fixed object, especially if it’s pivoting, but on the rudder’s lifting pulley there’s no room to attached a krab or mini shackle. The lowering pivot has a hole and channel for a nipple (right). I suppose I could track down a short length of appropriate wire cable, but for the moment it’s a job for our good friends, the zip ties. I also moved the rudder lifting knob to the right side: forward to lift (slightly more effort); pulling back to drop seemed intuitive.
In this pre-optimised form I crossed the two miles to Tanera Mor with a light WSW wind at 2 o’clock. First, like a bush pilot, I checked my flaps: up and down, left and right, then started the engine and pushed on the throttles. Very soon something was wrong. I was having to rudder hard left and the pedals were leaning way forward. I stopped to knot the lines to take up some slack, but still the boat was turning into the wind and the rudder was very slow to respond.
With a skeg on, it’s usually the bow that pushes round on a crosswind. Was the new rudder assembly making more windage to push the back around? More stopping to add knots to the pedal lines. I was also reminded that with a rudder you don’t just set it and paddle away, but are constantly making tiny corrections. You probably do the same with your paddle and a skeg, but never notice until it gets obvious (the whole point of fitting a rudder). For this reason a rudder wants to be as smooth-running and taut as possible.
The forecast was cold and northerly so, over-dressed in a cag and dry pants, all this foot and arm work took it out of me as I resolutely tried not to correct with my arms. It was a relief to arrive at Tanera’s 200-year-old pier. Mooring up, I noticed my rudder plate was dislodged (left), explaining why the pedal tension and tracking had gone awry. It was only when I got back that I noticed I’d fitted my nutted ‘underplate’ upside down and the nut had pulled out. Oh Brother What a Plonker. I locked down the plate with a zip tie and readjusted the pedal lines yet again.
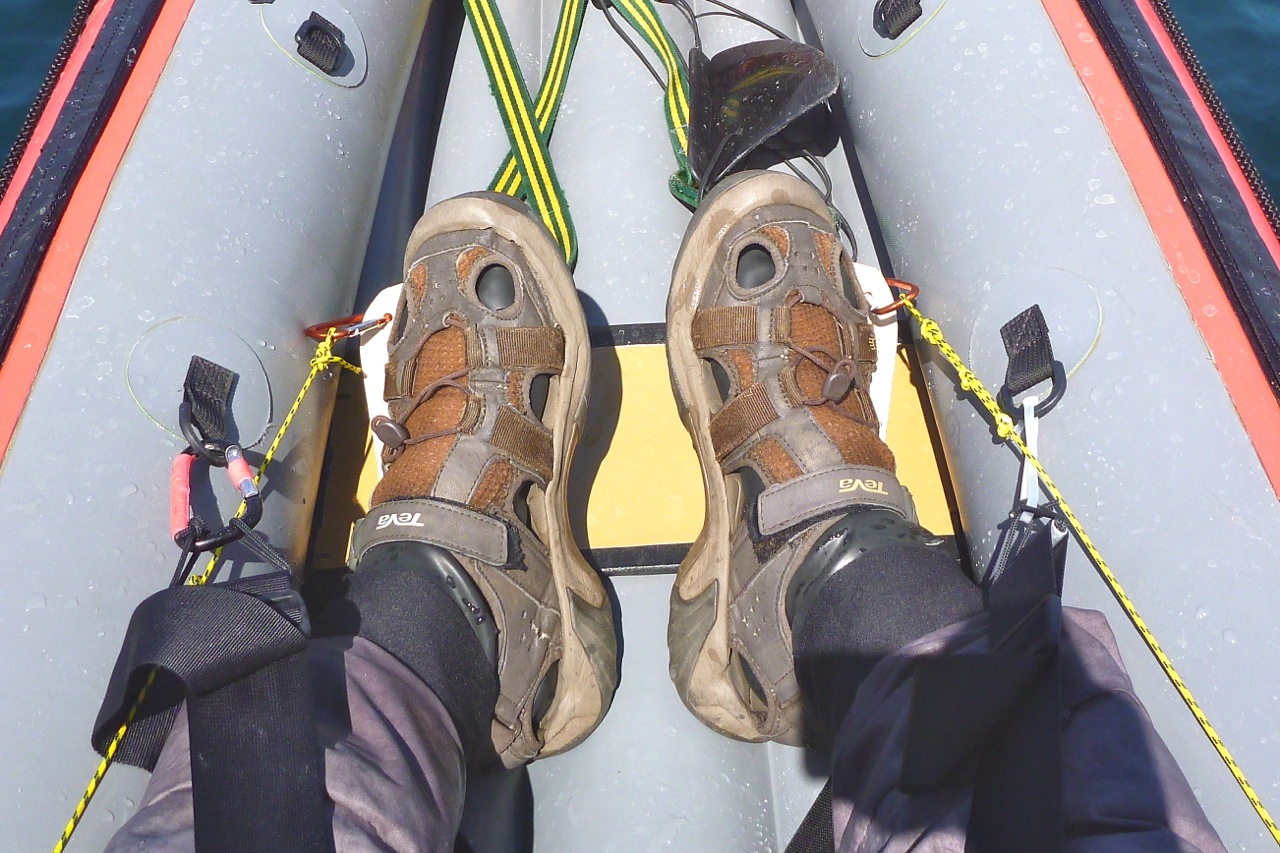
It was also clear that my scrapheap pedal board was rubbish. Heels resting on the board (left) put them two inches higher than normal – not good for paddling efficiency, comfort or pedal actuation; perhaps quite good for neglected muscles. That was easily fixed by turning the board around.
After an hour exploring this historic corner of the island (now no longer possible with the new owner’s developments), I headed back and immediately noticed a much more responsive rudder – now you’re talking! It was like driving with all the wheels done up tight. Lower heels gave a much better angle on the pedals and I noticed I was now operating the pedals with the outer edge of my feet, as I recall on the Incept. Line drag was minimal but now the wood laminate pedal board creaked and the zip tie hinges were a bit mushy. I’d already ordered another slab of LDPE chopping board to make a pedal board out of something more water-resistant than compressed dust, as well as the extravagance of proper marine-grade hinges (well, that’s what it said on eBay). I tried a quick bit of disc sailing too but it wasn’t really windy enough – more on that later.
As I neared Badentarbet beach the g-friend happened to swing by and, showing her some moves, I was amazed how sharply the boat could turn at low speed in the shallows, almost like a handbrake turn. Of course, this is kayaking not The Sweeney, but it’s good to know it worked. I also got a chance to test my newly bootied Kokotat dry pants – they worked like they should, too.
Back at the house, I realised the pedal lines had been cut before considering the need to move the pedal board forward for tandem paddling. Luckily, more Dyneema turned up next day, so I re-used the former yellow cord for the rudder lifting lines and ditched the saggy red paracord. Much tauter action.
The wheeled cord locks turned up too (right). I had a suspicion they wouldn’t work for adjusting rudder lines and I was right. They need tension from the same direction while snugged up against the edge of a stuff sack or something. I tried doubling the lines with two pulling the same way but the red Dyneema is too thin, hard-surfaced and slippery to work with these locks.
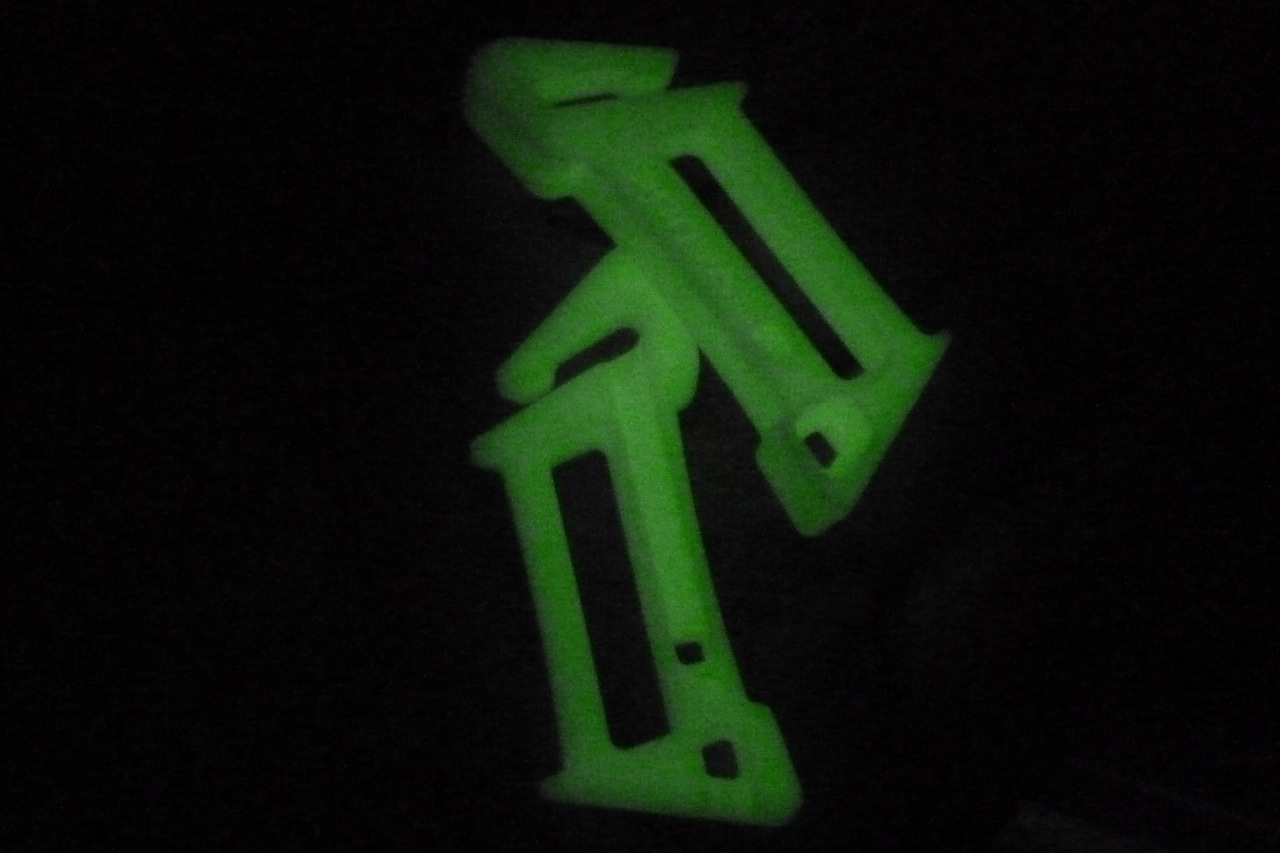
I settled on a ‘truck tarp knot’ then got the idea that the locking guyline adjusters off my Vaude tent might do the job – and they glow in the dark too! My Odyssee has guylines to spare.
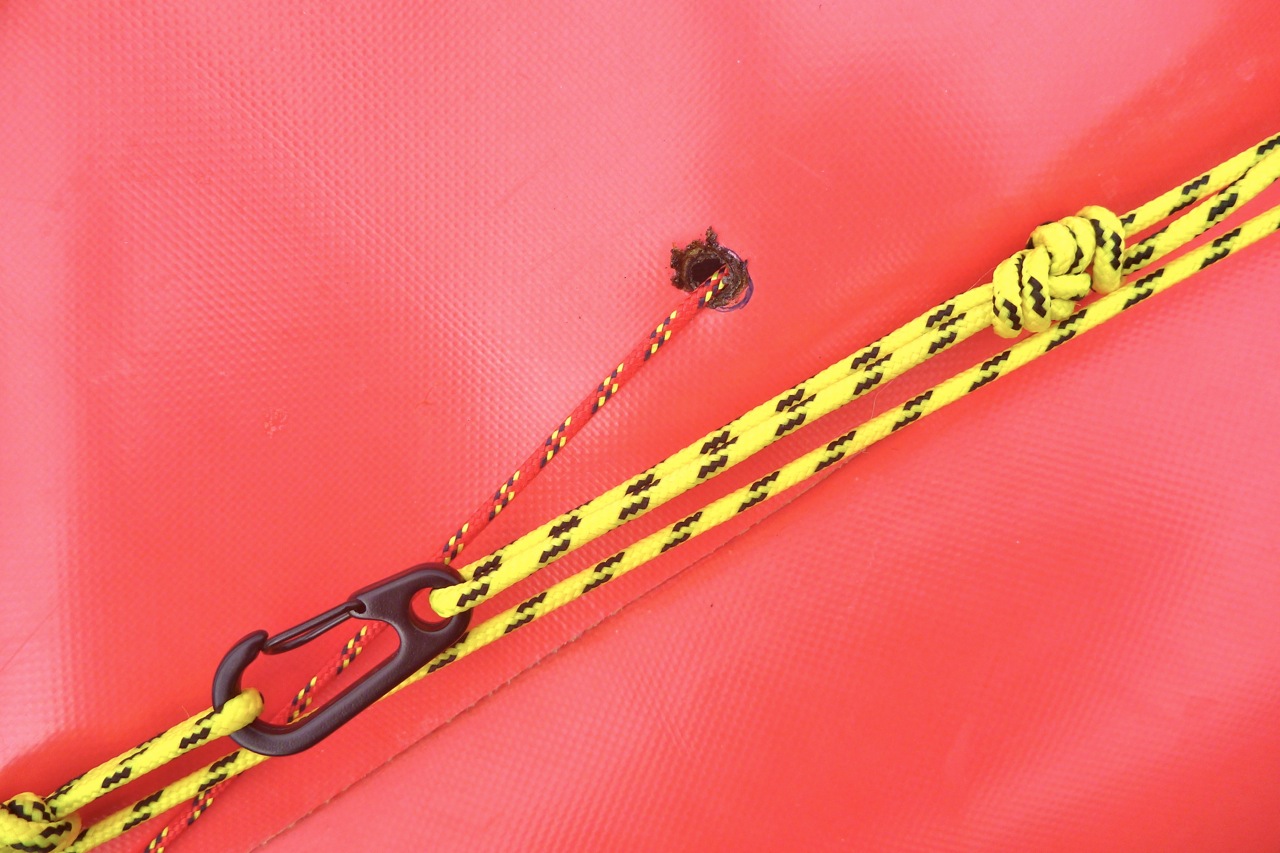
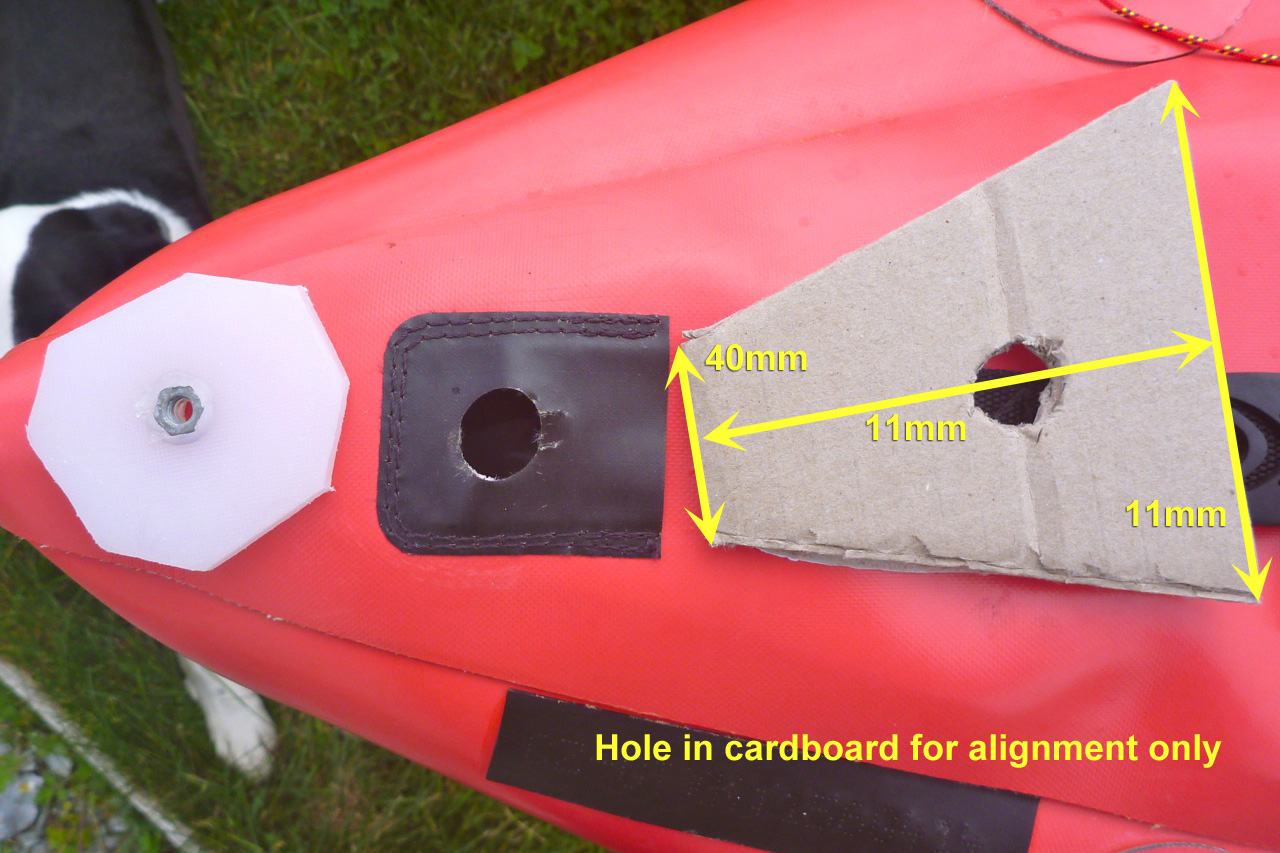
I set about making small improvements, including adding two holes in the boat’s back deck triangle (as Gumotex do on post 2016 Seawaves) to make a cleaner run line for the pivot lines. It’s no great pleasure stabbing a red-hot poker into your favourite IK, but a side benefit is the rich aroma of burning Nitrilon rubber, not some cheap PVC. I’ll track down some nice eyelets later.
Once I realised the rudder board had come undone because I’d mounted the nut plate incorrectly, it was clear the strap looped to the rearmost deck line sleeves weren’t doing much. The main mount was through the drain hole, which relied on the large nut plate (left) underneath to stay fixed, plus the saddle strap (left) limiting any yawing. The whole plate could be slimmed down to resemble Gumotex’s factory version.
So I think I’m going to follow up on my own speculation and either form a triangular nut-plate below the deck to help keep the rudder plate in line with the boat, or I may make a new long thin plate (yellow, left) that reaches back past the kayak’s portage strap. With a slot to get round the handle, I’ll poke another hole in the deck and this way the plate will have two mounting points plus the saddle strap and will not deflect.
Rudder 1.1 While waiting for more chopping boards to turn up, I went out for another run with the Mk1.1 set-up. Much windier this time – 15 to 20mph from the SW. Normally I’d not go out in this, but the point of the rudder was to ease effort and improve control just before such conditions set in.
That was the theory. In practice I struggled to get out of Old Dornie harbour against the wind and soon had to put in to readjust the pedal lines. What now!? The luminescent Vaude clamps were effective but not a 4-second job like they should be. They can go back on the tent. A better line locking mechanism needed. If I’d looked back I’d have noticed the rudder plate had become dislodged yet again by the forces pushing the boat around. That explained why getting right out of the harbour was such a slog, let alone tackling the 15-knot headwind and lashing rain. Deceptively, there were few whitecaps out there, but a deep swell was rolling through, probably lifting the rudder out of the water. Who’d have thought it was Midsummer’s Day.
Turning back, I hoped I might get a bit of a run on the wind, but control was even worse – shades of Ningaloo but without the mangos and barramundi. Back at the pier, it was a relief to see it was only the rudder plate at fault, although I’d not have been surprised if it was just too windy for any sort of IK-ing today. While waiting for ‘what-do-you-think-I-am-a-bloody-taxi-service?’ to turn up, I strolled along the exposed shore on the off-chance of finding some LDPE jetsam, but all was glistening seaweed and frayed rope.
Rudder 1.2 I’m running out of time with the luxury of having the sea at my doorstep. That evening it occurred to me the rudder plate was always deflecting clockwise because the lip of one glued-on reinforcement plate underneath pressed against the stern and stopped it turning the other way. I did what I’d considered initially and glued a thin strip of LDPE to act as an opposing locating edge so the plate sat more securely once saddle-strapped down to the boat’s triangular stern.
This surely should be enough to keep the plate in place, but while I was fiddling I made a template for the triangular nut plate which might further help locate the rudder plate (right). When more LDPE turns up I’ll cut one out and melt another M6 nut into it. if this doesn’t work a longer plate with another through-the-deck fixture below the portage handle (as visualised above in yellow) ought to fix this once and for all.
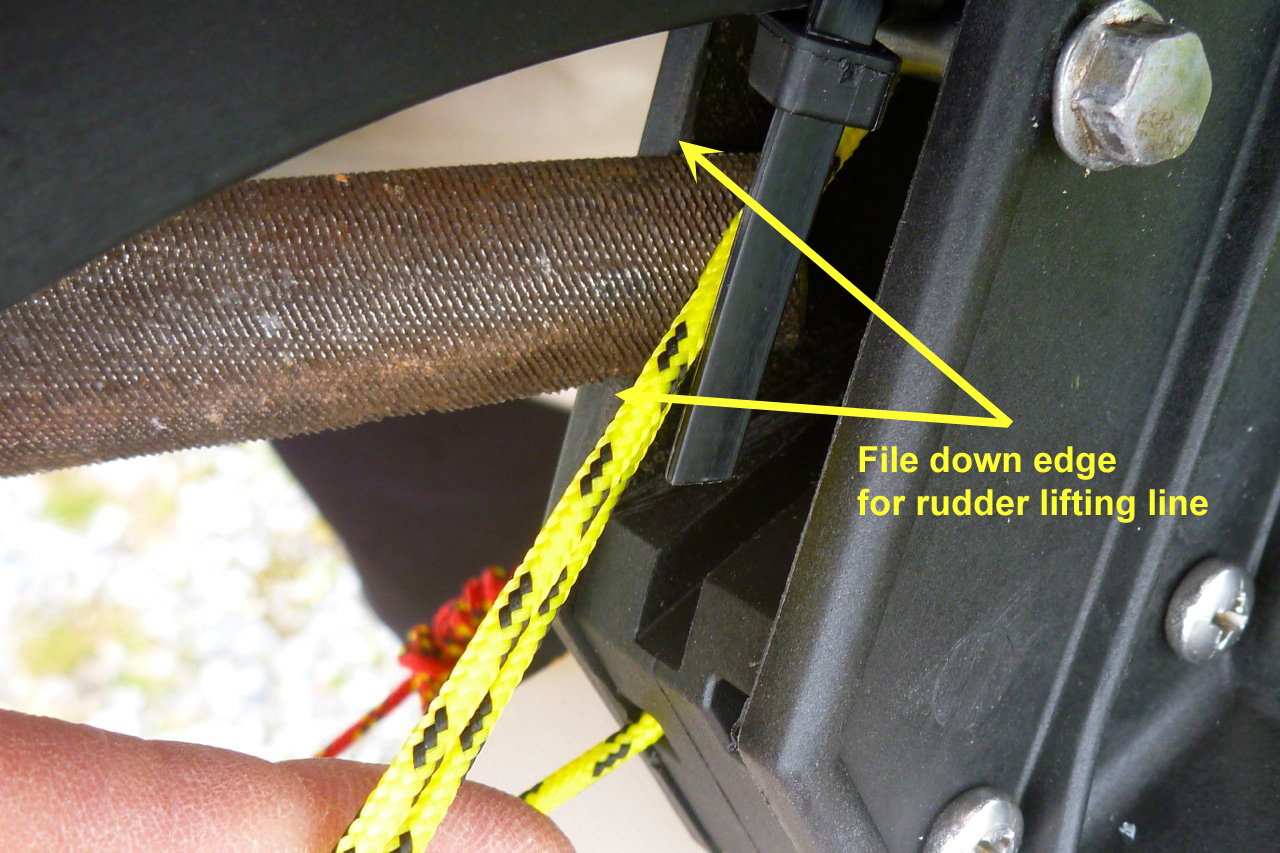
Other jobs: trimming off the board’s unneeded flab to make the current haxagonal shape, filing down the edge of the rudder body where the lifting line rubbed (right), and one more tweaking of the rudder pedal lines.
I headed to back to the harbour where it was still blowing about 15mph, but within a minute suspected it was pivoting again, possibly from the pull when dropping the rudder. The added locating strip wasn’t enough. Who knows how Gumotex manage it but on this set-up the surefire solution is a second in-line fixing point (as above) and perhaps that triangular under-plate to stop the mount pivoting once and for all.
Partly, these issues are due to underestimating the forces that a combined 120kg of paddler in a 4.5m-long kayak moving at 4mph puts on a rudder and its mount. Add some wind, current and waves and how well the small blade is fixed to a big boat becomes critical. Nearly there, brothers and one clear benefit: the ability to sit the kayak on the ground with no skeg stress. I can see me leaving the rudder on there full time and adding some sort of bombproof lock-out to make it the mythical articulated / lifting skeg.