See also:
PRV maintenance by Marcin

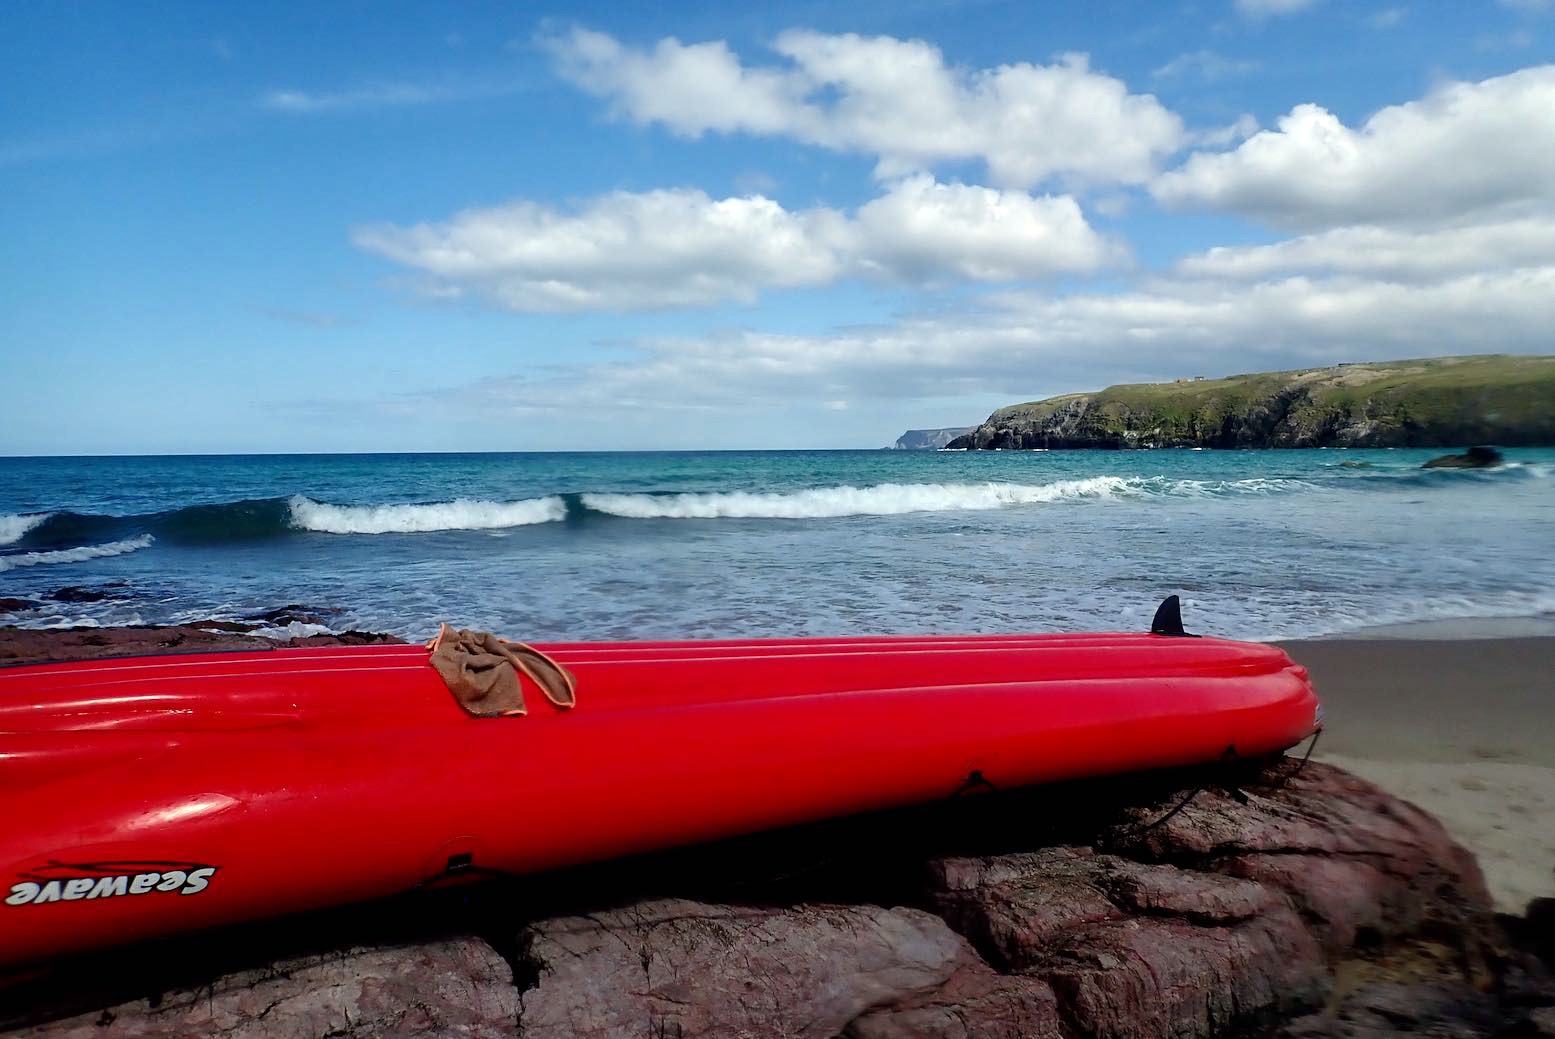
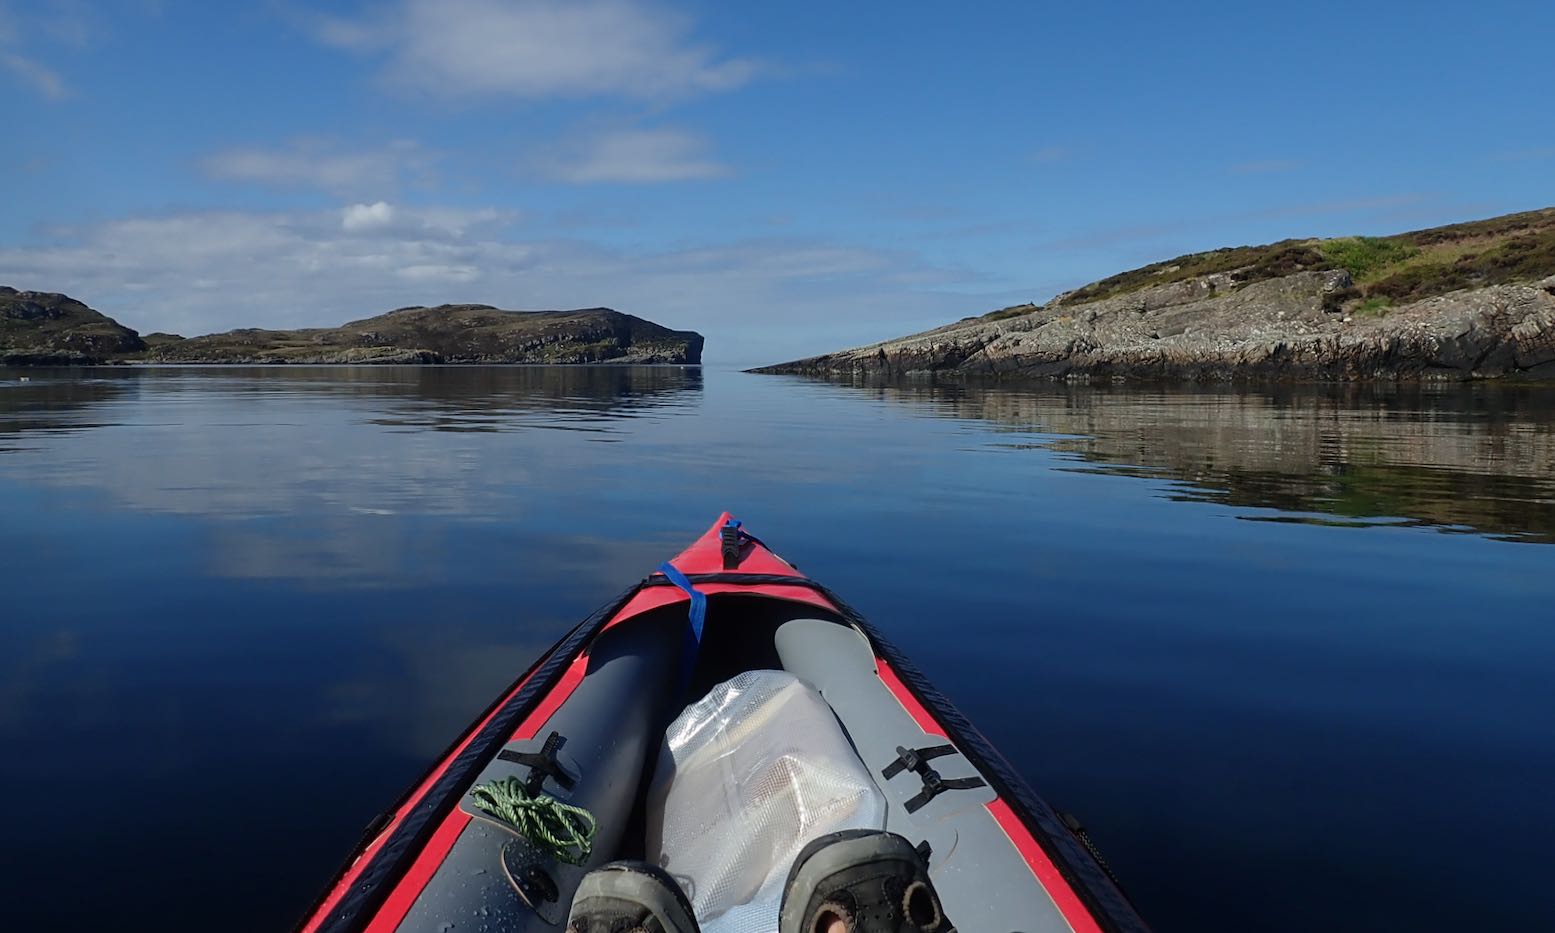
The other day we paddled the Seawave off Durness beach where the surf was bigger than I’m used to. Hitting a breaking wave as we paddled out didn’t help; the swamped boat needed tipping out at the next beach. It was a bit too offshore windy to roam, but it was still a thrill to be paddling on the very top of Britain, just 2175 miles from the North Pole (about the same distance south to the Canaries).
After the paddle I took care to dry, wipe down and roll the boat up on a sand-free rock bench, but lacking a hose back at the house, I had to rinse one bucket at time – not ideal. When I pumped up, the floor soon went flat: sand was in the seal of the floor’s PRV (what’s a PRV). It’s a thing that happens but in nearly 20 years of Gumotexing it’s never happened to me. Today was my day.

The design of the valve means that if the boat swamps in the surf, water laden with grit can enter via the six vents and pool in the valve body right above the seal. The next time it purges, sand grains can slip down onto the soft rubber seal surface and stay there, letting air leak out.
Because the chances of this are high, with a leaking floor PRVs are the usual culprit, not the nearby inflation valve with its sealed valve cap, or less still, a puncture. But don’t rule either out (the cleaning procedure for an inflation valve will be the same).
Fixing a PRV
Much of what follows is my take on Polishman Marcin S’s translated post linked above. It’s not how I actually did it, it’s how I would do it next time after quite a lot of trial, error and better ideas or procedures though up along the way.
Before disassembly, first try giving the PRV a darn good blow-through by pumping like billy-o and letting it purge. It will help to prise off the vent cap with a small flat screwdriver so grains blow away, not bounce back in. Pump up and see what happens. Chances are it won’t work.

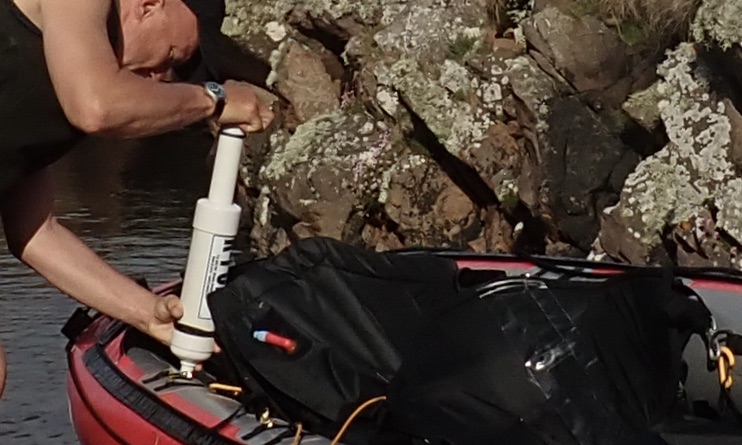
Next I suggest putting the boat on a slope (to save water and weight) and flood the stern to establish the pace of the leak from the PRV. You will do it again at the end to see if there is any change. By dragging the boat around 180°, you can let the water slosh down to the bow while you remove the PRV at the stern at the high end.

Don’t try this; manometer leaking 
Small bubbles rising from the PRV
Don’t plug in a manometer to try monitor the leak over a period of time; it cost me a few hours and a disassembly or two before the flooding idea proved my manometer was leaking from the base faster than the PRV. As we know, pressure gauges are plugged in briefly to get a reading, then as quickly removed. To test for a leak, water is best.

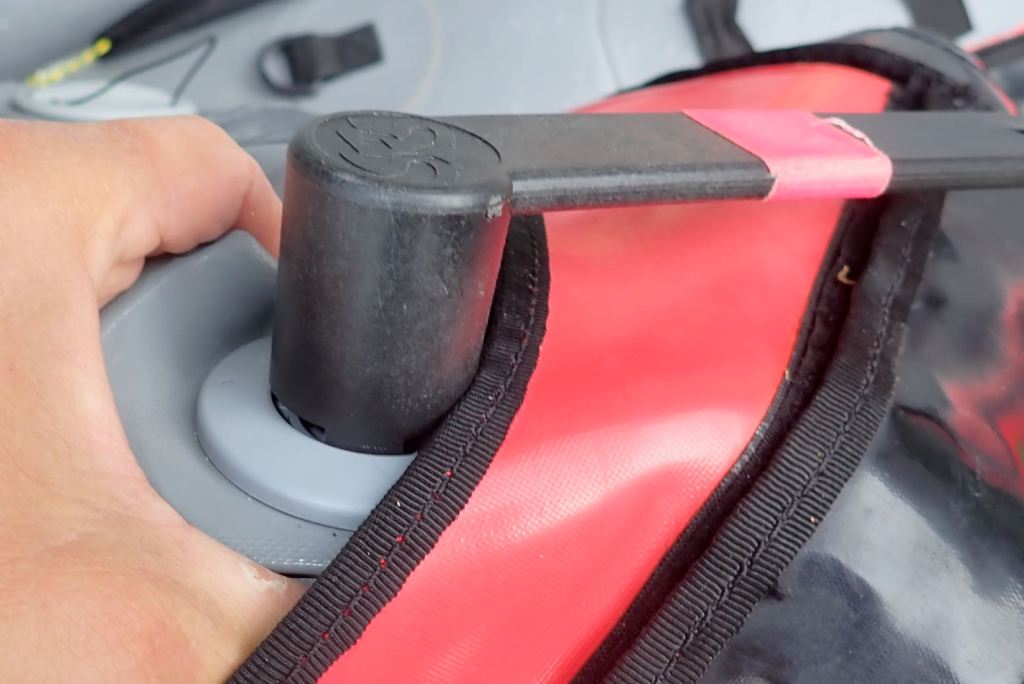
Six splines below the vent cap 
Buy one now
You now know for sure the PRV is leaking so will have to remove and clean it. Flicking off the vent cap exposes the valve body’s six splines. Fit your Gumotex valve tool (or eBay clones from £6) and unscrew the PRV. As Marcin says: the plastic one will do; you don’t need the expensive metal one Gumotex also sell. Expect the PRV to be very tight. Marcin pre-lubed his, I didn’t but it undid easily enough. My boat is less than a year old.
What a tool 
Don’t let the backing nut fall away (or the o-ring)
It’s easier to start unscrewing the PRV with the boat fully inflated, but separate the two parts of the valve only once fully deflated so there’s less chance of the backing nut inside the hull rolling away out of reach. Same with the loose o-ring on the valve body base; don’t let it drop into the abyss.

PRV with black o-ring 
Rinsing; worth a shot
With the PRV in hand, you can see how it works: a spring-loaded valve opens upward when pressure from within reaches a pre-set level – on a Seawave supposedly 0.25 bar or 3.5 psi (but it might close as low as 0.20). As pressure drops it seals shut. At this point you might try rinsing under a tap while pushing the valve open, but you’re going to have to disassemble it anyway to check the state of the seal.

Set the o-ring aside and unscrew the 6mm locknut on the valve stem. Press on the sprung valve from the other side to stop it spinning as you unscrew the nut. But before you do this, count the number of threads or take a photo (above), as the position of the nut regulates the purge pressure; the more you screw down the nut the higher the purge pressure. I notice Marcin’s nut on his Solar was much less screwed in than mine (lower purge pressure). (At one point I tried screwing in my nut an extra turn to improve sealing, but it didn’t seem to make much difference; still closing around 0.2. Maybe a few more turns are needed, but of course you don’t want to go too far and compromise the floor.


Left: pliers to undo the nut; magnifying glass and torch to closely inspect the rubber seal. Right: the disassembled PRV. From top left: valve body, o-ring, valve stem with rubber seal, spring, spring cross-washer, 6mm lock nut.

Ooo-er, quite a lot of fine Durness beach on there.

I chose to clean the rubber seal with an ear stick and toluene solvent. (I tried, but decided not to remove the rubber seal from the stem). After carefully wiping off the grains on, around and under the seal, I dipped the whole thing in the toluene bottle cap (not too long as toluene is strong stuff on plastic; it dissolved the orange marker dot). Don’t forget to inspect and wipe the inside of the plastic valve body too.

A lovely, clean PRV seal. Reassemble and carefully screw down the metal nut onto the soft plastic valve stem to where it was – or what you prefer.
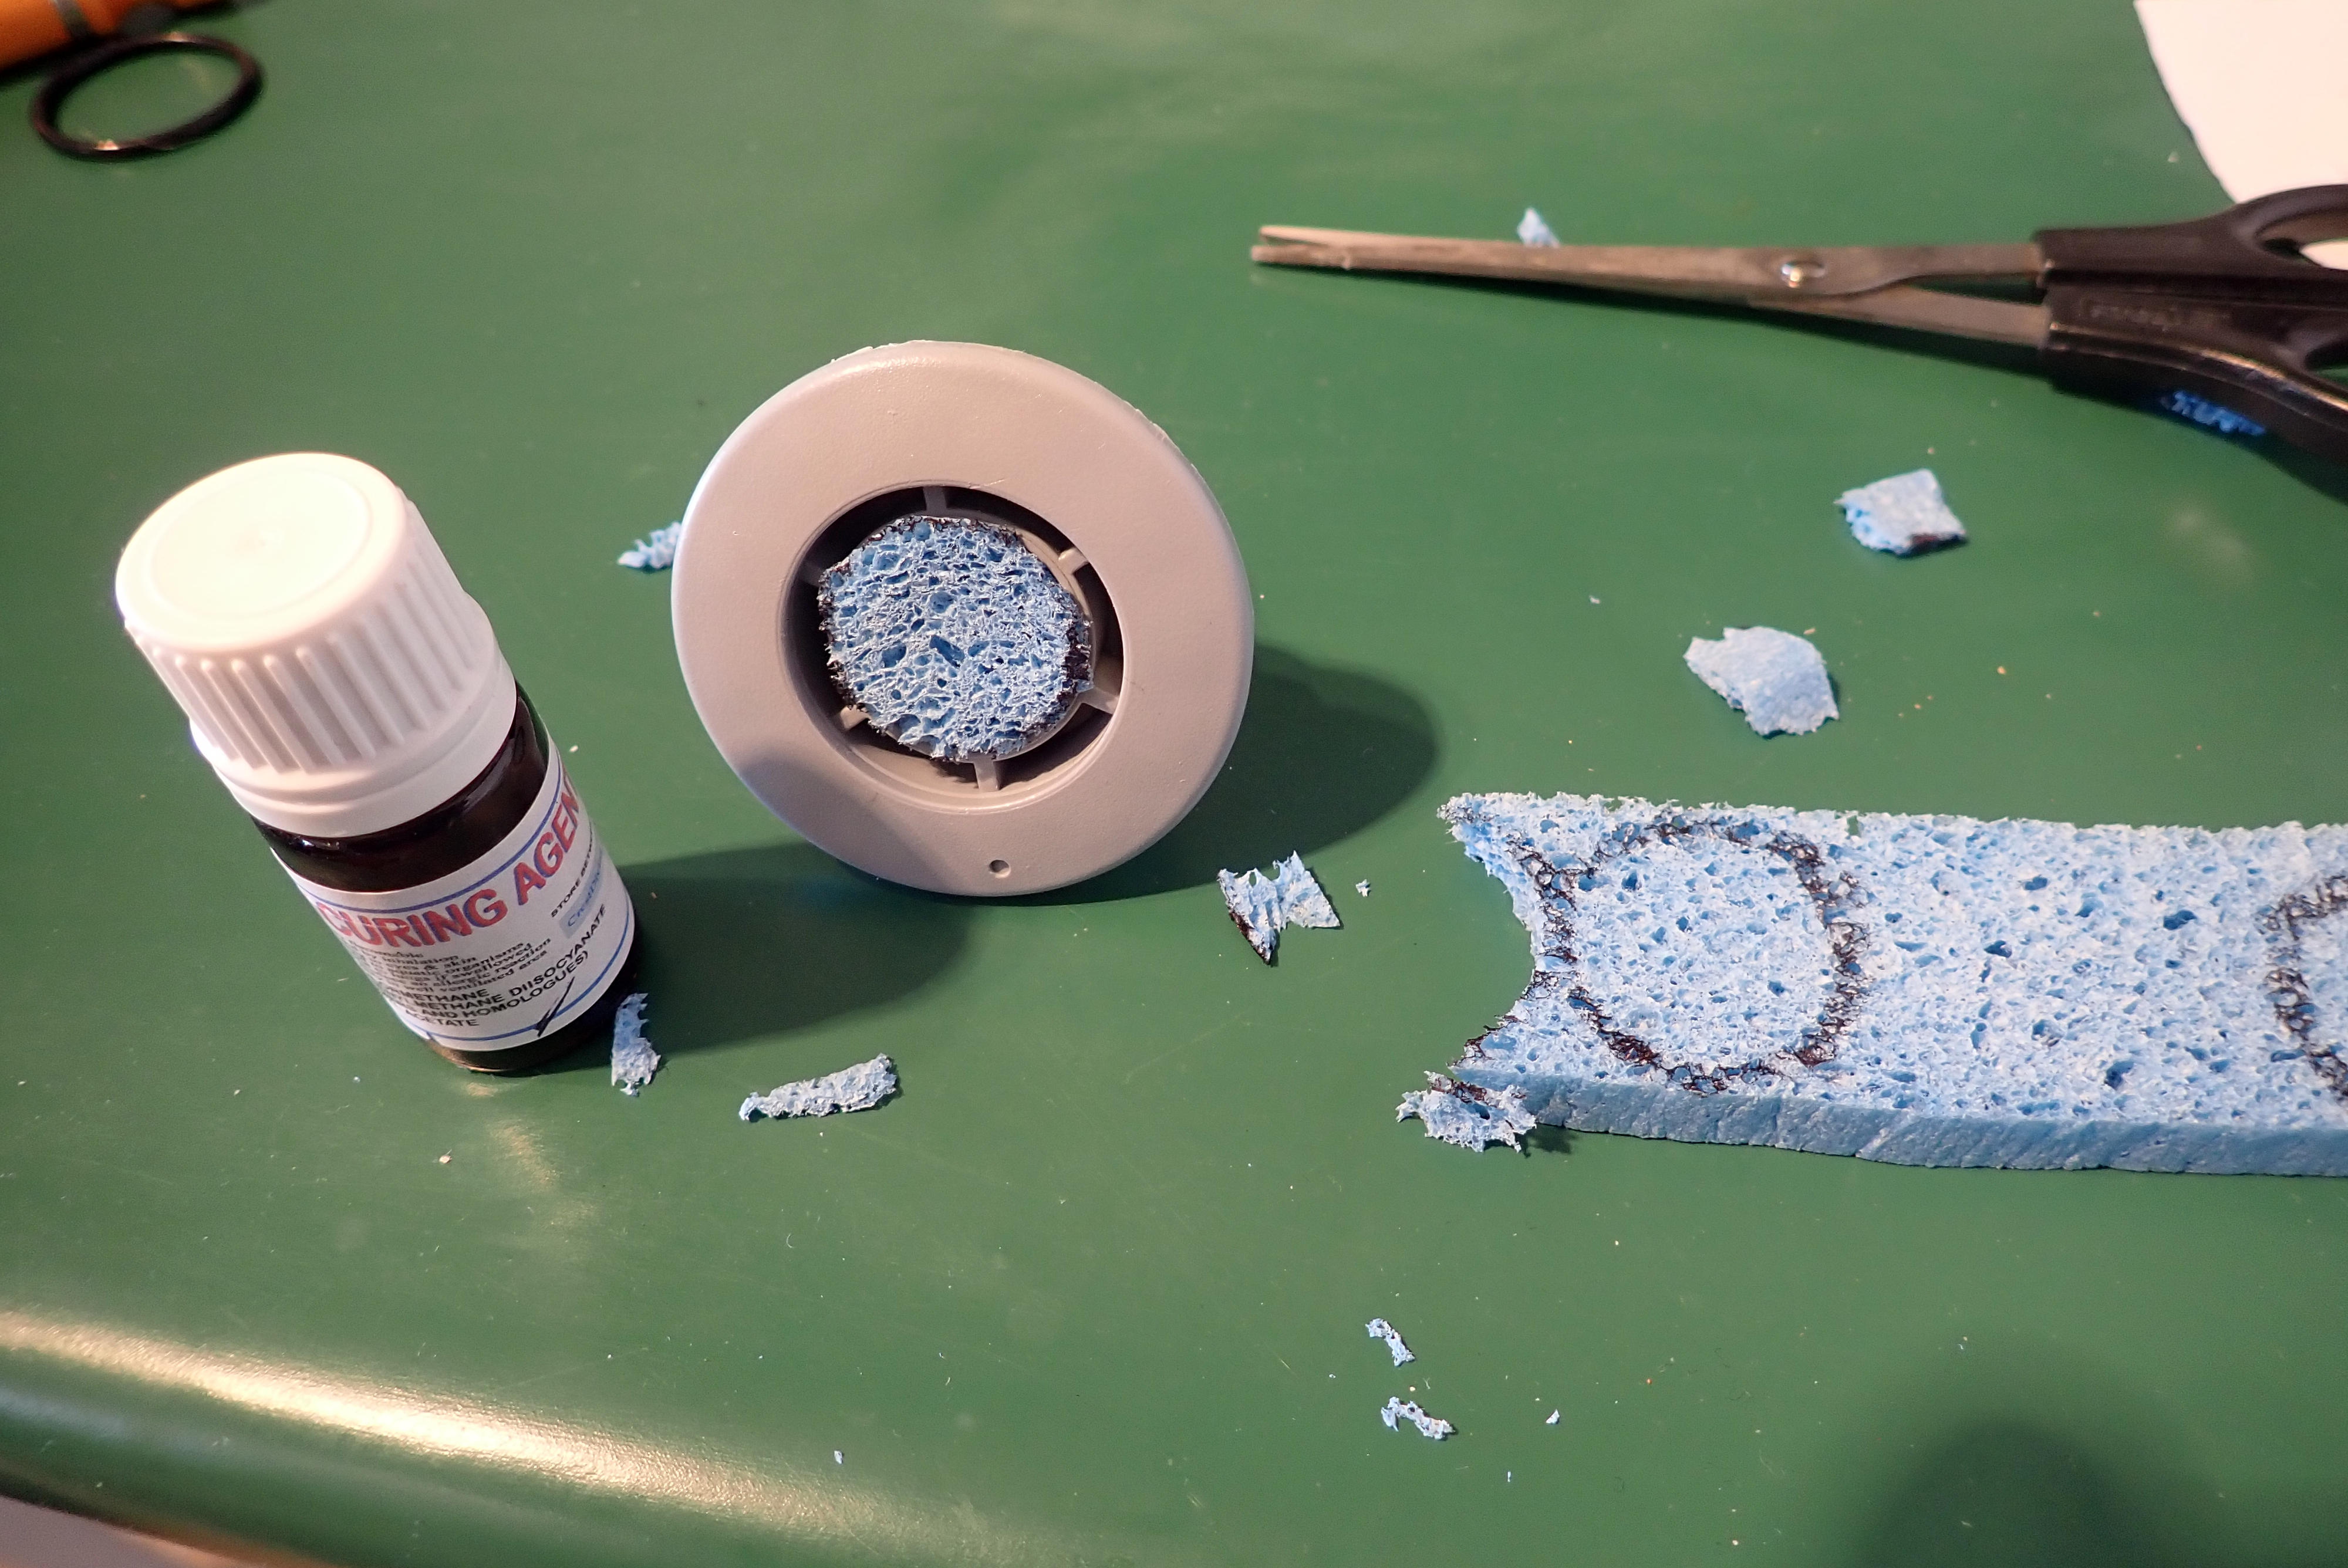
Grit-catching foam filter 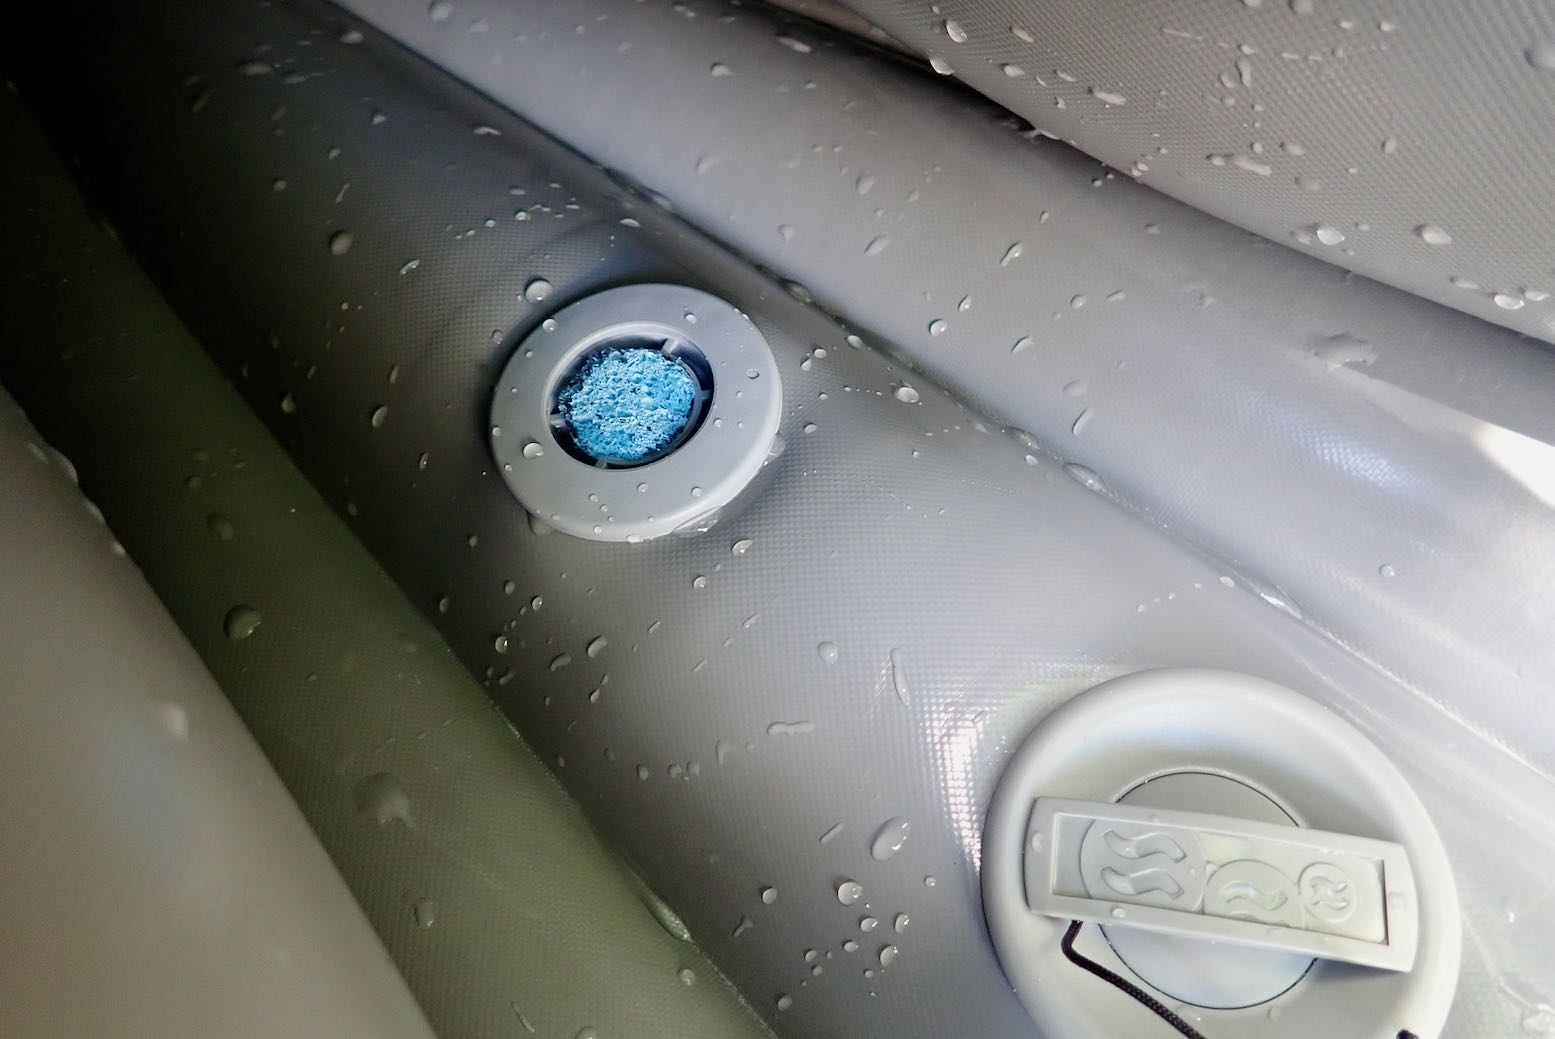
Marcin suggests sticking some sponge under the vent cap to catch grains in future. Sounds like a good idea. These are easily removed/rinsed/dried or replaced by flipping off the vent cap.
Edge caught in thread 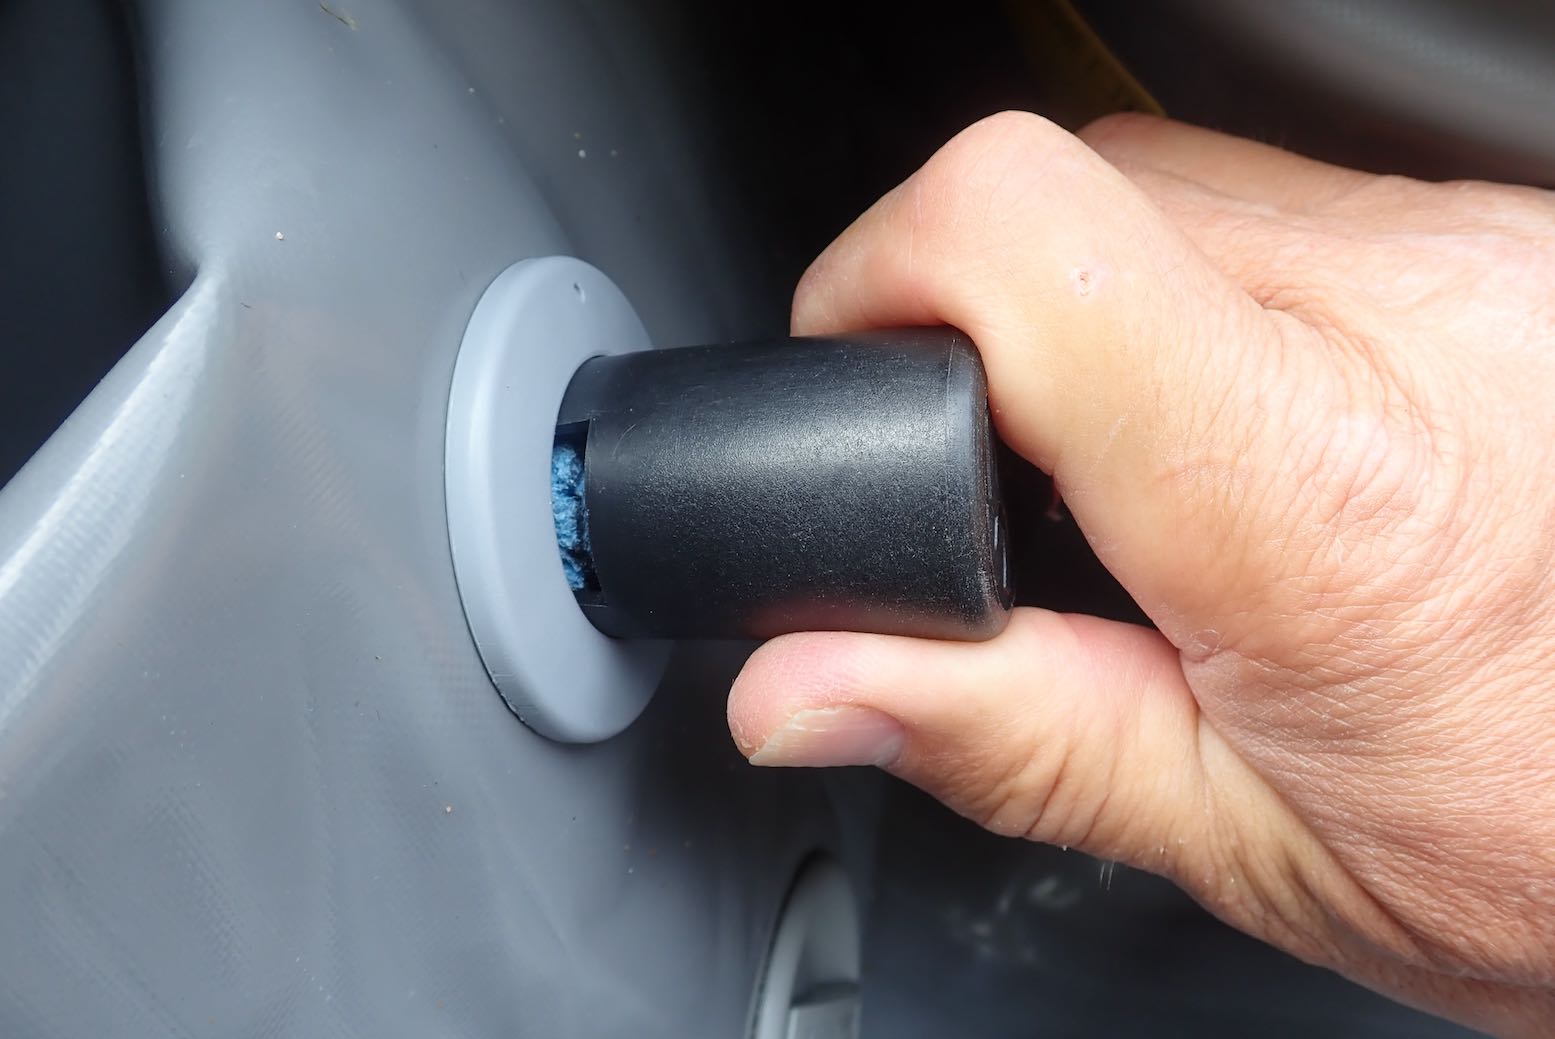
Tooling on 
Clip on the cap

A quick Hail Mary to Saint Columba and you’re now ready to refit the valve. You shouldn’t need any lube other than a bit of water for things to reassemble smoothly, though I decided to lube the o-ring with some TiZip silicon grease.
I found as you start screwing in by hand it feels like it’s cross threading. It isn’t: the edge of the fabric is getting caught in the thread. Back up and jiggle the valve body and loose fabric around to make sure the body has slotted and centred its flange into the fabric hole.
Pump back up, tighten the PRV down some more, but probably don’t clip on the vent cap just yet as you may be going back to square one, as I did (partly because the fitted manometer was leading me astray).
Now flip the stern back downhill and let the water slosh back over the Seawave’s valves. I found the PRV purged for about a minute, then abruptly stopped with an odd underwater squawk … but carried on leaking slowly. Another removal and check and refit and there’s still a very slow leak – a 2mm bubble every 2-3 seconds, but with the floor now lying in the warm afternoon sunshine, that may be normal purging. I decide it’s as fixed as it can be. A few hours later, all was normal again and we are all much the wiser.
Moral of the story: if you think sand-laden seawater may have pooled in your PRV (most likely from crashing beach surf, not normal, deep-water paddle-splash), back on shore flip the vent cap off and rinse the PRV cavity with fresh water, ideally flipping the boat upside down, so any grains flush out.