Category Archives: Gear

Paddles, clothes, buoyancy vests, etc

MYOG: TiZip Pakbag

See also:
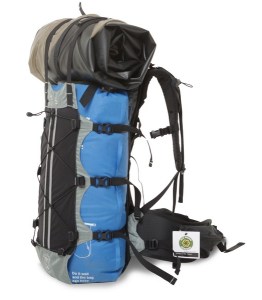
Deck bags for packboats

FYI 2023: Not sure what or how but TiZip tell me the MasterSeal design has updated

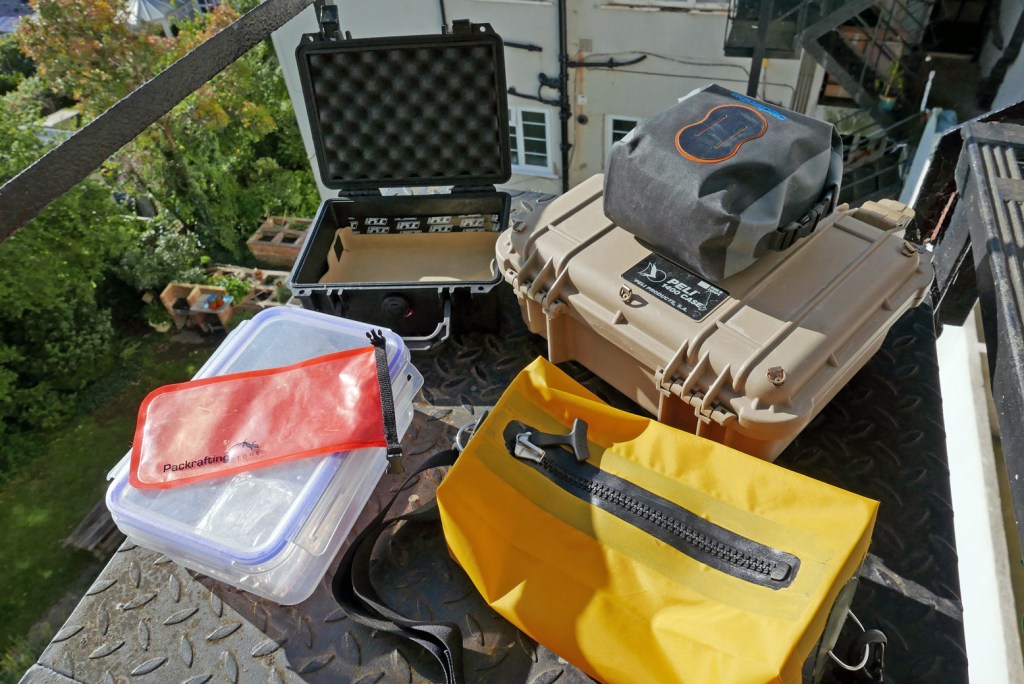
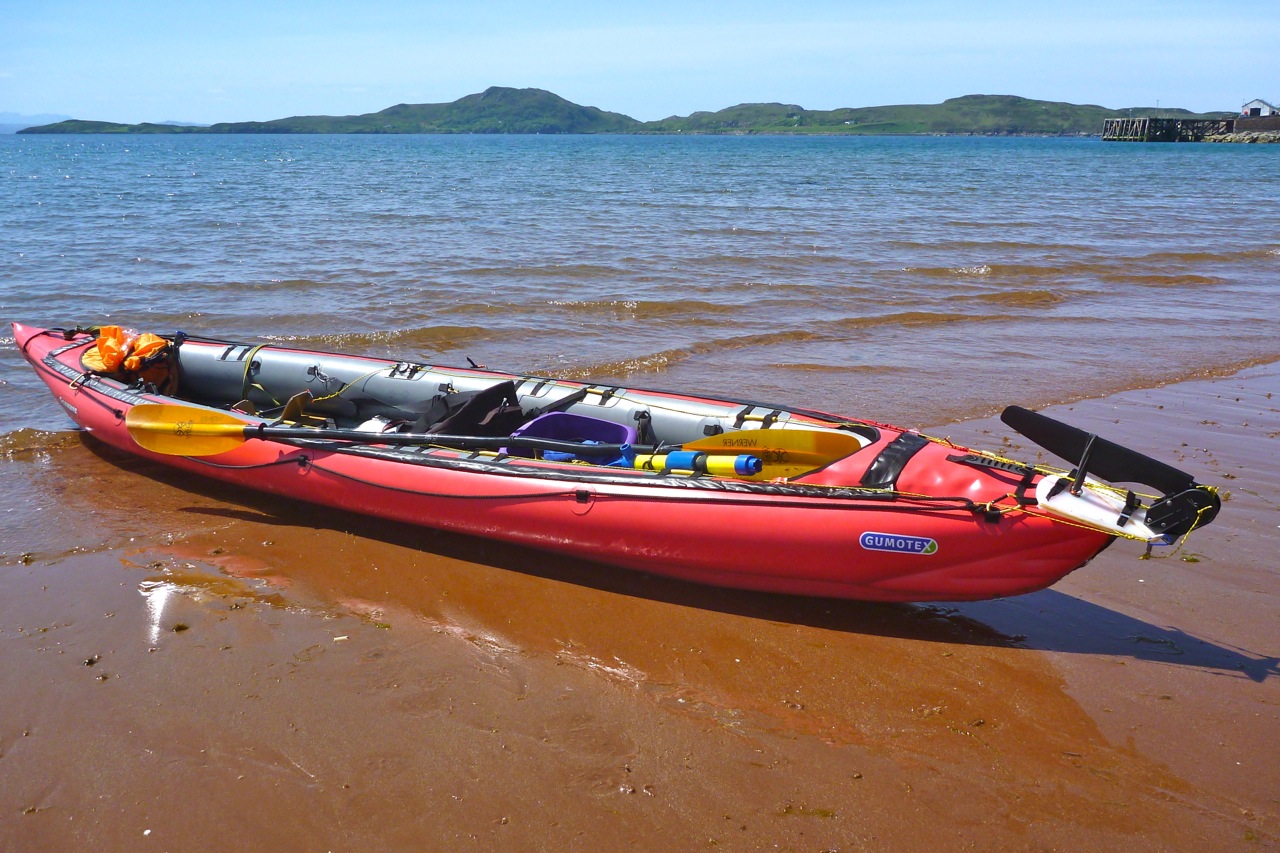
As mentioned here, wafting down the Tarn Gorge one summer with a Watershed Chattooga drybag jammed under my knees gave me plenty of time to configure a ‘deckbag’ to better fit my needs.

bagbag2


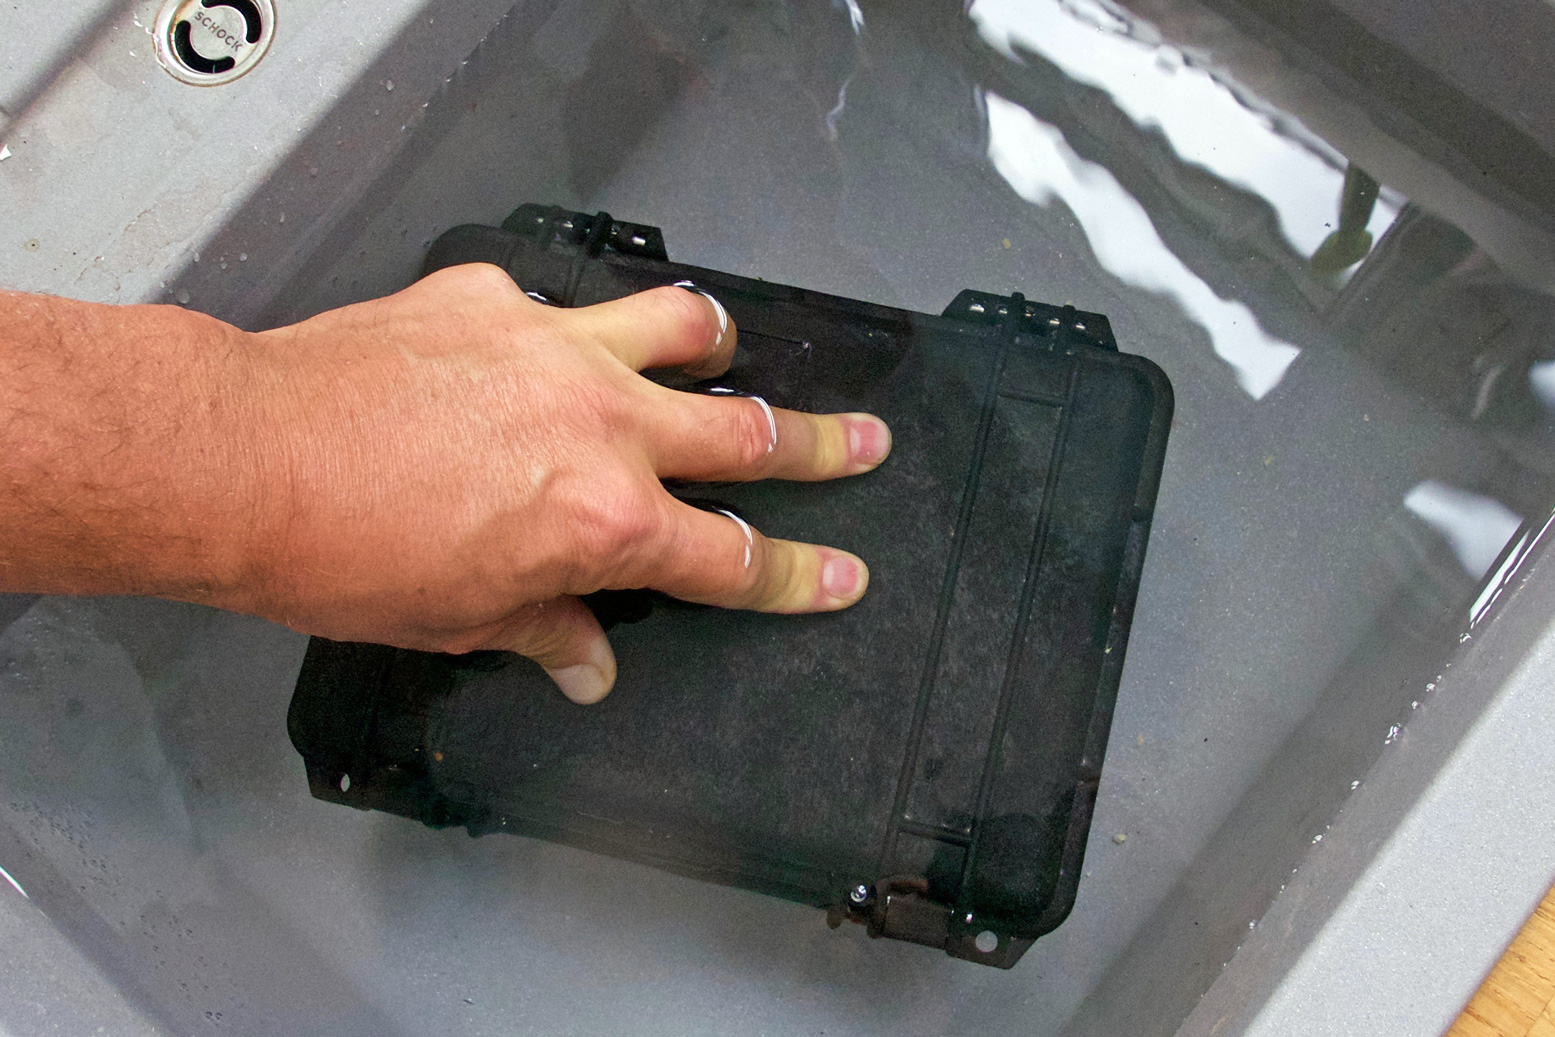
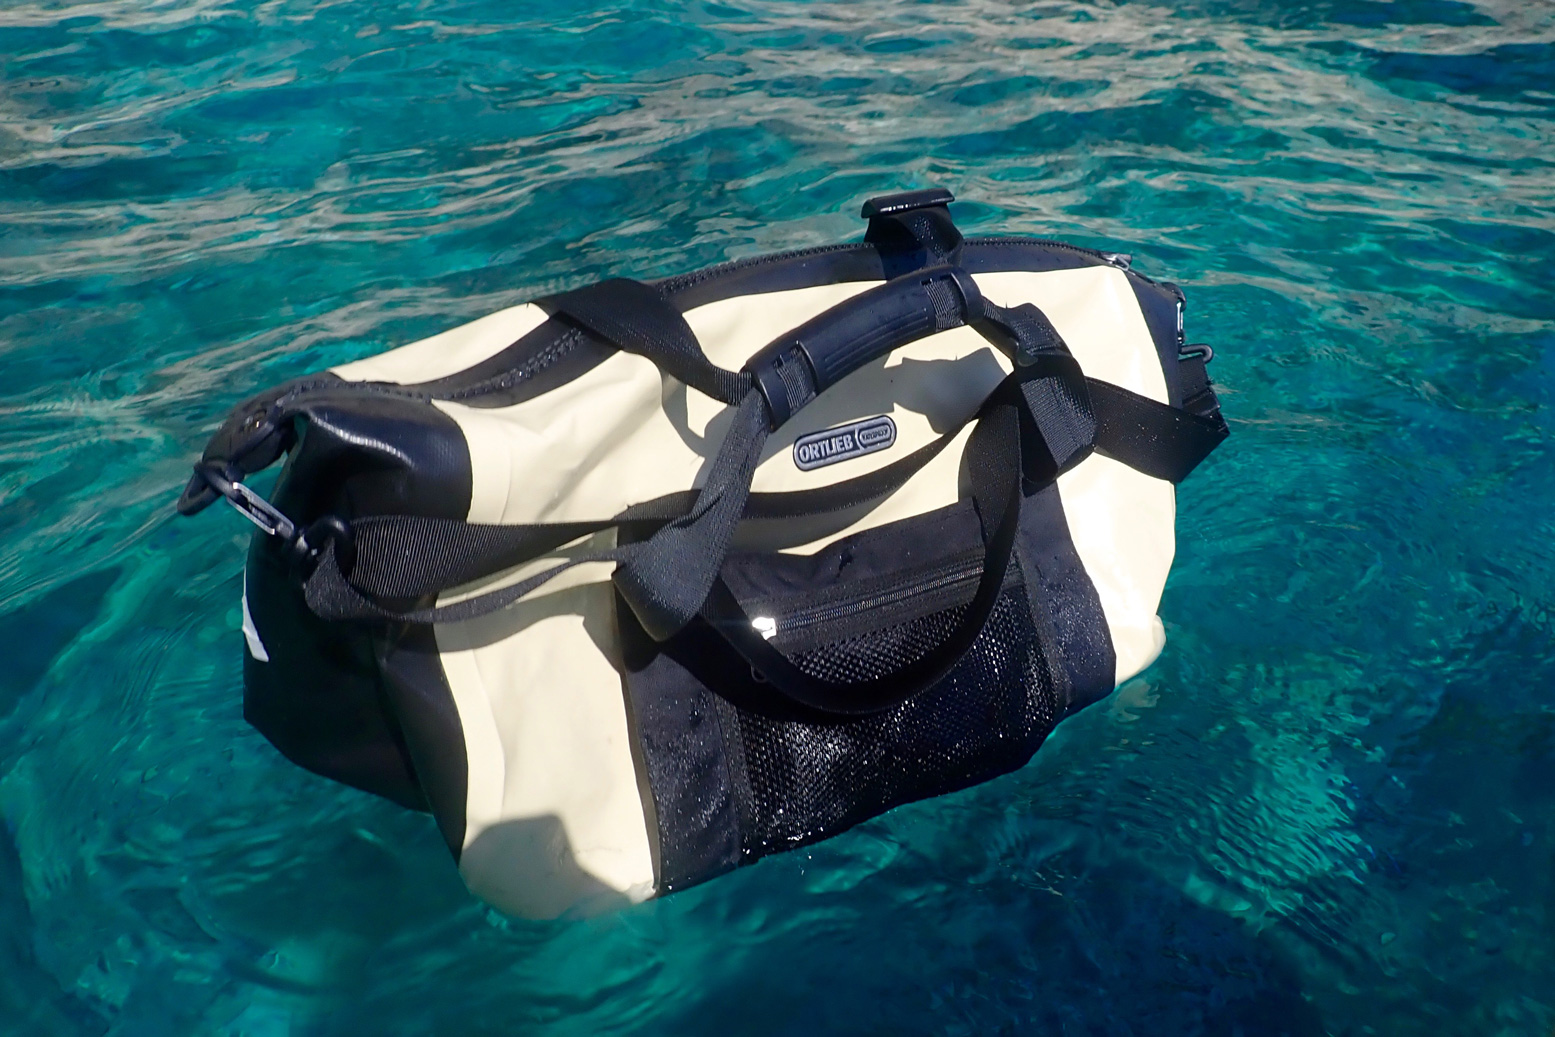
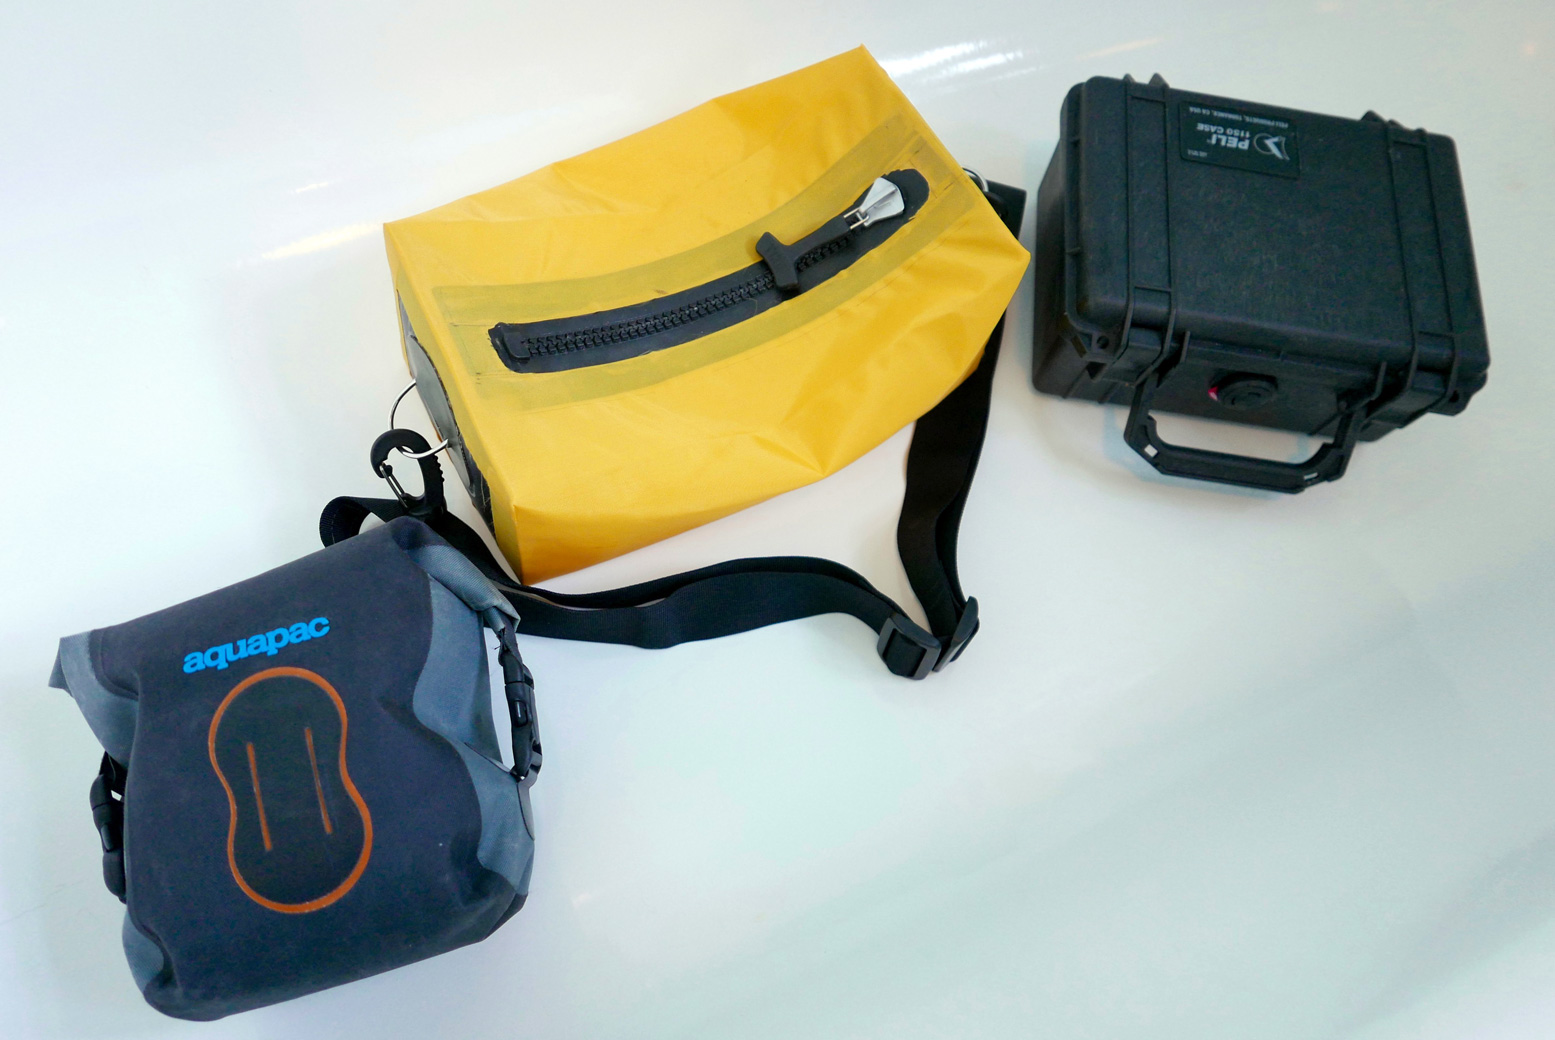
Peli cases are too heavy and cumbersome for these sorts of trips, while dependably dunk-proof – or even submersible bags like the Chattooga are too big and too fiddly to seal easily (since replaced with an Ortlieb Travel Zip). All I needed a 5-litre bag to sit on the floor below my knees for my must-stay-dries.
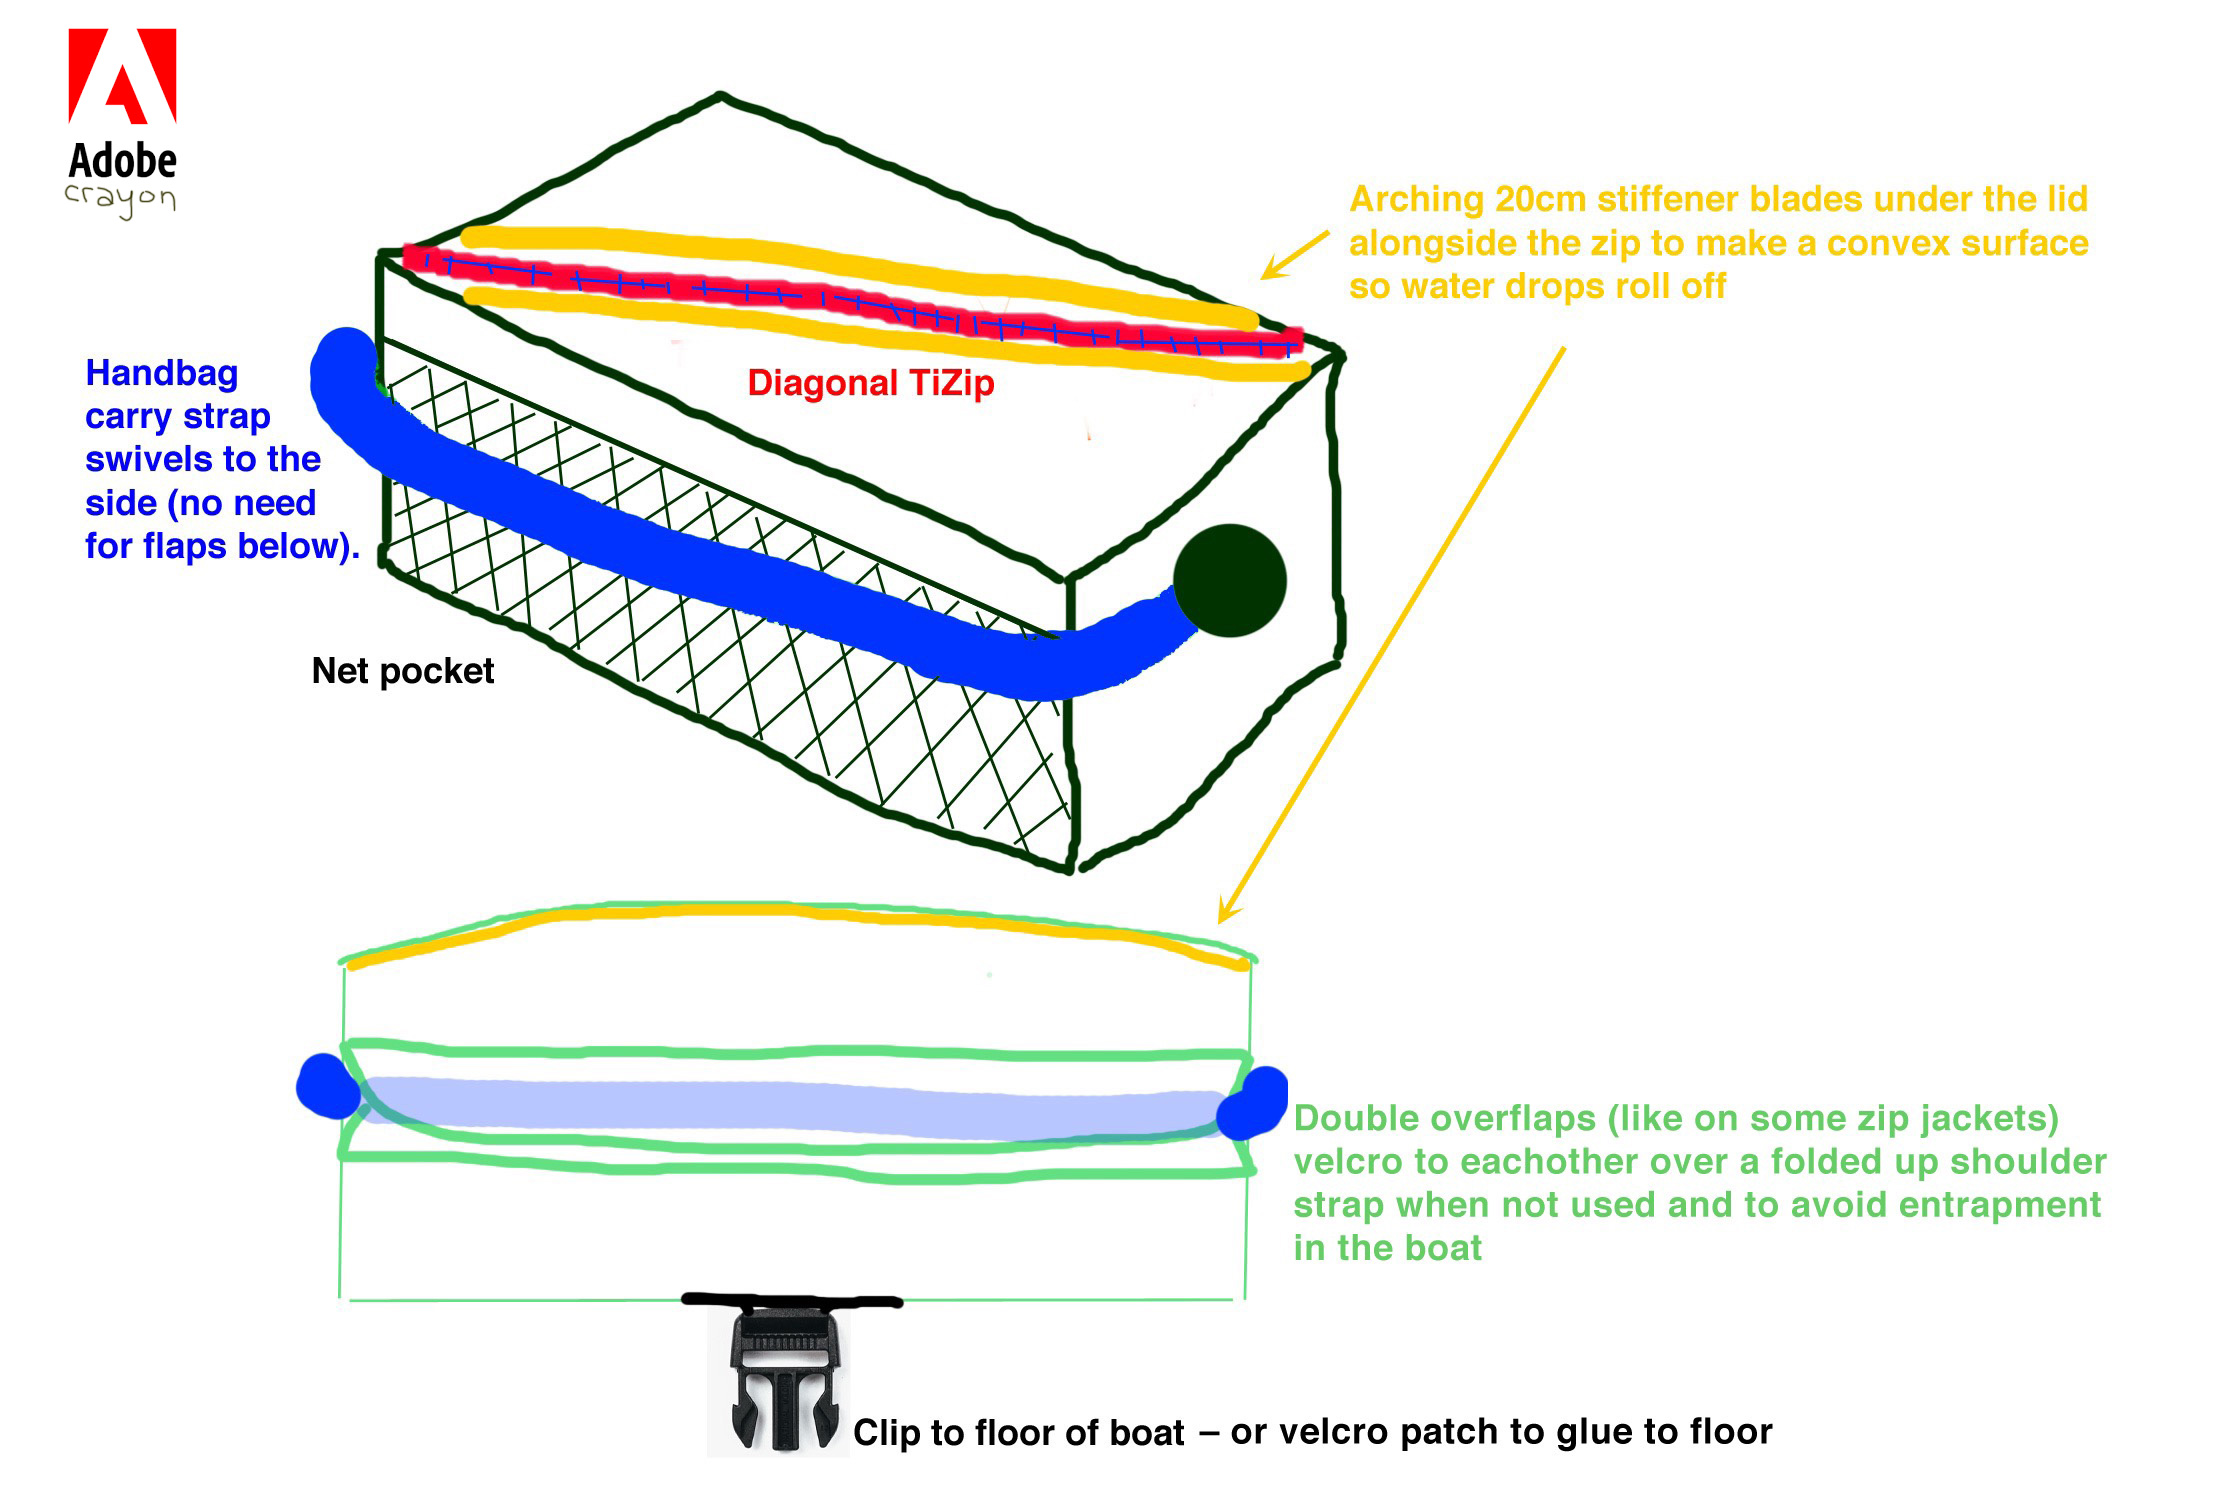
Using state-of-the-art Adobe Crayon™ CAD software I came up with a design (above) and optimal dims of about 29cm x 15cm wide by 12cm deep giving about 5 litres volume. Part of the attraction of this project was learning to heat-weld TPU fabric with a small iron. It looks so much easier and less messy than glue. Or so I thought.

Before I got – quite literally – stuck in, I considered adapting some of the many heavy-duty SealLine PVC roll-top dry bags I have knocking about. All I needed to do was stick a zip in, then somehow cap one end with a round piece of something. I may well try that later but what I was actually aiming for was a stable box not a cylinder to sit securely on the floor of a boat.

Heat welding: important to understand
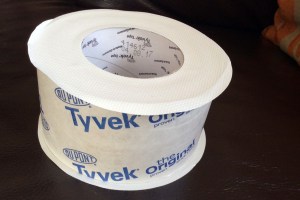
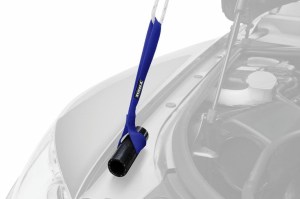
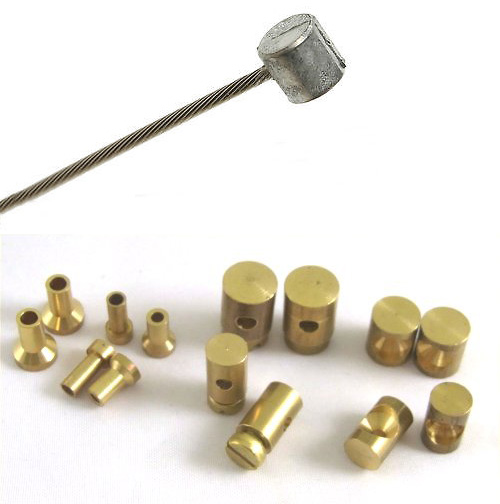
PVC plastic can’t be heat sealed with an iron because it’s double coated. With double-coated anything (TPU, PVC, etc) the hot iron will easily melt the coating and make a right mess. Done this way you need to use a heat gun and a roller (left) which requires three hands. Or use single-sided PVC seam tape. Or of course, use glue.

The body of my Pakbag could be made from single-coated yellow 210D packraft hull fabric, with the near-square end panels in ‘both-sides-coated’ 420D black packraft floor material. At 650g/sqm (27oz/sq yard) this stuff is good and thick. The thin yellow is 275g/sqm.

fabric

Half a metre minimum order of each cost €10 and €20 respectively from extremtextil in Germany; a very handy resource for the home fabrician. What you see left is what’s left over. Extrem were also one of the only places I found who’d sell a couple of 23-cm TiZip MasterSeal 10s for €23 each. Rolled delivery cost a bit more but avoided folds and was very fast. In the meantime I bought a used Prolux iron off ebay for 20 quid and already had some scissors, a table, a ruler and a knife.

bagbagtemp
edsiz

I’m not so skilled at home handicrafts so expected to make a right mess of things first time round, and was prepared to make a second bag. The next best thing I could do was think carefully before diving in like Edward Scissorhands at a confetti convention.
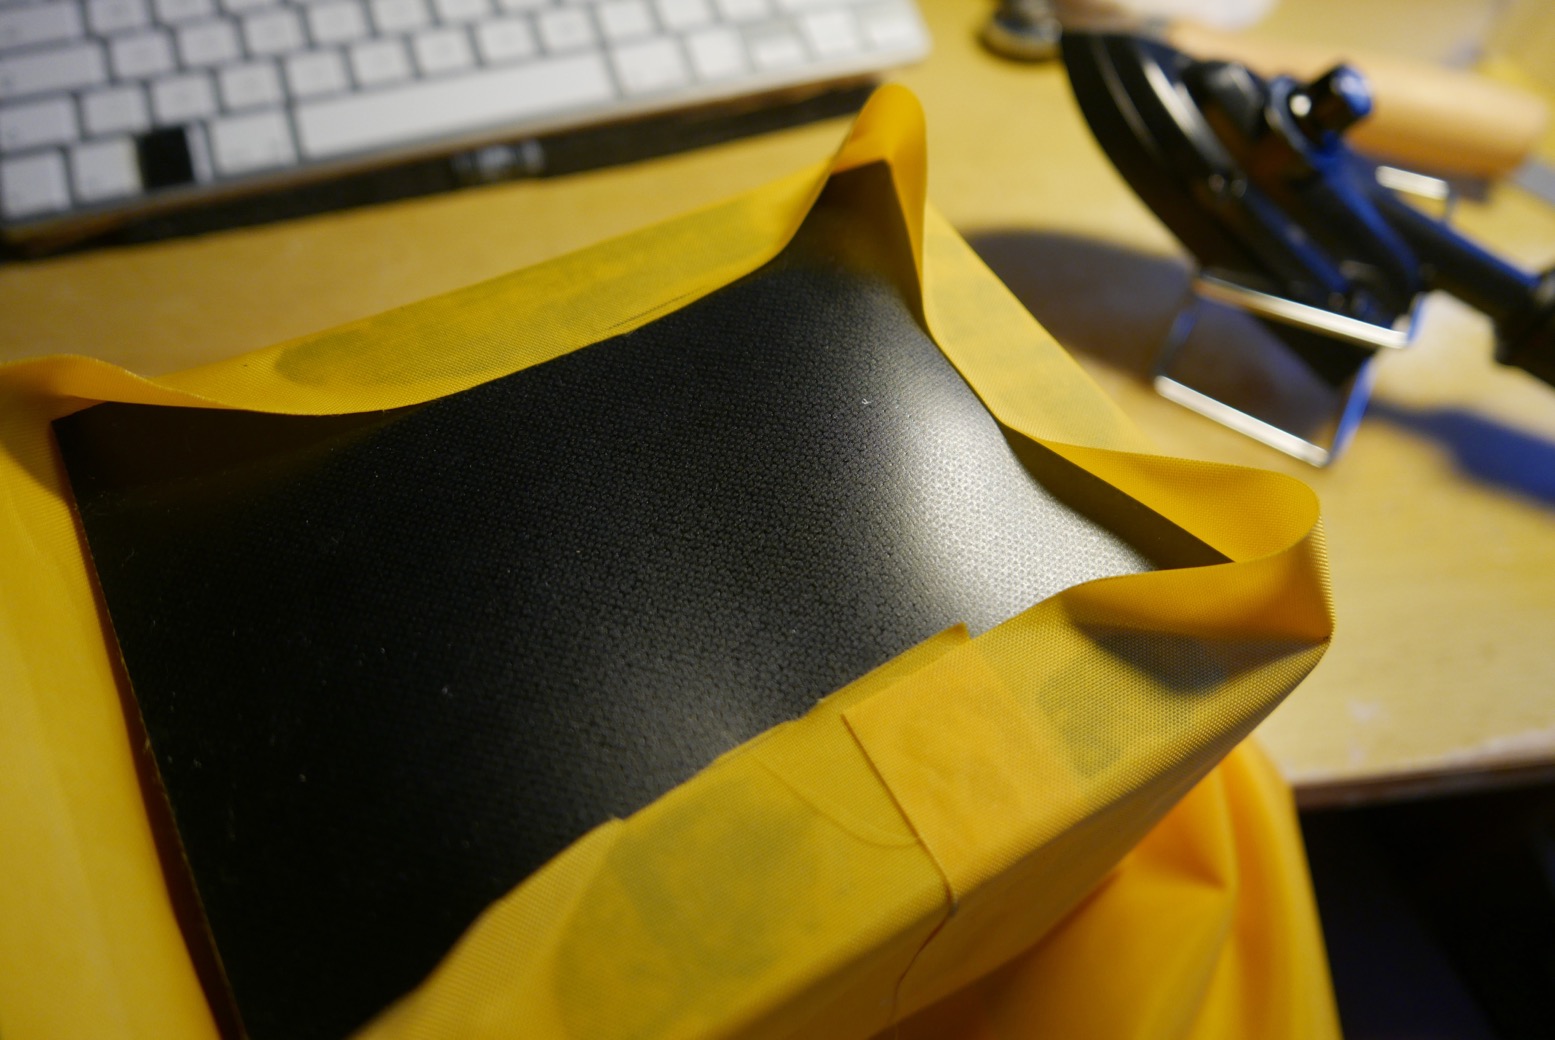
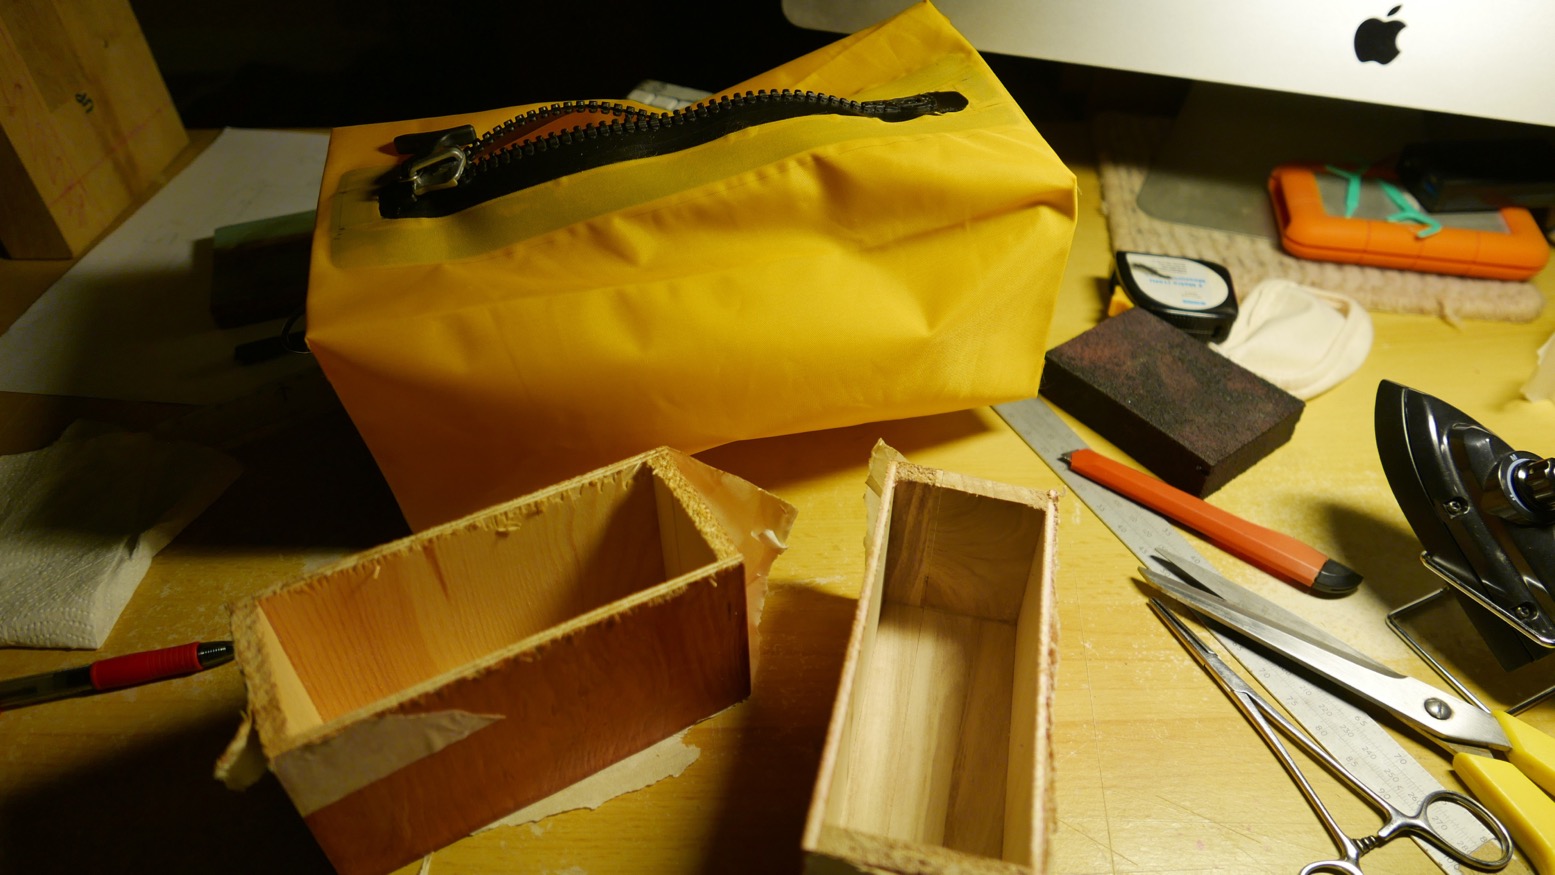
One smart decision I made was to use a wooden mould to form the bag around. I could have laboriously hand-sawn some kitchen-shelf leftovers down to size, but after more ebaying found a pair of hobbyist’s knick-knack balsa boxes which added up to 15 x 12 x 30 stacked.
As mentioned, you can’t iron on the coated side of TPU fabric; the coating will melt all over your iron before it bonds to whatever’s underneath. You can only directly heat an uncoated surface while pressing down the coated side which melts to the corresponding panel – coated or uncoated.

pablito

You can learn a lot from the DIY Packraft website. Lord knows how these guys manage to make packrafts from a roll of raw TPU. There can be no doubt that my attempt would end up looking like Picasso in an abattoir, but a dinky, curve-free pakbag ought to be within my abilities.

prolux

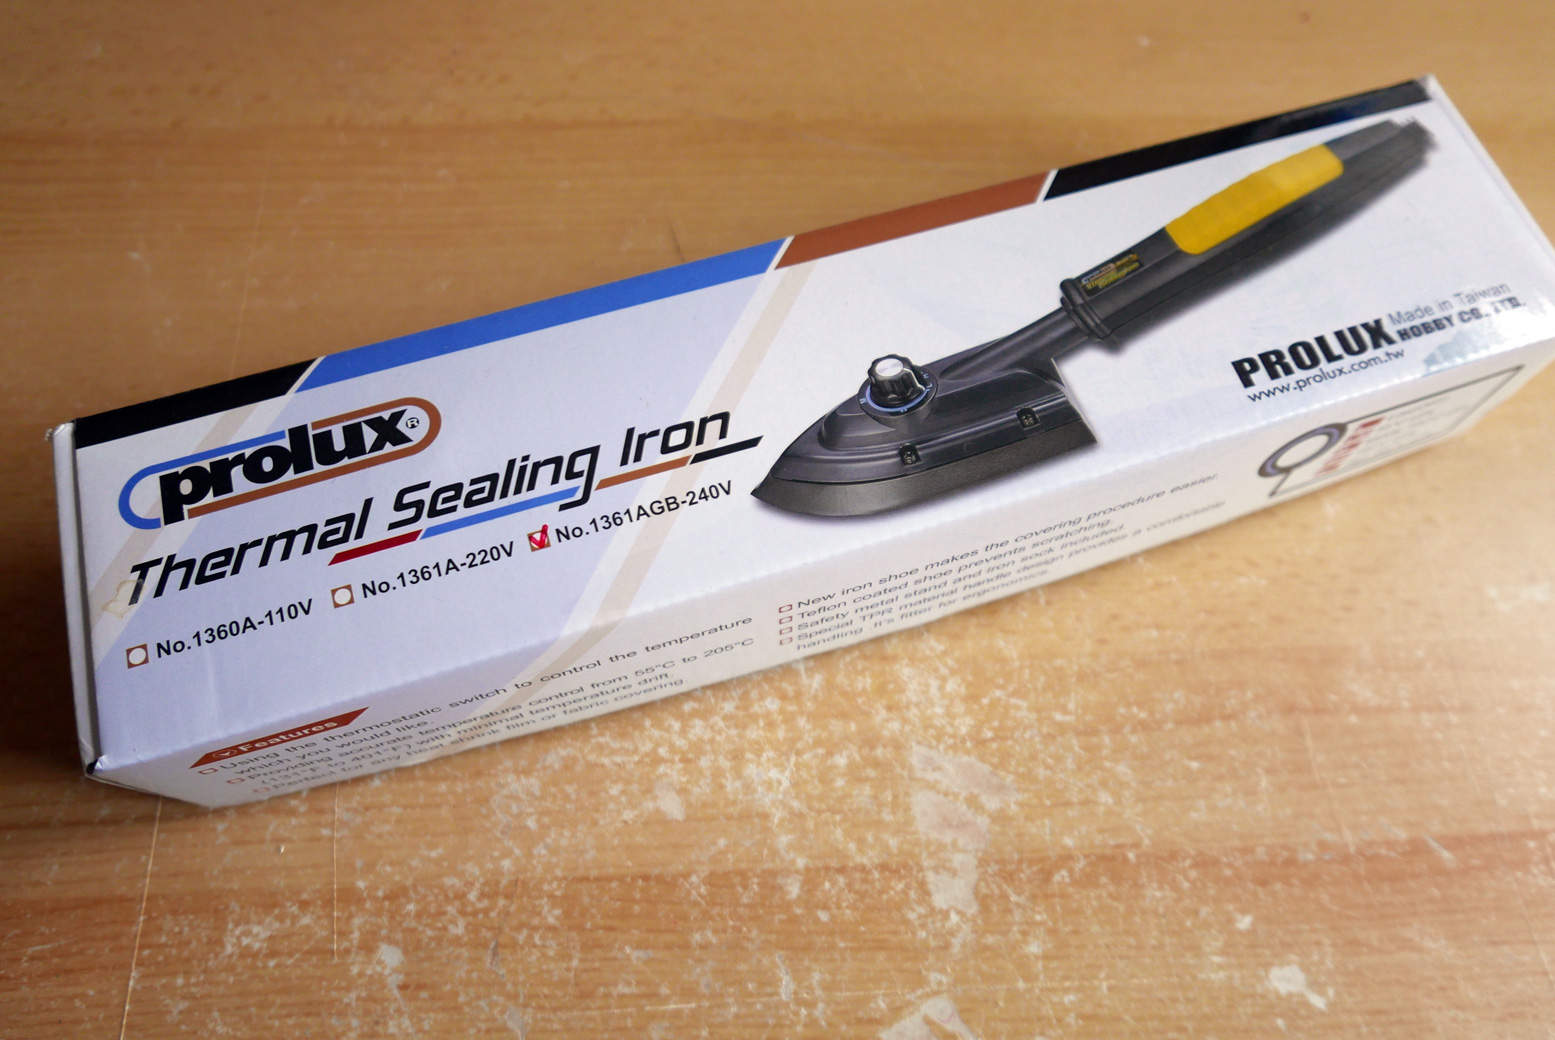
They mention the need for an iron with an adequate and consistent spread of heat up to around 220°C. Rated at 205°C, my cheapo Prolux was not in this category. I understand model makers find them ideal for applying thin transfers. For TPU work you need an iron with more poke, costing at least three times as much.
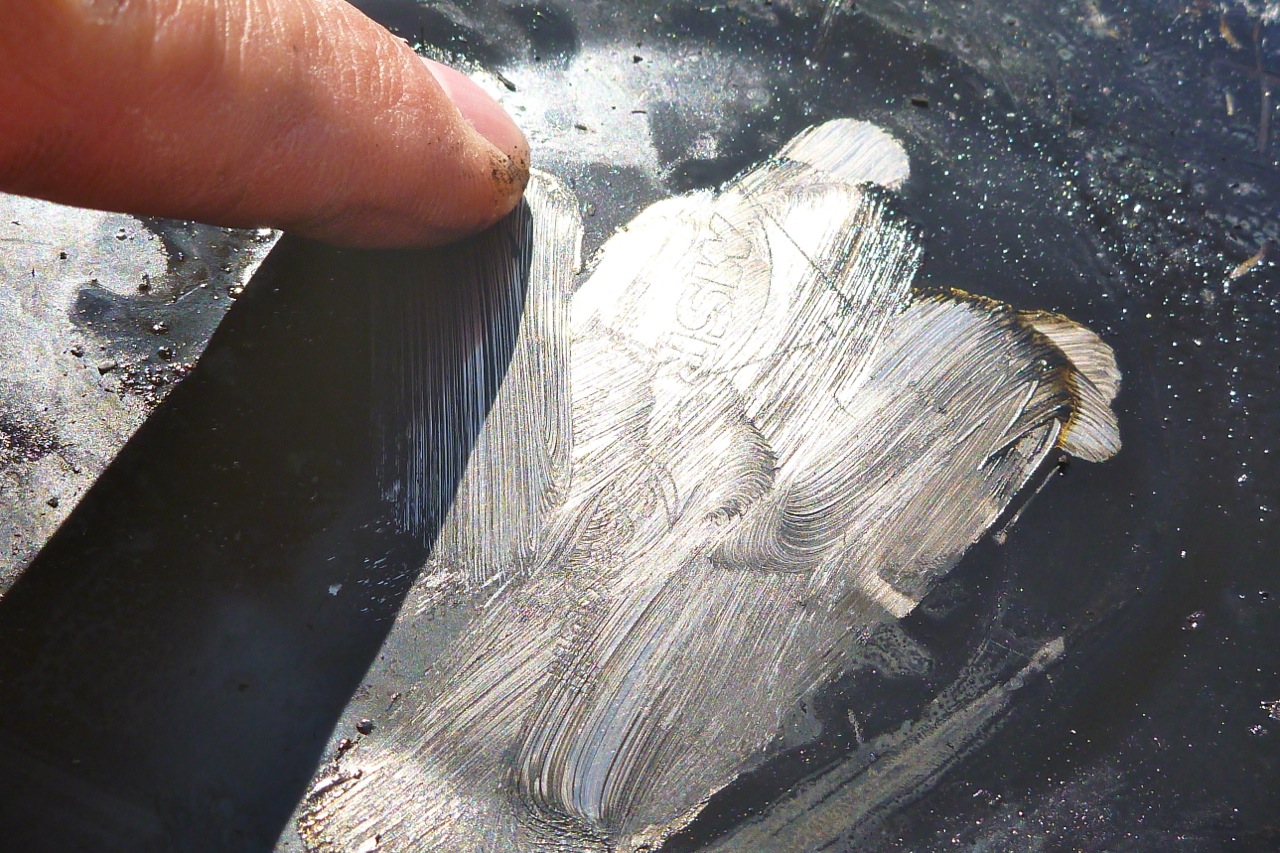
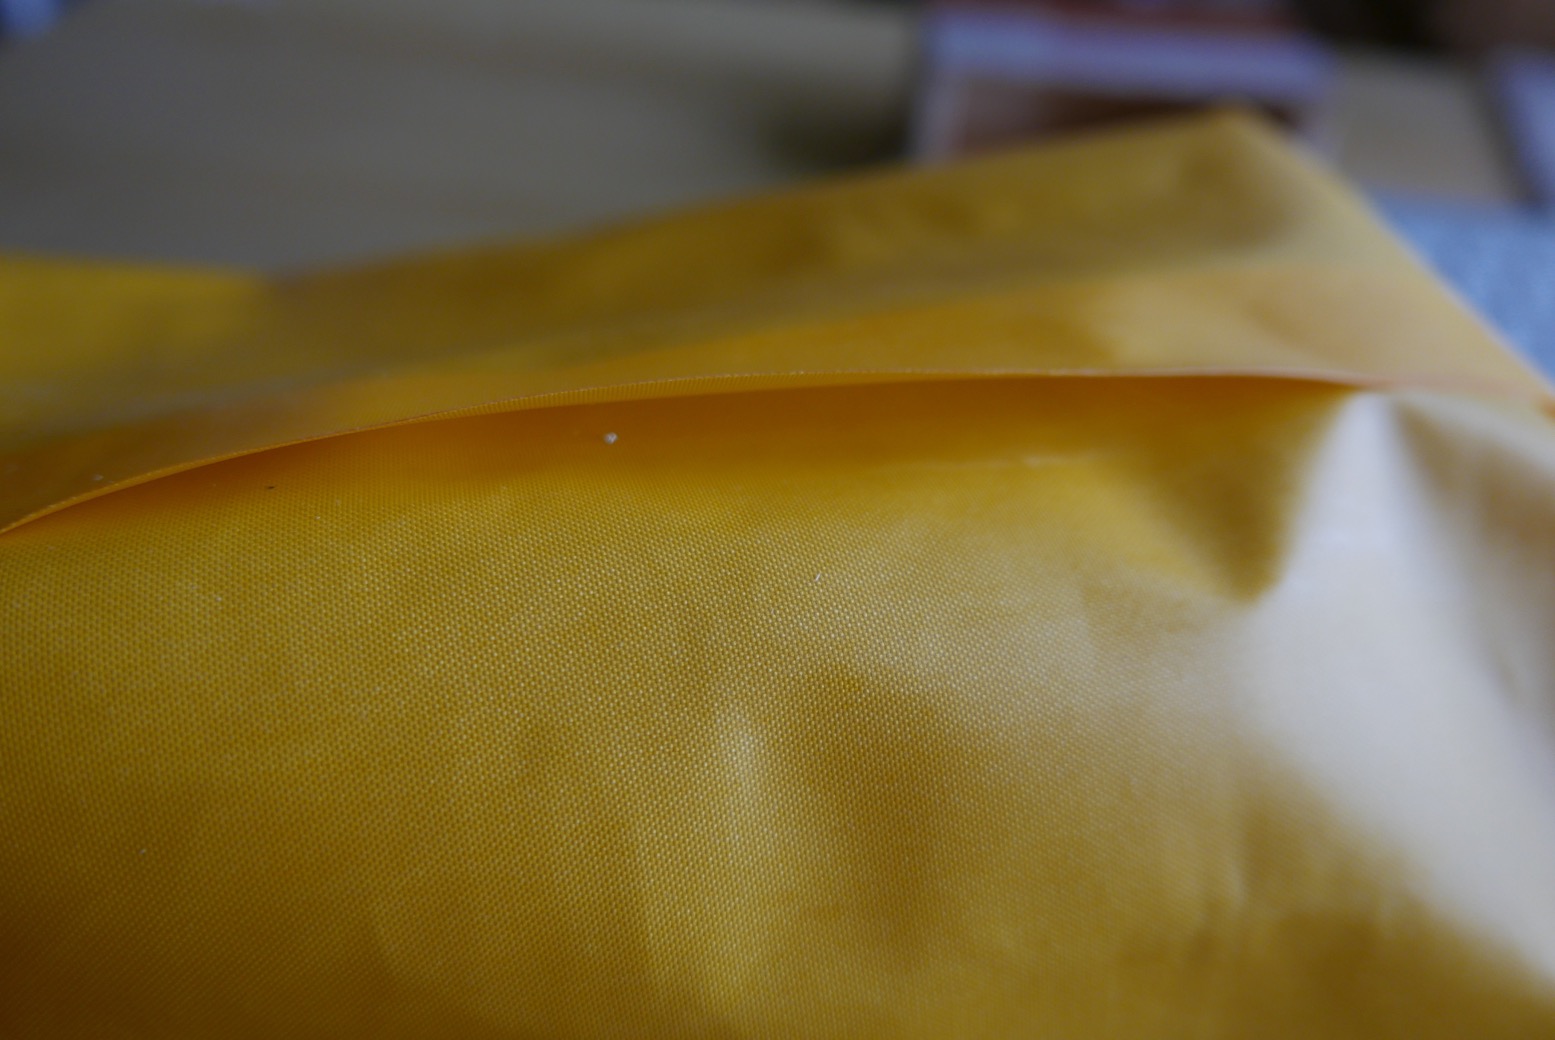
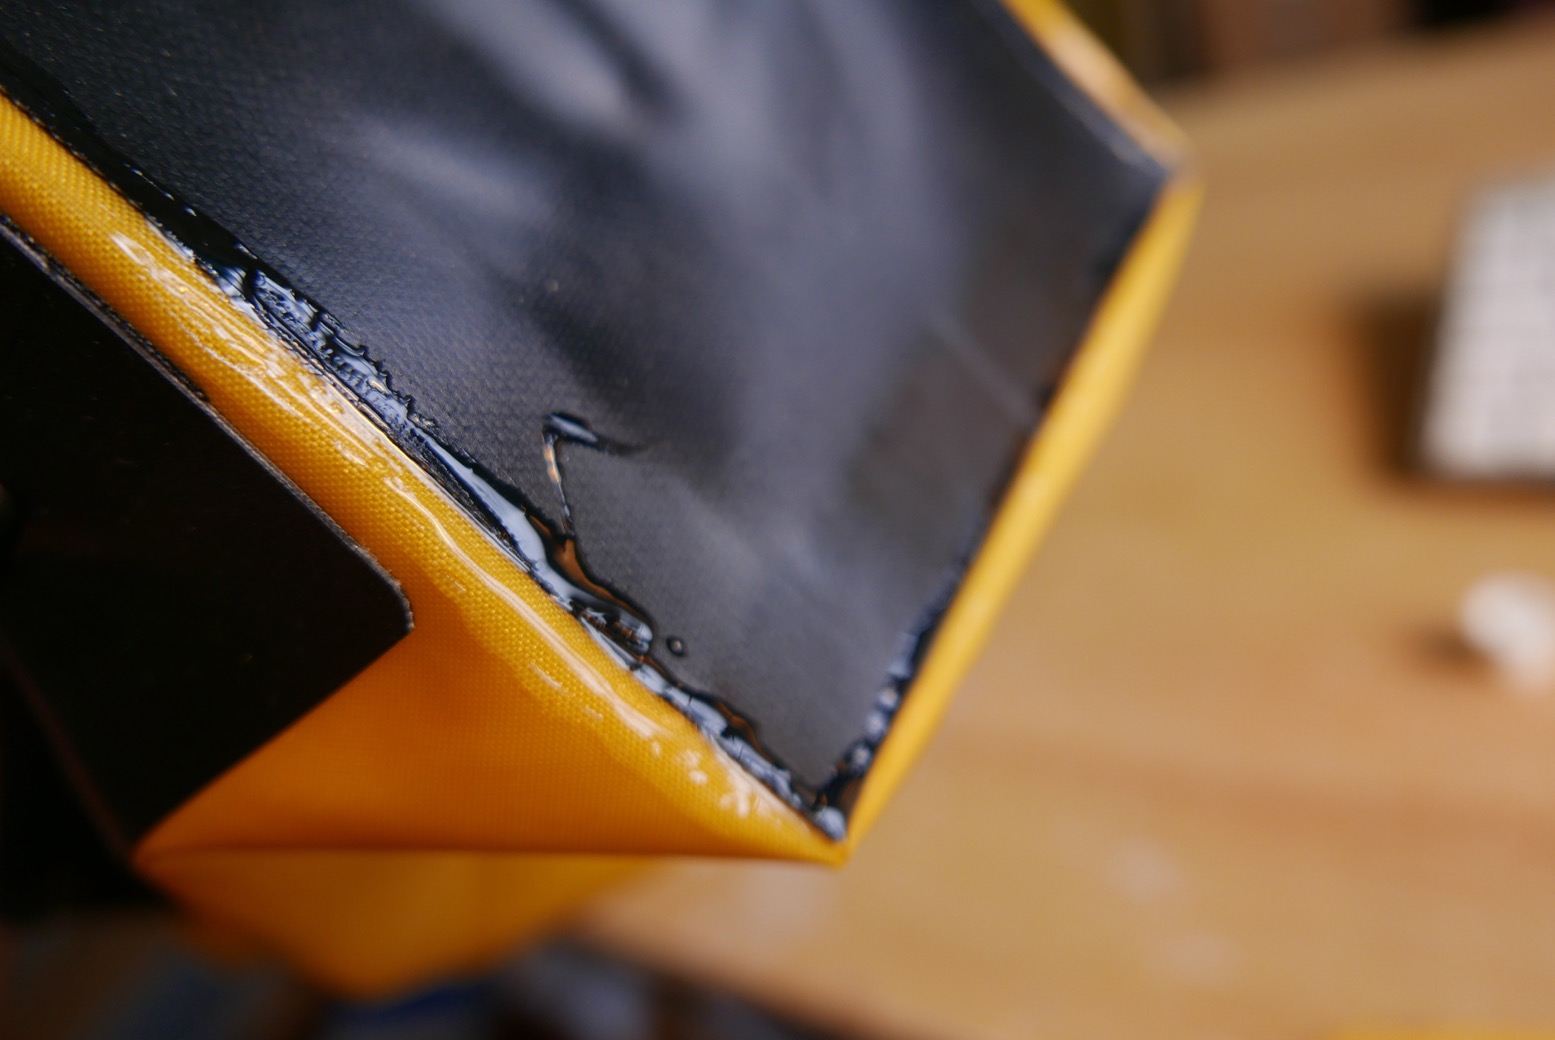
I practised joining 210D to 210D, but sealing was far from instantaneously miraculous. It took repeated ironing and pressing, as well as spot heating to get a full seal with virtually no air gaps or lifted edges. You could then peel it apart if you got an edge up, but you certainly couldn’t pull it apart. I thought maybe the coating may be too thin or once melted was gone for good, but it’s probably just my crap iron.

For the end panels you need to seal 210D on to the thick black 420D. The box mould really helped to make a neat-enough job. One interesting observation about joining fabrics by sewing or heat-welding is that millimetre-precise measurements aren’t critical as they are with wood or metal. I took more time than I needed cutting the exact forms and trying to get precisely perpendicular edges. A big metal set square may help, or you can find stuff round the house – in my case, some square glass bathroom scales. Another tip is arrange something sticky under your cutting edge ruler so it doesn’t slip as you slice hard to get a full, straight cut.

tizpper

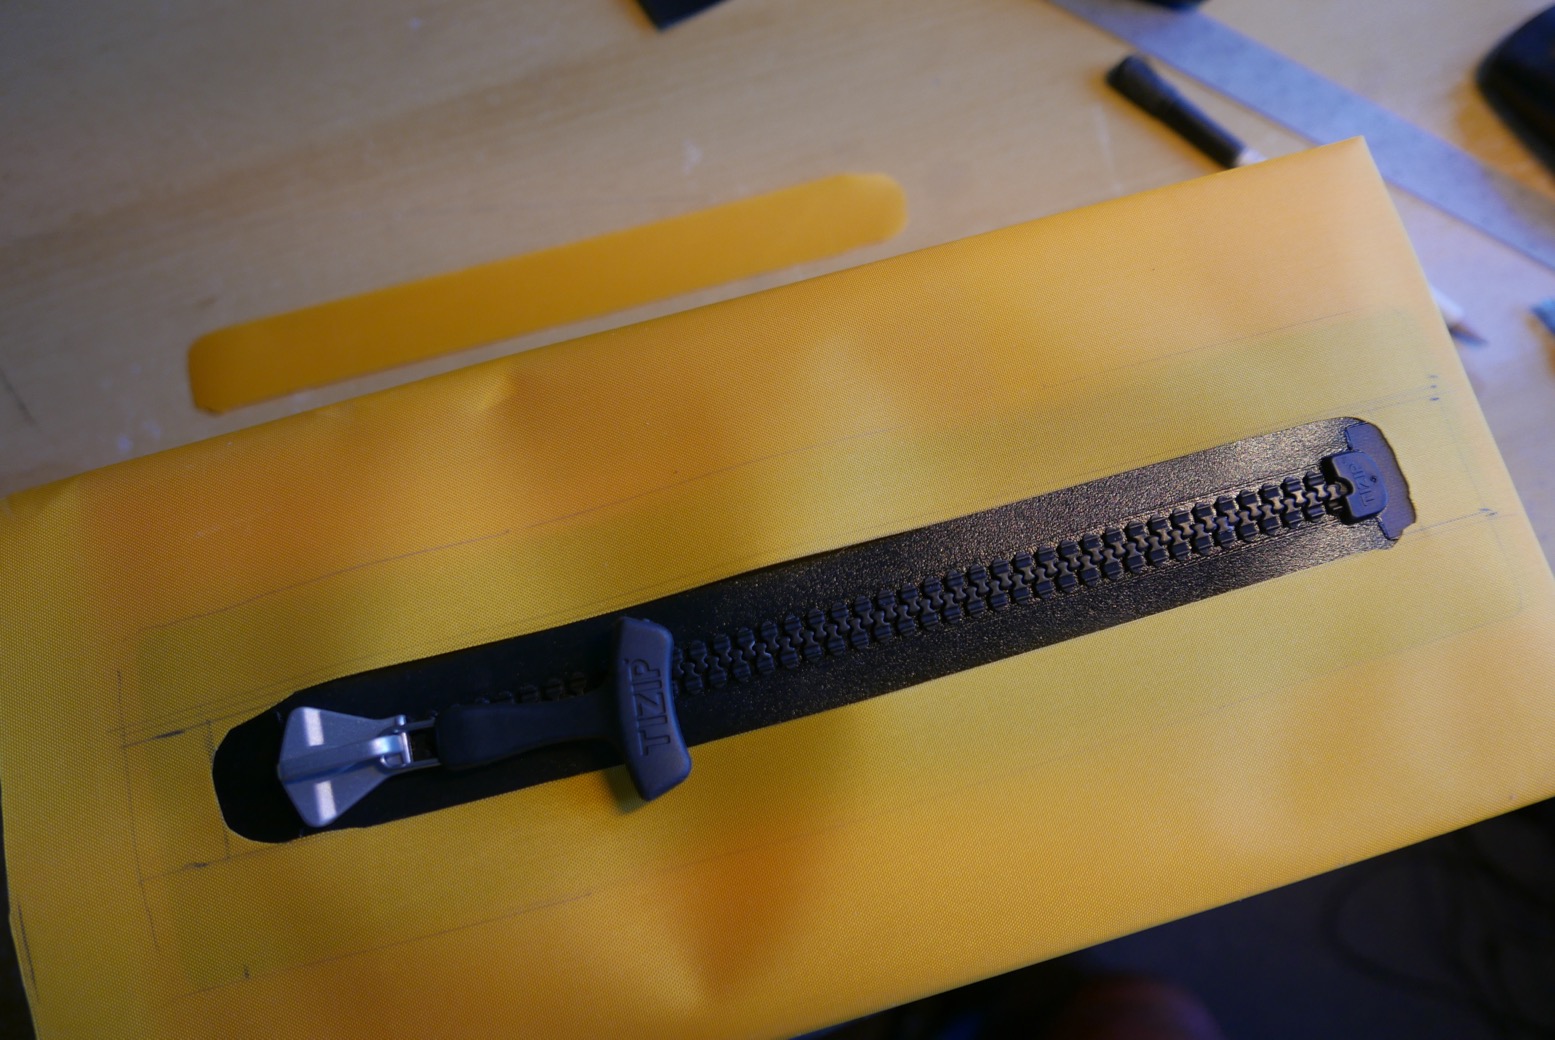
The length of the bag is partly governed by the available zip size. The 23cm MS10 Tizip which extrem sell is presumably used as a relief zip on men’s drysuits, but for a bag has a minimally useful aperture of just 19cm. The next size they sell is a massive 71cm. They must make TiZip sizes in between (for example for packraft cargo hulls), but good luck tracking them down online.

dekbo1
First job was wrapping the bag body panel round the box mould and sealing it. Cue endless to and fro with the iron to try and get a complete seal before I gave up and accepted I’d glue up the gaps later.  Looking back, I should have made this join on the top of the bag, either side of the zip. Barely two inches of yellow to yellow sealing required here. Now I know.
dekbo2
I dropped a black end panel on to the end of the box mould.
dekbo3
and welded down the bits between the corners.
dekbo4
Then I made an incision at each corner, pressed the flaps down over each other and welded on. Good to know the 210 welds much better to the thicker coated black stuff.
dekbo5
Sealing wasn’t perfect but all along I expected to have to hand seal all joins, and certainly all corners with Seam Seal.
dekbo6
Before sealing the other end, I cut a slot for the zip.
dekbo7
Then ironed it down. Again, the thick coating on the broad zip sides made good adhesion easier to achieve.
dekbo8
I stuck a home-made D-ring on the finished end. I actually needed this to pull the bag off the tightly fitting box mould before doing the other end. This requires sawing an end off the box so it can be removed through the zip hole after butting up against the unfinished bag end to support firm heat welding.
dekbo9
Oh dear, look at the state of that floor seal inside the bag. I went over it again with the iron, then filled up the gaps with glue.
dekbo10
Then I stuck the zip cut-out over it for good measure. Once inverted, I did the same on the outside for more good measure. It’s not pretty but it ought to seal.
dekbo11
With the bag still inside out, I went round the yellow-to-black joins with Seam Seal. It’s like Aquasure/Aquaseal, but runnier and takes a long time to dry.
dekbo12
Beautifully sealed seams. I should get a job at Alpacka.
dekbo13
The bag turned right way out. I’m amazed that it looks less crap than I  expected. No need for stiffeners; as hoped, the 420 end panels retain the boxy shape. The box mould (sawn off bits in the foreground) helped greatly in making a tidy form.
dekbo14
Without the strap the bag weighs 158g or 5.5 oz.
pakbag
Completed Pakbag alongside the Aquapac and a Peli 1150.
pakbagfoamer
Pakbag, with a foam floor panel to keep above any moisture. A sachet of silica crystals may help humidity, as does TiZip silicon lube for the zip end. It passed the submersion sink test.

Several features are omitted from the Adobe Crayon blueprint at the top of the page:

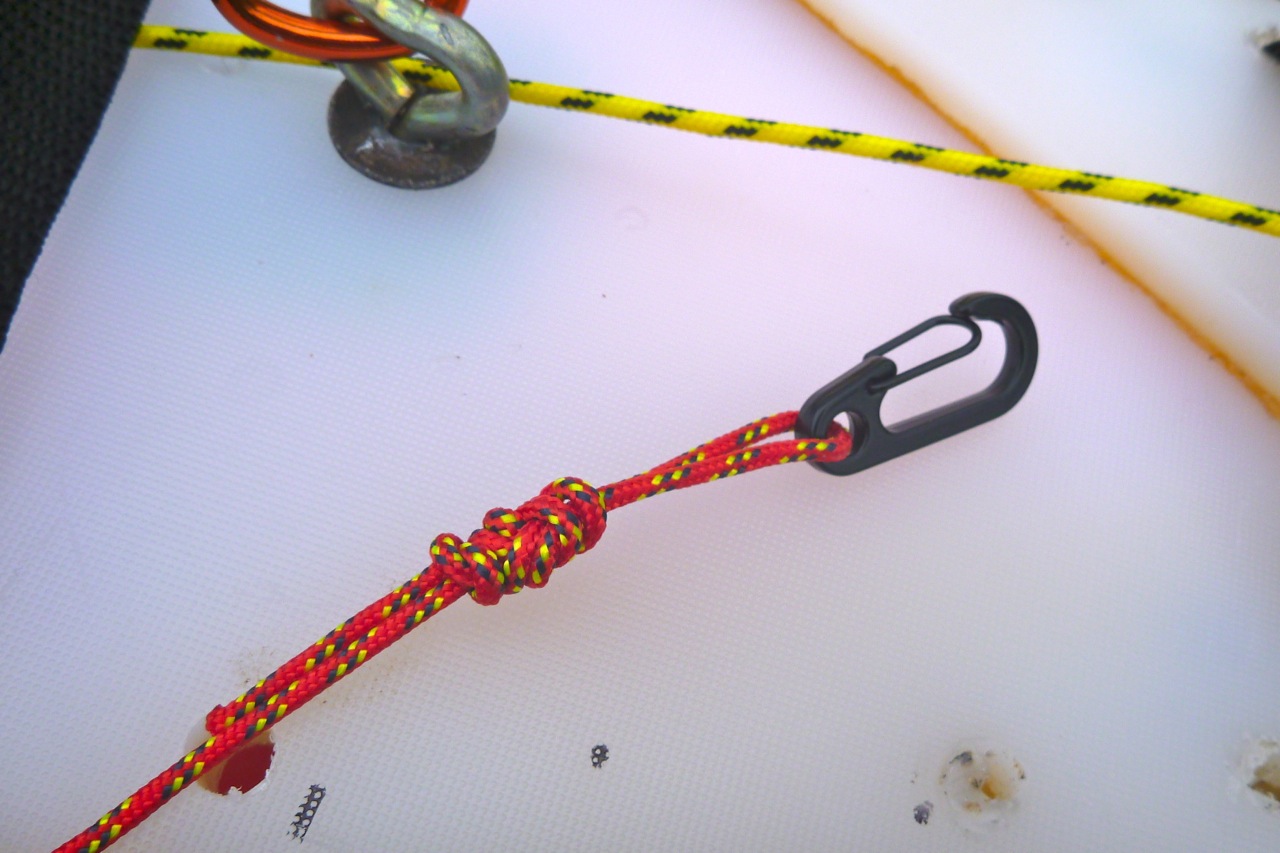
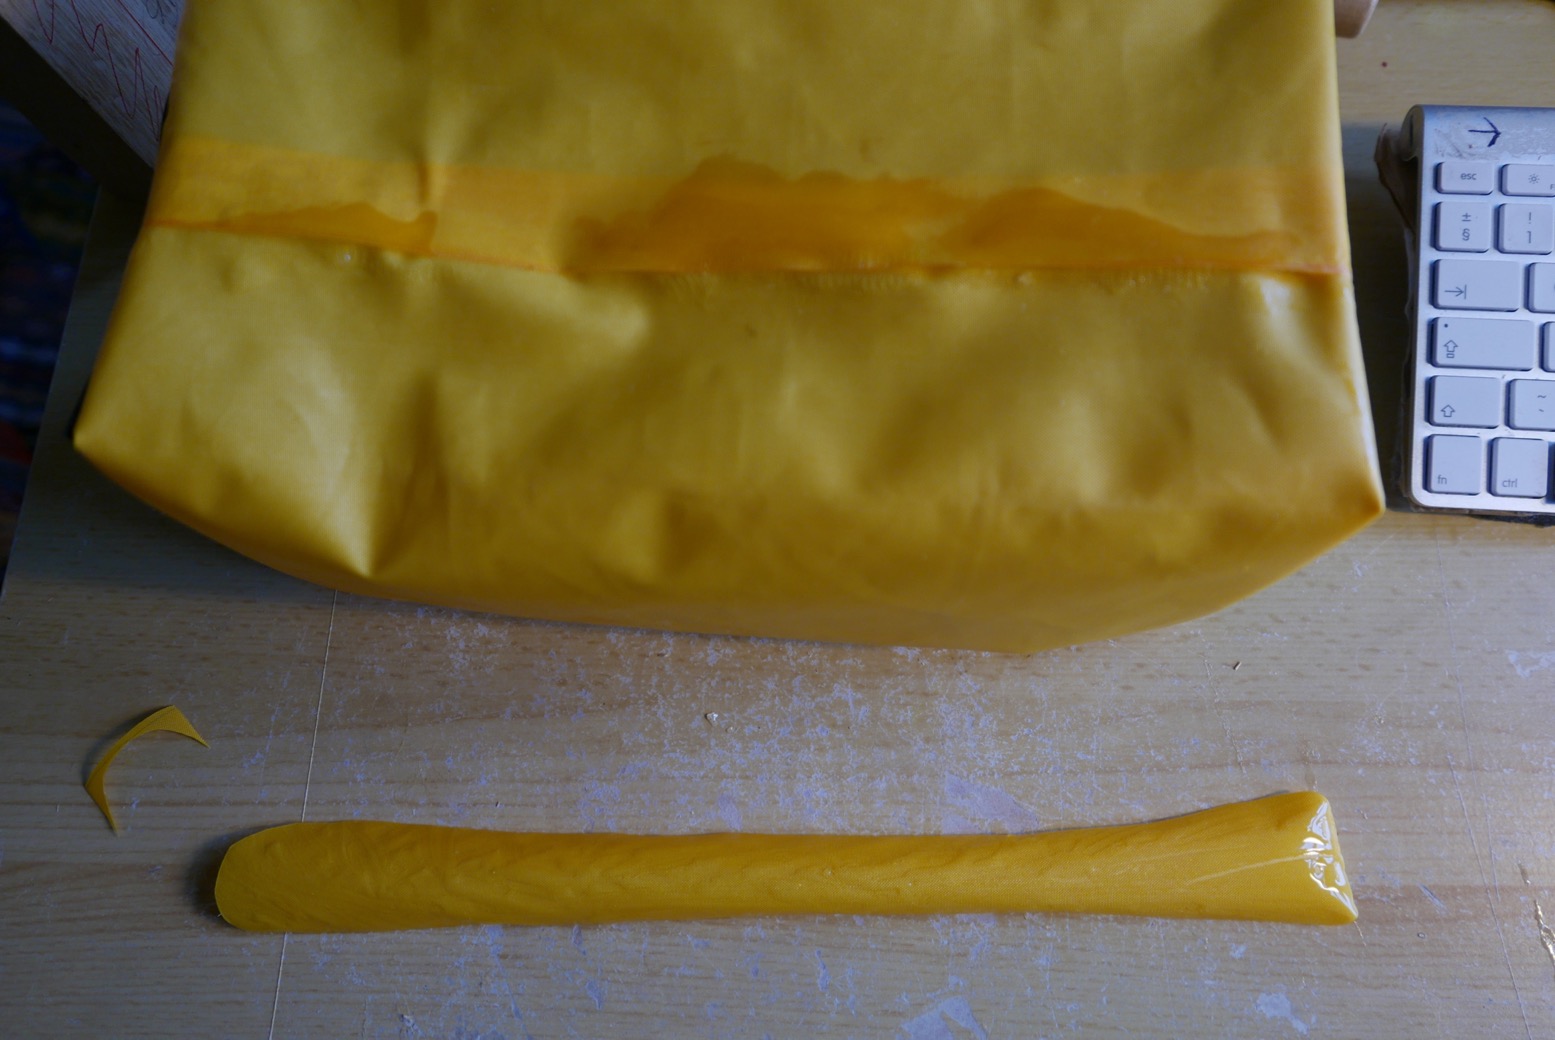
• The overlap sleeve on the side to contain the shoulder strap to avoid entrapment. On rough water I’ll just unhook the shoulder strap and stash it

• Otherwise the full-length shoulder strap can adjust down to ‘handbag ‘length so there’s less is lying about

• No side net. Would still quite like this but not sure how to do it neatly

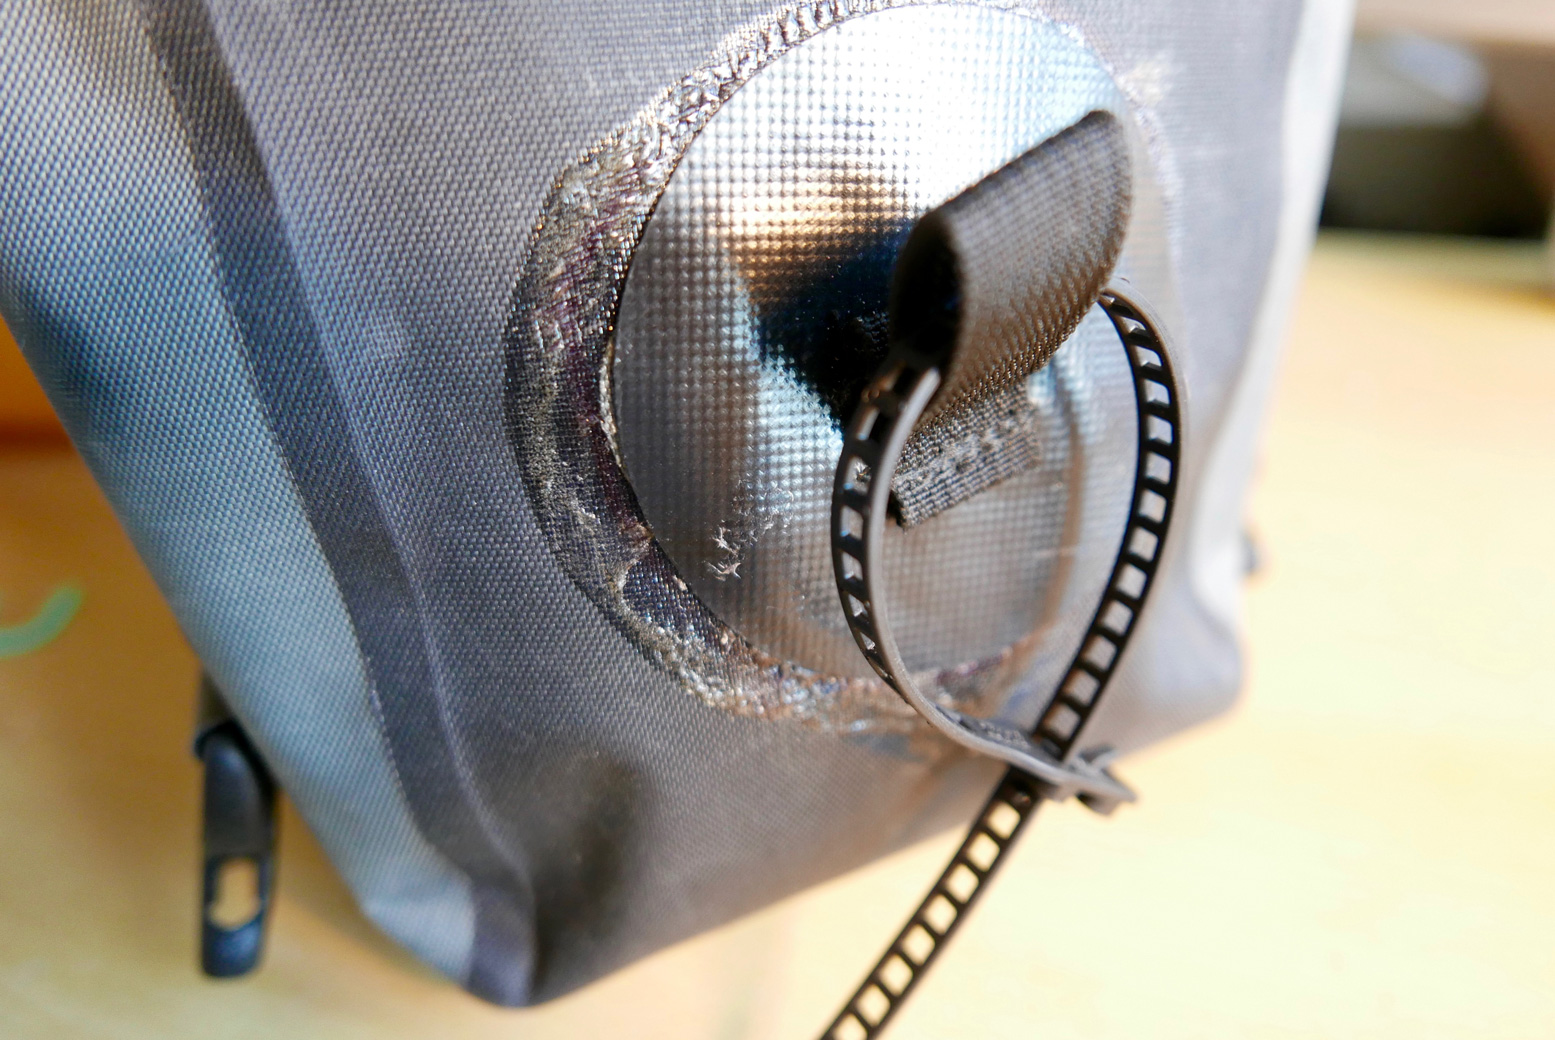
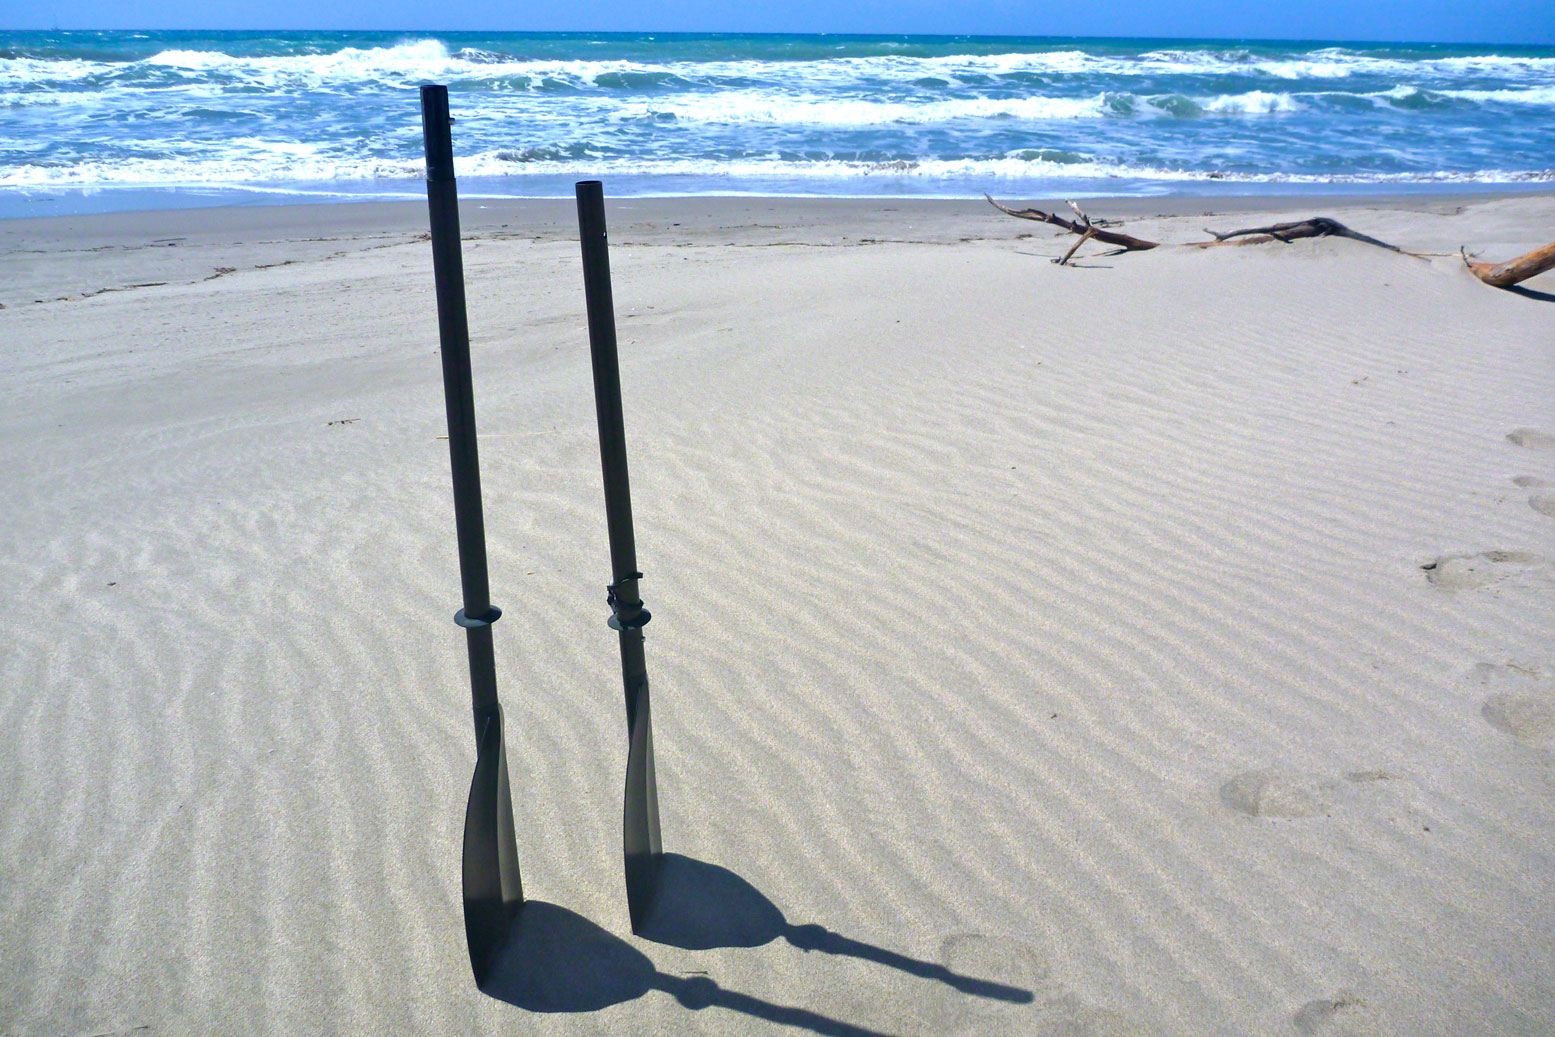
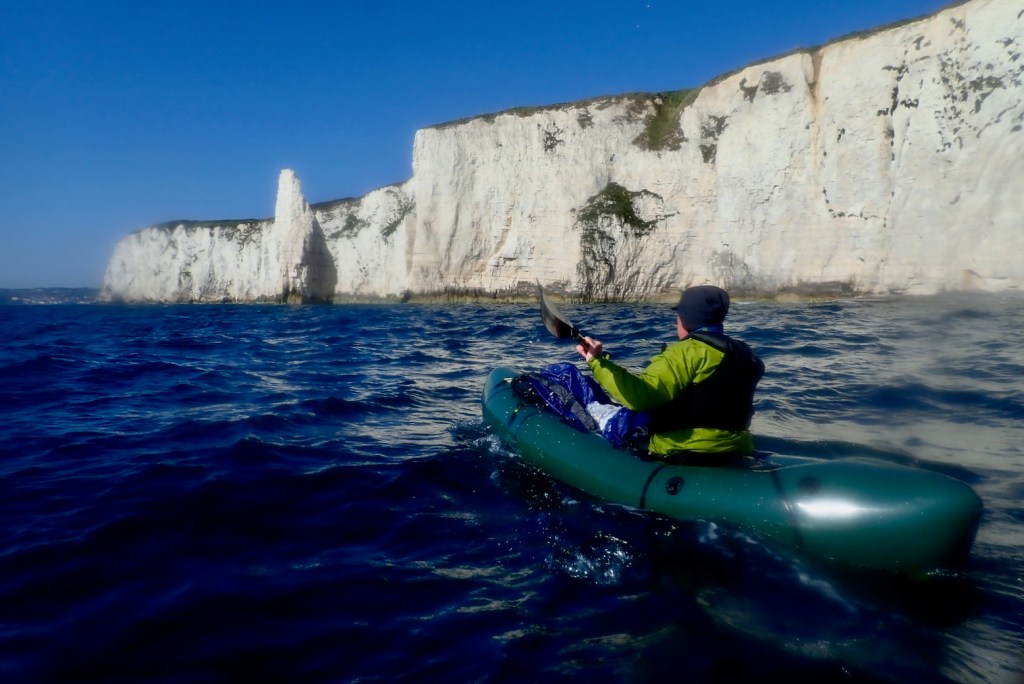
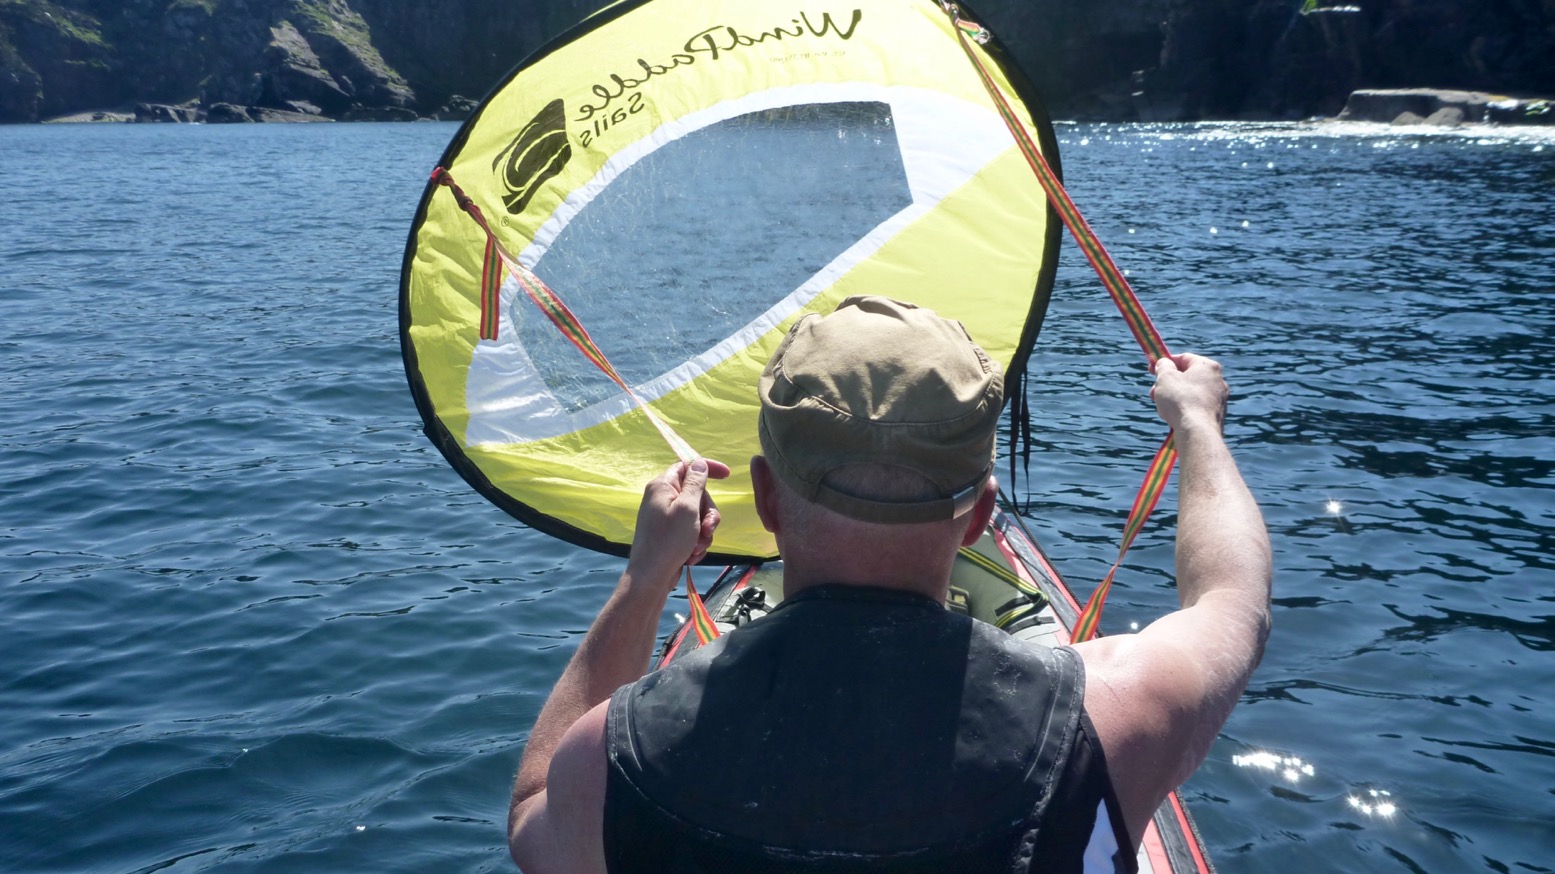
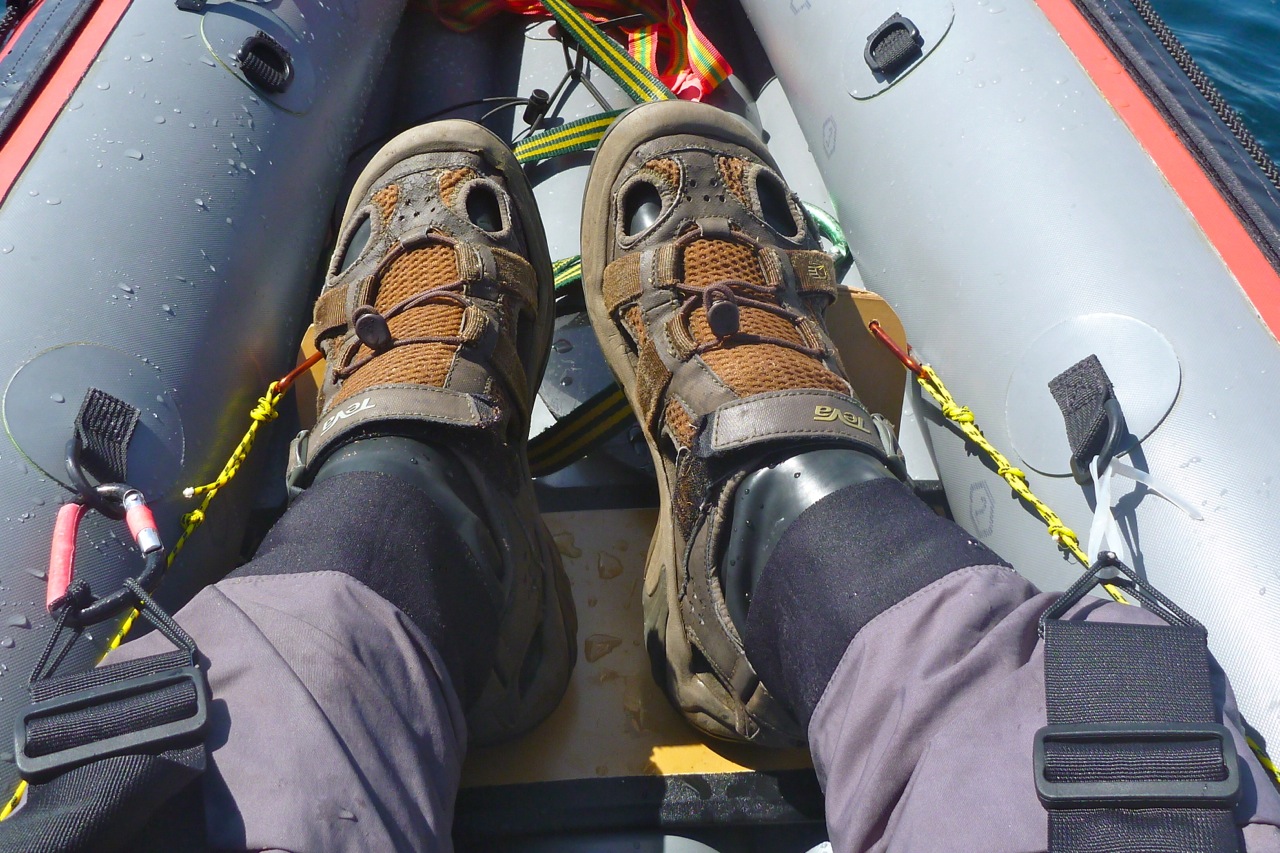
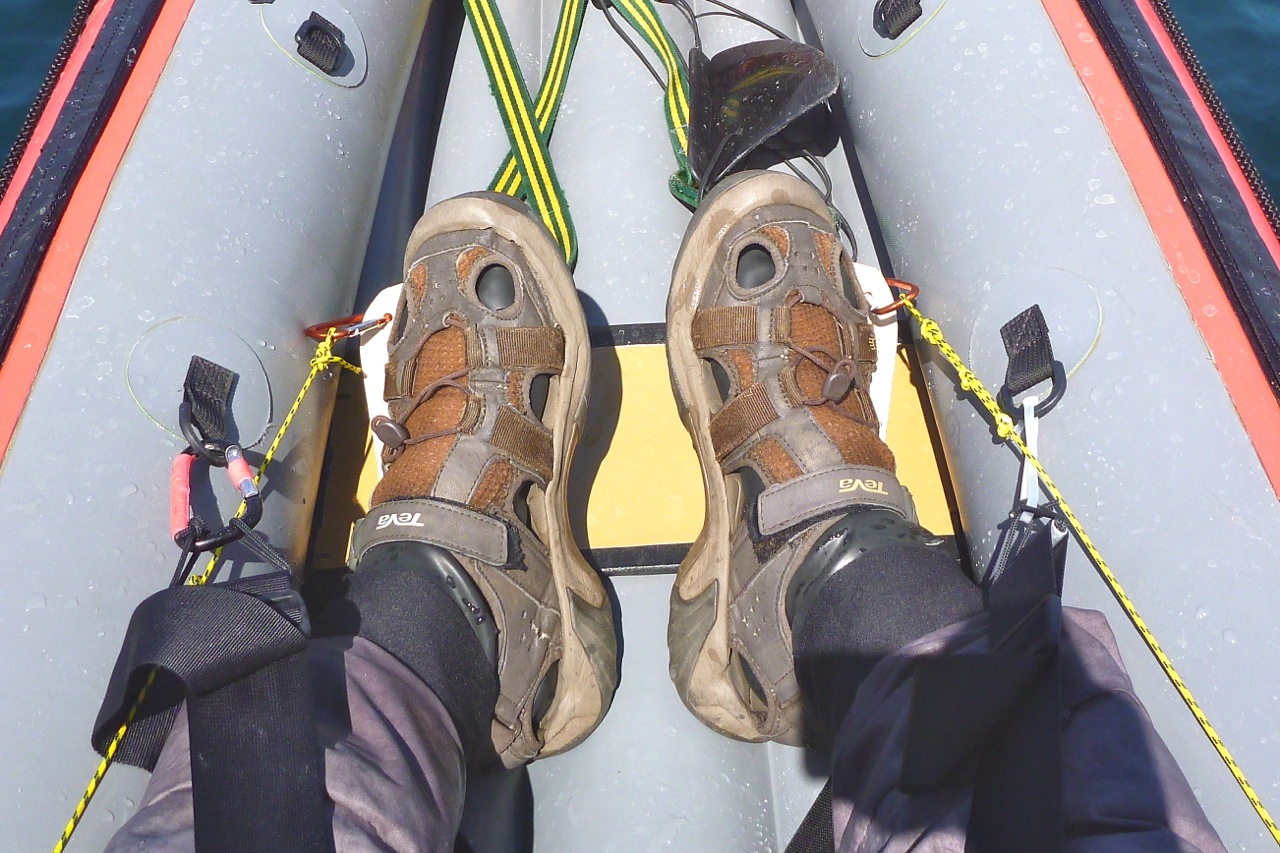
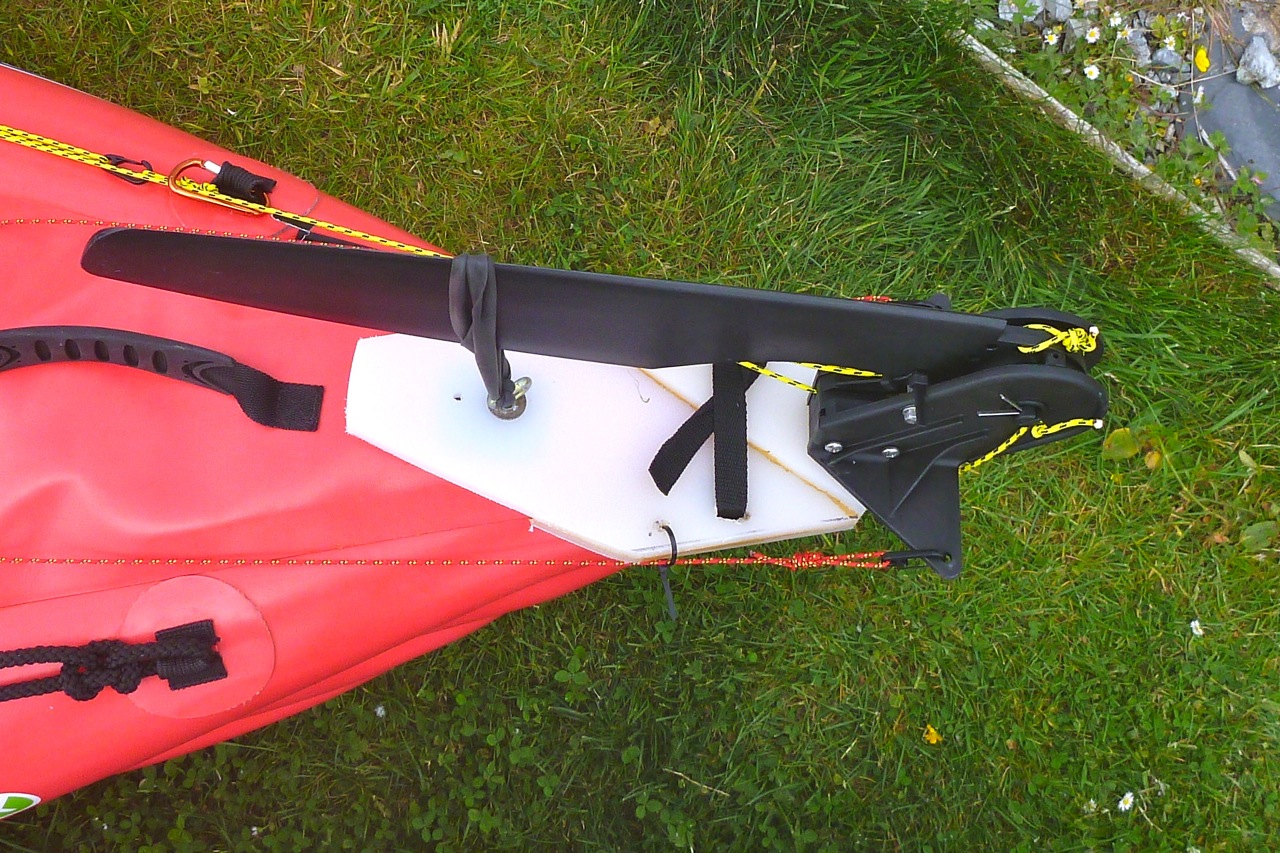
• TiZip is not diagonal – not important –dripbox but the arched stays idea underneath it may be. I noticed in France under the knees gets a lot of drips off the paddle (PSZ; right) which can get in when you open up.
Convex top would be good but a shake of the bag may thrown off excess drips before unzipping

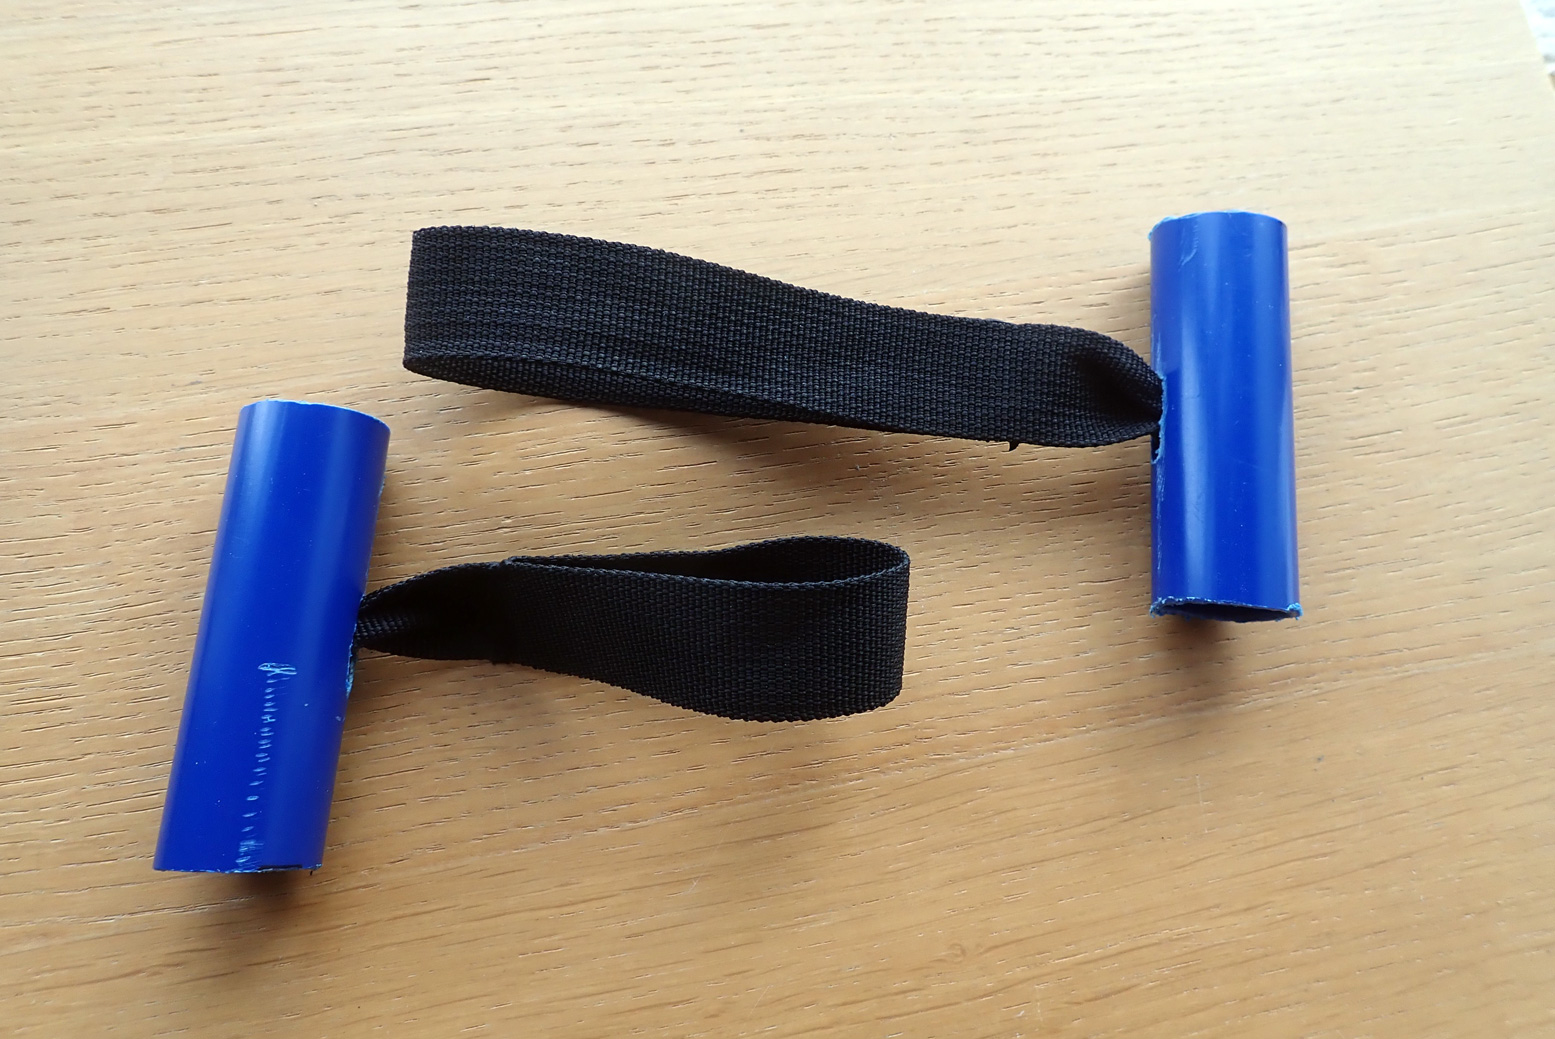
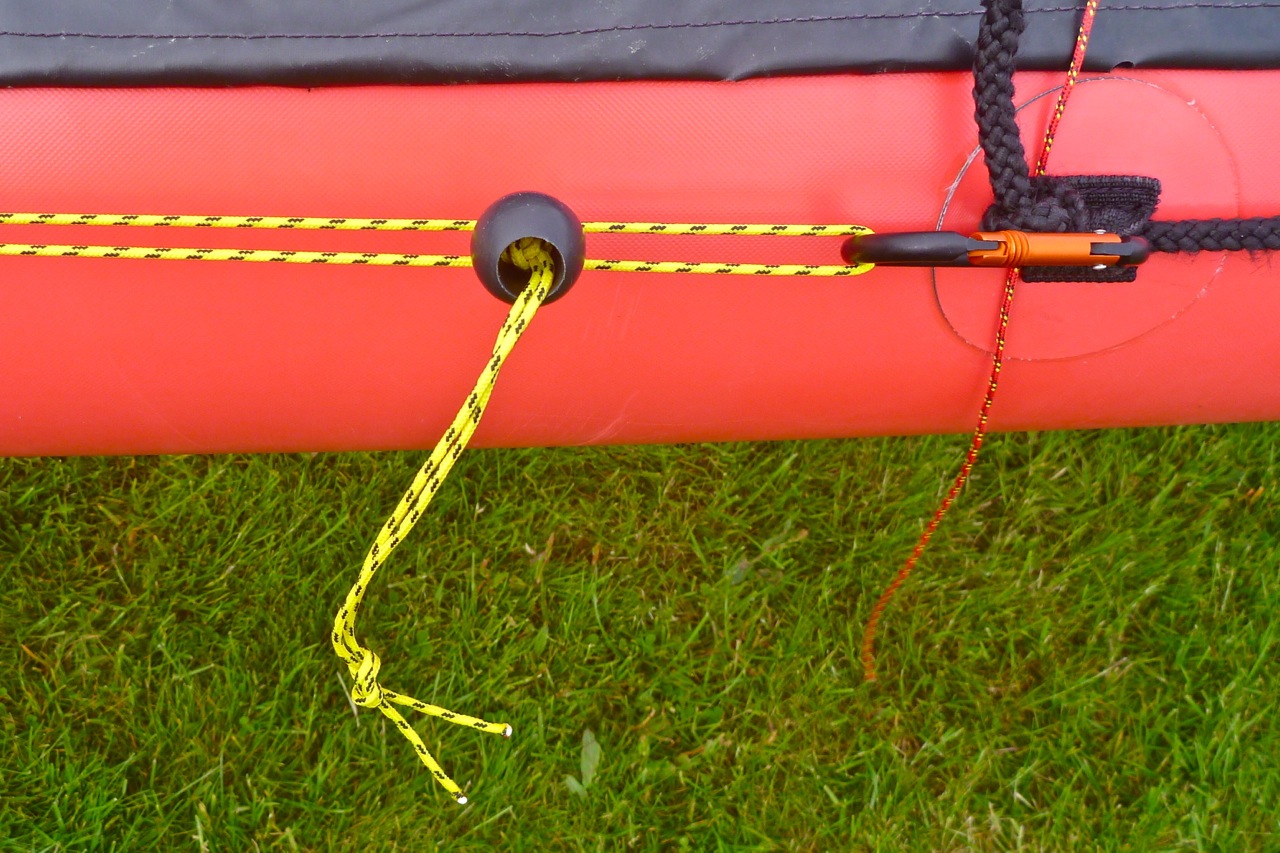
• Need to find a way to attach it to the packraft floor. Velcro might be low profile but with the repeated force of pulling apart, I’m not sure the shiny-backed stuff I have will glue to the bag or the floor well enough, even with proper two-part glue. So Ill just clip one of the strap rings a D-ring glued on, mid-floor

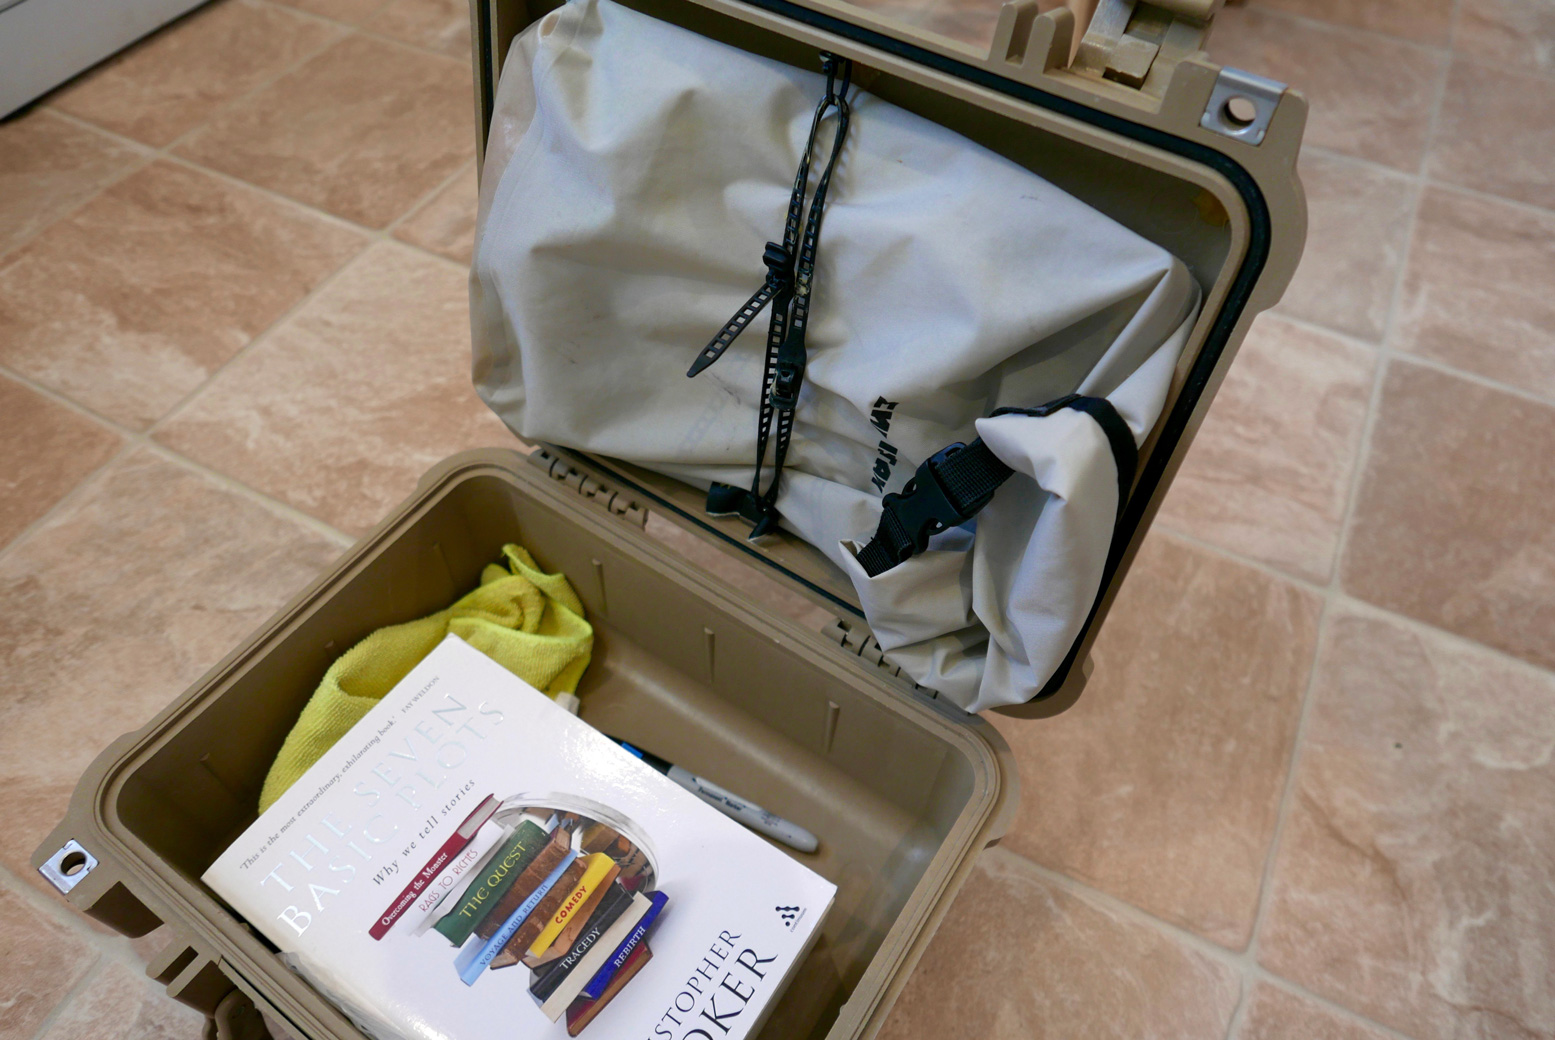
A few months later… using the Pakbag

pakbagwairo

After paddling the Wairoa River in New Zealand as a day trip, I can boldly claim my MYO Pakbag is fit for purpose. It’s just the right size for a water bootle, camera, GPS and wallet, even if the easy-to-use zip is a tad short for easy access.
One thing I didn’t appreciate is that, slung over the shoulder while sat in the boat, the bag is still handy to access but keeps off a wet floor and is always attached to you. No need to think where it is.

nzt - 12
NZWH - 10

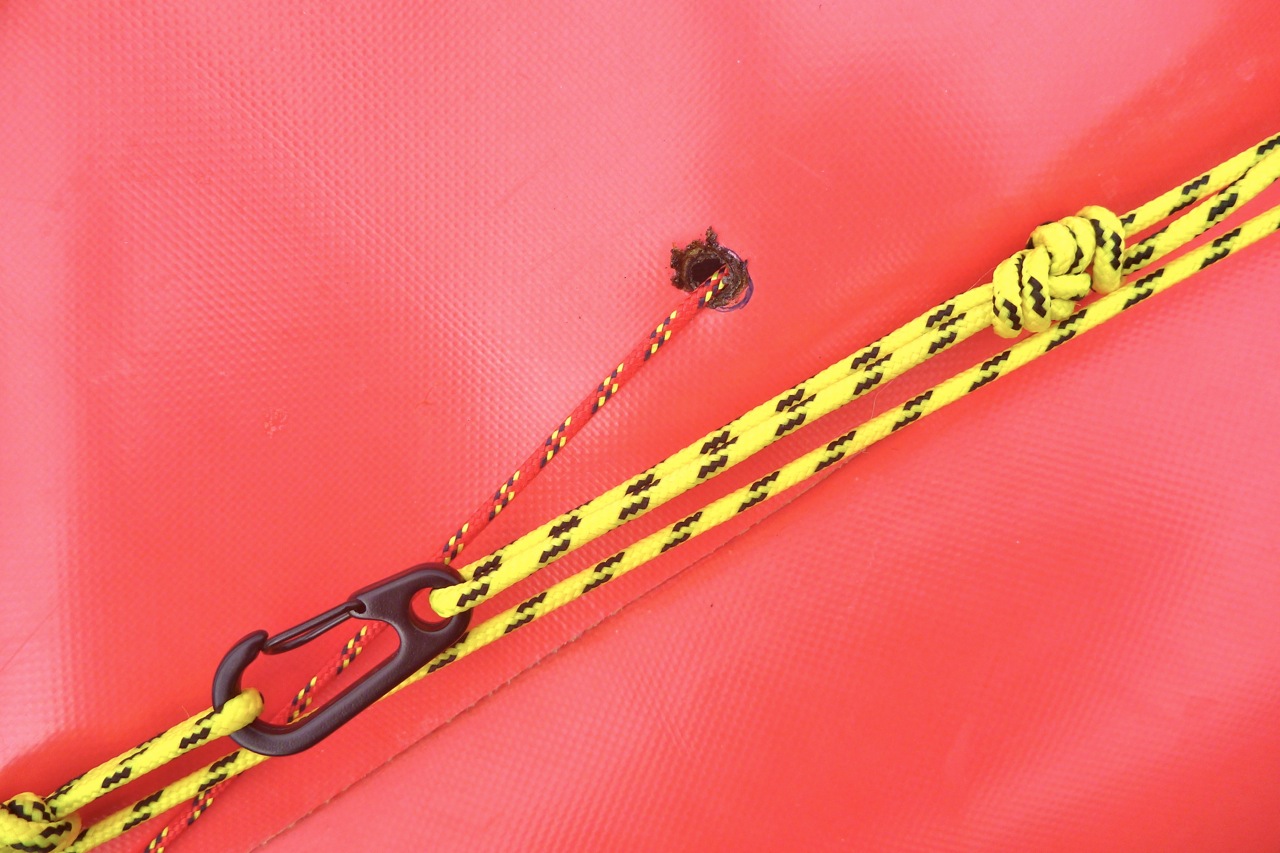
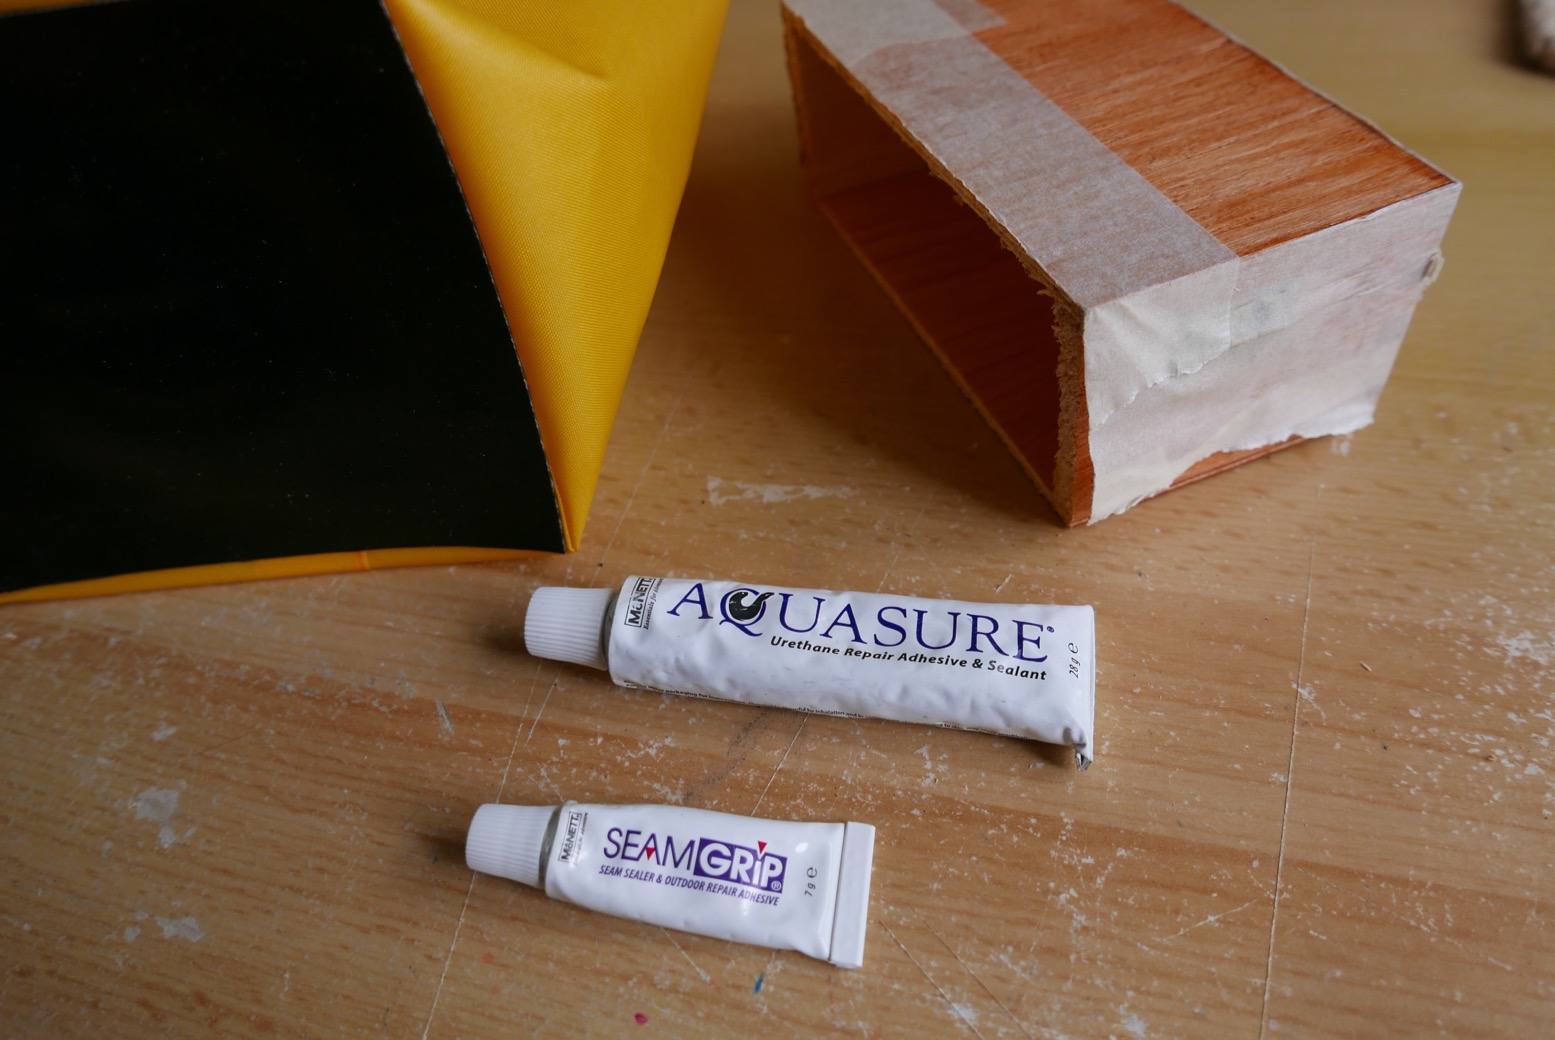
Sadly my glue or gluing skills are not so fit for purpose. I need to reglue the strap end-rings and a couple of corners. This time I’ll probably use 2-part glue which I know will tear off the coating from the fabric core before it separates from what it’s glued to.

What I’d really like is for someone to make this properly. The difficulty – as possibly mentioned above – seems to be that anything with TiZips requires the consent and approval of TiZip Inc before they supply a zip. It’s a way of ensuring a proper application to their tight specs is done so that their reputation is not harmed. Which is why many TiZip products, like my Ortlieb Travel Zip bag are unusually expensive. You’d think there must be alternative or knock-off TiZips around; I’m pretty sure I searched and searched.

nzt - 18

Deckbags for packboats

See also:
Anfibio DeckPack
MYOG TiZip Pakbag

ipratings

Whether on day trips or overnighters, how do you organise easy access to regularly used items and valuables, including stuff you want to carry when away from your packboat? I’m talking something capable of handling less than flat water, rated at least IP65 (right) to stash the wallet, phone, tablet, camera, travel docs, ammo and snacks. Stuff you want to keep dry in case of swamping or capsize, as well as being easy to get to on the water.

For walking or cycling, a daypack does the trick but that doesn’t really work in a paddle boat. The pockets and pouches in your pfd (right) have their uses, but they’re not waterproof. You want something that’s airtight when briefly submerged while easy to access on the water and portable off it. It’s actually quite a tall order.

mapcaseThings like paper maps and nav aids (GPS, compass) I keep in a separate waterproof pouch like the SealLine (left) with a double ziploc seal, even if this is yet more clutter knocking about around your legs.
Since I took that photo I’ve mounted a compass on the side of my Seawave IK – drum-comp very handy as it’s always there at a glance.
And I now use a IPX7-rated Garmin Montana with loads of mapping space, though I prefer to keep salty seawater off it where possible.

Waterproof waist bags
A small, roll-top waterproof waistpack actually ticks many boxes as long as you don’t mind being attached to yet more clobber. There are quite a few out there between 2 and 6 litres, from OverBoard (2 sizes) to Aquapac and the bigger SealLine. The good thing is a waistpack sits up on your lap, out of the water and the paddle splash zone (PSZ), but well within reach.

waistbags


The bad thing is they’re a faff to roll up and clip down quickly and reliably, and if you’re bobbing around in the water swimming after your boat you can be sure they’ll slowly leak. Read reviews and you’ll come across disgruntled accounts of ruined cameras or phones following a quick dip or even too much splashing. The problem, as usual, is the roll top; it needs to be tightly rolled down 2 or 3 times, then tightly clipped and even cinched down to the sides to make a good, dunk-proof seal. I believe a lot also depends on the nature of those sealing surfaces. As long as you avoid creases, smooth, shiny vinyl or PU pressing against the same will make a better seal than anything textured, like Cordura.

pelicone
pdb-otter

Hard cases
For years the obvious solution seemed to be small ABS or polypropylene hard cases commonly used for camera gear. I started years ago with a 9-litre Otterbox in my Gumotex Sunny days (left). The Otter was lighter and cheaper than the well-known Peli cases, and with either, you know the box will be airtight, access quick enough and boxes make a handy solid footrest in an IK as well as a seat or raised surface on a beach.

P1150539


After some years I changed to a Peli 1400, a bit less volume than the Otter, but a bit wider and flatter. Adding some retaining straps my Macbook Air fits neatly inside the lid (right), and below there’s room for everything I need in a day.

pellii

The only thing that spoils the Peli and similar boxes are the clamps which are hard to open or close effortlessly. Some sort of lever-arch mechanism would be better. Because of this I use the box less often than I would during a paddle. On top of that, a shoulder strap for hands-free carrying is awkward unless attachment rings are added. And at 2 kilos the 1400 is a bit hefty.

lunchbox

I really don’t need a PeliCase’s crush-proof ruggedness. All I want is submersion-proof airtightness up IP65 for which a lunchbox (right) or food storage box might do as well, as long as the durability and seal could be relied on.

pdb-wsheds

Around the same time I got into packrafts I discovered Watershed dry bags. Most of them use an oversized rubbery zip-loc seal which is submersion-proof and therefore miles better than roll-tops. The yellow, 30-litre Chattooga (left) was also more chuckable than a hard case, made a good pillow, and for me had secondary uses for biking. It fits under the knees just about, but as many find, can be difficult to open and close. To operate smoothly and seal quickly the big seal needs lubing with 404 or silicon grease.

I finally got tired of my Chattooga’s tedious seal-closure and got a (now discontinued) Ortlieb Travel Zip (below left) for £100. It has has proved to be a perfect daybag, also at 30 litres. I’ve used this packrafting in New Zealand, motorbiking in Morocco and paddling in Sardinia. The TiZip sees to immersions and two outside mesh-zip pockets make easy access to things that can get wet. Inside are a couple of zip pockets and the carry straps come together with the clever and comfortable hard plastic handle. Add a comfy shoulder strap with a pad and you’re good to go.
They seem to replaced it with a ‘40L‘ version (right) with backpack straps, but it seems to have the same dimensions as mine and so will be as good.

olyhoya
Ft7

Camera Bags
If you’re serious about paddling photos, get the best waterproof camera you can afford, like the Lumix FT7 – right – £400, or an Olympus TG5 Tough (left). You need a good one because the tiny lens must work within the housing so low-end ones are only OK while the light is good. Occasionally they’ll expose perfectly, but don’t bother the optical zoom beyond halfway unless it’s Elvis galloping on a unicorn.
Any shots on this website from 2019 on, like this story, are shot with the Olympus. You can see the difference. Get one of these cameras and the whole section below on waterproof camera bags becomes irrelevant.

aquapac-4-3
aquaseal


With a regular camera which I’ve also used, you need reliable water protection. I bought a used Aquapac camera bag (left). They’re just your usual roll down and clip jobbies, but inside the lid is a ziploc seal (right) which makes the bag much more dunk-proof than regular roll tops. Testing in a sink, bubbles only escape very slowly, but treading water with it attached to your waist might not end so well.

aquapatch

One flaw with these Aquapac camera bags are the flimsy belt loops. On mine I glued over one with a big tabbed patch (right). But really it’s too bulky to hang off a belt; I ziptie mine into one of the net pouches of my Anfibio Buoy Boy pdf, but only fold over and clip down when at sea. To properly close the seal is too much faffing and usually unnecessary – until it is.

dunkboxsubmarineDoing a sink submersion test (right) reminds you of the difference between hard cases and sealed bags. A rigid box is unaffected by the increased pressure of light submersion. If anything, the pressure forces the lid down on the seal even more.
With a bag it’s the opposite: even a few inches underwater compresses the bag, forcing the air out through any weak point, usually the closure. This is why submarines are made of steel, not PVC fabric.

peli1150

On the Tarn I found the Chattooga under my knees too big in general, and too big to exit the boat easily (or in a rush). But I sure didn’t miss lugging the hefty Peli 1400 around.
I thought a lot about my needs and for the Allier came up with an interim solution: a smaller 1150-like hardcase (left) of about 2 litres volume for my essentials, including the LX. It worked OK, bar the usual easy opening issues.
I knew from the Tarn what I really wanted was a small waterproof under-knee ‘deckbag’ with a waterproof zip closure. The zip eliminates the bulk as well as dunking unreliability of roll-tops, while the bag weighs much less than a box and carries effortlessly and comfortably on a shoulder strap. I had the dimensions and design all jotted down in my head and eventually made one because…

airefrodo

Waterproof TiZip bags
A lot of Googling later I realised no one makes such a thing. There are plenty of TiZip daypacks like the Lowepro Dryzone range, or larger, watersports-oriented duffles from the likes of Ortlieb or Aire (Frodo; right) or SealLine, which resemble my own YKK-zipped Watershed UDB – one of my favourite bags. But none of the above are smaller than my 30-litre Chattooga.

orttrunk
tanker

The closest candidates I’ve found include the IP67-rated Ortlieb Trunk Bag (right and left). At 8 litres it’s a bit on the big side (add up the claimed dims and it’s more like 11 litres). And these days it only comes with a fitting mechanism to lock it to a bike rack. Very clever but this all helps raise the weight to over a kilo and price up to £98. The fabric is also not your usual pliant and mildly carcinogenic Ortlieb PVC, but resembles Heavalon (with its distinctive hexagon patterning) which Gumotex use as decking on some boats.

The Trunk-Bag could suit a lot of paddlers but as it’s made for bikes, you do wonder if it’s actually dunk-proof. Tellingly, the product description says underwater resistance: ‘lower edge of product, duration: 30 mins‘. As well all know, it’s common to be paddling a packraft with a little water swilling around the floor, so unless you slaver the base of your Trunk-Bag in Aquaseal, water will slowly seep through. Not good.

stormfront

You’d imagine fly fishing waist bags, are ready for dunking. But they’re so large they often came with an added shoulder or neck harness to help take the weight. Plus it seems fly fishing gear may be to outdoor gear like smoked salmon is to fish fingers – prices are nuts. Patagonia make the Stormfront (left), a 10-litre waistpack with an added shoulder strap – yours for as little as £180! It’s just a dunking PVC handbag with a zip!

You’ll find any number of other fly fishing roll-top bags at twice the price of hiking or SUPing examples pictured above.
Note that many find waterproof zips like the plastic TiZip or brass YKK stiff to operate, just as they are on a dry suit. Ideally, you need a good T-toggle and some sort of tab to pull against. And I do wonder if incorporating TiZips to the required standards explains the high prices for gear using them. The full range of TiZips is not readily sold to consumers, only to manufacturers for products which use them.
Anyway, long story long, I decided it might be fun to make my own TiZip deck bag. Read about that here.

Six Packrafting Essentials

Packrafting Quick Guide
Packboat rescue and survival aids

fx-gear

The basic gear you need for packrafting adventures so you don’t end up as above, or simply just inconvenienced and wet.
For general camping kit (sleeping, eating, washing) you’ll find lists all over the internet and beyond. Mixing paddling with walking, I prefer a 1-kilo down bag, a compact tent, a thick, full-length air mat and a Pocket Rocket-like burner with a big Tatonka or MSR 500ml+ pot/cup and a Gimp stove for back-up
Below, I suggest cheap alternatives in green. A cheap alternative to a proper packraft is of course… a Slackraft but you’ll only every buy one once.

1. A pack for your raft

paragonnrs
nrsparagon01

Do you use a regular hiking backpack packed with your boat in or outside, or a purpose-made drybag pack with usually a rudimentary integrated harness, or use a separate packframe harness as pictured?

If you’re a first timer and own a regular hiking backpack, make do with that, but having tried both I prefer a harness. You’re on the water so (unless you can store in the hull, waterproofness trounces all-day carrying comfort. A submersible UDB duffle is tougher, as airtight as a packraft and provides high-volume back-up flotation should you get a flat on open water; exceedingly unlikely but important and reassuring.

For short approach walks like on the Tarn, or the Kimberley, I used my UDB’s basic integrated harness: just sewn-on straps. For Turkey which was mostly walking, I fitted it into NRS pack harness (above left; no longer made) whose load capacity easily exceeds its straps and your back.
In Germany Anfibio Packrafting now sell the more sophisticated US-branded Six Moon Flex Pack (left; new 2021 design), a ‘drybag hauling system’. You can lash anything that fits within the straps, including your rolled-up boat. ULA Epic is another one. In Europe such harnesses seems unknown.
Remember: with any big backpack the key to support and comfort is a stiff board or frame connecting the hip belt and shoulder strap mounts so the weight can be carried low on your hips, not hanging from your burning shoulders.

Cheap alternative: any old rucksack and a tough bin bag.

2. Four-piece paddle

pad-abmr

Get a paddle that breaks down into four pieces for easy transportation. A paddle like this may not be as stiff as a good two-piece, but the Aqua Bound Manta Ray left or the Anfibio Wave (right) will still be under a kilo and anyway, you’re in a slow packraft not a razor-thin surf ski. Some four-parters don’t like being left assembled when wet; don’t leave it out of the water more than a day or it may be very hard to separate.

feather

Even cheap alloy-and-plastic ‘shovels’ come with adjustable feathering; an ability to offset the blades. Flat (zero offset) works OK, but most find a bit of offset makes paddling more efficient. I’ve got used to 45° Right (left blade rotated 45° forward) over the years. Whitewaterists prefer 30°. Left handers will go the other way. The Anfibio Wave had infinite feathering and 10cm length adjustment.

Cheap alternative: A TPC 2-piece or similar.

3. PFD (‘personal flotation device’)

bbuey
499_1

A proper foam pfd is bulky in transit but is essential for remote solo paddles or whitewater (as is a helmet and a whole lot more if you’re really going for it).
For flatwater paddles and calm, warm conditions Anfibio’s lightweight inflatable Buoy Boy (left) has twin inflation chambers, rolls down to less than a litre in volume and comes with handy net pockets and a useful crotch strap to stop it riding up when you’re flailing around in the water. At any other time, you’ll barely know you’re wearing it. Note It does not claim to be a CE-rated buoyancy aid.

Cheap alternative: A used foam PFD.

tevafloater

4. Wet shoes
I’m on my second pair of Teva Omniums (left) which are do-it-all wet shoes that are OK for unloaded walking. If trekking the wilderness for days with a full pack over rough terrain, you’re better off with proper lace up trail shoes or boots, but bear in mind that anything with a breathable membrane takes ages to dry once soaked inside out. I use membrane-free desert boots. SealSkin socks are another solution, while they last. More here.

Cheap alternative: Old trainers or Crocs.

5. Day bag or case

P1290855
peli11

You want something light to carry your valuables when away from the boat in populated areas. Choose a bag or case which fits under your knees without getting in the way. Whatever it is, it will sit in water, get splashed or even submerged, so it needs an airtight seal. If it has handy external storage pouches or pockets, so much the better.

Recently in France I tried an Underwater Kinetics box (22cm x 16 x 8; 540g, above left) used on ebay for under a tenner. It’s about the size of a Peli 1150 but a bit less deep and took my Kindle Fire, camera, wallet and bits. It’s light enough to carry away from the boat and also happens to make a handy camera stand. 
But most of the time I use a 20-L Ortlieb Travel Zip (left) which zips open easily and stores loads. As for a camera? This is what you want.

Cheap alternative: large, clip-seal lunchbox and a plastic bag.

6. Repair kit

A couple of feet of Tyvec or similar tape and a small tube of Aquaseal is probably all you need for quick repairs. Something I’ve never had to do in all my years of packrafting.

Cheap alternative: Pieces of vinyl tape stuck to you spare repair patches.

WindPaddle Adv 2: disc sailing revisted, again

Sadly WindPaddle.com went bust but now Anfibio make something similar

Packboat sailing

Adding a rudder to the Seawave inspired me to drag out my cheapo disc sail. I last tried it three years ago on the Amigo (below) when it worked OK, even without a rudder. But of course, a rudder is much better for keeping the boat on the wind while sitting back with the paddle on your lap and your hands on the sail lines.

hellosailor
sai-sailor

Pulling the sail out the 3mm fibreglass rod or ‘batten’ broke. I  bought some more which, if anything, felt more pliable than the original but before I took it out it was broken in two places. Long sections of fibreglass rod in greater diameters can’t be sent bent so incur much higher postage charges which made reviving my KnockOffPaddle uneconomical. Worse still, removing the splintered rod from the sail (before I decided to ditch it) filled my hands with glass splinters for days. Nasty stuff.

wp1

I looked again at the original  WindPaddle whose prices have dropped in the UK. Their Adventure II model is up by 13cm to 119cm or 47″ in diameter, making a claimed area of 1.42m (as usual, π x r2. doesn’t add up to ‘1.42’ but never mind). It folds down to 42cm or 16 inches diameter but with squidge some more (ovalise) to tuck securely into the floor of your boat, and weighs just 400g (+30g for a control line).
I asked about the cheaper Scout sail and why it’s rated at 4–15 knots when the new Adventure II is rated at 6–30kn. It’s not just the bigger area; the Adv II has a significantly stiffer composite batten to help hold its shape. That’s important and why ships don’t have rubber masts.

wp3

A problem with all sails is that they can start swinging from side to side in a recirculating frenzy before either settling down, collapsing or diving for the drink, possibly when the wind is more than they can handle. I recall with previous V and disc sails that lot of your time is spent managing that motion, rather than galloping across the waves like a flying fish, but the promise of achieving that is why I persevere.
Update 2021: After having much better results with a AirSail on a packraft, I think some of this swinging could be down to clipping the sail to slack decklines, and not directly to mounts on the boat’s hull. I will try that next time.

WP2

When the £116 sail arrived, it certainly had a better quality feel than my smaller knock-off which went for under £20 on eBay and are now under a tenner. The sail fabric feels thicker and the crucual perimeter batten isn’t a regular GRP rod-like in a tent, but a flat flexible composite band about 8mm by 1mm. It takes significantly more effort to fold the Adventure II three times into its 16-inch hoop, but that should result in a more stable sail in action. Sea trials here.

coi - 12

Alternative to D-rings for IKs

IKavity

Michael S from BC came up with a good idea for securing stuff, seats or thigh straps to the floor of your IK without resorting to the faff gluing on D-rings – something that takes application and the right glue to do well.
He suggests the cavity formed between the floor and the sides when you pump an IK up can be used to jam in short tubes attached to tape loops. Example left is a Sea Eagle Full D-S, but I know Gumotex and other IKs I’ve owned have a similar space along the sides.

tieseawav

Pictured below are some Sherpak Quick Loop tie-downs which go from $15 a pair on amazon US. You can buy Thule ones for six times as much or search eBay for <Kayak Hood Trunk Tie Down Loops> sent from China for 7 quid. The idea is you shut them under your car’s bonnet, tailgate or doors (right) to help lash on stuff including boats.

But they could also be lodged in an IK’s floor/side cavities as you pump up, and of course can be positioned anywhere and slid forward or back. It’s possible the 1-inch diameter tubes shown may be too small and pull out, so make your own using larger conduit from a hardware store, or just a shore-side stick and washed-up rope.
Below: I made my own. To be tested. Neato mosquito as my Kiwi mate used to say.

Seawave Rudder MkII tested

Gumotex Seawave main page

Rudder rationale discussed
Gumotex’s 2016 factory version
Making the Mk1 prototype rudder
Testing the Mk1 prototype

Update 2019:
I’ve not used my MYO rudder since I made it in 2016 and sold it with the boat in 2020. Partly because I’ve only done day trips predicated on nice weather, but also it’s all just more faff and clutter, not least the lines and footboard. As explained earlier, for multi-day trips you must deal with the winds you’re given so a rudder is a good idea. But even then, you only notice your relative lack of speed (due to sidewind paddling correction) alongside others. Alone, you’re as fast as you are [grasshopper].
Rudders are not about steering as they are on powered boats; in a kayak they’re about enabling efficient, balanced paddling on both arms by compensating for the boat’s deflection by side winds. 

mulla
mulamap

While waiting for rudder bits to turn up, we went out for an evening paddle round Eilean Mullagrach. It was pretty calm but at no point did I think, ‘Darn, I wish I had a rudder’. When it came to turning corners we just paddled hard or dragged a blade and round we came.
But the Seawave rudder project carries on like a supertanker with a jammed… rudder, if for no other reason than it’s fun to experiment and a rudder can also work as an articulated skeg when locked out – something I may look into when it’s all done.

rudderdyl

Ironing out the flaws with the prototype added up to attaching it more securely at the back and making the pedal board out of something more responsive and durable. By coincidence, all these components can be sawn from a single piece of 450 x 300 x 12mm LDPE chopping board (above) which costs from £8 on eBay in a range of colours. This is 50% thicker than the smaller board I used on the prototype plate so doesn’t need doubling up and gluing to make it rigid.

rudm211
rudm21
rudm23

At the back I  slimmed the rudder plate right down to a simple strip of 65mm x 450mm, glued a block on the end to better support the gudgeon swivel pivot sleeve and added the crucial second fixing under the portaging handle (above left). I also added a triangularish screw plate underneath (left, with red cord) so it all sits snug in the stern. With the hardware and saddle strap that now adds up to 306g (the rudder unit weighs 450g with its running lines). Even though it’s slimmer than the proto plate, it weighs about the same because it’s now 12 mil. But looks a whole lot neater.

rdd5
rudnee1

The pedal board is from the same slab but uses stainless hinges, not zip ties. I’m reminded, you’re constantly making small adjustments as you paddle so pedals need to be as taut and responsive as possible. Once I’d trimmed the board and pedals a bit (left), with hinges it came in at 660g.
The board and maybe the pedals could have been made from 8mm if there was some to spare – but an 8mm board wants to be ~450mm wide to sit snugly in the boat’s side channels. Like the rudder, the pedal board will be subject to strong forces in heavy seas so also needs to be solidly jammed in. Meanwhile, I noticed the floor-laminate prototype  board (right) gained nearly 15% in weight after getting wet – a sign it won’t last long. Still, it made a good template.

garbpedals

I do wonder if something like the Grabner rudder pedal bar (left, similar to Gael’s old H2) would be much lighter, as solid and as effective as my board. It costs €70 plus €30 for a pair of Zoelzer pedals.
I can’t really see how I could replicate that alloy footrest bar – out of copper tube filled with resin perhaps (like this motorbike rack)? It’s held securely in place without fittings by being jammed in the channel cavity between the floor and the sides (like my board), but a check with Gael advised me against it. As it happened, I’d pretty much decided the same mid-test run (below). A sliding ally bar plus seawater isn’t a great combination and might bend or break, or the pedals snap. I know the ally backrest bar on my Amigo wasn’t up to it and Gael’s backrest broke (though it was ancient). My plastic version may weigh double but should be solid. Interestingly, just as a bag of clam cleats turned up to make a quicker way of fine-tuning the rudder pedal lines from the cockpit, I see left that Grabner use them – a good sign.

rudhorse
rudm221

The weather here’s about to crack and then we’re moving south, so in a rush I took the revised rudder plate out for a test with the creaky waterlogged pedal board. Heading towards Horse Island tidal passage, I didn’t need a weatherman to know which way the wind blew: from the WNW at about 12mph.

pedalo

Initially, the boat needed constant small corrections to maintain a course, and there was some stiction, hopefully down to the zip ties on the soggy pedal board. I tried a few tight turns and marvelled at the control and how sharply the boat swung round like a pedalo. The rudder plate is now as rock solid as anything fitted to an IK can be. Again, I consciously tried not to correct with my arms, just my feet, which were twitching regularly.

rudm24

At Horse Island I was way too early to pass through the passage, but as it was probably my last paddle here till next year, I decided to head for Badentarbet. Turning north, closer into the wind the micro corrections were no longer needed and the boat ran as if on a skeg, but without arm corrections. I’m pretty sure paddling 20–30° off the wind would have required arm steering, but I just hacked away towards Rubha Dunan on the mainland as the wind increased. When I tried a bit of downwinding, protracted rudder juggling was needed to keep the back-end in line.

I passed through a channel on the headland and the NW wind got steadily stronger so crossing the bay to the beach seemed to take ages of effort. By now the small corrections I’d been making were no longer necessary, perhaps something had bedded in, the knots had tightened up or, like riding a bike, I’d just got the knack of minimal rudder movement to keep the boat on track. But upwind paddling is comparatively easy so I tried across the wind, now running over 15mph, and a bit more downwinding which gave me that unsettling Ningaloo feeling. This must be the weak point of a buoyant, windprone IK (especially when unloaded), and maybe all kayaks and canoes too. The chop was only a foot high but were there a swell of a metre or more, the rudder would be briefly lifting and the stern sliding. I wonder if in such conditions a combination of rudder and skeg (which is always submerged) might be a way of limiting weathercocking? Or perhaps just more practice is required. There’s also another solution that might arrive here in time to try out.

rudrudd
rudalio

As I neared the beach the wind was hard in my face but I realised I was actually on good form, unlike on the Tanera run with the prototype. So I hammered away with all I had until my strake hissed onto the sands. Paddling hard is all helped by my brilliant, bent-shaft Werner Camano paddle, no less than ten years old this summer. It still clips together with a satisfyingly ‘clunk’ and has very little play. If it ever got lost or abducted by aliens I’d buy another without hesitation. I was glad I’d got stuck into a longer test run than planned, and am now confident my MYO Seawave rudder is in the ballpark. Hopefully, the new pedal board will complete the job. 

rdd4
  • Total weight: 300g rudder plate + 450g rudder + 660g pedal board + ~100g rigging = 1.51kg (3.3lbs), or < 10% of the boat’s weight
  • Total cost MkII version: £20 rudder + £15 rigging + £8 LDPE board + £10  hinges + £2 fittings = £55
rdd2

For about £200 posted I could have installed a 2016 Seawave rudder kit, but from all the images I could find at the time it was unclear exactly how it secured at the back – there must be their version of an unseen triangular underplate, but even then it’s still a stressed-out single point attachment. My additional under-handle fixture eliminates any chance of pivoting.

gumrud3

And the plywood Gumotex footboard (right) appears to sit loose and seemingly will also pivot on that single strap. Production versions may differ and let’s not forget that adding all this complexity also adds a risk of breakage or damage. The simplest solution is usually the best, but the 160-g skeg will always be clipped in the boat as a back-up and a Seawave is controllable (if much slower) with no tracking aids at all. It’s worth remembering: a rudder isn’t about day-to-day tracking, it’s about maintaining a course when the boat gets pushed about in stronger winds. In such conditions a skeg is essential and a rudder is an improvement, as explained here.

rudstash
rudderweights

On the beach, prior to lugging the boat over seaweed-clad boulders, it took only 30 seconds to unclip the rudder mechanism from the plate to pre-empt stumbling and damaging it. Since then I changed the rudder plate mounts with tool-free knobs and an eyelet (above). When rolling the boat up it was best to pivot the rudder plate around the drain hole 90° to pack better.

rudm25

Packboat rescue and survival aids

The other year while leaning over on a salmon pen platform, my cherished six-year-old Benchmade Griptilian slipped out of the pfd and down into the briny depths. We ummed and ahhed about diving down to retrieve it, but I’m told these pens are 20-metres deep and can hold no less than 80,000 fish.

It was a bitter loss, all the worse when I saw what a replacement cost new. Long story short, I replaced it with a similarly anti-stealth orange PBK EMT Rescue Knife for a few quid (left). Like they said “you won’t worry too much if you drop it off your lifeboat and [it] sinks into the depths.” No I won’t.

aqua
tippy

At 150g it’s heavy but locks out with one of those cheap ‘liner’ locks and has a window-smashing stud, should I ever find myself in the nightmarish scenario of being trapped in a sealed aquarium. You also get a pocket clip, plus a handy line cutter – a good idea when your packboat begins to acquire too many lines and straps all adding up to an entrapment risk when expelled from the boat in lively water.

As it is, I’ve long had a quick-grab Benchmade #8 Rescue Hook permanently attached to my main pfd (below). With no sharp point, it’s a good thing on an inflatable and rusts quietly away.

NRS Pilot knife

Then the other day I decided I could streamline things by ditching the somewhat illegal PBK EMT with a proper, quick-grab kayaking rescue knife. NRS’s blunt-tipped Pilot Knife seems the main one available in the UK at around £44. The RRK is another with a hooked tip. The NRS’ locking mechanism wasn’t the smoothest from new, especially when reattaching. I gave it some WD40, but as it is the blade exposed in the shealth looks too ‘knifey’ when strolling into Greggs wearing the PFD after a peckish paddle. So I managed to elongate the Benchmark’s fabric sheath and the NRS slips in there unseen, while still being quickly grabable.

Once you’ve cut yourself free from your boat, the next thing is to alert others of your distress. Some sort of pea in a whistle body gives it a more punchy warble. Look up referee whistles on ebay from Fox or Acme. The piecing blast it puts out will be hard to ignore.

Phone, knife, whistle
helporwhat
Practice self-recovery before you need to.
With IKs, getting back in alone from deep water is easy compared to a hardshell. Same with a packraft. That’s part of the appeal.

Seriously: the best way to dodge dangerous situations is to avoid them in the first place. That’s not as glib as it sounds. For me, who’s written and talked (and even won awards) about adventure travel for over four decades, paddling is one of the more potentially risky things I do these days. Or at least one where I’m aware of my limitations paddling mostly alone.
I got the whitewater thing out of my system some time ago and have settled on Grade 2 or portaging. At sea, I mostly do day trips in fine weather, which in the UK can mean days or weeks staring out the window. But I’ve yet to have a ‘moment’ nor come close to falling out of my sea kayak. On rivers, I’ve not been tipped out of an IK since my Sunny days and never in a packraft. That’s how boring my boating is! I’ve managed that by avoiding the high-adrenaline side of things: technical whitewater, pounding surf, gale-force winds, as well as being ready to portage or change plans mid-trip. I’ve had my fair share of dramas doing other stuff. For me the adventure with paddling is quietly exploring wild places with packboats. I leave the appalling fascination of this sort of thing to others ;-)

Seawave – Oh Rudder, How Art Thou?

Seawave main page
Skip forward to MkII rudder

You might just like to fast-forward to DIY rudder Mk2

ohrudda
snaps

Within hours of finishing my prototype rudder I set about finishing it properly, and after a test run to Tanera Mor, made further improvements before trying it again.
The whole set-up wants to be mountable/removable without any tools or knots to untie. I used mini karabiners to attach the various lines but realised snaplinks with a ring are better, as they’re permanently attached so won’t get lost. I recall the fine wire clips on my Incept rudder and after hours of webbery found out they’re called fishing snaps (right). Let me tell you, you can spend a lot of time online trying to figure out if size 00 is bigger than size 8 and still end up buying ones so small you need tweezers to open them. Moving on, some ringed karabiners (black, right) now do the job.

rudd01
rud71

I only know two knots from my climbing days and still regularly use the Figure of Eight, (right and left) a quick way to put a loop on the end of a line that’s easy to undo
If you want to feed an Fo8 into a fixed ring (like the black krabs, above), just knot a loose ‘8’ near the end of the line, then feed the loose end back in and around the Fo8 all the way out again. And add a lock knot for good measure.

nips

Lines shouldn’t be knotted directly to a fixed object, especially if it’s pivoting, but on the rudder’s lifting pulley there’s no room to attached a krab or mini shackle. The lowering pivot has a hole and channel for a nipple (right). I suppose I could track down a short length of appropriate wire cable, but for the moment it’s a job for our good friends, the zip ties. I also moved the rudder lifting knob to the right side: forward to lift (slightly more effort); pulling back to drop seemed intuitive.

rudd03
rudd07

In this pre-optimised form I crossed the two miles to Tanera Mor with a light WSW wind at 2 o’clock. First, like a bush pilot, I checked my flaps: up and down, left and right, then started the engine and pushed on the throttles.
Very soon something was wrong. I was having to rudder hard left and the pedals were leaning way forward. I stopped to knot the lines to take up some slack, but still the boat was turning into the wind and the rudder was very slow to respond.

tanrud

With a skeg on, it’s usually the bow that pushes round on a crosswind. Was the new rudder assembly making more windage to push the back around? More stopping to add knots to the pedal lines.
I was also reminded that with a rudder you don’t just set it and paddle away, but are constantly making tiny corrections. You probably do the same with your paddle and a skeg, but never notice until it gets obvious (the whole point of fitting a rudder). For this reason a rudder wants to be as smooth-running and taut as possible.

rudd11
rudd10

The forecast was cold and northerly so, over-dressed in a cag and dry pants, all this foot and arm work took it out of me as I resolutely tried not to correct with my arms. It was a relief to arrive at Tanera’s 200-year-old pier. Mooring up, I noticed my rudder plate was dislodged (left), explaining why the pedal tension and tracking had gone awry. It was only when I got back that I noticed I’d fitted my nutted ‘underplate’ upside down and the nut had pulled out. Oh Brother What a Plonker. I locked down the plate with a zip tie and readjusted the pedal lines yet again.

rudd05

It was also clear that my scrapheap pedal board was rubbish. Heels resting on the board (left) put them two inches higher than normal – not good for paddling efficiency, comfort or pedal actuation; perhaps quite good for neglected muscles. That was easily fixed by turning the board around.

After an  hour exploring this historic corner of the island (now no longer possible with the new owner’s developments), I headed back and immediately noticed a much more responsive rudder – now you’re talking! It was like driving with all the wheels done up tight. Lower heels gave a much better angle on the pedals and I noticed I was now operating the pedals with the outer edge of my feet, as I recall on the Incept. Line drag was minimal but now the wood laminate pedal board creaked and the zip tie hinges were a bit mushy.
I’d already ordered another slab of LDPE chopping board to make a pedal board out of something more water-resistant than compressed dust, as well as the extravagance of proper marine-grade hinges (well, that’s what it said on eBay). I tried a quick bit of disc sailing too but it wasn’t really windy enough – more on that later.

rudd38

As I neared Badentarbet beach the g-friend happened to swing by and, showing her some moves, I was amazed how sharply the boat could turn at low speed in the shallows, almost like a handbrake turn. Of course, this is kayaking not The Sweeney, but it’s good to know it worked. I also got a chance to test my newly bootied Kokotat dry pants – they worked like they should, too.

rudd42

Back at the house, I realised the pedal lines had been cut before considering the need to move the pedal board forward for tandem paddling. Luckily, more Dyneema turned up next day, so I re-used the former yellow cord for the rudder lifting lines and ditched the saggy red paracord. Much tauter action.

rud61
rud62

The wheeled cord locks turned up too (right). I had a suspicion they wouldn’t work for adjusting rudder lines and I was right. They need tension from the same direction while snugged up against the edge of a stuff sack or something. I tried doubling the lines with two pulling the same way but the red Dyneema is too thin, hard-surfaced and slippery to work with these locks.

rudlok
rud51

I settled on a ‘truck tarp knot’ then got the idea that the locking guyline adjusters off my Vaude tent might do the job – and they glow in the dark too! My Odyssee has guylines to spare.

rud64

I set about making small improvements, including adding two holes in the boat’s back deck triangle (as Gumotex do on post 2016 Seawaves) to make a cleaner run line for the pivot lines. It’s no great pleasure stabbing a red-hot poker into your favourite IK, but a side benefit is the rich aroma of burning Nitrilon rubber, not some cheap PVC. I’ll track down some nice eyelets later.

rud41
rud03

Once I realised the rudder board had come undone because I’d mounted the nut plate incorrectly, it was clear the strap looped to the rearmost deck line sleeves weren’t doing much. The main mount was through the drain hole, which relied on the large nut plate (left) underneath to stay fixed, plus the saddle strap (left) limiting any yawing. The whole plate could be slimmed down to resemble Gumotex’s factory version.

rudideamk2

So I think I’m going to follow up on my own speculation and either form a triangular nut-plate below the deck to help keep the rudder plate in line with the boat, or I may make a new long thin plate (yellow, left) that reaches back past the kayak’s portage strap. With a slot to get round the handle, I’ll poke another hole in the deck and this way the plate will have two mounting points plus the saddle strap and will not deflect.

Rudder 1.1
While waiting for more chopping boards to turn up, I went out for another run with the Mk1.1 set-up. Much windier this time – 15 to 20mph from the SW. Normally I’d not go out in this, but the point of the rudder was to ease effort and improve control just before such conditions set in.

That was the theory. In practice I struggled to get out of Old Dornie harbour against the wind and soon had to put in to readjust the pedal lines. What now!? The luminescent Vaude clamps were effective but not a 4-second job like they should be. They can go back on the tent. A better line locking mechanism needed.
If I’d looked back I’d have noticed the rudder plate had become dislodged yet again by the forces pushing the boat around. That explained why getting right out of the harbour was such a slog, let alone tackling the 15-knot headwind and lashing rain. Deceptively, there were few whitecaps out there, but a deep swell was rolling through, probably lifting the rudder out of the water. Who’d have thought it was Midsummer’s Day.

rud222

Turning back, I hoped I might get a bit of a run on the wind, but control was even worse – shades of Ningaloo but without the mangos and barramundi. Back at the pier, it was a relief to see it was only the rudder plate at fault, although I’d not have been surprised if it was just too windy for any sort of IK-ing today.
While waiting for ‘what-do-you-think-I-am-a-bloody-taxi-service?’ to turn up, I strolled along the exposed shore on the off-chance of finding some LDPE jetsam, but all was glistening seaweed and frayed rope.

rude2

Rudder 1.2
I’m running out of time with the luxury of having the sea at my doorstep. That evening it occurred to me the rudder plate was always deflecting clockwise because the lip of one glued-on reinforcement plate underneath pressed against the stern and stopped it turning the other way. I did what I’d considered initially and glued a thin strip of LDPE to act as an opposing locating edge so the plate sat more securely once saddle-strapped down to the boat’s triangular stern.

rude11

This surely should be enough to keep the plate in place, but while I was fiddling I made a template for the triangular nut plate which might further help locate the rudder plate (right). When more LDPE turns up I’ll cut one out and melt another M6 nut into it. if this doesn’t work a longer plate with another through-the-deck fixture below the portage handle (as visualised above in yellow) ought to fix this once and for all.

rude4
rude6

Other jobs:  trimming off the board’s unneeded flab to make the current haxagonal shape, filing down the edge of the rudder body where the lifting line rubbed (right), and one more tweaking of the rudder pedal lines.


I headed to back to the harbour where it was still blowing about 15mph, but within a minute suspected it was pivoting again, possibly from the pull when dropping the rudder. The added locating strip wasn’t enough. Who knows how Gumotex manage it but on this set-up the surefire solution is a second in-line fixing point (as above) and perhaps that triangular under-plate to stop the mount pivoting once and for all.

Partly, these issues are due to underestimating the forces that a combined 120kg of paddler in a 4.5m-long kayak moving at 4mph puts on a rudder and its mount. Add some wind, current and waves and how well the small blade is fixed to a big boat becomes critical. Nearly there, brothers and one clear benefit: the ability to sit the kayak on the ground with no skeg stress. I can see me leaving the rudder on there full time and adding some sort of bombproof lock-out to make it the mythical articulated / lifting skeg.

Read about the MkII rudder.

ruddd1

Tested: Honey woodstove

See also
Woodgas burner
Gimp stove

stov6

In a line Ingeniously simple, versatile and super-light two-sized wood stove/pot stand/windbreak that packs flatter than a Kindle.

Cost £38 + post from BPL UK

Weight 265g in bag (+ 30g for square and Trangia base). 

How used Brew and barbie in the back garden.

honeydims
honey02

Good points 
Light, adaptable, compact and transport-friendly. More windproof than an open fire and simple to assemble. Clean stamping or cutting with no rough or sharp edges.

Bad points
A bit fiddly, but you’ll soon get the knack. Will get grubby. A hinged version is a tempting thought.

stov4
Six sides
stov1
Fpur sides. Too small and unstable

Description: Four- or six-sided stainless steel wood stove assembles in a minute with height adjustable bases and a grill. One wall segment is open for adding more fuel and the kit also includes a third base for a Trangia burner. You can also mount the floors higher to burner solid fuel. All the segments lock together to make a sturdy, stable structure and the perforated bases and slotted sides permit air circulation while acting as a windbreak.

stov8

Two wire tent pegs or chopped down coat hanger (not included) can slot through the sides so something like a 500ml Tatonka cup can sit low inside for added efficiency, and unlike some similar cups, the handles will be outside. You could also use the grill as a load-spreading base on soft terrain to stop sinking and help maintain air-flow underneath. Plus, if you have back problems, they make a Honey Stove in titanium, and if you want to cook bigger you can buy two extra side sections with a bigger base plate and grill to make an octagonal Hive Stove. It all disassembles in ten seconds and packs totally flat.


stov5

Review: I spotted this interesting looking stove on someone’s paddle blog, tracked down what it was and bought one. I ‘got’ the Honey Stove at first sight: a simple fuel container / pot stand / windbreak that breaks down flat to more or less the size of a slimline dvd case.

I’m not especially bushcrafty but recognise the value of a supplementary stove to either save butane or act as a back-up or alternative cooking device. Apart from driftwood, northwest Scotland isn’t really woodstove country unless you carry your fuel, but a Mediterranean setting certainly is. And as with the Woodgas stove I used in Turkey last year, you could pretty much carry this as hand luggage on a plane. No need to track down the right sort of gas canister at the other end.

honey04

Once the novelty wore off, the Woodgas stove – with its unintuitive top-down burning, flimsy pot stand and preferred tinder and pellets – was a bit too clever and as bulky as a Coleman, though still very light and unfiddly to assemble. The Honey stove burns conventionally with paper under twigs and sticks. ‘I could make that with an old paint pot!’ I hear you exclaim. Go ahead, but don’t forget to stamp your paint can flat before you pack it away, then wrench it apart again when you next need a cuppa.
The included Trangia-style burner support is a nice touch but for me a bit redundant – I got over Trangias in the late 70s and never got into solid fuel tablets either until i discovered ethanol blocks. To me, the whole point of a stove like this is to use locally sourced fuel.

honey06

The smaller square format for a cup (right) is a bit small to carry an adequate charge of wood but six-up you can fit in plenty and my MSR Stowaway (left) sits just right.
First go out of the bag 500ml of water boiled in 9 mins in a bit of a breeze and a bit of refuelling. I don’t think I measured the Woodgasser but I’d say it’s about the same once it got ‘on the gas’, and I bet the Honey would be quicker still in drop-down, wire-peg mode or with a bit of practice. There’s no benefit to woodgas when it comes to sooty pots.

honey08

While the tea brewed I slapped on some tasty garlic and herb chicken kebabs on the grill. Never used them but I found a couple of charcoal BBQ coals and in no time my succulent, aromatic lunch was encased in a crisp  shell of burned meat – will we ever learn? But the last skewer cooked up to perfection on glowing embers not flames as if from my local kebab shop.

honey10

I was curious to see if the stove got warped by the heat – the Woodgas fuel bowl shrunk a bit which affected performance if not located correctly. The Honey’s floor plate and grill were a little warped but all still slot easily together. The stove has lost its BNIB sheen and was a little mucky with soot, but otherwise unchanged.

honey11

I also got round to trying the trick of wiping the cooking pot with liquid soap before using it to make cleaning easy. It works – the soot wipes right off (left); you could clean it with a bunch of grass. Who would have thought soap was so fire-proof.

UK manufacturer may explain the relatively high price for simple stamped or CNC cut steel, but the unit’s adaptability, versatility and unbeatable compactness make it feel much better value than the MkII Woodgas stove. There are much cheaper four-sided Chinese-made stoves on eBay using similar assemblies but BPL.UK’s six-sided version makes a marginally more spacious and stable burning platform and, as mentioned, can be expanded (for a hefty £26) to a bigger, eight-sided stove. A heftier than average knife may be needed to split wood into the ideal, pencil-sized pieces but the Honey Stove is an effective and foolproof supplement to a faster butane stove.

honey05