In a line A busty PFD at a great price and more pockets than the Crucible in May.
Weight 1.01kg (size M/L)
Cost £40 (heavily discounted on ebay)
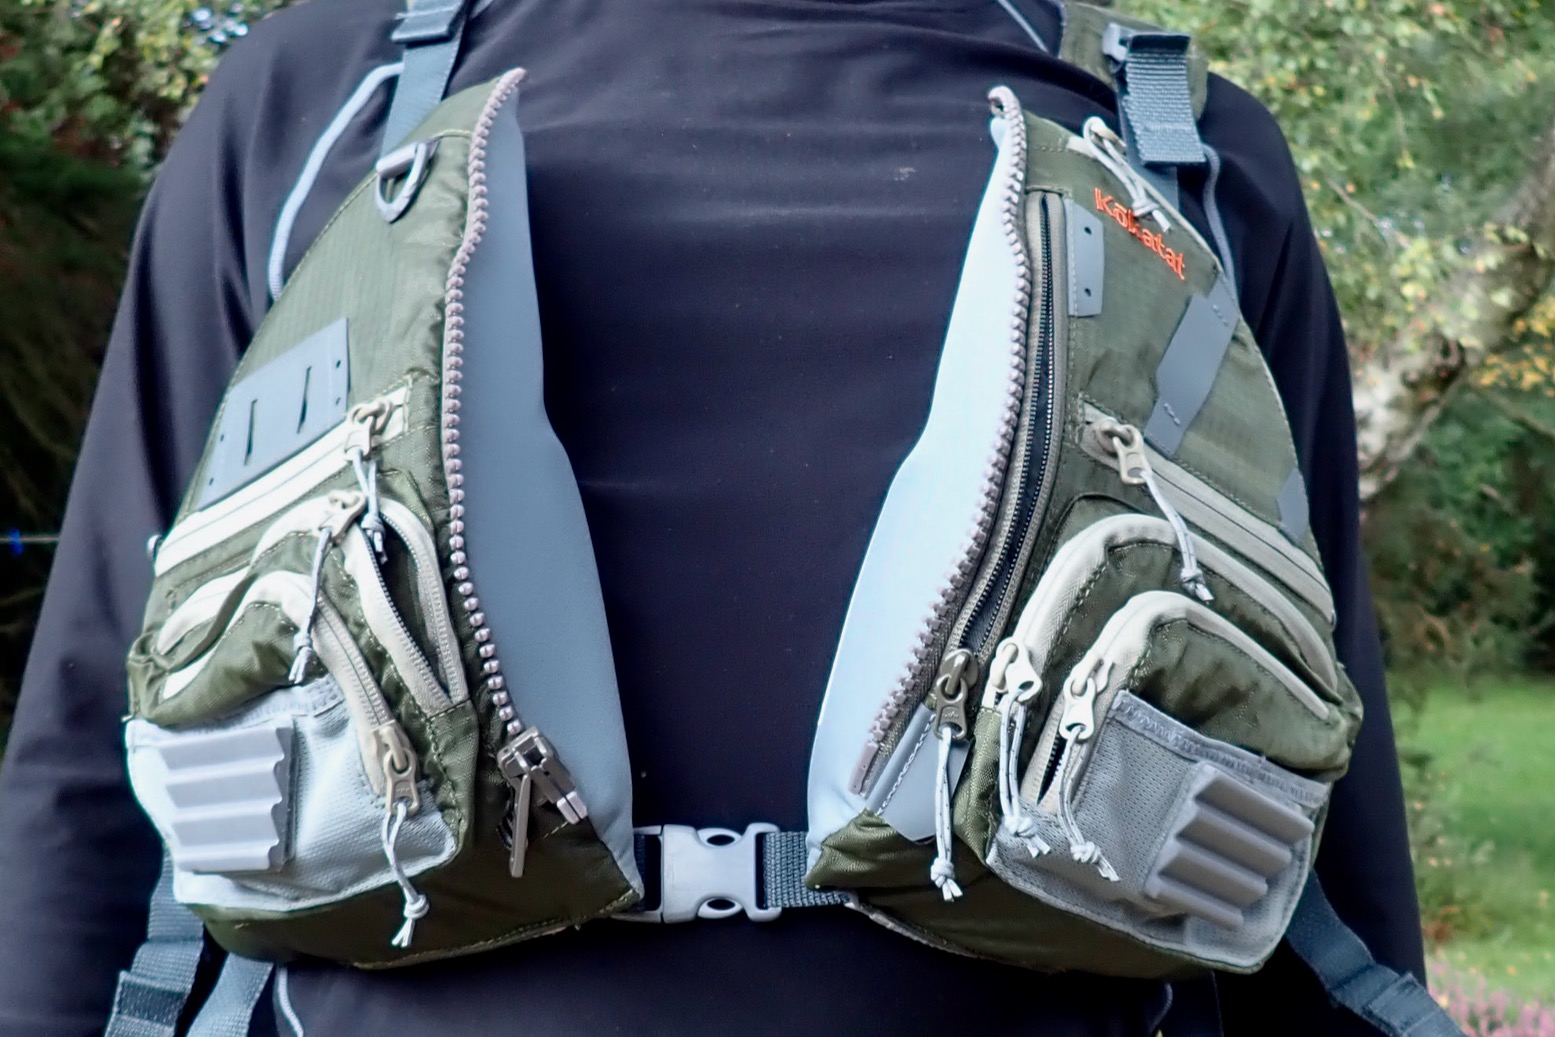
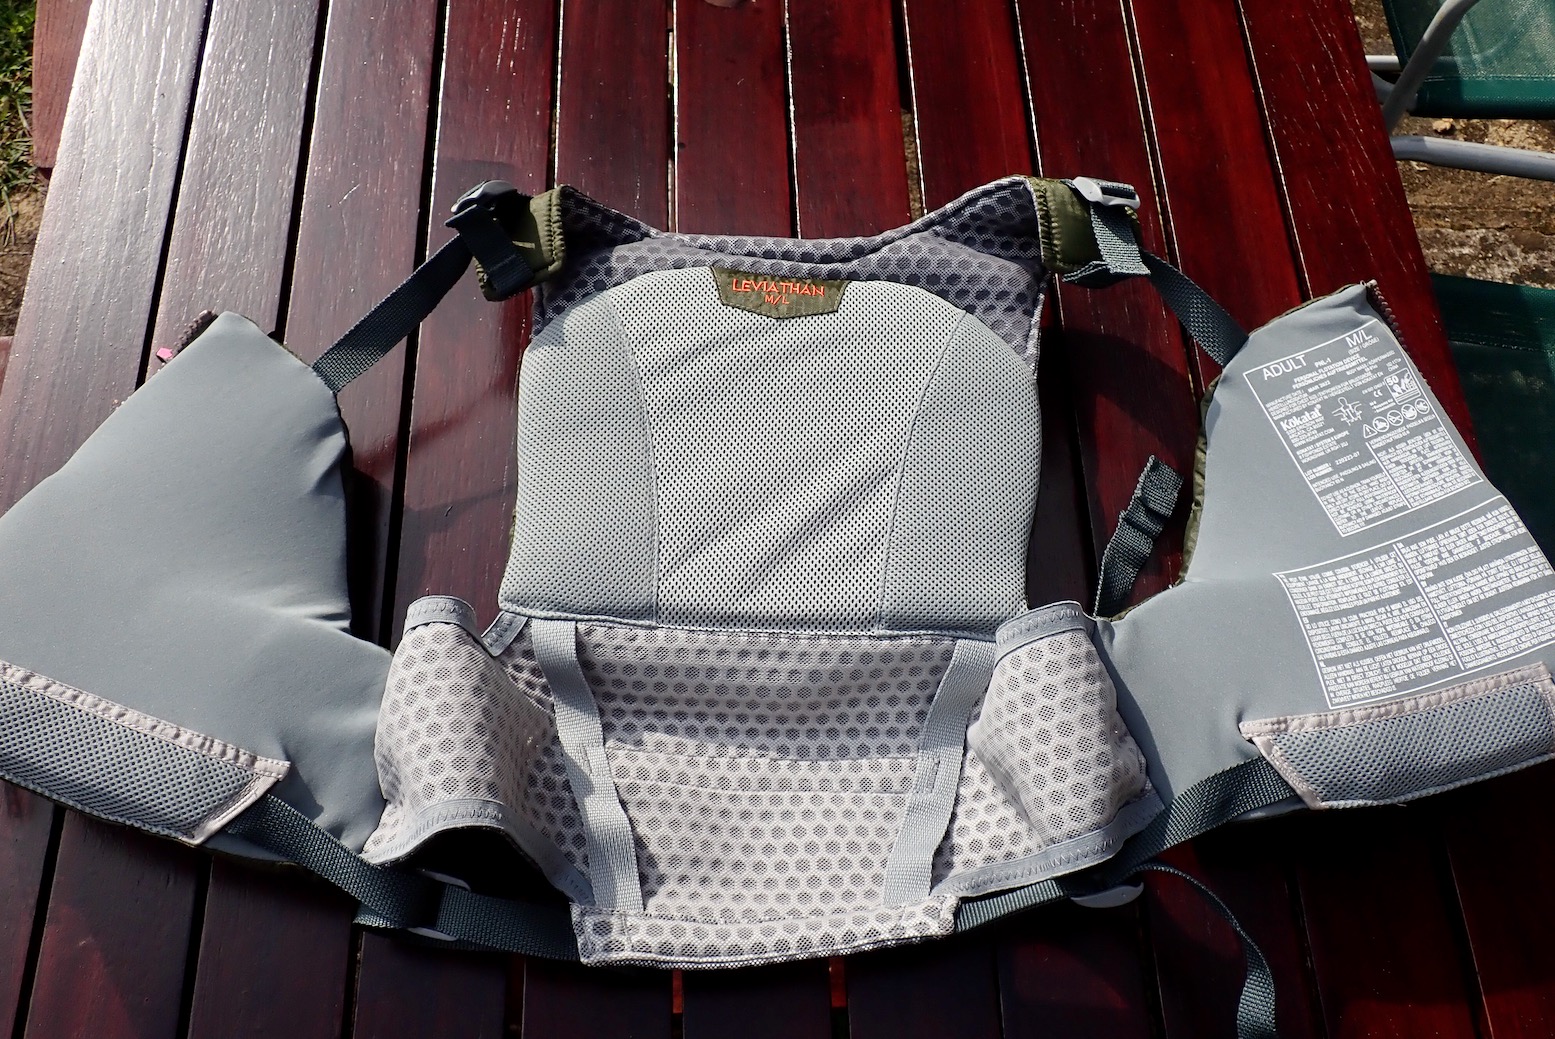
What they say The ultimate kayak fishing life vest, the Leviathan has 14 pockets and multiple fixture options allowing anglers to carry lures, tools, and gear wherever they choose. This high-back, performance, recreational life vest features body-mapped Gaia foam panels contoured precisely to allow the life vest to wrap the torso in a secure fit. Fleece-lined handwarmer pockets are a bonus for those chilly days. This Life Vest is certified for use in both the US (by The US Coast Guard) and Canada (by Transport Canada). You do not need to select a certification. The life vest is dual certified for both countries.
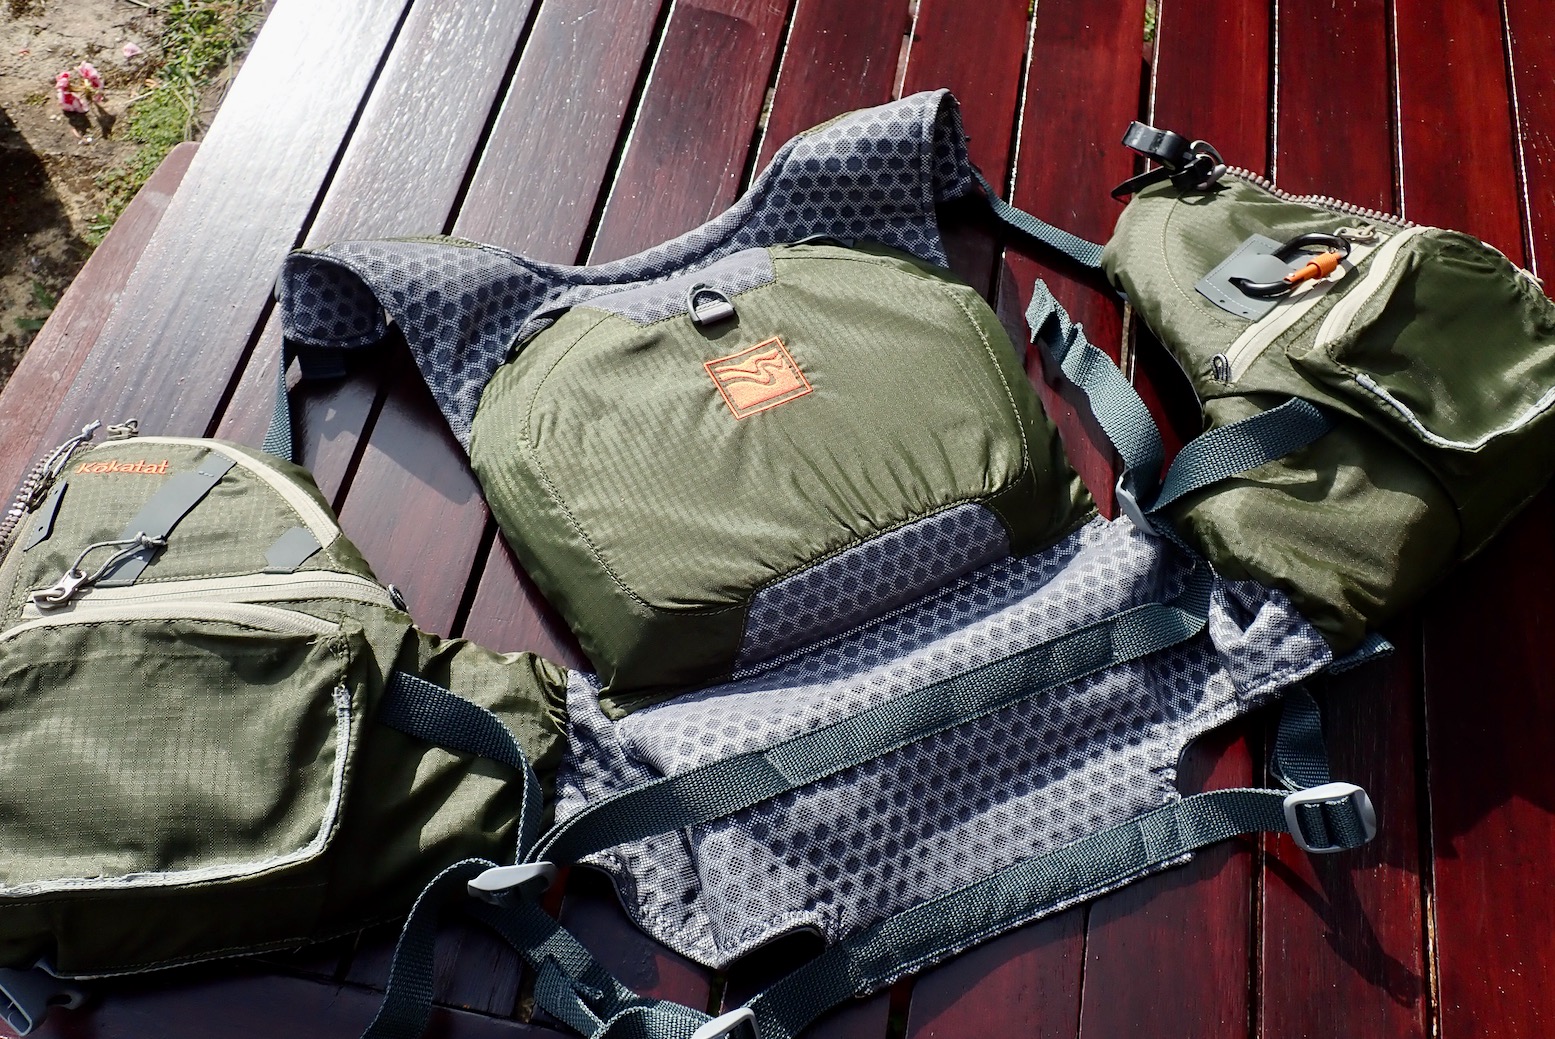
Review I read somewhere that a PFD loses its buoyancy over the years and should be replaced once in a while. In that case my 15-year-old, much travelled Kokatat Bahia Tour (right), bought at REI, Denver in 2007, must be well overdue for retirement to a golf resort in Spain. It’s been discontinued, and the Leviathan could be headed that way too, judging by the discounts.
Handwarmer pockets. Do they count?
Kokatat make some reassuringly expensive dry suits and sponsor big sea kayaking adventures, so it’s a trusted brand. I’ve never tested my old Kokatat, by choice or surprise, so have never experienced its floatability. Hopefully I’d not sink like a stone, but with a GPS in one pocket, a camera in another and a rescue knife, a bit more flotation might not go amiss. As it is I’m at the upper range of it’s body mass index When I spotted the Leviathan for just £40 on ebay (normally about £150), I set aside any stylistic reservations and clicked BIN. My compact, inflatable Anfibio Buoy Boy is OK for easy rivers or short crossings, but doesn’t claim to be a certified PFD and would be inappropriate alone on the open coasts around here in Dorset where you want to feel secure.
Pockets and attachment points galore
Breath in
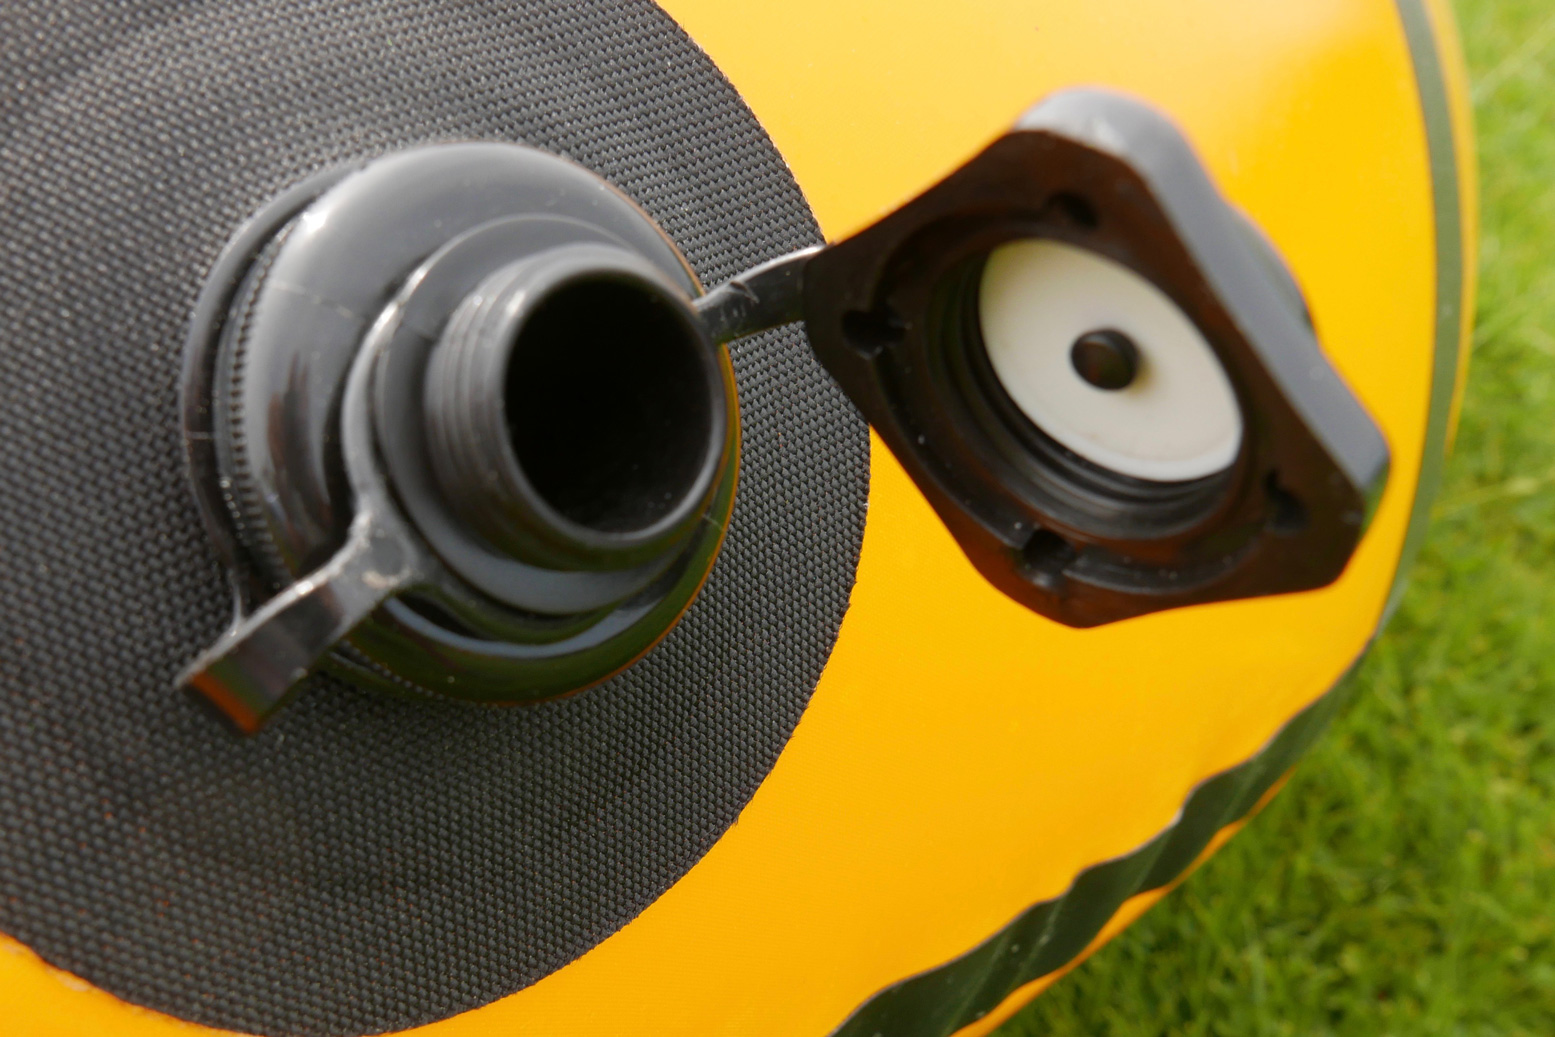
The Leviathan is a paddle fisherman’s PFD which explains the vast array of pockets. They’re handy, but I knew straight away 14 was OTT, even if four are tiny mesh pouches and two more are handwarmer slots. All this storage, along with generous foam implants give the Leviathan a busty appearance, even before you pack it with fishing paraphernalia. Or maybe I’ve had another well-fed summer. It won’t be as discreet to wear as a Buoy Boy. I’m not sure what the corrugated grey plastic blocks are, velcro’d on the mesh pockets. I’ve seen this on ‘tactical’ clothing: possibly for attaching insignia?
One underzip clip; shame
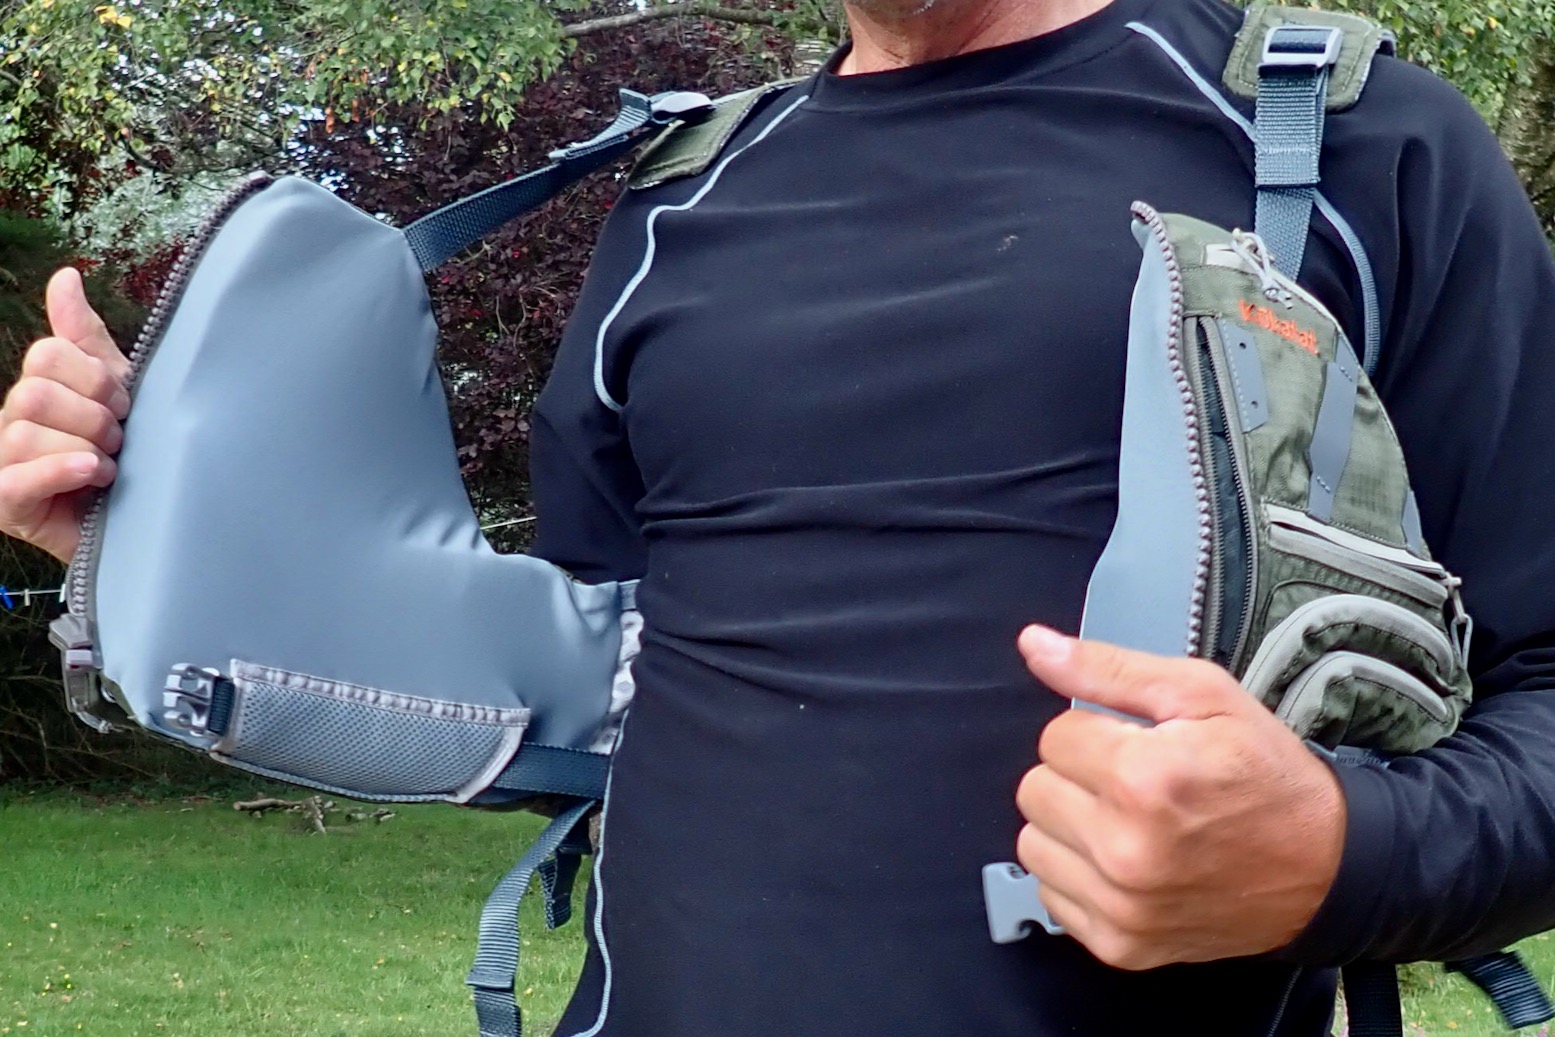
I like a front zip PFD, but will miss the second upper clip under the zip, as on my Bahia. It meant you could paddle on hot days with the PFD unzipped but still snug fitting. But one thing the Bahia lacked was a large pocket for a mobile phone in its waterproof pouch. If you paddle with a phone for safety, the advice is to have iton your person, not stashed awat in a dry bag somewhere on your packboat cartwheeling away downwind. The olive colour I quite like, though I admit it lacks the visibility of my Bahia’s faded mango.
Big pocket for mobbie. Tick
My Leviathan was not one hour out of the box when I set about it with a scalpel to trim the pocket count by 43% (6 pockets) while barely losing any functionality.
Another seamless IK&P modification
That done, I transfered my whistle, knife, biner and camera leash (in a pocket) from the Bahia and am ready to try it out on my next paddle.
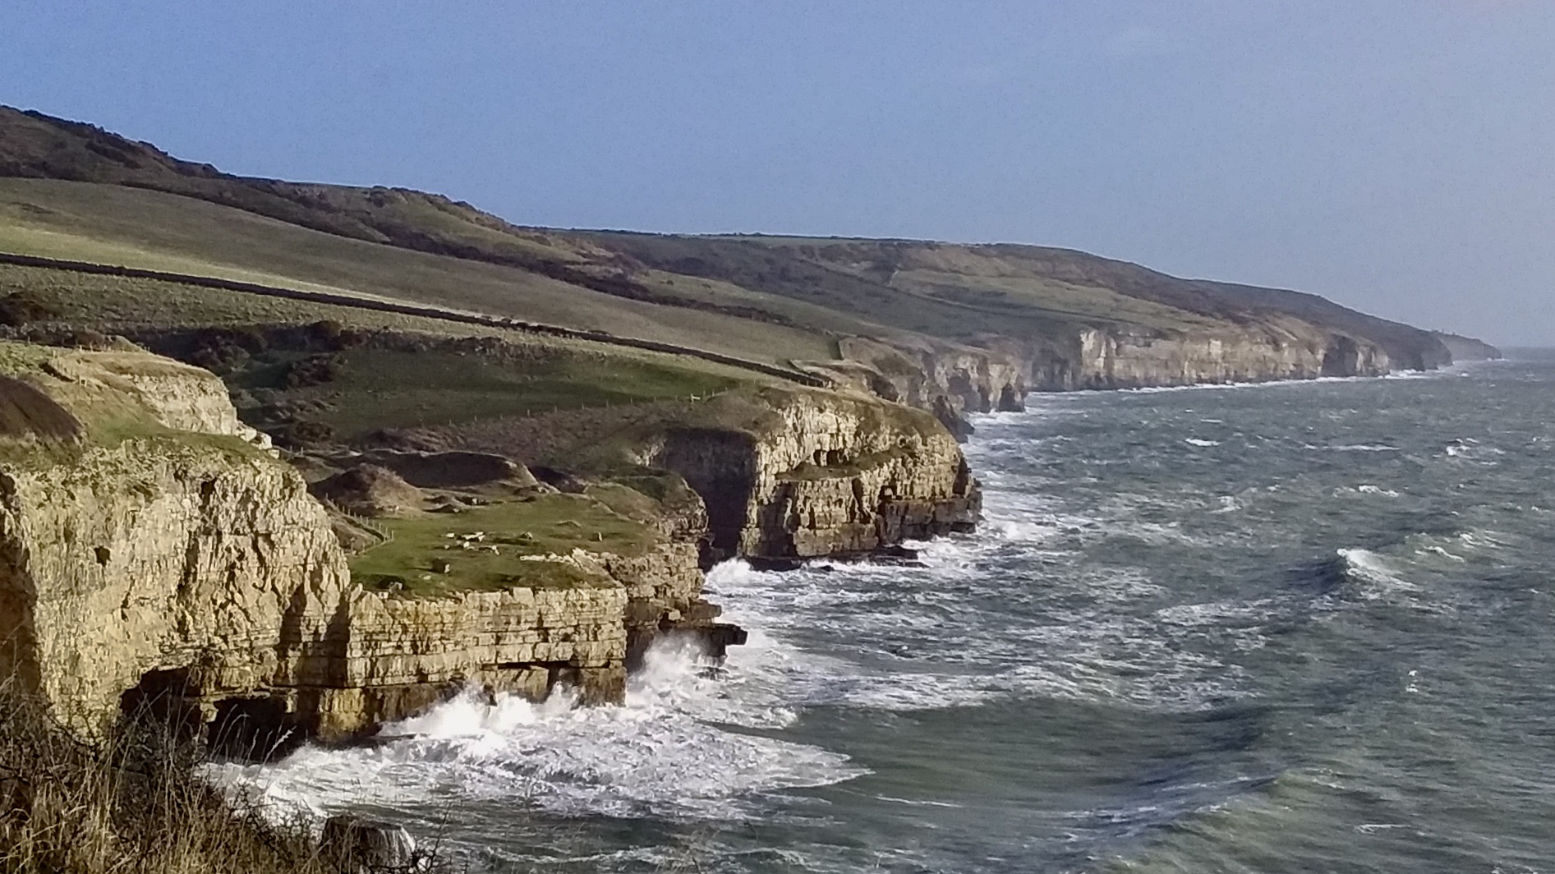
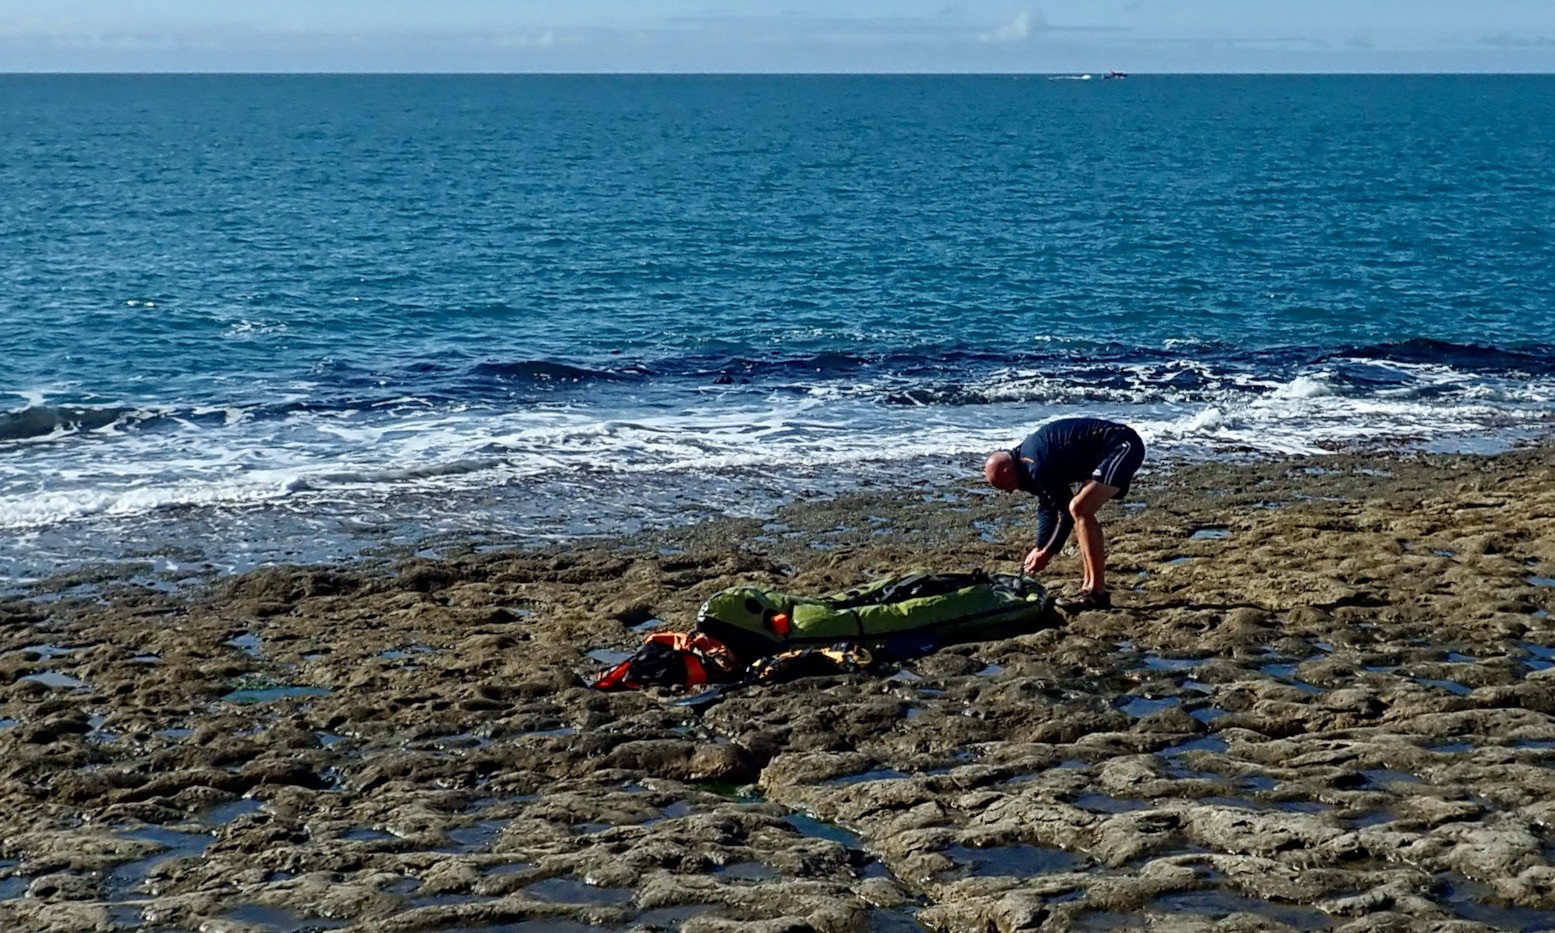
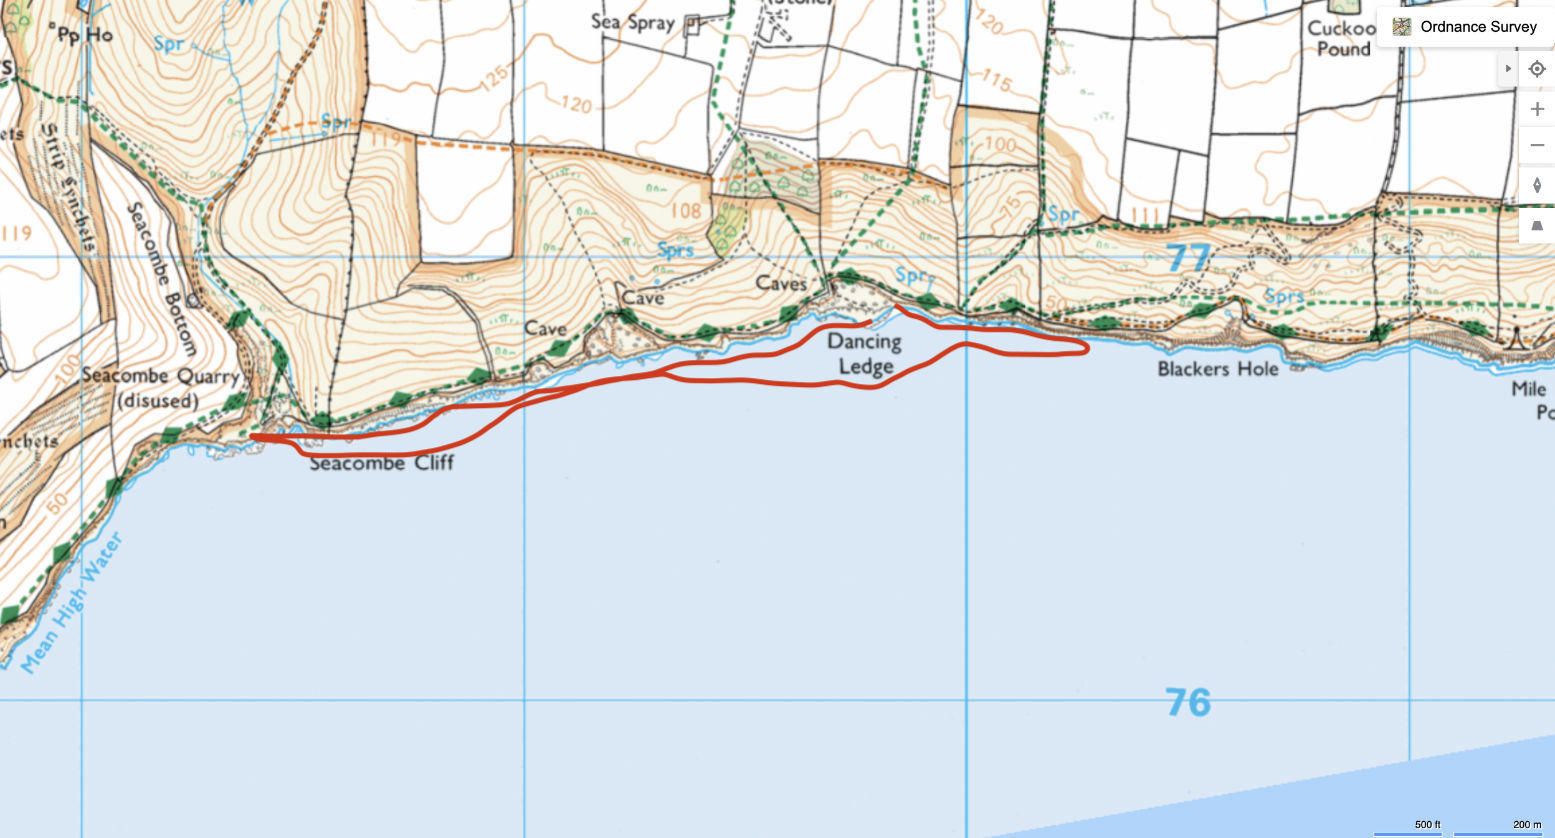
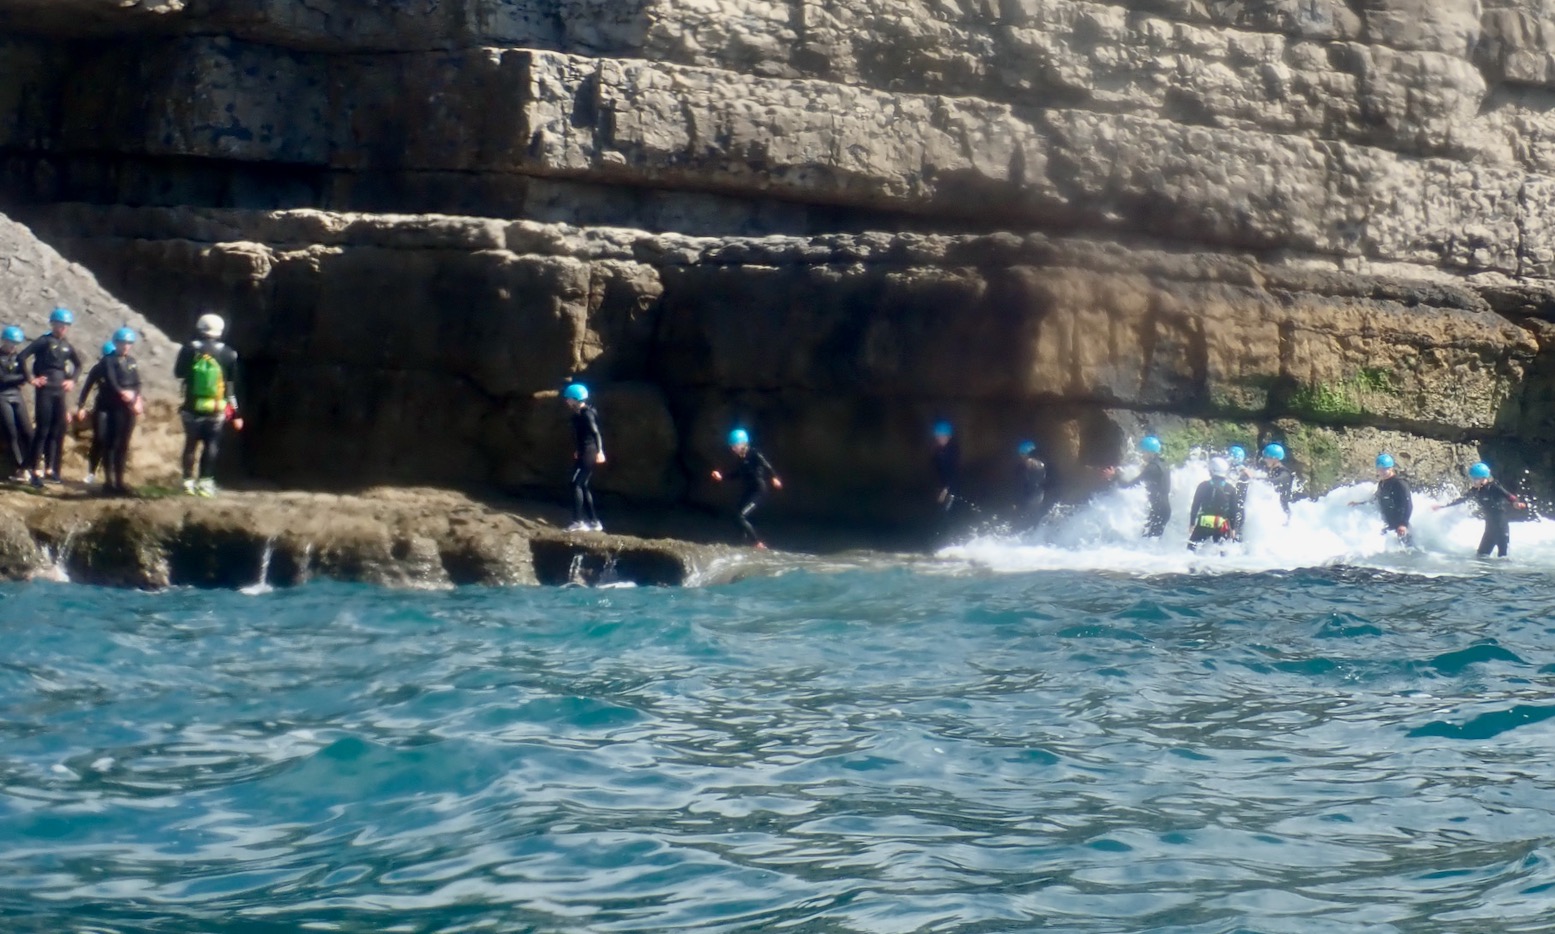
You wait weeks for a calm, sunny day to come along – and then one does. So in my back pocket I had a modest sea excursion planned for the TXL: the cliffs and caves west of Dancing Ledge. It’s a mile’s walk from Langton Matravers village across the fields to the coast where the downs drop steeply to the former Portland stone quarry. From Swanage, about four miles to the east, Dancing Ledge is the first of the few sea access points along this cliff-bound Jurassic Coast.
Approach to Dancing Ledge
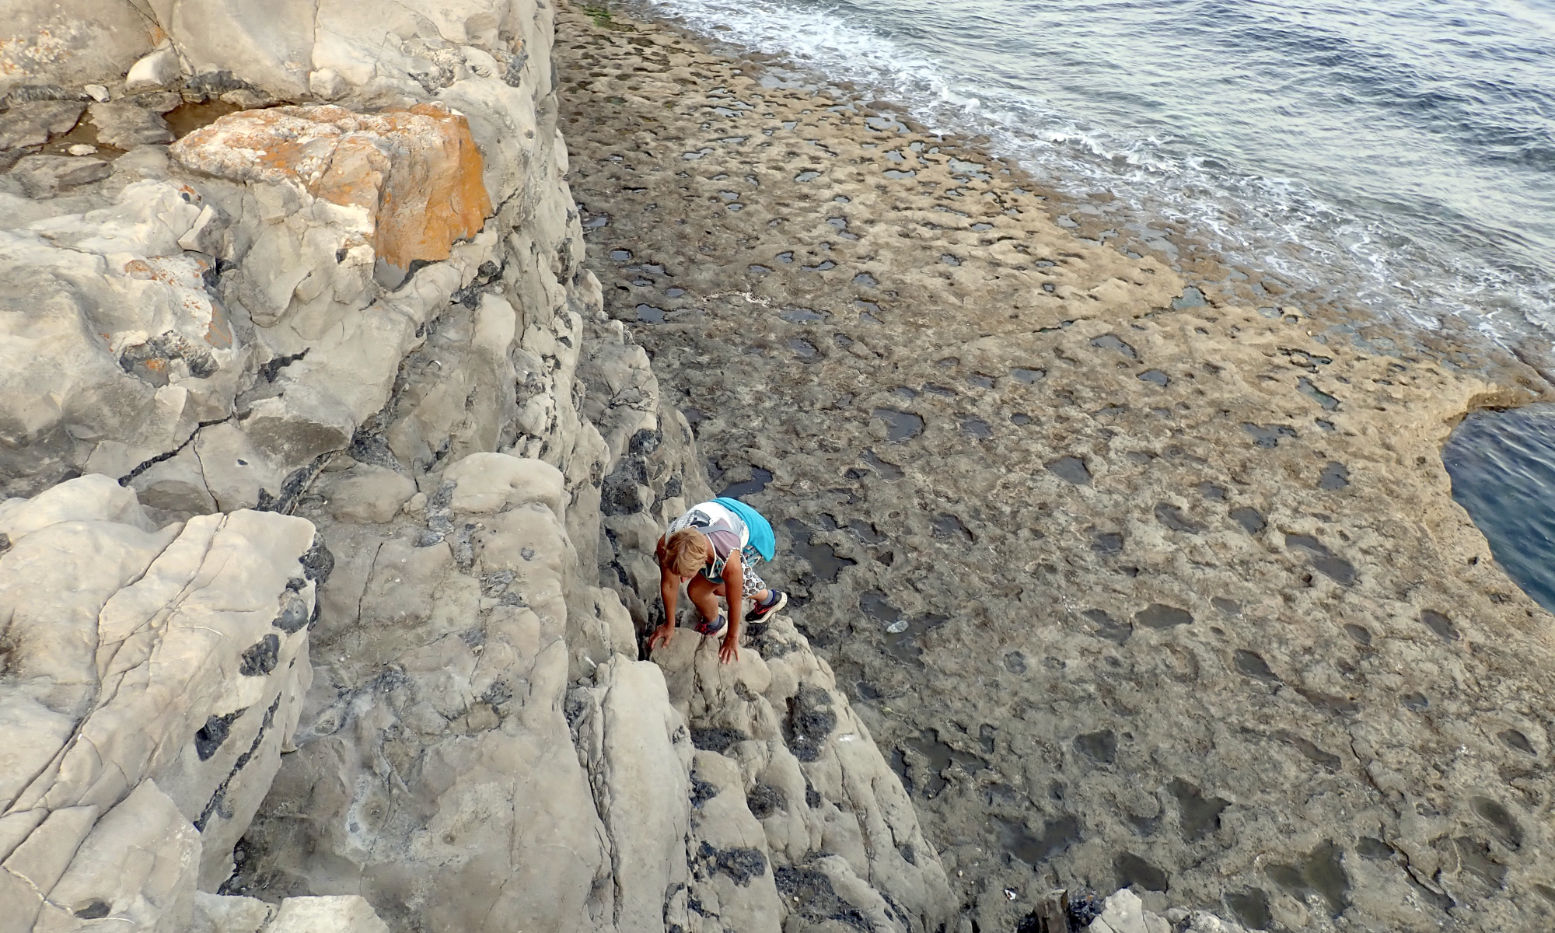
At low tide the lower, natural ledge is revealed, making getting in and out relatively easy. But to reach it you still have to scramble down a small cliff (below). It was easier to chuck the packraft backpack down before descending after it. Alone, rolled up or inflated, getting this far with an IK would be a struggle. This is why we like packrafts – and sea-going packrafts, so much the better.
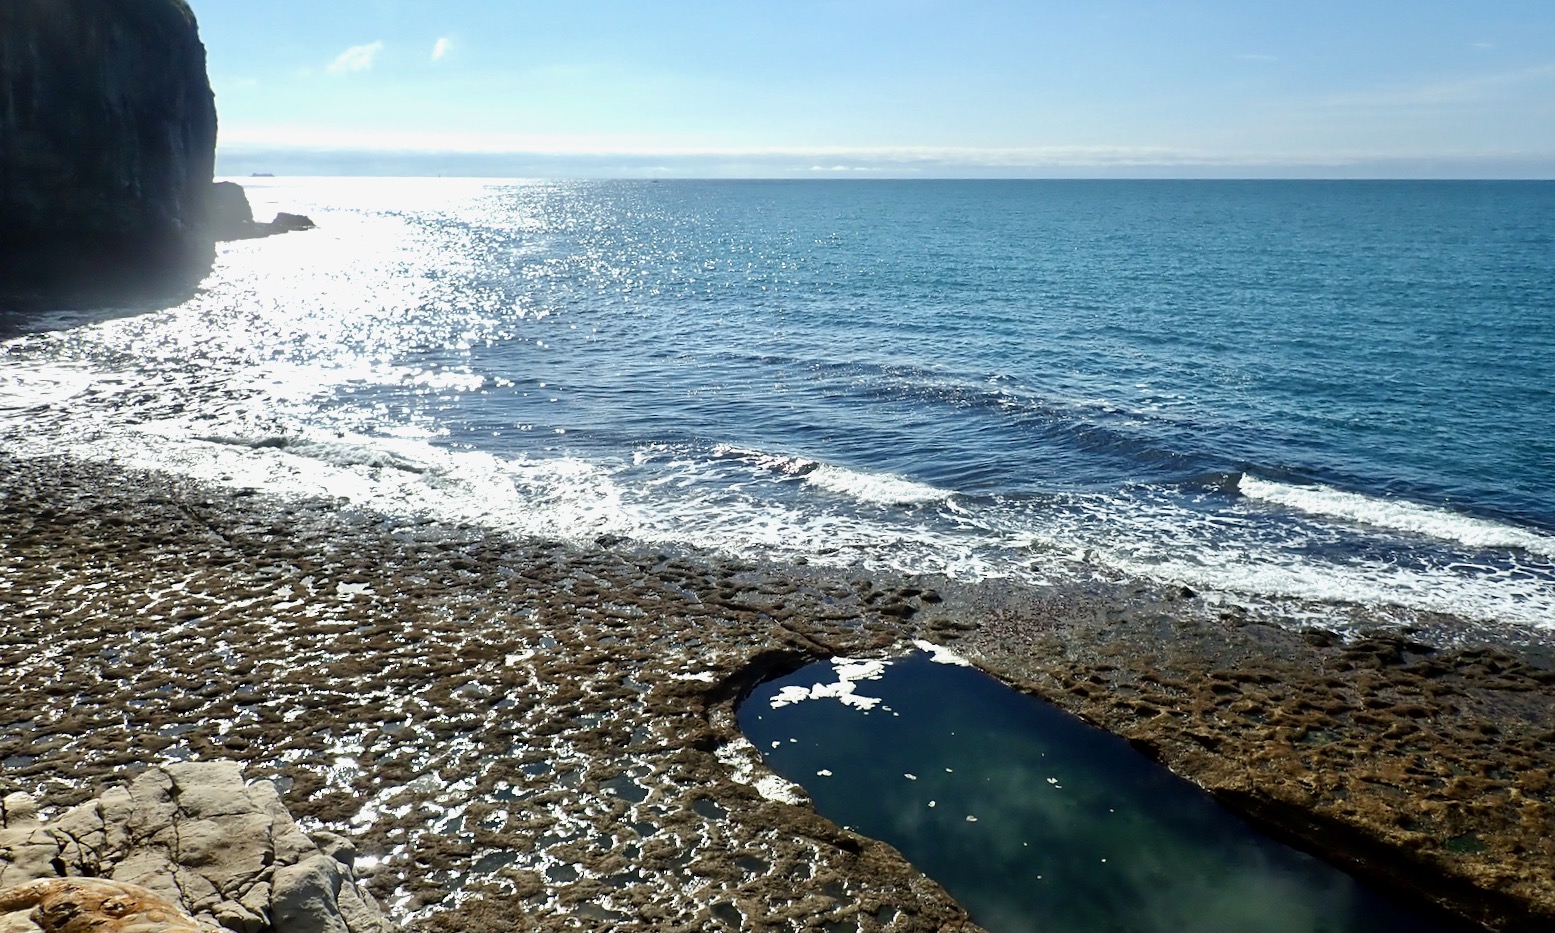
The point where you scramble down overlooks the Bathing Pool (below). It was blasted out of the rock in the late 1800s by the strict headmaster of the local Durnford school in Langton. Pupils then trotted off to the pool each morning for the character-building ritual of ‘strip and swim’, but with a now reduced risk of being swept out to sea. Decades later, James Bond author Ian Fleming attended the Durnford prep school and endured various torments before moving on to the more benign, towel-flicking environs of Eton. Unsurprisingly his Dorset years left a deep impression and later he named his 007 hero after a prominent Purbeck family, the Bonds of nearby Creech Grange. By 1999, when Bond 007 filmmakers had run out of Fleming’s dozen book titles, they chose ‘Non Sufficit Orbis’ or The World Is Not Enough, starring Pierce Brosnan. It was claimed as 007’s family coat of arms in On Her Majesty’s Secret Service, published in 1963, but was also the real Purbeck Bonds’ 16th-century motto. There’ll be a short exam later.
Back by the sea, even with wind speeds forecast at a lowly ‘4mph’ there was no balmy flat calm today, but that’s just the way it probably is with the wide open Atlantic to the west. Portland Bill or even nearby St Adhelm’s Head don’t do much to reduce the oceanic fetch driven by weeks of wind and squalls.
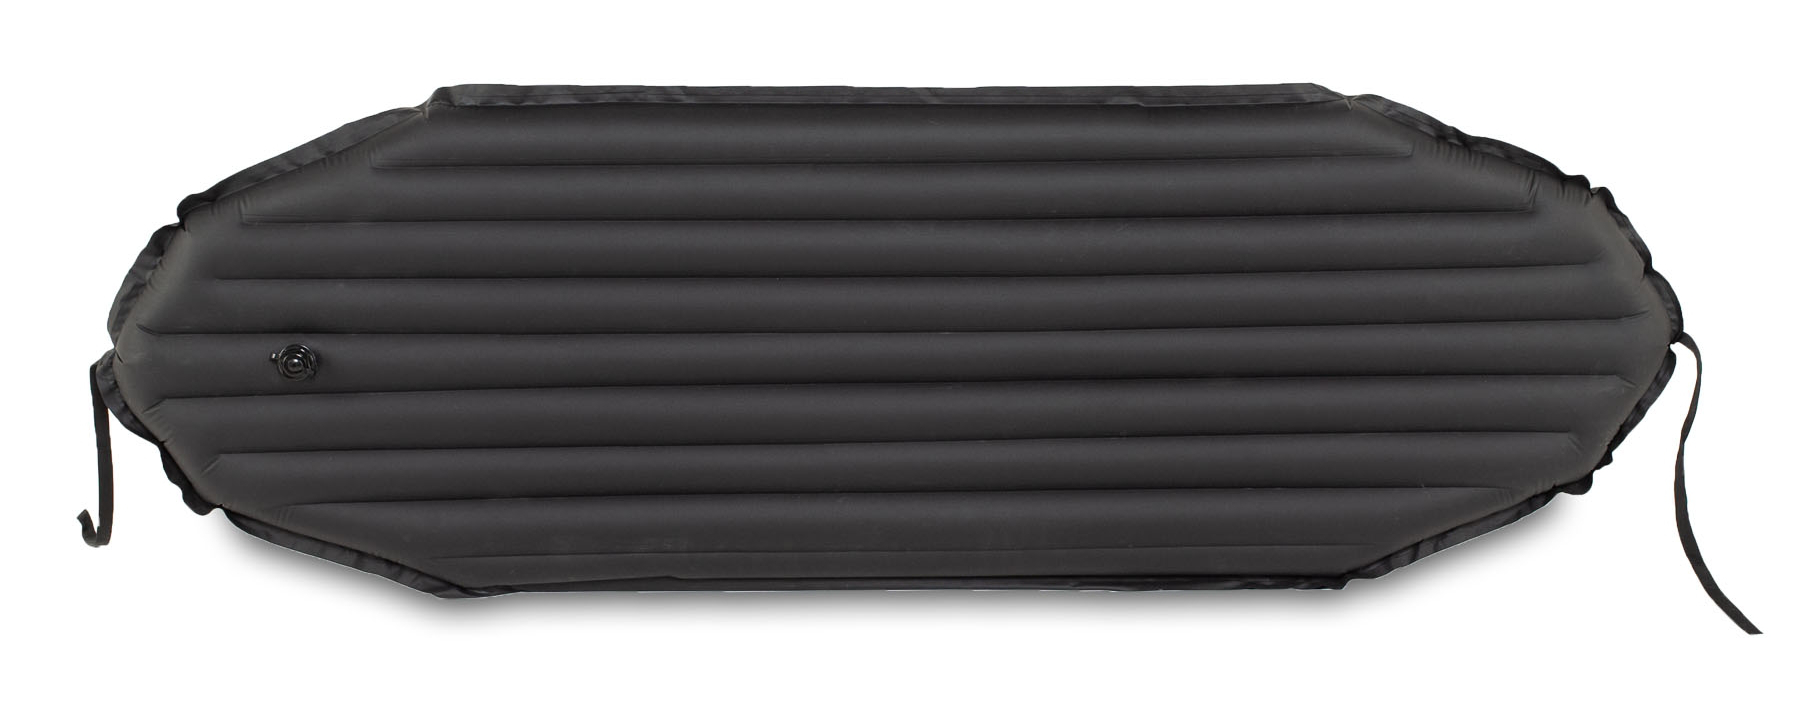
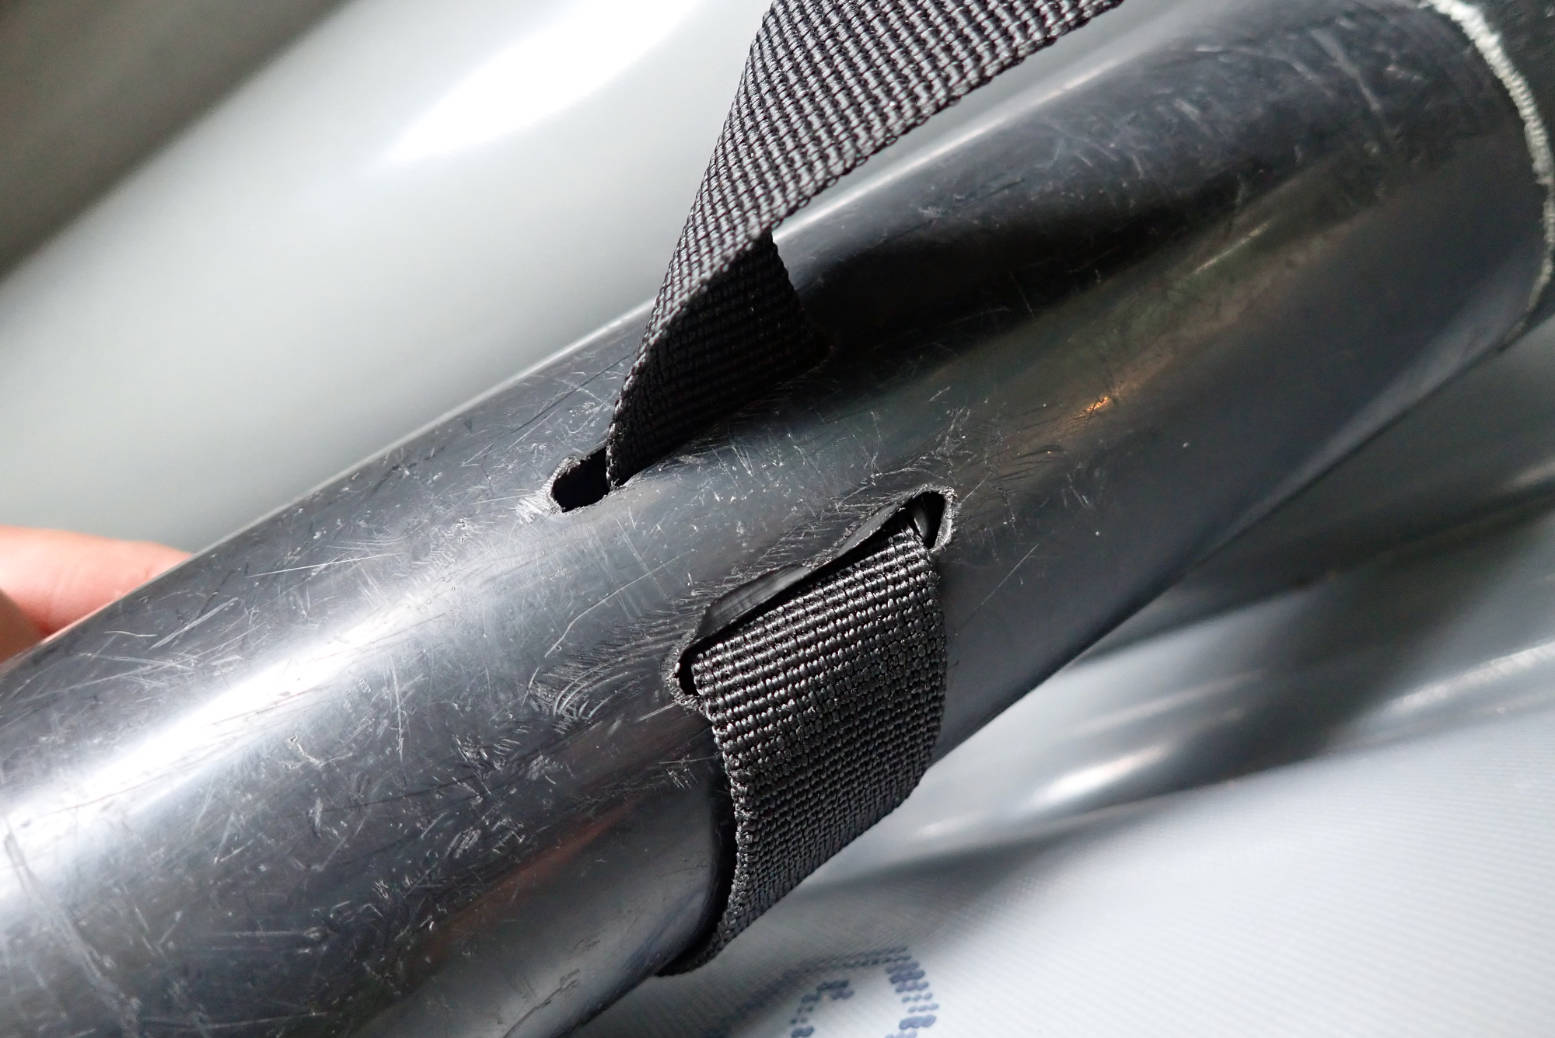
While setting the boat up I find today’s #ForgottenItem was the floor pad (left), which I was wanting to try again, despite being not entirely convinced. Two up, as we did near Skye last year, meant reduced legroom with the mat, but solo with my centrally positioned weight, I still like to think it will limit hull droop and floor sag to improve paddling response. (It does).
Alone, these exposed sea cliff paddles make me quite nervous, and a regular-sized packraft like my old Alpackas or Rebel would feel even more unnerving. The TXL’s healthy 2.8-metre length reduces that impression with less pitching, but I never fully relaxed today, so was happy it was only a mile to Seacombe inlet at which point I could get out and walk back if I wanted. Away from Dancing Ledge things calmed down a bit or I just get used to them, but elsewhere I needed to keep an eye seaward as bigger waves rose up.
With my old MRS Nomad S1, I learned that with longer, high-volume packrafts like a TXL, no matter how hard you pump them up with warm, ambient air, after 10 minutes out on cooler water, a crease develops midway along the side tubes as the air in the hull cools and contracts and the boat effectively loses a few fractions of psi. Though beginners might worry they have a slow leak, this is normal with inflatables. Ashore, I made use of Bond’s Pool of Torment (said to be the next film title) to pre-cool the TXL but knew it wouldn’t really work. Flooding the inflated boat for a few minutes is probably the answer. A little hand pump can only pack in, say, 2 psi at 18°C. Any more air forced in may burst the pump or stress the boat’s seams if done too often. But once part submerged by my weight on 12°C sea water, the hull cools and drops to, say, 1.8psi. It won’t get any lower, but it’s enough to lose its edge and means the boat paddles less efficiently. We can’t be having that!
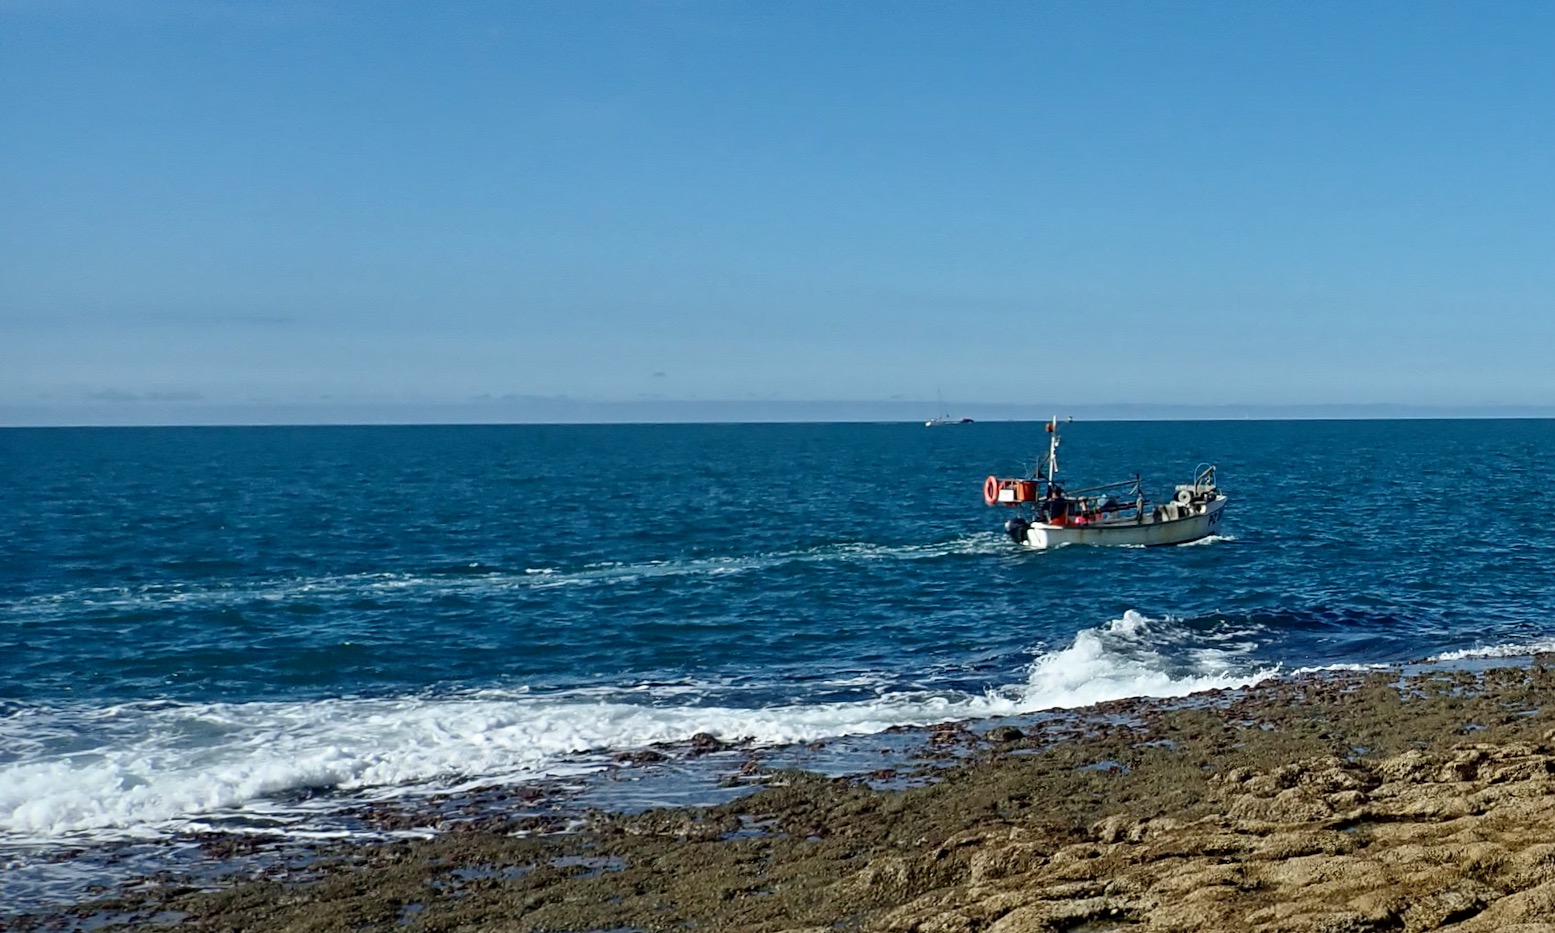
In my heightened state of anxiety at paddling a new, exposed locale, I was pleased to see a lobster boat passing my way (above). Later on I catch up and and meet the Chatty Fisherman. For a while I was worried the tide might turn before I got to drag myself away, but, Purbeck born and bred, he was a local quarryman who used his summer hols to snag a few lobsters and had lots to say about everything, including reduced catches of late. “We used to get hundreds [of lobsters] here before the seas got warmer. Now I barely get a handful.”
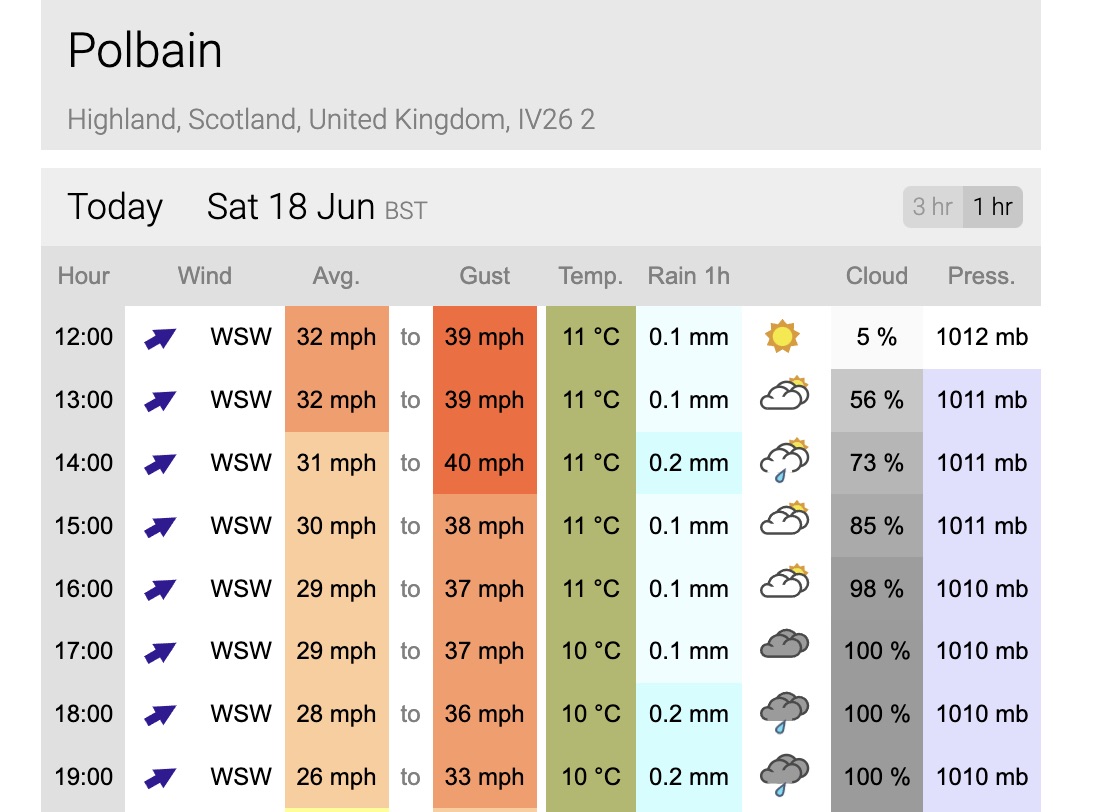
There was no place to hop off and top up the boat, though I could always flip round in the seat and do it on the water. That said, I wonder if longer packrafts like TXLs could benefit from repositioning the inflation valve closer to the central seat, like my old Incept K40 solo IK. The MRS Nomad had the valve on the bow, which was handy. I suppose this might make expelling the air on rolling up more difficult, but we now have mini pumps with suction settings, making valve position less important. With a passenger or another paddler alongside, on-water topping up is less of an issue, but had I thought it through before adding the second skeg patch, I could have glued it at the other end, as the TXL is symmetrical, but then is the bow bag tabs would be at the back. So halfway down one side would be better, Anfibio. Sorry, I did I say something?
I paddle onward. Most of the caves have too much intermittent swell rolling in to get close, but one twin-mouthed cavern (above) looks like it could be safely threaded in the nippy TXL without me getting lifted by a sneaky swell and knocking myself out on the cave’s roof.
Inside the cave
Further west I see a few people wandering about on the foreshore ledges, announcing the inlet at Seacombe, another old quarry. As I get near, I line myself up to get lifted by a wave and dropped onto a ledge. It ought to be easy but ends up a bit of a bundle. Before I can climb out I get sucked backwards into another wave, which drops onto the boat. But though it looks ungainly, timing isn’t that crucial in a stable packraft that’s easy to hop out of quickly. Lord knows how a sea kayak would manage. Up on the ledge I drain the TXL before flipping it back over and giving it a few jabs of the handpump so it’s pinging firm again.
Seacombe cliffs
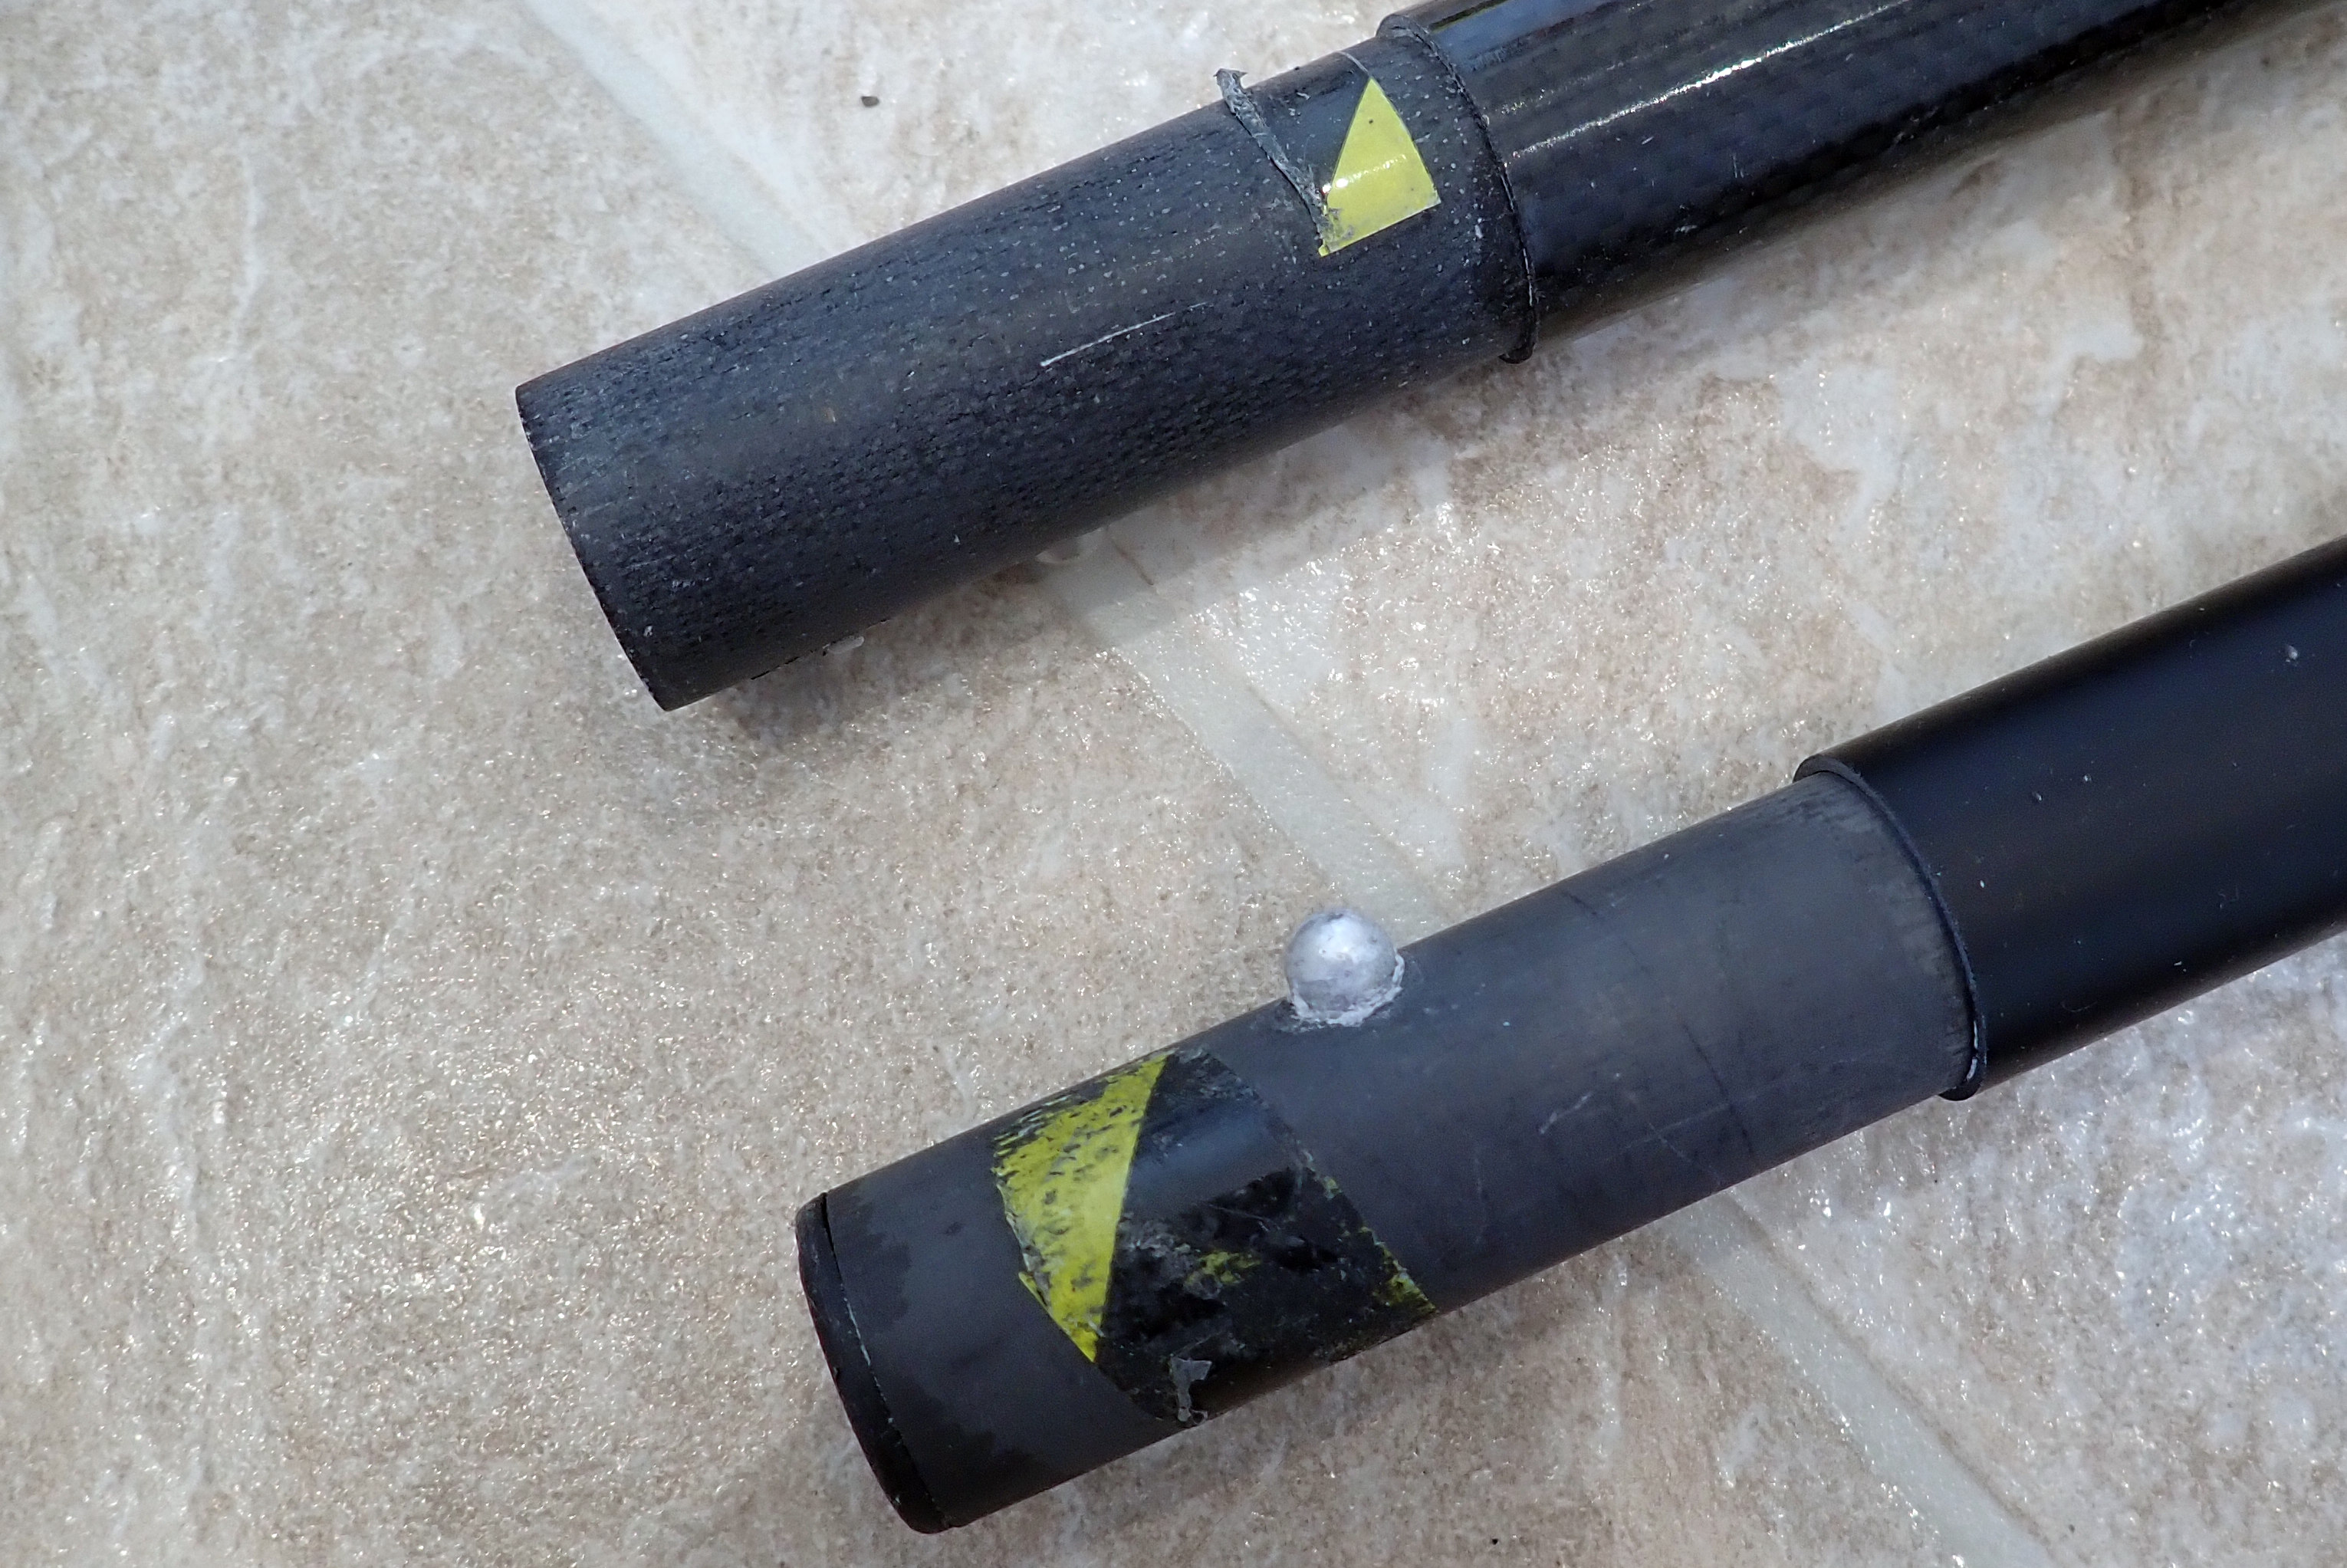
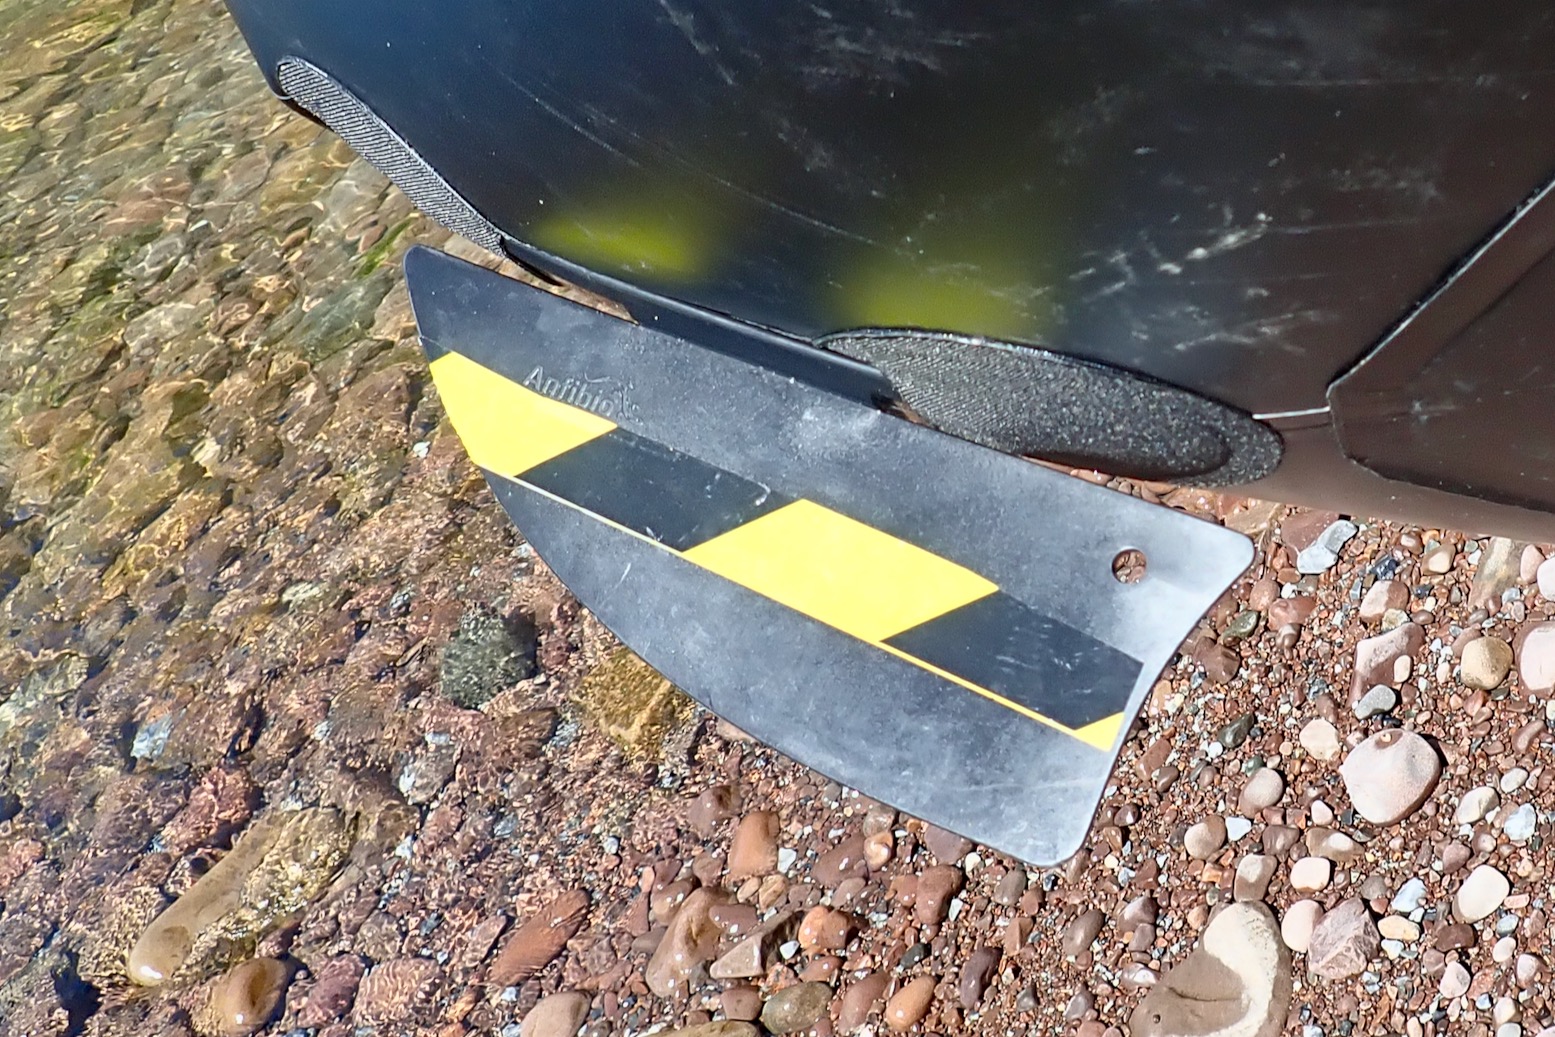
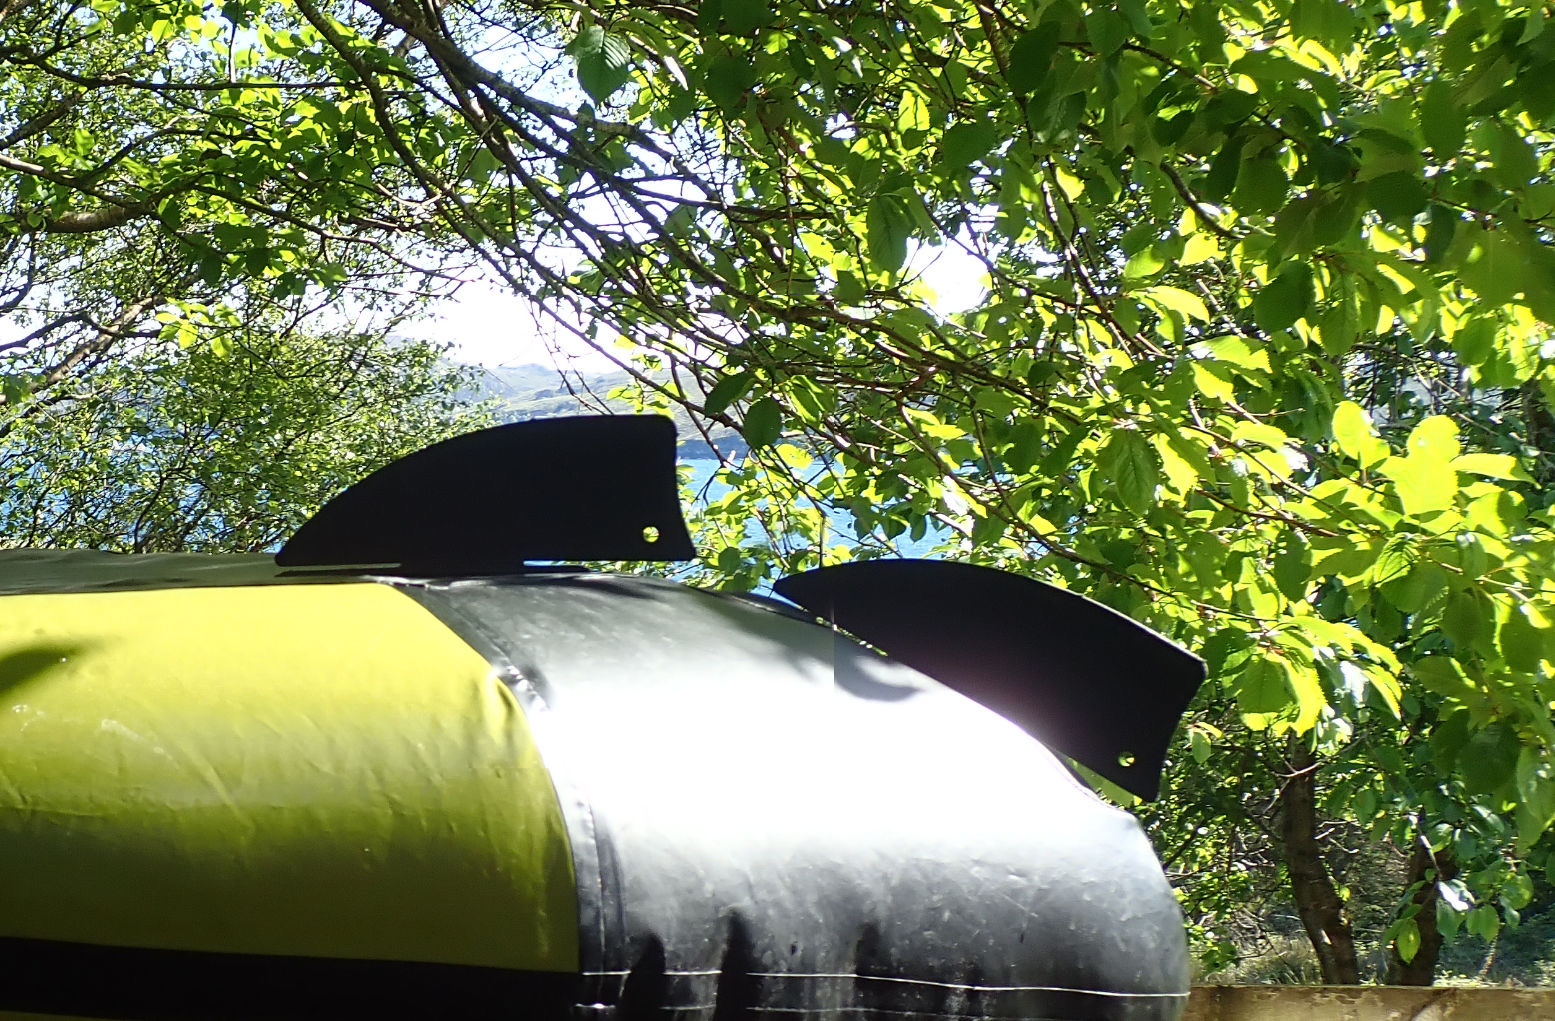
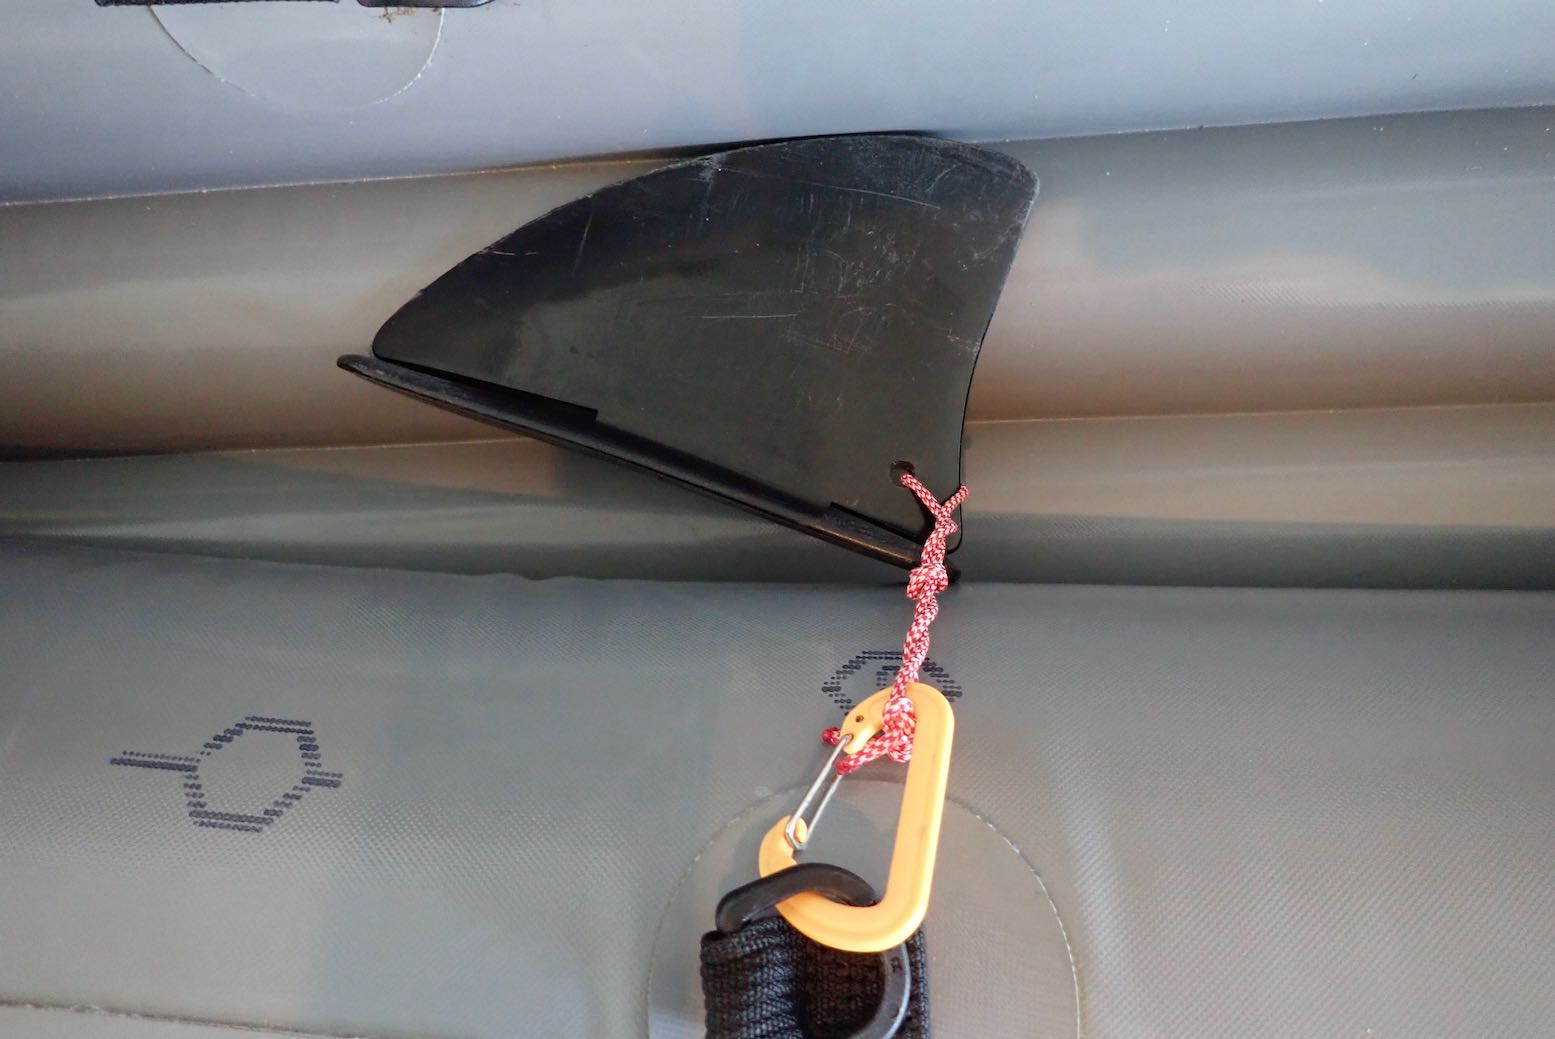
Putting back in, I’m alarmed to see my skeg lying on the rocks. My to-and-fro landing must have dislodged it. (It happened again on my next TXL; this is a fix). It is for moments like these (or, more commonly, distractions while packing up) that I wrapped it in hi-viz yellow and black tape. Had I lost it, the downwind paddle back would have been a bit squirrely, giving me something new to worry about until I realised the cause. Passing the twin-mouth cave I threaded earlier, the tide is already too high to repeat the stunt.
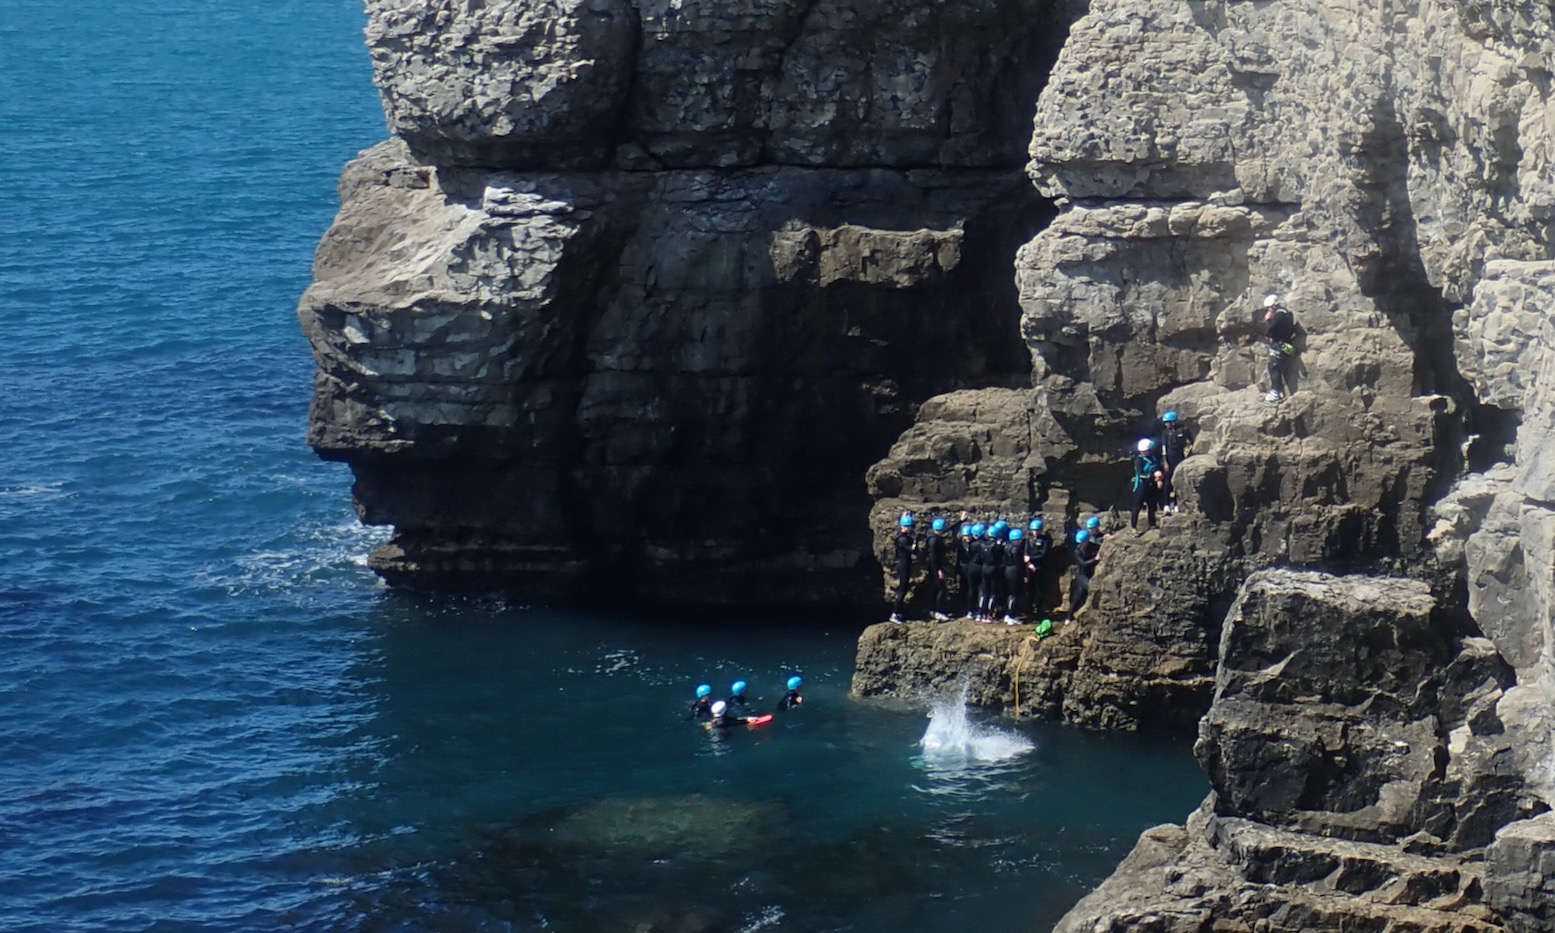
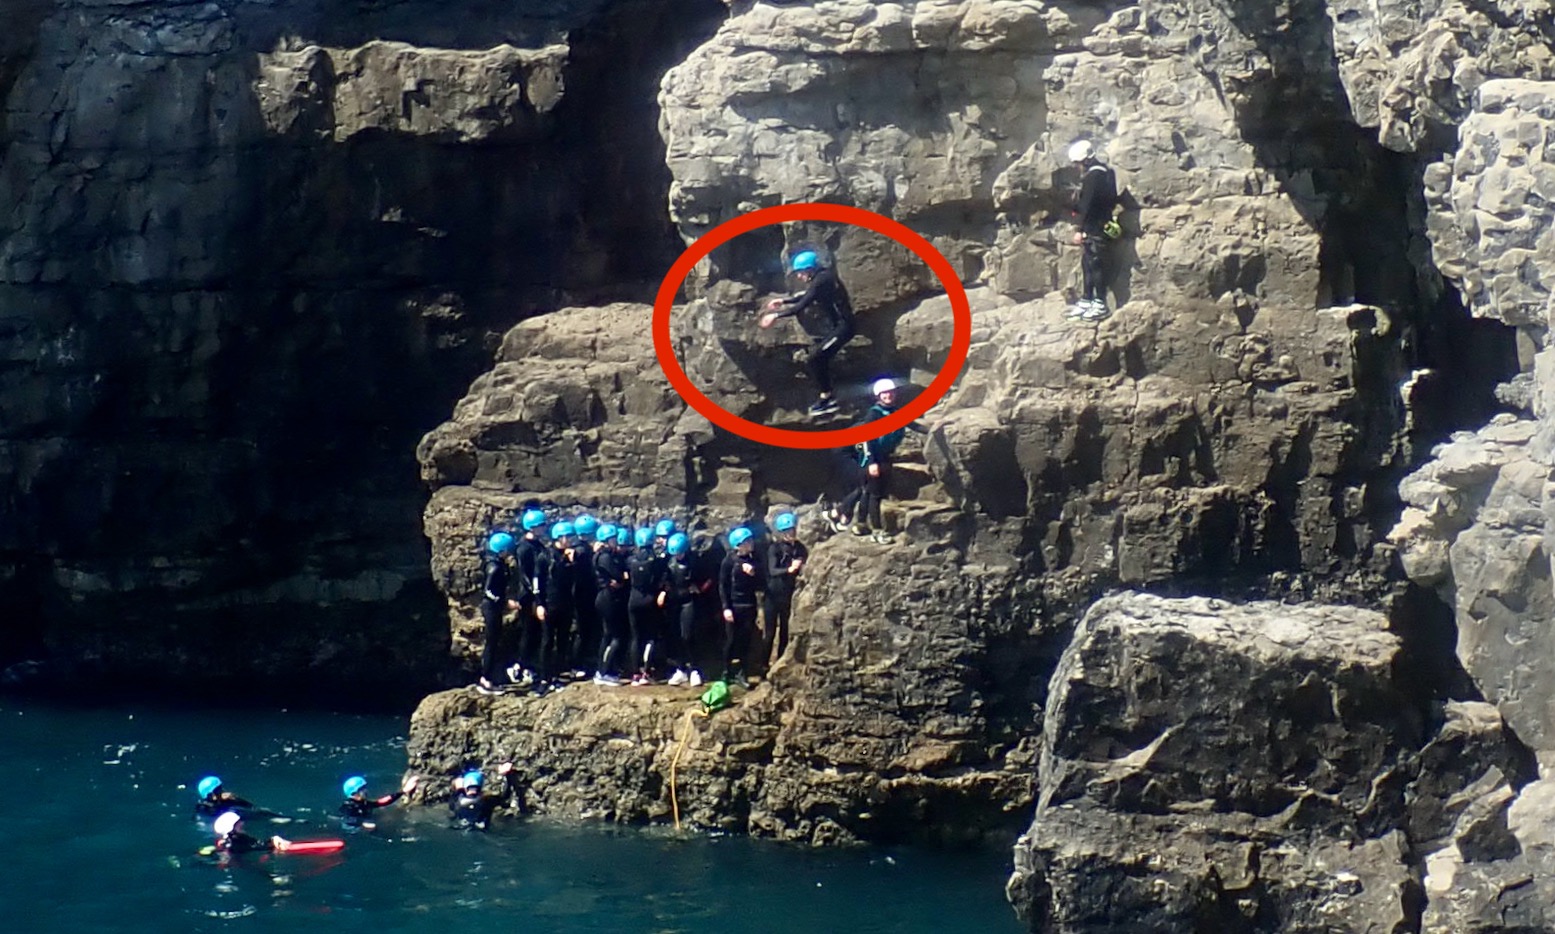
By the time I returned, Dancing Ledge was packed with day-trippers including groups of coasteering wetsuit-clad kids. They inched along the ledges, swam across cave mouths, and then clambered up to a narrow ledge to jump in. The next group was already lined up to follow so it all looked a bit sketchy and congested with just two guides for over a dozen kids (turns out it can be), but I bet they all loved it.
‘Beyonsaaaay! (or whatever kids shout these days).
As had happened so many times, a spell on the water without incident calmed the nerves. So I continue past the Dancing take-out and cast a wistful glance eastwards. It was only 2.5 miles, or an hour or so with the tide and wind and cliffs to the Isle of Purbeck’s southeast corner at Durlston Head, before a more sheltered turn northward to Swanage, another mile away over the Pevrill Ledge, the final hurdle into town. One for the next ‘calm’ day perhaps.
Looking east over Dancing Ledge
Anfibio Plus(+) fabric Checking out Anfibio’s TXL page later, I see they’re offering the option of the TXL and similar long/double models in chunkier Plus (+’) fabric. It’s only 17% heavier but 80% more tear-resistant, depending on how you measure that, but costs only €70 extra. It looks like it might be similar to floor fabric or comparable with Alpacka’s much more expensive Vectran option.
Anfibio don’t fully explain why they’re now offering thicker Plus(+) fabric; has the standard proved a bit less durable? I admit Anfibio do focus a bit too much on the ultra lightweight side of things which, alone in a single-skinned inflatable, is not where my priorities float. From my experience with stiffer PVC IKs versus more flexible rubber kayaks, I do wonder if a Plus(+) TXL or similar might be more rigid on the water without the need to pack it full of air. It may even exclude the need for the 900-g floor pad (it doesn’t). Along with what I estimate to be a <500g weight penalty, I imagine a Plus(+) TXL will roll up less compactly, but other than that it’s something worth looking into.
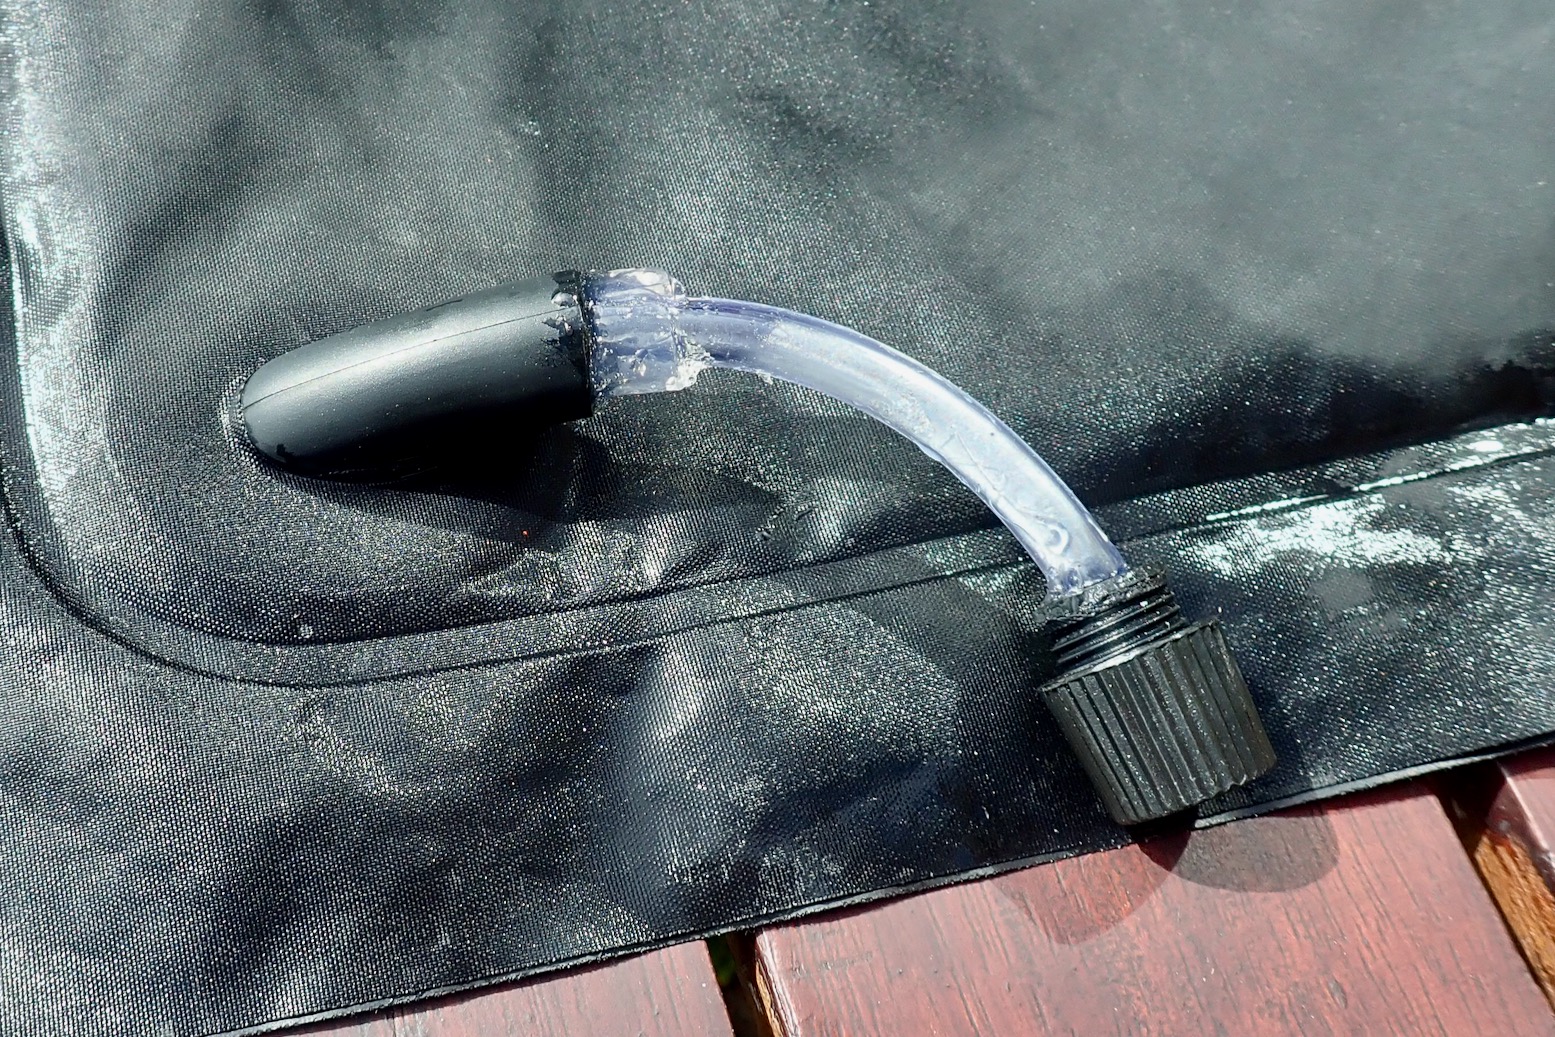
Quick-deflate seat While I was never a fan of the mushy, twist-lok stem valves on the early Alpackas, I’m not a huge fan of the sprung, one-way inflation valves Anfibio use on their seats and backrests. Great for easy inflation and holding high pressures, but a pain to deflate when packing up; you have to jam a fingernail in the valve and scrunch the seat while it ever so slowly deflates. At least with an old twist-loks you could suck the air out. And anyway, you don’t need full pressure in a seat. Far from it. There was talk of Anfibio modifying the seat valves for easy deflation but it’s not happened yet. Now the TXL is my sole packboat, I’m minded to set it up well. I failed to find anything other than Boston valves online. They’d work of course and will dump air really fast, but are a bit OTT and would need gluing in properly.
I had a spare dry bag with a neat twist lock valve a bit like Thermarest sleeping pad valves. But marrying it to the chopped off sprung one-way valve in the seat was tricky to do neatly. So I managed to do it not neatly (above left) with a bit of clear tube and lashings of Aquasure. Unfortunately the tube is narrow which slows things down or increases effort; win-lose. For the moment it works; I can unscrew the valve and roll up the huge seat, purging the air as I go. Looking back on this dramatic episode, next time I’ll just cut a hole and glue in a Boston valve (left) which are easily found online for under a tenner.
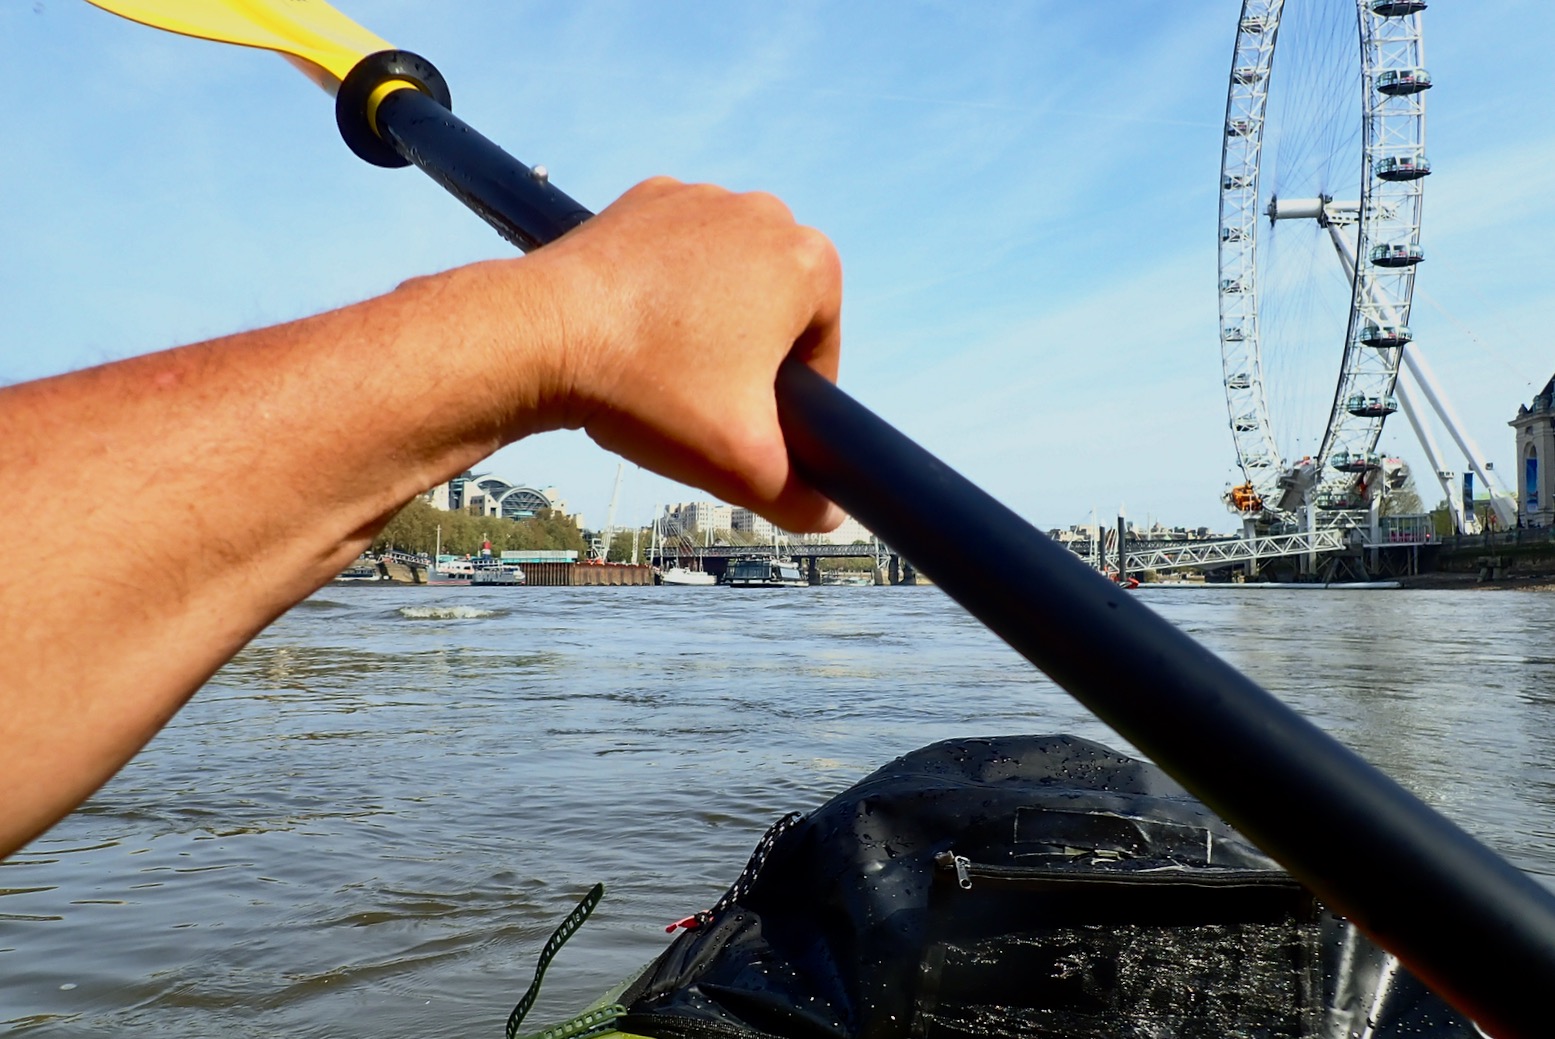
Two good-value, four-part paddles from Anfibio ideal for packraft or IK travels. The yellow VertexTour is a newer redesign and a lot lighter, even with a longer range of length adjustments and has a better clamp. But the black Wave (left) has the classic dihedral (two-faced) blade. What is the difference and does it matter?
What they say
Anfibio Vertex Tour Our new, redesigned Vertex Tour paddle comes with a classic double blade, fine shaft and sub one-kilo weight. Equally suitable for lakes, calm rivers and moderate whitewater. The position length is adjustable from 210cm to 225cm at free angle.
Anfibio Wave High-quality, lightweight carbon paddle for long tours on calm waters. Freely adjustable in length and angle.
I’ve done several hours with both paddles and for this comparison we took both on a 15-mile paddle down the Wey in Surrey in the TXL. It was a hot day but water doesn’t get any flatter unless it’s an ice rink. Below some weights and measures to mull over.
Weight g
Length cm
Shaft cm
Shaft g
Shaft ø
Blade gm
Longest piece cm
Blade cm
Price
Anfibio Vertex
851g
210-225
118cm
303g fibreglass
29mm
274g
63cm (blade)
44 x 19.5cm
€125
Anfibio Wave
1011g
210-220
108cm
283g carbon
29mm
365g
65cm (blade)
44 x 16cm
€125
I didn’t notice until I weighed the blades, but the two are made quite differently. The larger Vertex blade – about 650cm2 – has a molded central ‘corrugation’ to stiffen the blade. The Wave has a classic dihedral (two-faced) power face which is said to power smoothly through the water better than a plain flat blade. The Wave blade is also smaller – 600cm2 at a guess.
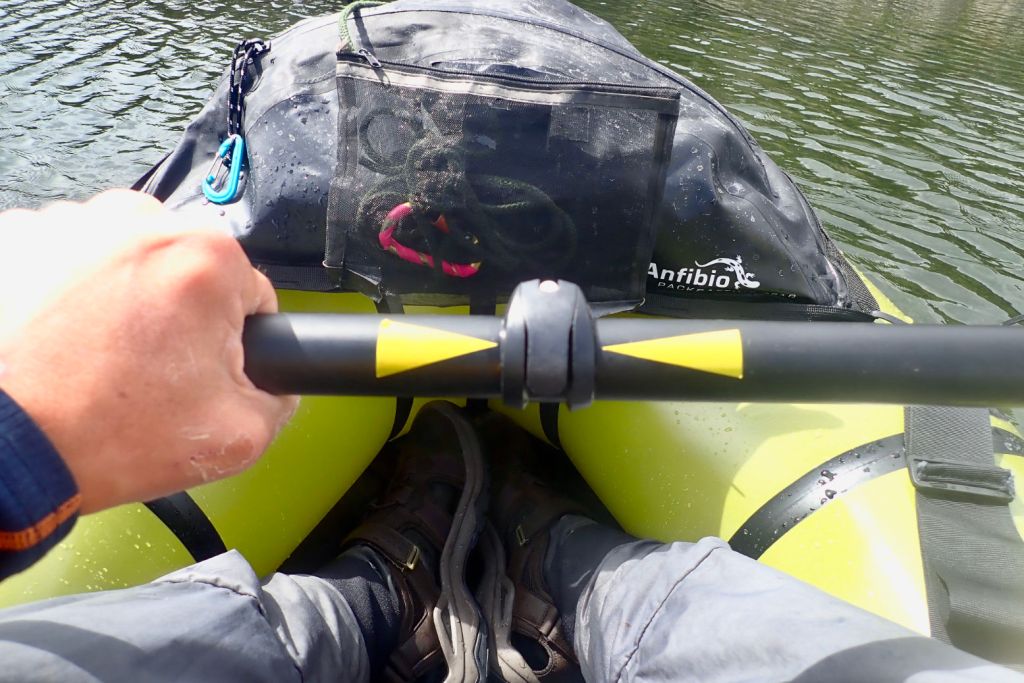
Black Wave dihedralYellow vertex more flat faced
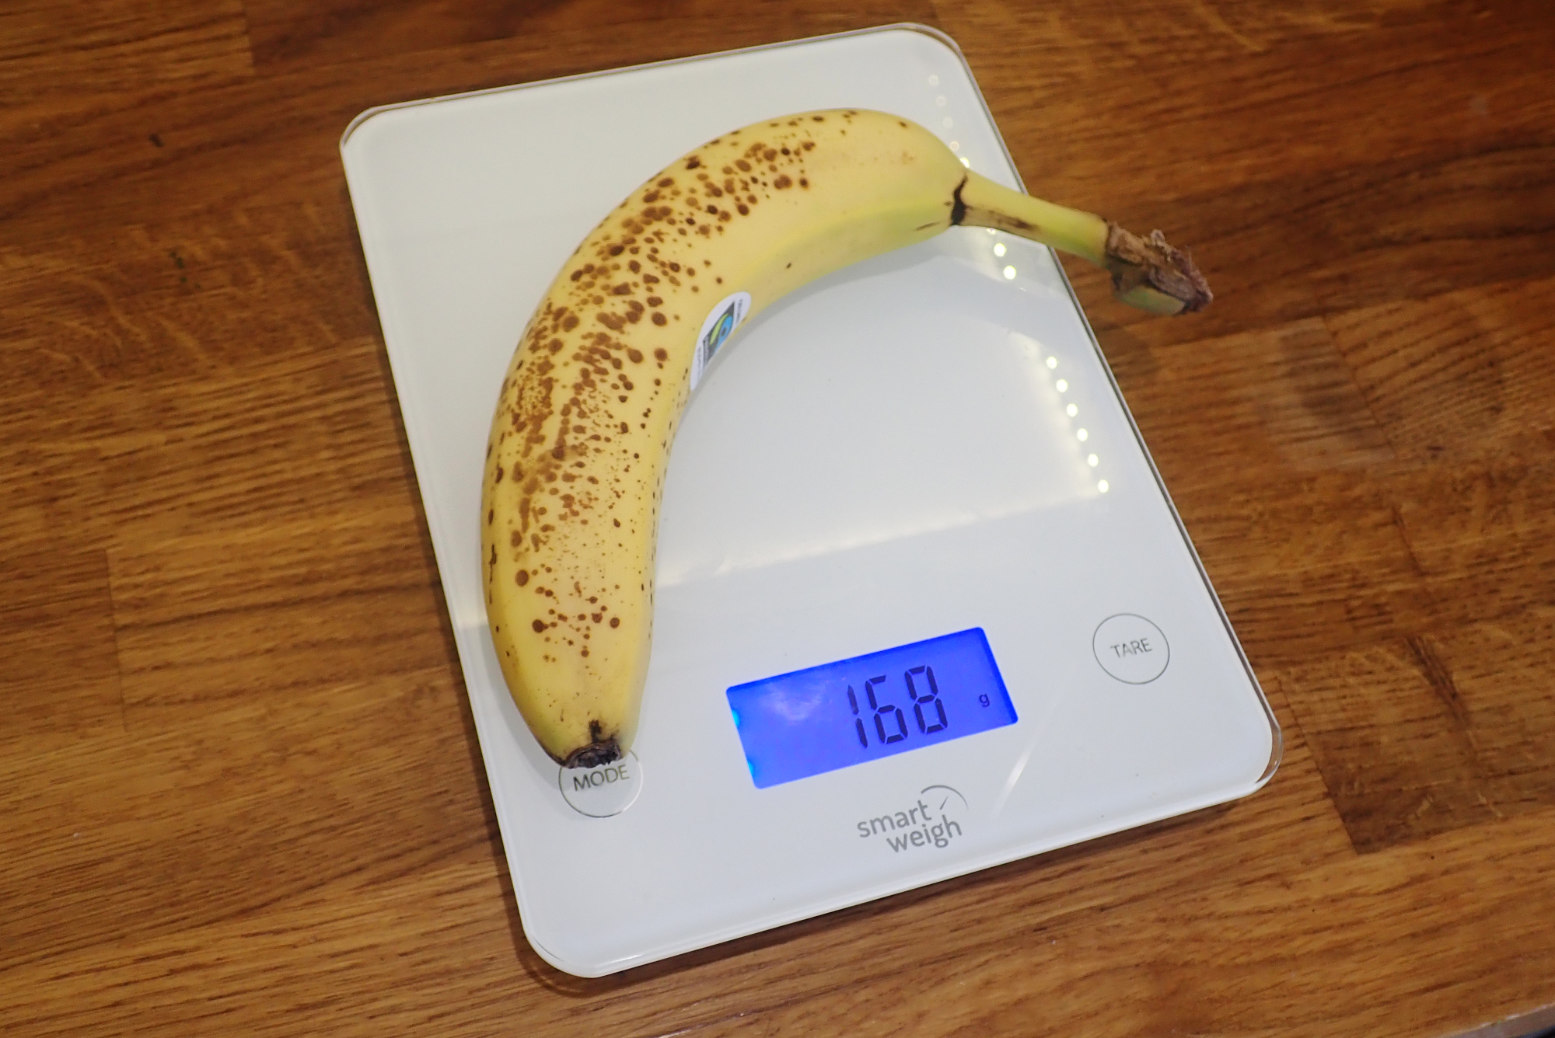
People ask: what is the the weight of a large banana?
So the main differences are weight, blade size and blade face, and I suppose adjustable length and the texture of the shafts. Will you notice the difference in a packraft? I very much doubt it but I think I’d prefer to paddle all day with the smaller bladed and dihedral Wave, even if it’s 160g heavier: the weight of a large banana.
I have a theory with length-adjustable paddles that into the wind or upstream (ie; max effort) you can ‘lower the gearing’ by shortening the paddle and leverage. Meanwhile downwind you can get the most of your paddle by setting it at full length overdrive. It’s good to have the option and one day I will test this theory but really, we paddle as hard as the situation demands. Sometimes easy, sometimes more efortful.
Wave shows the carbon weave; both are 29mm ø, good for smaller hands
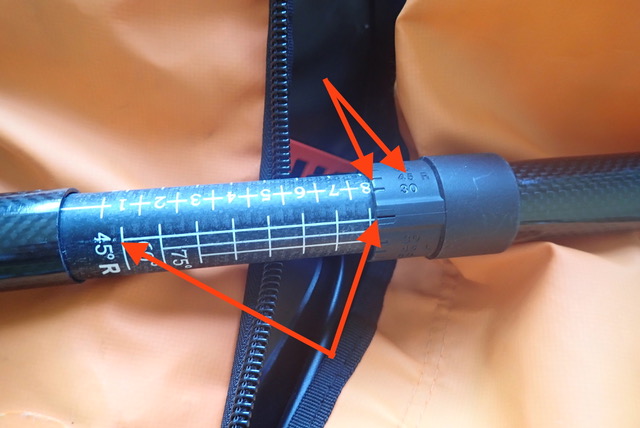
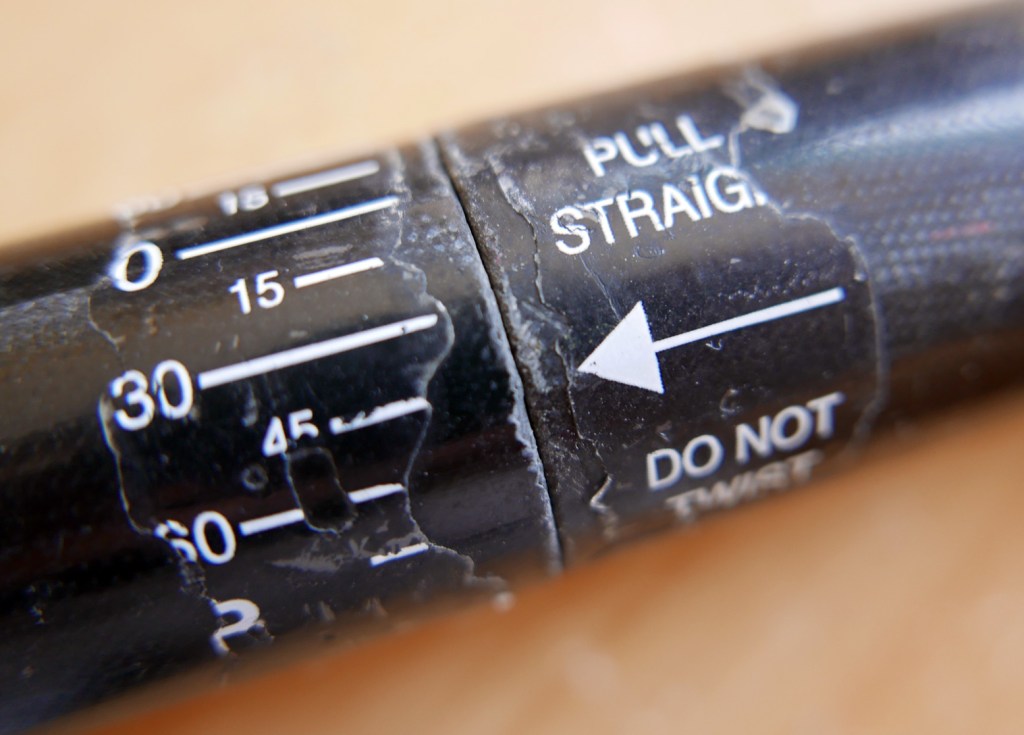
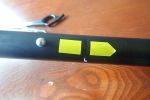
Feather angle alignment My Vertex came with no alignment line on the lever clamp to set the angle against a grid. It took me a while to work this out until I couldn’t and a couple of yellow tape arrows set at my preferred 45°R. Anfibio have since told me this was a production flaw and current Vertex have an alignment marker on the clamp. A permanent alternative to my stick-on arrows would be melting a slot into the clamp with a hot knife. It would be easiest to do this with the paddle feathered at zero (no offset) which is easy to estimate. Think before you melt or use tape!
No index line on the clamp. Tape arrows addedTwo ways of setting alignment on the Wave
The Wave’s alignment system is as you’d expect. In fact there are two ways: a slot on the clamp to align with the grid; and pre-set angles molded into the clamp to align with the zero line on the grid. As it is, on both paddles the white alignment grid gets slid over at each assembly and will probably wear away over the years so you’ll end up with a tape marker anyway. That’s what I’ve done on my old Werners which had a grid sticker on the outside which eventually peeled off.
The blades on both paddles felt a little loose once mounted on the shafts. Maybe they’re made that way as the shaft may swell over the years as it did on my carbon AquaBound. It’s unlikely you’d notice on the move but no movement is best. A small bit of thin tape (left; not a full wrap) was enough to remove any play and if the tape wears or pulls off it’s easy to apply some more. Once clamped down there was no play at the shaft join.
On the Wey you might notice the weight swapping from one to the other, but after a while you’re just paddling. In a way the ideal combo would be fitting the smaller Wave blades on the longer, better clamped Vertex shaft, but oddly they’re not interchangeable.
In the end, for €125 you will not be disappointed because either paddle will proper your boat forward, adjust readily and fit easily in your pack.
Incidentally, I did an IK&P survey when I paddled the Wey in 2021. 2022 numbers in red. In over a decade I saw my first every packraft actually being used on the water! An underinflated MRS. I got the feeling the owner didn’t know that airbagging was not enough; you have to top up too. Has he not read my book?!
Hardshell canoes: 1 1
Hardshell kayaks: 1 8 (group)
Hardshell SoT: 1 0
Vinyl IKs (rock-bottom cheapies): 5 1
PVC (bladder) IKs 3 0
Packrafts 0 1!
iSUPs: 10+ (mostly women or mixed groups goofing off) 10
The winds here have been belting out at up to 40mph for days, but I grabbed a quickie during a lull the other afternoon to try out some final mods.
Foam backrest: much better
My centrally seated TXL is like a small TPU kayak – the missing link, some say – so it needs a backrest that works. I was never won-over by the Anfibio inflatable backrest on the Revo or my boat; it manages to be both mushy and wobbly. But once on the water it was soon clear that, combined with my Lomo holdall wrapped into a footrest bundle (below left), the foam SoT backrest felt much better. The broader, firm pad spreads across the back supportively and is held up with straps, not thin elastic. Plus being able to press feet side-by-side against a flat, firmish surface, not jam feet into the bow, is also much more comfortable. It felt just like my old Seawave!
Feet side by side – betterUse a bag or get a blow-up footrest
I was giving the Multimat air floor one more try. It must do some good and I admit it may have helped replicate the IK feel. And unlike initial impressions, the half-inflated seat base is actually pretty stable sat on the stiff floor, not wobbly as I originally thought. Plus the pad protects the floor from impacts below, and heel scuffing inside.
I did feel again that the TXL skates across the water a little, bobbing on the stiff air floor. This flat-floor effect makes sense on a shortish 3:1 ratio boat and was one reason I thought a front skeg might be helpful (it wasn’t with the stock rear skeg). The air floor lifts the boat a bit higher in the water and the sliding left to right is more from wind and waves than in reaction to paddling strokes (like normal packraft bow yawing). But until conditions get too rough I don’t think it really hampers paddling progress that much. It’s a packraft after all, not a jet ski!
While I had the floor in, I tried the 15-cm thick seatbase fully inflated and sure enough, like Anfibio say, it’s too high and may get unstable on anything other than flatwater, even with my repositioned knee straps for added support (left). That’s why they offer the 5cm foam block (it’s on ebay, fyi). A thinner inflatable seatbase would be less agonising but it seems, like on an IK, the half-inflated stock seatbase actually works fine.
Only one skeg needed
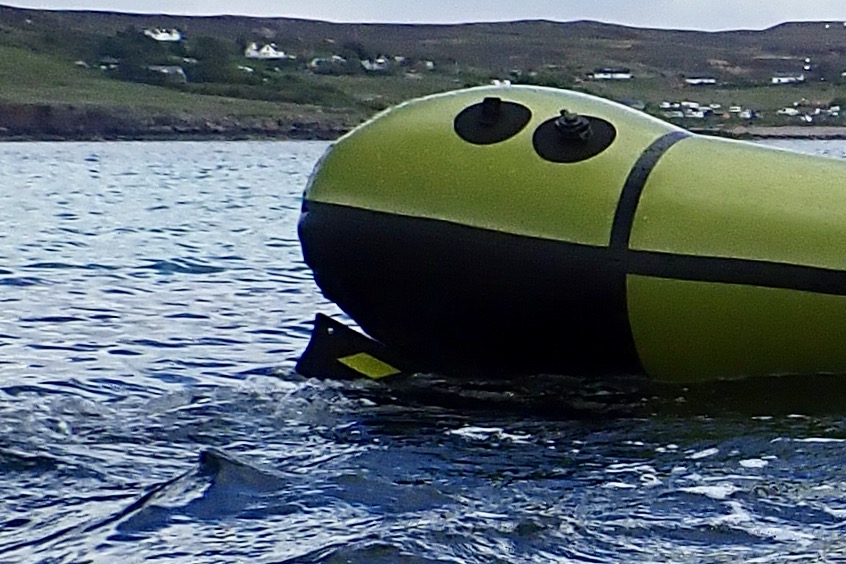
The other test was a skeg repositioned on the floor for full submergence – this is only needed for sailing; the TXL tracks well enough with the semi-submerged stock skeg position and goes OK without one. Had I not seen the selfies (left) and not tried sailing, I’d probably not have noticed.
The afternoon’s glassy calm had turned already. I pushed into the breeze out towards a low-tide skerry just off Tanera Mor, then heeled round for the mile back to Badentarbet beach and flipped out the WindPaddle. I left the stock skeg in place which was cheating a bit, but I’m pleased to say my earlier problems with weathecocking (stern blowing round, side to the wind) have been solved. No surprise a fully submerged skeg makes the TXL sail as well as my Rebel 2K and MRS Nomad. This was an important thing to pin down as I want to be sure my bloaty, IK-replacing Sigma TXL has something up its sleeve when the wind allows because, like any inflatable, in the other direction it will struggle as headwinds reach 15-20mph. Sailing still needs constant micro-adjustment, but it’s great to feel a gust tugging at the handlines as the Sigma ploughs a trough through the surf like a water buffalo wading across a mudhole. The boat was definitely hitting 7kph or more at times.
I was also trying an idea I didn’t get round to testing on my narrower-bowed Seawave before I sold it: a WindPaddle transverse bowsprit™. Those cunning Chinese will be copying it on ebay any day now.
Transverse bowsprit™ Ask for it by nameHang on, was I not the first transverse genius?
TXL vs MRS Nomad spacing
A WindPaddle disc sail starts bobbing madly left to right when winds get much over 10-15mph – it can’t unload the air fast enough. This is a side effect of mast-less downwind sails, but I figured if the bow sail attachments were further apart and more taught, the bobbing might be constrained. You want a downwind sail at the very front of a short boat, but on the TXL thr frontmost mounts are quite close together (compare to a Nomad, above left). My ‘transverse bowsprit‘ is a stick which extends the sail mounts out to the sides, like ship rigging. I used a foot-long bamboo stick with some Rovaflex loops on the ends and for the weight and minimal faff, I like to think it worked. A bit longer would be better; I have a 50cm rod lined up for next time. A few days after posting my sailing vid, YouTube thoughtfully directed me to a ten-year old video where a bloke with a hip-wide surf ski had the same idea (above right). Only he managed to zip along at a breathtaking 15kph in a 40kph breeze!
Heading towards shore, again, I aired-down the Multimat but again, can’t say performance deteriorated noticeably. After all, the MRS Nomad manages fine. The stiffening breeze rushed me towards the rarely exposed sands of Badentarbet beach and a short walk home.
So. Good to know the TXL is now largely sorted. Weather-wise, it’s been a wash-out in the far northwest this year, but there’s still enough summer left in the heatstruck south to do some trips.
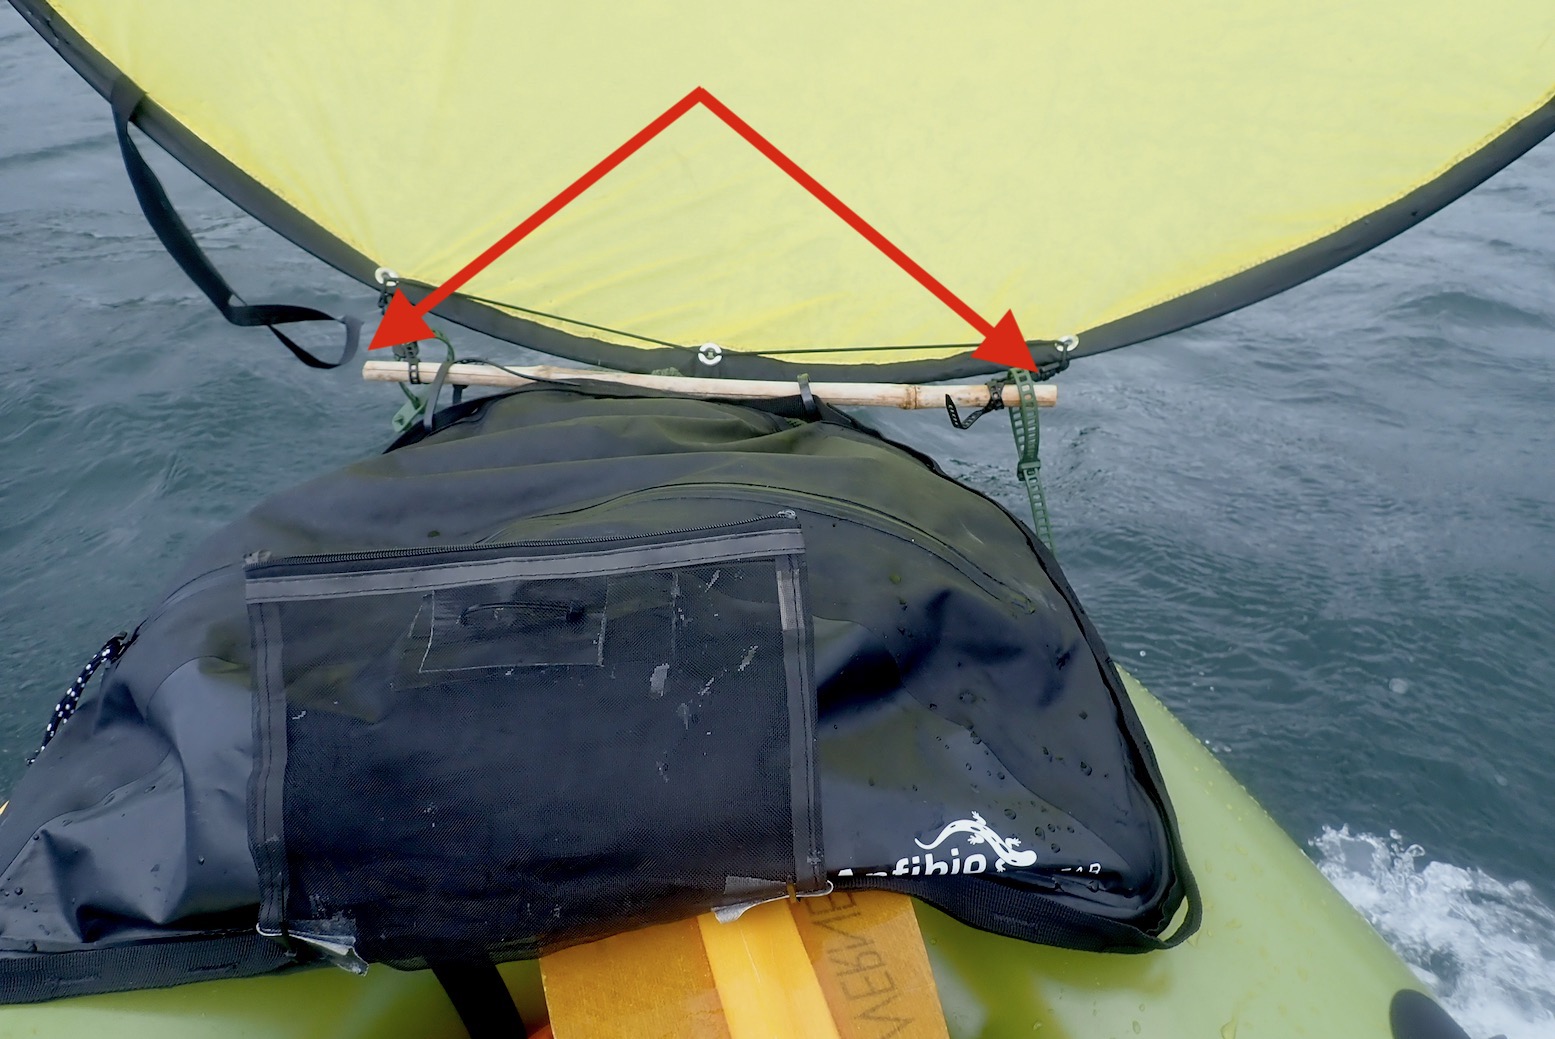
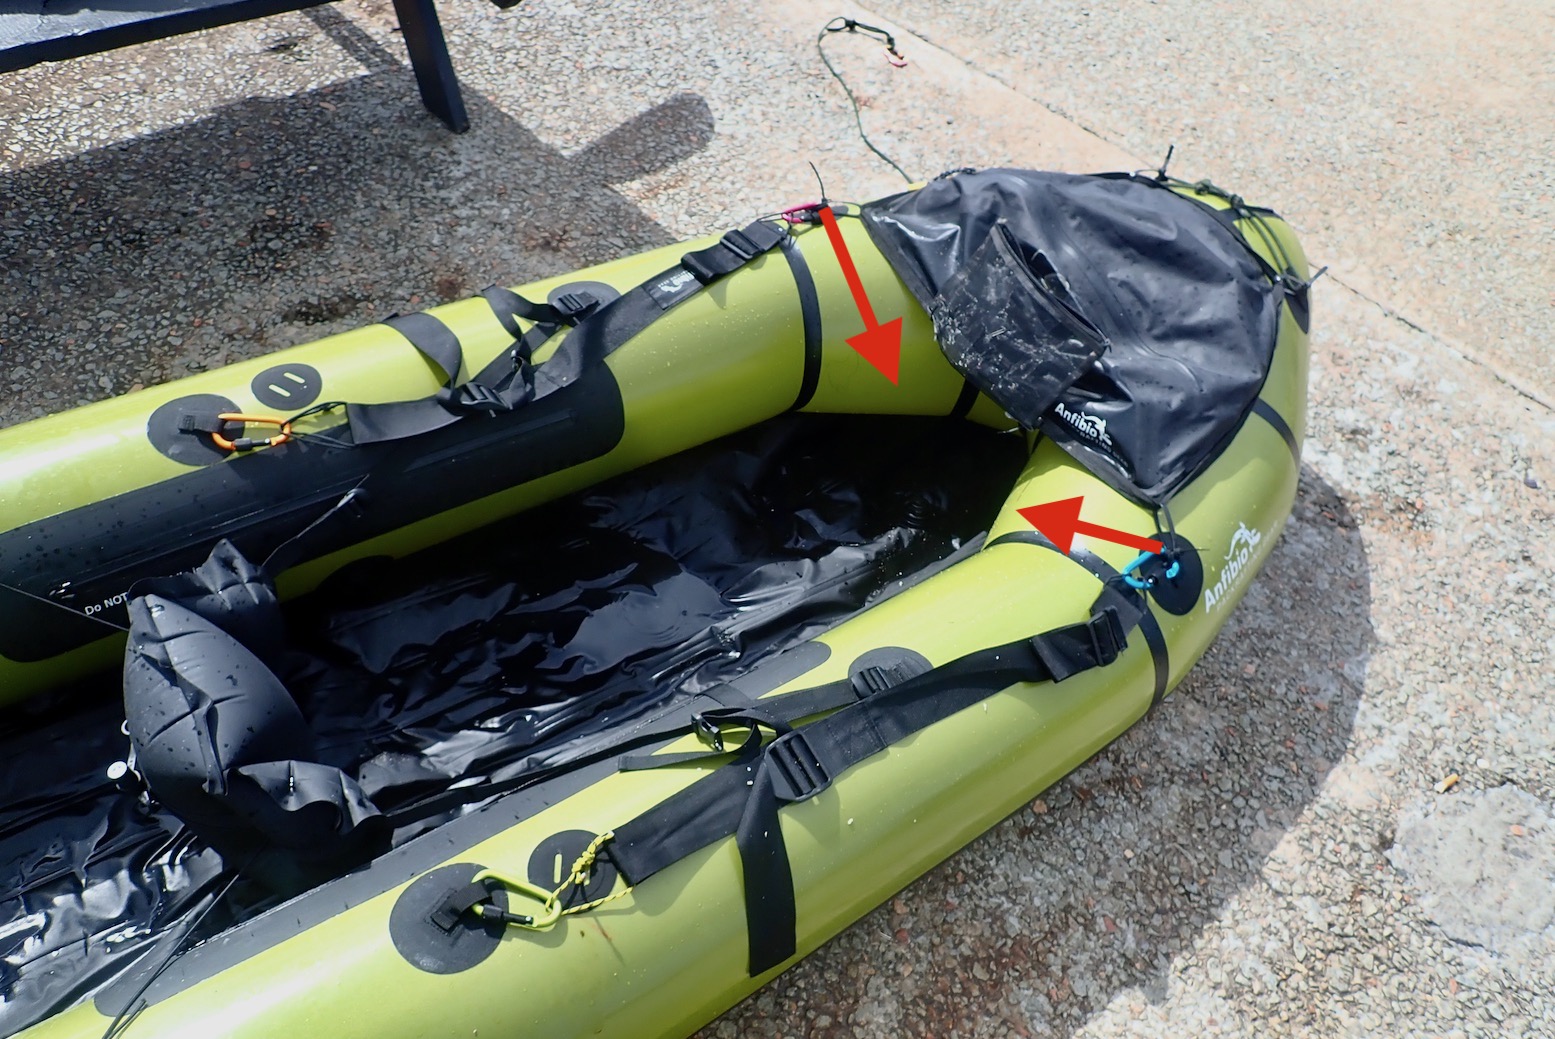
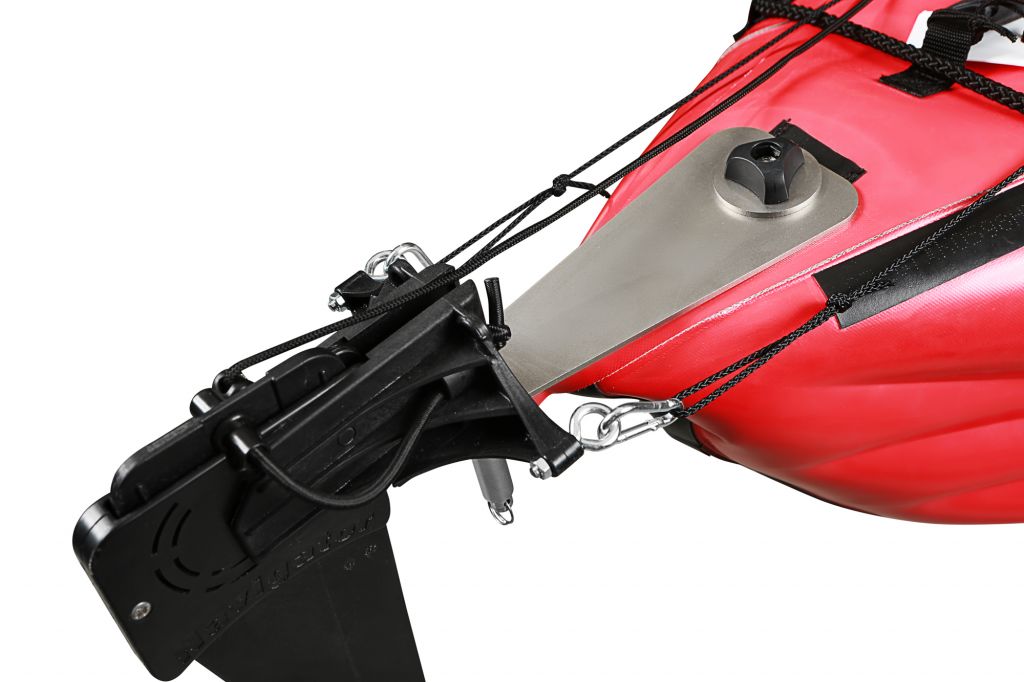
After various trials I decided for sailing the TXL would benefit with a skeg on the floor where it would be fully submerged except momentarily when cresting bigger waves. The standard position angled on the stern (left) sits too high on the buoyant TXL so doesn’t have much effect, though the TXL tracks pretty well on flat water, with or without the air floor, solo or two up. You can mount the skeg back-to-front (right) for more bite, but I hope tracking when sailing will be greatly improved with a fully immersed skeg. When the wind allows, I want the TXL to be a reliable sailer on longer paddles.
Under the floor stays fully submerged, even with the air floor.
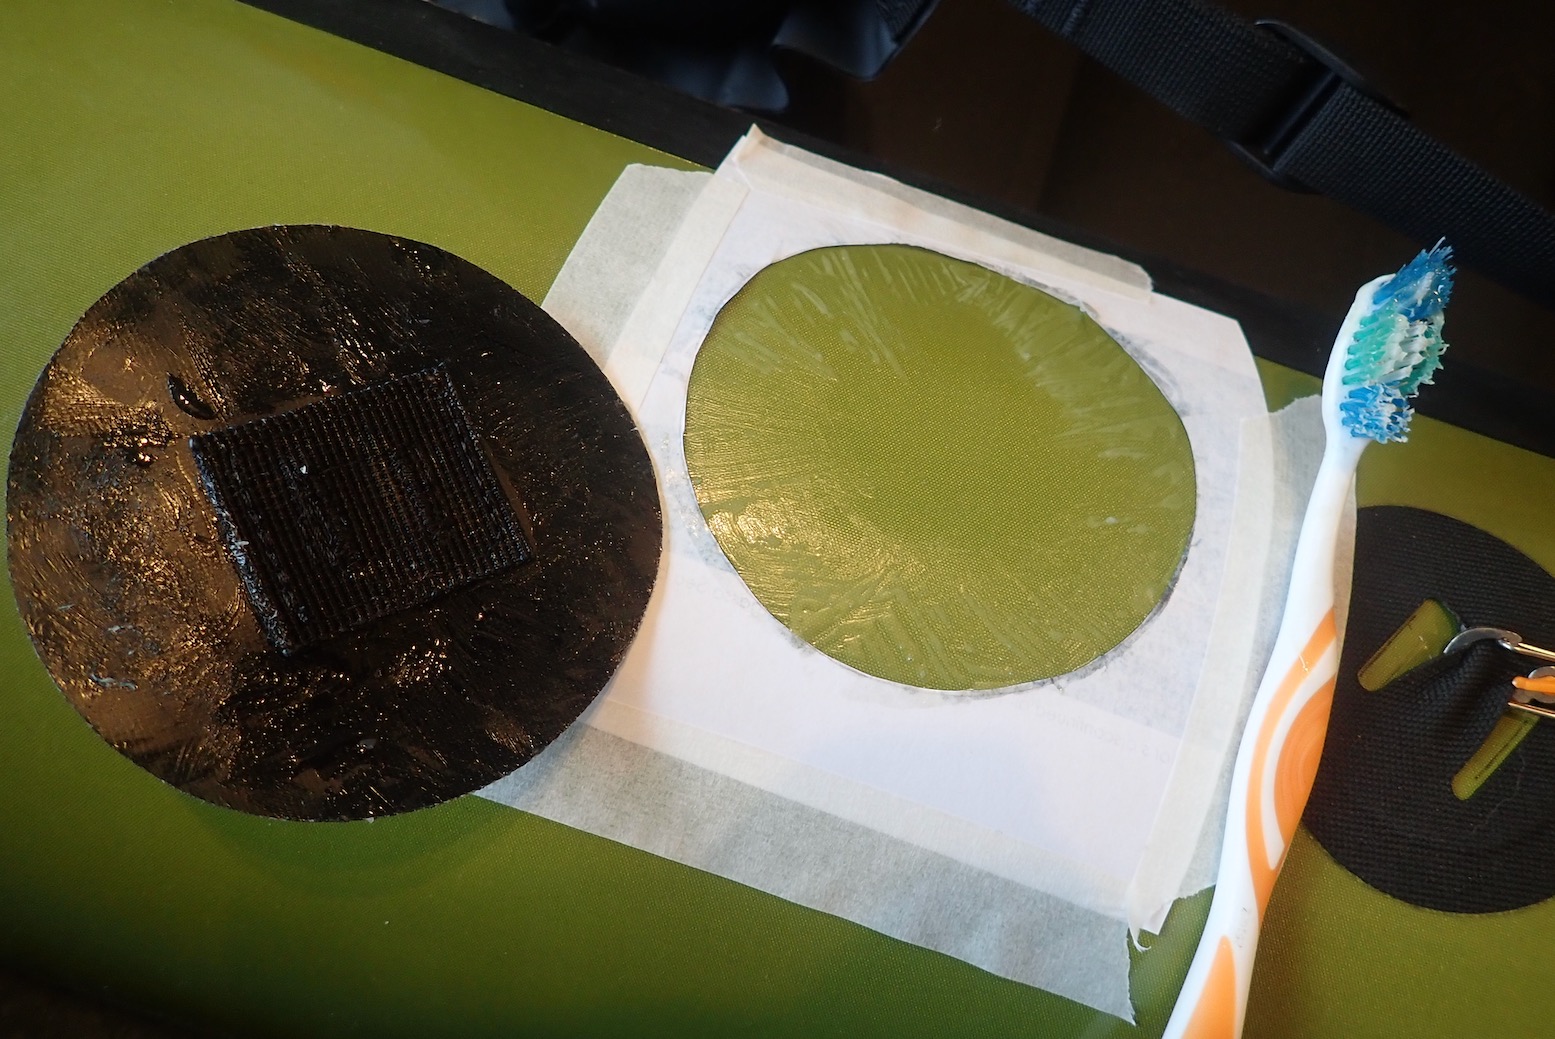
I could’ve simply made an extension to the stock skeg, but decided having two positions for the stock skeg would be less bulky. Like on an IK or a SUP board, the long but shallow Anfibio skeg would work well mounted horizontally under the floor (above, left). I’d already tried a skeg under the bow, but that did not work well at all. Waiting for good glue, I’d stuck that front skeg patch on with Aquasure and was surprised how easily it peeled off with less than a minute with the hairdryer.
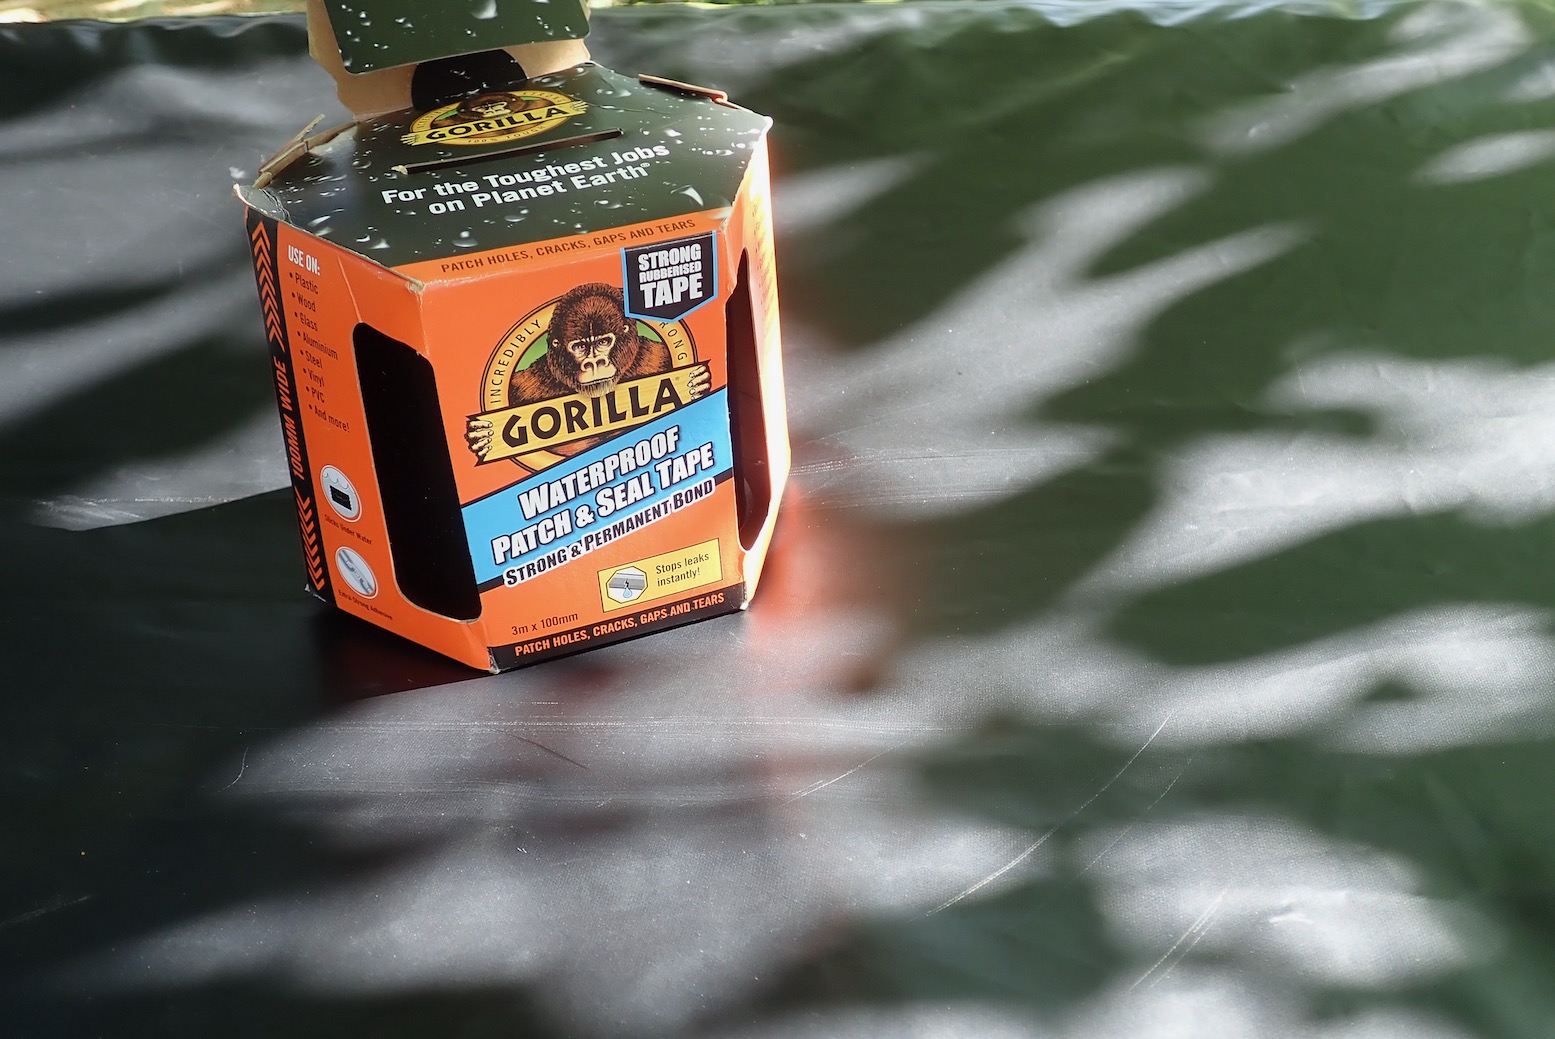
Just as I was about to clean the removed patch and glue it on with Helaplast (recommended by Anfibio), I thought super tacky Gorilla Patch & Seal tape would be even easier, using the spare Anfibio skeg patch as a template. But I decided P&S is just thick ‘rubber’ tape suited to sealing, not supporting a knocked about skeg. In fact regular, string backed Gorilla ‘duct’ tape would have worked (a good way to test the idea), and I’ve found lasts surprisingly well on a packboat. In the end I decided the liberated fabric-backed Anfibio patch would be best.
The most important thing is to mount the patch straight along the centre line otherwise you’ll be going round in circles. This is best judged with the boat inflated. After that, it’s the same Helaplast sequence as detailed here. While gluing, I decided to add a couple of tabs low in the front to make the thigh straps hook more effectively over the knees.
Floor-mounted skegLower mounts for thigh straps
The benefit of having two positions for the rear skeg instead of a bigger fin is that you can choose: use the standard position for shallow rivers (if a skeg is even needed) and use the floor mount on open water where wind and waves may push the boat around more, and if you hope to sail in a straight line.
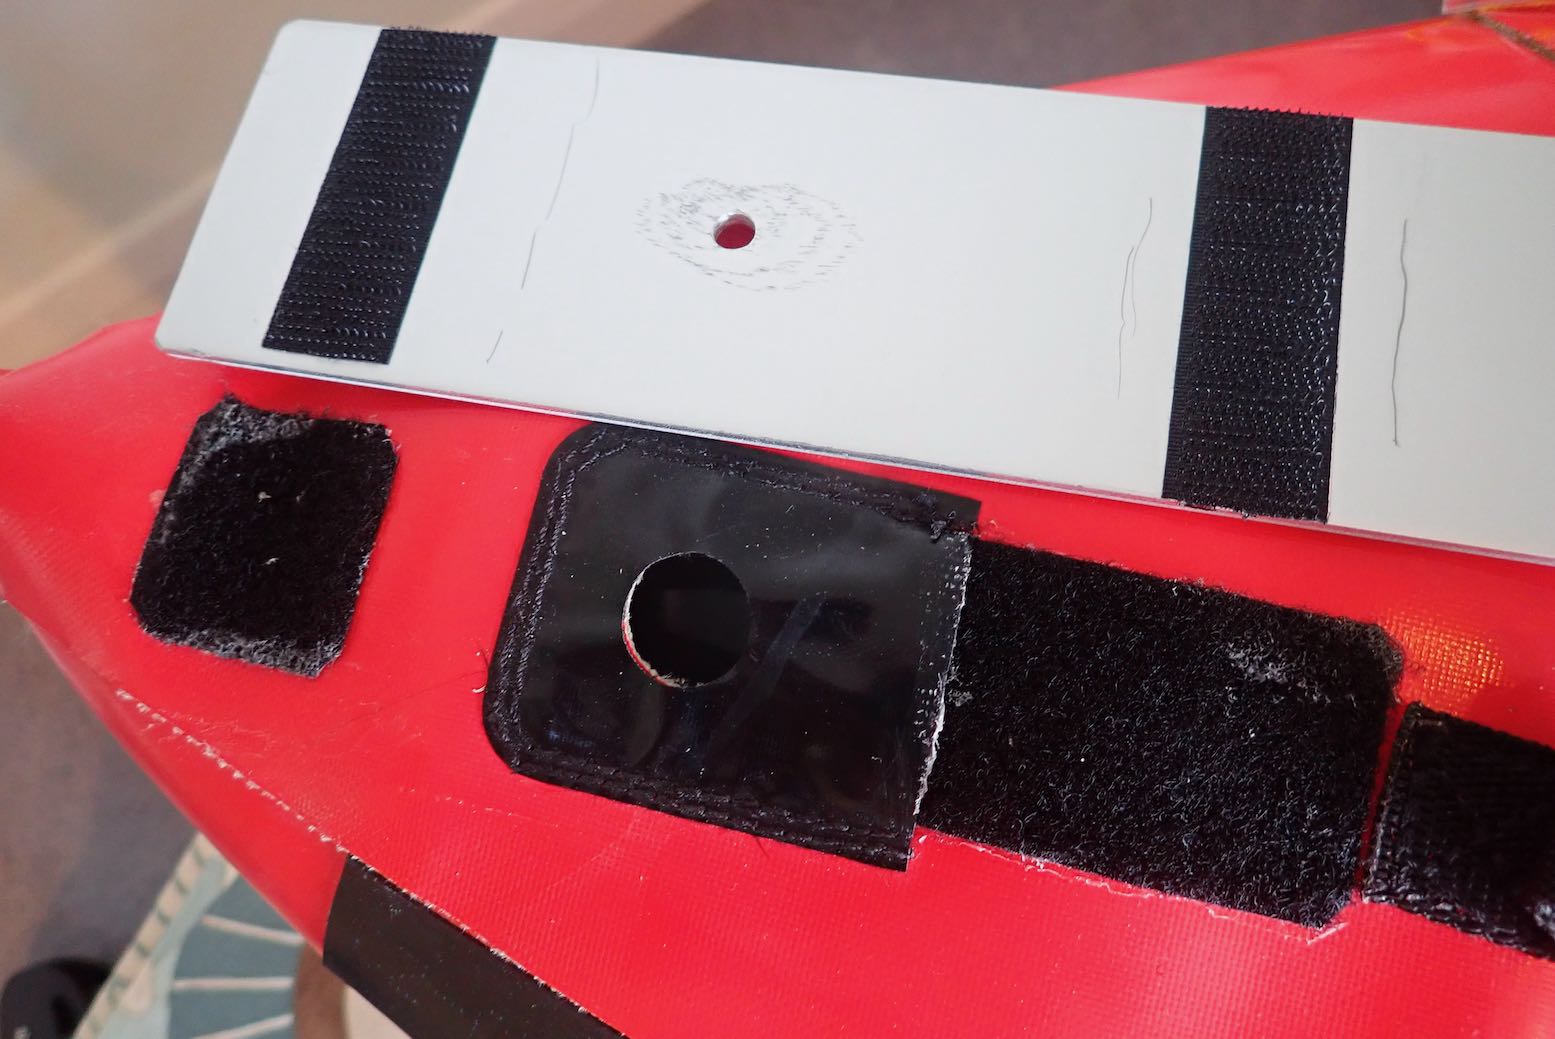
Foam backrest Sat up front, the stock inflatable backrest (below left) does the job, but in a low-pressure boat, the air cushion just adds more mushiness where you want support. As I say in the book or on Seats: sit on air; lean on foam. There is no advantage to inflated backrests other than saving a bit of packed space (might they also be cheaper to produce?). In this way, regular solo packrafts, where you lean on the back of the boat are better. Seated centrally in the TXL, you need a supportive IK-style backrest.
Anfibio air backrest; mushy and wobblyMRS Nomad uses foam backrest
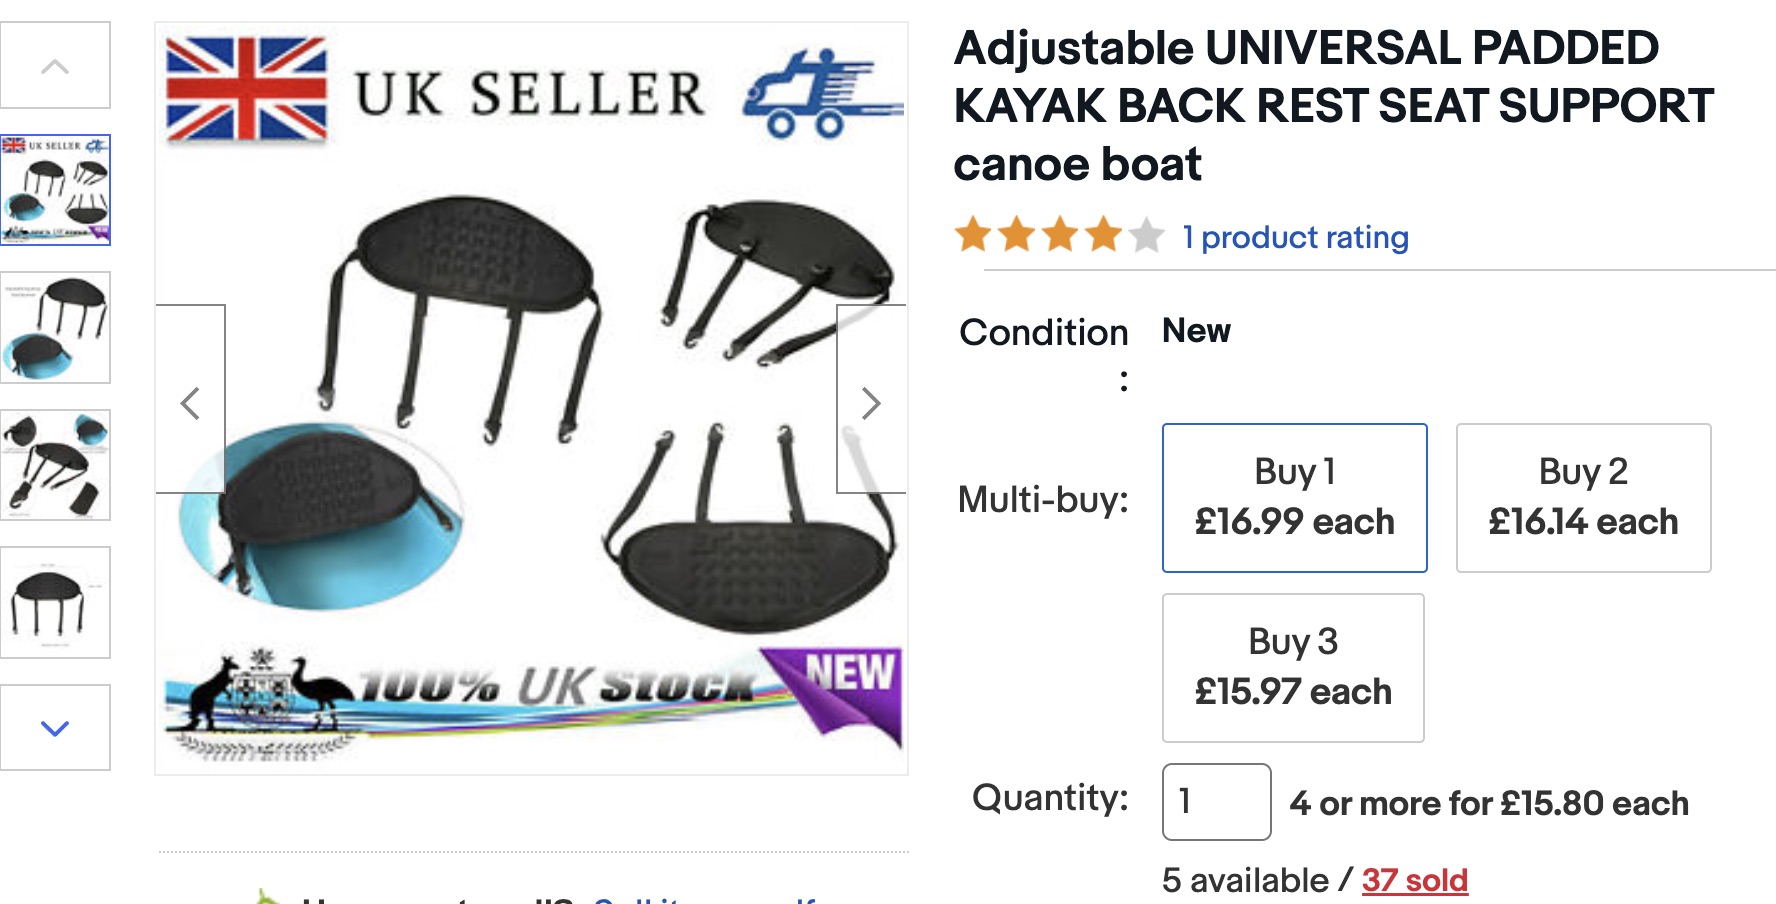
After a few outings I’ve decided to replace it with a spare foam SoT backrest (below), an idea which has worked well on my IKs for years. IK makers too have a blind spot when it comes to front seats. Today’s price for the backrest on ebayUK is 17 quid (left). Once I ditched the heavy ‘brass’ clips which came with mine, it weighs 200g, only 40g more than the Anfibio item (the ebay one shown left uses lighter plastic spring clips).
The foam backrest fits right on the TXL: the long tapes reuse the TXL’s front buckles and, less well, the rear straps come back through the flat tab mounts. A slide ring would work better here. I could have reused the thin, cinchable elastic cord which came with the Anfibio backrest but I suspect it was part of the problem (and thought so on the Anfibio Revo too). Counter-tensioned, non-elastic straps attached to a firm panel add up to better support. Up to a point the thinner foam backrest also makes more room behind it, too. And I won’t miss deflating the stock backrest to save on packed space, neither!
Years ago I remember when the value of fitting packraft rear skegs was debated. Then, the now common longer sterns were introduced by Alpacka and positioned the paddler more centrally which greatly reduced excessive bow yawing. The problem was largely solved. On a packraft you’d think a skeg under the bow would eliminate the yawing endemic to short, wide rafts while compromising turning agility. In fact, I wonder whether a packraft might yaw nearly as much at the back but you never notice. Like one of those Turkish dervishes, you’re actually pivoting from the middle of the paddle shaft, or perhaps a bit behind, at the centre of mass (left).
Rear skegs certainly improve tracking on IKs; you can manage without, but with a skeg you can paddle harder without constant micro-correctioning. On rivers I’ve found solo packrafts paddle fine without a rear skeg; or they’re too short to demonstrate noticeable improvements. There’s a bit of nodding as you move off which soon settles down with some momentum and a steady cadence. Even my symmetrical Rebel 2K (left; stern identical to bow, not extended) paddled fine down the Wye without a skeg. But when getting pushed around by a swell or on sea lochs (especially when sailing) fitting a skeg was worthwhile. Either way, rear skegs are a thing now with packrafts even if you don’t have to fit them every time. Certainly on my longer TXL I like to think the stock rear skeg aids coastal paddles; though we found a brief stint with no skeg was only slightly noticeable, paddling into the wind in a sheltered loch (no swell). Anyway, I’ve been curious to see what effect a frontal skeg has, so on buying my TXL I ordered a spare skeg and patch which Anfibio also sell separately for €21 + €6.
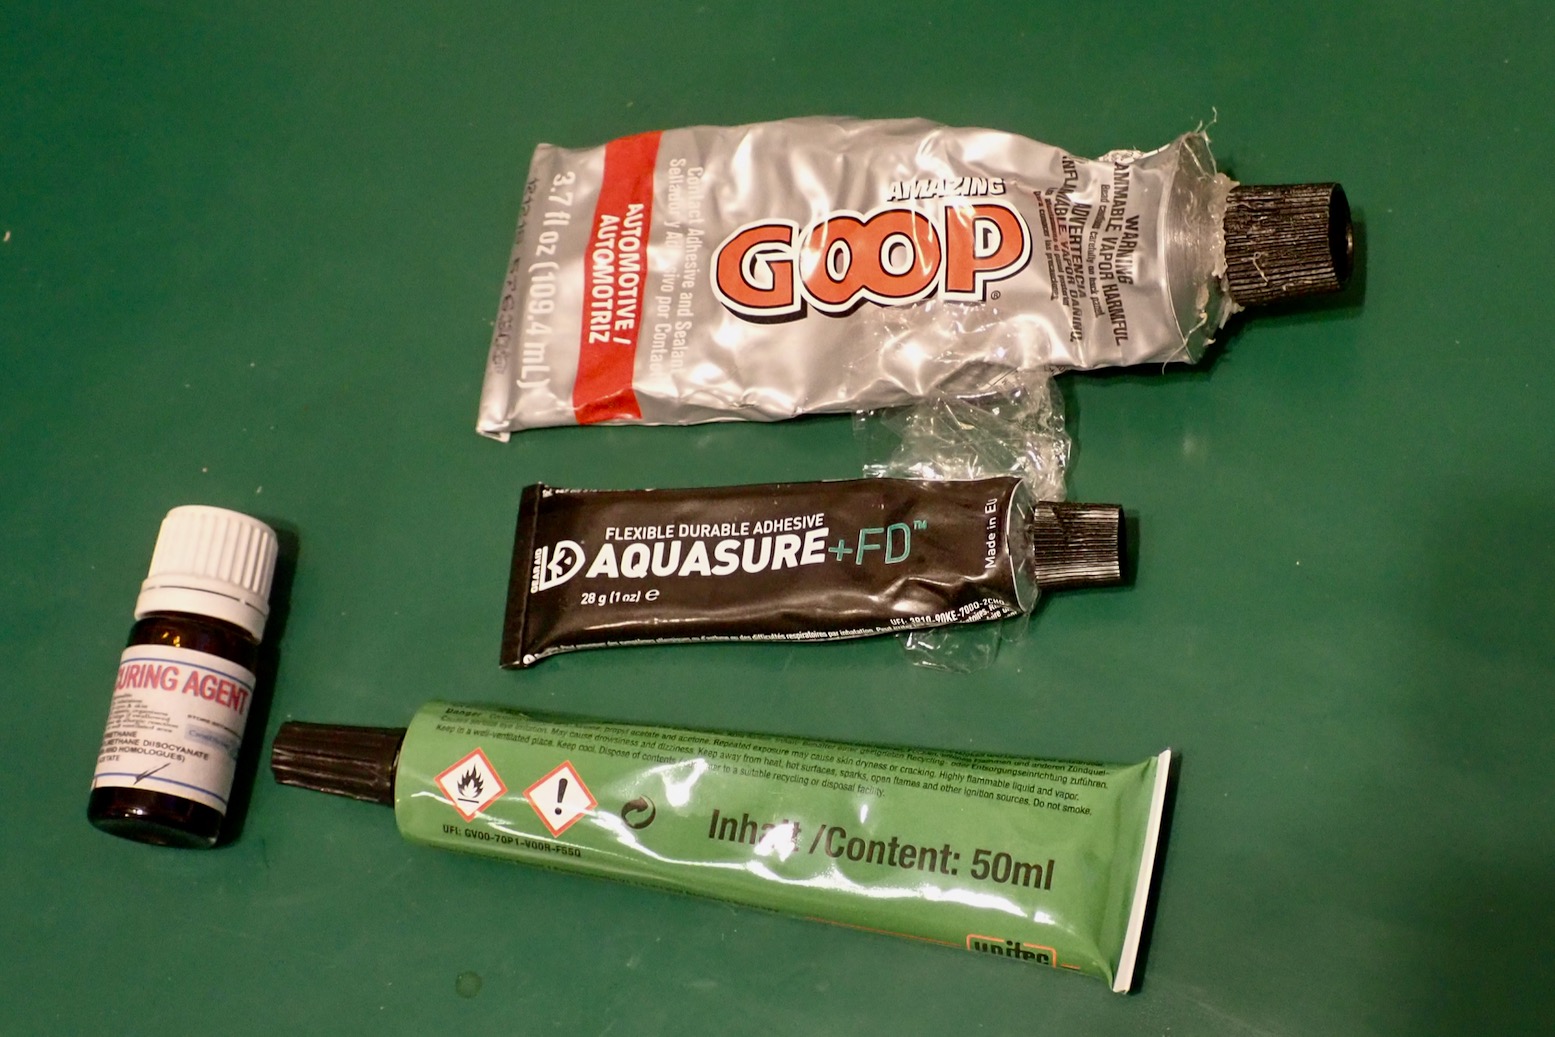
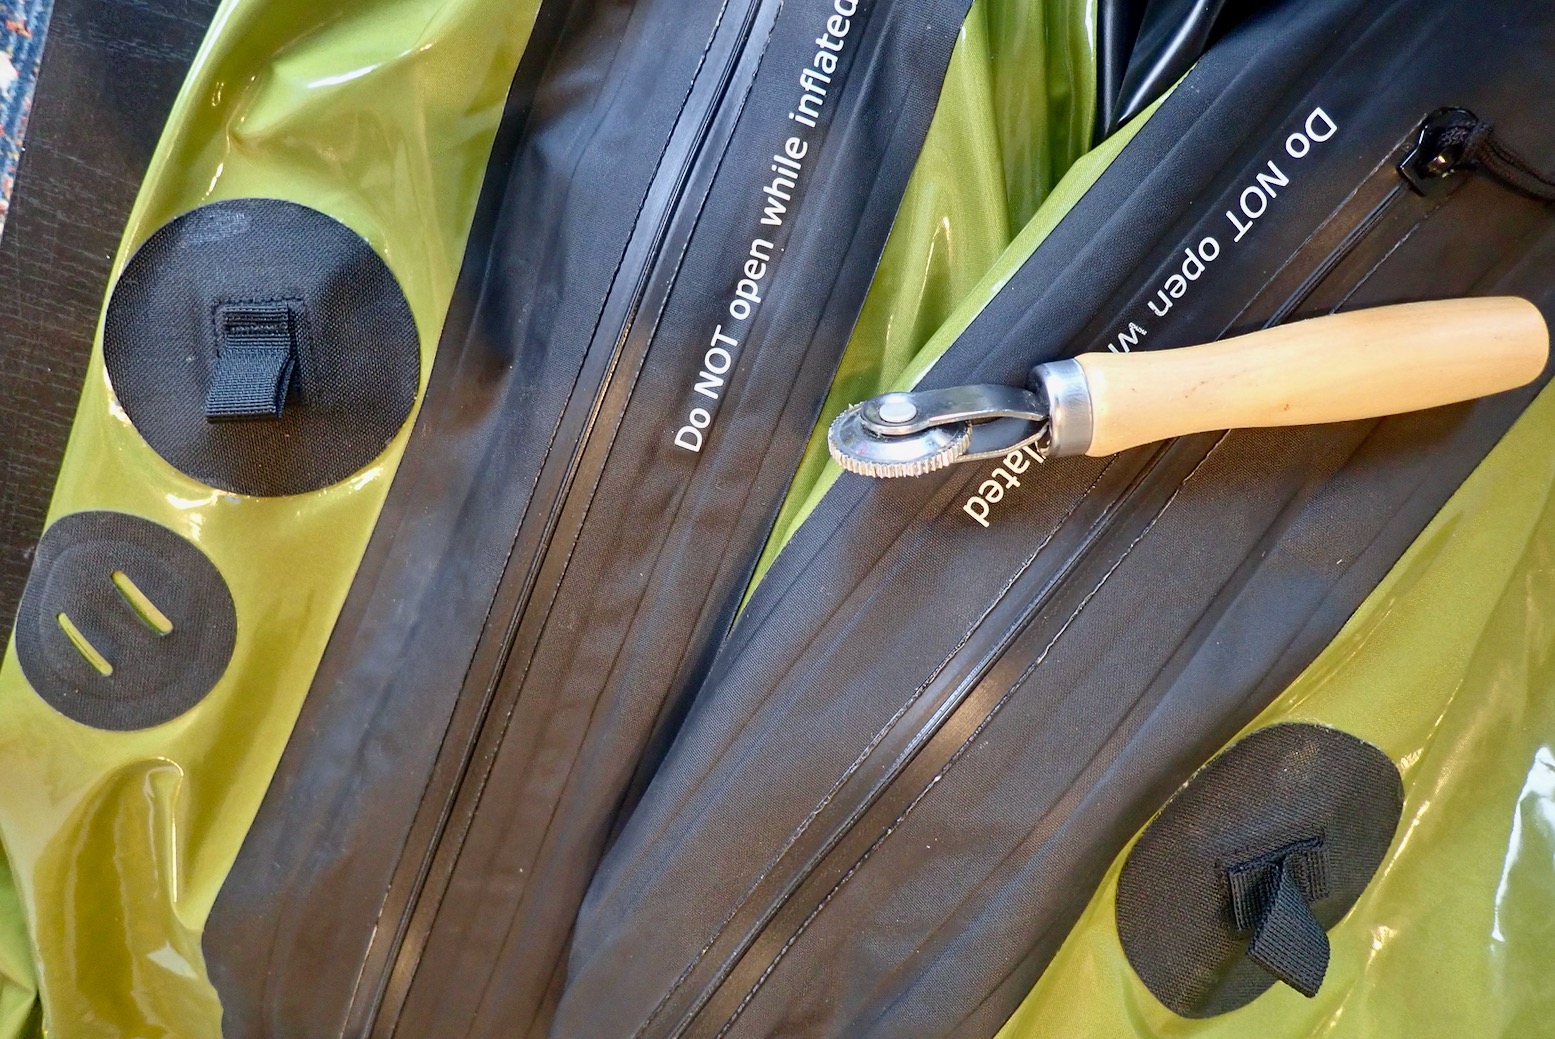
Goop no good; Aquasure OK; Helaplast better
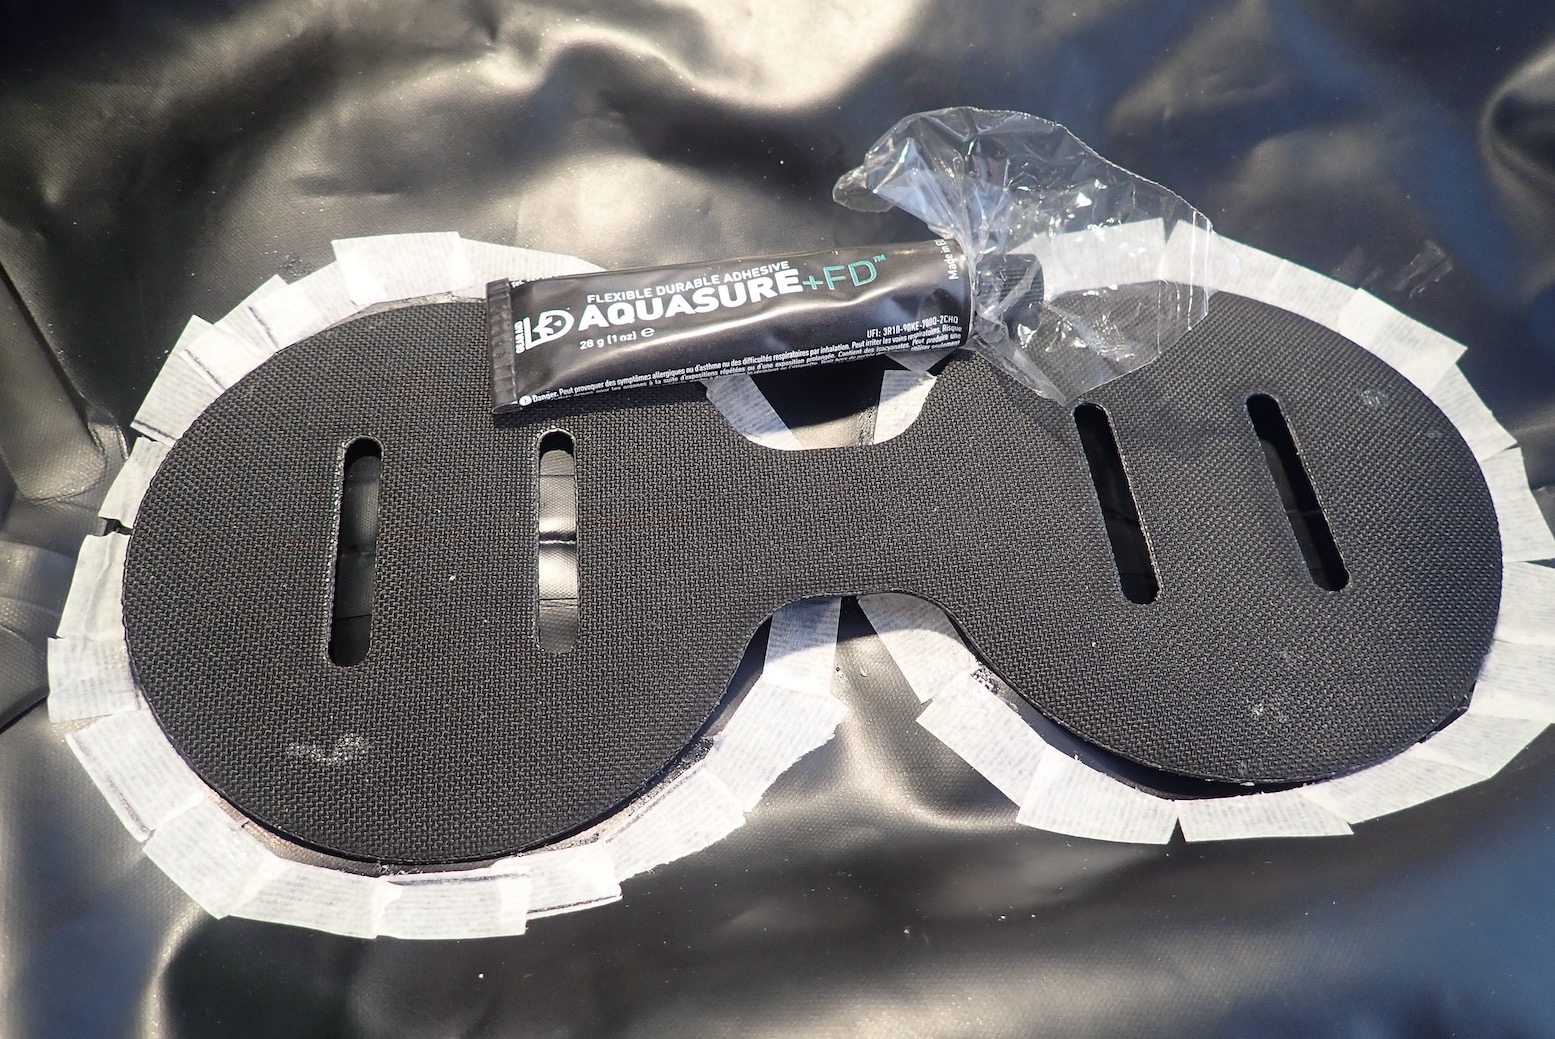
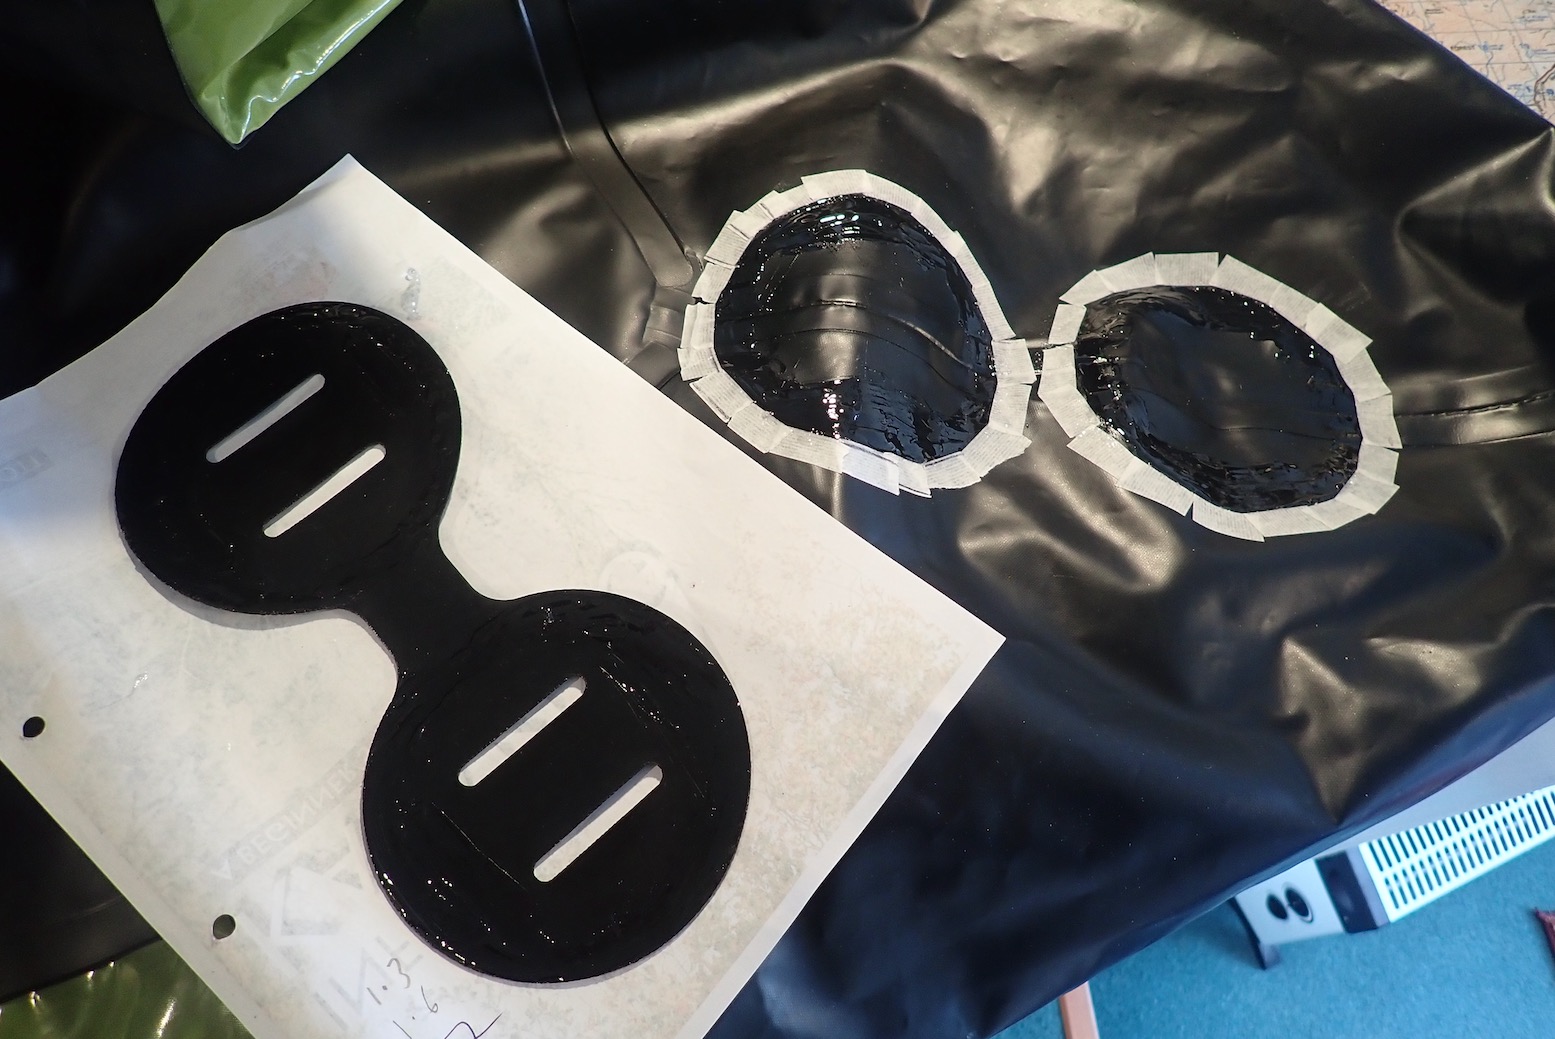
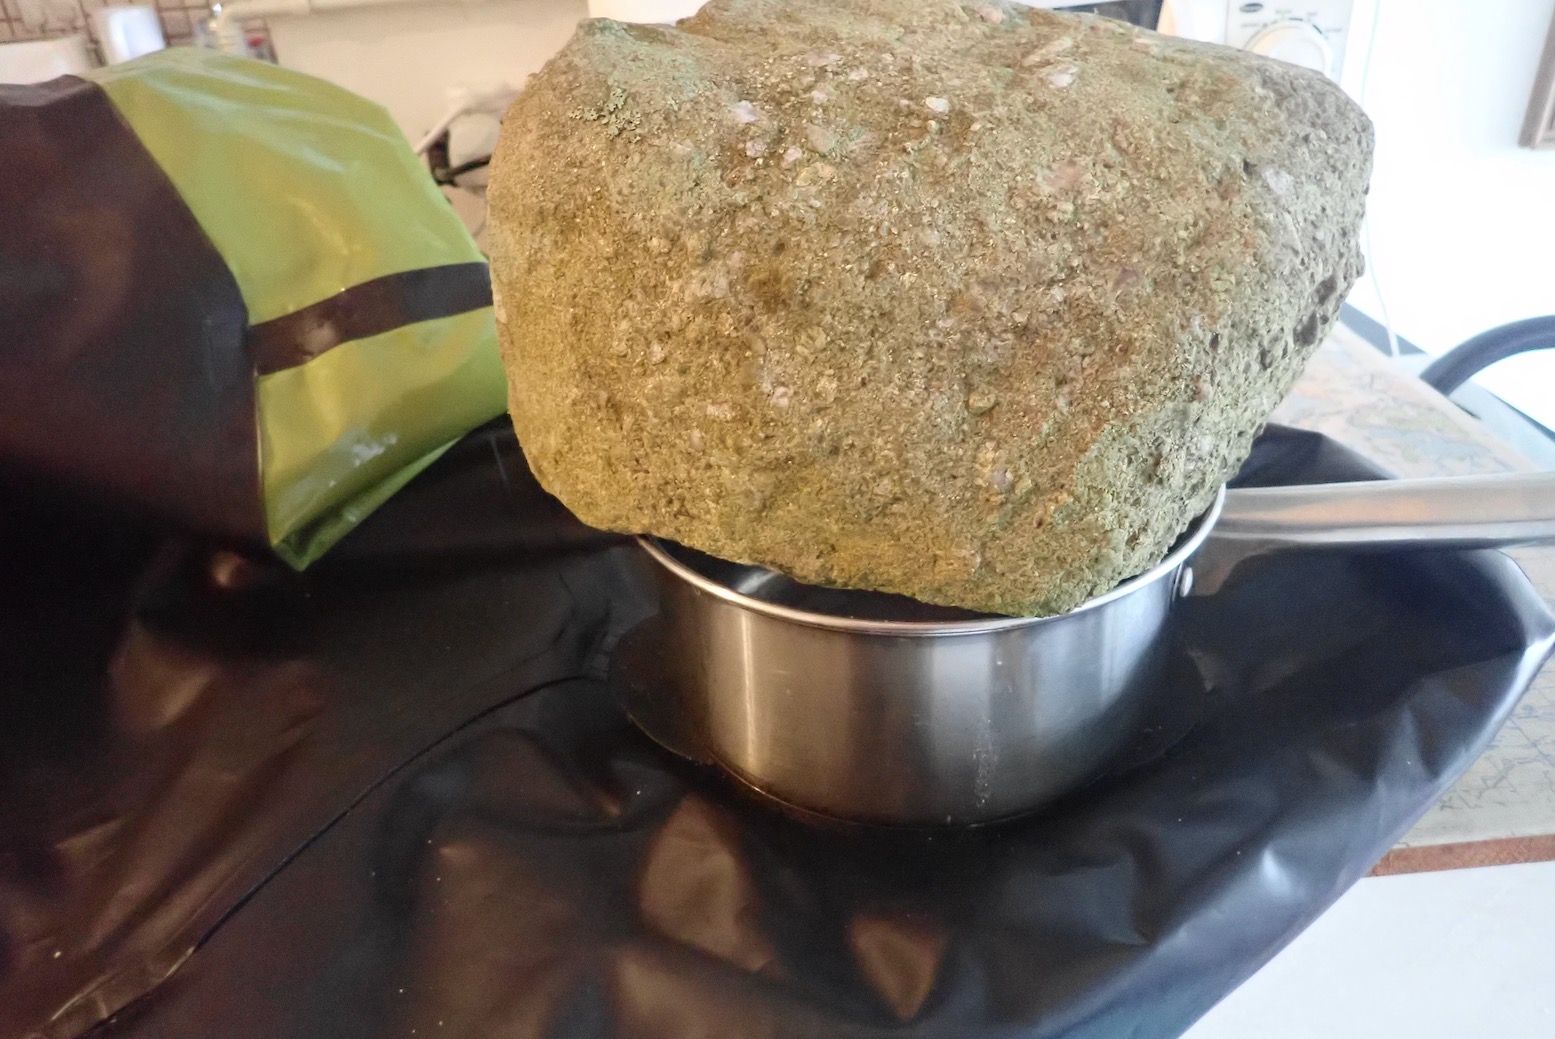
Gluing on a skeg patch As stick-ons go, this is not a mission critical job but you want to line it up dead straight which I now see is better done with the boat inflated. I just used the rear seam, hoping it was along the middle line. Anfibio recommend Helaplast which they can’t post outside of Germany, but which you can buy on ebay.uk (from Germany…) for €7 for 50ml. There must be something similar in the UK, but the problem is identifying it against something that provenly works. I had some Goop contact adhesive, but whatever their ‘Automotive’ variant is, it did not stick at all. So I decided to try some Aquasure+FD, leaving it to cure for half an hour before sending in the roller. That seems to have worked.
Make sure you don’t glue the middle down!Thin layer of FD on both; wait 30 minsPosition and press down hard with a rollerA piece of drystone wall for good measure
Using stock TXL mounts sort of works
Knee straps Part of me likes to think I’ll be using my nippy TXL the way I use my IK: fair weather, open-water sea paddles rarely more than a mile from shore. As this might require sustained periods of paddling I figured some knee straps would help, as they do in my IKs. It’s not so much for hardcore bracing or even rolling, the way they’re used in white water, but just to lock-out the legs so the core is more connected and you get good drive.
Anfibio sent me their latest 5-point thigh straps which I tried and liked on the Revo (left). But to make full use of them would require gluing on up to 8 extra patches (if not ideally the ladder patch; left).
I decided my old Anfibio 3P straps which I’ve used for years in my IK would be OK for my low-tension, flatwater use. They require adding just two pairs of attachment straps. I could have got away with the unused flat patch by the seat, but the direction on tension was off centre and would eventually wear, stretch and maybe break. These small patches are not really designed for such loads and now my Helaplast has arrived, I decided to try it. An old post on the Anfibio blog explains how to use Helaplast:
mark off area on hull
mix hardener 20:1
clean surfaces with solvent
apply a thin layer to both surfaces and wait 30 minutes
apply another thin layer and wait another 10 minutes
Position patch; it won’t adhere properly
Heat with hair dryer to reactivate glue and press down hard with roller. It’s better if the boat is deflated to do this on a hard surface.
Helaplast and hardener 20:1Thin layer on patch and hull, then waitAfter 2nd coat, wait, apply patch, heat and rollJob done, I hope
The heat reactivation trick was not one I’ve heard of before with glues (except to loosen stuff), but you could see it worked. Where the positioned patch was lamely stuck to the boat, a bit of heat saw it bond down well with some added rolling. You can tell when something looks well glued and this feels like it, though I’m sure glad I didn’t have to do that another six times.
Update Having paddled about with the straps a bit, they work OK, but the front mounts need to be lower to hook well over the knees without using the cross-link strap to pull each strap inward (not what they were intended for – entrapment hazard!). I did this a few days later. Knee straps also make a good set of handles for moving the boat about like a giant holdall.
Thigh strap attachment points are better off set low at the front.
In a Line Four-piece paddle 890g in kayak format with 15cm of length adjustment, fully variable feathering and includes T-handles to make a pair of canoe paddles, a long SUP paddle, a tarp pole or even an MYO packstaff.
Where used? Paddles on the Thames, Dorset coast, Wey and in northwest Scotland in my Sigma TXL.
What they say Revised, redesigned paddle combination for two-person packrafts, usable alone or in pairs. The very light fiberglass double paddle can be transformed into two paddles and even into a SUP paddle using two extenders. Continuously adjustable in angle and length (210cm to 225cm). Price: €175
Good value, light 4-parter Variable length and feathering Two canoe or a SUP paddle included Max 63cm length 29mm shaft will suit smaller hands Get a Vertex Tour for €125 if you just want a packraft paddle
Blades a bit loose; fixed with bits of tape No index mark to set feathering angle 29mm shaft narrower than the 32mm I’m used to Smoothish fibreglass surface is a bit slipperier than my other paddles
This paddle was supplied free in exchange for editorial work on the Anfibio website
Review A quality two-piece like my ageing Werners is usually my first choice for a day out, but for travelling with a packraft, especially on public transport, a 4-piece paddle makes sense. You won’t go any slower or get more tired; it just won’t feel as efficient and solid as a good two-parter – and feeling efficient can give you confidence, even if there’s nothing in it. Now sold, my Aqua Bound Manta Ray carbon shaft was at least ten years old and still hanging in there, and that was my second one after selling the first to an envious mate. It wasn’t as stiff as my Werner but it got me across the water all over the world, while doubling up as a packstaff.
Anfibio’s Vertex Multi Tour really does try to cover everything: kayak paddle, two canoe paddles and even a SUP board paddle – if you own all those it could be what you need. I don’t, so used the canoe handle extenders to make a Mk2 packstaff. Did I mention packstaffs yet? I did notice the spring-button blade connection was a little slack; a matter of a fraction of millimeter clearance and fixed by a bit of tape, easily removed. Maybe the paddle will swell into a tighter fit once repeatedly wetted? (The Manta Ray blades tightened up over the years). It took a while to notice the Vertex also has a slightly thinner 29mm shaft – less comfortable to grip for me. Smaller handed persons will prefer this. It’s also smoother which makes me think a little texture aids grip without raising blisters on long outings.
Length adjustment is something new on me and I like to think is not a gimmick. On our windy Dorset paddle I ran the paddle short (210cm) into the wind, and longer (220 or so) downwind; a bit like low and high gearing, using a higher cadence on the short length when working into the wind. I need to try this a few more times to see if it really makes a difference, or I just think it does. With the lever clamp, you can adjust in a couple of seconds.
Like most paddlers I am right handed and paddle with the left blade rotated forward: 45° R. But unlike my Werners (below left), there is no sticker or other index alignment marker to set your feathering angle on the Vertex. It seems this was a production oversight and current Vertex paddles have an alignment marker – make sure yours has.
Remains of Werner indexingOn Vertex a bit of tape does the job
I also realised it matters which blade you attach to which shaft for your shaft feathering alignment sticker to have consistency. After sticking on some yellow alignment arrows (as I’ve done to my older Werner’s where stickers peeled off), I added more tape on the left blade and the section of shaft with the lever clamp. Match yellow to yellow and you are good to go.
Left: Werner Corry (700cm3); Vertex a bit lessThinner shaft suits smaller hands
The Vertex’s blade looks like a fairly standard 650cm2 and should take the usual beating of being pushed off rocks and so on. Once you’re paddling the finer points of paddle response fall by the wayside; if you’re moving into the wind and waves and current at the end of a long or hard session you will feel tired. But once you add some stickers, for the price and weight and versatility the Vertex Multi Tour does it all, and is in stock in Europe right now, unlike many American-branded paddles.
29mm shaft for smaller handsMk2 packstaffTape eliminates slackBlade about 650cm2Variable lengthLength and angle gridPulled fine on choppy seas4 bits – a paddleinyourpack
Rather like sails where I Made My Own, lost interest, then returned with a proper WindPaddle, after five years I’ve come back to the idea of fitting a rudder to Seawave 2. Mostly, this was inspired by a much simpler pivoting footrest tube idea from fellow Seawaver Jules, replacing cumbersome and bulky foot pedals. A rudder ought to make the Seawave more useable in a slightly greater range of conditions, including sailing which I tried again recently.
Gumotex’s £219 kitJules’ MYOEbay rudder mech: £25
Jules’ footrest pivot
I could have bought the Gumotex rudder kit for just £219, but as always it’s more fun to piss about for hours and days on the pretext of saving money and conjuring up small improvements. IKs sit higher than hardshell kayaks, so I coughed up 25 quid for the longest rudder mechanism I could find on ebay: 510mm. It weighs 550g. The stern-mounted rudder plate started as a slab of was a chopping board, then became an aluminium plate additionally located with velcropads, as Jules and Gumotex use. I found secure clamping of the rudder mounting plate to be important to stop it turning on its axis. There is perhaps more torque on the mount than might be expected when a rudder blade tries to turn a 4.5-m boat. As you’ll see I ended up making a Mk 3.1 rudder mount in a mixture of soft and hard chopping board, as well as a Mk 3.2 in aluminium. There’s a 20g weight difference. Another bright idea idea Jules had was running the rudder lines out of the way under the deck velcroflap and inside thin tubing. That largely eliminates any exposed lines. I also liked his idea of controlling the rudder by pivoting a drainpipe footrest tube from the centre, eliminating the need for cumbersome foot pedals. Overall the whole mechanism: rudder, mount and clamp (220g), cords and tube (50g), adds up to less than a kilo and under £50 (some bits I had already). Eliminating foot pedals was the main saving in weight and bulk.
Mk3 Rudder for Seawave 2
Items needed:
Ebay rudder assembly from £20
Piece of HDPE chopping board, 3mm x 400mm x 60mm, aluminium bar, or similar
Stick-on velcro
Hand clamping knob and nut
6 metres of PVC (or PTFE) pipe with 5mm internal diameter
11 metres of 2mm Dyneema cord
4-inch ø x 30cm plastic drainpipefootrest (if not used already)
2 metres of 25mm strap
A few mini snaplinks, fish snaps or similar
You may also like:
Knob for rudder lift, cinch locks and clamcleats
Make 2 central slots, then attach the strap
Footrest I already use a drainpipe as a fixed footrest. At 25cm wide, another 5cm would still fit between the Seawave’s sidetubes and may give a bit more finesse and leverage to rudder steering. If this proves the case with mine, it’s an easy swap. Drill and/or hot-knife in two adjacent slots in the middle and feed the strap through. You must fix the footrest to the strap so there’s no slippage. A big knot inside will do. Thread the strap’s loose ends through the stock footrest attachments buckles on the boat’s floor. You can now easily re-position the footrest tube forward or back for tandem or other sized paddlers. This is handy whether you use a rudder or not. While fine in the straight line along the hull top, putting a bend in the soft PVC tubing down the insides of the hull caused too much drag on the lines. So to avoid wear on the grey Hypalon, I just chopped the PVC tube back and stuck on some tape. (As you can see I need to add another strip for the tandem position). It’s probable the harder PTFE tubing Jules used causes less stiction, but having the rudder line exposed near the footrest-pivot make adjusting clamcleats and cinch locks easier.
Footrest-pedal in solo position. Tape avoids wear on hullTakes 1 minute to reposition for tandem paddling
I stumbled on quite a fast and easy way to fine tune or readjust the footrest pedal tension: inline clam cleats (or cam cleats or rope locks) which I came across during my V-Sail experiments years ago. Feed the line through as shown below; centre both rudder and footrest, then cinch up and you should be good to go. Once you’ve established the right line length through the cleat for a certain fixed position, it can help to ‘memory mark‘ the cord (as I did in red). Though I bet once I get on the water and use the rudder a bit, they’ll go off alignment, so probably better to wait till then.
How to thread your clamcleat (rope lock)Inline clamcleat: fast adjustment & red memory markers
You need enough rudder line slack to slide the whole pedal-footrest forward about a foot when paddling two-up. Loose ends can be tidied away with cinch locks. Eleven metres of Dyneema cord is enough to do this job on a Seawave, including a single rudder lifting line. (To push and drop the rudder too you’ll need another 3m.)
Cinch lock tidies up loose endsAnd lifts rudder line a bit to reduce drag
Rudder mountplate The 10mm red chopping board I bought was actually quite bendy (LDPE, not HDPE?) compared to other bits I realised I had all along. The less play in the rudder system the more responsive it will be; an IK’s stern mounting is mushy enough. This time round I copied Gumotex’s idea of using small velcro pads to stop the rudder twisting on it’s pivot-clamp axis. Initially lacking stick-on velcro, I glued plain velcro, using the PU glue from the Gumotex repair kit. For one-part glue, it seemed to fix the velcro pretty well but if not, some sticky-back came in the post.
Gumo glue seems surprisingly goodOn the ally plate I used stick-on
I knew from last time I made a rudder the under-plate shape helps eliminate pivoting of the mount, but you can draw out the truncated triangle by simply tracing the converging top seams at the stern, then make the under-plate from whatever you got. I used a bit of plywood: jam it in snugly, mark the point under the stock drain hole, remove and drill. I glued and taped a nut to the back of the ply and added a bit of string to help pull the under-plate out.
Triangular under-plate – importantJam it in, mark a hole and drill
I would have rather made the rudder top mount plate from ally but with little more than a hacksaw and a kitchen stool, lacked the tools to do a neat job. Then, while waiting for parts to arrive, I realised it was possible to buy ‘aluminium bar off cuts’ on ebay (right). Using the word ‘bar’ was the key. This place, or others like it, sell various sizes, including 3mm x 400 x 60mm for 7 quid.
Jules’ neat rudder mountNeeds a visit to a beautician’s but works the same
I’m pretty sure most kayak rudders come with a 48-mm pivot pin of 9mm ø. Or was it originally 3/8″s, which is 9.5mm? The pin slips into a 10mm gudgeon swivel sleeve/tube. Some hardshells have this tube moulded in the stern; on an IK it must be built into the rudder mount plate. Above left, you can see Jules (as well as Gumotex) integrate a gudgeon swivel tube into the end of the mount plate; a tricky thing to do accurately with a just a hand drill, though Jules’ thick plate makes it a bit easier. On my Mark 3.1 white HDPE mount, I glued layers of the old red LDPE into a block of plastic, then drilled a 10mm hole which works OK.
Bracket from China; hole ø 11mm10mm washer needed to reduce play
When it comes to an ally rudder mount, online you’ll find stainless steel kayak rudder pivot ‘C’ brackets for a fiver. They weigh 57g and are usually screwed to the vertical stern of a hardshell, replicating the gudgeon tube. Even though they’re only a fiver, it seems impossible to buy these from anywhere else but the Far East, and it would be more than a fiver’s work to fabricate that shape from hard stainless steel. I bought a pair anyway; they arrived in a fortnight, but hole diameters (not stated in the advert) were 11mm, meaning 2mm of play with my rudder pin which feels too much. Oh China, your poor manufacturing tolerances let me down! So I glued on some 10mm washers to eliminate the slack. I’d have been better off making something after all. It had occurred to me I could have bent my 400-mm piece of 3mm ally into a full ‘C’, either curved round a pole, or bent on an edge at two right angles, as up above left in cardboard. Tweak the alignment and precisely drill two 10mm holes and the rudder swivel mount and plate are all one piece. In fact, that 3mm alloy plate I bought was pretty stiff, so I settled on a simple L bend (and without a vice, even that wasn’t perfect), then glued and bolted on the Chinese ‘C’ bracket.
Not a perfect ‘L’ when bent in a metal gate frame
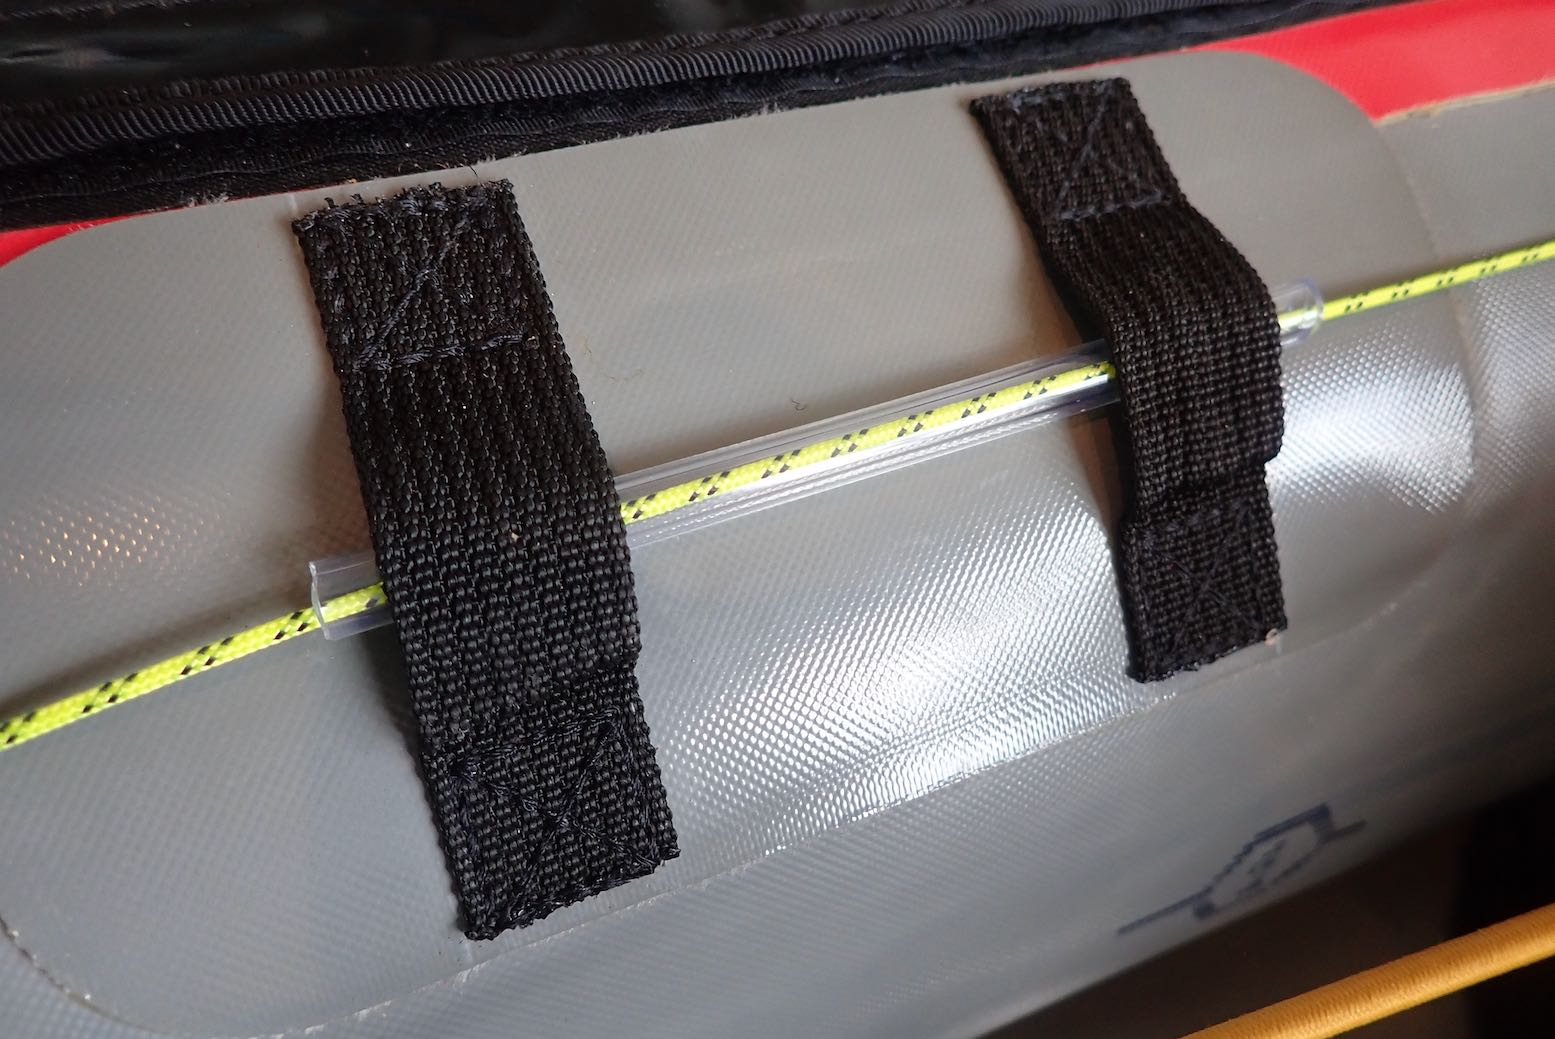
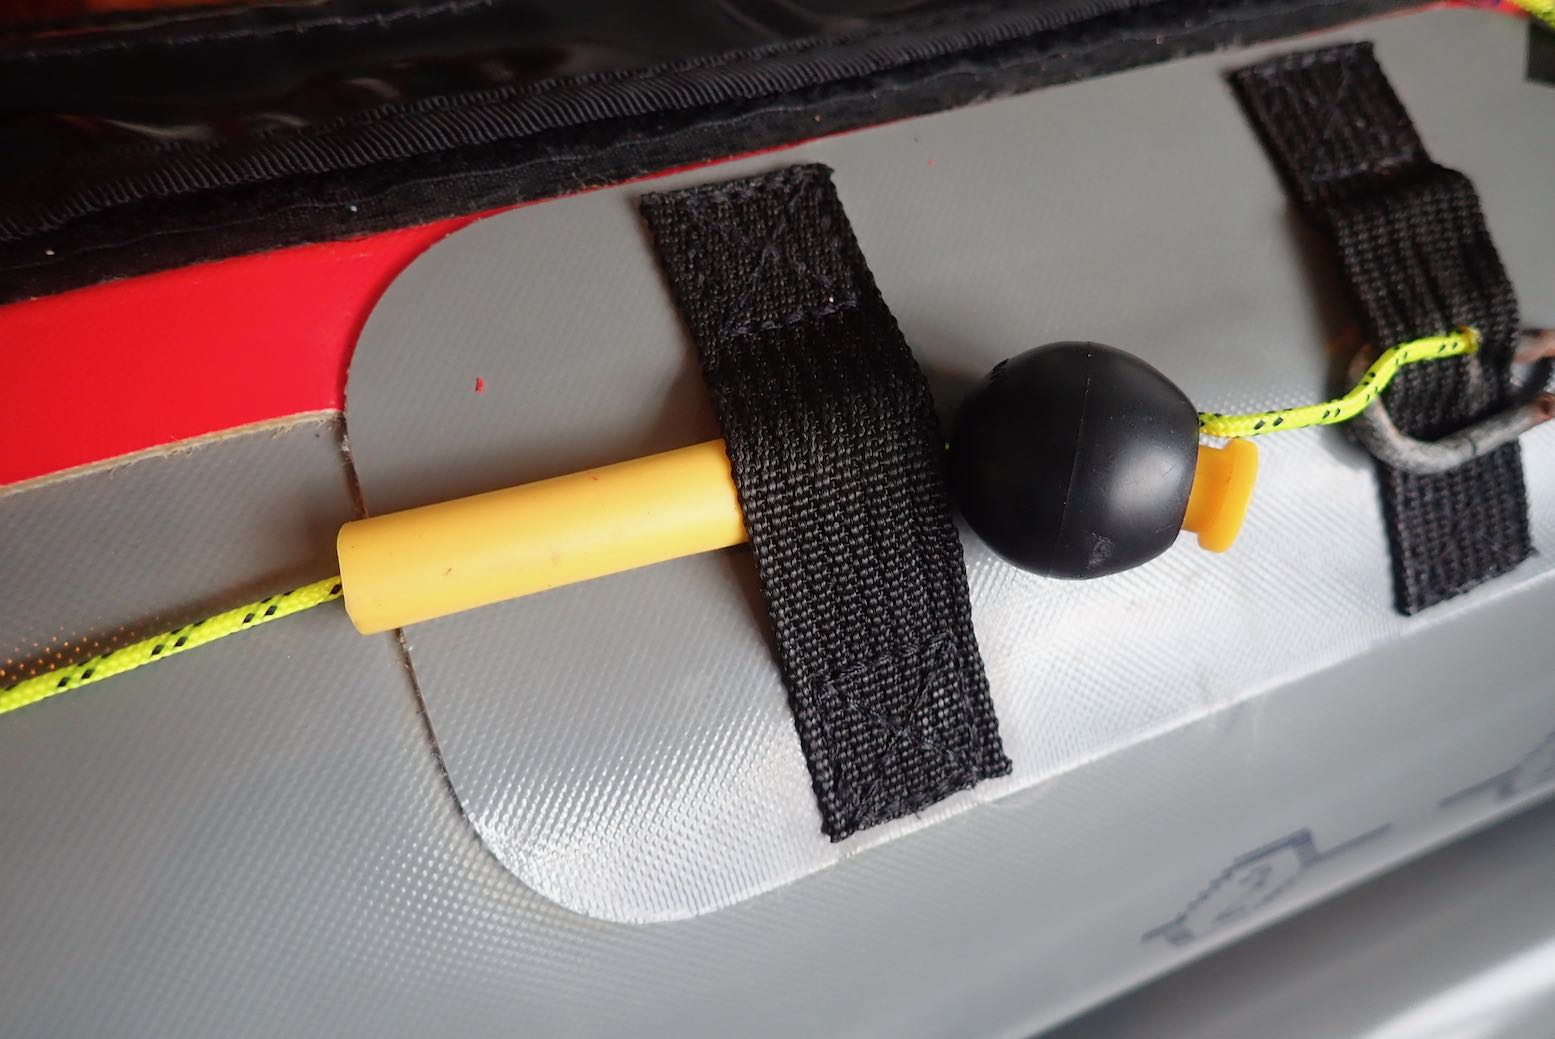
Rudder pulley Rudder blades have a hole in the back so the pulley can lift and lower the rudder near a shore. For the moment I’ve decided to keep things simple and only use a single lift line, not a doubled-up line (another 3m of cord needed; 14m total) to lower the rudder as well. I intend to use the paddle to reach back and flip the rudder into the water. If that is a poor idea, I can easily add a two-way rudder line. On packing up I realised this line needs to be in two sections if the rudder and plate are to be easily removable when rolling up the boat. The join can be at the back near the plate. As you can see I ran out of Dyneema and used an orange shoelace.
Separation needed to remove rudder but leave lineLoose lines hook up out of the way when rudder not used
I fitted the lift line along the sides, using the deck support rib tabs and running through spare bits of tubing to avoid wear and aid smooth running. I fitted a tension-adjustable knob at the hand end of the lift line on the left, though anything will do. Pull forward six inches to lift the rudder. Flip the rudder back down with the paddle blade.
Lift line runs through tubeTension adjustable lift knob
Does that flat, 4mm front edge of the rudder blade need chamfering to cut through the water, or am I other-thinking it? Who knows but watever you do, keep the skeg handy in case the rudder plays up.
Rudder blade could do with a sharp leading edgeKeep the skeg handy
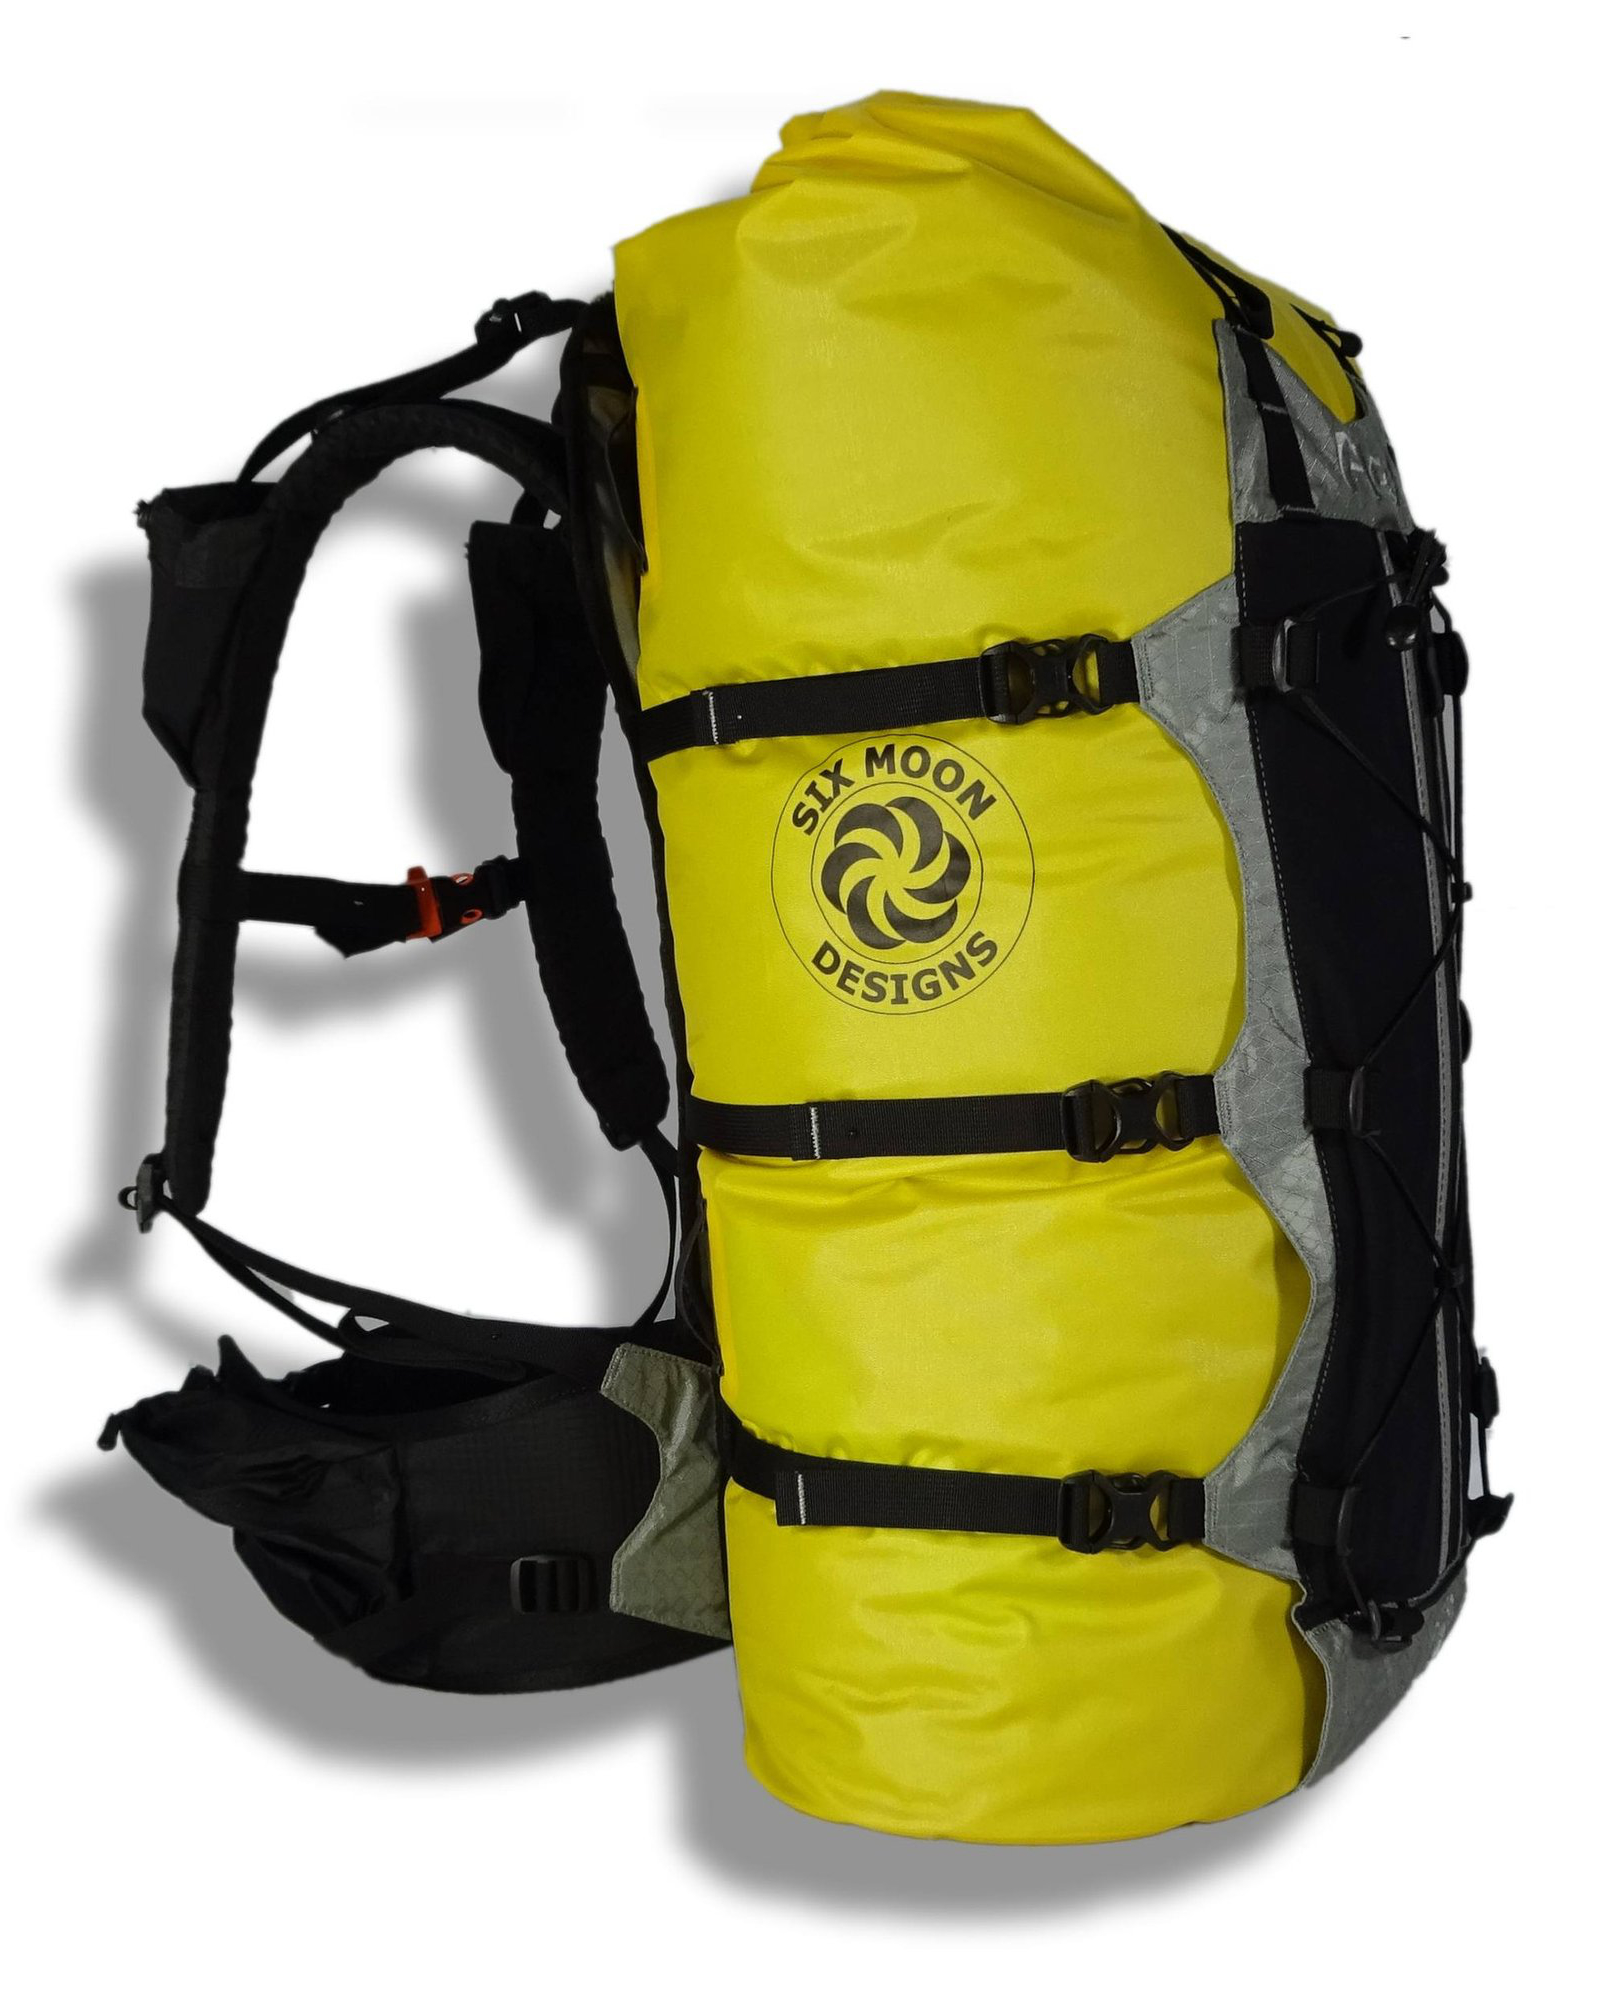
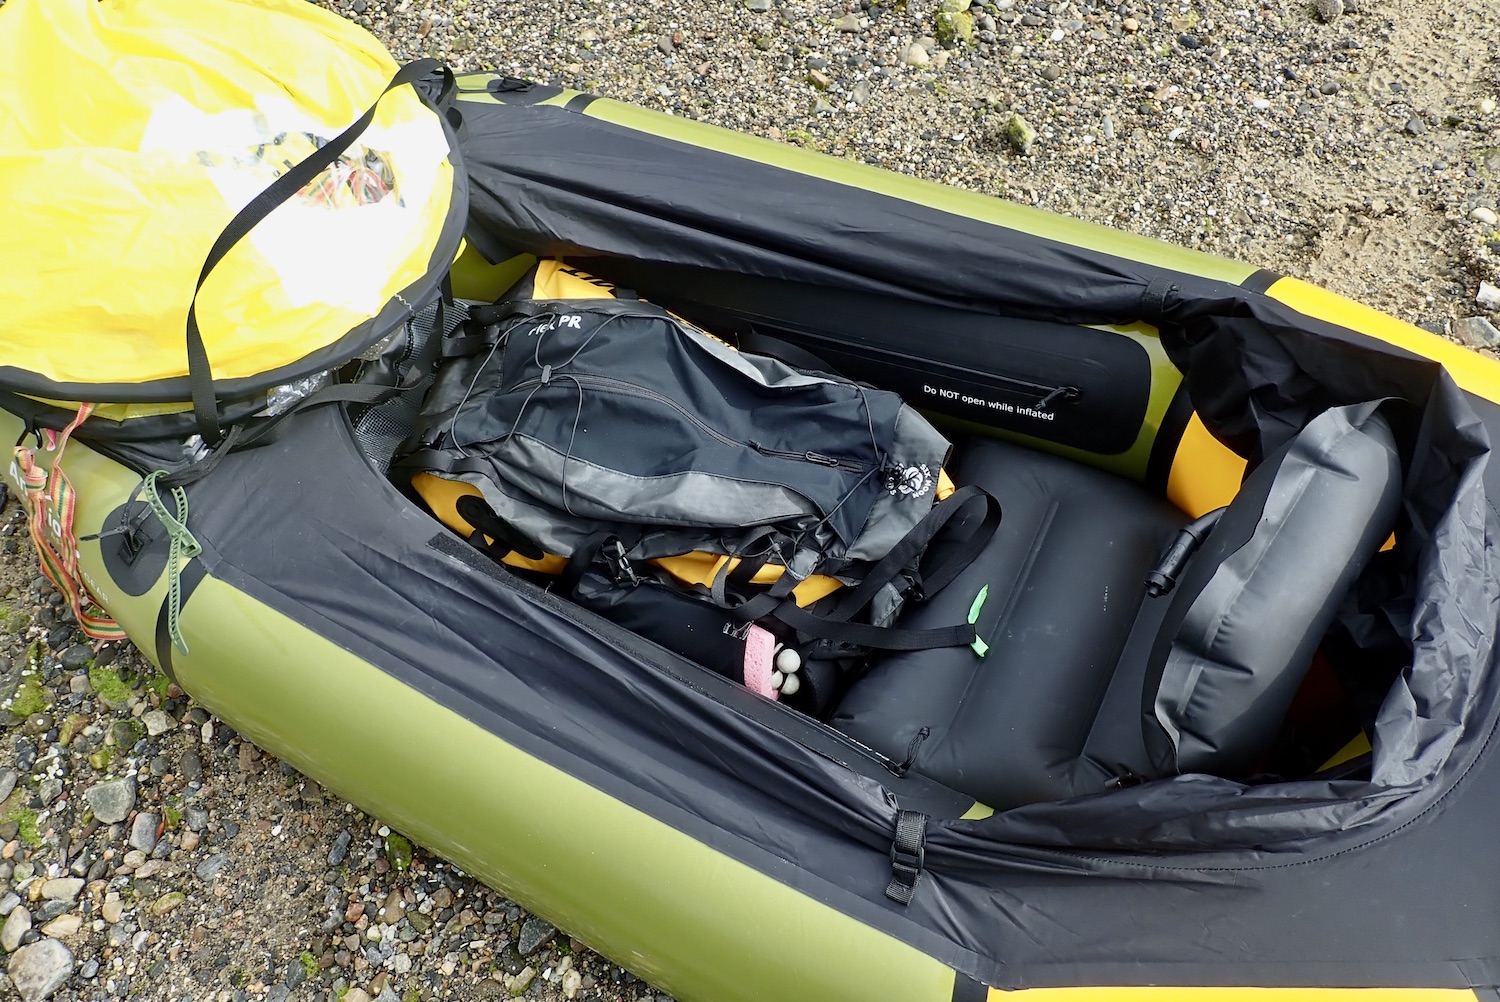
Weight (verified): 1525g in Large (shoulder straps 212g; hip belt 376g; back panel 937g). Used with Sea to Summit 60L dryback; 316g. Usable total 1840g.
Where used Four-day packrafting recce on Knoydart, covering about 50 miles, and another 3 days packrafting there (about 25 land miles).
The Flex PR was supplied free for testing and review by Six Moons and Anfibio
• Carries heavy loads like a proper rucksack • Includes no less than nine pockets • Four-strap adjustable hip belt • The price dropped by 25% around 2025
• Loads of black buckles with very long black straps on the black back panel (a 1-star review on the 6M website also mentioned this). • Fixed shoulder-strap mini-pockets too small and too high for me. • Wide outer panel means too much slack to cinch down the side straps fully • Refitting once back on land takes more time and buckling about than just shoving it all in a regular backpack.
What They Say The [new for 2021] Flex PR is a multi-use pack specifically designed for pack rafters. The Flex PR is a 50L dry bag with a removable suspension system designed for carry heavy loads in comfort. Whether you are portaging on a canoe trip, hunting in the backcountry, or doing trail maintenance, the Flex PR will keep your gear dry, your accessories handy, and your back comfortable.
I’m on the TRAYNE!!
Review I’ve long been a fan of pack harnesses as I call them; aka: portage packs or multi-use packs. Once combined with a bombproof dry bag like my aged Watershed UDB, your packrafting load-carrying needs on land and water are solved for under 2kg. Lash all you needs to the harness and hit the hills.
It took me years of experimenting with ex-military and hunting-focussed metal-framed versions before I discovered backpacking-oriented ‘soft’ harnesses like my NRS Paragon. No longer made, the Paragon was a basic 100-dollar harness and a bit on the small side for me. The fully adjustable Six Moon Flex PR is up there with the best hiking load-carriers.
NRS Bags: just a roll-top dry bag with shoulder straps; not a long hauler
What’s wrong with a regular rucksack? Well, they’re not waterproof like a PVC dry bag can be, and if you have a proper dry bag likje NRS above, you’ve less need for a backpack which is just more bulk. Plus, once you account of 4-5kg of rafting clobber, it won’t all fit in a normal hiking rucksack and on the water you may end up with a soaking backpack, or one which is hard to cram into hull storage. I tried this on my very first multi-day packrafting adventure from Morar to Rannoch Moor way back in 2010 with my Alpacka Llama, carrying a huge roll-top vinyl dry bag (left; like the NRS bags). I was stronger then and it sort of worked, but once you get into it, a dry bag lashed to a pack harness works best. Wet things are separated or more accessible.
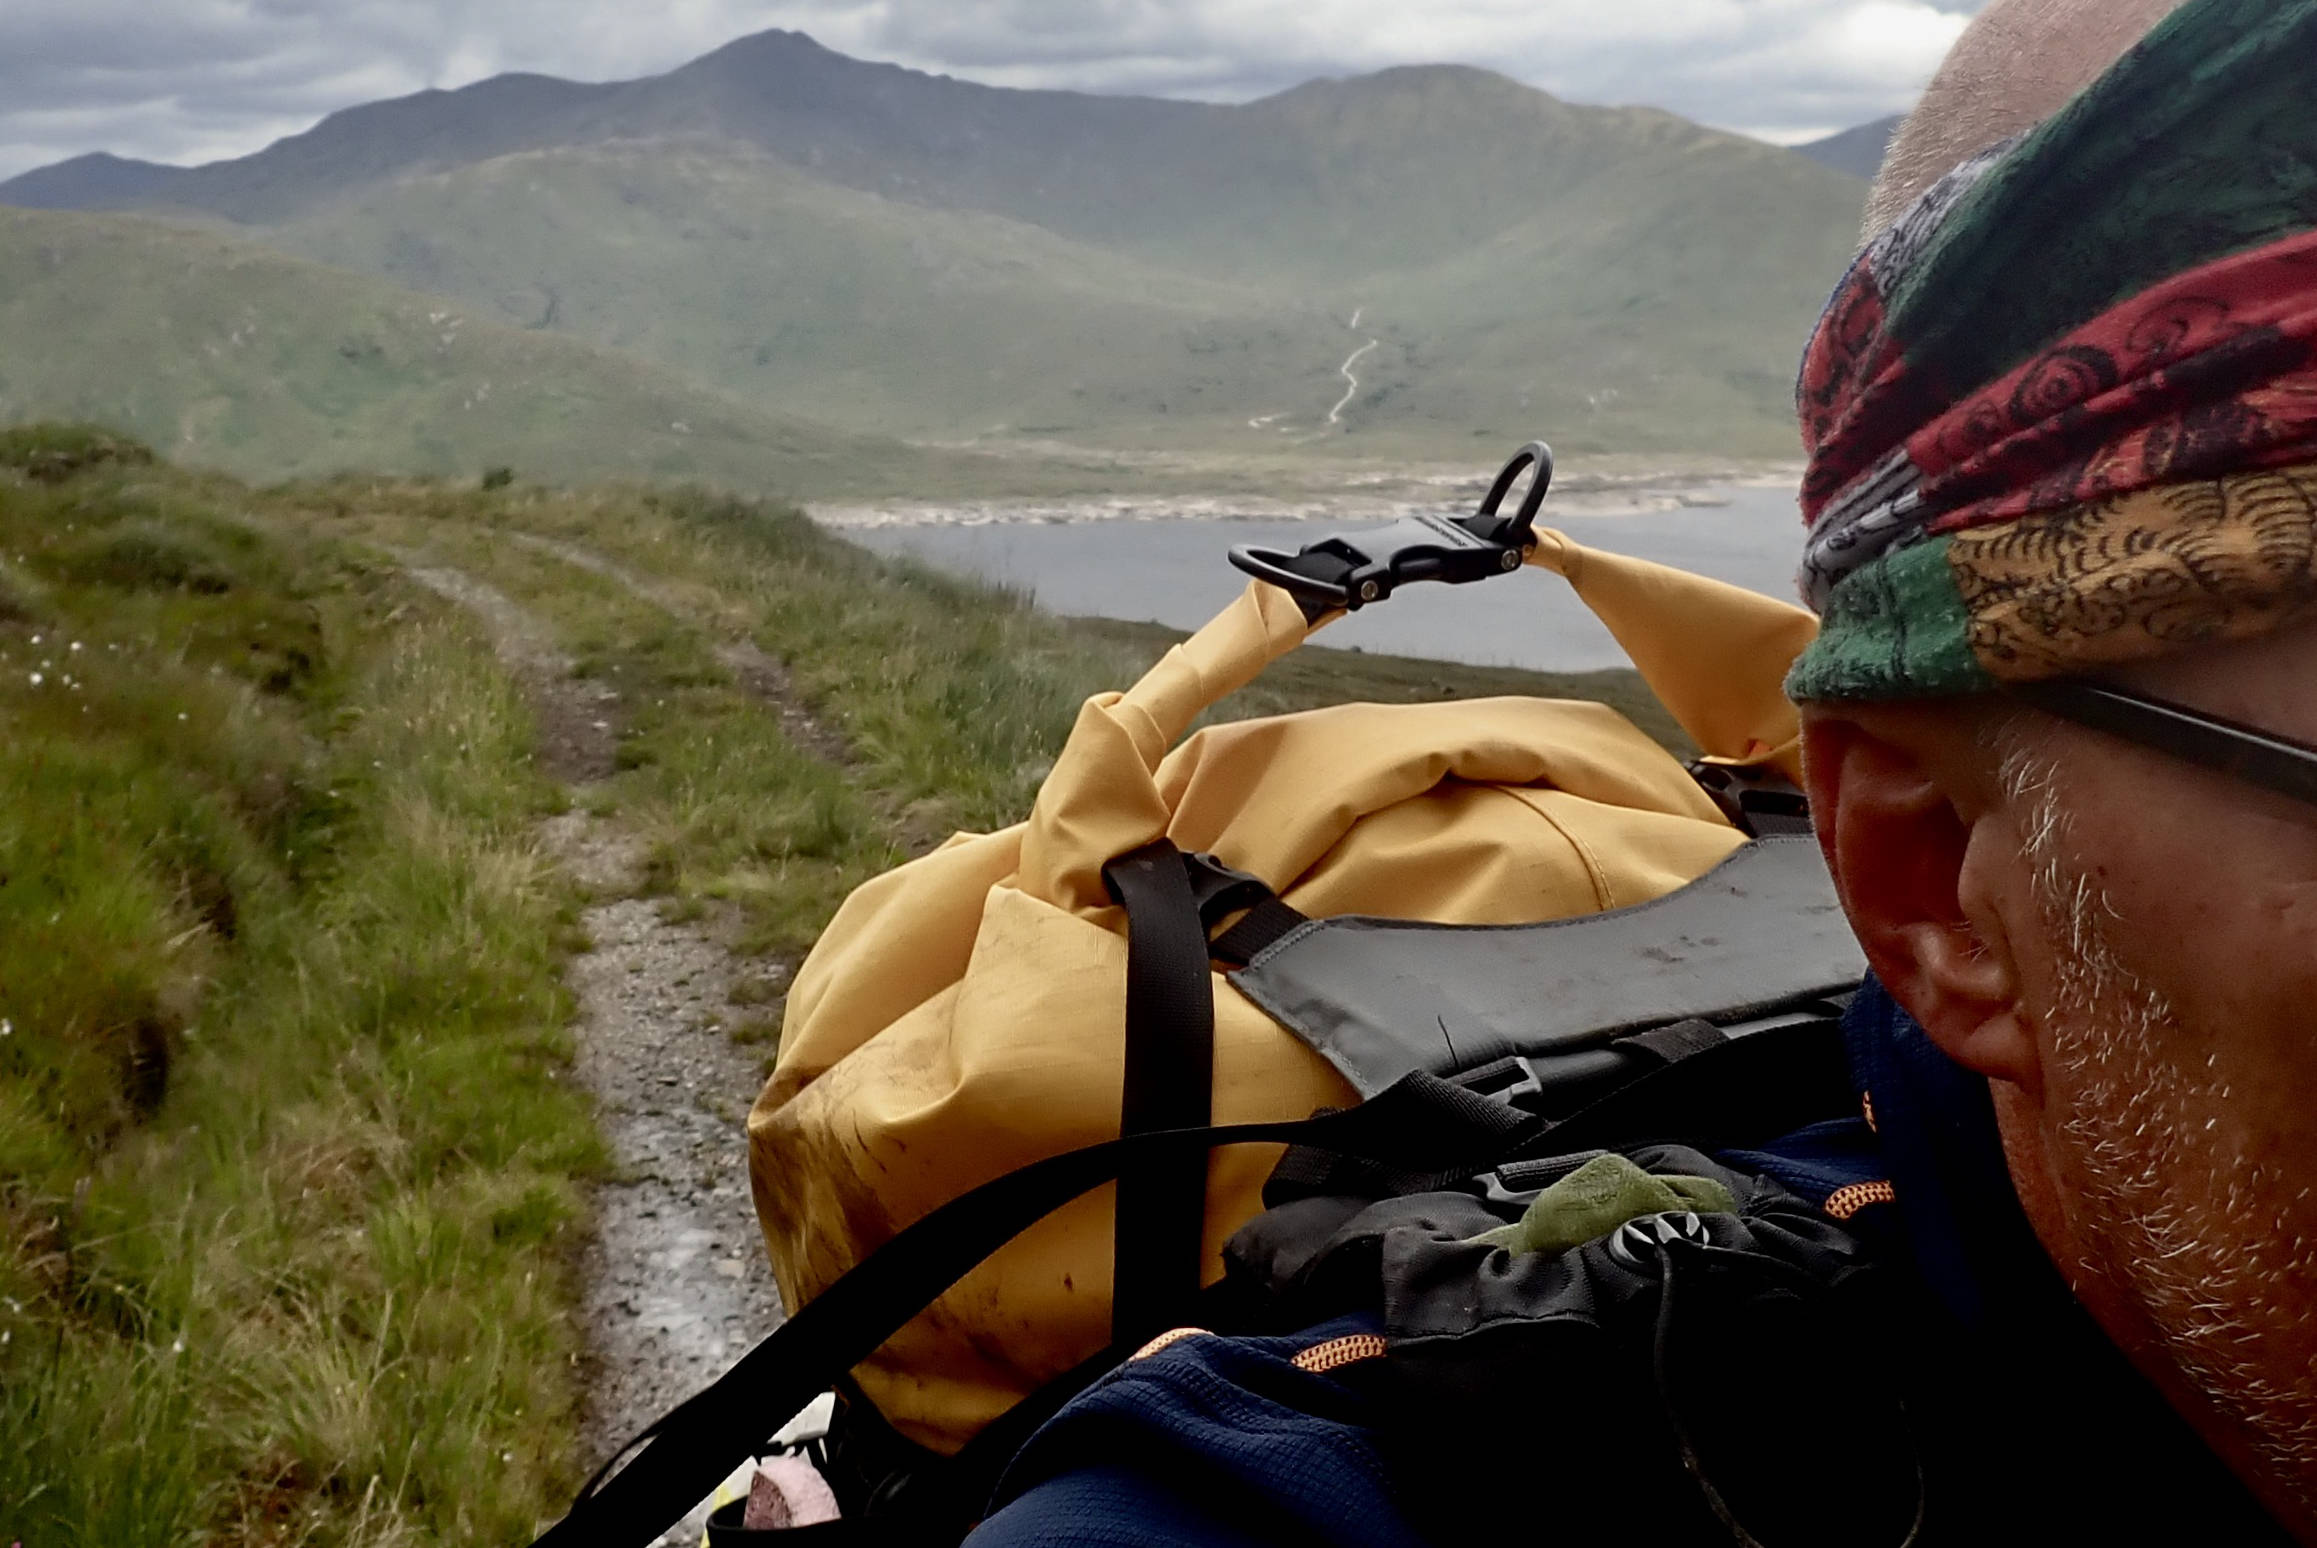
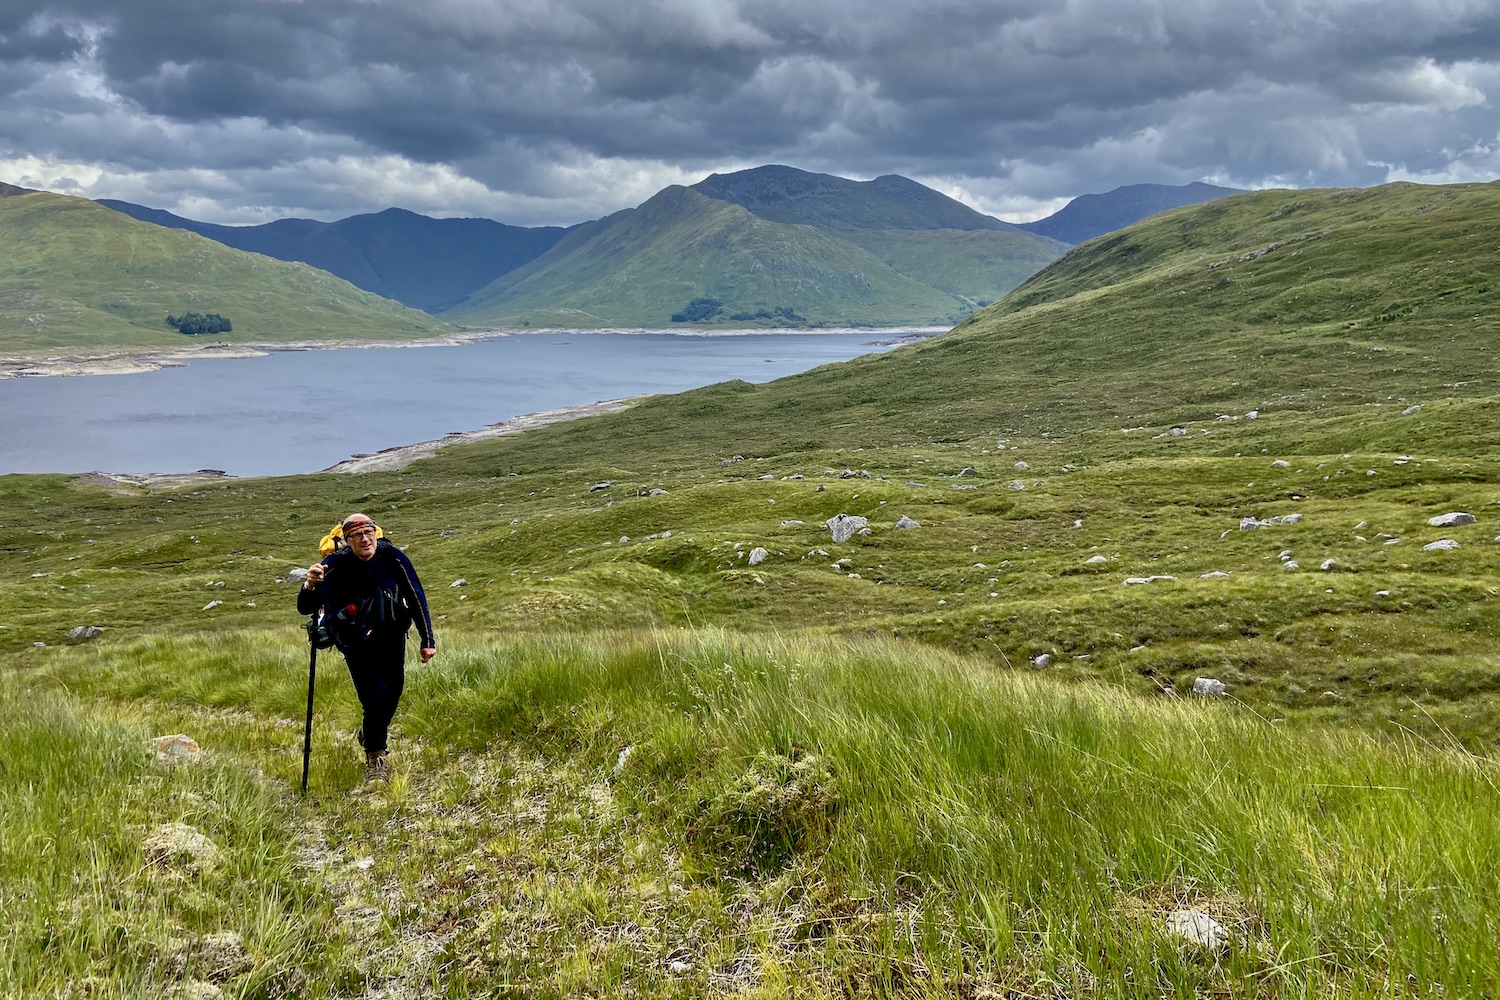
I jumped in the deep end with my Flex PR, carrying an initial load of 18kg on a four-day tour of the Knoydart peninsula with my Rebel 2K. My plan was rather over ambitious for a new area, so it turned out to be more walking than paddling. I came back to do it better a couple of weeks later so the Flex PR got a week’s heavy hauling, covering about 70 miles.
Back Packing, Back Packing, Oh isn’t it wild?Pull-out ribbed and curved alloy stiffening rod
Out of the box the Flex PR comes in three sections: the load-carrying back panel incorporating the fabric strap-down flap which wraps up and around your dry bag and then cinches down at the sides. The lumbar panel is supported by a removable, pre-bent ribbed alloy stiffening rod which you want to take care not to bend. The wide hip belt slips in through a sleeve at the base of the back panel and velcros in place. And the shoulder harness slips down into another velcro sleeve with various adjustment marks. At 6′ 1″ (1.85m) and after some experimenting, I settled on the longest setting, as below left.
The back pad and big sleeve and outer pocket (right)Inside of the harness which wraps round a drybag
I do wonder how securely velcro will hold the weight after a while, but it’s not like you’re undoing it several times a day, and most of the weight rests on the hip belt with velcro on both surfaces. The PR has loads and loads of straps: six on the hip belt; twelve plus a bungie on the back panel, and three on the shoulder harness. With your own dry bag it will take a while to configure the PR to your liking, but after that you can leave it be. You may also be tempted to snip off the excess on the straps, but initially it’s better to knot them up or try and tuck them out of the way until you know for sure which ones are really too long. Better too long than too short. (The foot-long shoulder-top tensioning straps are primary candidates for the snip.) After a day or two, in an effort to reduce strap overload I detached the removable stabiliser ‘Z’ straps. Six side straps and two over the top ought to do the job. These Z-straps had some interesting removable buckles (above right) I’ve not seen before.
Dangling straps keep the flies awayUDB was too slim and sausagey for the Flex PR
6MD 50L dry bag with purge valve
You’ll need a rugged and dependable dry bag to handle prolonged rain, persistent waves and rough handling, although with my Rebel 2K I’ve lately joined the ranks of packrafters stowing baggage inside the hull, not out on the bow, so on the water a submersible-grade dry bag becomes less critical. The Flex PR is designed to be used with 6MD’s 50-litre, 227g (8oz) roll-topdry bag (another $45; left) which includes four side loops which match up with the harness’s side straps. (I didn’t ask for, or use this bag.) What it’s made from or coated with is not stated on the link above, but one review listed ‘210D TPU-coated Nylon’, which sounds the same as a lightweight packraft hull. It includes a purge valve which will release any air after the bag is rolled up for packing and as you cinch down. Nice touch.
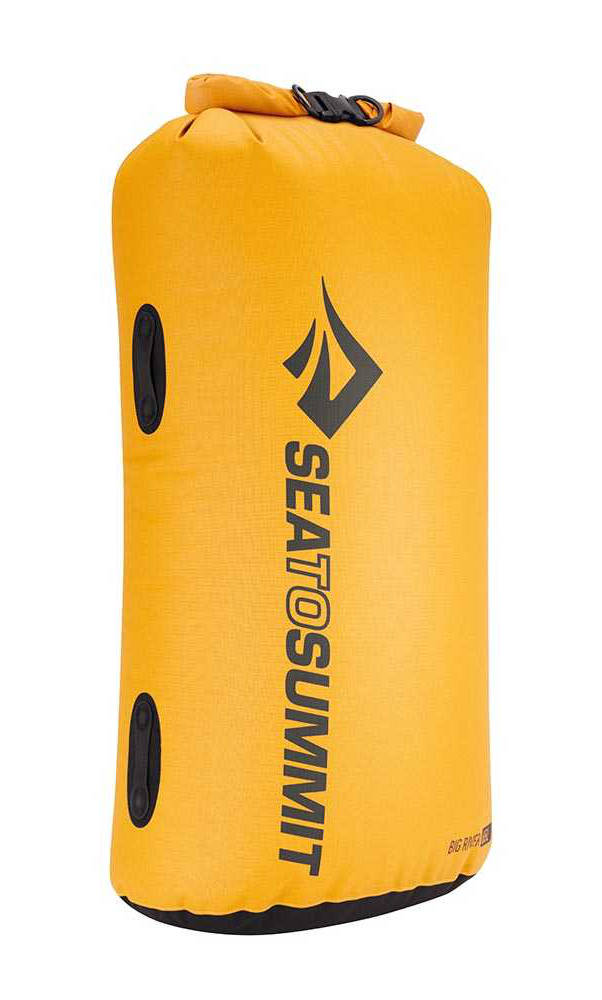
Sea to Summit Big River 65L
Although the Flex PR has generous external storage and additional lashing options, I do feel that 50-litres is aminimum for a few days out in the back country. Better a larger bag and add another couple of rolls of the closure. Something like the ovalised Australian Sea to SummitBig River65-litre TPU roll-top (left). This is TPU laminated on 420D nylon with a white lining and a textured, ripstop exterior. It weighs 315g (verified) and has hypalon side loops which more or less line up with the Flex’s side straps. It now costs £80. Compare it to S2S’s 75-litre Big River Dry Backpack for £150 of less, with a thin hip belt.
It took the first Knoydart recce trip to realise my large, sausage-like UDB duffle wasn’t suited to the Flex. And much as I prefer a top loading holdall-style bag, every morning I had to re-lash my black UDB into the harness, made harder by everything being black. When bothered by swarms of midges or rain, you don’t want to have to think about re-lashing the pack correctly each time, and there were times my long, thin load felt lopsided because the tall bag lacked girth.
Don’t mention the B-word
I’ve since tried to tidy up the set-up by tucking in unneeded loose ends and tying coloured ribbons to the important cinch straps, just like better tents have colour-coded markers for poles, but I couldn’t tighten the UDB down properly so it was often lopsided. So I bought myself the S2S Big River 65 dry bag, top-loading, like a rucksack. As mentioned, the Rebel 2K’s massive 140-litre in-hull storage capacity now makes a bombproof, over-the-bow dry bag like my trusty UDB redundant.
triple dry bag test
Back home, I dummy rigged three dry dry bags (above), but I can see it might still be a faff lashing on each time, just with added colour. However, one benefit of this multi-bag idea would be they pop straight into the 2K’s capacious TubeBags with no emptying and repacking. That would be handy on a trip where you’re switching between walking and rafting more than once a day.
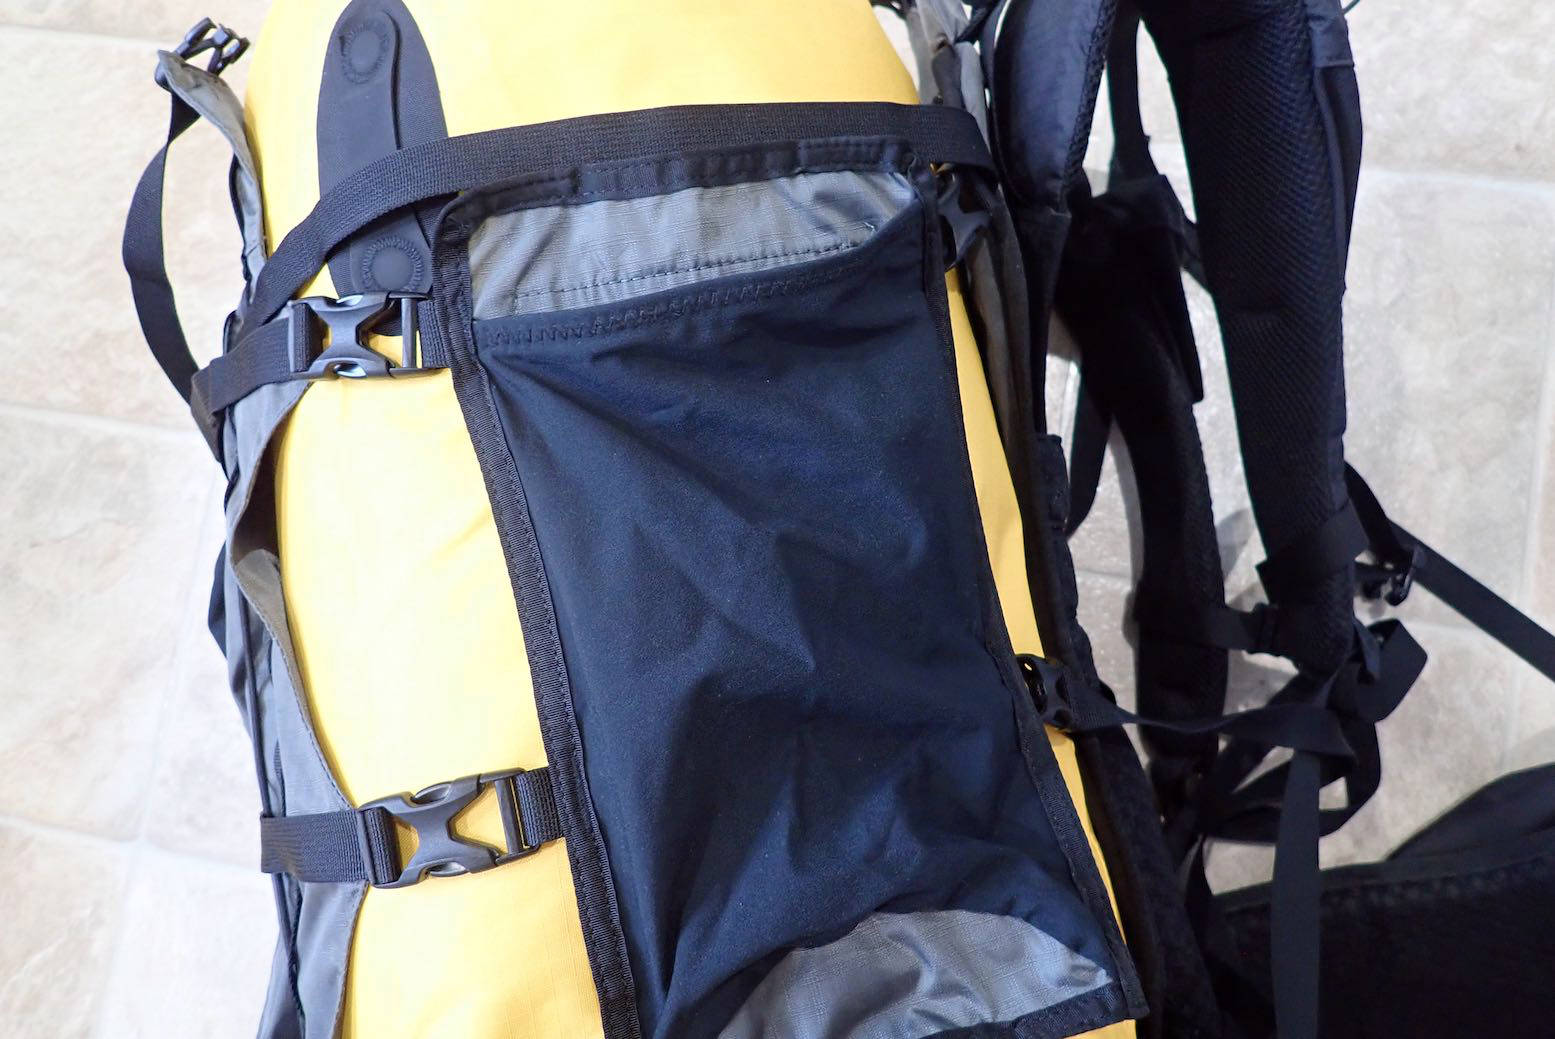
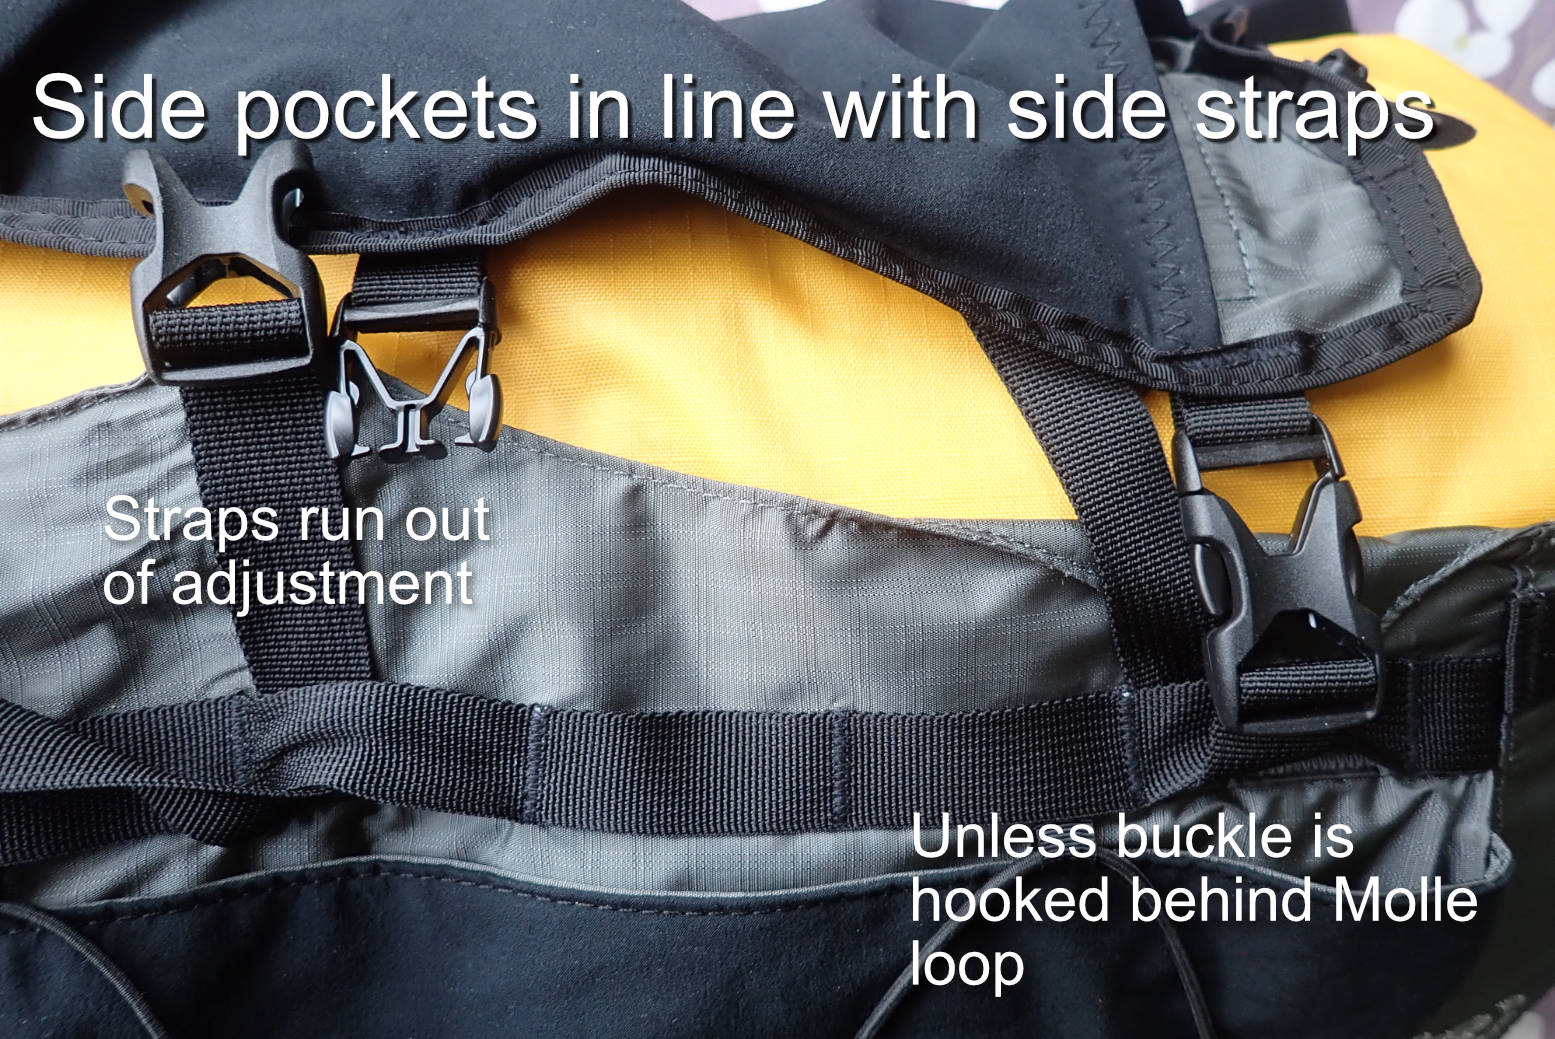
Pockets One of the best things about the PR are the numerous pockets which do their best to replicate a regular backpack, adding to convenience on the trail, something I missed on the Paragon. There’s a small hidden zipped pocket inside the back panel, two big fist-sized zip-ups on the hip belt and two detachable side pockets. With a stretchy outer fabric, these will easily each take a 1.5 litre water bottle or a rolled up cag. They can clip in line with the side cinch straps (below left), or can be Molle’d (daisy chained) from behind. Attaching them in line would make tensioning easier, but unless your load has a massive girth, the width of the pockets combined with the wide back panel makes it difficult to fully tension a normal sized pack properly before you run out of adjustment. Maybe my Sea to Summit bag was an odd shape, but it’s 30% bigger than the 6MD dry bag. Setting the rear panel buckles two inches further towards the centre would do the trick. One way round this might be to slip you paddles down the sides to add girth.
Side pockets clipped in line; too much slack for cinching
Next, you have stretchy cinch-up pockets sewn to the shoulder straps but, as others have noted, they’re too small to secure anything bigger than a Garmin InReach or maybe a midge net, and are set oddly high. On me they were level with the tops of my shoulders. Although they have to dodge the chest strap which can be Molle’d up or down in five positions. It would be better if the pockets were Molle-backed too. As it is, it’s easy to buy accessory shoulder-strap pockets for your bigger items. Not done get. The wide outer cover has a big open sleeve which swallows a four-part paddle, and in front is a long stretchy, gusseted zip pocket for more of whatever you’ve got. On top of that is a criss-cross elastic cord which I used to attach a WindPaddle.
Removable 2-litre side pocketsAdjustable lumbar support
My walk was quite hard: 18 miles on day one, followed by a tough crossing from sea level up to 1500 feet and back down to sea level. While I got a few initial aches from old injuries initially carrying over 18kg, at no time did my shoulders get sore which proves the stiff harness panel was taking the weight at the hip belt (and from there down to the hard-pressed feet). And the hip belt is particularly good: the pockets aren’t waterproof but are a useful size (unlike the Paragon), and the twin straps each side mean you can cinch it in snugly, whatever your hip shape. I’d have preferred a bigger hip belt buckle and in fact found all the Flex’s clip buckles oddly hard to link; they didn’t readily clip together, possibly due to relatively soft, bendy plastic.
Packraft underneath is vulnerable to scuffs but lower CoG.
On the way back to the Inverie ferry I decided to take the packraft out of the UDB and strap it underneath (above), using the fitted straps for this purpose. Surprise, surprise, the lowered load carried much better. Hung outside and quite wide but out of sight. But the rolled-up boat is vulnerable to getting snagged on barbed wire fences, farm gate latches, or when being hauled about in transit.
Knoydart Trip Two I returned to Knoydart with a chum and the 65-litre S2S Big River (below). Left attached in the harness’ side straps, this made the Flex work as intended like a regular rucksack; no need to re-lash or adjust too much every morning or when swapping from walking to paddling.
Sea to Summit 65-L Big River dry bag. That’s more like it
Roll top closure may seep through eventually; a cover could be easily tucked under the straps
Using the 65-litre bag, I did wonder if 50 might well be adequate, but this was with minimal and compact camping kit. Any warm- or spare clothing or a dry suit would soon need more volume in the dry bag. We had two half-days of lashing rain; my mate fitted a shower cap over his regular rucksack and I found the water had seeped only a little way through the rolled folds of the Big River., as it does with most roll tops. The bigger your bag the more tight rolls you can make on the closure, but actually in pouring rain it would be fairly easy to tuck a cover over the closed dry bag rolls to stop any rain getting there.
Boat dry bag as foot matFlex PR under the knees with handy pocket access
With everything within the pack loaded into six bags, it took just a minute to transfer them into the Rebel 2K’s hull and zip it up. I then used the chunky Gumotex dry bag which held the packraft as a footpad on the packrafts’s floor (to stop gritty boot heels prematurely chewing up the boat’s floor) and found I could easily shove the empty harness under my knees and zip up the deck. This made repacking the Flex at the shore relatively quick easy, though it always takes 20-30 minutes to get going.
The Flex PR now carries its load as well as can be expected and the S2S Big River added capacity for cold weather gear or a dry suit. I must say I didn’t really miss the lack of a purge valve; you burp the bag in the usual way then roll it down. Any spare air will be squashed out by the compression of the straps. The combination now offers reliable waterproofing on foot, while the pack would work OK on the bow, though in-hull storage (if it fits) and harness under the knees is more secure all round.
PS: On both trips I used my roomy 20-litre Anfibio DeckPack (below) as a handy day pack for which it worked very well. The stuff inside is behind a waterproof zip, is easily accessible on the move and up to a point, keeps the lashing rain from wetting out your cag.