Performing my cutting-a-kayak-in-half trick gave me a long overdue chance to see exactly how they’re put together, as well as other stuff, like why it was failing and how well certain glues stuck.
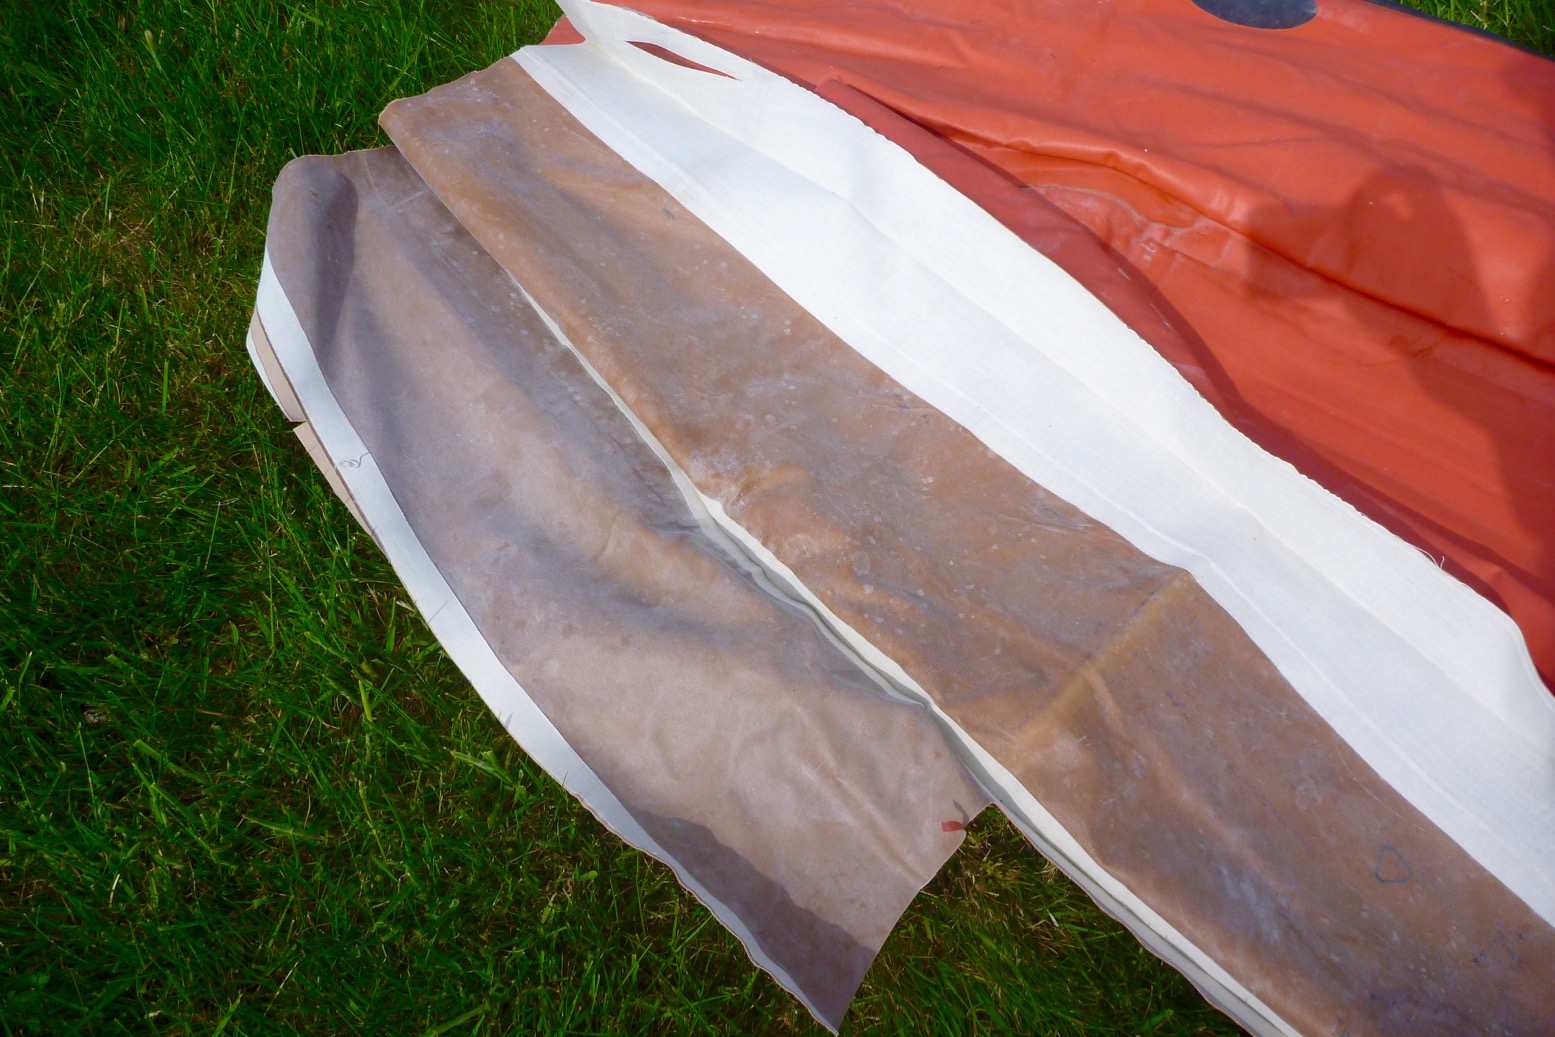
The neoprene inside I used to assume it was the same coloured coating inside the boat as out; it’s just simpler. But of course, the diagram left is clear: what’s outside and what’s inside an IK hull is not the same stuff. There’s no need to waste UV-resistant hypalon coating (or colouring or that matter) inside the boat’s benighted chambers. All it needs to be is the same durable and airtight coating, and neoprene – the brown rubber-like coating left – does that fine. I bet I’m not the only one to mistake ‘neoprene‘ as simply that closed-cell sponge used in wetsuits or laptop sleeves. In its solid form it’s a durable synthetic rubber, but I presume lacks the full-on UV resistance of hypalon which DuPont invented shortly after.
I-beam floor As mentioned here, an inflated vessel will seek equilibrium by attaining a rotund form, be it tube or sphere. A flat inflated plane such as an airbed or an IK floor needs to be a series of parallel tubes unless it’s just a non-inflated sheet, like packraft- and white-water raft floors. So this is an IK I-beam floor (above): probably the same tough core of nylon or polyester scrim, but without the impermeable hypalon and neoprene coatings of the exterior panels. Note the pre-folds or creases to help the Semperit pack flat. I imagine modern IKs do the same, but it all explains the necessary attention to detail which makes ‘tubeless’ IKs like this so labour intensive, compared to ‘bladder’ designs like Aire.
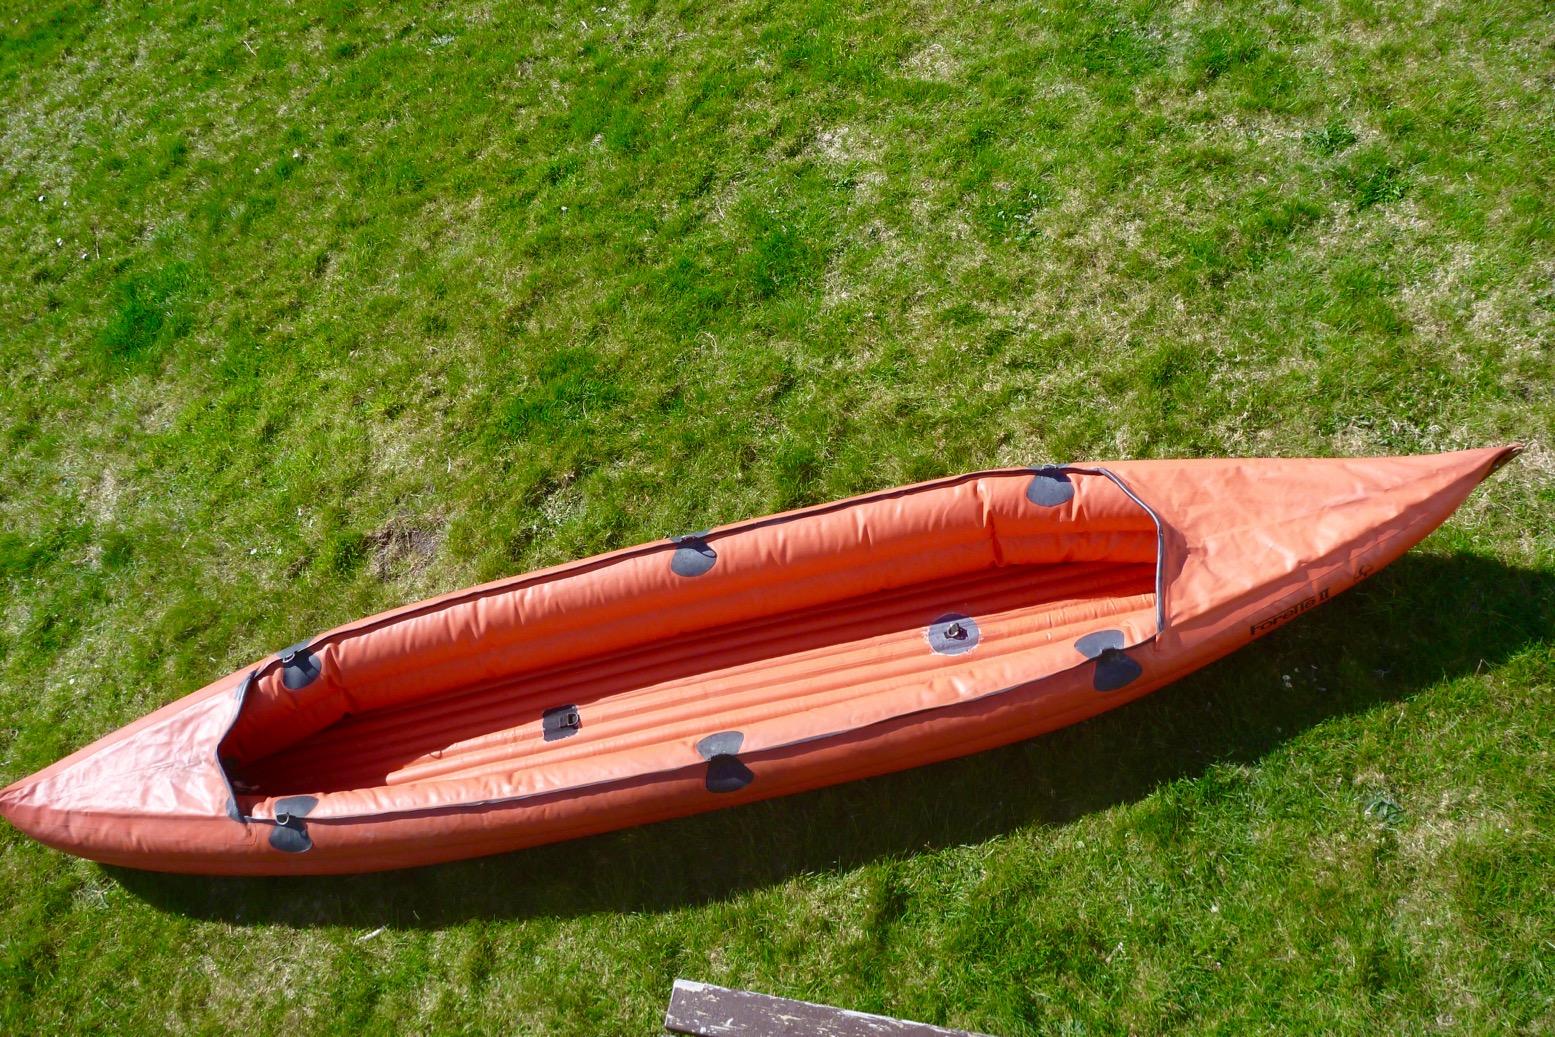
Twin side-tube IKs like this Forelle, the Incept and Grabner Holidays, have two smaller tubes one on top of the other, rather than one fat side tube like my Seawave (below, red) or Amigo. It gives the same buoyancy, more freeboard (above water height), a slimmer profile (more speed) and more volume inside (easier loading). The red Seawave below is 82cm wide; the Semperit is 72. It makes the boat look a whole lot better too and overall, because it’s also as stable, I’d say it’s the best design for an IK, but it also needs I-beam sections to constrain the two side tubes.
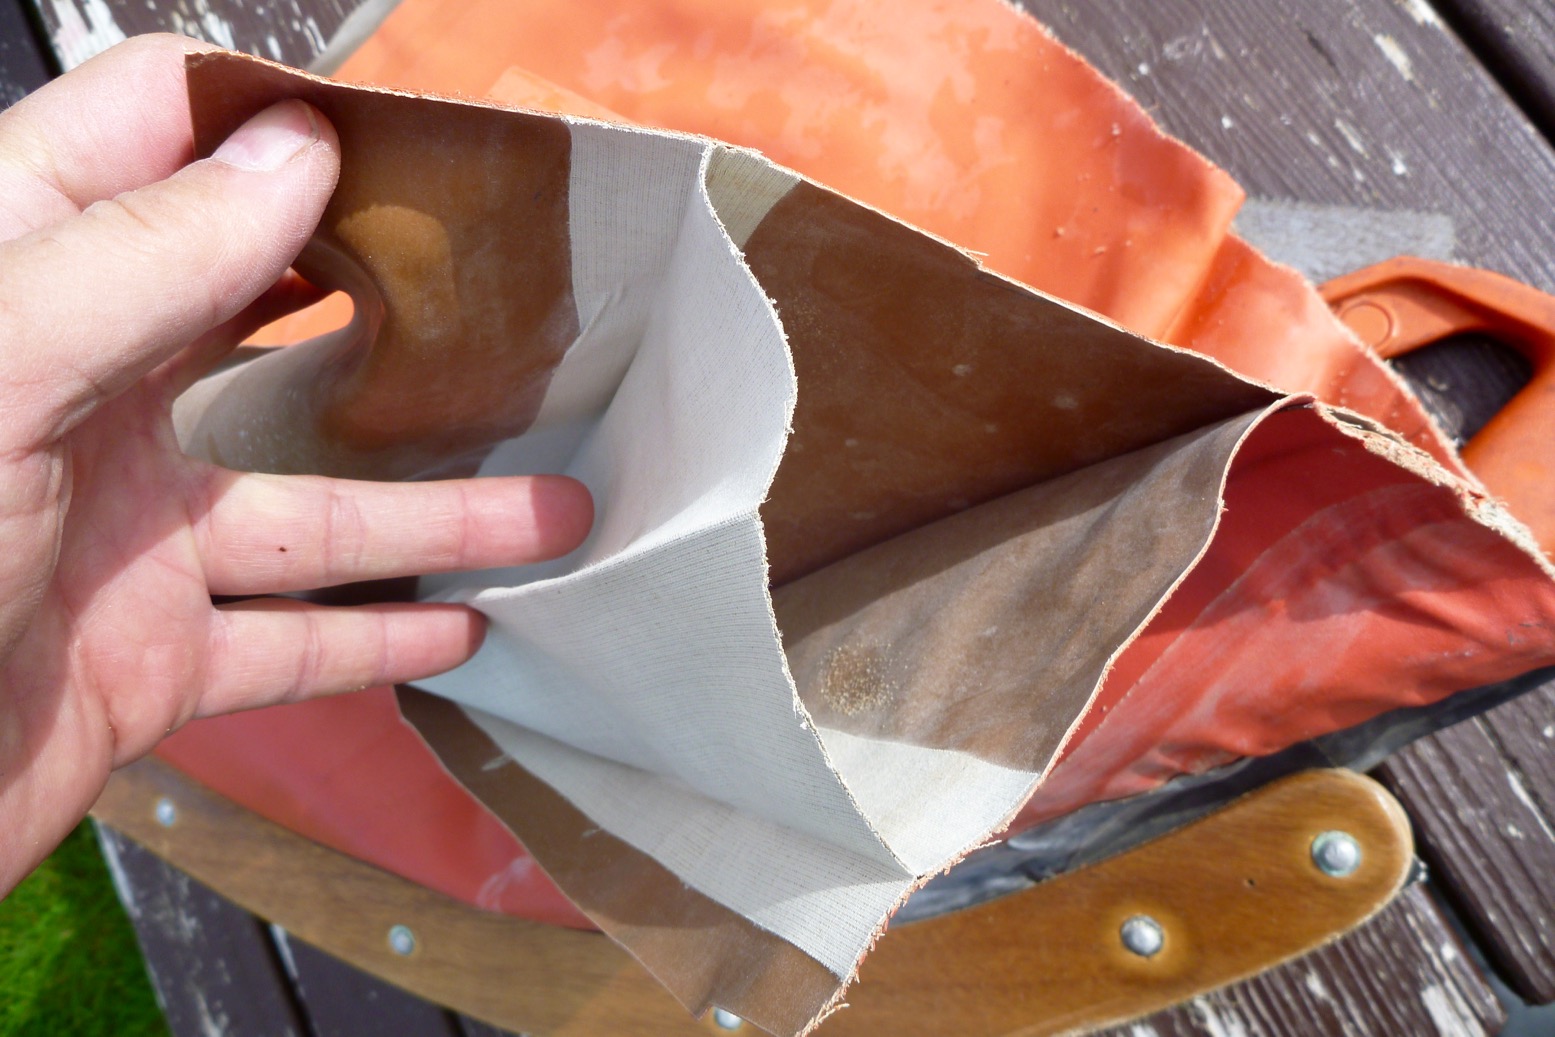
I can’t say I could suck air through the scrim easily, but I’m pretty sure it’s porous – I didn’t find any transfer holes to allow air to flow between adjacent tubes – they might be a weak point. When an IK like this is over-inflated (or left in the sun) and has no PRVs (none on the Semperit), it’s this scrim which either tears apart, most probably at the T-join where it’s glued to the neoprene. I tried tearing sections of scrim by hand; impossible where it was uncut, but as soon as you nick it with a knife it would tear quite easily, like thin cotton cloth. This fabric was at least 40-years-old and had one or two patches of mildew, but was still tough and the whole assembly of the boat has held together amazingly well over the years.
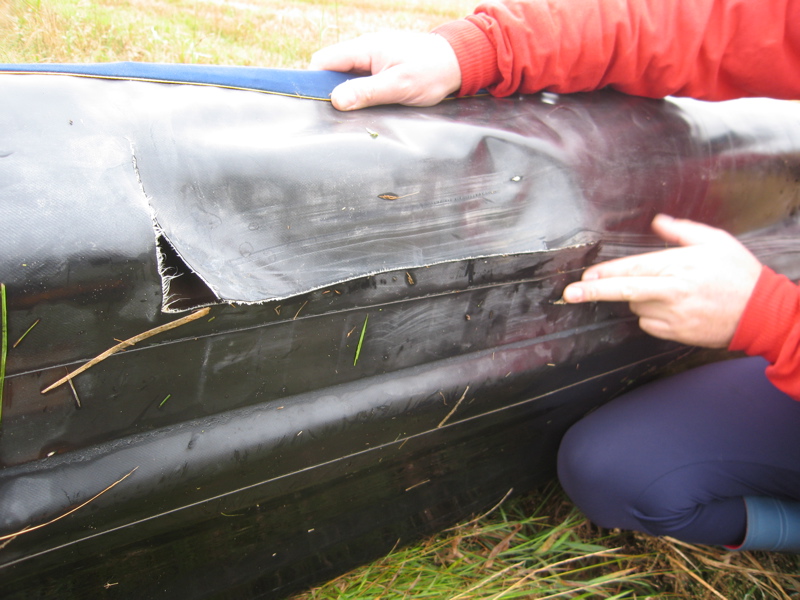
Where mine failed Inspecting the fatal second leak alongside the earlier repair, it seemed air was pushing through where two sections of I-beam scrim butted against each other. Perhaps the old coatings stretched differentially here or were just worn out. It did look like the hypalon was simply flaking away. I could have fixed that leak but, as mentioned, another would probably pop up whack-a-mole style somewhere else, quite possible while at sea in either my- or a new owner’s hands.
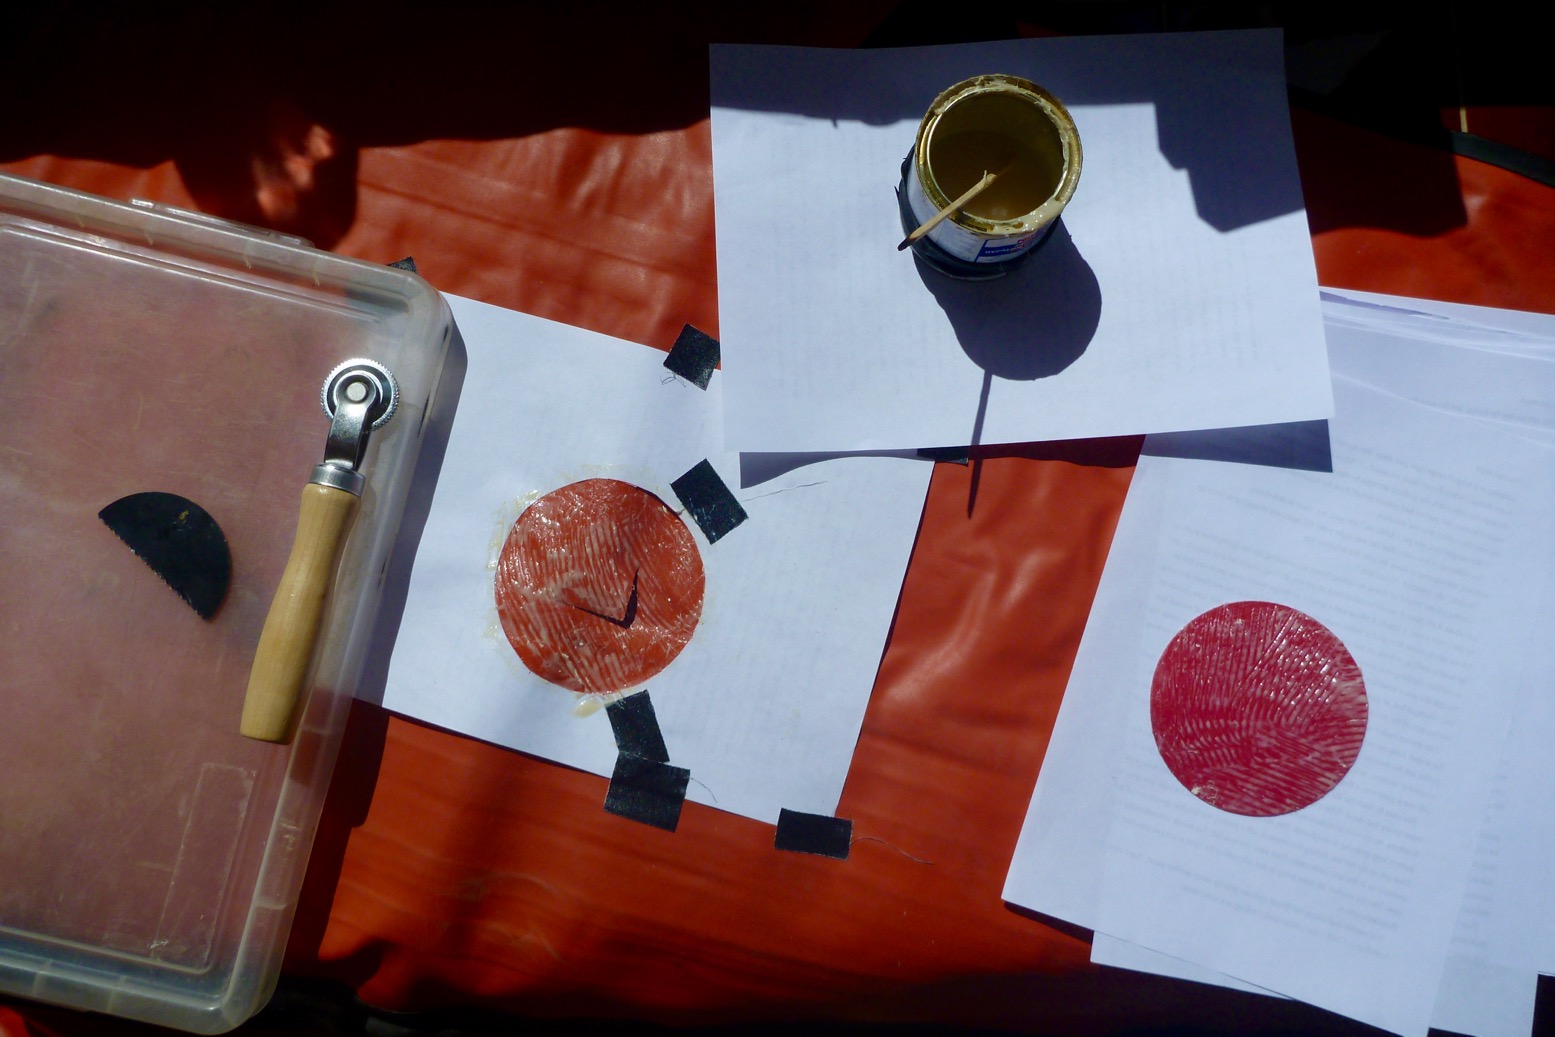
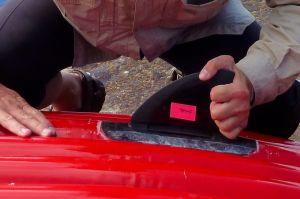
Glue test I repaired the big original ‘L’ tear with a 5″ round patch of hypalon and two-part glue (above and left). I then patched a down-to-the-scrim scratch under the hull with one-part Bostik 1782 (left). I used the same glue to repair the initial new leak inside (bubbling water, above).
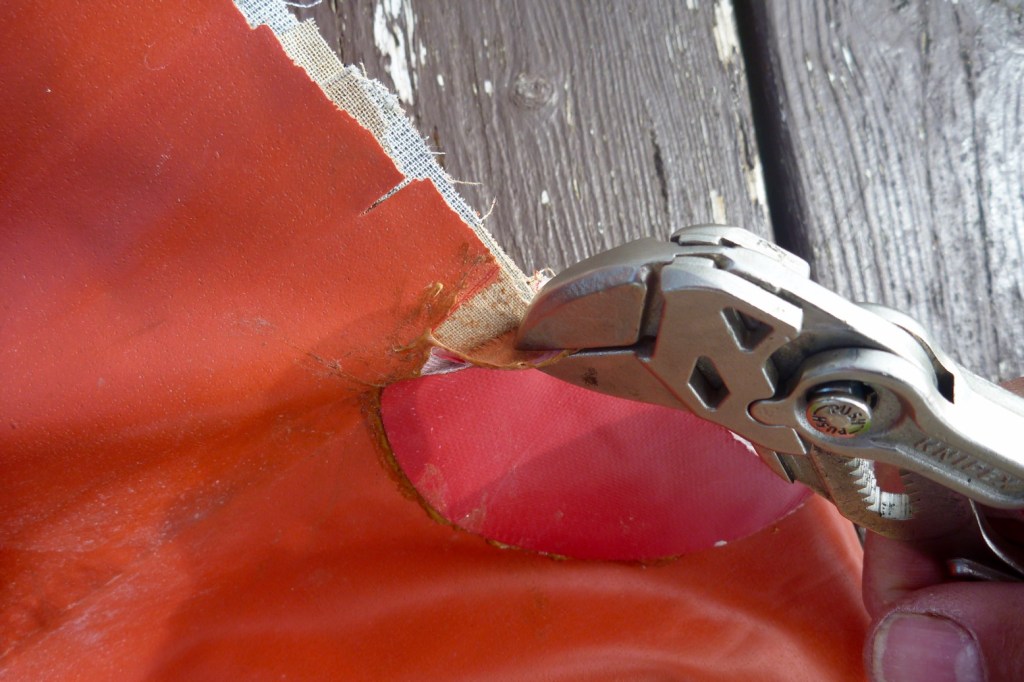
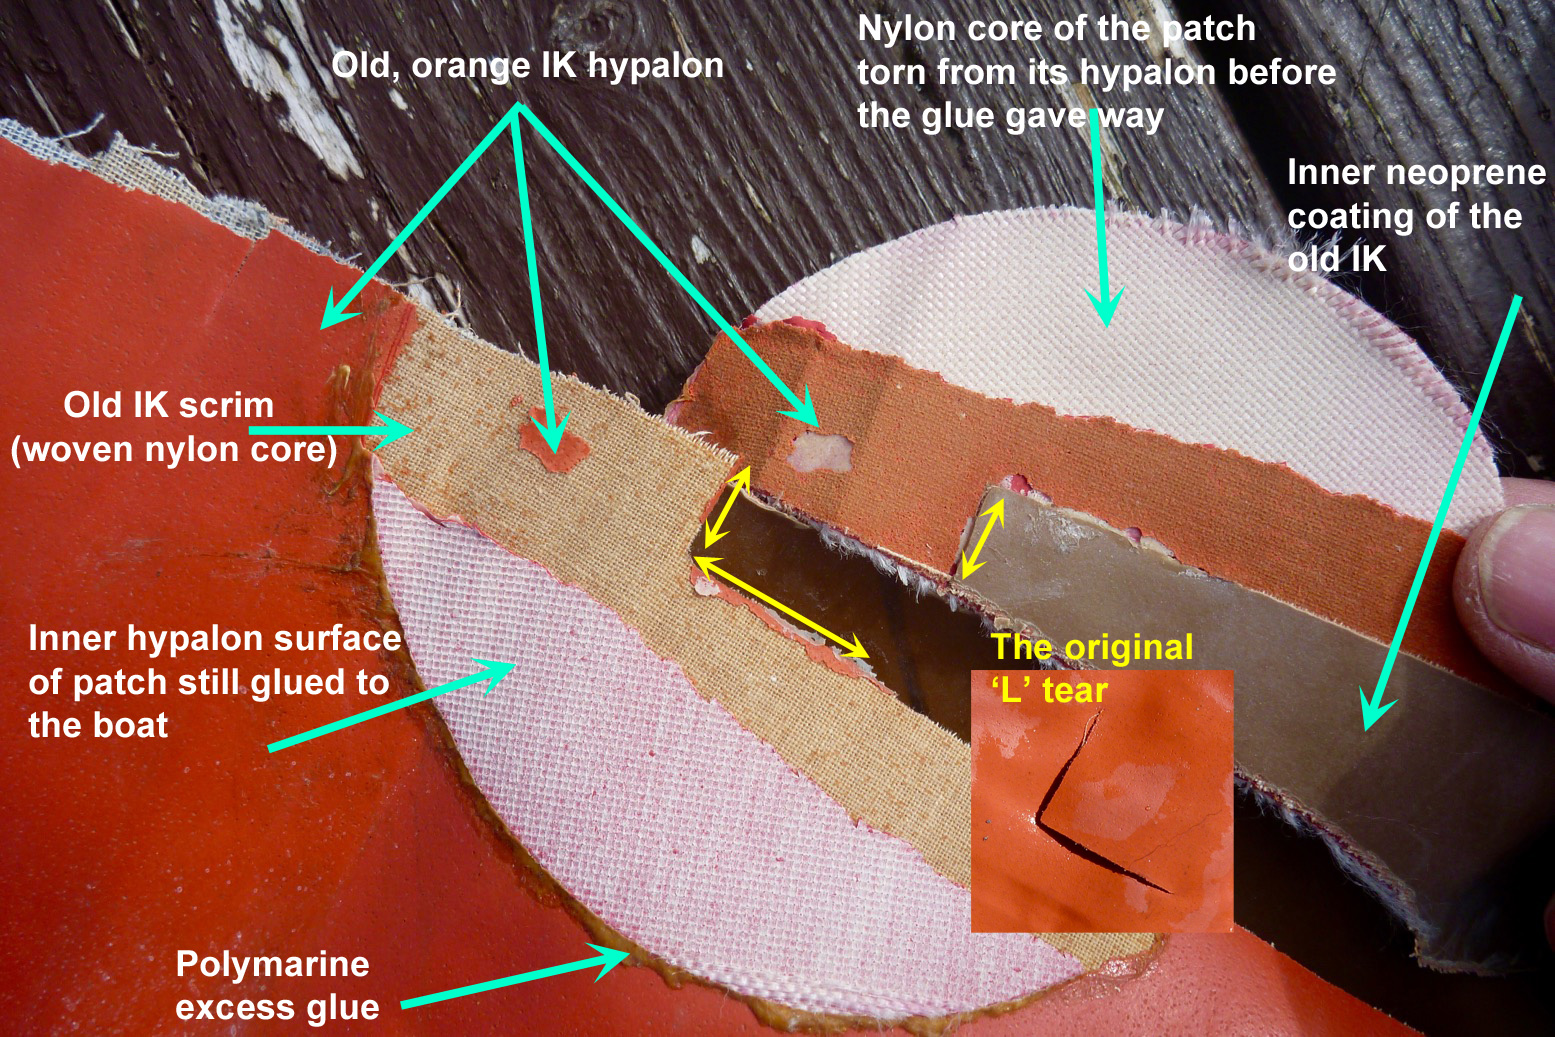
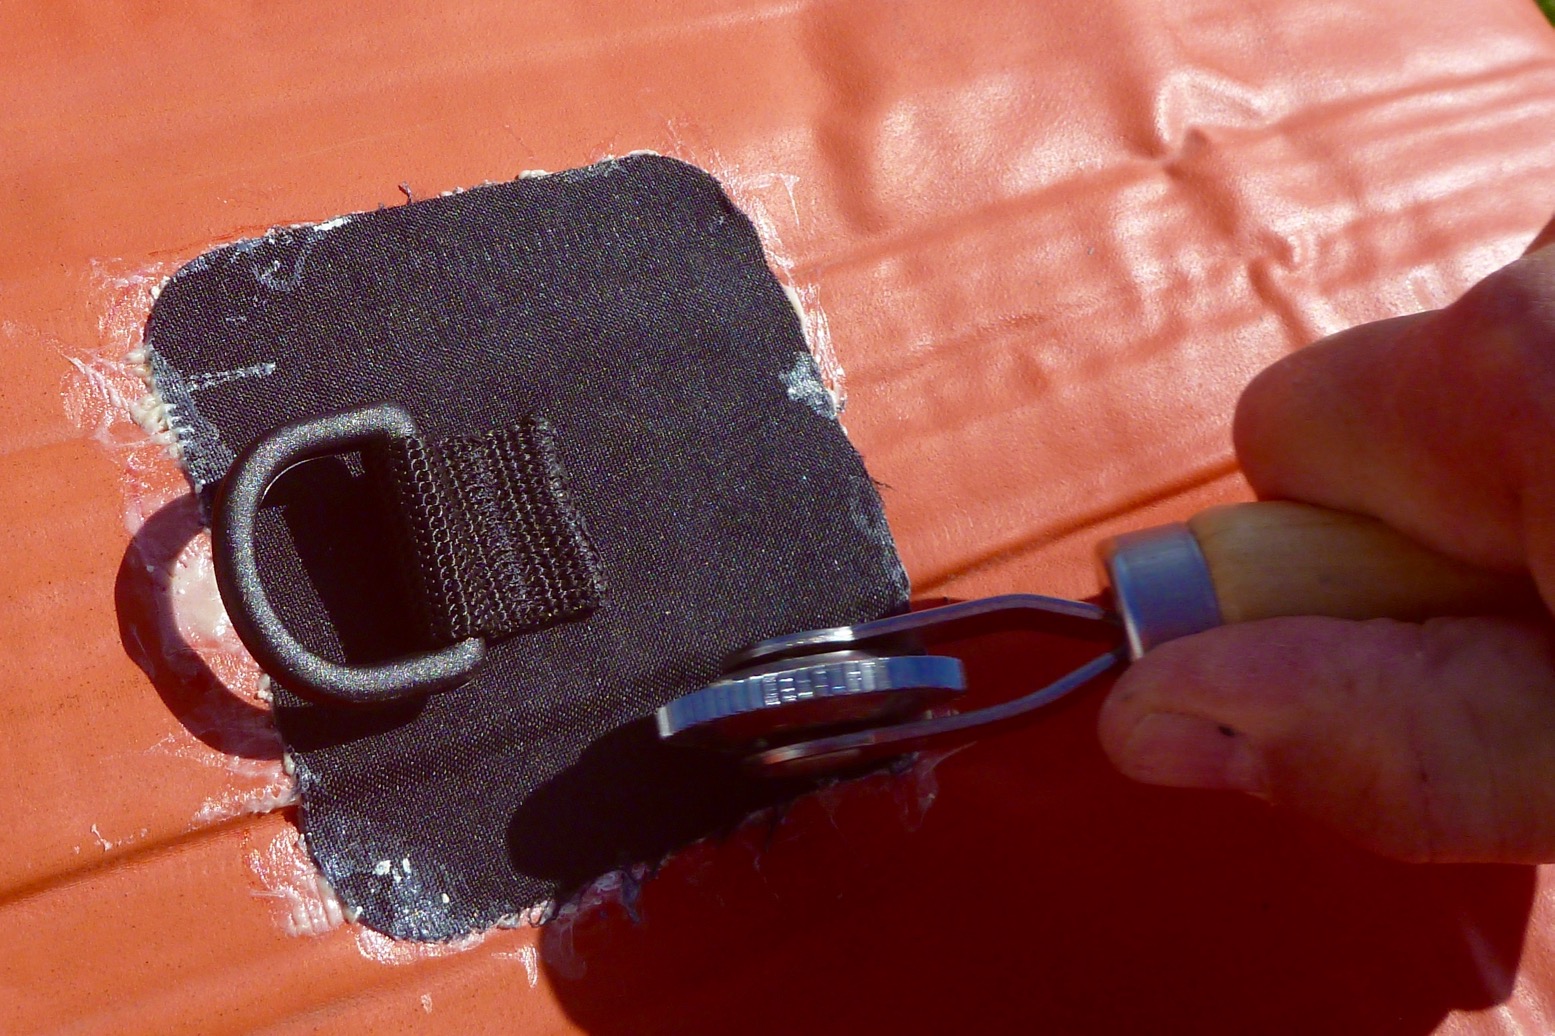
Although I’m pretty sure they’d have lasted, I could easily pull off the Bostik patches by hand. Pulling off the big round Polymarine’d patch was another matter. It just so happened I’d sawn through the round patch but, only once I got some pliers under a lip (above left) was I able to separate it from the hull. As you can see in the big image below, either the ancient orange hypalon coating of the IK, or the newer red hypalon of the patch separated from their respective nylon cores – the glue’s bond was stronger than the actual hypalon coatings, new or ancient.
I get a bit lazy about having to faff about with two-part glue, and I also wonder if I ever guestimating the 25:1 ratio correctly. But as you can see, this stuff sticks. If you absolutely, positively want things to stay stuck or sealed, use two-part adhesives. I still don’t know if the second part curing agent merely speeds up the drying process, or is chemically integral to creating the very strong bond. I’d think it’s the latter, otherwise why bother.
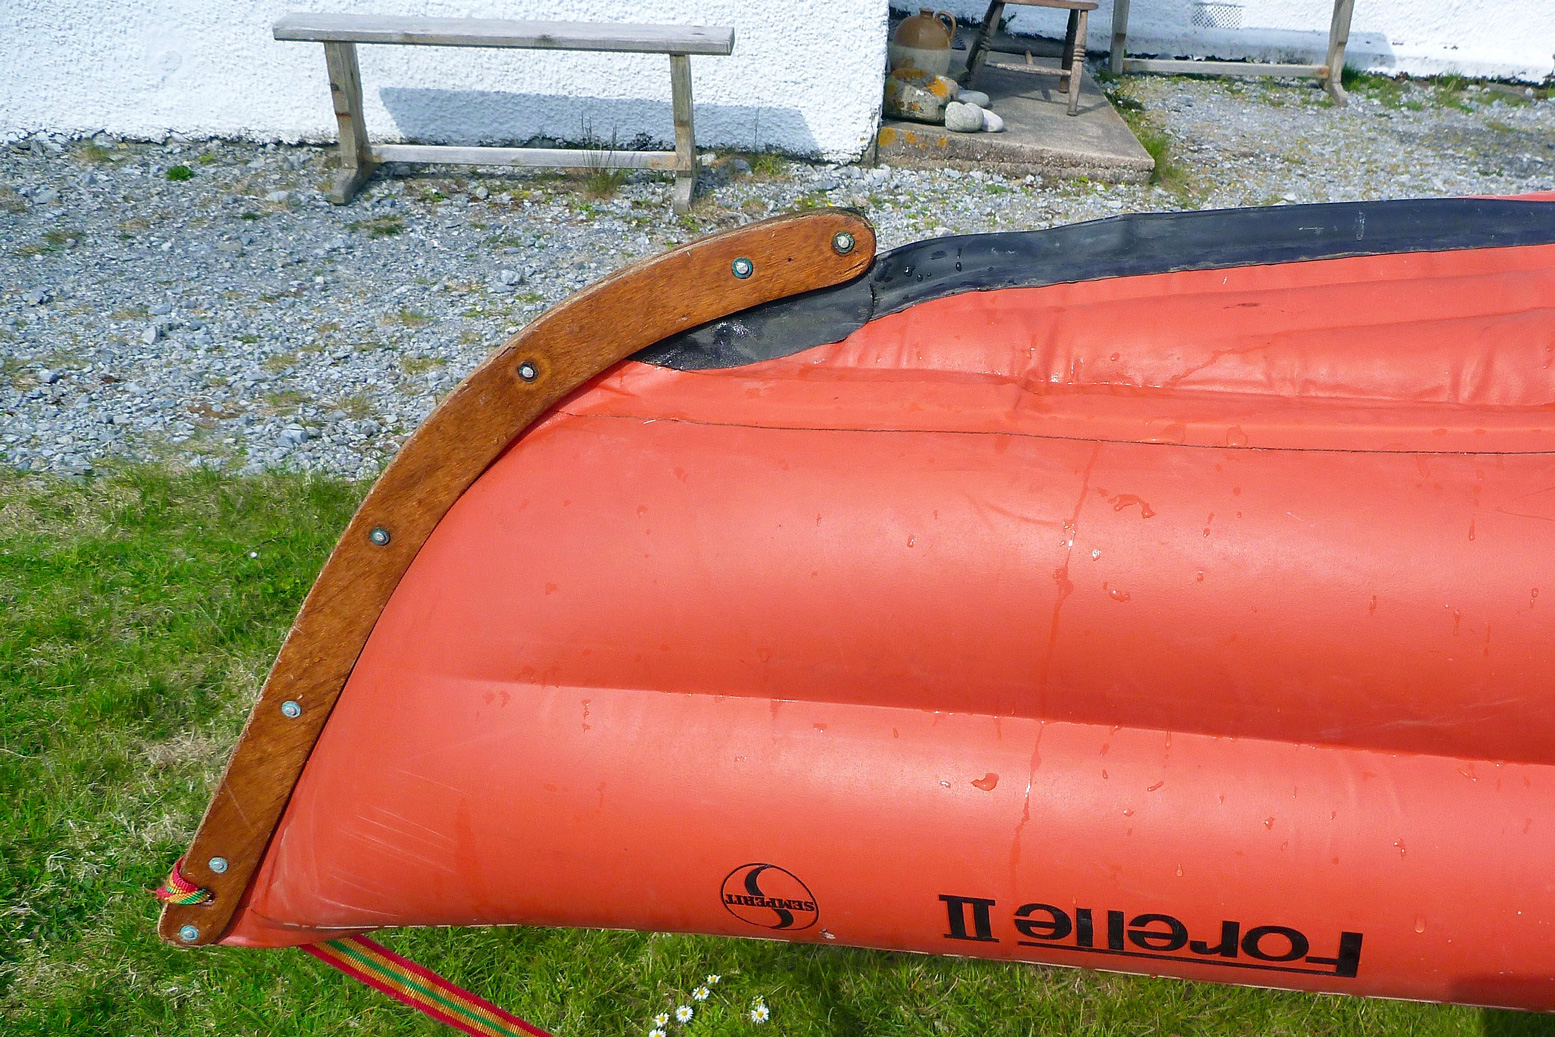
Other stuff The distinctive marine plywood bow has lasted fine – no warping at all and the rivets are still intact. It may have been an early design solution to easily joining the three sections of the hull in a nice sharp point, though they managed that join easily enough at the back. Maybe it was as much for protection and a frontal tracking aid.
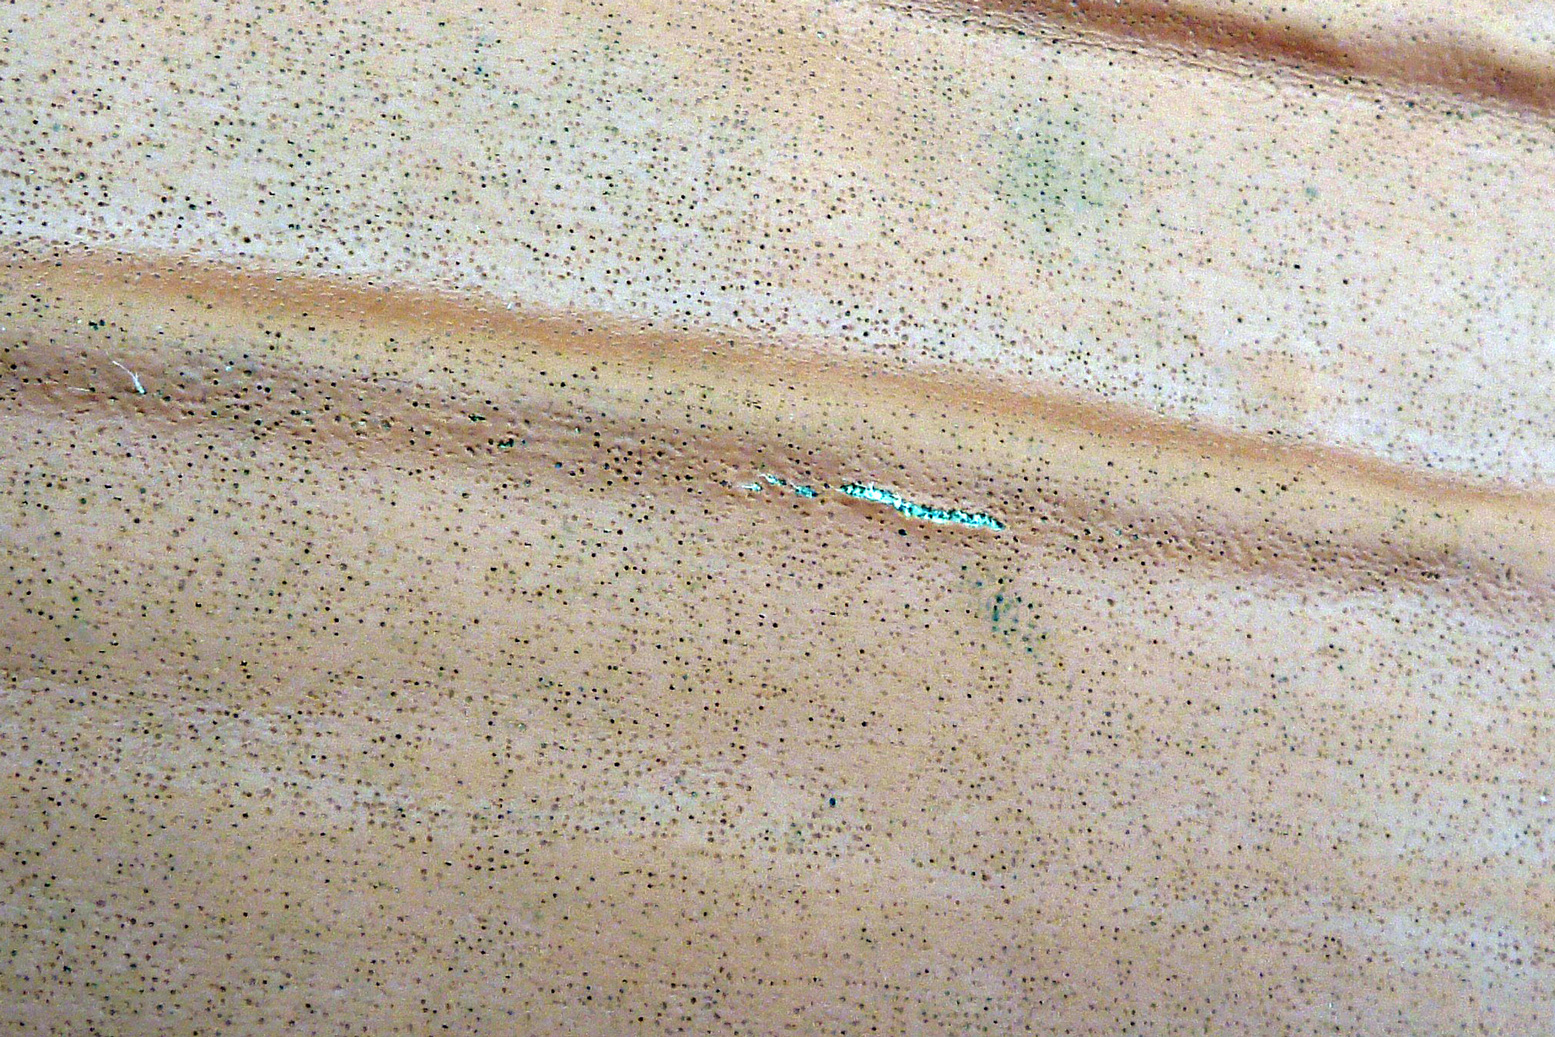
A couple of days after trying out the Semperit I noticed a scratch on the hull bottom (left) so decided to pre-emptively patch that with Bostik 1782 (less faff than 2-part). It looked like an old scratch which had opened up by reusing the boat. I reinflated a day or two later, but a few days on noticed the floor was flat. I pumped it up again – air was hissing from a crack in the hypalon coating inside the boat, more or less under the seat (below; colours enhanced for clarity).
This seemed a bit odd. The boat hadn’t been over-inflated or left in the baking sun, and there wasn’t any obvious rubbing in the two hours I’d used it, though I suppose this is a high-wear area and an old boat.
I suspected general, age-related delamination or entropic porosity. The outer orange hypalon coat can be rubbed or scratched down to the fabric core, as with the hull scratch I’d just repaired. But inside should be an airtight layer of neoprene. There’s no way of checking that without open boat surgery. To be honest, it’s what I half-expected from a 40-year-old IK, which is why I’d kept the refurb and expenses to a minimum. I suspect sudden use after many years possible neglect had accelerated decay. I see the keel-strake is coming away too, as are some other black patches holding the rusting D-rings.
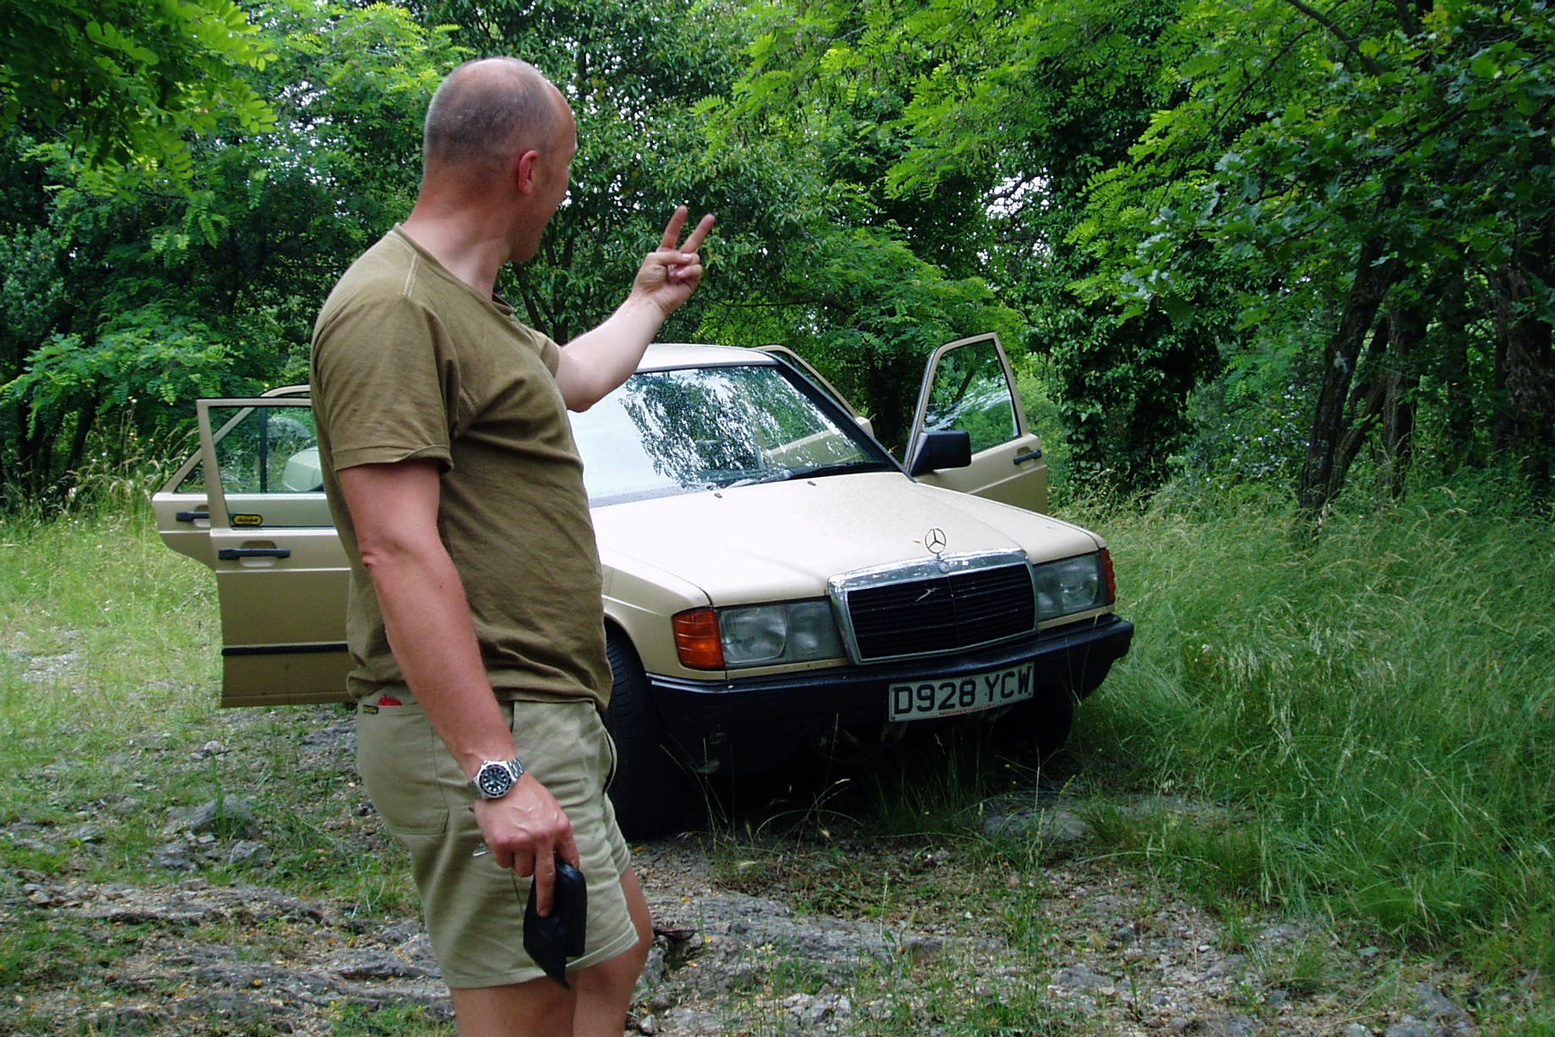
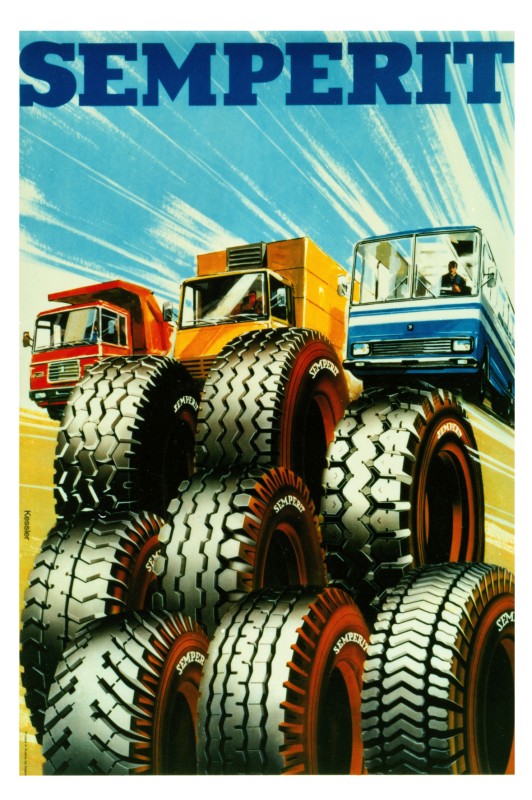
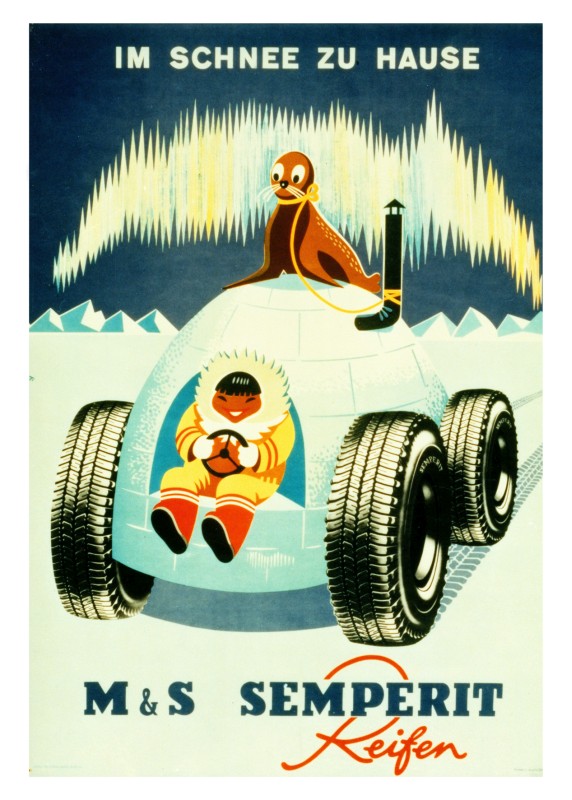
I’ve experienced similar deterioration when buying old vehicles for long trips. They seem like a bargain and have a solid ‘they-don’t-make-’em-like-they-used-to’ reputation. But reviving them, or just asking them to perform as they once did, can lead to a string of failures until it’s just not worth it (left). Much depends on how they’ve been maintained over the years. I recall writing in one of my books (or maybe on here): “you can’t give your old gran a pair of trainers and expect here to run a marathon without having a heart attack“.
I patched the wear-hole with more 1782, reluctant to waste good two-part PolyMarine. I pumped up and filled it with water: all good, but an anomalous perforation somewhere else can’t be ruled out. That’s another thing I’ve learned with old cars and bikes: you replace the clapped-out engine then the clutch goes; you replace the clutch and the gearbox goes; you replace the gearbox and so on… The strain of refurbishment gets passed on to the weakest point, and when that’s repaired, to the next weakest point. An IK will get you to shore on two chambers, especially if it’s just the floor that’s gone. I had that once with the Incept. Out with your pals on a warm summertime river that’s no drama. Elsewhere, alone with the wind picking up; not so trivial.
Years later I learned PolyMarine make SealFlex – a latex sealant (right) to revive old inflatables, PVC or plastic. You pour some in each chamber and roll the boat around for a couple of days. It costs £26 posted for 500ml – possibly worthwhile on your cherished RIB; not so sure on this old IK but had I known of it I may have given the old Trout a pint’s dose. After that you’ve got to know when to call it a day, and that day may have come. It might be fine for a guest or a rec river boat, but I don’t do so much of that nor have space for more stuff than I need.
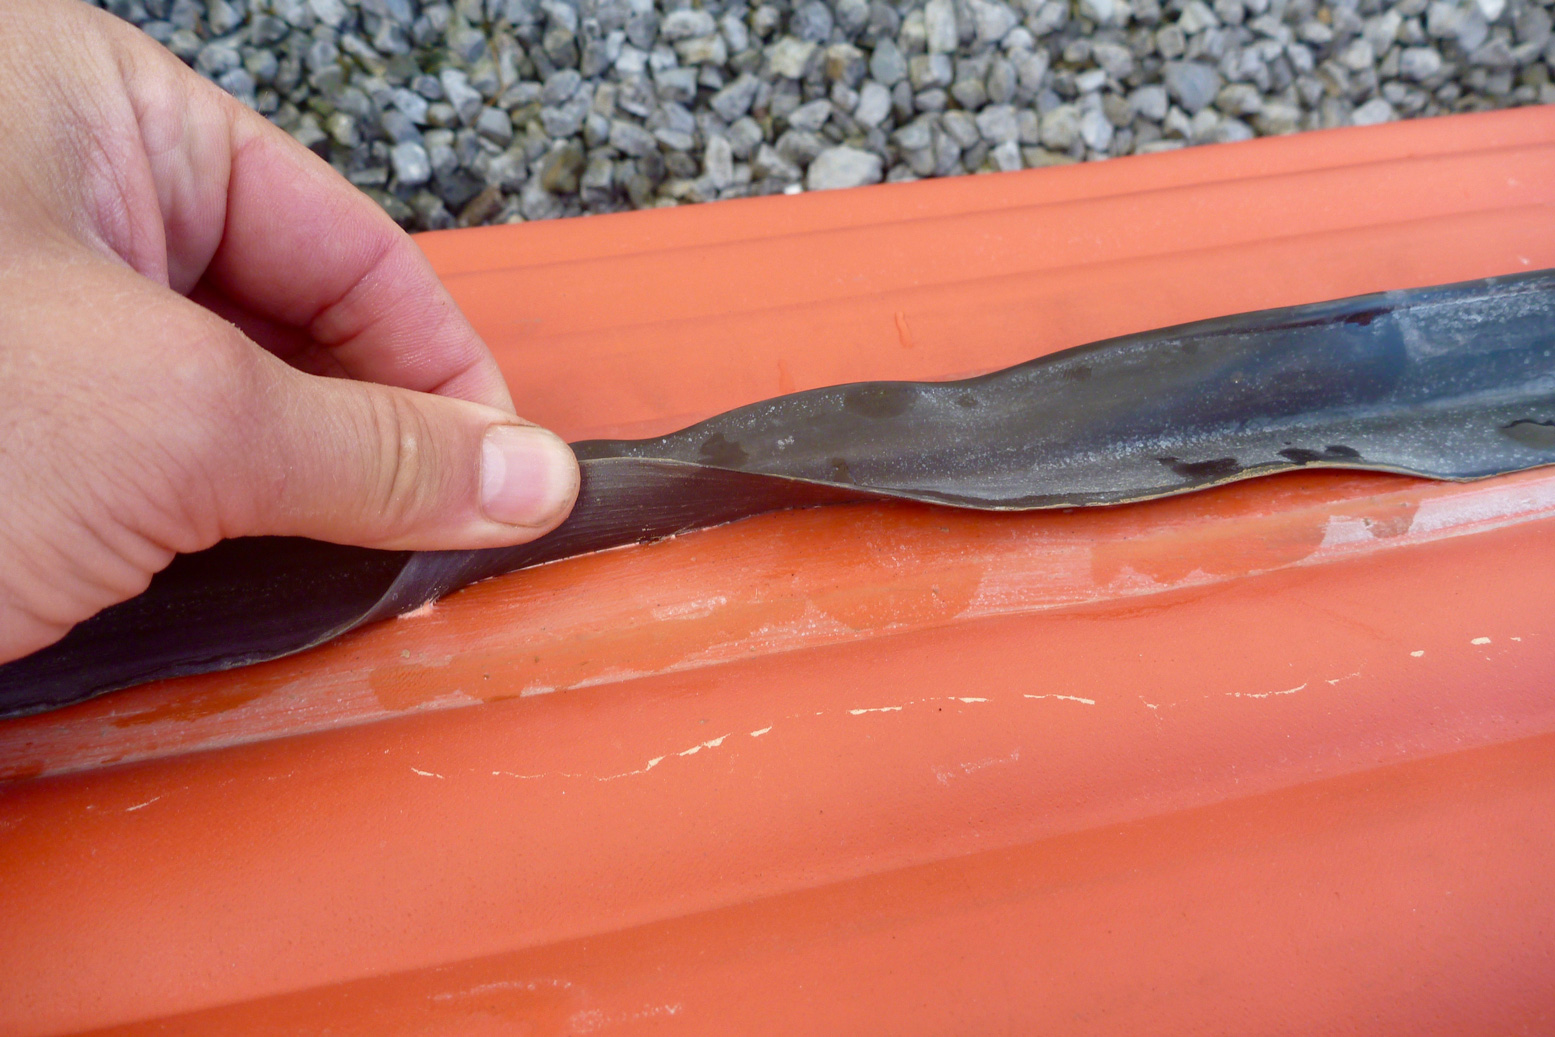
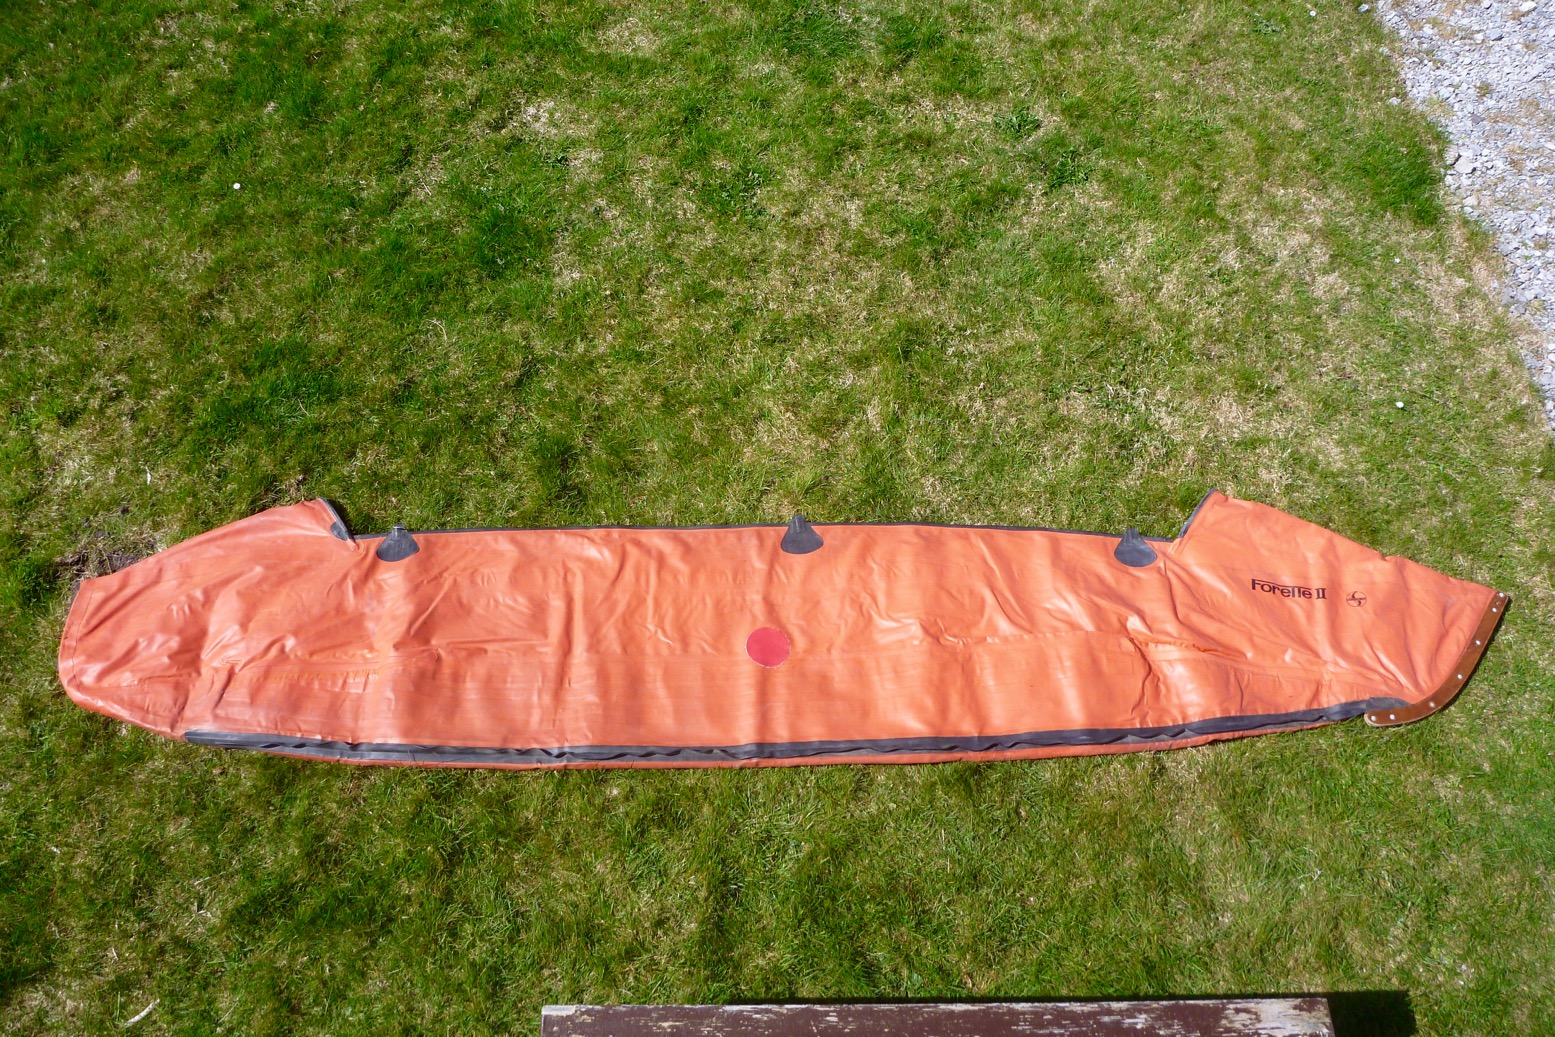
A few hours later the floor was soggy – this time it had let go a few inches up from the recent patching. Up to then I’d been considering putting it back on ebay with a clear semperit caveat emptor. But then I decided sawing it in half would be more fun and educational. I always wondered what exactly an I-beam floor looks like. More here.
Here in the Summer Isles the reliable May sunny spell is about to end. It’s been great for solar panels with strong afternoon easterlies, not so good for day-long IK-ing. Suilven mountain even caught fire. Yesterday, before it picked up we nipped out in the Seawave to Eilean Fada Beag (below) and listened to the birds. By the afternoon it was blowing hard.
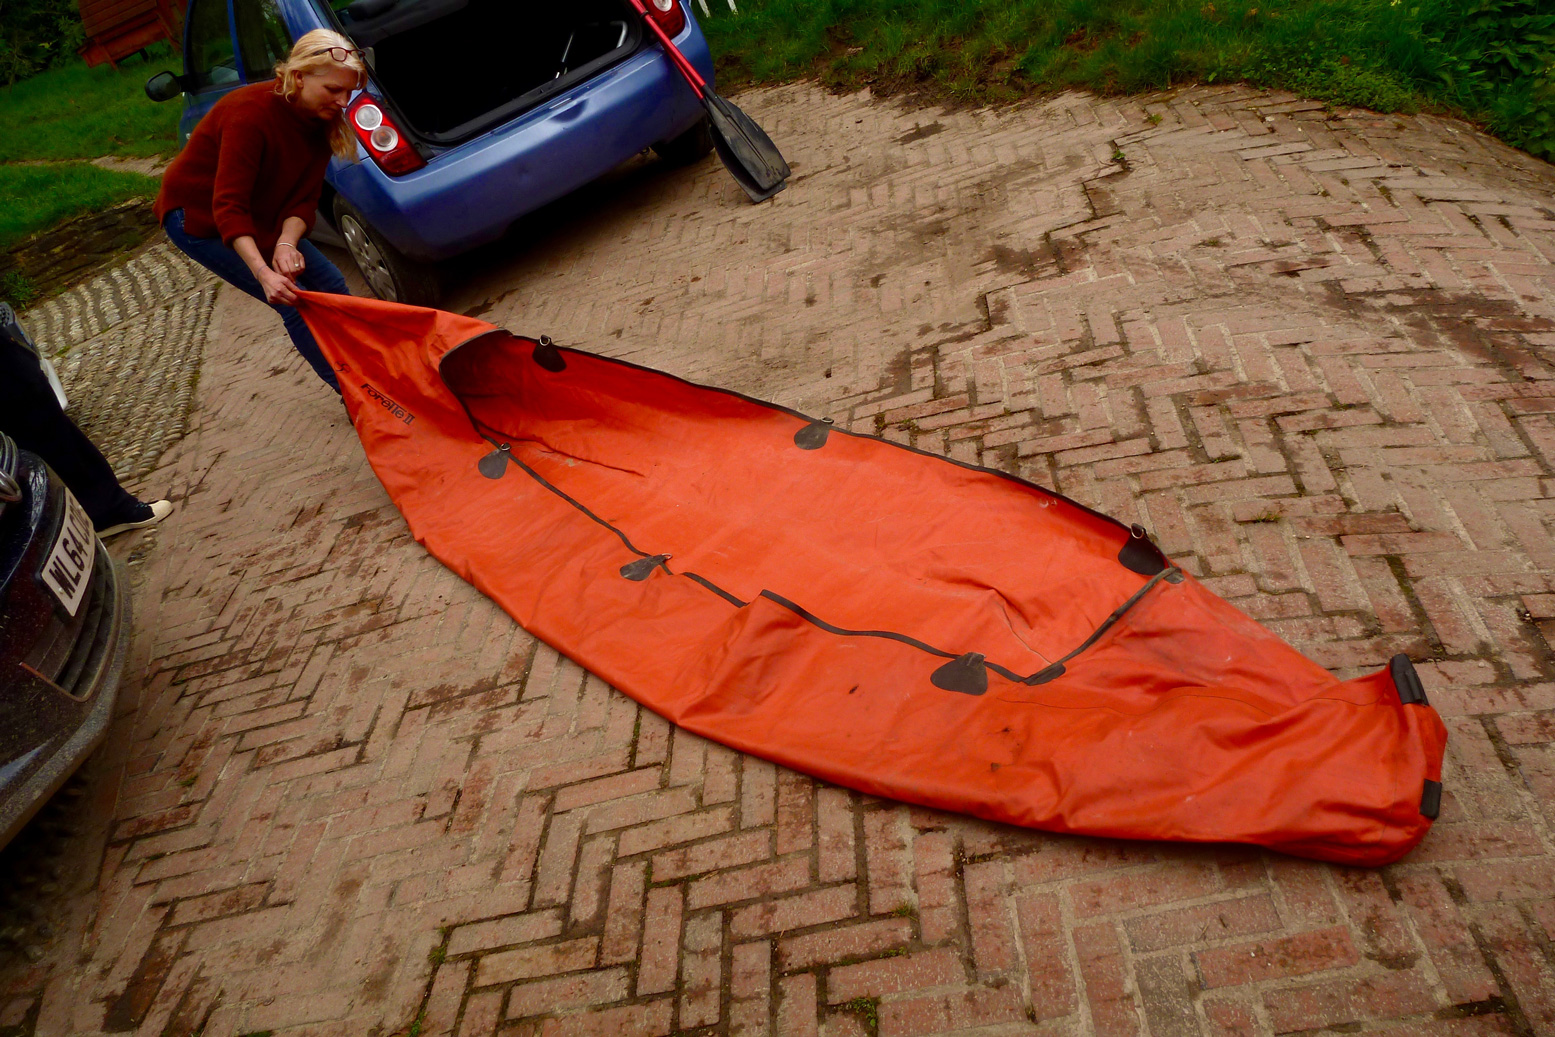
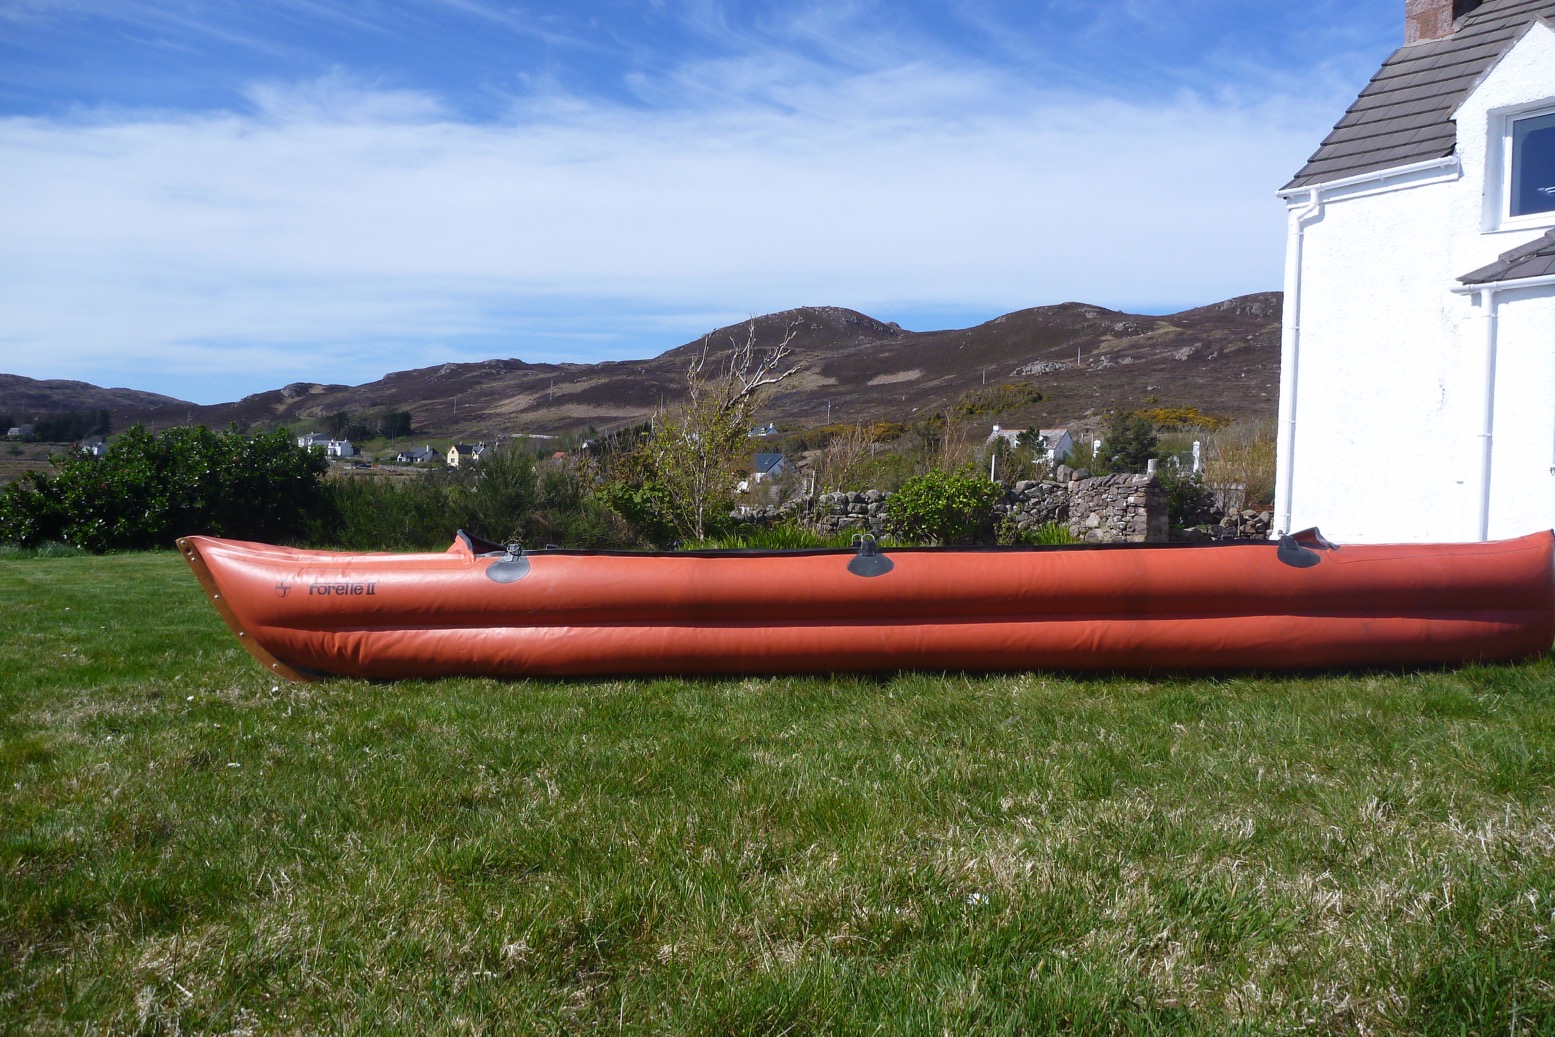
High time to patch up my latest IK: an old Semperit Forelle 2 I picked up in Cornwall. The boat was sold with some classic paddles which went straight in the bin, as well as a big tear in the side (right). Plan is to patch that hole, then see if it still holds air.
Semperit is an Austrian tyre manufacturer who’s still in business. Afaik, their IKs were a bit of a short-lived rubbery diversion in the 1960s. If my 40-year-old boat has no other more awkward leaks, I’ll rig it up and take it for a spin. But first, I scrubbed off a couple of decades of crud and let it dry.
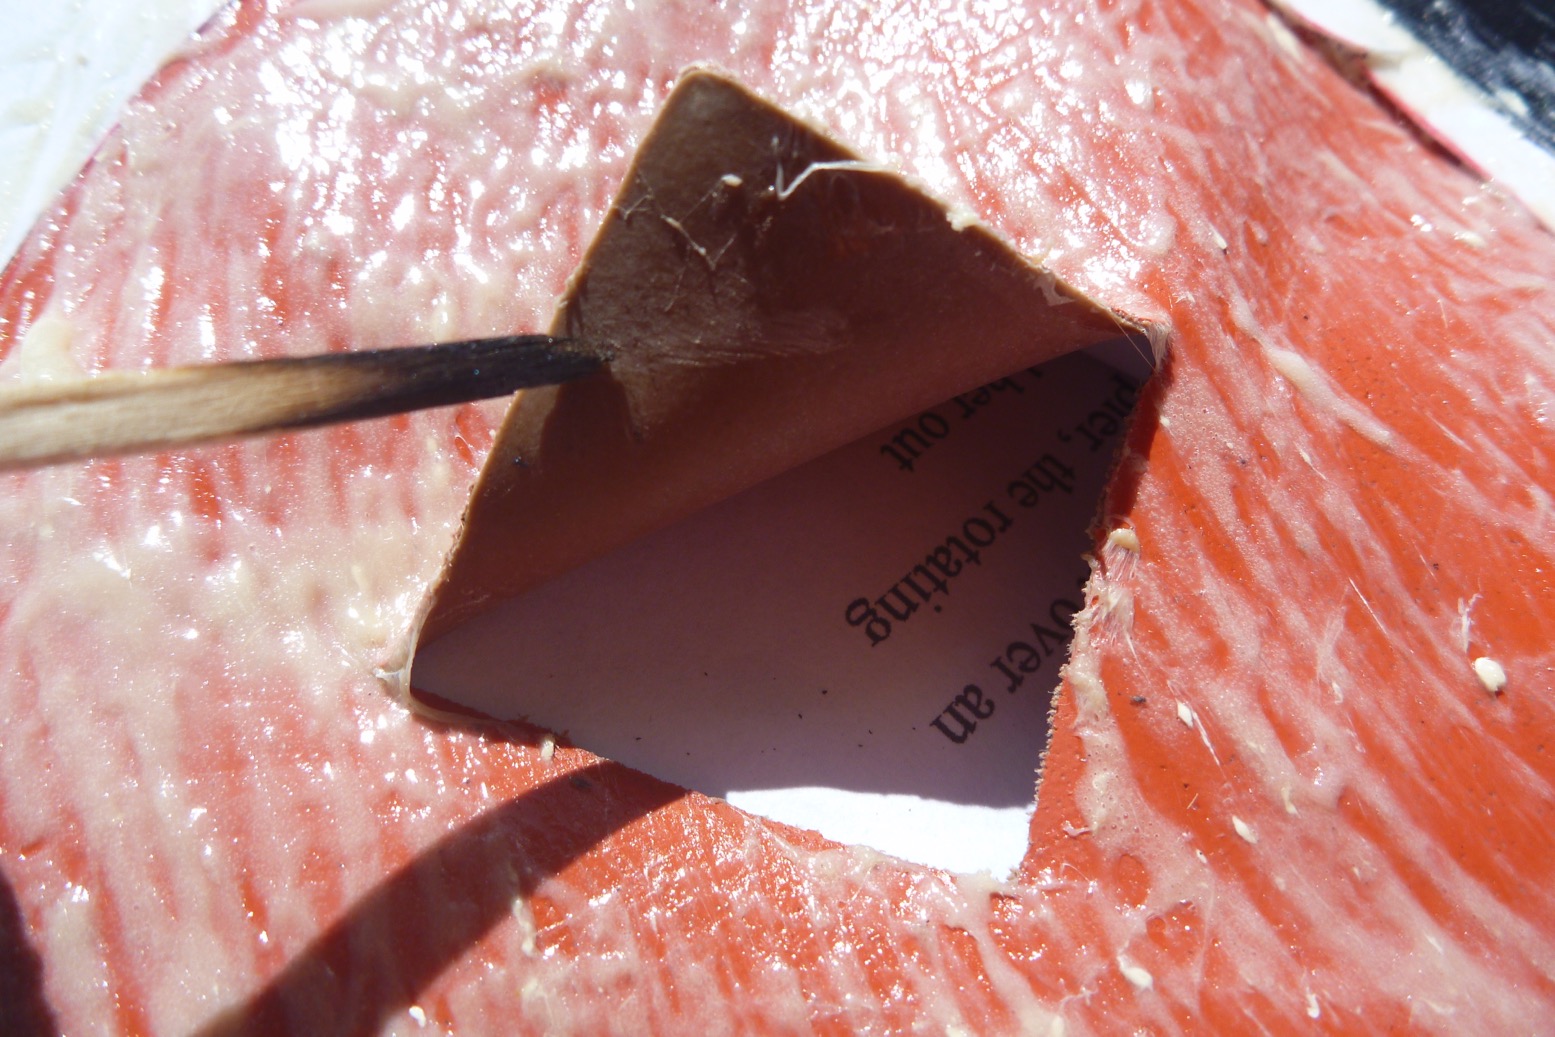
I wondered about sewing up that L-tear before patching it – the Forelle’s hypalon seems pretty thin, but decided to just slap on a 5-incher. I’ve glued on loads of accessory patches but have never actually had to repair a hole in a hypalon IK in all these years. So I took note of the NRS repair video here: rough up hole and patch: wipe clean with solvent; apply two coats of glue and when knuckle dry apply the patch and roller the living daylights out of it.
Watching that vid, I saw they used a much better tool for pressing down patches; an ash-handled Sealey TST15 tyre patch roller, unless I’m very much mistaken. The knurled metal wheel embedded in the wooden handle can lay down much more pressure than the wide plastic lino roller I’ve been using. Just before I did that, it occurred to me stray glue may squeeze through the tear and glue the insides together. Don’t want that nein danke so, with no better ideas, I stuck a bit of paper in there. Seems to have worked.
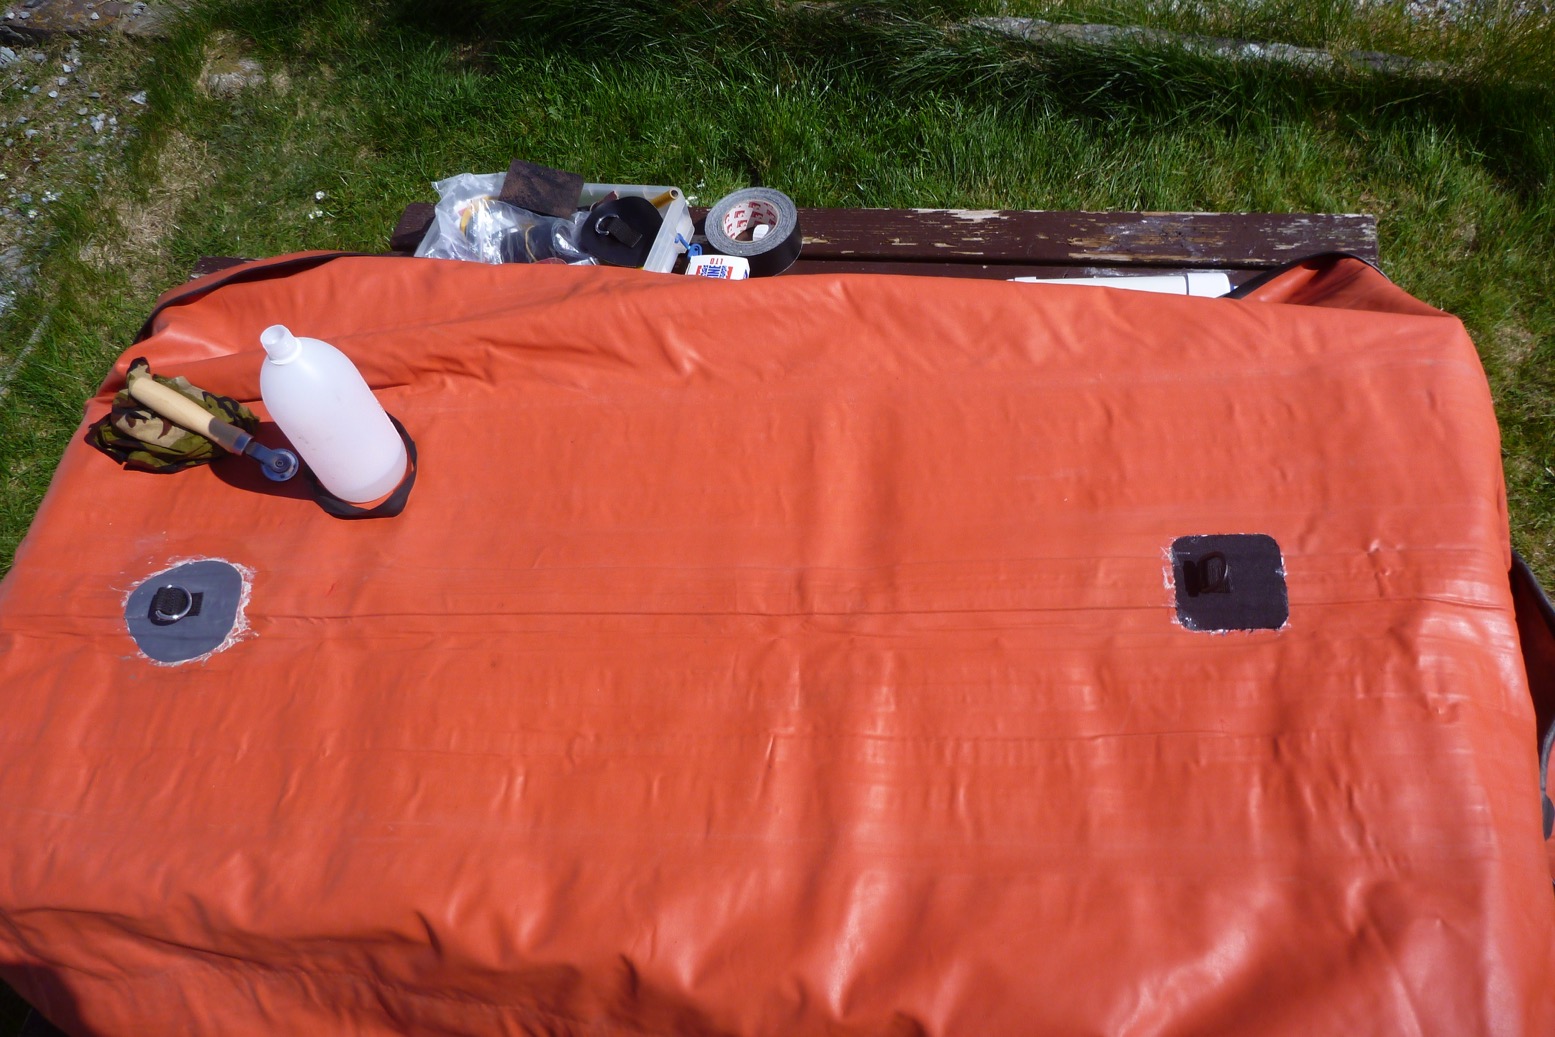
With glue left over, I thought I may as well stick on couple of floor patches for a seat base and a footrest tube. As these are non-critical fittings I used any old D-rings I had: a woven nylon one and probably a PVC. I’ve glued PVC to hypalon before for other fittings.
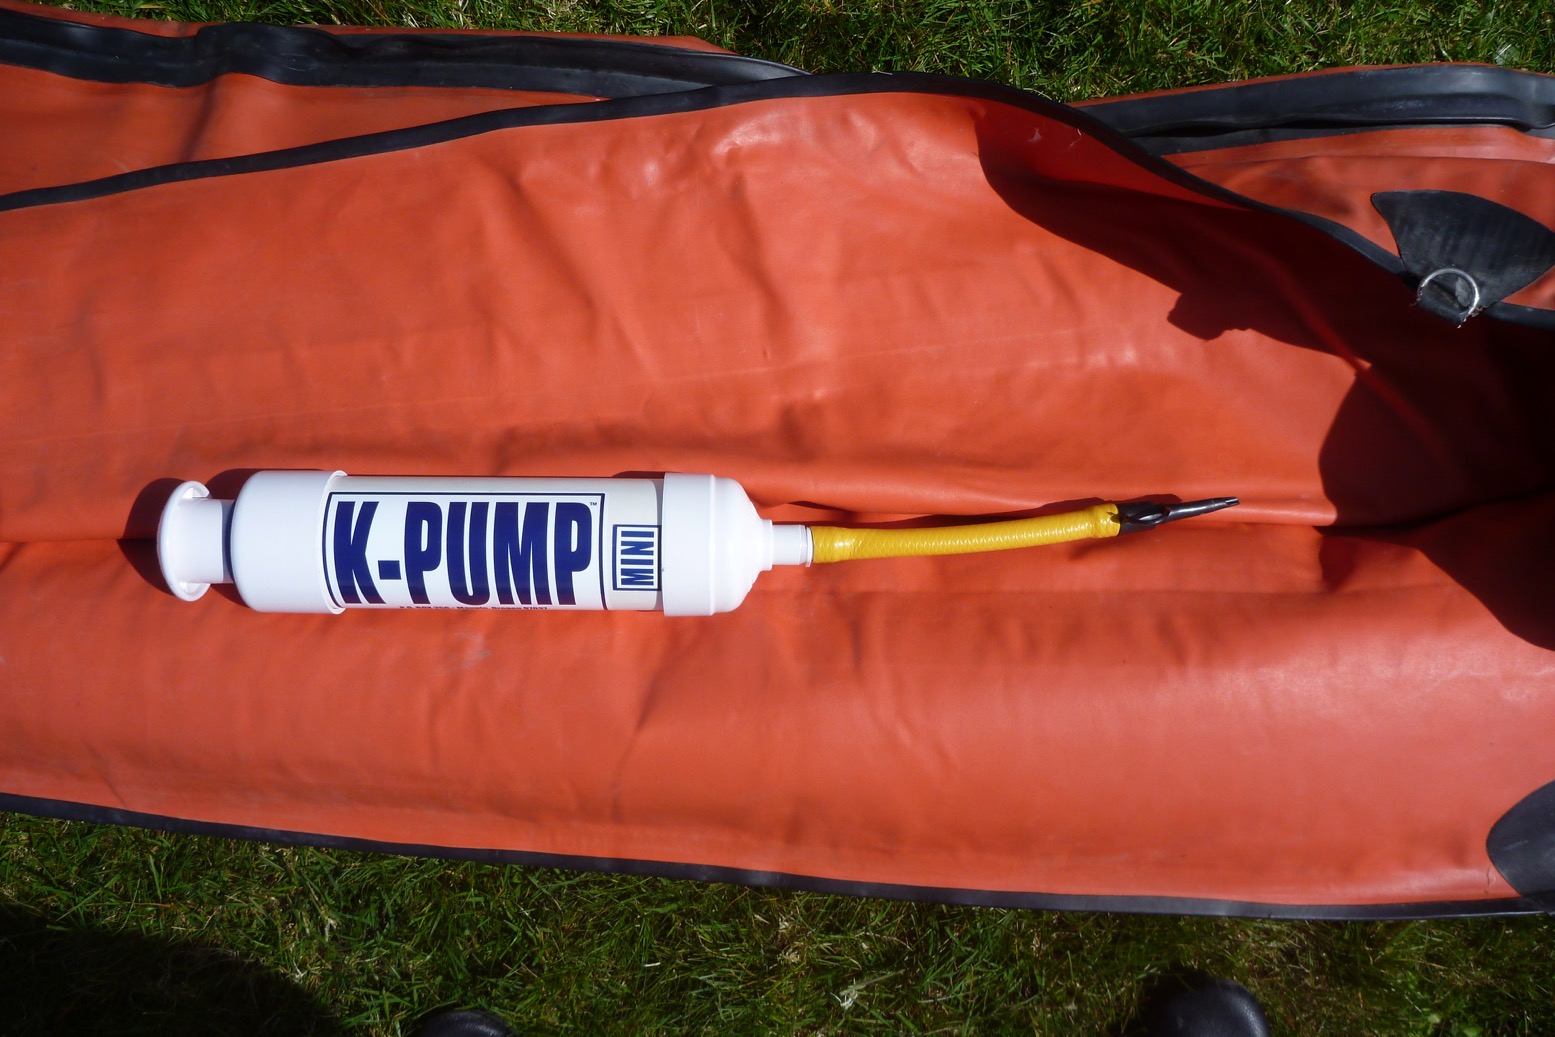
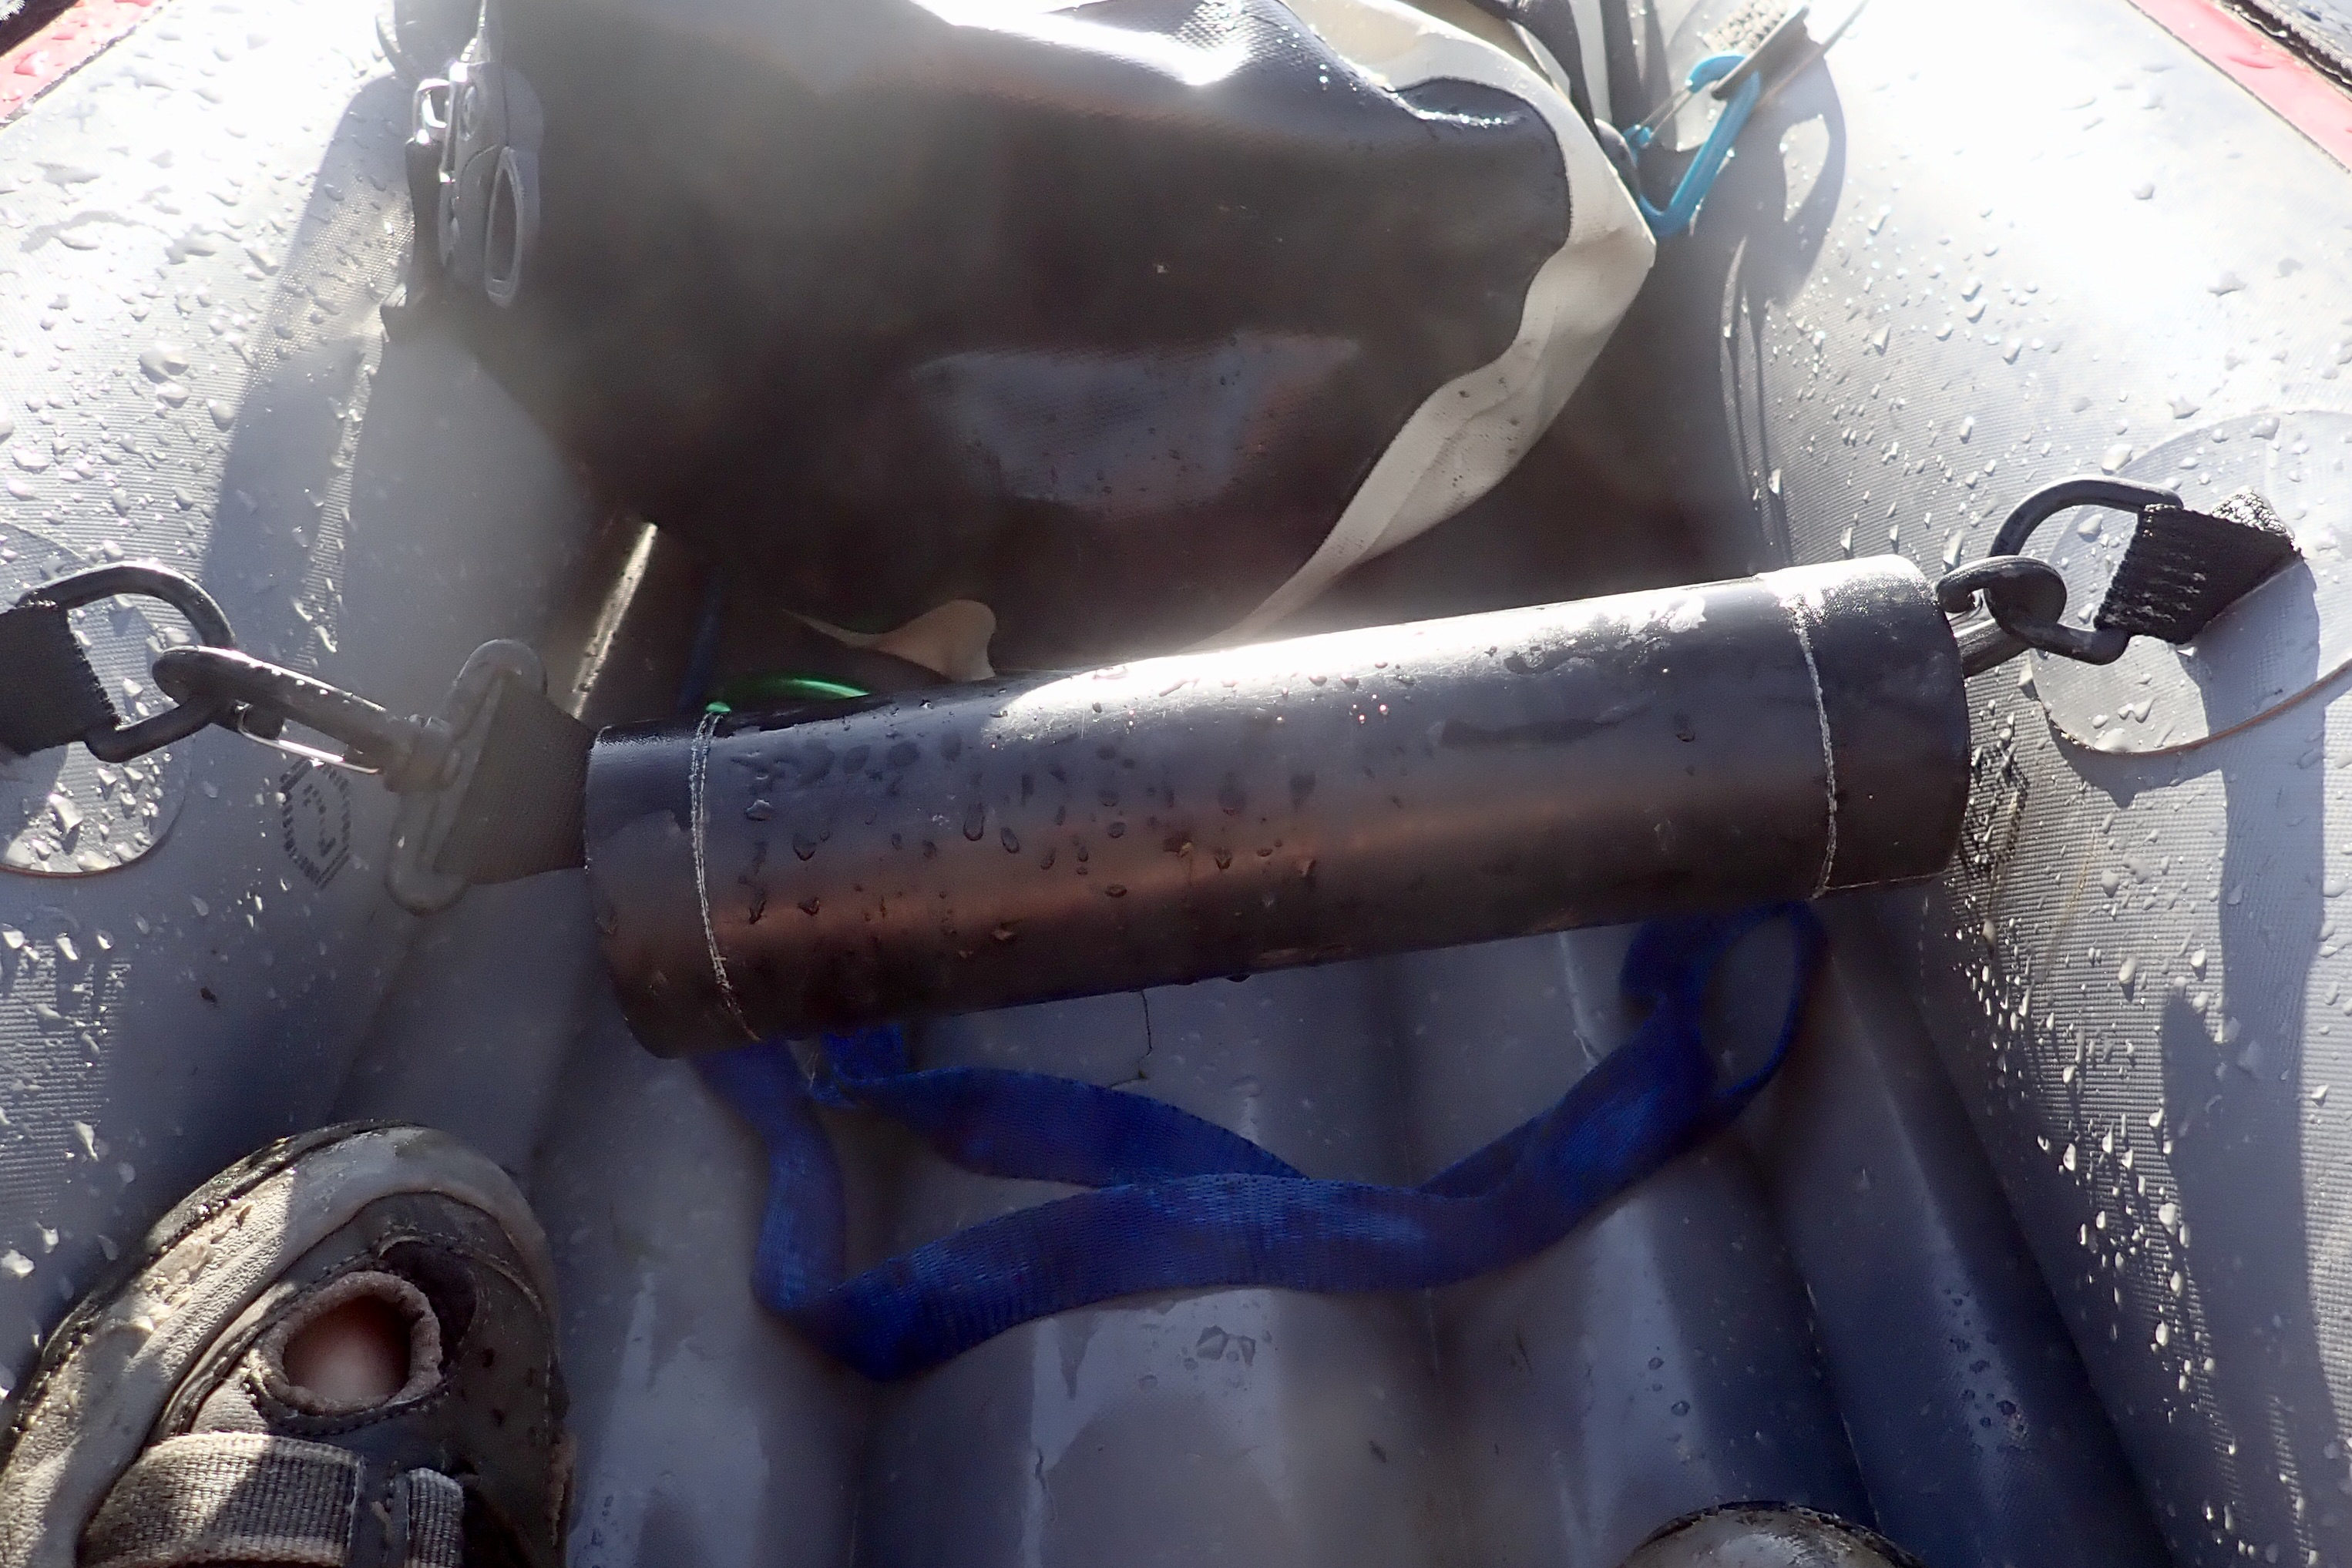
With them in place I couldn’t resist rigging up the old Trout with a rope-and-pipe-lagging backrest, an old Alpacka packraft seatbase; a drainpipe footrest tube and a lead. All stuff I happened to have in my IK box of bits or found in the barn among the rat droppings. I jury-rigged the K-Pump for nozzeling but haven’t pumped it right up to 2psi as I’m letting that big patch cure for a bit.
Looking round the repaired boat I see it has rudder mounts; not sure I’ll need one on a 3.56m boat. There are six D-rings on top of the double side tubes but they don’t look like they’ll take the backwards strain of a fabric backrest Forelles came with wooden backrest bars, (like Grabners who took over Semperit) and which I’ve found prone to bending when used with a firm footrest tube.
There’s also a squished up full-length keel strip along the bottom. If it works for tracking it will be nice not to have the usual skeg-grounding aggro in shallows or on land. But maybe that keel will slow down turning which is why they have the rudder attachment? We shall see. With twin side tubes the Forelle is just 70cm wide – that’s <28″. But with a thin floor and me sat low in the high sides I’m sure it will be stable enough. Gumotex still use them for their seats, but the ‘lilo plugs‘ on the three chambers are a bit of a faff for getting a good charge of air.
If the Semp proves viable, I may replace them with proper IK valves. Or I may just leave them as they are. Three £15 Gumotex valves + a £20 PRV will cost the same as the boat, and the lilo plugs can be regarded as their own ‘total loss’ PRVs – when the boat gets too hot they pop! And anyway, there’s no room to fit a big IK valve in the floor as the tubes are too close together. Knock-off Halkey valves go for 7 quid; I might stick a couple in the sides and leave the lilo plug in the floor.
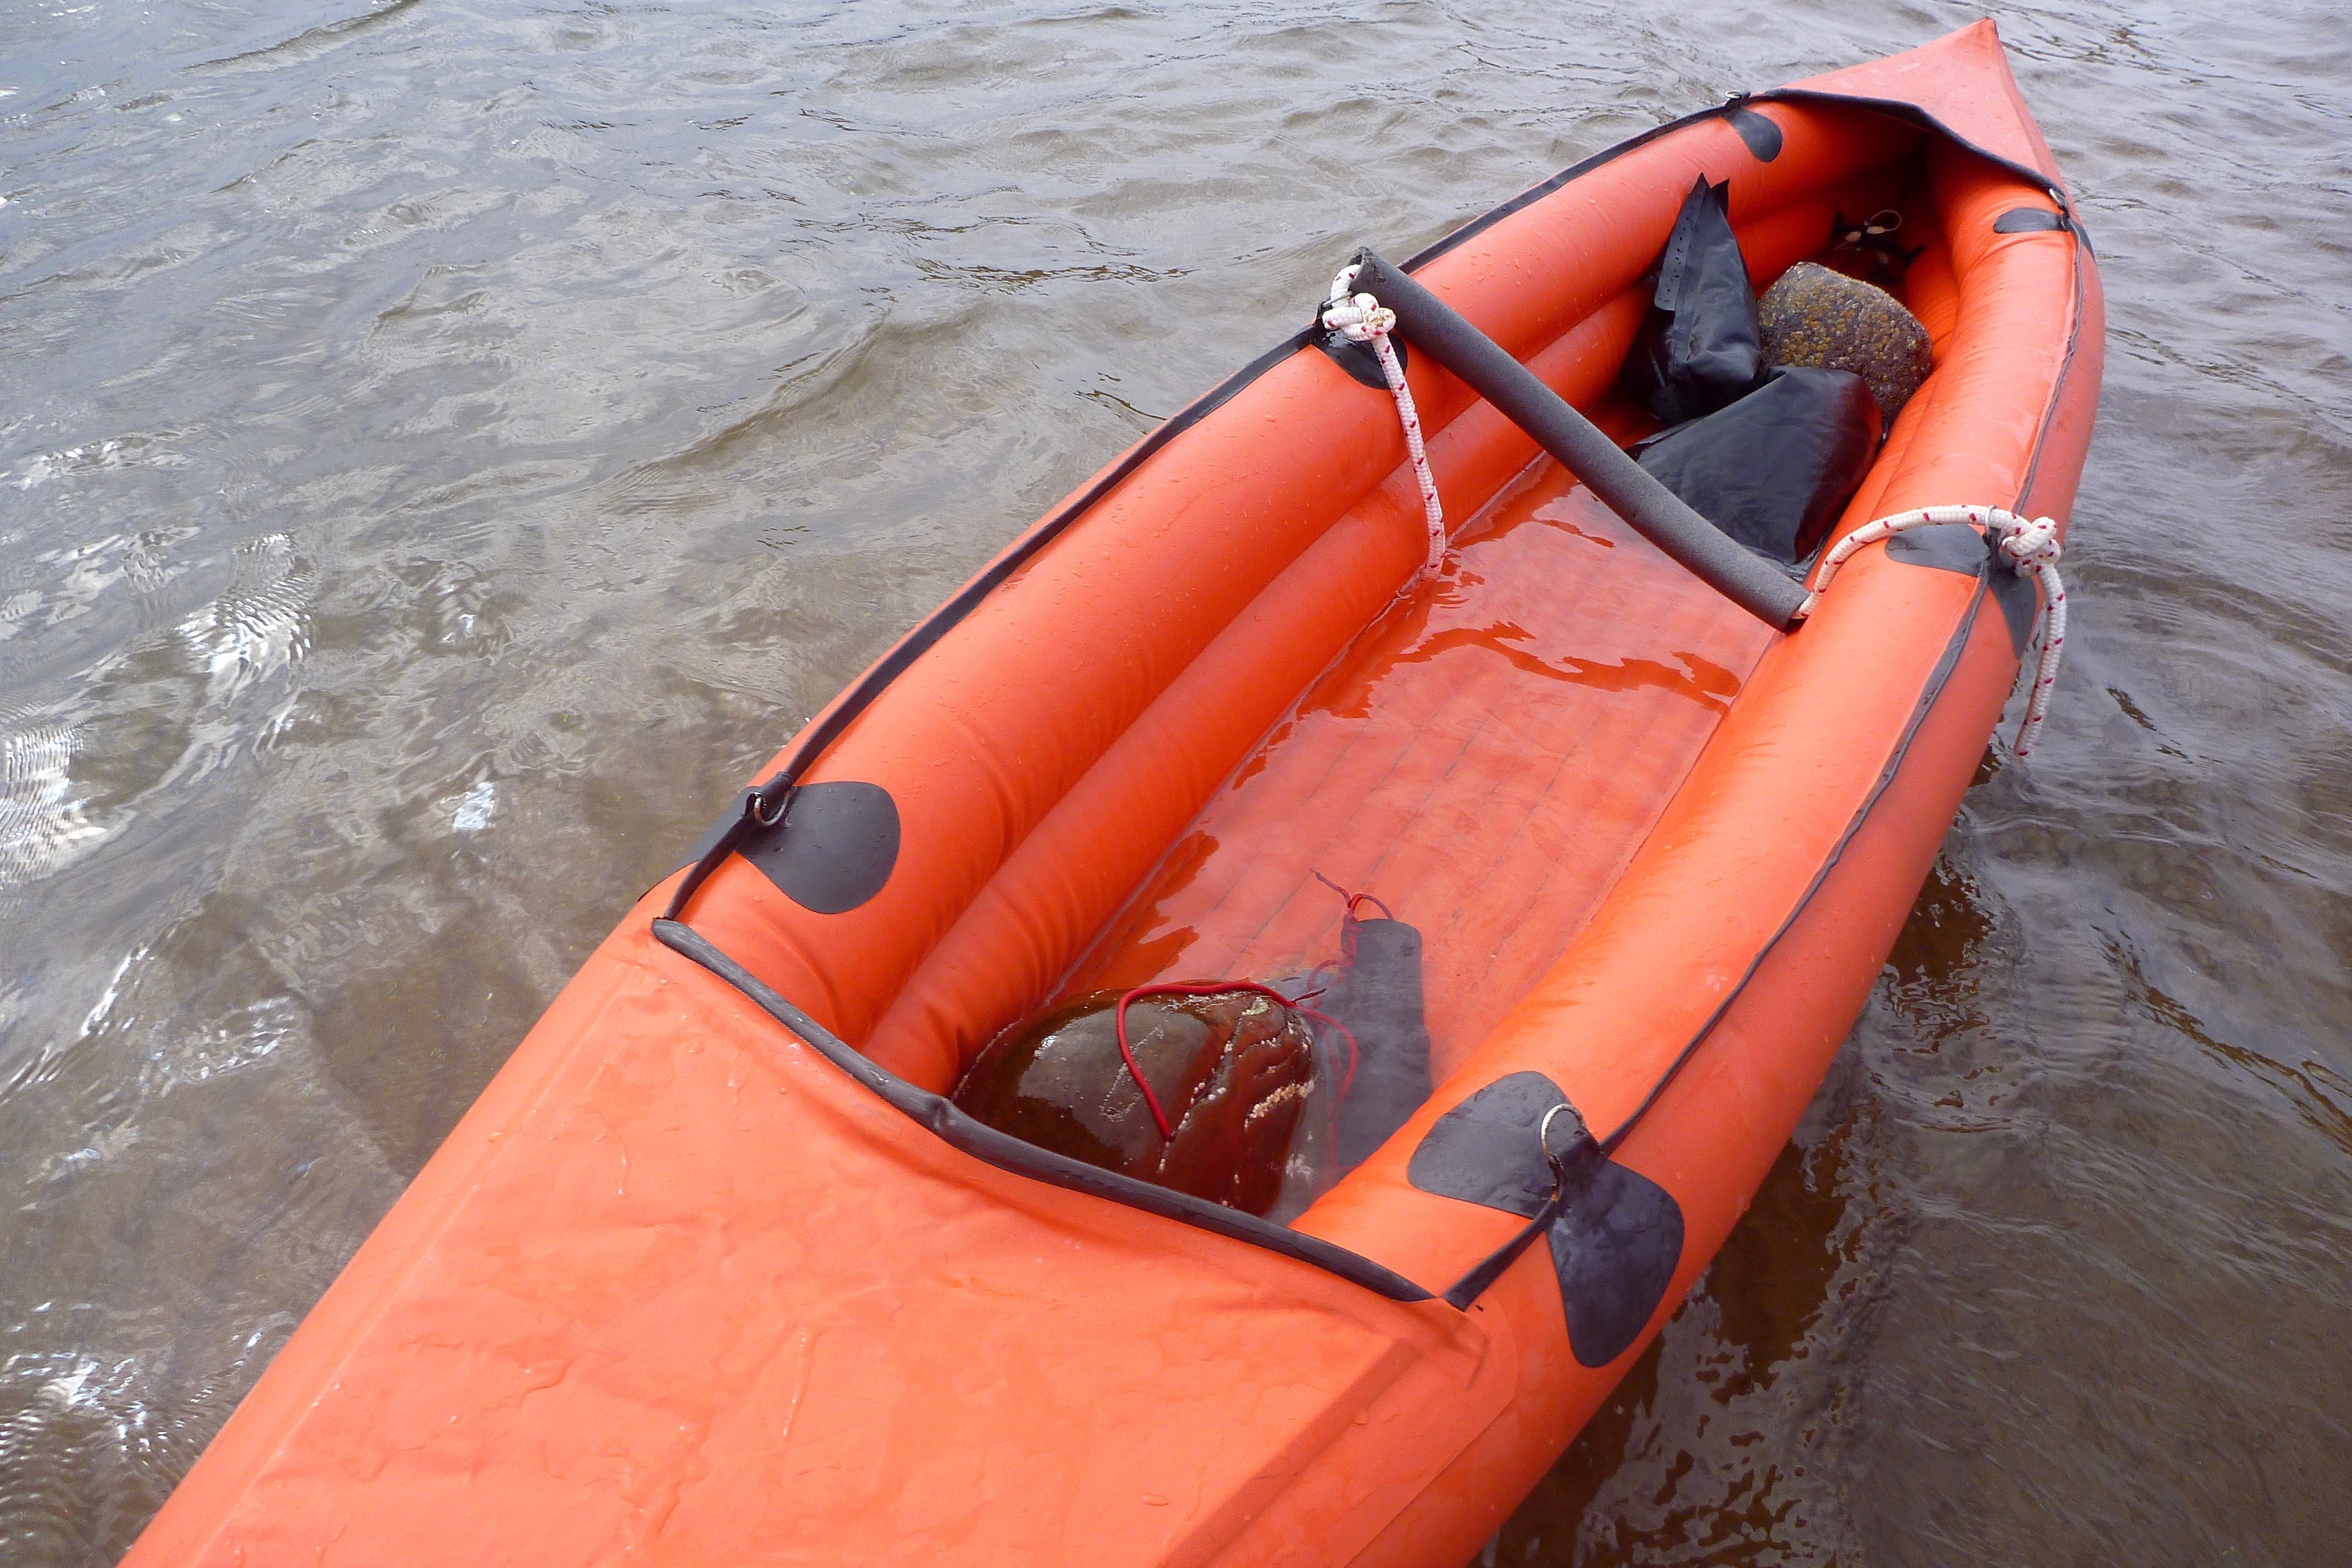
I put it back in the barn with my other restoration project for a couple of days. When I came back it was limp but not draped over that cabinet like a wet pizza. I pumped up and it stayed firm enough, though I’ve forgotten how mushy an 0.2 bar IK feels. It reminds me why I seriously took the idea of trying to increase the rigidity of my old Sunny before getting other IKs. At the beach I filled it with water and stones – no obvious leaks, (or so I thought). A testament to 40-year-old hypalon and glue.
Have to say too, once pumped up, for an IK the old trout is not bad looking. I think the discreet upsweep of the bow, that plywood ice breaker and slender twin tubes make it look a lot less of a bloat than some. Sea trials to follow.
… I deliberately chose [these Kokatat Swift] dry trousers with no sewn-in socks as my drysuit has those. With the Swifts … I’ll just wear short Seal Skins and have no worries about the sewn-in socks getting holed by gravel. Time will tell how they wear and perform.
Well, I’ve changed my mind. I’ve never been convinced by the Goretex/membrane magic; at least not for hillwalking – I get too hot and sweaty. But making less heat paddling an open kayak on a cool Scottish day, the stuff seemed to work. It keeps out the splash and light rain, but because the leg muscles are inactive, sweatiness is barely apparent. Using a regular eVent hiking cag on top produced more mugginess, but nothing as bad as on the hill and easier to control with the front zip and adjustable cuff cinches. Unlike a hardshell, for an IK there’s no great benefit to buying a regular kayak cag with a waist seal as there’s no cockpit spray skirt to seal it against. If you really want to keep dry all over, just use a dry suit.
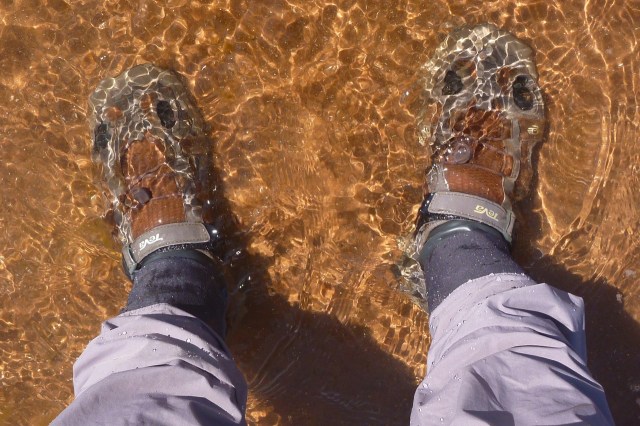
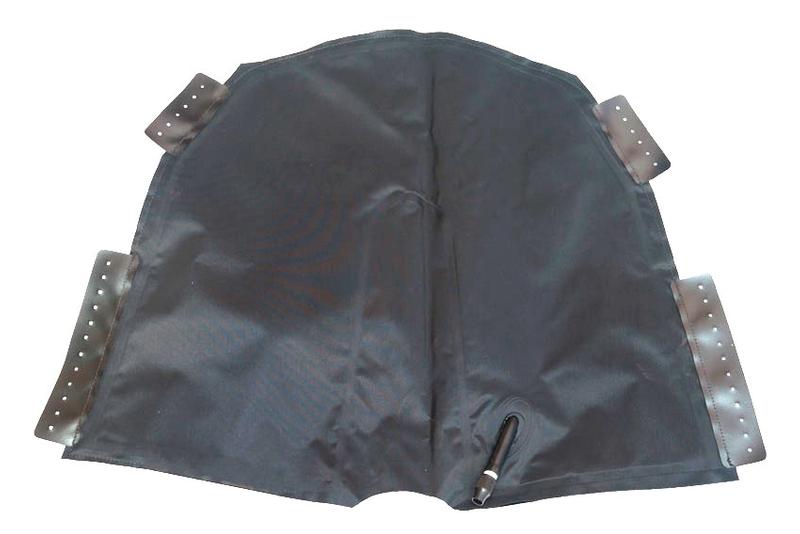
On one trip I found that the Swifts with knackered SealSkinz didn’t really work. ‘Waterproof’ SealSkinz only last until the clingfilm-like membrane goes. Then they become saggy sock-bags with insulation qualities no better than woollen socks. In fact, they may well chill damp feet. Wearing my slowly dilapidating Teva Omnium water shoes (left), I now think it’s better to seal feet properly with latex socks. IMO latex is easier to repair than socks laboriously made from off-cuts of membrane fabric which, like all that kind of stuff, has a limited life span, especially under the grinding weight of a foot. Bizarrely, I see most don’t make dry pants with integrated latex socks, only membrane, which must be a a cost or maybe a UV thing. Anfibio is an exception. But you can easily buy dry pants with latex ankle seals and glue on latex socks which are readily sold individually for around 20 quid.
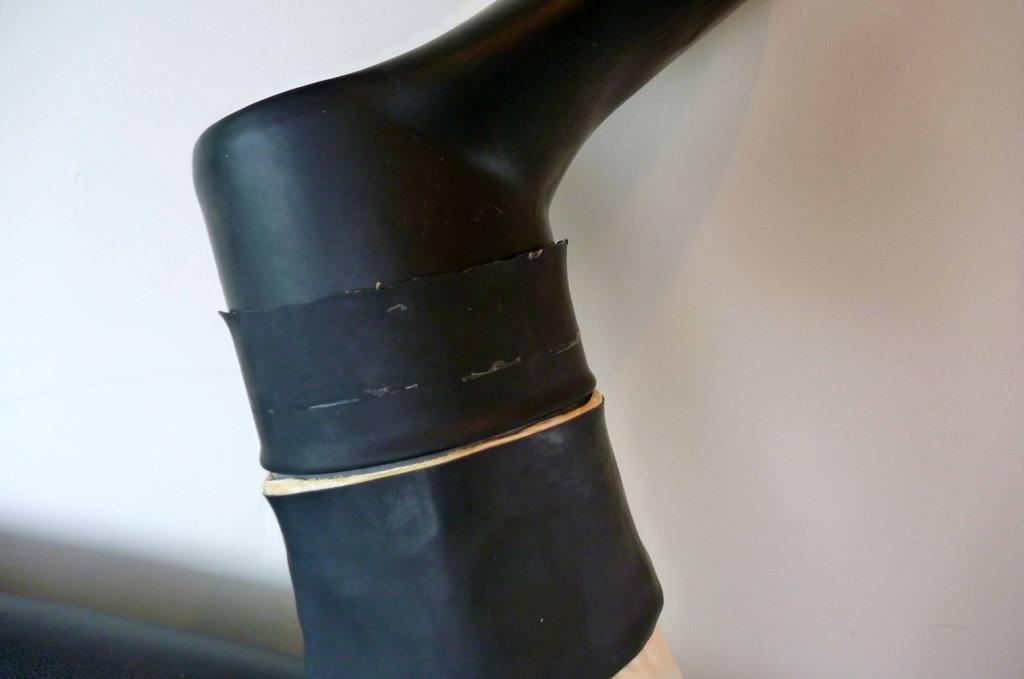
Gluing on latex socks First I trimmed the latex on the trousers and the socks to similar lengths. Getting a circumference match is important if there’s to be no leak-prone creasing once they’re joined. You’d think gluing latex socks to latex trouser cuffs would be simple. Not so it seems. My first go using regular rubber glue didn’t take to the shiny outer surface of the pants’ latex.
I read of using two-part adhesive, even though that refers to the tricky latex-to-dry suit fabric seal, not similar latex. So with the leg and the sock remounted on a piece of 5-inch plastic drain pipe (below), I tried again mixing up some PolyMarine Hypalon adhesive. This stuff sticks like a velcro electro-magnet, but curing times are lengthy and there’s the whole faff of getting the 25:1 mix correct.
Mount on a pipe
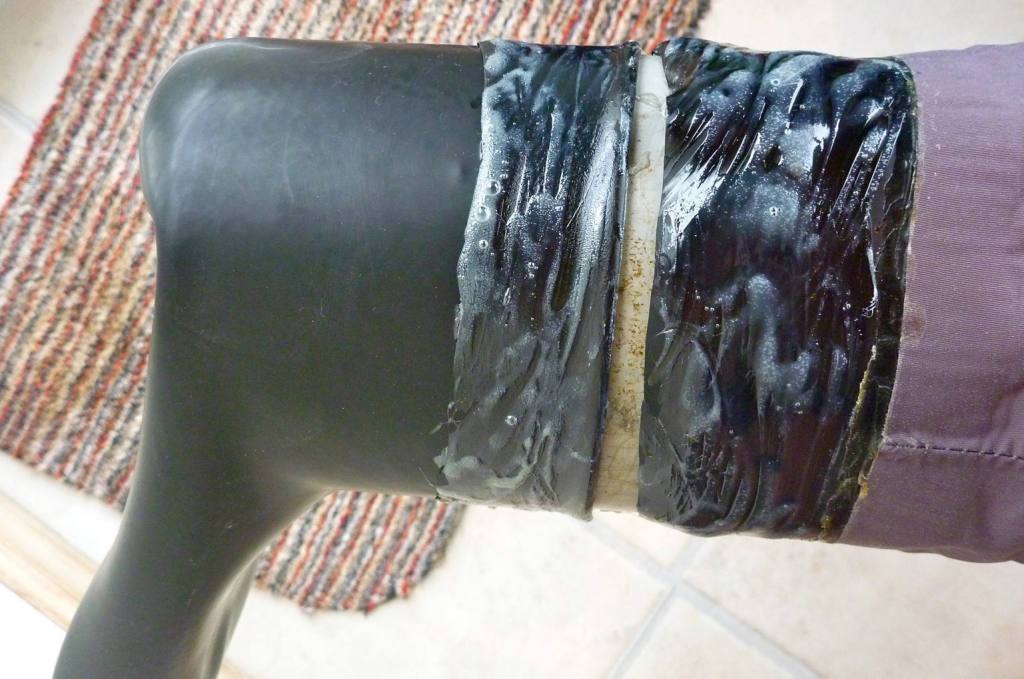
Fold sock back and glue
Fold over and press down
I folded back the sock about 3cm on the pipe end and nudged it against the exposed trouser leg cuff (left, above). When the adhesive had cured after 30 mins, it’s another coat (middle), wait 3 mins then just roll the sock over onto the leg and lay in with the roller then strap it up for a couple of hours. There was one small leak, easily fixed.
When cooler weather requires them but you don’t want a full-on drysuit, these fully sealed pants have been great. I can wade right in without getting wet feet, and wearing regular socks underneath the latex is are warm and comfy. A few years later one sock started leaking; a tiny hole, easily fixed with a dab of Aquaseal. They say latex is prone to UV so is best kept out of sunlight (which is why latex cuffs are often covered) and given the odd squirt of 303 UV protectorant or NikWax Solarproof.
Integrated socks – best thing you can do to your dry pants
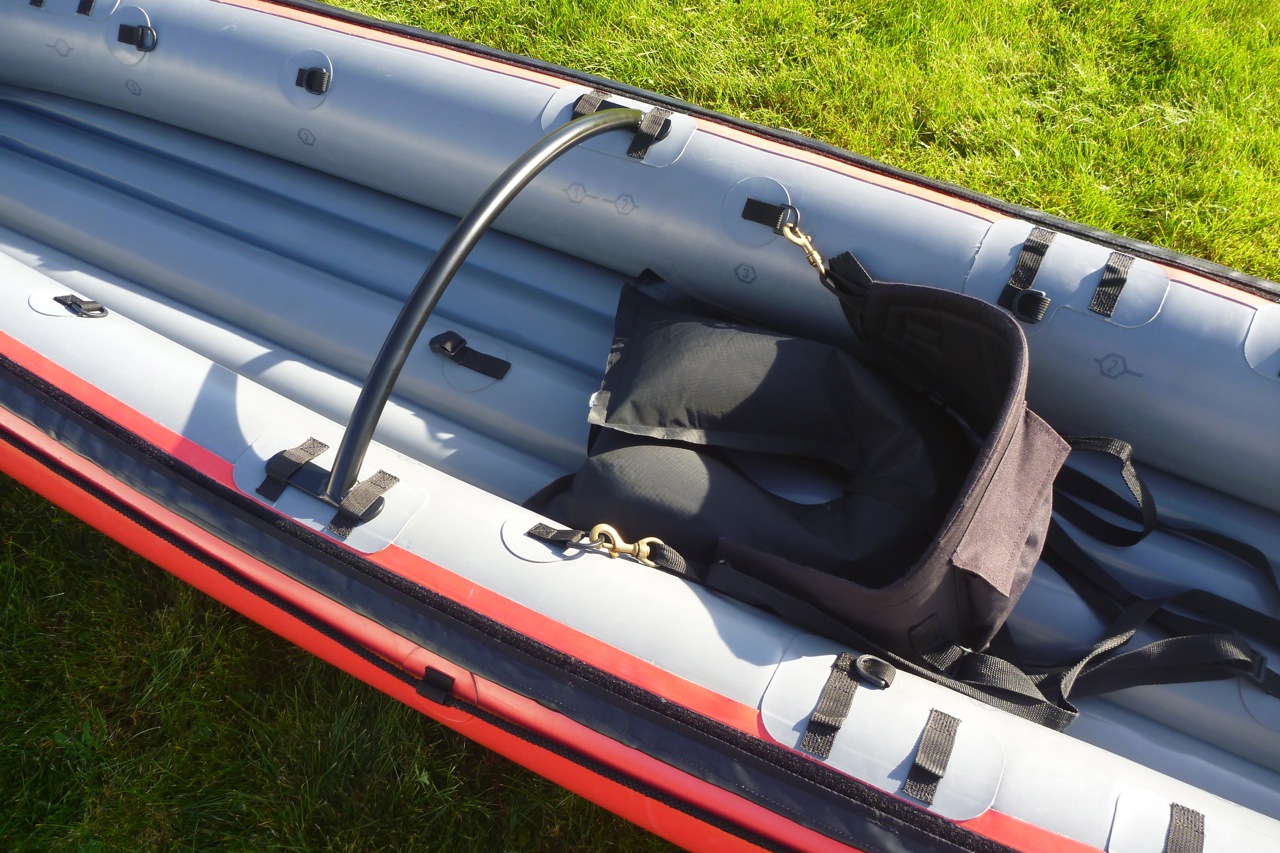
Grappling to get the boat out of the muddy Medway river at Yalding one time put a light scrape on the hull. It reminded me that, along with fitting PRVs to the sidetubes, another winter job was to fit a protective strake under the bow where most scraping occurs. Better to get the protection in early while the boat is newish.
A 70 x 15cm Hypalon off-cut (close enough to Nitrilon) was 14 quid on ebay and once trimmed left enough for another strake or two. I had some Polymarine two-part adhesive (below) and glued the strip to the boat’s curved form with the floor inflated, even if that meant working the roller to press it all together was less effective. I then slathered some Seam Seal around the nose of the strake to protect it from unpeeling (less runny Aquaseal would have been better but a Seam Seal tube was open. More on glues here).
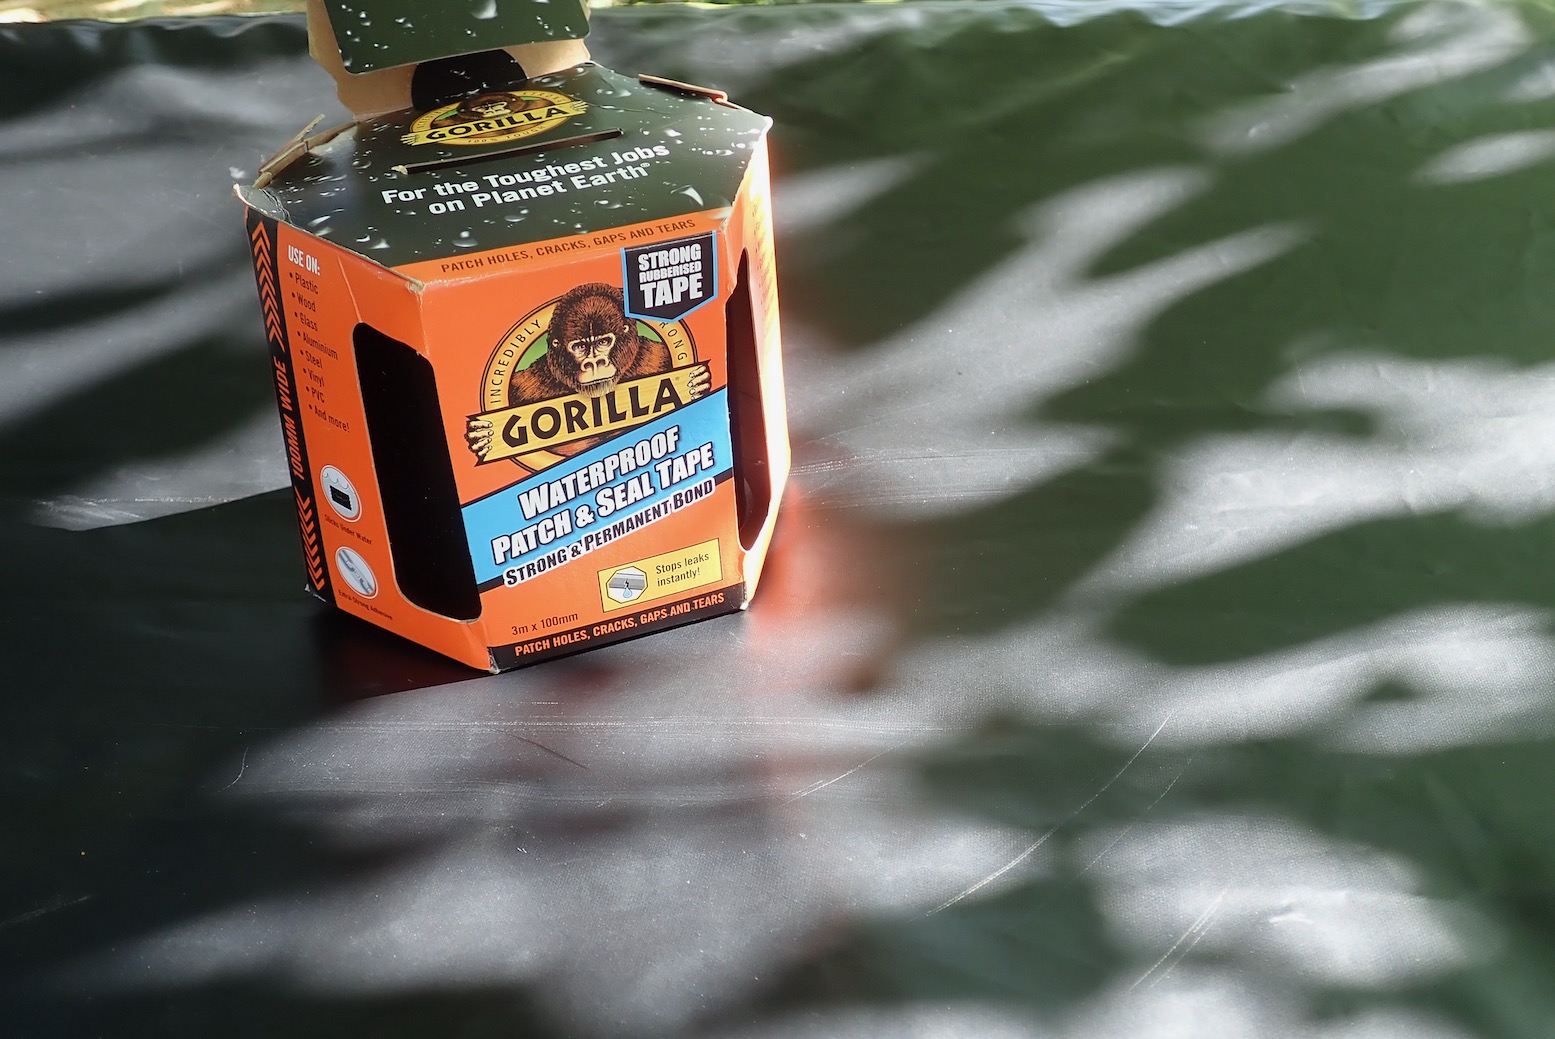
2021 Update A strake is a good idea but actually got hardly worn, so on Seawave 2 I just stuck on some Gorilla tape, maybe two layers, in the same place. Easily renewed/removed.
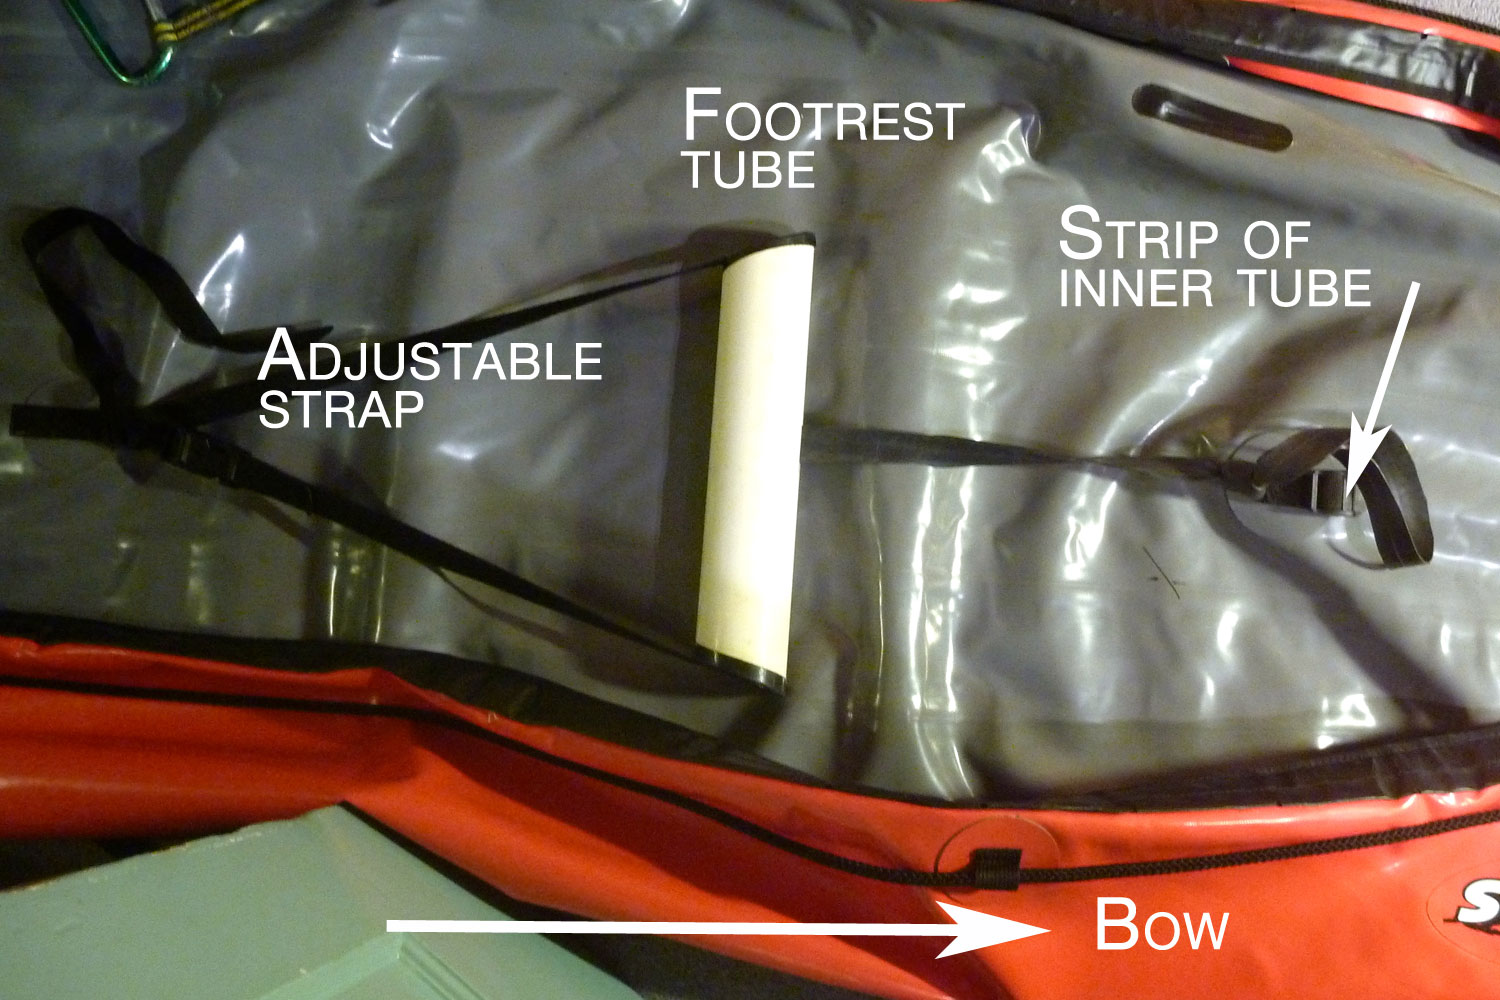
While the boat was filling the hallway and causing a hazard to domestic navigation I also bodged up a better system for the all-important footrest. A bit of inner tube now counter-tensions the footrest from the bow to keep it in position. It means the thing is now fully adjustable across a wide range of positions, can easily be fine-tuned from the water, removes in seconds for boat cleaning/drying and needed no extra fittings glued to the boat. Once great thing about the Seawave is the multitude of attachment points on the floor and sides.
While on the river my aged Mk1 Alpacka U-seat base went flat, split right in the U. This seat is part of a lighter and comfier system I brought over from my Amigo – an improvement on the one-piece Seawave seats. It’s currently unfixed to the boat and the thin nylon must have ripped while yanking it into position on the river after getting back in. Again, I’m trying to avoid gluing extra D-rings to the hull – they’d limit seat base adjustment options anyway.
Better then to attach the seat base to the base of the backrest with a couple of zip ties. The whole backrest/seat base can then slide forward and back off the backrest side straps and it all unclips from the boat in less than 3.7 seconds. I glued up the punctured U-seat but it won’t last, so I’ve ordered MkII Alpacka seats (left) from Packrafting Store: €70 delivered for a pair. From Alpacka US the seats cost $25 but their auto-calculated international postage is nuts, let alone tax and VAT issues. These seats have the U filled in like a webbed foot: stronger and less floppy for just ~12g extra weight.
Seawave 2 seats and thigh straps
2021 Update. I’m using the same system on Seawave 2; a non-U packraft seatbase and a used backrest off a Bic SoT with a piece of stiff plastic board slotted inside.
Heavy
Better
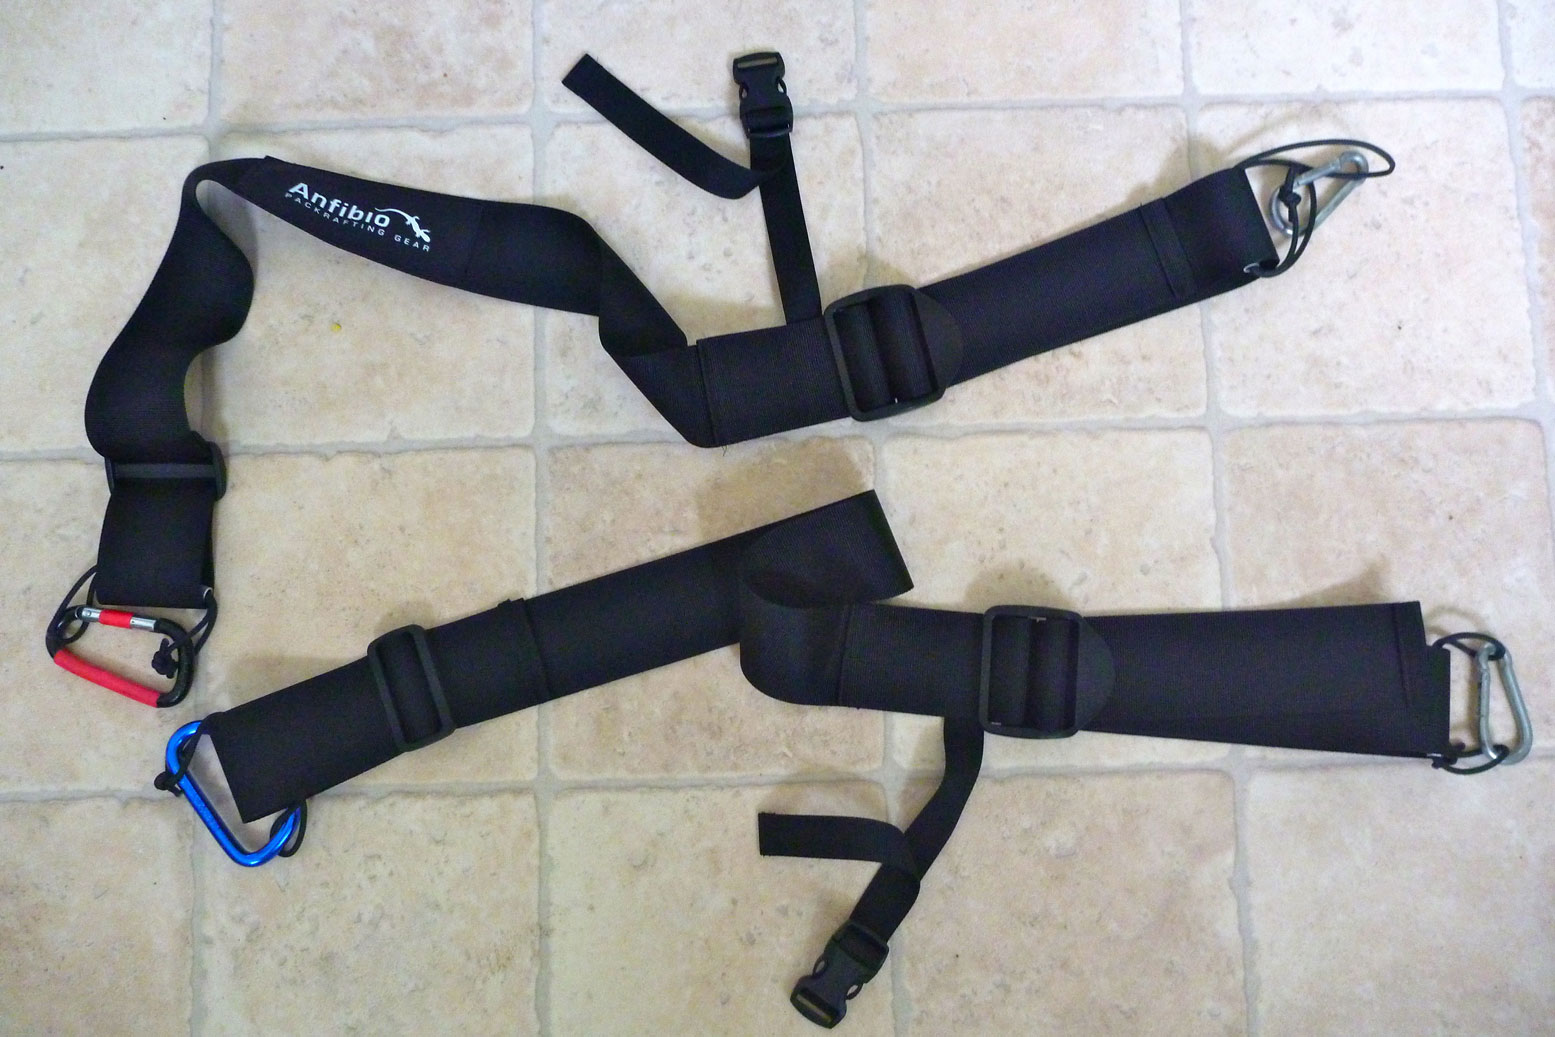
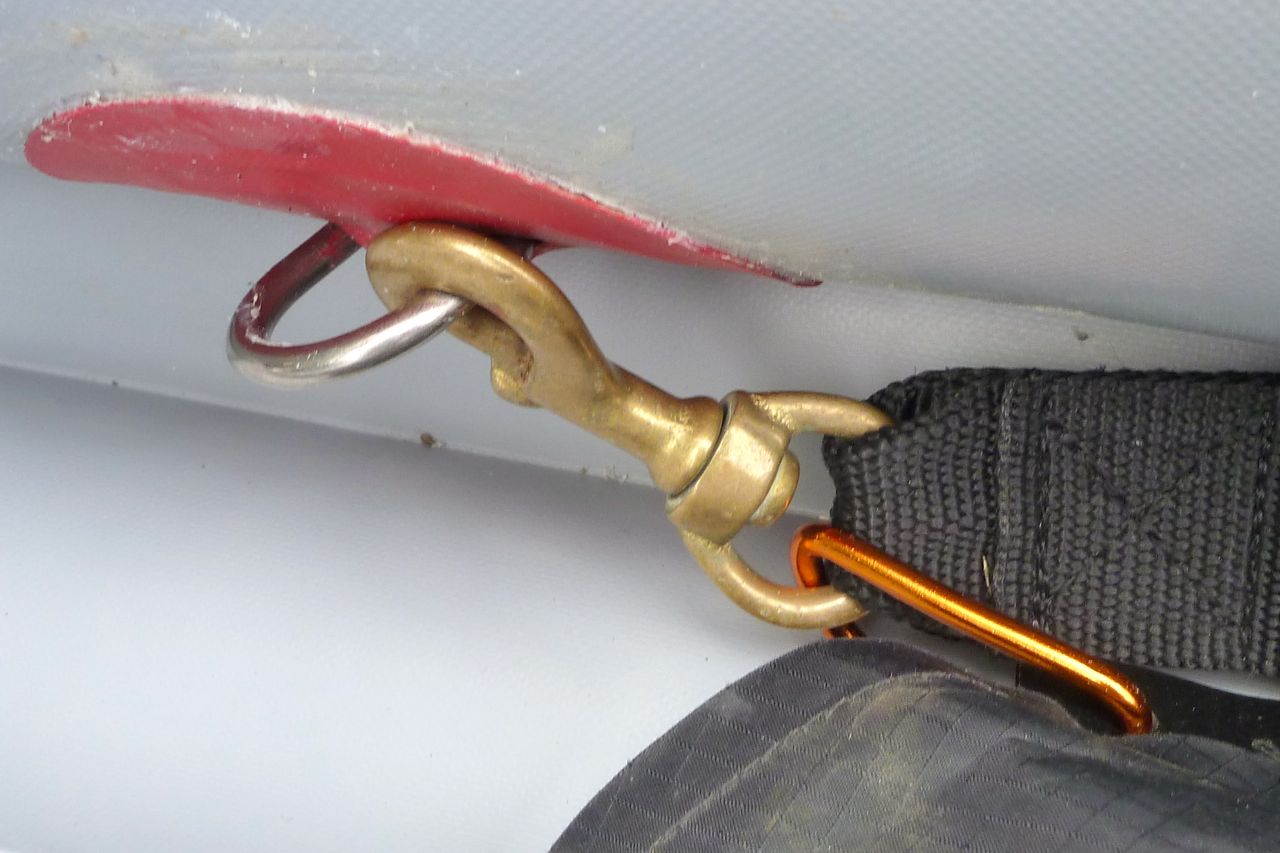
I’ve also ditched my old my SoT thigh straps (left). Nicely padded and effective though they were, the brass spring connectors and padding made them feel heavy and bulky at ~720g.
Instead I got some non-padded Anfibio packrafting straps (they’re different now). With my biners they come in at 270g. The delta-straps dangling off the sides are a clever idea, designed to give a more direct pull when rolling a packraft for example. Can’t see myself doing that in any of my boats. Whether you’re rolling or just paddling, in rough water the more direct connection with the boat the better. I’m a big fan of these light but effective straps now. No need for paddling.
Clipped together is actually the wrong way – entrapment hazard!
It’s understandable to worry that something like an inflatable boat is a bit of a liability when out in the middle of a deep lake, hairing down some white-water or when far out to sea. This is especially pertinent if your only experience is a beach toy made of a thin and stretchy PVC film.
I’ve owned over a dozen inflatable boats and have only had one tiny thorn pinprick in the Incept, age-related fabric perforation on an ancient Semperit and a hole worn through careless transportation in my Seawave.
Once on the actual water it’s hard to think of anything actually puncturing my full Nitrilon Gumotex IKs or the old Grabner. What more often happens is some kind of accidental wear or rubbing when not paddling or during transportation, like the trolley wheels which wore a hole in my Seawave, or the windy tree branch which rubbed (but did not puncture) my Grabner (left). I also snagged my packraft’suninflated floor on submerged concrete once, then added protection to the outside and padding on the inside to stop that happening again.
I’ve also travelled with cheap slackrafts that have got ruined within minutes and punctured every other day. You do get what you pay for. So when it comes to glue I’ve learned that preparation and application are vital to getting a good repair: rough it up; wipe it down with solvent, apply the right glue to both surfaces, wait, then slap on the patch and press down hard with roller to achieve a long-lasting bond. More below.
Is your boat plastic or rubber? As explained here, broadly speaking IKs are made of either rubber- or PVC-coated fabrics. Rubber-based Hypalon, EDPM or Nitrilon is much less used now and most with the tubeless construction method. On a boat like this, rough up the surface, clean with solvent (see below), apply the right glue and a same-material patch, all which needs to be done well as the patch is vulnerable on the outside. Or, you can just dab some Aquaseal directly onto a small hole in the hull to protect it from wear, as shown above left (not an actual puncture).
One-part glues I’ve succeeded in gluing on non-critical D-rings onto Gumotex Nitrilon and Grabner EDPM (Grabner), as well as PVC to Nitrilon using single-part Aquasure urethane sealant/adhesive (‘Aquaseal‘ in North America). Allowing Aquasure or similar to half-cure in air for 30 minutes, then sticking together and letting it ‘seal’ to itself is a way of bonding anything – even non-compatible rubber-based Nitrilon to PVC, as I did here. SeamGrip is a runnier version of Aquasure to get into cracks and seams. Though I’ve not tried it yet, British-made Stormsure is the same thing. Apply a thin film of Aquasure to both surfaces; wait half an hour, then bond with all you’ve got.
In the UK you can buy Aqausure in 28g tubes from £6, or 250g for around £24. Unless you have a lot to glue/seal jobs, be wary of saving money with the big, 250-g tube. Give it a chance and it’ll split and harden before you get to use it all, even if it’s effectively over half price. Alternatively, I’m told a good tip is to store it in the freezer once opened.
The other one-part glue I used on my PU/PVC Incept IK, Slackrafts and used recently on an old hypalon Semperit is Bostik 1782, not least because it once went real cheap on ebay.
I can’t say it worked that well on my Incept; two-part adhesive is always better. Even on the slackraft the Bostik softened and shrivelled the thin PVC. But on non-critical applications (D-rings and none-huge tears), 1782 seems to work well on hypalons (rubber is always easier to glue than plastic PVC) and at £10 for 100ml was good value. Plus it’s a nitrile rubber/resin-based solution and I’ve found won’t go off and harden in the tube like Aquaseal often does. It’s my favourite, do-it-all, one-part glue.
For years Gumotex supplied rubbish Chemopren Universal gluing in their repair kits. It looked like the brown rubber solution you’d use on a bicycle inner tube. I tried to use it on my Gumotex Sunny years ago and found it was crap. Back then it may have been me, but I tried to use Chemopren again recently on my hypalon Semperit and it wouldn’t even adhere to a roughed up, MEK’d surface! To be fair, it might have been many years old, but so are my other glues.
The glue that came with my second Seawave in 2020 was a small tube of Elastick (left). It looks like a generic polyurethane do-it-all glue, like Aquasure. It will probably remain unused with the boat until it turns solid. I’d sooner rely on Nirtile-based 1782 or Aquasure for field repairs. Tbe problem with these urethane glues is once you open them or the alloy casing cracks they dry up and harden.
Two-part glue
For important jobs use much stronger two-part adhesives suited to actually assembling air boats as well as making more permanent fittings and bomb-proof repairs. At about £15 posted for a 250-mil tin, PolyMarine 2990 Hypalon adhesive is much cheaper per ml than Aquaseal or Bostik 1782. In the UK Ribstore and Ribright sell similar stuff, and Bostik 2402 is the same but prices vary wildly. Just make sure you buy for Hypalon or PVC. I’ve used it to glue D-rings onto my Grabner (more here), floor patches to my Alpacka, latex socks to my dry trousers and patches as well as repairs to my Nitrilon Seawave and Sunny. It sticks like shit to a s***el.
The trick is to measure out the correct quantity. Above: the small bowl about half full of glue and hardener – about 10cc or 2 tablespoons? – was enough to fit two 80mm D-rings. Each surface: the back of the Ds and the hull, need two applications half an hour apart.
In 2017 when I dismembered an old IK, I was easily able to pull off recent patches glued on with Bostik by hand. But I could only pull off Polymarined patches with a pair of Knipex hydraulic trench pliers and even then, the patch coating pulled away from it’s core (lighter exposed weave below) or the patch remained stuck to the boat and instead pulled off the dead’s boat’s hypalon coating revealing the fabric’s yellowed core or scrim. The two recently glued surfaces could not be separated. They say the mixing of the two components causes a chemical ‘vulcanisation’ and molecular cross-linking which creates a very strong bond. Mixing and applying two-part is a pain, but it works.
Get a good roller
Single or two-part, once you apply your patch, roll it very hard with something like the classic Baltic-pine handled Sealey TST15 stitch roller (left) aka: tyre repair roller used for innertube and tyre repairs. The knurled metal wheel set in a solid handle applies much greater pressure than a wide plastic roller I used to use, and they’re only about a fiver on eBay. Buy one now so you’re ready.
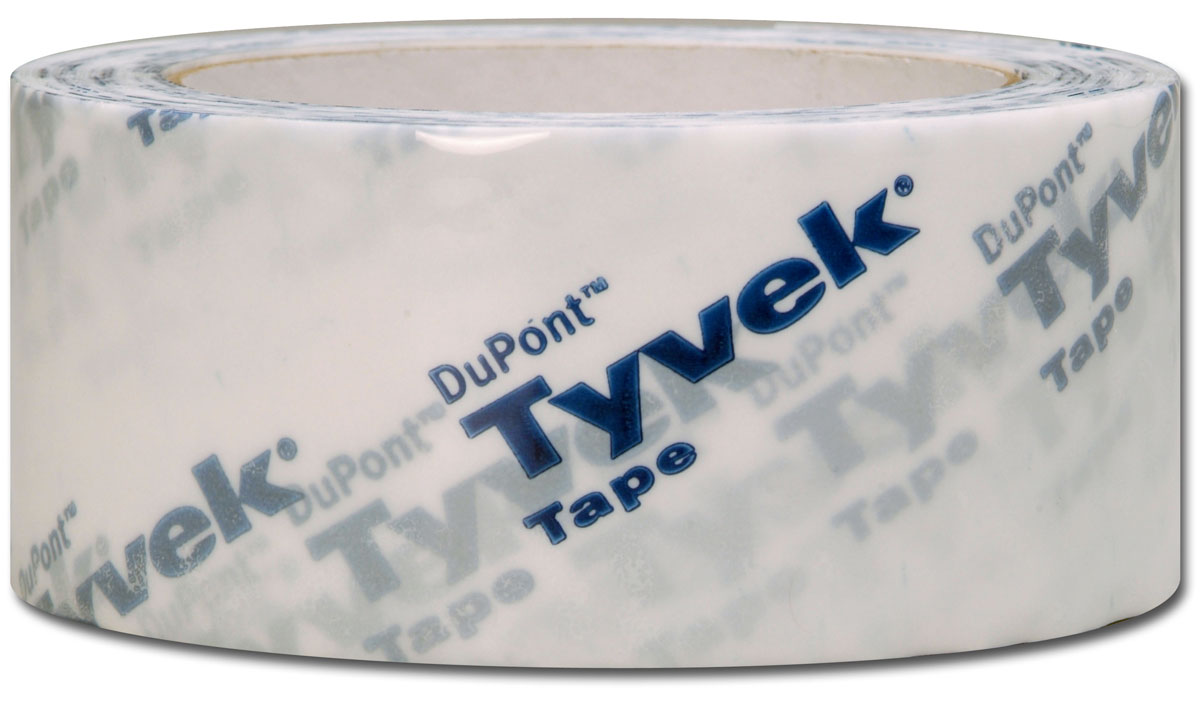
Bladder boat and packraft repairs With smooth-skinned packrafts use two-inch wide Tyvec tape produced by DuPont. Just peel off the back and apply a section to pricks or small tears once the surface has been cleaned and dried. No need for roughing up, but a quick wipe with solvent won’t do any harm. Larger tears can be sewn then taped. Tyvec will work on urethane IK bladders or use ultra tacky Gorilla Patch & Go tape for deep floor scratches and cuts. It will remain impermeable even once immersed.
Helaplast to stick things onGorilla P&G for repairs
Aire-style bladder boat repairs are actually easy. According to Aire’s youtube vid, you unzip the hull shell, slap on a bit of Tyvec on the split, tape up the inner side of the hull shell gash to keep out grit, reflate and off you go. You can glue up in the usual way later, if necessary. I had the feeling that on my Feathercraft Java the urethane-coated sponsons made of thin ripstop nylon fabric (like tent flysheet material) couldn’t have been securely repaired with tape. In fact, it would be difficult to bond anything well to the slippery nylon fabric compared to smooth urethane plastic or hypalon-like surfaces, but perhaps once inflated the seal would have been fine.
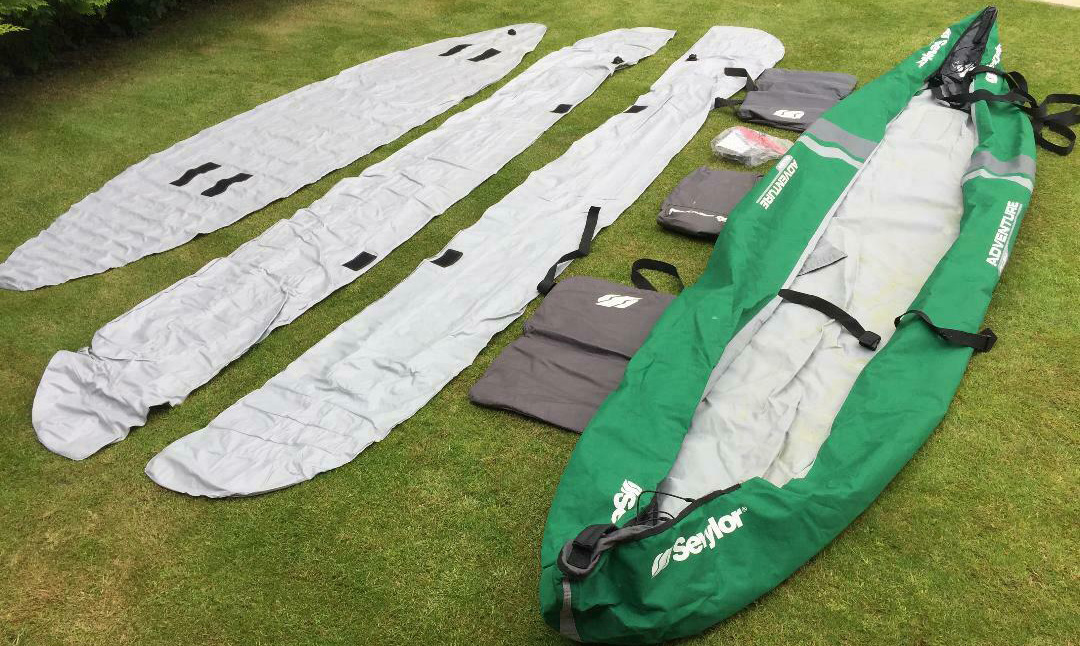
On this Sevylor it was the green envelope which ripped a metre long on the second outing! The owned may have over-inflated on a hot day – it only runs 1-1.5psi. The envelope is just a nylon fabric shell so would be an easily sewn repair. Usually it’s the inserted bladders which go. They can be patched.
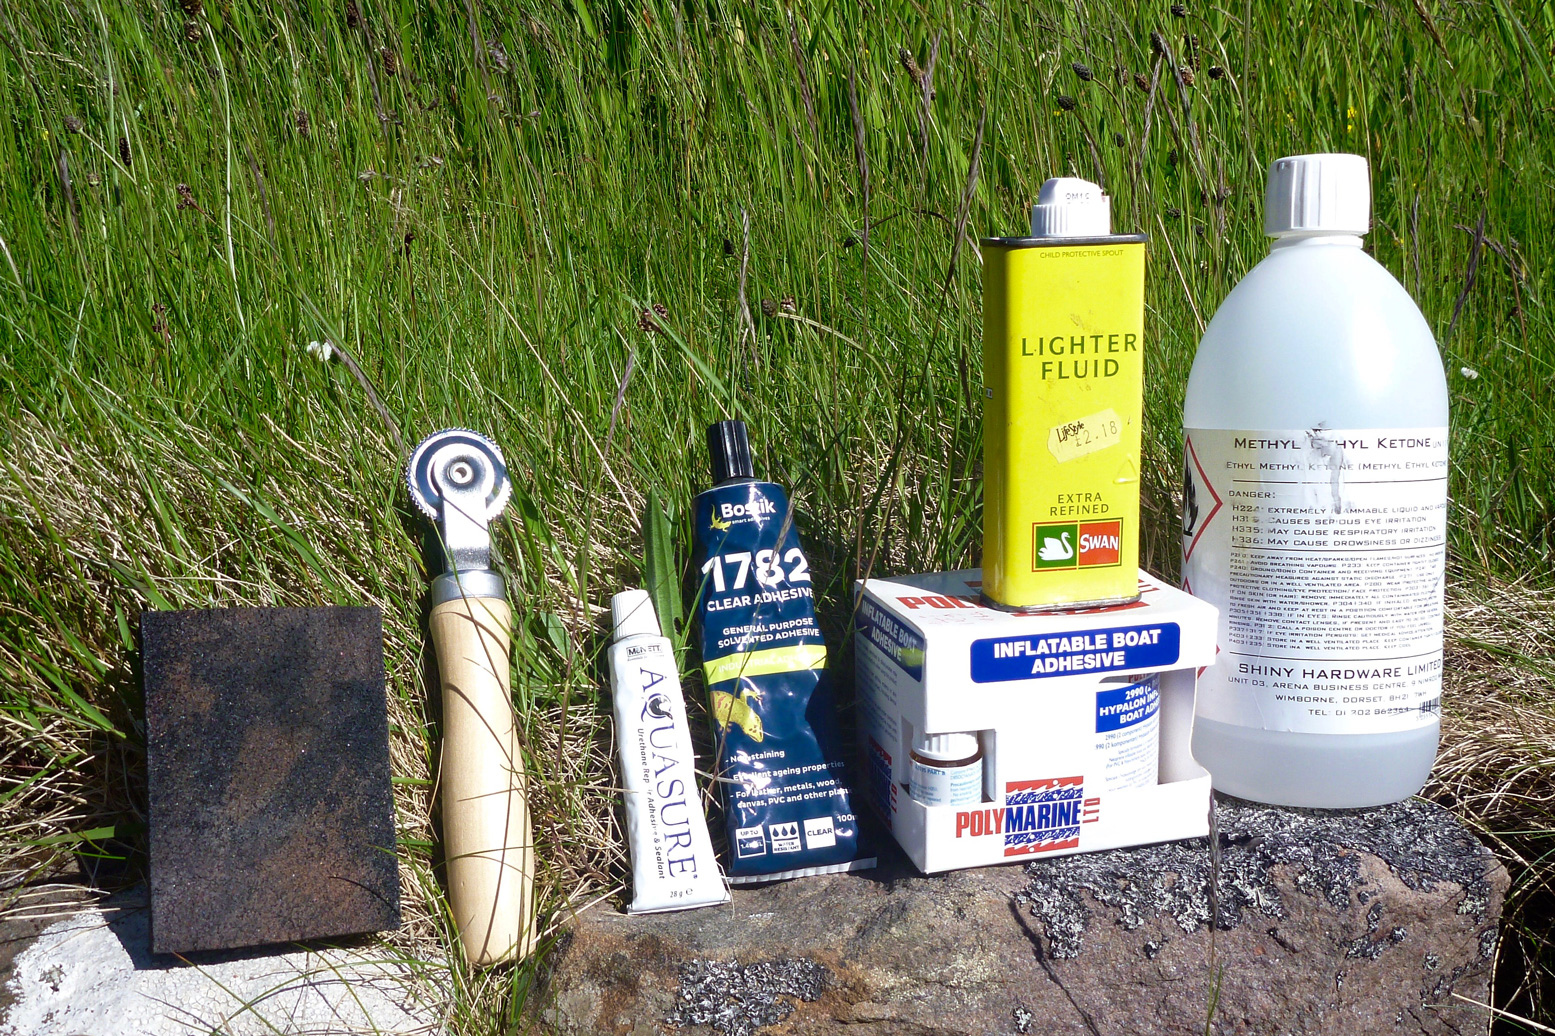
Once you’ve done your roughing up (sandpaper or a foam abrasive sanding block, left) you need to clean off the residue as well as any oil or grease present. Anything will do in a pinch; alcohol and spirits, after-shave or nail polish remover (acetone), lighter fluid, white gas or petrol of course, but not oilier diesel, aviation fuel or Nivea for Men. Bleaching agents aren’t the same thing. In the end just use water to remove the dusty, post-roughing residue, and on a cold day it can help to warm up the damaged surface to cure the glue more quickly.
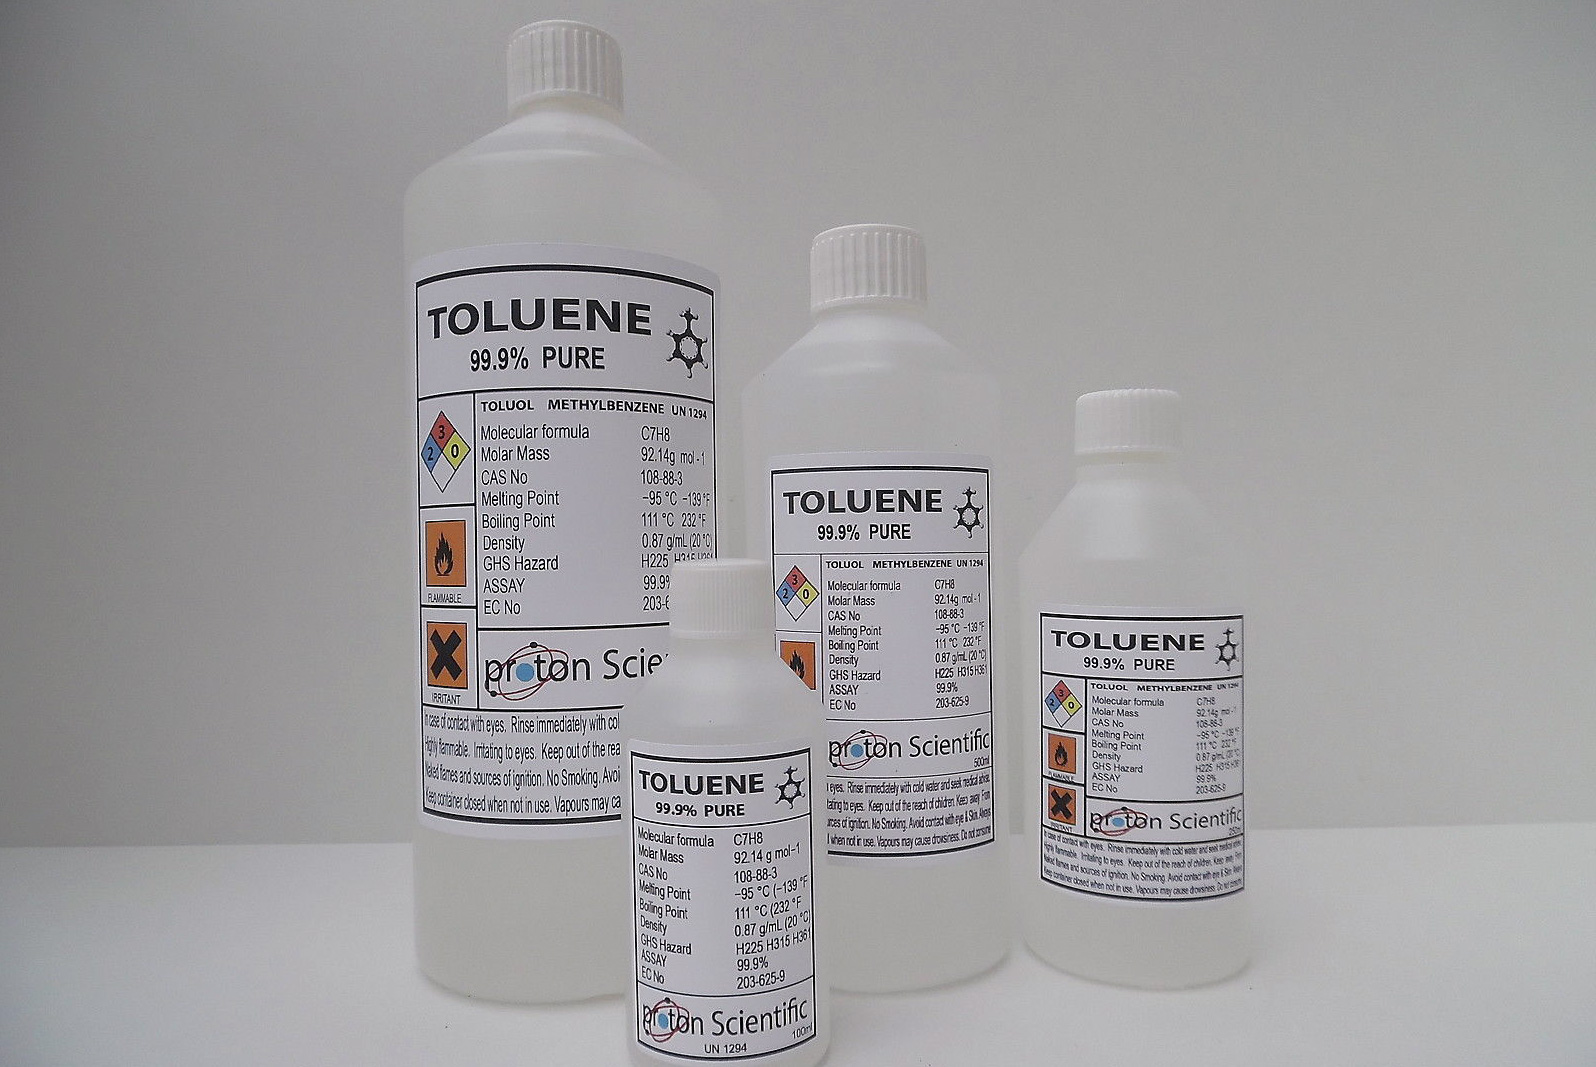
Tri Nitro Toluene (TNT)
For a travel repair kit a tin of lighter fluid (same as white gas) or nail polish remover (acetone) are easy to buy and handy to pack. Back at home I’ve found MEK (Methyl Ethyl Ketone) is inexpensive at £9/ltr and hideously effective. Acetone is even cheaper and perhaps less extreme – all we’re really talking about is cleaning off any grease and the dust after sanding. They say MEK is for PVC boats rather than Hypalon, but on a thin plastic slackraft the PVC will shrivel up before your eyes once MEK’d. Even on rubber-based coatings use MEK or similar toluene sparingly. Expect some colour to come away on the cloth and the coating to soften at bit: good for adhesion. Note the NRS video above specifically recommends toluene (the second ‘T’ in ‘TNT’ explosive, fyi) for hypalon. On ebay uk it’s the same £9/ltr but they won’t post this stuff around the USA.
Huge tears and bear bites
If you have a huge gash, as in the folding Klepper’s hull below, sewing is the only way to contain the tear when applied to an IK. Then apply a huge patch with adhesive, as normal. The boat below caught a cut-down metal fence stake buried in a shallow river bed and was actually sent back to Klepper for professional repair. It’s tempting to think an IK’s pressurised hull would have skimmed over the stake rather than snagged it. The smaller 1-inch L-tear on the left was glued with a 5-inch patch but the 30-year-old IK proved to be totalled.
This huge tear…was carefully sewn up..and patched. Good as new.This old Klepper caught a metal stake buried in a riverbed. Rrrrrrrip. Even then, sewing up the tear and a big enough patch, that would be an easy repair
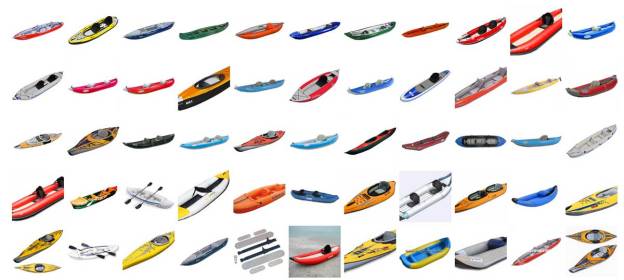
Inflatable kayaks are a bit like mountain bikes. You can buy a blinged-up piece of overweight junk with ‘full suspension’ from a superstore for under a hundred quid. Or, if you’re serious about your cycling fun you can buy something decent that’ll be a joy to own and ride.
Unlike my previous new IKs, out of the bag you don’t get much with a Grabner Amigo. In fact you don’t even get a bag. With Grabner IKs just about everything except the repair kit and air you pump in is an extra which undermines the otherwise striking 14kg weight. To make up for this dearth of equipment, in the catalogue they even list the specification label (right) as among the boat’s standard features! So my Amigo added up to the bare boat with carry loops at each end and two backrest bars. No seat, skeg, pump, lashing points (D-rings). On purchase, I ordered half a dozen D-rings and a pressure gauge. The rest I’ll work out myself. Having learned what’s needed over the years, that suits me fine.
With the high pressures an Amigo runs it’s great to finally have a pressure gauge that’s easy to use (left). There are no pressure release valves (PRVs) to stop an Amigo splitting a seam if left out in the hot sun, so it’ll be a quick way of keeping tabs on the boat’s pressure or ascertain it’s at full charge. I’ve added a marker in pink to easily line up with the Grabner’s rating of 0.3 bar (4.3 psi) – not 4.3 bar as I mistakenly did once (the old eyes are going…).
Fitting a tracking fin
Before the Amigo even got wet I glued on a Gumotex skeg patch (left, £12) and thick plastic Gumo skeg (another £12). All up cheaper and stronger than Grabner’s similar slip-on €60 alloy version. I took a chance using MEK to wipe and one-part Aquasure to glue the Nitrilon patch to the Grabner EPDM hull as I didn’t have proper two-part adhesive to hand. I figured it would work OK as a skeg isn’t under great strain like thigh- or footrest D-rings, for example. Years later, no problems. Apply a thin film of Aquasure to both surfaces; wait half an hour, then press down with all you’ve got.
A skeg is a pain in the shallows or when dragging a heavy-laden boat over the heather; that’s one thing I liked about the Incept’s hinged rudder, but I can’t think how to make an effective hinged skeg except the way Feathercraft do it on their self-bailing Java (it slips up and down through a slot in the self-bailing floor).
Press down hard!
Can just about the fitted when inflated
A slip-in skeg can’t be slipped off a fully pumped up boat, at least one like a high-pressure Amigo, though actually after a couple of months it’s less tight and can be done. Being able to do that is very handy for portages or grass-dragging, though the skeg itself looks pretty tough. Of course, an IK works without a skeg, but on coastal waters they’re a good idea. More on that topic here.
Pump
The Amigo uses more secure bayonet inflation valves which with the right adaptor (see inset below left) don’t pop out at the high pressures (0.3 bar/4.3psi) this boat requires.). Pump hose-end bayonet adaptors are easily bought in the UK from RIB suppliers on ebay. Inset left, the black one is what Grabner sell with a fitted fibre sealing ring and steps in the bayonet to suit different valve depths. The ‘butterfly’ finger tabs make this easy to twist in place, too. The green one uses plastic spacers held in place behind a black rubber washer to get a good seal. You wouldn’t want to lose these push-on seals and it’s hard to twist in place, so for the moment I’d say the Grabner one is better. Write that down, quick!
A now almost extinct yellow-hosed Bravo foot pump that suits some Gumotex can’t manage Grabner pressures, at least not my aged Bravo which hisses from various leaks before you can get a full charge. I’m amazed it’s lasted as long as it has. I got myself a bulky 2-litre barrel pump (above left, £20) rated at over 11psi. As you can imagine, on a low-volume IK this works fast, not least because it pumps on up and down strokes. Like Bravo foot pumps, it also has a second port to suck out ever last dram of air – handy for compact packing at the end of a tour.
The Bravo barrel is bulky so I’ve got a K-PumpMini (right, review here) from i-canoe in Ireland who can import anything from the NRS catalog in the US, and without a huge mark up too (€80 delivered, not sold in the UK). My longer K-Pump 100 worked surprisingly well inflating the Incept; we’ll see how the Mini model performs on the Amigo. If nothing else it will be a handy top-up pump; Grabner cover themselves very comfortably by claiming that anything under a 20% pressure loss over a 24-hour period is not a warranty claim, though I’ve never owned an IK that lost that much air in weeks let alone a day. K-Pumps can’t suck out air like Bravo pumps, but using a loose hose with the bayonet fitting it can be done by lung.
Additional D-rings
Next, I glued on my half-dozen D-rings (left). Front and rear will hold down gear; the other four locate my cut down packraft seat as well as an adjustable footrest tube similar to what I made for the Solar last year. The seat and foot rings will also double up as thigh strap location points. I’ve not always been that successful at gluing on previous boats, so this time did it by the book: roughen with sandpaper, wipe clean with MEK or alcohol, apply glue to both surfaces thinly and wait half an hour, glue again and wait less, then apply and press down hard with the roller.
Doing this I had a feeling the two-part Polymarine 2990 adhesive (right) was more effective than whatever I used doing the same job on the slipperier PVC-U Incept a year or two ago. I suspect Hypalon/Nitrilon is easier to glue; ‘plastic’ PVC-U is more effectively heat welded.
Thigh straps
Over the years I never really got into using the thigh straps on my Incept or Java – perhaps the need for ruddering the Incept made them more tricky to use, or perhaps I’m just an idle paddler. But with the Amigo, I want to have that option to help it shift. In any case, it’s worth persevering with thigh straps as this is one of the main things that separates IKs from hardshell kayaks in terms of boat control in rough conditions and optimal torso-centered paddling efficiency. Straps are not quite as effective as bracing your knees under the top deck of a hardshell, but they’re all you can do with an IK. Otherwise, you’re just sitting in a canoe or on a floating log. I’ve now got fully used to the straps on the Amigo and use them without thinking, just like I feel much more secure with the toe clips on my bike’s pedals.
Footrest
In my opinion, you need some kind of footrest too, if a braced body is to make an efficient paddle sweep – it’s probably more important than thigh braces. Last year I improved this on the old Gumo Solar that’s occasionally used by the g-friend. The Gumotex footrest cushion (same as my old Sunny) was too far away for the 5-foot Mrs to use effectively and is squidgy at best. On the Amigo I was able to use the front thigh strap D-rings to hook up the 4-inch footrest pipe (above left) with an adjustable strap looped through. It works fine.
Seat
At the other end I’ve separated the toilet-like seat base of my old Alpacka Denali packraft from the backrest section. It clips to the rear thigh strap hardware with mini snaplinks (left). This ultralight seat has already been repaired once by re-heat sealing the flat seam and another hard bounce may pop it again. It’s lasted the summer but if that happens I’ll come up with something better; any inflatable pad or IK seat base will do. The Incept seat was pretty good, so was the firm-backed Feathercraft Java seat which didn’t fold under strain. Right now, at about 50 grams, the cut-down Alpacka seat base is about as light as a kayak seat can be.
The hard plastic Grabner backrest was comfortable enough to lean on once I added a bit of karrimat, though it kept coming adrift from the lug holes when the bar pivoted down, usually when manhandling the boat, but occasionally on the water too. At sea it’s quite awkward to refit the bar into the black rubber lugs as the hull sides push apart. The only way I found was to face backwards in the boat, swing the legs out into the water and squeeze them against the hulls to repeg the seat bar.
To keep the bar in place while retaining a tool-free, quick detach element I hammered out the outer brass peg and replaced it with an R clip (above left). But that didn’t last too long – one clip bent and fell out and, as expected with footrests, the alloy bar was bending against the strain. I tried a blue seat strap instead (right), but hooking that to the rubber seatrest lugs looked like it put too much strain and distort them. Ripping those lugs off would be a pain. No way round it but to glue on another two D-rings as I did on the Solar; a 4.5-inch patch has four or five times the glued surface area of the seatbar lugs so ought to take the strain. D-ring prices seem high so I settled on what I knew – chunky Grabner items at €15 each (right). Grabner deliver fast from Austria.
The seat strap was a crude solution so I figured I may as well try a proper, full-height backrest off an SoT. On ebay the ‘heavy-duty‘ item (left) with long adjustment straps and even a back pocket went for £24 – less than the two D-rings which hold it in place. As far as I can tell the rear straps’ only purpose is to hold the backrest upright, but it’s proved very comfortable – like a proper seat and with no inflation required. I’ll keep the original seat bar for less frequent two-up paddling where I don’t have a footrest to put a strain on it. So after a couple of months use I have optimised my Amigo by completing the adaptions listed here, making a comfortable and more practical boat for coast hopping and river touring. The cost has been six D-rings £80; seat £24, glue £15, seat base and straps already had; Gumo skeg and patch £24, and two pumps, gauge and adapters £110.
Gael’s H2 review here, Compared with other kayaks here Solo paddle up the Scottish Sea Kayak Trail: Part 1 – Part 2
After more than 12 years my tandem Grabner H2 IK was showing signs of wear all over. The most visible appeared behind the fore half deck where two grommets fed the grab lines (below left). Around those grommets the rubber coating had worn off, showing the bare woven core material of the Hypalon fabric.
I knew Grabner could provide an MRO service as stated on their web site and the French Grabner reseller confirmed he could send my boat to the factory in Austria for a quotation. That came the week later in German, but what didn’t need translating was the substantial figure at the bottom which added up to something like “you’re better off buying a new boat”. Another major concern was a crack that developed under the aft backrest bracket (middle). This ill-designed bracket has a sharp edge that gets pushed into the skin under the weight of the paddler. After some years of chafing it had worn a small hole that proved difficult to patch reliably.
I must to admit the H2 is not as perfect and tough as I’d claimed so loudly. Encounters with various submerged obstacles and a number of uncontrolled landings had resulted in many scars and scratches all over the hull. I now also own a similar Incept K40 for solo paddles, but as I intended to keep the H2 as a tandem boat, I thought it was time to give it a serious makeover.
Grabner’s attitude to those requiring a more seaworthy kayak than an H2 was get an Explorer or the framed but now discontinued Discovery, but those IKs are way too bulky and heavy (26kg and 29kg respectively) for transportation when shuttling about.
My H2 weighs just 16kg. Plus they are just about the most expensive IKs in the inflatable world (left). I discussed the money issue with the other half of the H2’s crew who happens to also be the purser. She too wanted to keep the H2 and was not as appalled by the cost as I was, so after a short deliberation we decided to proceed. Three weeks later my local reseller informed me enthusiastically that my H2 was here and beautifully refurbished. Save for the numerous patches it looked like new.
The Grabner folks had done a great job; even the foredeck grommets had been neatly repaired.
All backrest brackets had been replaced with new parts of a much better design. A new pair had been added at my request to enable solo paddling from a central position. Up till then I’d sat in the back of my H2 when solo.
Most cockpit fittings like footrest and D-ring brackets which had started coming loose had been reglued.
There was a keel strip on the bottom as well. Surprisingly the Austrian guys hadn’t paid attention to the colour of the patches (left). While the inside the H2 is yellow, they applied patches in external red. I should have supplied them the yellow patches I’ve got in my repair kit. Anyway, I’m happy the boat is in such great shape again, if not better than before. I can’t claim it’s worth as much money as I’ve spent on it, but I’m sure my H2 will go for another 12 years.