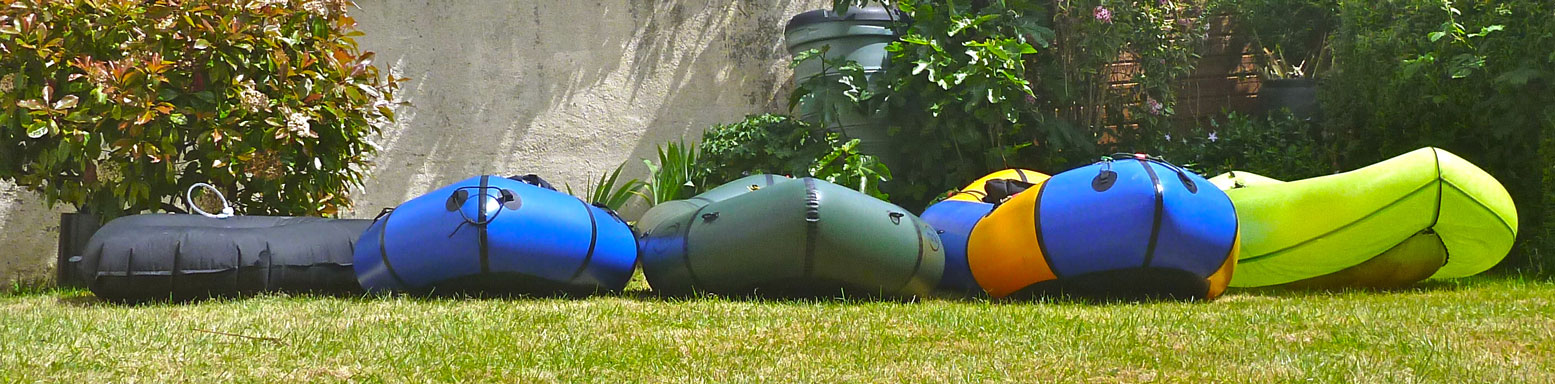
After being pulled out of the Matkat this was much more like. I was gliding along, whoosing forward with each paddle stroke, tucked under the deck of the MRS Microraft. Yeah, baby! However unfair, we all admitted that whichever boat you used after the Bin Bag was the best boat of the day. A Chinese-made packraft sounds like a hard sell, especially when it so closely resembles a Gen II decked Alpacka that it risks being labelled a cheap knock off. But the price of the Microraft isn’t cheap, and as far as we could tell neither is the build quality. With China’s enduring if outdated ‘made in Hong Kong’ reputation and MRS’s unsophisticated website on Aliexpress, this can be something that’s hard to get your head around. But we forget that good and cool stuff is made in China too: when’s the last time someone scoffed at an iPhone because it was made in Chengdu? The difference is that iPhones are probably designed in some groovy Californian creative play pen. That’s not the case with MRS but whoever’s behind them is definately not in the knock-off or pool toy game and has gone out of their way to make this comparable with Alpacka in more than just looks. The deck may look identical to the thin velcro-and zip item I had (but rarely used) on my first two Alpackas. But the Microraft differs significantly in having parallel side tubes (like a white water raft) and less bow upturn. You imagine the parallel tubes simplify construction a little and I didn’t sense any noticeable tracking drawbacks on the water. On the contrary this arrangement makes for a footbox that’s as wide as the seat so that even in this Small/Medium 120-cm-long model my large feet weren’t jammed as they are in my 177-cm long Yak. At 27cm the Microraft does run the thinnest tubes of the bunch and I noticed that Bob (at 85kg – right) looked quite low and back-heavy (I’d have been even lower) while Hannah and Lois looked just right in this raft. And we’re told that a side benefit of slimmer side tubes is better edging in rough water. The picture from the Store (left) clearly show that the Microraft can tackle the white water with the best of them. The seat is threaded in with string like Alpackas and our boat came with nine attachment loops, four up front, two at the back and three inside. The fabric has less of a shiny sheen too, but is applied to both sides so is more puncture resistant. Another thing I liked about the MRS was the non-featherweight air bag that feels so much nicer in the hand than my Alpacka’s net curtain. (They say restos with heavy cutlery can charge more). And the valve cap attached to the valve body: a simple solution to lost caps held on with string. I never trusted that lightweight ‘Cruiser’ deck on my Alpackas, and the attachment was messy with exposed positioning tape peel;ing away on a hot day. But as our test day grew increasingly chilly and wet, so everyone in the MRS including me was pleased to tuck in and zip up, like a granny by the fireside. It’s not a bomb-proof solution to white water – the decked Trekraft or self-bailing BAKraft are probably better, but it sure slows down the swamping while keeping your legs warm. Only the 1000-euro price tag needs some getting used to; it feels too close to an Alpacka while you assume Chinese workers’ wages aren’t, even if their workmanship and the materials used are hard to tell apart. If you took off the MRS label, I could have easily been fooled that this was a new Alpacka model. And that alone must be worth the price.
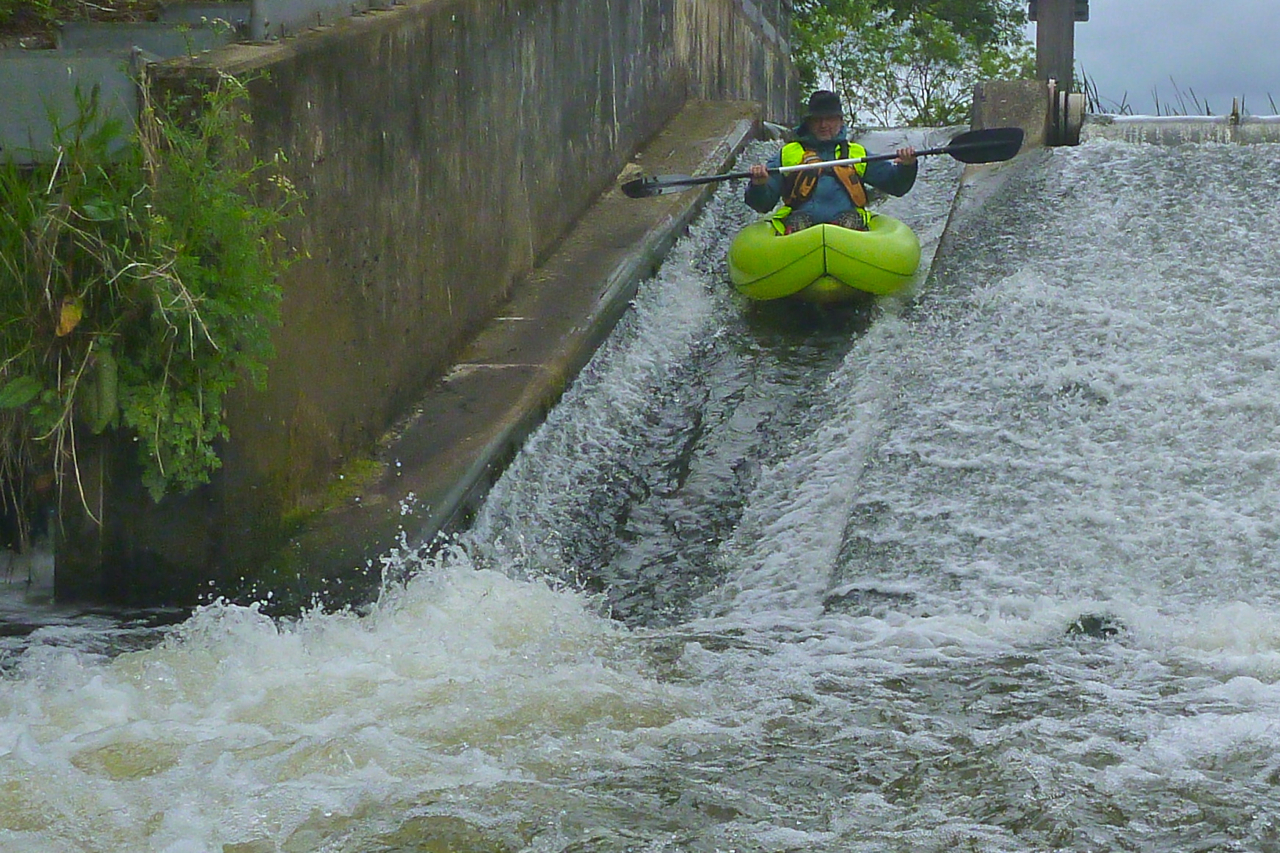
A muddy bank below Porters chute and it was my chance to mount the BAKraft – that’s ‘BAK’ as in Backcountry Airlight Kayak. The concept was developed in Idaho by a guy called Cory Walker until nearby Aire in Meridian, ID stepped in to help finish the job. The result is a ‘packraft’ that resembles Aire’s shorter whitewater IKs like their 2.9-m Force, right down to the rockered ‘banana’ profile, bladdered ‘AIRECell’ construction and high, self-bailing floor.
I’ve long admired Aire’s IKs from afar and came close to buying one a couple of times, but besides being unknown in Europe, the weight, price and the bladdered design always put me off, even though some are guaranteed for up to a decade. As a packraft-like-kayak I wasn’t so sure about the BAKraft either. Intrepid wilderness adventurer Forrest McCarthy took an earlier prototype down the Grand Canyon last autumn, but a promised full review has yet to appear. In fact, the long post had surprisingly little to say about the new BAKraft: “very responsive yet amazingly stable” was the limit of it.
The BAKraft pitches itself as a hybrid IK/packraft or maybe even an ‘SoT’ packraft that seems more suited to whitewater than packraft trekking. It’s important to note that the boat we had was a prototype and at the time of writing Aire were midway through a ‘production/material’ cock up that had set them back a few weeks. It’s unclear exactly what that was but it’s possible that some of the reservations you will read below may be addressed.
Whatever turns out, we’re assured the final version will be much lighter because both the Aire and BAKraft websites claim BAKrafts will be ‘7lbs 2oz’ (114oz or 3.23kg). On the water our prototype weighed in at 4.25kg with seat and thigh straps – that’s over a kilo or nearly a third more than their target weight. The final production BAKraft will have to go on quite a diet, even if this claimed weight follows the supposed ‘industry standard’ of a stripped out boat with anything removable removed (that’s how Alpacka do it).
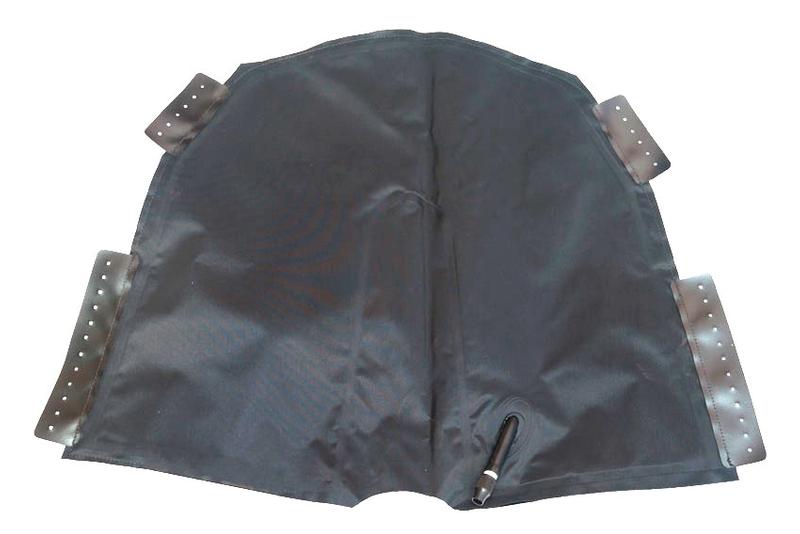
There’s more on each of the test boat’s construction in the intro page but the most obvious place to save weight will be in the heavyweight material used for the backrest. It’s a PU-coated nylon which feels about 500 denier and weighs 458g.
In our prototype it looks like the same fabric was used in the I-beam floor where you’d imagine it might be needed. So Cory the designer explained in an email when I was trying to square the weight anomaly. You may agree with him when you undo the side zips and see how thin a urethane AIRECell actually feels. I’ve never actually seen one before and I wonder if this is the same weight as used on their IKs and rafts. Other than that our prototype was a bit over-generous with attachment points: a line of eight along each side of the floor (similar to Aire IKs), four more on the deck and two under the bow and stern with metal rings. There are even what look like carry handles midway under the boat (right). For portaging, perhaps? Who knows but there’s some scope for a little weight saving before the floor takes a urethene AIREcell.
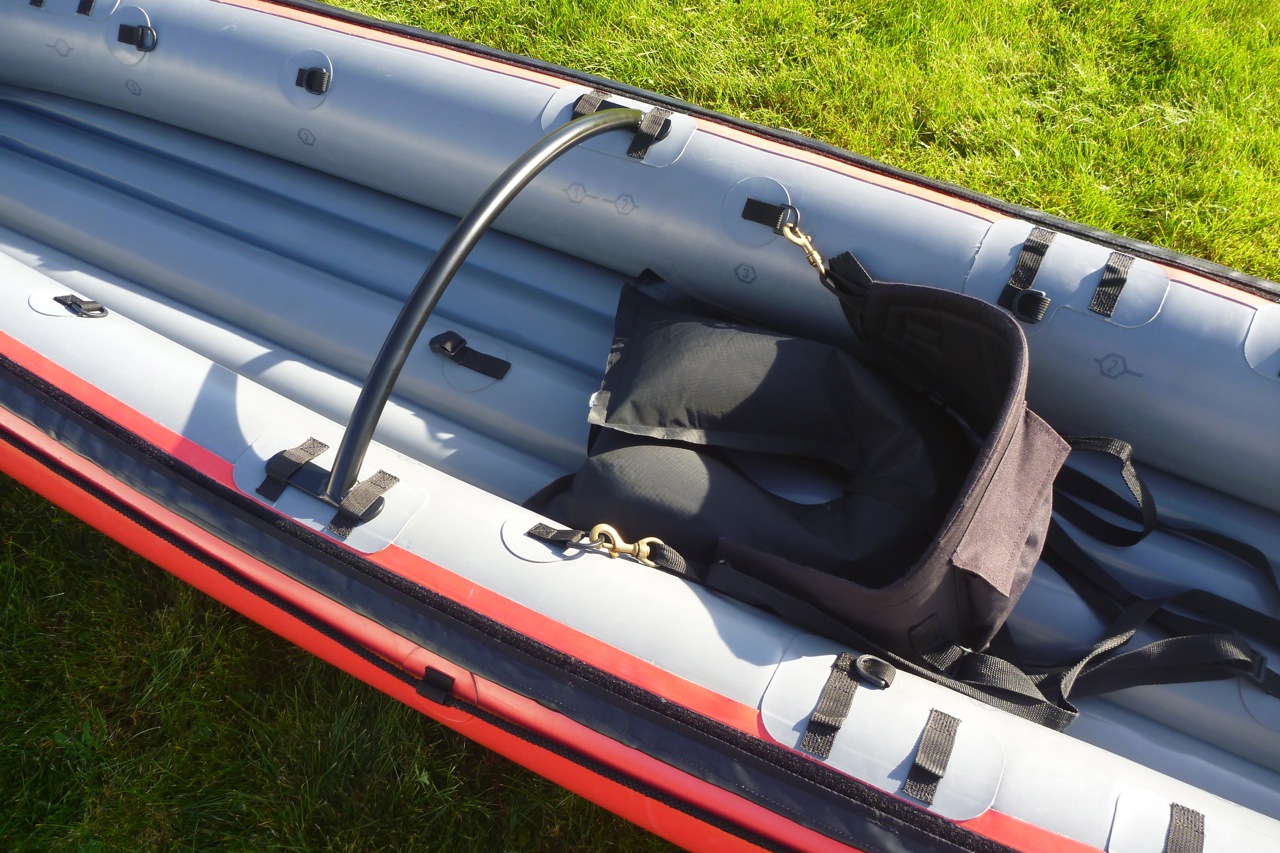
The first thing they might consider is ditching the whole ‘ISC’ (‘inflation, seat, cargo’) bag idea. As an inflation device you’ll have read it’s cumbersome and unless I’m missing some trick it doesn’t work for long as a backrest either, because a roll-top seal is not an airtight seal.
I anticipated this and sure enough, the backrest slowly collapsed as you tip further and further back until you look like someone in a deckchair on Brighton beach. This is partly because the semi-rigid seal strips in the bag opening are folded and sewn into the uncoated side of the fabric which is textured, rough and therefore not airtight. Rolling the fabric the other way – PU coating out – to make sleeves for the strips would have made a more effective seal. It’s hard to think someone like Aire of all people didn’t anticipate this. There is a twist-lock valve at the back of the bag (part of the convoluted inflation system described on the intro page) but you can’t reach it on the water without getting on your knees and turning around (a long Supai-like top-up tube might help if they persevere with this idea).
Fact is, the best use for this ‘ISC’ bag is simply a trunk. Right from the start we piled all our stuff into it in the vain hope of making it a more supportive backrest, but it’s not in an ideal place for weight distribution and trim. Everyone who paddled the BAK looked back heavy. With the raft’s bow sticking up, a sudden gust on steep wave might flip you over backwards, surely not a good thing in a creek boat. As it is the BAKraft’s high bow and buoyancy would make it hard work touring all day into a headwind, wherever you stash your gear.
I say ditch the ISC which ruins the elegant lines of the boat anyway. Let the user sort out their own baggage requirements if needed. Then supply something like a Feathercraft BayLee-air bag or their handpump (just $35) and concoct a simple stiff-backed, non-inflating backrest. Aire knows all about that; I used one of their IK seats years ago on my Gumotex Sunny. It was the best thing around at the time. Otherwise, fit a TiZip in the ISC bag or revert to the sealed inflatable pillow or thwart backrest shown above left.
On the water you sit high on the inflated floor – a necessity to keep you out of the water that sloshes around the self-bailing ports. On getting in I instinctively pulled on the thigh straps; they helped a bit from sinking backwards against the backrest, but interestingly I didn’t feel the lack of a seat pad made my paddling stance uncomfortable which makes me think shoulder-to-water height may have more to do with it than bum-higher-than-feet. That height helps you reach past the metre-wide sides and, with the pump-assisted 2psi pressure in the tubes, the BAKraft skims along quite efficiently, even if I was leaning back at 15°, 16°, 17°… Sagging backrest apart, a much longer paddle would be needed to genuinely assess comfort.
I can’t say I perceived any drag from the bailing ports, the comparatively high pressure saw to that and the pronounced rocker saw the raft easy to turn (though no packraft is exactly short on turnability). Obviously, the chutes didn’t give the Aire any grief; this raft was gagging for some meaty white water which in southeast England is as commonplace as a herd of stampeding wildebeast.
Not being a white water thrill-seeker I wasn’t inspired by the half-finished BAKraft. It’s too heavy and bulky for packraft travels and the backrest and inflation system needs rethinking. The thigh straps are a start, but a footrest is also needed for steep impacts or just general paddling efficiency (easily done with all the attachment loops).
But even if they do get the weight down to the claimed 3.23kg, I feel the BAKraft is much better used as a creek boat than a traditional packraft for wilderness travel. And even then, Sven from the Store admitted in the rapids it was quite a steep learning curve compared to regular spray-skirted whitewater packrafts with a much lower centre of gravity and so better stability. The buoyancy is massive but it’s a tippy boat, both side to side and front to back. Doubtless, I wouldn’t last five minutes in it. He also found the Dyneema floor a bit slippery when wearing nylon clothing and the thigh braces not so comfy (I find fitting braces floor-to-floor works best, as shown in the video below).
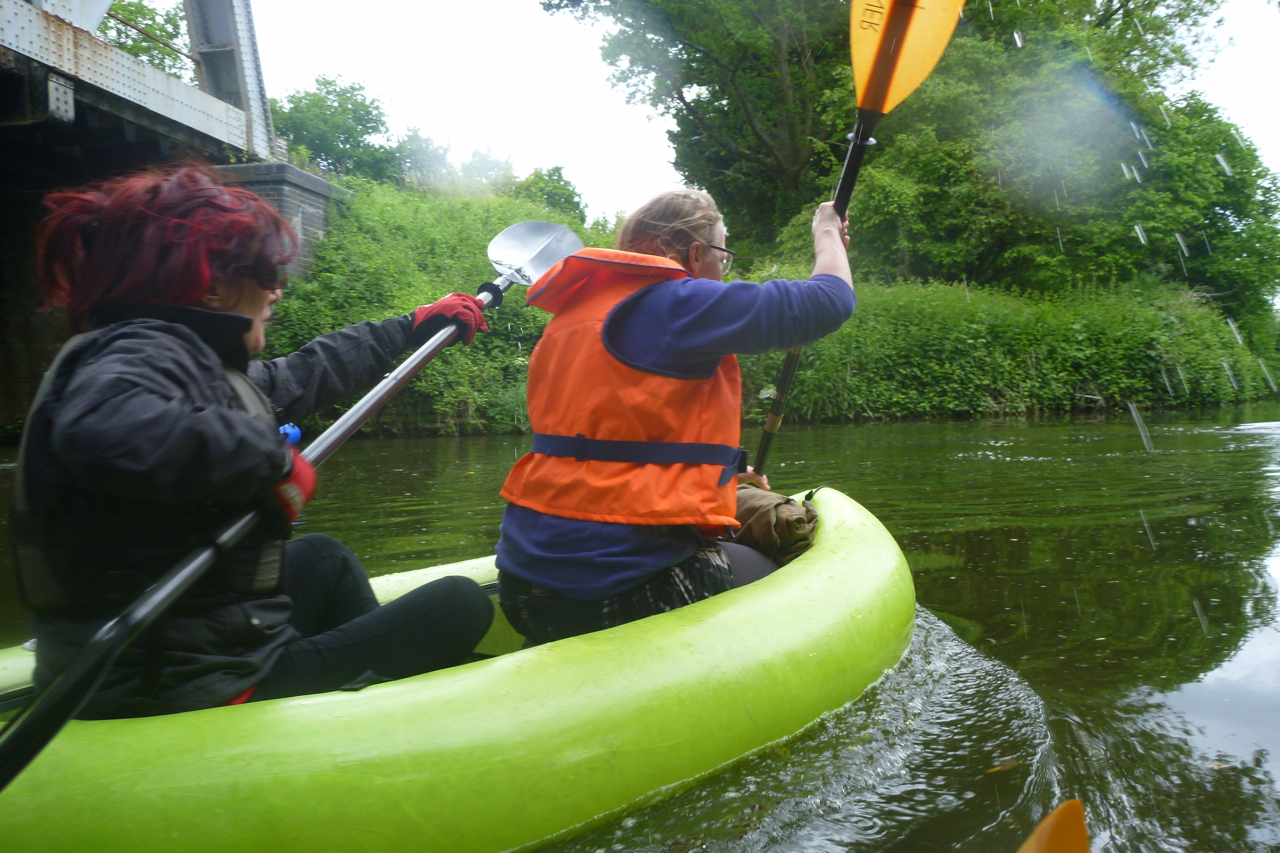
Towards the end of the test we got a chance to test the BAKraft’s payload claims when we abandoned the Matkat. Lois and Hannah paddled it two-up with a total weight of 150kg with all the gear. Lois at the back found herself sitting in water until Hannah hung her legs out over the bow to counterbalance things. But for her it wasn’t a viable paddling stance and it’s not designed to do this of course. If you’re looking for a small double packraft, the Trekraft worked better.
The BAKraft will suit experienced whitewater rafters who prefer not being hemmed in by spray skirts and can handle the boat’s lively characteristics. I can see skirt-scorning BAKrafters scrambling way up to some inaccessible mountain river to pull off a first descent which would have been a chore to get to with any other type of boat.
When it was all over I was reminded of the other factor that’s always put me off bladder (‘inner tube’) boats. They take ages to dry while leaves and other riverine detritus collected in the nooks and crannies which all need a good hosing. With a TPU packraft it’s just a quick wipe, shake and vac. (The black Supai dried even faster.) A production BAKraft won’t get around that, but hopefully some of the flaws we found in this prototype will get sorted in the final version.
Size (fully ‘inflated’) 90cm long x 38cm wide. Circumference 120cm
Features Grab handles at each end; holdall handles; basic backpack harness; small zipped mesh inside pocket; one-way inflation/purge valve
Fabric: Don’t know exactly, a tough, abrasion-proof nylon fabric with a glossy coating on the inside
Cost About £120 in 2011. No longer made
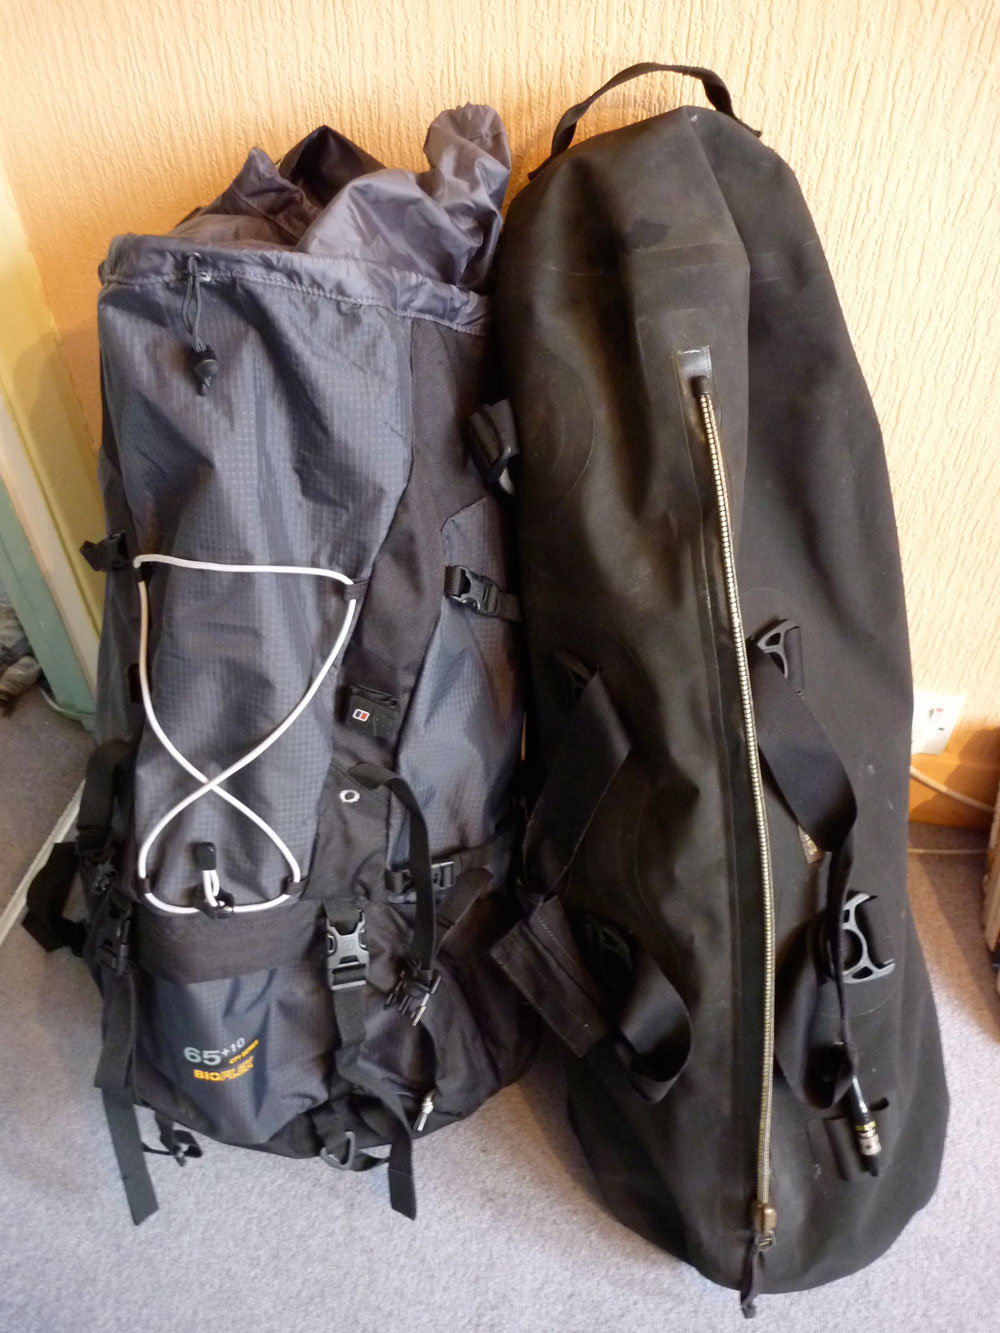
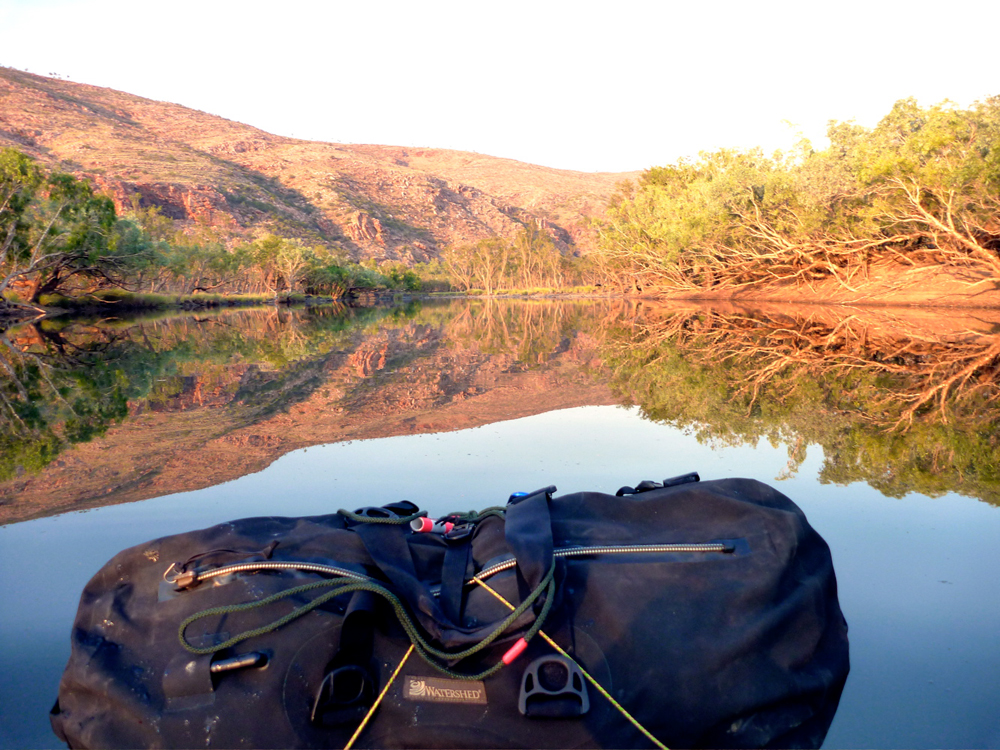
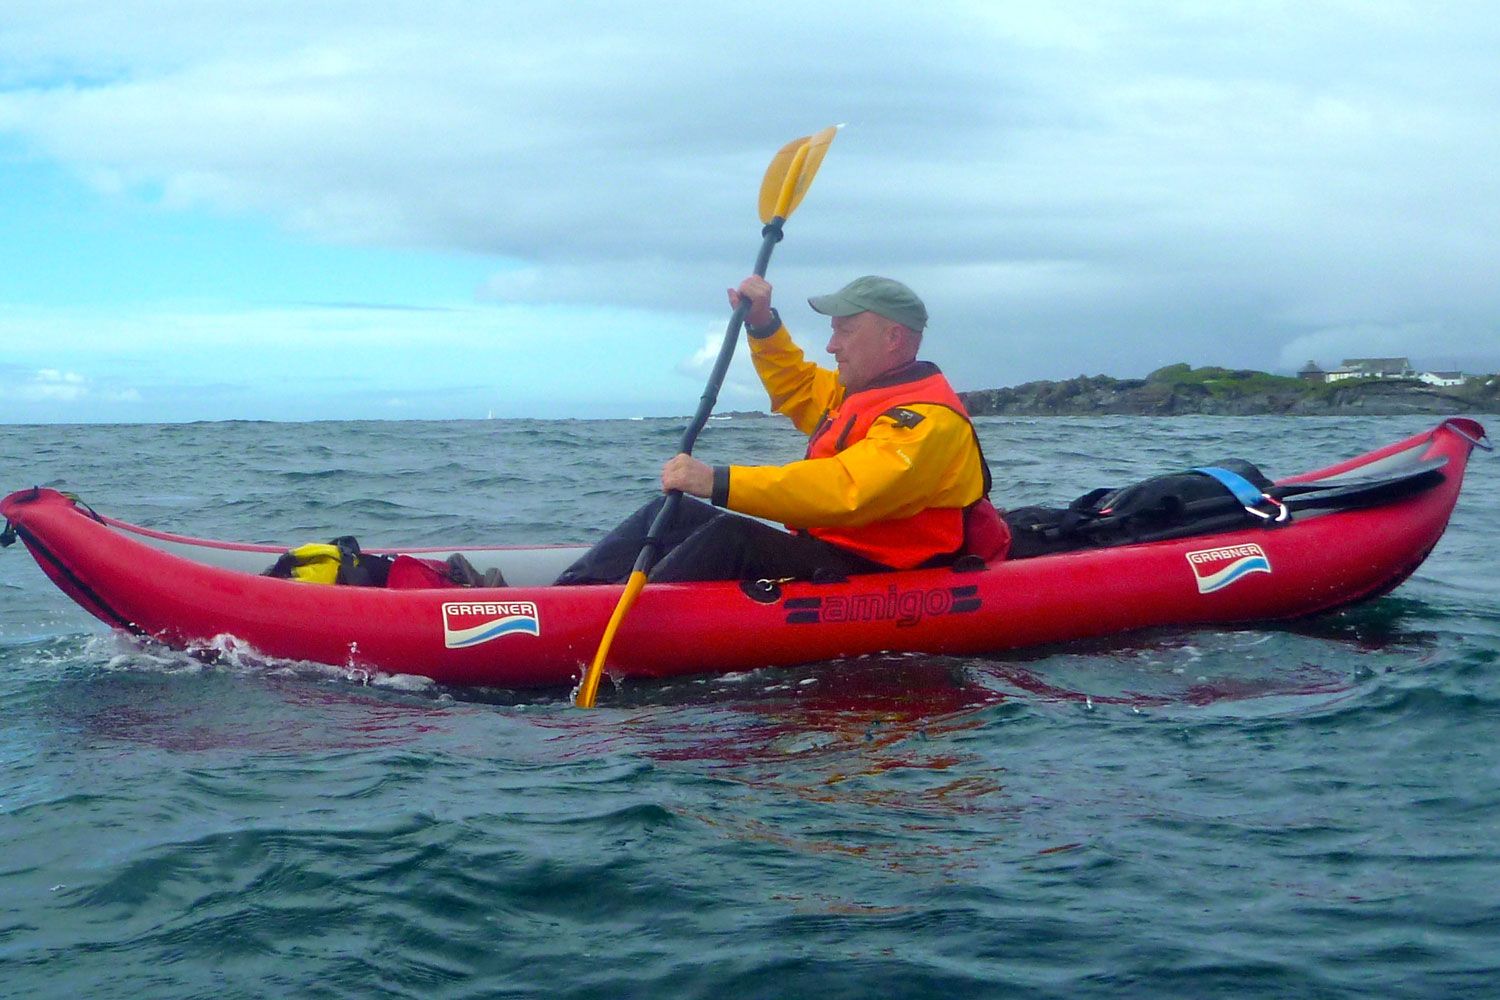
I’ve been using this big holdall for ten years on kayak and packraft trips in France, Australia, Turkey, the US and in the UK, as well as a side bag on my motorbike. As it’s among my favourites it gets its own page. ‘One dry bag to rule them all’ I wrote back then and my UDB still ticks that box. Your typical roll-top dry bags aren’t submersion proof, yet in paddle sports submersion is a likely scenario. Using roll-tops I found myself packing drybags inside dry bags to keep important things like clothes and down bags dry. With the UBD you can just chuck it in and zip it up.
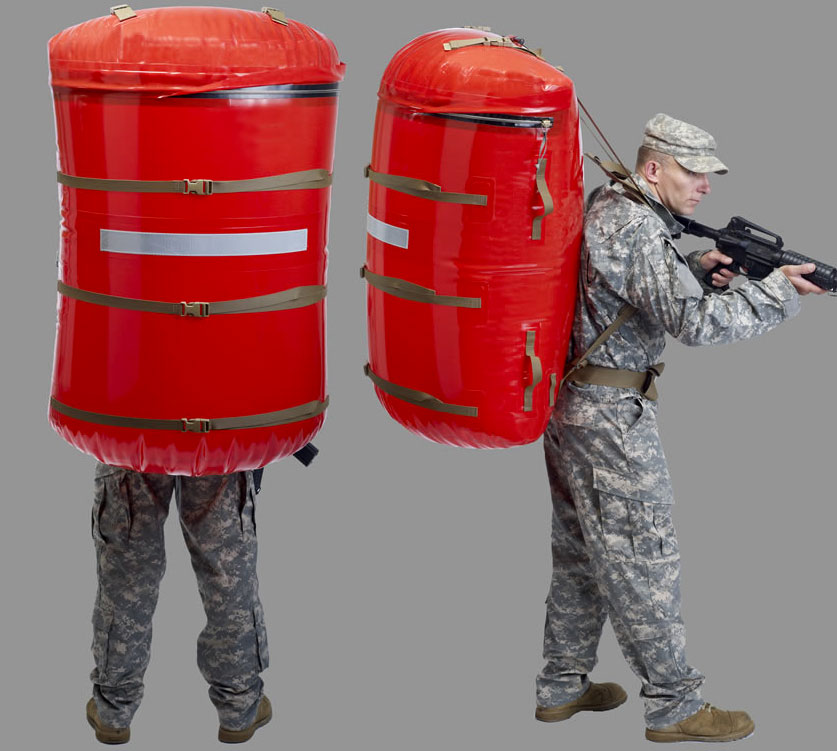
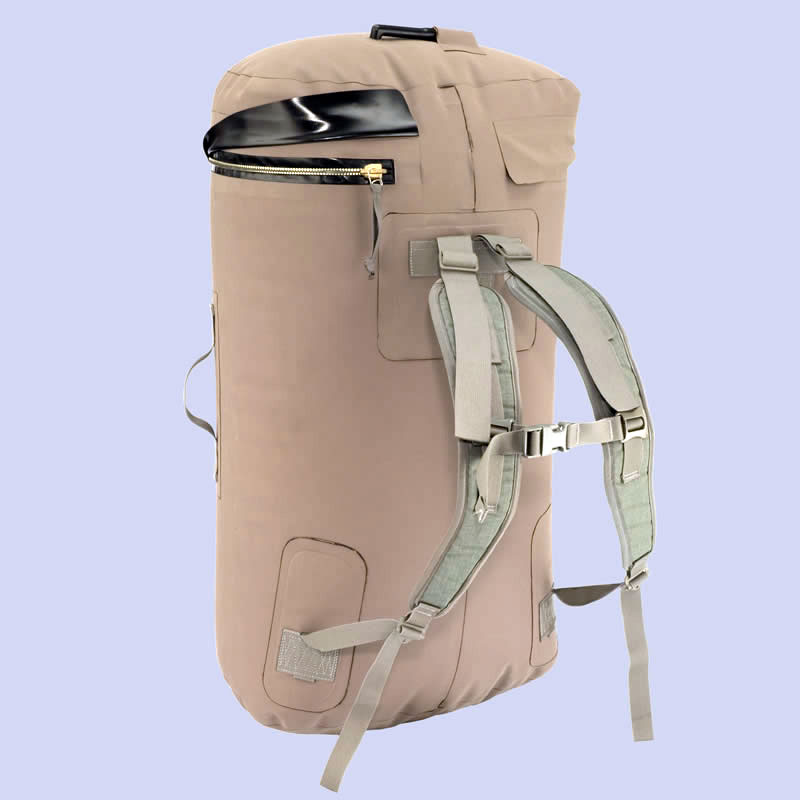
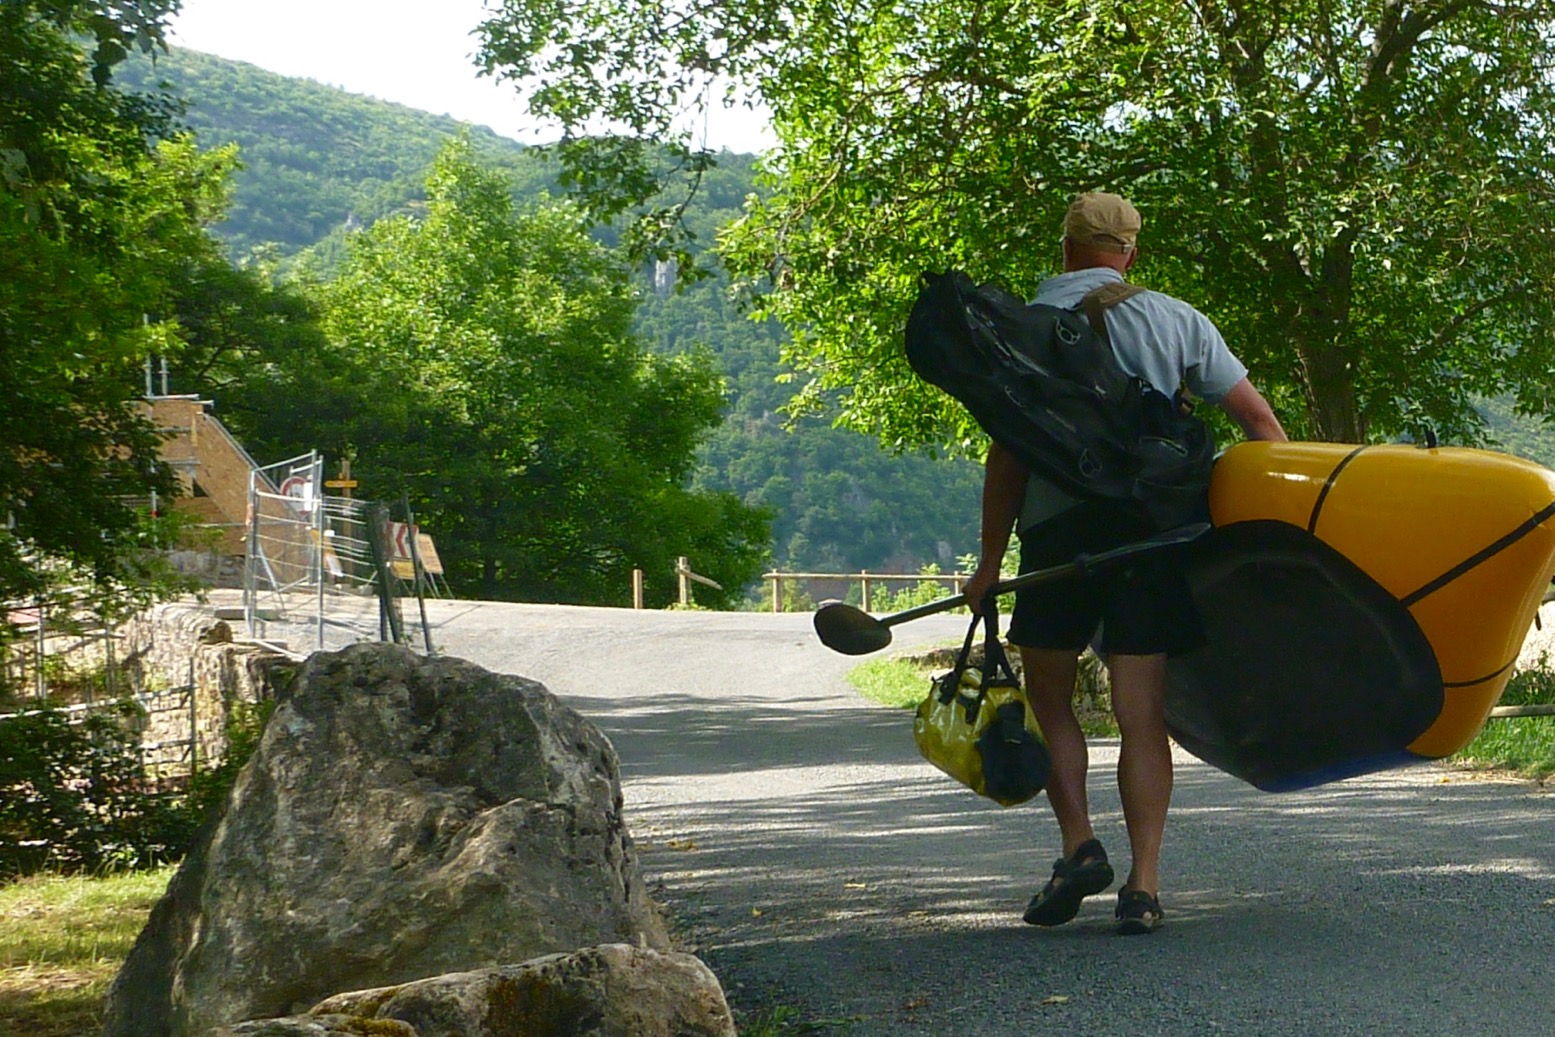
Initially, I tried using the UDB as a backpack (left) but, like trying to do that with any holdall, it’s only a short term solution that puts a huge strain on your shoulders. Plus I found the harness was poorly positioned so the pack sat high on my back, further increasing the centre of gravity, but running the shoulder straps loose (as left) didn’t work either. It became clear the included harness was not intended for anything more than short hauls. What was needed was a frame of some sort, or a better harness. You can read a summary of my experiments here. In the end the NRS Paragon pack harness and later Six Moons suited my needs best.
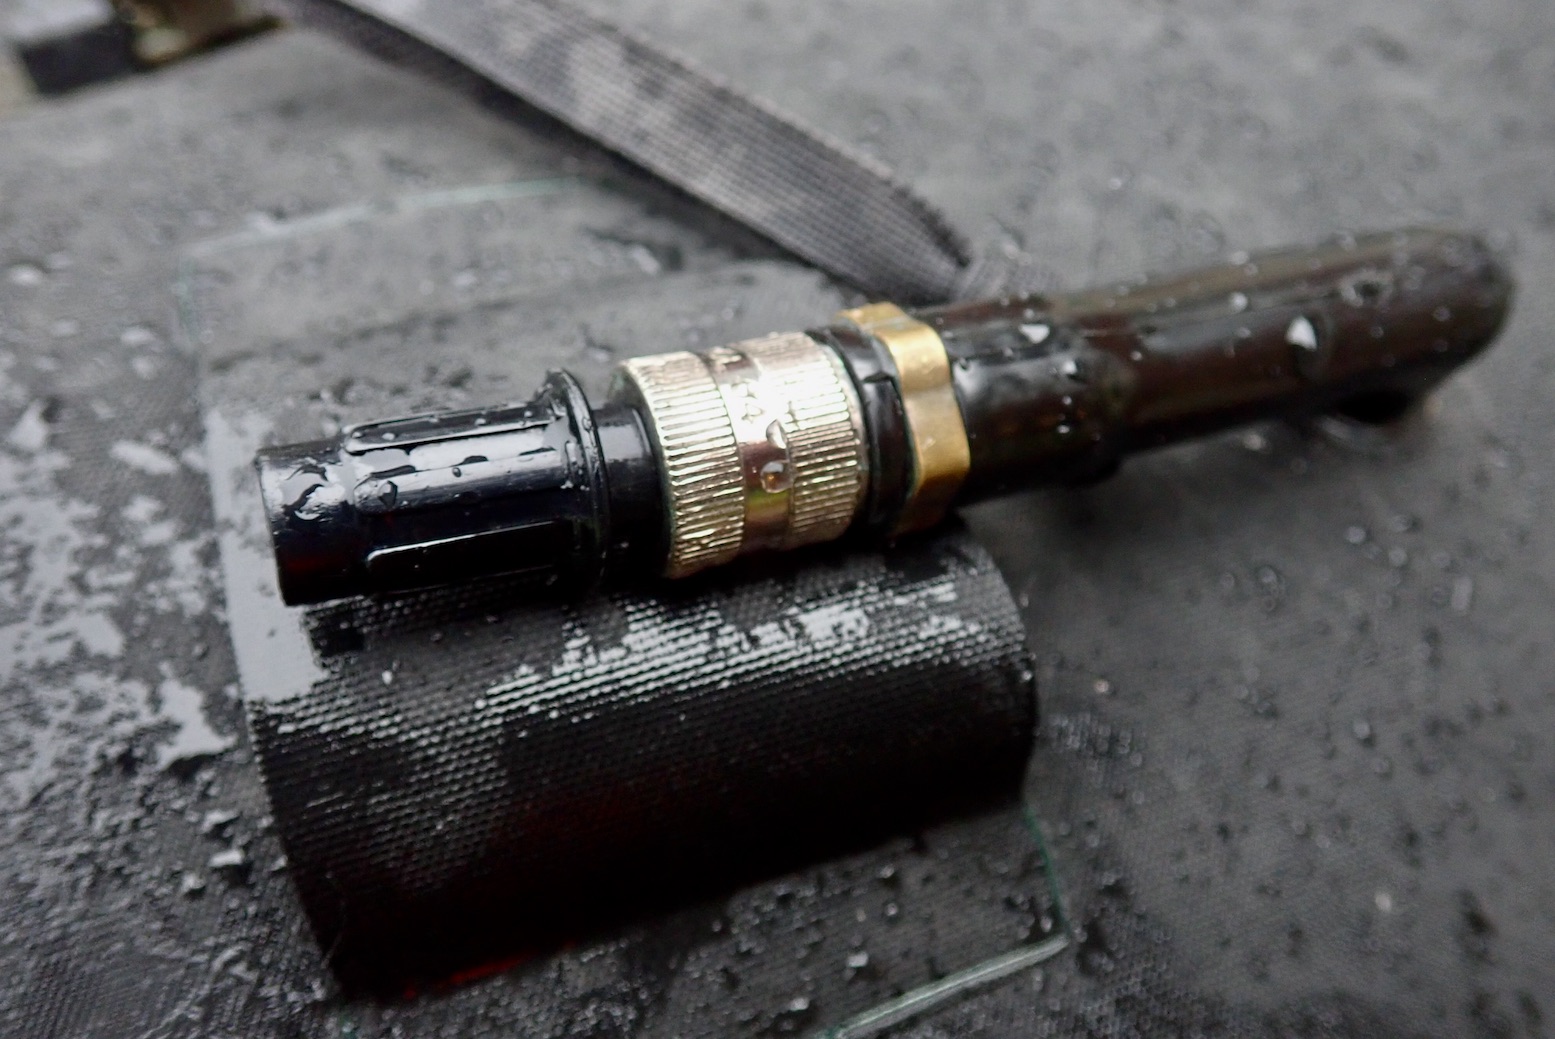
What I like about my UDB is that it’s a simple, rugged and basic big-ass bag with handy handles and a reliably submersion-proof closure. There are no gimmicks unless you count the purge valve. On the water it eliminates any worries about stuff getting wet and of course it’s something to hold on to if your boat get shot out from under you by a dozy spearfisherman.
Watershed still make bags with drysuit zips – see the gallery below or the website. But they’re either huge or or are priced for military procurement departments only. I also used Watershed’s 80-litre Westwater (above – more like 70L) for packrafting day trips, but pushed it a bit hard on one cross-country MTB ride which ripped out one of the strap fixtures.
Like their handy 30-litre Chattooga day holdall (left, yellow), the Westwater has their slick watershedding fabric which is tough for sure but less agreeable or grippy when pressed against your back all day. And like the UDB the straps have the legal minimum paddling (though are easily replaced). Both use their chunky giant fold-over zip-lock closure which I’m sure works as well as a drysuit zip. But if it had to be one bag it’s my UDB – ‘One dry bag to rule them all’.
What more is there to say about the Watershed UDB? How about that in 2019 I adapted it with a cheap, chopped-down lightweight, big-wheeled folding trolley (right) from previous packboating trips to carry my packraft to Australia and New Zealand. With zip ties and straps, the trolley frame lashed securely to the rugged UDB’s harness tabs and I could roll it with the top handle. It weighed in at 2.7kg. Interestingly, the rigidity provided by the UDB once fully inflated (as above) helped make it more comfortable to wheel and less of a sack on wheels. But one thing I did notice is that without a full-length telescopic metal frame the set up tends to bob up and down annoyingly as you walk.
The thinking was that once packrafting a river for a few days (I never made it), the UDB trolley would still be more compact than a regular wheeled travel bag, while enabling wheeling along paths and long gravel roads to get to the river. It was all an attempt at not blithely splashing out the huge but pricey Ortlieb Duffle RS 140 (left) which I’d been eyeing up. A few months later I eventually did buy a used RS140 for the Seawave but can still see plenty of years use in the UDB.
Update 2022: Using it in Morocco as a general holdall I noticed a separated seam where the body fabric attached to the zip, with another lifting a bit nearby. An easy repair with Aquaseal one-part sealant.
In a line Sturdy, inexpensive, no-membrane boot with rock-hard soles that are immune to sharp, stony trails.
Cost Rrp £175/$330. Got mine new for £70 off ebay uk and another pair for £20 used.
Weight901g (10.5 UK) + 86g Sole insoles
Available over half price new on eBay uk; round toe box avoids toe-mashing blisters; chunky, gimmick-free Vibram tread; no membrane so will dry quickly and won’t get hot; with heat-contoured Sole footbed these boots are as comfortable as you can expect for something with minimal padding taking 120-kilo loads.
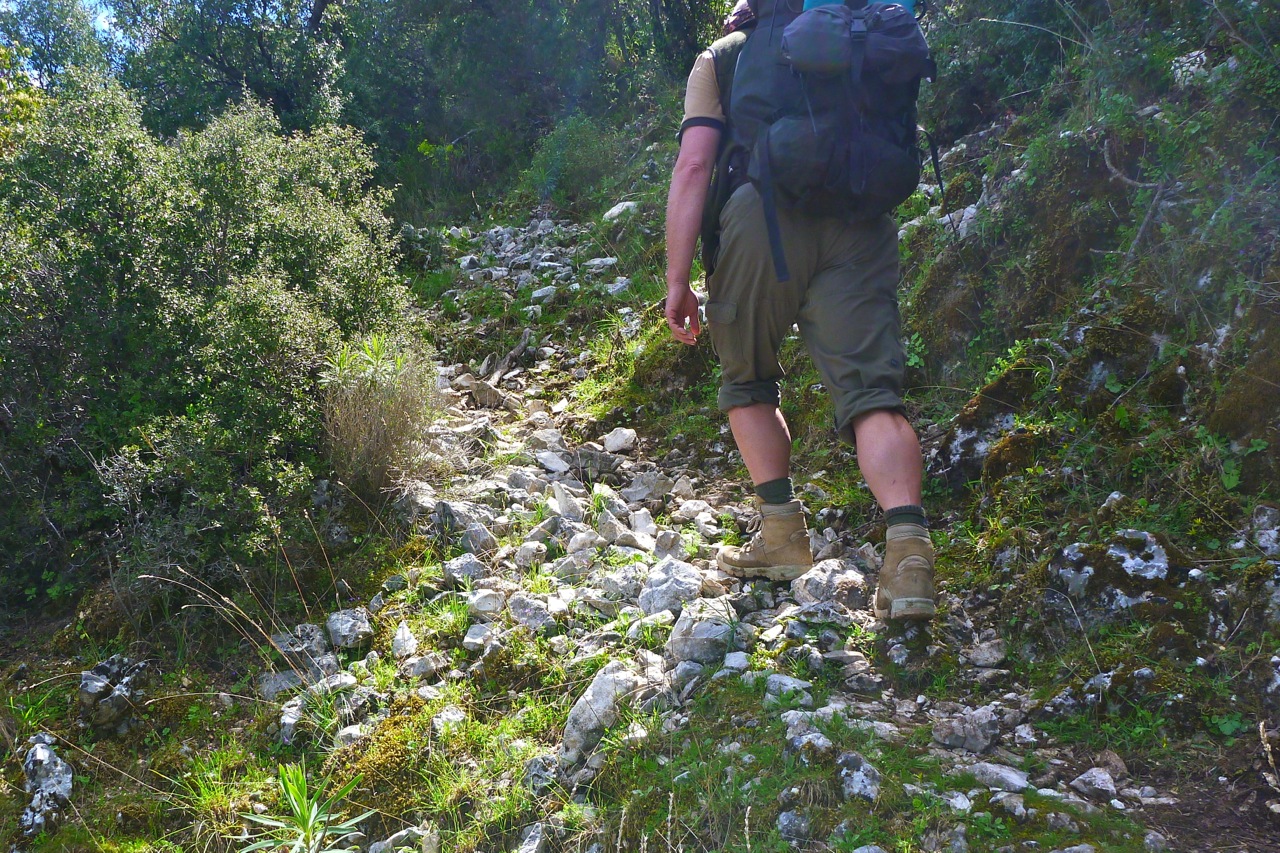
Feel clompy, but then they are classified as a heavy-duty military boot; OE removable insole was truly rubbish; like an over-inflated moto tyre, the stiff sole (in an impact sense, not flex) tends to skate or roll off loose stones where softer soles would conform and grip. Can get painful on too much asphalt, but that could be my old feet.
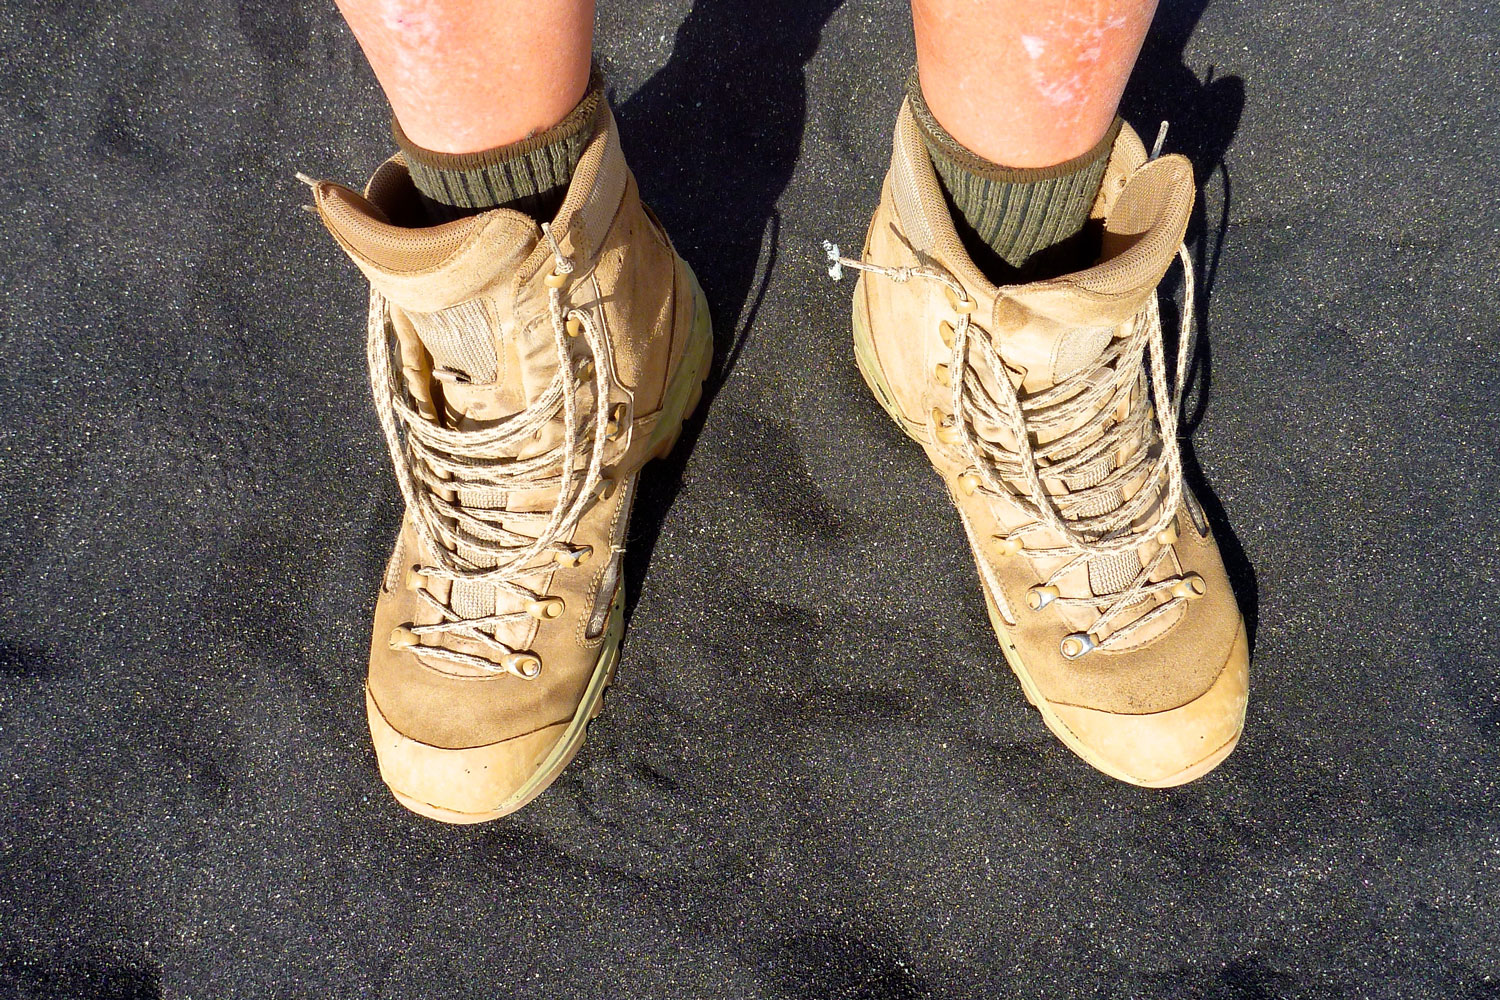
Used forUK packrafting, motorbiking, days walks up to 15 miles, a two-week walk with packraft in SW Turkey and another two-weeker in Mauritania with camels.
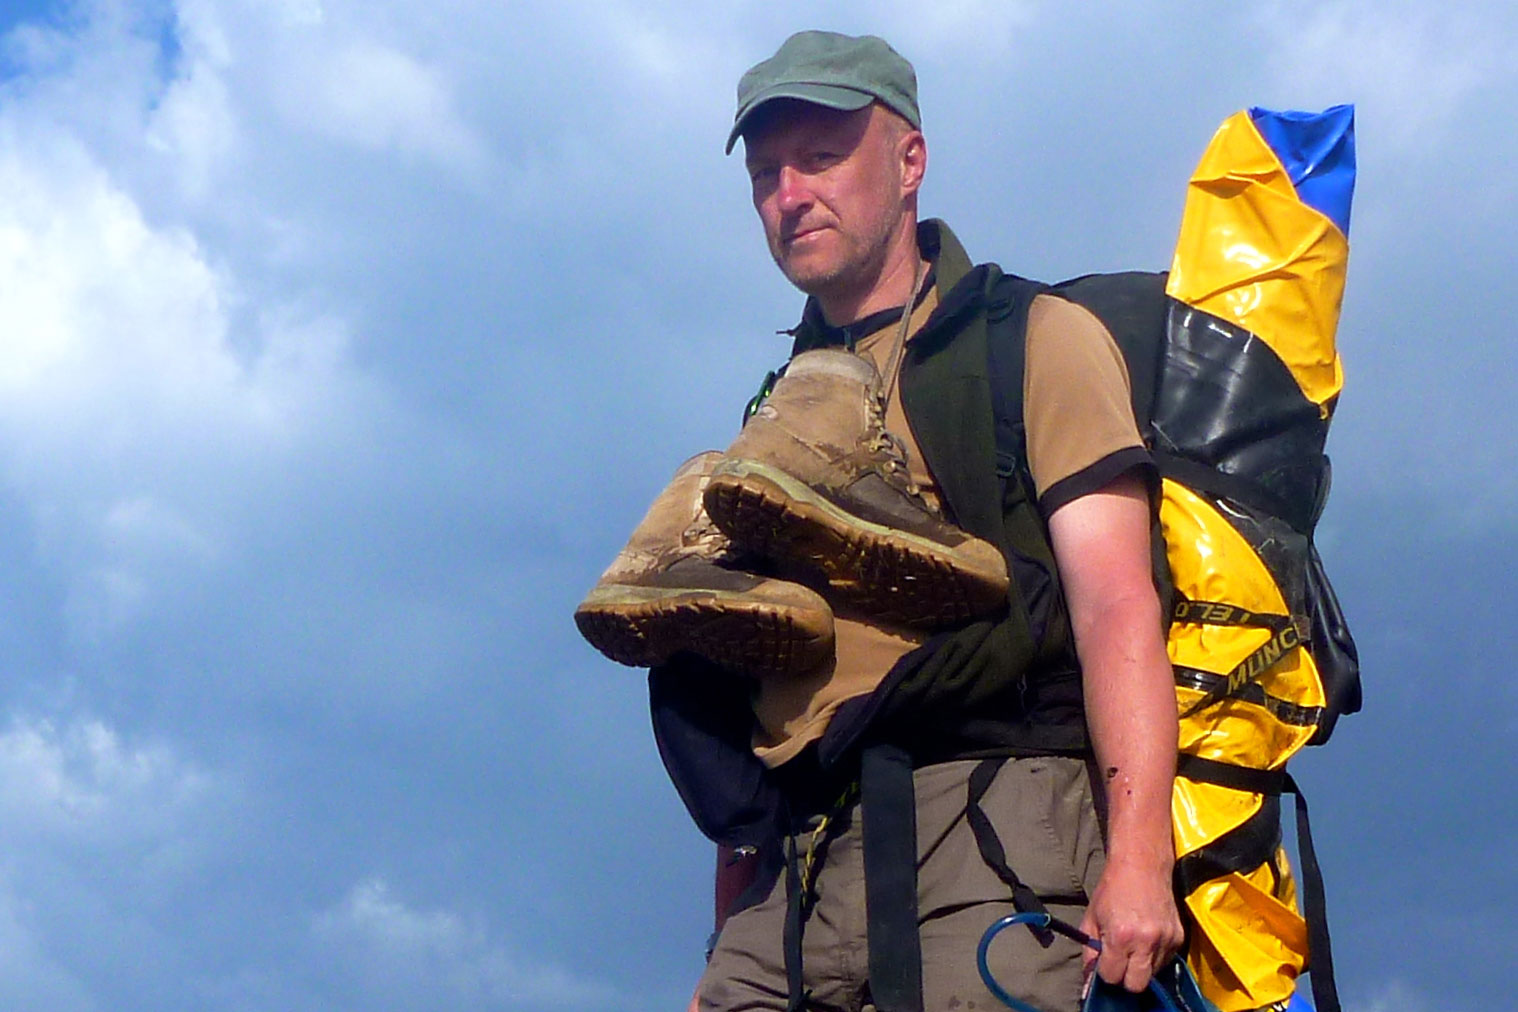
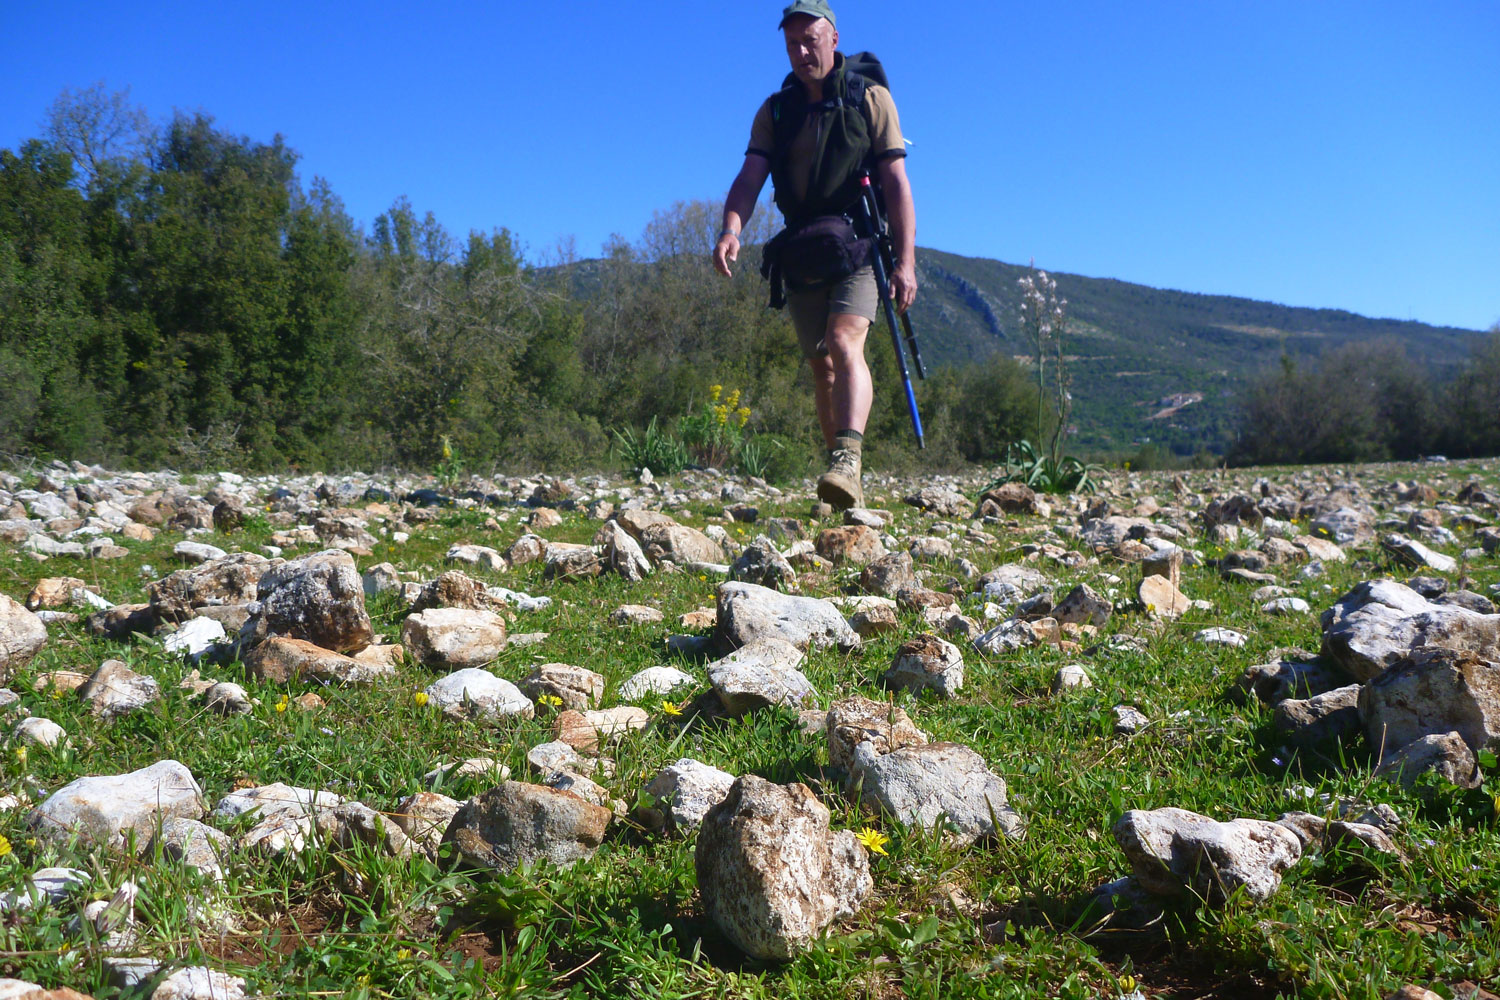
After about a year’s use including the Turkish coast with my packraft, I think I’ve finally settled on some packrafting boots that are up to negotiating rough cross-country terrain but can also recover well from getting soaked.
For ages I was looking among the mainstream boot makers in outdoor shops for something with a loose-stone proof sole but without a breathable membrane. To me this whole membrane business in boots is the biggest trick since Kaiser Soze convinced us he was a figment of our imagination. Once a boot goes in the water over the top (in Scotland it can happen) all the king’s Gore-Tex and all the king’s men won’t keep Humpty’s boots dry. In fact I think Gore-tex and the like will merely prolong the drying process even when the GTX membrane fails as it surely will in something as abused as a boot.
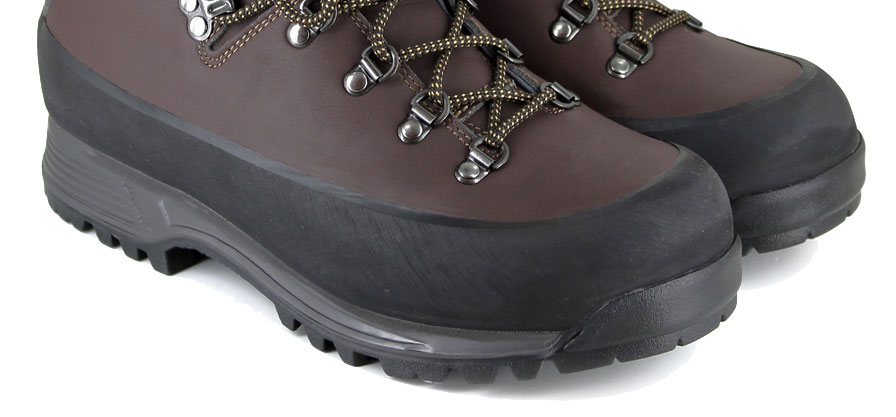
As the name suggests, the Elites are something all the major boot manufacturers in the US and Europe have been banging out since the invasion of Iraq. I don’t want you to think I flit around in camo-gear forever ‘checking my exits (well not since my teenage years) but you have to admit the best military gear is made to serve a purpose rather than look fashionable in a logo-over your-back-right shoulder kind of way. I did try some very similar Meindl Desert Fox boots and years ago (before the wars) had UK-bootmaker Alt-Berg sponsor me a custom desert boot (right) for an ambitious ride into the desert before these types of boots acquired military connotations.
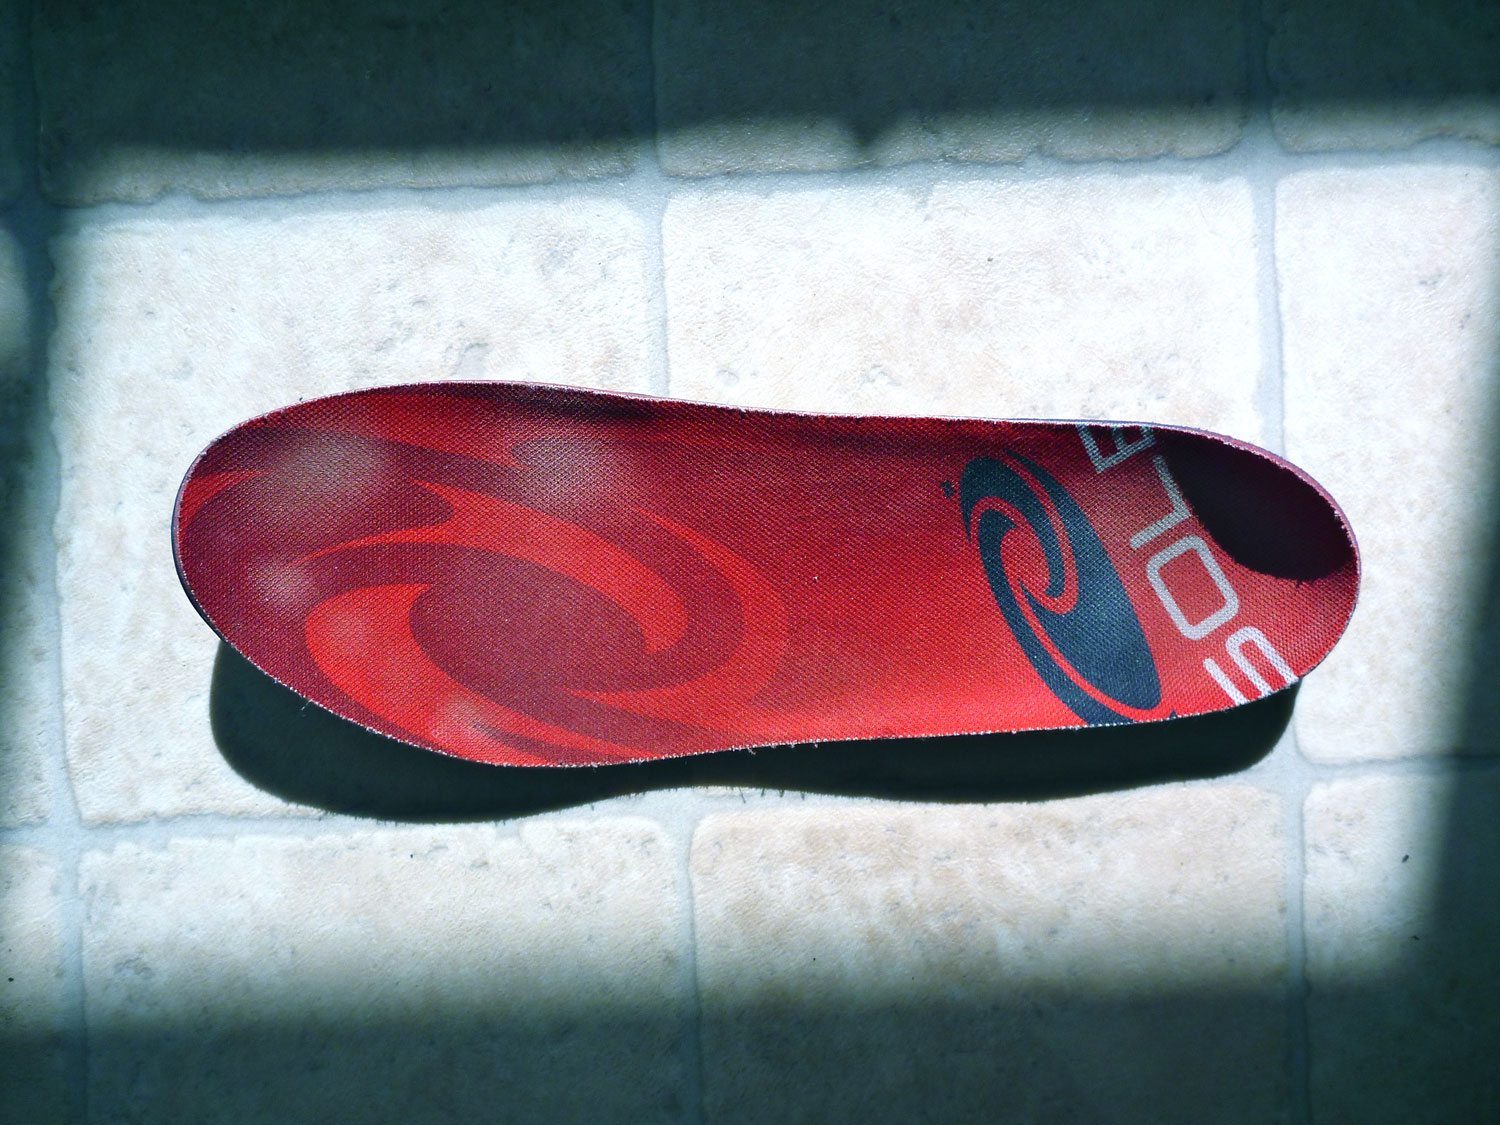
Significantly on this Turkish walk where I drank up to 3 litres a day and still got in parched, I never felt the compulsion to air off and cool down my feet at lunch time. I didn’t even think about it and when you consider the terrain, load and temps that’s quite a testament to all-day comfort. No other boot I’ve owned could have managed that, though I’m sure the gallingly expensive Sole heat-moulded footbeds (left) contributed greatly to that all-day comfort. With them and the inside of the boot’s sole there’s virtually no cushioning; all you have is what spring there is in your socks and the flesh on your feet. Sure it was good to take them off at the end of a long day, but then so it was with the pack and everything else I wore.
The only time my feet got into the red zone and I felt blisters coming on was while walking with another guy who moved pretty fast over the sharp, weathered rocks and loose stones which required full concentration and packstaff support. I kept up just, but it was an uncomfortable pace. Luckily I knew that afternoon would end for me with a paddle to the village. Next day I set of again in the boat across the lagoon and then resumed dawdling along at my own pace and my feet felt fine.
It’s not all rosy in the Lowa Elite squadron though. One problem I had with the boots was their tendency to skate on loose rocks and there were plenty of those on the Lycian Way. All walkers I met found the terrain challenging at times (trip report coming) but I must admit I lost confidence in my walking ability on some of the rubble-strewn coastal side slopes where thorny overgrown scrub often exacerbated the difficulties to force me off balance or to stoop. These stumbles set off old injuries in my legs which I usually manage. I couldn’t have managed without my packstaff (left). The fastest walkers I encountered were all using twin poles.
The other time the boots showed their limits was on extended road walking when the balls of one foot would get sore, but again I put this down to an old broken foot which plays up at other times too, like with those Alt-Bergs back in 2003 when I was merely riding a bike. Slipping into something more comfortable like a pair of Doc Martins would have solved that and the unvarying plod of road walking is something many boot walkers dislike. I suppose there can be no compromise: on the trail either your feet soles get mashed from the pummelling that soft boot soles transfer; or you’re walking in a pair of clogs immune to whatever’s underfoot. I slipped back once and fell forward twice in 200+ kms and had many more slips.
It would be great to have a trail shoe made on the same solid footbed as I suspect the whole boot ankle-support thing is something of a myth unless you’re carrying really heavy loads. If a few more stones get in then so be it – a shoe will be lighter and the foot cooler. But I suppose you could use the same ‘it’s an artificial aid’ argument for a packstaff.
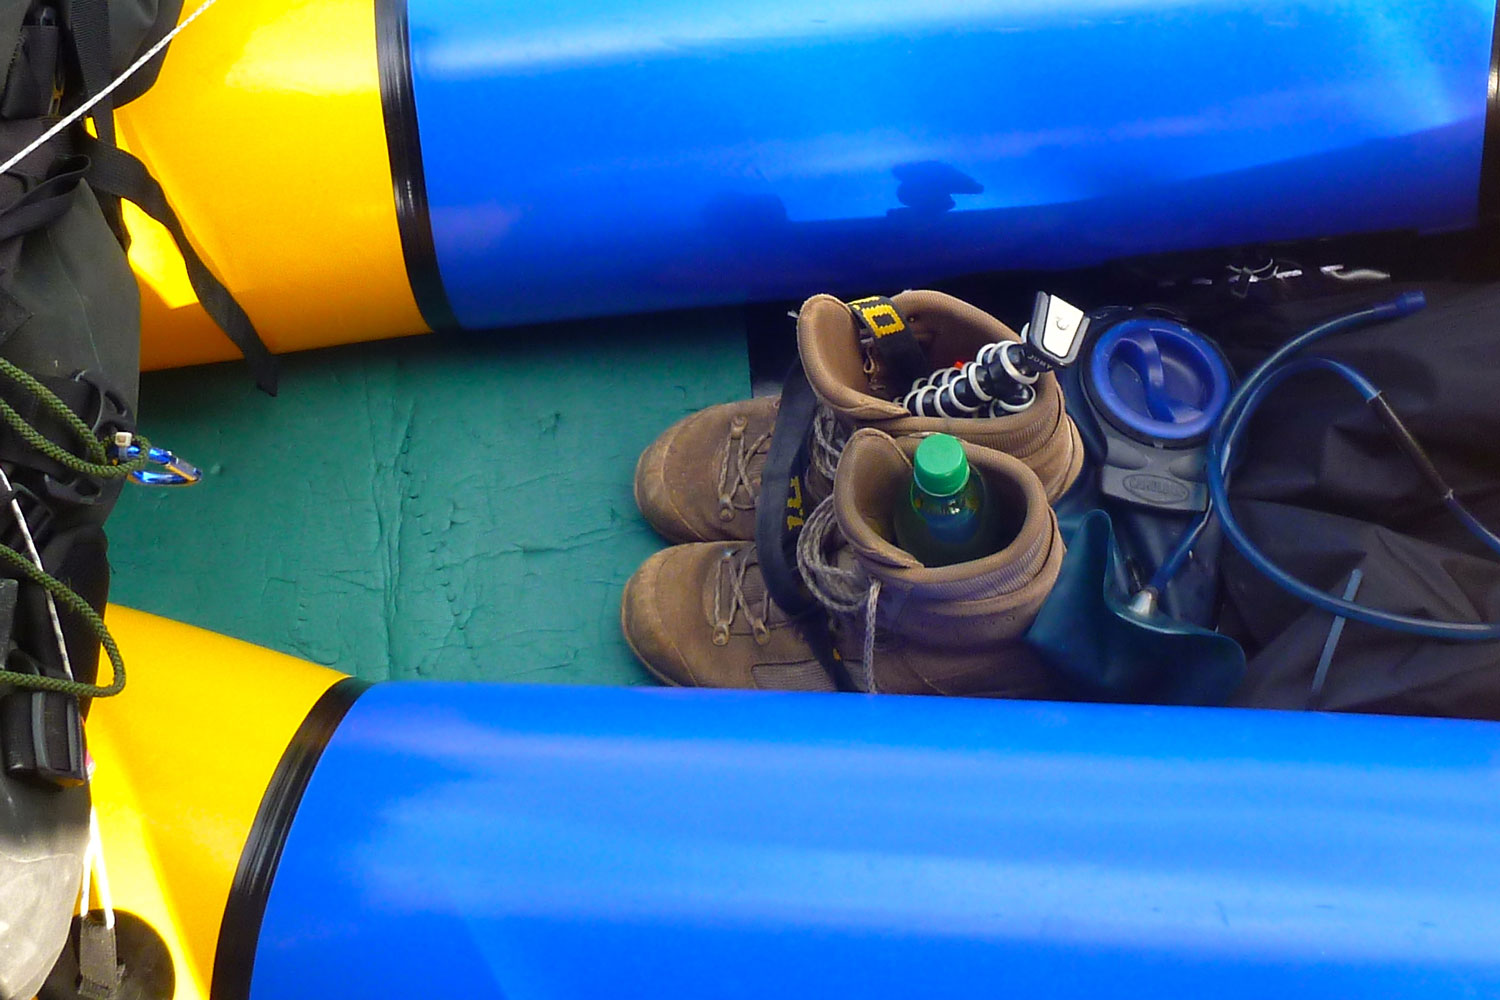
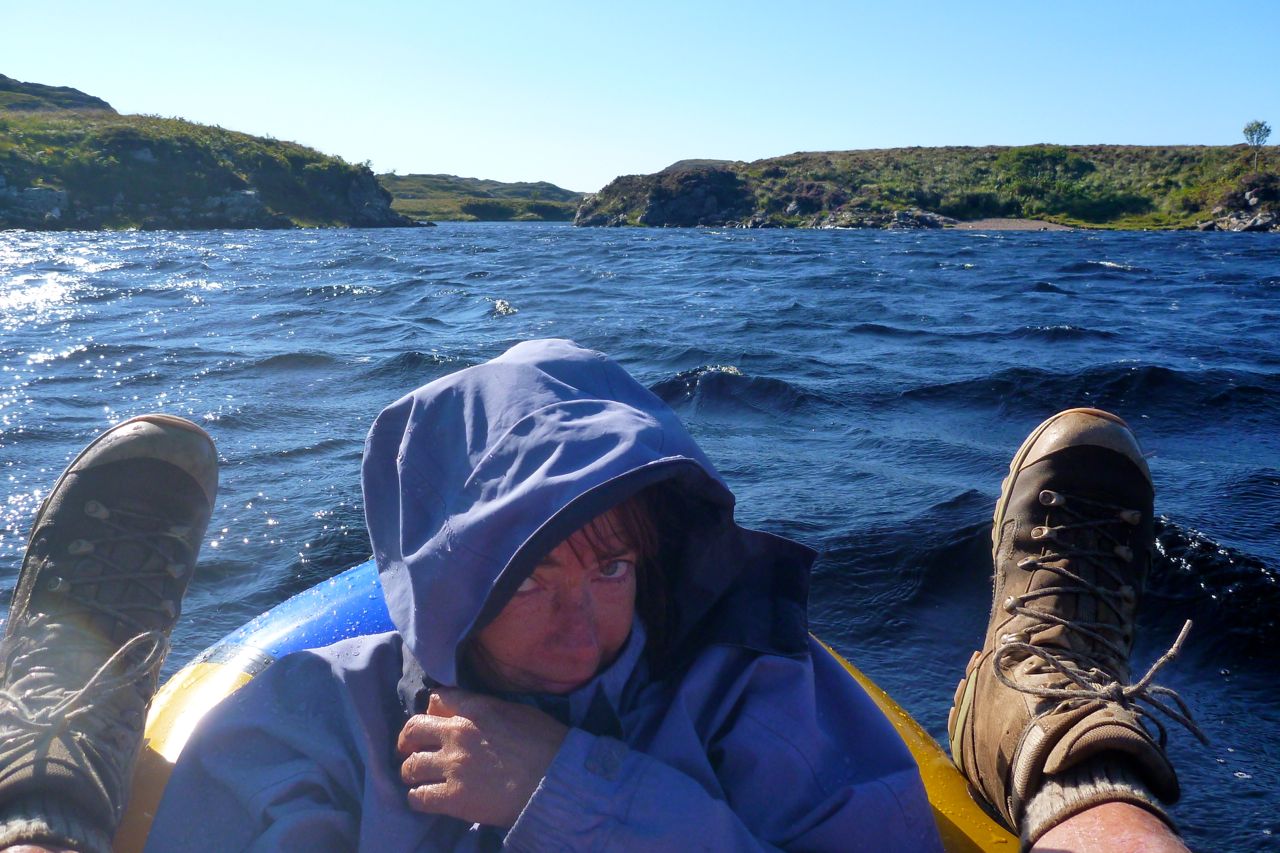
As for wet weather UK tramping I’m happy to use either SealSkinz membrane socks (while they last) or, to be honest just wear any old thick wool or whatever socks that keep the feet warm when wet. I don’t tend to get cold feet and don’t mind warm wet feet. In the packraft, to spare the boat and air the feet in Turkey I choose not to wear boots so stick them between my knees (right) where they make handy pods for a water bottle and the camera.
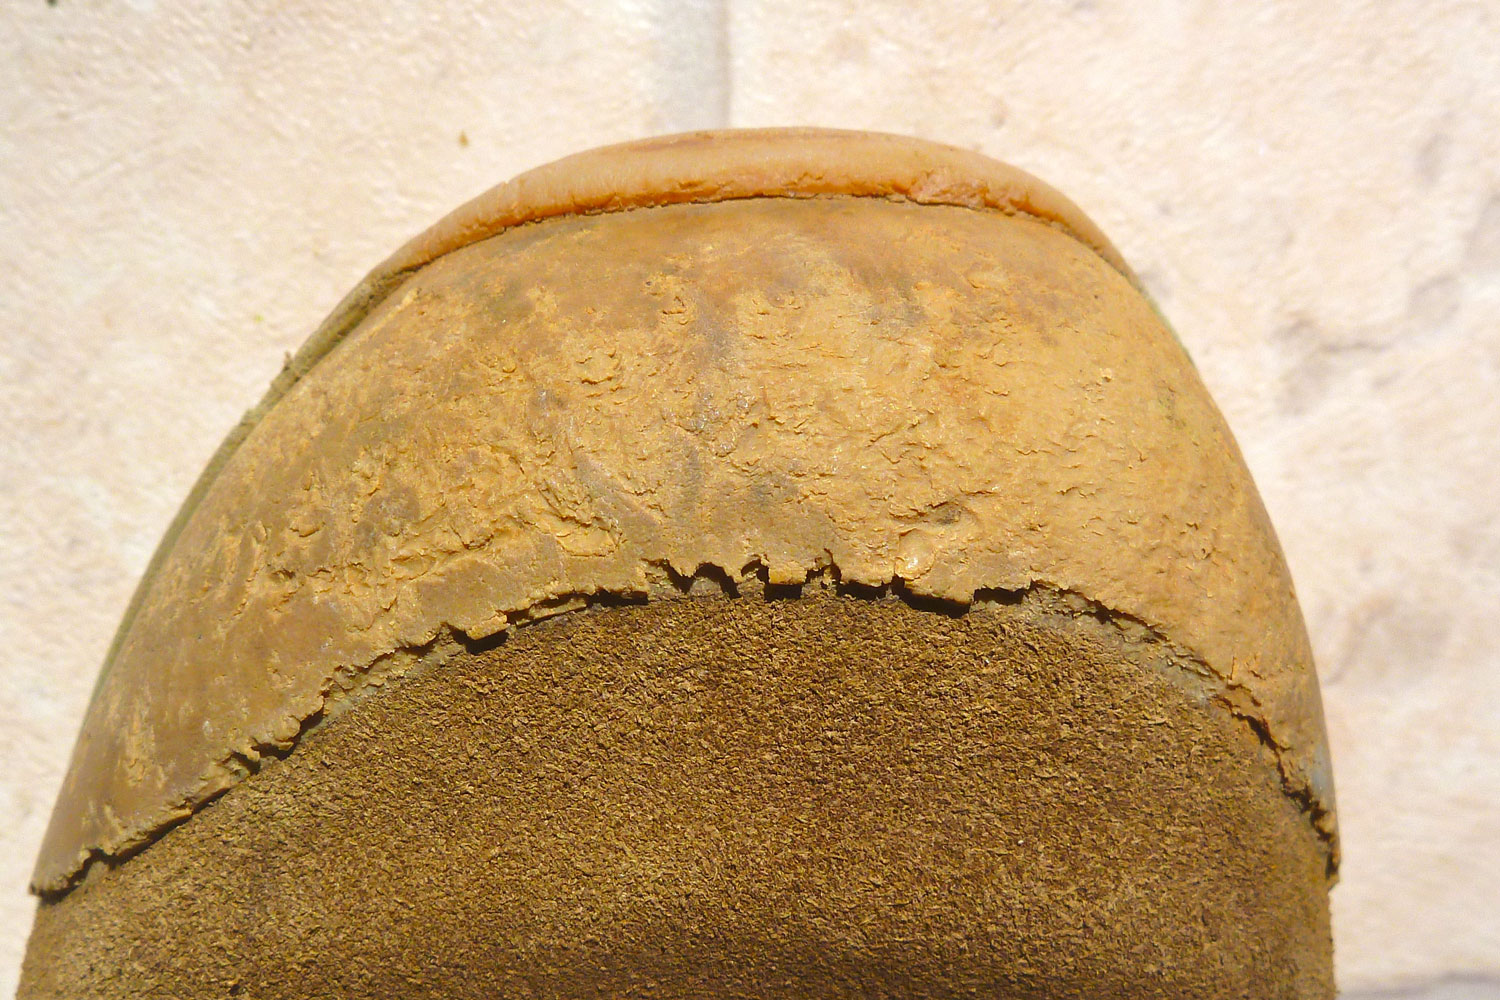
Damage report I’ve worn out a pair of regular outdoor shop shoes in one 12-day Sahara camel trek – and also ended up with my feet badly blistered. The Lowas handled the recent bashing much better. As you can see on the left the toe box got a hammering and one thing a desert boot could do with is a fat rand (right) to protect the stitching from stone damage. It’s not all sand dunes in the desert.
The fabric side panel threading on one boot is now missing a few stitches and the front of the sole was coming away from the toe too. But both those things ought to be easy to repair, with the sewing not risking damaging any futile membrane. The paint has chipped off the lace D-rings or hooks (right). They’re also rusting a little, probably after wading in seawater. The set-back double-rivited D-ring has a pinch-locking cam in it to jam the lace in place, but the laces have shown no signs of wear.
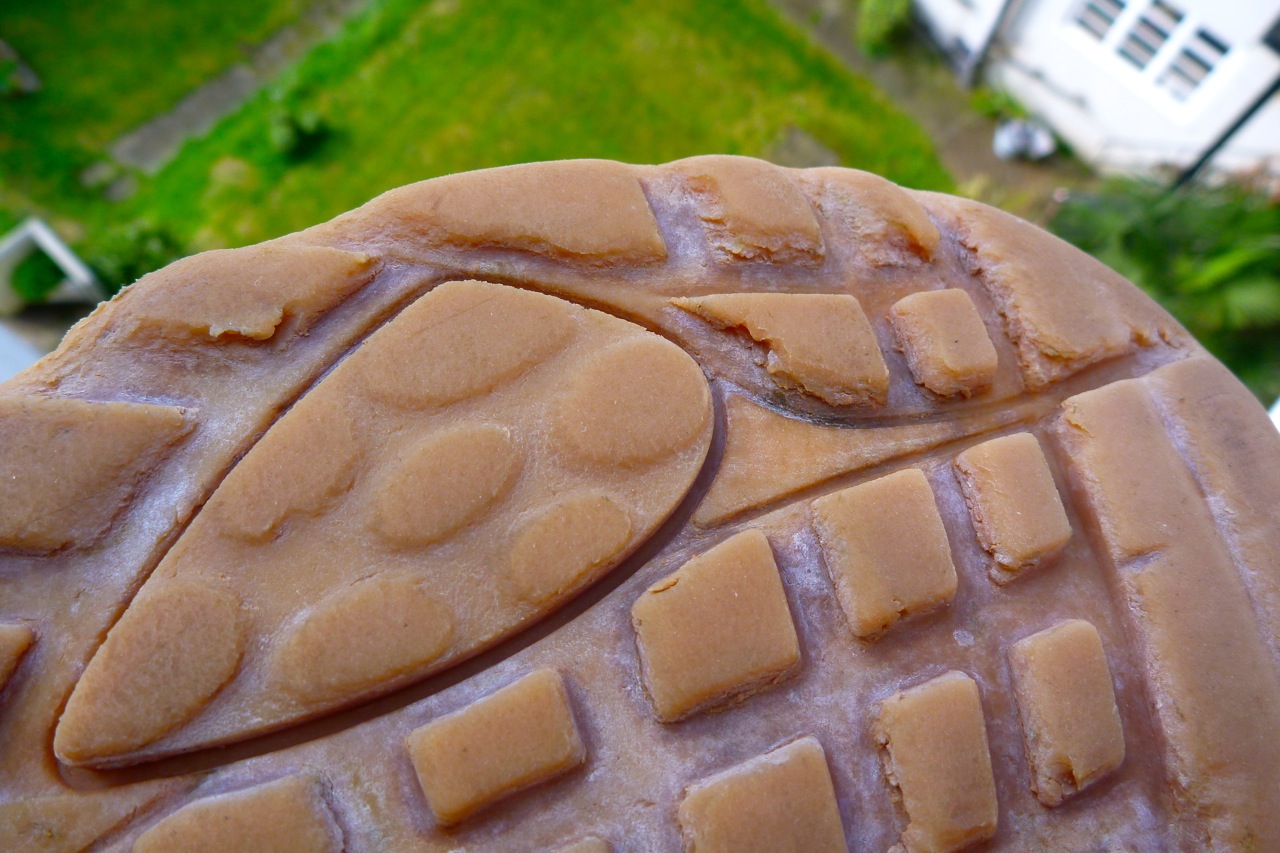
With a combined weight of some 120-kilos pressing on them the heavily lugged Vibram outsoles have lost their edge and are a little chewed up but have plenty of life left in them. On the Lycian Way I met people taking a day out to bus to a town in search of more rugged footwear, while others bathed their feet in salty lagoons in the hope they’d recover.
To summarise: what makes these Lowas work for me is the round toe that suits my wide feet (extra wide version available, but rarely cheap on eBay); the quick-drying fully breathable uppers keep feet cool which I’m sure mitigates blistering; the solid outsole feels immune to sharp rocks while the Sole insole provides an anatomic footbed that’s customised to your actual foot shape. Plus they’re half the price or less than anything similar at Cotswold and all the rest. And I quite like the sandy colour – a scrub in the bath cleans them up nicely.
But these Middle Eastern wars may not go on forever so I just talked myself into buying a back-up pair, used but actually in better nick than mine are now, and for just £20. In 2020 there were still loads of near new Elites on Ebay for around £25.
Update 2018. I used the Lowas alongside my Teva Omniums on a two-week camel trek in Mauritania (negligible load carried). Good to have a choice but, while a bit over the top, in the end the Lowas was the better do-it-all footwear for that trip. Flip-flops would have done around the camp to avoid the thorn menace and for an airing one can go barefoot in the dunes.
I originally looked at jungle boots: similar membrane-free military footwear that’s designed for frequent soaking and drying. They feature minimal leather on the uppers, with Cordura nylon panels elsewhere, as well as instep drainage holes (left) like I bodged on previous shoes. Jungle boots tend to be high to keep creepy crawlies out, but at least these sections are not stiff and so end up light. Left is the British-made Altberg jungle boot. Silverman’s illustrate both types of Altberg J-boots which cost around £170 and use ‘amfibio’ leather suited to being soaked. I took a chance and bought a used pair off ebay once. Very well made with a solid, rock-proof sole, but a couple hours’ walking proved they were a little too big for me. I’ve compromised on boots before and don’t want to make that mistake again.
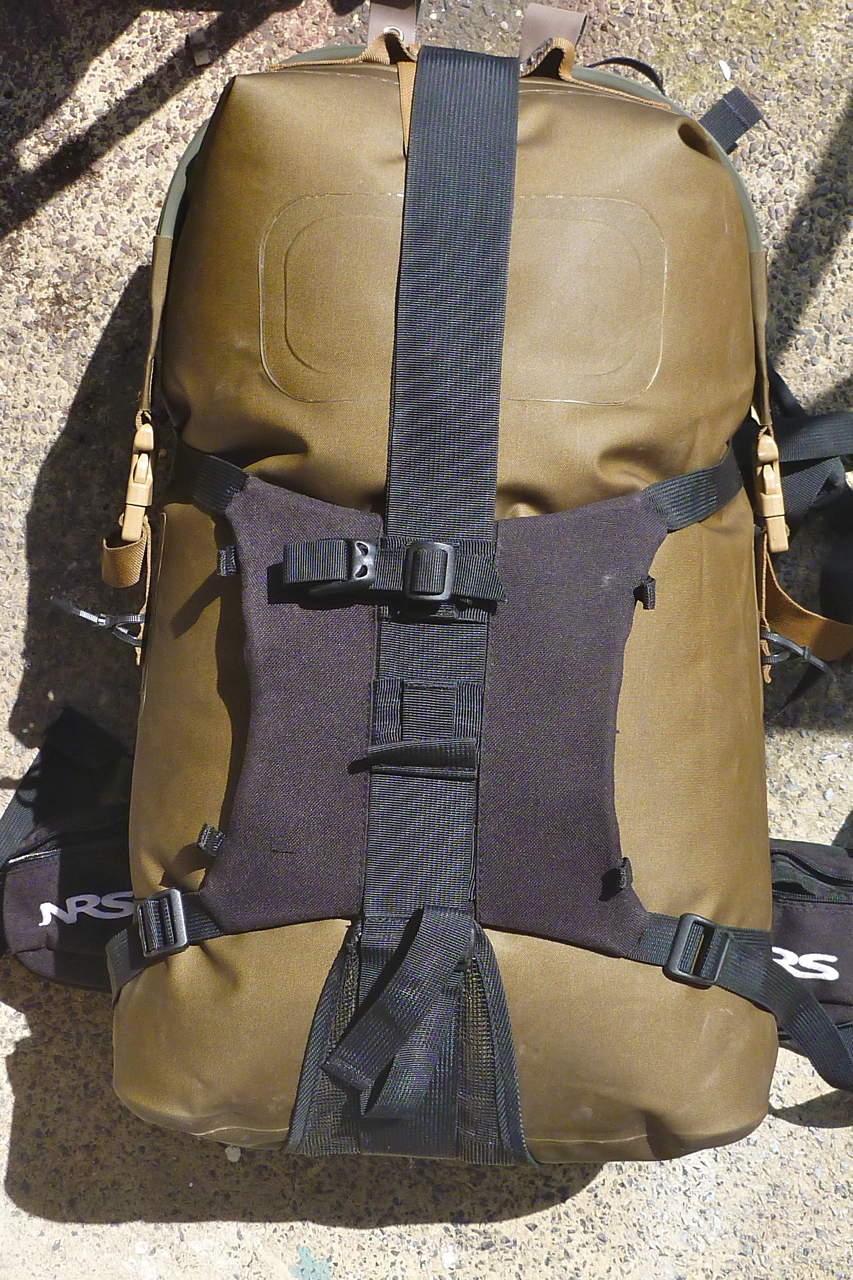
In a line Surprisingly effective and well-featured carry-all pack harness.
Cost $100 from NRS but no longer made. The Six Moon Flex Pak is similar and a bit more sophisticated. I’ll be testing one of those shortly.
Weight 1340g.
Capacity Vertical strap adjusts out to 1.96m; horizontal straps up to 1.8m. That’s a pack volume of some 200 litres but I imagine anything more than 25kg will be hard carrying. For that you’d want a Lastenkraxe.
Features Padded hip belt with small zip pockets, chest strap, fully adjustable 3-belt pack harness, padded plastic backboard; ice axe loop; padded pouch with elasticated cord on the back.
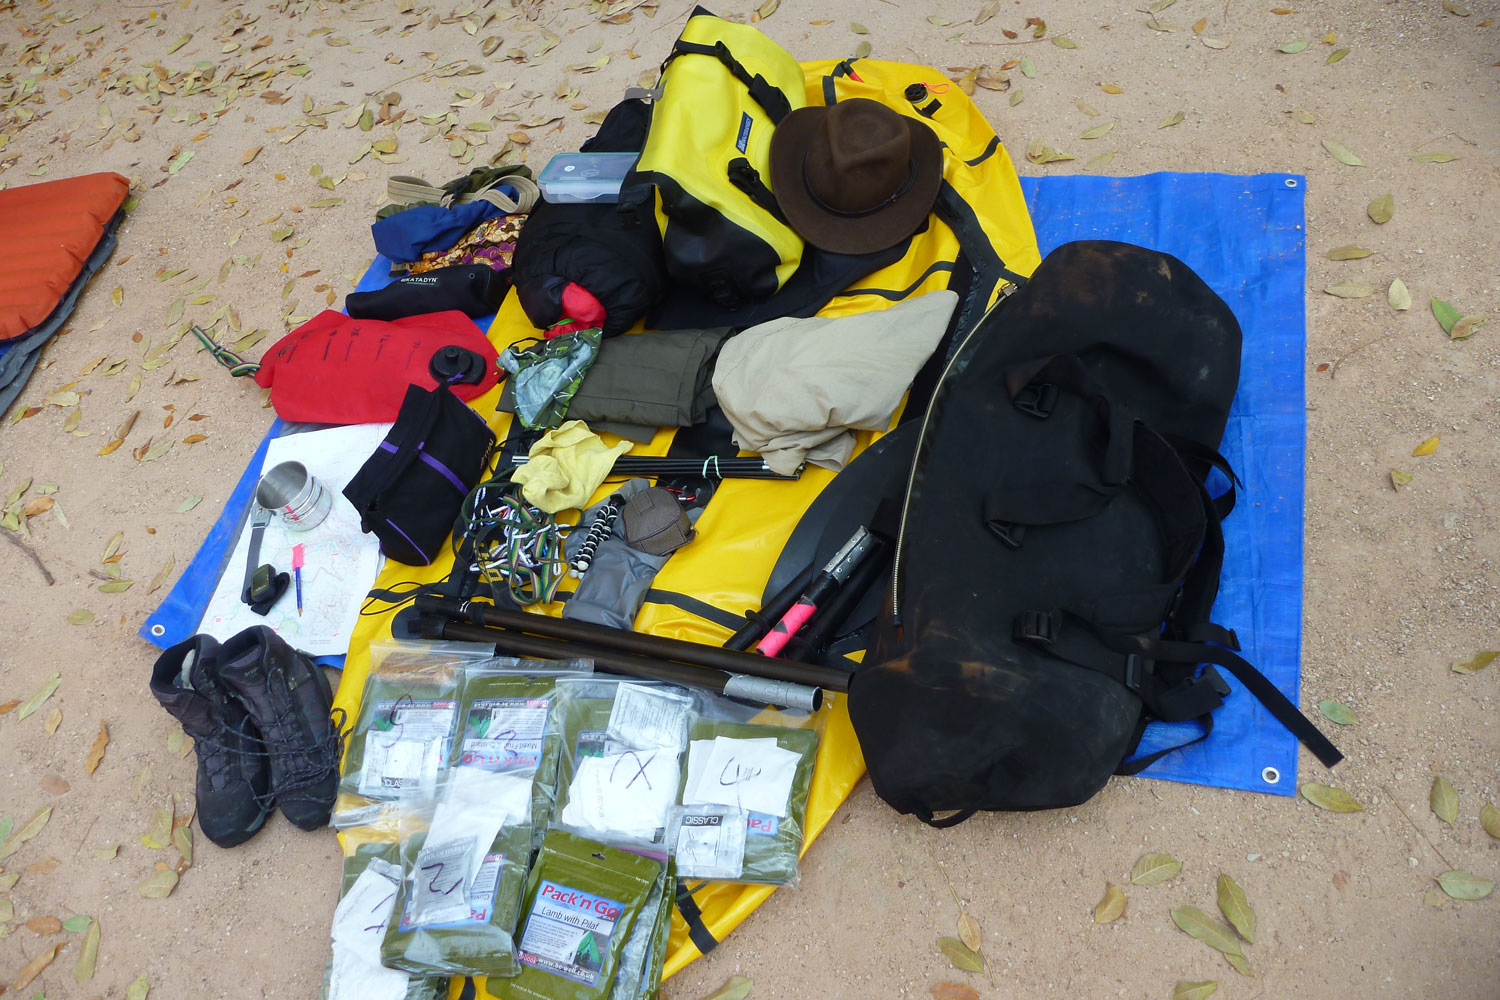
Where used On a 200-km walk with packraft along SW Turkey’s Lycian Way. Walking in Umbria carrying a holdall. Day trips with packraft.
Q/d clips make getting to the pack easy. More comfortable than you’d think Fully adjustable Capacity for bigger loads than you can probably lift. Pouches could easily be added to the side straps.
Zip pockets on hip belt too small and awkward to get to. Not made anymore. Padding a bit lean over a long day on rugged terrain.
What they [used to] say The NRS Paragon Pack is the epitome of versatility. Rather than buying an entirely new dry bag, the Paragon™ Pack allows you to retrofit your existing bags into the ideal portage pack.
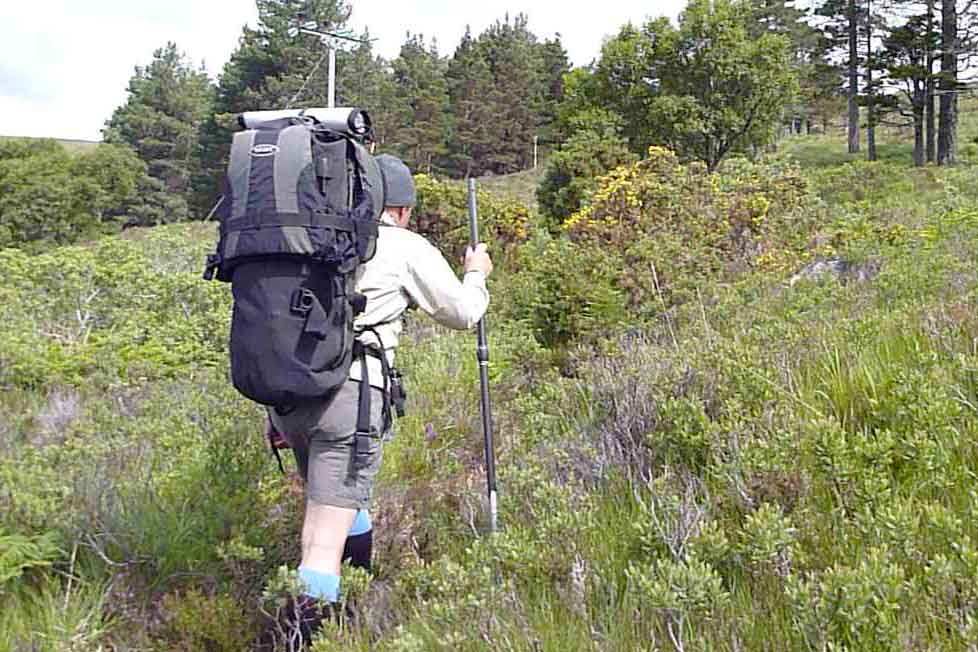
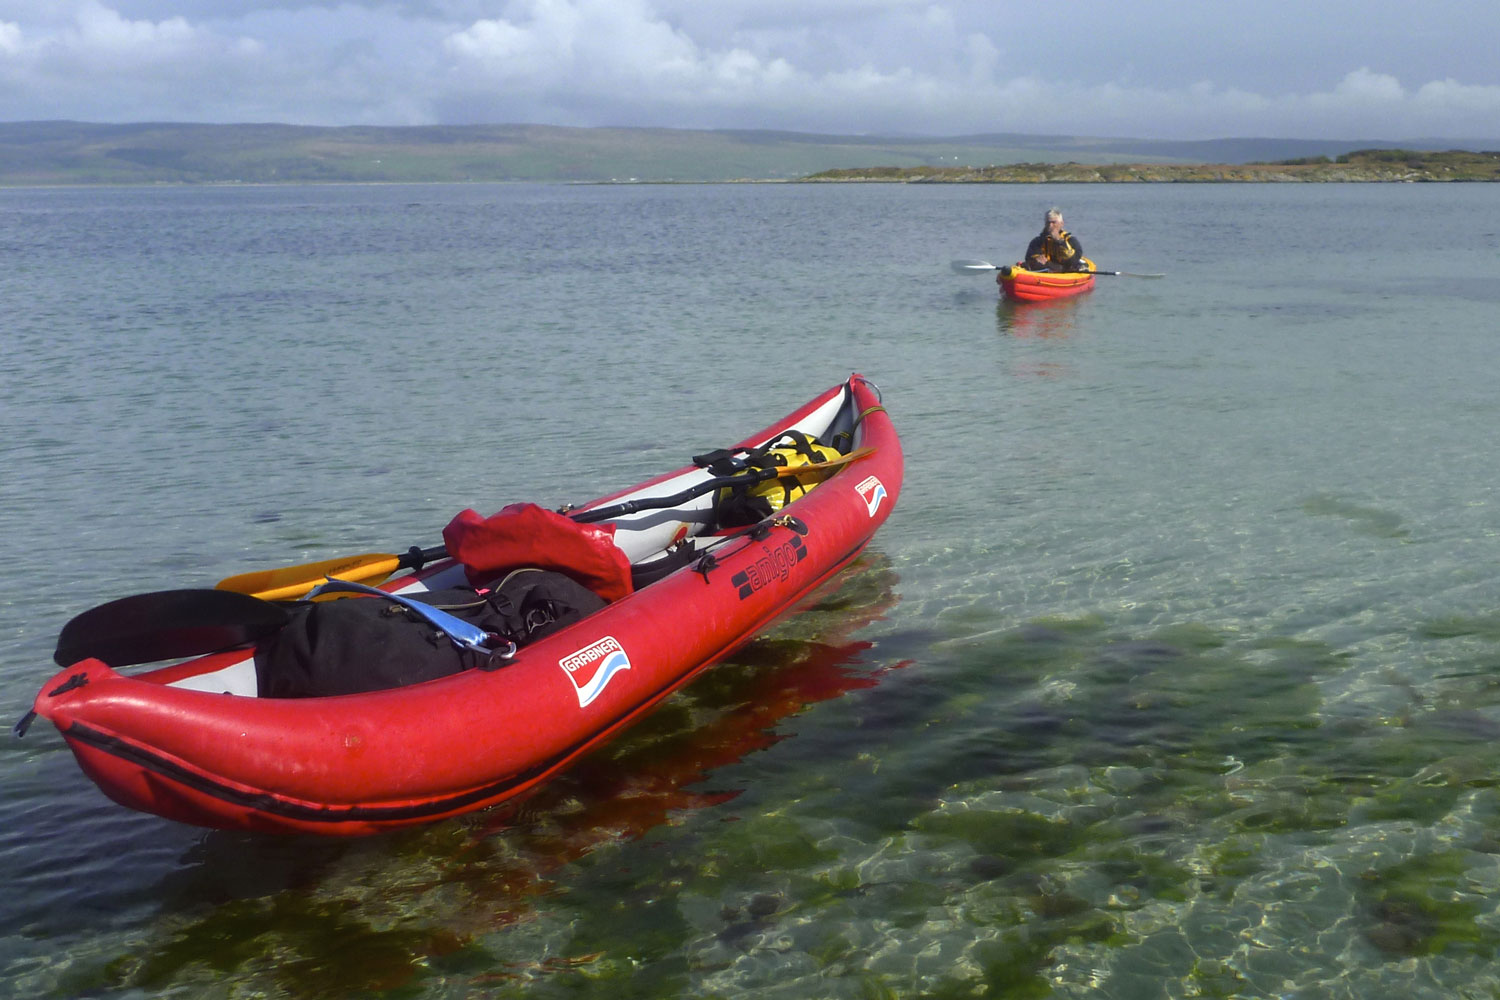
What’s wrong with a normal backpack? It took me a long time to find NRS’s Paragon was just what I needed for travelling with a paddle in my pack. It then took another year to get round to testing it properly on a long walk with a small boat. I admit a decent conventional backpack is better suited to walking long distances over rough terrain with heavy loads. I tried that on my first packrafting trip in Scotland, carrying a giant PVC drybag for my TNF Terra 65 while on the water. Although it’s not happened yet, the problem would be capsizing at which point the roll-top ‘drybag’ couldn’t be expected to seal for long. Because of that, everything inside that mattered needed its own drybag, neither of which would also last a prolonged immersion. All that bagging makes access a faff.
Then in 2010 I got myself my still brilliant Watershed UDB – a 1.1-kilo, 96-litre holdall made from a bombproof fabric and with a chunky drysuit zip – that is drysuit-dry not roll-top ‘drybag’-dry. I like my Mk1 UDB (also no longer made) because it’s a genuine immersion bag so doesn’t require back-up drybagging of the contents. Zip up the heavy seal and it’s as airtight as your pack boat and good to go. What’s more – especially on a packraft – a bag like this provides 96-litres of reassuring secondary buoyancy should my single-chamber packraft boat go flat on the water.
The UDB came with a rudimentary backpacking harness which, like the handles, were sewn to the bag. As we all know, a load-carrying backpack needs some kind of rigid frame or plate linking the waist belt and the shoulder straps so the weight can rest low on the hips, not hang high from the shoulders. When walking for days with typical 18-kilo loads, that makes a big difference to comfort and stability. The UDB’s token harness wasn’t designed for this and anyway, was poorly positioned on the bag.
As you can read here, I did the usual searches for ex-mil packframes and thought of cutting up a regular used backpack, but not before buying a Tatonka Lastenkraxe (left). That system, based on hunter’s L-frame packframes I’d seen in the US, can certainly carry a load but even with its huge padded straps and belts, at 2.7kg is a bit OTT and clanky for packraft travels. I think these sort of packframes are more suited to man-hauling very heavy loads or relatively easy terrain and then doubling up as a camp stool.
On the Trail At Gatwick check-in the Paragon slipped easily inside my UDB, avoiding the problem of stray straps getting caught in conveyors or landing gear. At the other end, fitting it took 10 minutes and I was out of the airport on the 3-km walk to the nearest hotel. I had concerns that the rigidity of the backboard (or ‘lumber support system’) wouldn’t be up to it, but of course once any pack is solidly strapped to a bendy board it can flex with the body but will maintain the rigid distance between the hip and shoulder belts. Only the strap mounting arrangements can come adrift under the load and for me, they didn’t.
My load was around 17-kilos + water and other bits in a small waist bag. That’s one flaw in running a UDB: there are no handy side- or mesh pockets to use, far less a slot to take a 3-litre water bladder. I was planning to rig something up between pack and harness but never got round to it. Early on, the Lycian Way was initially well provided with gushing springs, wells and cisterns meaning I could get by on just a half-litre bottle. Later, I needed another bottle but even then was often parched as the weather warmed up and usable cisterns got strung out.
Once something works OK I tend not to fiddle. I might have tried extending the back length to drive the weight more to the hips. The strap and back padding is not in the plush Lastenkraxe league. While I did have problems managing my balance on the gnarly and awkward coastal paths, in the end I can’t blame that on the Paragon, just the load, the terrain and me.
The lightweight NRS Paragon could easily take my current Seawave IK rolled up for short cross-country portages to and from the water. It will worked well with my other Watershed backpack – the 70-litre Westwater (left). Like the UDB, that bag came with rudimentary shoulder straps but became all the more useful and comfortable as a backpack once strapped to the Paragon. The pictures show a little more clearly how the pack wraps around a bag.
Now I know it works I may look into fitting fatter shoulder straps on the Paragon’s straps and other minor mods. Or maybe I’ll just leave it as it is.
In a line Lightweight air travel-friendly ‘burn anything’ woodstove that’s more efficient than an open fire.
Cost £50. (This unit was supplied free of charge by SBS for review).
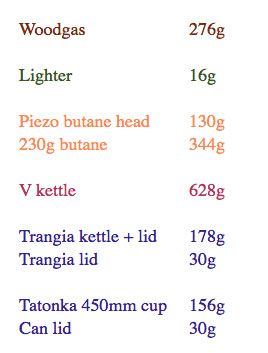
Weight 276g in bag.
How used Boiling water on a two-week walk and paddle in southwest Turkey.
Good points Very light; operating knack soon acquired; in the right environment fuel is everywhere; quicker and more efficient that a pot on an open fire. Unlike gas or liquid cans, can carry on a plane without issues. Tatonka folding-handle mug just fits inside.
Bad points: Seems expensive at 50 quid; feels a bit flimsy; MkII pot support wires felt less secure for mugs than the feet on the Mk1 version (on ebay for under a tenner) but take much less space and are lighter; after a few uses my fuel tray ‘shrunk?’ and could slip through (explanation below). Wouldn’t be my first choice in damp UK conditions.
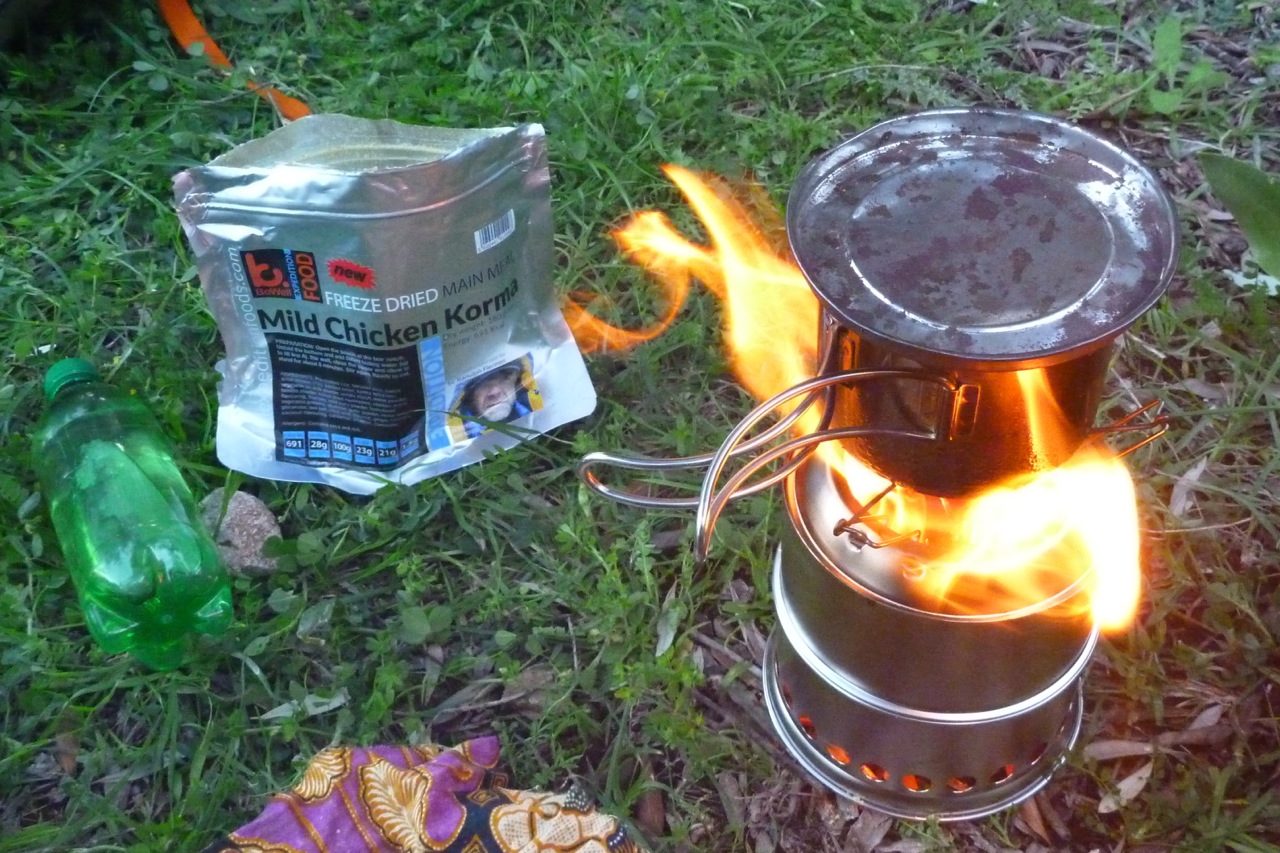
Review: For this 200-km trip along the Mediterranean coast I was all set to just heat up water on small open fires until I remembered the Wild Stoves woodgas stove still sitting unused. The plan had been to use it on my Sahara camel treks but they off at the moment. Walking and paddling as much of the Lycian Way as I could manage in a fortnight would give me a chance to finally put the woodgas stove to the test.
As carrying compressed gas cans on a plane is considered bad form and quite possibly detectable these days, taking the woodgas stove avoided the need to track down a suitable gas can or other fuel in the small Turkish towns I’d pass through on the way to the trail head, as well as the tedious anxiety of making that fuel last. Who hasn’t ditched gas cans for a flight back home? On the right, comparative weights which shows that of the options available to me the woodgas stove was a good choice.
I was only planning to boil water so did consider taking my proven Australian V-kettle (left) but its packed volume is about twice as much, it weighs 650g and anyway I wanted to try out the stove. Gary at SBS sent some wax-impregnated paper firelighters as well as a suggestion that woodpine pellets as used in posher types of cat litter would be a good way to get the knack. I tracked down a 3-kilo bag at a garden centre for as many pounds and took a portion with, but once there found my pellets were small enough to fall through the stove’s fuel tray vents. A few fine twigs or dry leaves fixed that, but even then I’m not sure the cat litter I had made that much difference as there was plenty of very dry wood wherever I stopped. In the end I dumped the remaining cat litter to save weight.
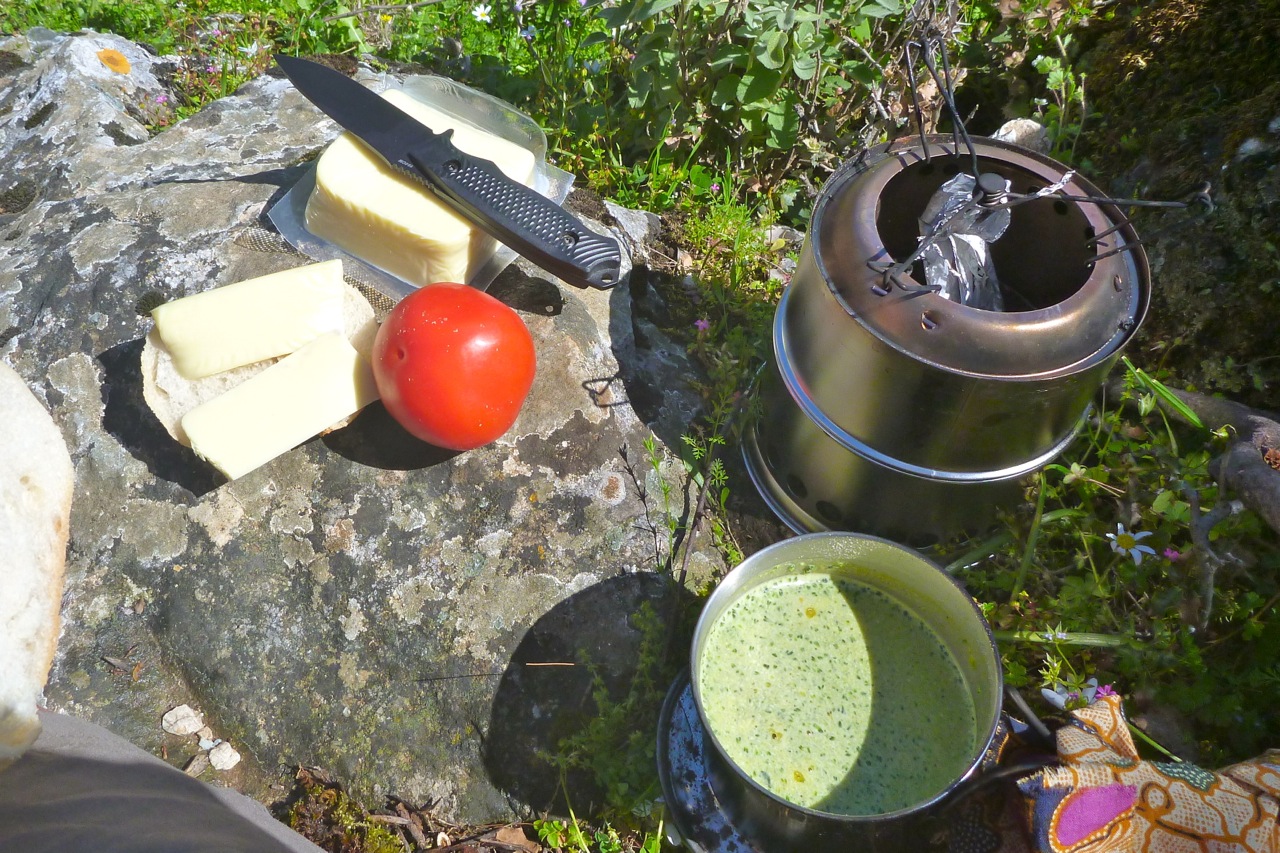
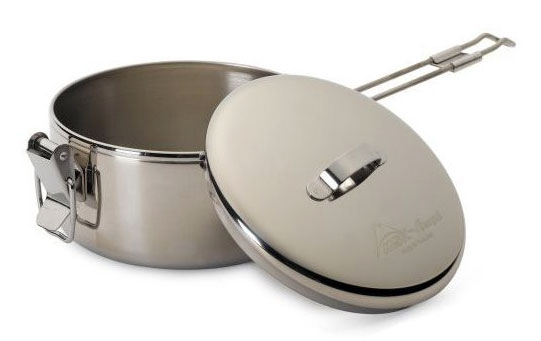
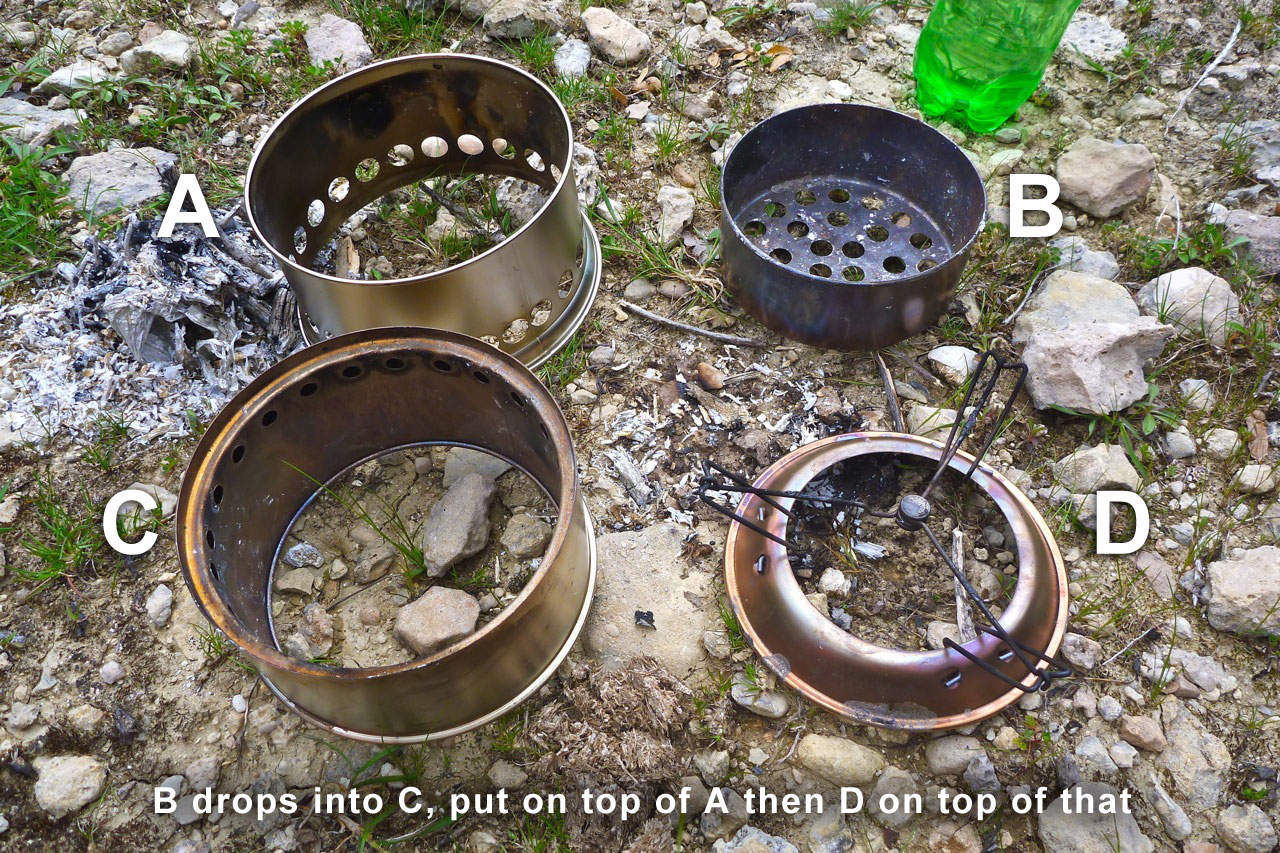
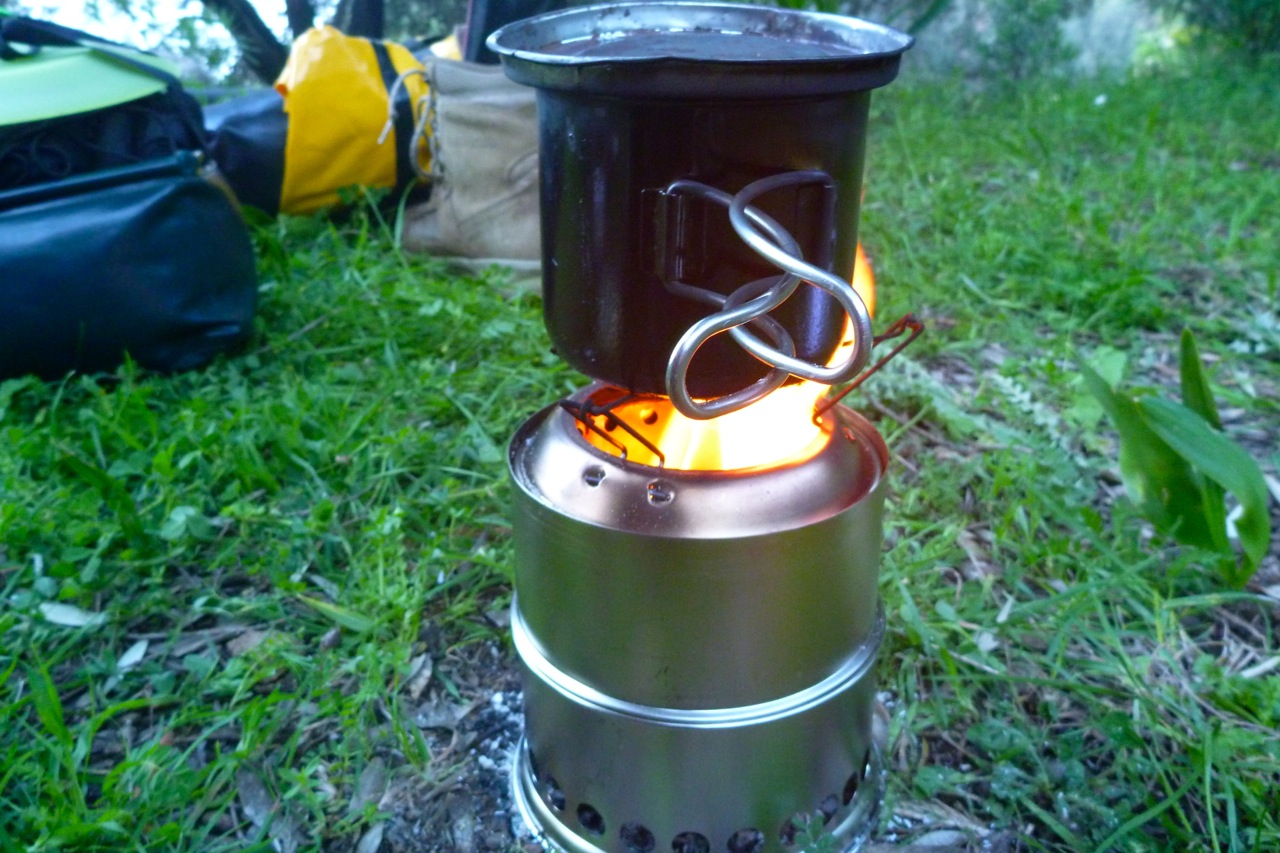
By chance my handy 450-mm Tatonka pot-cup just fitted inside the stove (right) making a slightly taller packed volume that still fitted in the bag, but giving the cup’s full volume in which to store stuff. That was all the cooking pot I needed for my water boiling needs. My stainless Tatonka perched rather unsteadily on the wire supports and soon acquired a glossy black varnish of burned pine sap. Apparently wiping some liquid soap on the cup will stop that forming or make it easy to scrub off. If you want to cook rather than boil, Wild Stoves sell the stove with a 775-ml stainless-steel MSR Stowaway pot with clip down handle and lid (right). The stove fits neatly inside.
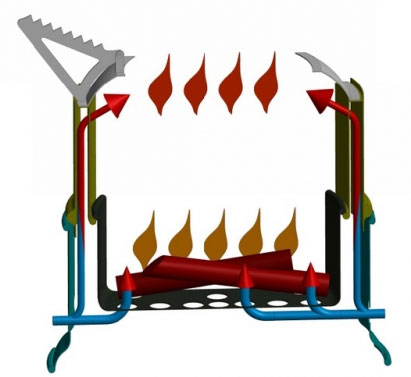
I hear a crude woodgas stove or something similar is easily made for a couple of concentric cans which is why some baulk at Wild’s £50 asking price. But it’s more than just vented a windshield on which to rest a pan which is more or less what a Trangia is. Like a Trangia or the linked home-made stove above, air feeds in from the base to feed the fuel tray’s twiggy charge – but once burning that charge then warms the double-walled sides of the woodgas stove’s combustion chamber, sucking up more air to create a secondary, hotter burn as it mixes with wood gas emitted by the burning charcoal developing below. Or something like that. It’s this secondary burn coming out of the vents just below the pot which makes a woodgas stove more efficient than simply putting it over a three-stone fire. And it’s certainly more in keeping with the keep-it-simple ethos than similar woodgas stoves which – hard to believe – resort to a battery powered fan to stoke the flames! That’s surely an admission that the design is flawed.
The scraps of Mediterranean scrub I readily found easily got a burn going. Kindling and the firelighter strips were another matter. As I got the hang of the stove with Gary’s detailed instructions to counter-intuitively put kindling on top as the stove burns downwards, I tried to use no artificial aids (short of rubbing two sticks together to make a flame). It’s always good to be prepared if you run out of waste paper, but I never quite got the hang of it. Maybe dead eucalyptus leaves doesn’t kindle as well as a handful of dry Saharan camel grass.
So a bit of wax paper tucked into the top kindling of thin twigs (left) worked best to initiate a reliable, faff-free burn. At best the stove would be ‘on the gas’ in about 2 minutes. Orange flames would emerge in a ring from the top vents and soon my mug was making kettle-like noises. It probably took a bit longer than my mini butane gas burner with a good wind shield – or a well-packed v-kettle, but – besides benefits already mentioned – we’re talking a couple extra minutes to reach a boil. As long as it takes to prepare an ekmek and kaşir sandwich.
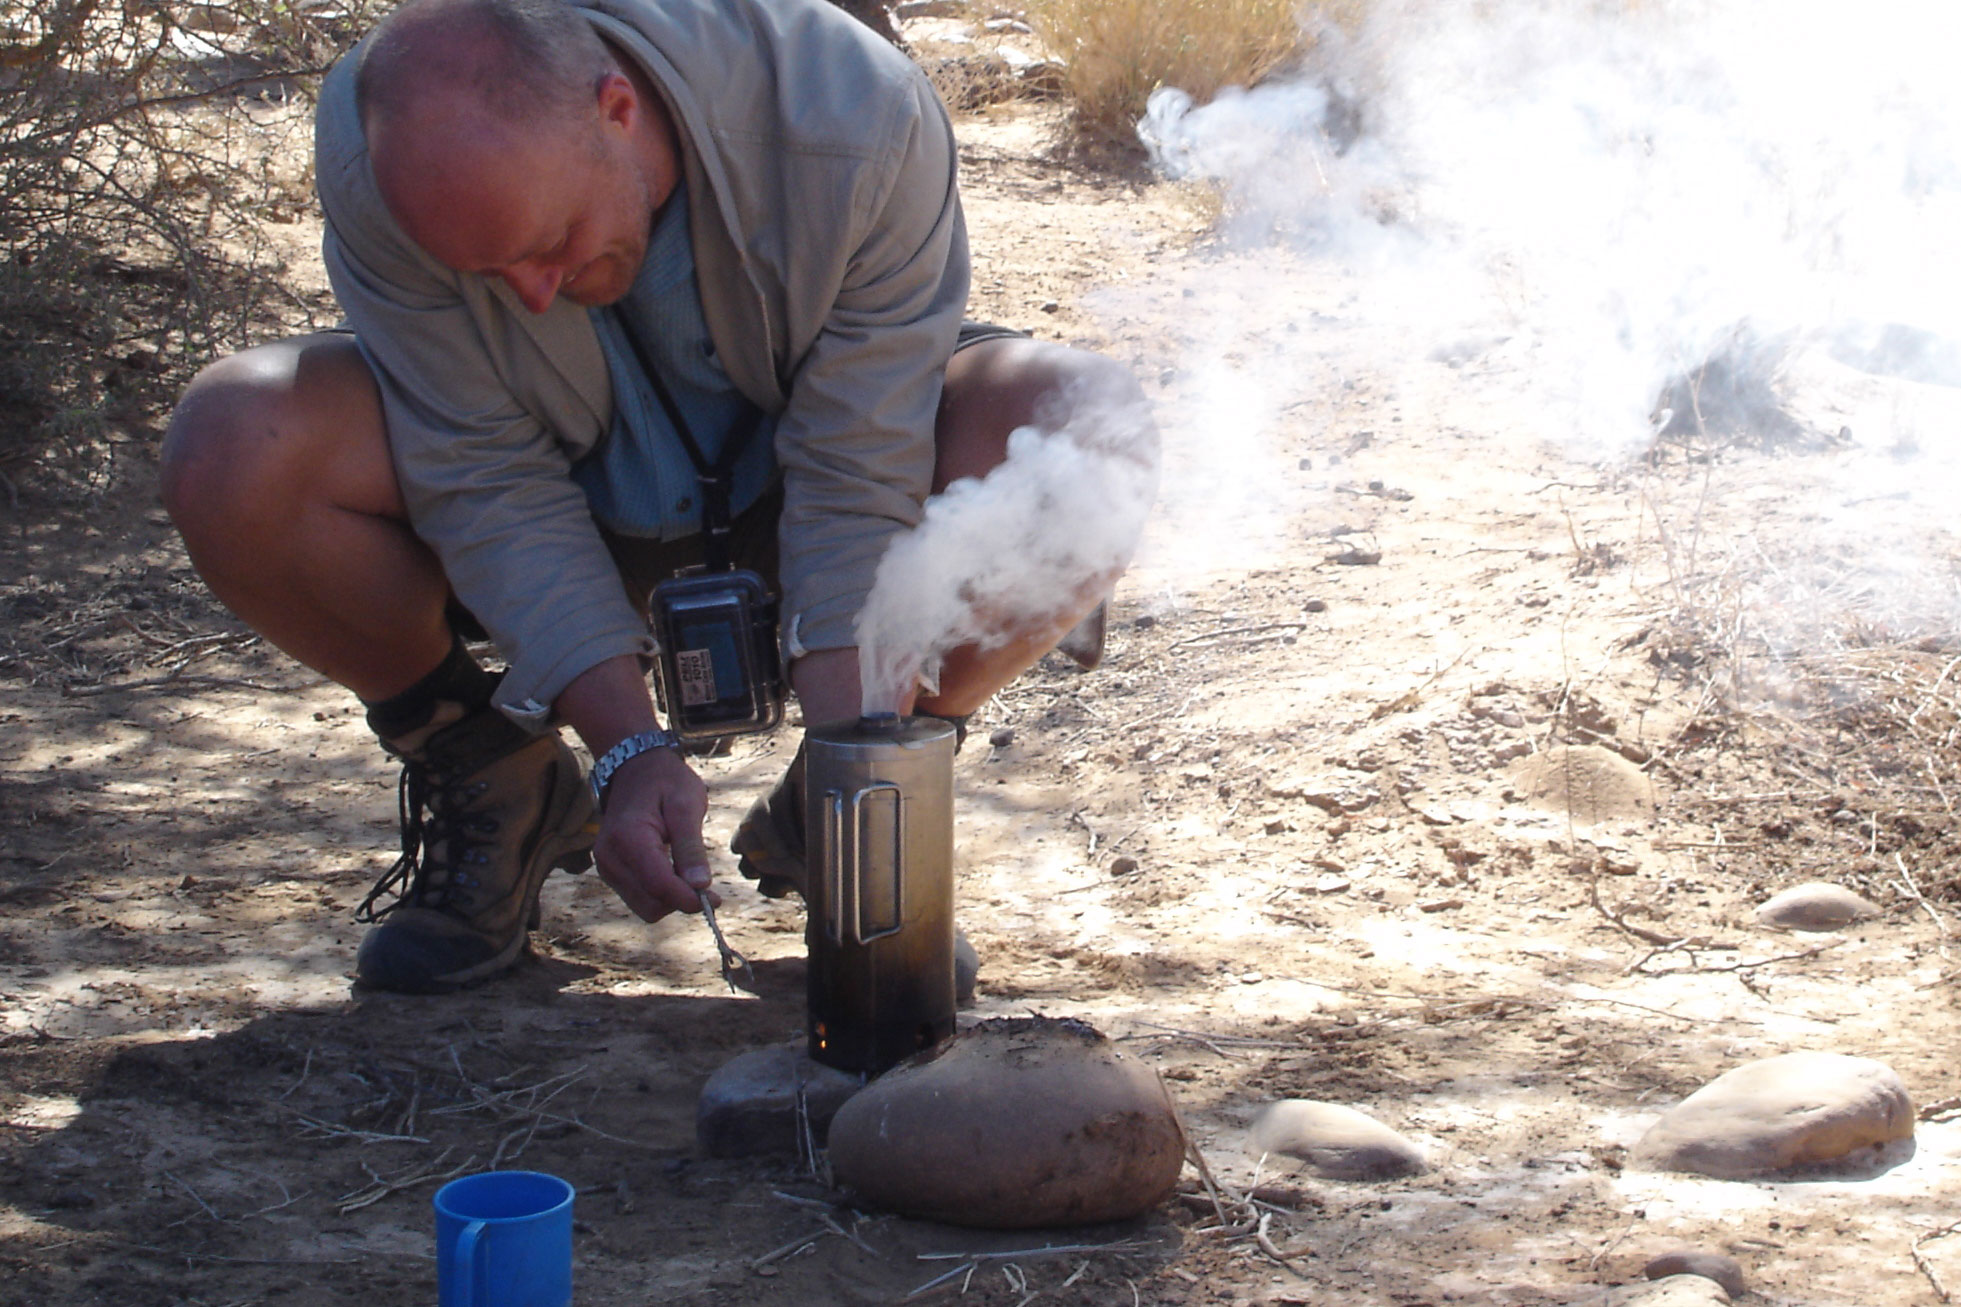
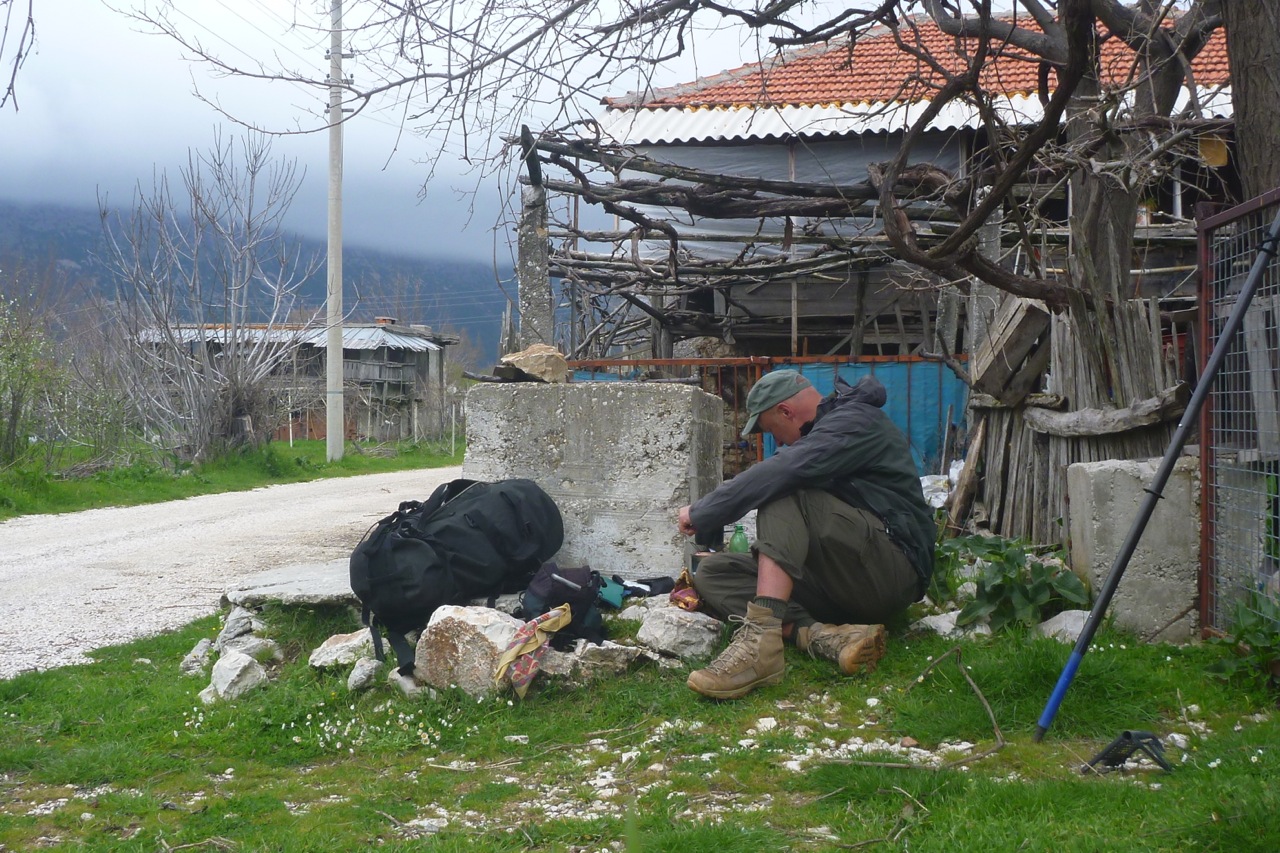
All was going well until one chilly and overcast day up at 850m (right) when, with a long and high afternoon’s walk to go, I really needed the benefits of a quick hot pint of cuppa soup. I perched by a well on the edge of a village but for some reason the stove wouldn’t gas up. The fuel was as dry and brittle as dead wood can be. Was it the altitude, the cold, the wind, the wrong wood? Half my matches, several sheets of wax paper and then pages from my guidebook went up until, determined to get a feed, I finally I got a lukewarm soup but lost over half a precious hour in the process. Then I noticed the fuel tray resting low and unevenly inside the base housing. Turned out that presumably the heat had deformed the tray which was now a little smaller than the base tray’s rim support. Neither was especially oval from careless packing but the tray could now easily get displaced and so messed up the convection needed to make it all work. Knowing that to be the cause, next time I was careful while loading the fuel tray and had no more problems, even if some days getting on the gas took longer than others. I put that down to varying wood types and atmospheric anomalies.
The woodgas stove is a little more fiddly than a conventional upward-burning volcano kettle but of course a kettle is only a kettle. Making do with food and drink that only required hot water was fine with me on this trip (I spent most nights half-boarding in pensions), but a stove can of course cook proper food. Had I been doing more wild camping I know from previous experience that despite its convenience, freeze-dried ‘bag food’ gets galling after more than a few days.
It may not be my first choice up in the sodden, treeless far north of Scotland but I now know the woodgas stove is ideally suited to Mediterranean or sub-tropical conditions and means wherever I might land by plane, I’ll have a reliable cooking stove just as long as I can find something to burn in it. I see Wild sell the usual ‘Kelly kettles’ with those redundant fuel trays plus chains and plugs and what not, as well as a smaller but similarly over-designed ‘SAS’ mKettle. How complicated does a v-kettle have to be? It would be great to see Wild add a light and simple v-kettle to their range, similar to the one-piece + lid version I use. It would sit well alongside their similarly basic but ingeniously functional woodgas stove.
Grappling to get the boat out of the muddy Medway river at Yalding one time put a light scrape on the hull. It reminded me that, along with fitting PRVs to the sidetubes, another winter job was to fit a protective strake under the bow where most scraping occurs. Better to get the protection in early while the boat is newish.
A 70 x 15cm Hypalon off-cut (close enough to Nitrilon) was 14 quid on ebay and once trimmed left enough for another strake or two. I had some Polymarine two-part adhesive (below) and glued the strip to the boat’s curved form with the floor inflated, even if that meant working the roller to press it all together was less effective. I then slathered some Seam Seal around the nose of the strake to protect it from unpeeling (less runny Aquaseal would have been better but a Seam Seal tube was open. More on glues here).
2021 Update A strake is a good idea but actually got hardly worn, so on Seawave 2 I just stuck on some Gorilla tape, maybe two layers, in the same place. Easily renewed/removed.
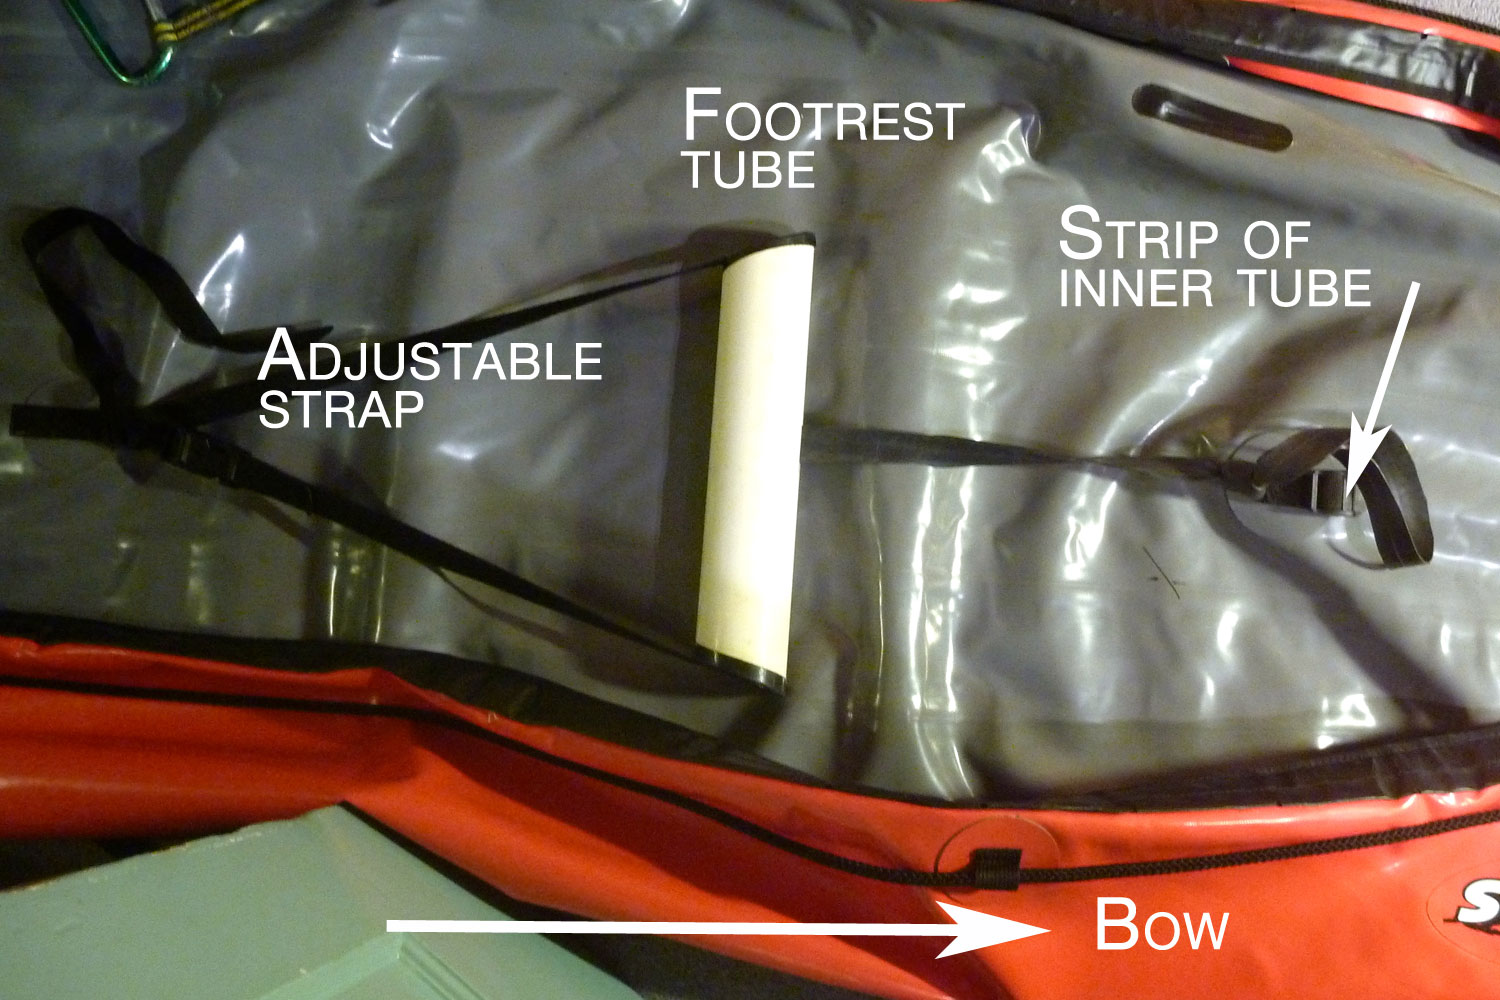
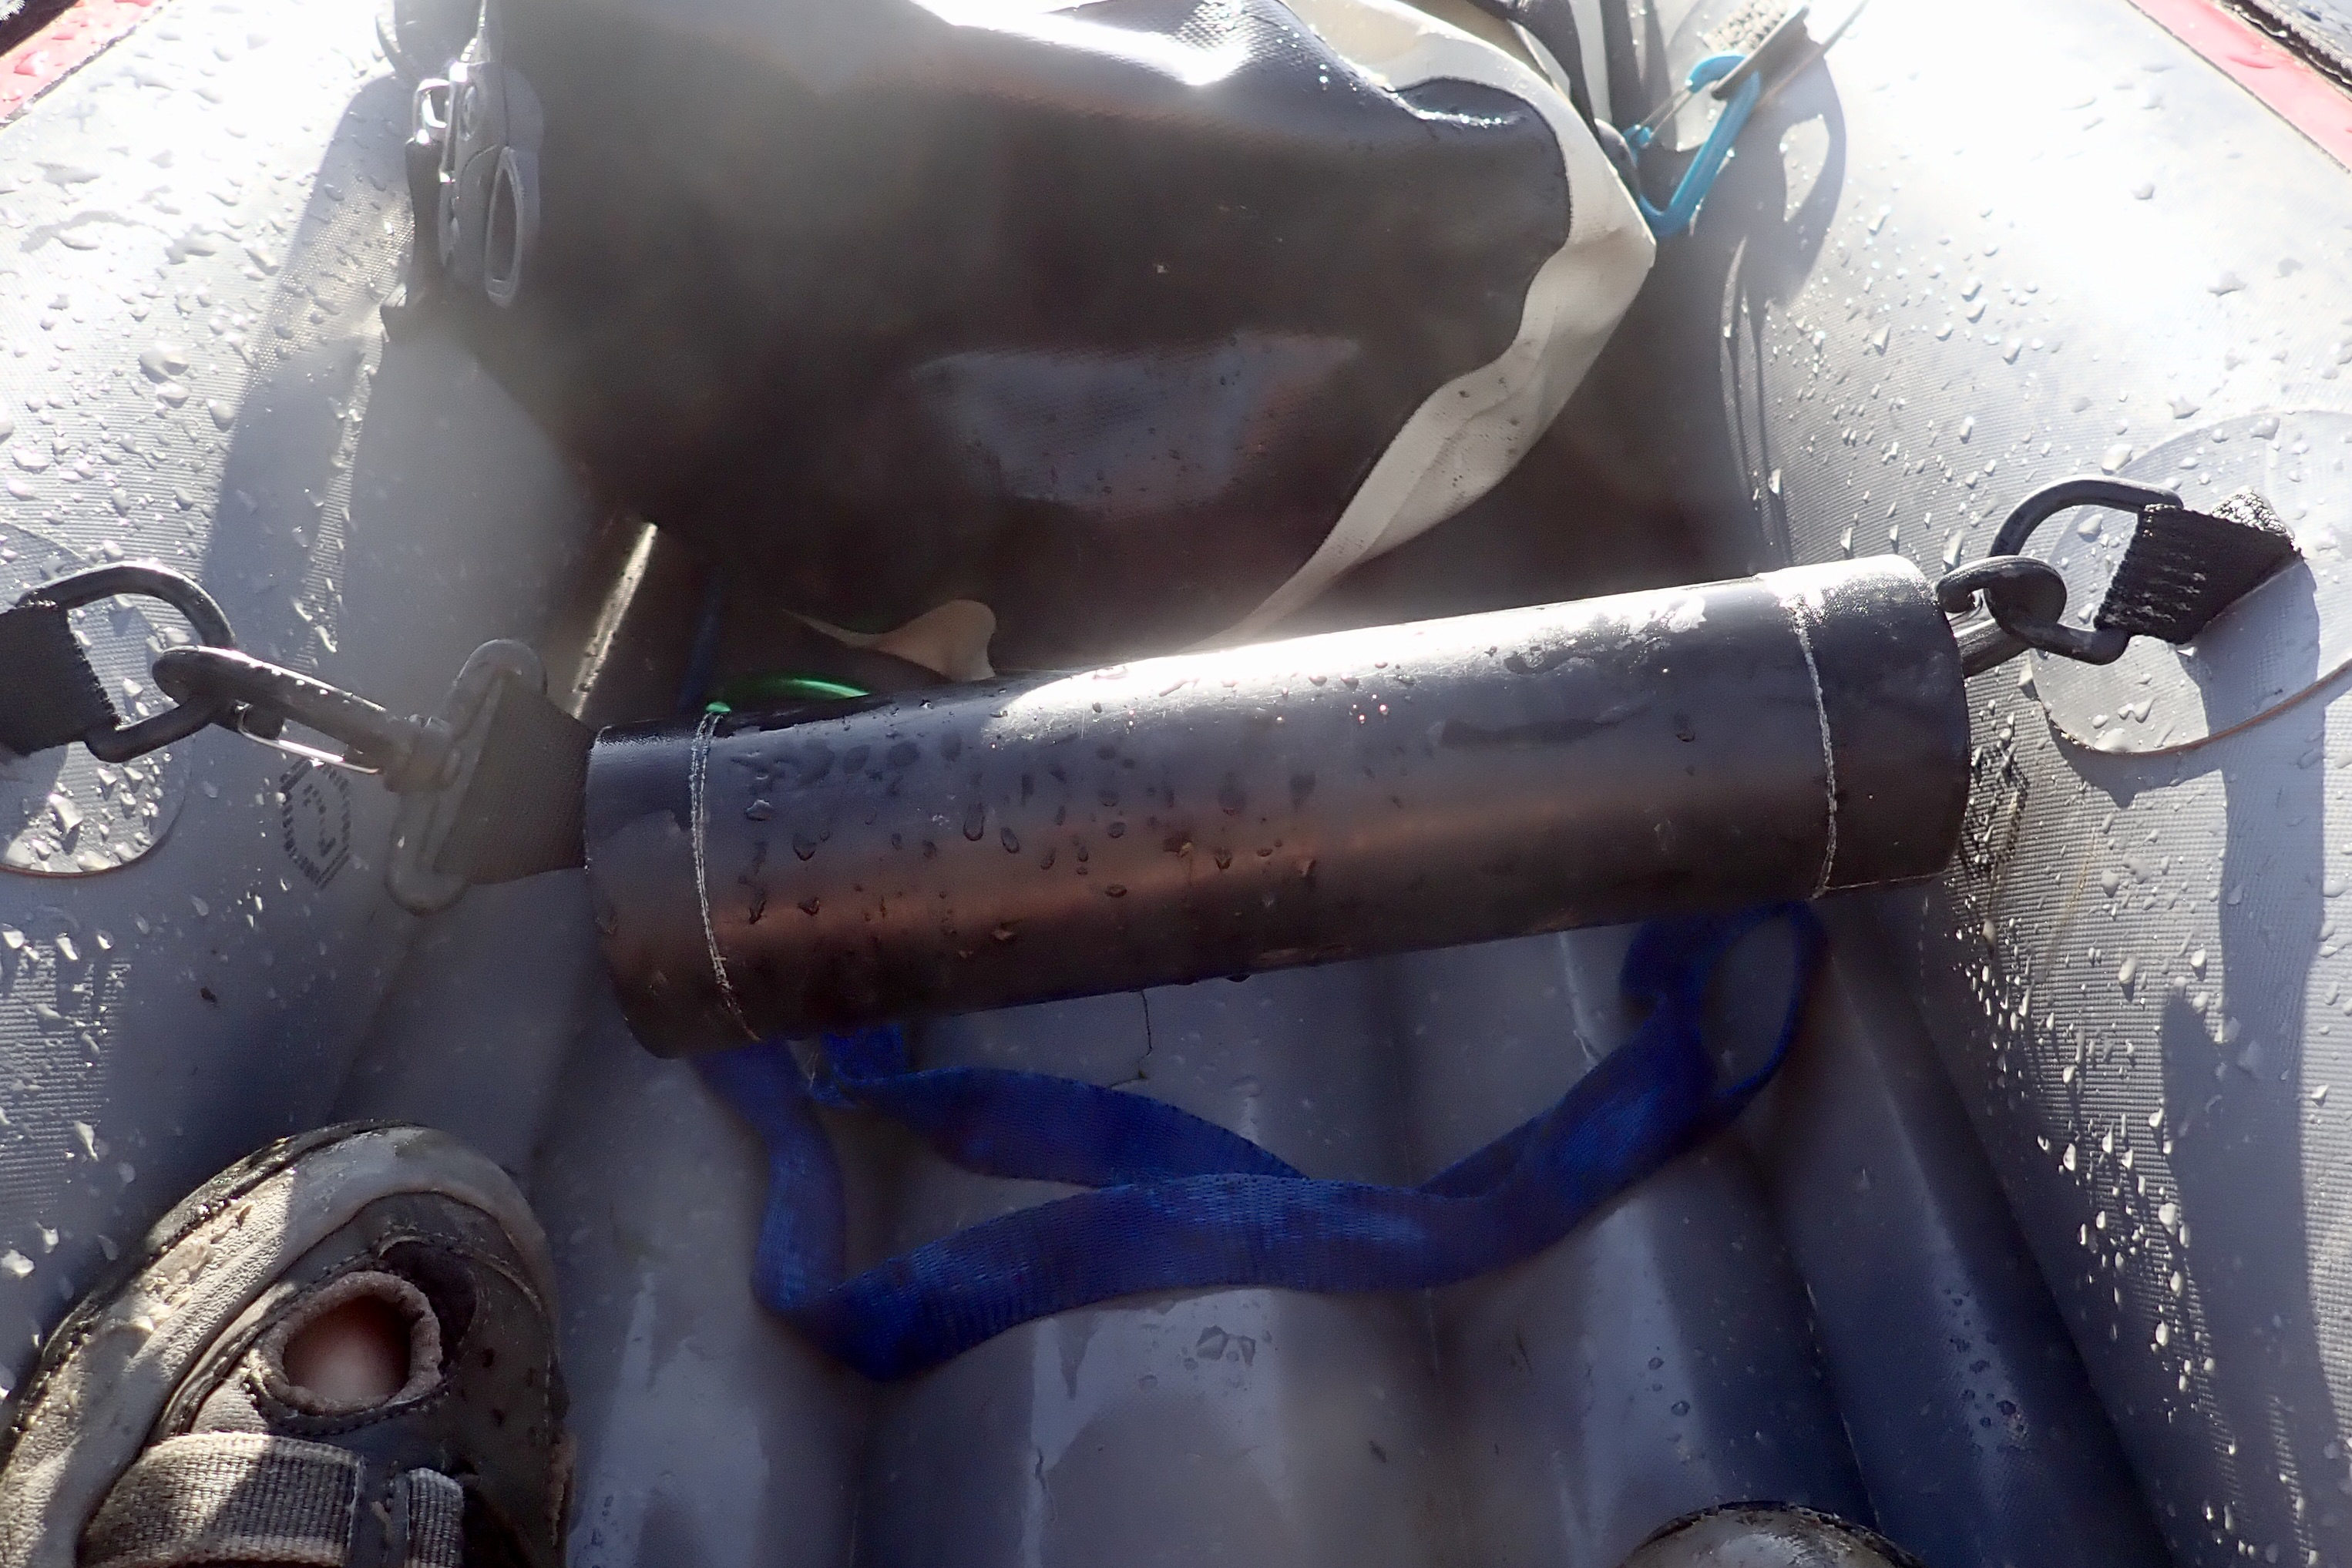
While the boat was filling the hallway and causing a hazard to domestic navigation I also bodged up a better system for the all-important footrest. A bit of inner tube now counter-tensions the footrest from the bow to keep it in position. It means the thing is now fully adjustable across a wide range of positions, can easily be fine-tuned from the water, removes in seconds for boat cleaning/drying and needed no extra fittings glued to the boat. Once great thing about the Seawave is the multitude of attachment points on the floor and sides.
While on the river my aged Mk1 Alpacka U-seat base went flat, split right in the U. This seat is part of a lighter and comfier system I brought over from my Amigo – an improvement on the one-piece Seawave seats. It’s currently unfixed to the boat and the thin nylon must have ripped while yanking it into position on the river after getting back in. Again, I’m trying to avoid gluing extra D-rings to the hull – they’d limit seat base adjustment options anyway.
Better then to attach the seat base to the base of the backrest with a couple of zip ties. The whole backrest/seat base can then slide forward and back off the backrest side straps and it all unclips from the boat in less than 3.7 seconds. I glued up the punctured U-seat but it won’t last, so I’ve ordered MkII Alpacka seats (left) from Packrafting Store: €70 delivered for a pair. From Alpacka US the seats cost $25 but their auto-calculated international postage is nuts, let alone tax and VAT issues. These seats have the U filled in like a webbed foot: stronger and less floppy for just ~12g extra weight.
Seawave 2 seats and thigh straps
2021 Update. I’m using the same system on Seawave 2; a non-U packraft seatbase and a used backrest off a Bic SoT with a piece of stiff plastic board slotted inside.
Heavy
Better
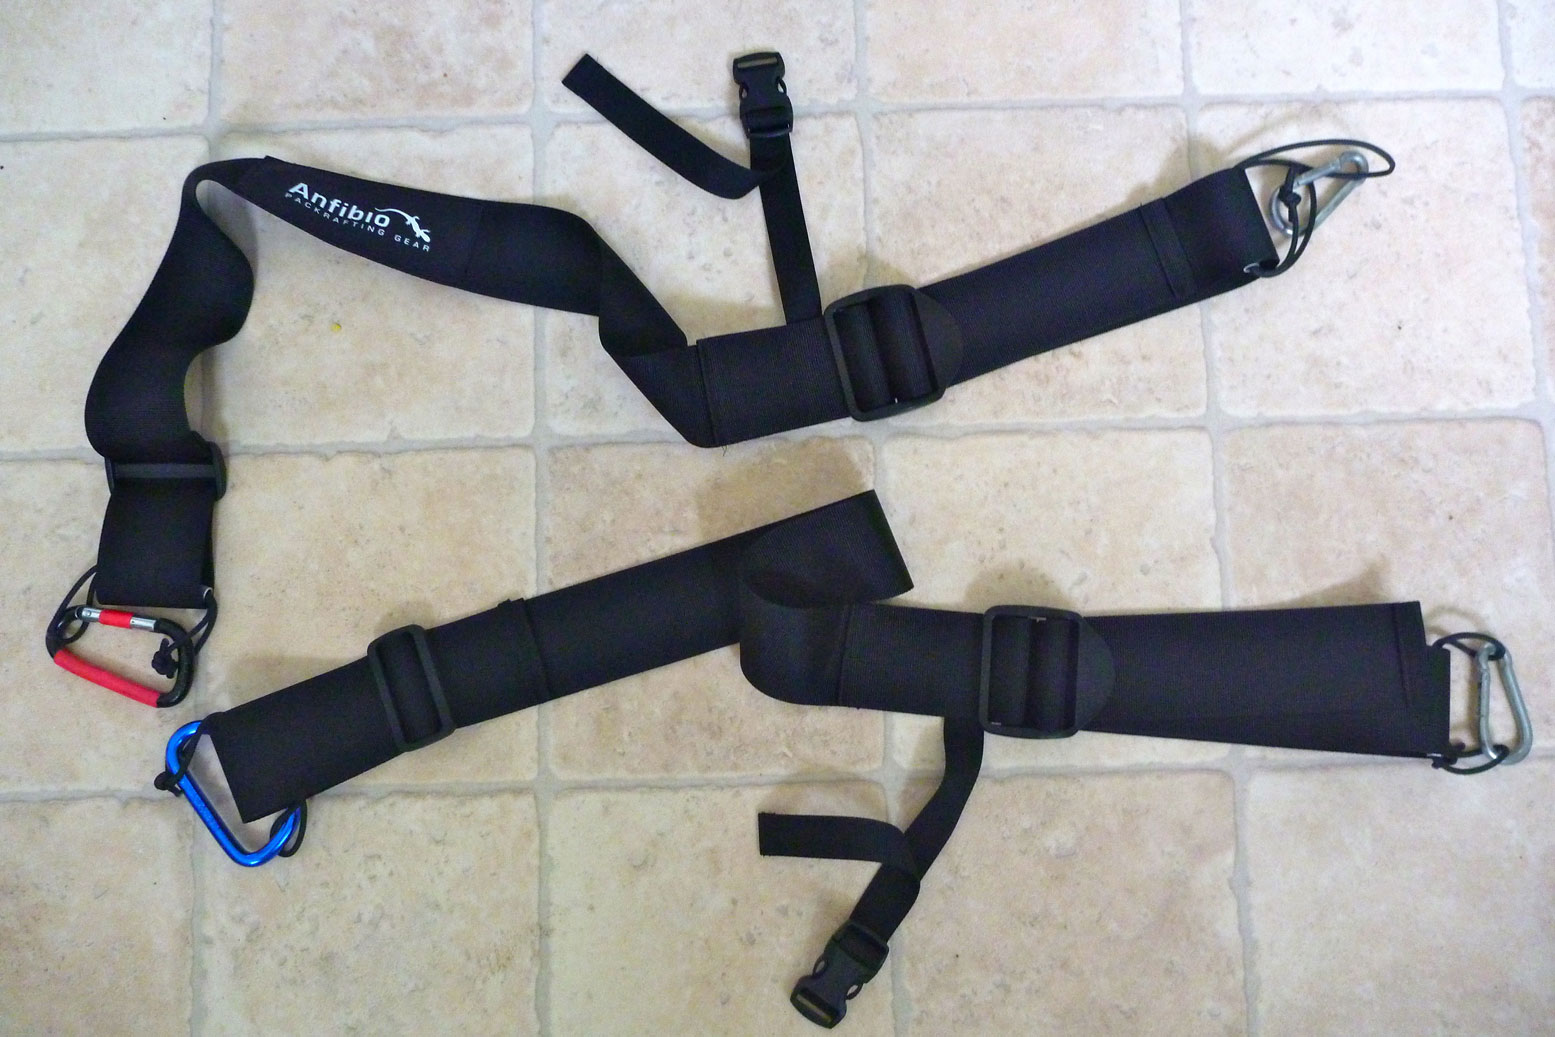
I’ve also ditched my old my SoT thigh straps (left). Nicely padded and effective though they were, the brass spring connectors and padding made them feel heavy and bulky at ~720g.
Instead I got some non-padded Anfibio packrafting straps (they’re different now). With my biners they come in at 270g. The delta-straps dangling off the sides are a clever idea, designed to give a more direct pull when rolling a packraft for example. Can’t see myself doing that in any of my boats. Whether you’re rolling or just paddling, in rough water the more direct connection with the boat the better. I’m a big fan of these light but effective straps now. No need for paddling.
Clipped together is actually the wrong way – entrapment hazard!
Not much time for paddling at the moment, but with a staggering three days of cloud-free skies while the south had its traditional wet bank holiday, we had to down tools and go and do something. How about another walk over Suilven and paddle back – was last time three years ago already? The motorbike was left at Inverkirkaig, so this time it was just a paddle-and-boot ‘biathlon’.
With the car parked near Glencanisp Lodge, it’s about a 2-hour walk along the estate track to the turn-off leading up to Suilven saddle. On the way we pass Suileag bothy where Jon and I overnighted in May, tackling an Assynt variant on the Cape Wrath Trail.
It’s only a mile and a quarter from the estate track to the saddle, but with the 430-metre rise, it takes up to an hour. The washed-out last few feet onto the 600-metre-high saddle are on all fours. Above at the back, Quinaig, one of the best of the Assynt mountain walks. No packraft required.
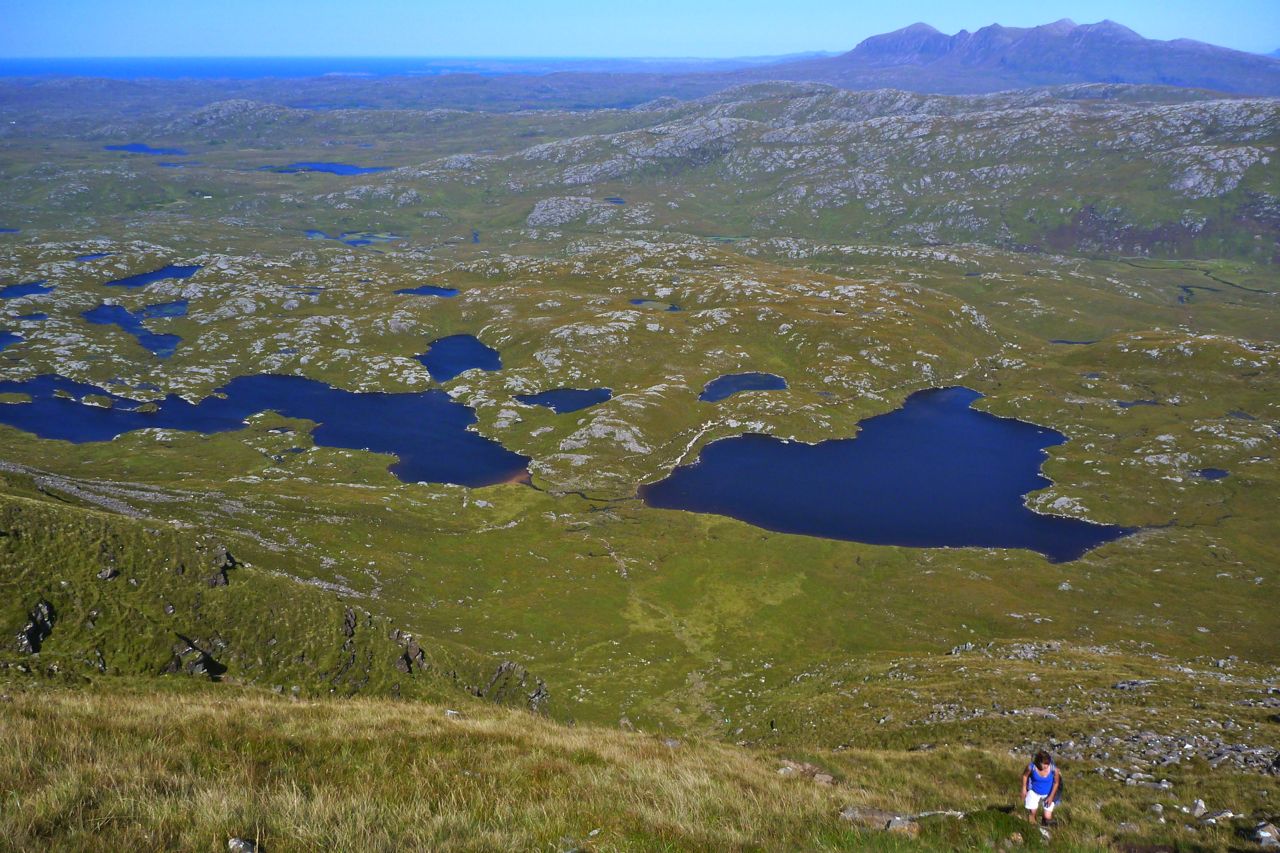
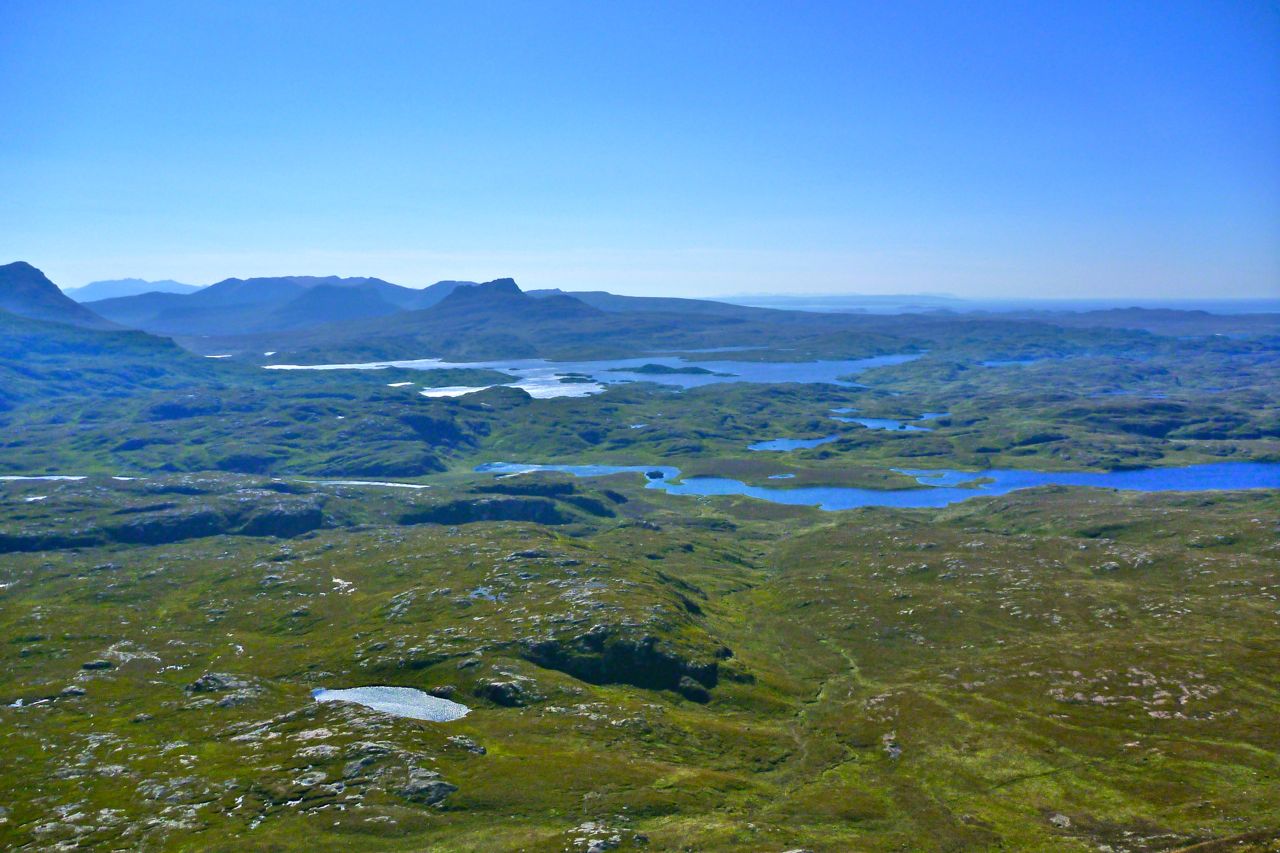
At the breezy saddle it’s quite busy – well, ten people or so – so we decide to lounge around and not visit the 731-m summit, nice grassy spot though it is. Far down below on Fionn Loch, we think we can see three canoes heading upstream towards the canoe camp alongside the rapids (more or less the middle of the picture, above). But they’re moving so slowly, for while I thought I was mistaken. Soon we’d realise why they were creeping along at about one foot a second.
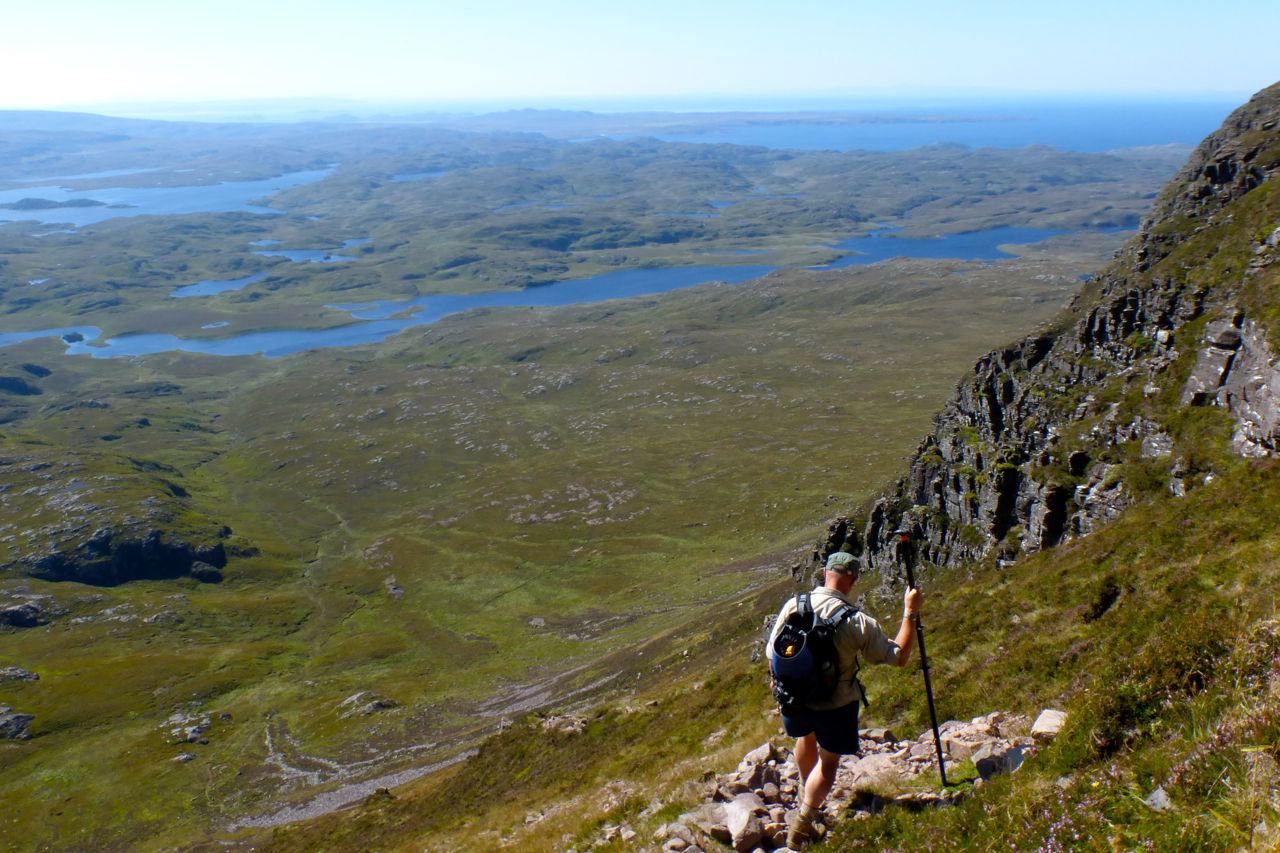
We set off down the exceedingly steep south side of the mountain.
Here I get my first chance to appreciate the canoe-handle T-piece I’ve added to the end of my packstaff. It makes a much better support when inching down steep slopes, and the long packstaff can reach down a foot below your boots. Anyone would think I was going on about packstaffs again.
Coming off Suilven, the gradient begins to ease. By Fionn lochside a strong easterly is blowing and the packraft fills up almost by itself, even if the boat is on the verge of taking off. This looks a lot more than the 15-mph forecast. The wind will blow us downstream, but it looks rather gnarly out there, and we’re only at the ‘top’ of the fetch. It’s about a mile and a half along the loch to the river inlet and will get choppier downwind.
Visiting baboons might enjoy a view of my butt patch – glued on with Bostik 1782 and (appropriately) lined with gorilla-tape. Even though the 2014 Alpackas have a bit more back-end buoyancy (as we were about to find to our cost), for the weightier and lazier paddler, a butt patch offers useful protection in the shallows.
Did I say it’s very windy? And to make matters worse I’m rather careless about the weight distribution, forgetting how we did it last time in much calmer conditions. With the packs in the middle of the boat and the Mrs’ legs tucked in, instead of reaching back, the bow was noticeably low.
Once out midstream, the bow started swamping in the chop which was a little alarming. The restful 1.5-mile downwind paddle to the river inlet is abandoned. I tell the Mrs to lean towards me, and I paddle across-wind for the other bank. The odd wave splashes over the side.
We could have tried again with the packs on my back, but were a bit unnerved. As it is, two-up the boat was a little hard to handle in the wind, and we have no pfds. So the Mrs takes to the bank – a long detour around a lagoon – while I tip out the boat then allow the wind to whip me along the loch, pulling over to wait once every few minutes.
I’m not sure I want to engage with the wind funnel at the ‘narrows’ of Fionn Loch, as by now the whitecaps and chop are getting it on. Plus I’ve lost track of the Mrs. So I pull over and stagger over the bogs to see where she is.
Reunited, we’re effectively on the south side of the Kirkaig river, so are still going to have to paddle across to get to the north side for the regular path back to the car park. I recall the river entrance nearby is in another bay which will be out of the easterly fetch. With better thought out trim, that crossing should be less risky.
I know from previous experience that trying to carry an inflated packraft even five minutes to the bay in this sort of wind will be like trying to wrestling a pterodactyl. So out with the plug and under my arm it goes. That’s the great thing with packrafts: they’re as easy to paddle in as they are to walk with, though there’s probably a more elegant way of saying that.
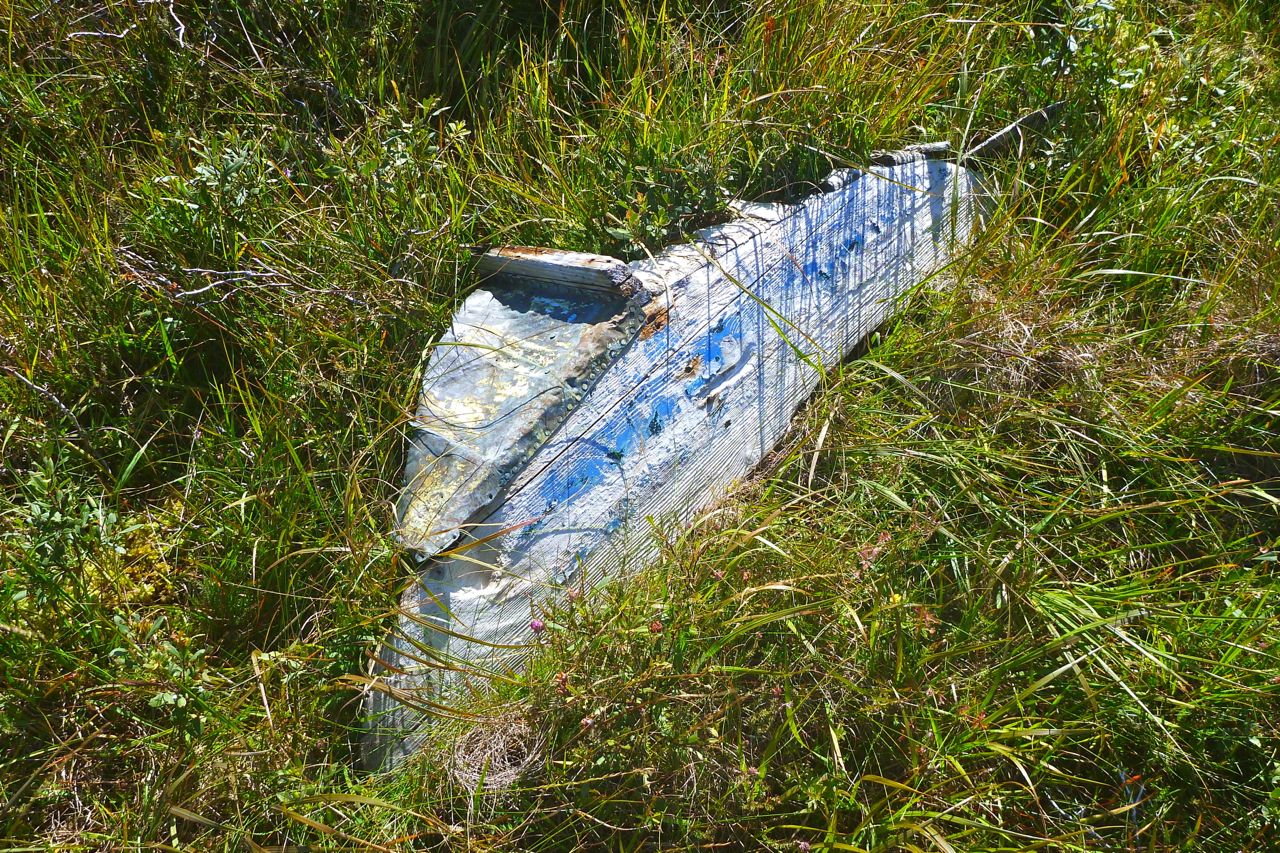
This rotting transom is all that remains of the last boat that came this way.
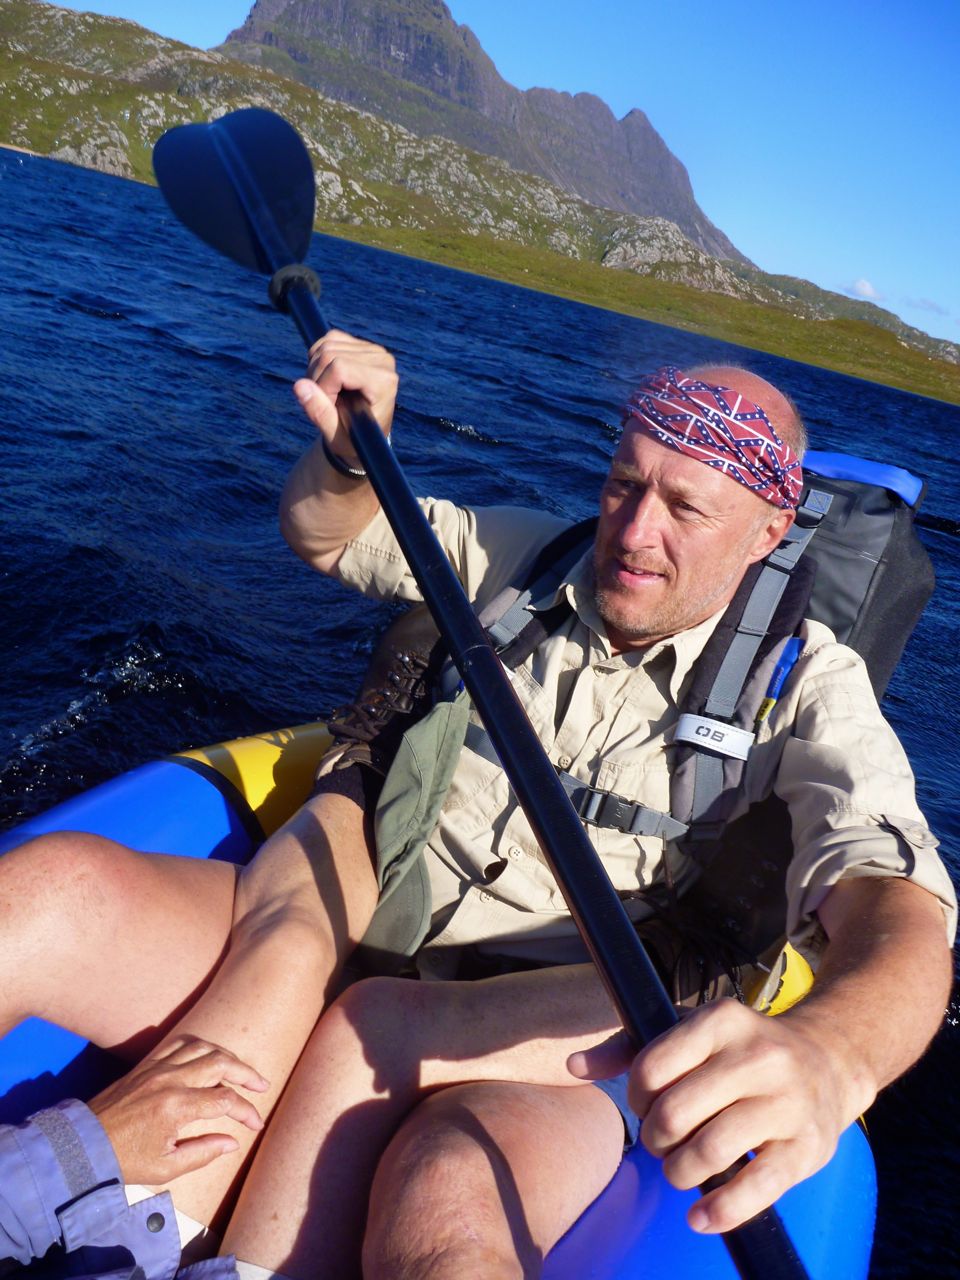
Another quick air up…
…and we set off across the small bay…
…for a small beach by the river entrance (above my right boot). Two up with the wind, I don’t want to get involved with the swift current flowing through the inlet towards bone-crunching waterfalls.
Back ashore I roll up the Yakpacka…
…and we set off for the 3.5-mile walk back to the bike at Inverkirkaig. And even here on the path the wind nearly knocks we over a couple of times. It was only an 11.5-mile day (10 for me on foot + 1.5 paddle), but by the time we get back to the bike we are pooped. Luckily, this year we have a lovely house to go back to.
For my sort of paddling integrated latex socks, latex wrists, neoprene at the neck plus a front entry zip and a relief zip add up to the best all-round combination.
About Drysuits Even in summer the benefits of a drysuit for northern British paddling are worthwhile. Like wearing overalls to get stuck into a messy job, you know you’re covered. You can wade in as deep as you like and take all the splash that’s going without risking getting chilled should your underclothes get soaked when a waist or limb seal leaks. And for me, nervous of the deep and often paddling alone in the northwest (even if it’s rarely more than a mile from shore), it’s an added layer of security.
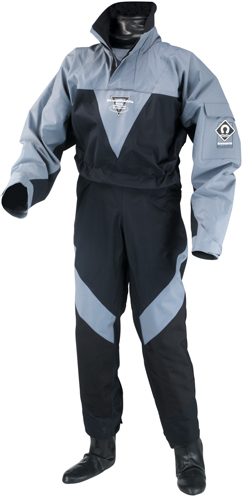
My chunky old Crewsaver Hyperpro drysuit (left) cost only £180 and did the job amazingly well. But even at 2kg, it was heavy enough to need internal braces and was often too hot and sweaty for active paddling. I don’t tend to get cold easily but wonder do if it was more of a sailing suit less well suited to energetic paddling.
When it comes to exposure, should you fall in, being wet from trapped sweat is nearly as bad as getting wet from seawater. Once pressed against your body by water pressure, I’m told the actual benefits of a drysuit in slowing down hypothermia are only measured in a few extra minutes. To be agile enough for paddling, drysuits are not immersion or survival suits (above right) made to snuggly bob around for hours until the RNLI find you. In such a scenario it’s the fleece underneath that can make a difference, and I have a Gul one-piece (left) for those chilly days. At anything above single-digit temps, it’s just too warm, but if anyone remembers romper suits from their toddling days, they know how comfy it is to wear a onesie over their nappies. They go for about £25 and many outlets throw them in for free with the drysuit.
Re-entry training and drysuit testing
Whatever membrane fabric the Crewsaver used, like many sub-Goretex fabrics it was more waterproof than breathable. As it is, I’ve never experienced the true magic of breathable membranes which work under a much narrower set of parameters than we imagine (temperature gradients, fabric saturation, and cleanliness), even if they’re surely better than being wrapped in bin bags and duct tape.
Before the Hyperpro I briefly owned a much lighter Kokatat Tropos (below) which I sold in haste and which closely resembles my Anfibio Packsuit. Kokatat are known for their high-end Goretex expedition kayaking drysuits, but they don’t use two-layer ‘Tropos’ membrane fabric anymore so maybe it’s just as well I flogged it. The closest thing Kokatat now sell is the better breathing three-layerHydrus 3.0 Swift Entry which goes for over £700 in the UK.
Relief zipper: don’t even hesitate; it’s chilly out there. Might work for women using a SheWee, too
Semi drysuit I’d often wondered what exactly a semi-drysuit was – a half-arsed fabric that sort of keeps water out? Sven at Packrafting Store explained: it’s a drysuit with a comfier neoprene rather than a latex neck seal. Latex (as on my Hyperpro) seals very well but worn all day gets uncomfortable. I recall reading about some guys who paddled South Georgia in the South Atlantic fitting ‘venting hoops’ into the latex neck seals of their top-of the range Kokatats during less stormy episodes to stop them choking or boiling over. Unless you expect to be frequently immersed in storm- or whitewater conditions, you may prefer a neoprene neck seal. The rationale is that because the head and neck are usually above the water when wearing a buoyancy aid, the seal here is less critical than on submerged wrists or ankles/feet.
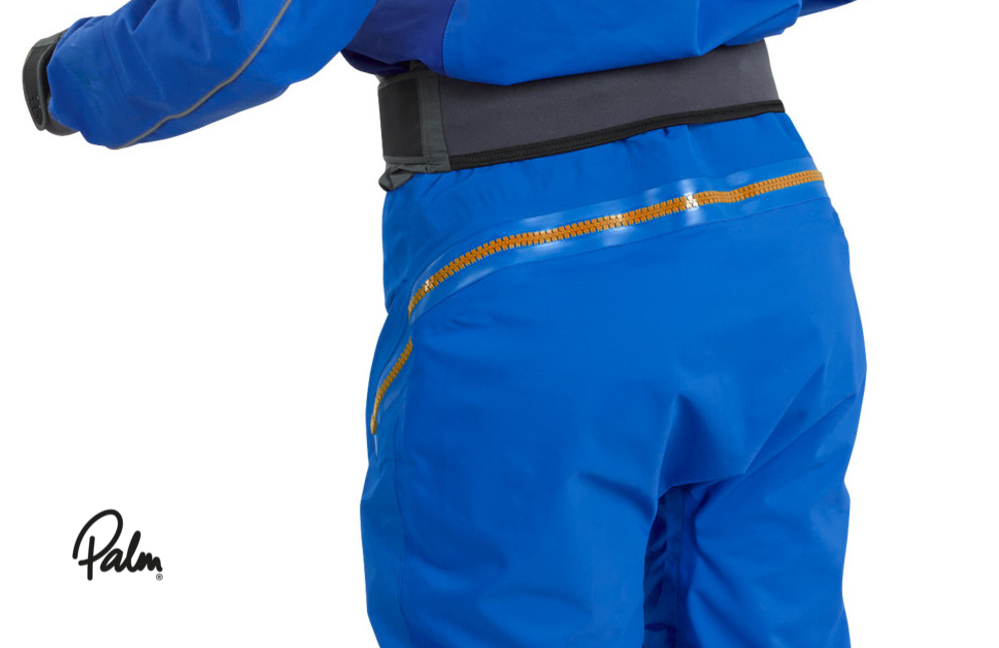
Relief zips; responding to Nature’s call Presumably you won’t be paddling the tropics in a drysuit so, at the very least, the need for a slash can become paramount, especially as the years pile on. Get a suit with a relief zipper or, as I did with the Tropos, pay an extra 100 quid to have one fitted later. A woman could use a front relief zip with a SheWee, otherwise women-specific drysuits feature a dropseat zip across the back of the hips for the same purpose. note the waist drawcord or seal too; also helpful to retain body heat.
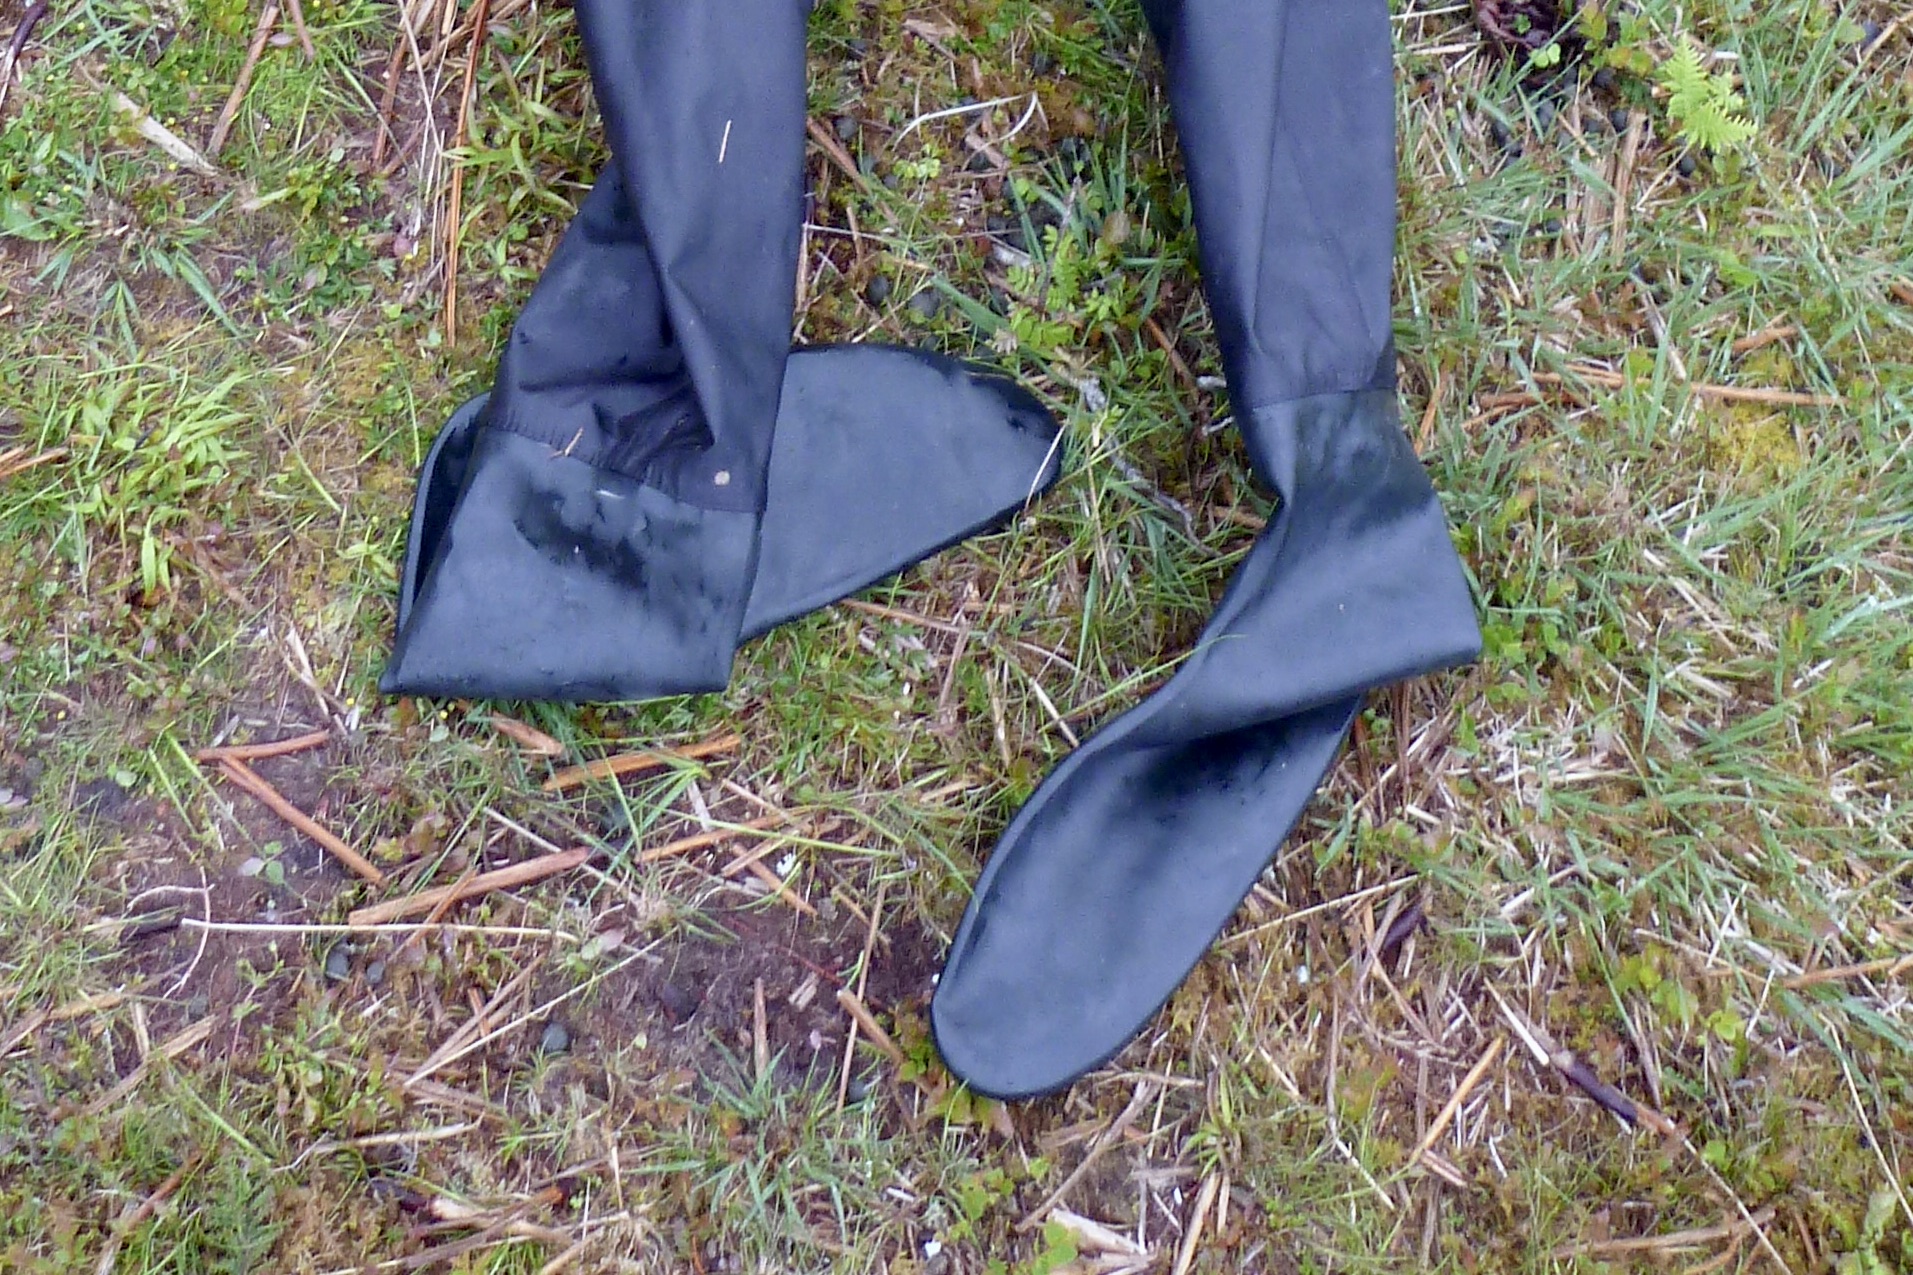
Integrated socks or ankle seal? It’s a drysuit so you want to be dry, and that includes your feet. Far better to have integrated socks than ankle seals and then find another way of keeping your feet dry or at least, warm. Looking at drysuits again recently, I see that nearly all come with integrated feet laboriously made of sewn and taped membrane fabric, yet the benefits of any breathability in the feet are minimal, while the membrane will eventually fail and be difficult or expensive to repair or replace.
Get latex socks
Not fabric
Sven at Anfibio confirmed what I felt: integral latex rubber socks are the way to go; they may be heavier than membrane versions but are much easier to repair, more robust for walking as well as reliable. Wear some thick socks and a pair of wet shoes on top and the feet will be dry and warm.
Drysuit zips The Crewsaver had a horizontal back zip, the Tropos was front diagonal while the Anfibio is front horizontal. The back zip may look neat (right) but when tired or cold, I found the articulation required to unzip myself was quite an effort. It does mean you can open it on the water to vent off while guarding against frontal splash, but it would be hard to zip up in a hurry. Front diagonal doesn’t seal so well with spray skirts they say (not an issue with IK&Ps) and so it’s hard to find fault with the front horizontal format.
Anfibio Packsuit I found the Anfibio Packsuit easy to get into, light enough not to sag and the zip easy to work and check that that you’ve sealed it properly. The Anfibio suit uses a plastic TiZip Masterseal dry zip (top of the page) that’s lighter and easier to slide than old-style brass YKKs. Wax or silicon spray is all the TiZip needs, as with YKKs.
Anfibio’s Packsuit can weigh as little as 800g in smaller sizes. My XL version was custom tailored and with the latex socks and the relief zip options at 1332g and rolls up to about half the volume of my old Hyperpro. Weight is saved with no cuffs covering the latex parts which are said to be vulnerable to UV. A regular dose of 303 Protectorant (right) should see to that. There are also no pockets or other features, just what you need to keep you dry.
Best of all, on our four-day paddle around the Slate Islands I found the Packsuit unobtrusive to wear. Unlike previous drysuits, I rarely felt the need to peel off at the slightest stopover, and the relief zip is a no brainer, enabling on-water ‘defuelling’, if necessary, just like a B52 on a long-range mission. Wearing just a shirt and runner’s leggings, I never felt hot on the water nor got chilled, and during a downpour on land one evening, was happy to wear it right up to the point we scurried for our tents.
I’ve yet to do an immersion test but have found that stretching made the inside coating peel off the neoprene neck seal but don’t know what this coating is actually for. It’s certainly not waterproofing so doesn’t really matter. Other than that, no issues.
I received the Packsuit in return for editorial work on the Anfibio Packrafting Store website. It costs from €419 with tax and in my custom spec would have cost €550.


 After being pulled out of the Matkat this was much more like. I was gliding along, whoosing forward with each paddle stroke, tucked under the deck of the MRS Microraft. Yeah, baby! However unfair, we all admitted that whichever boat you used after the Bin Bag was the best boat of the day.
 A Chinese-made packraft sounds like a hard sell, especially when it so closely resembles a Gen II decked Alpacka that it risks being labelled a cheap knock off. But the price of the Microraft isn’t cheap, and as far as we could tell neither is the build quality. With China’s enduring if outdated ‘made in Hong Kong’ reputation and MRS’s unsophisticated website on Aliexpress, this can be something that’s hard to get your head around. But we forget that good and cool stuff is made in China too: when’s the last time someone scoffed at an iPhone because it was made in Chengdu? The difference is that
  iPhones are probably designed in some groovy Californian creative play pen. That’s not the case with MRS but whoever’s behind them is definately not in the knock-off or pool toy game and has gone out of their way to make this comparable with Alpacka in more than just looks.
 The deck may look identical to the thin velcro-and zip item I had (but rarely used) on my first two Alpackas. But the Microraft differs significantly in having parallel side tubes (like a white water raft) and less bow upturn. You imagine the parallel tubes simplify construction a little and I didn’t sense any noticeable tracking drawbacks on the water. On the contrary this arrangement makes for a footbox that’s as wide as the seat so that even in this Small/Medium 120-cm-long model my large feet weren’t jammed as they are in my 177-cm long Yak.
 At 27cm the Microraft does run the thinnest tubes of the bunch and I noticed that Bob (at 85kg – right) looked quite low and back-heavy (I’d have been even lower) while Hannah and Lois looked just right in this raft. And we’re told that a side benefit of slimmer side tubes is better edging in rough water. The picture from the Store (left) clearly show that the Microraft can tackle the white water with the best of them.
 The seat is threaded in with string like Alpackas and our boat came with nine attachment loops, four up front, two at the back and three inside. The fabric has less of a shiny sheen too, but is applied to both sides so is more puncture resistant. Another thing I liked about the MRS was the non-featherweight air bag that feels so much nicer in the hand than my Alpacka’s net curtain. (They say restos with heavy cutlery can charge more). And the valve cap attached to the valve body: a simple solution to lost caps held on with string.
 I never trusted that lightweight ‘Cruiser’ deck on my Alpackas, and the attachment was messy with exposed positioning tape peel;ing away on a hot day. But as our test day grew increasingly chilly and wet, so everyone in the MRS including me was pleased to tuck in and zip up, like a granny by the fireside. It’s not a bomb-proof solution to white water – the decked Trekraft or self-bailing BAKraft are probably better, but it sure slows down the swamping while keeping your legs warm.
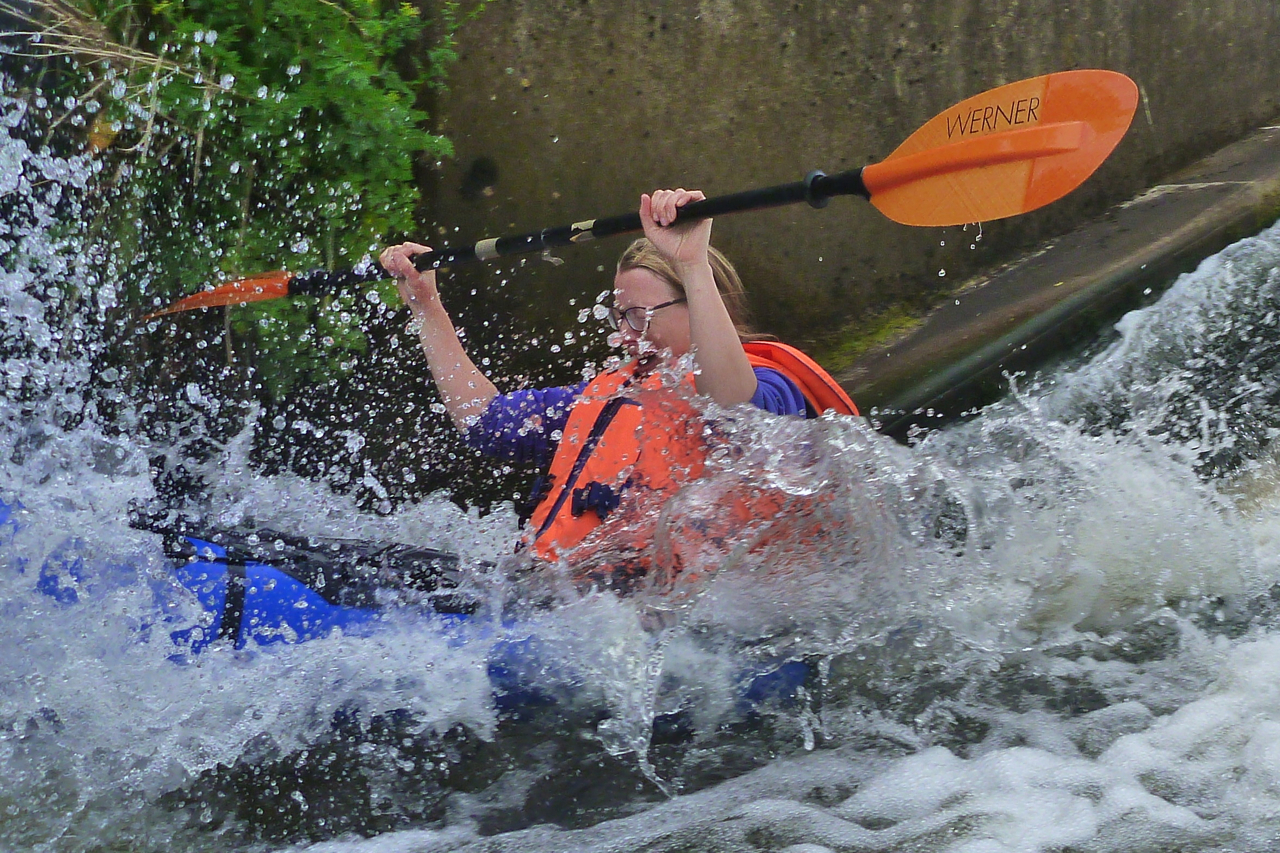 Only the 1000-euro price tag needs some getting used to; it feels too close to an Alpacka while you assume Chinese workers’ wages aren’t, even if their workmanship and the materials used are hard to tell apart. If you took off the MRS label, I could have easily been fooled that this was a new Alpacka model. And that alone must be worth the price.