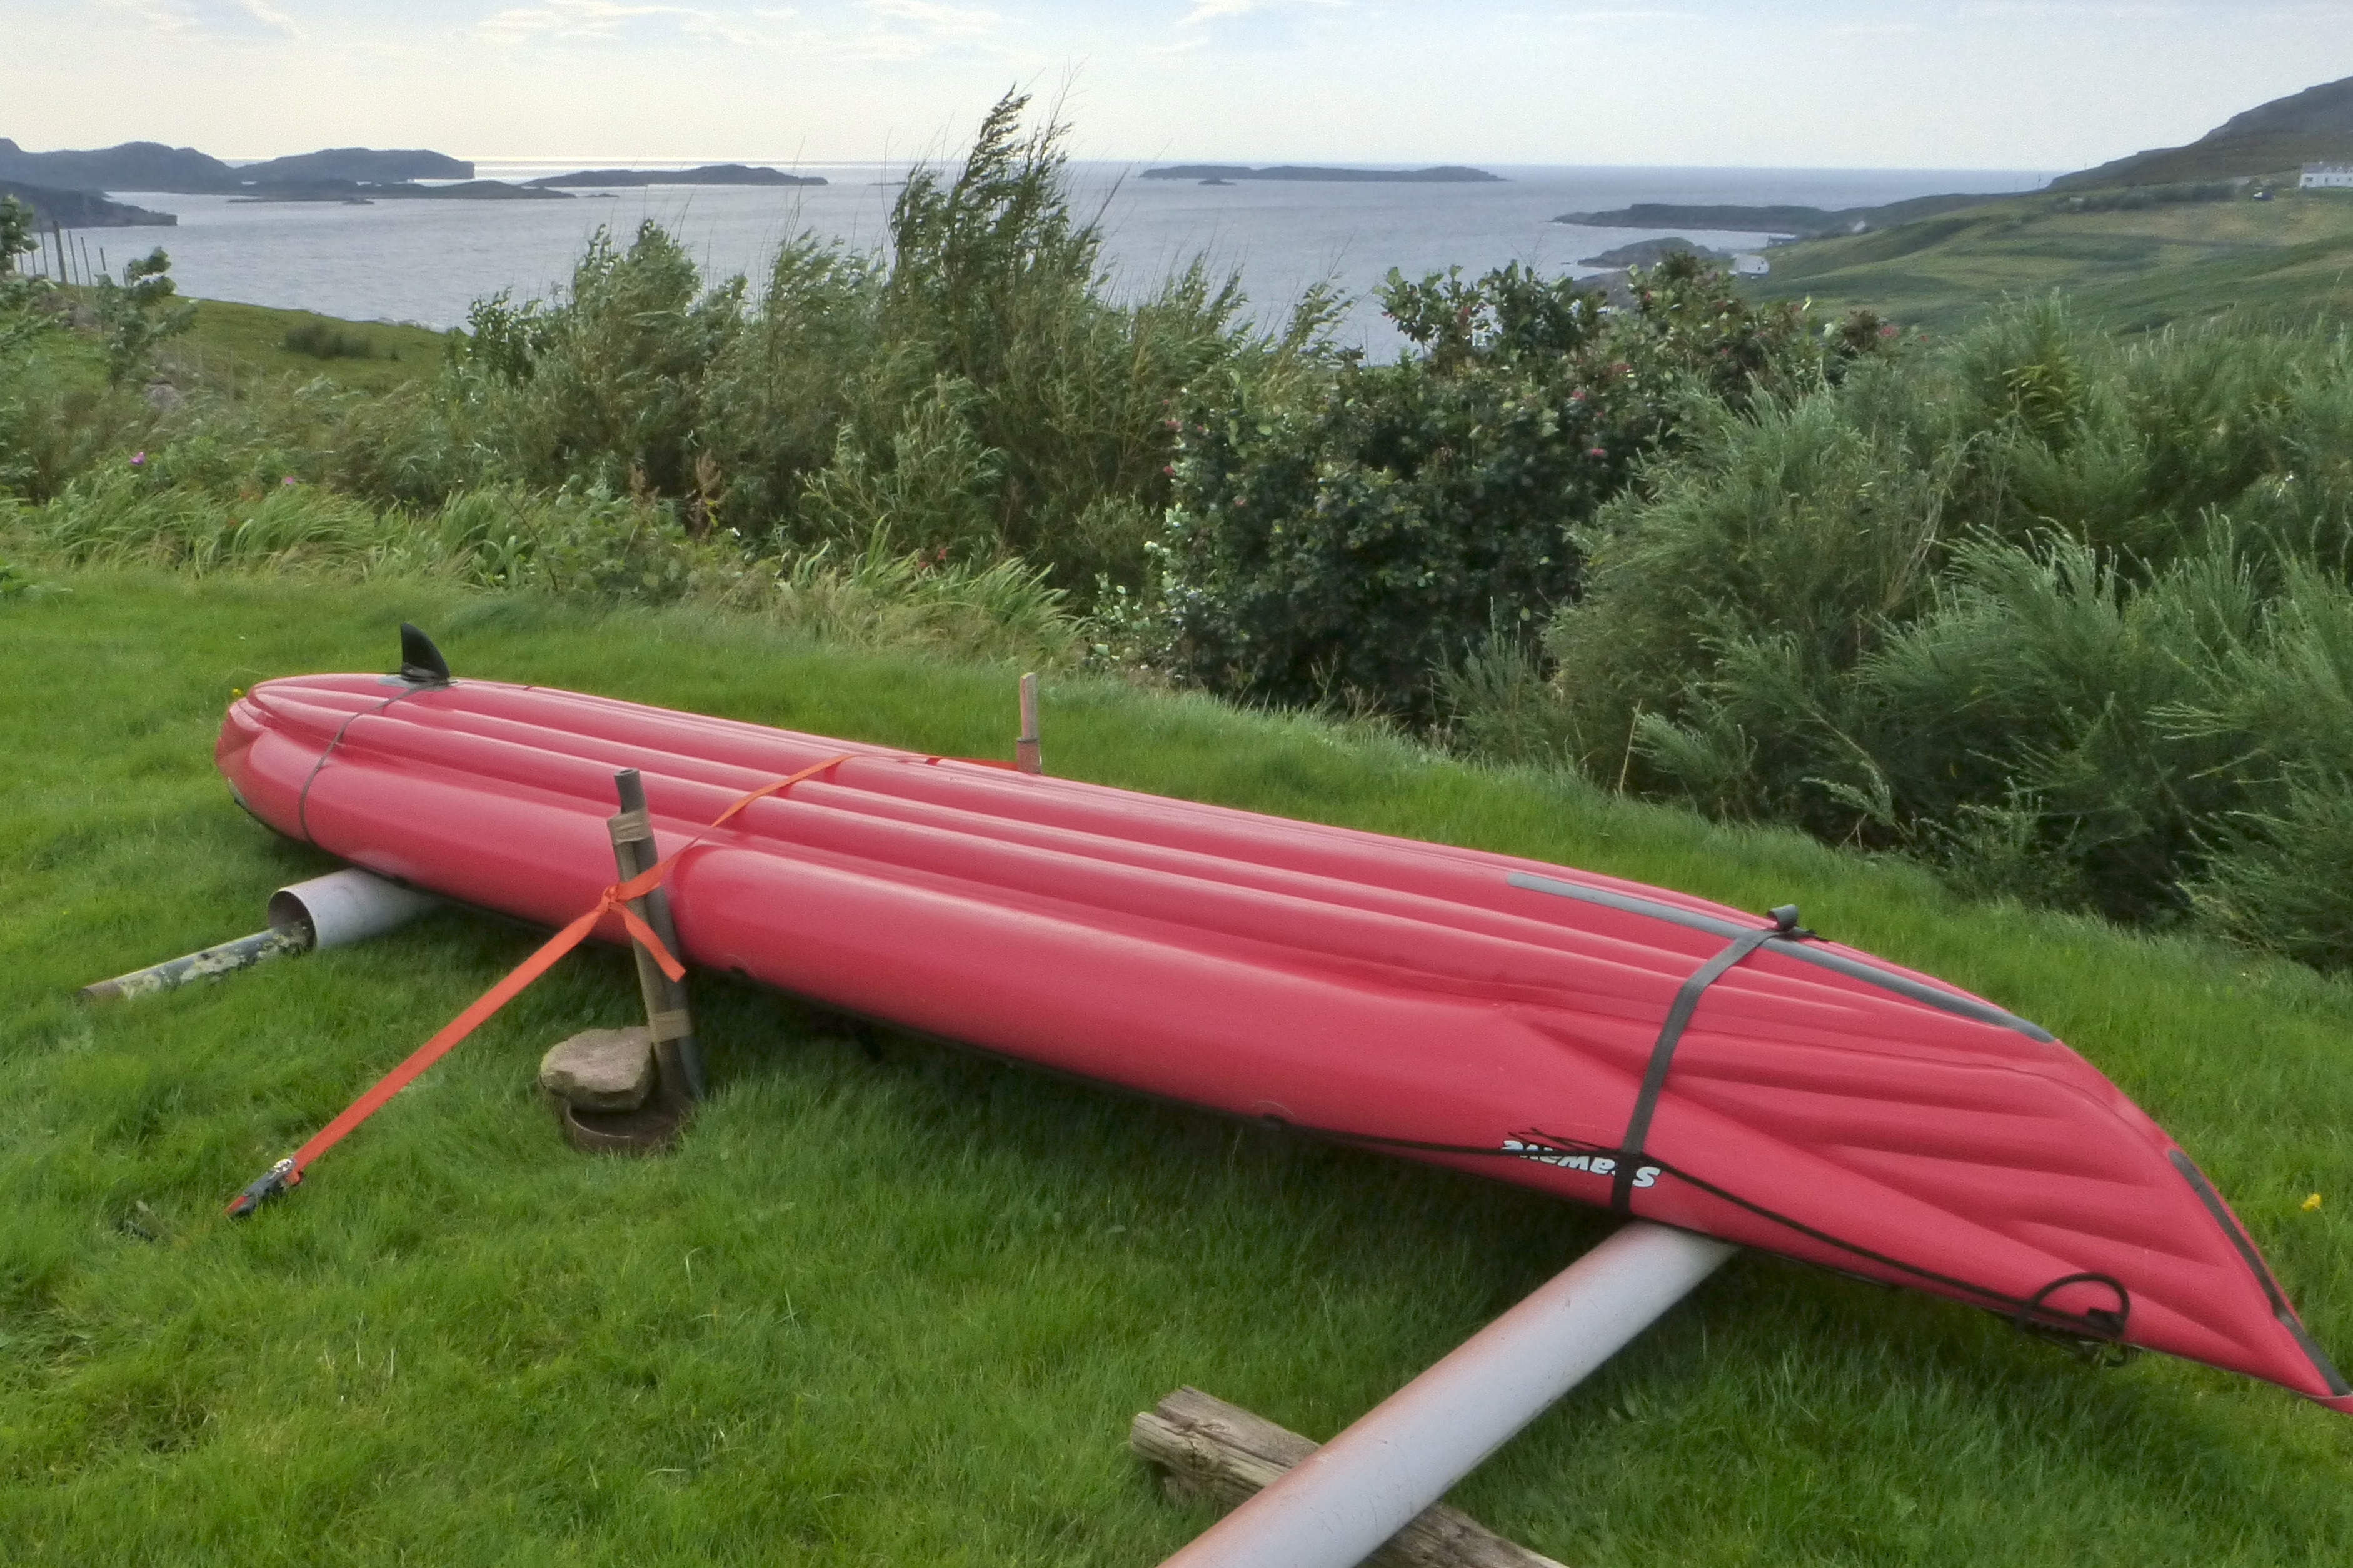
The Seawave was released in 2013 and in 2016 a near-identical model came out with a rudder option. The Seawave can be used as a single, double or triple, and is sold in Euroland for around€1625 or £1425 in the UK. They used to be a bargain. Not any more. In 2023 the Seashine version came out – a Seawave with a drop stitch floor (like the Thaya and Rush); slightly heavier, wider and longer and a lot more expensive.
My stats for my Seawave are 4.5m x 78cm wide and 17kg plus a claimed payload of 250kg which sounds plausible. Significantly, the Seawave’s pressure is rated at 0.25 bar (3.6psi) all round, midway between the Gumotex IK norm of 0.2 and Grabner’s 0.3 bar. Some of Gumotex’s orange series whitewater boats run 0.25 and their IKs were never that shoddy. Having said that, the PRV in the floor of the Seawave has the same ordinary rating you’ll find in a Twist or a Palava or probably any other Gumotex IK (more here) but the adjacent sticker claims 0.25 bar max. It’s the side tubes that now take 0.25 bar, not 0.2. What they now call Nitrilon is not like the stiff old hypalon-like Nitrilon of my early Gumboats. Increasing hull pressure is one way of getting a more rigid and therefore faster IK, but it’s the integrity of the ‘I-beam’ floor that’s the usual limitation. The Seawave has a pressure-release valve in the floor but not on the side tubes, and I read these pressures are said to be on the conservative side. You can’t over-inflate the floor but these Gumboats can handle more in the side tubes providing you watch it when out of the water in the heat.
The Seawave is long for an IK, but with just a skeg (optional, but there’s a rudder now), you wonder if this could be hard work to turn into the wind. However, in France kayaks destined for sea use (beyond a certain distance from the shore) must be homologated or approved in some way, and the Seawave has passed this test.
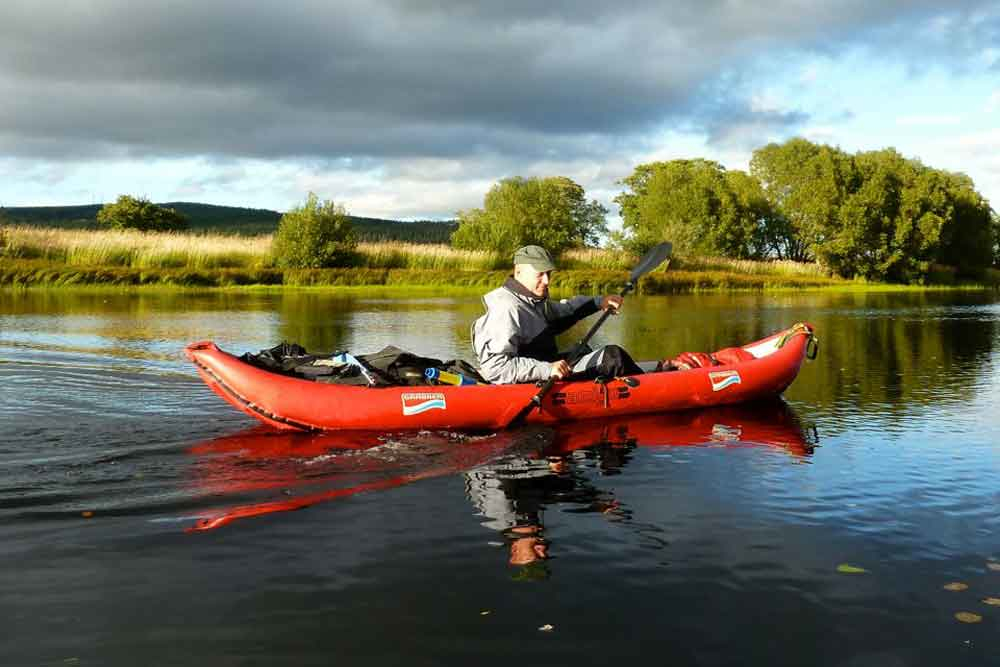
The great thing with the velcro deck (for one or two) is that it can be removed; on my Incept I paddled like this approximately 99.9% of the time, with the deck rolled to one side. Even at the slightly higher pressures, I have to say at one point in the video I noticed the Seawave bending with the swell. My Sunny used to do this, taking on water over the low sides, but with a deck that ought not be less of a problem, even if you imagine there’ll be some seepage through the velcro in heavy conditions or white water.
Flexing is a problem with any long inflatable and even my short and high-pressure Grabner (left) flexedin certain conditions. Manufacturers get round it with metal frames (Feathercraft, Advanced Elements), twin side tubes (some Grabners, Gumo Seakers, Incept) stiff fabric (Incept) or just high pressures like Grabner, but that demands very good construction. Drop-stich panels are the new way of doing it now.
There are more impressions as well as some nice pictures from an actual owner, Norman, right here (translated from French). He ran a 410C for a few years and talks of pumping his Seawave right up to 0.35 (5psi) bar which makes for good speed (6kph average he claims). That is 40% above the recommendation so let’s hope the seams on the Seawave can take it, cap’n.
It looks like grey, Halkey-like valves in the back, not the old-style black ones that Gumo used. And I see that Gumotex have again adapted an idea that I had on my Sunny years ago (right), a drain hole at the back. Only theirs features a neat sliding cover. It could all be the normal process of improvement of course, but I recall that after I had some smaller skegs made for my Sunny (and sold to a few others), Gumotex reduced the size of theirs to the current black plastic ones. And then the velcro deck idea. Whatever, it’s gratifying to see ideas I have tried or written about actually making it into production.
Enough of this speculation! Actual impressions on receiving my boat here, followed by half a decade of very enjoyable Seawave paddling.
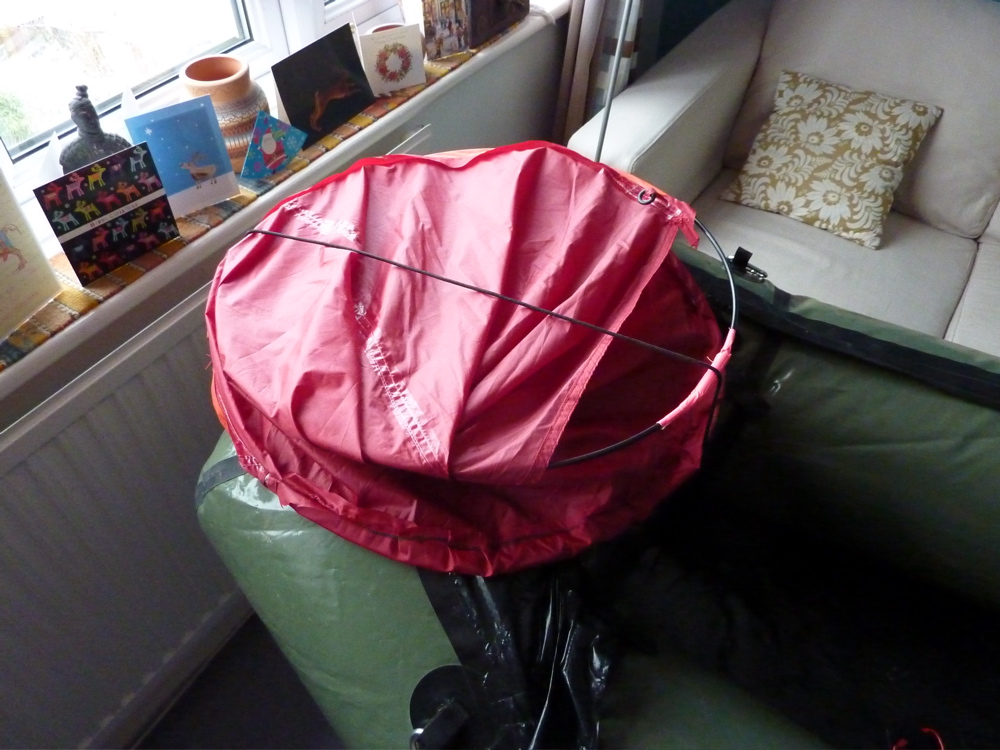
A few years ago I got a batch of discounted Decathon Quechua ‘2 seconds 1’ pop-up tents (right; £20) for a desert tour I was running, and have a couple leftover. Now everyone’s offering cheap pop-ups. People love the idea and though I don’t suppose this is a tent you’d want on the north face of Annapurna in a gale, when you arrive at a camp tired after a day of desert biking, you just want to click your fingers and, Abracadabra, you have a cozy shelter to call your own.
Whoever came up with the idea of flexible hoops sewn into a 3-D form to spring apart and make a tent or shelter was ingenious. I still marvel at it today. It seems a photographer John Ritson got to idea of adding fabric to a flat loop in 1985 and invented the collapsible Lastolite light reflector (right) after he saw a carpenter fold the blade of a bandsaw (See the bottom of this page). I imagine a Lastolite (a 38-incher costs £50) was the motivation behind the WindPaddle idea, but from a plain disc to a tent is quite a leap.
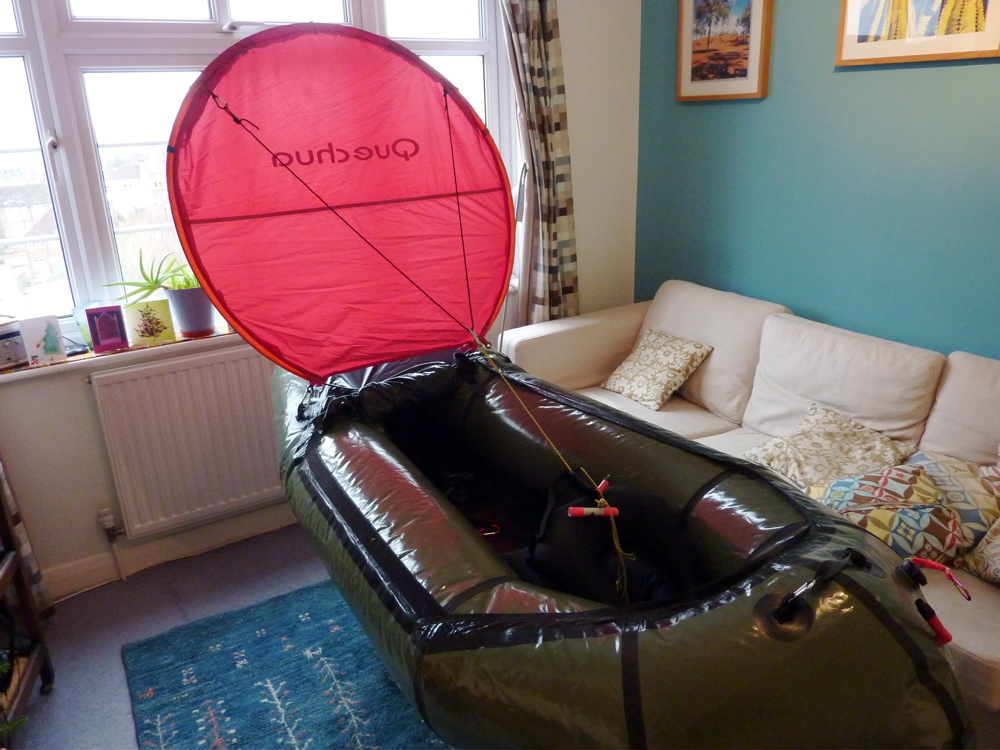
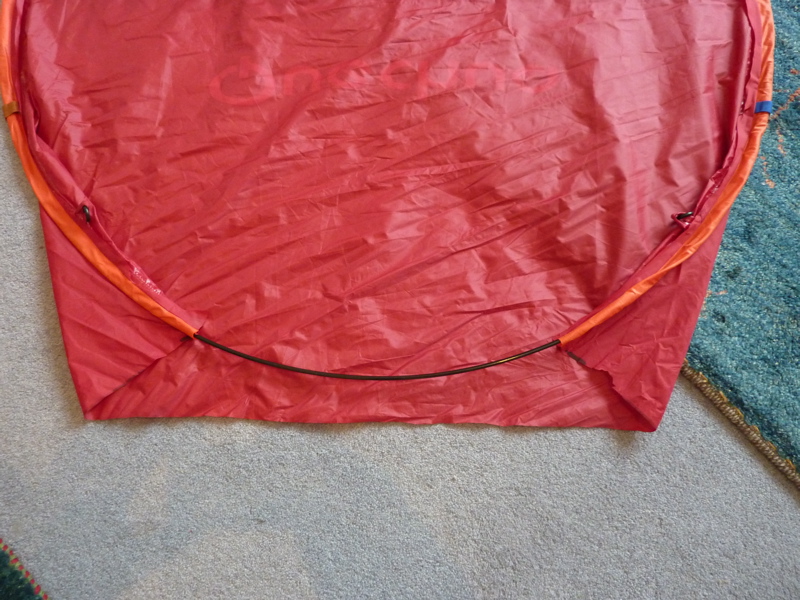
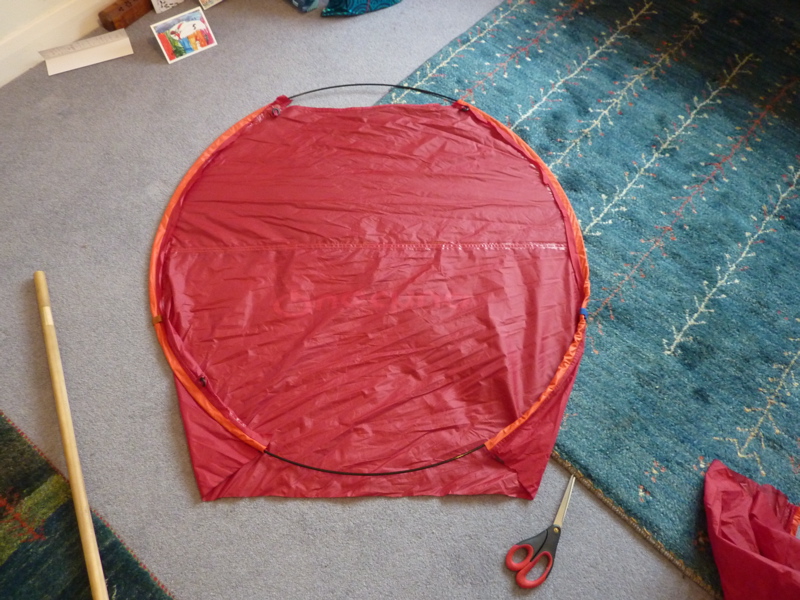
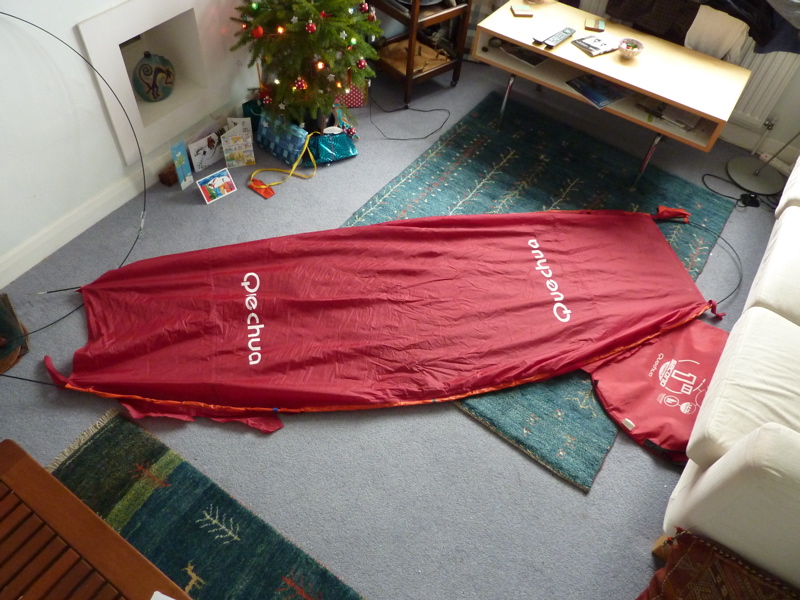
So I took a knife to one of my used Quechua tents. Bad though it felt shredding a perfectly functional shelter, in the spirit of the Inca shaman, it will be reincarnated as a sail – or more ill-conceived clutter to shove under the bed. Dismembering the Quechua gives two giant hoops of 4mm nylon-coated alloy and another of 6mm. Having been told that WindPaddles can deform easily under strong winds, I chose the thicker wire to use for the hoop (Gallery pic 2, below) in the hope of reducing this possibility. (Warning: when opened up these springy wires can fly about all over the place). Cutting the thick loop in half and rejoining it with the metal collar/tube (don’t lose this bit) gives a hoop of around 40 inches or 1 metre diametre making a sail area of 0.785 m2 (8.45 ft2) – similar to a WindPaddle, but with negligible dishing. I built up the sawn-off end with some cloth tape to stuff into the collar-tube, and then taped it all up (so it’s easily undoable). There’s enough fabric in the main body of the tent’s flysheet (Gallery pic 1) to make two 40″ disc sails if you cut from the middle, so 1 tent fly = 2 sails. I only worked this out after I cut. You want to use each curved end of the flysheet with as much orange hem-sleeve as possible (Gallery pic 4) – it saves on sewing later. You don’t want, as I thought, the flat middle section which of course won’t become a smooth disc once formed into a loop with the wire. Gallery pics 5 to 9 show how to gather up the slack, trim it, tack it down and get the Mrs to sew it up as if she hasn’t got enough work to be getting on with at this time of year. Gallery picture 10 is the sewn-up sail with a handy gap at the bottom for I don’t know what and which also happens to coincide with the position of two little hooped tabs at 5- and 7 o’clock which you can use mount it to an Alpacka’s rearmost bow loops using mini snaplinks (Gallery picture 11). By chance there are 2 more sewn-on plastic rings at 10- and 2 o’clock to mount a control string. The length of string I used happened to be just right to wrap around the folded over tent, though it’s all under tension and pretty unstable; you might want something like a bulldog clip to stop the sail deploying unexpectedly. I also think my control string may be on the short side, but it’s what was lying around. My disc tent doesn’t have anywhere near the dishing (depth) of a WindPaddle or an umbrella-like spinnaker sail I am told. I still haven’t worked out if this is significant (it is). One would imagine a deeper WP-like sail – a ‘bowl’ rather than a ‘saucer’ – would be more stable downwind but less good at tacking across it (probably correct) but what do I know? Last time I sailed a boat was over 35 years ago. I suspect a flip-out disc sail like this is probably a compromise when it comes to sailing effectively, but then so are pack boats. If round sails were such a good idea the Vikings would have them. It may even prove to be not fully useful and so just more junk to carry about which is why, after trying the umbrella, I chose to make one for next to nothing rather than spend £140 ($215) on a WindPaddle in the UK. It was easy to make, is light (250g or 9oz), and it can swapped between my Alpacka packraft and Sunny IK in the time it takes to unclip 2 snaplinks and attach them elsewhere. Other uses include something to sit on, a doormat for the tent, a windbreak, sunshade or umbrella. There is a slight problem: you can’t see where you’re going, especially on the shorter packraft with a metre-wide sail a metre on front of you, but on most water that ought not matter too much and if it does, I can cut in a window (like a WindPaddle) if that is the sail’s only flaw. As to how it sails, Monday after Christmas had a good southerly wind and the warmest day for weeks (ie: above freezing), but the reservoir I chose was a rink and looks like it’ll be that way for a while. It’s been the coldest December in the UK since records began so a test run make take a few weeks to complete. To see how it sailed first time out, click this.
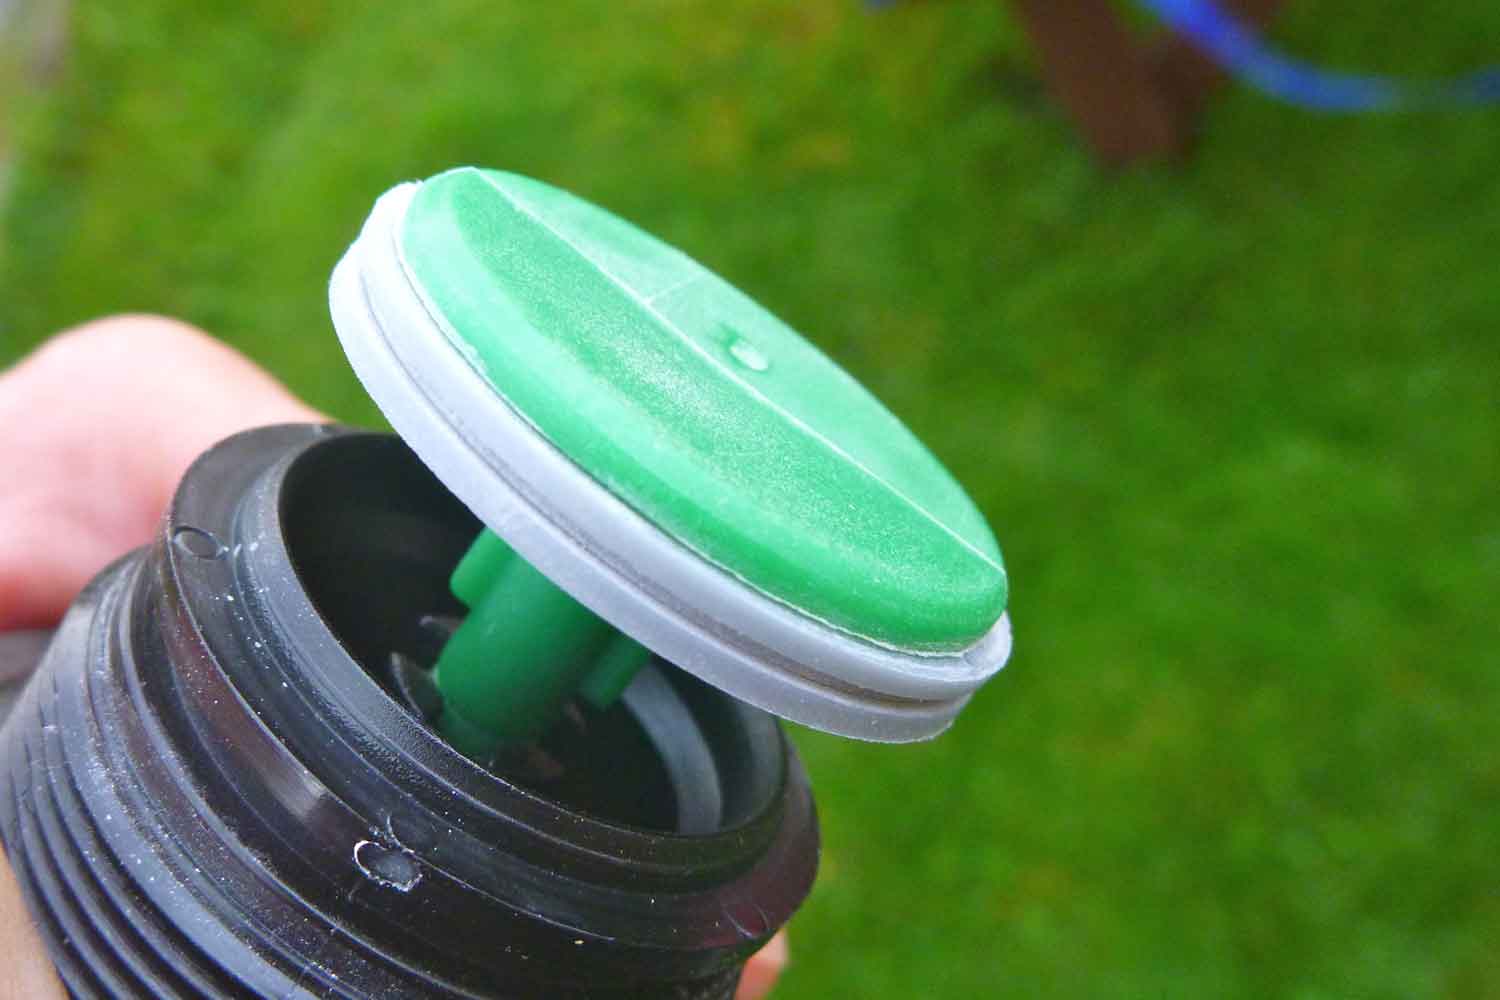
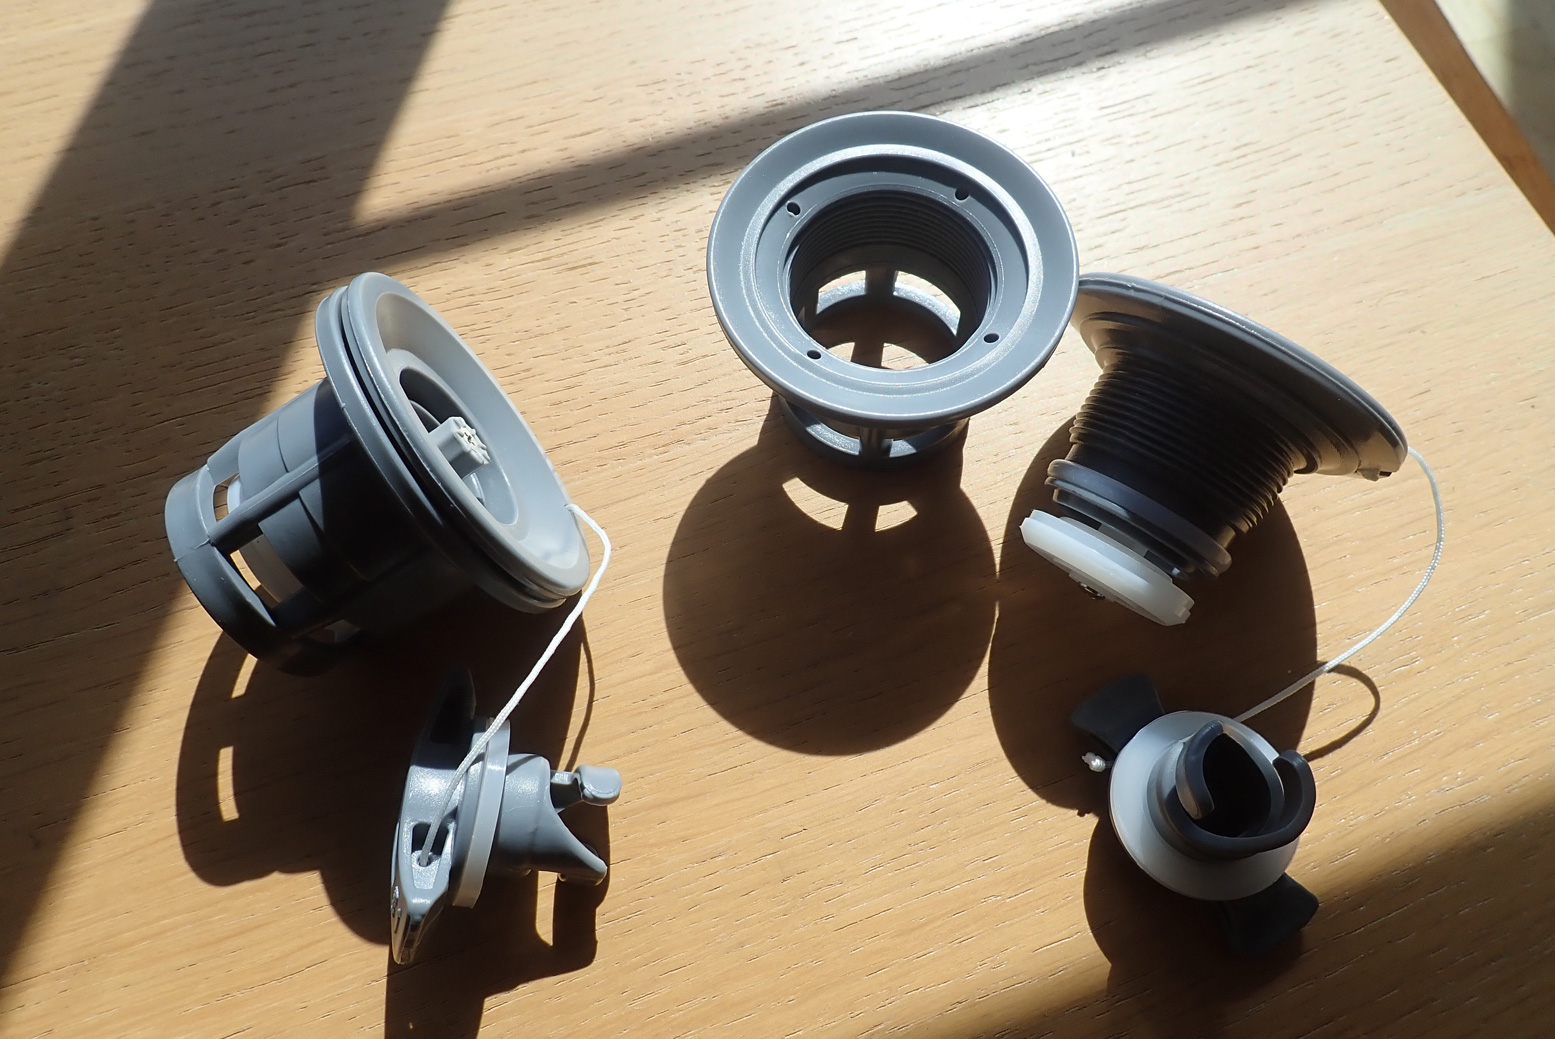
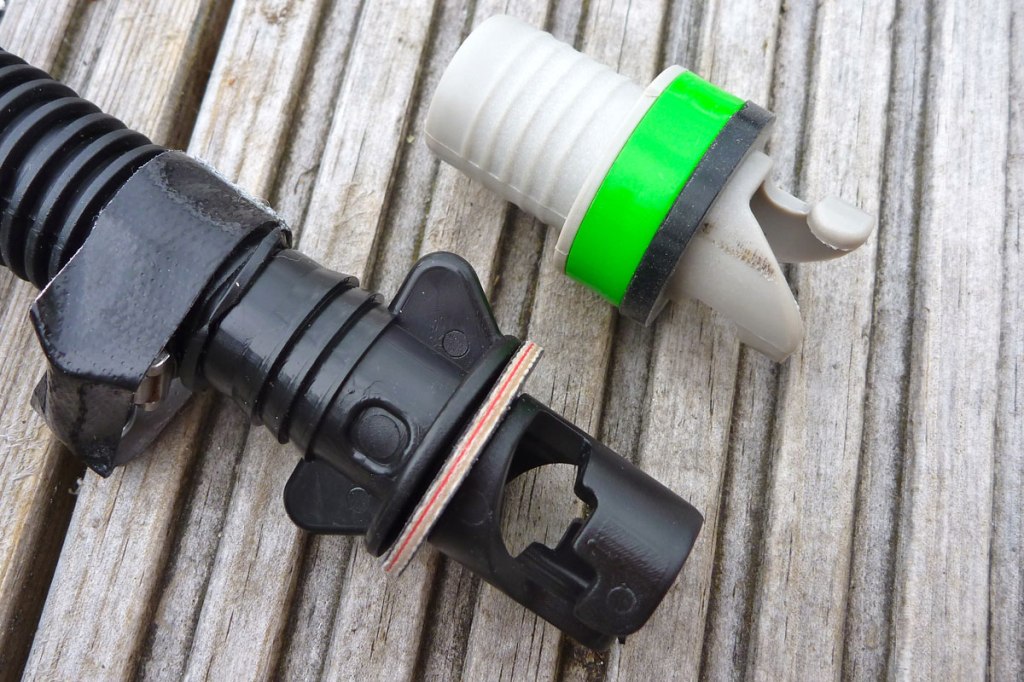
The best inflationvalves for an inflatable packboat aren’t the bungs you find on an airbed or an old Semperit. Nor the thin, twist cap stems off a Feathercraft Java or an old Alpacka. What you want are one-way valves. Like a car-tyre valve, one-way operation as well as a secureseal are the key, so what pumps in doesn’t push back or escape when you remove the inflation hose. Found on cheaper IKs and packrafts Boston valves are simple and effective for lower pressures. More below.
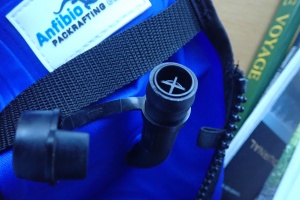
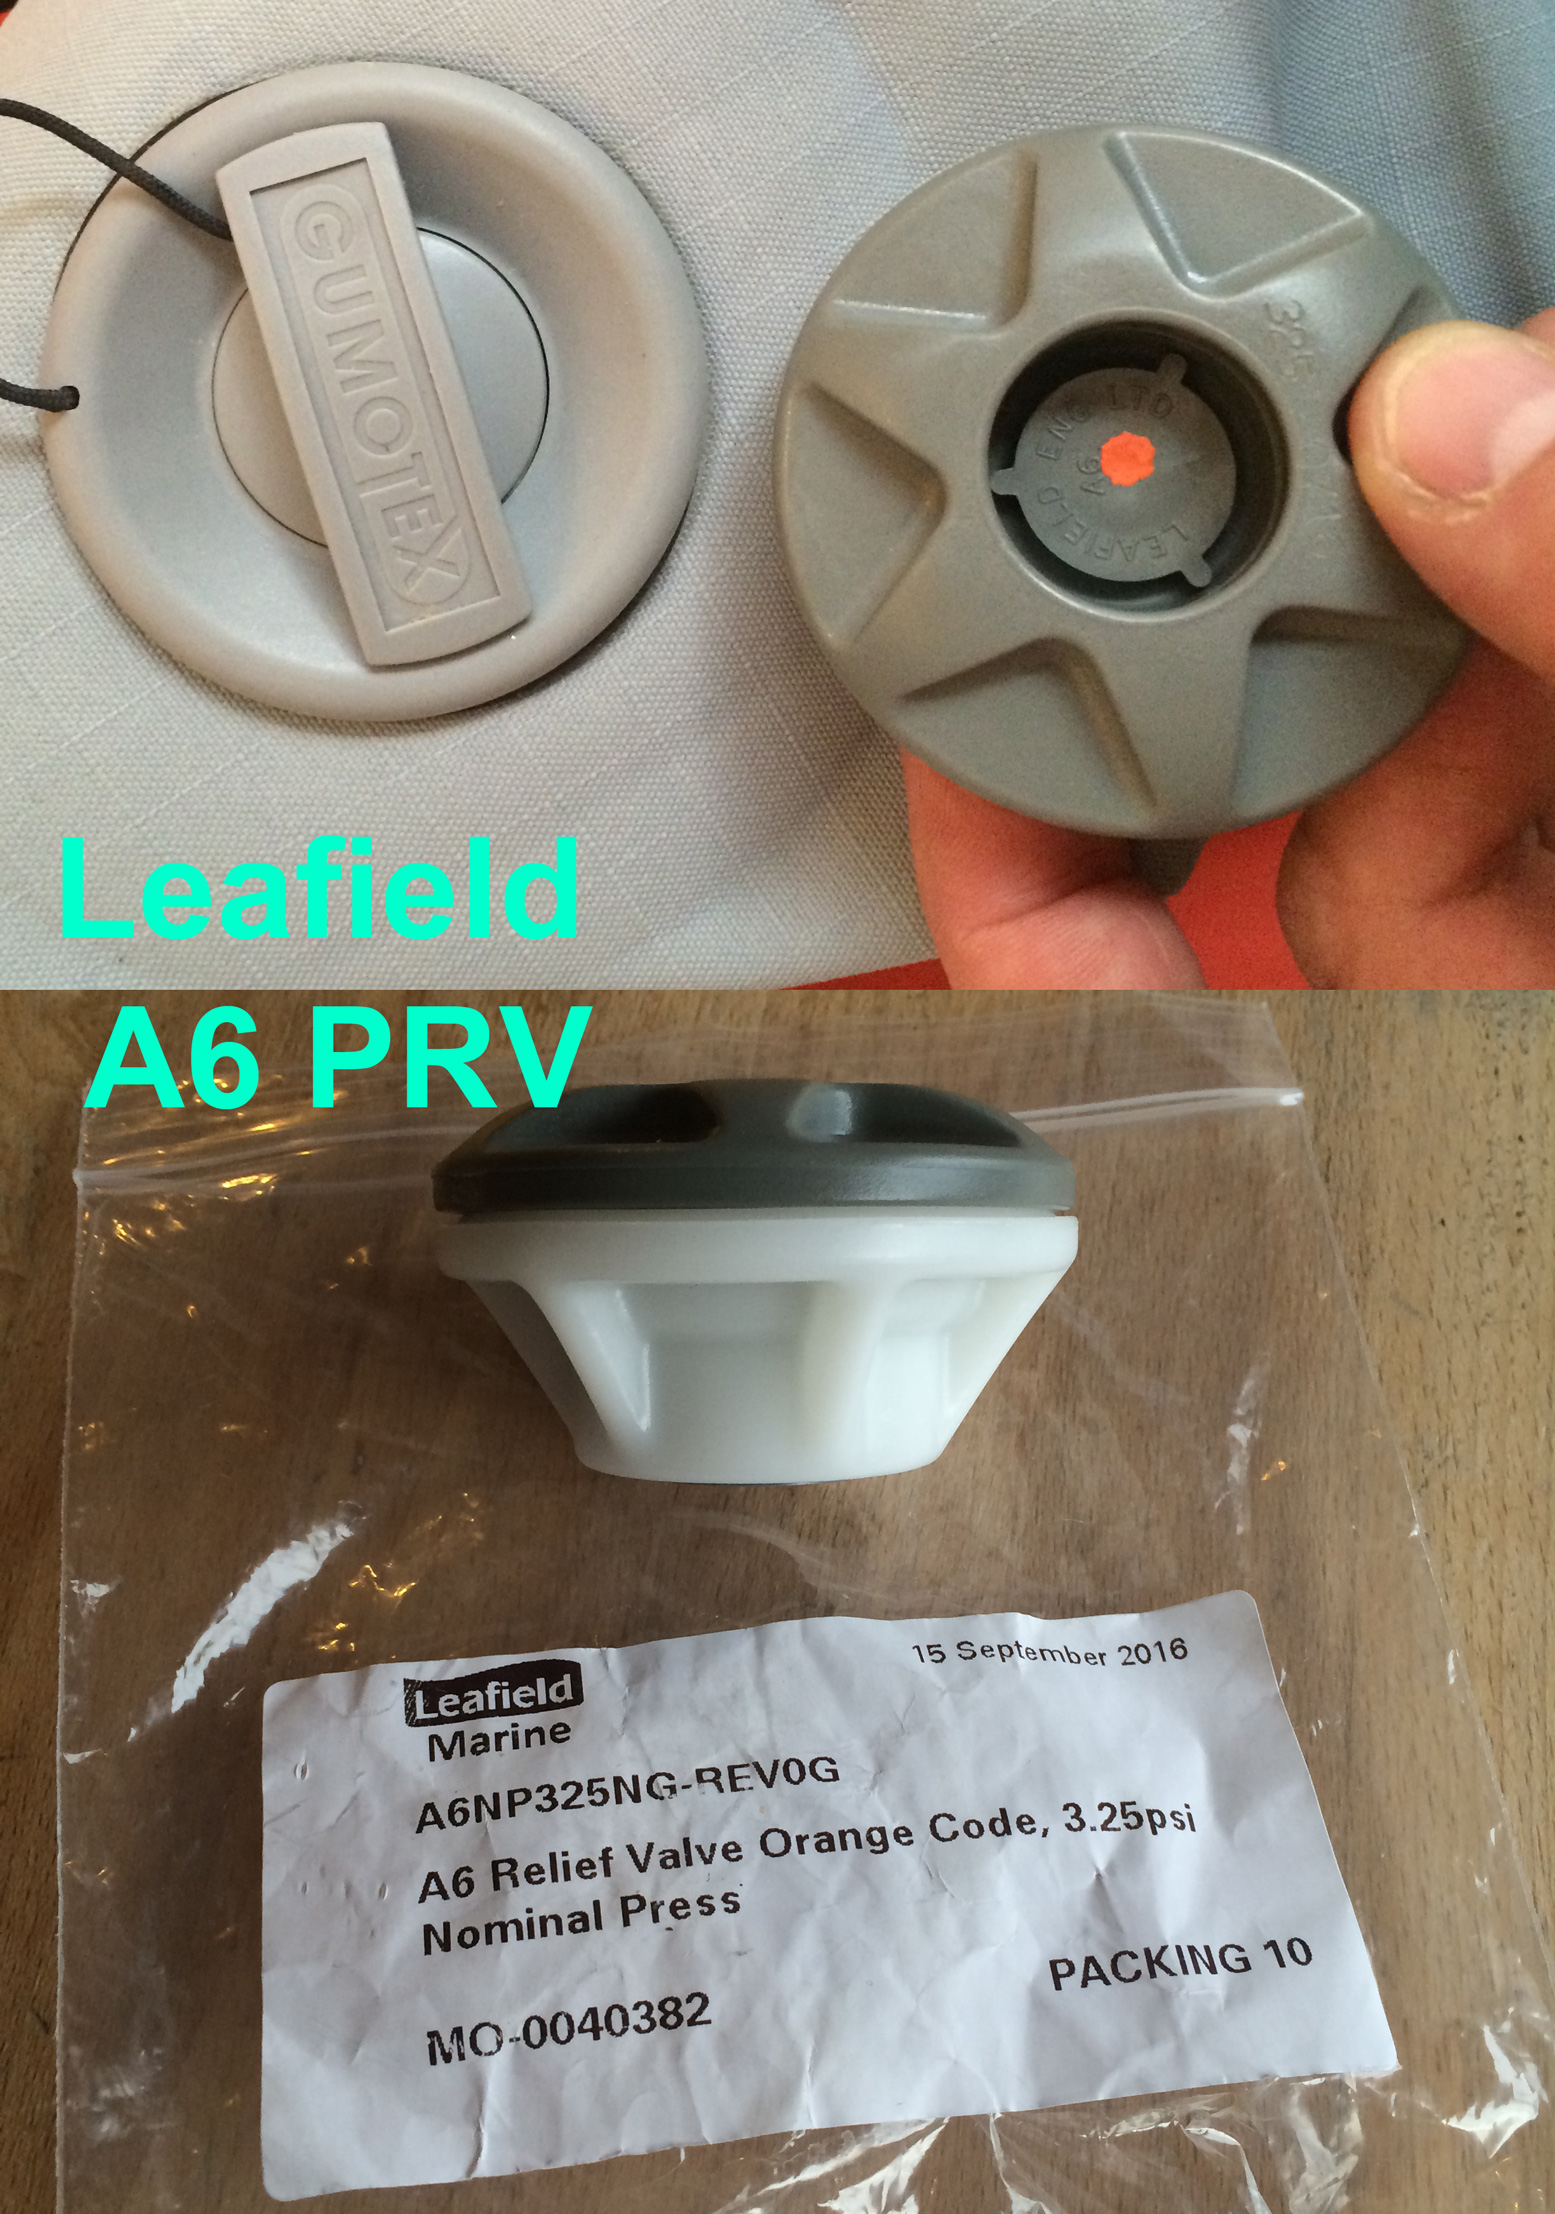
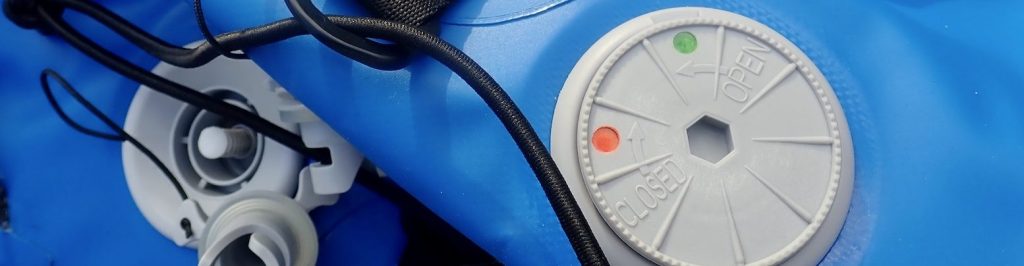
What I call raft valves (left) like Halkey Roberts, Leafield suit higher pressures and are needed for dropstitch panels. In America they’re called ‘military’ valves. With raft valves you either push and twist the button clockwise to lock open (deflating). For pumping up, push lightly and turn anticlockwise so the button springs back up to seal. This closed ‘button up’ position is the best way to transport an IK too. To lose a little pressure (say, the boat is getting hot in the sun) just jab the valve core button, same as on a car tyre.
Many raft valves are now ‘push-push’ (graphic left) which work like a clicking biro so are even easier to use. I always refit the cap seal straight away to keep water and grit out of the mechanism.
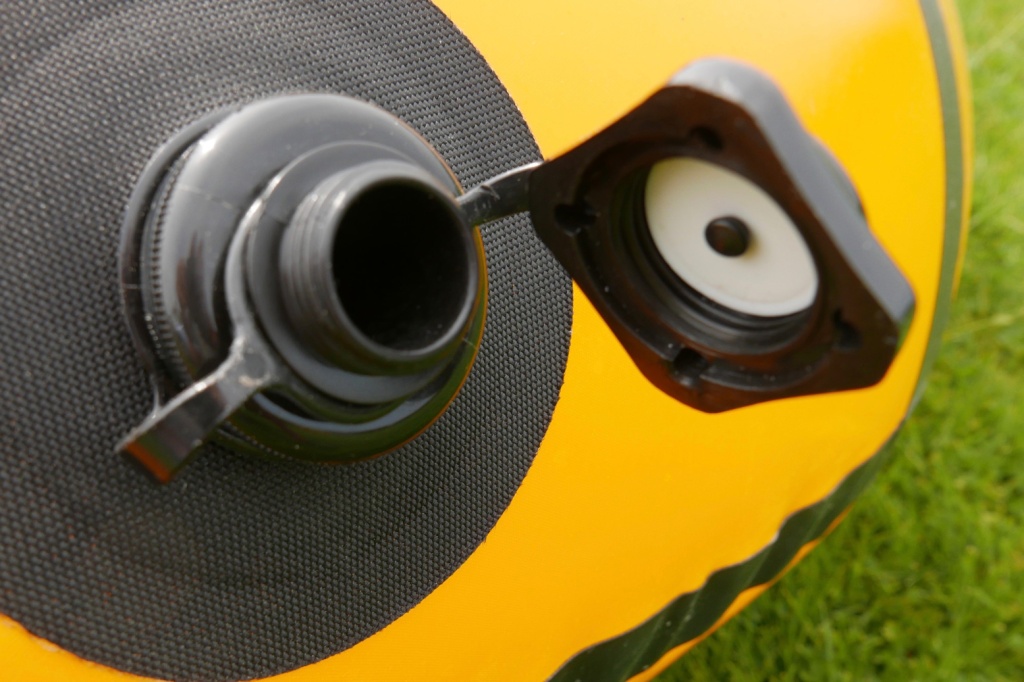
Two raft valves. On the left the collar goes inside the hull, the valve body screws into it tightly and the dust cap goes on top.
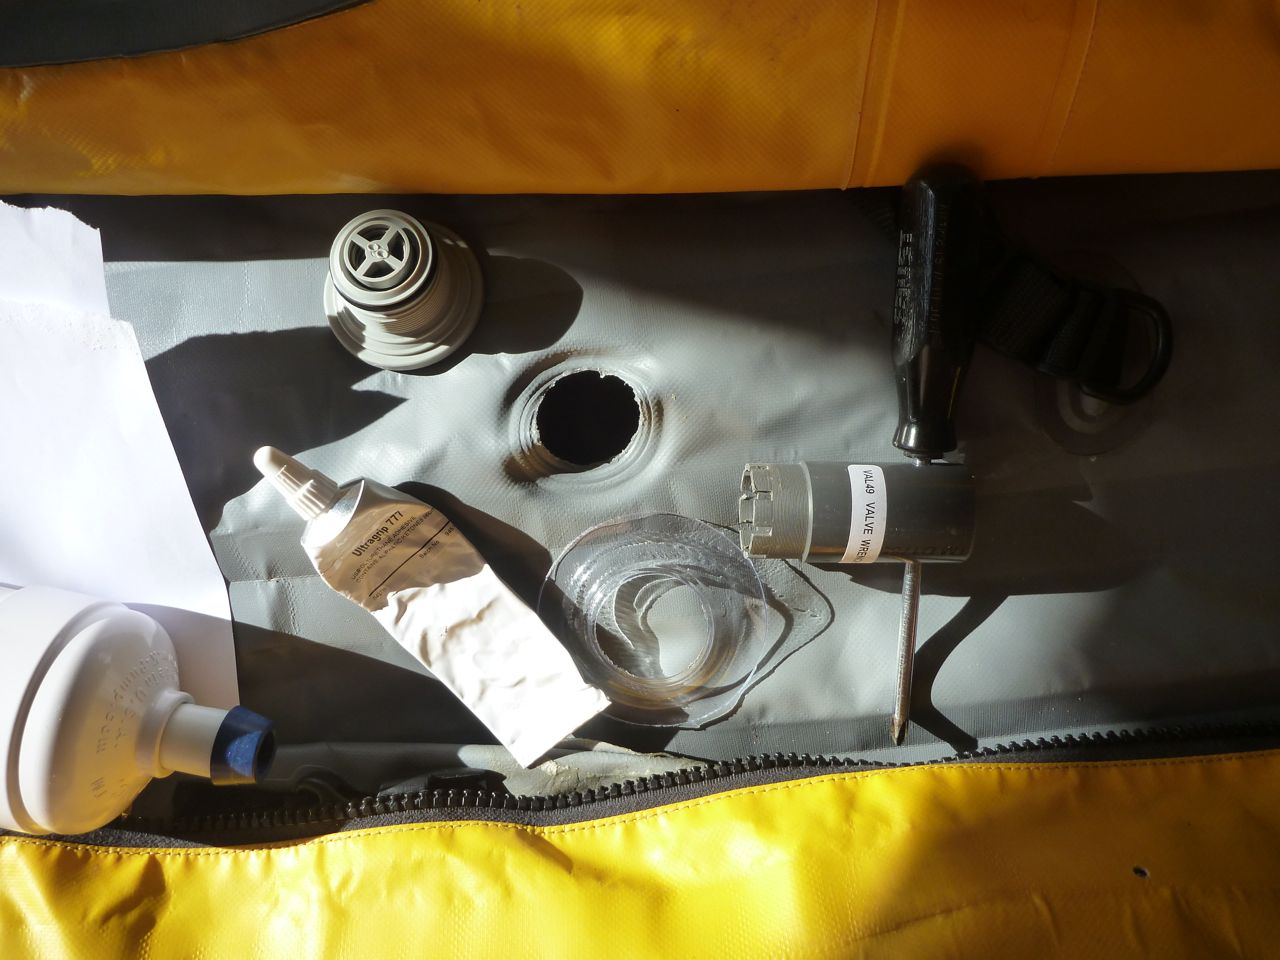
I’ve found these valves reliable on all my IKs, although this Gumotex 410C owner didn’t. Once in a while – or after the boat is new – you may want to check the valve is screwed tight against the fabric with the valve spanner, right. They’re also useful for removing the valve (or a PRV; see below) should it play up.
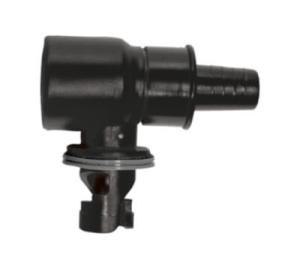
When it comes to inserting the inflation hose, a simple push-fit plug as shown below left can work; just jam the adaptor into the valve body and it usually stays in place while pumping. It looks cheap but on a Gumotex at least, works fine. With higher-pressure boats like Grabners and Incepts and some Gumotex (as well as dropstitch boats), the jam-fit can blow off so you’re better off using a bayonet fitting (below right) which won’t pop off as pressure builds.
Low-pressure valves for packrafts
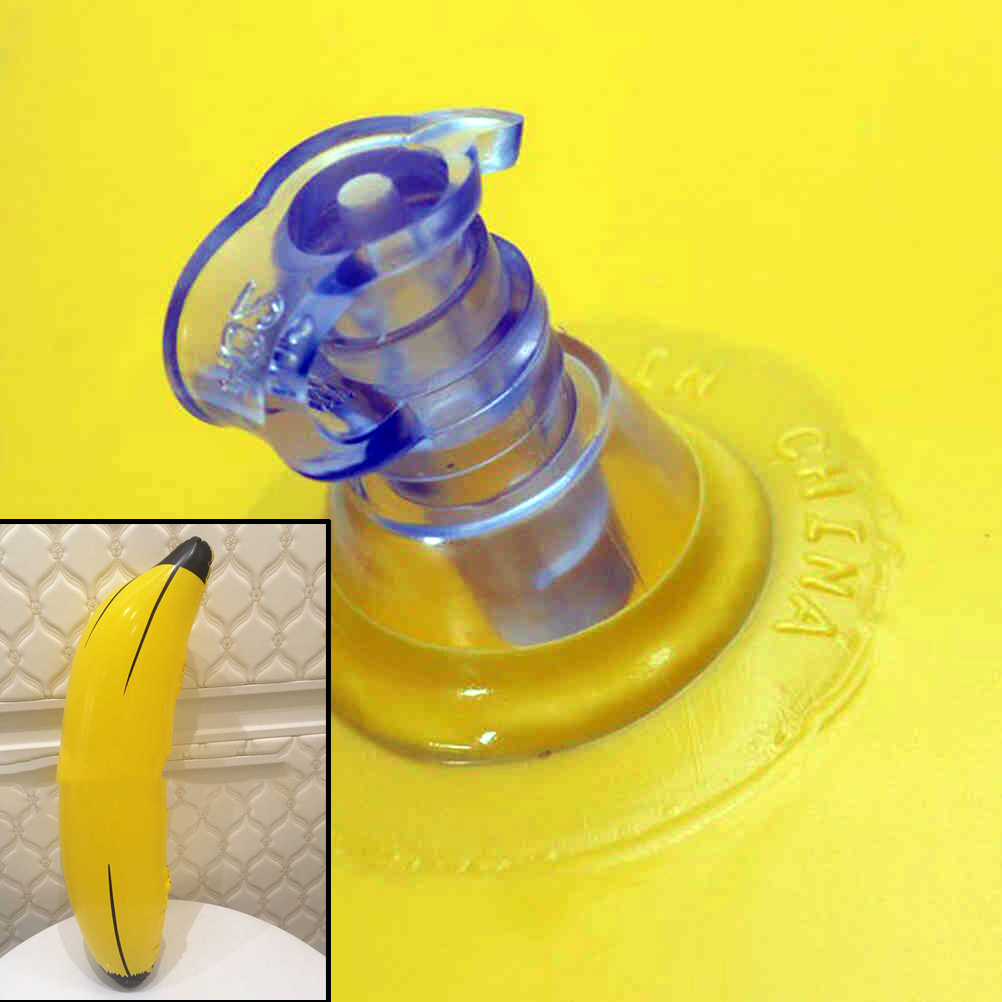
Alpackas and even Feathercraft used to use crappy, soft plastic twist-lock oral stem valves (below left) which you could never be sure were done up just right and which didn’t take well to pump nozzles.I suppose they were a step up from blow-up airbed plugs (below) which are still found on cheap IKs.
Retractable one-way flap valve. Annoying to delateLilo plugs: Ok for seats, crap on a hull
Now best used on inflatable seats and the like, they’ve been superseded by similar one-way stem valves (below right) with a light spring closure easily openable by lung pressure. They’re a bit trickier to deflate: you have to depress the ‘X’ with a finger while squeezing out the air. The one below right is actually on a buoyancy vest.
Twist-Lok: OK for seats and old packraftsSpring valve one-way for higher pressure
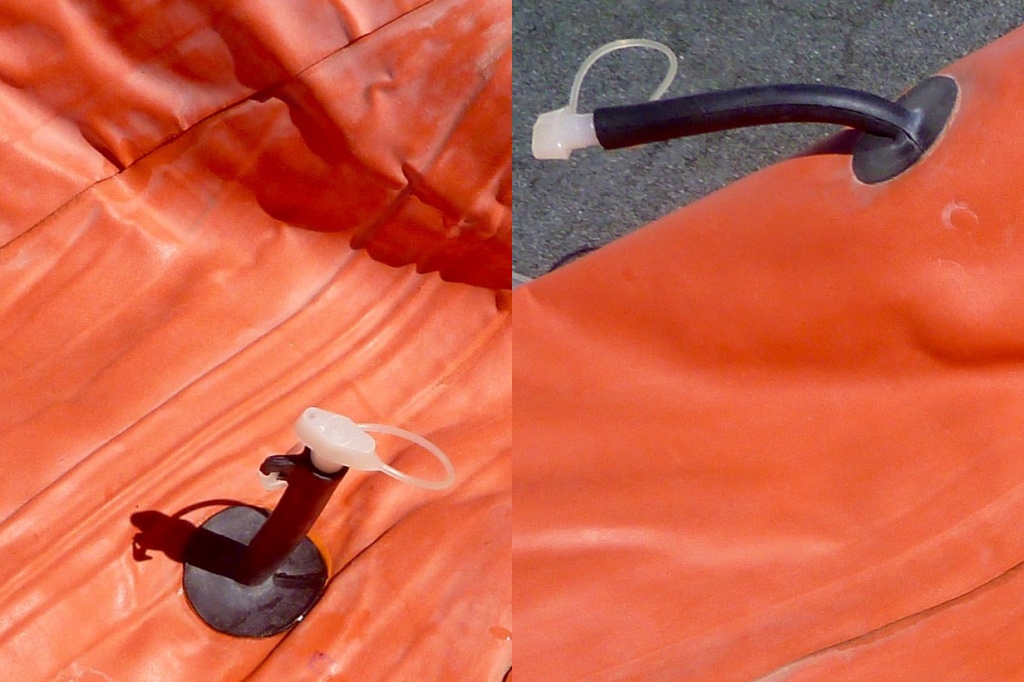
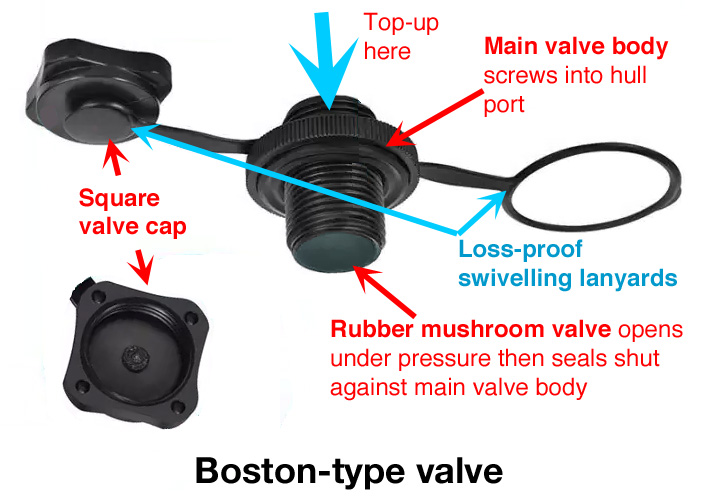
Boston valves is a generic name for a one-way valve long used on cheap IKs as well as slackrafts and have now become common on packraft hulls. Note they’re widely copied and not all may be identical, like well-known branded IK valves. The square top cap screws onto the round valve body which itself has a knurled edge to easily unscrew from the hull port (below right). Here you attach your air inflation bag or open to quickly dump the air when rolling up.
Inflation: top cap removedRubber ‘mushroom’ valveDeflation: unscrew valve body
Ideally suited to low-pressure boats like packrafts, they use a simple rubber ‘mushroom’ valve on a stem (above middle). Once the main valve body has been screwed back into the hull, unscrew the square cap to finish the inflation process by either topping off by mouth or with a hand pump.
A one-way Boston-type valve eliminates the need for the old separate stem valve and the whole assembly has swivelling plastic lanyards so nothing drops away when unscrewed.
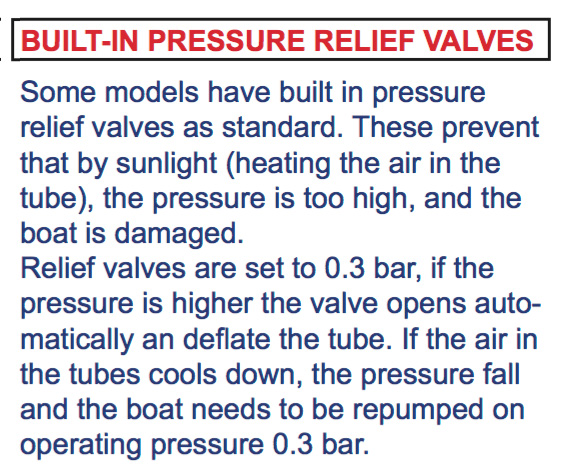
Pressure release valves (PRV) for some IKs
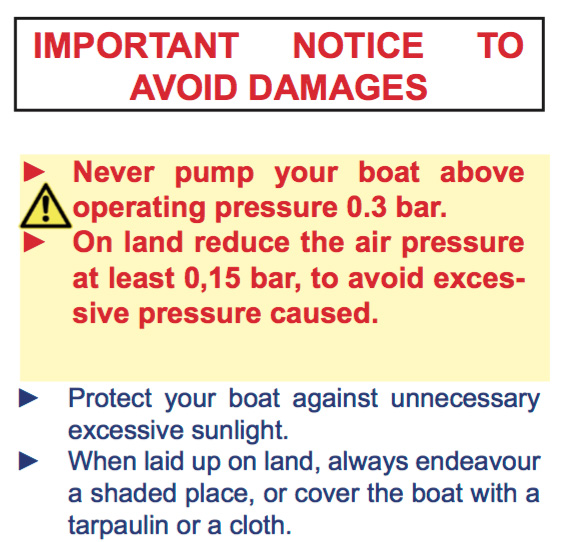
I’ve learned the hard way to be careful and not let an IK get too hot when out of the water. On a hot day you can feel the more exposed sidetubes tighten like a drum. This of course happens to be good for rigidity and paddling efficiency but isn’t good for the seams or an I-beam floor or the sewn seams of a cheap shell&bladder IK.
Oddly, not all Grabner IKs have PRVs which means…… faffing about with pressures on hot days.
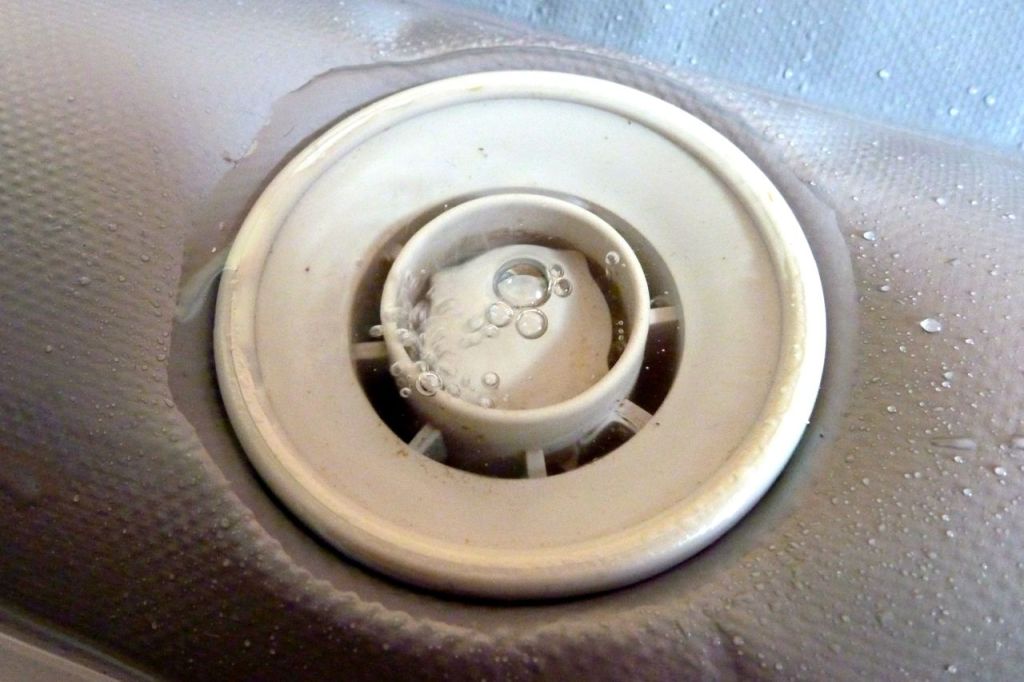
The floor tube on my old Sunny had a pressure release valve – oddly it’s something rarely mentioned in the specs, even on current Gumboats. It’s there to protect the I-beam floor which could rupture inside under pressure (I-beam floors explained here). The valve is set to purge (open) at a certain pressure when the air inside heats up, expands and pressures rise. With Gumotex it is 3psi or 0.21 bar. It means an IK can feel a bit soft on a cool morning following a hot day; don’t worry, you don’t have a leak, it just purged some air when hot yesterday and in the cool air make sit a bit soggy. A quick top up is all you need to do. The handy thing with a PRV is that it makes a good guide to how hard you ought to pump up the other chambers of the boat without PRVs when you don’t have a pressure gauge. At whatever pump effort the floor PRV starts hissing, that’s the same or a bit more pressure to put in the side tubes which usually don’t have PRVs.
As mentioned, the air in an IK can also get cooled, for example when pumping up on a hot day and then putting the boat in a cool river: a normal scenario. Cold air contracts (loses volume/pressure). Because you want the boat to be as rigid as possible, after initial inflation it’s worth topping up again once the boat is in the water; splashing helps cool the sides. Topping up, or tempering as it’s called, optimises rigidity and with long, 2psi boats you need all the rigidity you can get. Conversely, pumping up your boat in sub-freezing temperatures then putting it on water which actually ‘heat’ it up, though this is a much less likely scenario.
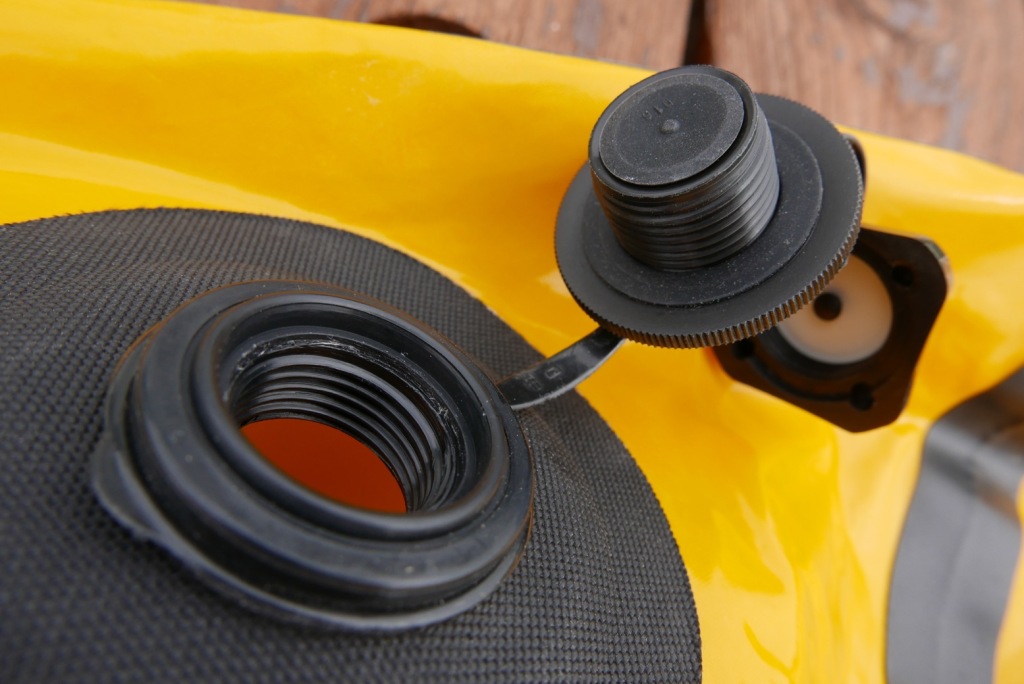
A PRV purging correctly
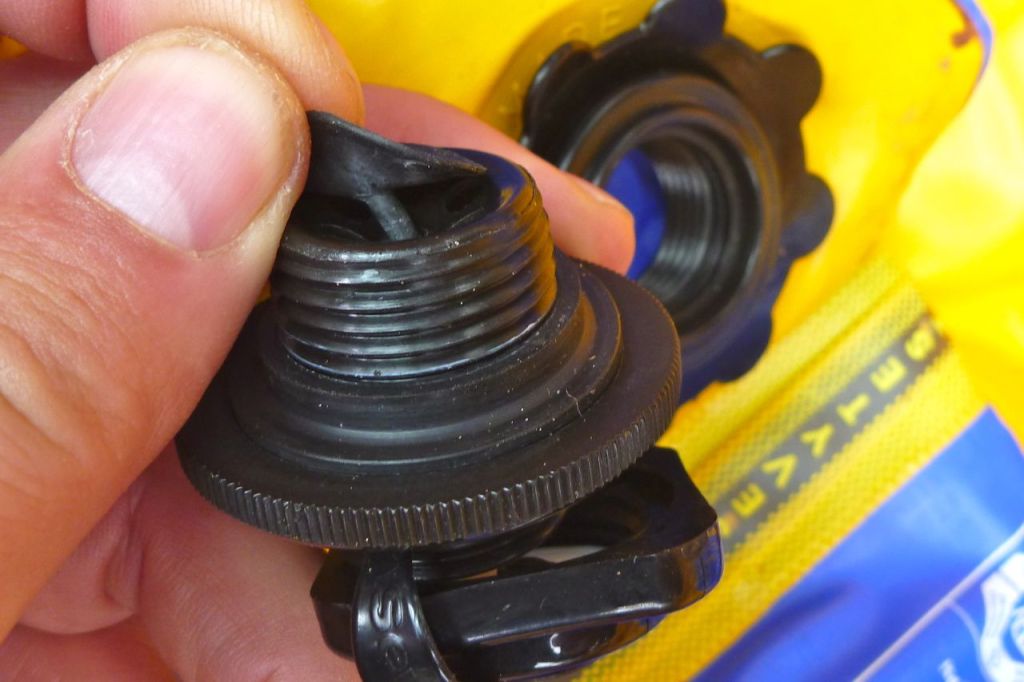
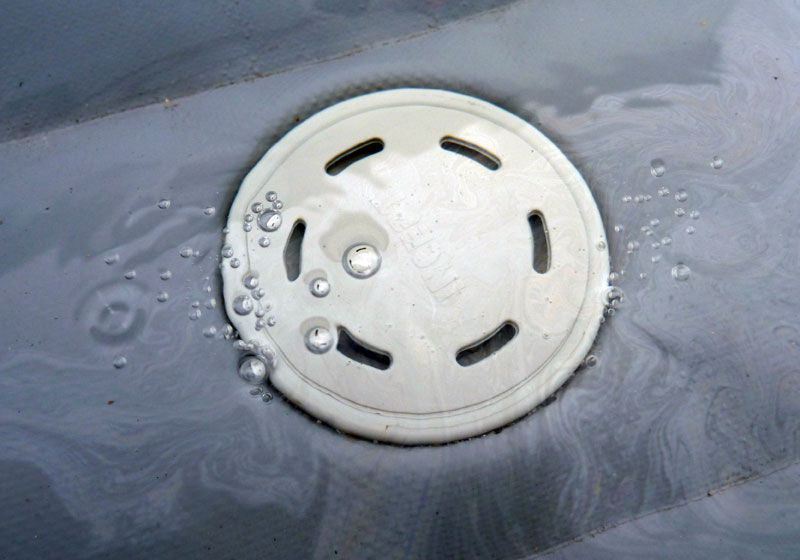
PRV leaking from the sides not through the valve. Needs tightening with a special tool; a common necessity with hastily assembled new IKs.
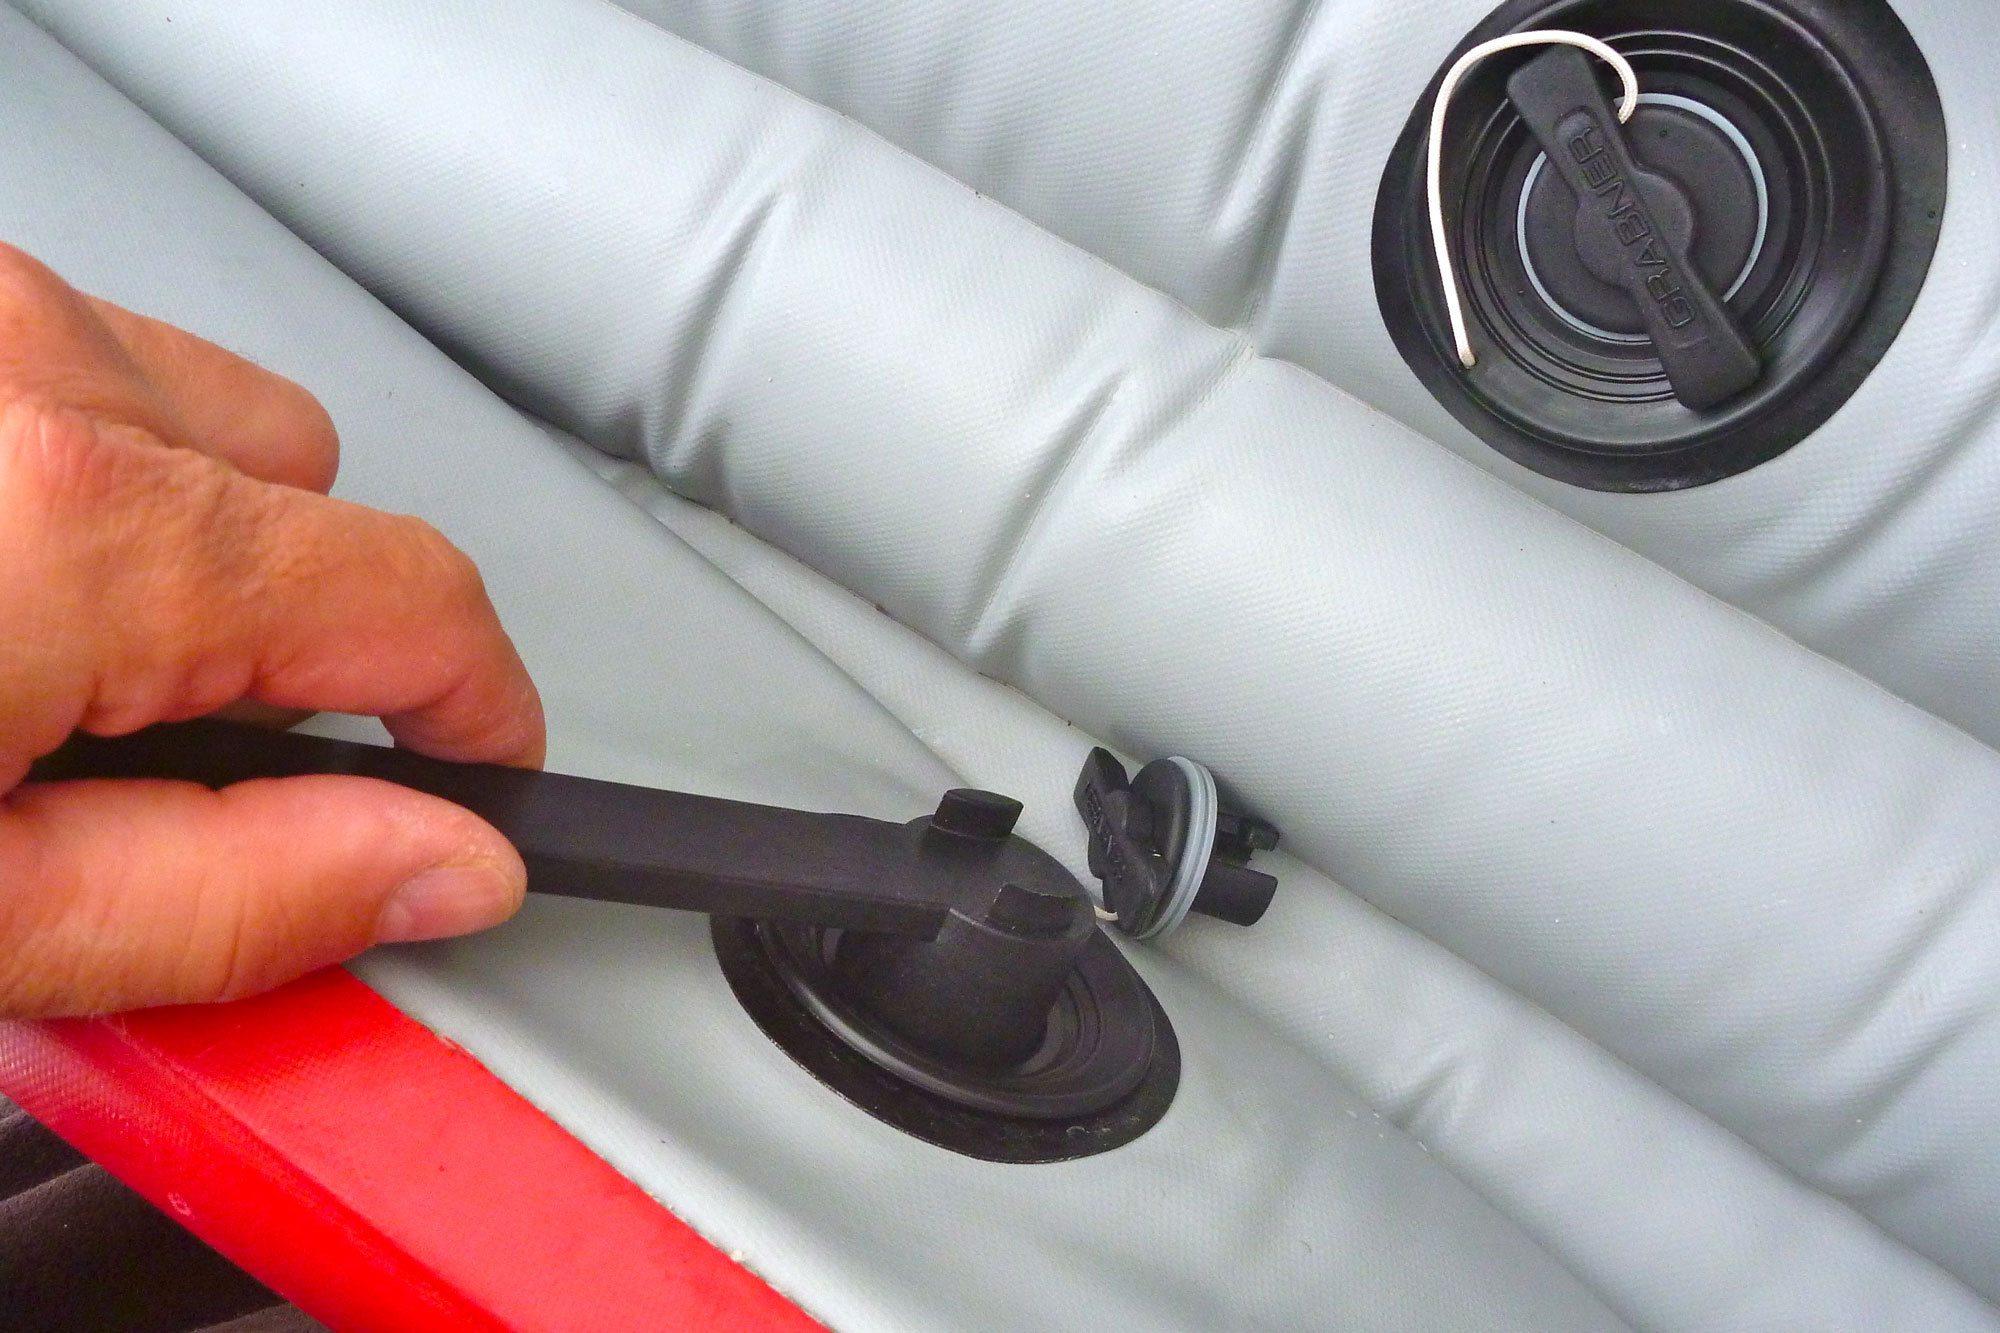
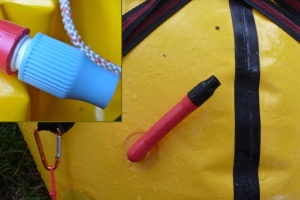
My higher pressure Incept K40 had PRVs on all chambers which meant you could confidently leave it in the Sahara and it would safely purge then feel a bit soft once cooled down back in the water. Picture above: Incept PRV test with the protective cap removed and purging correctly through the centre. Below: a PRV being resealed after leaking from the edges (left). This was because I failed to check tightness after buying the new boat, as recommended by the manufacturer. (My Gumotex IKs never needed such tightening or checking in years ownership.) I ended up also fitting sidetube PRVs to my Gumotex Seawave to run higher pressures and the be able to leave it pumped up and out of the water for months at a time. Like any valve, PRVs can leak due to grit on the seal or a weak or sticking spring. Grit is not so unlikely when you think they can’t have a cap and have to sit on the floor of an IK, with water and sand occasionally swilling in and down into the body. Try removing the cap and blasting it out with air and maybe give the spring a squirt with 303 (UV protectorant). The best thing is to remove the PRV with the same valve tool, inspect and clean the sealing surfaces and reinstall.
Oddly, my old Grabner Amigohad no PRVs at all and neither do the latest Holiday models and a few other Grabners, even though all run higher than normal 0.3-bar pressures. One presumes Grabner are so confident in their construction they’re not needed, despite the warnings above. It should be included with the boats, but if your pump has no gauge, Grabner do pressure relief adaptors to fit on the hose (left) which purge at 0.3 bar, so dispensing with faffing about with a handheld pressure gauge. It’s a good idea.
My current Zelgear Igla 410 has closeable 0.25 bar PRVs on the twin I-beam sidetubes (below). The separate DS floor runs twice that pressure but has no PRVs. I find it’s actually quite handy to ‘lock in’ the air during cool transits or when getting into the water. When the paddle is over I open the PRVs which hiss a bit back down to 0.25 bar. I leave it like that until the next paddle when I top everything back up.
Lockable PRVs; quite handy actually
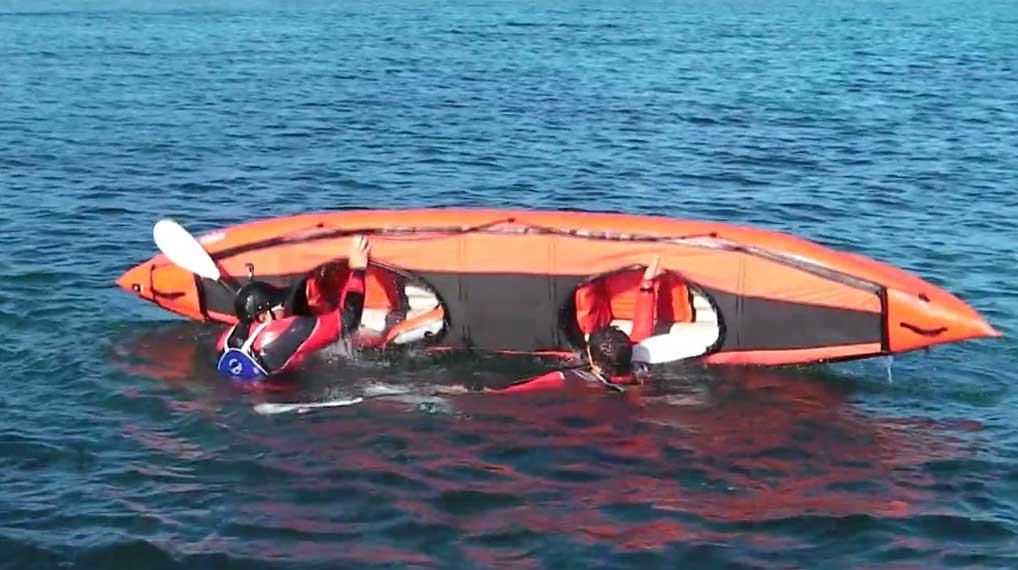
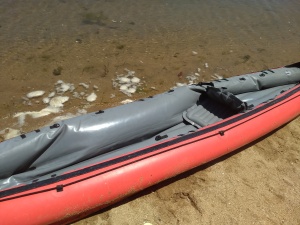
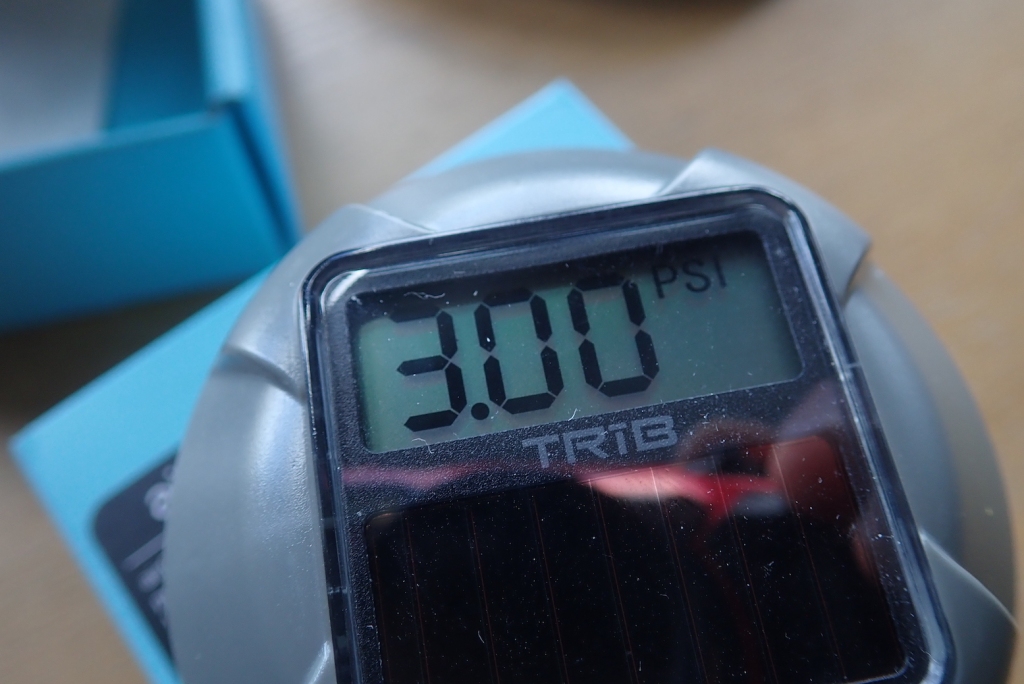
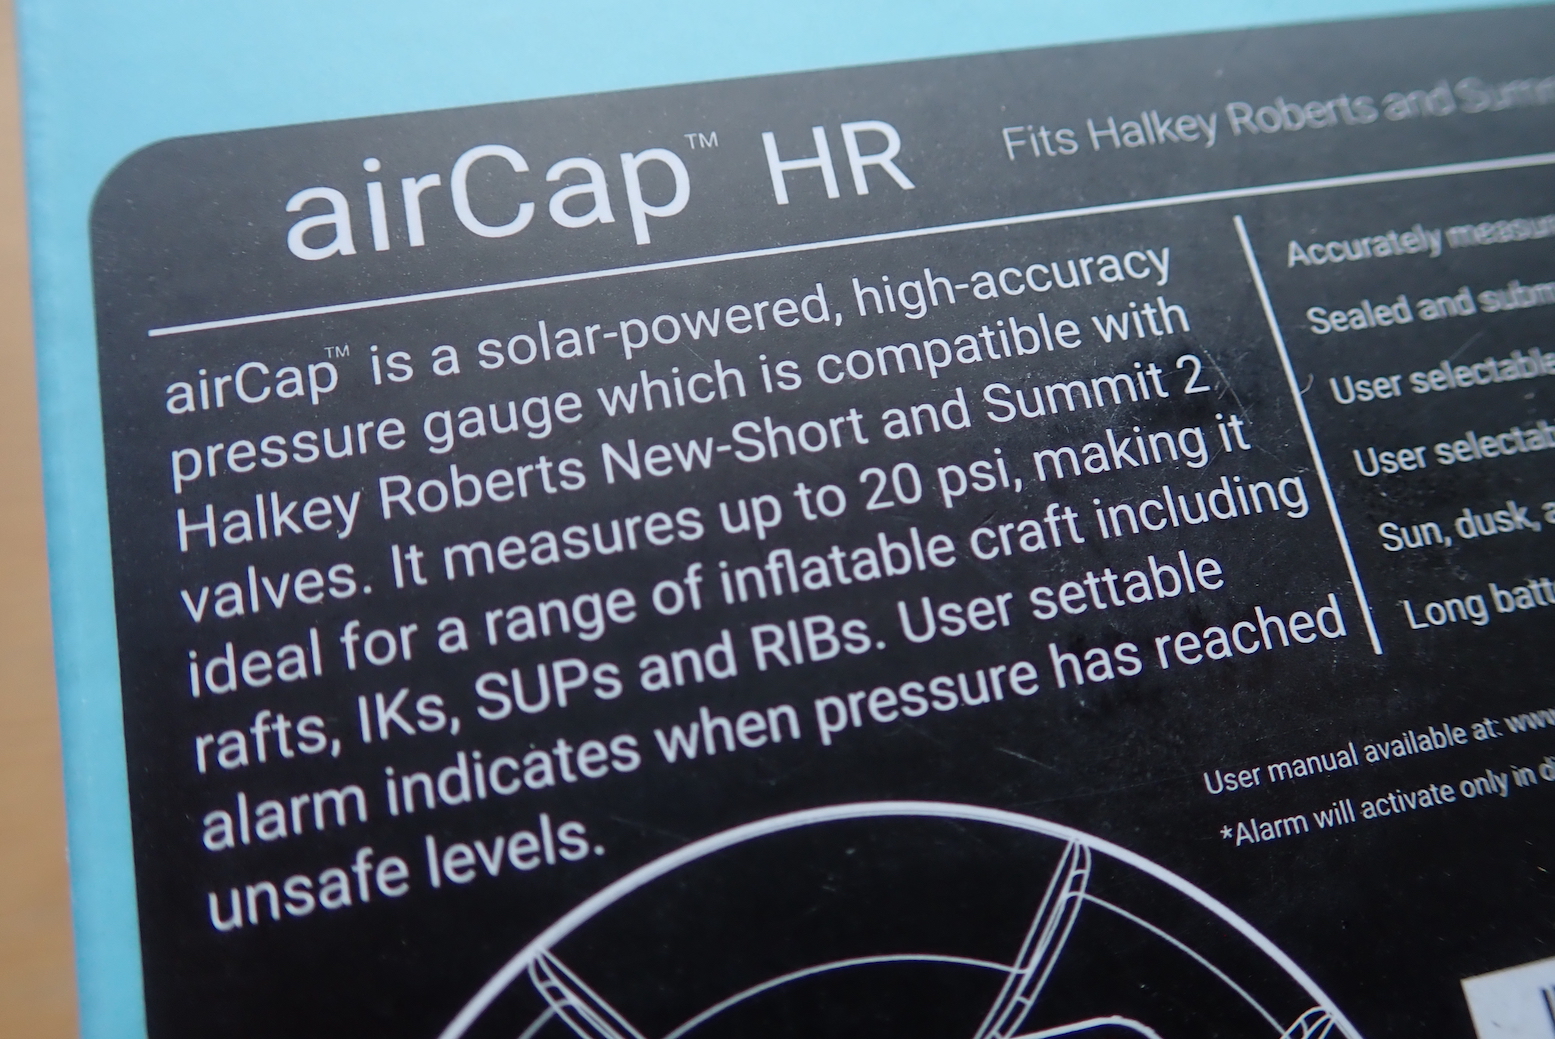
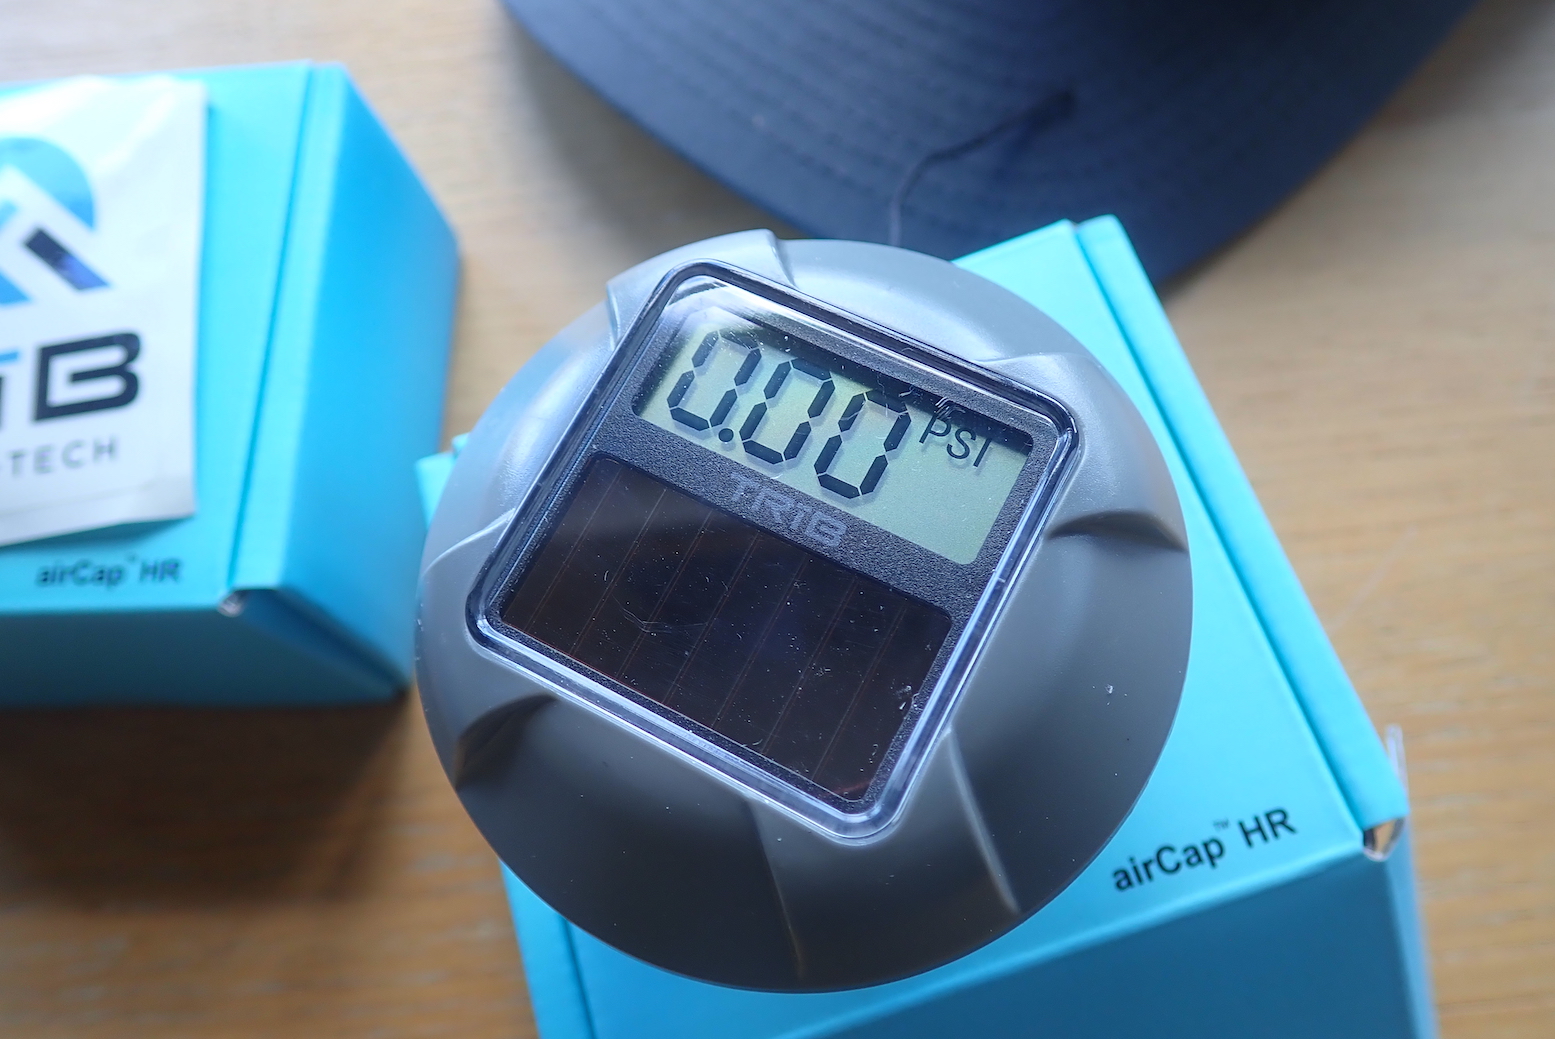
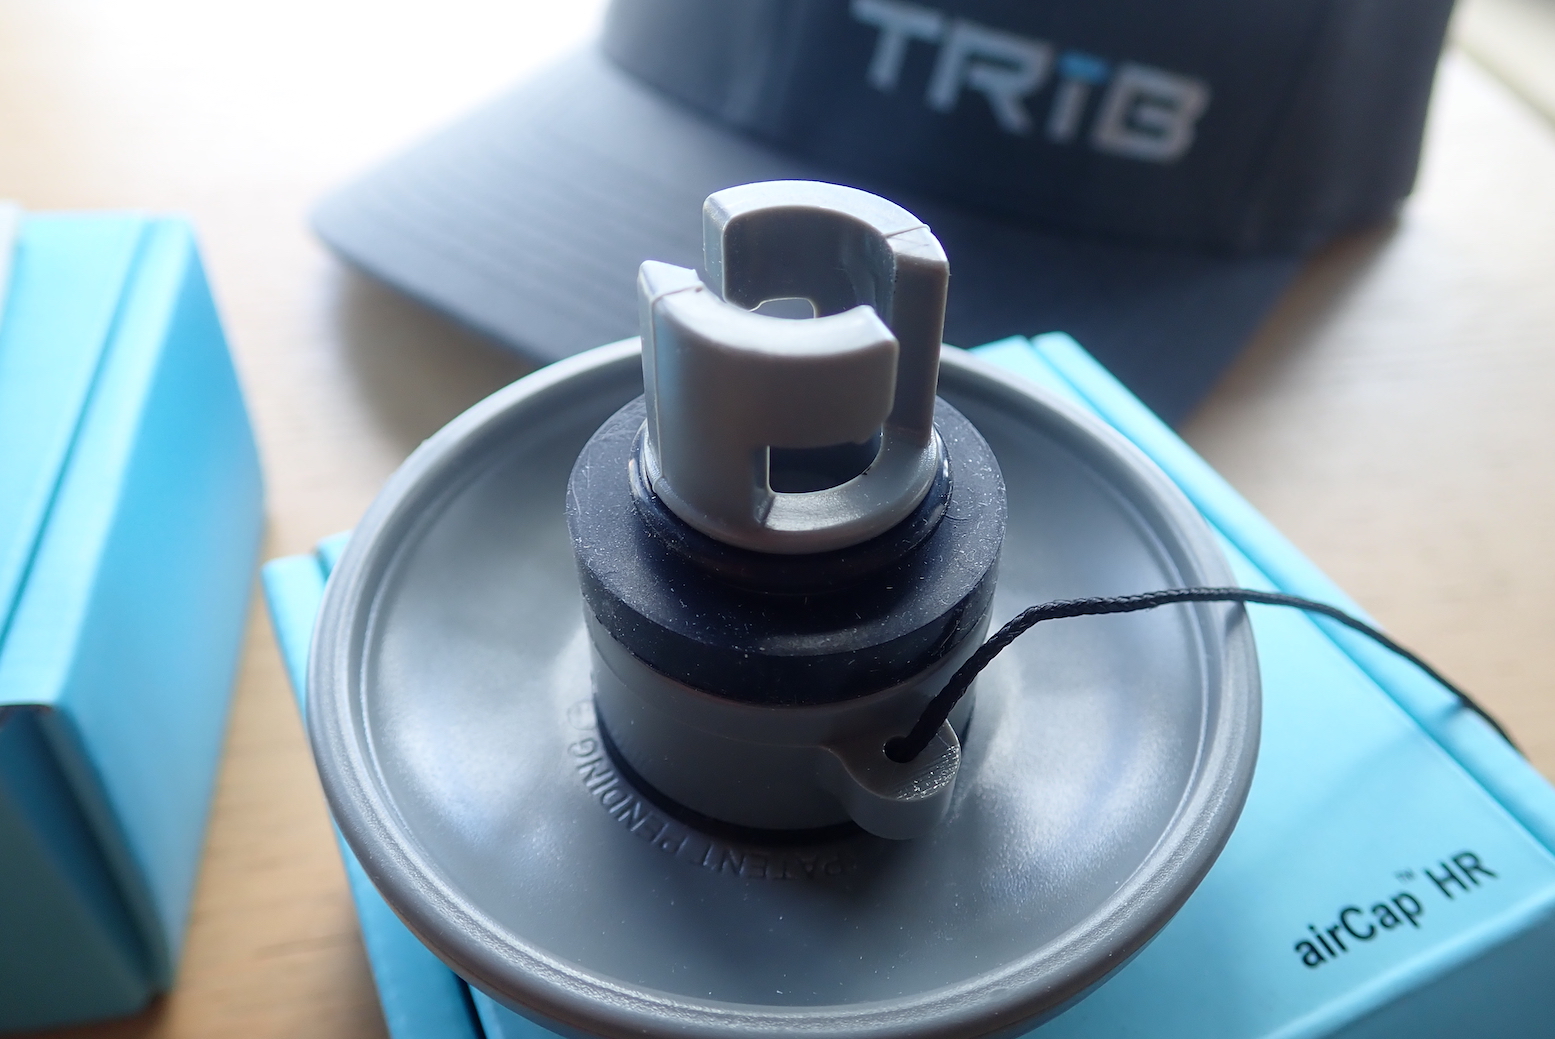
Another good idea are TRIB airCap live pressure monitors so your boat doesn’t end up like the Seawave left (actually an unexplained internal rupture while in the water). These TRIB solar-powered gadgets replace the valve cap on bayonet-type inflation valves like Halkey Roberts or Gumotex. One fitted securely an LCD display displays your pressures in psi, kPa or bar, a bit like TPMS for cars and motos. And like TPMS, you can even set a bleeping alarm at anything up to 20psi / 1.37bar. You need to make sure the seal is good and air is not slowly leaking out, but you can also use them as simple digital pressure gauges: twist on, measure and remove. Once fitted, you can watch as pressure drops after you put the boat in the water, and then seeing it rise out on a hot river bank. If I kayaked in a hot country (ie: not the UK) they’d be a simple alternative to the faff of installing PRVs. TRIB airCaps cost $40 in the US and the same in £s in the UK. The ribstore sells them.
Short answer: IKs: yes. Packrafts: helps away from white water
Generic, over-tall skeg. Snap-prone but trimable.
A skeg is like a fixed ‘rudder’ under the back of the boat which makes it easier to go straight (track). Only the very cheapest single-skin vinyl IKs don’t have skegs (Grabner, one of the most expensive IKs, is an exception; though it’s an optional add on). If you’re IK doesn’t come with one, it’s easy to glue one on (see below).
Some flat-floored IKS have up to three (imo, a gimmick), and many skegs on Chinese-made IKs are unnecessarily tall (too deep) which makes them snap-prone. Just about all skegs can be easily removed by hand, because in shallow rivers you might want to do so to avoid grounding. You can as easily buy a spare and trim it with a hacksaw.
Gumotex skeg glued to a Grabner Amigo
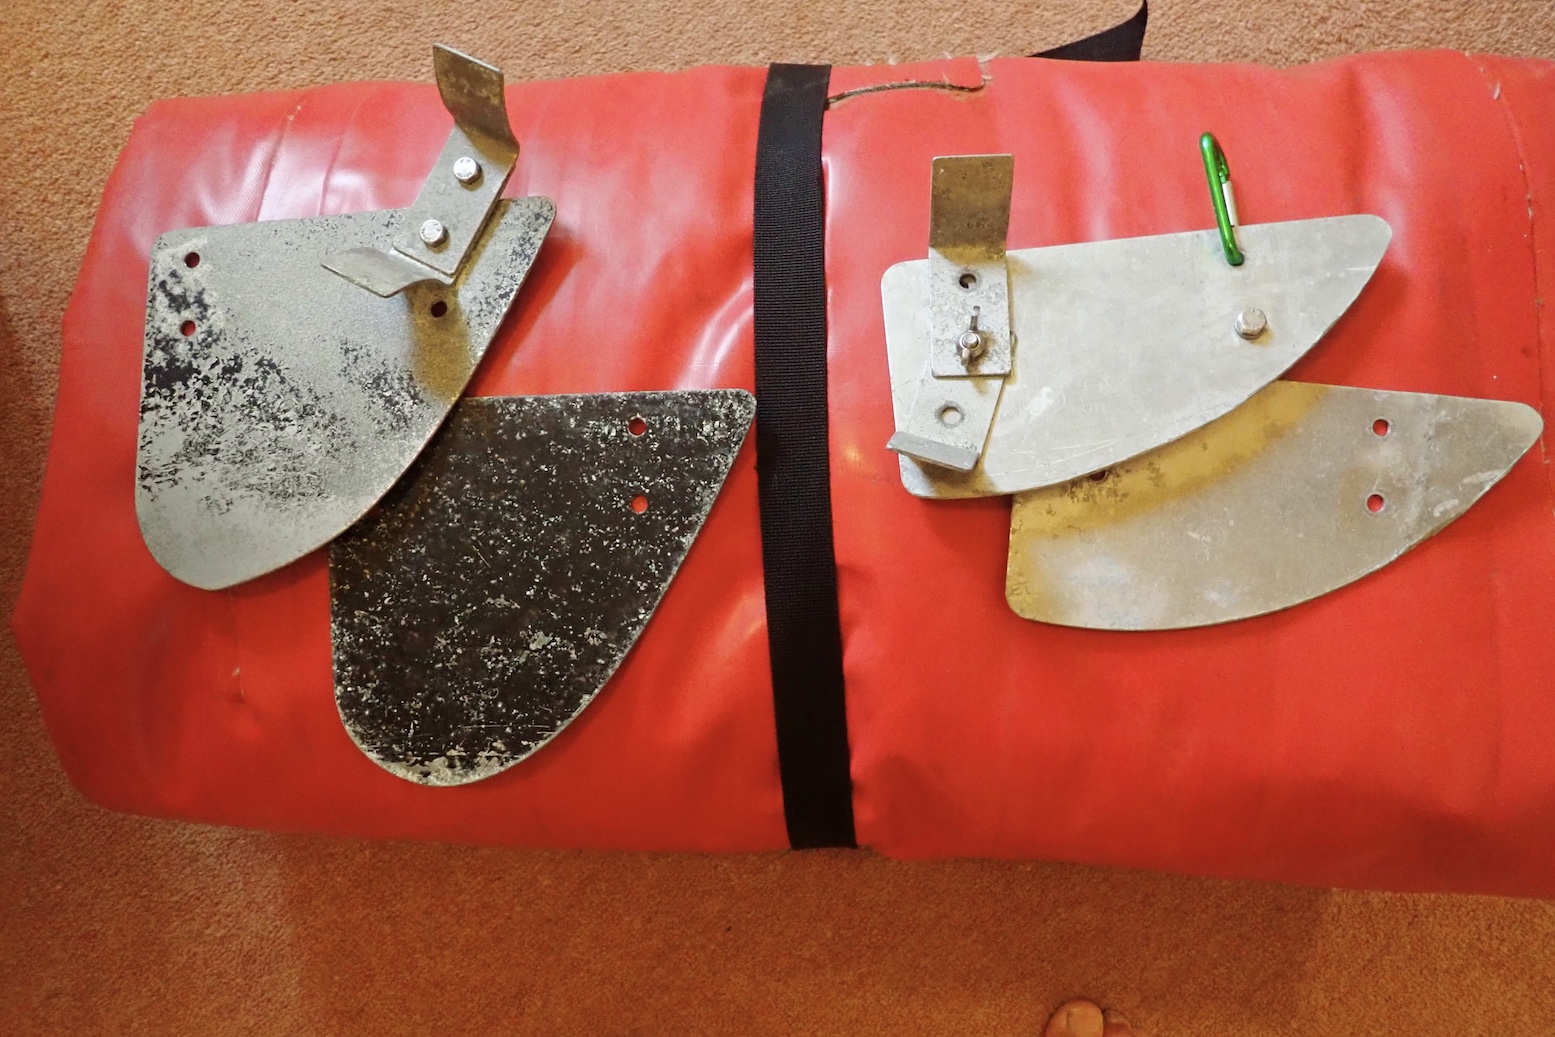
Original over-sized Gumotex alloy skeg on the left. Later smaller; now tough plastic.
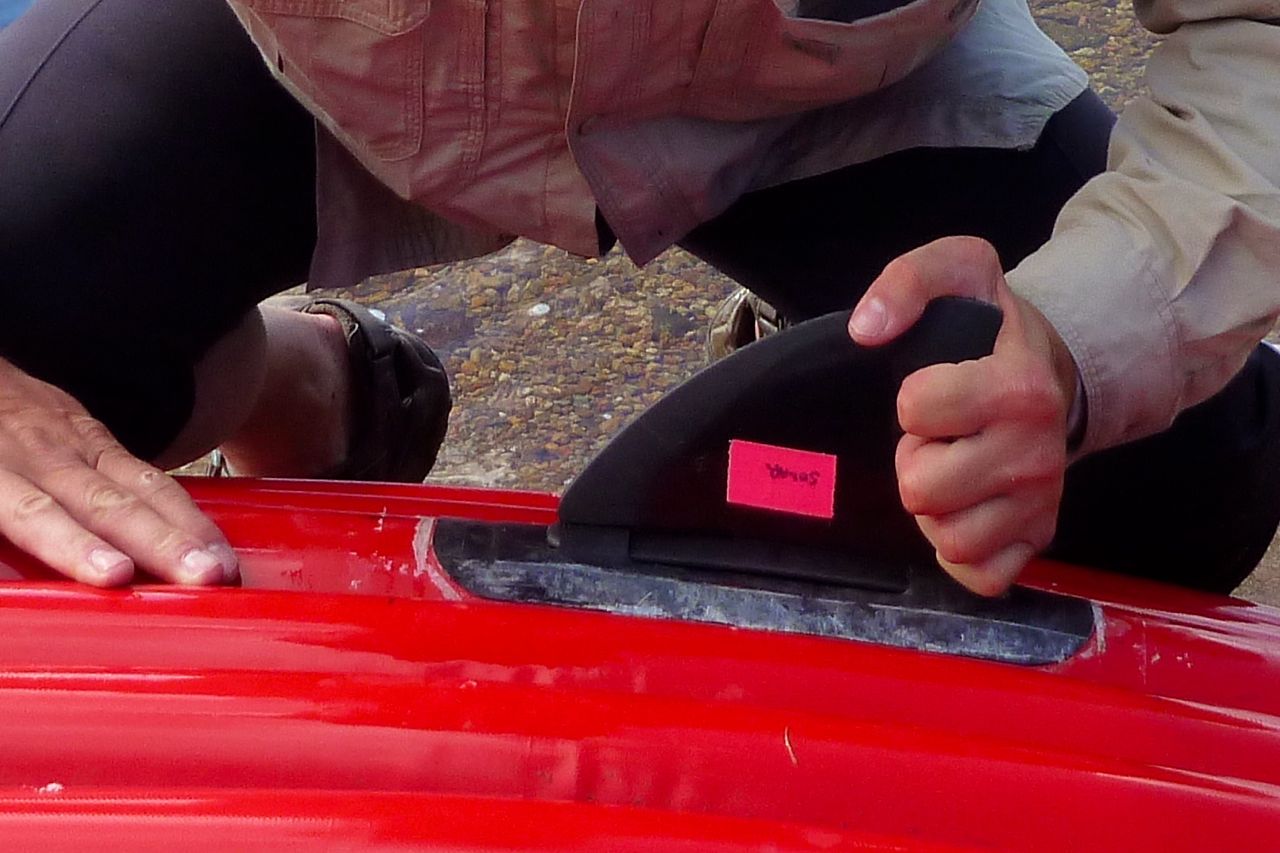
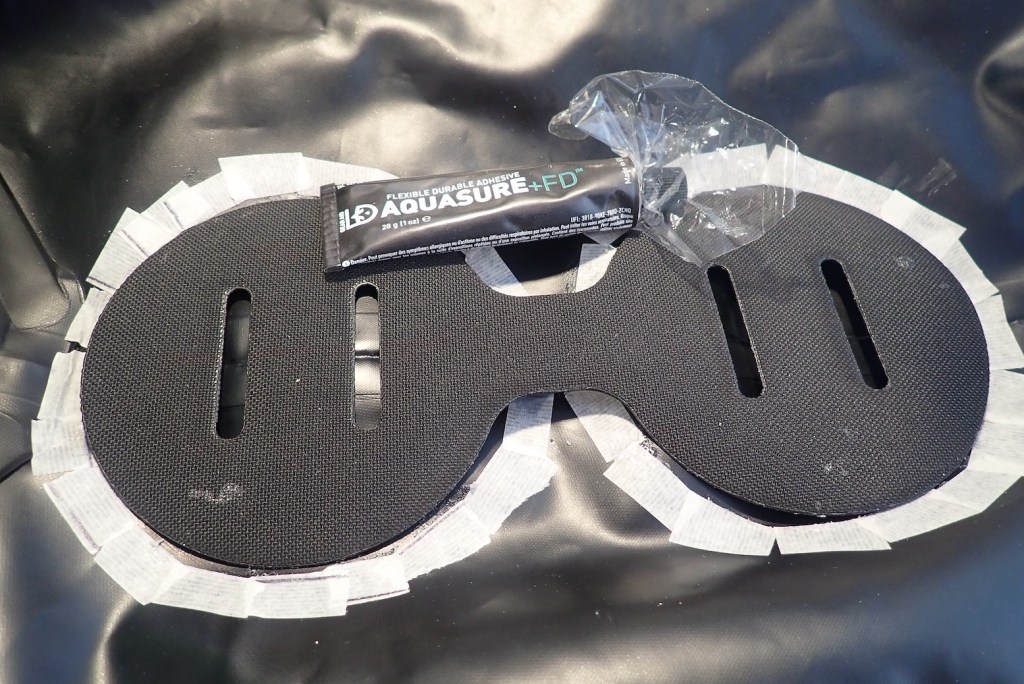
Years ago Gumotex introduced a slip-on, black plastic tracking fin (skeg, above) which was near identical in shape to one I’d had made to replace the old-style oversized alloy skeg (left). A smaller skeg made better clearance and still tracked fine. But metal bends; tough plastic is much better and that’s what all their boats come with now. I’ve fitted these plastic skegs to older Gumotex IKs and other IKs. The kit is about £25 + glue, and the plastic skeg is pretty much unbreakable. Just make sure you glue the mounting patch on really well; it helps if your boat is made from a matching rubber fabric as the supplied Nitrilon patch or make your own patch from same fabric. But I have glued PVC to rubber successfully – use good two-part glue. The pictures below help you see where to position a skeg.
On shore a skeg is a pain with a loaded boatSkeg: underneath and at the backGluing a Gumotex fin to a Grabner (which come with no skegs)
I fitted the Gumotex plastic skeg to my Grabner Amigo IK (above) and at sea used it all the time. But on the shallow River Spey (below) this boat didn’t handle at all well without a skeg, possibly because the tailwind pushed the kicked-up stern around. It was really quite annoying because a few years earlier my broadly similar Sunny managed the Spey just fine without a skeg, so skeg-free tracking clearly varies from boat to boat.
Paddling without a skeg If you’re an experienced paddler you’ll have acquired the knack of going straight without a skeg – handy for paddling shallow rivers where the skeg would ground. A little more paddling finesse and constant smallcorrections are required, especially if powering on. It’s good to learn this technique before you need to: fix your eyes on a tree or marker on a distant bank and paddle as gently as you like towards it, not looking away and keeping the nose of the boat in line with the marker. By using very light strokes you’ll see it can be done if it’s not too windy when again, a skeg helps with tracking (going straight).
Gumo Solar with no skeg
I even found I could paddle a ten-foot Solar 300 (above) without a skeg. Once you know you can go straight without a skeg, it’s just a matter of adopting the same finesse but with a bit more power. Only when you attempt the speeds of a Viking longship will bow deflection or yawing get too much because to paddle faster and still go straight you need a skeg. Out at sea or on busier rivers, I always use a skeg.
IK&P Tip: drill a small hole in your plastic skeg and attach a ring or zip tie directly to you boat. It’s annoying to turn up and find you misplaced your skeg.
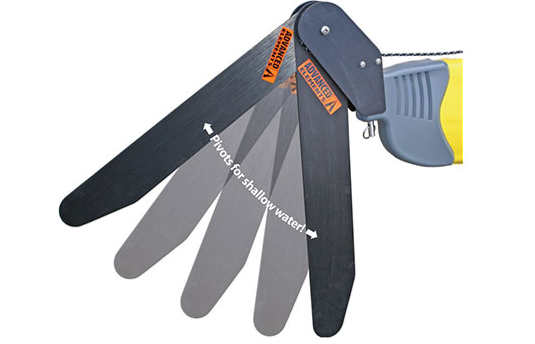
I’ve often thought a hinged retractable skeg would be a good idea: it would pivot backwards when dragging in shallows, then drop back down when there’s enough depth. It seems SUPs need skegs and in the US, FrogFish have made such a thing for boards, but you hear the spring can be a weak point. If your kayak has a rudder mount (or you can make one), another way of doing it is fitting a swing-down skeg similar to kayak rudders. It works the same way as a rudder with a looped cord swinging the skeg up over the stern, or down into the water. The pivot skeg shown top right is made by Advanced Elements for their AirFusion IK and costs about $/£80. Or have a look here.
Packrafts
On shorter, wider, slower solo packrafts the consensus used to be that skegs made little difference. Especially when unloaded and with a full-weight paddler, the bow yaws merrily left to right as your paddling pivots the boat from the back. Or so I used to think until I tried the skeg on my Rebel 2K. Up to then I’d been ambivalent about them – using the same boat fully loaded a few weeks earlier on a fast flowing river, yawing had not been an issue. But unloaded (and with my generous 95kg of ballast) yawing was notably reduced with a skeg. Speed however, was the same or was too small to measure.
If you think about it, a packraft actually pivots from a point around the middle of your swinging paddle, not from the stern, as it feels from the seat. The centre of mass behind the pivot point does make an unladen bow yaw more, but the stern will yaw too; just less and unnoticed.
Longer stern puts you more in the middle of the boat, like a kayak
One reason some packrafts may manage without a skeg is that way back in 2011 Alpacka invented the ingenious extended stern (right). It helped limit yawing much like a skeg, and effectively positioned the paddler more centrally, like a kayak, while also adding trim. This idea has been widely copied by just about everyone since and it definitely works, compared to the original dumpy Alpackas. But as mentioned, once there’s a good load over the bow, yawing is reduced in any packraft. Anfibio sell a detachable shallow skeg and glue-on patch for €21. My Rebel 2K came with a skeg and I must admit I use it most of the time now. But it does not have a fully extended stern like the Alpacka above right. Then again, my longer Nomad tracked great without the skeg.
Skeg on an MRS Nomad. Tbh, tracks great without itSkeg on an Anfibio 2K. Reduces yawing
Frontal skeg? Now I have a longer 2.8-m Anfibio Sigma TXL and I was curious to see if adding a frontal skeg would make a difference. Seated centrally or two-up, this boat does not yaw from the boat like an unloaded solo packraft, but it does wander a bit (track poorly), especially with the inflated floor pad). I decided a front skeg did not help much, though it might improve sailing.