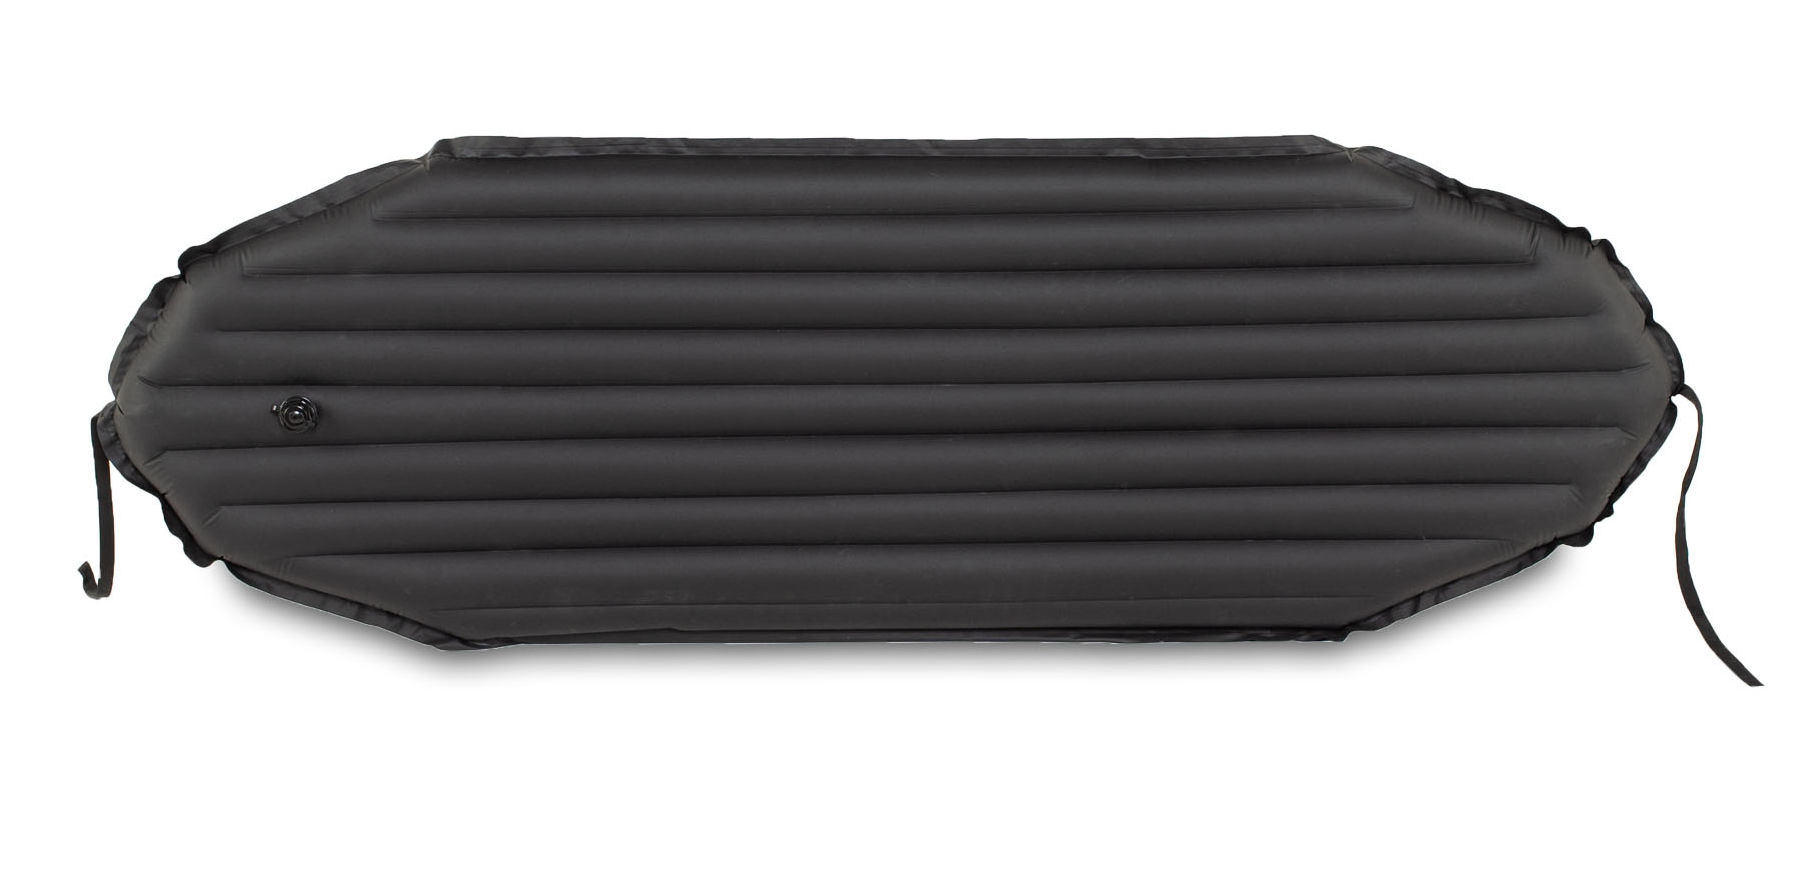
As it was with kayaks, so it is with packrafts. AE are the first to produce a solo and two-person packraft with a removable dropstitch floor.
For years packrafters have used the idea of shoving in sleeping mats as floors, and right now Anfibio sell slot-in Multimats to fit some of their boats. The idea is improved rigidity for a better glide, insulation for your legs in very cold conditions as well as raising your seating position for better visibility and paddle draw, stability notwithstanding. Plus longer packs like my TXL will sag less when paddled solo.
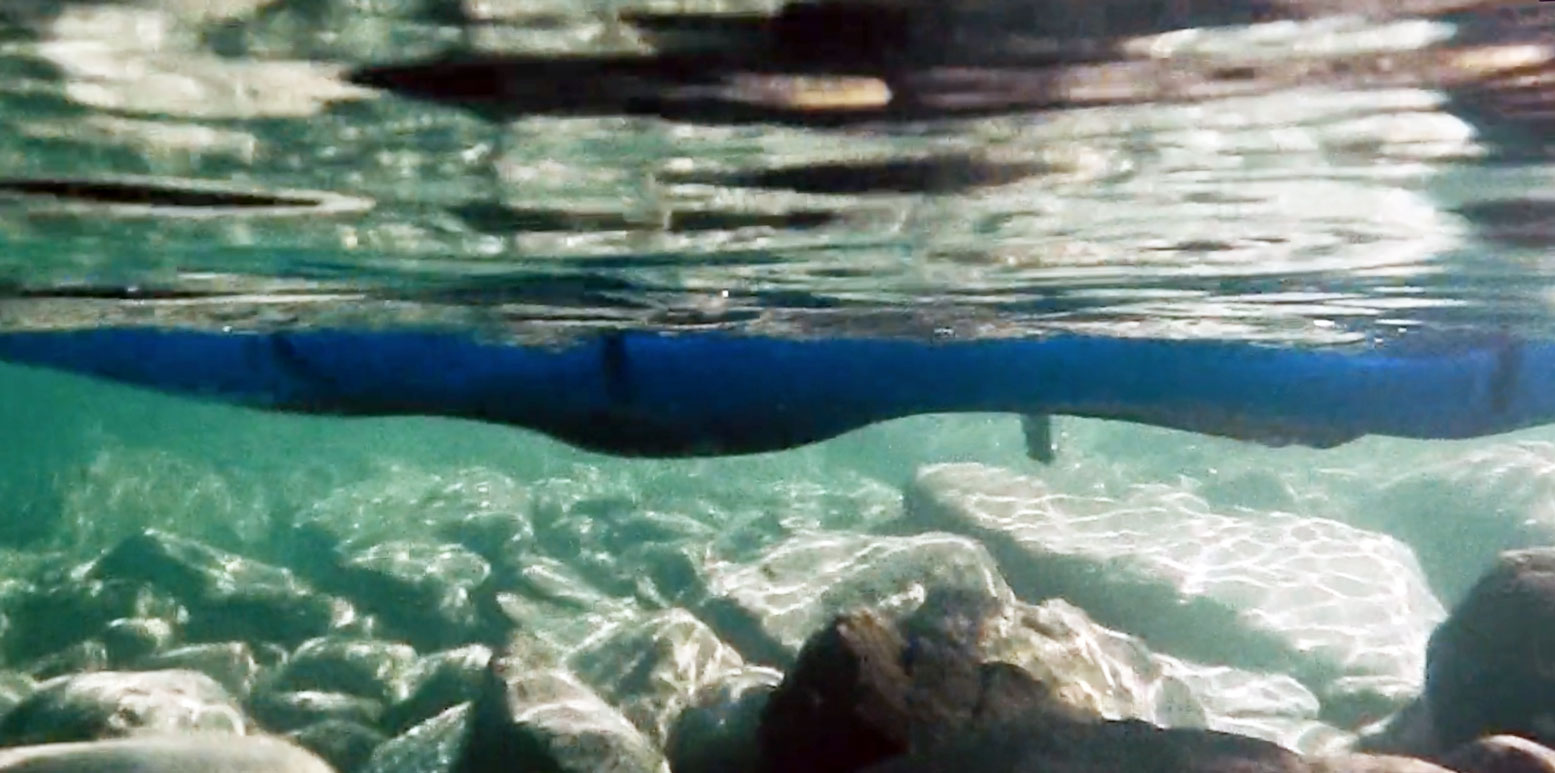
One problem with a regular packraft’s plain floor sheet is that the weight of the paddler sags downwards (as above), making a wear-prone low point in shallow rivers as well as not doing wonders to a packraft’s glide, such as it is. Being at the heavier end of the human spectrum, one pre-emptive solution I used on my Alpackas was a double layer of floor fabric or ‘buttpatch’, as Alpacka called them. It meant I could scrape through shallow rapids, knowing the 840D floor was a little more protected withg another sheet of 840D. This is a bit less of an issue these days when packraft sterns are longer which means the solo paddler is more centrally seated and less back-heavy
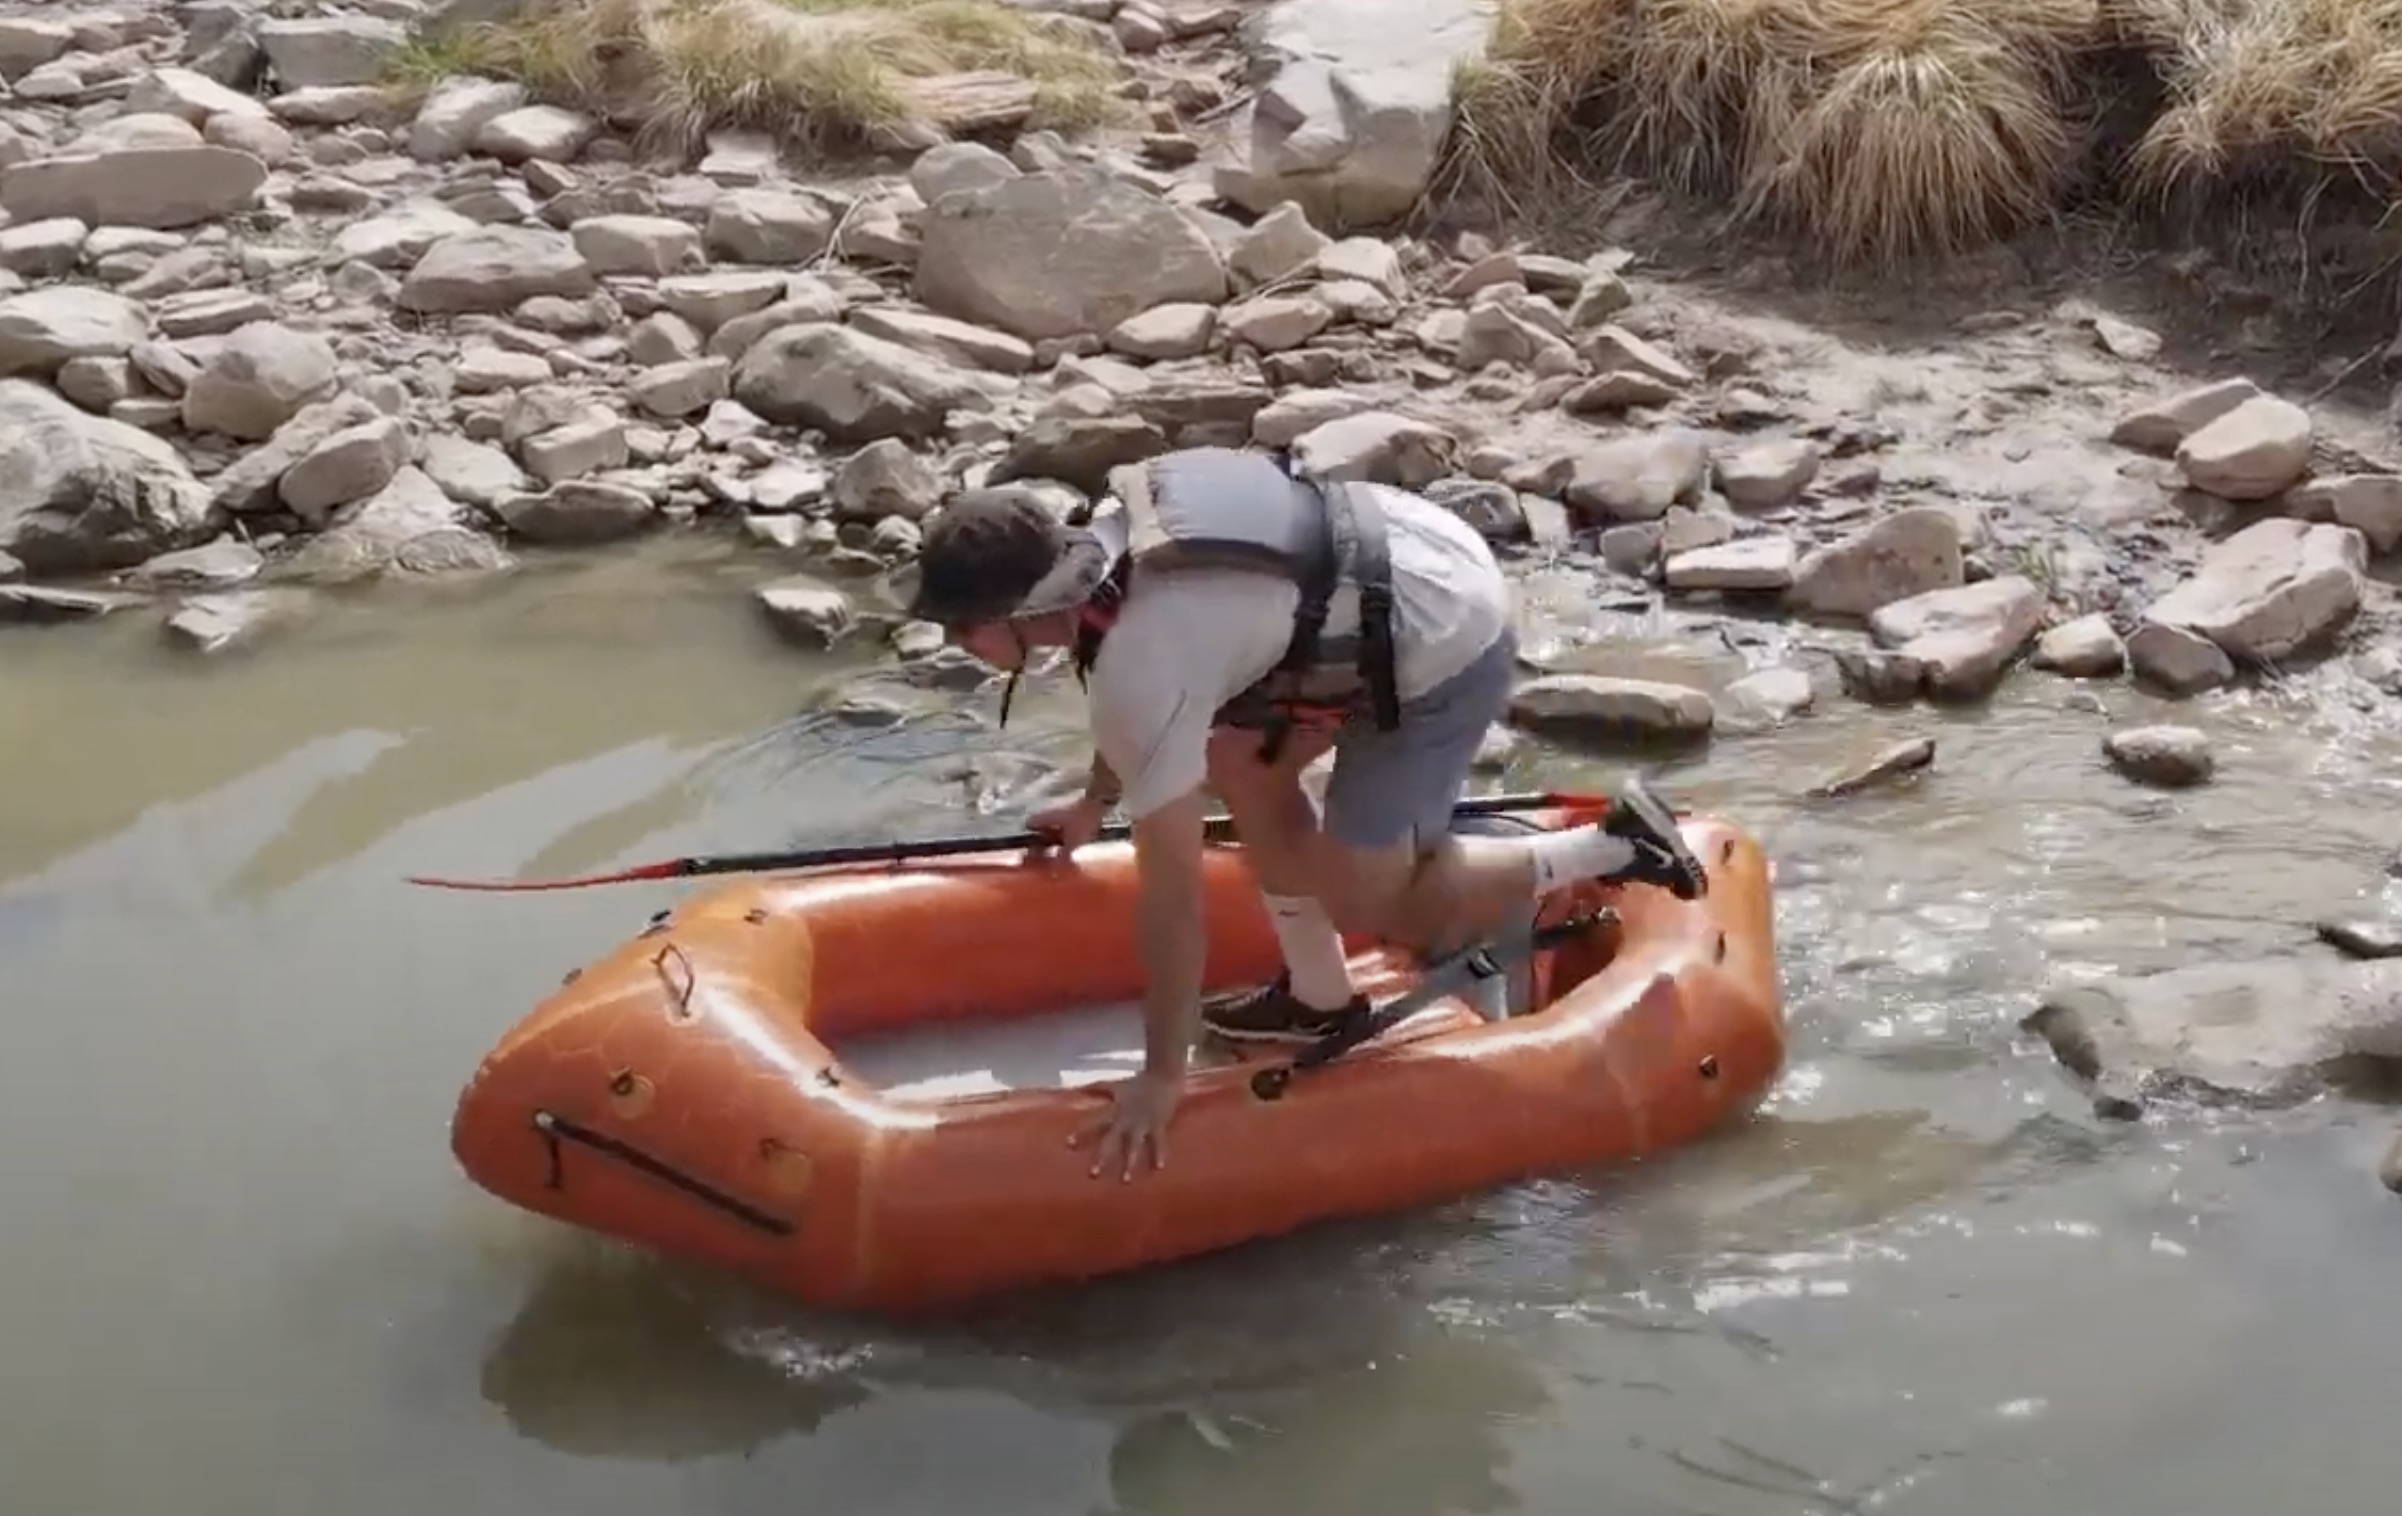
The DS floors on the AE Packlite+ packrafts eliminate this sag with all the benefits stated above. And being a separate panel, you can choose to use it or not, if weight and bulk matters. The DS floor’s pressure is 4-6psi, clearly enough to stand up and paddle the raft like a board at 1.5mph. It also makes getting in easier, in that you can stand on the firm floor (left).
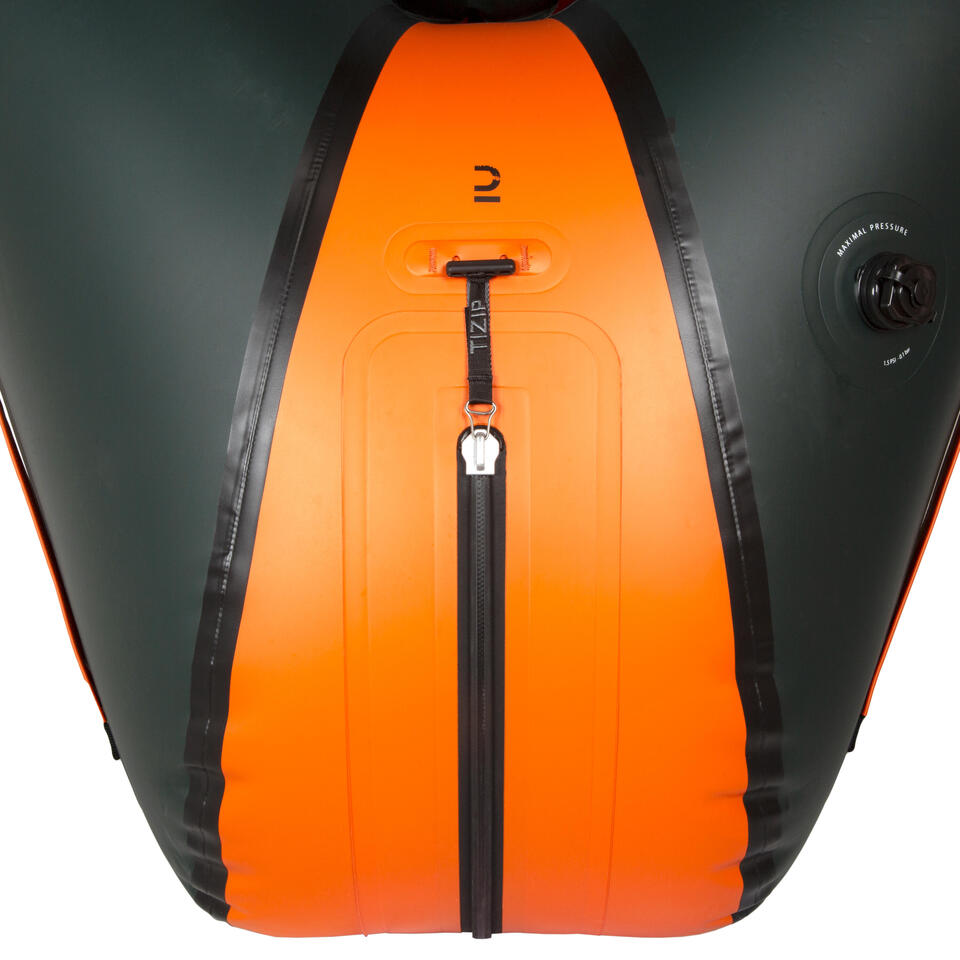
Despite the orange Prop65 warning label usually associated with PVC (for sales in California), AE’s new packrafts are made from 210D TPU. Interestingly, the hull uses a high-pressure raft valve as opposed to the more common Boston valves, but this is probably to simplify inflation as the DS floor must use a valve like this, so they may as well be doubled up. It should mean the hull can hold a bit more pressure to make a really rigid boat. The boats also have about 14/20 attachment loops, carry handles and even a 530-cm TiZip for in-hull storage. Nice touch. Plus you get carry bag and barrel pump and the longer boat gets a skeg. Just as with IKs, I think a DS floor’s main benefit will be on longer packrafts like the tandem which could be used solo to make a fast boat similar to the MRS Nomad, but without sag.
The Packlite+ AE3037 costs $899 and weighs 6.1kg, or 13.4 lbs (KG) and as little as 3.2kg with no floor or seat. It’s 99cm wide (39″) and 221cm long (7.25′).
The tandem Packlite+ XL AE3038 goes for $1199, weighs from 8.3kg ( 18.3 lbs) down to 4.4kg. It’s also 99cm wide (39″) and 3m (9.9′) long.
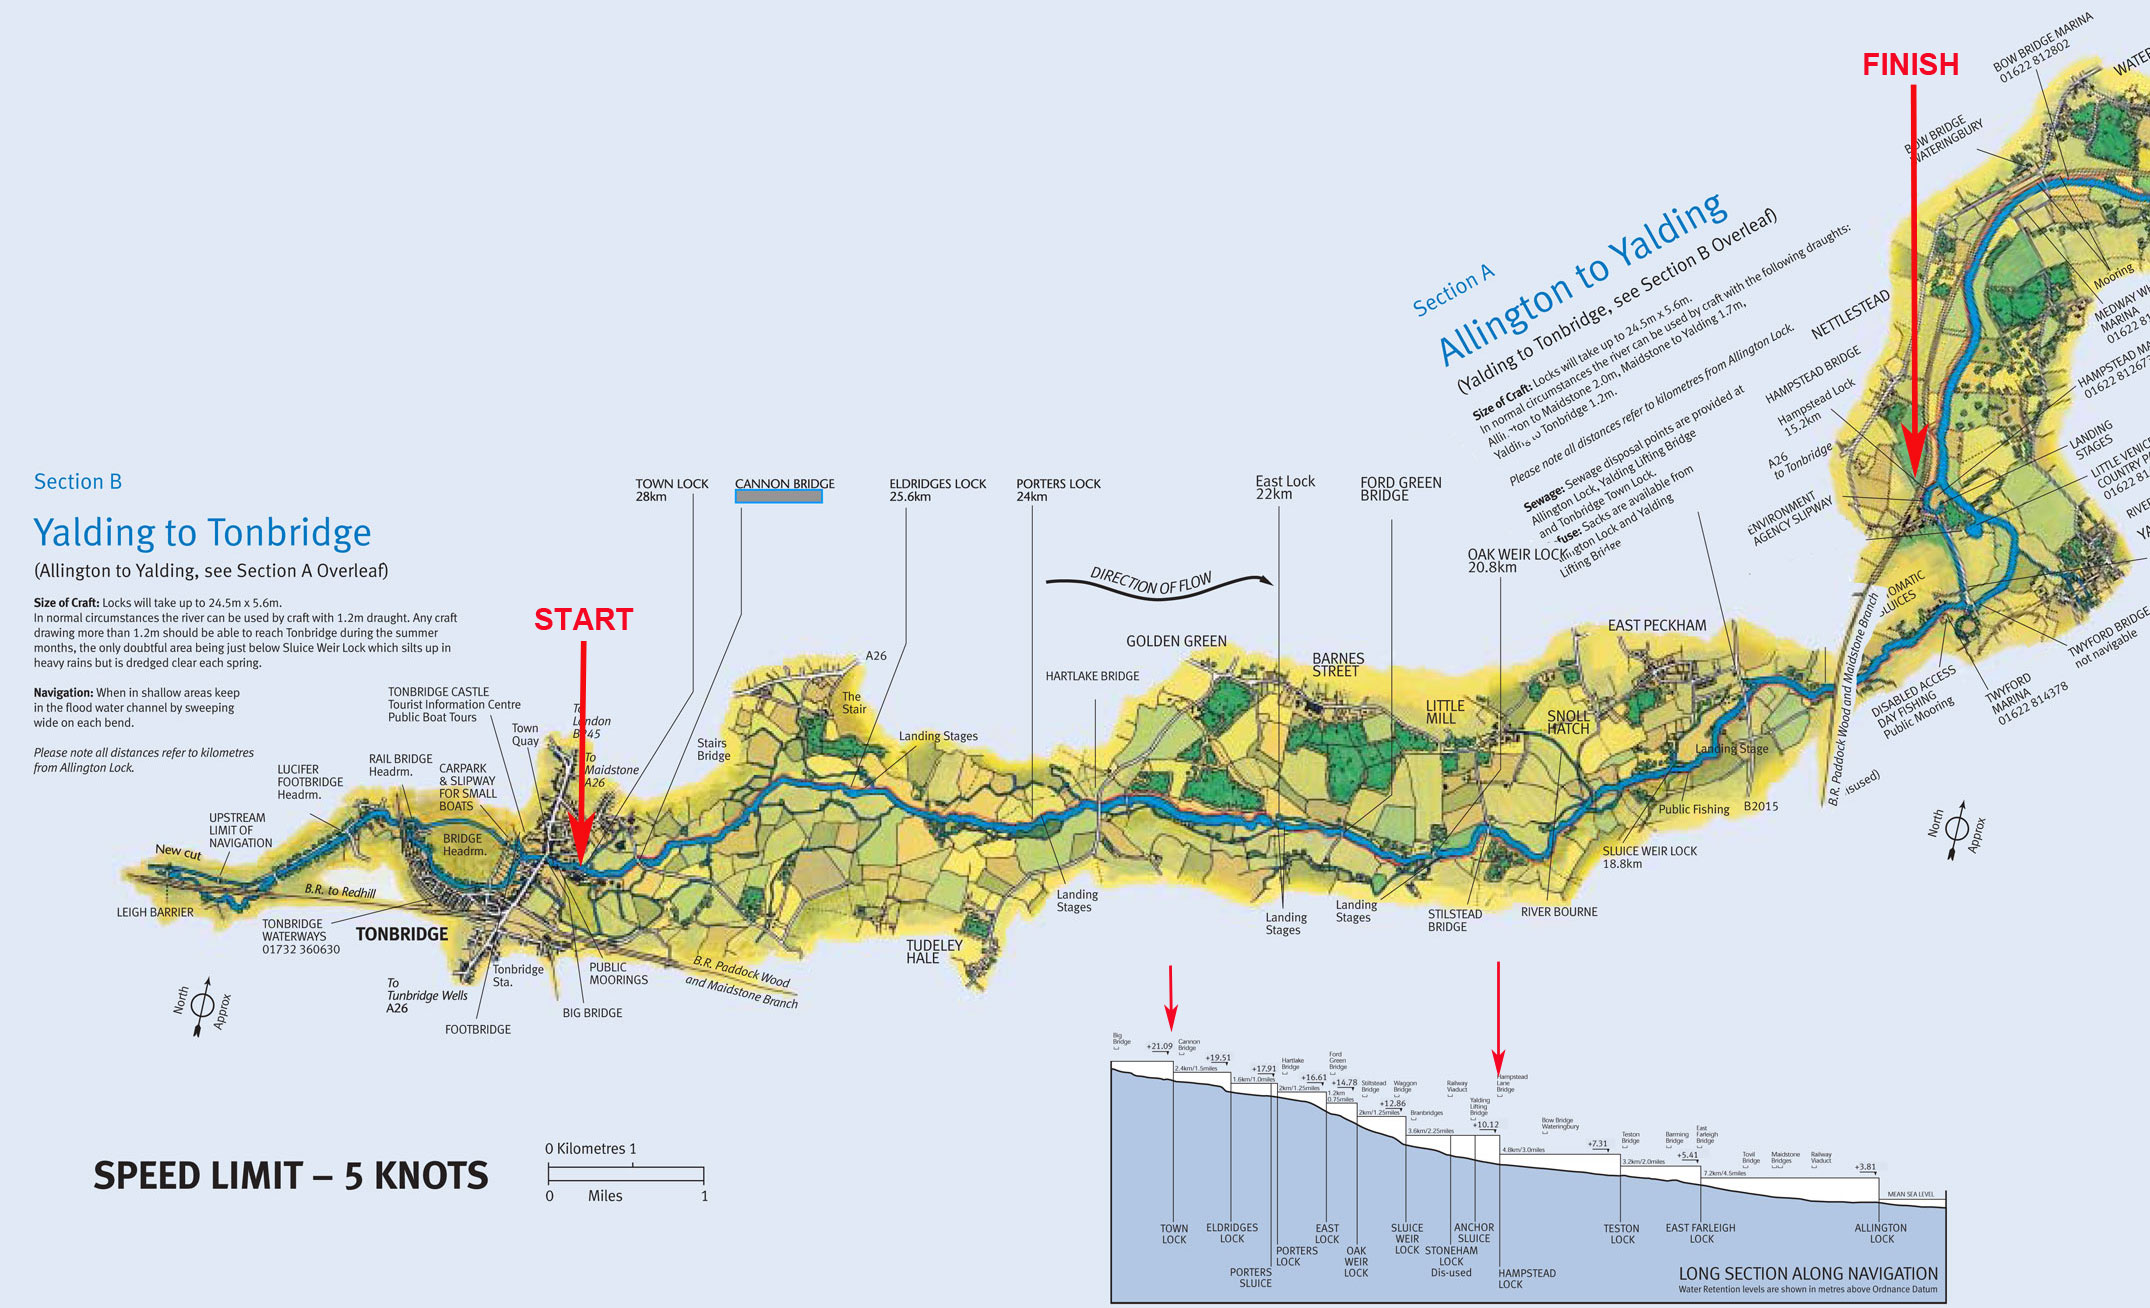
Monday was the calm after the first big storm of autumn, a sunny day to packraft 8 miles along the Medway from Tonbridge to Yalding station. With recent heavy rains, I was expecting a noticeable current on the usually placid Medway whose flow is constrained by numerous locks.
I’ve been caught out on this river before by massively dropped water levels (usually during winter maintenance), so I remembered to check the river status on the website. Oddly it claimed all was normal, but the Medway was clearly up to the grass and I wondered if the five canoe chutes downstream may be closed. Oh well, each lock or weir has a handy low-level jetty so a little portaging will be some extra exercise. It wasn’t till I got back home that I saw they’d issued the warning you see above left.
The noise of the thundering weir at Tonbridge Town Lock put me on edge, and as I set off across the carpet of white scum the over-loaded weir had generated, I was mindful of the latest in a series of revelations about how much raw sewage gets dumped directly into English rivers and coasts by water treatment plants (it’s said fines are cheaper than treatment). A week ago it’s said public outrage had forced the government to reverse a vote against regulating raw sewage dumping. In fact, it seems intensive livestock production is a greater threat to healthy, biodiverse rivers. A few months ago activist George Monbiot exposed how the Wye (which we packrafted last spring) was choking to death from the effluent produced by cattle, pig and chicken installations in its catchment area. The brown, flood-charged brown waters swirling around me now took on a different meaning.
The Medway was moving like a proper unfettered river at a pace I’d not seen before. Small eddies, boils and whorls spun up to the surface at each bend or constriction, and occasionally the boat got pushed or pulled about.
Eldridge Lock, weir and chute
Eldridge chute at normal levels
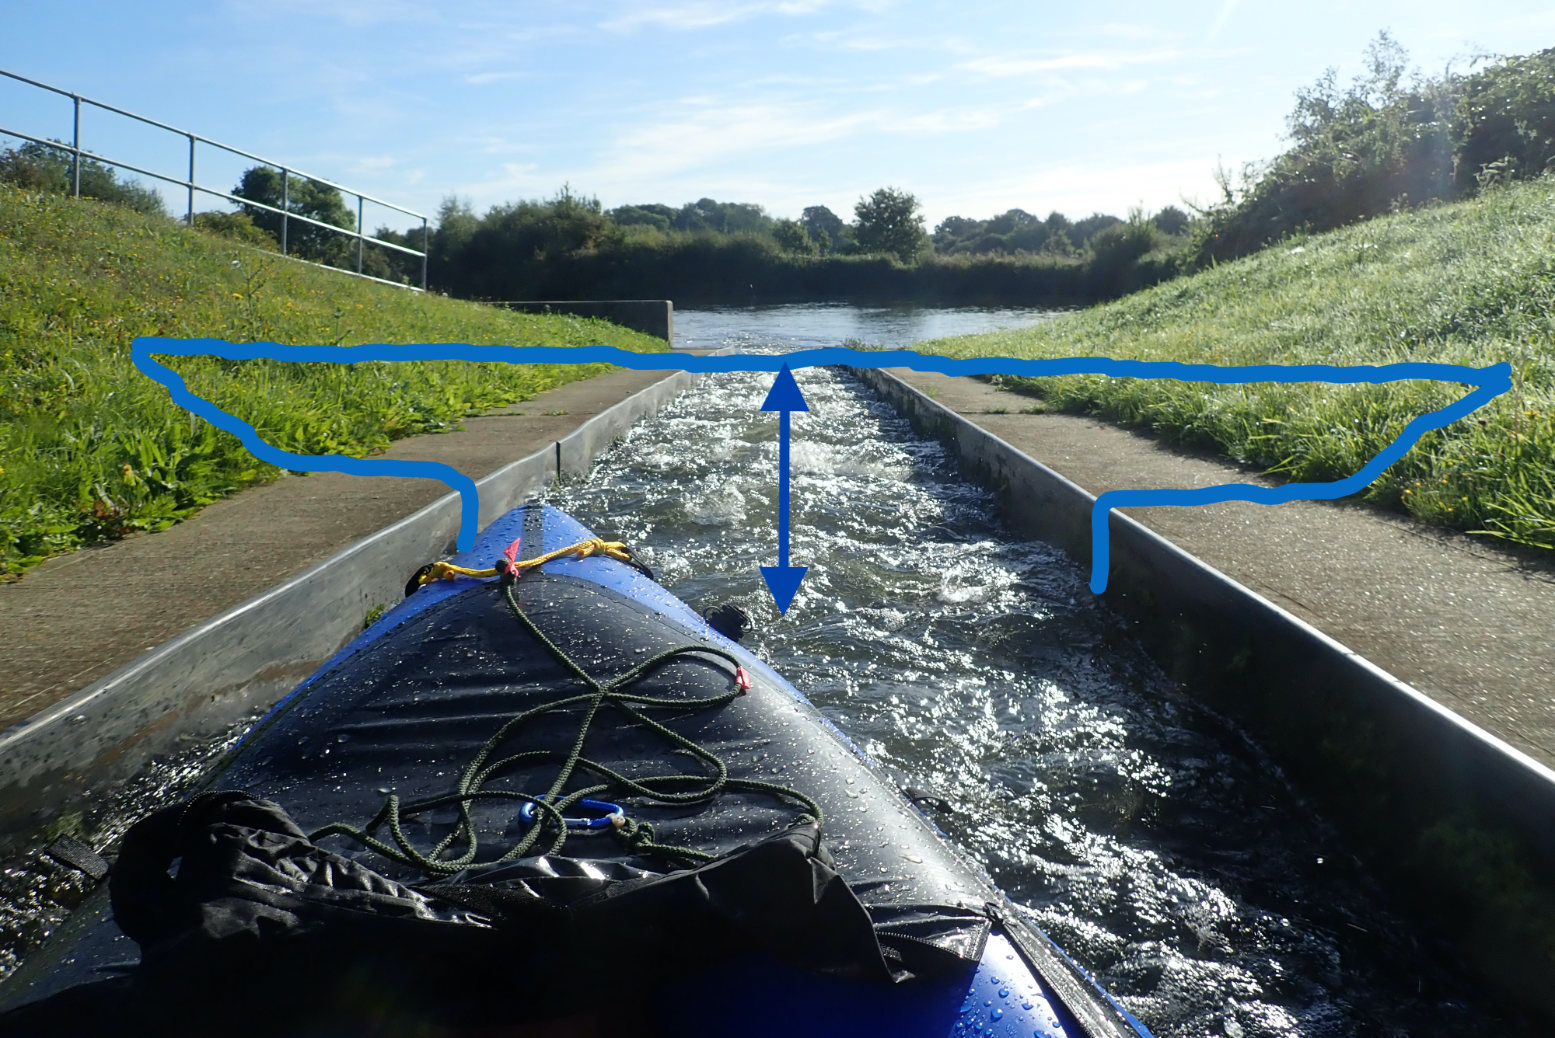
On arriving at Eldridge Lock, the very shallow-gradient chute had burst its banks, so to speak, and was twice as wide as normal, with the metal edges of the channel hidden in the brown murk. A little taken aback, I was too focussed on keeping the packraft in line to take a photo. Once down, the powerful eddies belting out of the churning weir right alongside the chute took a bit of digging to get across, before carrying on downstream through the frothed-up scum. As a longer boat could have got crossed up and flipped over in the unconstrained chute, you’d think think they’d have closed it.
Porters Lock chute. Straightforward but often closed (as today) for no obvious reason
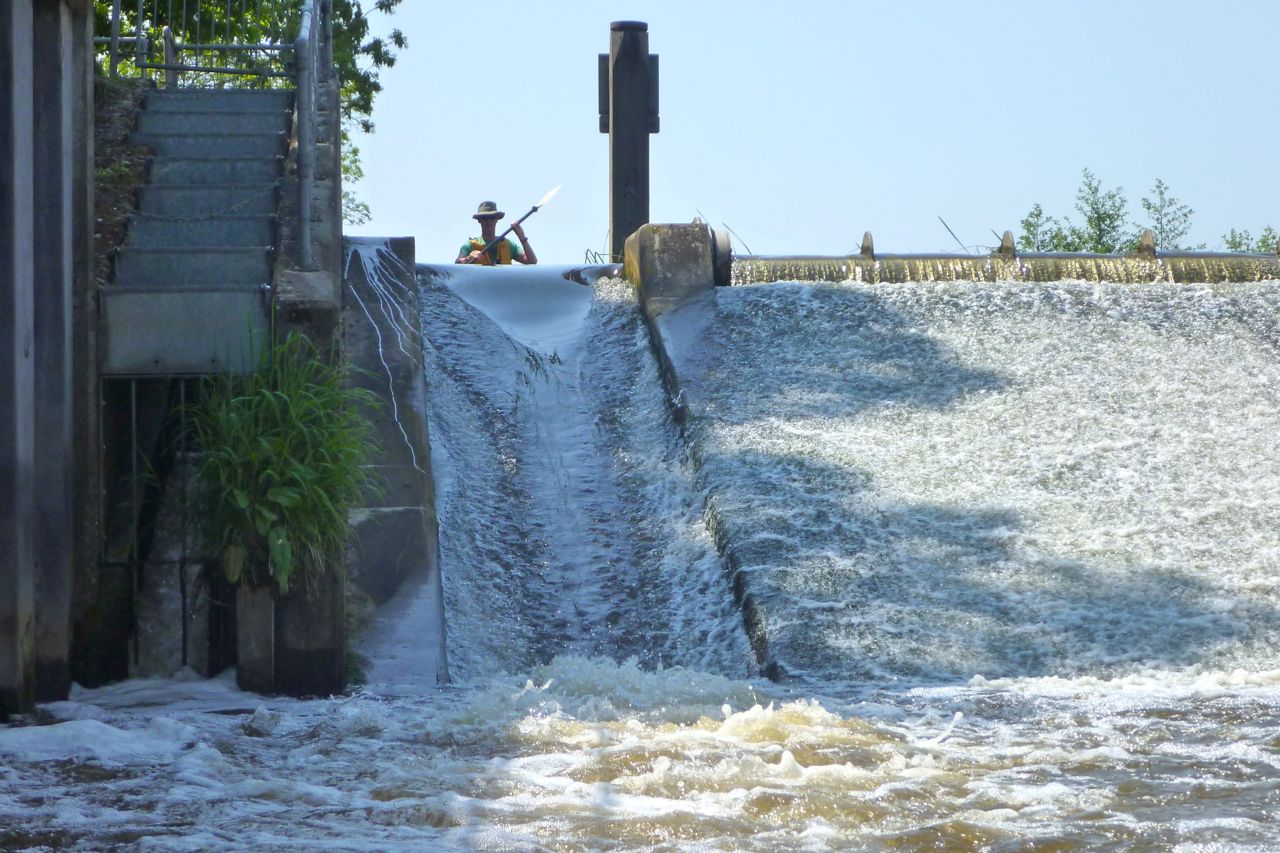
Downriver, the gate was closed on the Porters Lock chute, which appeared the same as normal and perfectly straightforward. With the base of the chute separated from the adjacent weir’s turbulence, I slipped under the bar, as I’ve done before, and shot the chute with ease.
Oak Weir chute. Same as normal but closed.
The next two chutes at the similar East- and Oak Weir Locks were also unflooded if flowing briskly within their sides. But the gates were too low to slip under, so I rolled out of the boat and carried it down to the jetty.
Jetty below Oak Weir Lock
Sluice chute running a bit harder on another day
With the strong current and a helpful back breeze, I got to the final chute at Sluice Weir in what felt like no time. Branches and other debris obscured the entry point which, even at the best of times, is difficult to nose up to to check the chute was clear without getting sucked in.
Because you never know what may be jammed half way down the chute until you tip over the edge, I decided to cross over to the jetty on the other bank and have a look before hurtling down.
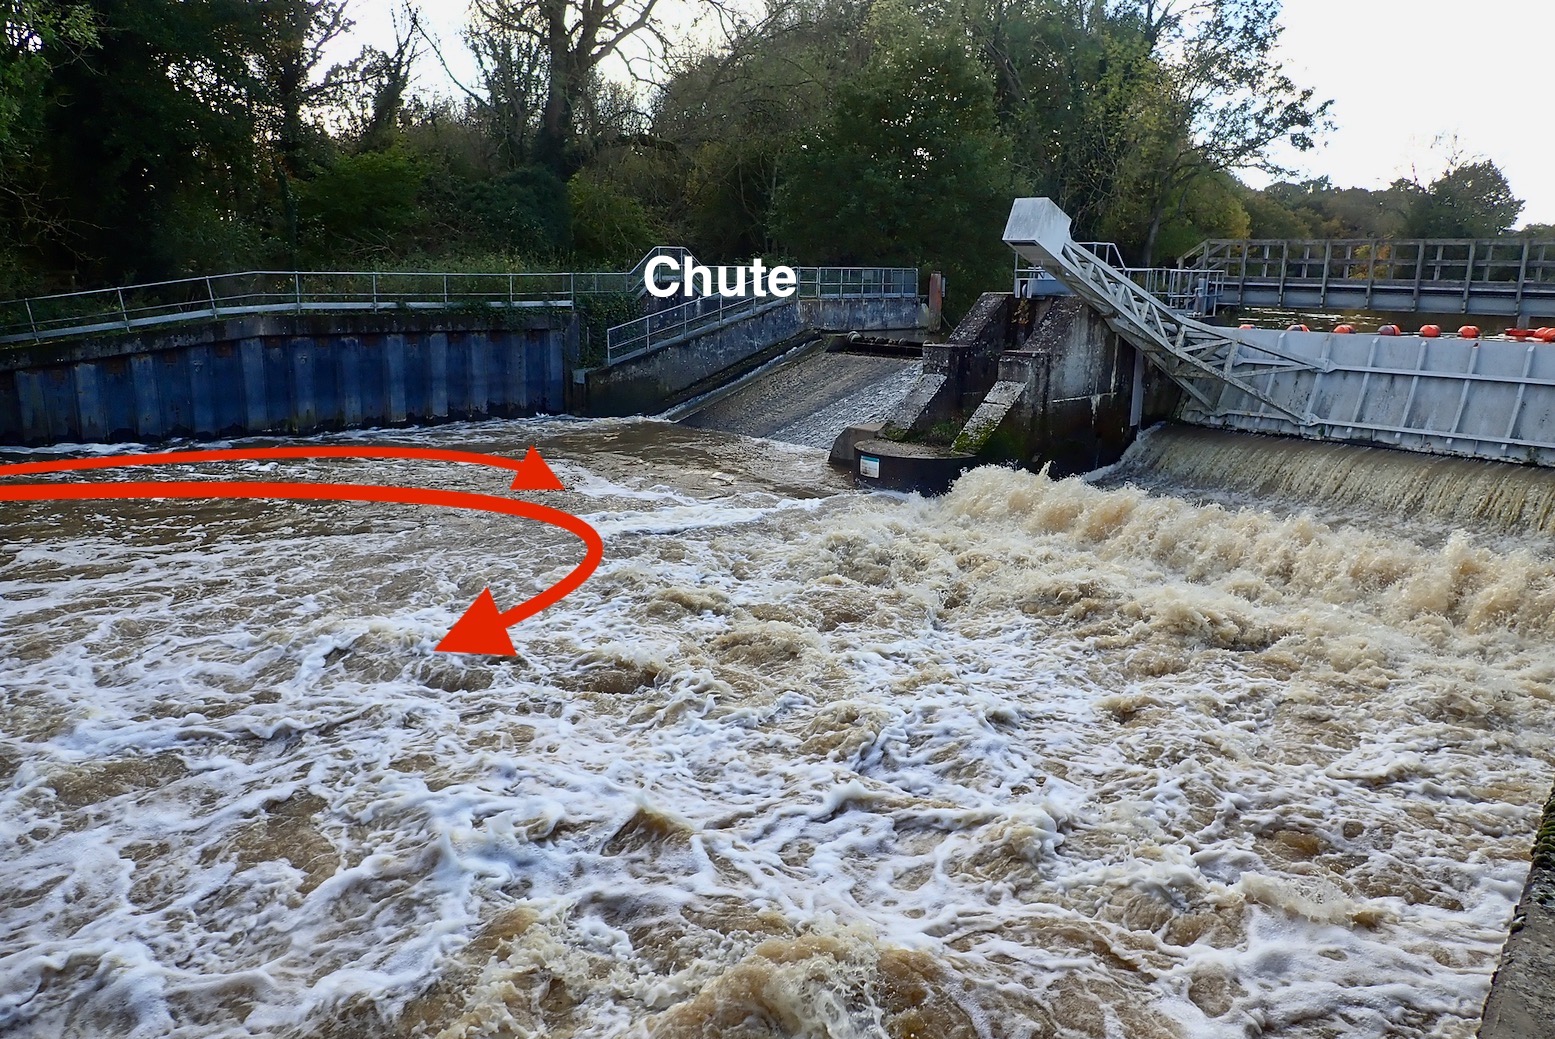
Just as well as, although the chute was clear and running shallow within it sides, the thundering weir alongside span a back eddy clockwise right into the placid drop zone. The packraft would have almost certainly skimmed over to the flow, but as I was right by the put-back-in jetty, the ‘dare’ didn’t seem worth the risk. Messing about near weirs can end badly. Maybe it was a matter of timing on the day, but it seemed ironic that two potentially dodgy chutes were open, while the three straightforward ones were closed.
All that remained was the last mile or two to Yalding Weir and on down the short, deadwater canal to Hampton Lock for a wipe, roll up and the 14:40 back to London.
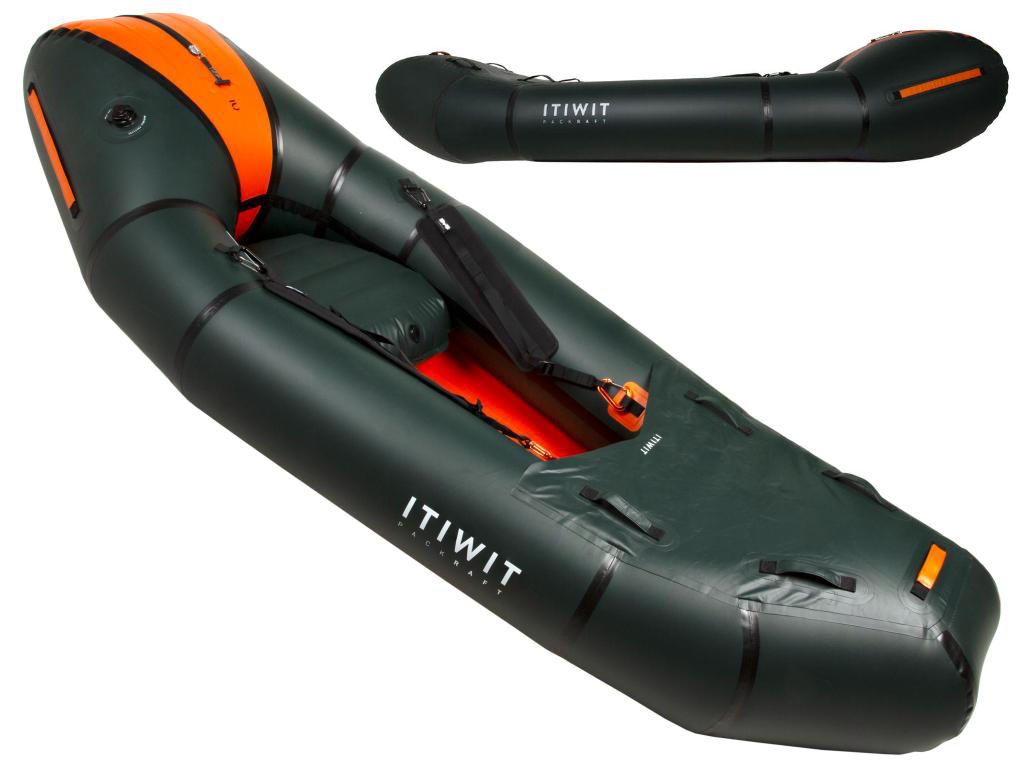
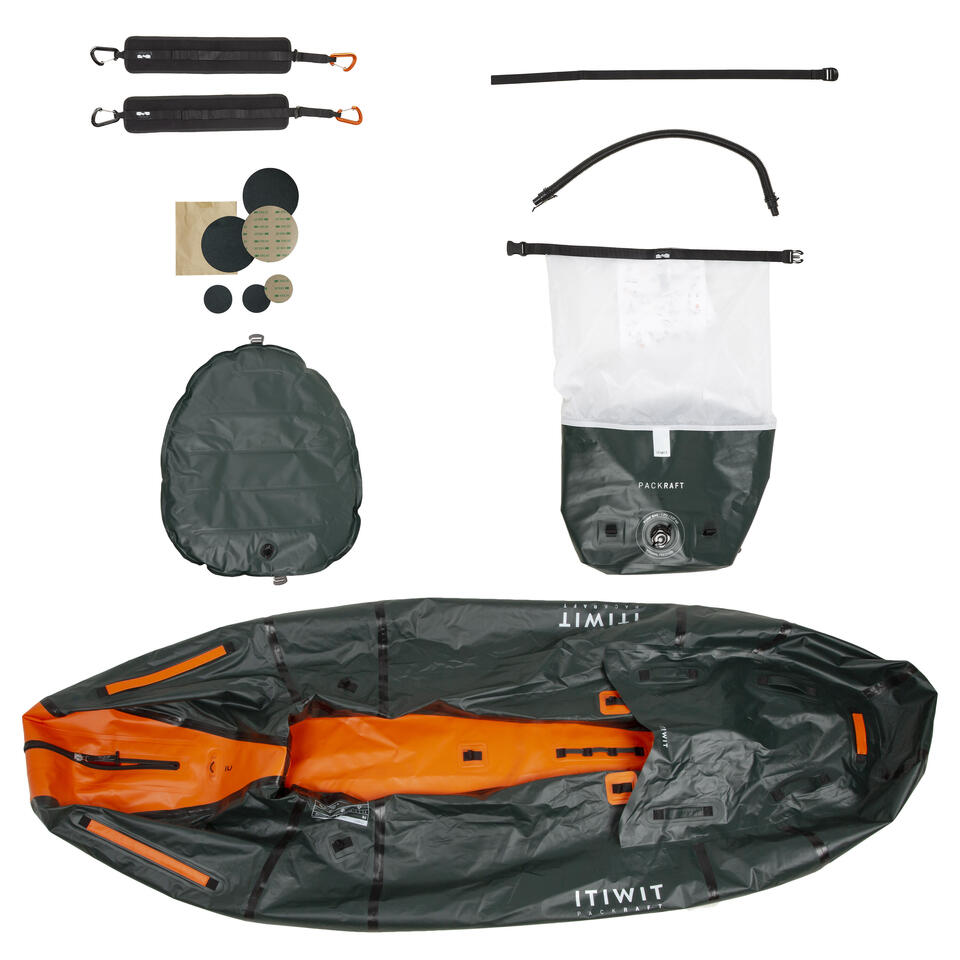
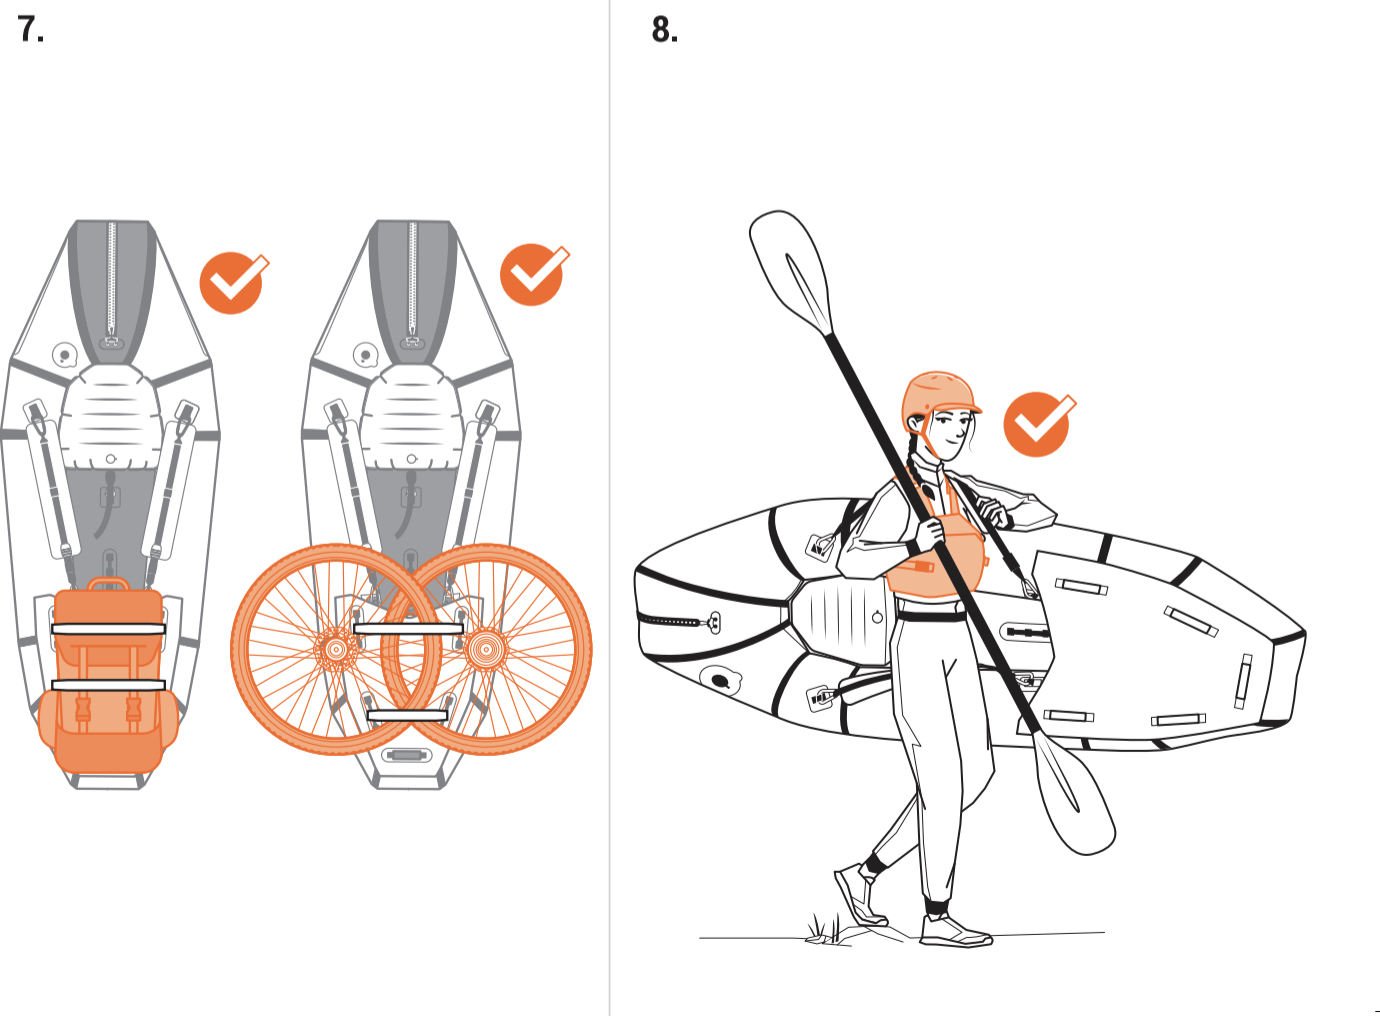
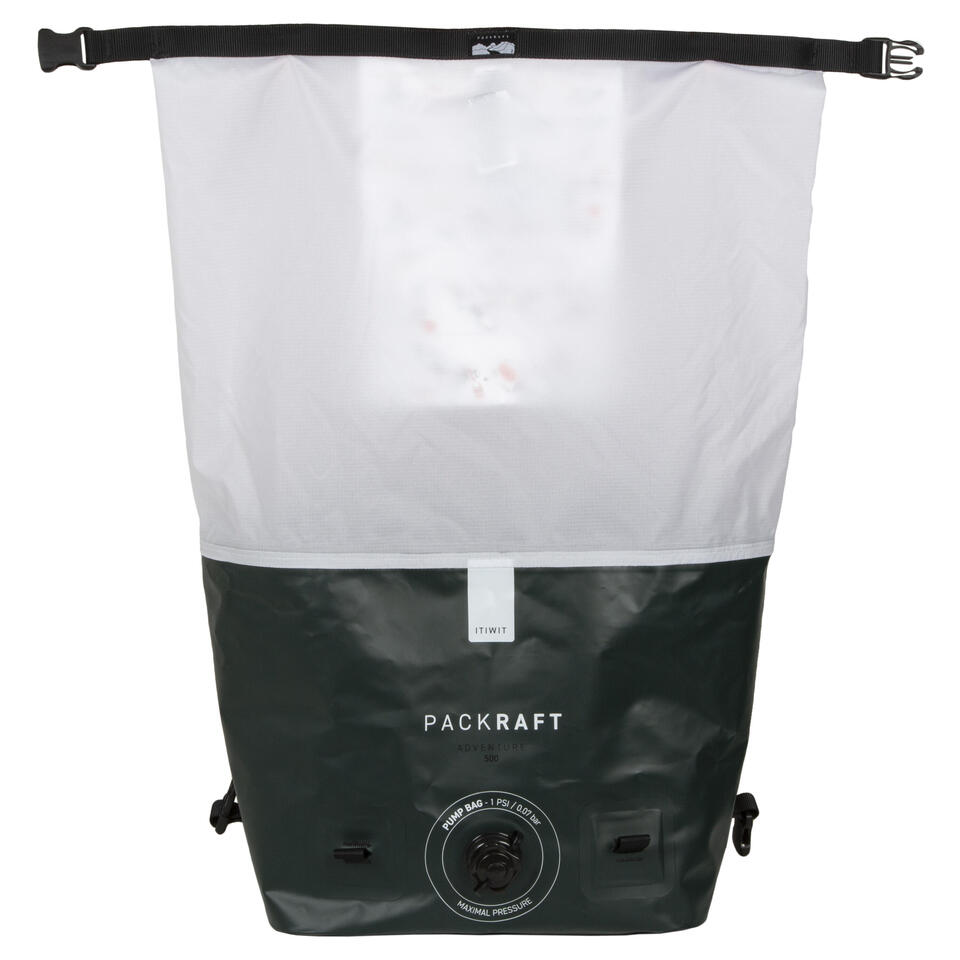
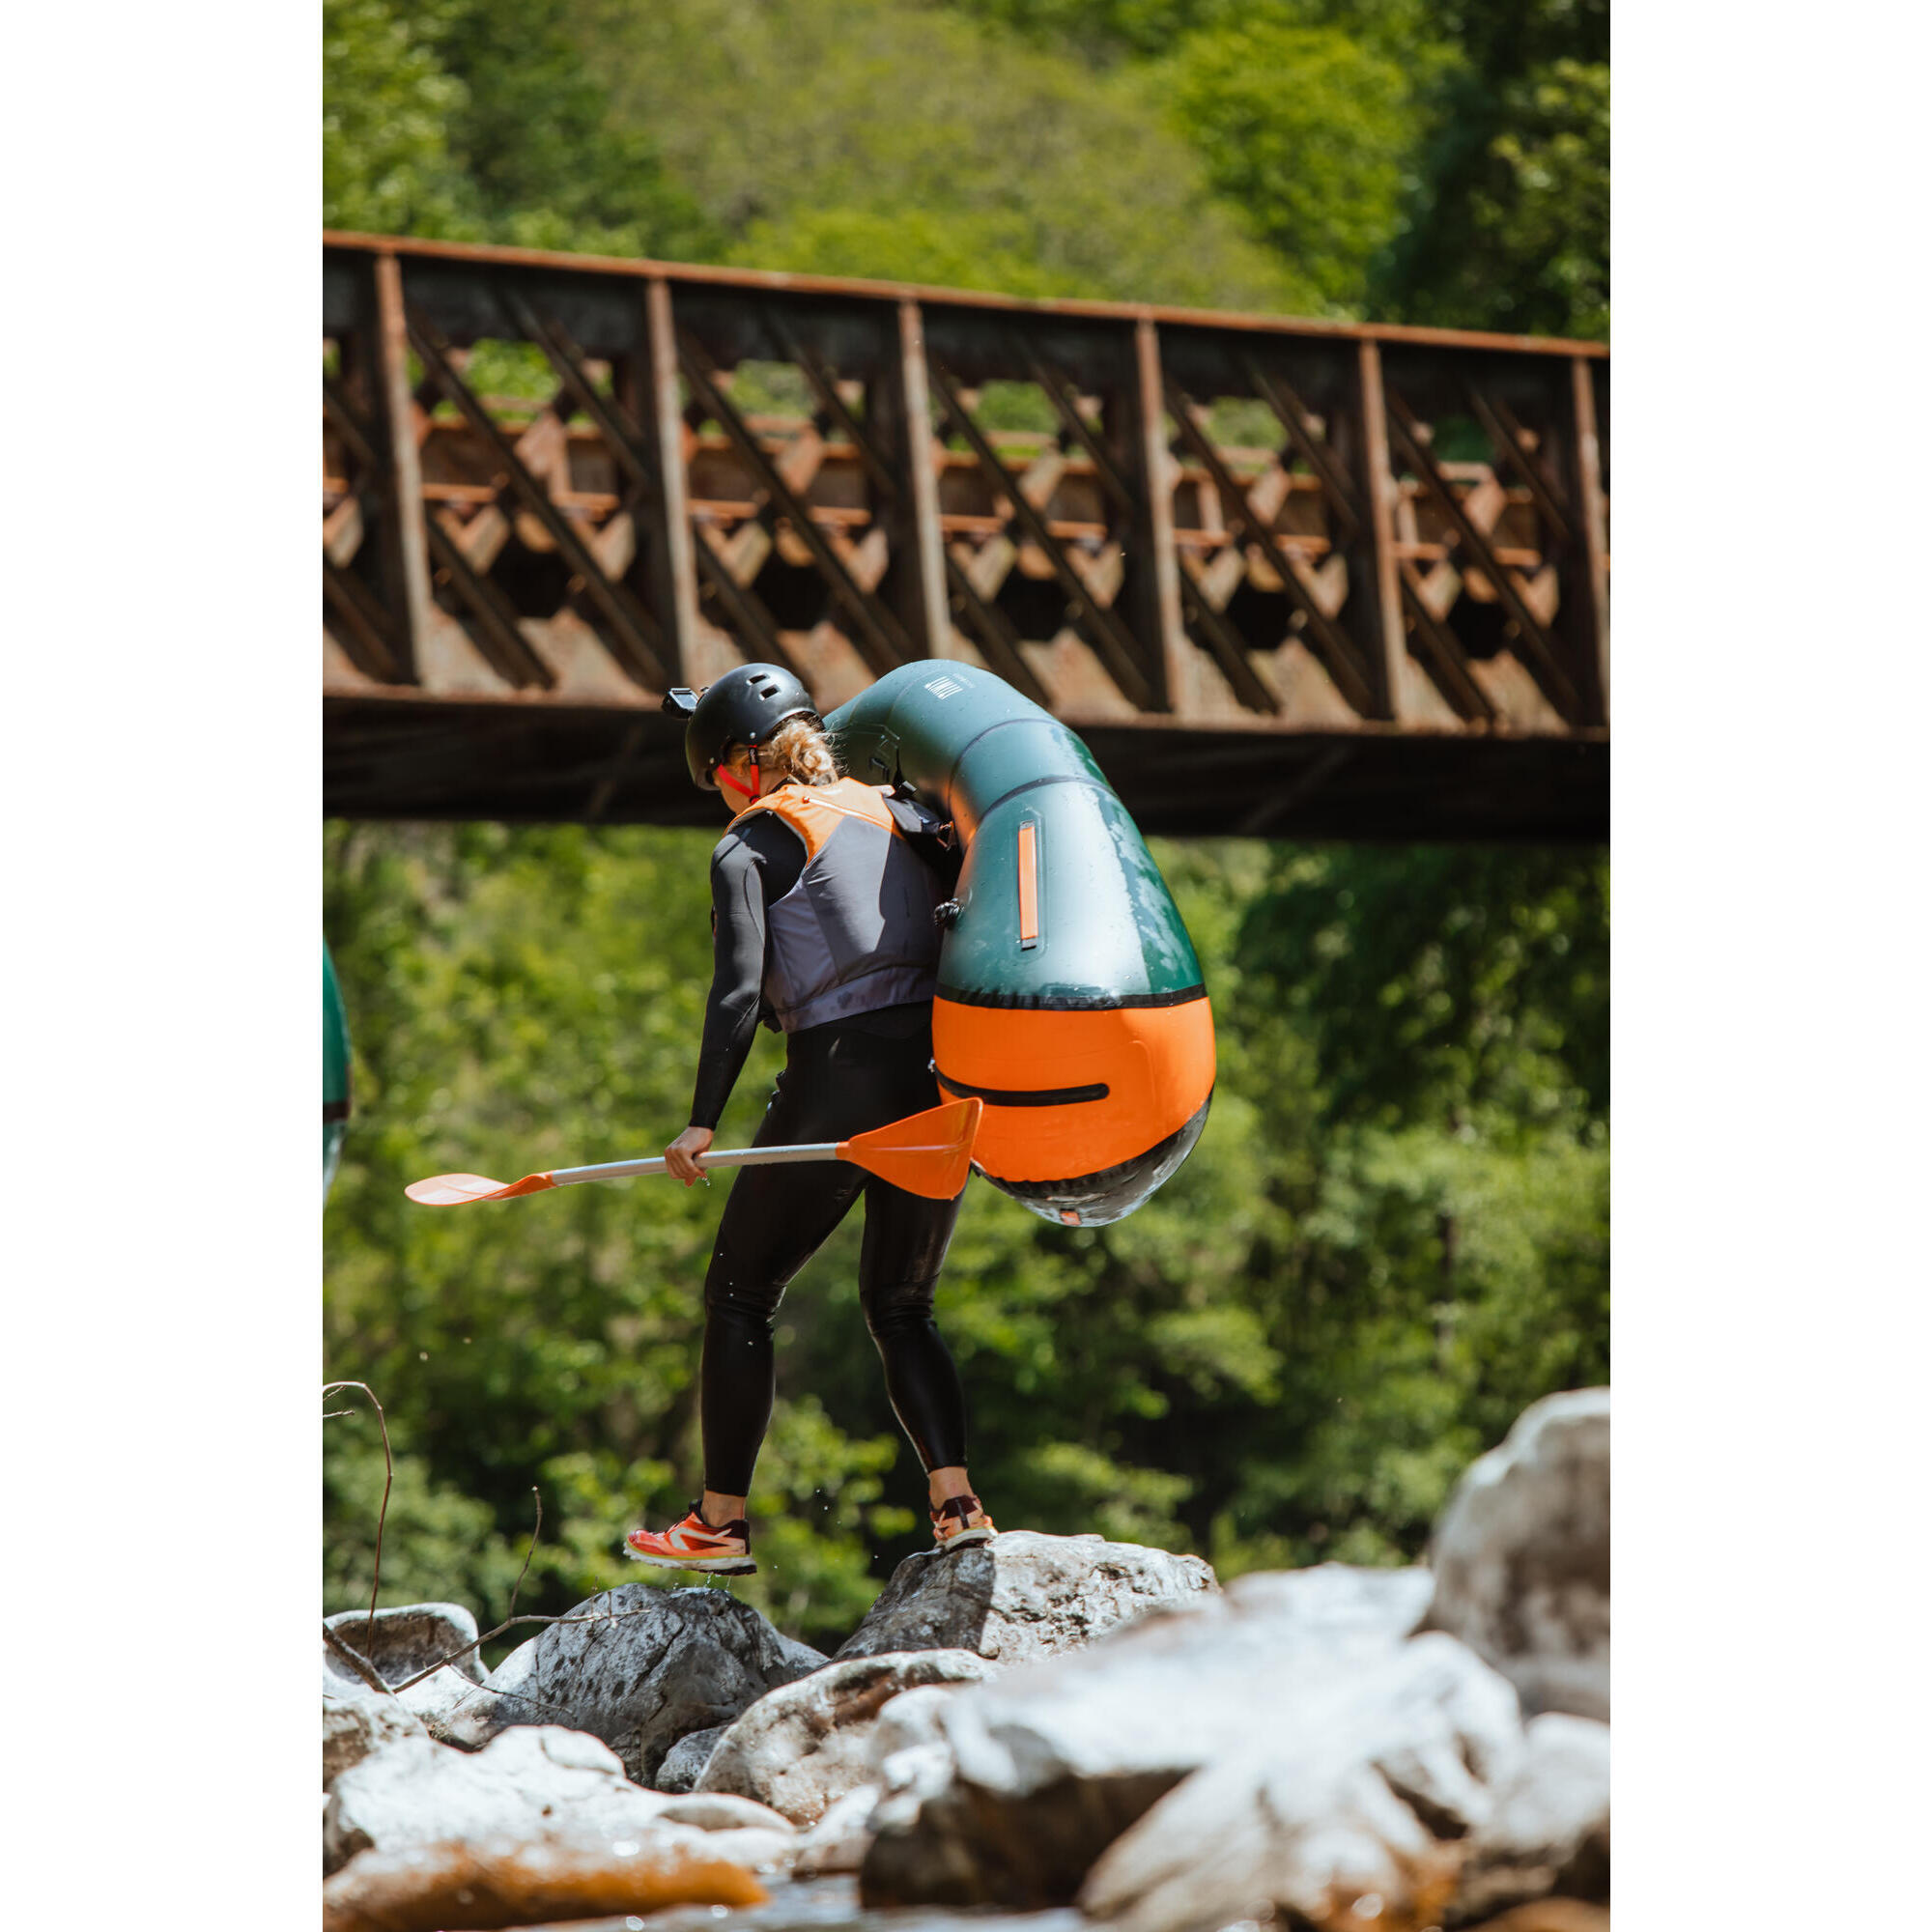
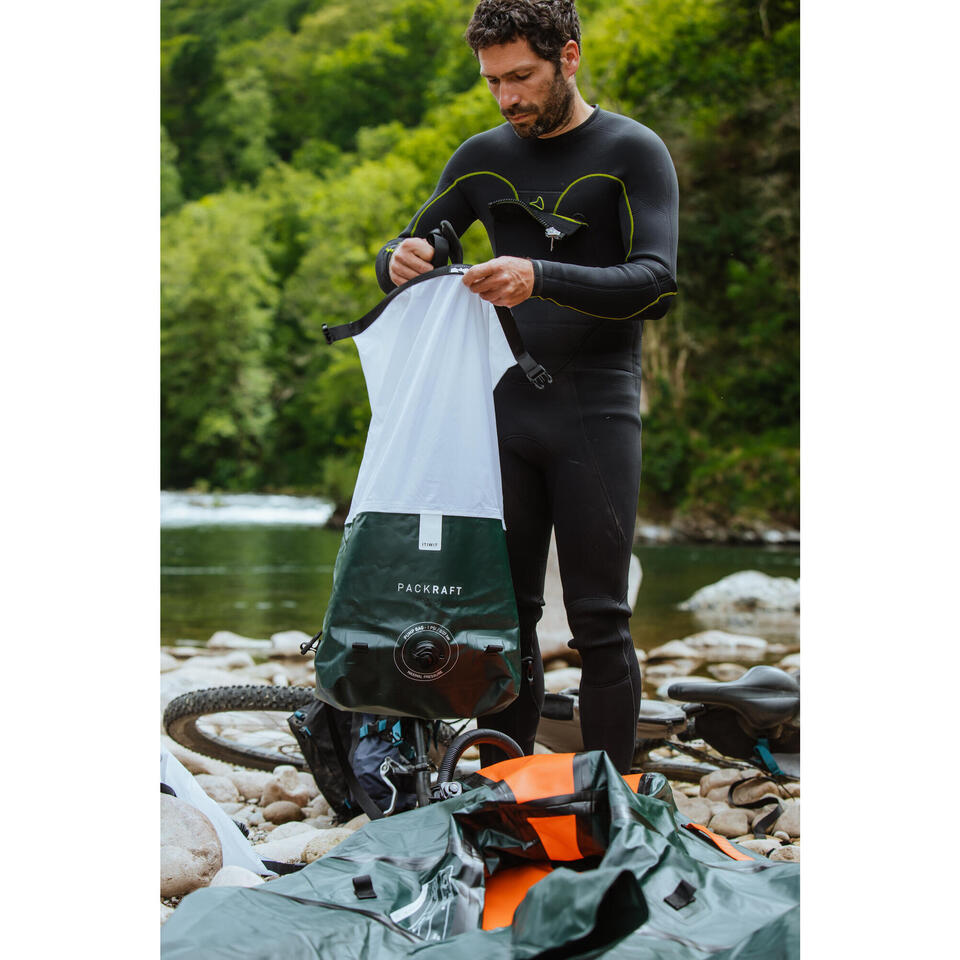
After doing so well with their budget IKs, Itiwit, Decathlon’s paddle sports brand, have entered the packraft market with the TPU Itiwit Adventure 500 Packraft. Complete with a 50-cm TiZip for in-hull storage, thigh straps and a ‘bikerafting’ deck, you pay 500€, were it available. The boat was launched online in August 2021, then withdrawn, some claimed due to safety issues (see below). It was online again in the UK when I wrote this in September. Note UK Decathlon only sell the 100, although the 500 appears online in European stores. Rated at WW2, above left it looks mostly black but is actually ‘Dusty green / Blood orange’, as the action shots below clearly show. There’s an online manual here.
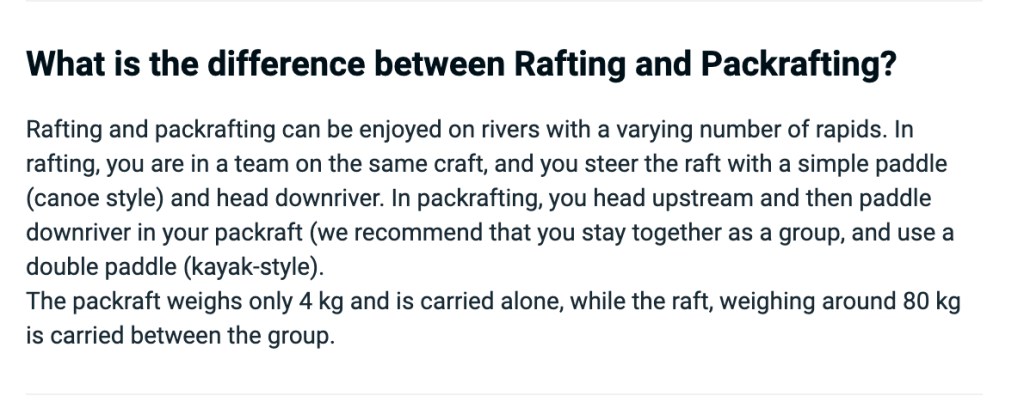
As with hardshells (especially sea kayakers) vs inflatables), there can be a certain ‘know-all’ snobbery, evident here too when a huge outfit like Decathlon – known for their keenly priced, own-brand outdoor gear – barge in on the cottage industry of packrafting. Those scoffers may like to look at Itiwit’s X500 IK; no one else has even got close to making an FDS IK like that, so it’s a mistake to assume Decathlon only bang out cheap crap for the masses. I doubt Itiwit sell many X500s, but from £260, I bet their wide-as-a-door budget IKs are the best selling budget inflatables in the UK, if not Europe. River-pootling, dog-in-the-boat recreationalists absolutely love them. Packrafts being pretty similar, the ‘Adventure 500’ will be popular too (as often, Itiwit are vague or inconsistent about model names). At Decathlon you get a lot for your money and they are also helpfully on hand to clarify the difference between rafting and packrafting.
Size is 230cm x 90cm which is near identical to my Rebel 2K and a do-it-all packrafting standard, even if the image above left above suggests it’s some 13cm longer, assuming the width is 90cm. The claimed weight comes in at a hefty 3.8kg; that’s PVC packraft territory though includes all the kit shown left. There is no mention of TPU denier, tube diameter or internal dimensions, though they’re probably standard too. One reviewer even doubts it is TPU.
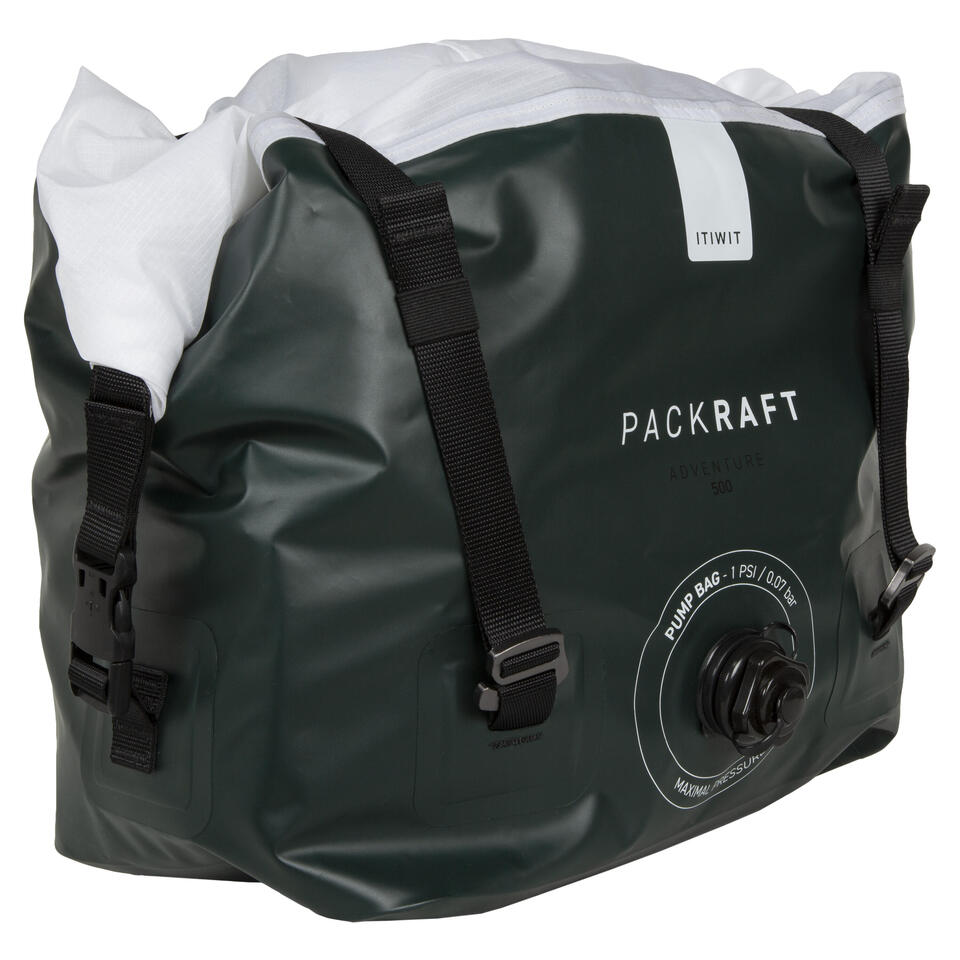
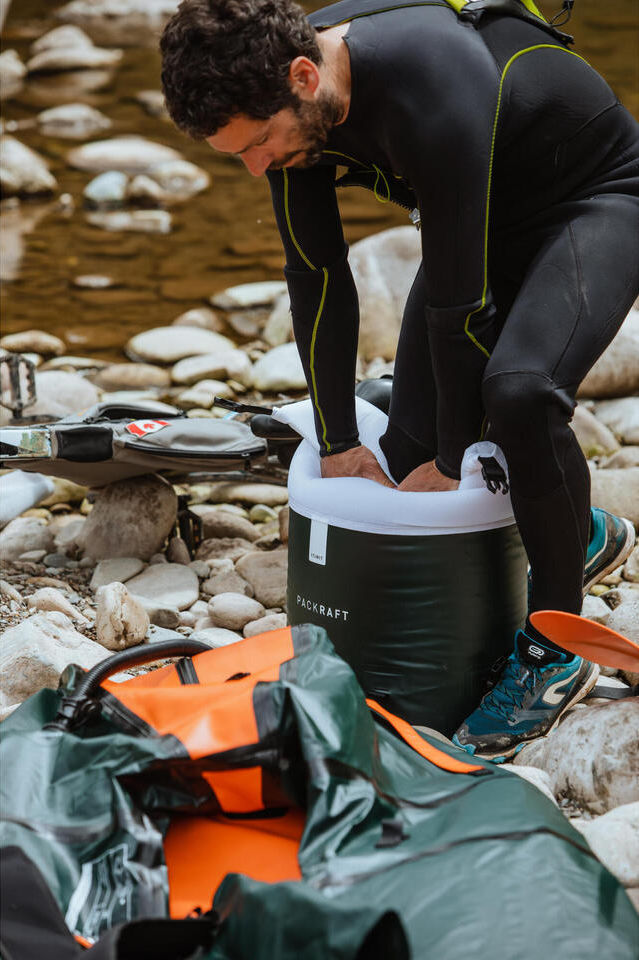
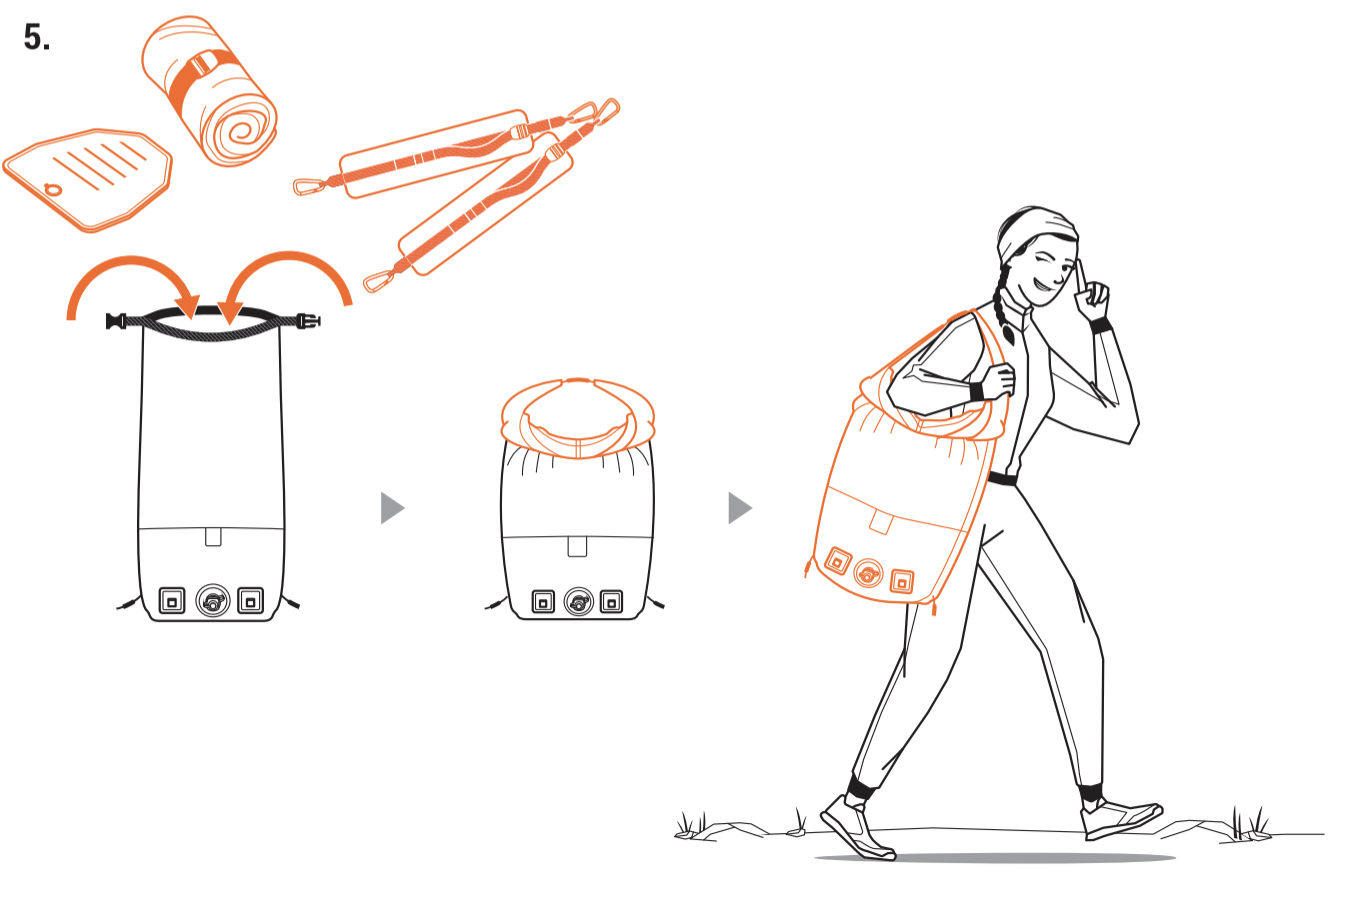
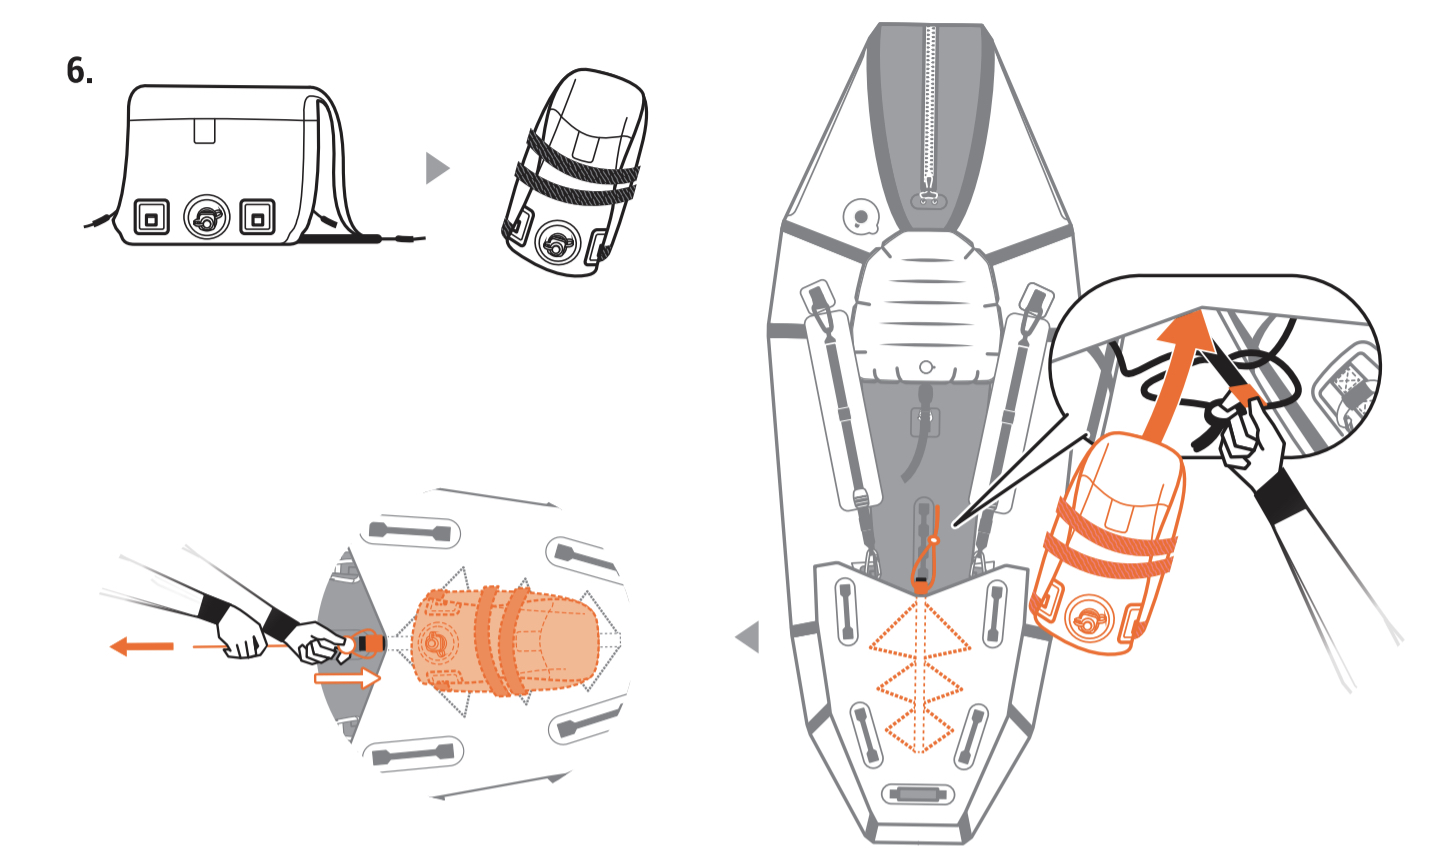
The carry bag doubles as a dry bag (like Gumotex IKs) but also works as the inflation bag via a tube. Three uses; quite clever if not weight minimalising. The packraft (and the bag?) has a regular Boston valve like Itiwit IKs, so you’d then use that tube or the boat valve to top up by mouth. Give it all you got: a firm boat responds much better on the water.
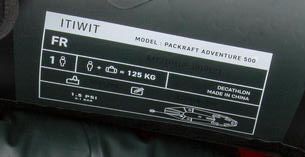
The bag and both valves state: ‘Maximal Pressure 1 psi / 0.7 bar‘ which is almost down to slackraft level, but there’s no way of telling when you reach that pressure. Like most well-made TPU packrafts, it ought to be able take a more than that and unless you’re Tarzan, you can’t over-inflate a packraft with your lungs. Left in the sun out of the water, dark green may heat up and raise internal pressures quicker than much lighter colours, though packrafts stretch better than IKs. I’ve not heard of a proper packraft blowing a seam due to overheating, unlike countless cheap PVC IKs. Meanwhile, the conformity label (below right) states a more realistic 1.5psi / 0.1 bar.
Allons-y!
The hull’s raised lashing/carry straps look fairly chunky and will be easy to grab from the water. But despite what is claimed, the ‘deck’ can’t keep out splashes over the bow; they’ll just stream right into your lap, even if it does appear to make a good platform for a bike. Good on Itiwit for recognising the appeal of bikerafting (on social media, at least). It will all help potential buyers ‘get’ packrafting.
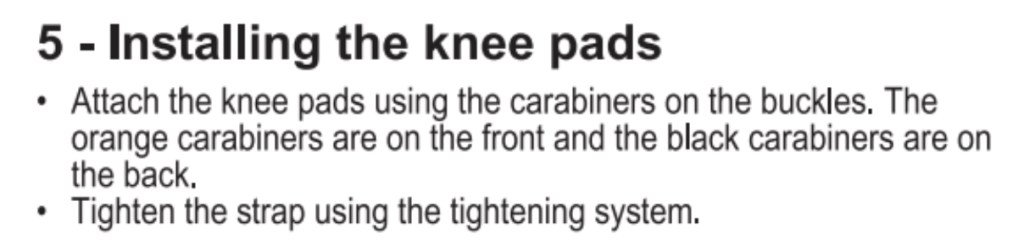
The inclusion of thigh straps (badly translated as ‘knee pads’) seems odd, given the boat’s profile and implied WW2 use. It suggests Itiwit misunderstood the product, or tried to be a bit too clever with added features. Thighstraps definitely help when using any inflatable beyond Grade 2 white water – ie: when some skill and technique must be applied alongside raw nerve. But realistically, you’d need a proper sealed deck or a self-bailer to tackle such conditions. This boat will be swamped after the first couple of rapids.
Unclear: fix straps with gates down/in?Here: gates up
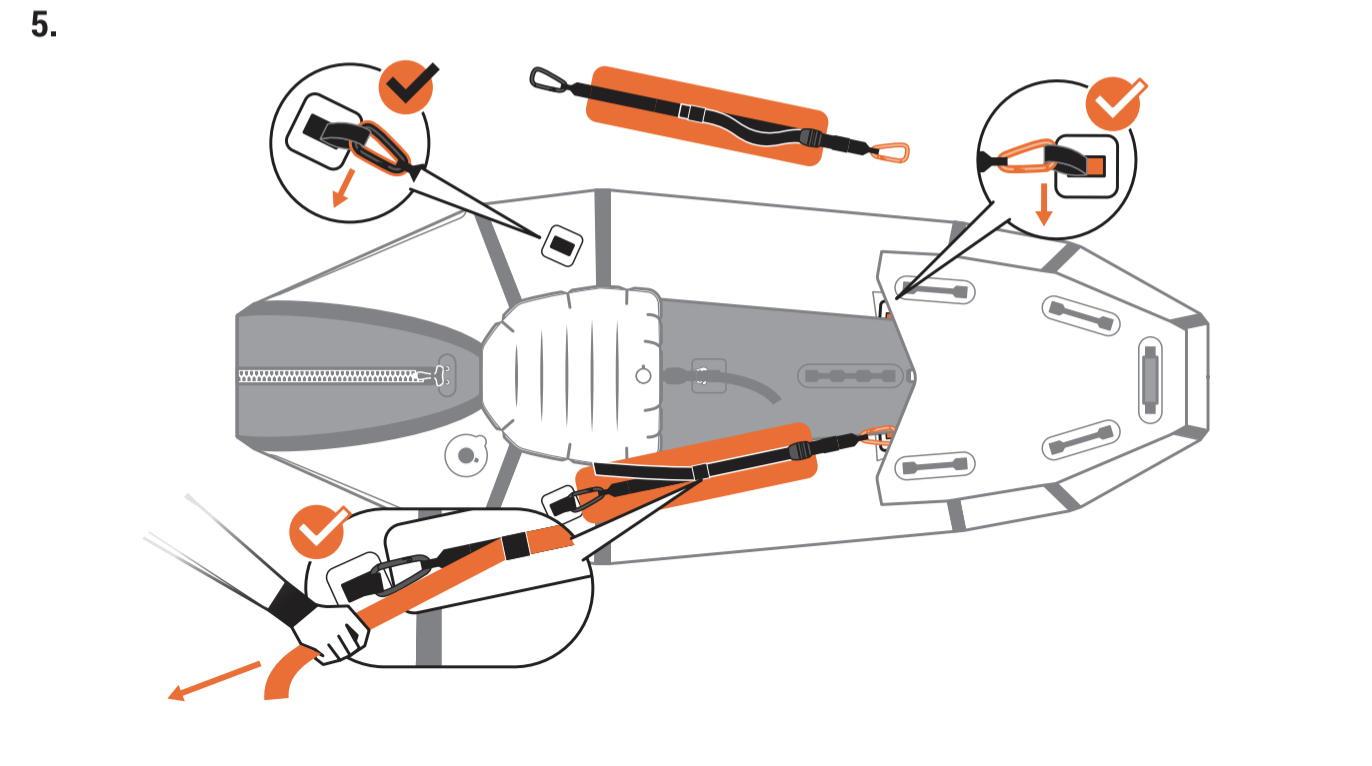
It was pointed out that the small sprung-gate snaplinks aka: karabiners (‘biners’ or ‘krabs’) used to attach the straps to the hull are an entrapment hazard. Rock climbing practice has long recommended using screw-gate (locking) krabs on the climber’s harness, even if loads of sprung-gate (open) krabs are dangling off it, attaching the gear. Below from the manual: orange krabs at the front, black by the seat. Rationale unknown, but may become so on seeing the actual boat.
Allons y
A few years ago I recall Alpacka’s founder was reluctant to introduce any type of thigh strap (however attached) to her growing range of white-water packrafts. Iirc, Alpacka even experimented (unsuccessfully) with strap-free knee blocks. A hardshell creek boat has them under the deck to help triangulate your body and transform control from the hips. For gnarly white-water, surf and not least rolling, straps are pretty much essential on appropriately decked (or bailed) IKs and packrafts. Elsewhere they’re just not needed as unlike an IK (not least a boxy FDS), a packraft is a cozy fit round the hips and against the back and feet, providing bracing and connection like a well-laced running shoe. While inadvertently getting your pfd straps hooked to the Itiwit’s mini sprung-gate krab is faintly possible while getting rolled around in a Grade-4 stopper, it’s much more likely with full-size krabs. Thigh straps are the bigger entrapment hazard, as is any loose, foot-trapping rigging on a boat, on top of the many other ways of coming to grief on eaux vivant. In more sedate flatwater paddling scenarios, regular open krabs are a handy way of quickly securing stuff; my boats have several, though I find myself using corrosion-free SoftTies more and more. Go ahead and fit screw-gate/locking krabs or a chunky re-usable SoftTie; your entrapment risk will not be eliminated if you get in trouble. For normal packrafting, I’d simply remove the straps to reduce the clutter.
Though not mentioned, there’s a line of adjustment tabs on the floor, possibly footrest mounts for shorter folk? But no backrest, which are largely redundant on a packraft anyway. Under the deck is some tensionable elastic cord to stash your carry bag up out of the way once on the water. Nice touch, or another entrapment hazard? Lord oh lord, what a minefield!
There’s also what looks like a whole lot of buoyancy at either end, though they rate it at 125kg; boater with gear. Then again – unlike with IKs – when’s the last time anyone ever rated a packraft’s buoyancy? It’s such a vague metric and as it is, I’m not sure I’ve ever come close to 125 kilos; camping with a bike may push it to that limit. More impressions when/if one turns up at my local Decathlon store.
Some possible land & sea routes around Knoydart. All land routes are trails or tracks, fwiw
Looming over the Sound of Sleat opposite the Isle of Skye, Knoydart is a famously rugged peninsula that’s inaccessible by road; part of the so-called Rough Bounds. Rising north of Loch Nevis, the mountains top out at the 1020-metre (3346′) summit of Ladhar Bheinn (‘Larven’), before dropping back down to LochHourn. On an OS map, contour lines here are as dense as spaghetti and to the south, Loch Morar is Europe’s deepest body of freshwater. Sounds like packrafting country!
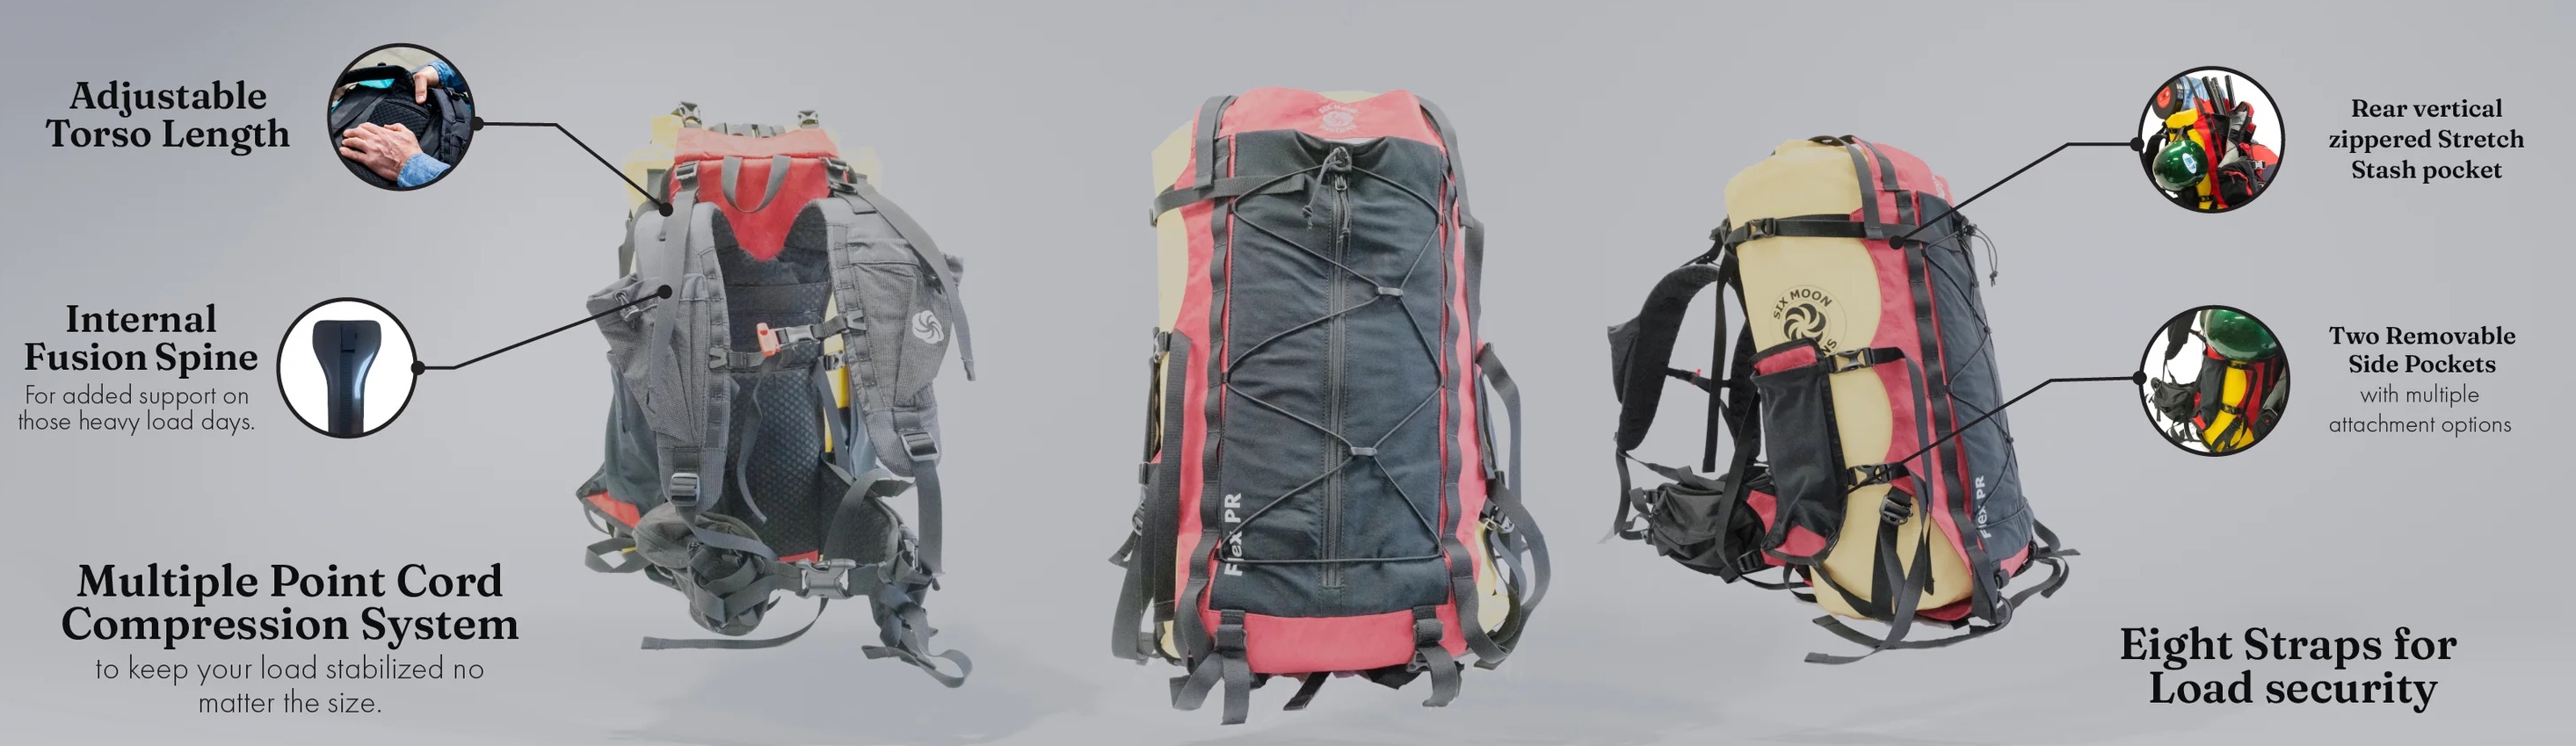
It took just a morning to stitch together a challenging three-loch loop via Loch Quioch, but once I got there the initial 20-km stage down the channel of Loch Hourn looked a bit daunting alone in the untried packraft sailing outfit and required a 4am start at Low Water if I was to do the loch in one tide. By the time I tried something else, I was pushed back by wind and tide, so I settled for a good look around, tested the sail on the Rebel 2K, the Six Moon Designs Flex PR pack harness and a new tent before returning a fortnight later with Barry with whom I’d paddled the River Wye last April.
Driving up to Mallaig freed us from train timetables, which left the weather and 18-kilo packs as our main constraints. Unfortunately, the forecast dropped an F5 headwind on the Friday we planned to paddle out of Loch Nevis back towards Morar or Mallaig. Along with agreeable tide timings, I realised this was a limitation of circularpackrafting routes on the Scottish west coast: chances are you’ll hit a prevailing southwesterly which may slow your packraft to a crawl (as I’d found). Depending on where you are, that can mean turning back or a tough walk out. Maybe both.
Red and blue: this trip. Green: earlier visits. two 1000m+ summit excursions also shown
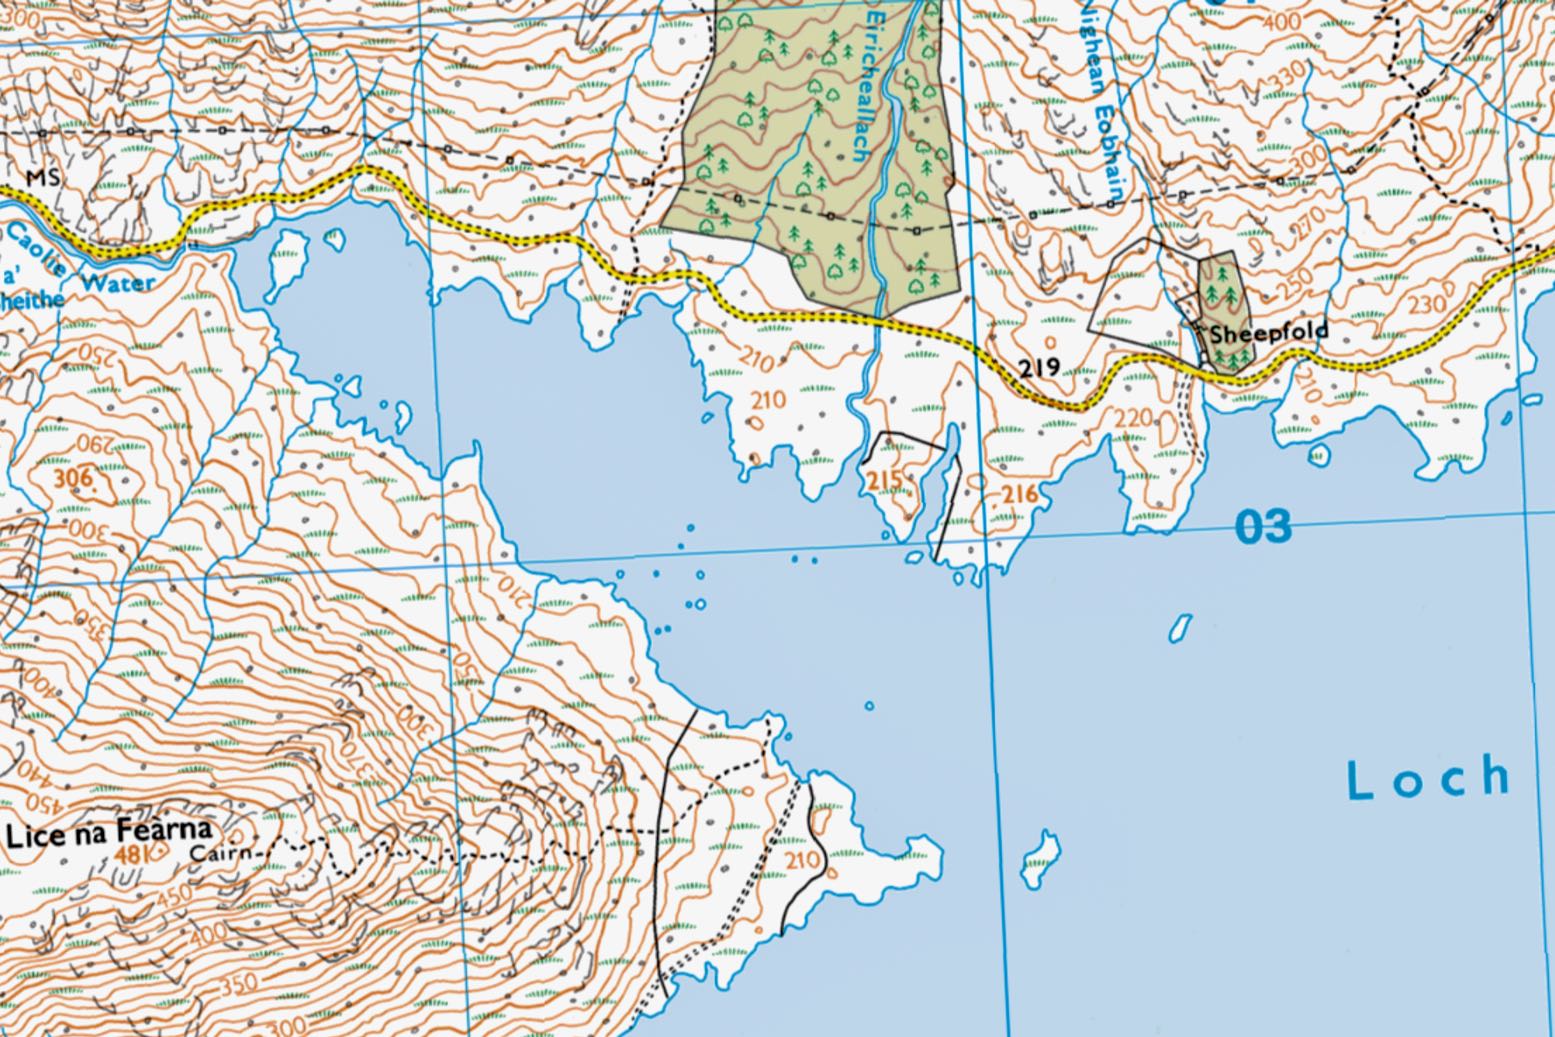
So Barry and I flipped the plan: hike 16km from Inverie (the only village on Knoydart) over to Barisdale, paddle inner Loch Hourn (7km), walk up to Loch Quoich (8km), cross it and then head 6km to a bothy in desolate Glen Kingie. From here, on Windy Friday we’d walk 6km over another pass to the 20-km long Loch Arkaig and try and sail the F5 west, maybe getting as far as Fort William via the River Lochy, though gusts out here were tagged at 40mph. At Fort William we’d catch the train back to the car in Mallaig.
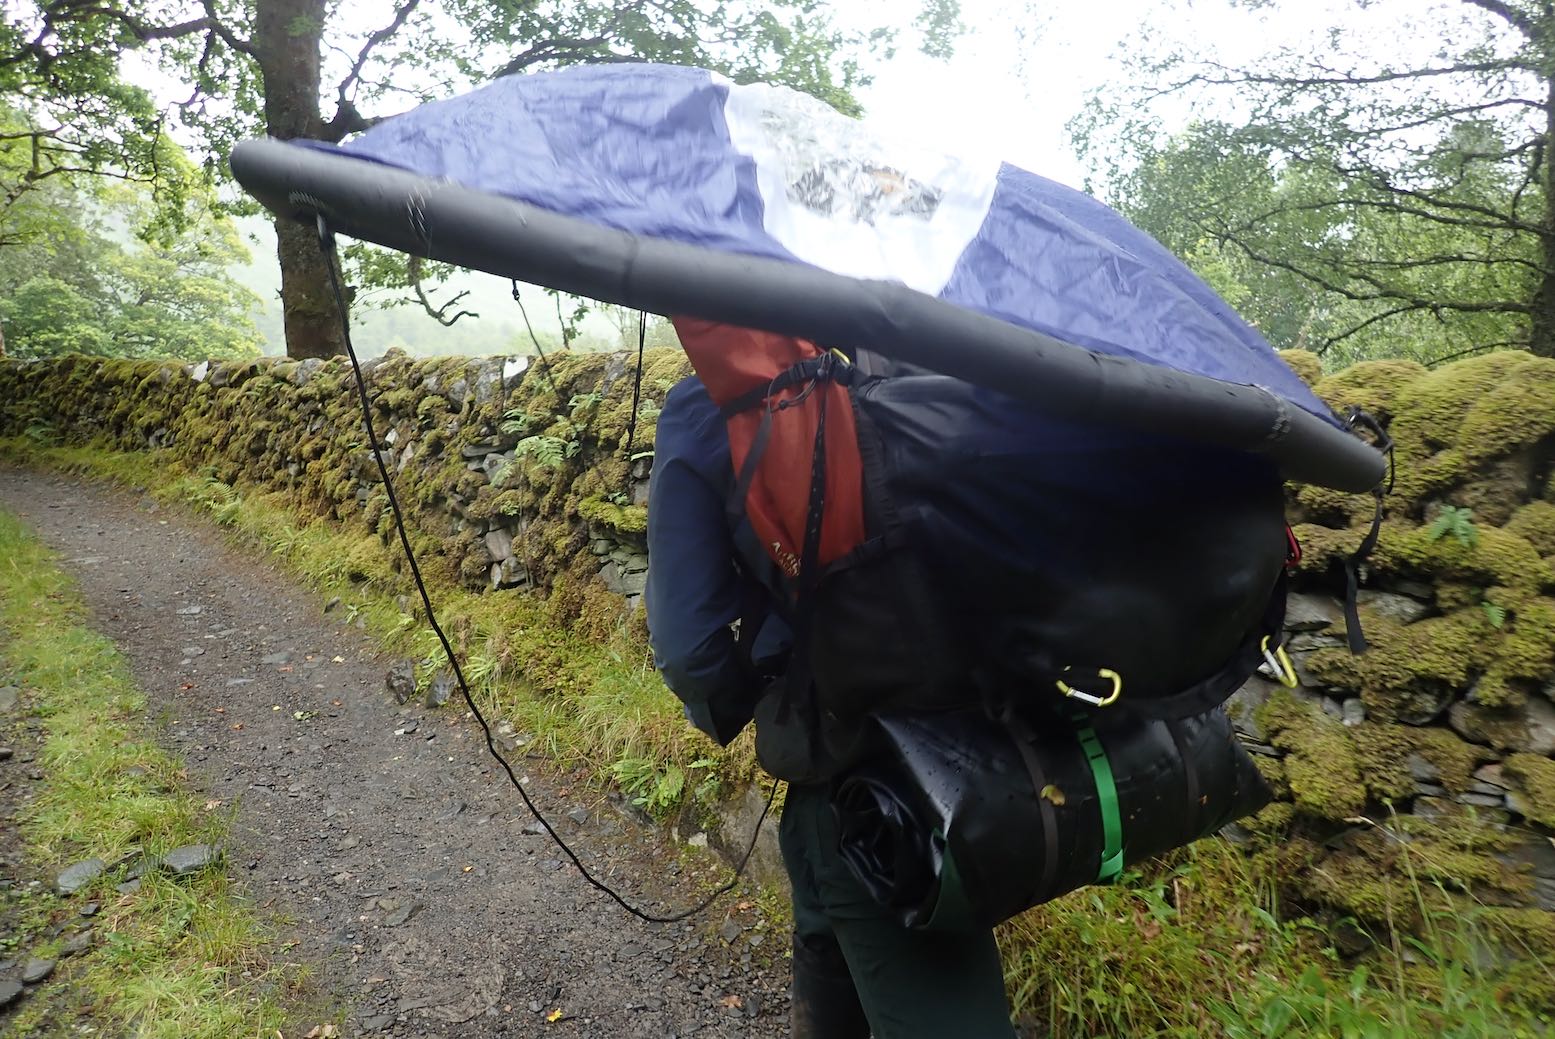
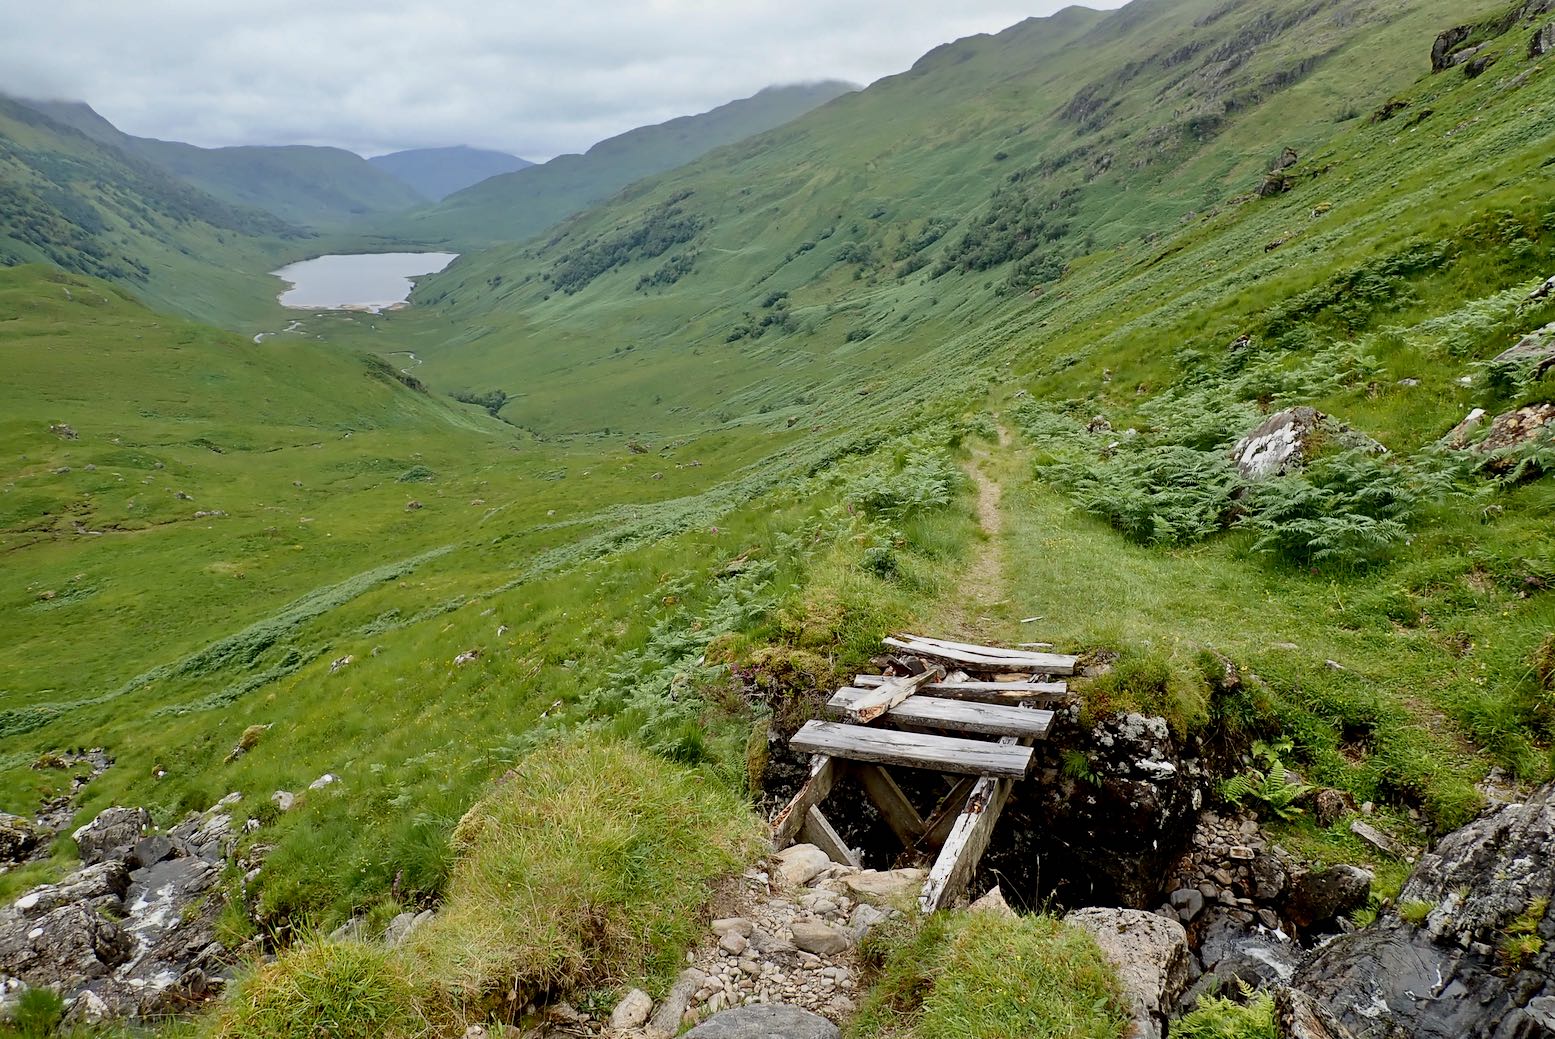
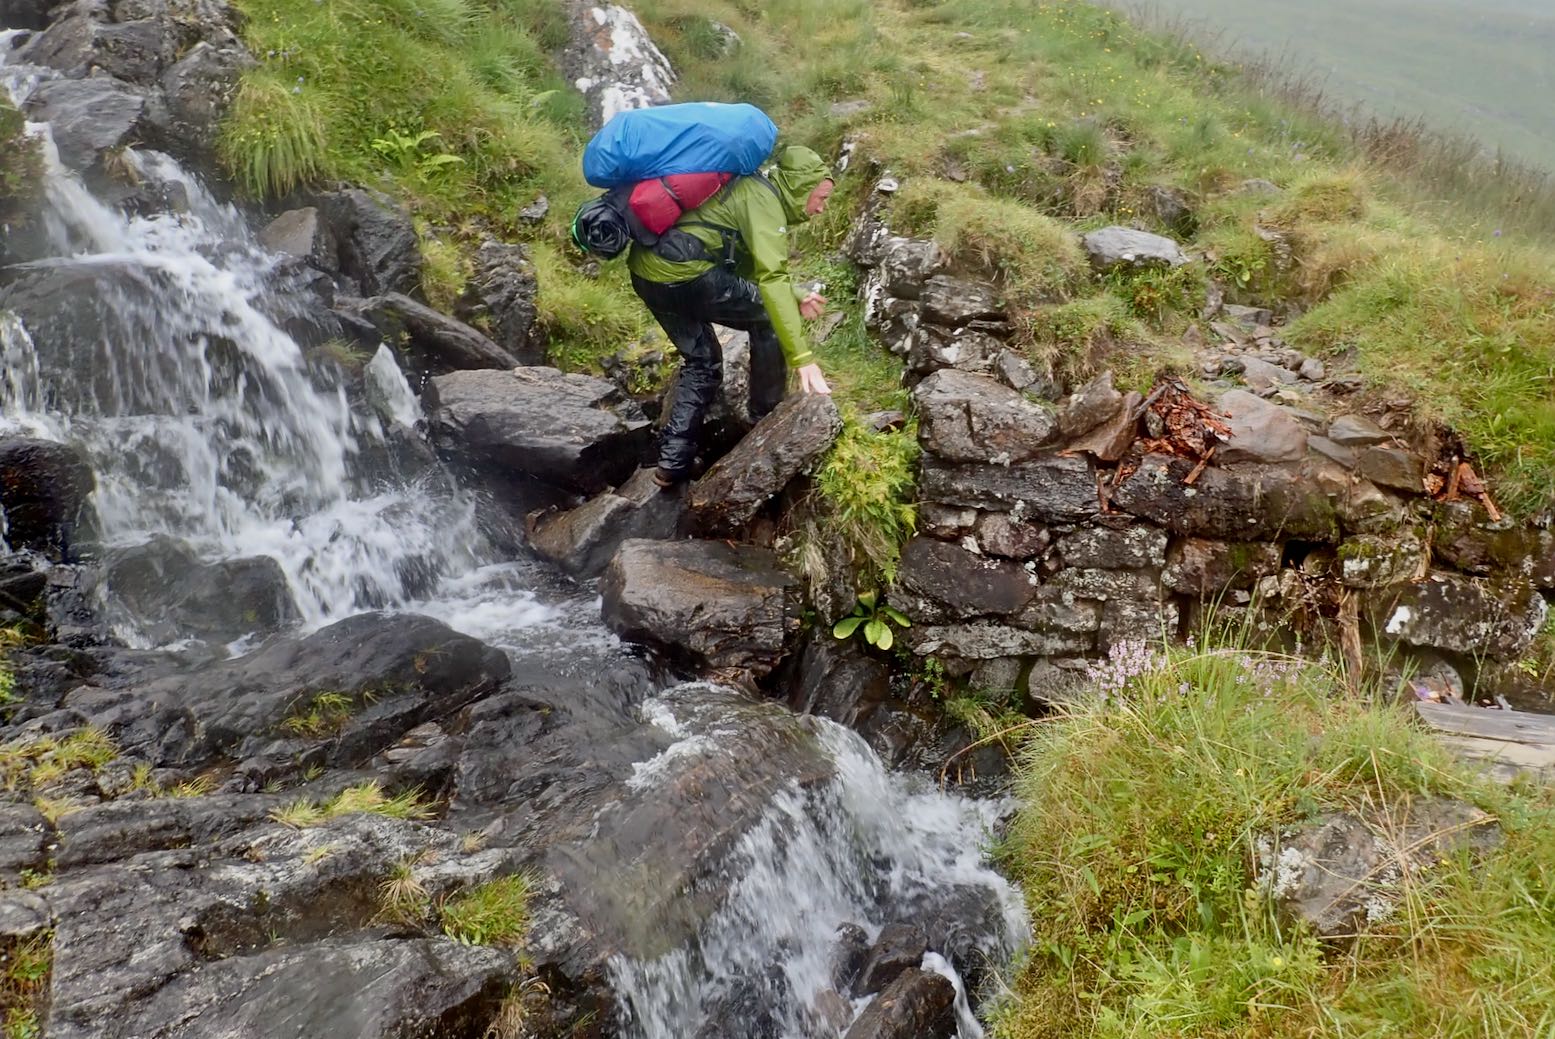
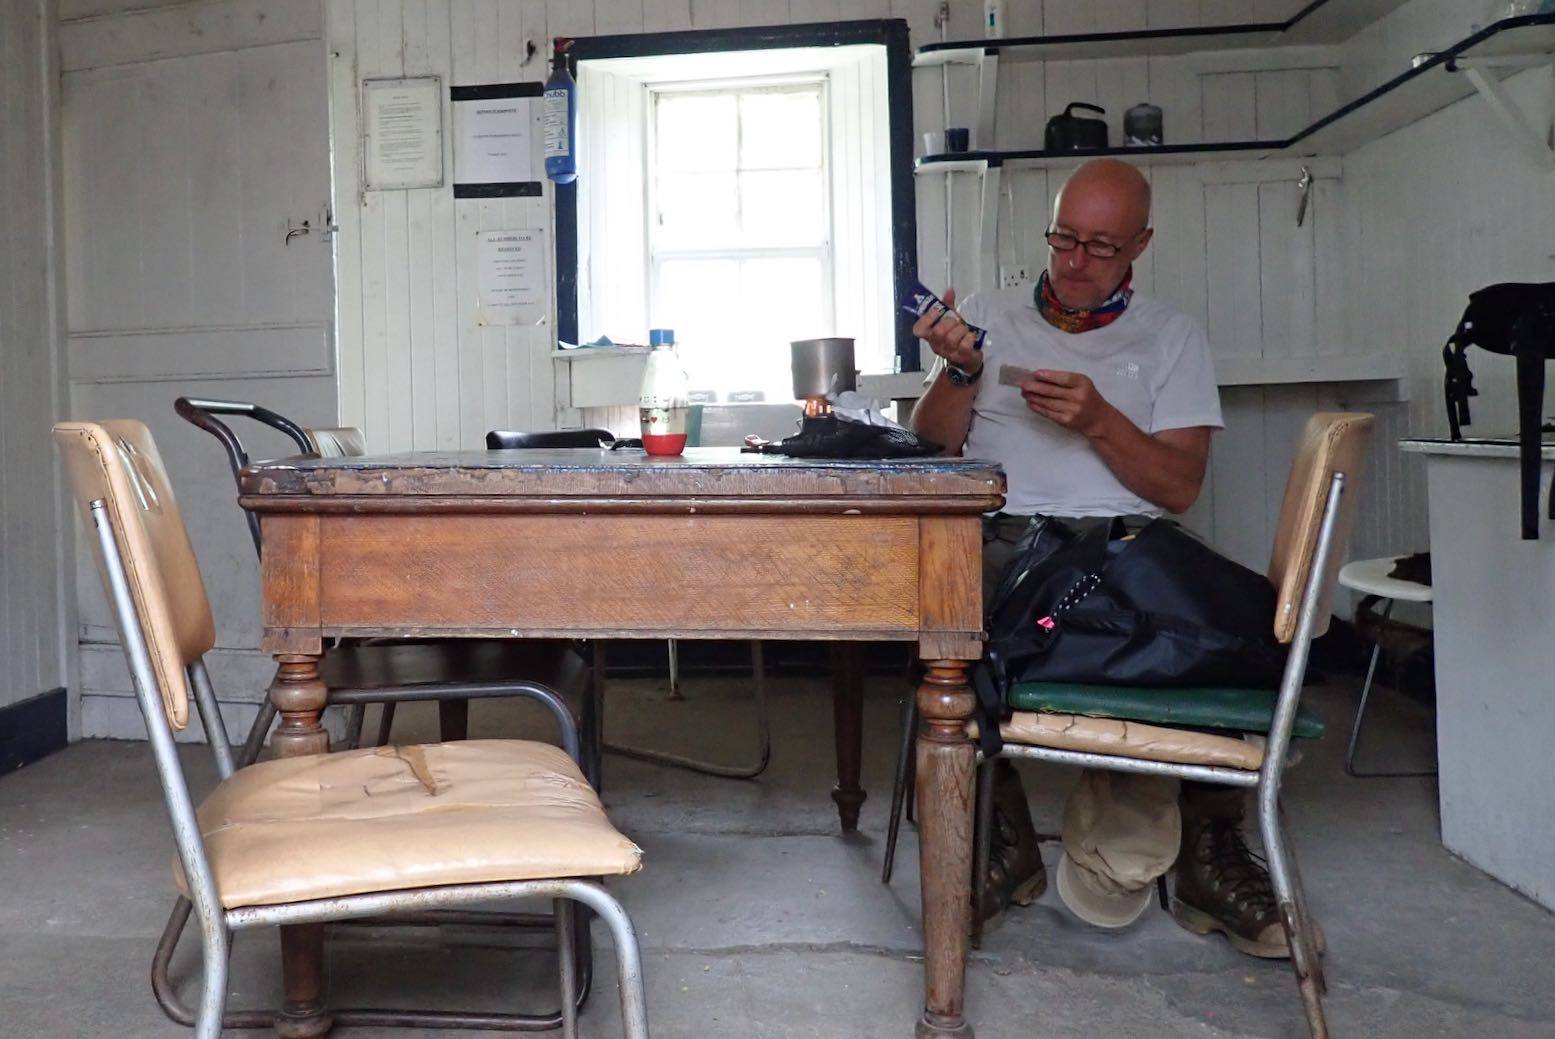
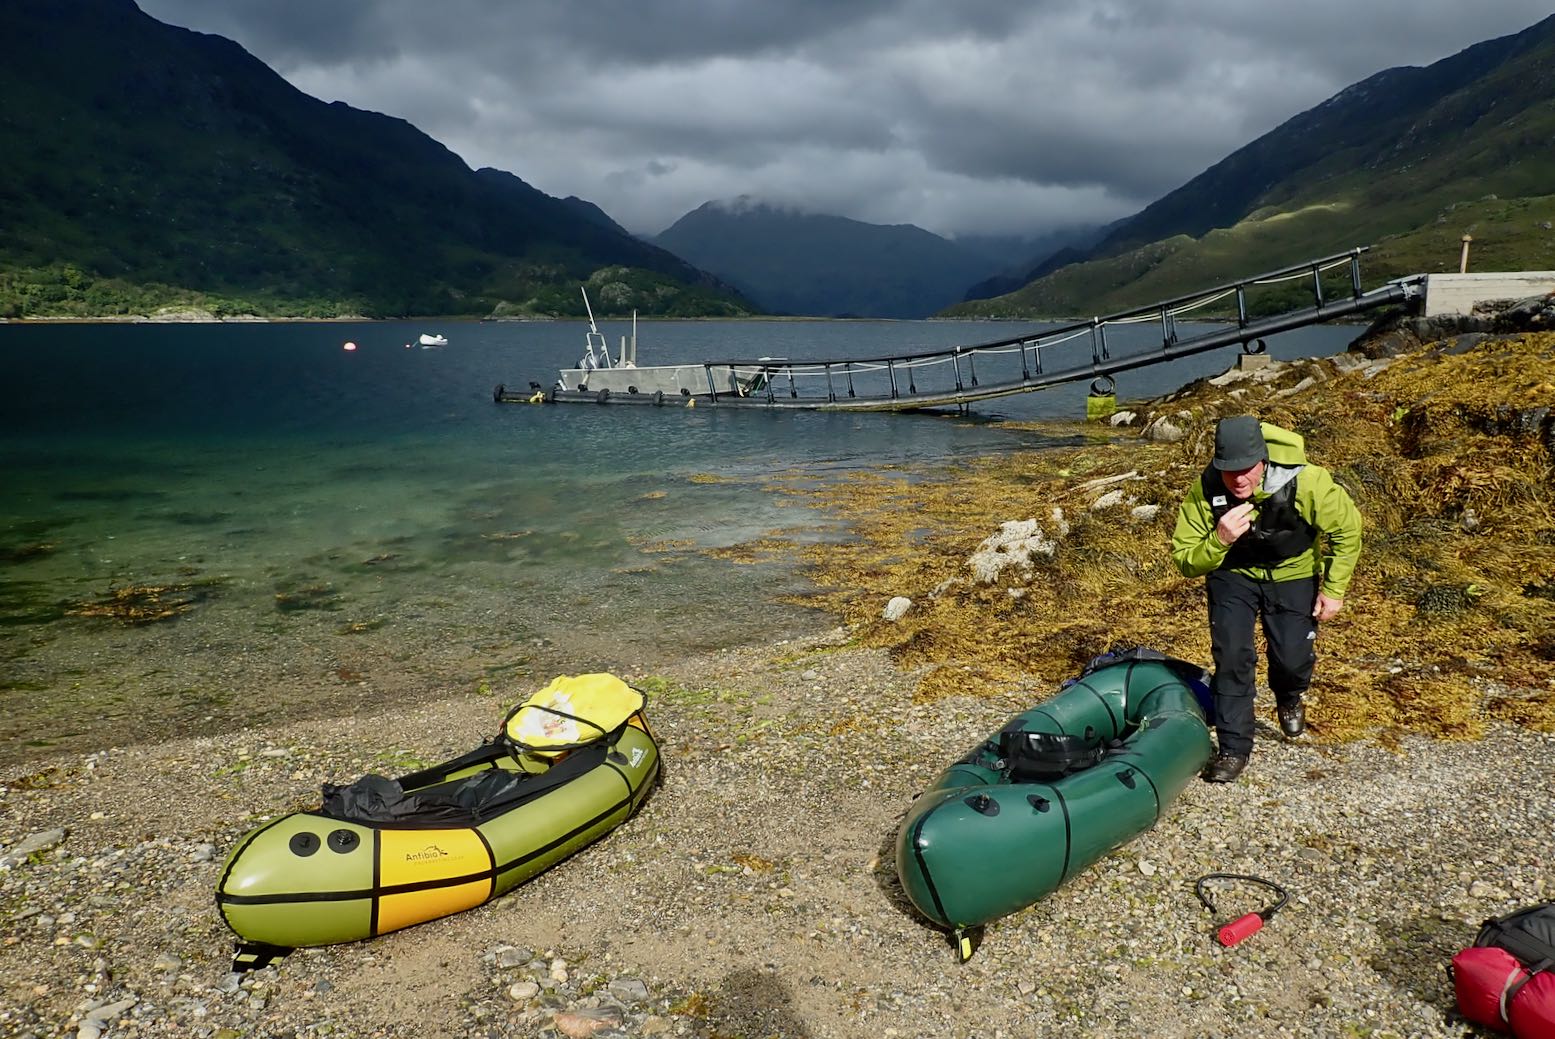
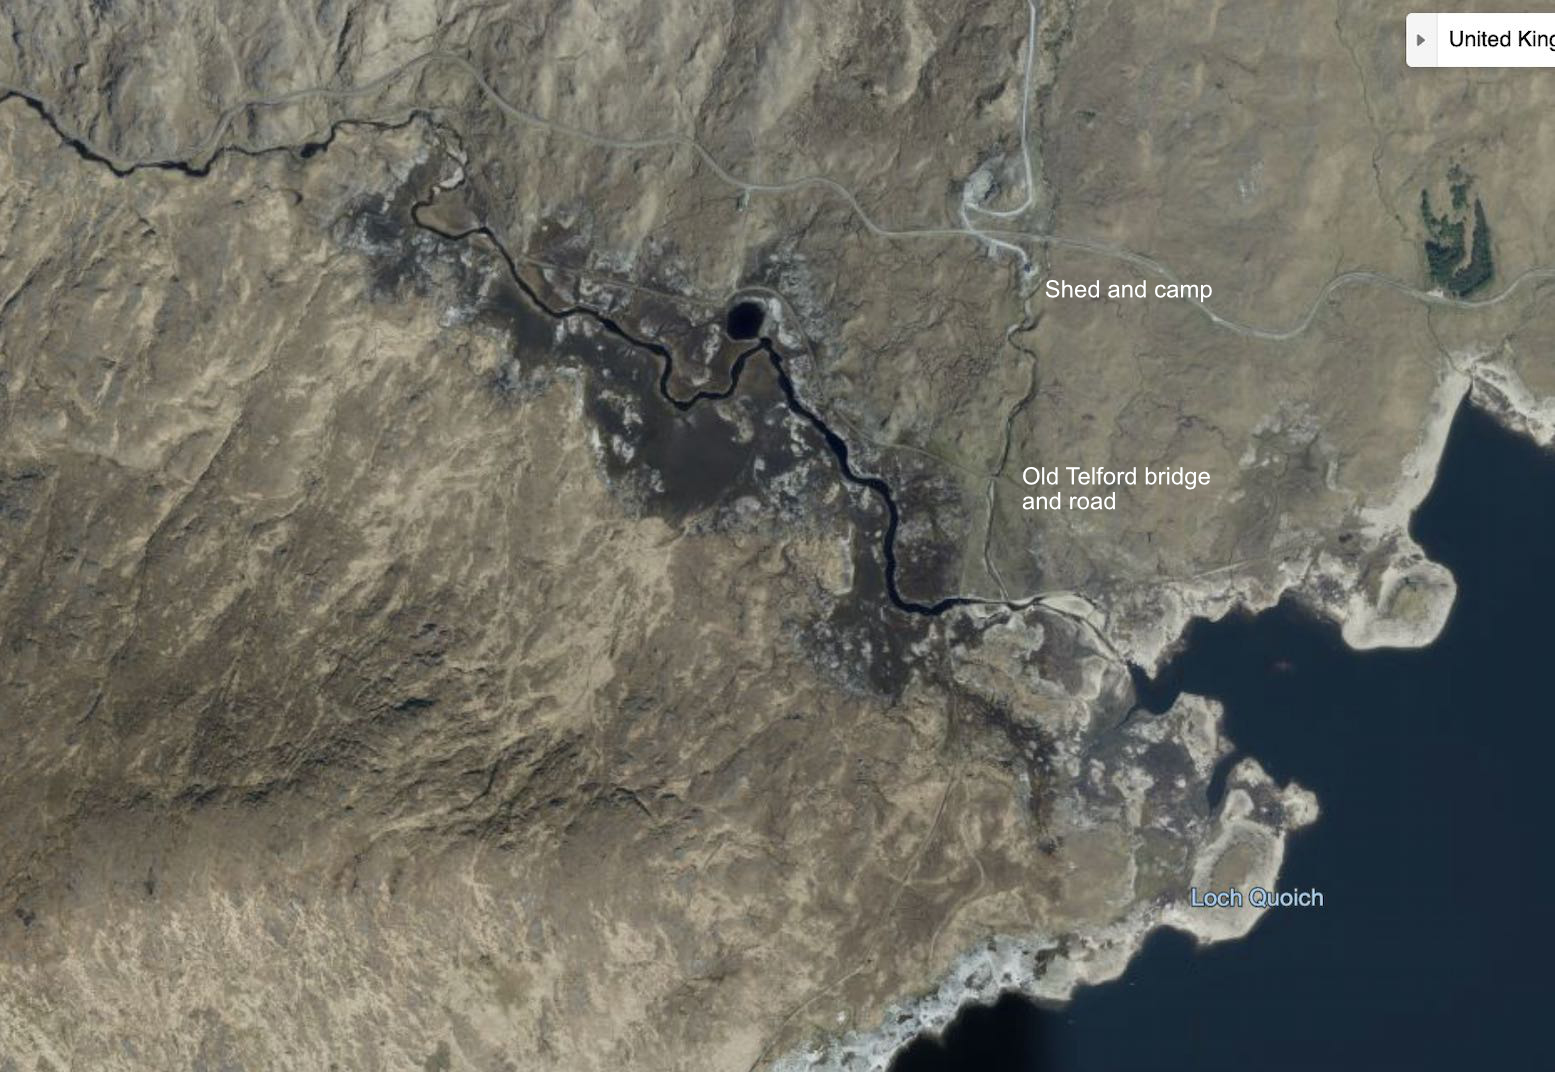
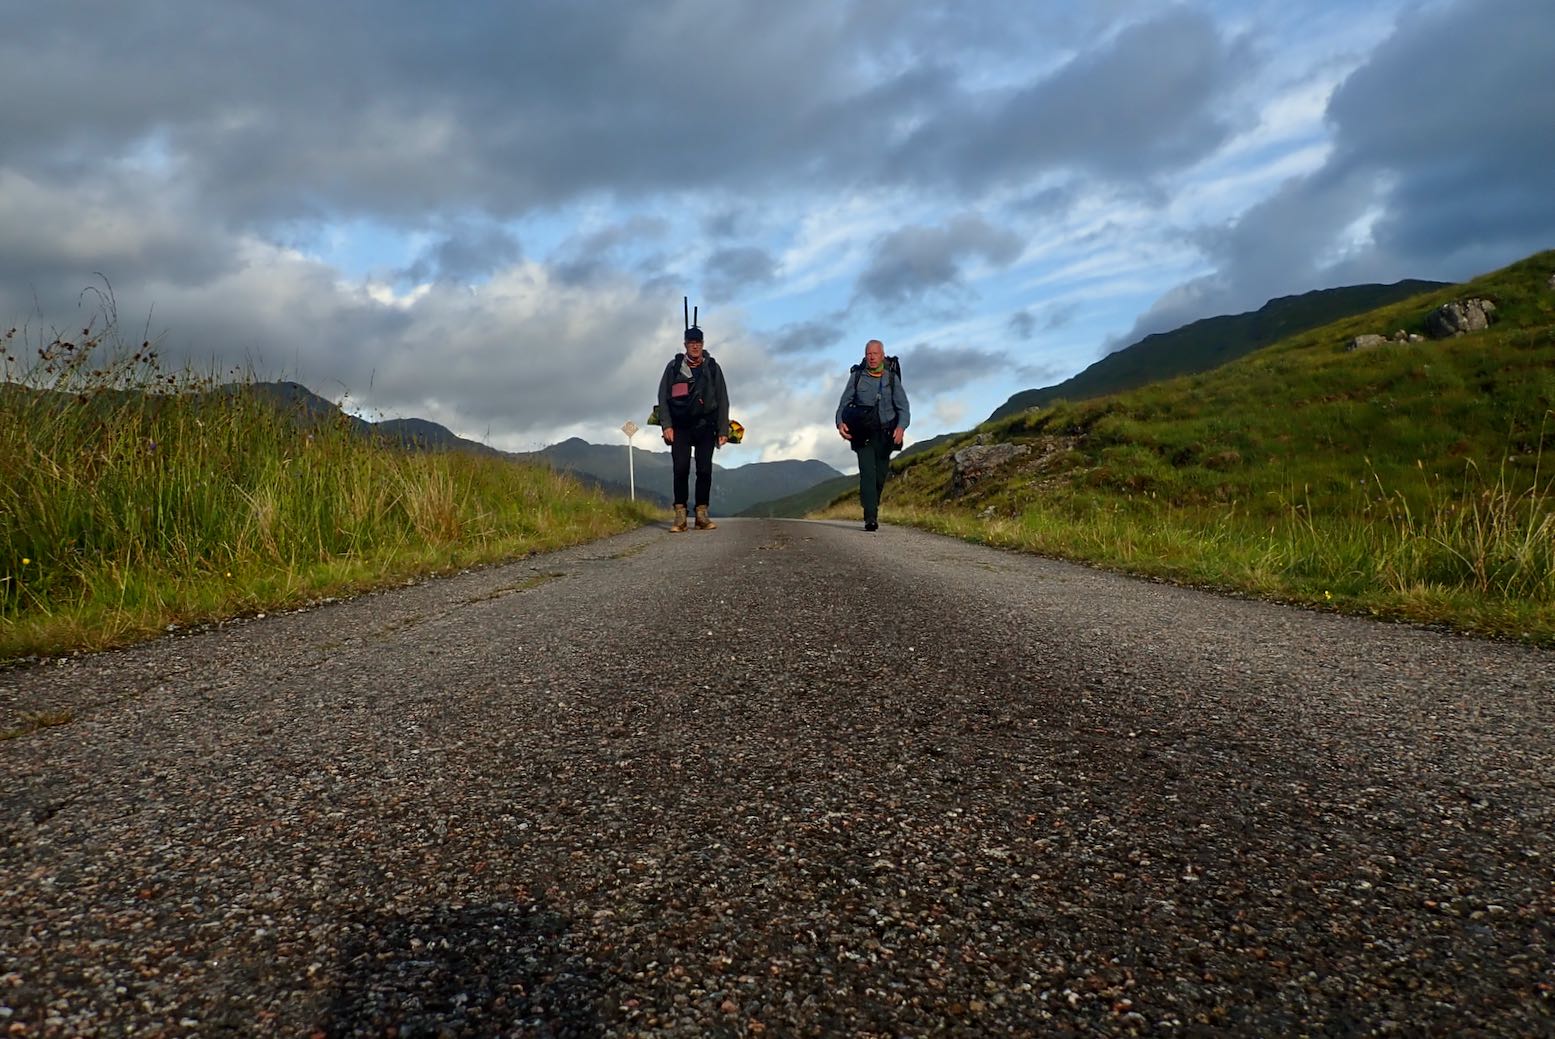
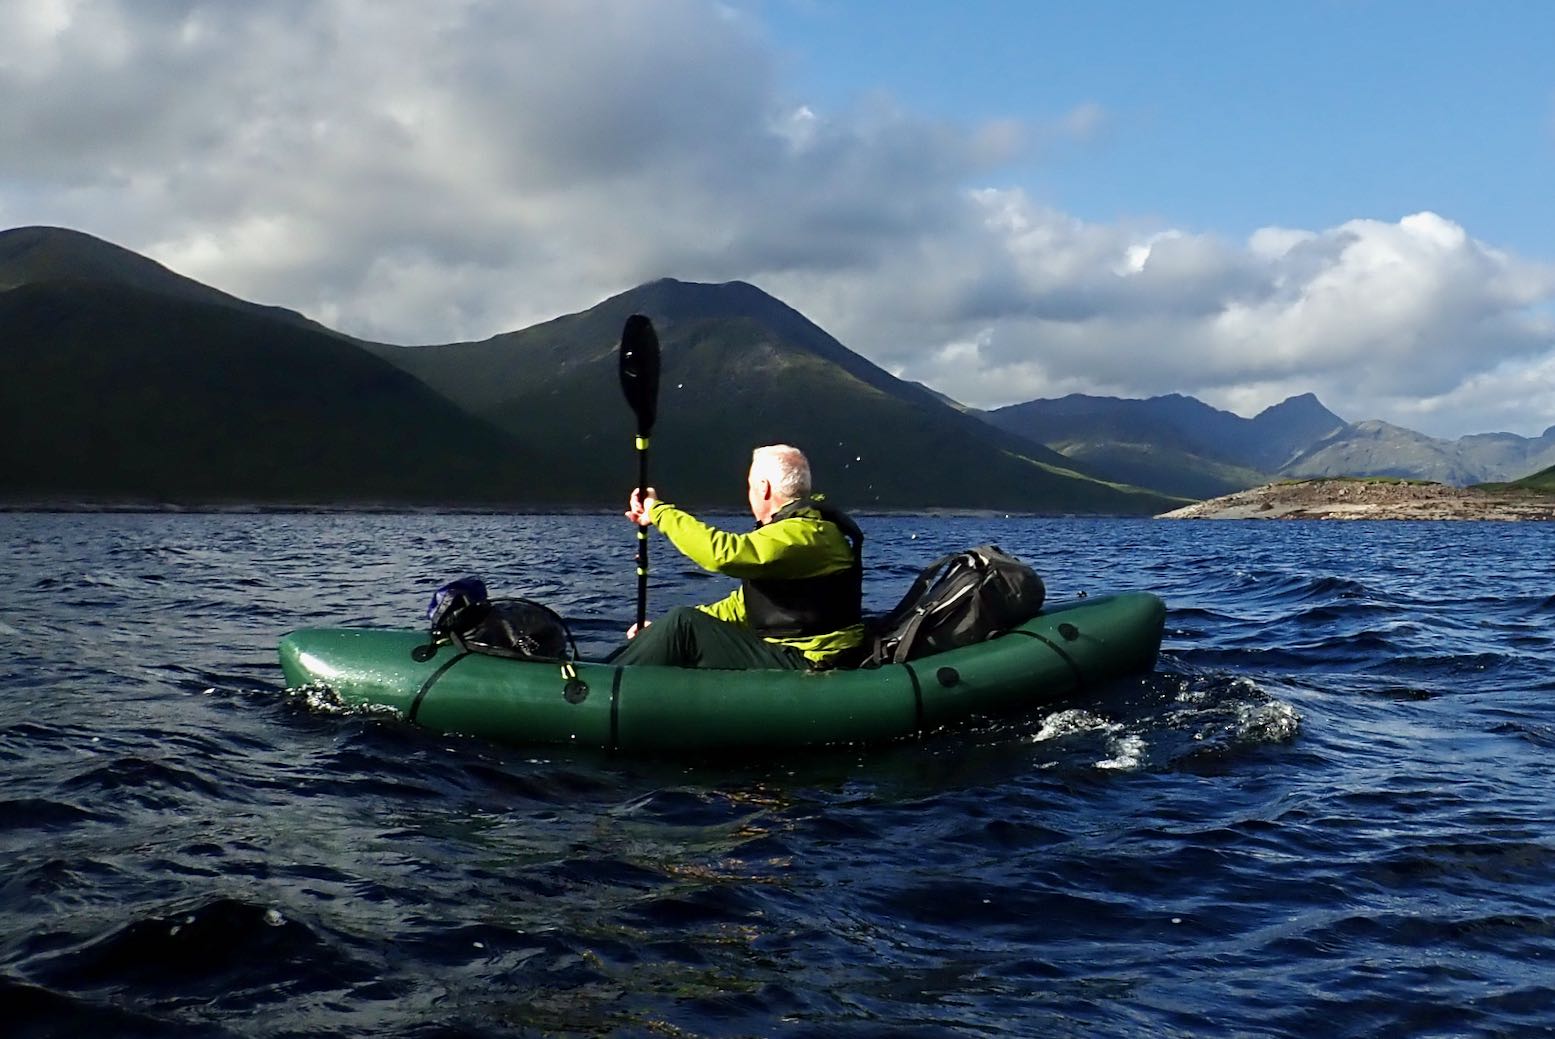
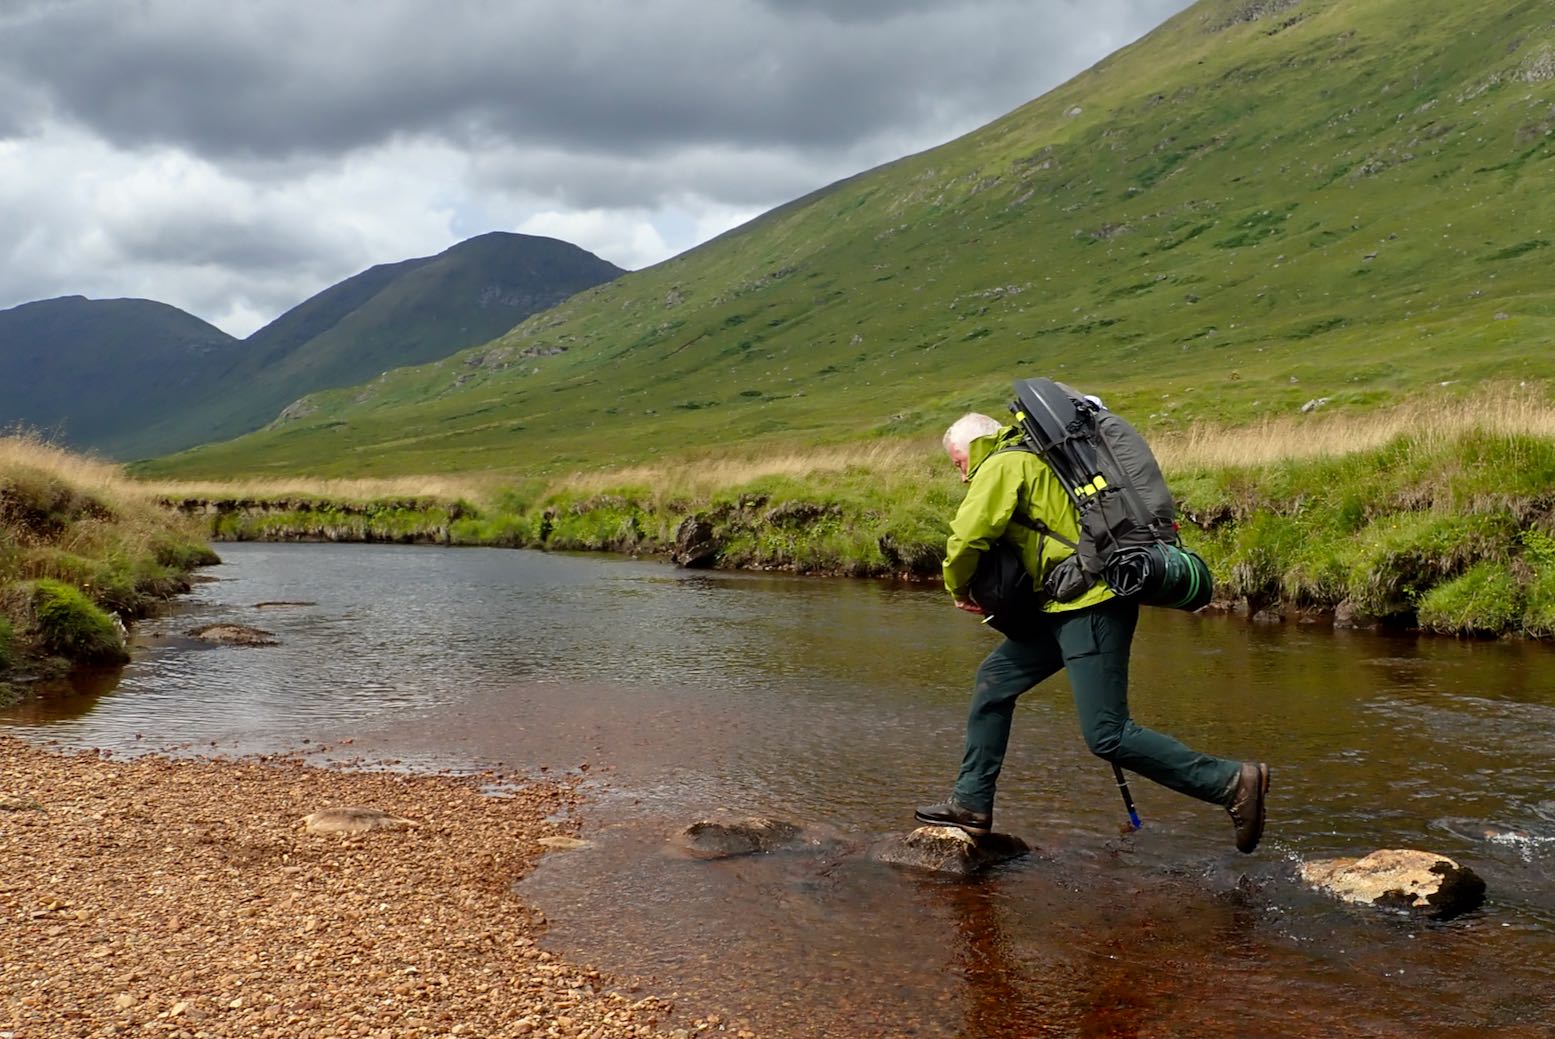
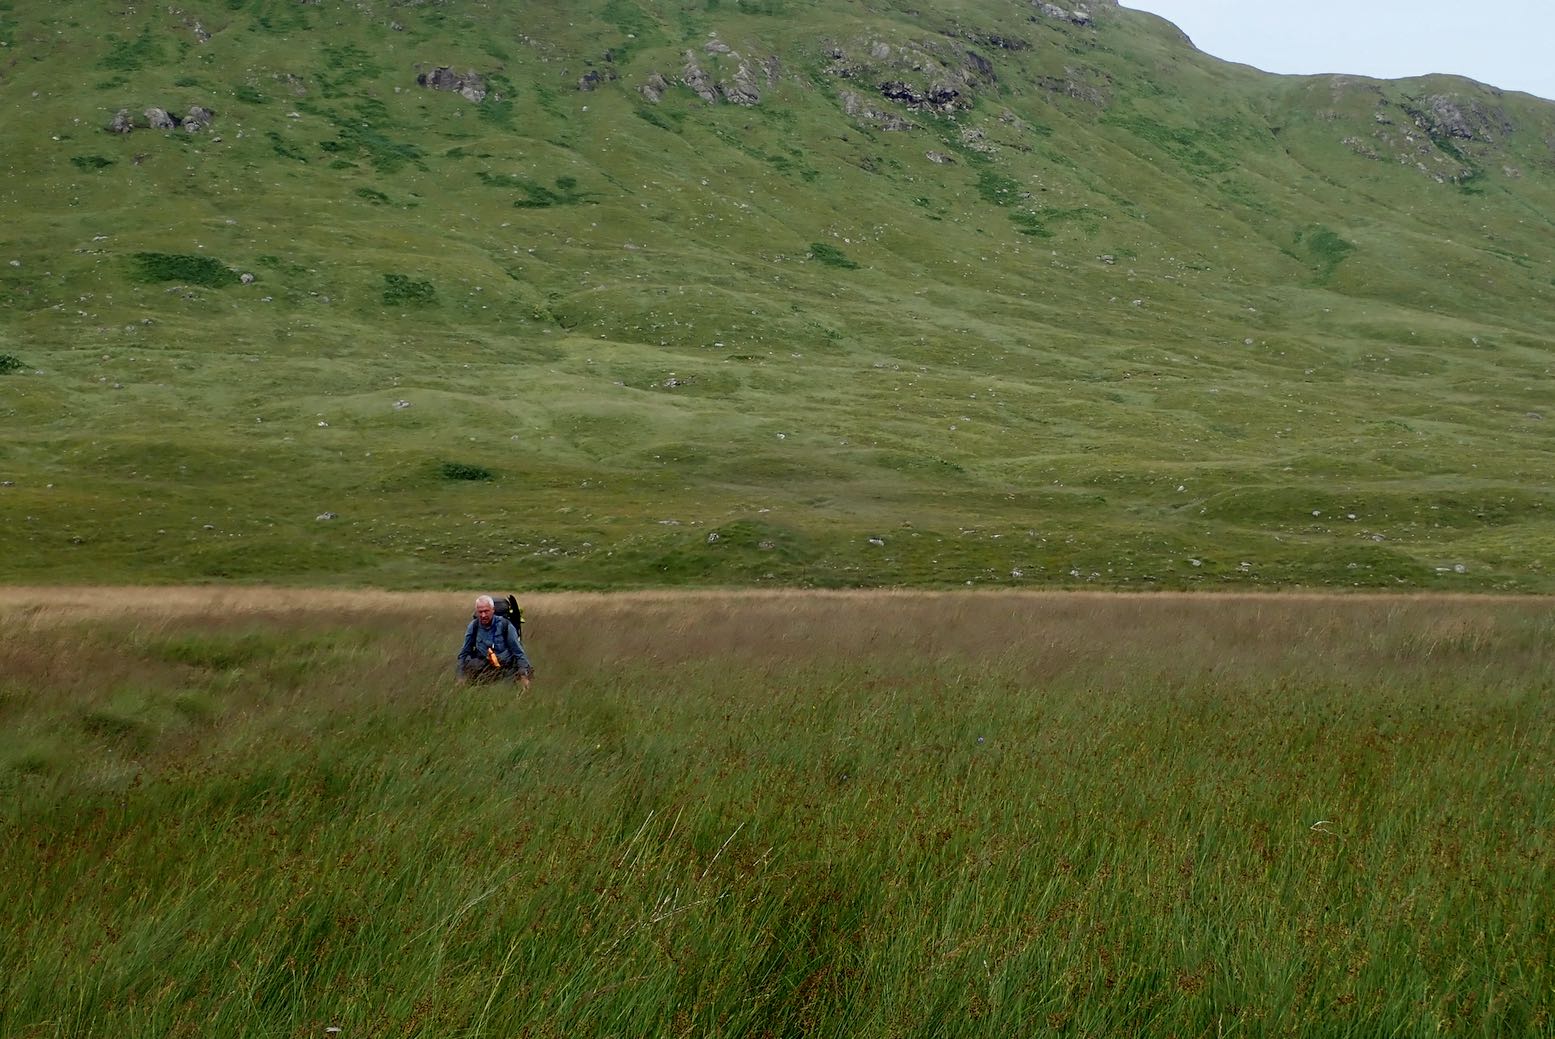
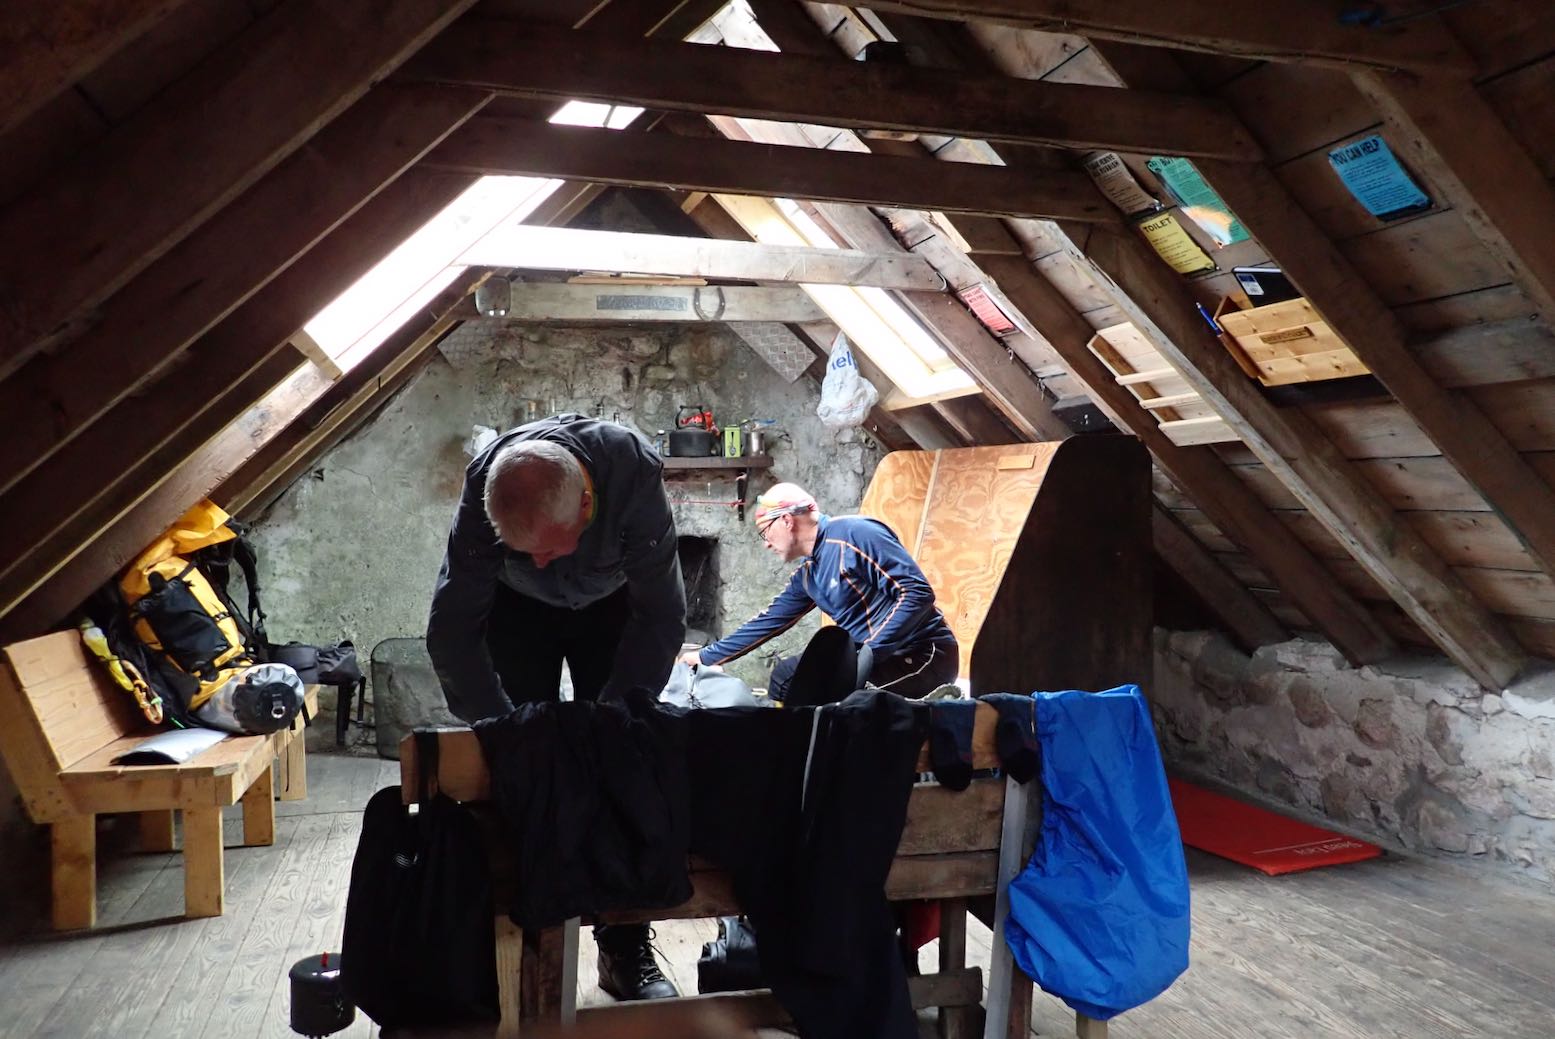
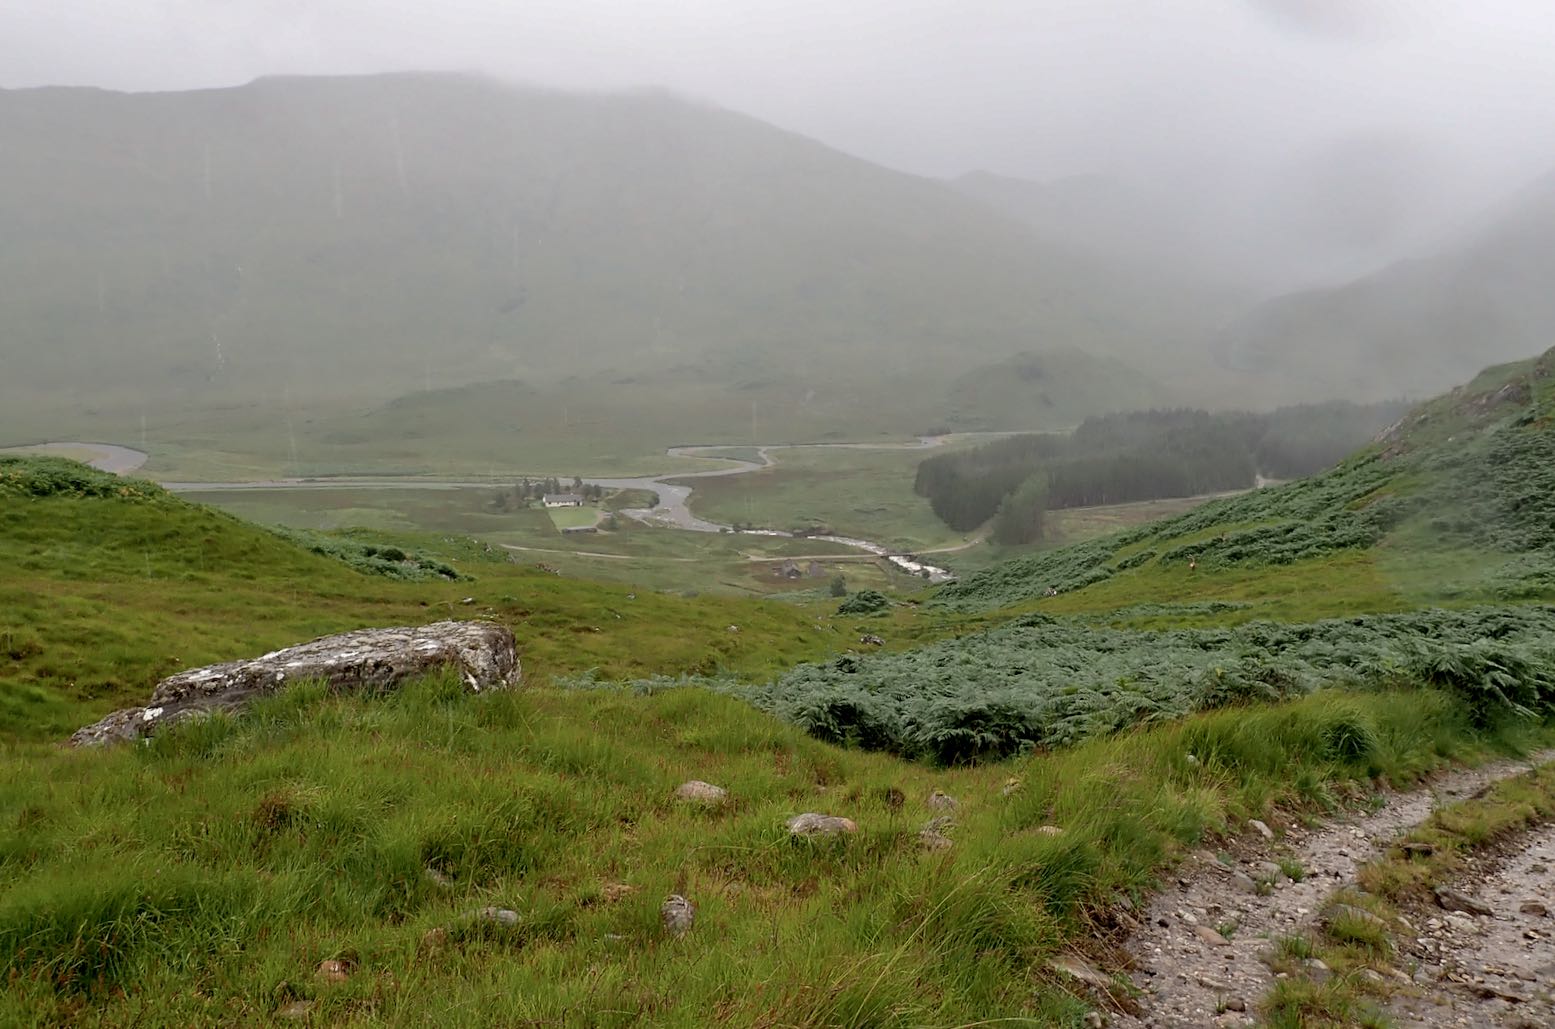
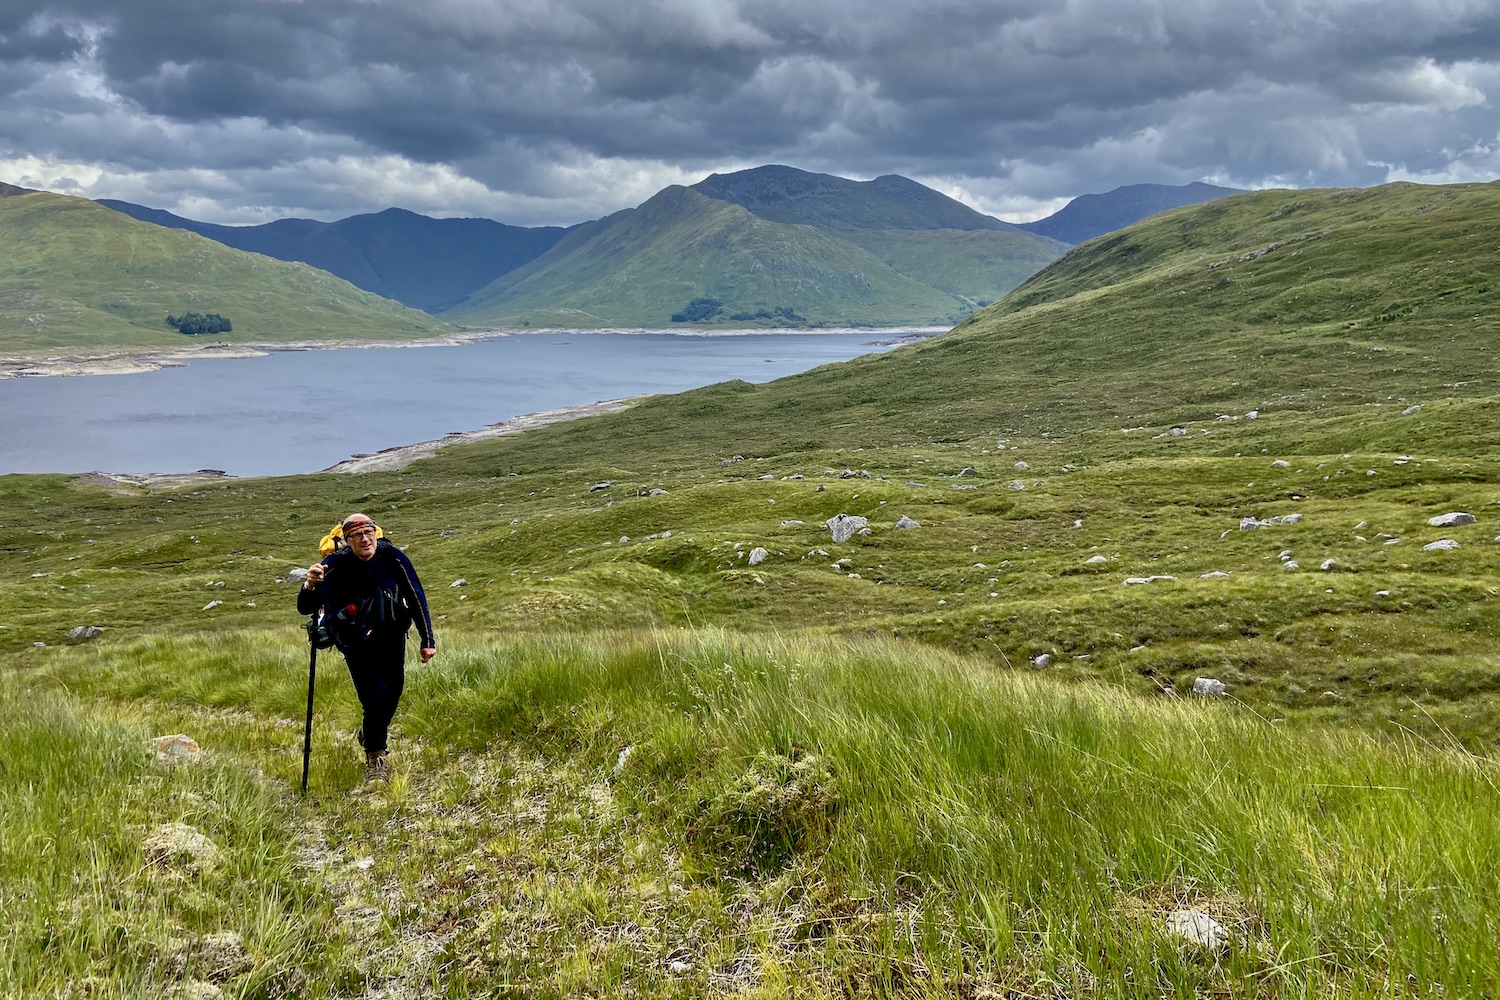
Ferry from Mallaig to Inverie; the only way to Knoydart other than walking or paddlingToday we will get wet. Barry tries his Anfibio AirSail brollyThe long walk from sea level up to the 1500-foot Barisdale passTwo weeks ago this bridge was on its last legsNow it’s gone, requiring a ford as the rain sets inTwo weeks ago I arrived in Barisdale bothy utterly knackered; this time we’re both soaked through and shivering. Hot tucker needed quick!Mid-afternoon the rain stops and the spring tide and wind are just rightWe arrive at the Loch Hourn jetty with 3-4 hours to HW and only 7 clicks to Kinloch HournHoist the mainsails and off we go!Barry’s longer MRS Nomad S1 is notably quicker than my 2KPeak flow through the Narrows. Standing waves wash over the S1’s sides and a hidden current shoves it sideways So I appreciate the Rebel’s zip-up deck. Even paddle-sailing I can’t catch the NomadWe leave Kinloch Hourn with two hours of daylight for the 7km walk to Loch QuoichThis walk is taking forever and my feet are killing me. Where is the inlet by the road?We give up and camp by a pump shed; the noisiest place for 50 miles. We’ve covered 20 miles today.Later I check Bing: unlike maps and Google, it shows Loch Quoich’s much lowered water level following the 2010 droughtNext morning the once-submerged 200-year-old Telford bridge mentioned in the link above is visible below our camp. It explains the weathered milestones we saw on the walk up from KL-HWe carry on along the road until we can get nearer to the shore without getting bogged down Opposite a small plantation we get our chance but a headwind in blowing from the southeastOnce on Loch Quoich the boats make good progress and we’re soon in the lee of the hillsBehind Barry, the 3291-foot (1110m) mountain of Sgurr Mor, with Knoydart’s peaks beyondWe didn’t want to get off Loch Q, but the time had come to plod on southwards to the next lochA rough 4×4 track makes nav a bit easier; it’s a 200m climb to the passOver the watershed and down into Glen KingieNear here Barry (a registered smartphonaholic) gets a freak whiff of wifi. “Rain expected 14:00; let’s step on it!” Up ahead is the Kinbreak bothy we’re aiming forFording the River Kingie not far from the bothyFrom the river we take a direct route. Big mistake: it’s only 700m but knee-deep tussock hellThe bothy is in sight but we end up flat on our backs more than onceNot far now…. Will it be open and vacant?Halleluia! I only learned later that MBA bothies had reopened after Covid just four days earlierSoon the rain lashes down and doesn’t stop. Let it pour!We spend the afternoon eating and drying and chatting. What a relief to be here. Thank you MBA!I had a set of these ex-army mess tins as a teenager. Now lampshade/reflectorsAt dusk three dozen deer come down from the hillsides to ensure ticks are evenly spread across the glenMy boots snag a cozy spot by the fireBy 10pm the only sound is the rain hammering on the roofWindy Friday. We wait in vain for the rain to let up, then face the inevitable. Yesterday this burn was a trickle. My boots are soaked againDespite re-applying Nikwax’s finest oitments, my 10-year-old cag is as effective as an old t-shirtAfter two hours bog-hopping, Strathan homestead rises from the murk. We’re both drenched so heat up a snack between two locked barns. It’s still a long way to anywhere. We’re fed upThere is a lochside road but it’s a 4-5 hour trudge. Then in a lull we pass a beach: “Let’s put in!” we say simultaneously Had we forgotten today was Windy Friday with forecasts of 30mph gusts?Twenty minutes later we’re holding on for dear life, pelted by torrential, wind-driven rainBut our packrafts are amazingly controllish-able, stable and much faster than walking, providing you steer off the shore80 minutes and 7km down, I need a slash and Barry needs to tip out his flooded boat. We’re both drenched and chilled. Sailing may save energy but doesn’t generate warmthThe next shower is stampeding down the glen. Barry gets another rogue signal and calls in the only black cab in Fort WilliamWith good gear like a dry suit, the rest of Loch Arkaig would have been a blast. But this was 40 quid well spentStarter preceding a delicious curry at Tiger Wall in FW. And it ain’t bag food!Long drive home with much talk of Gore Tex ProRed and blue: this trip. Green: earlier visits. two 1000m+ summit excursions also shown
Our plan fell apart like a wet paper bag on a 1200rpm spin, but what a great mini packrafting adventure that was on the fabulous Scottish west coast.
Weight (verified): 1525g in Large (shoulder straps 212g; hip belt 376g; back panel 937g). Used with Sea to Summit 60L dryback; 316g. Usable total 1840g.
Where used Four-day packrafting recce on Knoydart, covering about 50 miles, and another 3 days packrafting there (about 25 land miles).
The Flex PR was supplied free for testing and review by Six Moons and Anfibio
• Carries heavy loads like a proper rucksack • Includes no less than nine pockets • Four-strap adjustable hip belt • The price dropped by 25% around 2025
• Loads of black buckles with very long black straps on the black back panel (a 1-star review on the 6M website also mentioned this). • Fixed shoulder-strap mini-pockets too small and too high for me. • Wide outer panel means too much slack to cinch down the side straps fully • Refitting once back on land takes more time and buckling about than just shoving it all in a regular backpack.
What They Say The [new for 2021] Flex PR is a multi-use pack specifically designed for pack rafters. The Flex PR is a 50L dry bag with a removable suspension system designed for carry heavy loads in comfort. Whether you are portaging on a canoe trip, hunting in the backcountry, or doing trail maintenance, the Flex PR will keep your gear dry, your accessories handy, and your back comfortable.
I’m on the TRAYNE!!
Review I’ve long been a fan of pack harnesses as I call them; aka: portage packs or multi-use packs. Once combined with a bombproof dry bag like my aged Watershed UDB, your packrafting load-carrying needs on land and water are solved for under 2kg. Lash all you needs to the harness and hit the hills.
It took me years of experimenting with ex-military and hunting-focussed metal-framed versions before I discovered backpacking-oriented ‘soft’ harnesses like my NRS Paragon. No longer made, the Paragon was a basic 100-dollar harness and a bit on the small side for me. The fully adjustable Six Moon Flex PR is up there with the best hiking load-carriers.
NRS Bags: just a roll-top dry bag with shoulder straps; not a long hauler
What’s wrong with a regular rucksack? Well, they’re not waterproof like a PVC dry bag can be, and if you have a proper dry bag likje NRS above, you’ve less need for a backpack which is just more bulk. Plus, once you account of 4-5kg of rafting clobber, it won’t all fit in a normal hiking rucksack and on the water you may end up with a soaking backpack, or one which is hard to cram into hull storage. I tried this on my very first multi-day packrafting adventure from Morar to Rannoch Moor way back in 2010 with my Alpacka Llama, carrying a huge roll-top vinyl dry bag (left; like the NRS bags). I was stronger then and it sort of worked, but once you get into it, a dry bag lashed to a pack harness works best. Wet things are separated or more accessible.
I jumped in the deep end with my Flex PR, carrying an initial load of 18kg on a four-day tour of the Knoydart peninsula with my Rebel 2K. My plan was rather over ambitious for a new area, so it turned out to be more walking than paddling. I came back to do it better a couple of weeks later so the Flex PR got a week’s heavy hauling, covering about 70 miles.
Back Packing, Back Packing, Oh isn’t it wild?Pull-out ribbed and curved alloy stiffening rod
Out of the box the Flex PR comes in three sections: the load-carrying back panel incorporating the fabric strap-down flap which wraps up and around your dry bag and then cinches down at the sides. The lumbar panel is supported by a removable, pre-bent ribbed alloy stiffening rod which you want to take care not to bend. The wide hip belt slips in through a sleeve at the base of the back panel and velcros in place. And the shoulder harness slips down into another velcro sleeve with various adjustment marks. At 6′ 1″ (1.85m) and after some experimenting, I settled on the longest setting, as below left.
The back pad and big sleeve and outer pocket (right)Inside of the harness which wraps round a drybag
I do wonder how securely velcro will hold the weight after a while, but it’s not like you’re undoing it several times a day, and most of the weight rests on the hip belt with velcro on both surfaces. The PR has loads and loads of straps: six on the hip belt; twelve plus a bungie on the back panel, and three on the shoulder harness. With your own dry bag it will take a while to configure the PR to your liking, but after that you can leave it be. You may also be tempted to snip off the excess on the straps, but initially it’s better to knot them up or try and tuck them out of the way until you know for sure which ones are really too long. Better too long than too short. (The foot-long shoulder-top tensioning straps are primary candidates for the snip.) After a day or two, in an effort to reduce strap overload I detached the removable stabiliser ‘Z’ straps. Six side straps and two over the top ought to do the job. These Z-straps had some interesting removable buckles (above right) I’ve not seen before.
Dangling straps keep the flies awayUDB was too slim and sausagey for the Flex PR
6MD 50L dry bag with purge valve
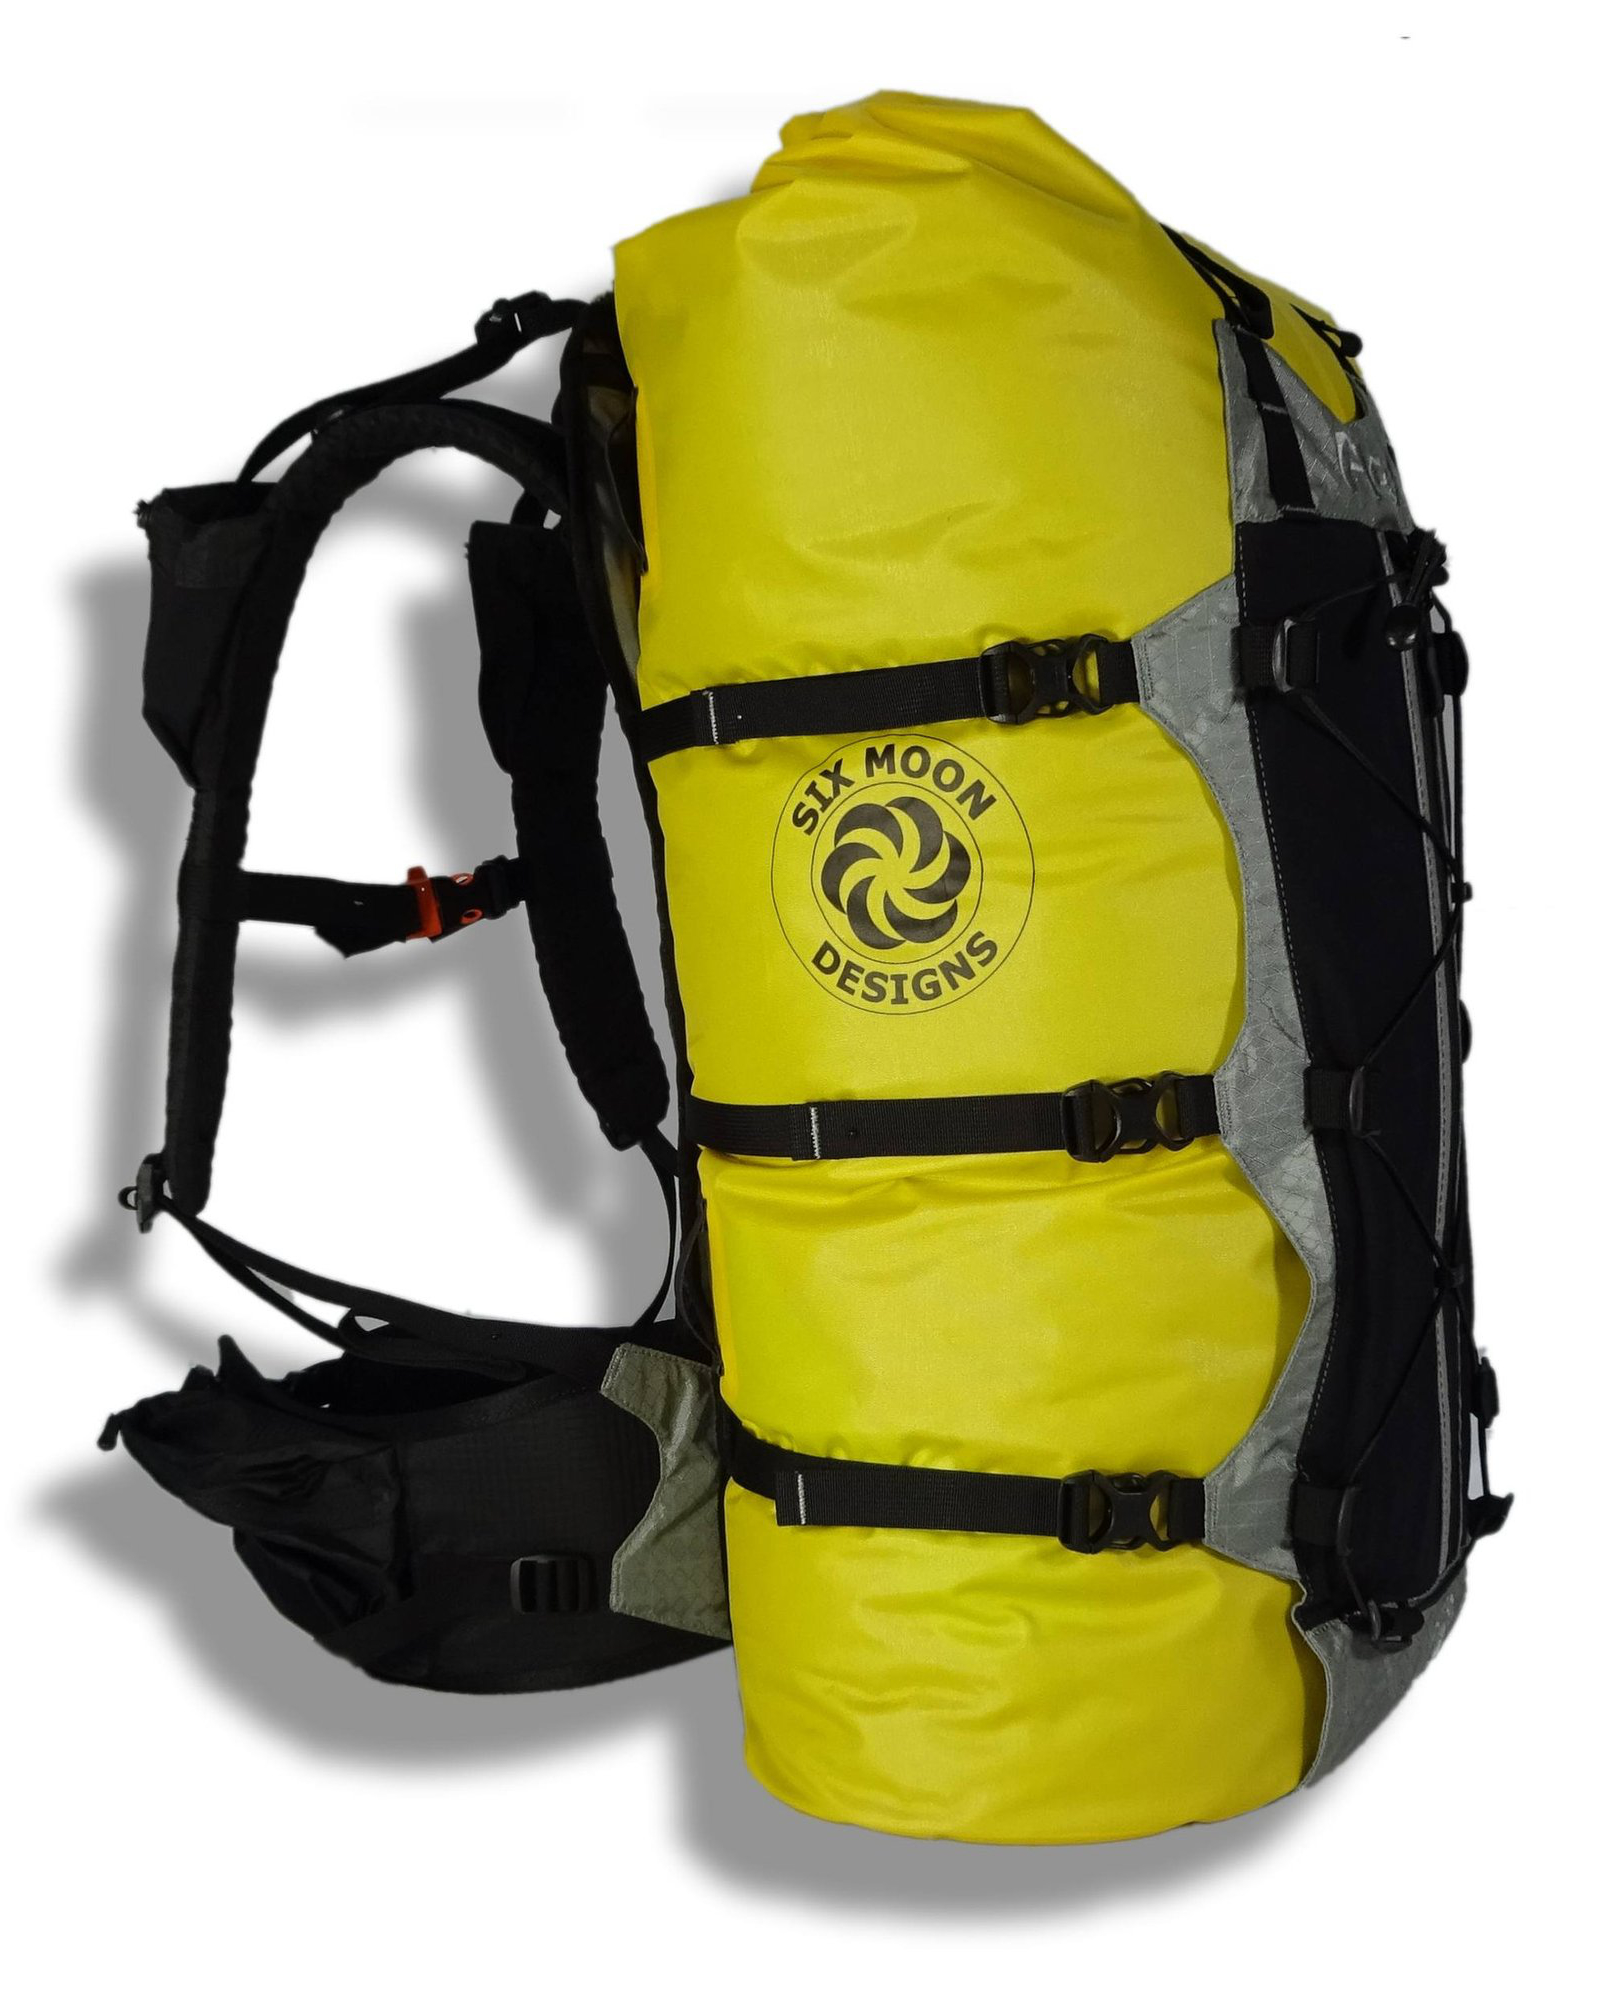
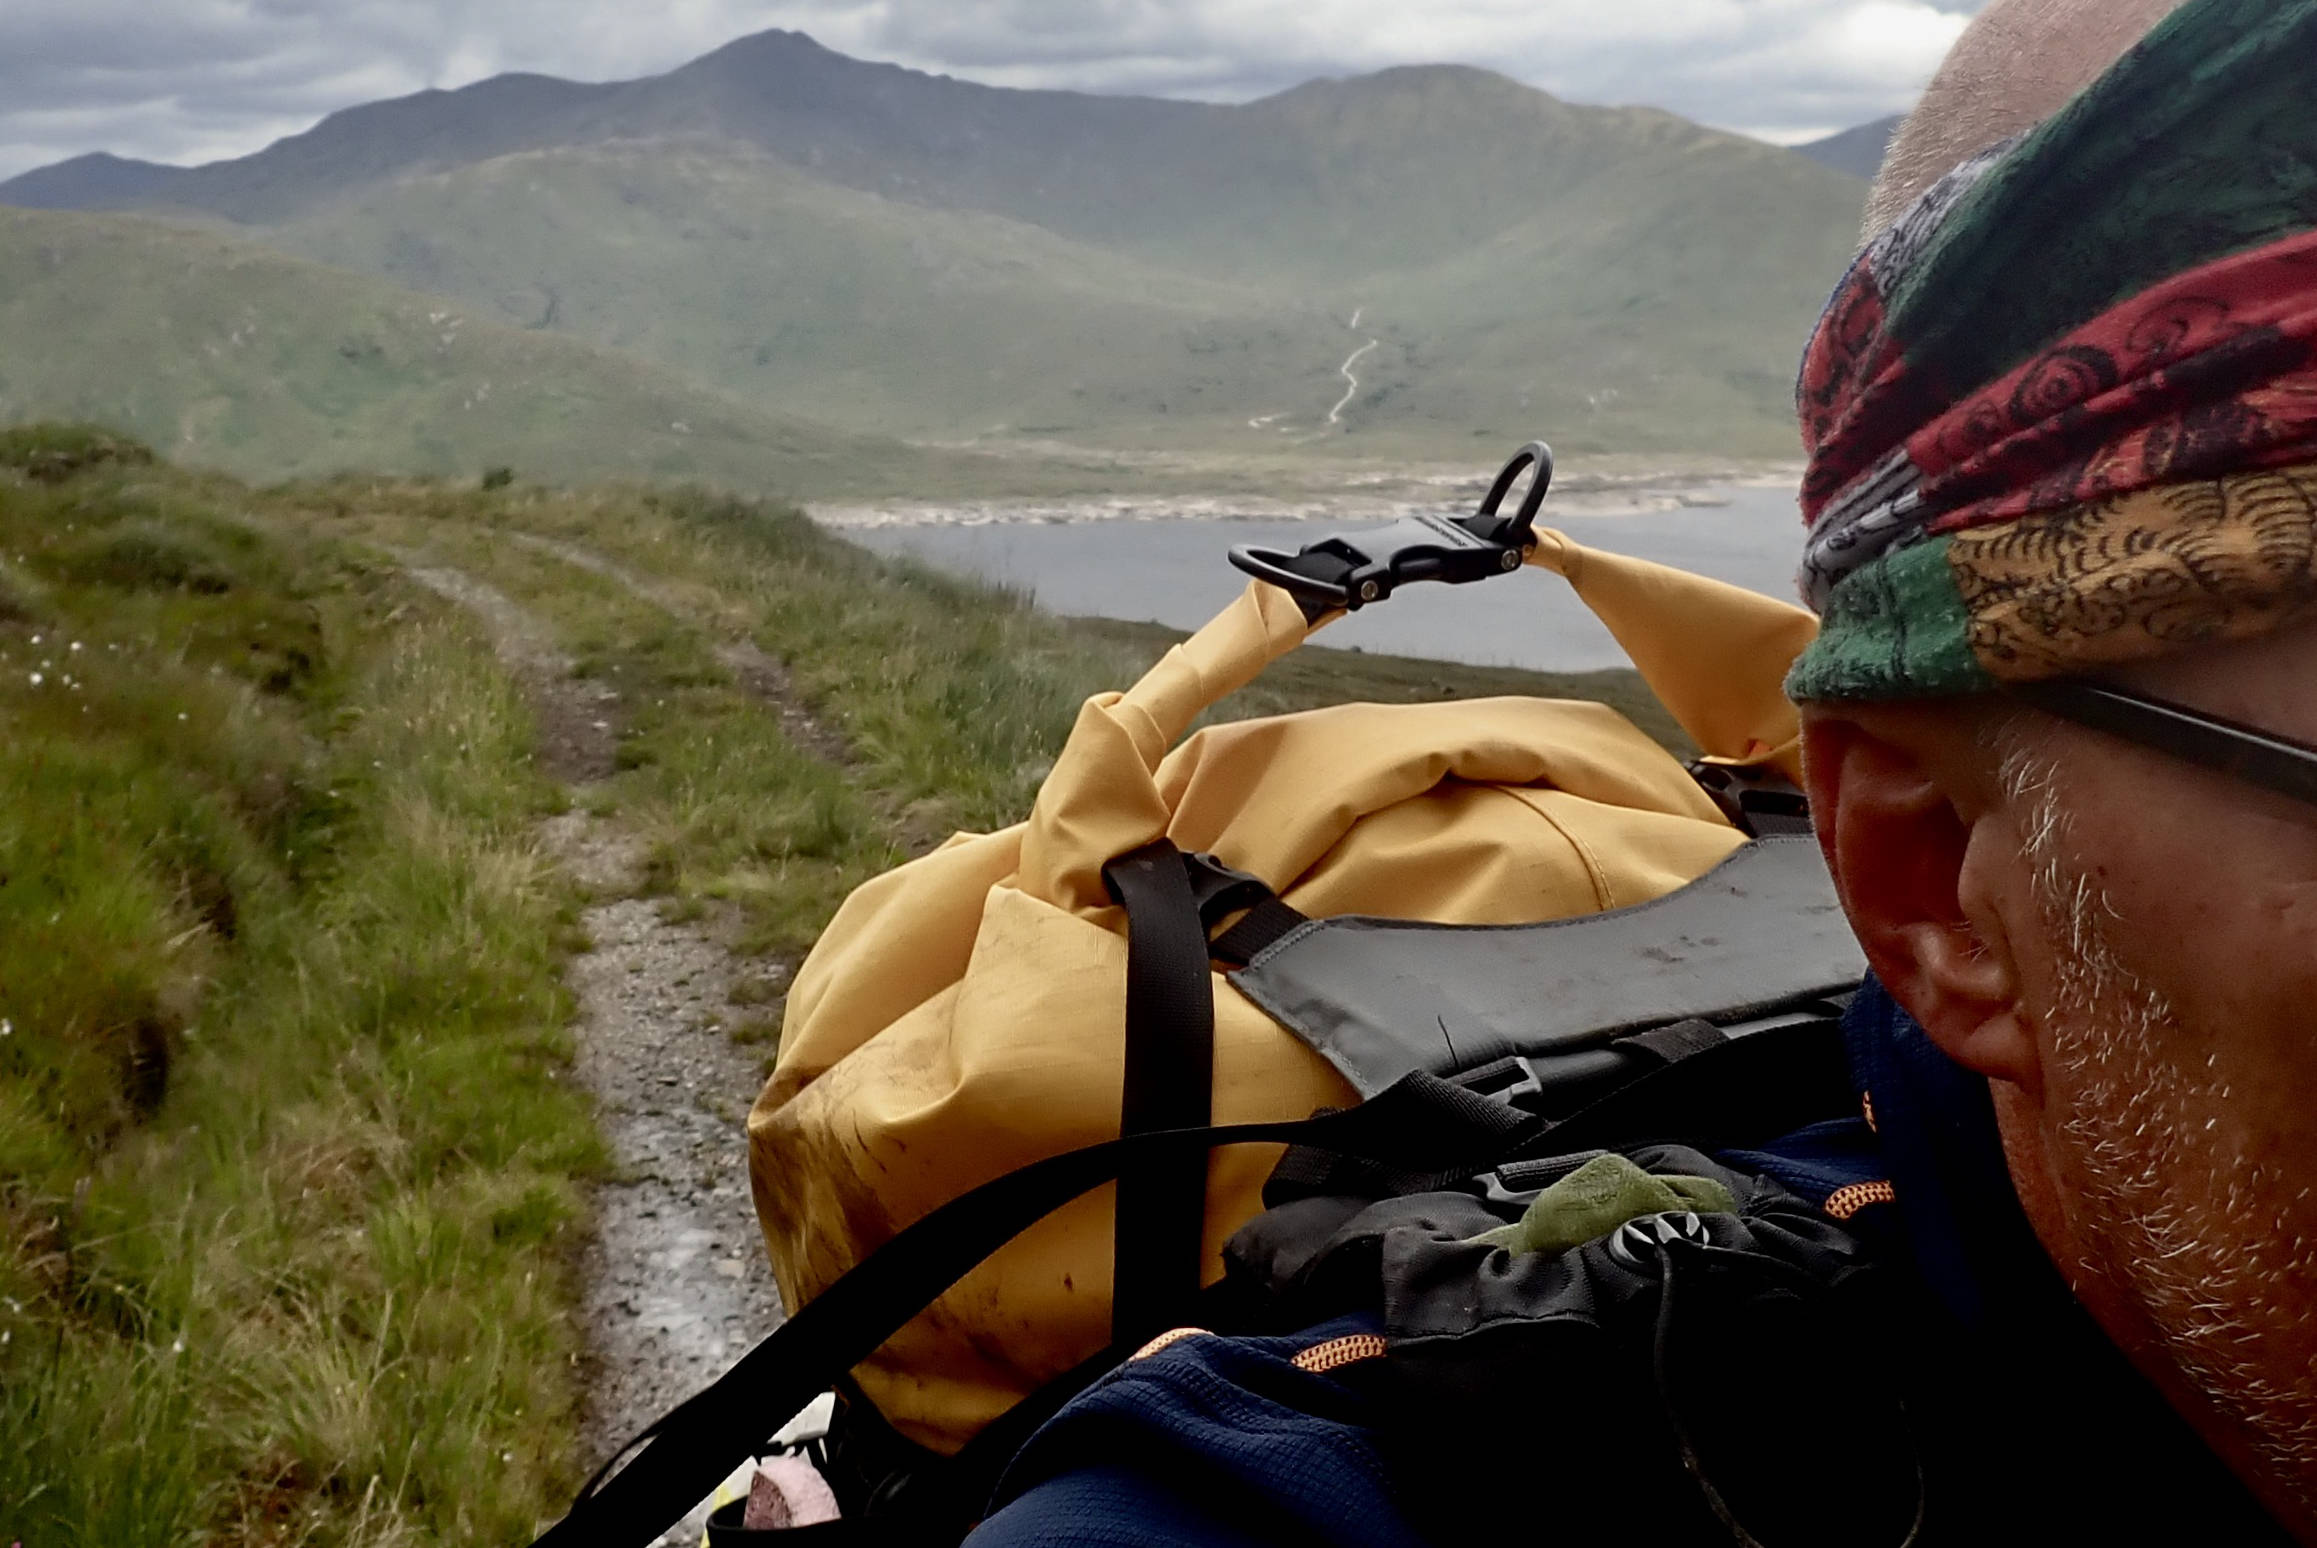
You’ll need a rugged and dependable dry bag to handle prolonged rain, persistent waves and rough handling, although with my Rebel 2K I’ve lately joined the ranks of packrafters stowing baggage inside the hull, not out on the bow, so on the water a submersible-grade dry bag becomes less critical. The Flex PR is designed to be used with 6MD’s 50-litre, 227g (8oz) roll-topdry bag (another $45; left) which includes four side loops which match up with the harness’s side straps. (I didn’t ask for, or use this bag.) What it’s made from or coated with is not stated on the link above, but one review listed ‘210D TPU-coated Nylon’, which sounds the same as a lightweight packraft hull. It includes a purge valve which will release any air after the bag is rolled up for packing and as you cinch down. Nice touch.
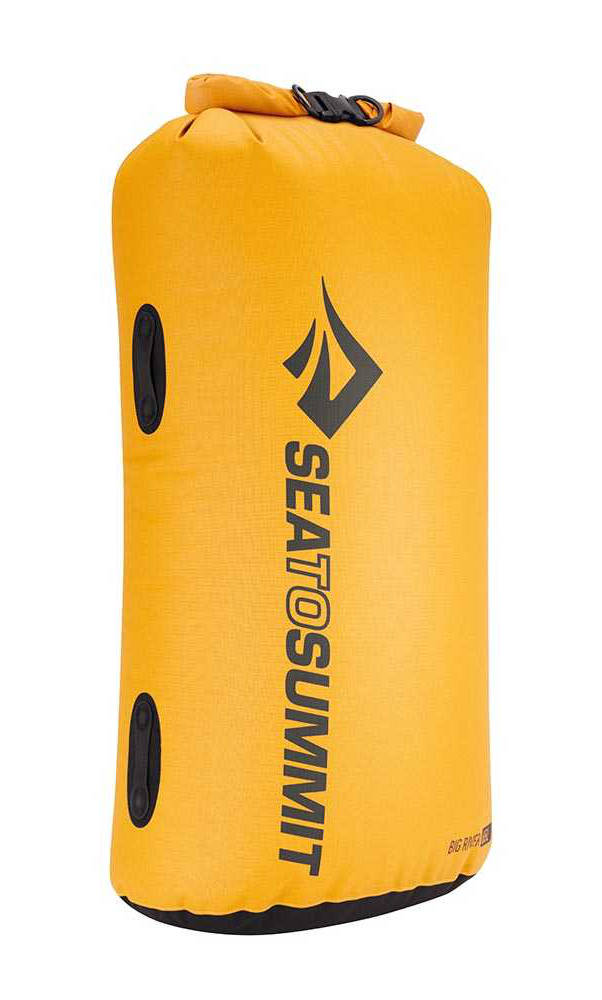
Sea to Summit Big River 65L
Although the Flex PR has generous external storage and additional lashing options, I do feel that 50-litres is aminimum for a few days out in the back country. Better a larger bag and add another couple of rolls of the closure. Something like the ovalised Australian Sea to SummitBig River65-litre TPU roll-top (left). This is TPU laminated on 420D nylon with a white lining and a textured, ripstop exterior. It weighs 315g (verified) and has hypalon side loops which more or less line up with the Flex’s side straps. It now costs £80. Compare it to S2S’s 75-litre Big River Dry Backpack for £150 of less, with a thin hip belt.
It took the first Knoydart recce trip to realise my large, sausage-like UDB duffle wasn’t suited to the Flex. And much as I prefer a top loading holdall-style bag, every morning I had to re-lash my black UDB into the harness, made harder by everything being black. When bothered by swarms of midges or rain, you don’t want to have to think about re-lashing the pack correctly each time, and there were times my long, thin load felt lopsided because the tall bag lacked girth.
Don’t mention the B-word
I’ve since tried to tidy up the set-up by tucking in unneeded loose ends and tying coloured ribbons to the important cinch straps, just like better tents have colour-coded markers for poles, but I couldn’t tighten the UDB down properly so it was often lopsided. So I bought myself the S2S Big River 65 dry bag, top-loading, like a rucksack. As mentioned, the Rebel 2K’s massive 140-litre in-hull storage capacity now makes a bombproof, over-the-bow dry bag like my trusty UDB redundant.
triple dry bag test
Back home, I dummy rigged three dry dry bags (above), but I can see it might still be a faff lashing on each time, just with added colour. However, one benefit of this multi-bag idea would be they pop straight into the 2K’s capacious TubeBags with no emptying and repacking. That would be handy on a trip where you’re switching between walking and rafting more than once a day.
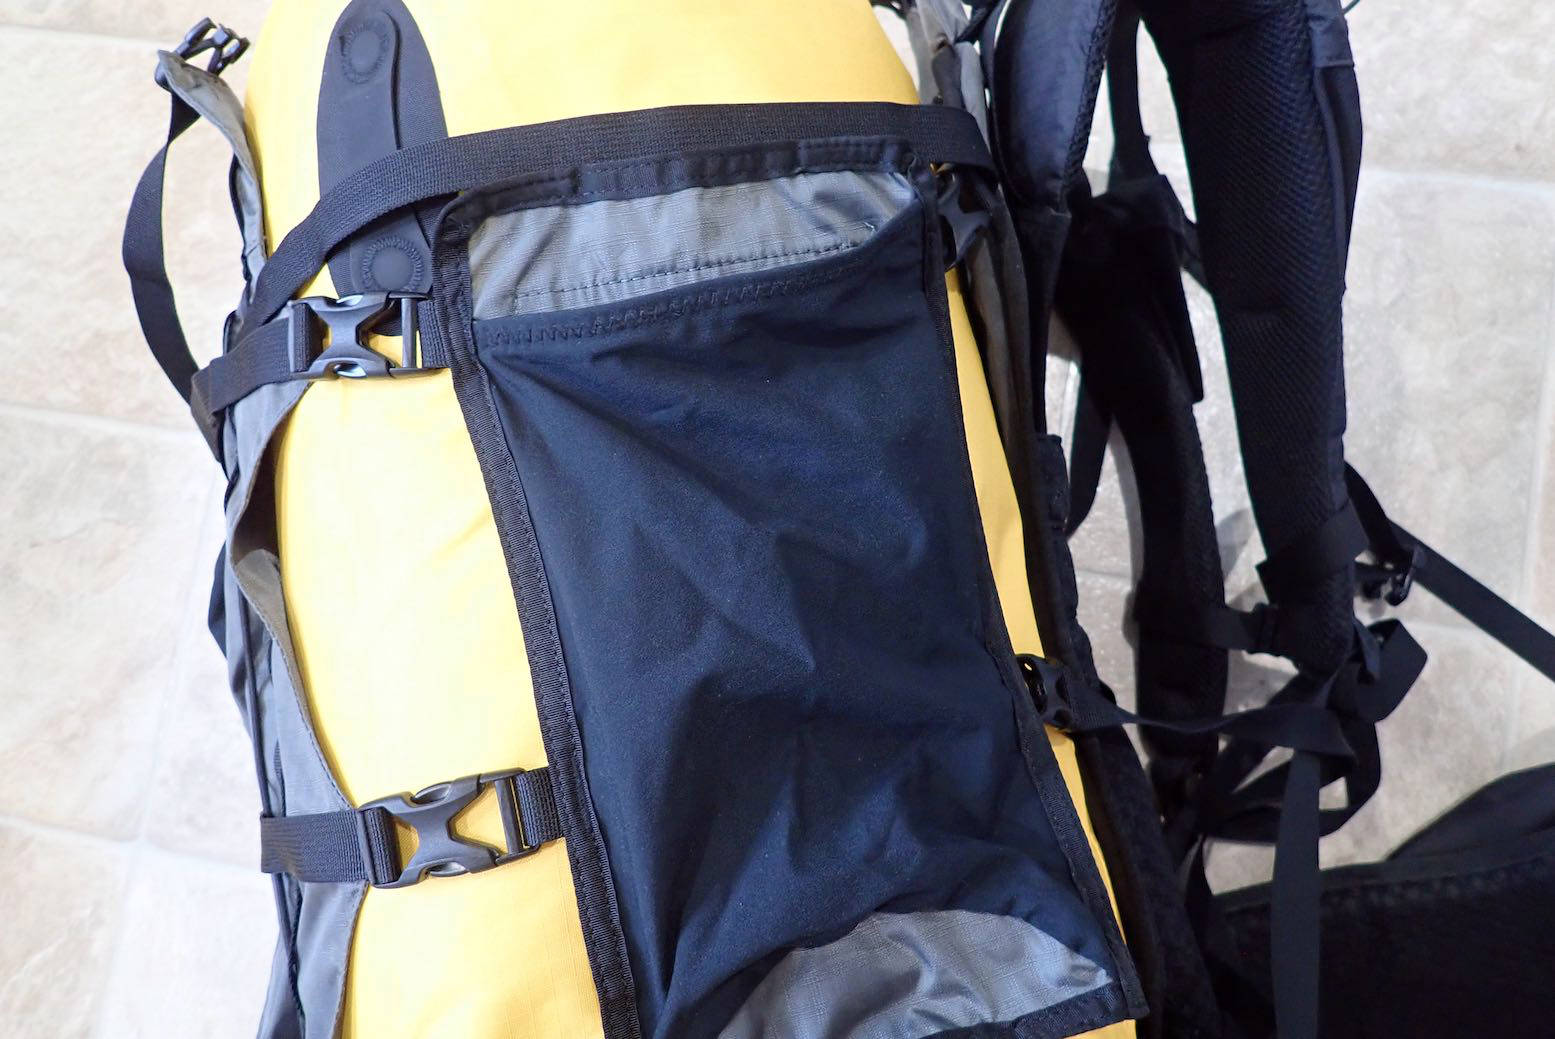
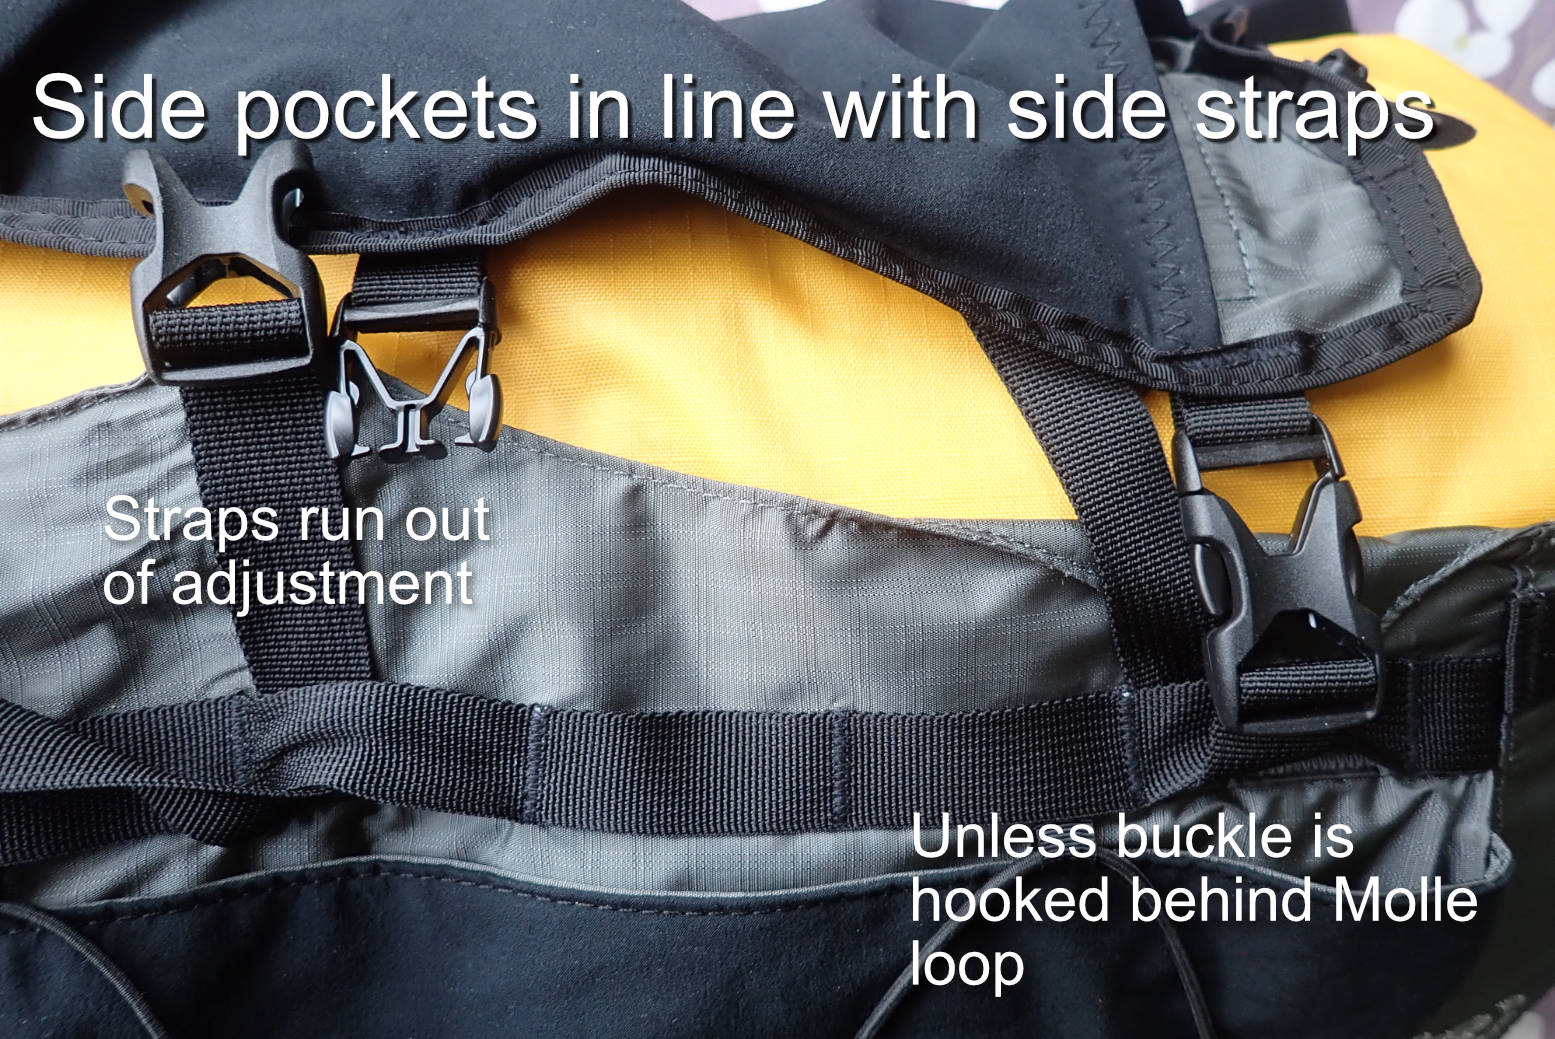
Pockets One of the best things about the PR are the numerous pockets which do their best to replicate a regular backpack, adding to convenience on the trail, something I missed on the Paragon. There’s a small hidden zipped pocket inside the back panel, two big fist-sized zip-ups on the hip belt and two detachable side pockets. With a stretchy outer fabric, these will easily each take a 1.5 litre water bottle or a rolled up cag. They can clip in line with the side cinch straps (below left), or can be Molle’d (daisy chained) from behind. Attaching them in line would make tensioning easier, but unless your load has a massive girth, the width of the pockets combined with the wide back panel makes it difficult to fully tension a normal sized pack properly before you run out of adjustment. Maybe my Sea to Summit bag was an odd shape, but it’s 30% bigger than the 6MD dry bag. Setting the rear panel buckles two inches further towards the centre would do the trick. One way round this might be to slip you paddles down the sides to add girth.
Side pockets clipped in line; too much slack for cinching
Next, you have stretchy cinch-up pockets sewn to the shoulder straps but, as others have noted, they’re too small to secure anything bigger than a Garmin InReach or maybe a midge net, and are set oddly high. On me they were level with the tops of my shoulders. Although they have to dodge the chest strap which can be Molle’d up or down in five positions. It would be better if the pockets were Molle-backed too. As it is, it’s easy to buy accessory shoulder-strap pockets for your bigger items. Not done get. The wide outer cover has a big open sleeve which swallows a four-part paddle, and in front is a long stretchy, gusseted zip pocket for more of whatever you’ve got. On top of that is a criss-cross elastic cord which I used to attach a WindPaddle.
Removable 2-litre side pocketsAdjustable lumbar support
My walk was quite hard: 18 miles on day one, followed by a tough crossing from sea level up to 1500 feet and back down to sea level. While I got a few initial aches from old injuries initially carrying over 18kg, at no time did my shoulders get sore which proves the stiff harness panel was taking the weight at the hip belt (and from there down to the hard-pressed feet). And the hip belt is particularly good: the pockets aren’t waterproof but are a useful size (unlike the Paragon), and the twin straps each side mean you can cinch it in snugly, whatever your hip shape. I’d have preferred a bigger hip belt buckle and in fact found all the Flex’s clip buckles oddly hard to link; they didn’t readily clip together, possibly due to relatively soft, bendy plastic.
Packraft underneath is vulnerable to scuffs but lower CoG.
On the way back to the Inverie ferry I decided to take the packraft out of the UDB and strap it underneath (above), using the fitted straps for this purpose. Surprise, surprise, the lowered load carried much better. Hung outside and quite wide but out of sight. But the rolled-up boat is vulnerable to getting snagged on barbed wire fences, farm gate latches, or when being hauled about in transit.
Knoydart Trip Two I returned to Knoydart with a chum and the 65-litre S2S Big River (below). Left attached in the harness’ side straps, this made the Flex work as intended like a regular rucksack; no need to re-lash or adjust too much every morning or when swapping from walking to paddling.
Sea to Summit 65-L Big River dry bag. That’s more like it
Roll top closure may seep through eventually; a cover could be easily tucked under the straps
Using the 65-litre bag, I did wonder if 50 might well be adequate, but this was with minimal and compact camping kit. Any warm- or spare clothing or a dry suit would soon need more volume in the dry bag. We had two half-days of lashing rain; my mate fitted a shower cap over his regular rucksack and I found the water had seeped only a little way through the rolled folds of the Big River., as it does with most roll tops. The bigger your bag the more tight rolls you can make on the closure, but actually in pouring rain it would be fairly easy to tuck a cover over the closed dry bag rolls to stop any rain getting there.
Boat dry bag as foot matFlex PR under the knees with handy pocket access
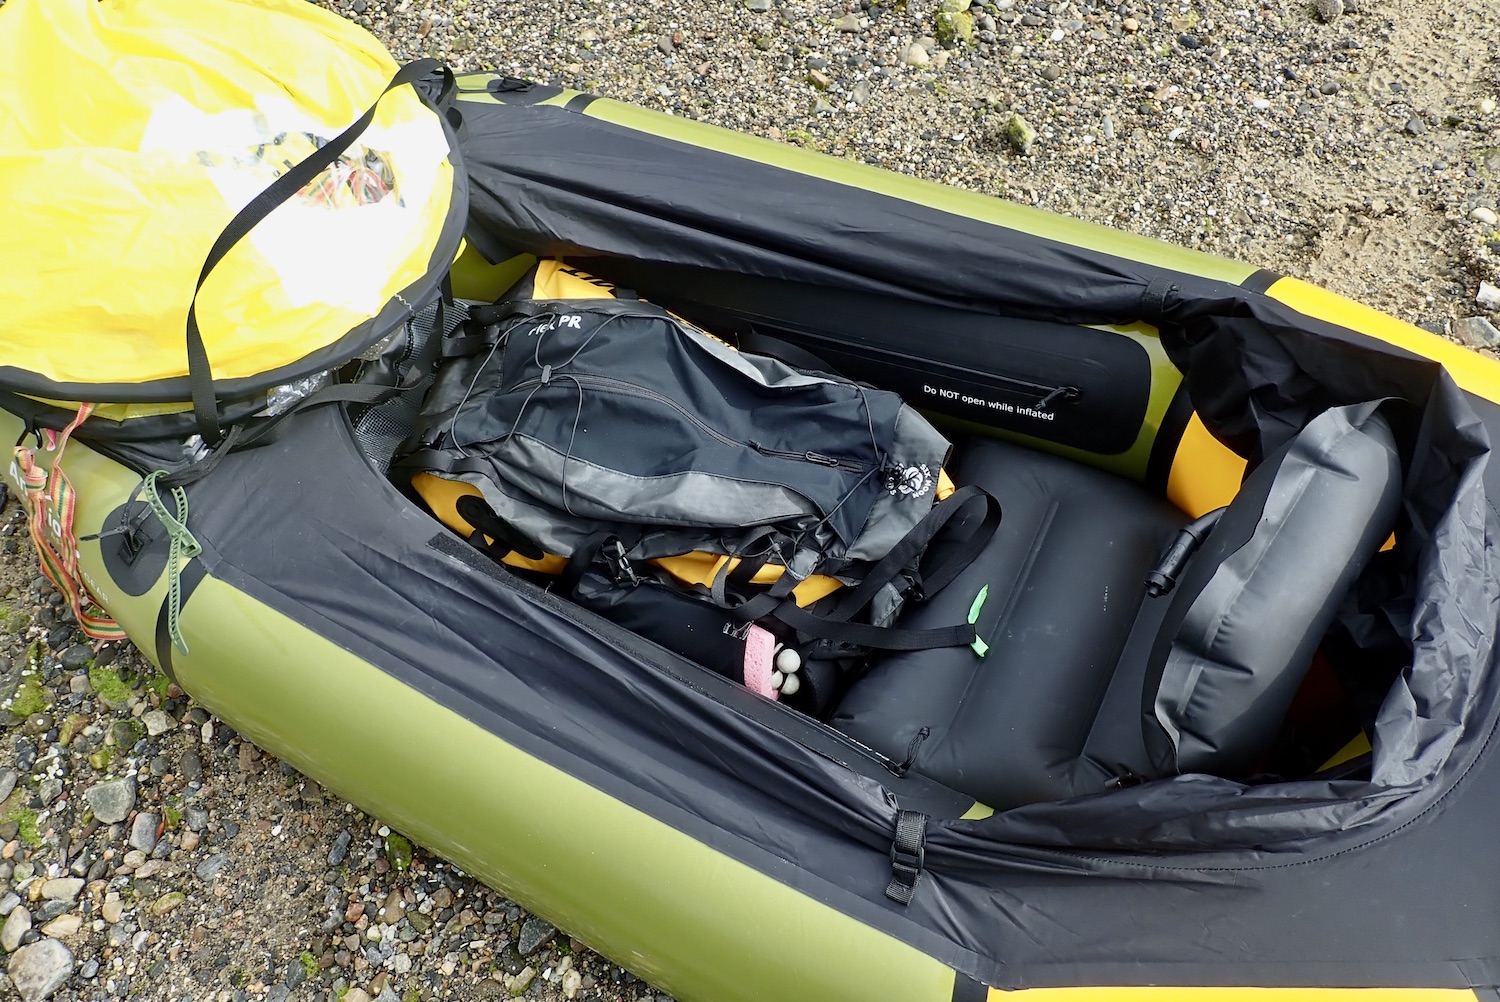
With everything within the pack loaded into six bags, it took just a minute to transfer them into the Rebel 2K’s hull and zip it up. I then used the chunky Gumotex dry bag which held the packraft as a footpad on the packrafts’s floor (to stop gritty boot heels prematurely chewing up the boat’s floor) and found I could easily shove the empty harness under my knees and zip up the deck. This made repacking the Flex at the shore relatively quick easy, though it always takes 20-30 minutes to get going.
The Flex PR now carries its load as well as can be expected and the S2S Big River added capacity for cold weather gear or a dry suit. I must say I didn’t really miss the lack of a purge valve; you burp the bag in the usual way then roll it down. Any spare air will be squashed out by the compression of the straps. The combination now offers reliable waterproofing on foot, while the pack would work OK on the bow, though in-hull storage (if it fits) and harness under the knees is more secure all round.
PS: On both trips I used my roomy 20-litre Anfibio DeckPack (below) as a handy day pack for which it worked very well. The stuff inside is behind a waterproof zip, is easily accessible on the move and up to a point, keeps the lashing rain from wetting out your cag.
Where used Loch Hourn, off Knoydart, Scotland (on my Anfibio 2K, and alongside an MRS Nomad S1).
Barry tries his Anfibio AirSail as a brolly
Rolls up compact (unlike framed versions) Big surface area Unexpectedly stable, controllable and steerable As long as you’re not using a deck, it can be temporarily pulled down and tucked under the knees when not wanted A 3.5-m long Nomad S1 can move at up to 5mph in strong gusts Uses the same valve and pump as the packraft Doubles as a tent footprint or mini-tarp or even a brolly
Window is too high (on a fat-bowed packraft) On a regular sized packraft, sailing might be slower than you think About 20% more expensive than Anfibio’s same-diameter PackSail Punctures or twisted bladder more likely than a broken batten?
The AirSail was supplied free by Anfibio for testing and review.
What They Say The first packraft sail of its kind! The light, inflatable AirSail gets your packraft going and lets you experience speed even on calm waters. The sail creates completely new possibilities to be on tour with the Packraft. Only 466g and minimal packing size.
Review On a multi-day packrafting trip or where you’re not returning the same way into the wind, sailing downwind is a smart means of conserving energy while enjoying a look around. At any other time, it’s just plain fun. Until now, the only options for packrafts were flexible, spring-out WindPaddle disc sails and their many inferior knock-offs. I’ve made my own and tried both, and currently own a WP Adventure 2 which has been OK on the Seawave IK and my old MRS Nomad, and even better on the Rebel 2K.
The Anfibio AirSail differs by using an inflatable bladder ring inside a fabric rim casing which you inflate via a Boston valve with the same 10-euro mini hand pump you use to top up the boat. The sail’s outer diameter is 137cm, so the sail is close to 130cm, as stated. Surprisingly, it seems to be possible to achieve as effective levels of stiffness to a flexible batten disc sail – a key to consistent performance – while an AirSail packs down to the size of a sleeping pad. My WindPaddle folds down to a flat, 40-cm disc which some might find more awkward to pack on the trail, though I can’t say I did.
Alone, out on the water in windy conditions it would be tricky to deploy the AirSail. Assuming a skeg is fitted and the sail’s already clipped to the bow via a couple of mini-karabiners, you need to reach forward to unstrap the sail (hard in my 2K with a deck zipped up), unfurl to unkink it, plug in your mini pump and give it two dozen jabs to fully inflate – all without being blown around or losing your paddle. Were I doing this, I’d add a short ‘haul-line’ to the base of the sail so I could pull it back into arm’s reach. I chose to do all this by the shore in the lee of a headland. I started with my electric Flex Pump but for some reason it didn’t do much, considering the small volume. It was the same next time, so in future I’d go straight to mini hand pump which needs around 25 pumps.
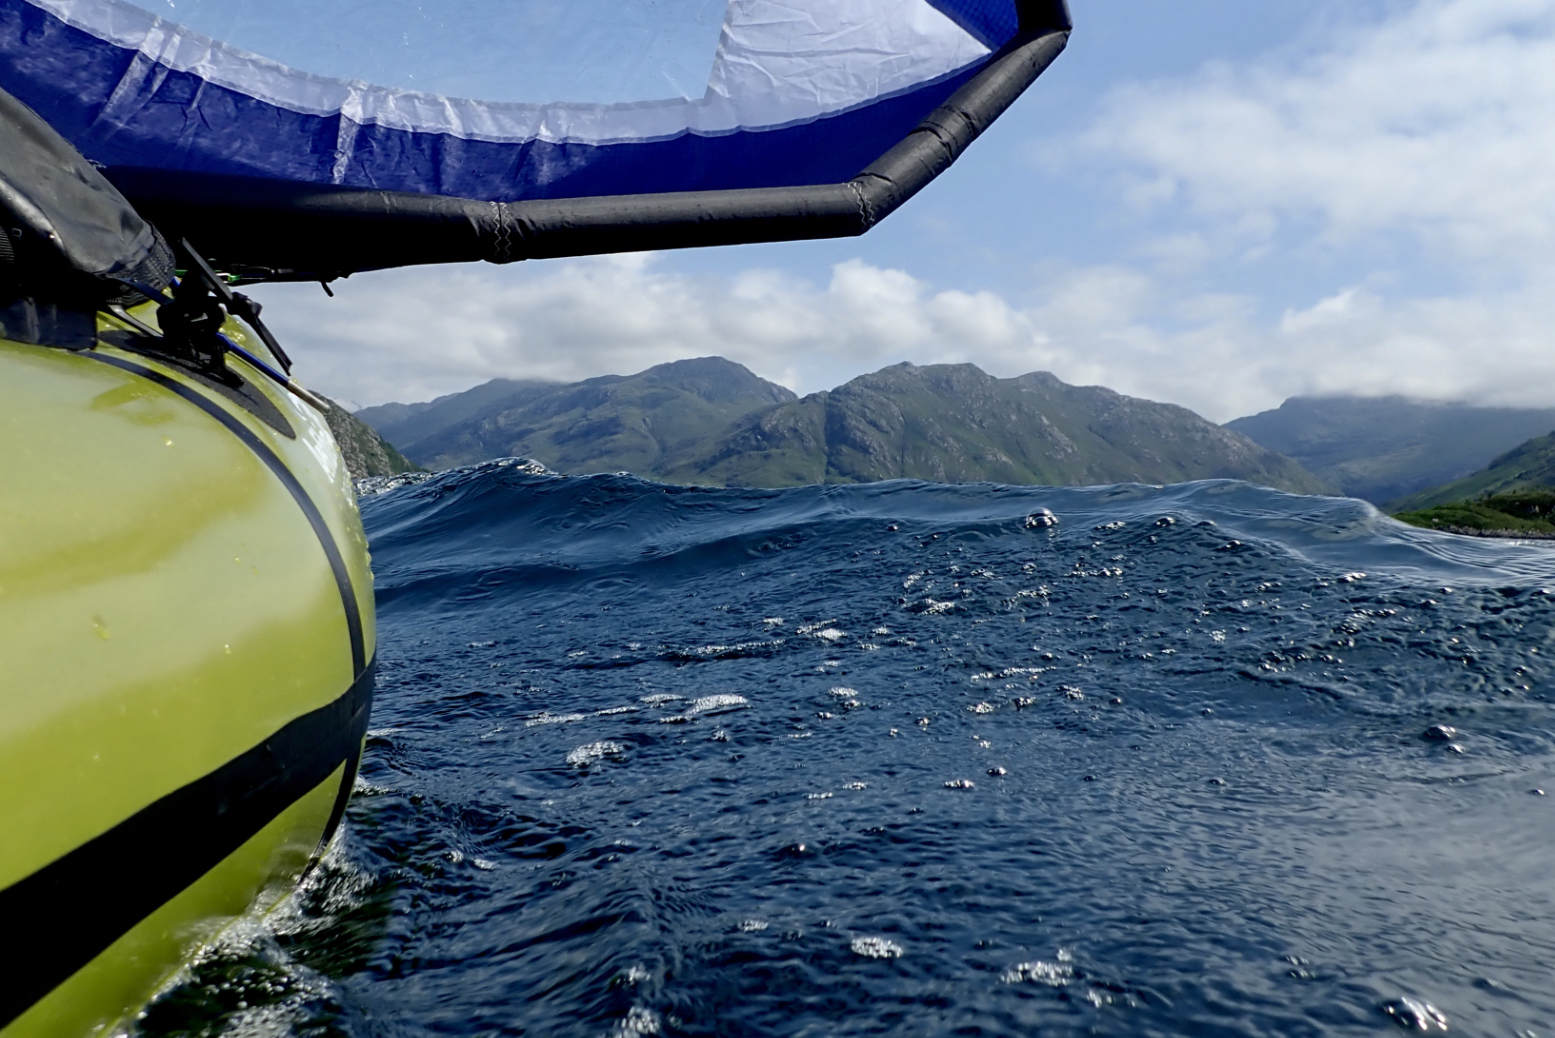
From my experiences with the WindPaddle on kayak and packraft, I was a bit nervous the even bigger AirSail might be a handful. I needn’t have worried. Funnelled down the steep-sided Loch Hourn, winds gusted to 15mph, but the Rebel 2K with the AirSail was easy to manage in a way the WindPaddle 2 never has been so far on other boats. And this was with an under-inflated air ring. There was no violent see-sawing from side to side, little need for constant correction and, considering I was out in the middle of a windy sea loch, I felt safe and in control. My paddle was leashed to the mooring line but also slipped securely under and out of the way underneath the DeckPack.
Use hand (safer in strong winds)Clip to pfd…..or use your head in calm winds
This plain sailing was partly because the 2K could not break into a gallop. I doubt I was going much faster than paddling, but it sure was effortless and relaxing. Had there been a signal I could have easily updated my profile on Insta or checked the forecast. The 4km which had taken me an increasingly slower 80 minutes, was covered downwind in an effortless 60 minutes I also think the low centre of gravity of the loaded 2K helped it sit on the water and – crucially – the lack of slack between the sail and boat fittings kept the under-inflated sail from swaying. I must try this taught rigging on the kayak next time; that could have been my problem all along.
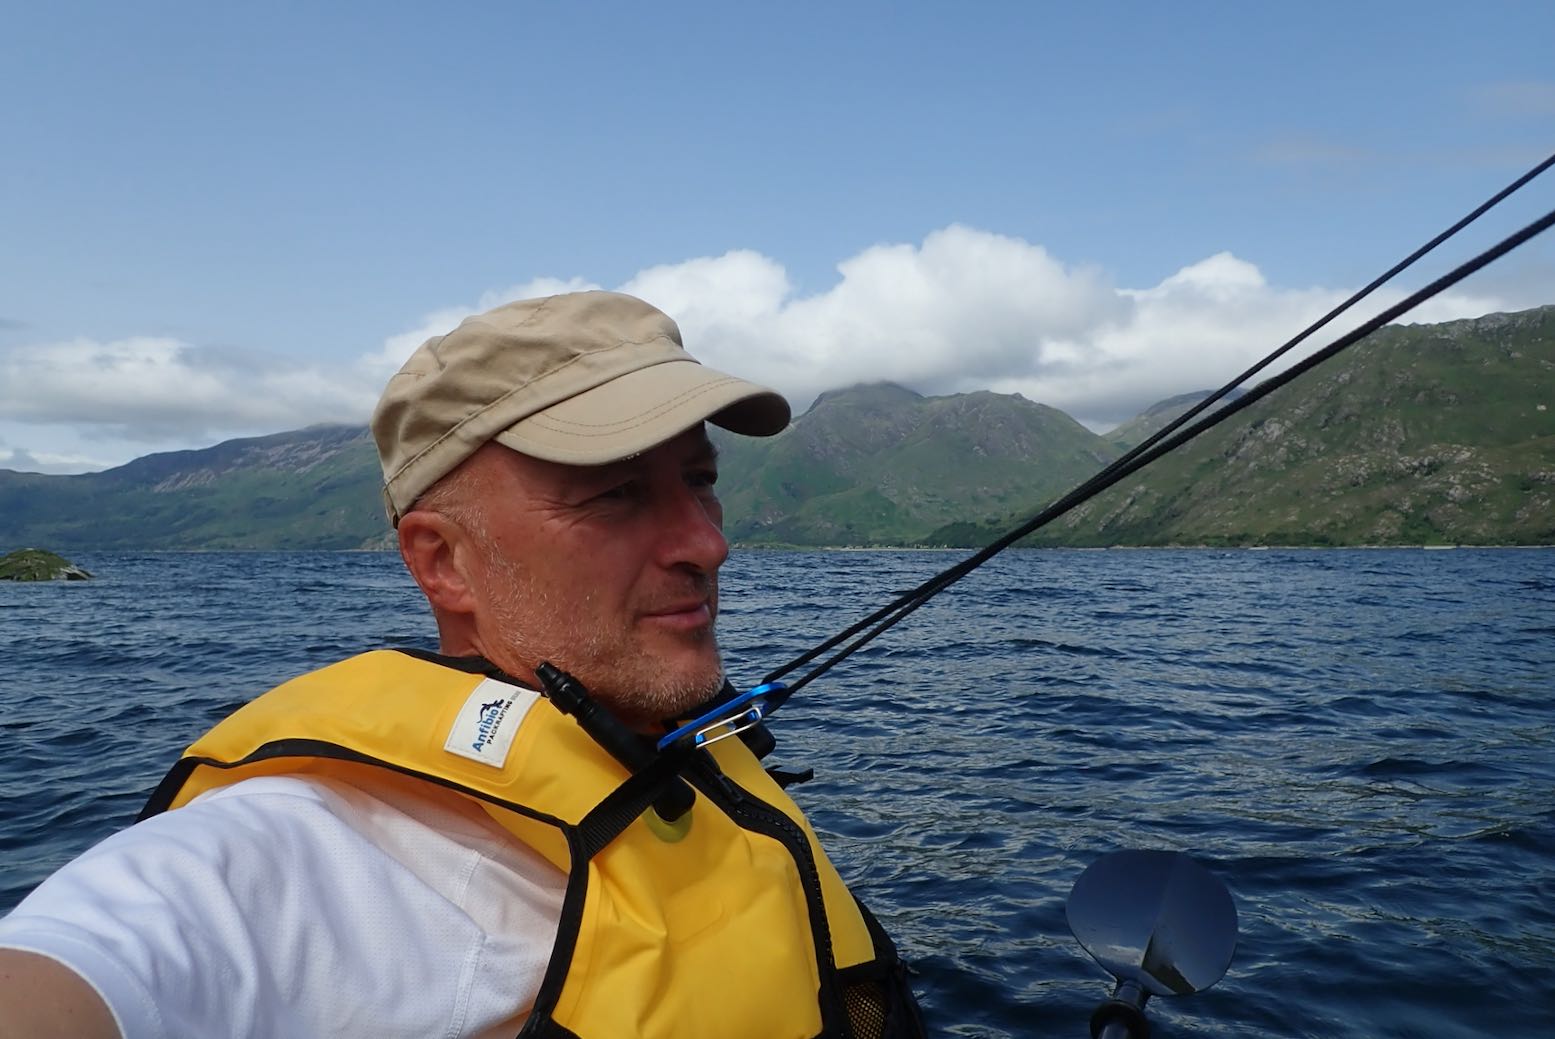
With the line clipped to a karabiner on my pfd or behind my head, most of the time I was sailing hands free which made filming easy. The line was just the right length, too. Only tiny tweaks were needed to keep the boat on line, due to the back getting blown round. This was most probably down to the small skeg, but was all much less frantic than my recent sail with the WP on the Seawave. I suppose with free hands, the paddle could have been used as rudder to maintain a heading, but I didn’t think to try that as I was going vaguely in the right direction. Something to try next time. One problem with the AirSail: because the bow on a 2K is high compared to a kayak, the window is too high to see what’s ahead; it’s the lower third which needs a clear PVC pane. Most of the time it doesn’t matter; you can lower the sail or look around. In fact, it would be great if the whole thing was made of clear film, but weight, rolled volume or strength may not add up.
Holding on for dear life, and AirSail on Nomad S1 bursting at the seams in 25-mph gusts
With the line out of your hands it’s easy to try and add a bit of speed by paddling as well, but at best this might add a tiny bit of speed and will help keep you warm. You do notice that not paddling can chill you. Once you’ve had a good look around, after being used to having to paddle every hard-won metre, sailing slowly might even be said to be a little boring unless the winds are strong,. But on a long day on a multi-day tour, you’ll welcome the break when you get a chance, as we did on Knoydart.
As you can see, a couple of weeks later I travelled with a mate in an MRS Nomad S1 using the same Anfibio AirSail, with me WindPaddling in my 2K. The longer Nomad is a bit faster than my 2K, and with the AirSail was quite a lot faster, maybe 15%, especially in strong winds. That meant that the Nomad had to stop to wait for me to catch up, which also proved that the AirSail could be pulled back and tucked out of the way under the knees. The added space up front on the Nomad makes this easier than in a regular packraft, but requires not using a deck, unless some sort of cross-strap arrangement is set up to hold the sail down.
AirSail; another thing to inflatePaddle-sailing helps you keep warm
Longer MRS Nomad S1 sailed quicker than my 2K
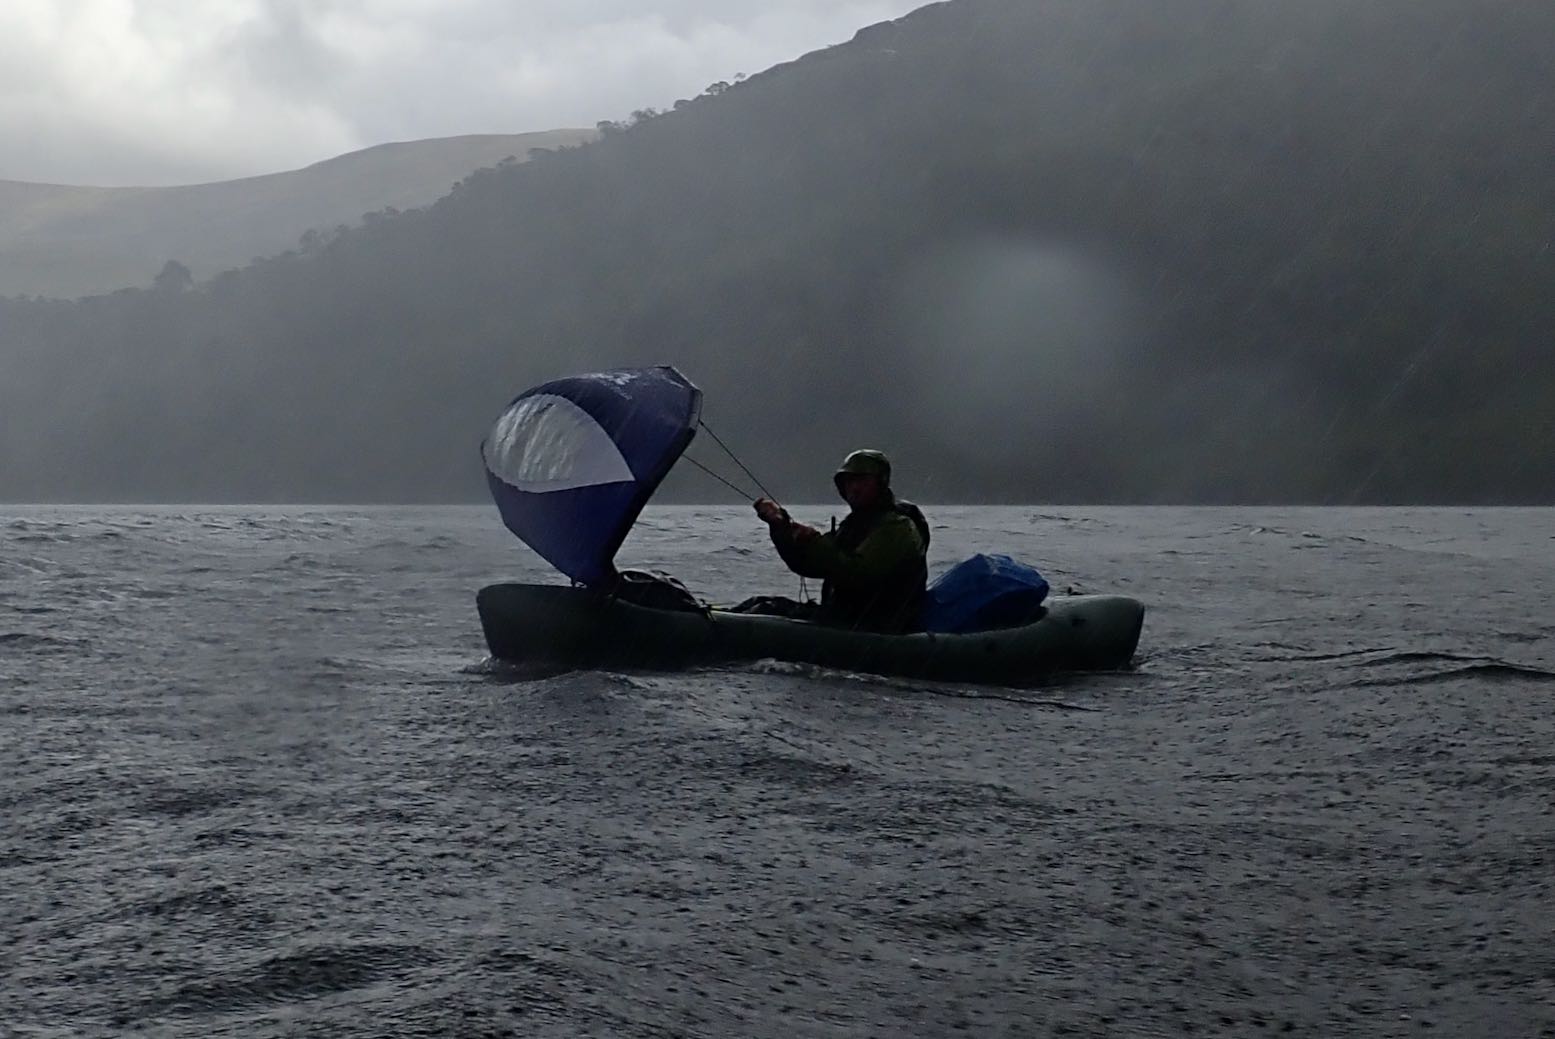
Sailing in squalls of up to 25mph took quite a lot of concentration but never felt unsafe. The Nomad was reaching 5mph (8mph) but remained stable and controllable (as did my slower 2K with the WP sail). With both types of sail, this was sailing at its best: satisfying, safe but exciting too The problem with sailing is you don’t generate any heat. We were already wet from a long walk before we got on the water, and neither of our hiking cags were up to it. After an hour or so of hanging on in torrential squalls, and with another two hours to the end of the loch, my mate in the undecked Nomad had to go ashore to drain his boat by which time both of us were chilled. We’d both tried paddle-sailing to warm up (and me, to catch up), but were too far gone to make a difference in the conditions that day. If you plan to paddle and sail an undecked packraft in all conditions, get a dry suit and maybe a bilge pump.
Having used the AirSail and paddled alongside one, I still think I’d choose the cheaper, same weight/ø, batten-rimmed PackSail. For me the value in being able to stow or release a sail in a few seconds is not offset by the slight awkwardness of needing to stash a 40-cm disc. But it’s nice to have the choice.
For easier access, unhook the left corner from the peg.
In a line Light and compact single hoop tent suited to packrafting; just don’t expect a palace.
Cost £330 ‘Grade B’ direct from Terra Nova (normally £500).
Weight As delivered in the bag: 1.26kg
Where used A few nights around Knoydart, Scotland and mid-Wales.
As light and compact and you’ll get, for the money Long enough inside, once you lie down Good venting options Quick pitching, once you get the knack As boring greens go, it’s not a bad hue
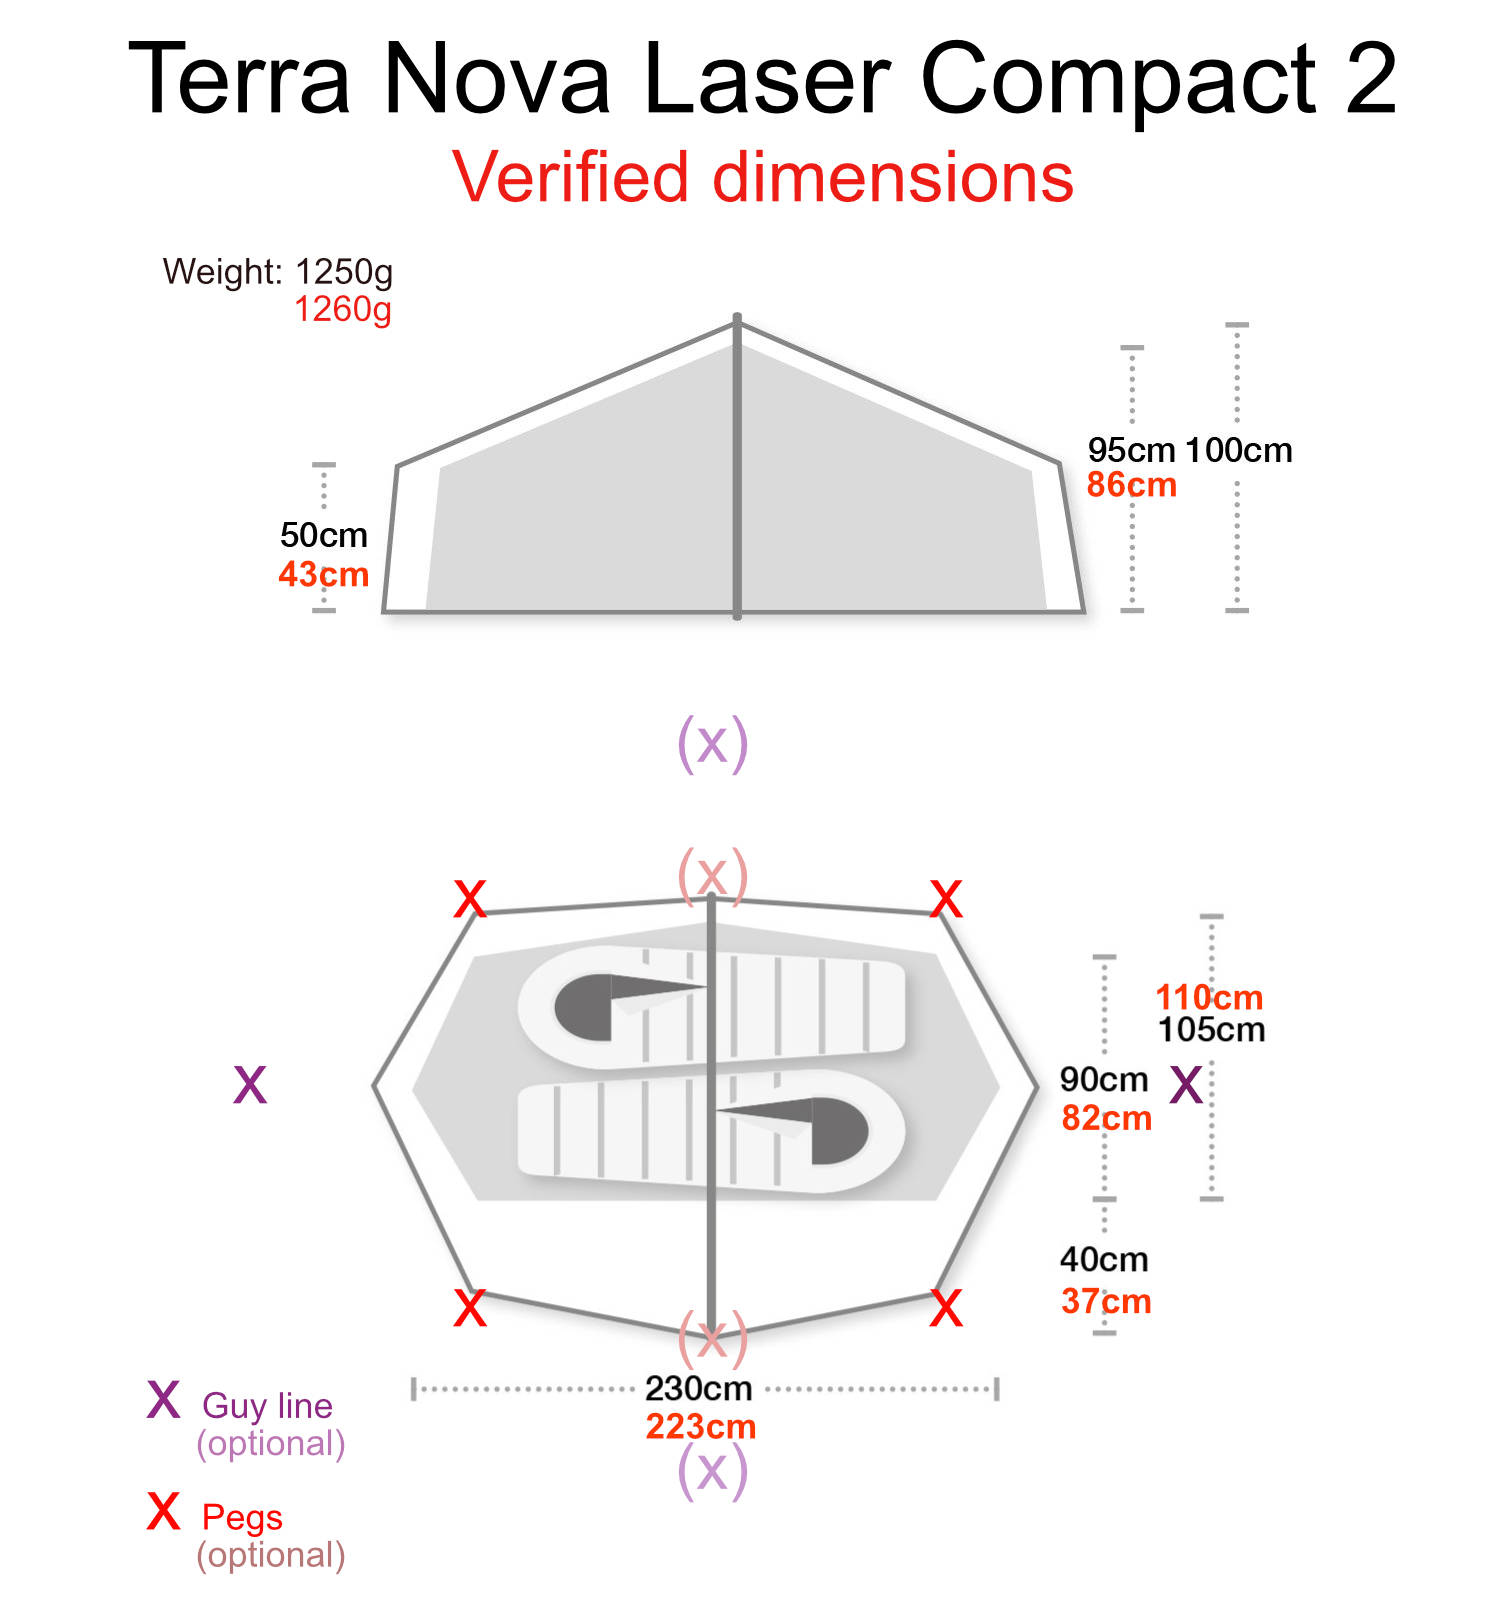
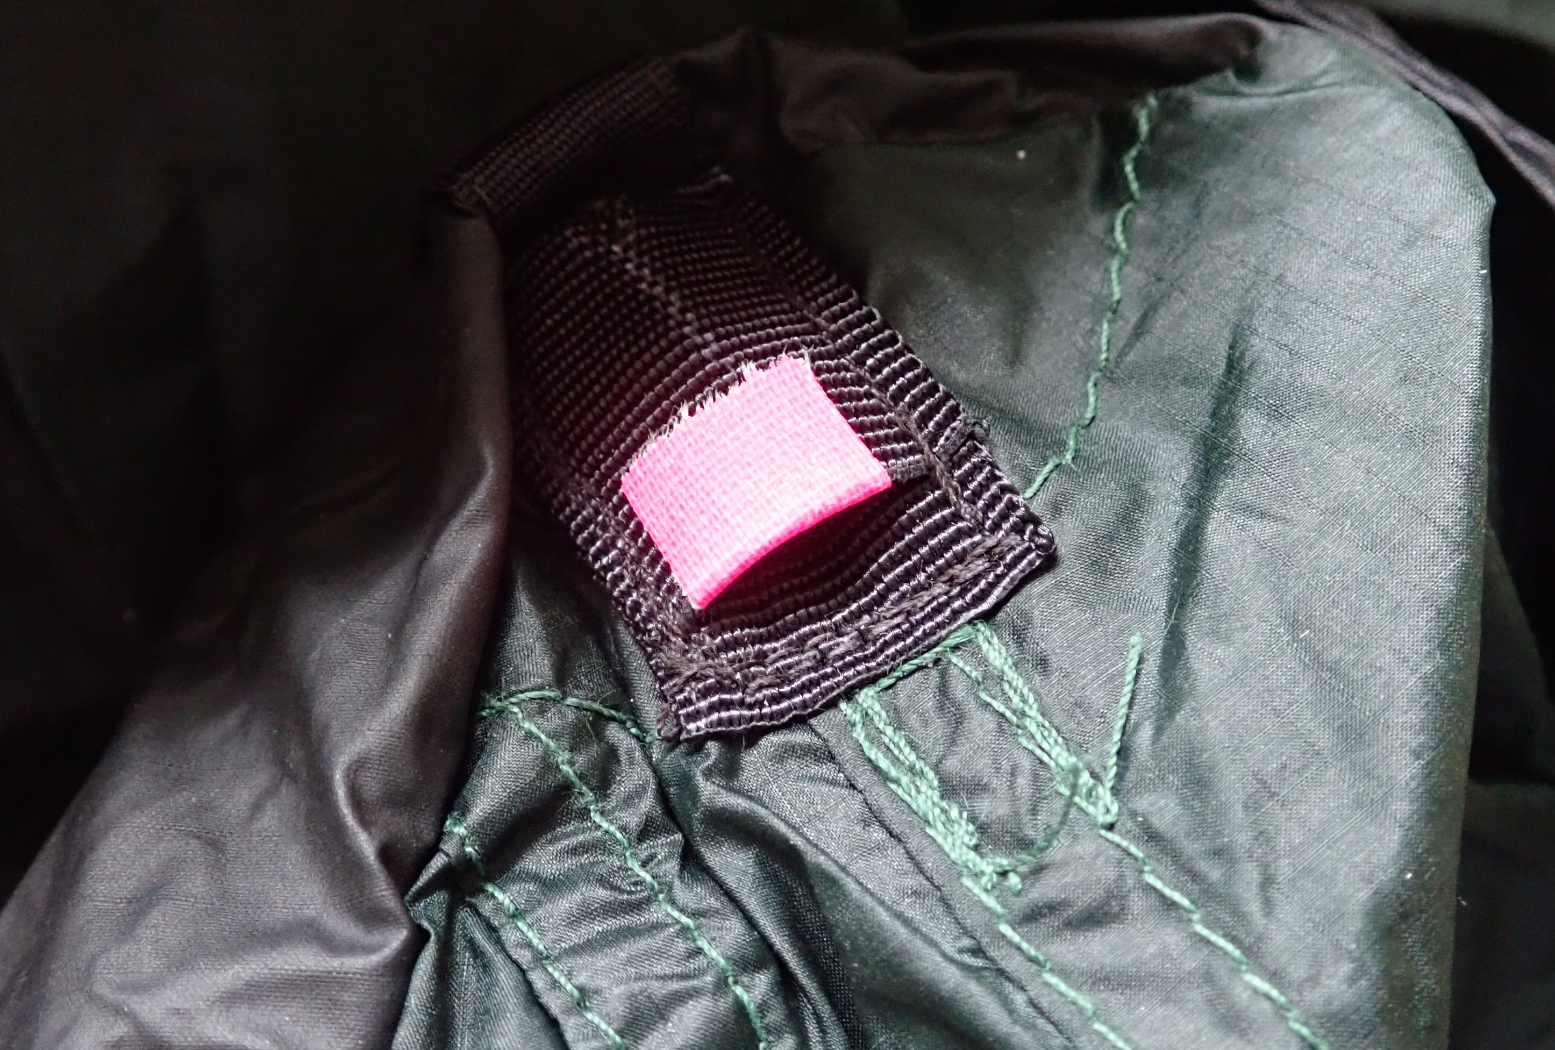
Smaller than claimed in nearly all dimensions Way too small for two adults, despite ‘2P’ claims The fly door zip always snags – this drives me nuts Toggling up the tent door is awkward and unreliable (just undo one corner – picture above) Afterthought lace-on rain cover Basic (but light) bent-wire pegs Fly only rated to 1200mm Despite vents and an open door, it can be wringing wet with condensation
What They Say The [Terra Nova] Laser Compact 2 is the small pack size version of the classic two-person tent, the Laser Competition 2, that offers a great mix of being super-low weight with additional comfort. With all of the benefits and features you would expect from a 2-person lightweight tent partnered with a compact pack size of only 30cm long.
Review I talked myself into a new tent for a Knoydart trip; something with less weight and less uncompressed bulk, but still with UK-weather friendly all-in-one pitching. At a claimed weight of 1.23 kilos (2lb 11oz), the Laser Compact 2 is over half the weight of my long-discontinued, five-year-old Vaude Odyssee. There was nothing wrong with the Odyssee apart from perceived bulk and actual weight. The space inside was great and the stand-alone stability was handy. To save bulk, one time I packrafted in France with just the outer, but for Scottish summers a midge-proof inner is as vital as a rain-proof cover. The Laser Compact 2 is like the older Laser Competition model, but the main pole now breaks down to just 30cm. TN also do an ‘All Season’ version with additional guys and a 30D/5000mm head flysheet at £550 and 1.8kg. And under their budget ‘Wild Country’ label, they do a similar looking Zephyros 2 for just £210 and 1.85kg. So weight-wise the Laser hits the sweet spot. Other tents I considered were the MSR Hubba, as used by Barry on the Wye in April, the similar Big Agnes Copper Dome (both around £450). Tarp Tent’s Double Rainbow was another one I looked at before bouncing off on a Dyneema (Cuben fibre) trajectory. Once I realised this research could take some time, seeing the little-used Laser at a third off direct from Terra Nova put me out of my misery and I took a chance on something different. It helped that after more than five years and 10,000km, round-Britain walker Quintin Lake still rated his.
Garden pitch: first impressions Even without watching the vid below, first-time pitching was not too confounding: thread the main hoop; fit the short end-poles and guy them out, then peg the four corners. My old Exped footprint (200g) slipped underneath. (I didn’t bother with the ‘rain cover’ till later). Apart from a bit of grass inside, the tent appeared like new.
At 10g each, the ten supplied pegs are light, but are just just bent alloy wire which date back to the 1970s. I left them in the box and staked out with my old MSR Groundhogs at an extra 4g a shot. Peering inside, I was prepared to be a little disappointed with the Lazer, and so I was. As expected, it looked pokier and less welcoming than the Odyssee, and once measured (twice, over two days) proved to be substantially smaller than stated, most annoyingly in headroom of just 86cm. I’m sure glad I didn’t pay 500 quid to find that out.
On the bright side, at 220cm the sleeping length is fully usable because the inner’s ends are upright, not sloping, (so no damp sleeping bag foot). Like my old Hilliberg, with few poles to latch on to, the inner isn’t especially taught, adding to the cramped feeling, but better pitching and tensioning improved this. The inner mesh door zips right back down to one corner where there’s a small mesh pocket to stuff it into. With the main fly porch entry at the other end, this only pocket would be at your feet. Two people my size in here would be unbearable, but as a solo tent it’s OK. At this weight, compromises are to be expected. The Laser comes with an 80-g pole seam rain cover which you thread on with bits of string. It’s there to stop heavy rain seeping through the over-arching seam, but feels like a design afterthought. Once you fit it you can leave it there until it comes undone, then I left it off. It looked like mine had never been fitted and was missing a cord lock to cinch it up snugly. Some have reported the attachment strings coming away from the rain cover; others say the cover isn’t needed unless it really pours. Terra Nova now recommend sealing the seam. Why not just design a waterproof flysheet?
Rain cover draped overHigh-wind guy attached to cover, not tent
Compared to my 3 cross-pole Vaude, the single-pole Laser may get pushed about in the wind. Another reason to leave the rain cover fitted is that it incorporates additional guys to help stabilise the tent. The guy lines on mine looked too short to provide good triangulation, but I’ll give them a go when the time comes. With the rain cover laced and cinched, and the seams underneath sealed (more below), the Laser ought to be up for some rain and wind.
Clear DIY sealant + white spiritMix 1:1 or soAnd paint your seams
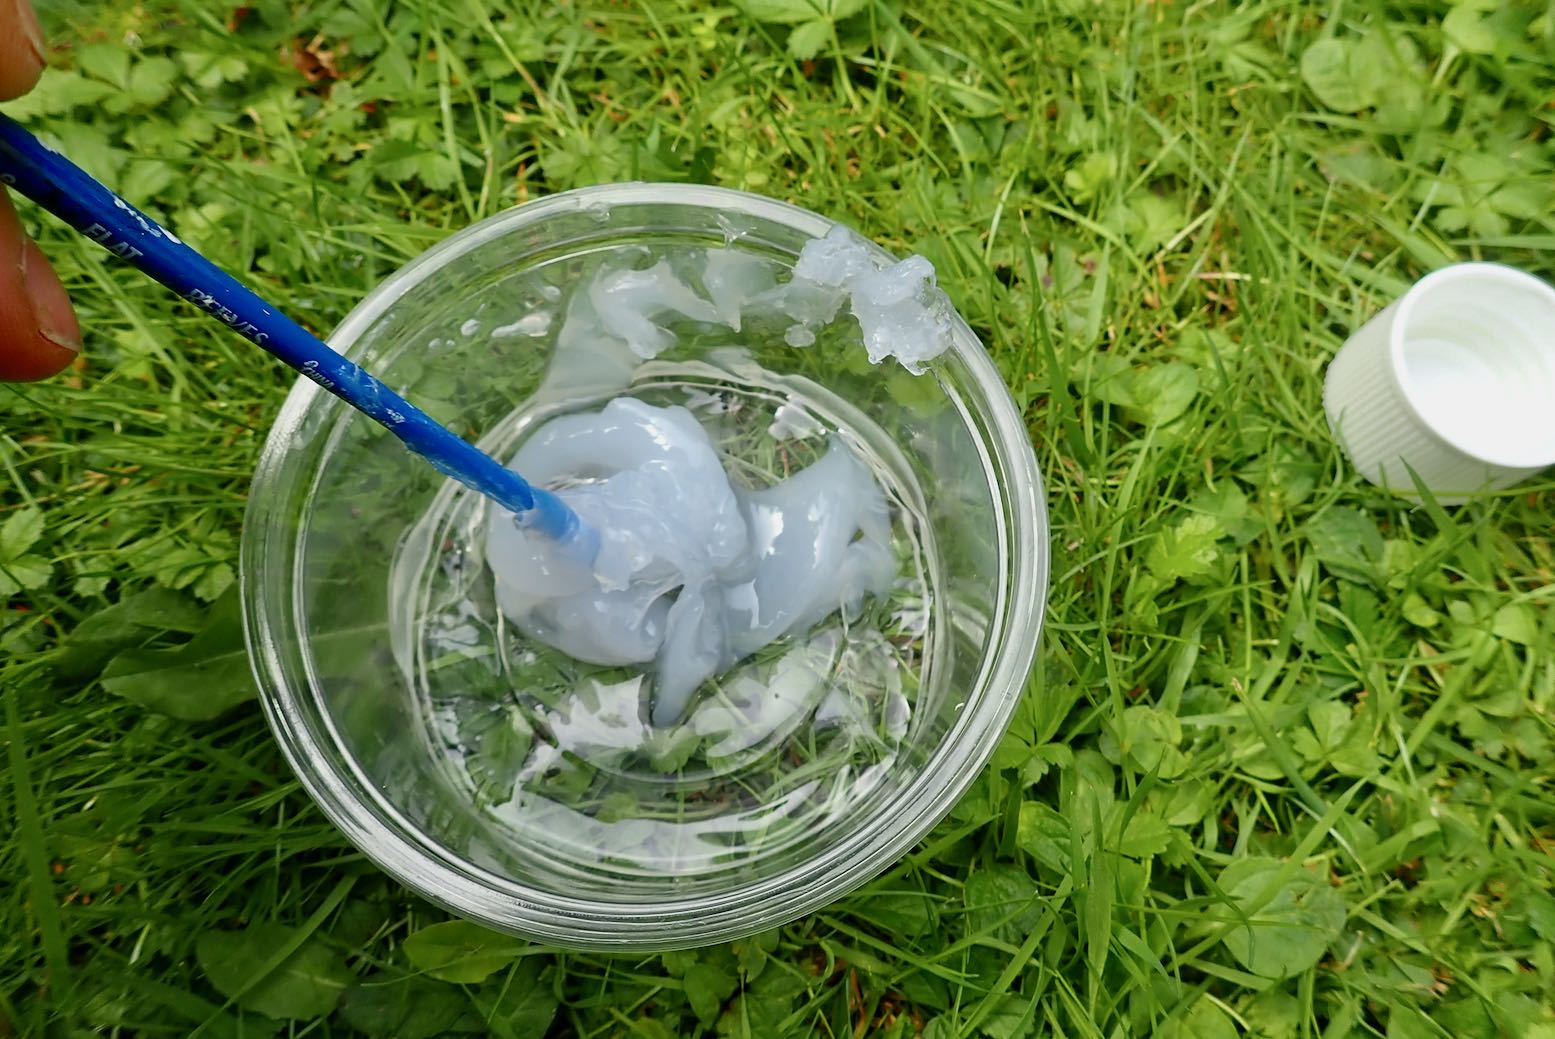
This after-purchase seam sealing to make a tent fully waterproof seems an odd practice, but for years many expensive American-branded tents required this. MSR even have a how-to video. Imagine; you pay hundreds for a bomber tent, then you’re expected to finish the job of making it an effective shelter! Seam sealing is actually as easy as painting and it’s satisfying to start your tent-bonding process by enhancing impermeability. You can buy 28g tubes of tent seam seal for £8 or, if you have some clear bathroom sealant and mineral/white spirit under the kitchen sink, that’ll work mixed 1:1 (add more spirit for a runnier mix). It takes a good few hours if not a day to dry.
Camping on Knoydart Considering it’s mostly wilderness, finding ten square feet of flat, smooth terrain fit for camping can be a struggle in Knoydart. Ironically I spent three nights in unexpected campsites where the roomy pitches and nearby kitchen buildings made the whole business of bug-free cooking so much easier. Morning and evening midges made lounging around outside irksome; this was the first time I’ve used a midge net in Scotland, but I’ve not come here in July for that very reason since I was a teenager.
In fact the compact inner was not noticeably frustrating, and I realise getting out without snagging the fly is easier with side-entry tents like this. Condensation could be as bad or as negligible as any other similar tent. The end vents were never closed and neither was the fly door, where possible. Three nights the fly was soaking inside and out, and two nights all was nearly dry. But with the second door and easy to lift corners, wiping it all down prior to packing was easy to do well, especially using a cellulose sponge wipe (right). I’ll keep one with the tent in future. The sil-nylon fly material is very slippery; it’s even hard to shove it all back into the stuff sack.
One persistent issue I had which slowed down pitching was locating the fabric slot sleeves for the short pole at each end of the tent. It’s all a mass of green and black on black. I didn’t even spot the tiny sleeve at all first time round and put the pole in wrong. I’ve since added a bit of fluo tape to help make that easier while the rain lashes, the wind howls or the midges torment. Others, who’ve been to SpecSavers, complain that toggling the door up out of the way to the inner is awkward and it comes adrift. I agree and one reviewer recommended simply using a tent peg; other TN tents now use mini-magnets for the same job. For the moment I’ll use a small bulldog clip.
All in all, I ended up with a begrudging affection for my Laser 2 because it packs down so darn small. And a year later, pitching after a very long walk in Wales, I was surprised to be heartened by the sight of the pitched Laser, rather than groaning at the thought of getting in. I’ve yet to experience heavy winds or rain, or spend a rainy day tent-bound, which may change my view, but where weight and bulk count – as they do with packrafting as opposed to kayak camping – the Lazer ticks my boxes for the moment.
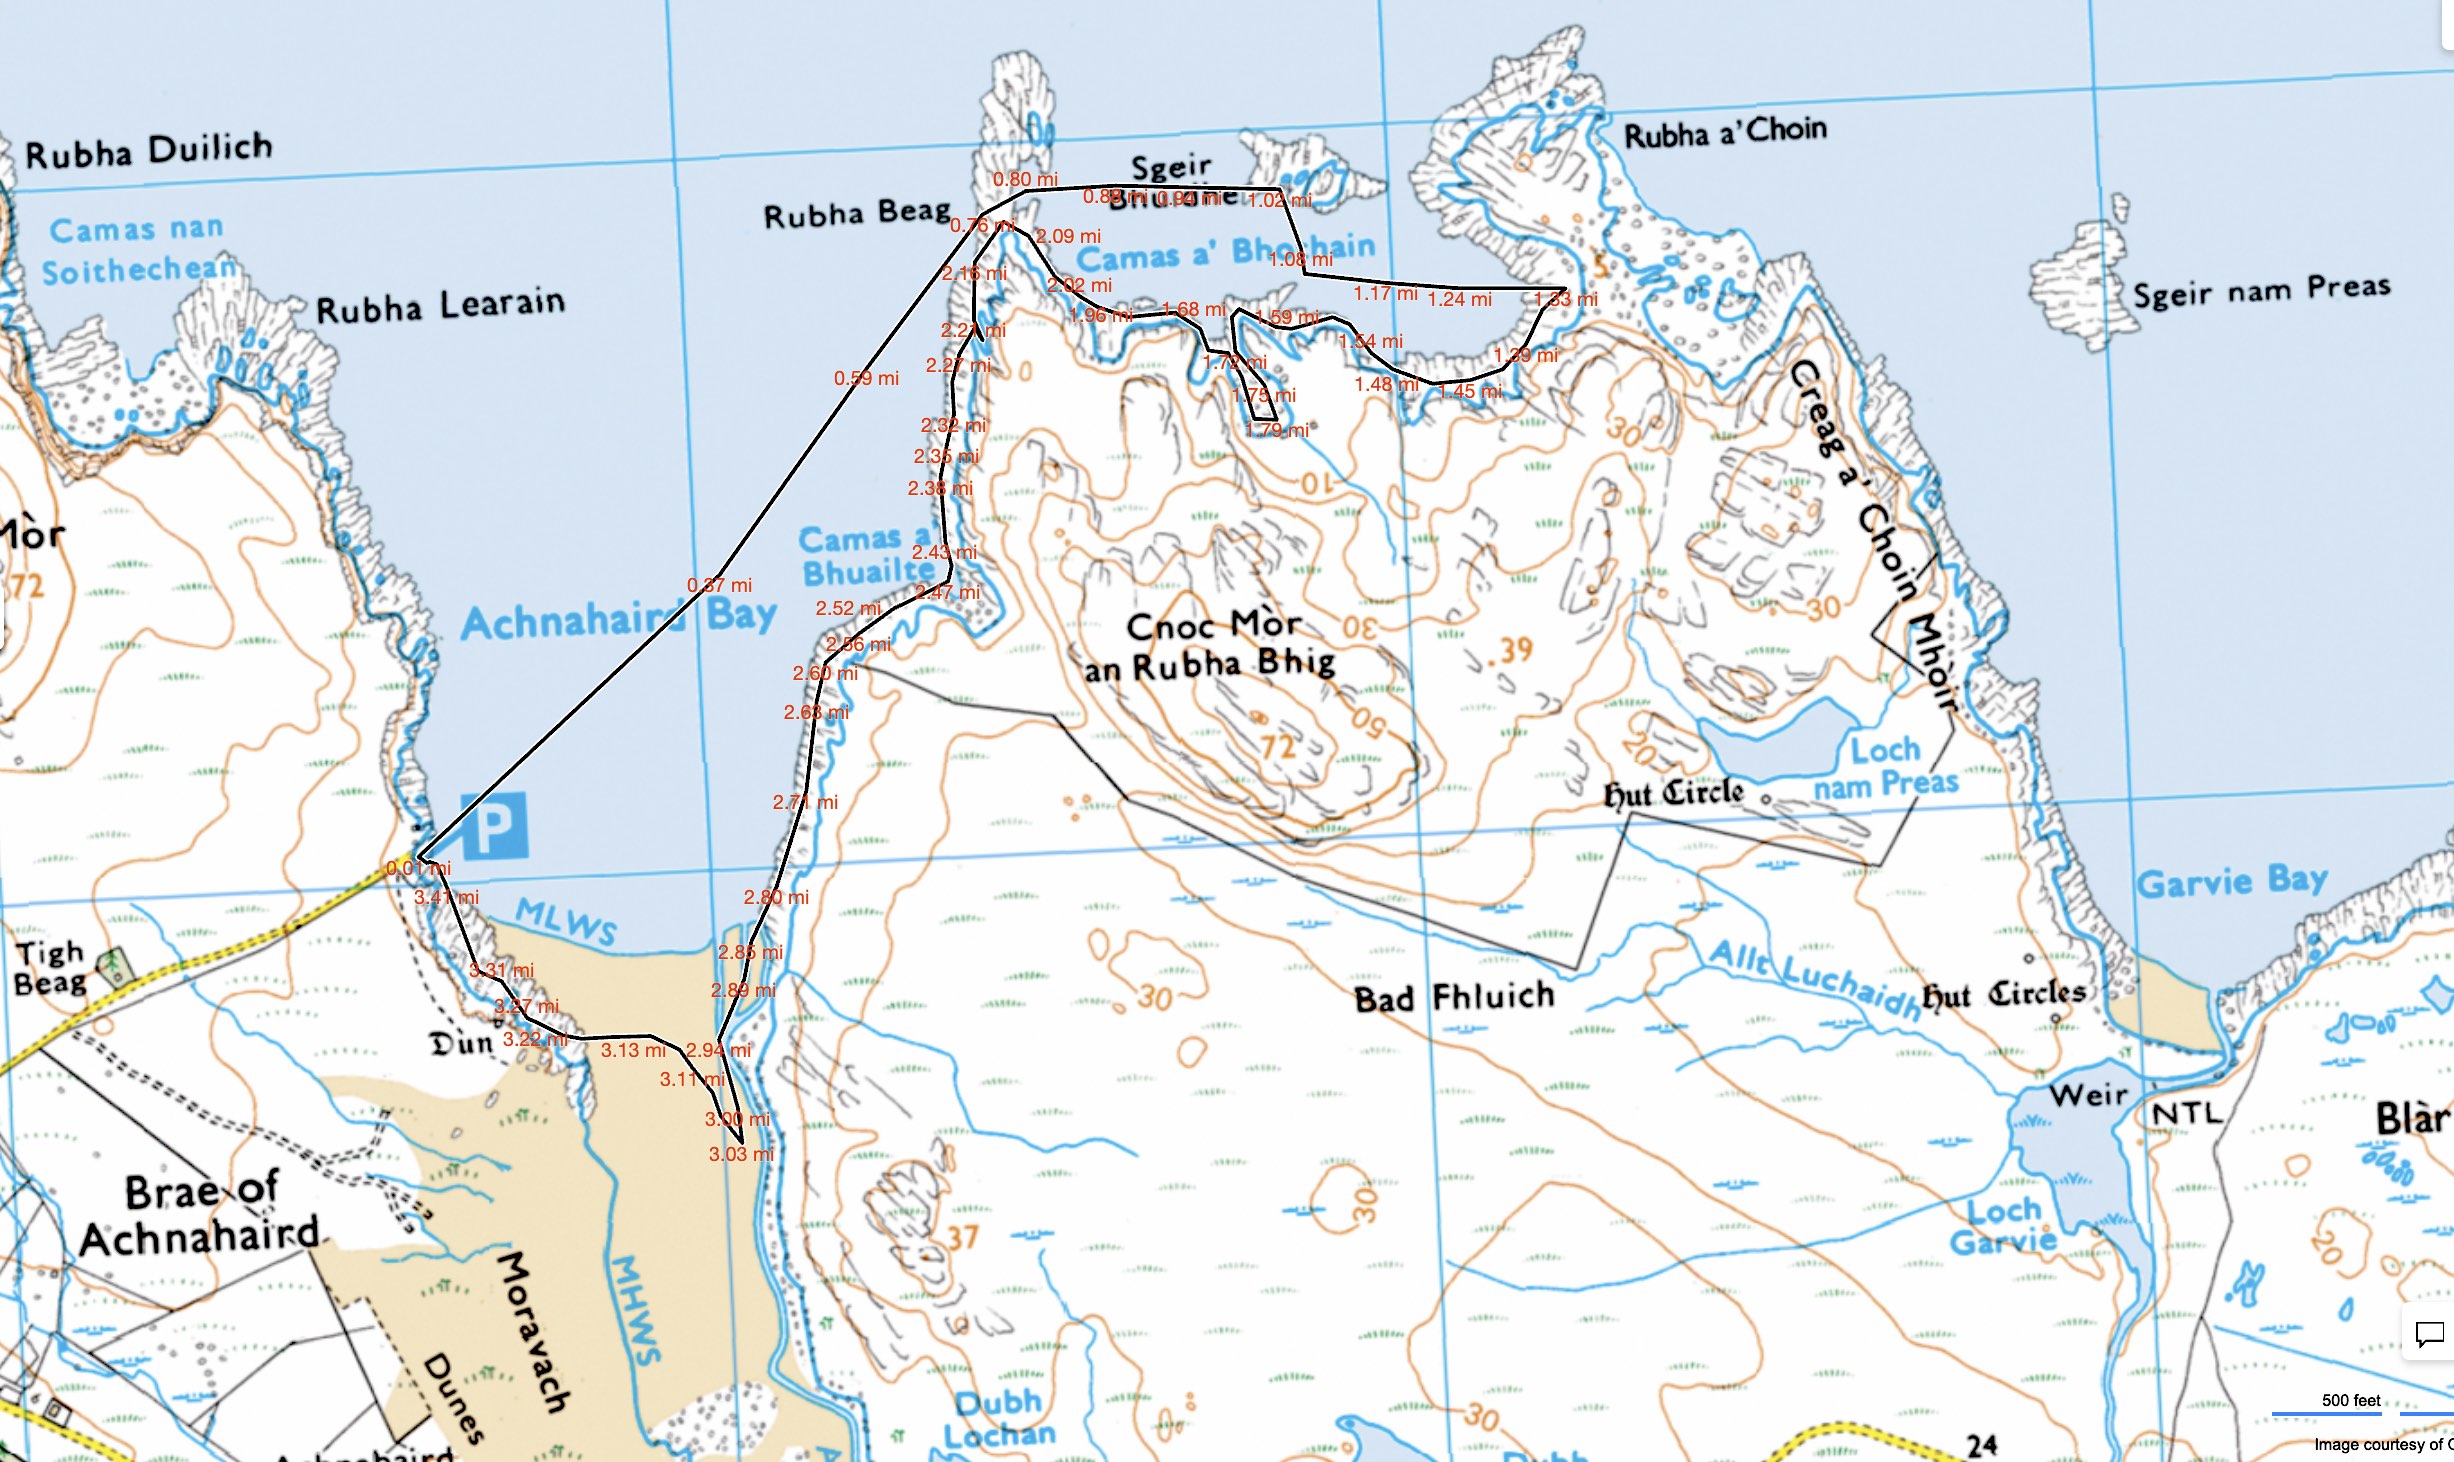
Around here the inshore sea paddling is exceptional, even if packrafting the inland lochs is also pretty good. Having done most of the latter routes, I thought I might try some coastal packrafting. Garvie Bay arcing west to Achnahaird Bay looked like a good one and happens to parallel probably the best walk on the peninsula which we’ve done many times. That route could be a 20-km combination of cycling, walking and paddling, but as it was the last calm evening for a while, we thought we’d go out together in the kayak and I’d try the packraft on the way back. That way everyone got to play.
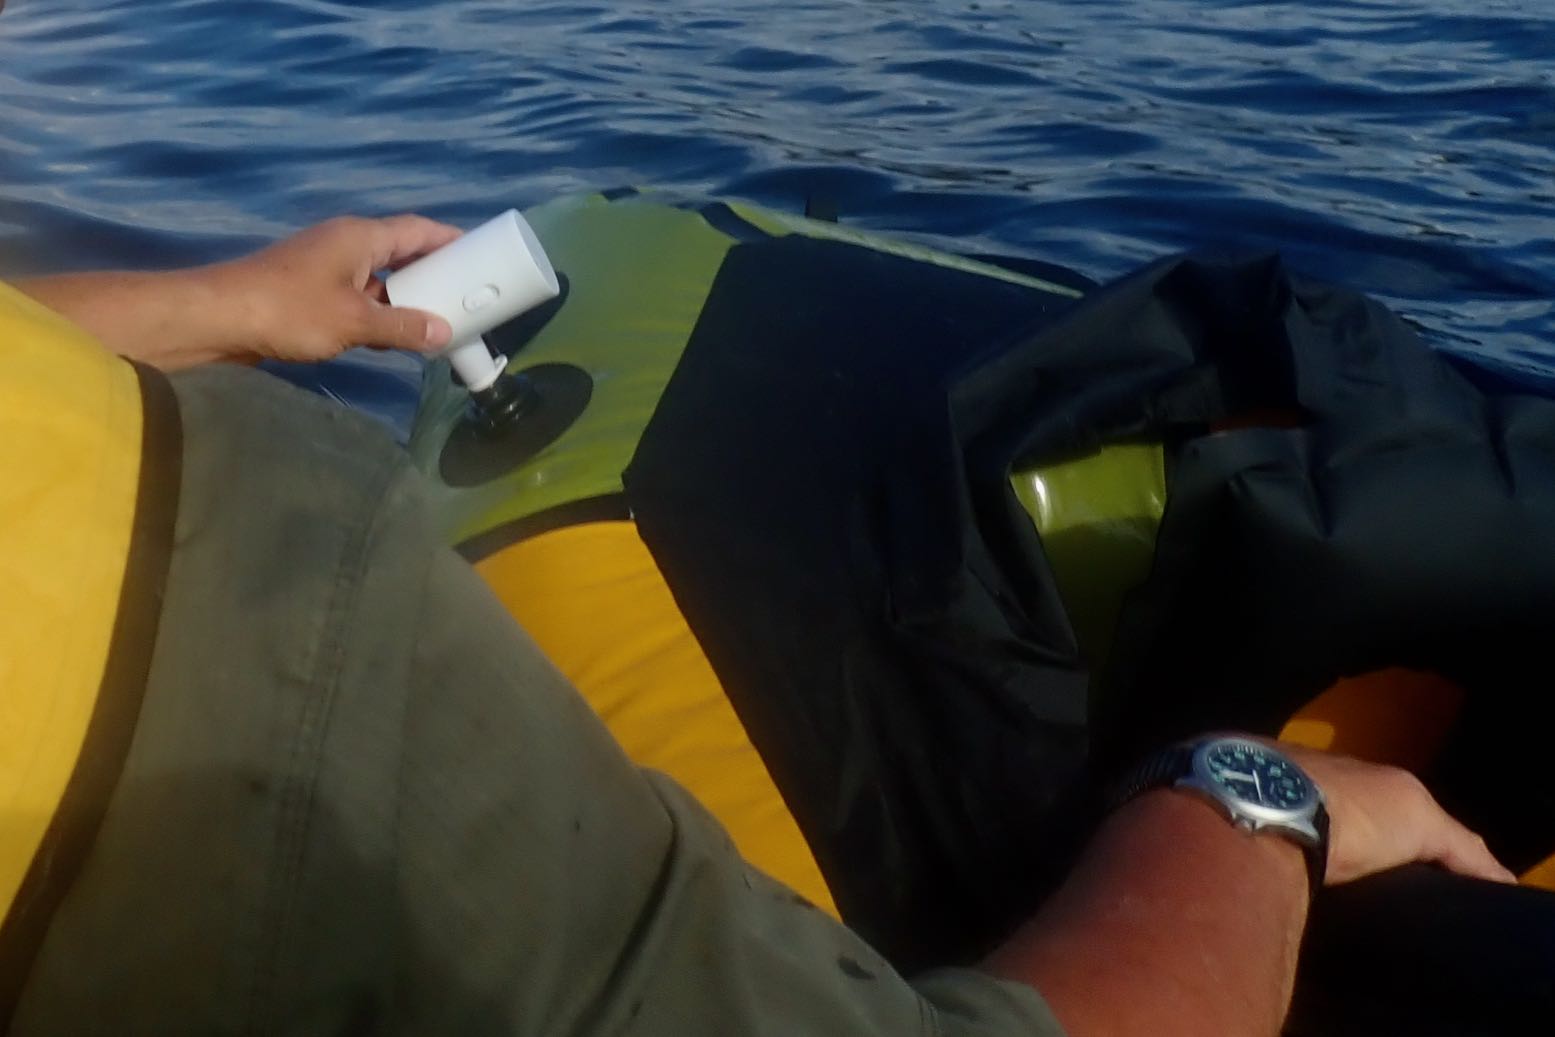
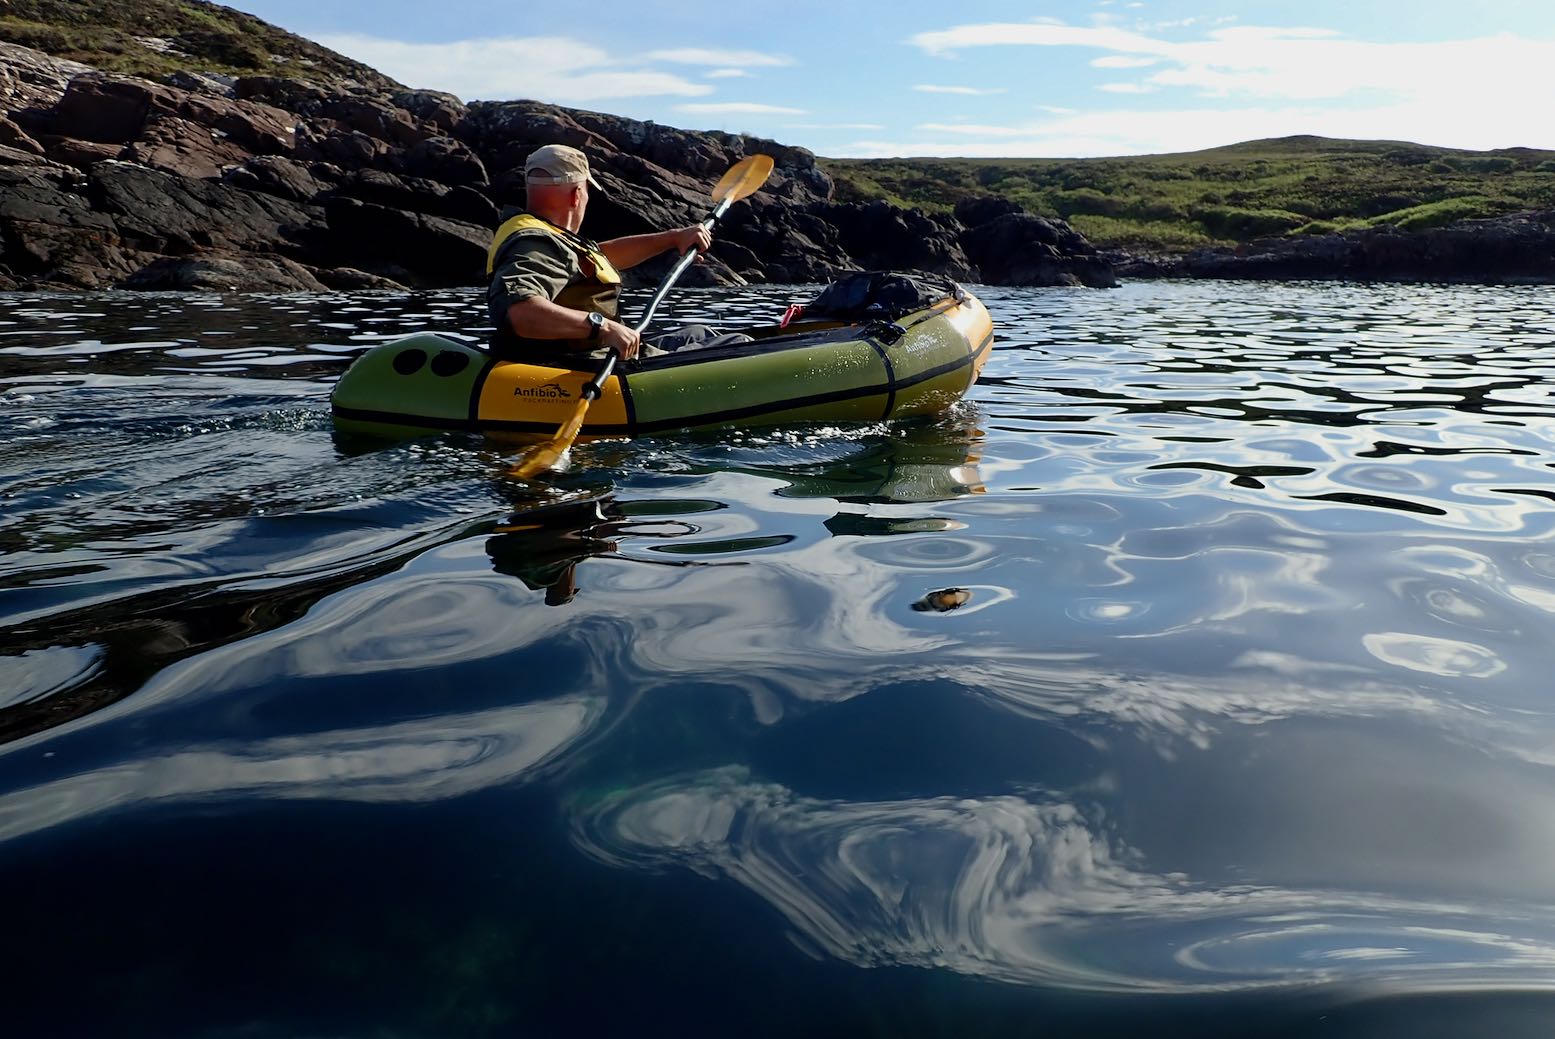
A light NW breeze blew onshore as we cut across Achnahaird Bay like a blue fin tuna. The approach of HW meant we slipped through the submerged skerries of Rubha Beag and into the crab’s claw inlet of Camas a Bhothain (Bothy Bay). This seemed a good spot to deploy the packraft with the aid of my exciting new gadget, a mini electric pump. I unrolled the boat over the water and let the pump buzz away for a couple of minutes, topped off with the hand pump, then clambered aboard.
Buzzing noise
Man the lifeboats!
Paddling away, I realised this was the first time I’ve paddled my Rebel 2K unloaded and I was a bit shocked by the bow yawing. Now fully back-heavy, one good swipe of the paddle and it could flip a 180°, just like my old 2010 Alpacka Llama.
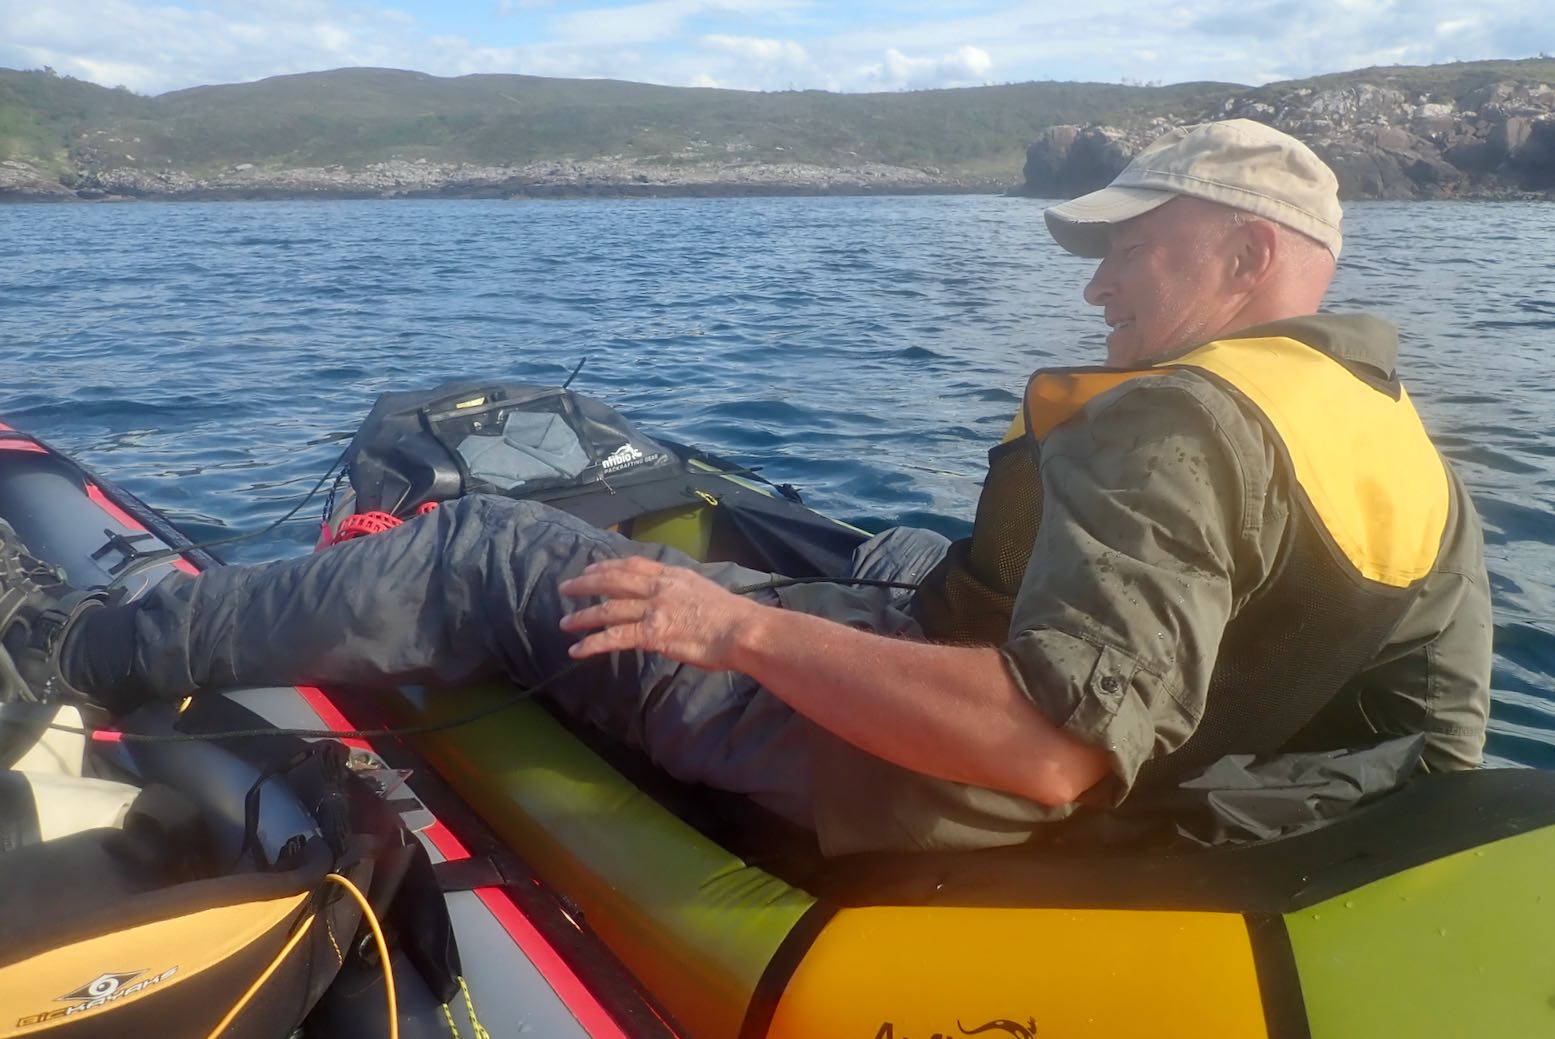
Ah, but in my haste to launch the lifeboat I’d forgotten to fit the also-untried skeg which comes standard on the 2K. I waddled over towards Rubha a Choin beach and slipped it on easily, while the Mrs transferred to the Seawave’s front seat.
I’ve been ambivalent about the value of a skeg on a packraft, but now back on the water the yawing was notably reduced. If you think about it, a packraft actually pivots from a point around the middle of your swinging paddle, not from the stern, as it feels from the seat. The centre of mass behind the pivot point does make an unladen bow yaw more, but the stern will yaw too; just less and unnoticed.
Skegging ‘eck!
On the Wye my 2K was fully loaded with the centre of mass moved forward and which minimised any yawing, even without a skeg. (With a heavy load over the bow a reduction in yawing is well known with packrafts). Now unloaded and with the bow riding high, swish-swosh yawing was exacerbated, but is actually happening at both ends of the boat. So any type of fin or extension of the stern (like the post-2011 Alpackas – right – and all subsequent copies) will constrain this, while not affecting steering. So, bottom line: skegs work on a packraft and are easy to retro-fit.
A short-but-wide packraft actually pivots from near the centre, not from the back as the impression suggests
All the remains is a packraft’s agonisingly slow speed. These are not boats made to enjoy the sensation of flatwater paddling; they are boats to enjoy getting to out-of-the-way places easily. Any type of disturbance to progress, be it wind or current, may slow you to a stop, or worse. Something like the longer Nomad S1 I had would be better for this while still being packable. Still, in these ideal conditions it’s nice to float along observing the coastal features.
Paddling back down the east side of Achnahaird Bay, a back-breeze made progress feel achingly slow. Lately, I’ve come to value metres per second (m/s) as a metric of wind or paddling speeds. Something moving past you (or vice versa) at three metres per second is easy to visualise, though I suppose we can all visualise a 3mph walking pace, too. It’s what YR uses and is easily converted to ‘double + 10%’ for miles per hour (so 5 m/s = 11.18 mph). Or just double it and you nearly have knots (5 m/s = 9.8 kn), for what that’s worth. Crawling past the rocky coast it looked like I was doing 1 m/s at times. We had a race: diminutive Mrs in a big, long kayak; me in the packraft. Within ten seconds the Seawave streamed away while Bunter frothed up the water like a cappuccino machine.
Oh well, you’re as fast as you are. Like cycling in Tajikistan rather than Kazakhstan, for the best experience match your routes with your mobility and conditions. Next calm day I’ll do the full Garvie loop.
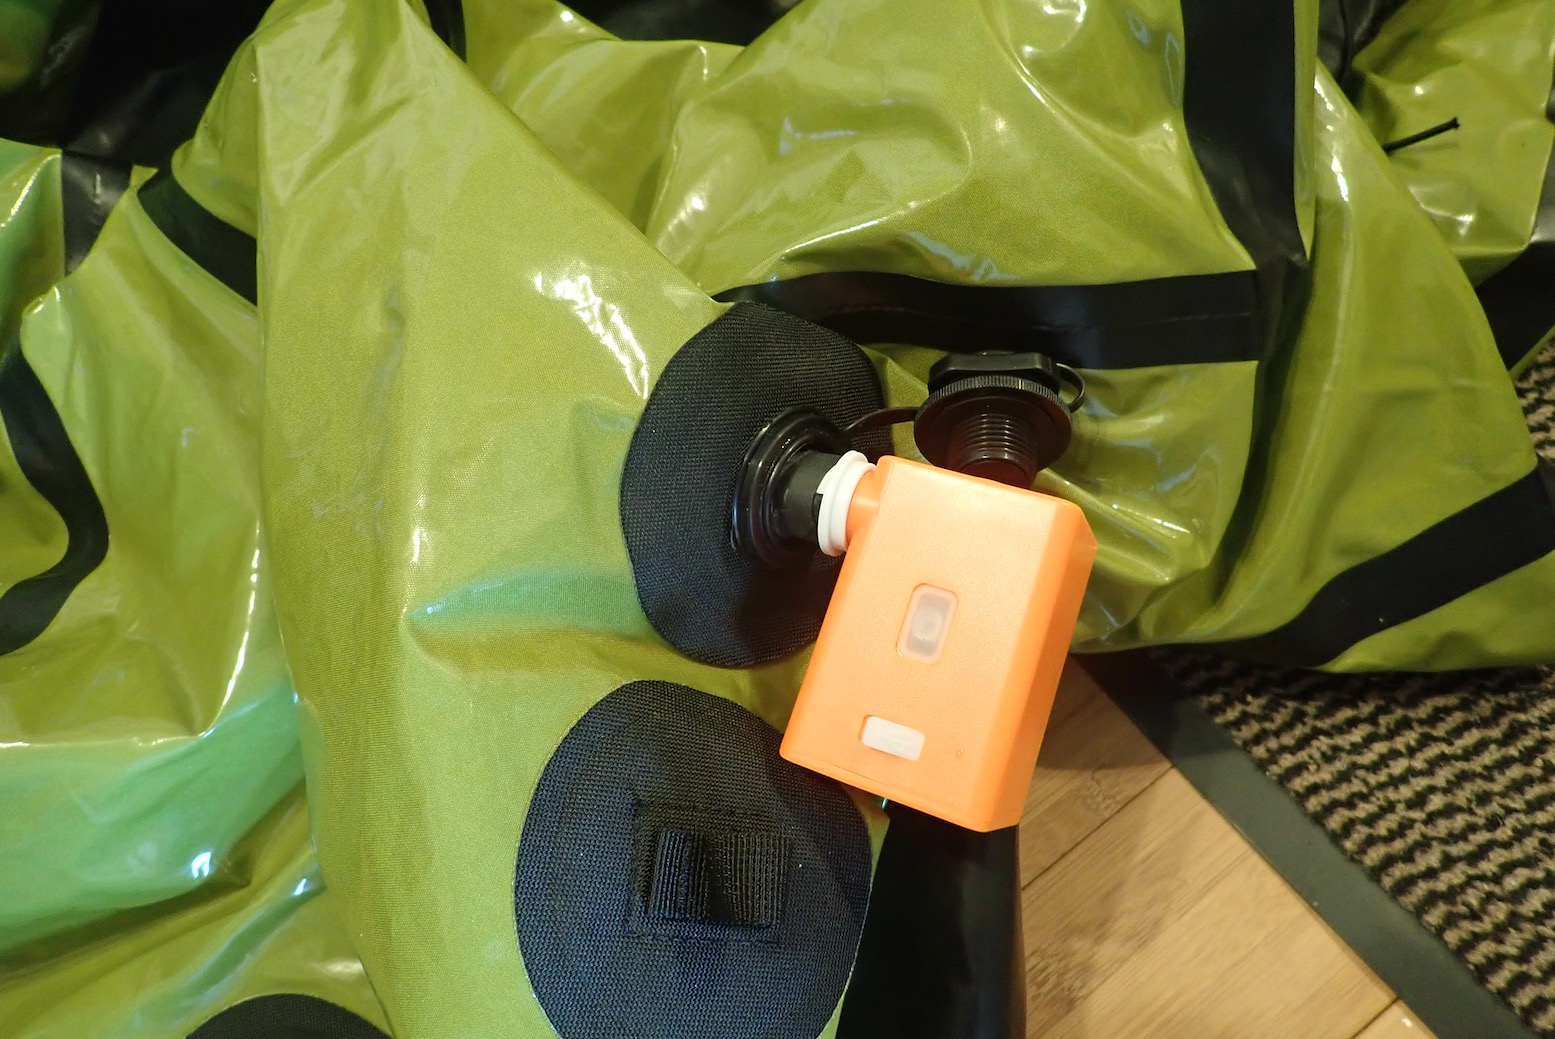
Update May 2022. Charged Max Pump packed up after a year/20 uses. Slide switch was off so not accidentally discharged. Plugged into computer; no charge light. Plugged into USB wall socket (as have done before): very bright light followed by smoke… Replaced with the boxy, orange, heavier, notionally waterproof Max Pump Plus for £23.
In a line Cheap, light, compact, USB rechargeable and fast, for when air-bagging is a faff or awkward.
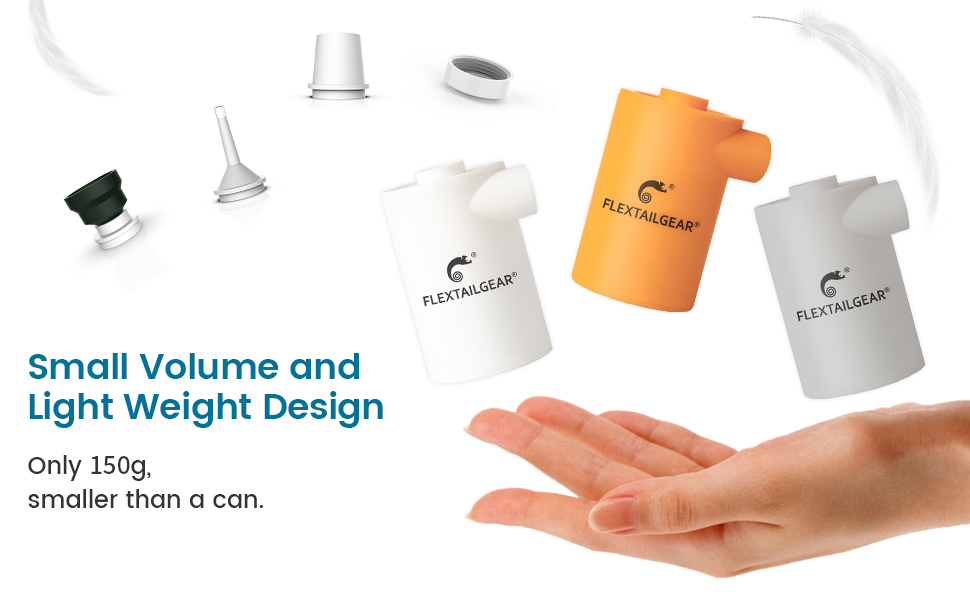
Light, compact Faster than clumsy air-bagging – handy on a narrow bank/shore Can suck (vacuum) as well as inflate Ought to do > 15 fills Max Pump as a conventional stiff slide switch, not ‘touchy’ inductive switch on the newer Max 2 version. Max Pump Plus has a silicon covered press switch. Will do other stuff, like airbed mats and fire embers Newer models can be used as a power pack, have LED lights, are IPX7 rated and can be programmed to sing Waltzing Matilda.
None of the supplied nozzles with Max Pump jammed nicely into a Boston valve My Max Pump packed after less than a year and about 20 uses. Replaced with bulkier Max Pump Plus Only replaces air-bagging; still need to top up by mouth and/or hand pump Will discharge eventually, unlike manual methods, and will eventually die for good
What they say My name is Max Pump 2020. I can quickly inflate and deflate your swimming tube. air mattress. and other inflatables. With vacuum bags .I can create more capacity for your suitcase and wardrobe at home. When in outdoor.I can provide oxygen for your burning ovens. enabling you to enjoy your food more easily.
Apple, pump with nozzle and my Boston adapte
rMax PumpMax Pump Plus
Review An electric pump to save a couple of minutes’ packraft air-bagging? Do me a favour! That’s what I think when applied to bulkier IKs where a two-way barrel pump is fast and easy. But factor in cost, weight, size, USB rechargeability plus supplementary uses and, for a packraft, FlextailGear’s range of pumps (above) is worth a punt. Air-bagging is a clever idea to inflate a typical packraft, but on some days it’s not the most intuitive of actions, perched on seaweed covered boulders. Once a day is fine, but on a trip where you’re airing up and down a few times a day, the effortlessness of the Max Pump is welcome. A good case to point was my paddle on the Wye where accessing my Rebel 2K’s internal storage pockets to get to the camping gear each night meant re-inflating the boat every morning. The Flex pump would have made this less tiresome. Another example is getting back from a tiring sea paddle and wanting to reinflate the boat to rinse and dry properly. Plug in the Flexy and get on with other after-paddle chores.
Max Pump adapters but none fitted a Boston valve’s two ports just right
Actually the grey rubber nozzle (right) will push and seal into the main threaded port, and with my second Max Pump Plus, there was a hard plastic nozzle to fit a Boston’s mushroom valve (middle) too. But to reduce loose bits, I made a 2:1 adapter (left) to fit both ports, using tape to make a good seal.
Out of the box With Max Pump I got the pump, four nozzles, a short USB-A lead and a small bag. While one nozzle loosely fitted a Boston valve’s threaded airbag port / dump valve, nothing fitted the one-way valve body. You’d think with Boston valves so common on Chinese-made slackrafts, packrafts and cheaper IKs, this Chinese brand would include a Boston valve nozzle. Luckily, I’ve amassed loads of adaptors and nozzles, and one 16mm (5/8″) adaptor fitted the pump’s main nozzle and jammed into the Boston port. [The orange Max Pump Plus included a nozzle for the valved port].
The rubber bung adapter fitsWith added tape my combo fits both ports
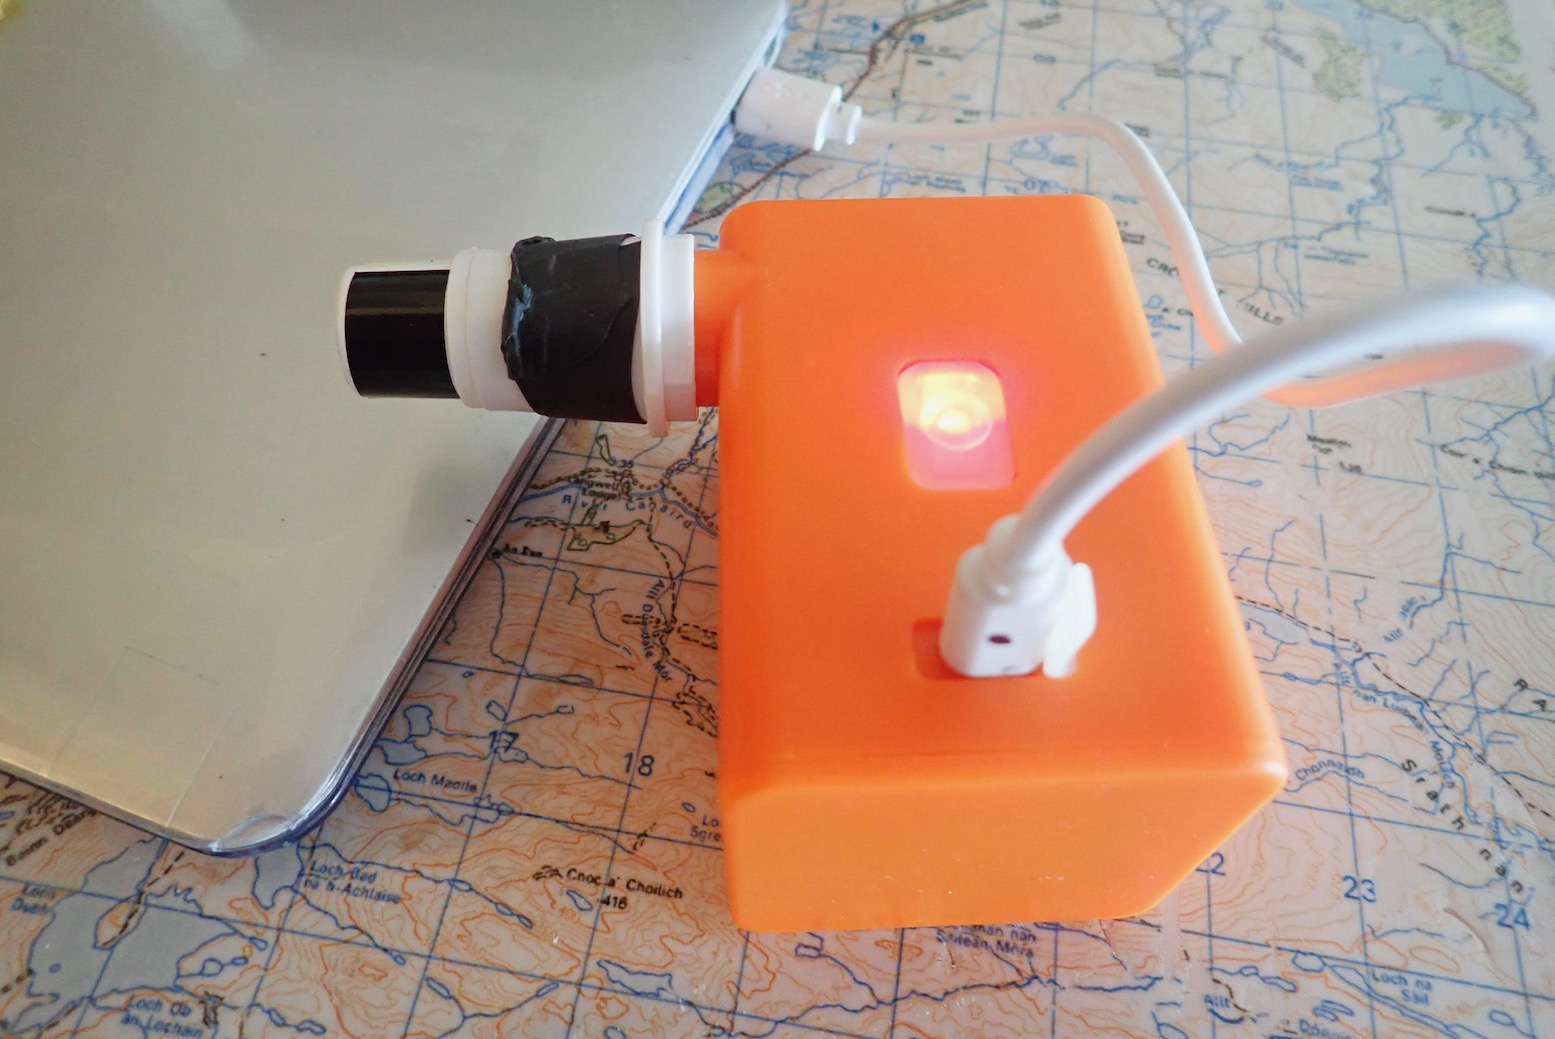
Off a laptop allow two hours to fully charge the pump out of the box. After just three fills (12 mins?), it took just hour or less to get the green light. Off the mains is faster.
Two-and-a-half minutes
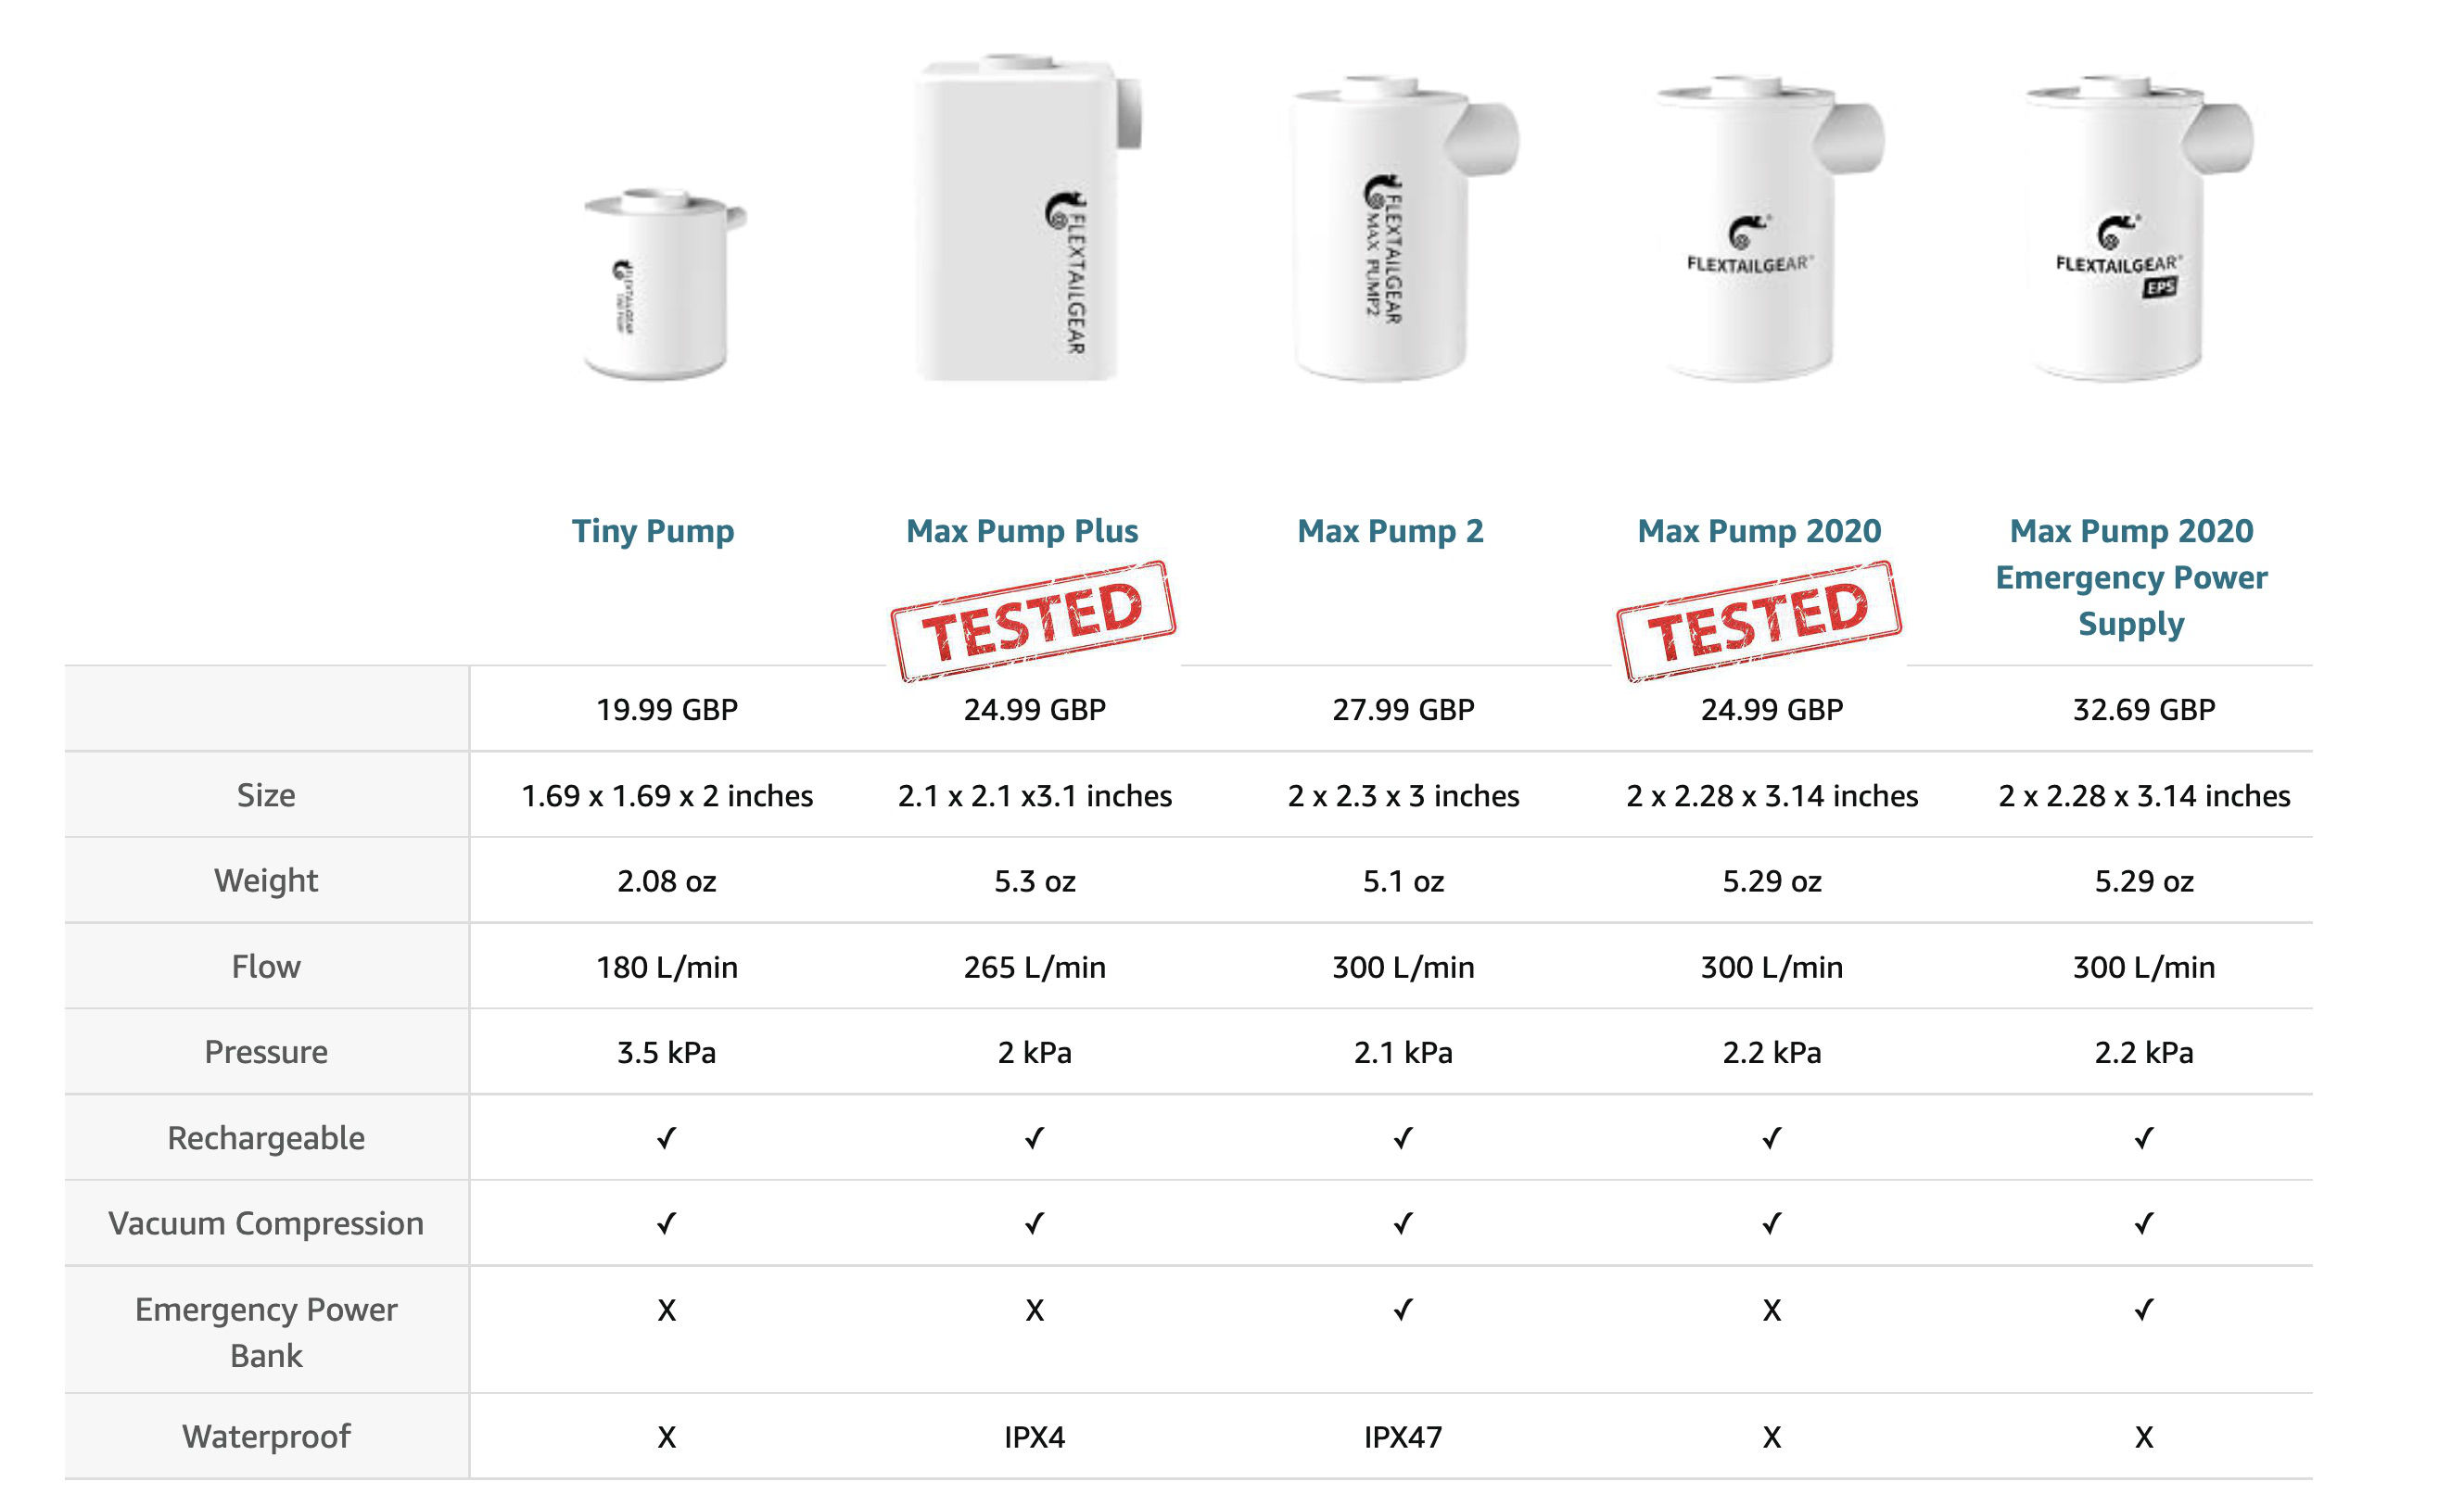
I estimate the volume of my Rebel 2K was 240 litres, (12 jerricans) so at the claimed flow rate of 300 L/min (currently the highest in Flextailgear’s range of mini pumps), that ought to take less than a minute. In fact it took 2:30s to reach the equivalent of airbag pressure (full volume; above). But this was pushing through the one-way valve, (like a car tyre) not direct into the hull via the airbag port / dump valve which has no resistance. Now with a bigger TXL with a volume of around 350 litres, I inflate directly through the screw port into the hull: 2:20s and if you’re quick you don’t lose much air screwing the cap on. Then I Flex for another 30s via the valve (or do 20 breaths to save the battery) and finish off with the handpump. According to the Flextailgear table above, my heavier orange Max Pump Plus has 10% less power and max pressure than the Max Pump, but it’s hard to verify any of this data other than weight. The fact is, either pump does a packraft in a couple of minutes. Max Pump Plus: 170g + nozzles.
My comfy full-length Exped Synmat XP 9LW – which also needs air-bagging to avoid humid breath – inflates in just 25s. And as many will know, air-bagging a sleeping mat in a cramped tent when you’re worn out is not one of the joys of camping. The Max 2020’s 3600mAH lithium battery is claimed to run for 40 minutes, so that ought to do at least 10-15 raft fills plus a few mats, when camping. I imagine the Max Plus will be the same.
Deflating either of these items is of course as easy as rolling them up, but getting the last bit of air out can be tricky, even though it can save a lot of packed volume. Pump suction definitely works on my Seawave IK because the one-way valve can be pulled open with the bayonet nozzle. On the packraft and mat, you have to suck from the unvalved airbag port, and by the time you’ve plugged that, some air gets drawn back in. I find just rolling up, squeezing, then sucking the last of the air by mouth works best, as your hands are free to get to the valve cap fast.
Max Pump Plus will do my Anfibio TXL in under 3 mins
Last word to Sven from Anfibio: “Can’t live without one anymore. Cannot remember when I last used an inflation bag.” These young people, honestly.