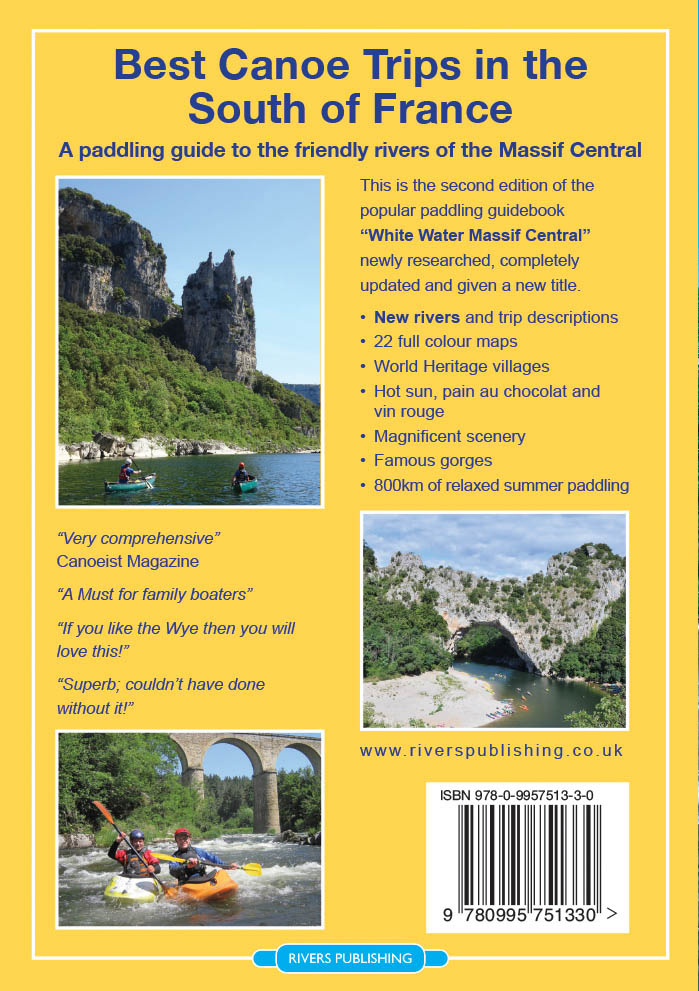
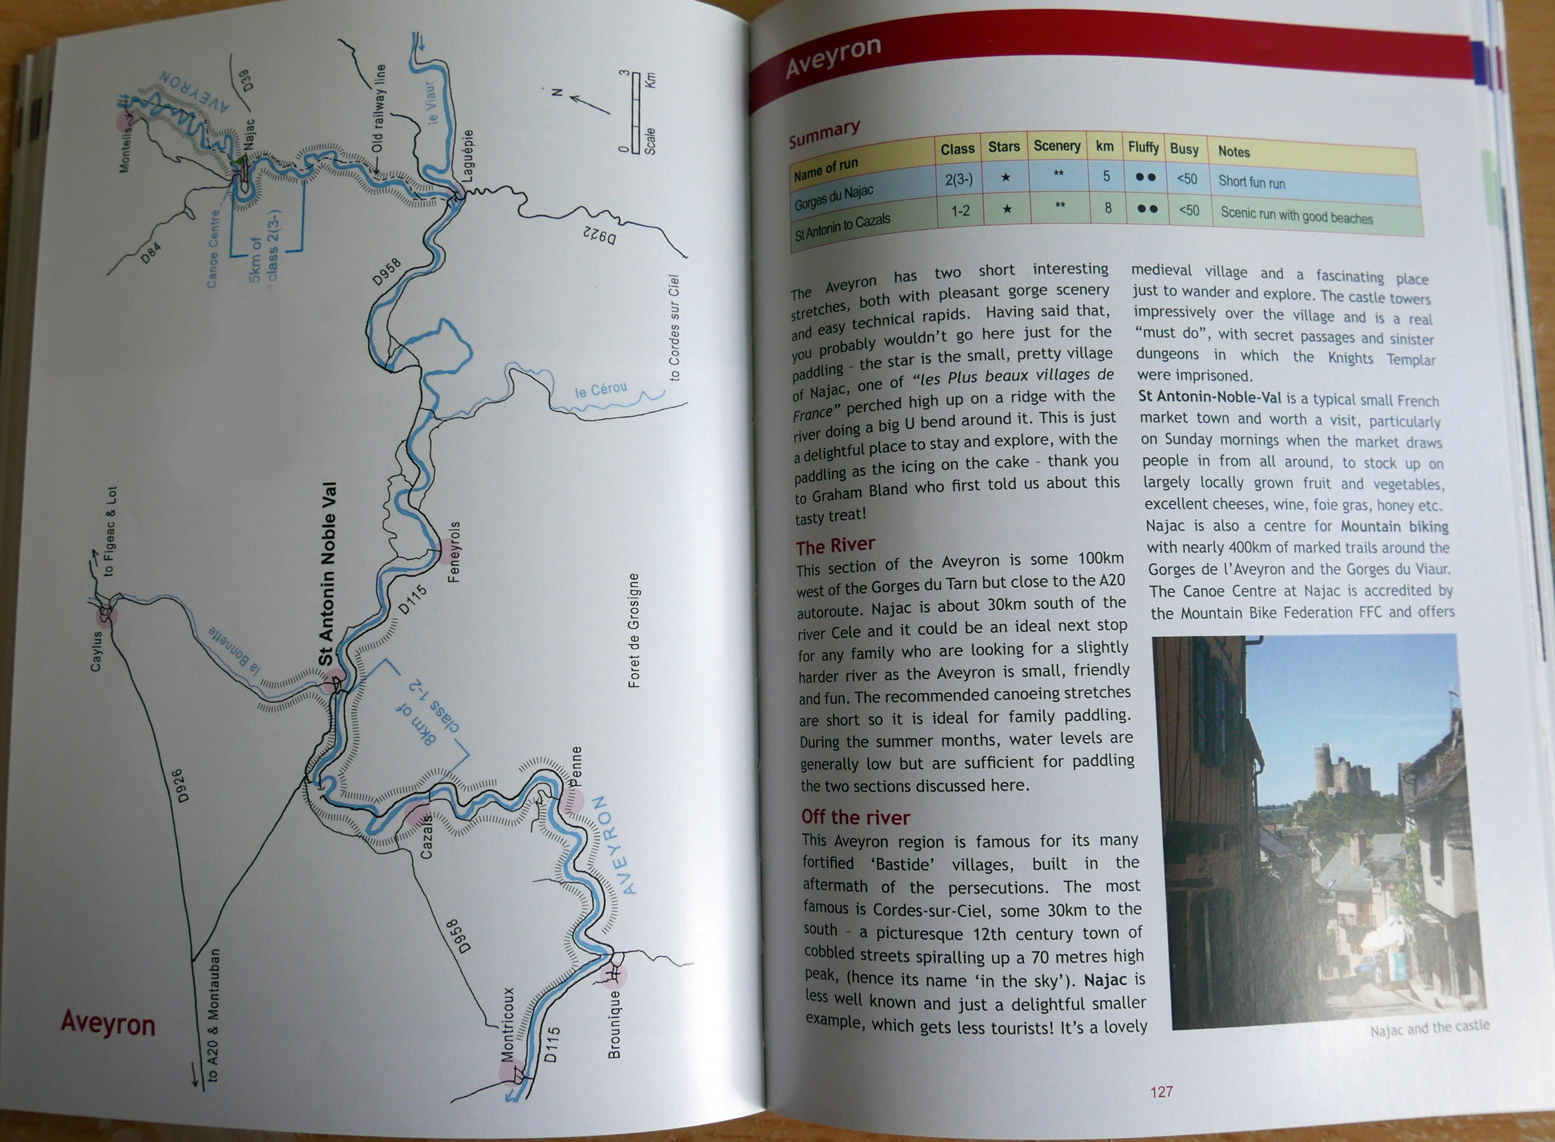
Back in print after 16 years, Rivers Publishing have updated their 2002 White Water Massif Central canoe guide, now less scarily titled: Best Canoe Trips in the South of France. Packboats aren’t mentioned, but what’s doable in a canoe is well suited to IKs and is easier still in packrafts.
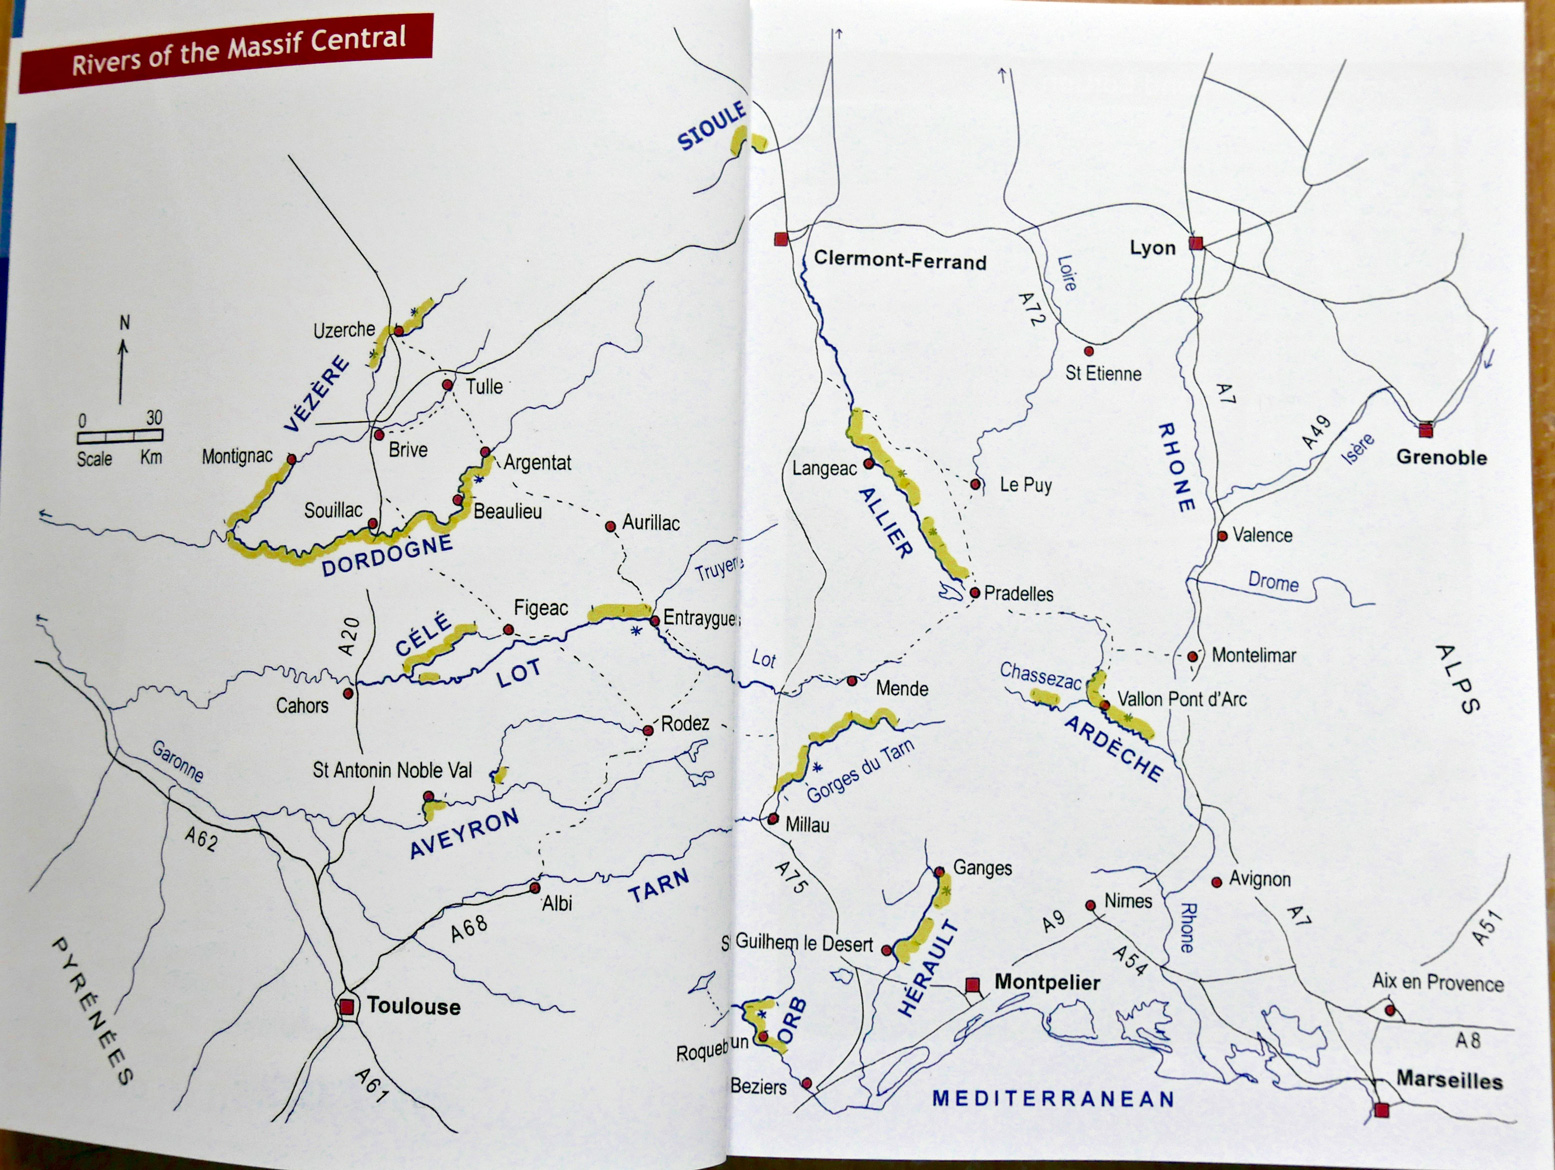
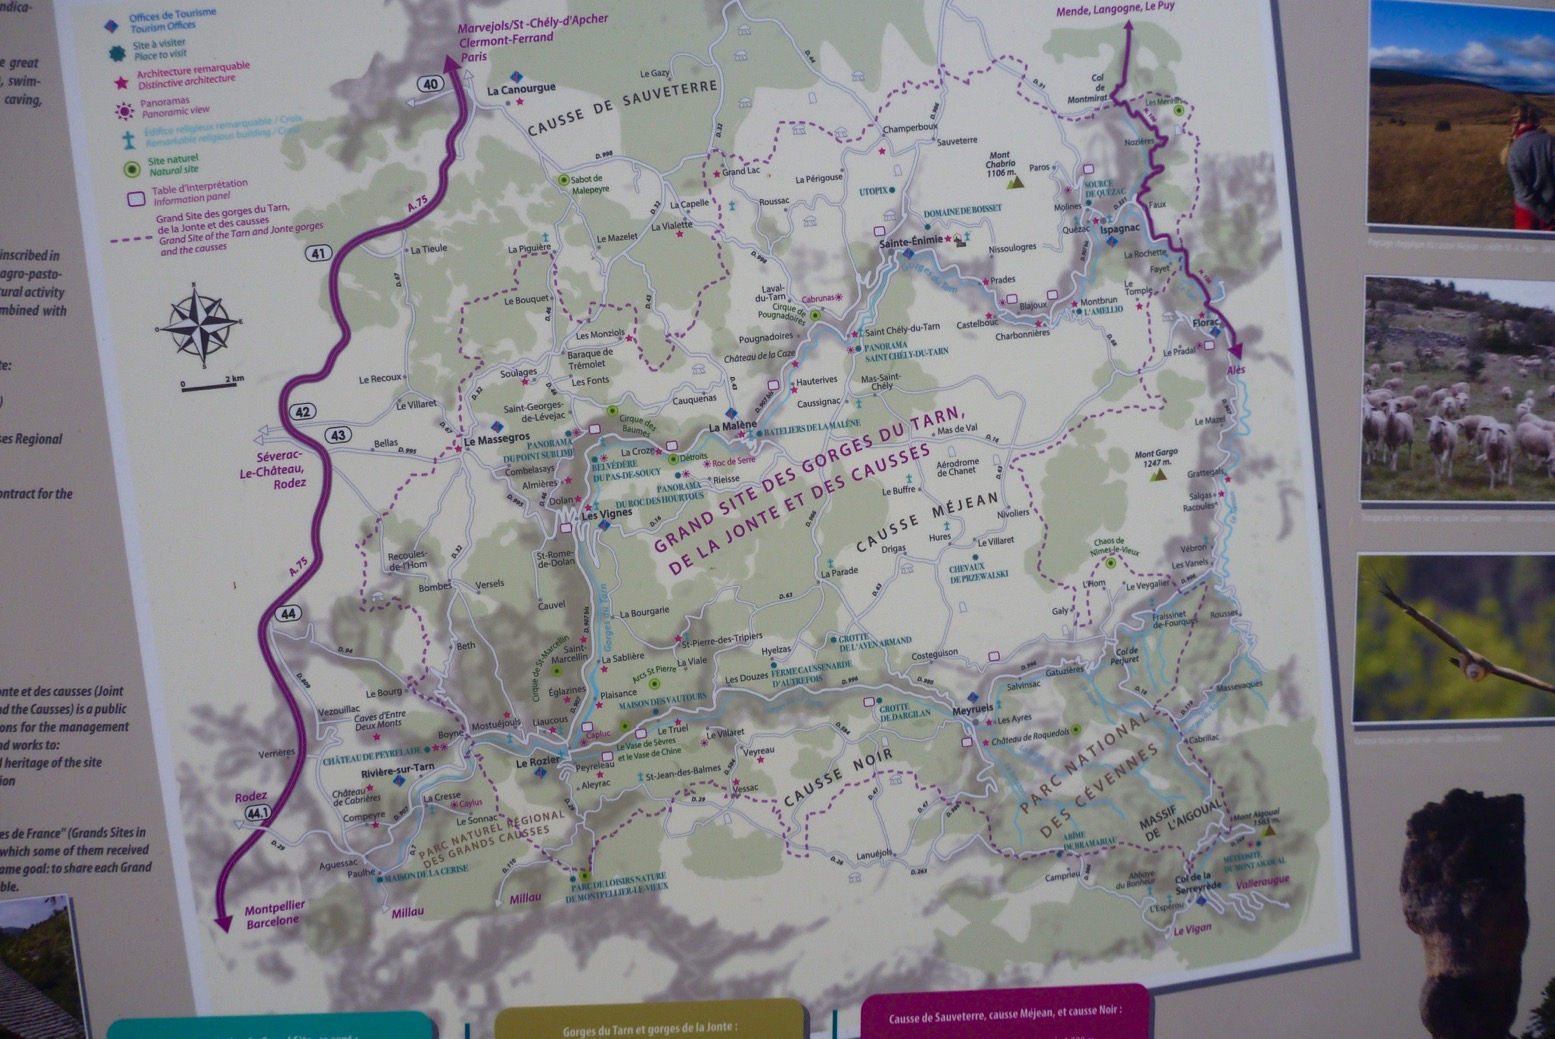
Compared to a Pesda Press paddling guide, Best Canoe Trips looks old school and a bit amateurish, but there’s nothing else like it in English covering France’s inspiring Massif region (right). It’s a good example of: ‘write it and they might come’. Even now, let alone back in 2002, trying to amass this sort of information online would take days of effort and translating, (though I belatedly can see how online translation apps can make a book like Rivieres Nature en France usable by readers with limited French. Whichever you choose, this is why there’s still a place for proper, well-researched paper guidebooks.
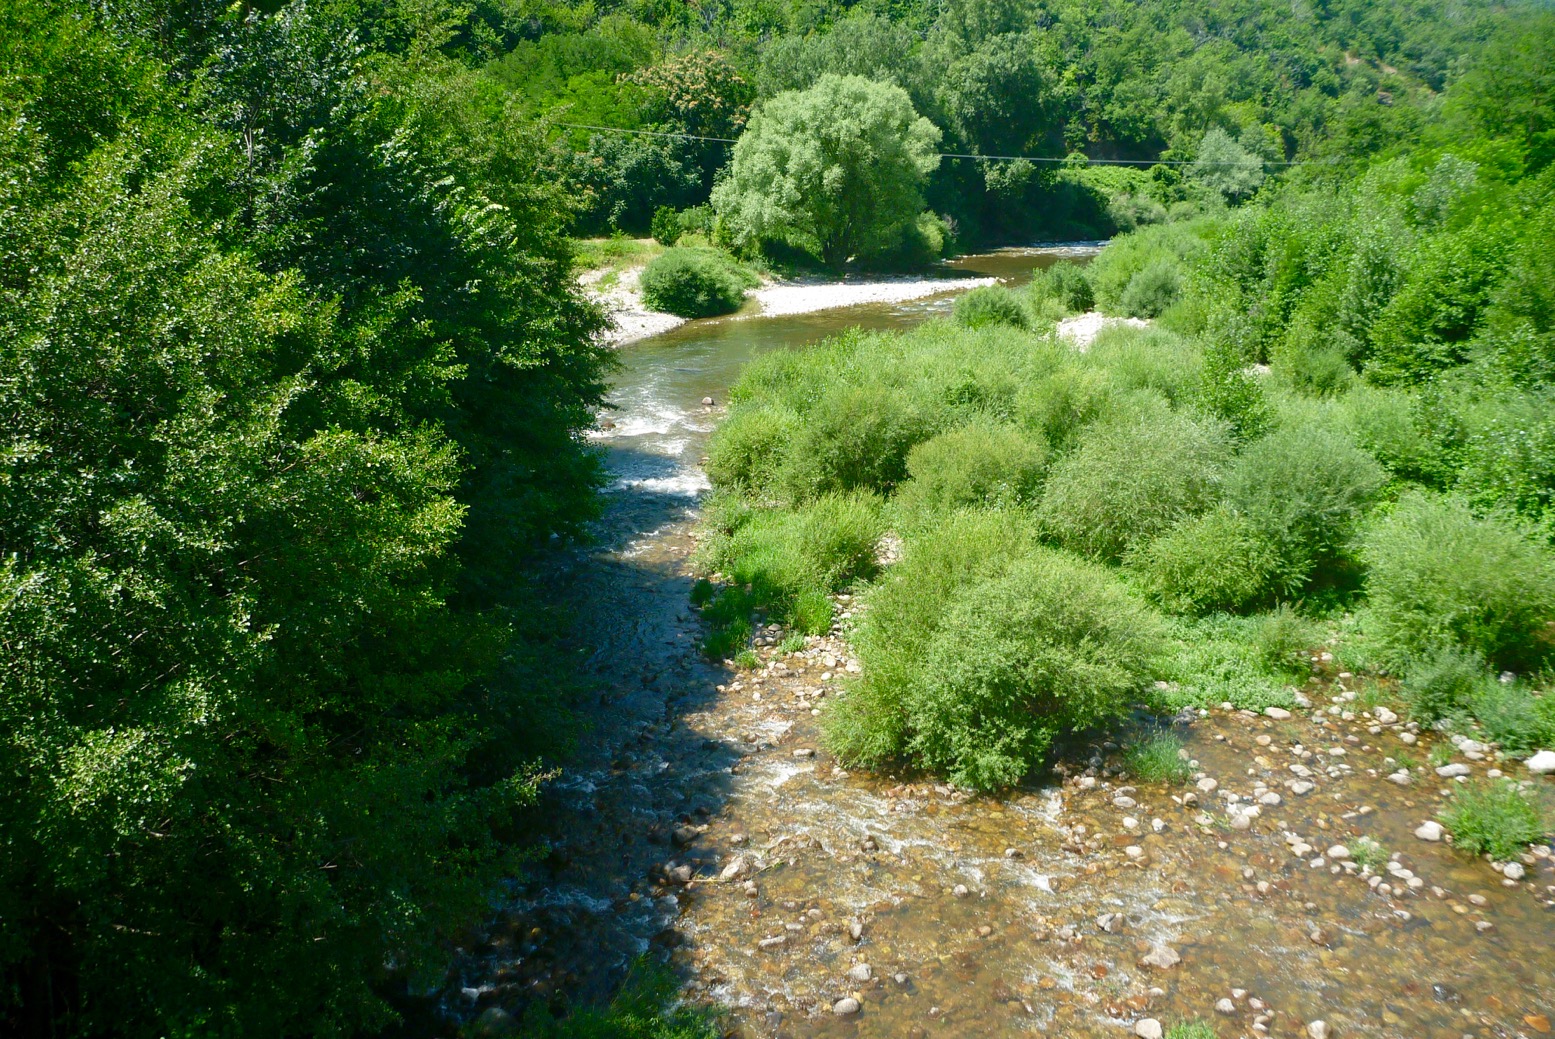
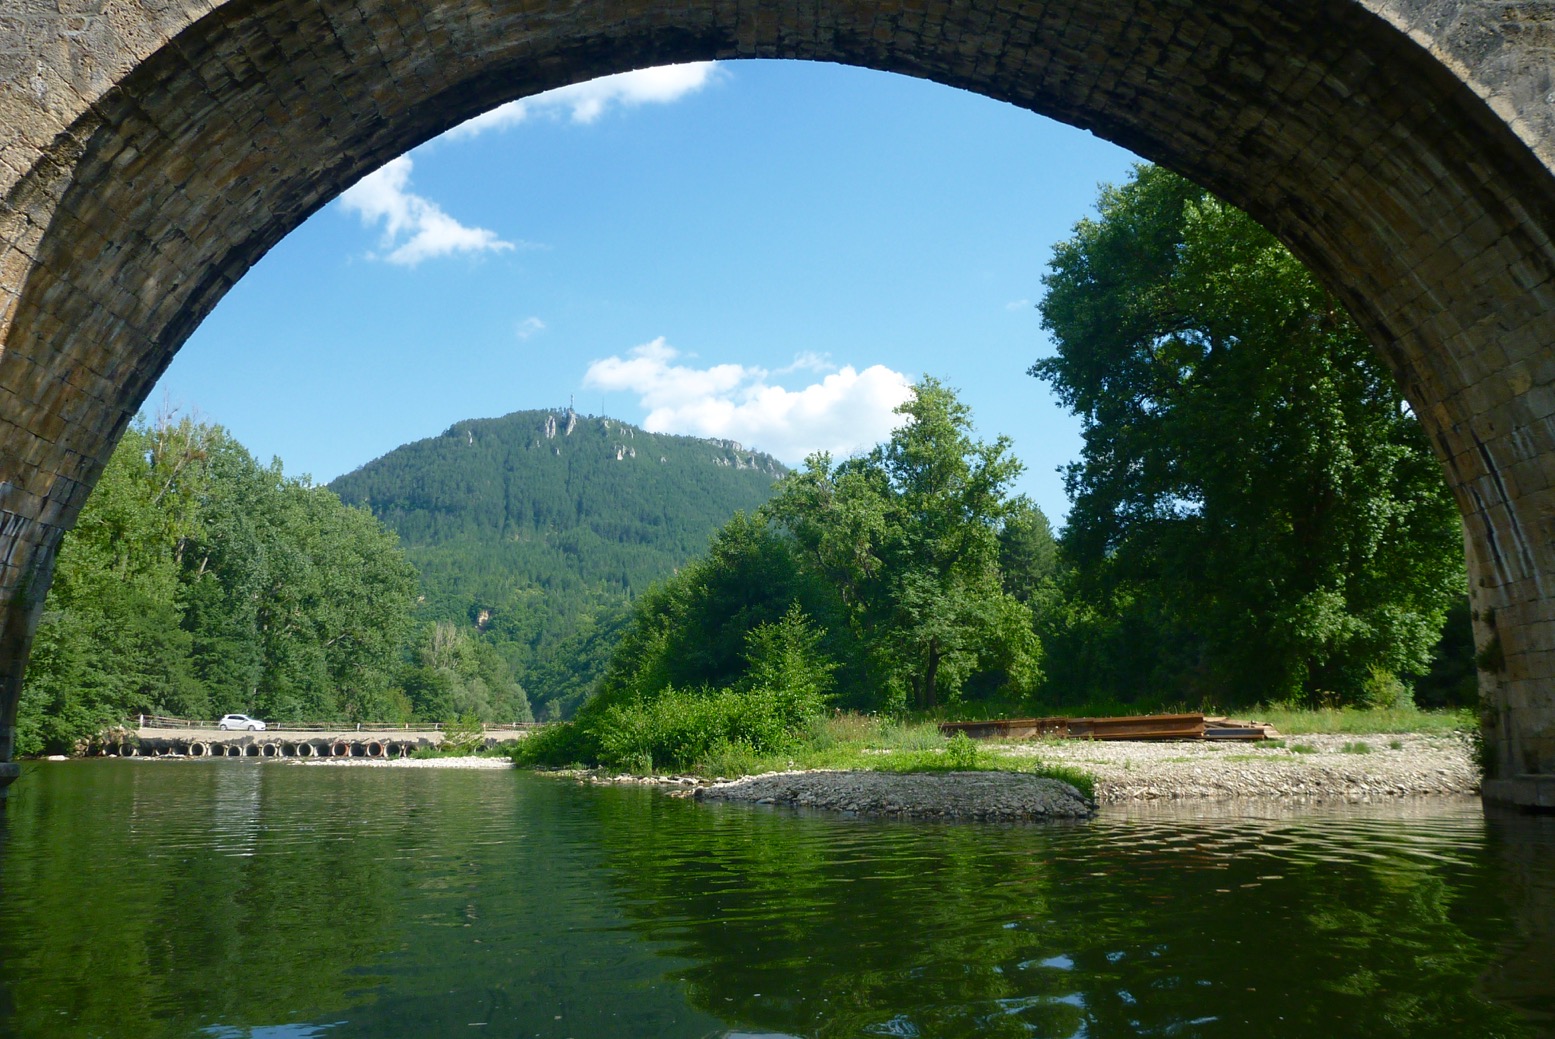
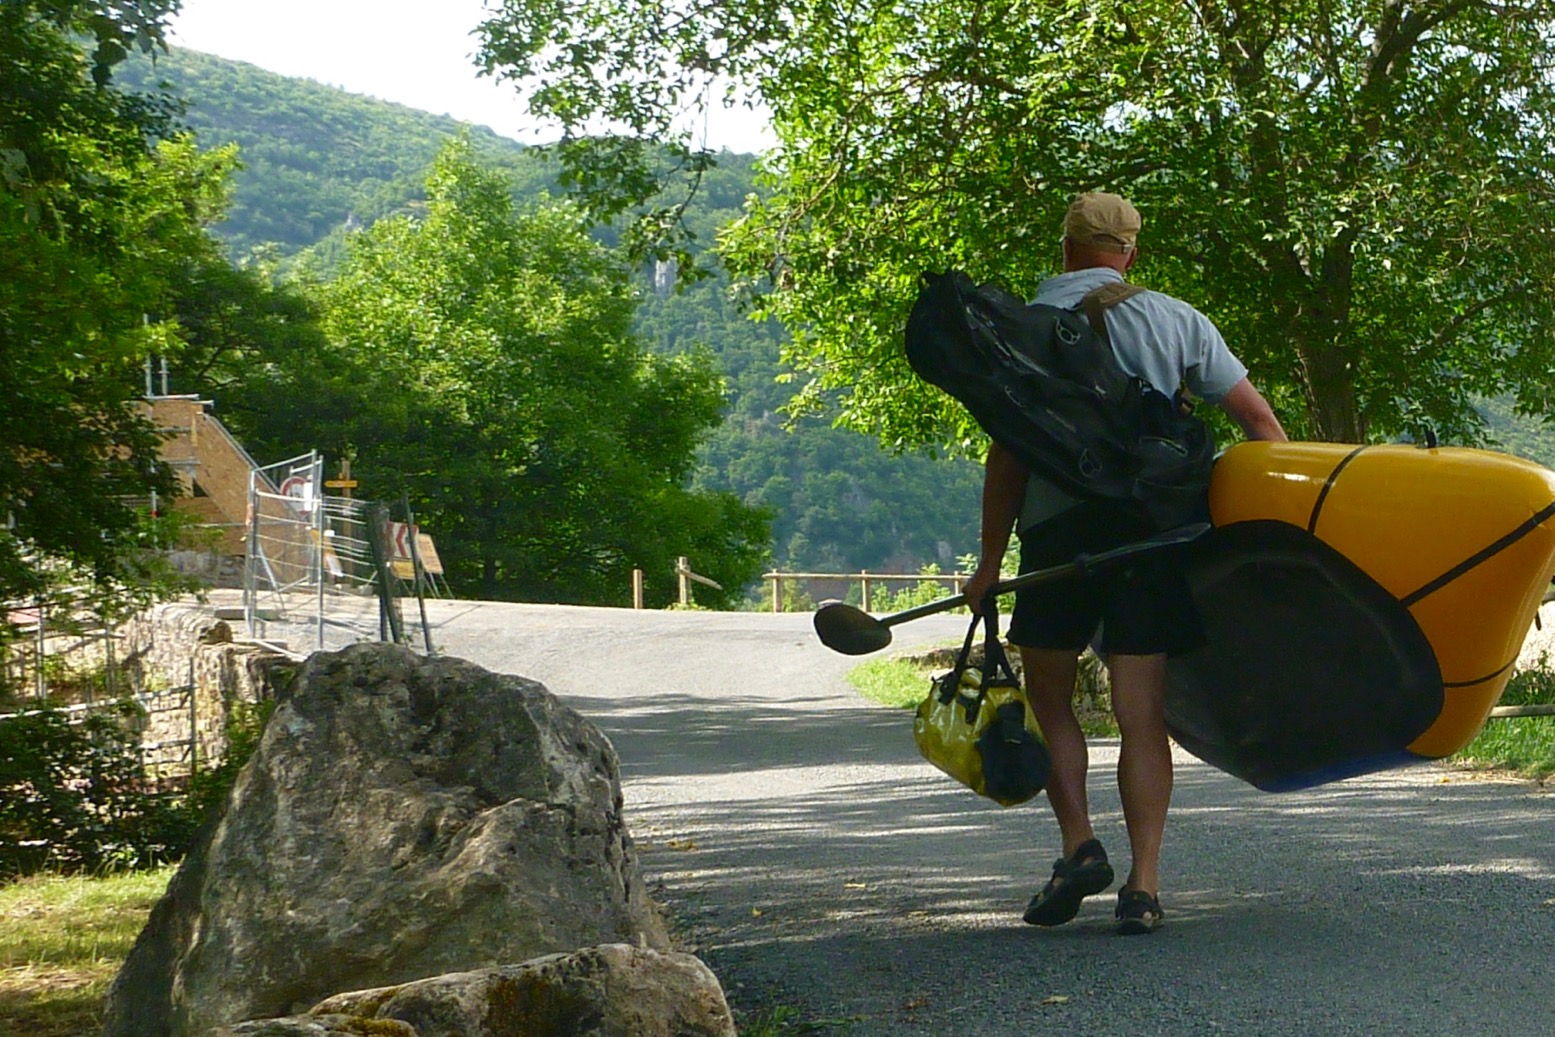
Visiting over the years with packboats using planes and trains and mates in vans, I’ve ticked off just about all the original book’s big rivers. Like a lot of activities in France, the whole scene is so much more fun, open and less rule-bound than the UK. You can’t help but smile as you bundle into a Tarn or Ardeche rapid alongside floating barrels and screaming teenagers clinging to upturned rentals.
What they say:
[Best Canoe Trips in the South of France] is written for the recreational canoeist, kayaker, or stand-up paddle boarder going on holiday to the South of France. Rivers include the famous Gorges du Tarn, Gorges de l’Ardèche, Dordogne and Lot, besides some lesser known jewels such as the Allier, Hérault, Orb, Vézere and Célé. The Massif Central is renowned for its canoeing and the rivers in this guidebook are some of the best in the world for canoe-camping. This guide book targets those rivers that have easy white water and assured water levels in the summer months of July and August, when most families have to take their holidays. New dams, reservoirs, and guaranteed water releases means that canoe tourism is now huge in the Massif Central and this guide covers over 800km of class 1-3 [rivers], with all the details needed for a fabulous and truly escapist, holiday. This new edition has details of two new rivers, 22 detailed colour maps, updated river descriptions, recommended campsites and lots of inspiring photographs.
What I think • Great selection of brilliant rivers • Loads and loads of good colour photos show how it is
• Some maps lacking in detail and consistency • Route descriptions could be more concise • Poor updating; errors on the two rivers I paddled recently • What’s with the fake cover?
Photoshop?
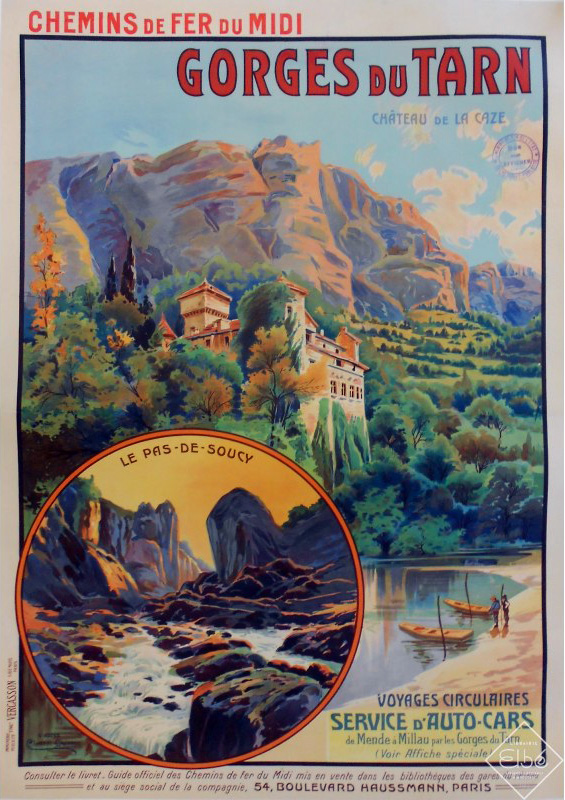
Review If you know the original edition (far left), first thing you’ll spot is the near-identical cover, but with scary, frothing rapids airbrushed out and a somewhat anachronistic SUP pasted on, a embarrassingly clumsy attempt to cash-in on the current SUP craze. Some of Rivers’ other publications feature very nice retro poster-style covers (right) which would have suited Best Canoe Trips perfectly. Can a non-faked image of canoeing in the Massif be so hard to track down? The book is full of them. But if you don’t know the previous edition you’ll probably not notice the front cover photoshoppery. Imagine what AI could manage today?!
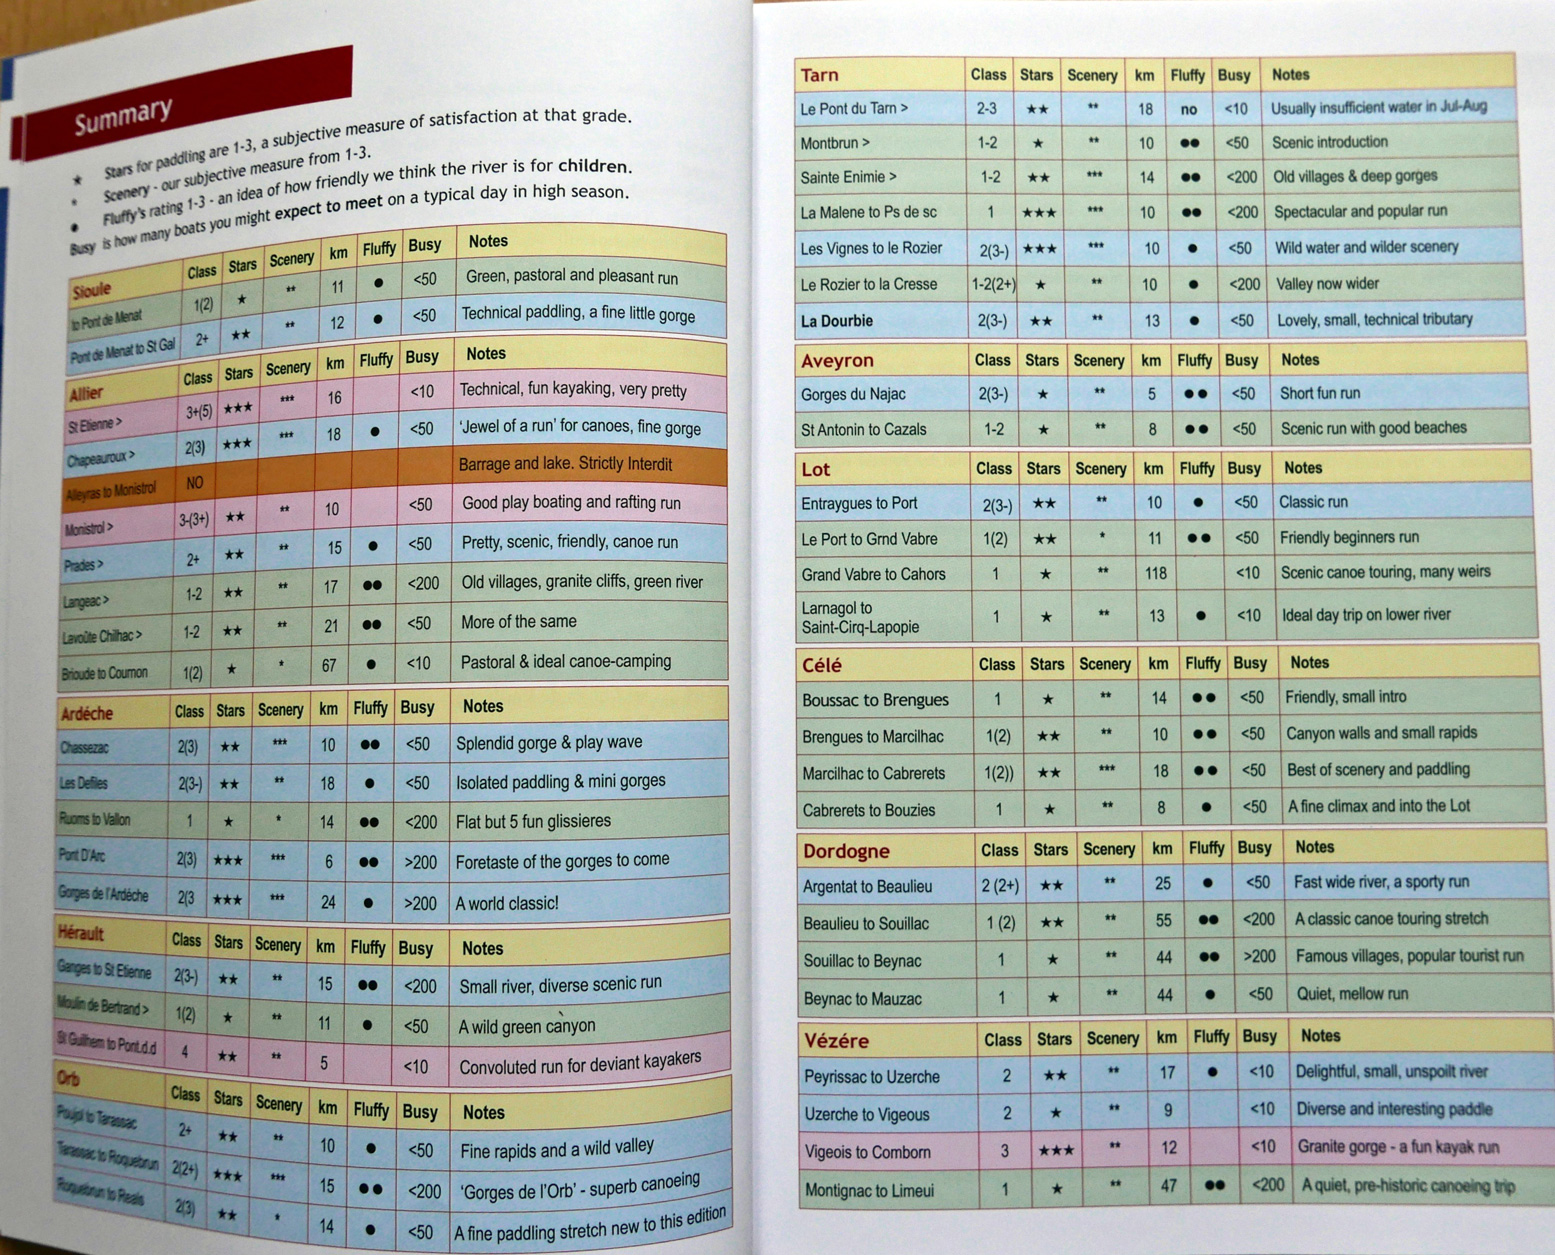
Excellent at-a-glance summary of all the rivers
Inside, it’s now full colour and twin column, like a Pesda. Two small rivers have been added: the 23-km Sioule north of Clermont, and all of 13km of the Dourbie meeting the Tarn at Millau. It’s not much which proves they did a thorough job first time around, even if some descriptions were incomplete. Up front are Planning and Resources sections before getting stuck into the 11 (actually 12, with Chassezac) river descriptions. Each river still gets a rating table for magnificence, enjoyment, child-friendliness, as well as cleanliness, temperature, flow in cumecs, and busy-ness. Of these last four, the traffic is most useful for what to expect. Without lab tests, all the rivers I’ve done looked clean enough, and temperature was what it was on the day, depending on depth or season. And who but a river pro knows what ‘7 cumecs’ looks like? There must be some rationale to it, but to me identifying the locations of more easily understood river level gauges (where present) would be much more useful, as you can refer to this handy live river levelswebsite.
The river descriptions remain long-winded – 85km of Tarn goes on for 16 pages, albeit with loads of photo padding. It makes it hard to pin down the nitty-gritty. Headings include Camping, Off the River, Food & Drink, more Camping, then Maps & Guides. Then each suggested shuttle-able day-stage is described, some getting Summary and Description headings, some not. Boxes cover asides, others list tourist offices and campsite telephone numbers where surely websites (as in the old edition) are infinitely more useful. The ‘Off the River’ heading is a nice touch, suggesting the many other things to see and do locally, and you get a recommendation for the best IGN map/s for the river. You’ll need that because, despite a handy, ‘big picture’ river map scaled-down to fit a page, with the subsequent stage maps you’ll struggle to orientate yourself unless you keep track closely, and the important detail is rendered inconsistently from map to map. All but three of the 20-odd maps are the same as edition 1. At over 1:100,000 scale (some over twice that), the 50k or bigger walking standard would be much better, such as Chassezac on p64. Only the map for the new Sioule river shows how it should have been done: a coincidentally usable scale of 71k and each weir, rapid and so on marked with a small red dash so you know what’s coming or where you are. To a nervous newb this is important. The old maps retain tiny dashes marking such things, but in blue over a blue river with blue writing that’s hard to read.
Just follow the river you might think. But when you’re wondering just how far to that nasty-sounding weir (which turns out to be nothing), without offline GPS mapping or a phone signal, a well-drawn and detailed map with bridges and other landmarks, is so much more useful and intuitive than columns and columns of text where one drossage reads very much like another. For 20 quid I’d expect to have proper, usable maps. Full, town-to-town river descriptions would also make more sense than obscure put-in to obscure take-out. We managed fine continuing beyond the half-described Chassezac (listed under ‘Ardeche’ for some reason) all the way to the actual Ardeche confluence. Same with the Tarn: Florac to Millau is a great 3-4 days. Why not just provide a full and accurate description right through to the white water course in Millau (a fun finale!) and let the reader decide where to start and end? Whoever they sent to update the Allier phoned it in. Distances (another useful aid to orientation; easily measured online) were out. Over-emphasised descriptions of ‘blink-and-you-miss-them’ pre-industrial weirs are now irrelevant, while other chute-avoiding weirs have become fun Class 2s. There are even left/right portaging errors introduced since the previous edition. See the Allier page for more detail. The ‘fluffy-duck-mascot’ joke was done to death first time round. Unfortunately, the author still thinks it has some mileage in this edition. Oh well, chacun a son gout. The switch to colour has given the book a fresh new look, but as a worthwhile improvement, the inconsistent updating has led to a missed opportunity. It’s perhaps to be expected because, as the author hints and my impressions concur, fewer families holiday like this anymore. Holiday-makers just bundle into a rental for a day and get vanned back to the campsite. All that is a shame as without the first edition I’d have missed out on a whole lot of memorable paddling adventures in lovely southern France, one of the best paddling locales in western Europe.
FYI 2023: Not sure what or how but TiZip tell me the MasterSeal design has updated
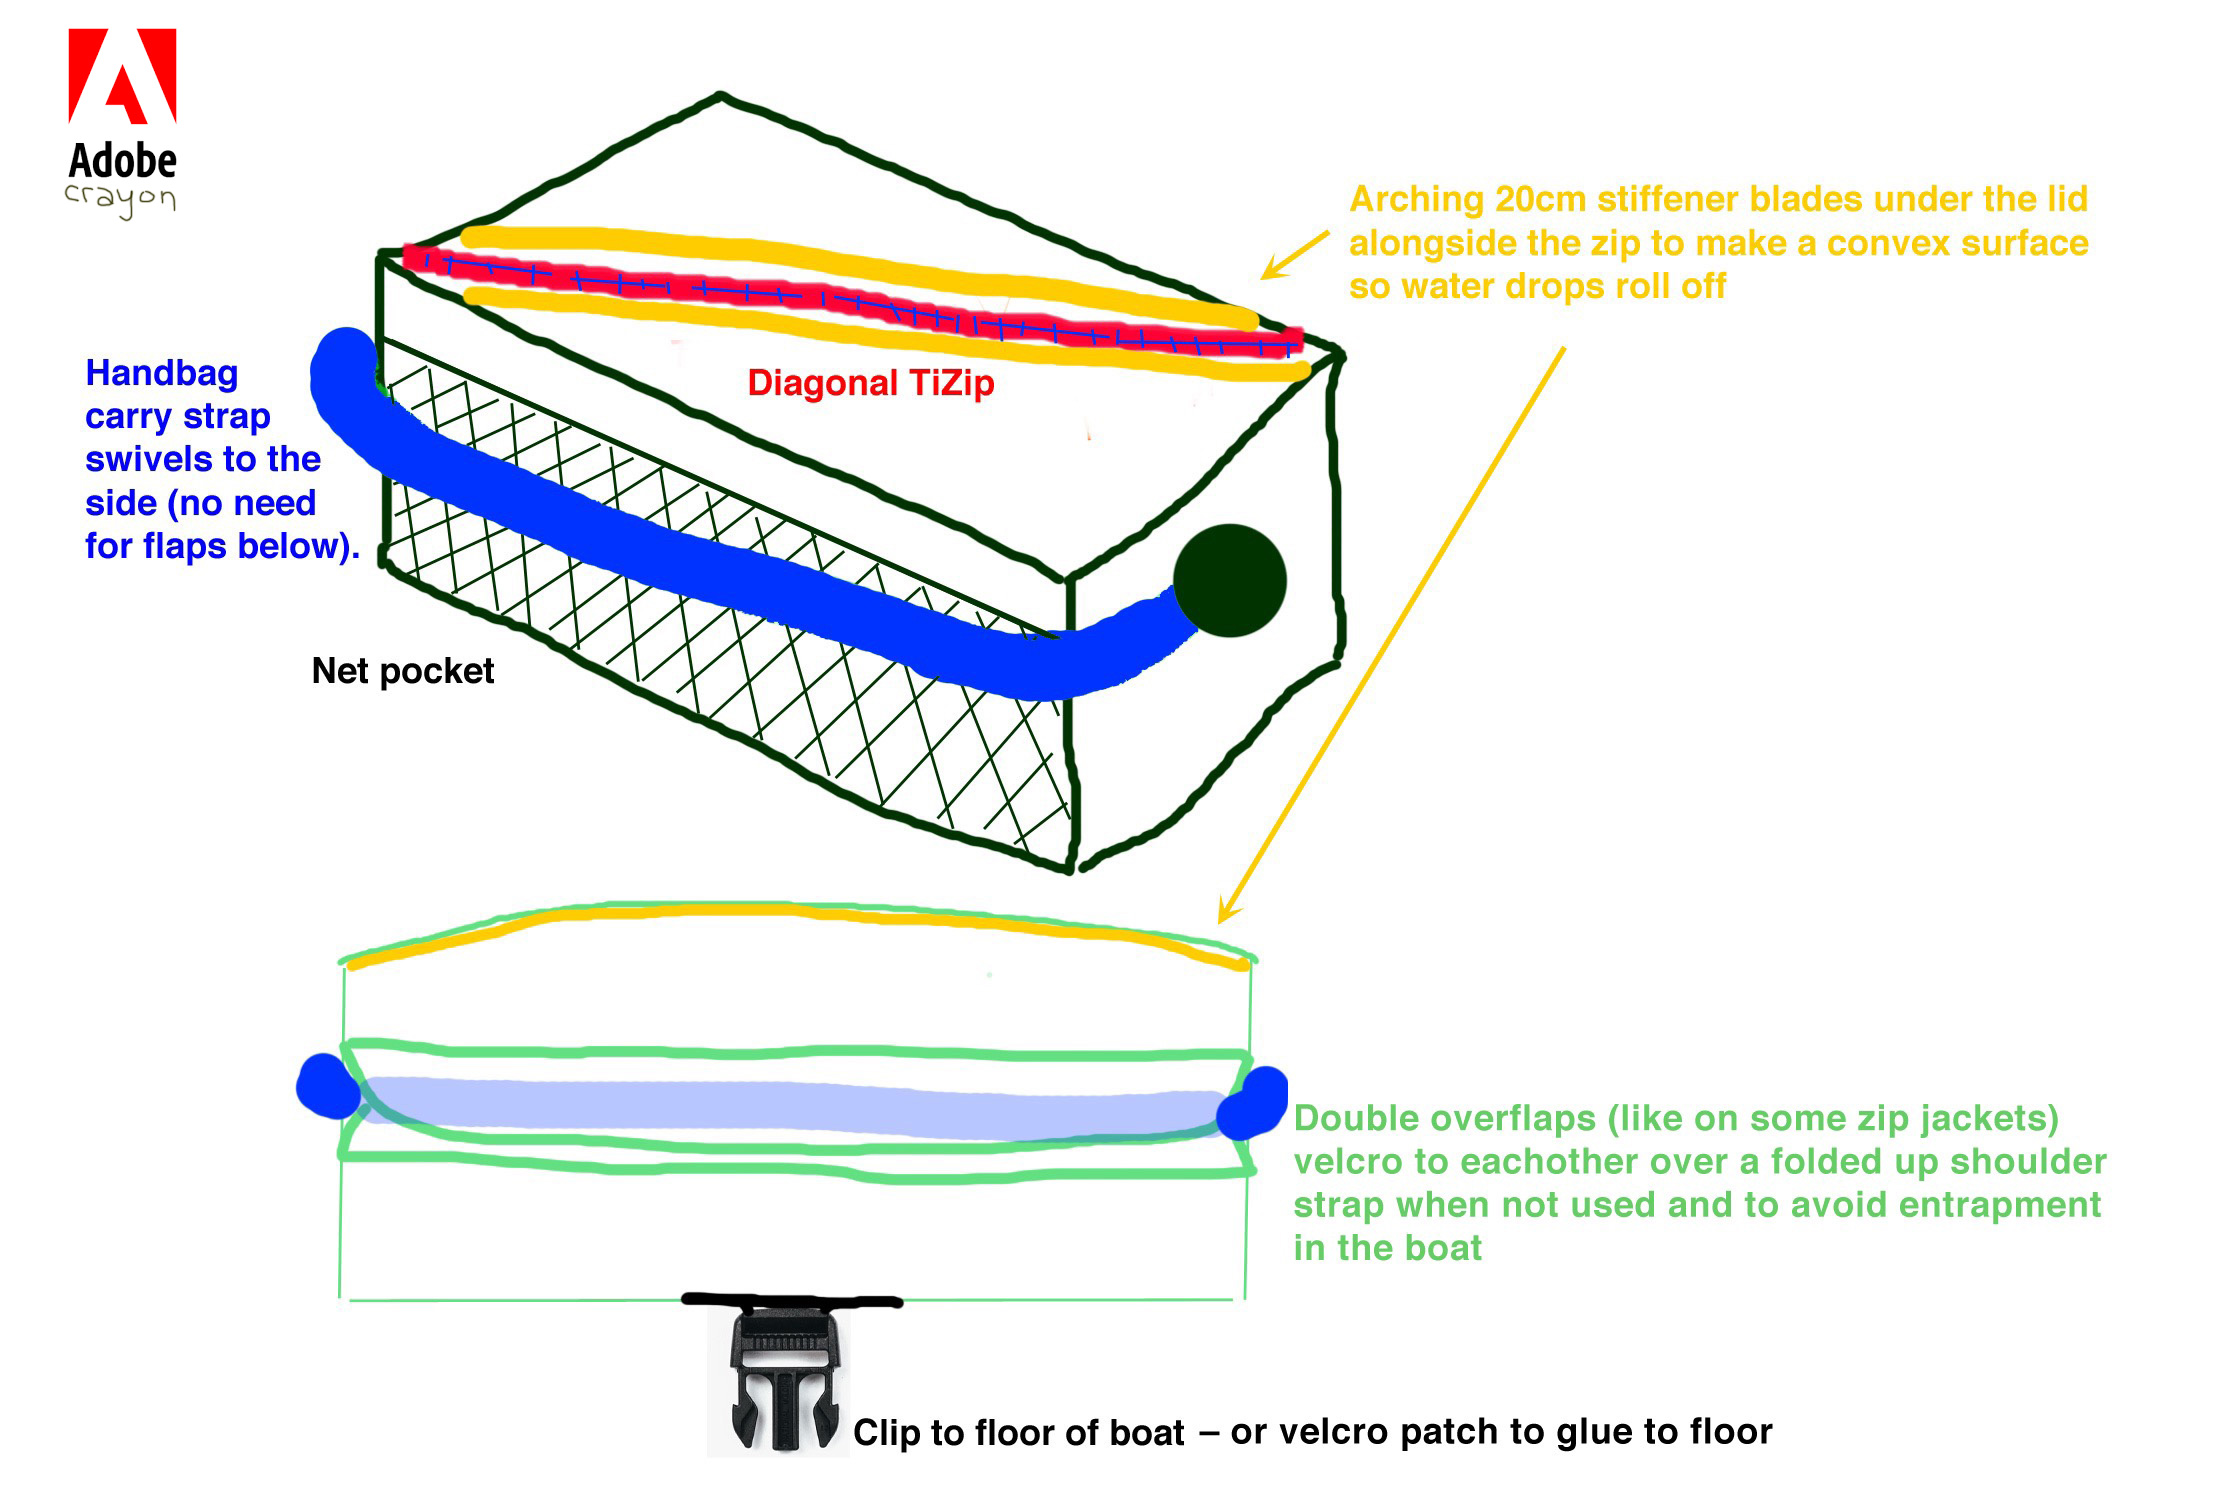
As mentioned here, wafting down the Tarn Gorge one summer with a Watershed Chattooga drybag jammed under my knees gave me plenty of time to configure a ‘deckbag’ to better fit my needs.
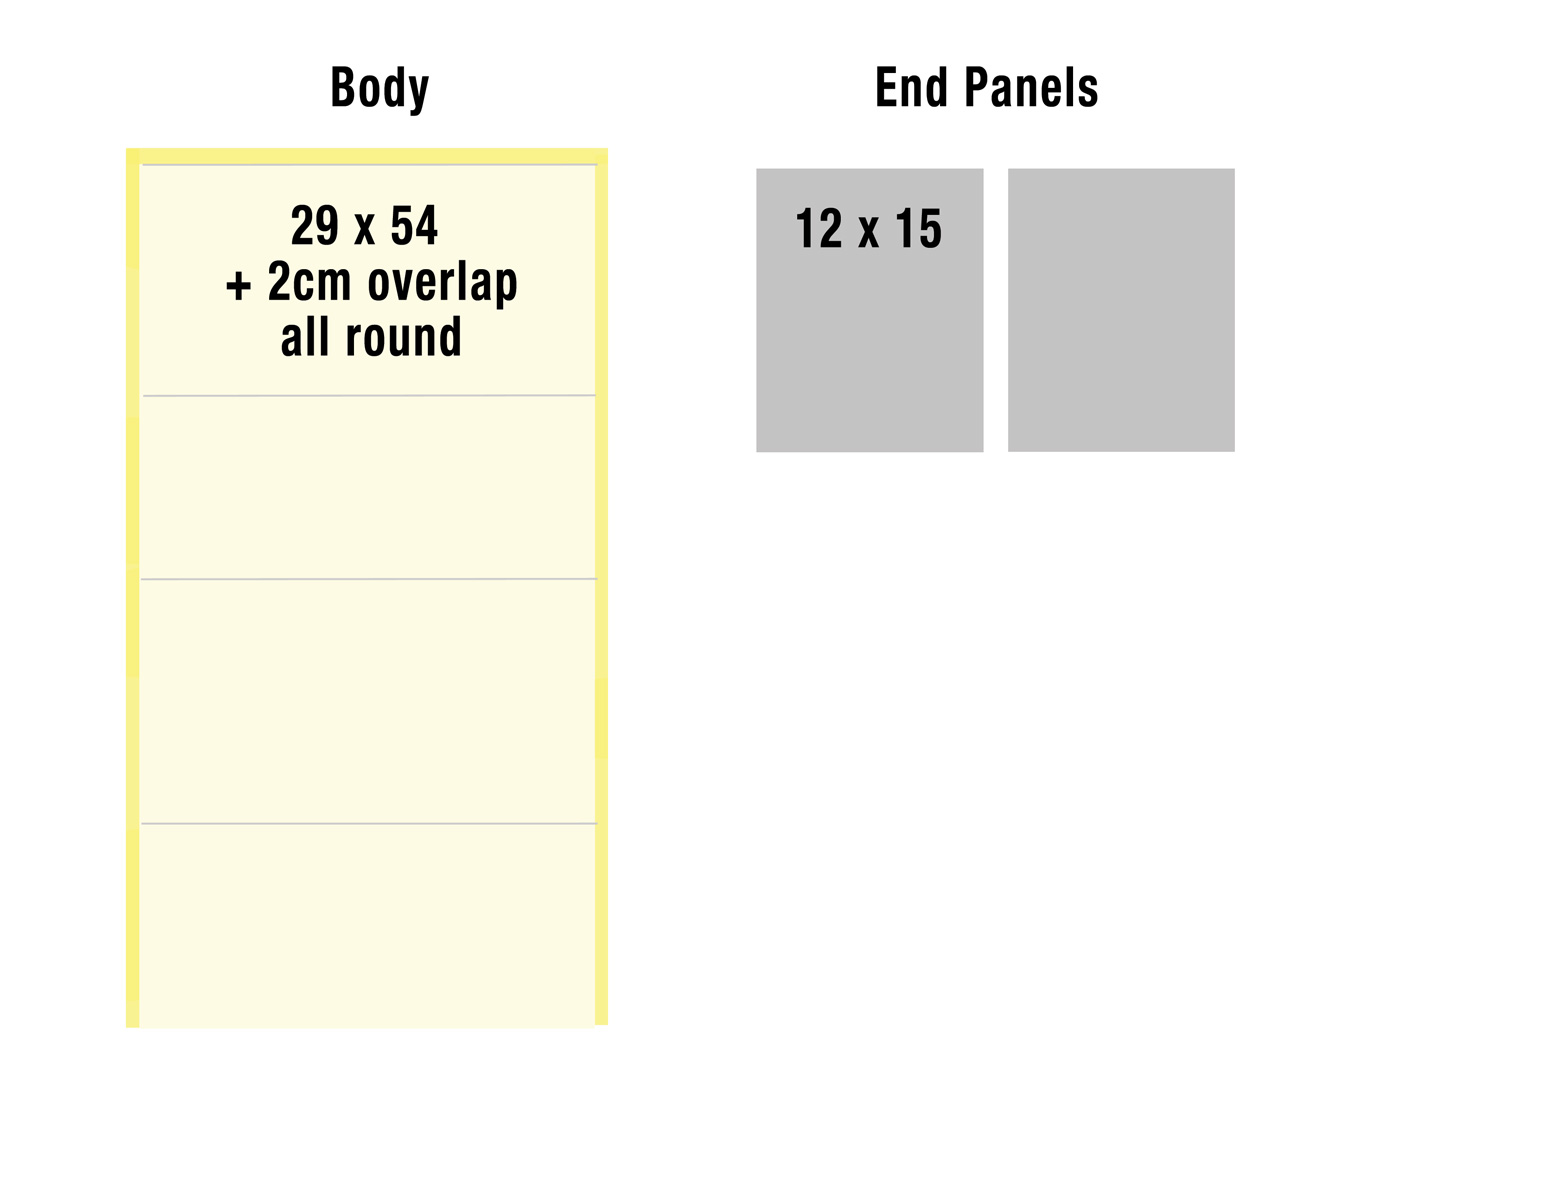
Peli cases are too heavy and cumbersome for these sorts of trips, while dependably dunk-proof – or even submersible bags like the Chattooga are too big and too fiddly to seal easily (since replaced with an Ortlieb Travel Zip). All I needed a 5-litre bag to sit on the floor below my knees for my must-stay-dries. Using state-of-the-art Adobe Crayon™ CAD software I came up with a design (above) and optimal dims of about 29cm x 15cm wide by 12cm deep giving about 5 litres volume. Part of the attraction of this project was learning to heat-weld TPU fabric with a small iron. It looks so much easier and less messy than glue. Or so I thought.
Before I got – quite literally – stuck in, I considered adapting some of the many heavy-duty SealLine PVC roll-top dry bags I have knocking about. All I needed to do was stick a zip in, then somehow cap one end with a round piece of something. I may well try that later but what I was actually aiming for was a stable box not a cylinder to sit securely on the floor of a boat.
Heat welding: important to understand PVC plastic can’t be heat sealed with an iron because it’s double coated. With double-coated anything (TPU, PVC, etc) the hot iron will easily melt the coating and make a right mess. Done this way you need to use a heat gun and a roller (left) which requires three hands. Or use single-sided PVC seam tape. Or of course, use glue.
The body of my Pakbag could be made from single-coated yellow 210D packraft hull fabric, with the near-square end panels in ‘both-sides-coated’ 420D black packraft floor material. At 650g/sqm (27oz/sq yard) this stuff is good and thick. The thin yellow is 275g/sqm.
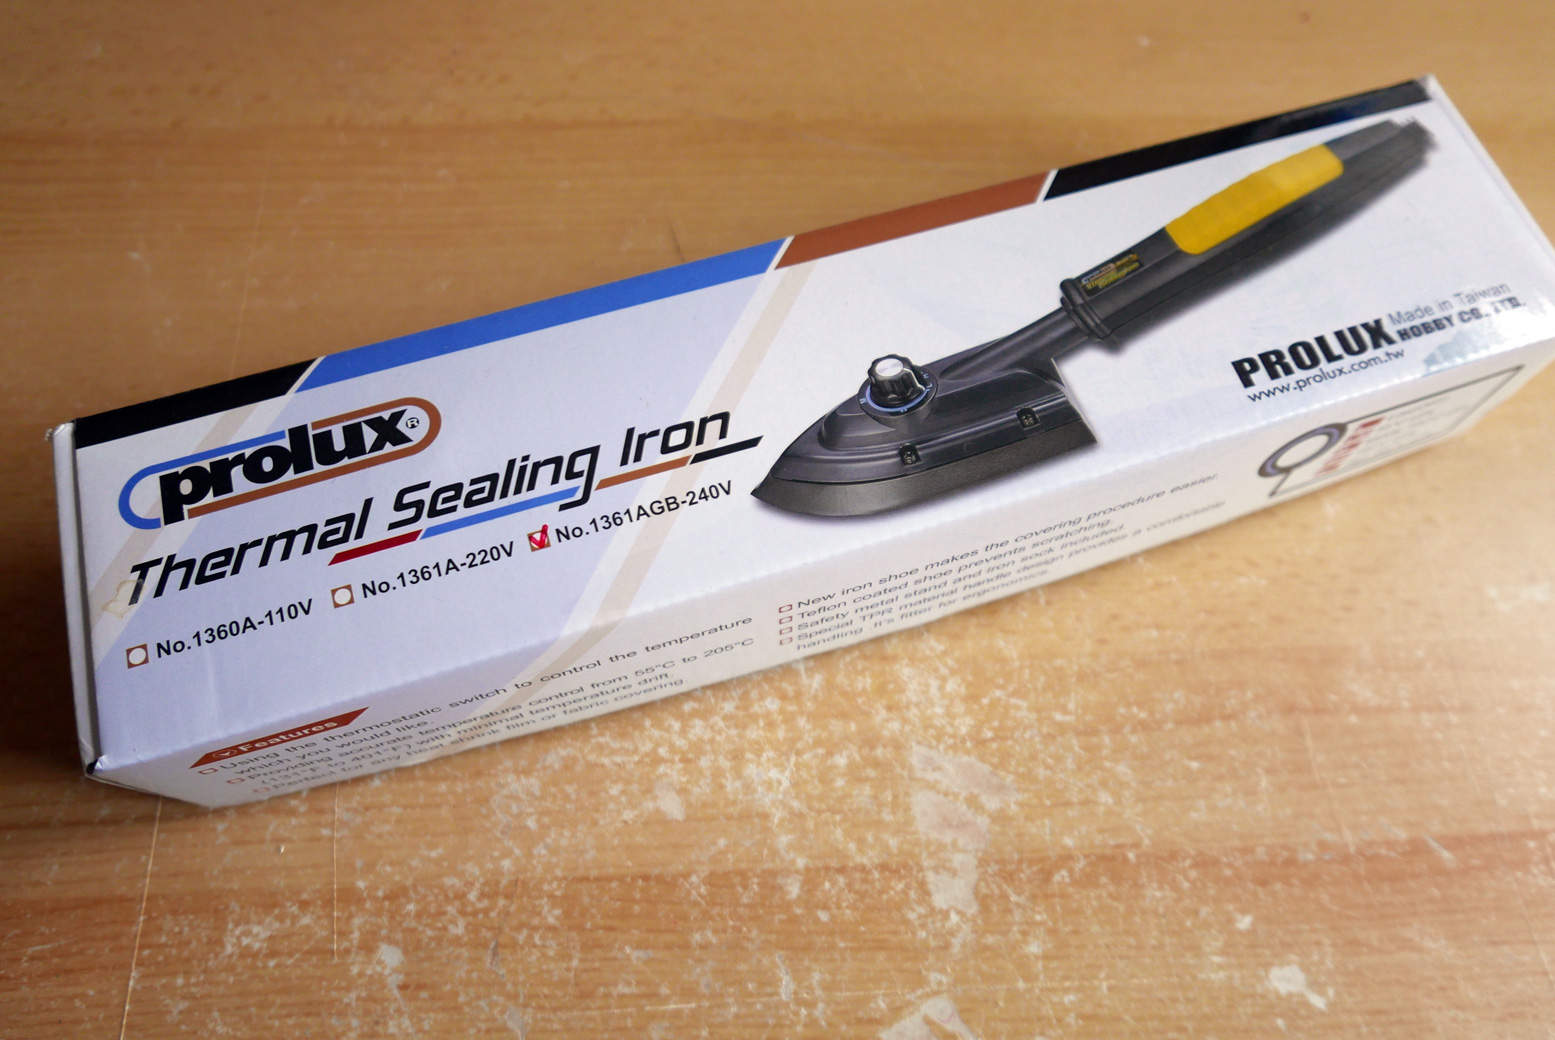
Half a metre minimum order of each cost €10 and €20 respectively from extremtextil in Germany; a very handy resource for the home fabrician. What you see left is what’s left over. Extrem were also one of the only places I found who’d sell a couple of 23-cm TiZip MasterSeal 10s for €23 each. Rolled delivery cost a bit more but avoided folds and was very fast. In the meantime I bought a used Prolux iron off ebay for 20 quid and already had some scissors, a table, a ruler and a knife.
I’m not so skilled at home handicrafts so expected to make a right mess of things first time round, and was prepared to make a second bag. The next best thing I could do was think carefully before diving in like Edward Scissorhands at a confetti convention. One smart decision I made was to use a wooden mould to form the bag around. I could have laboriously hand-sawn some kitchen-shelf leftovers down to size, but after more ebaying found a pair of hobbyist’s knick-knack balsa boxes which added up to 15 x 12 x 30 stacked. As mentioned, you can’t iron on the coated side of TPU fabric; the coating will melt all over your iron before it bonds to whatever’s underneath. You can only directly heat an uncoated surface while pressing down the coated side which melts to the corresponding panel – coated or uncoated.
You can learn a lot from the DIY Packraft website. Lord knows how these guys manage to make packrafts from a roll of raw TPU. There can be no doubt that my attempt would end up looking like Picasso in an abattoir, but a dinky, curve-free pakbag ought to be within my abilities.
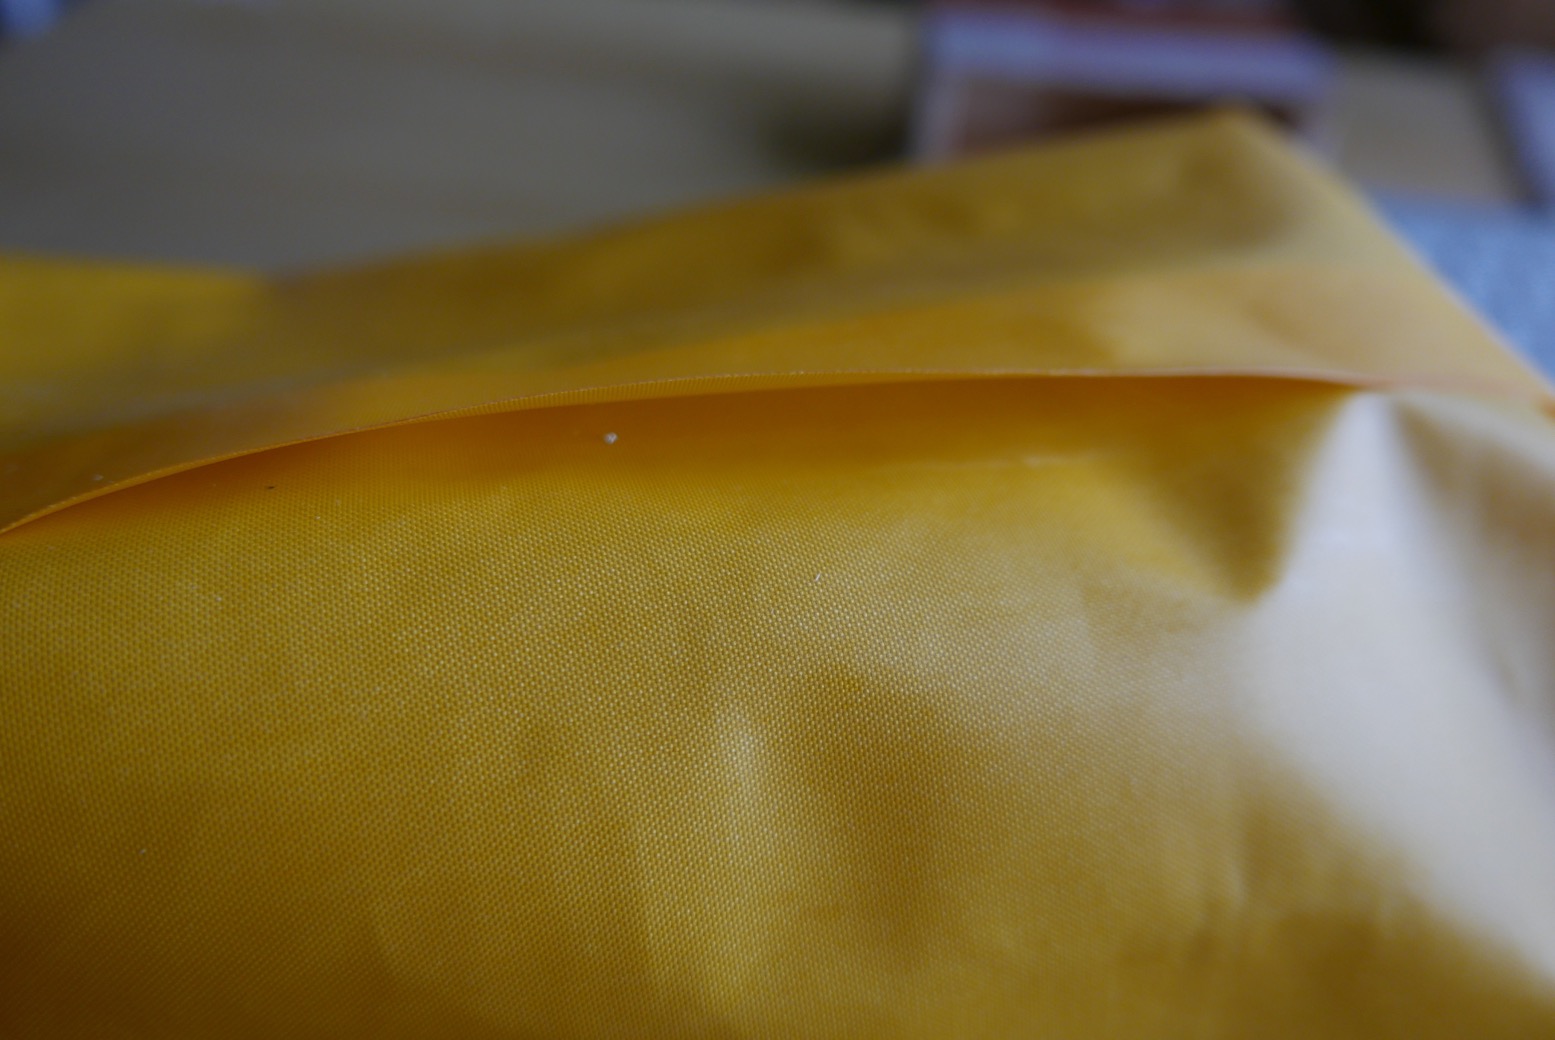
They mention the need for an iron with an adequate and consistent spread of heat up to around 220°C. Rated at 205°C, my cheapo Prolux was not in this category. I understand model makers find them ideal for applying thin transfers. For TPU work you need an iron with more poke, costing at least three times as much. I practised joining 210D to 210D, but sealing was far from instantaneously miraculous. It took repeated ironing and pressing, as well as spot heating to get a full seal with virtually no air gaps or lifted edges. You could then peel it apart if you got an edge up, but you certainly couldn’t pull it apart. I thought maybe the coating may be too thin or once melted was gone for good, but it’s probably just my crap iron.
For the end panels you need to seal 210D on to the thick black 420D. The box mould really helped to make a neat-enough job. One interesting observation about joining fabrics by sewing or heat-welding is that millimetre-precise measurements aren’t critical as they are with wood or metal. I took more time than I needed cutting the exact forms and trying to get precisely perpendicular edges. A big metal set square may help, or you can find stuff round the house – in my case, some square glass bathroom scales. Another tip is arrange something sticky under your cutting edge ruler so it doesn’t slip as you slice hard to get a full, straight cut.
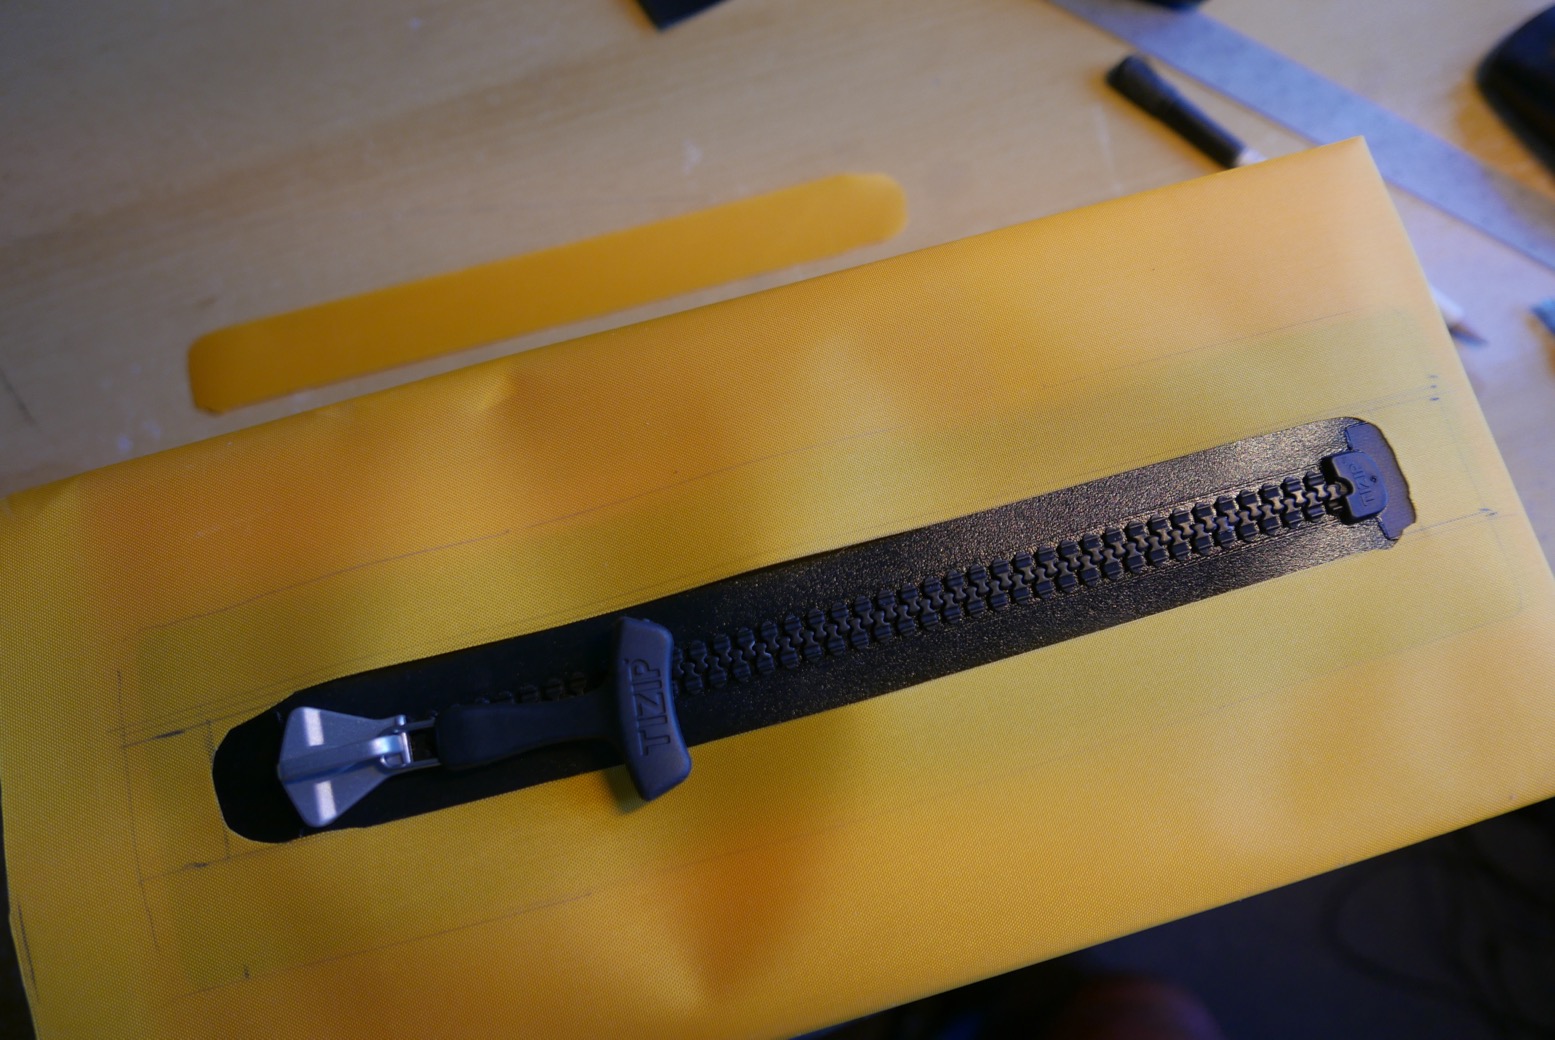
The length of the bag is partly governed by the available zip size. The 23cm MS10 Tizip which extrem sell is presumably used as a relief zip on men’s drysuits, but for a bag has a minimally useful aperture of just 19cm. The next size they sell is a massive 71cm. They must make TiZip sizes in between (for example for packraft cargo hulls), but good luck tracking them down online.
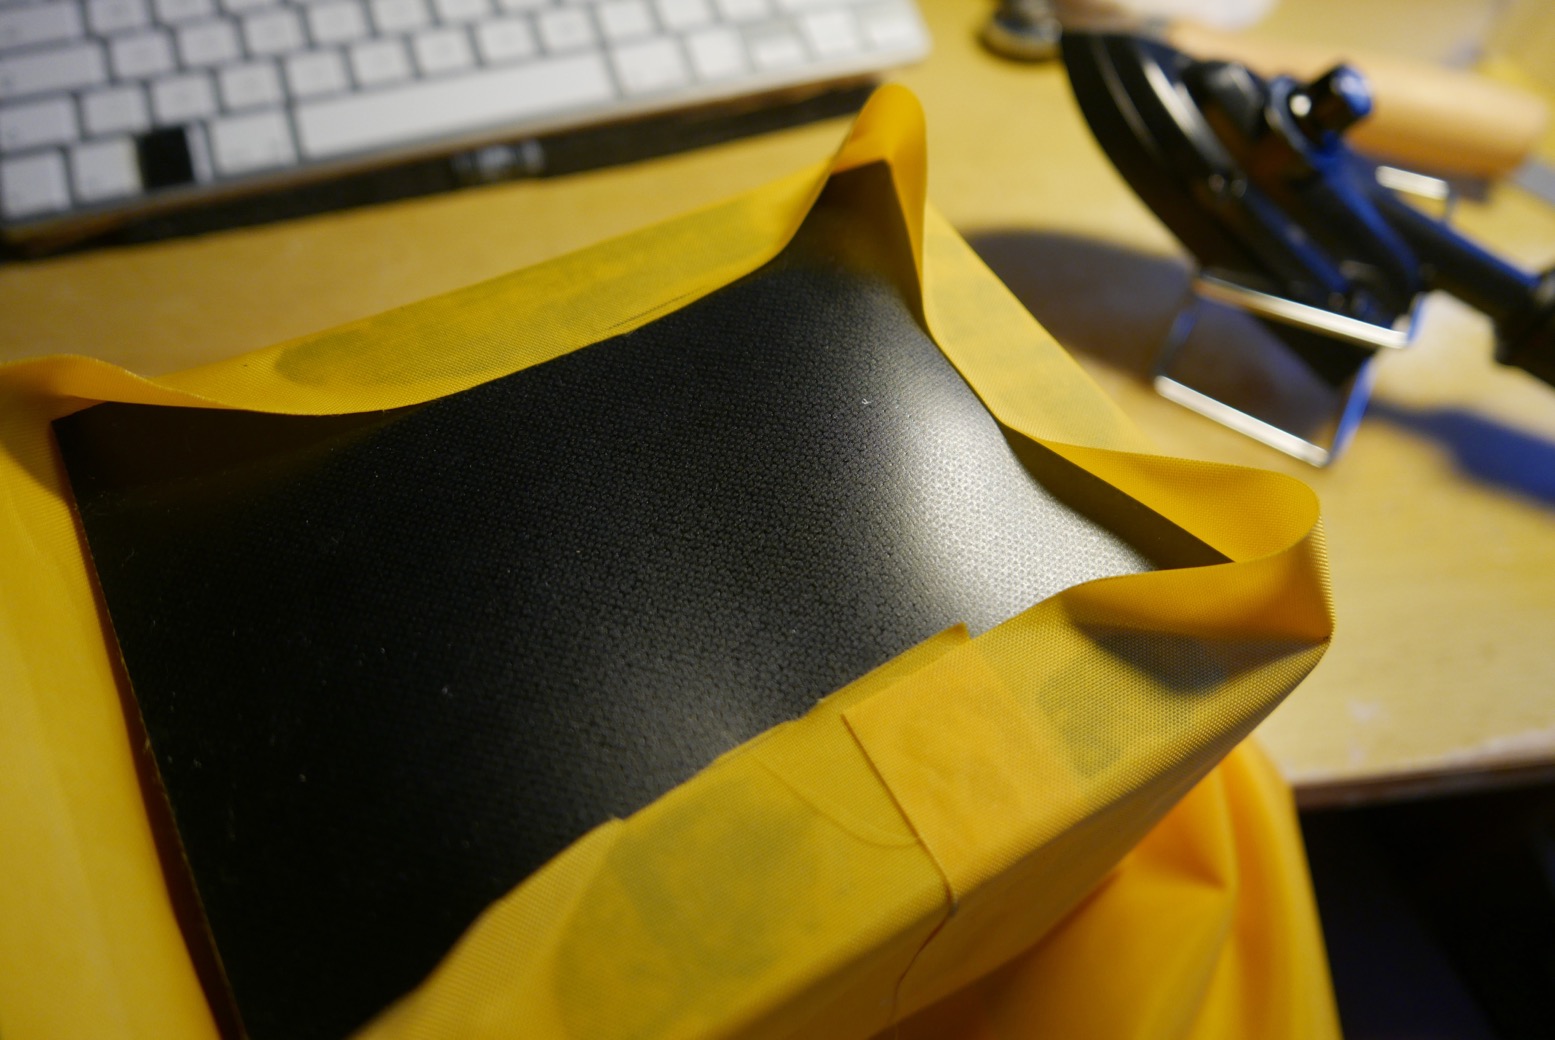
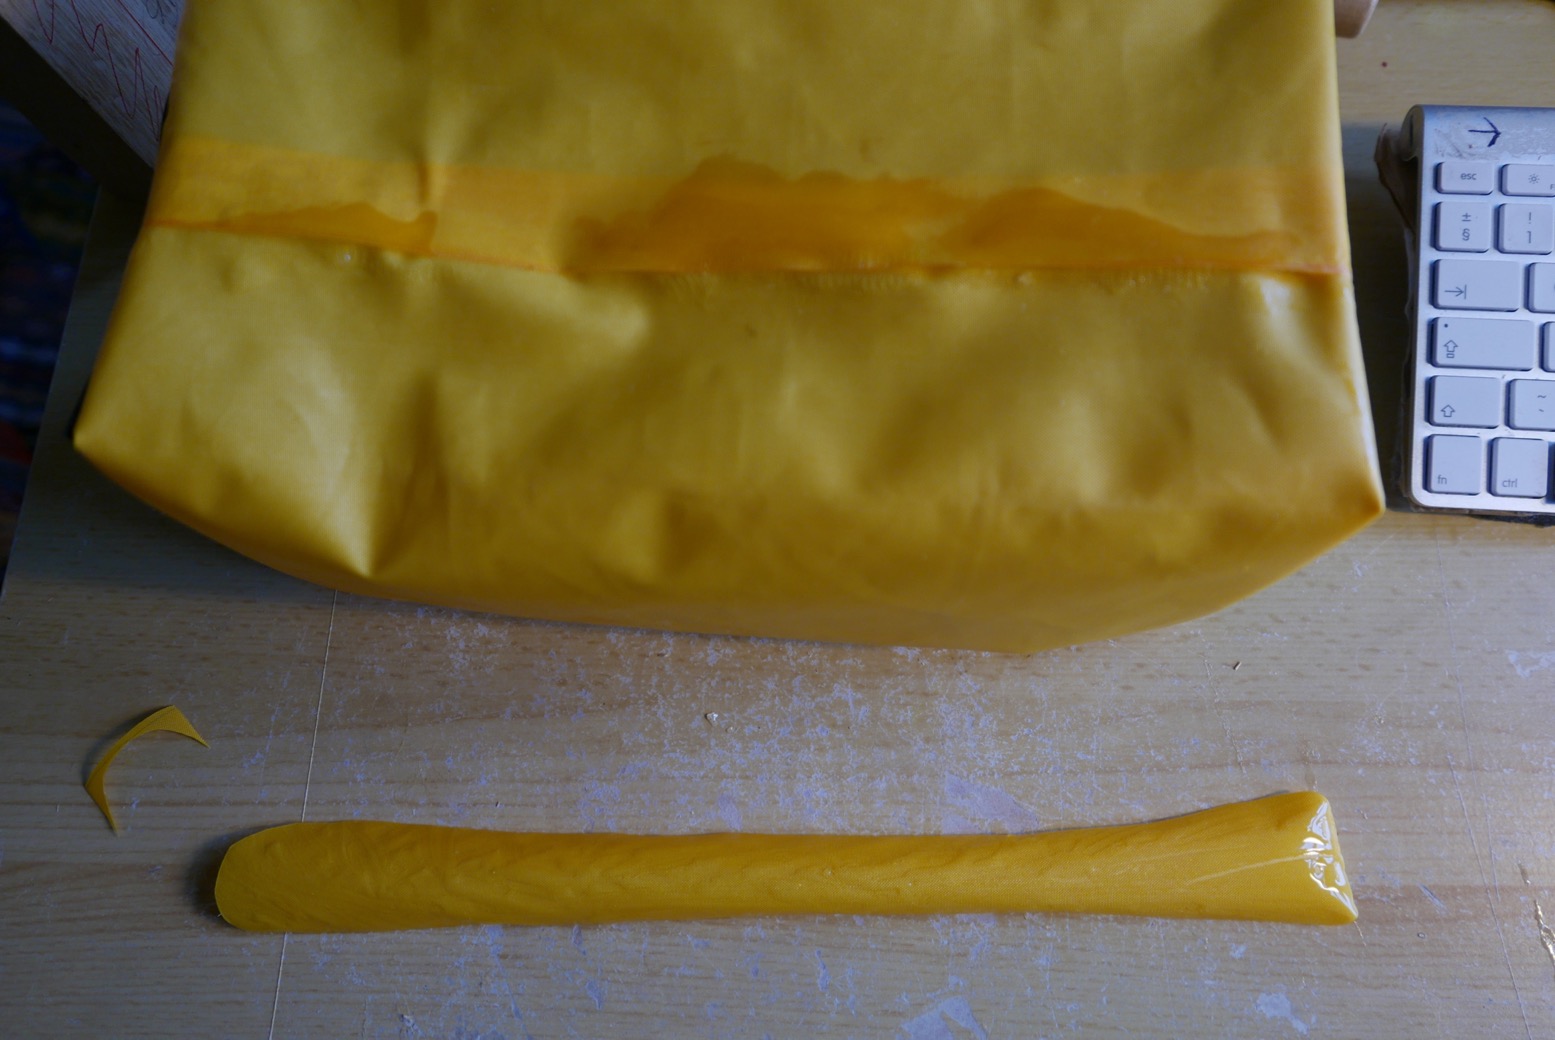
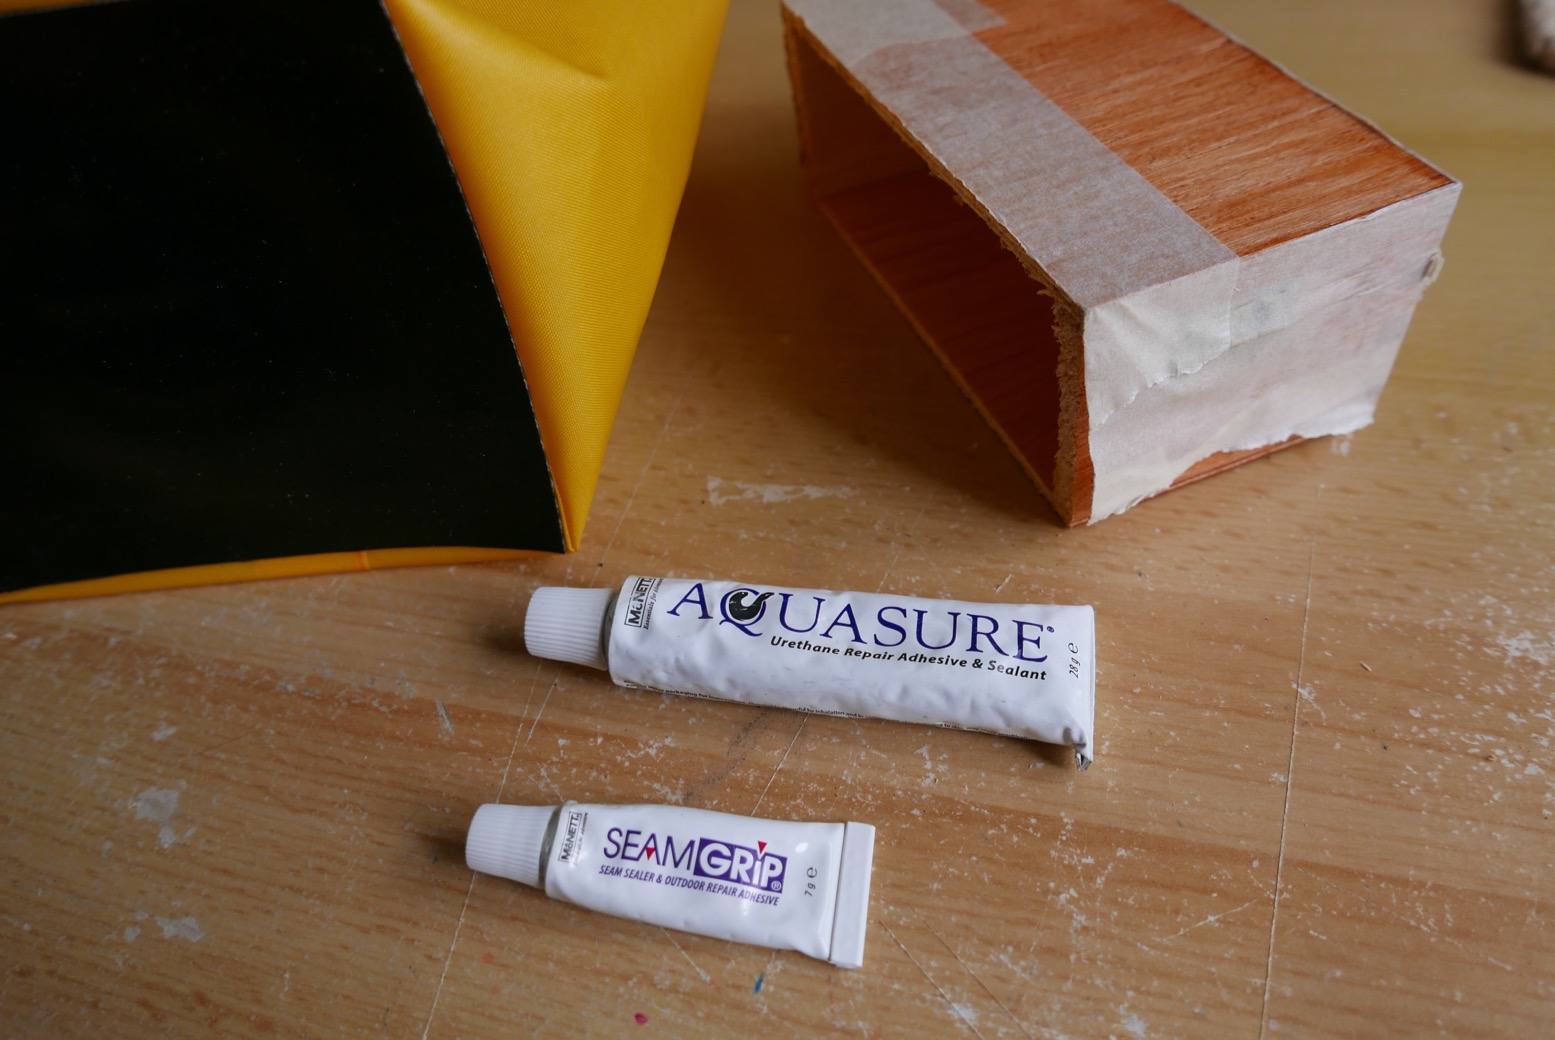
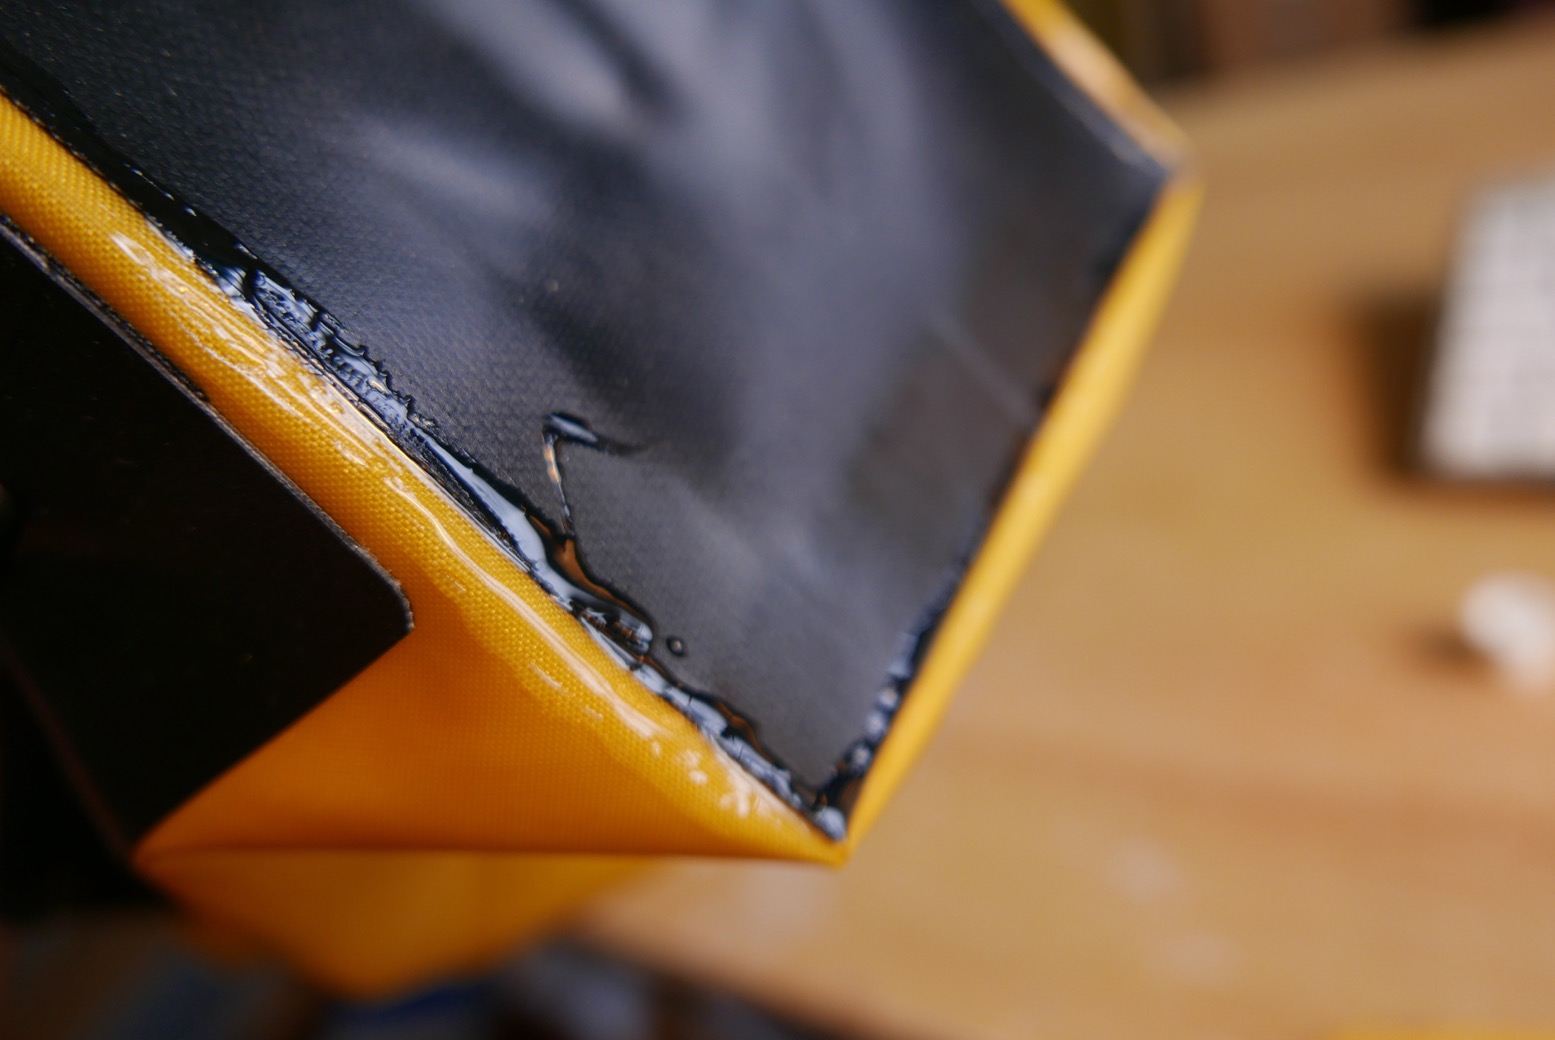
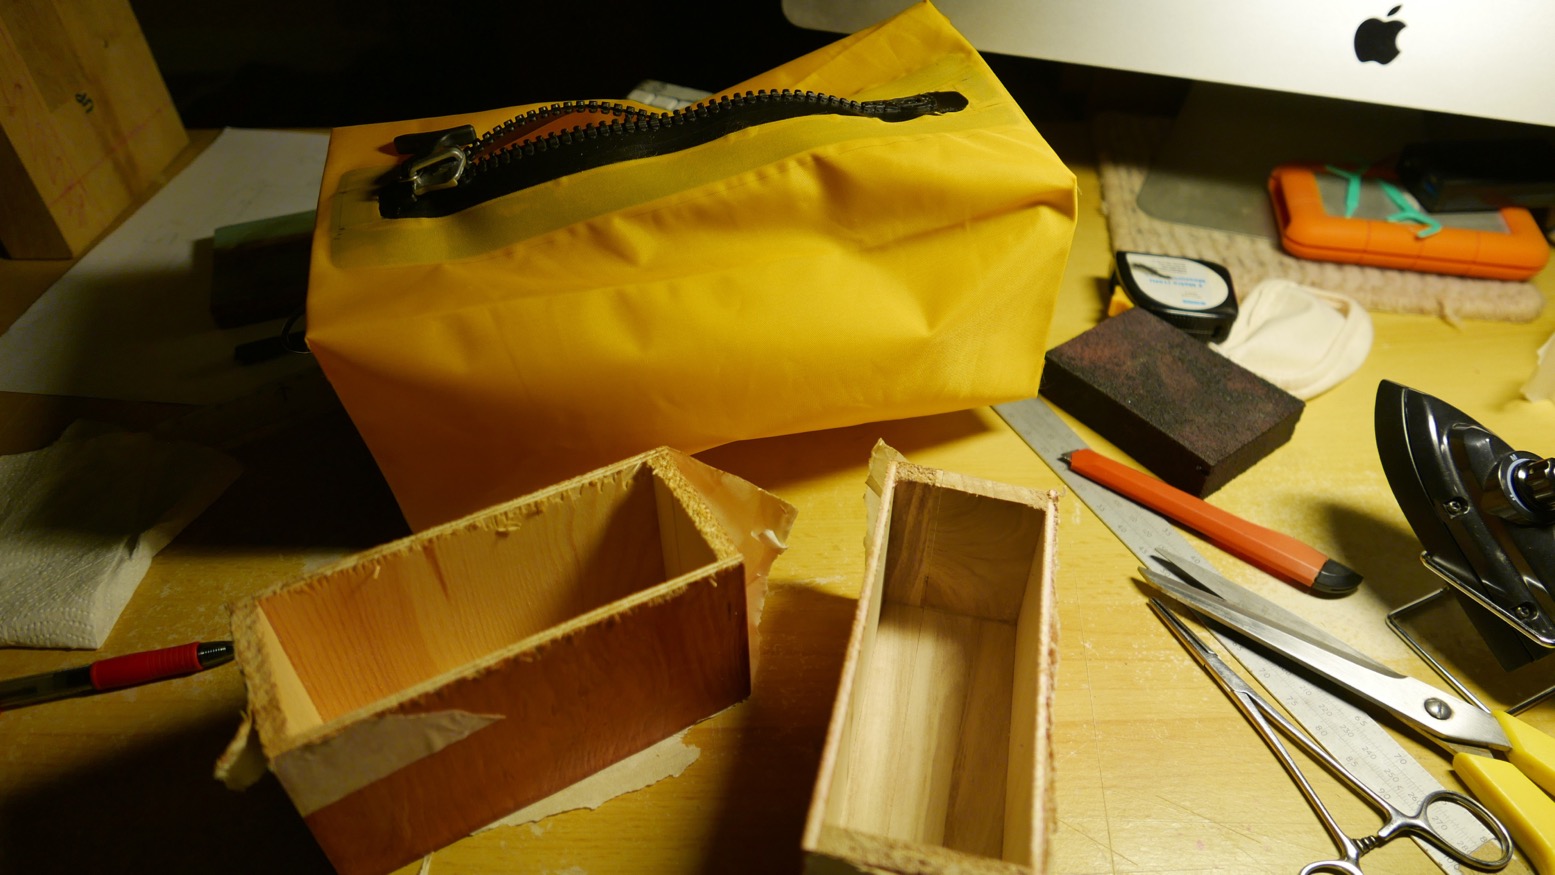
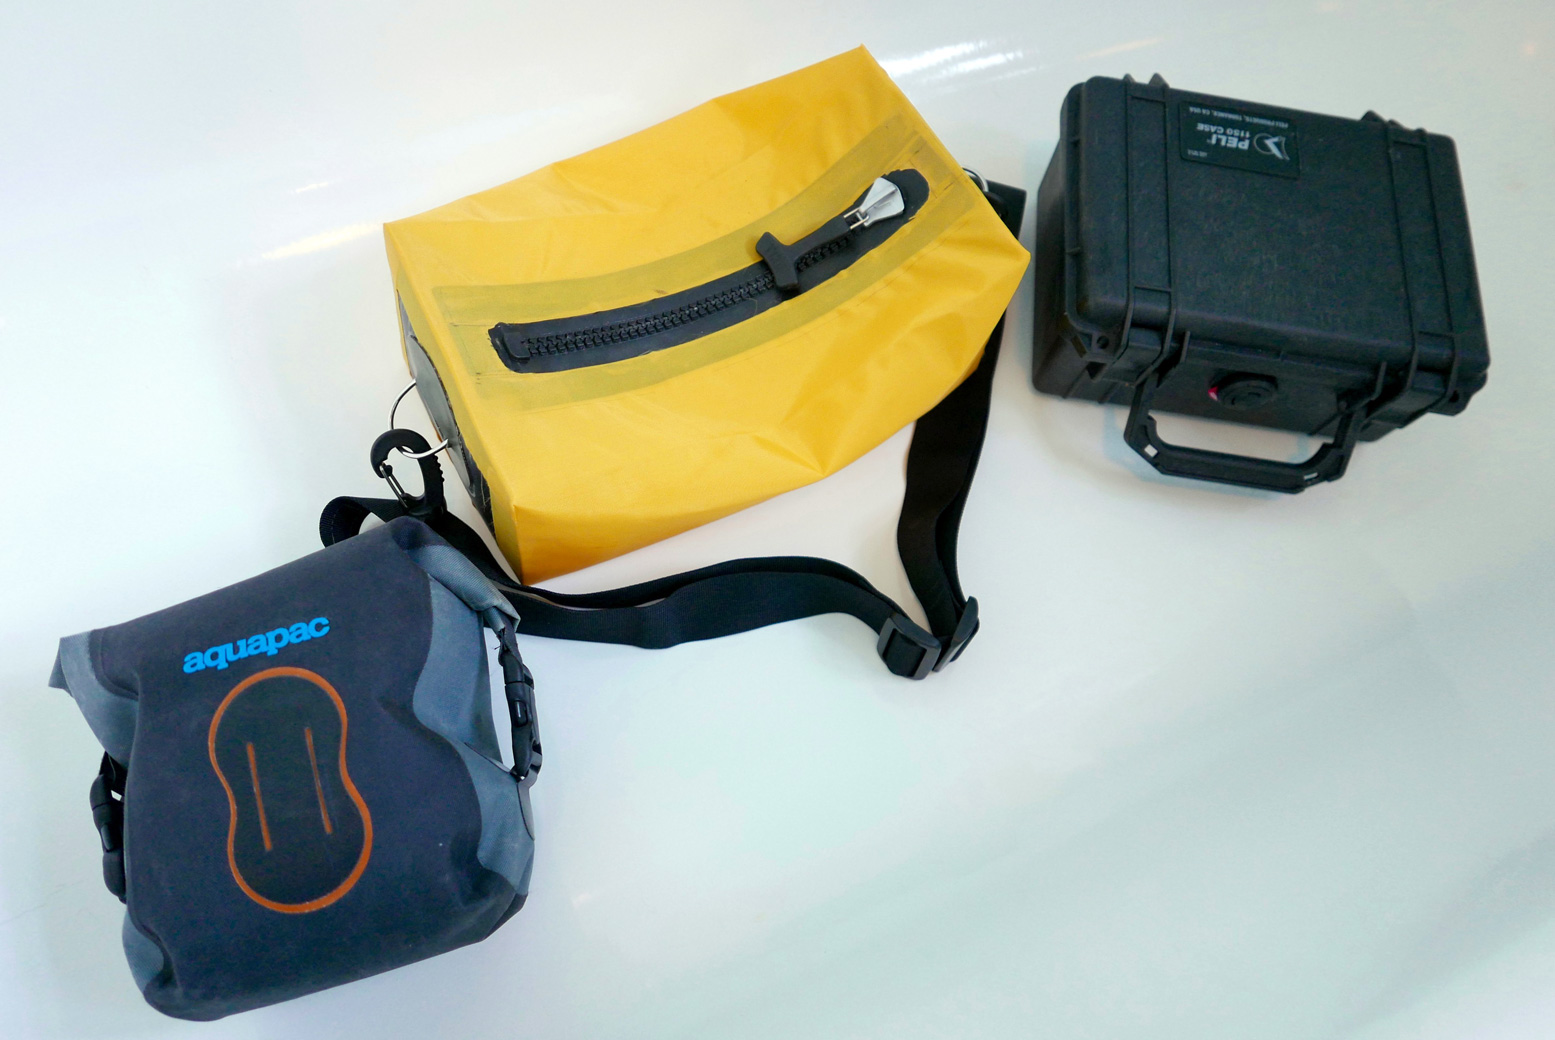
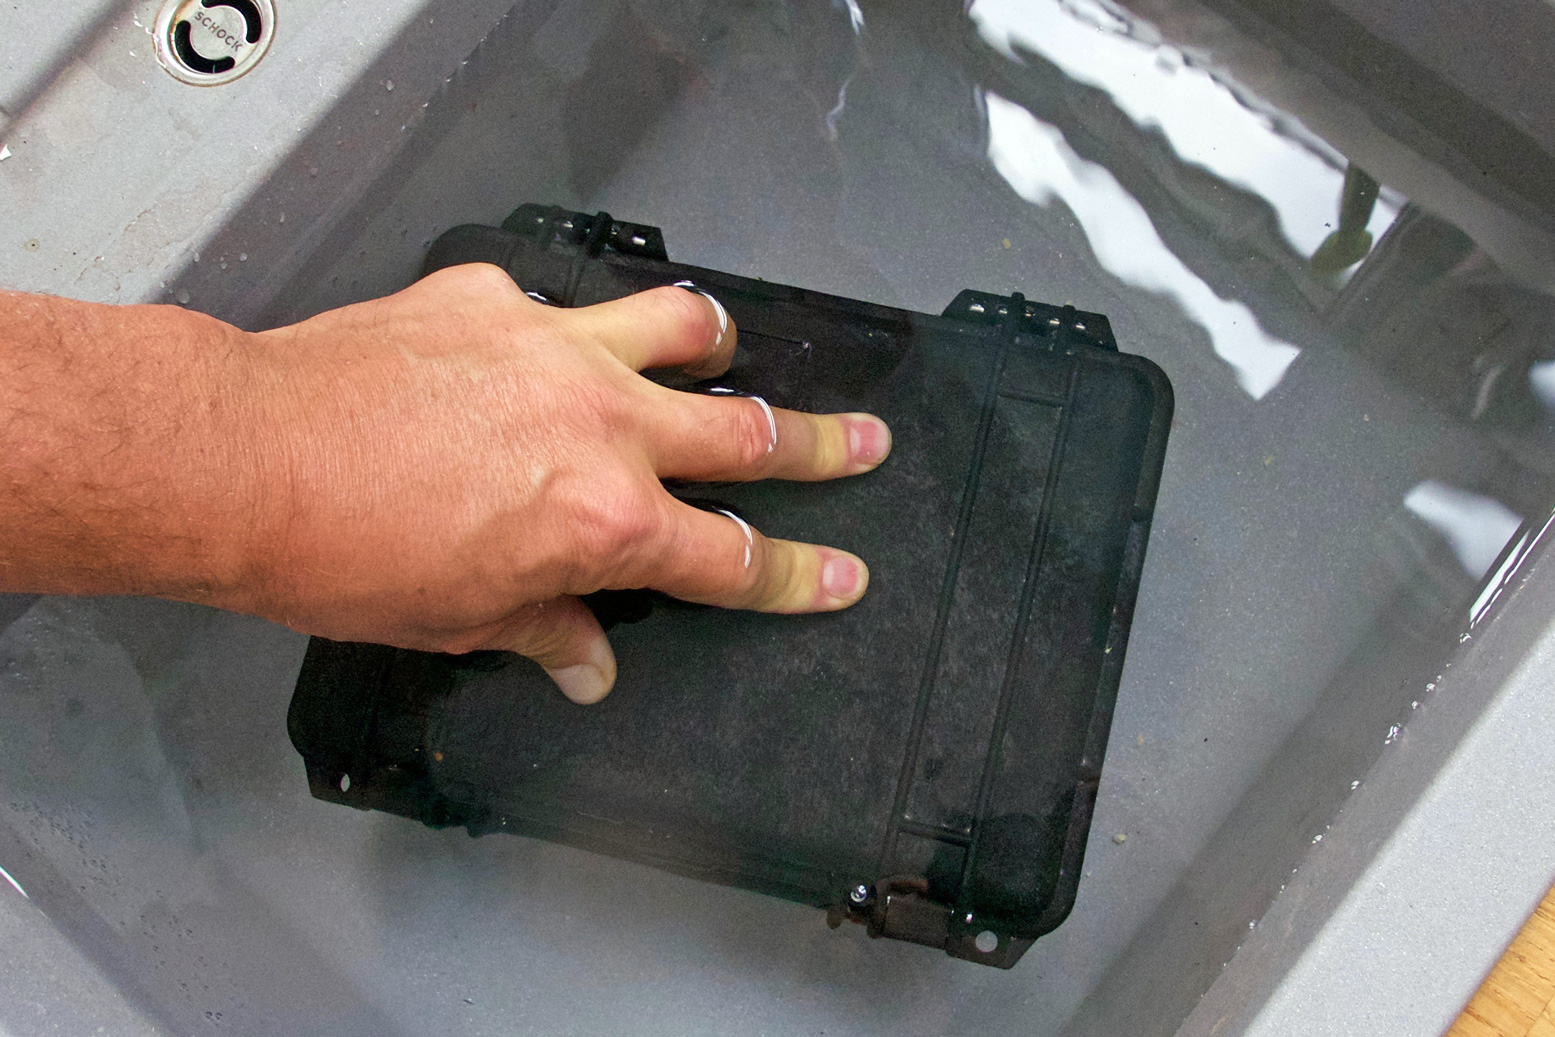
First job was wrapping the bag body panel round the box mould and sealing it. Cue endless to and fro with the iron to try and get a complete seal before I gave up and accepted I’d glue up the gaps later. Looking back, I should have made this join on the top of the bag, either side of the zip. Barely two inches of yellow to yellow sealing required here. Now I know.I dropped a black end panel on to the end of the box mould.and welded down the bits between the corners.Then I made an incision at each corner, pressed the flaps down over each other and welded on. Good to know the 210 welds much better to the thicker coated black stuff.Sealing wasn’t perfect but all along I expected to have to hand seal all joins, and certainly all corners with Seam Seal.Before sealing the other end, I cut a slot for the zip.Then ironed it down. Again, the thick coating on the broad zip sides made good adhesion easier to achieve.I stuck a home-made D-ring on the finished end. I actually needed this to pull the bag off the tightly fitting box mould before doing the other end. This requires sawing an end off the box so it can be removed through the zip hole after butting up against the unfinished bag end to support firm heat welding.Oh dear, look at the state of that floor seal inside the bag. I went over it again with the iron, then filled up the gaps with glue.Then I stuck the zip cut-out over it for good measure. Once inverted, I did the same on the outside for more good measure. It’s not pretty but it ought to seal.With the bag still inside out, I went round the yellow-to-black joins with Seam Seal. It’s like Aquasure/Aquaseal, but runnier and takes a long time to dry.Beautifully sealed seams. I should get a job at Alpacka.The bag turned right way out. I’m amazed that it looks less crap than I expected. No need for stiffeners; as hoped, the 420 end panels retain the boxy shape. The box mould (sawn off bits in the foreground) helped greatly in making a tidy form.Without the strap the bag weighs 158g or 5.5 oz.Completed Pakbag alongside the Aquapac and a Peli 1150.Pakbag, with a foam floor panel to keep above any moisture. A sachet of silica crystals may help humidity, as does TiZip silicon lube for the zip end. It passed the submersion sink test.
Several features are omitted from the Adobe Crayon blueprint at the top of the page:
• The overlap sleeve on the side to contain the shoulder strap to avoid entrapment. On rough water I’ll just unhook the shoulder strap and stash it
• Otherwise the full-length shoulder strap can adjust down to ‘handbag ‘length so there’s less is lying about
• No side net. Would still quite like this but not sure how to do it neatly
• TiZip is not diagonal – not important – but the arched stays idea underneath it may be. I noticed in France under the knees gets a lot of drips off the paddle (PSZ; right) which can get in when you open up. Convex top would be good but a shake of the bag may thrown off excess drips before unzipping
• Need to find a way to attach it to the packraft floor. Velcro might be low profile but with the repeated force of pulling apart, I’m not sure the shiny-backed stuff I have will glue to the bag or the floor well enough, even with proper two-part glue. So Ill just clip one of the strap rings a D-ring glued on, mid-floor
A few months later… using the Pakbag
After paddling the Wairoa River in New Zealand as a day trip, I can boldly claim my MYO Pakbag is fit for purpose. It’s just the right size for a water bootle, camera, GPS and wallet, even if the easy-to-use zip is a tad short for easy access. One thing I didn’t appreciate is that, slung over the shoulder while sat in the boat, the bag is still handy to access but keeps off a wet floor and is always attached to you. No need to think where it is.
Sadly my glue or gluing skills are not so fit for purpose. I need to reglue the strap end-rings and a couple of corners. This time I’ll probably use 2-part glue which I know will tear off the coating from the fabric core before it separates from what it’s glued to.
What I’d really like is for someone to make this properly. The difficulty – as possibly mentioned above – seems to be that anything with TiZips requires the consent and approval of TiZip Inc before they supply a zip. It’s a way of ensuring a proper application to their tight specs is done so that their reputation is not harmed. Which is why many TiZip products, like my Ortlieb Travel Zip bag are unusually expensive. You’d think there must be alternative or knock-off TiZips around; I’m pretty sure I searched and searched.
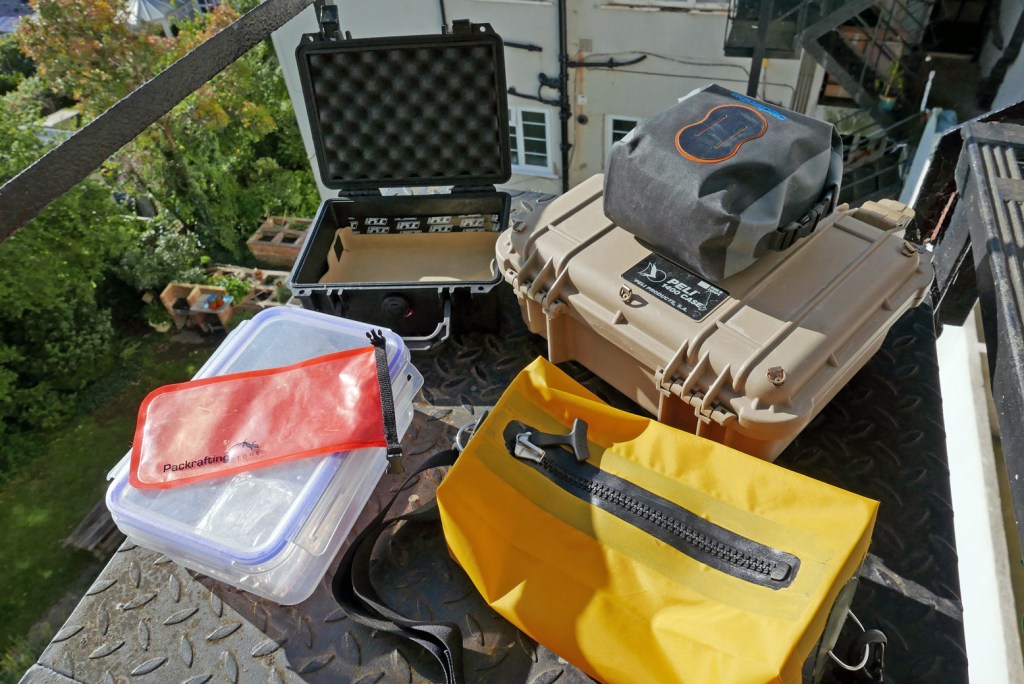
Clockwise from top left: Peli 1150, Peli 1400 with Aquapac camera bag on top, my yellow Pakbag; roll-top phone pouch; four-clip food container.
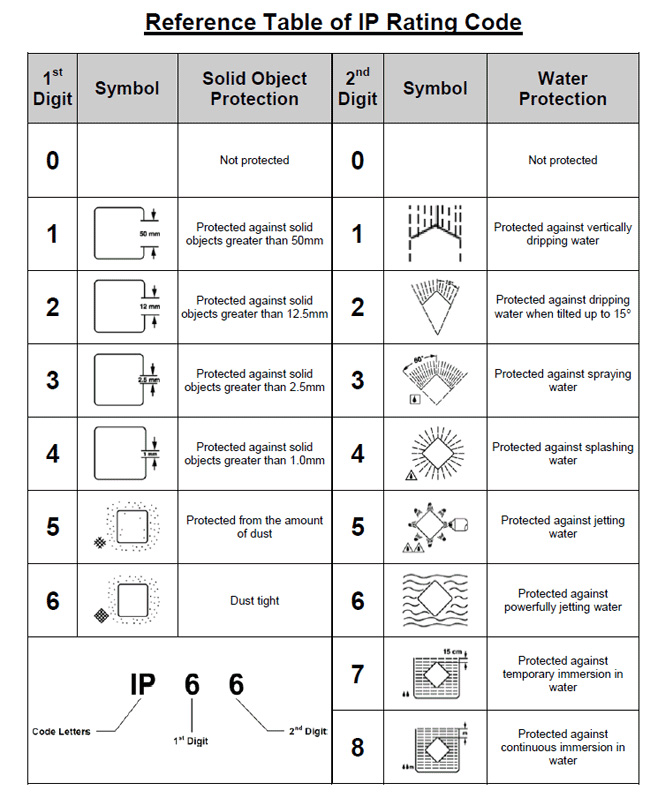
Whether on day trips or overnighters, how do you organise easy access to regularly used items and valuables, including stuff you want to carry when away from your packboat? I’m talking something capable of handling less than flat water, rated at least IP65 (right) to stash the wallet, phone, tablet, camera, travel docs, ammo and snacks. Stuff you want to keep dry in case of swamping or capsize, as well as being easy to get to on the water.
For walking or cycling, a daypack does the trick but that doesn’t really work in a paddle boat. The pockets and pouches in your pfd (right) have their uses, but they’re not waterproof. You want something that’s airtight when briefly submerged while easy to access on the water and portable off it. It’s actually quite a tall order.
Anfibio smartphone case. Submersible and keypad works through the plastic
Things like paper maps and nav aids (GPS, compass) I keep in a separate waterproof pouch like the SealLine (left) with a double ziploc seal, even if this is yet more clutter knocking about around your legs. Since I took that photo I’ve mounted a compass on the side of my Seawave IK – very handy as it’s always there at a glance. And I now use a IPX7-rated Garmin Montana with loads of mapping space, though I prefer to keep salty seawater off it where possible.
Waterproof waist bags A small, roll-top waterproof waistpack actually ticks many boxes as long as you don’t mind being attached to yet more clobber. There are quite a few out there between 2 and 6 litres, from OverBoard (2 sizes) to Aquapac and the bigger SealLine. The good thing is a waistpack sits up on your lap, out of the water and the paddle splash zone (PSZ), but well within reach.
The bad thing is they’re a faff to roll up and clip down quickly and reliably, and if you’re bobbing around in the water swimming after your boat you can be sure they’ll slowly leak. Read reviews and you’ll come across disgruntled accounts of ruined cameras or phones following a quick dip or even too much splashing. The problem, as usual, is the roll top; it needs to be tightly rolled down 2 or 3 times, then tightly clipped and even cinched down to the sides to make a good, dunk-proof seal. I believe a lot also depends on the nature of those sealing surfaces. As long as you avoid creases, smooth, shiny vinyl or PU pressing against the same will make a better seal than anything textured, like Cordura.
Hard cases For years the obvious solution seemed to be small ABS or polypropylene hard cases commonly used for camera gear. I started years ago with a 9-litre Otterbox in my Gumotex Sunny days (left). The Otter was lighter and cheaper than the well-known Peli cases, and with either, you know the box will be airtight, access quick enough and boxes make a handy solid footrest in an IK as well as a seat or raised surface on a beach.
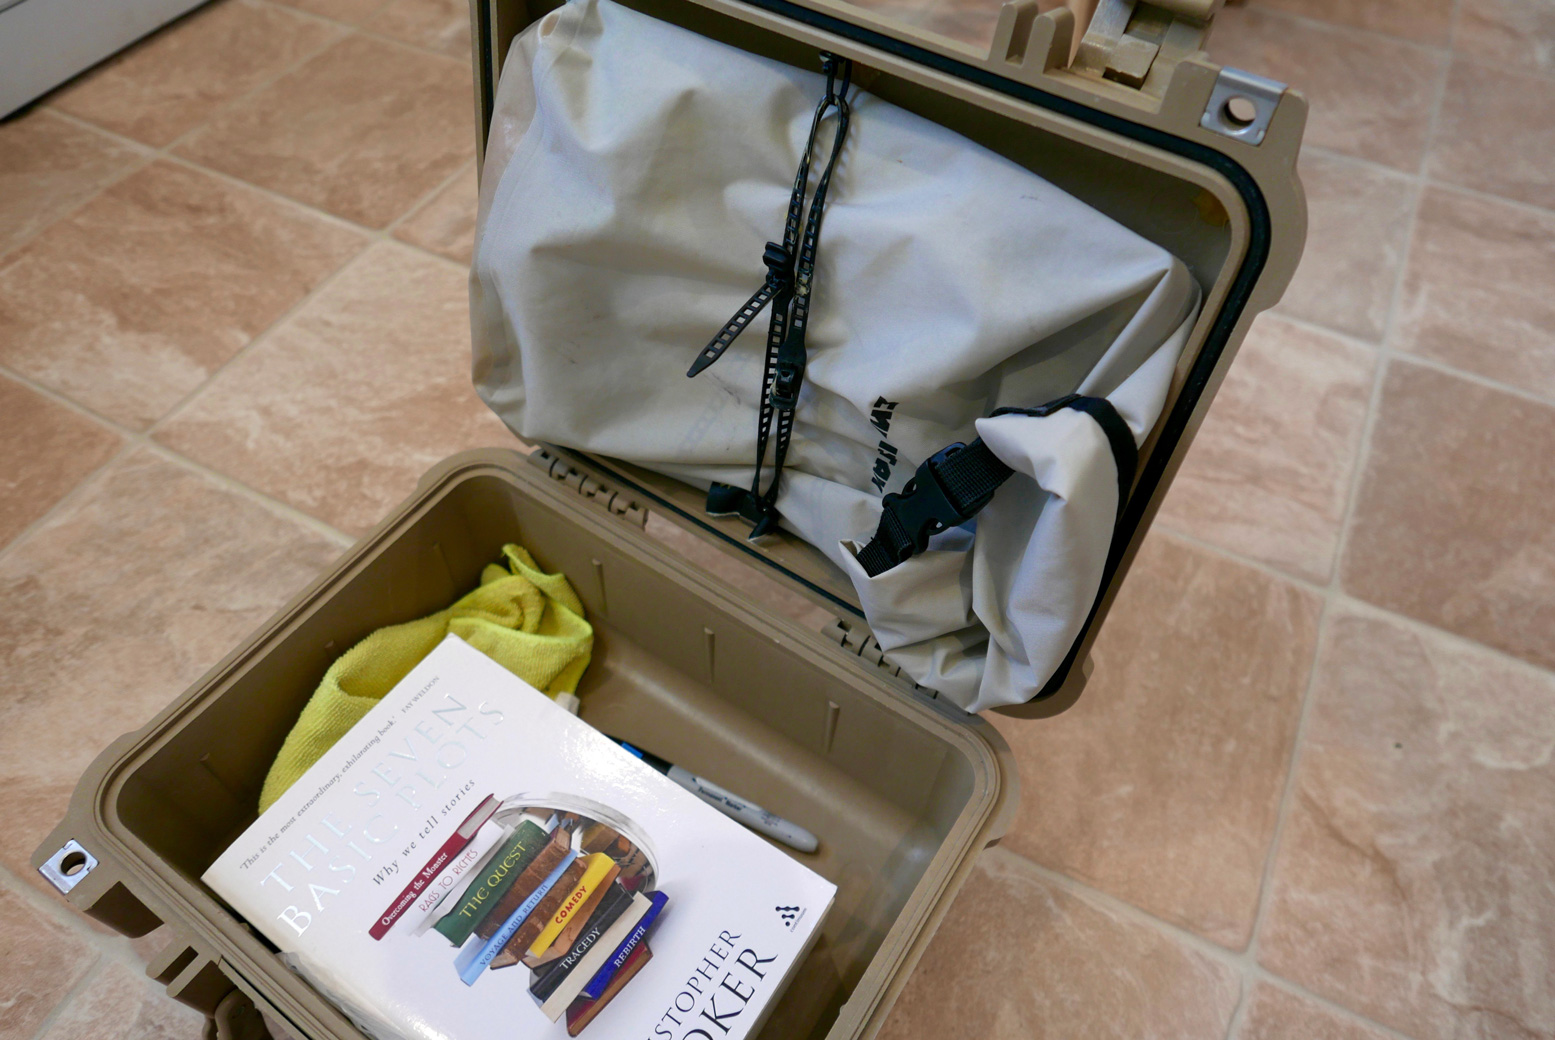
After some years I changed to a Peli 1400, a bit less volume than the Otter, but a bit wider and flatter. Adding some retaining straps my Macbook Air fits neatly inside the lid (right), and below there’s room for everything I need in a day.
The only thing that spoils the Peli and similar boxes are the clamps which are hard to open or close effortlessly. Some sort of lever-arch mechanism would be better. Because of this I use the box less often than I would during a paddle. On top of that, a shoulder strap for hands-free carrying is awkward unless attachment rings are added. And at 2 kilos the 1400 is a bit hefty.
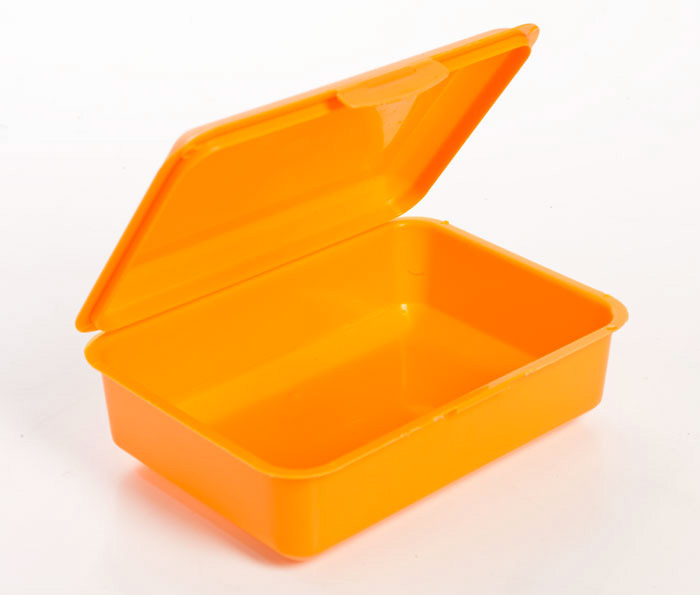
I really don’t need a PeliCase’s crush-proof ruggedness. All I want is submersion-proof airtightness up IP65 for which a lunchbox (right) or food storage box might do as well, as long as the durability and seal could be relied on.
Around the same time I got into packrafts I discovered Watershed dry bags. Most of them use an oversized rubbery zip-loc seal which is submersion-proof and therefore miles better than roll-tops. The yellow, 30-litre Chattooga (left) was also more chuckable than a hard case, made a good pillow, and for me had secondary uses for biking. It fits under the knees just about, but as many find, can be difficult to open and close. To operate smoothly and seal quickly the big seal needs lubing with 404 or silicon grease.
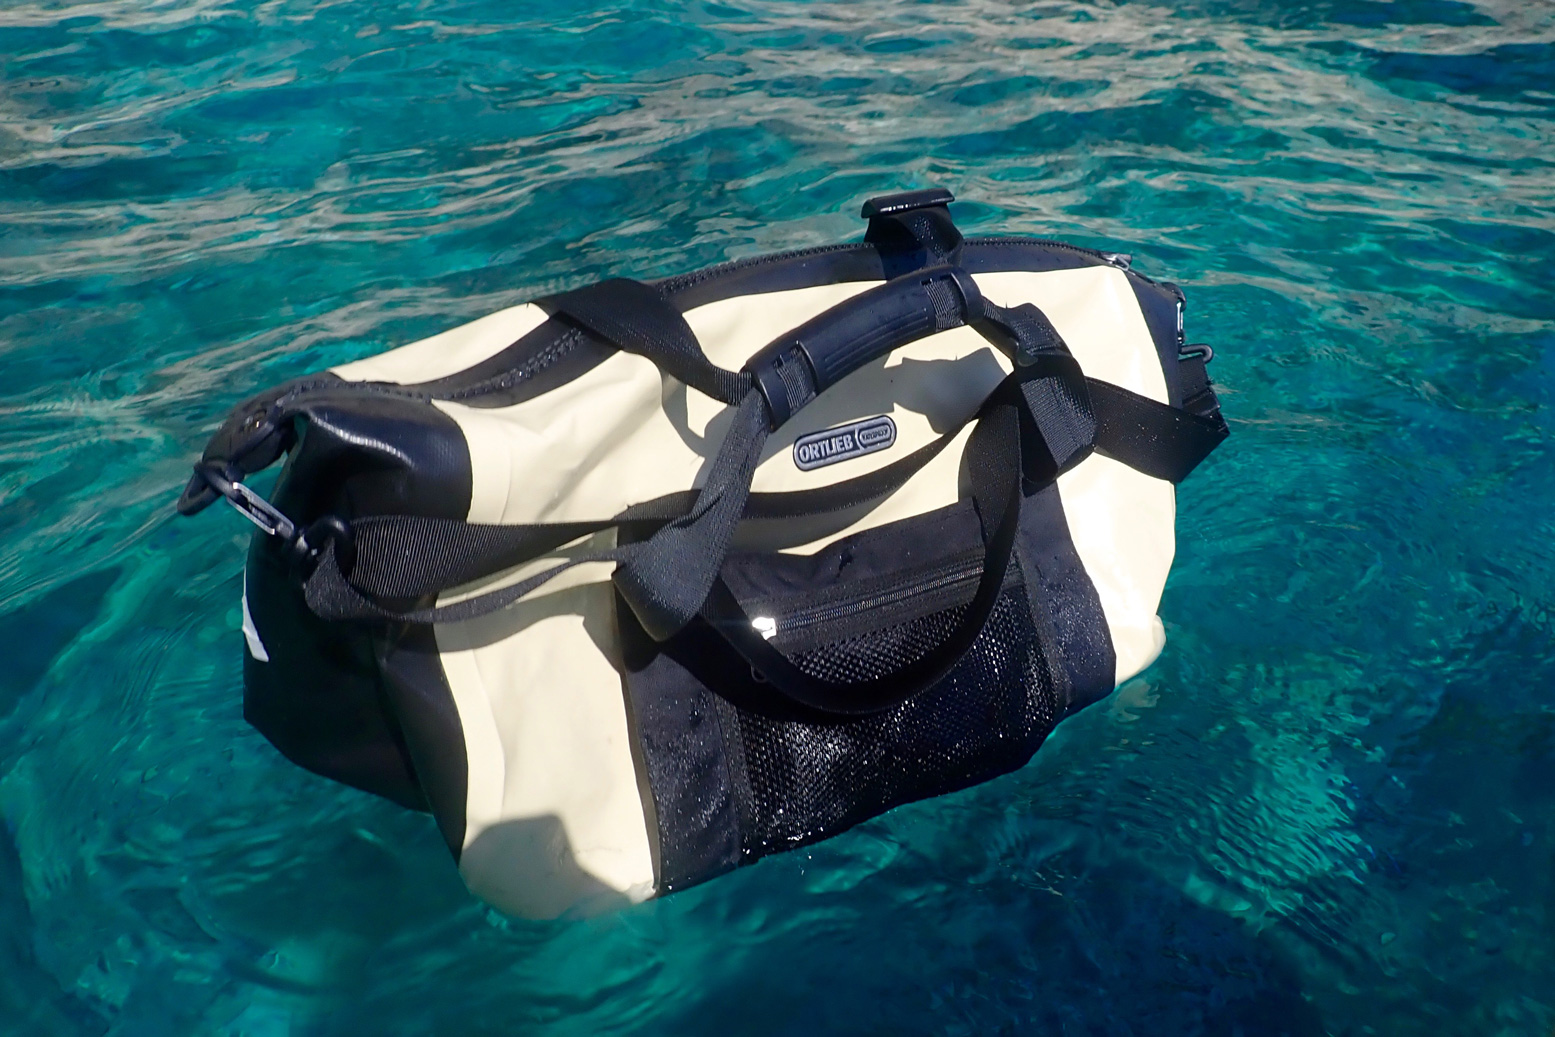
I finally got tired of my Chattooga’s tedious seal-closure and got a (now discontinued) Ortlieb Travel Zip (below left) for £100. It has has proved to be a perfect daybag, also at 30 litres. I’ve used this packrafting in New Zealand, motorbiking in Morocco and paddling in Sardinia. The TiZip sees to immersions and two outside mesh-zip pockets make easy access to things that can get wet. Inside are a couple of zip pockets and the carry straps come together with the clever and comfortable hard plastic handle. Add a comfy shoulder strap with a pad and you’re good to go. They seem to replaced it with a ‘40L‘ version (right) with backpack straps, but it seems to have the same dimensions as mine and so will be as good.
Camera Bags If you’re serious about paddling photos, get the best waterproof camera you can afford, like the Lumix FT7 – right – £400, or an Olympus TG5 Tough (left). You need a good one because the tiny lens must work within the housing so low-end ones are only OK while the light is good. Occasionally they’ll expose perfectly, but don’t bother the optical zoom beyond halfway unless it’s Elvis galloping on a unicorn. Any shots on this website from 2019 on, like this story, are shot with the Olympus. You can see the difference. Get one of these cameras and the whole section below on waterproof camera bags becomes irrelevant.
With a regular camera which I’ve also used, you need reliable water protection. I bought a used Aquapac camera bag (left). They’re just your usual roll down and clip jobbies, but inside the lid is a ziploc seal (right) which makes the bag much more dunk-proof than regular roll tops. Testing in a sink, bubbles only escape very slowly, but treading water with it attached to your waist might not end so well.
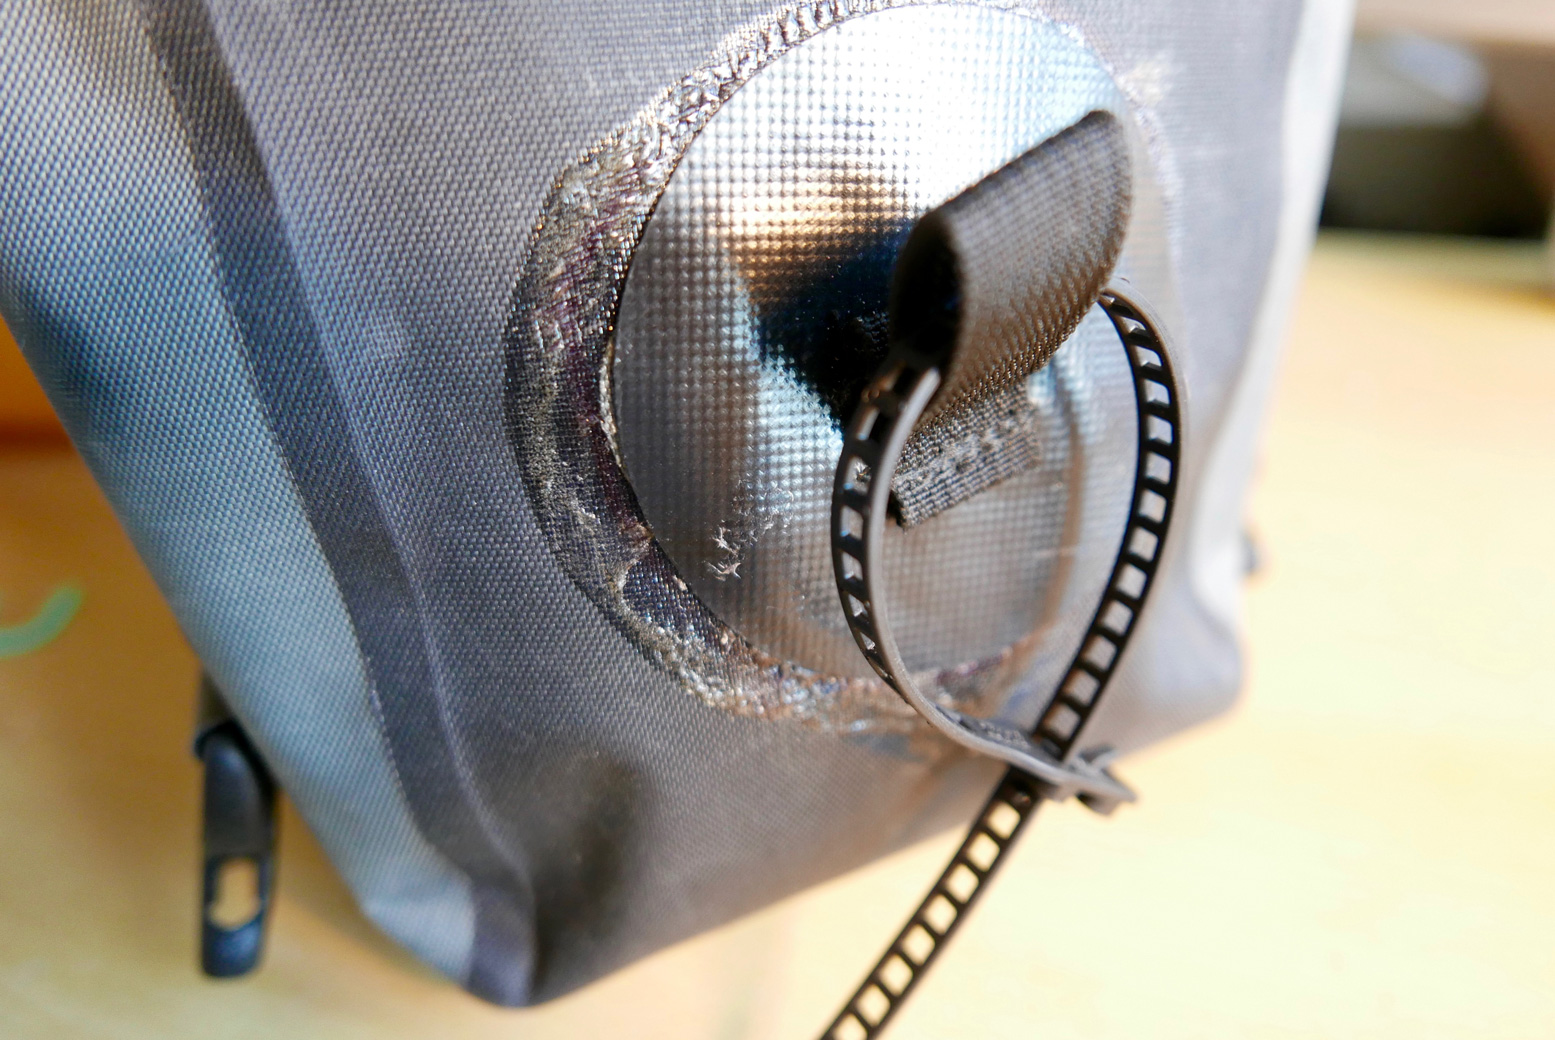
One flaw with these Aquapac camera bags are the flimsy belt loops. On mine I glued over one with a big tabbed patch (right). But really it’s too bulky to hang off a belt; I ziptie mine into one of the net pouches of my Anfibio Buoy Boy pdf, but only fold over and clip down when at sea. To properly close the seal is too much faffing and usually unnecessary – until it is.
Doing a sink submersion test (right) reminds you of the difference between hard cases and sealed bags. A rigid box is unaffected by the increased pressure of light submersion. If anything, the pressure forces the lid down on the seal even more. With a bag it’s the opposite: even a few inches underwater compresses the bag, forcing the air out through any weak point, usually the closure. This is why submarines are made of steel, not PVC fabric.
On the Tarn I found the Chattooga under my knees too big in general, and too big to exit the boat easily (or in a rush). But I sure didn’t miss lugging the hefty Peli 1400 around. I thought a lot about my needs and for the Allier came up with an interim solution: a smaller 1150-like hardcase (left) of about 2 litres volume for my essentials, including the LX. It worked OK, bar the usual easy opening issues. I knew from the Tarn what I really wanted was a smallwaterproof under-knee ‘deckbag’ with a waterproof zip closure. The zip eliminates the bulk as well as dunking unreliability of roll-tops, while the bag weighs much less than a box and carries effortlessly and comfortably on a shoulder strap. I had the dimensions and design all jotted down in my head and eventually made one because…
Waterproof TiZip bags A lot of Googling later I realised no one makes such a thing. There are plenty of TiZip daypacks like the Lowepro Dryzone range, or larger, watersports-oriented duffles from the likes of Ortlieb or Aire (Frodo; right) or SealLine, which resemble my own YKK-zipped Watershed UDB – one of my favourite bags. But none of the above are smaller than my 30-litre Chattooga.
The closest candidates I’ve found include the IP67-rated Ortlieb Trunk Bag (right and left). At 8 litres it’s a bit on the big side (add up the claimed dims and it’s more like 11 litres). And these days it only comes with a fitting mechanism to lock it to a bike rack. Very clever but this all helps raise the weight to over a kilo and price up to £98. The fabric is also not your usual pliant and mildly carcinogenic Ortlieb PVC, but resembles Heavalon (with its distinctive hexagon patterning) which Gumotex use as decking on some boats.
The Trunk-Bag could suit a lot of paddlers but as it’s made for bikes, you do wonder if it’s actually dunk-proof. Tellingly, the product description says underwater resistance: ‘lower edge of product, duration: 30 mins‘. As well all know, it’s common to be paddling a packraft with a little water swilling around the floor, so unless you slaver the base of your Trunk-Bag in Aquaseal, water will slowly seep through. Not good.
You’d imaginefly fishing waist bags, are ready for dunking. But they’re so large they often came with an added shoulder or neck harness to help take the weight. Plus it seems fly fishing gear may be to outdoor gear like smoked salmon is to fish fingers – prices are nuts. Patagonia make the Stormfront (left), a 10-litre waistpack with an added shoulder strap – yours for as little as £180! It’s just a dunking PVC handbag with a zip!
You’ll find any number of other fly fishing roll-top bags at twice the price of hiking or SUPing examples pictured above. Note that many find waterproof zips like the plastic TiZip or brass YKK stiff to operate, just as they are on a dry suit. Ideally, you need a good T-toggle and some sort of tab to pull against. And I do wonder if incorporating TiZips to the required standards explains the high prices for gear using them. The full range of TiZips is not readily sold to consumers, only to manufacturers for products which use them. Anyway, long story long, I decided it might be fun to make my own TiZip deck bag. Read about that here.
In 2005 the Dordogne and nearby Vezere were my first multi-day rivers in my Sunny IK, all helped by the discovery of the inspiring White Water Massif Central guidebook. The Dordogne was a good choice but to be honest, a bit easy. Ready for something un peu plussportif, I’d got it into my head from that book that the Ardeche was too hardcore, so I’d be better off on the less famous Allier between Chapeauroux and Brioude (big map, above).
Gumotex IC and IKs paddling pros on the Allier, 2025. And they al trained back from Brioude – respect!
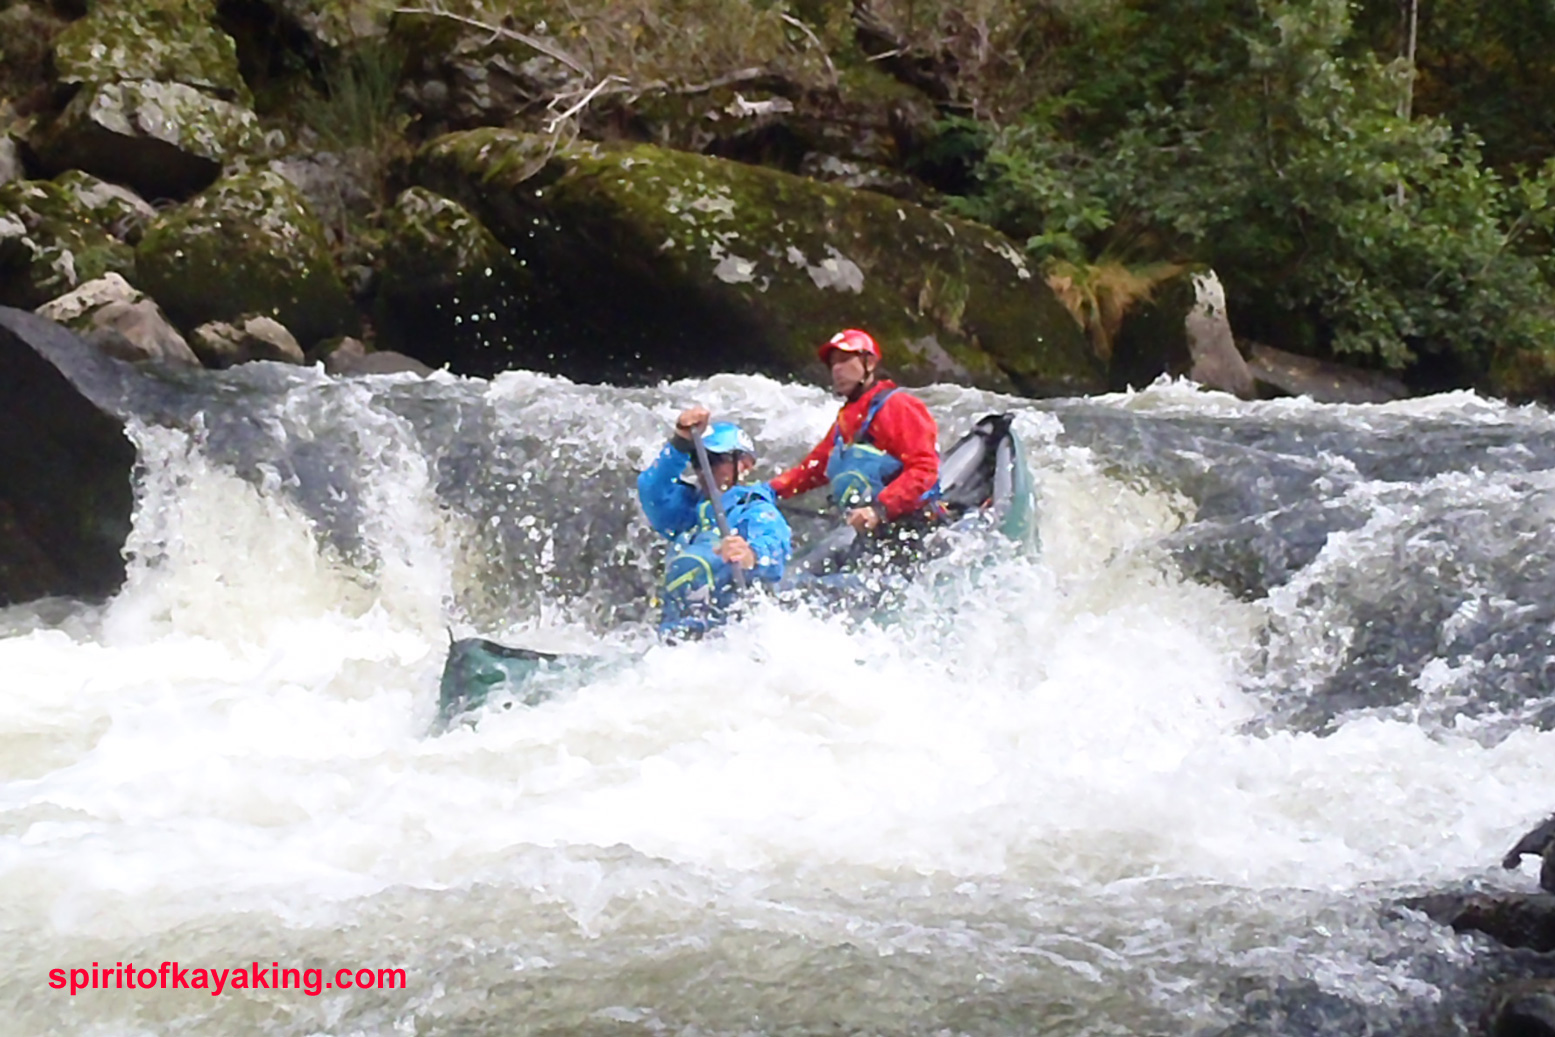
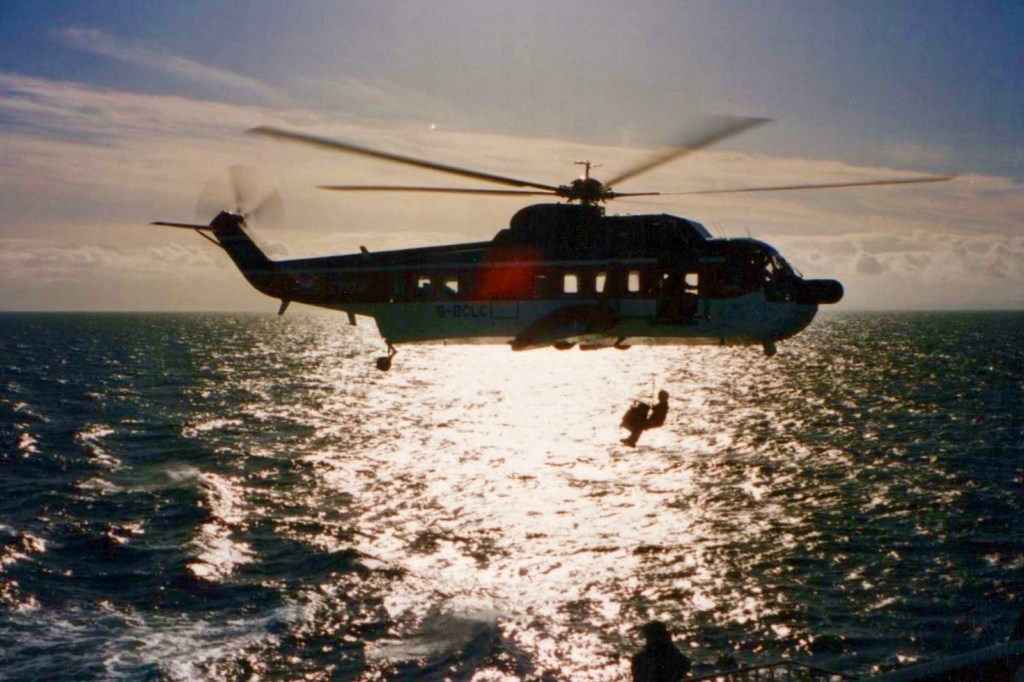
In fact, as you can read here (admittedly at twice the normal summer flow; video too, as well as the video above), parts of Allier can get tricky (left; a plastic canoe folded against a rock). Even though a railway carves and tunnels right along the gorge, on the first two days from Chapeauroux there are places where the rapids come at you fast and with no easy way out of the gorge if you get in trouble. Over the years stranded paddlers have been rescued by helicopter.
Not fully comprehending all this, in June 2006 I set off from Chapeauroux in my Sunny, and at the very first bend was flapping about like a salmon with a seizure, trying to stay on track. It went on like that for a while, then eased up and actually got quite pleasant by the time I reached Alleyras for the night. This was more like it; a wild river rather than the broad Dordogne lined with droning pumps irrigating the adjacent farmland.
Next morning a taxi transported me past the then-closed section dodging the Poutes dam below Alleyras (more below) and dropped me at Monistrol. Here again I failed to fully appreciate the greater challenges immediately ahead, even if the guidebook was clear: great fun in a creekboat, but an open canoe will fill up on the longer rapids. And if I didn’t know it then, I sure do now: the white water abilities of open canoes and IKs are closely matched, while IKs might easier to control for beginners (like me).
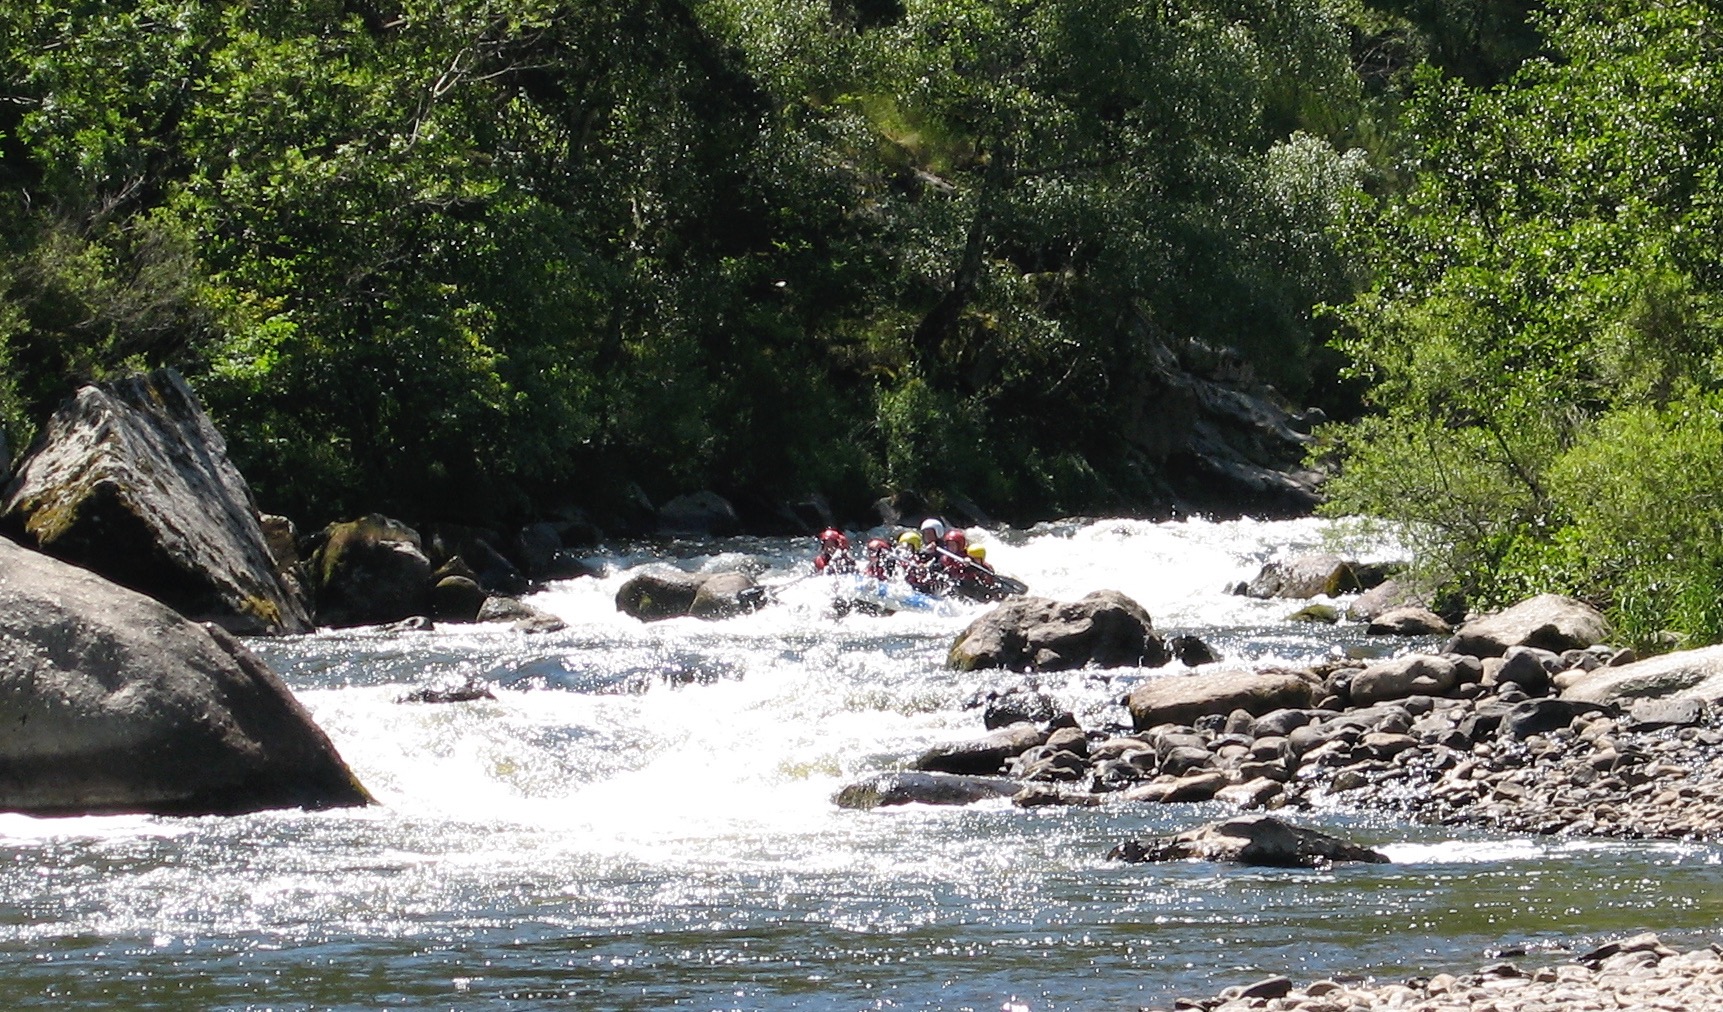
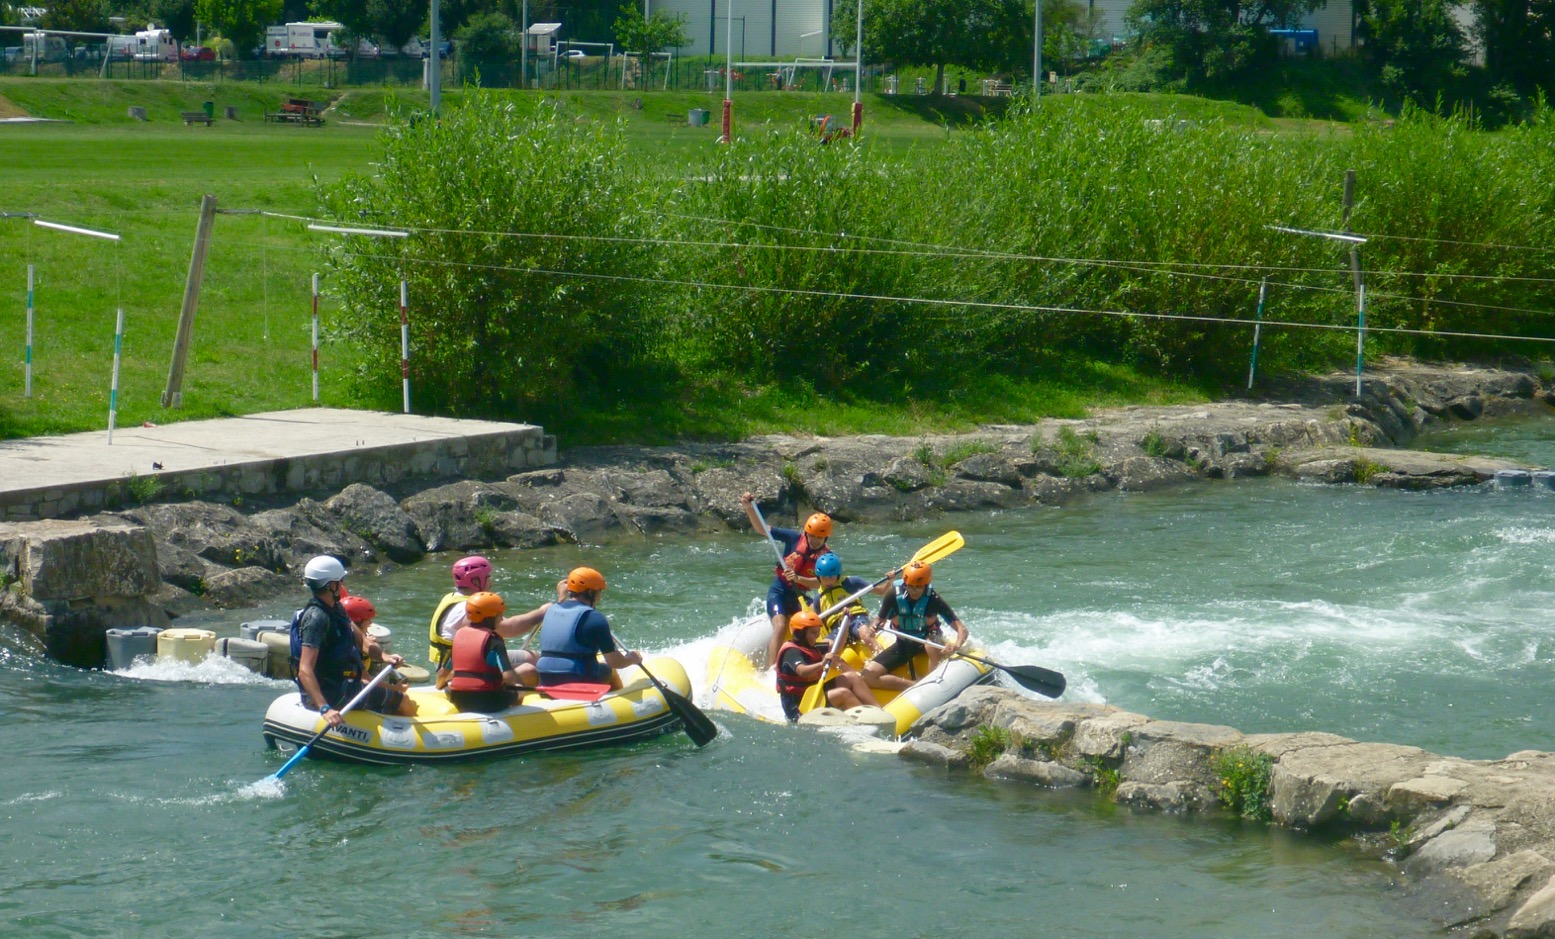
This Monistrol stage is run by commercial rafting trips (above), also a telling sign about the nature of this part of the river. I scraped through that day, exiting a few rapids with a boat full of water, and on one ending up swimming alongside it. Looking back, I’m pretty sure this was the exit of ‘La Barraque au Ponnet‘ (KM3.5; more below) with that raft above coming through soon after I stopped. It was all a bit of a shock.
Unless you’re confident, I’d suggest not following my example in doing this section alone. Consider a recce in the commercial raft if there’s one going that day, or ask if you can tag along for safety.Or find some paddle pals.
A few kilometres before Prades (KM12 from Monistrol) it all becomes less of a white-knuckle ride, and what followed all the way to the Brioude take-out were fun, Grade 2 rapids and a couple of thought-provoking chutes or easy portages. All manageable in open packboats. As you approach Brioude on the last day, the paddling eases right up so that you start harking back for a bit of eaux vivants.
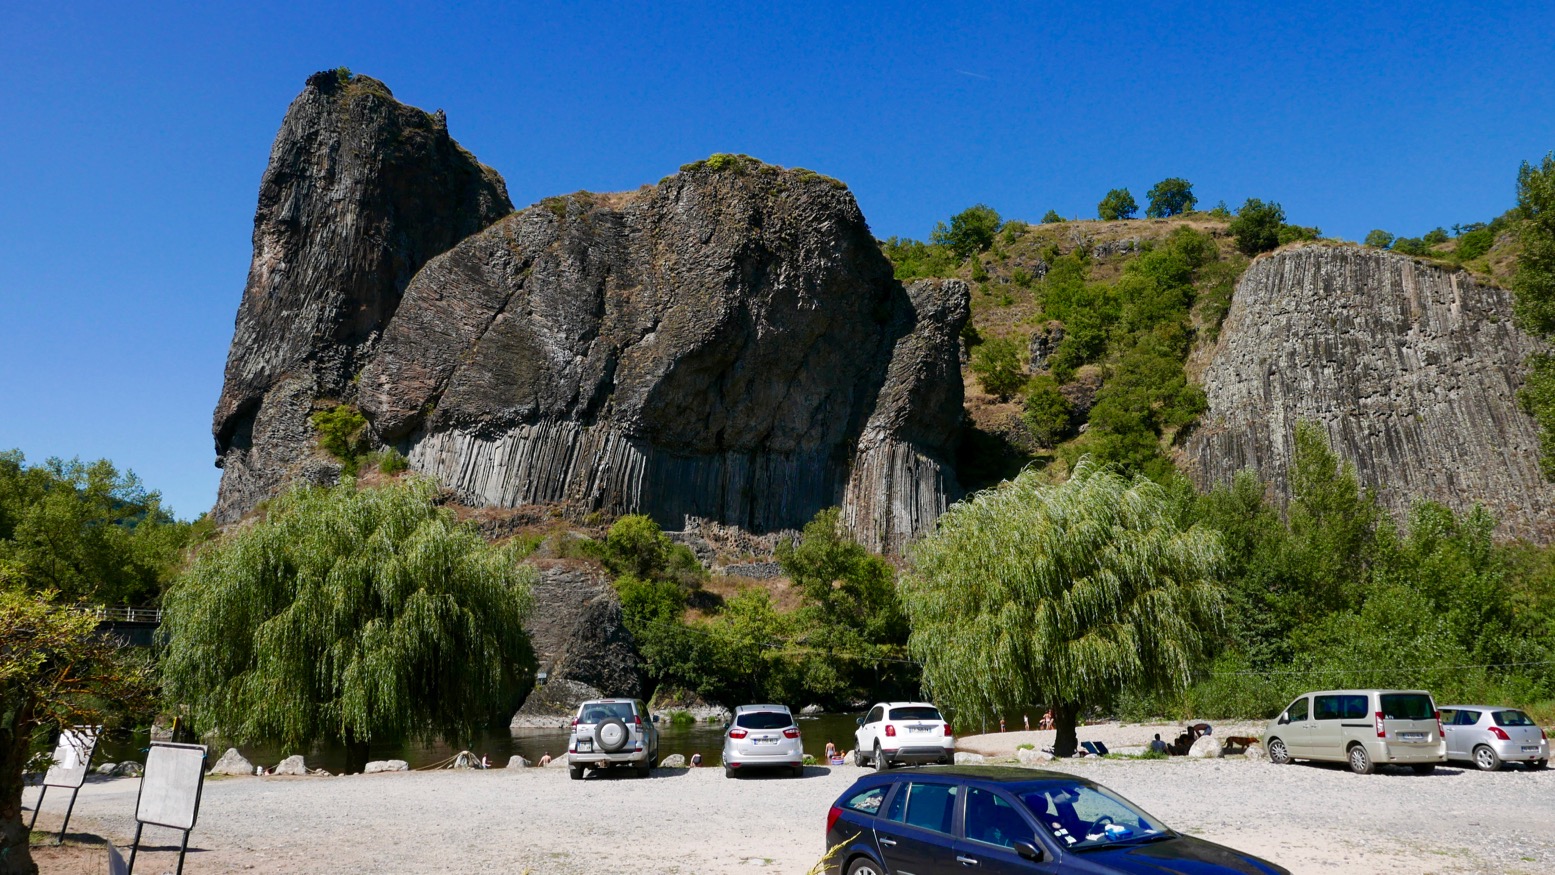
All along what they now call ‘one of Europe’s last wild rivers’ you’ll pass many striking outcrops of columnar basalt as well as pretty villages (like Chilhac, below) with adjacent campsites, boulangeries, quaint hotels – and not a chain store to be seen. Like the better known Ardeche and Tarn, the Allier is another Massif classic, still distinctively scenic but with non of the nose-to-tail traffic during busy holiday periods.
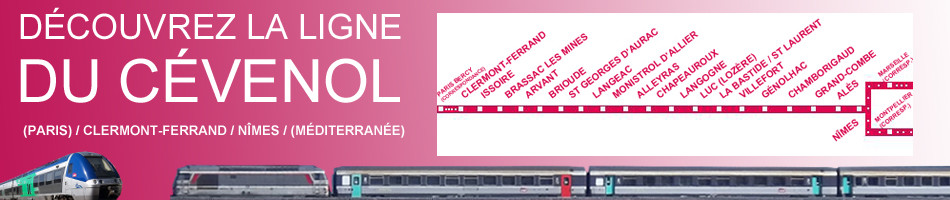
Getting there Although the daily trains aren’t frequent, with riverside stations at Brioude, Langeac, Monistrol, Alleyras and Chapeauroux, the Allier (left) is easy to get to with packboats. First, Easyjet yourself to Lyon, or Ryanair-it to Nimes or Clermont, two cities which are also linked by the scenic Ligne des Cévennes rail line (below). Brioude is an hour south of Clermont, and Chapeauroux is two hours over the hills from Nimes. Between them, Brioude and Chapeauroux span the scenic and paddleable 88-km section of the Allier.
One thing worth considering if you’re unsure about the half-day Grade 3+ Monistrol–Prades section, is coming up on the train from Brioude or Langeac. It passes right above the gorge where you get a good view of the Barraque au Ponnet and a few seconds later the ‘Roche qui Pleure’ drop a few hundred metres upstream (left; Gumotex Scout canoe). I’m sure glad I looked when I came back years later.
In 2018 I returned to the Allier, this time with a packraft. I flew to Lyon (cheaper and more frequent than last-minute Ryanair), caught the train via Clermont to Brioude (5hrs), and next day caught the first train to Monistrol (left). I planned to miss out the Chapearoux–Alleyras stage to save time and the taxi faff around the dam**. It left me three days to cover about 70 paddling kilometres back to Brioude.
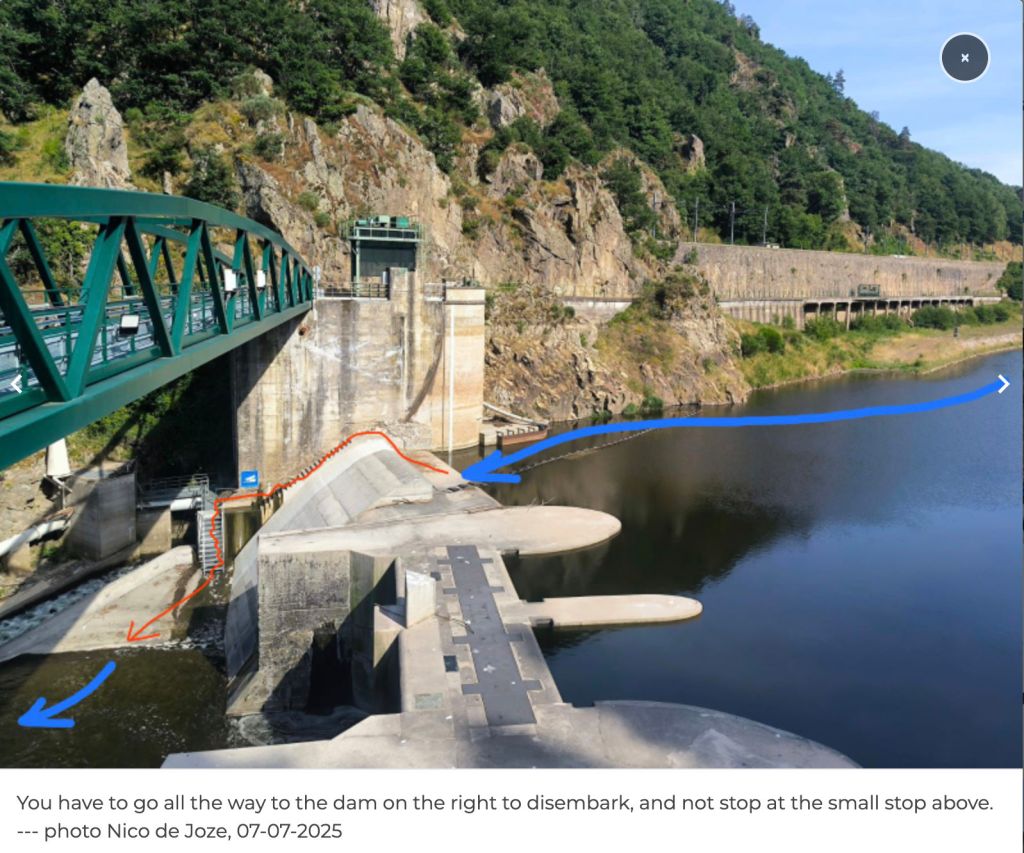
Poutes Dam **Since around 2021 (click ‘P5’) the long-closed section between Alleyras and Monistrol reopened to paddlers, with a portage around the new Poutes dam (below), 3.5km from Alleyras station (the train line crosses the river right in front of it). See the video link above. As part of the Allier resalmonification programme, the dam was lowered by 10 metres d and fitted with a ‘ladder’ to help the fish get upstream and propagate – plus give anglers something to do. Local environmentalists fought a long battle to get this done.
The train heading upstream passed right in front of the Brioude weir (left) where I’d be taking out in a couple of days. The line then rejoins the Allier at Langeac before heading for Monistrol. Soon it enters the wild gorge and looking down at the rapids below I thought… ‘Hang on a minute!’ which, a rapid or two later escalated to ‘WTjoF!?’.
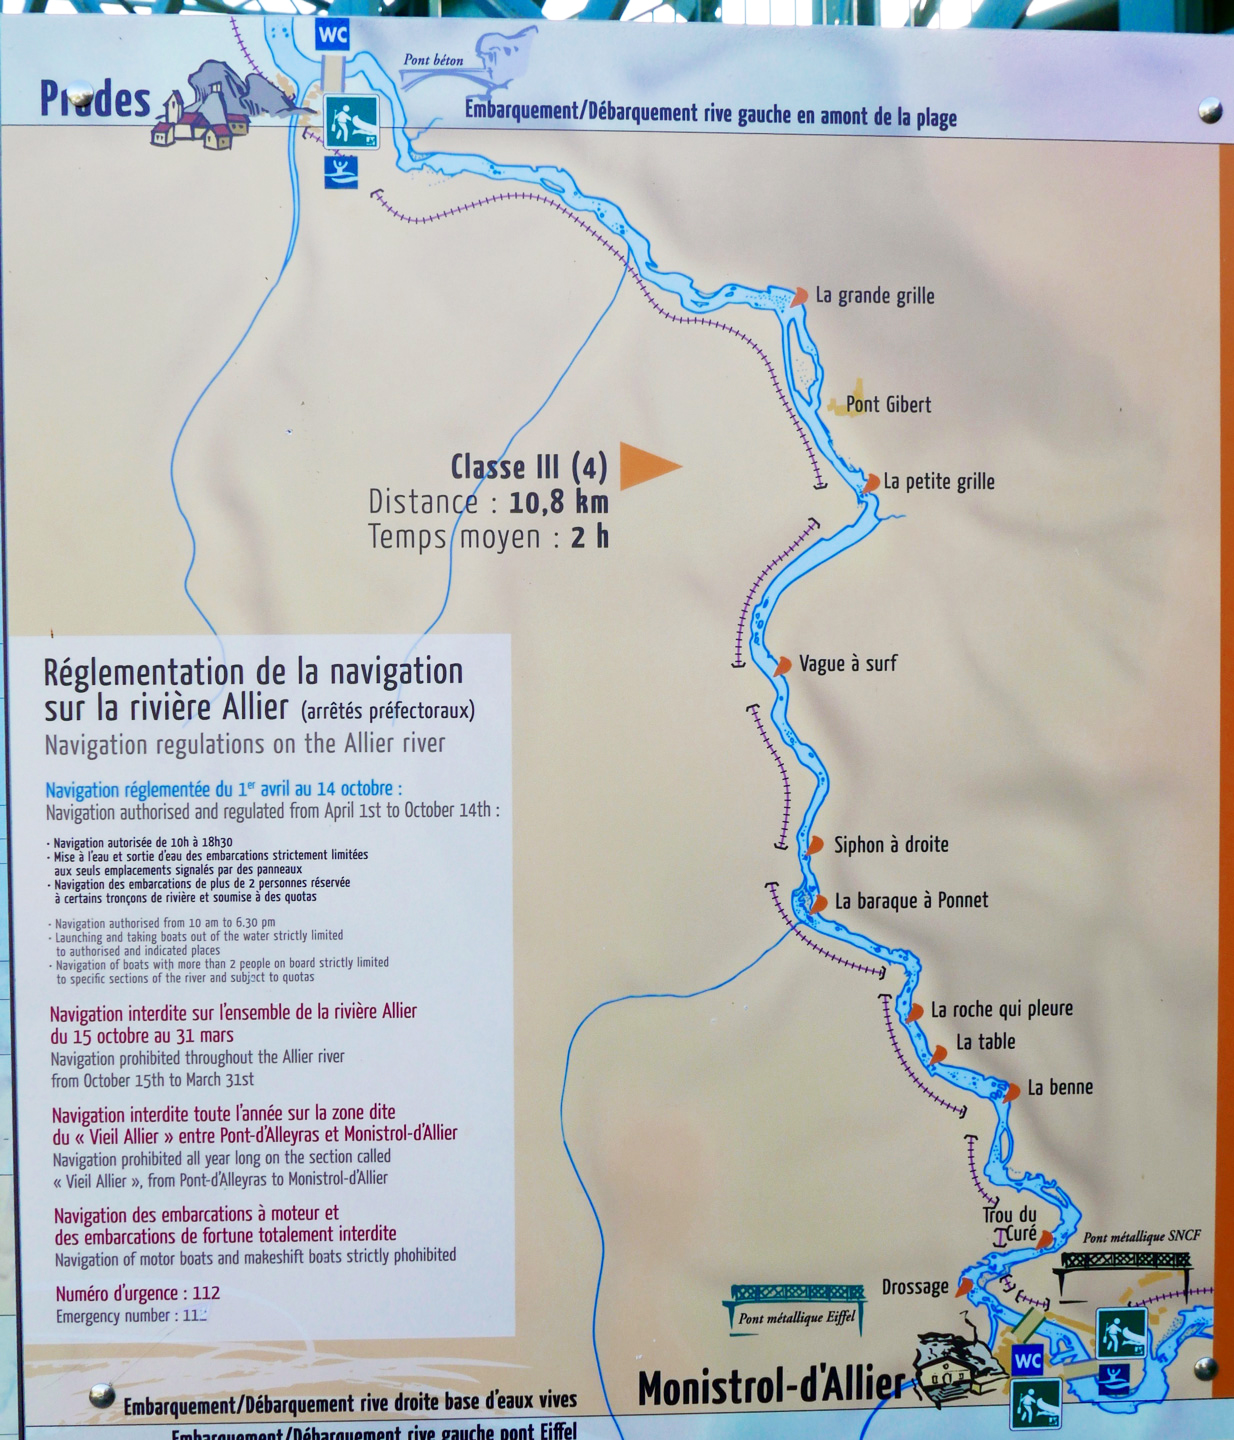
I recall being unnerved in 2006, but I’m sure they didn’t look this gnarly. I realised later that the first 100-m white plume was ‘Le Barraque au Ponnet’, easily recognisable on aerial maps. The other was ‘La Roche Qui Pleure’ – two of the plus fruitif chutes on this stage (map below left).
I got off at Monistrol, scoffed a petit dej at a deserted hotel and wandered around town wondering what to do. The river didn’t seem higher than normal; perhaps it was low back in June 2006 when I came through in the Gumboat? Either way, thanks to my train preview this stage seemed a bit too ripe for me; the Yak would be spilling over long before I was halfway through ‘Le Ponnet’.
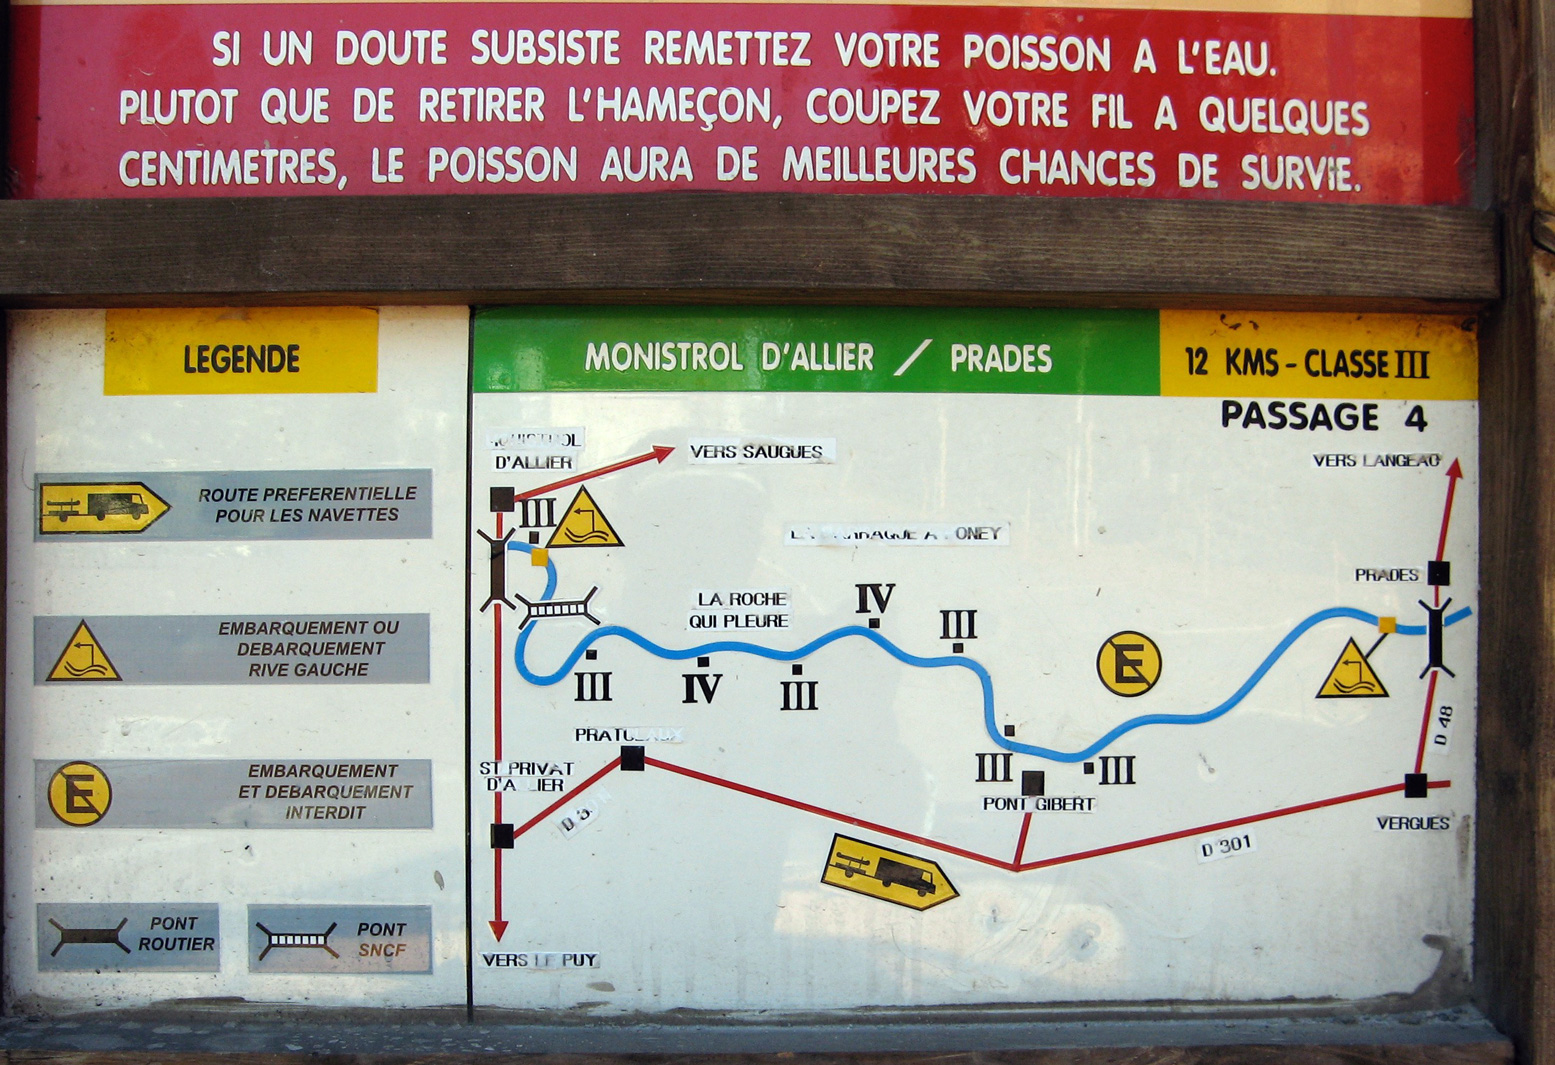
For a while I actually wondered if I was suffering from false memory syndrome from 2006 and might have cause to claim compensation if I could find the right lawyer. But I definitely recall the old Monistrol hydro plant (right) and my photo record shows I took the picture of the board below at 9.03 and arrived at Prades beach by 1pm, invigorated but not inordinately traumatised. River pictures were few back then in that pre-wet camera era.
Later, trying to work out what was different (other than my aged nerves), I wondered if I’d just glanced down on Le Ponnet during a particularly hearty pulse of dam-released water? Looking at the vigicrues website later, the flow graph for that day (at Prades) does show it was high as I passed by around 8am – before dropping six inches around midday. I knew from the Tarn earlier this summer that following a stormy night, a six-inch rise makes a difference – it speeds up the flow but can also smother stony rapids and make them easier. The pulsed releases every 8 hours are the lumpy pattern you can see along the bottom of the graph below for the days before and after I came through. As you can tell, I am bending over backwards trying to find ways to rationalise my new-found timidity! Above left: from the Eiffel bridge in town, you can see the first rapid (looking back upstream). Like the book says: if you don’t like how this or the next couple of runs look, turn back. Otherwise – strap in for the ride!
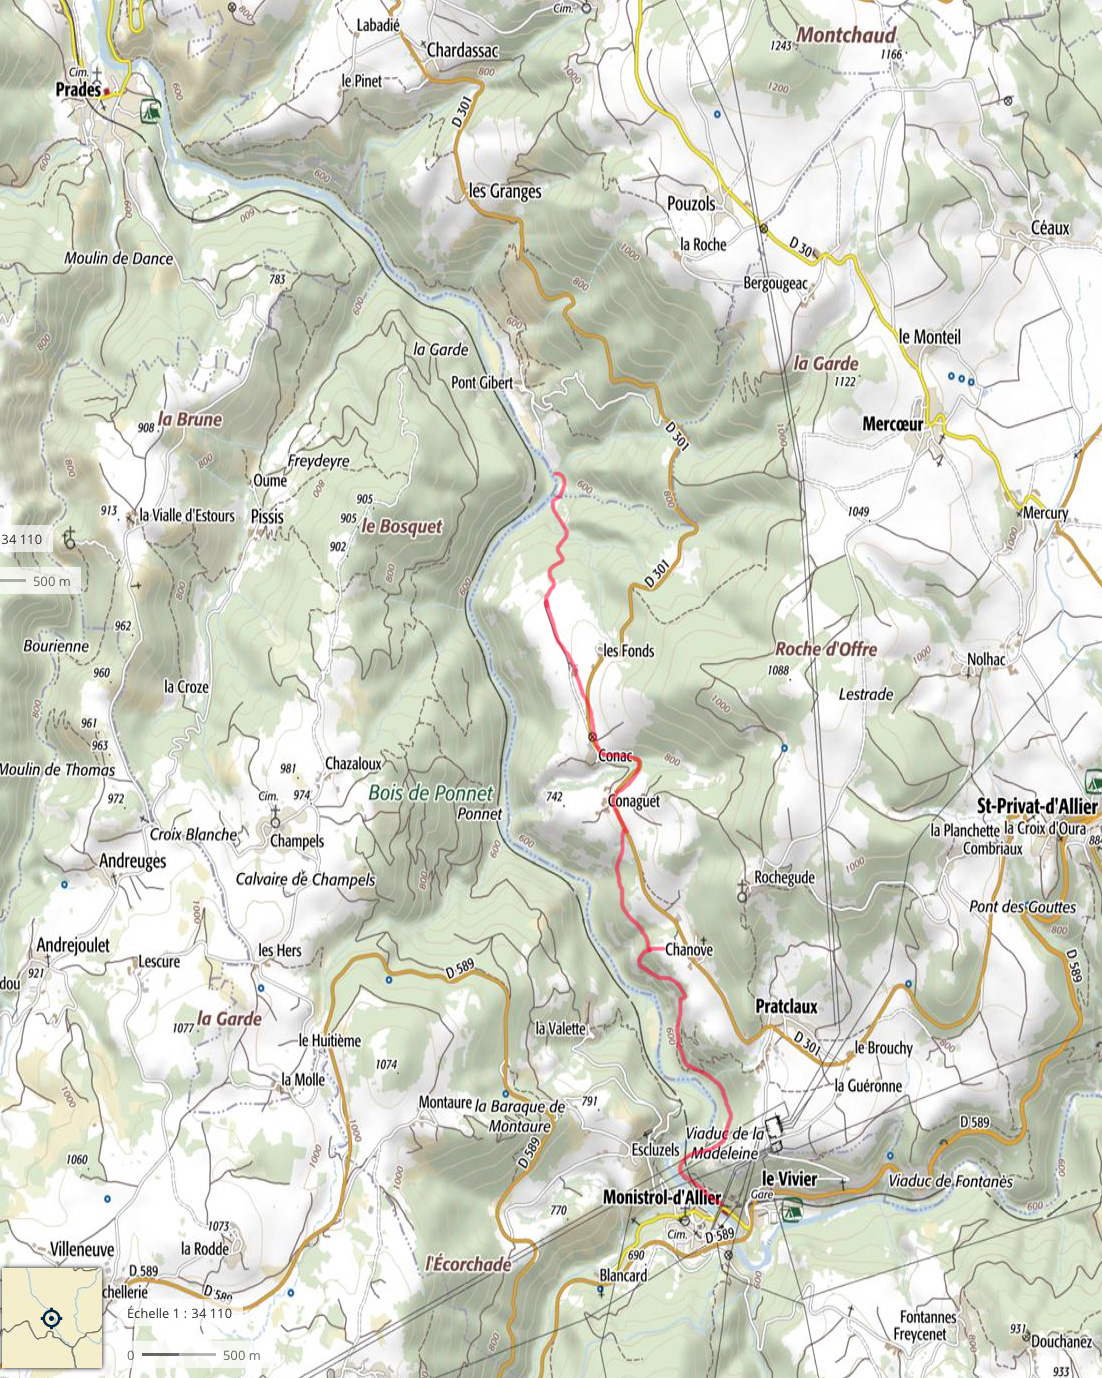
Annoyingly, my GPS with good maps was at the menders. I took a look off a passing trekker’s map (Monistrol is on the GR65 Santiago trail) but at 1:100k, I was none the wiser. I’d have needed a 1:25k map to find any viable paths along the gorge.
La Benne?
In the end I decided to follow a path by the bridge on the right side of the river, signed: ‘Viaduct, 1 hr’. It might continue along or above the gorge to a point where I could put in with the worst behind me. If it didn’t I could turn back and hitch or bus – or if desperate, clamber uphill to the D301 backroad to Prades. And that is what I did, but not without a huge amount of effort. Initially, the path followed the riverbank, passing a few Grade 3s (above, probably ‘La Benne’; KM1.8) which would have swamped my Yak like hot ‘creme anglais’ over a freshly baked rhubarb crumble.
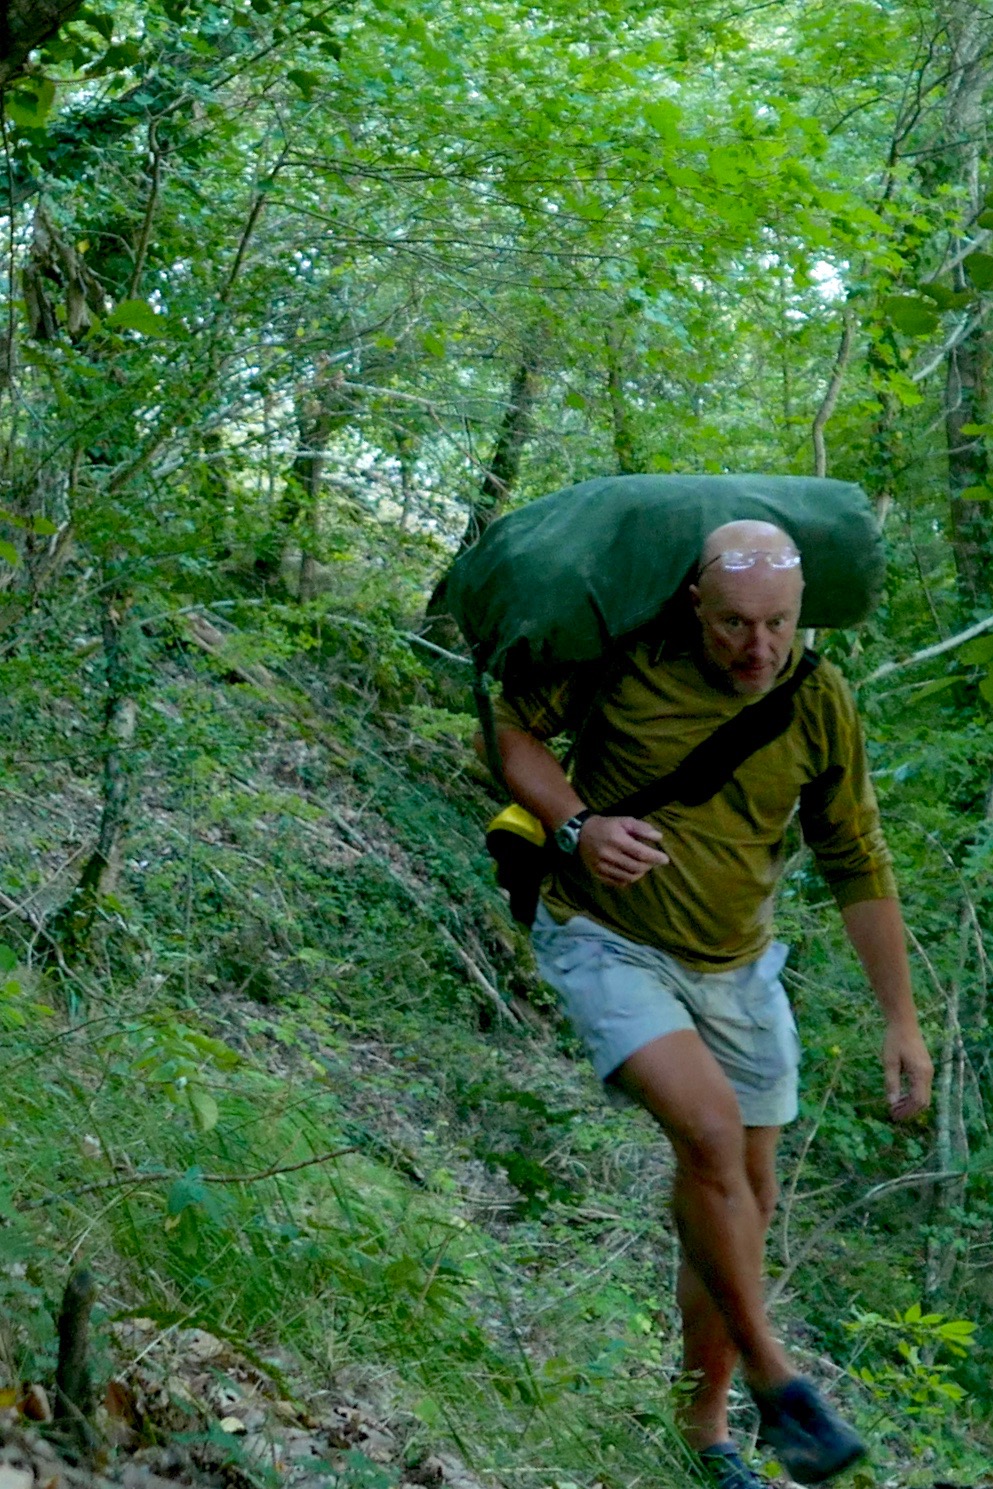
Some three hours later, high above the valley and heading for dehydration (33°C in Brioude that day), I gave up trying to follow a path. Fallen trees, brambles, scree slopes, an intermittent path and the 1:1 slope all took their toll. After an aborted attempt climbing a loose cliff, I managed to hack my way uphill and emerged a sweaty mess on the D310 backroad, looking like I’d just escaped from a teenage slasher movie. Scratched, bitten, stung and grazed to buggery, I’d covered 3km in three hours.
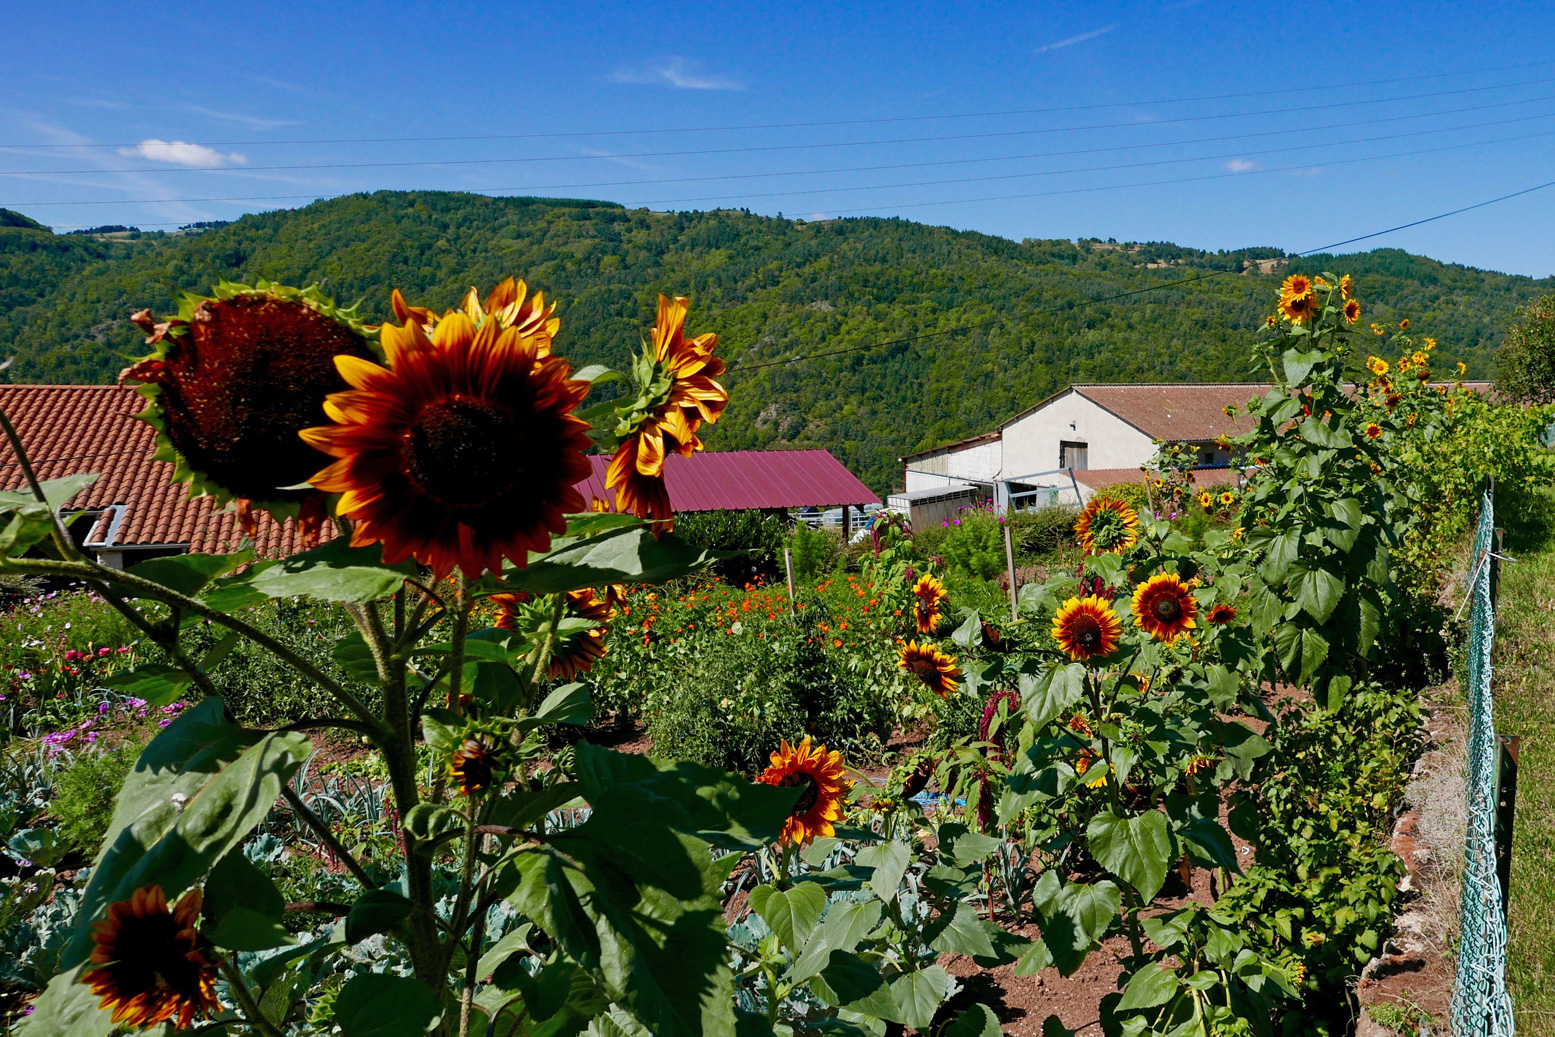
I washed in a cattle trough and passed through the sunflower hamlets of Conaquet and Conac, before splitting left down a side track and path leading back downhill, hopefully to rejoin the river below any enraged torrents.
This it did, just before Pont Gilbert and just below ‘La Petite Grille’, by chance nearly the last (and easy-looking) rapid, 8 river-kms from Monistrol. Although it didn’t feel like it at the time, this turned out to be pretty darn good route-finding without a map (left).
At one point earlier, while thrashing through the bush or teetering across scree slopes, I heard the telltale whoops of hyper-excited rafters far below. I realised that’s what I should have done: taken the fun option in a big-arsed raft as far as Pont Gilbert (if they’d take me, with baggage). I’d seen signs for a rafting centre near Monistrol station, but the town was so quiet I assumed they’d closed for the season. It would have been a great way to punch through the big rapids without a care in the world. Picture above: the ‘Le Ponnet’ viaduct down below with the long ‘Barraque’ rapid starting just around the corner and ‘Roche qui Pleure’ laughing menacingly from behind the trees on the left.
Dropping the kit bag and setting up by the riverside below ‘La Petite Grille’, it had indeed become hot enough to grill a salmon, but once on the water it sure felt good to flop down and float away like a stray log. Just like in the wilds of northwest Scotland, if you have the choice: float, don’t walk. Obviously part of me wondered if I could have managed the gnarly rapids upstream in the Yak. After all, I’d clearly scraped through years ago in the Sunny (still hard to believe). With someone alongside I’d have been braver but I’d followed my gut and felt happy with that.
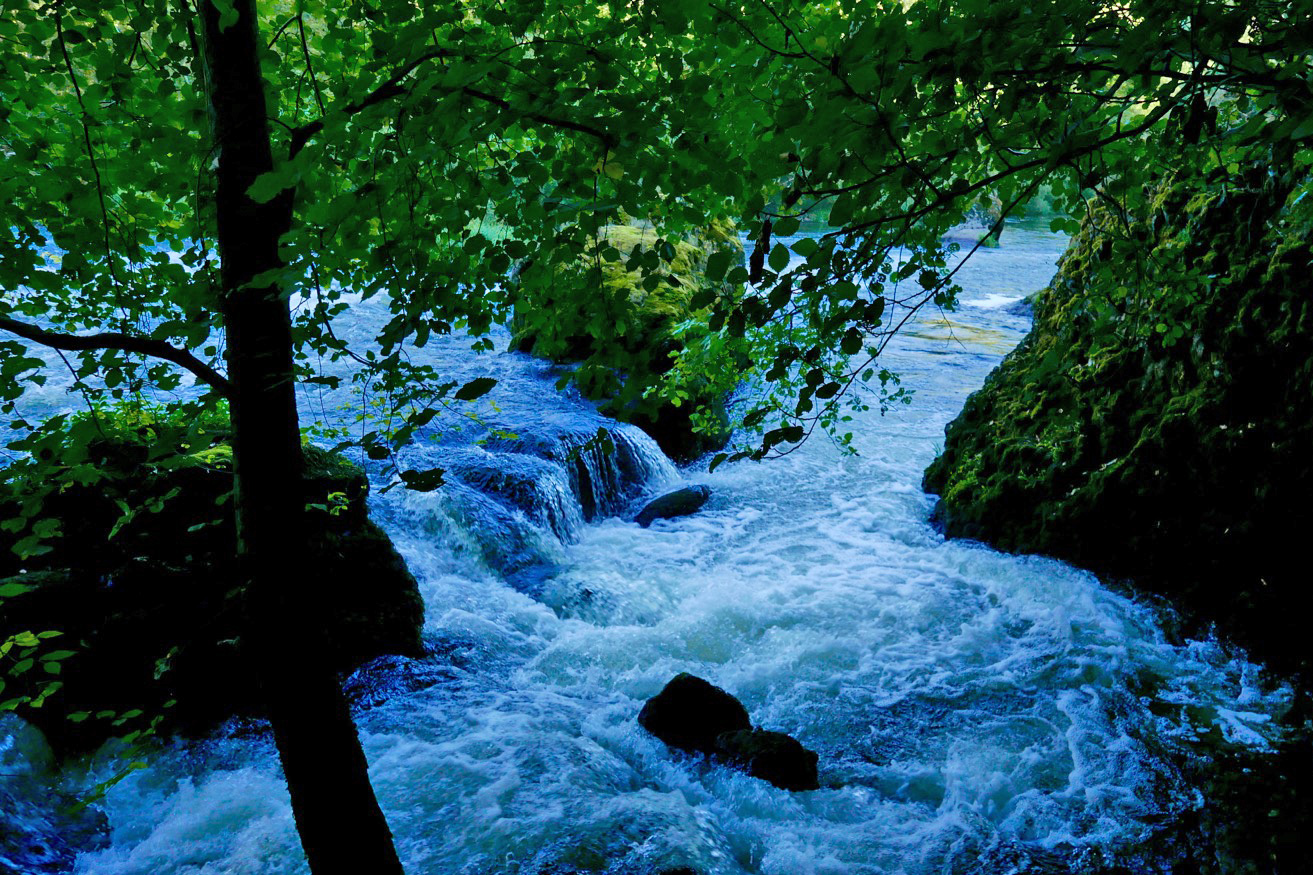
Watch Belgian packrafter Dzjow’s video below from 2014. He enjoyed the Monistrol stage so much he went back up on the train and did it again with GoPros rolling. Watching it, I’m glad I didn’t. From Monistrol starts at 1:57 and he shoots down ‘La ‘Roche qui Pleure’ (the image below) at 2:28, soon followed by ‘Barraque au Ponnet’ which starts at 2:34 (note the railway viaduct) and goes on for a while to the big rock (3:19) you’ll recognise on the left in the rafting pic, above. Dzjow was a hardcore adventuriste I’ve come across before. The following year he went on to do a self-admittedly tough and not so enjoyable trip in wild Patagonia. He hasn’t written about packrafting since.
After about 4km I pulled into Prades beach (below left). I needed salt and I needed drink. And while I was at it, what harm would a handmade mini quiche, some bacon crisps and a tartes aux framboises do? None at all, mon brave.
Now dizzyingly revived but still worn out by the morning’s commando course, I knew there was a bit of a drossage (great word) just around the corner, but it was all fun knowing a few others were playing around too, including SUPs. What is it with these SUPs? I’ve never seen them doing anything more than goof about in the shallows but rarely actually go anywhere, yet they’re clearly ten times more popular than IKs and Ps combined. What does that say about the state of post-industrial recreation in the developed world?
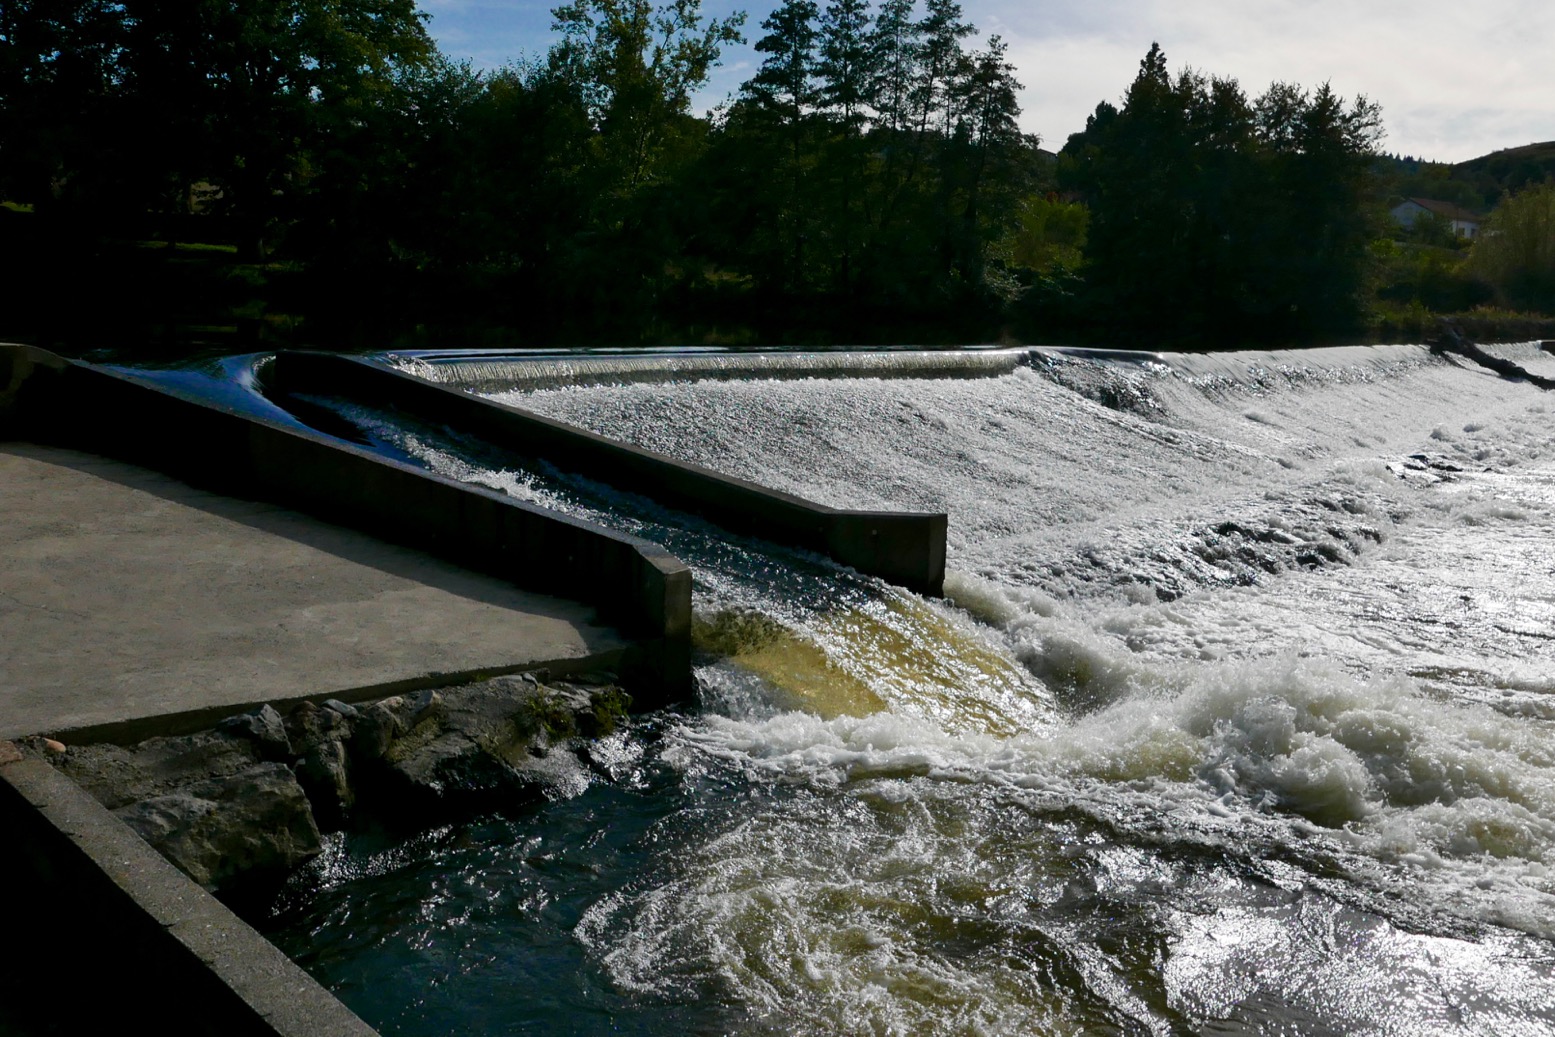
Unusually, I had a hotel booked at Reilhac, about 18km downriver, past Langeac. With just a couple of canoes on the water, the afternoon passed without drama, bar the odd wetting. But approaching Langeac, the din from the weir just before town was unusually intimidating. The canoe chute here (left) is well-known as being a bit of a drossage because it’s about 3 feet too short and so pumps a plume of water into a nasty backwave which not all boats can easily escape.
Spot the chute
And I do wish these Frenchies would mark the tops of their glissieres with two poles, indicating: ‘aimhere’. Above, show me the chute entry point while wearing a pair of sweat-smudged specs! Maybe the idea is by not having clear markers, paddlers slow down and look carefully. I did just that above and portaged round off a little beach on the right. I could not be arsed with hitting the churning pile to get catapulted over the bow like a 40-kilo sack of dried beetroots. I felt that no matter how far back I leaned, my short, light boat would plough ‘n’ flip, unlike a longer IK. Back in the water, I paddled on through early evening Langeac and an hour or so later was slumped on my Reilhac hotel bed.
The next day was just what I wanted; a short, easy run of just 13km, ending at the UNESCO-overlooked village of Lavoute Chilac where the charming Hotel des Pecheurs tottered on the slender gooseneck bluff above the Allier.
Three clicks downriver (6km from Langeac) was a double-drop weir-chute (below left). Easy enough providing you steer straight for the lower drop, but I walked it as I knew it would be a bailing job, and today was some 10 degrees cooler. Splish followed splosh followed splish down to Chillac (below, 11.5km from Langeac), another picture-perfect village sat atop a striking basalt plug with dreamy views over the Auvergnois countryside from the terrace by the church.
Half a click downstream from Chilac is an easy, short chute (left) on the far left. But once down it I realised the old weir passing below the mill on the right had pretty much been washed away, making the chute redundant and a fun ride down a long, shallow rapid. Clearly I was recovering my mojo if I was looking for some white water action again. Later, I read this weir has been flushed away for some years, but is another thing the new Canoe Trips,South of France guide had not updated.
Soon, the bluff of Lavoute Chilac rose into view. I pulled over left at the riverside park, let my gear dry, then walked into the village over the tall bridge (left). Les Pecheurs (white building on the right, below) was still on siesta, so I left the Yak by the steps and walked over to Le Prieure, the other creaky-stair hotel in the village, for a mouth-watering ‘Salade Auvergnate‘.
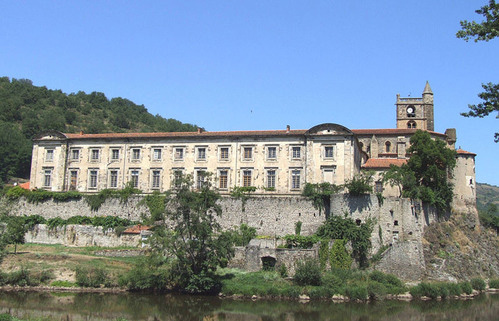
Wandering around the old church and the imposing, 18th-century facade of the abandoned priory (right, due for luxury flat conversion), I was staggered to see a July 1866 flood marker at the church’s back door. In the photo left my hotel room would have been submerged by a few metres. Perhaps the river’s acute 180-degree turn causes floodwaters to back up.
It’s the last day of my packrafting mini-break and by my estimates, I had about 22km of paddling, plus a 4km walk to Brioude station to catch the 4:10 to Lyon. I didn’t want to miss that so set off briskly, passing a canoeing couple (the only other boat I saw all day) until I could estimate my pace against a landmark. Before 11am I’d reached the bridge at Villeneuve meaning I’d covered 9.5 clicks in 80 minutes which gave me plenty of time. This Allier flows quicker than it looks.
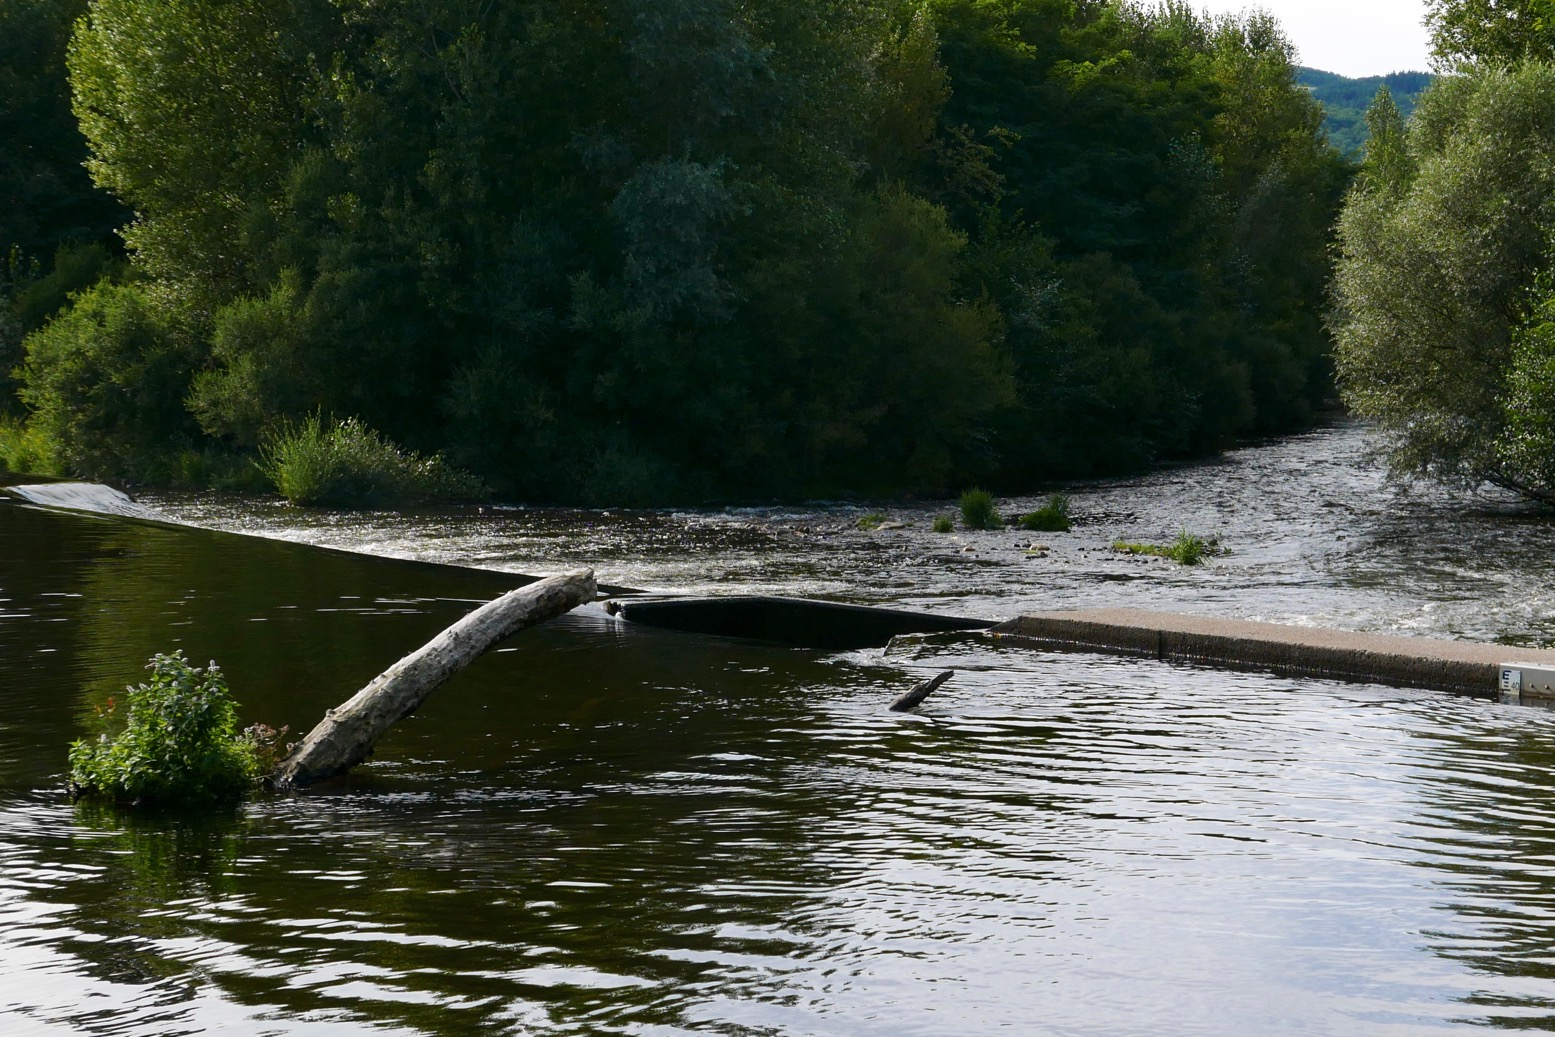
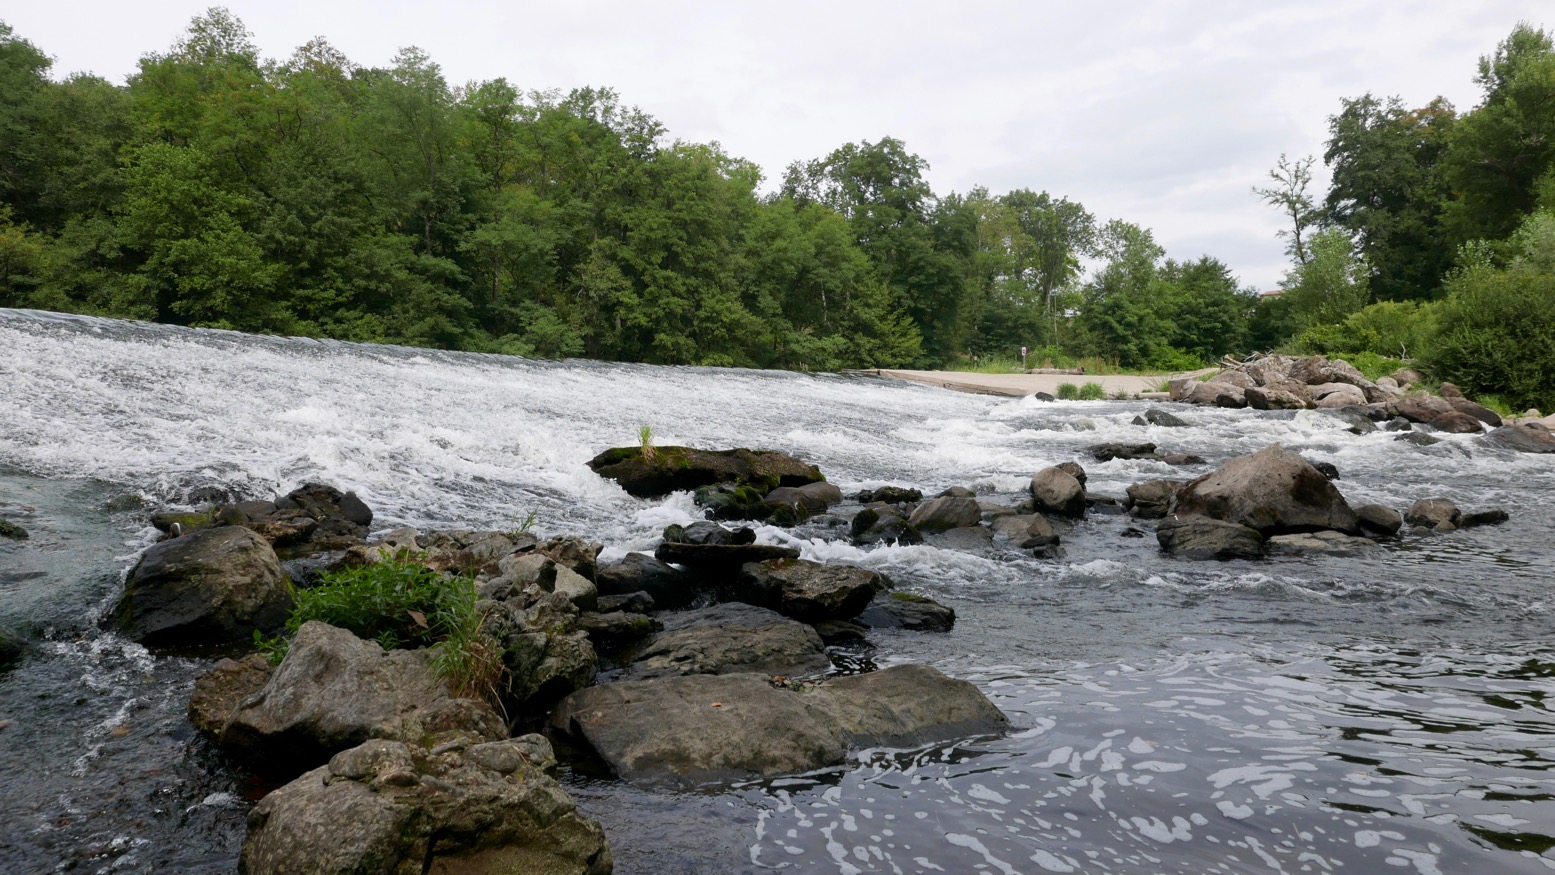
The book talks of another old weir to ‘shoot’ at Villeneuve campsite, but there’s nothing here except a ford with poles marking the car crossing. Many of the book’s ‘shoot an old weir’ descriptions are out of date. There’s rarely anything more than a line of rounded boulders and a drop of a few inches, making you wonder: ‘was that it?’ But at Ville Brioude, just before the tall bridge, the book suggests you can shoot a modern concrete weir (left). Good luck with that and those boulders lined along the base.
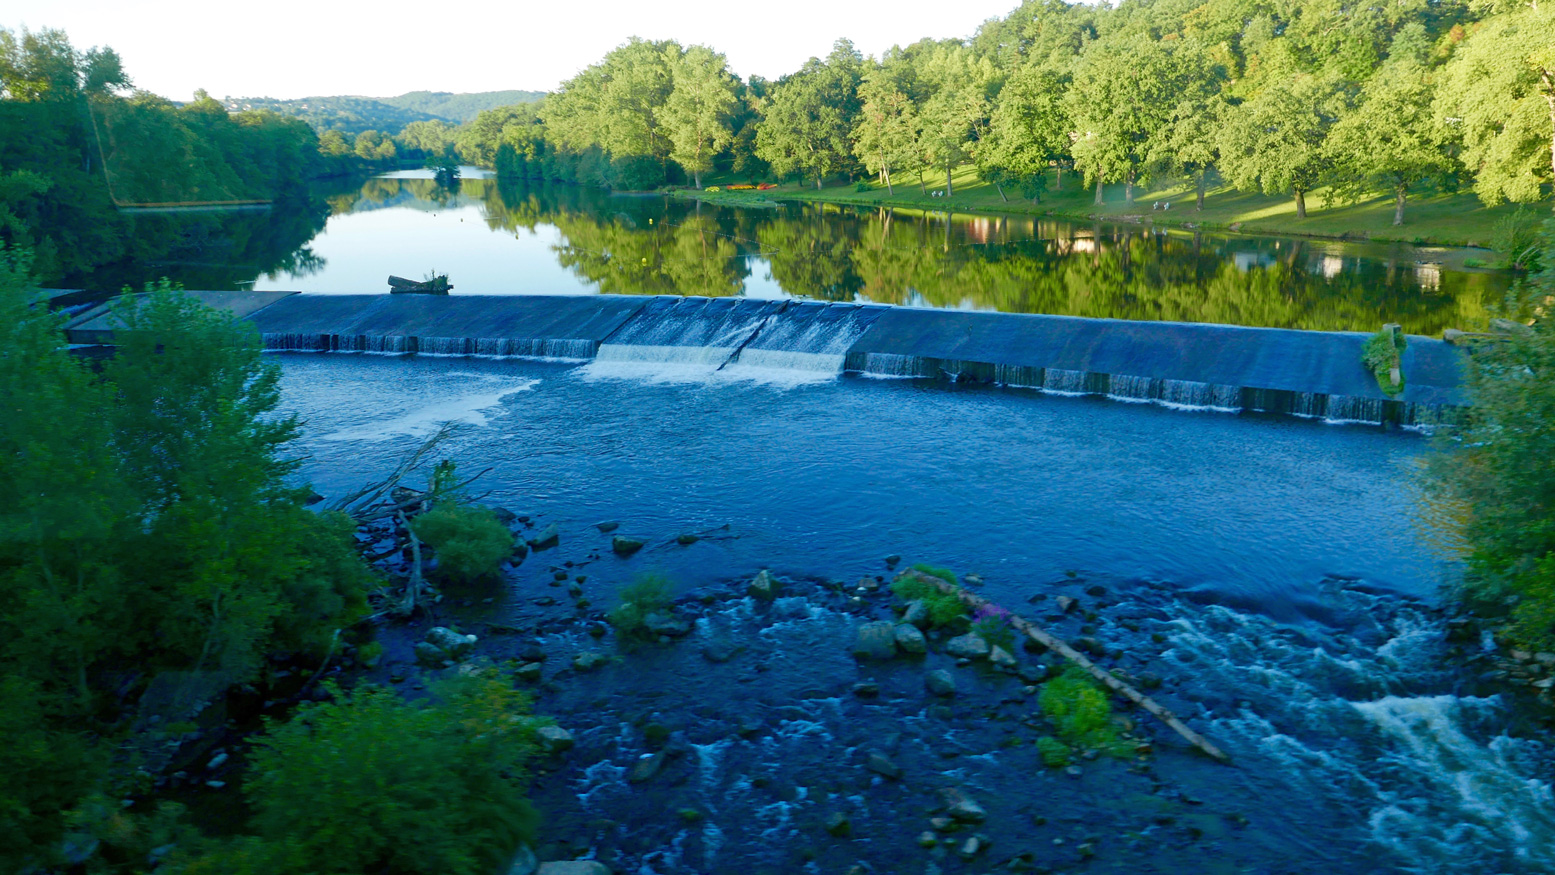
Finally I was back at the public beach below La Bargesse campsite (45.279097, 3.406962). Ahead was the big weir before the red brick rail bridge I’d crossed on the train a few days earlier (left). Here again the book now suggests ‘portage right’ and other convoluted options – perhaps a simple left/right mistake? Instead you simply take out at the grassy park, river left, walk over a little footbridge and put back in below the weir under the railway bridge and above a shallow rapid.
Once again, I’m amazed at the true amphibiousness of these packrafts, especially if not hauling camping gear on the trail. A long walk to dodge gnarly or closed stages is (potentially) easily done, even carrying an inappropriate kitbag. With plenty of time to catch my train, I dried off, got changed and walked over to Brioude for a coffee and cake in the town square below the basilica’s decorated tower. In the hills all around, the petrified volcanos and lush grassy valleys of the Auvergne countryside could easily sustain more exploring on foot, by pedal or with paddle.
The basic gear you need for packrafting adventures so you don’t end up as above, or simply just inconvenienced and wet. For general camping kit (sleeping, eating, washing) you’ll find lists all over the internet and beyond. Mixing paddling with walking, I prefer a 1-kilo down bag, a compact tent, a thick, full-length air mat and a Pocket Rocket-like burner with a big Tatonka or MSR 500ml+ pot/cup and a Gimp stove for back-up Below, I suggest cheap alternatives in green. A cheap alternative to a proper packraft is of course… a Slackraft but you’ll only every buy one once.
1. A pack for your raft
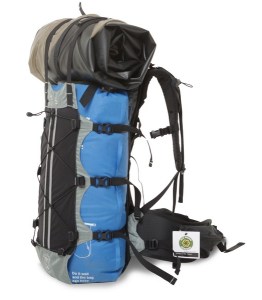
Do you use a regular hiking backpack packed with your boat in or outside, or a purpose-made drybag pack with usually a rudimentary integrated harness, or use a separate packframe harness as pictured?
If you’re a first timer and own a regular hiking backpack, make do with that, but having tried both I prefer a harness. You’re on the water so (unless you can store in the hull, waterproofness trounces all-day carrying comfort. A submersible UDB duffle is tougher, as airtight as a packraft and provides high-volume back-up flotation should you get a flat on open water; exceedingly unlikely but important and reassuring.
For short approach walks like on the Tarn, or the Kimberley, I used my UDB’s basic integrated harness: just sewn-on straps. For Turkey which was mostly walking, I fitted it into NRS pack harness (above left; no longer made) whose load capacity easily exceeds its straps and your back. In Germany Anfibio Packrafting now sell the more sophisticated US-branded Six Moon Flex Pack (left; new 2021 design), a ‘drybag hauling system’. You can lash anything that fits within the straps, including your rolled-up boat. ULA Epic is another one. In Europe such harnesses seems unknown. Remember: with any big backpack the key to support and comfort is a stiff board or frame connecting the hip belt and shoulder strap mounts so the weight can be carried low on your hips, not hanging from your burning shoulders.
Cheap alternative: any old rucksack and a tough bin bag.
2. Four-piece paddle
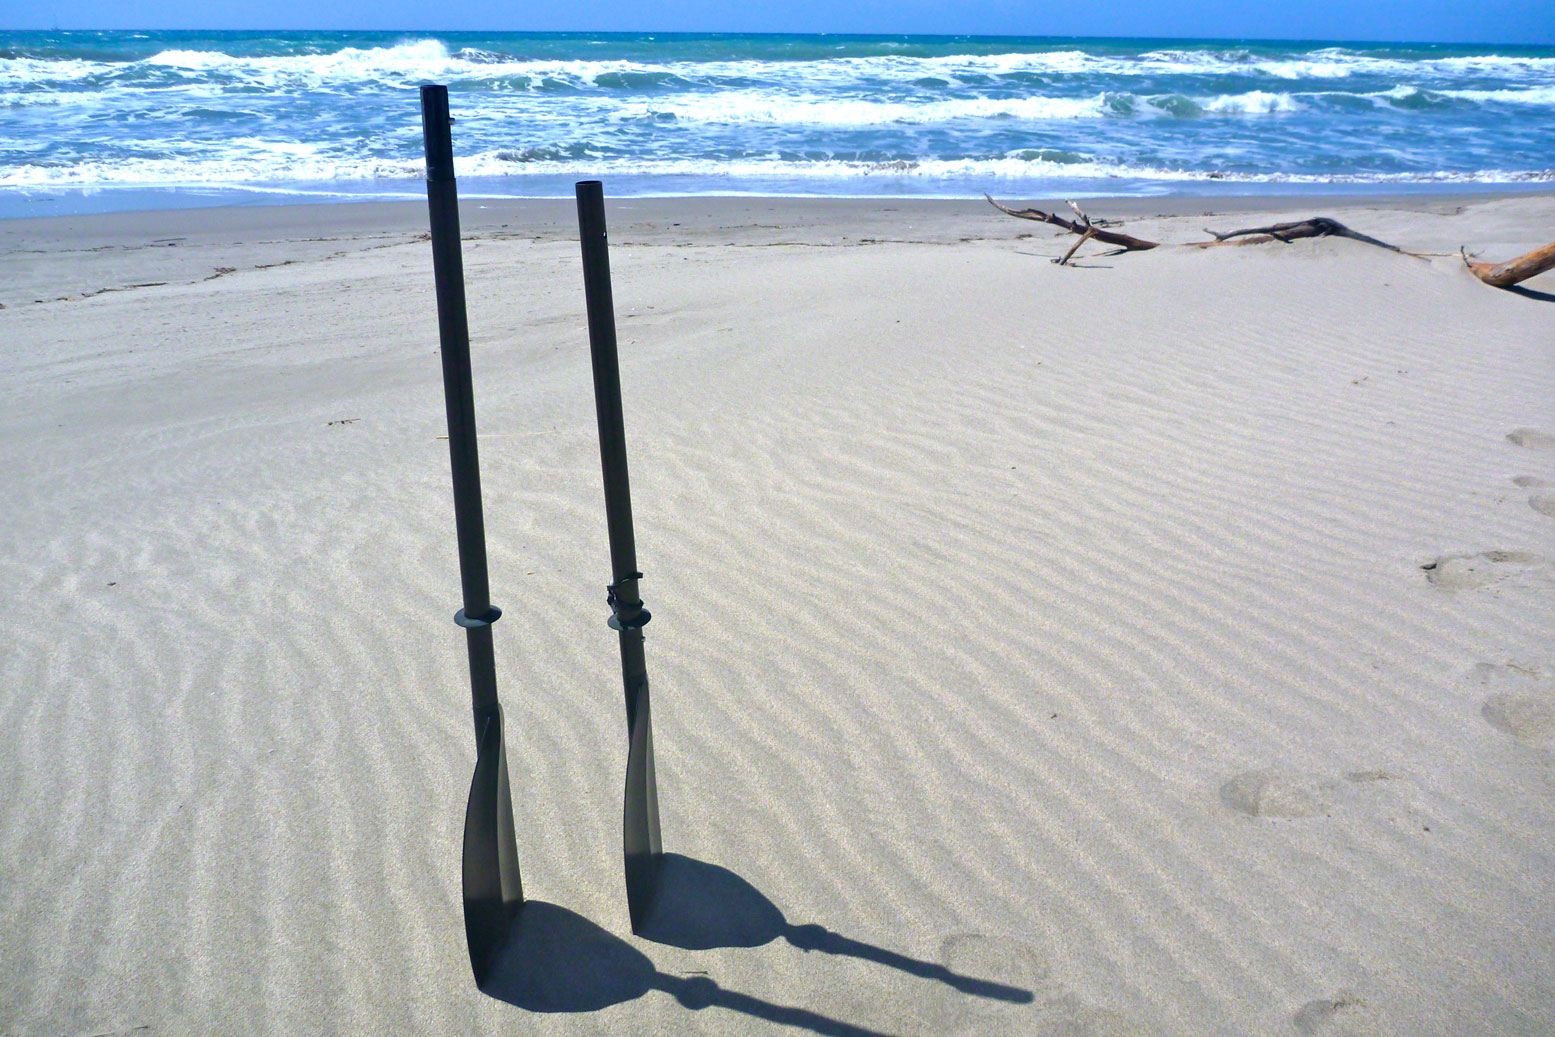
Get a paddle that breaks down into four pieces for easy transportation. A paddle like this may not be as stiff as a good two-piece, but the Aqua Bound Manta Ray left or the Anfibio Wave (right) will still be under a kilo and anyway, you’re in a slow packraft not a razor-thin surf ski. Some four-parters don’t like being left assembled when wet; don’t leave it out of the water more than a day or it may be very hard to separate.
Even cheap alloy-and-plastic ‘shovels’ come with adjustable feathering; an ability to offset the blades. Flat (zero offset) works OK, but most find a bit of offset makes paddling more efficient. I’ve got used to 45° Right (left blade rotated 45° forward) over the years. Whitewaterists prefer 30°. Left handers will go the other way. The Anfibio Wave had infinite feathering and 10cm length adjustment.
Cheap alternative: A TPC 2-piece or similar.
3. PFD (‘personal flotation device’)
A proper foam pfd is bulky in transit but is essential for remote solo paddles or whitewater (as is a helmet and a whole lot more if you’re really going for it). For flatwater paddles and calm, warm conditions Anfibio’s lightweight inflatable Buoy Boy (left) has twin inflation chambers, rolls down to less than a litre in volume and comes with handy net pockets and a useful crotch strap to stop it riding up when you’re flailing around in the water. At any other time, you’ll barely know you’re wearing it. Note It does not claim to be a CE-rated buoyancy aid.
Cheap alternative: A used foam PFD.
4. Wet shoes I’m on my second pair of Teva Omniums (left) which are do-it-all wet shoes that are OK for unloaded walking. If trekking the wilderness for days with a full pack over rough terrain, you’re better off with proper lace up trail shoes or boots, but bear in mind that anything with a breathable membrane takes ages to dry once soaked inside out. I use membrane-free desert boots. SealSkin socks are another solution, while they last. More here.
Cheap alternative: Old trainers or Crocs.
5. Day bag or case
You want something light to carry your valuables when away from the boat in populated areas. Choose a bag or case which fits under your knees without getting in the way. Whatever it is, it will sit in water, get splashed or even submerged, so it needs an airtight seal. If it has handy external storage pouches or pockets, so much the better.
Recently in France I tried an Underwater Kinetics box (22cm x 16 x 8; 540g, above left) used on ebay for under a tenner. It’s about the size of a Peli 1150 but a bit less deep and took my Kindle Fire, camera, wallet and bits. It’s light enough to carry away from the boat and also happens to make a handy camera stand. But most of the time I use a 20-L Ortlieb Travel Zip (left) which zips open easily and stores loads. As for a camera? This is what you want.
Cheap alternative: large, clip-seal lunchbox and a plastic bag.
6. Repair kit
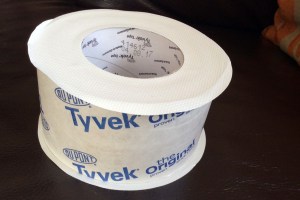
A couple of feet of Tyvec or similar tape and a small tube of Aquaseal is probably all you need for quick repairs. Something I’ve never had to do in all my years of packrafting.
Cheap alternative: Pieces of vinyl tape stuck to you spare repair patches.
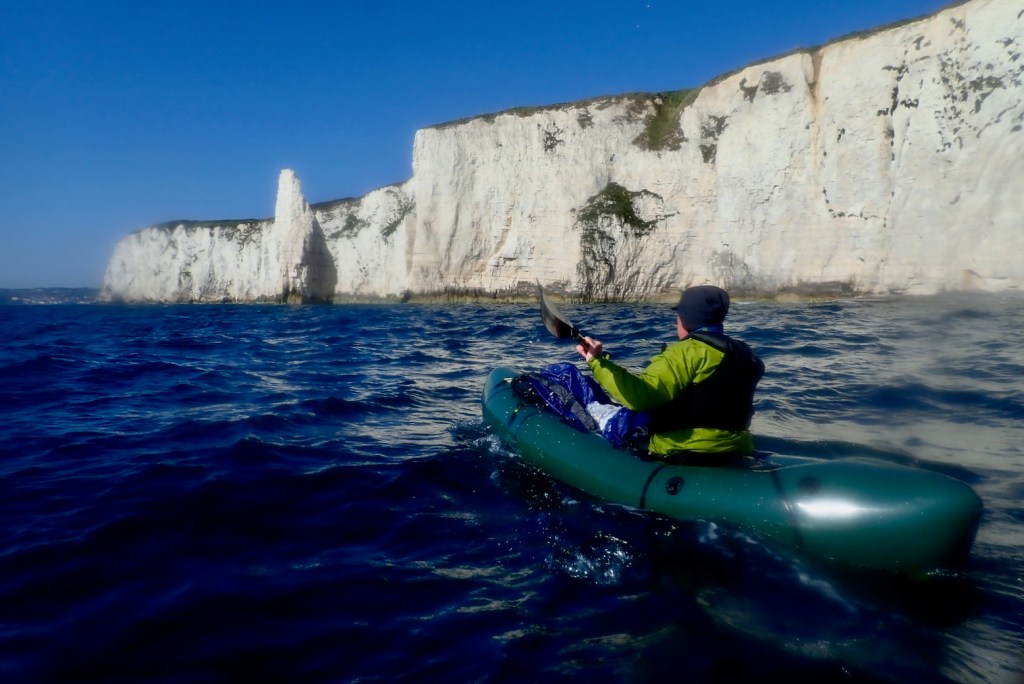
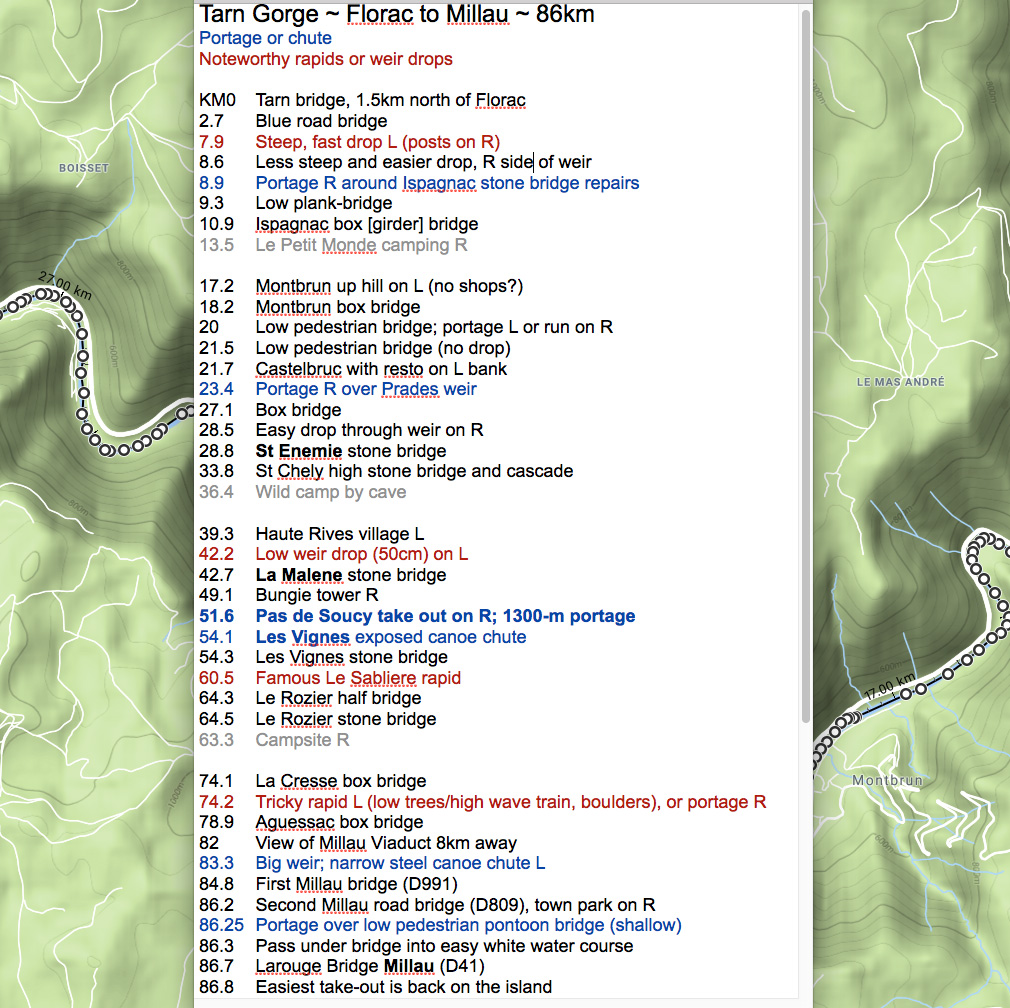
Just back from Tarn Gorge with the Yakraft, All the way from Florac to Millau; about 86km. I’m amazed the beating this boat takes, scrapping through the shallows and bouncing off the scenery. It took me two days plus two half-days each end, so about 18 hours of actual paddling. Surprisingly, I saw only day-renters or youth groups on the river – zero other private tourists like me. And from Florac to Montbrun, and Rozier to Millau I was the only boat on the water of any kind, unless you count an inflatable flying Pegasus.
There are two unavoidable portages: Prades (KM23.4) and a longer haul at Pas the Soucy (KM51.6). There are also two canoe chutes (Les Vignes; KM54.1, and just before Millau (KM83.3) plus an odd, unsigned low weir drop at La Malene (KM42.2). See the map below.
Besides a quick 1-day-er two years ago, we last did the Tarn in 2007 in the Sunny and a Solar: Florac to Rozier. It’s worrying what I’ve either forgotten, conflated with other Massif rivers or has changed, but the Tarn is actually a perfect first-time packrafter’s camping adventure. There’s a road alongside (not always accessible without pitons); daily villages for resupply and enough WW challenges to keep things interesting. The scenery and la belle France you get for free. I shipped a few litres on rougher drops but never came close to flipping, unlike a few rental hardshell SoTs I observed.
Getting to Florac (KM0) I took the cheapest redeye Easyjet to Montpellier (there are 2–3 a day), got a train from Gare St Roch to Ales (changing at Nimes) and next day caught the only bus at 12.10 from Ales for Florac, getting on the water at 2pm. You might also try Ryanair to Nimes but the way the timetables were at the time, you’ll still miss that key 12.10 Ales bus on the same day. Another idea might be the way I came back: express bus between Montpellier St Roch and Millau (2 hours) then non-direct train and several buses back upstream towards Florac. You might just manage that in a day. Work it out with the Millau tourist office or the internet. Eurostar London to Nimes in 6-7 hours sounds so much more relaxing apart from the change in Paris, but usually costs way more than the cheapest flights, and you still won’t get that noon bus from Ales same day from London.
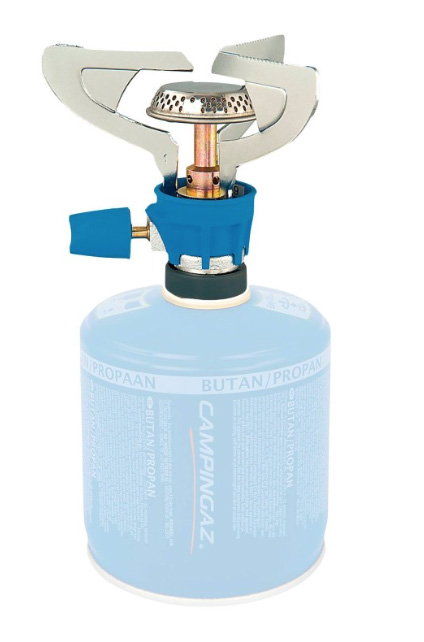
Knives & Gas At least on a train you don’t pay extra for baggage, but Eurostar won’t allow a useful-sized knife or camping gas cans. On a plane camping gas is also a no-no, so I planned to buy a can for my threaded burner in France. No luck as outdoors shops like Decathlon were all in out-of-town retail parks. Your classic blue Camping Gasis widely available in bigger supermarkets but has a different push-and-twist fit. I thought we sorted all this out years ago! Oh sorry, this is France. After traipsing around Ales finding only blue cans, I ended up buying the can and push-and-twist burner in St Enemie (probably could have bought in Florac too). At least next time in France I’ll have the burner and know I can get blue gas easily enough. Or you could always use a plane & rain proof ethanol Gimp Stove. I didn’t actually use my 10-function survival knife, but you know how it is; taking one makes it more of an adventure ;-) You can buy inexpensive wooden-handled Opinels easily in France.
River levels Not being a crusty demon of white water, I’ve never been that bothered about river levels, but a very good website is vigicrues.gouv.fr. You will see live measurements for the Tarn recorded at Florac (KM0); Montbrun (KM18), Mostuéjouls (KM65; near Le Rozier) and Millau. Generally in mid-summer Florac will read minus something and Montbrun will be between 0.3 and 0.5m. Let me tell you, once Montbrun gets towards 0.7m the Tarn is moving along very nicely indeed – up to 8kph in places – but 0.7m is usually a summer storm peak which subsides within a day. They say anything up to 1m at Montbrun is safe enough; beyond that things can get hairy.
Note the spike following a prolonged storm on Friday night/Saturday morning. Things sure sped up from then – last day I averaged 8kph – but never felt unsafe.
I found the old 2002 Massif Central book (right) not so helpful this time round. Even though I sort of knew what to expect – no outright Niagaras – I’d have appreciated better, bigger maps with each bridge, weir, portage and so on clearly marked to help orient myself. Also, the descriptions at each end, from Florac to Montbrun (first 18km) and beyond Les Cresses to Millau (last 12km) are either skimpy or now inaccurate, presumably because rental outfits don’t cover these sections of the river. On both these stages are rapids you’d really rather know about (see my map below). Read my review of the new edition, now renamed Best Canoe Trips in the South of France but with a near-identical Photoshopped cover (below right).
Thing is, on the Tarn you can pretty much blunder along in the dark; you won’t get lost, the rapids are never that technical, especially in a stable and agile packraft, wild camping is easy and proper bankside campsites, from basic to full-blown Hi-di-Hi holiday camps are plentiful and the main villages – St Enemie, La Malene, Les Vignes and Les Roziers are handy for snacks, drinks and pool toys. Can’t wait to get back to the Massif.
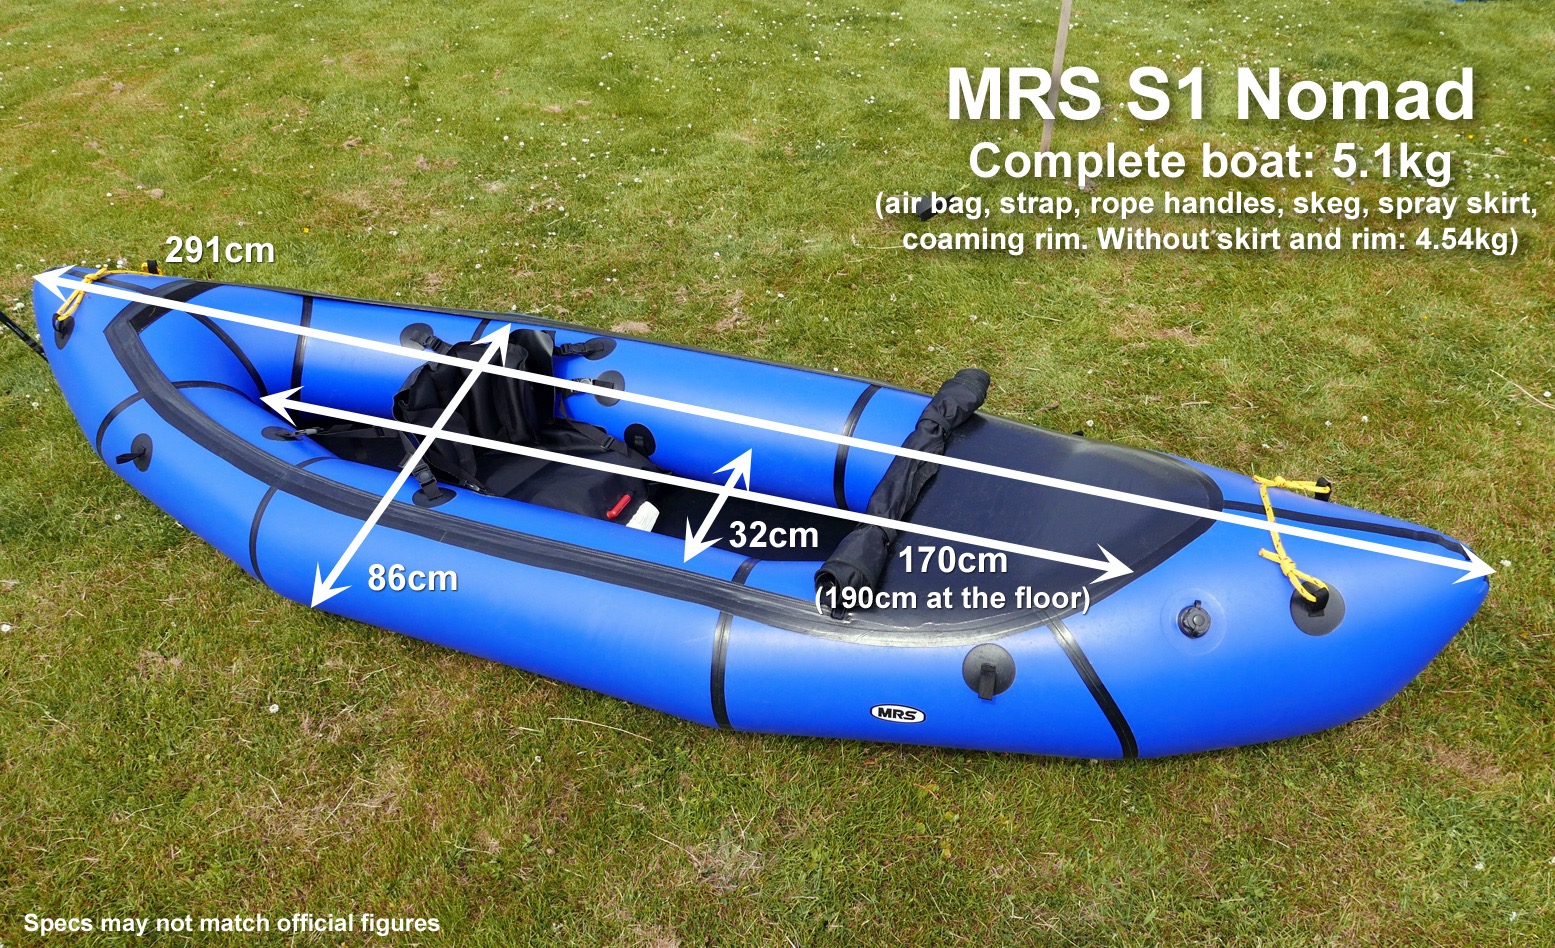
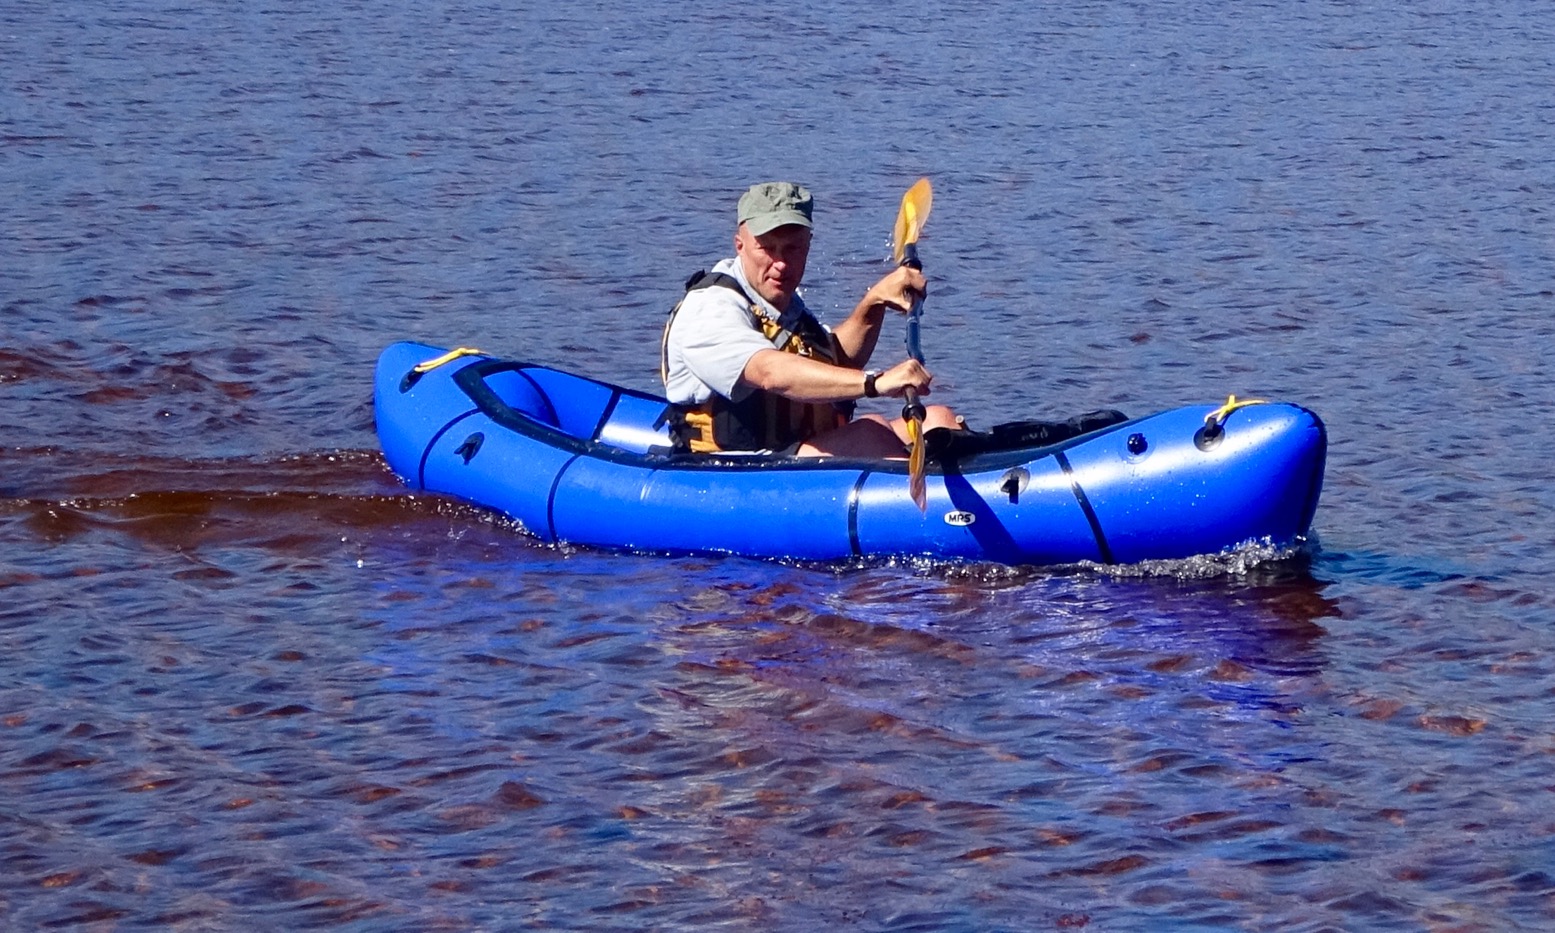
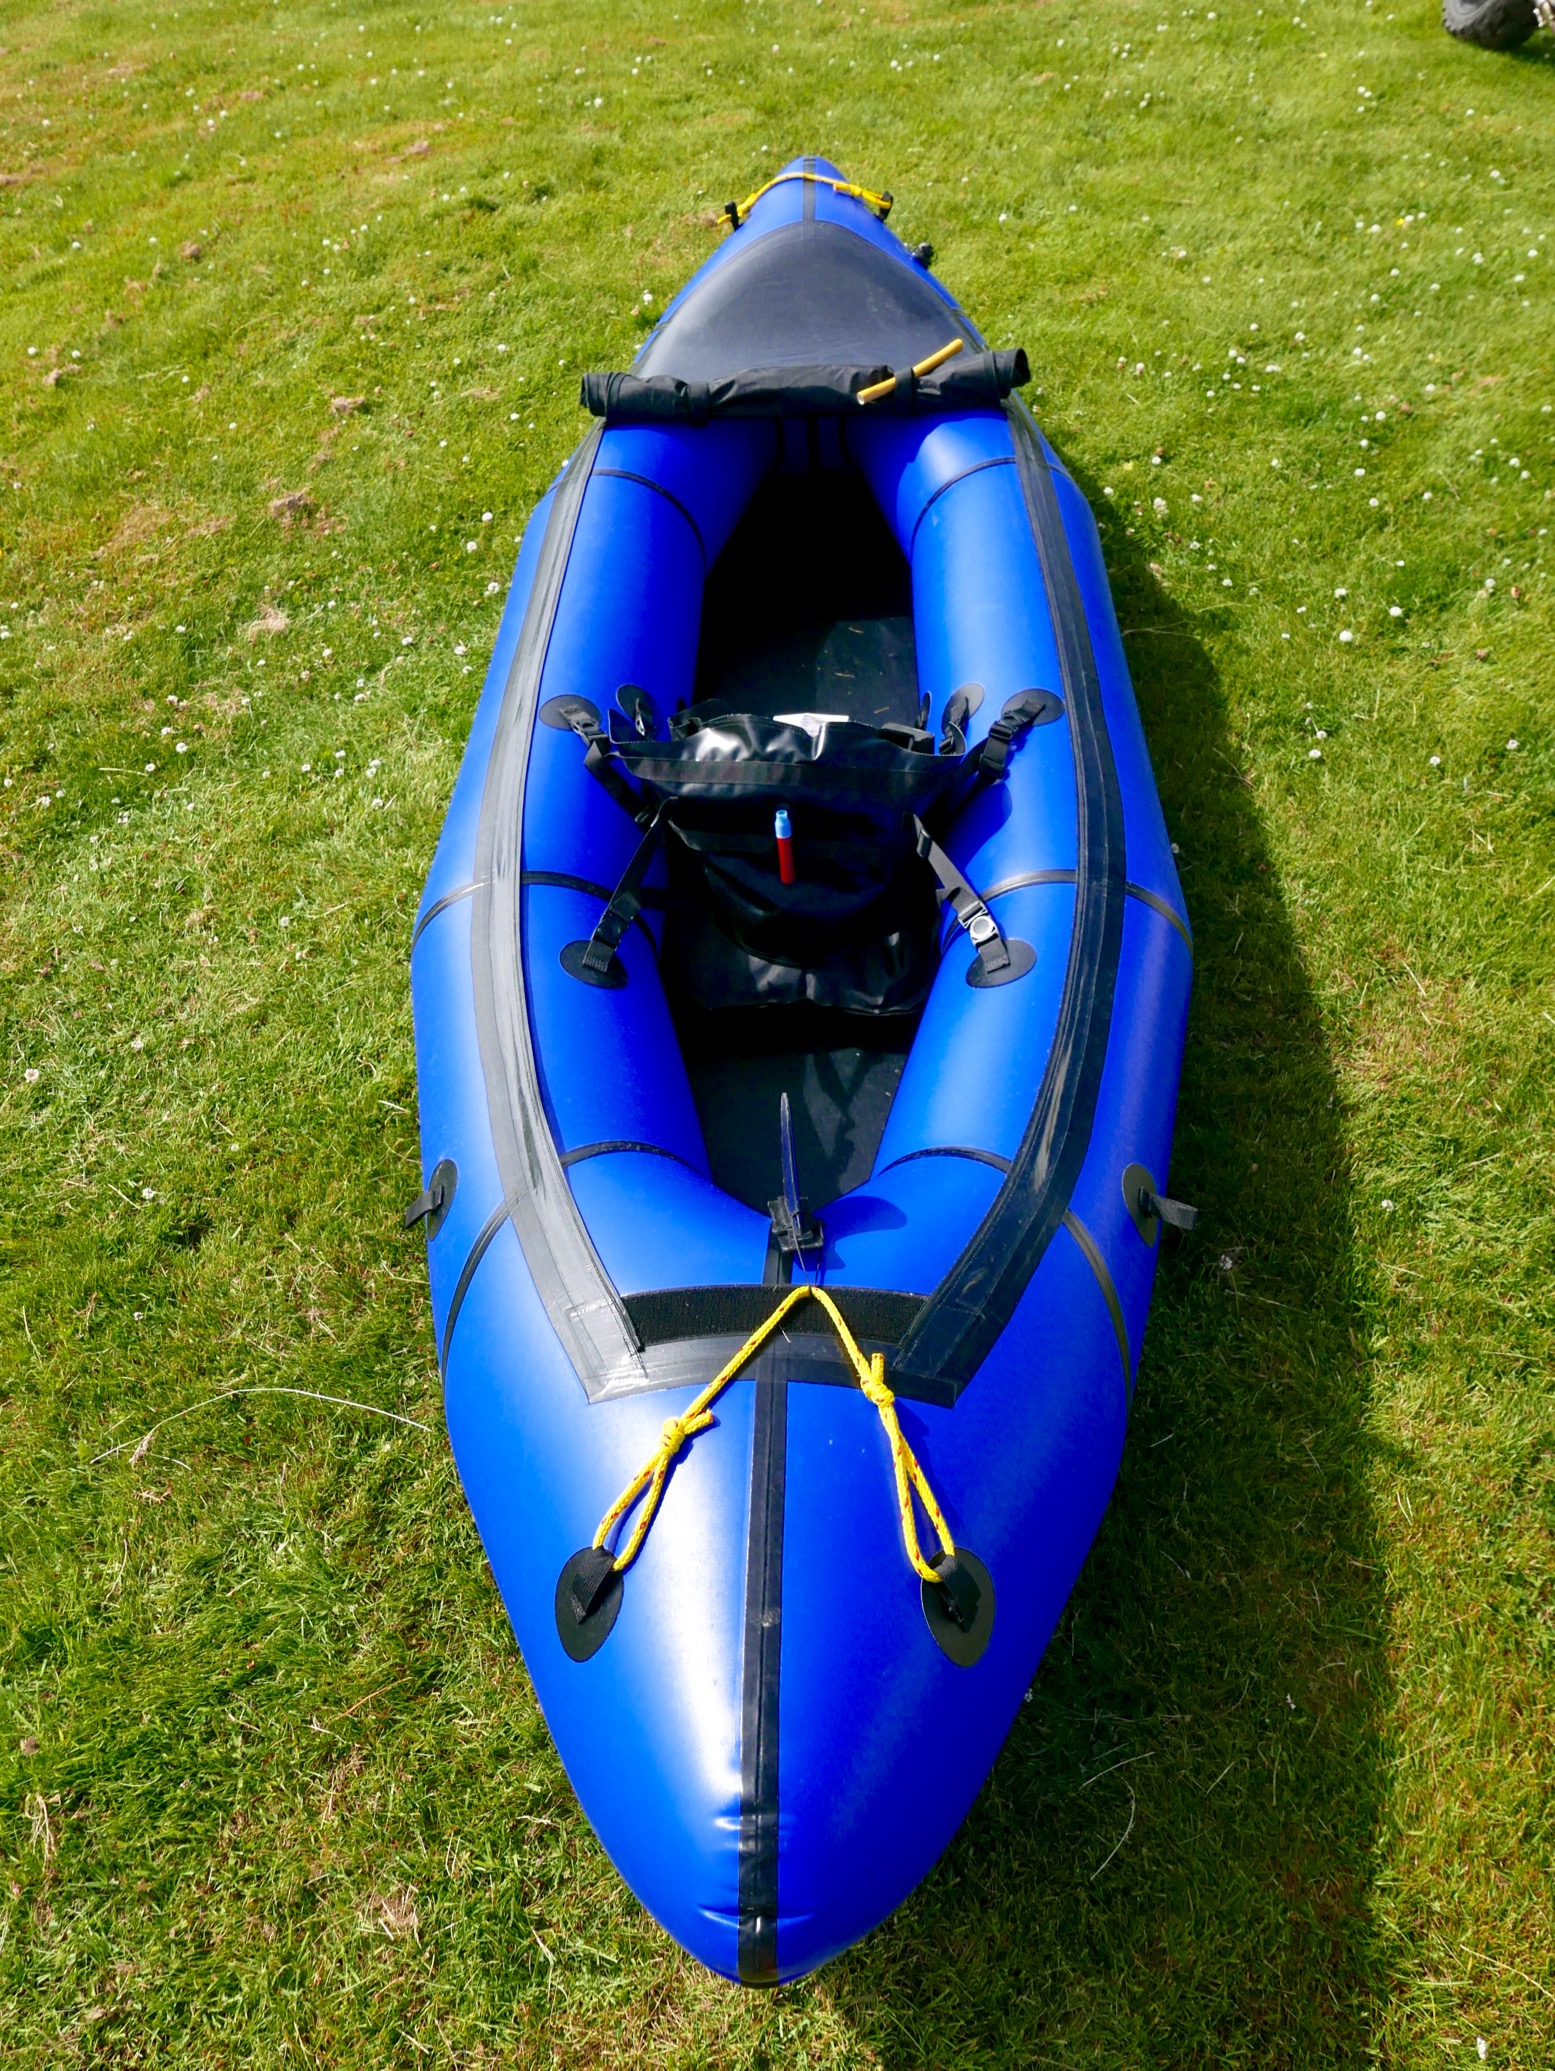
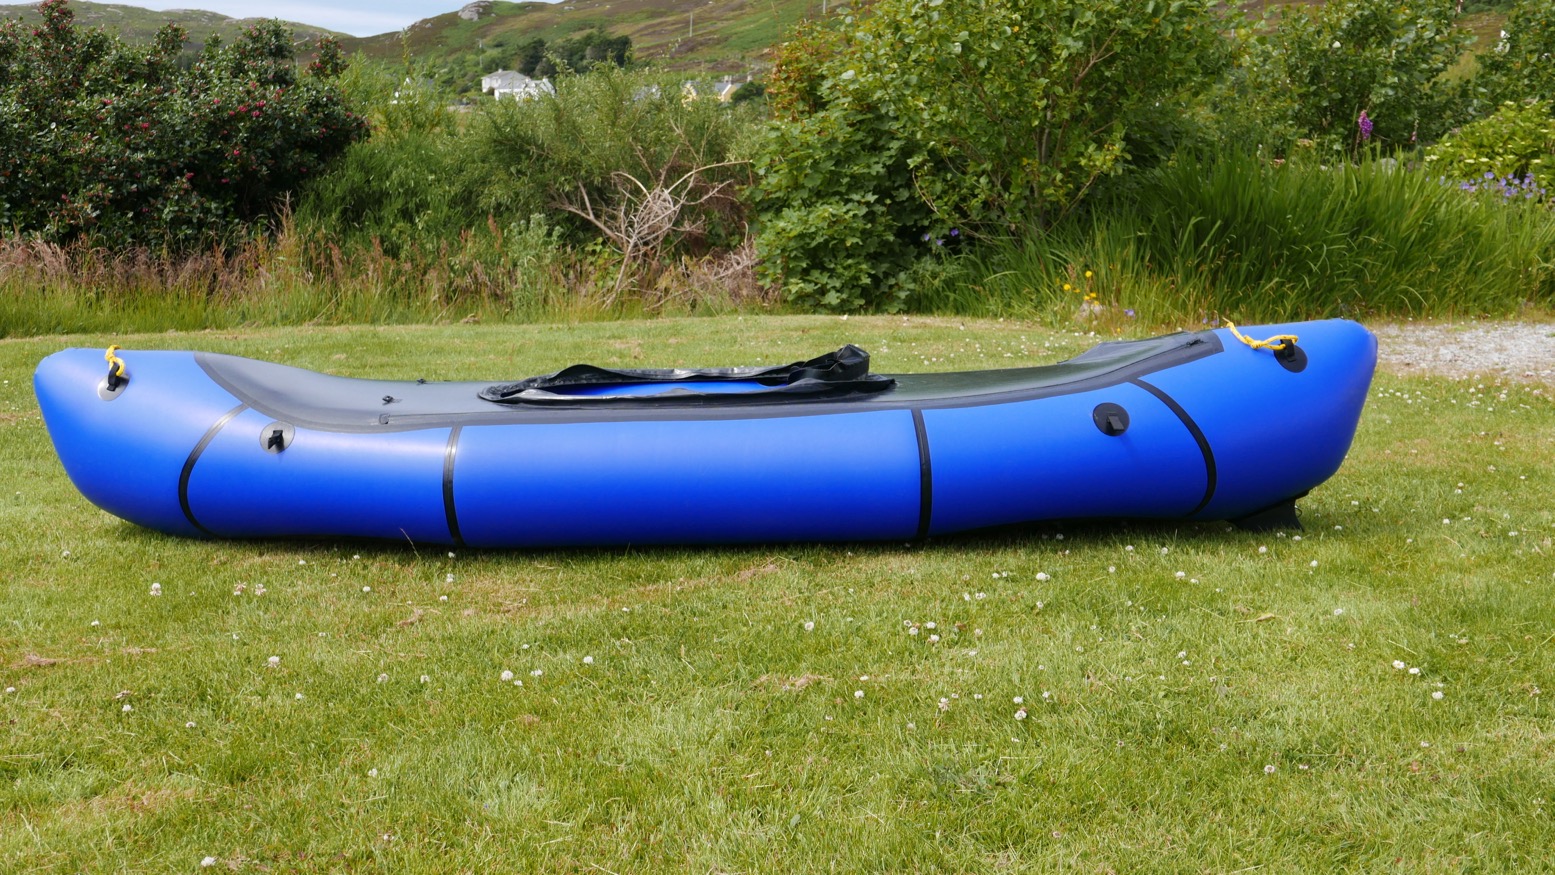
The application of what has proved to be durable, light and compact packraft fabric and reliable construction methods into slimmer, kayak-like forms was bound to happen. MRS’s 2.9-metre Nomad S1 is among the first solo examples I know of, co-designed with Germany’s Anfibio Packrafting Store whose Alpha XC we tested a couple of weeks ago. Fyi: in December 2018 I sold my 2014 Alpacka Yak and bought this ex-demo boat. Fyi2 Anfibio don’t sell MRS anymore.
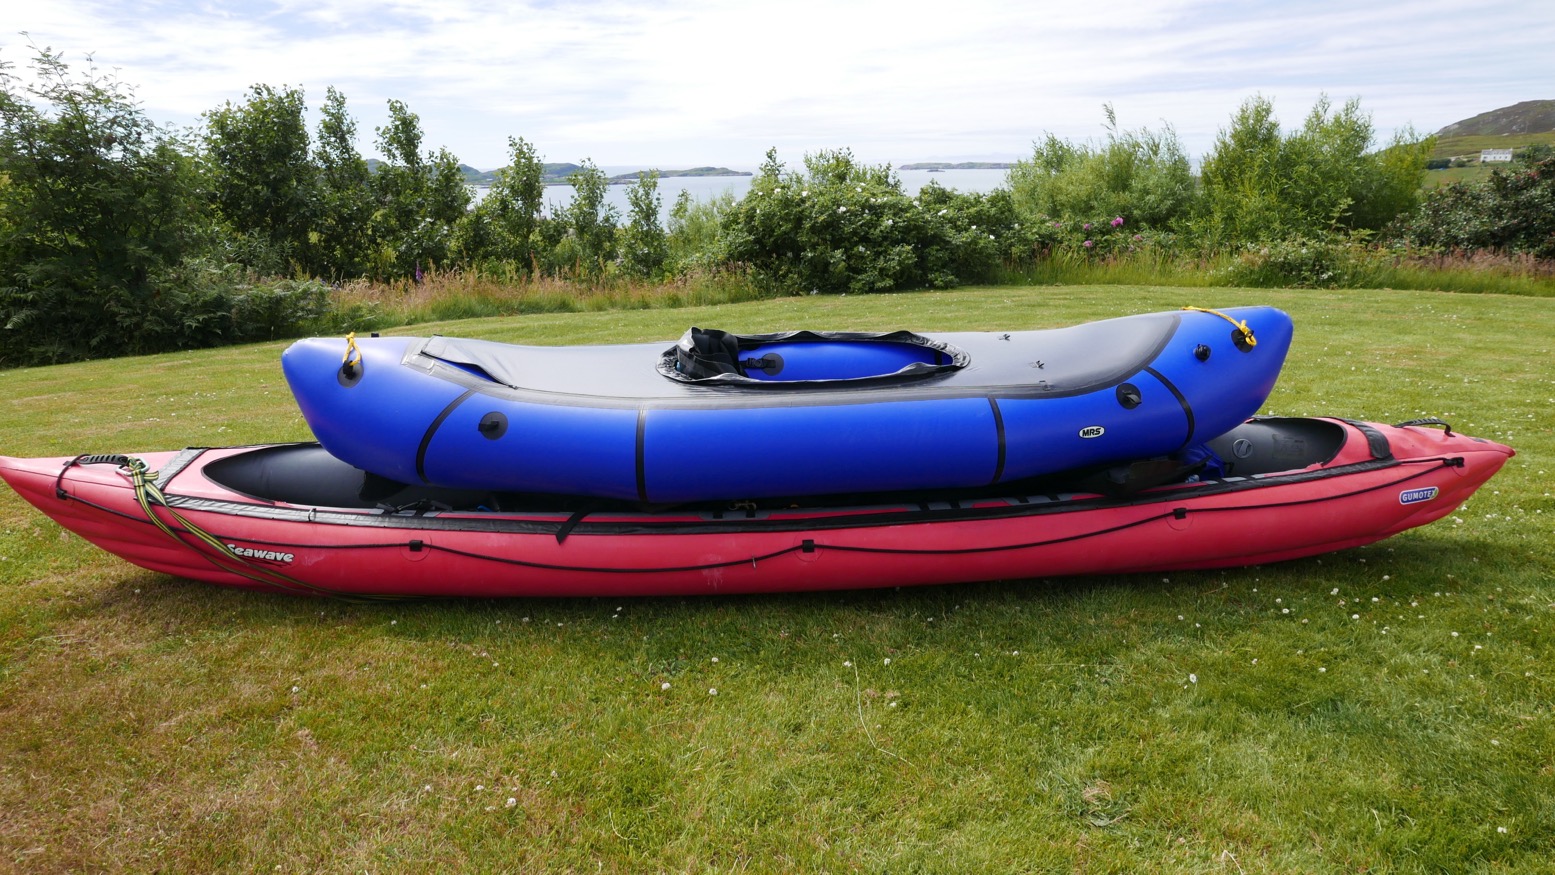
Is it a very light solo kayak or a long packraft? I’d classify it as the former, a boat that ought to paddle better than a packraft on current-free, flat water, and even manage some calm coastal paddling. The Nomad could be mistaken as the solo version of MRS’s tandem undecked Barracuda R2 double. But the R2 is a boat with seats which can be adapted to canoe-style kneeling, much fatter tubes and has a different bow/stern as well as not having a deck. The 1299-euro Nomad S1 is a stand alone boat.
What they say: Once packrafts broke conventions in water sports. Now the Nomad S1 is breaking conventions in packrafting. The central seating position and symmetrical bow and stern are similar to a conventional kayak, producing similar paddling dynamics. At 5kg, the gross weight is more than most solo packrafts, but the Nomad remains a very packable boat for easy travel and exciting adventures.
‘Sign here please’ Off the van, out of the box and straight onto the kitchen scales. Kerching: that will be 5.1kg please. Take away the large skirt and coaming rods and it’s down to 4.5kg, and a year later rigged up to my specs with a long lanyard, footrest, alternative non-inflatable seat back with a mesh pouch with bits in it, it is a real-world 4.7kg ready to go (right).
Hull fabric is your usual 210D TPU but coatedinside and out (like old Alpackas) for improved rigidity, with a floor in chunky 410D with aramid (kevlar) fibre reinforcement. The hull panels are stitched, then heat welded with tape; the floor gets glued to the hull and all the joins look neat and crease free. The deck and seat parts are lighter PU-coated or ripstop nylon.
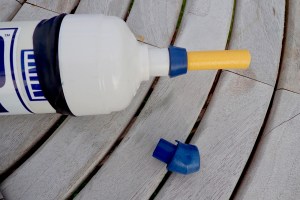
Unrolled, it looked like a lot of boat to have to blow up with the air bag. So I decided to speed things up with my IK barrel pump, using a bit of garden hose as an adaptor via the air bag screwed into Boston-style valve. More on those here. It took less than 5 minutes pumping. Later, I decided to try regular airbagging and found it only took 15 bagfulls to get it ready for topping off – less than you’d think.
To top off I found a shorter section of garden hose fitted neatly into the one-way valve port and makes it much easier to give the boat a few lungfulls and get the high-capacity boat nice and firm. A short bit of hose also fits into one adapter on my K-Pump which I usually use to top up my IK. With a K-Pump you can get it good and firm (but you can with much cheaper mini, balloon pumps too). The Packrafting Store offer a small Bravo foot pump for those who don’t have the lungs of Dizzy Gillespie. You do want to get this long boat as firm as possible, especially if you’re well-fed. But the Store recommends not to overdo it with a pump, and in the current warm spell I’ve been careful to air off a bit if the boat gets left in the sun all day following a max top off in cold water.
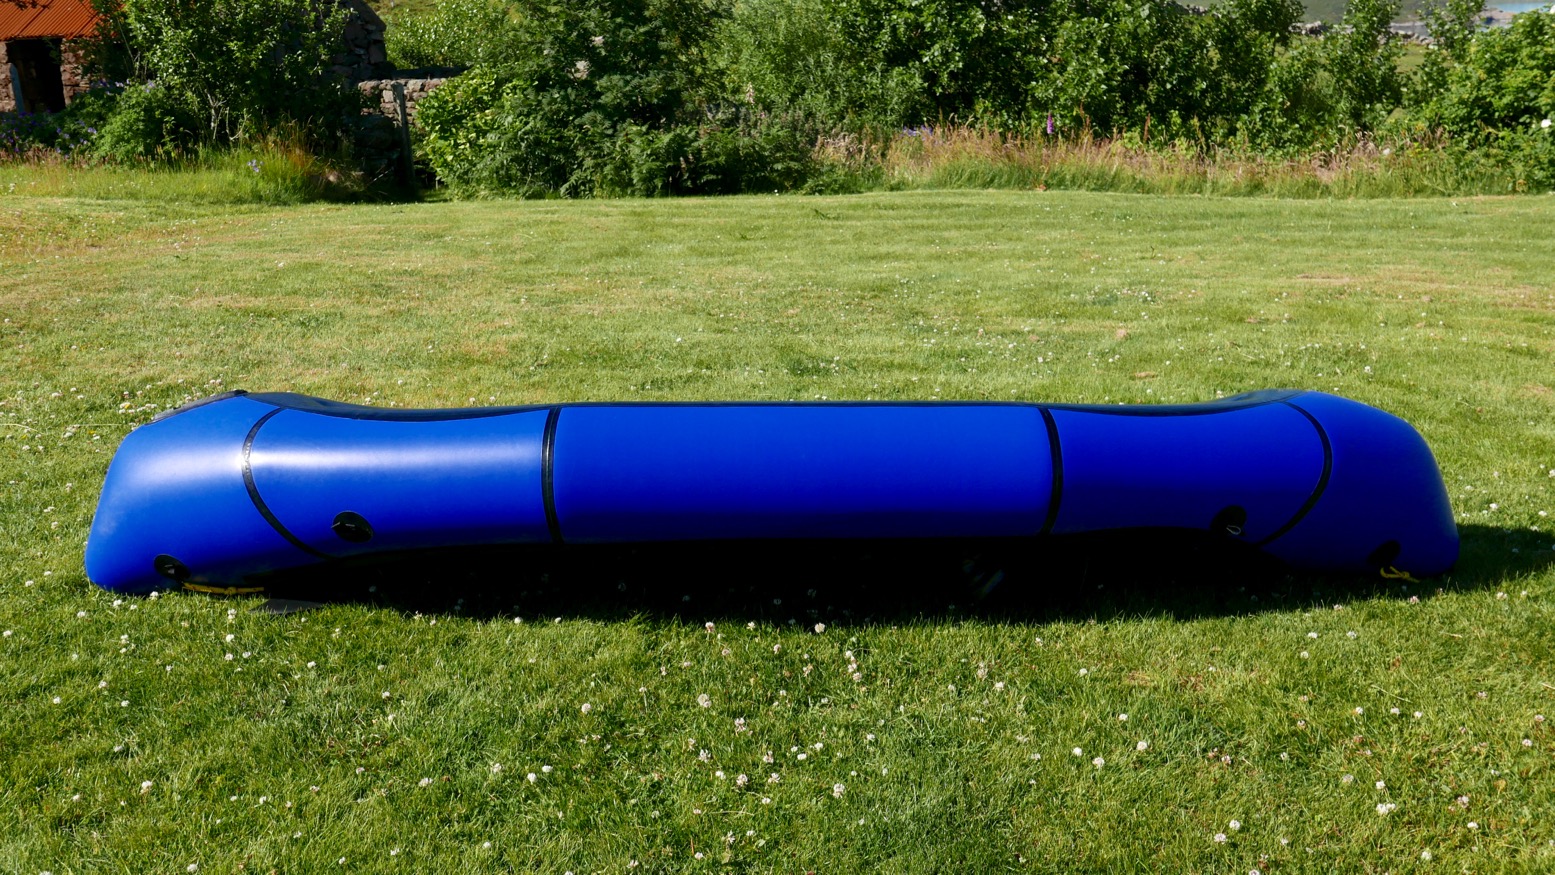
Once aired up the boat has a good shape – nice pointy ends; a promising sign in boating circles. The S1 is symmetrical like many IKs, and each end has a generous volume helping achieve a claimed buoyancy rating of 200kg. I can believe it; two of me in it and I bet it would still have plenty of freeboard.
The deck seems to be less flimsy ripstop fabric than I recall on my previous Alpackas. And unlike those boats which had a long perimetre zip, the Nomad has two parallel zips along each side right to the back which makes it dead easy to partly open and get to the ‘trunk’ without complete removal. Good design. You also wonder if the zipped-up deck might help tension the boat by constraining the sides when getting bent about in rough water. Maybe.
The 80cm x 49cm hatch is nice and big; I (1.85m) could get in and out with ease, though maybe not just after Christmas while wearing a drysuit and thick fleece. There are zips along the hatch rim to insert the 4-piece coaming rod (left) to make a firm seal for the spray skirt elastic. It struck me paddling later with the deck deployed that fitting the rods would create a 1–2-inch high lip which would keep out some water rolling down the front deck. The supplied spray skirt looked huge and had braces; but I never actually tried it. Rolled up to the front, the rolled up deck’s retaining velcro straps seem way too long. It didn’t really matter, they tucked in well enough. Maybe the extra strap length is to roll the unused spray skirt in there too.
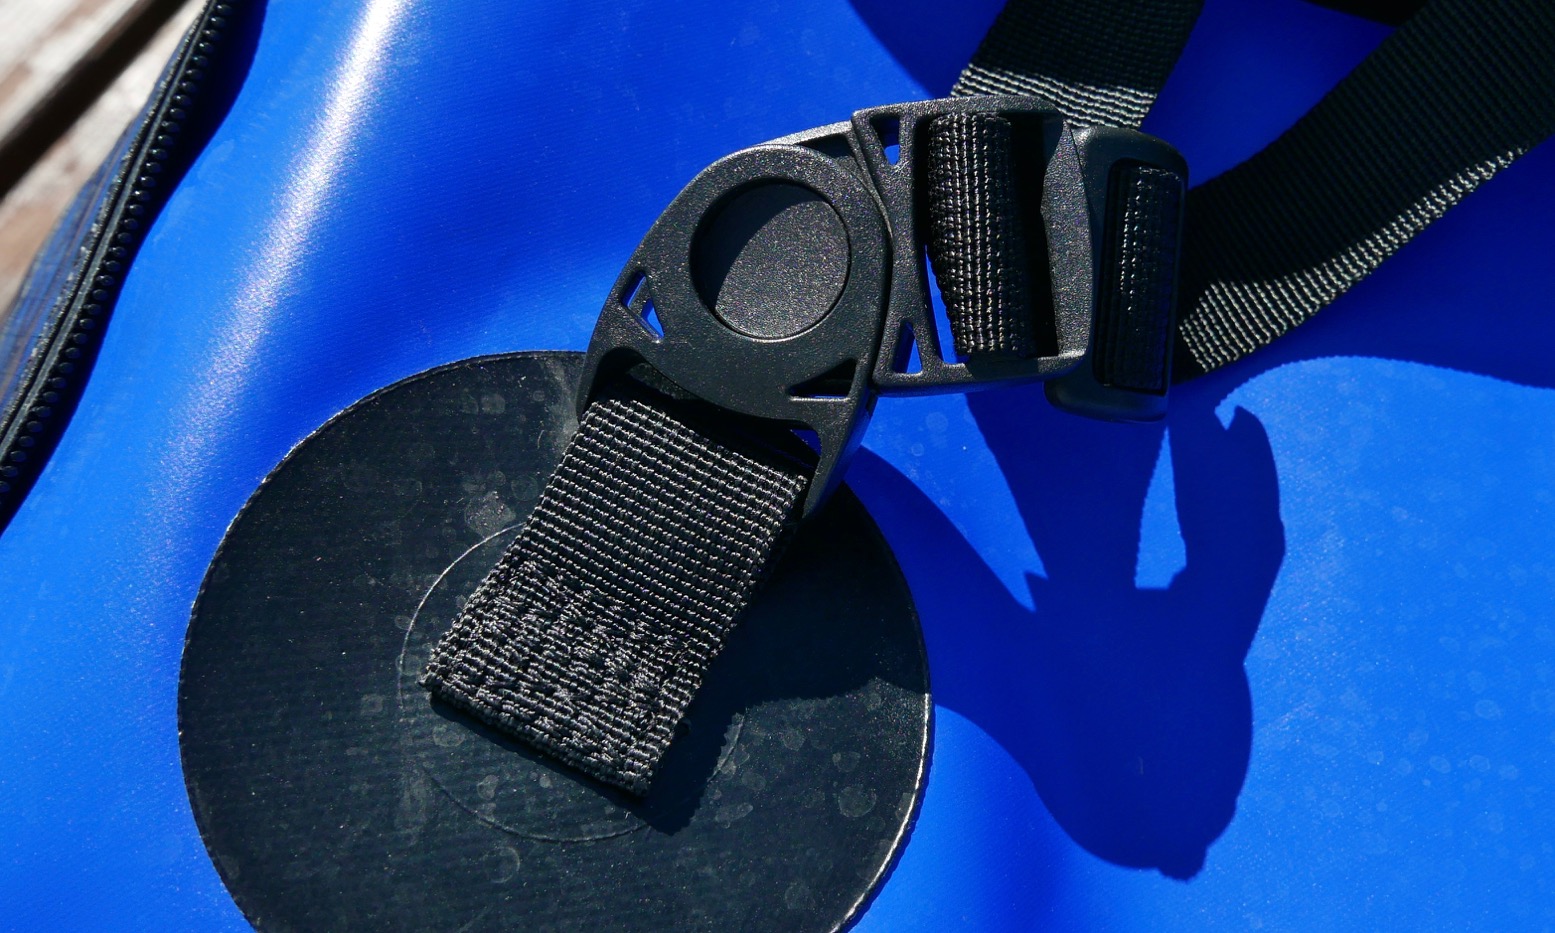
The two-piece inflatable seat and backrest are not your ordinary packraft affair. The anatomically curved backrest hangs from no less than six adjustable pivoting mounts using q/d clips (right) to reduce stresses on the mounts and help fine-tune your back support. A TPU sheet sewn to the back rest back takes the buckle tension. This backrest won’t flop forward as on some packraft one-piece backrest/seats – very handy when clambering in, especially through the hatch. The whole backrest weighs 310g and costs €39 if you want to fit one to your boat. It detaches in seconds, handy to allow a passenger to temporarily hop in.
Solo, the mass of your weight settles on the thick, seat pad. It’s attached via the usual, very much not easily adjustable or removable lace-up tab mounts, except they’re glued on halfway up the hull sides at the 32-cm narrow point (left), not down on the floor’s edge as on regular packrafts. One problem with this laced set-up is if you want to move the seat much more than an inch or two forward or back. Depending on your weight there will be fewer holes taking the load. It can’t be beyond the wit of packboat design to allow easy removal or repositioning.
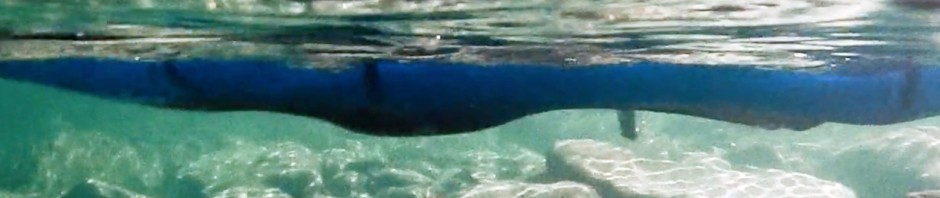
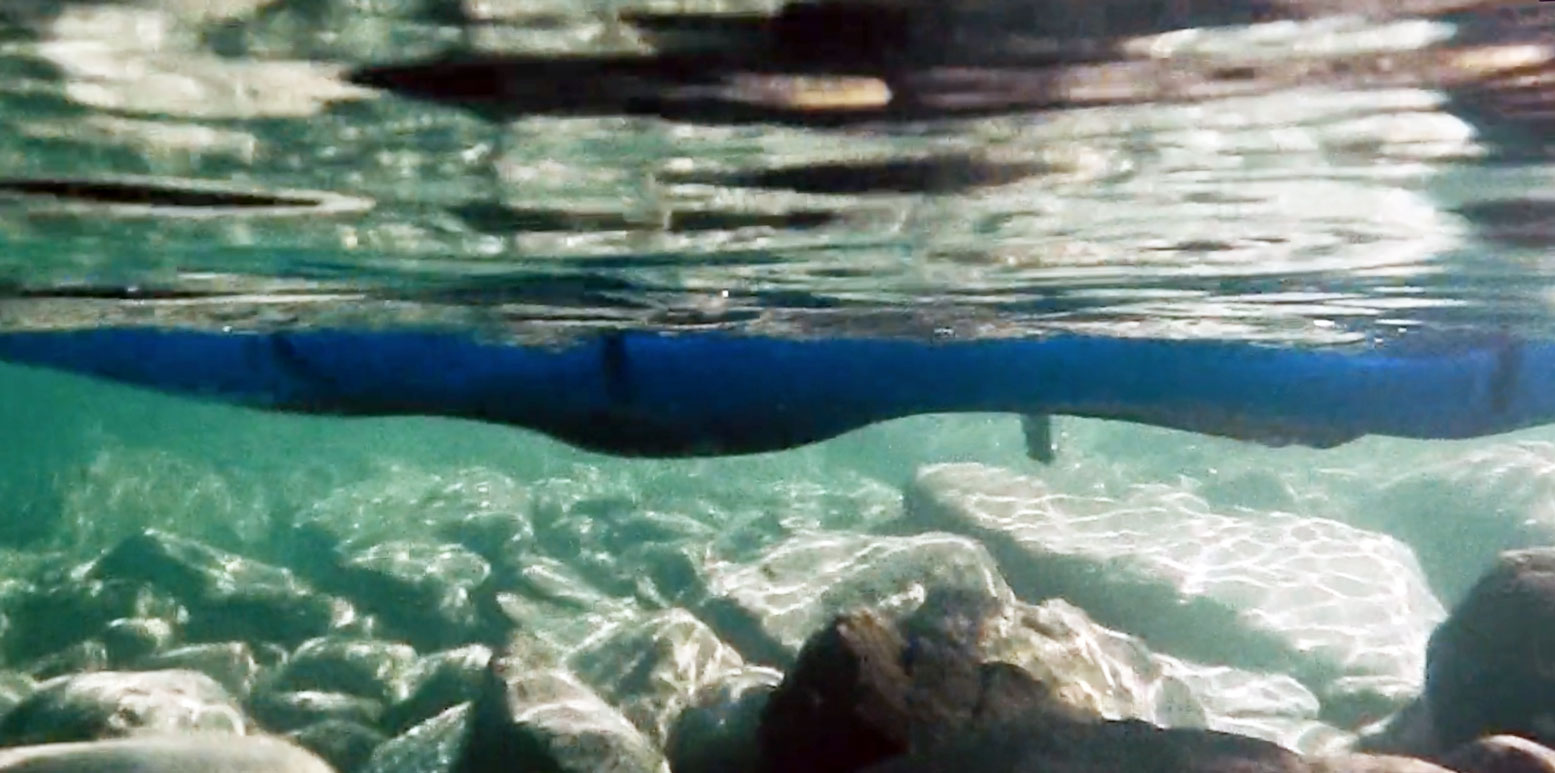
The S1’s clever seat arrangement partly supports the paddler’s weight from the big side tubes and so limits undesirable ‘bum sag‘. The Nomad does not sag like the underwater image above (an unknown packraft). In this boat the weight of the paddler presses directly on and deforms the floor which can’t be good for hydrodynamics or floor wear and tear in the shallows. Paddler weight pressing down midway in a long, low-pressure boat – even with an inflatable floor – tends to make it bend in rough water or a swell. You can see they thought about this with the longer-than-normal Nomad. It was the problem that limited my old Gumotex Sunny (water came over the sides in rapids or a swell) which was eventually solved by getting the more rigid, higher pressure Seawave (and which is solved entirely by drop-stitch technology).
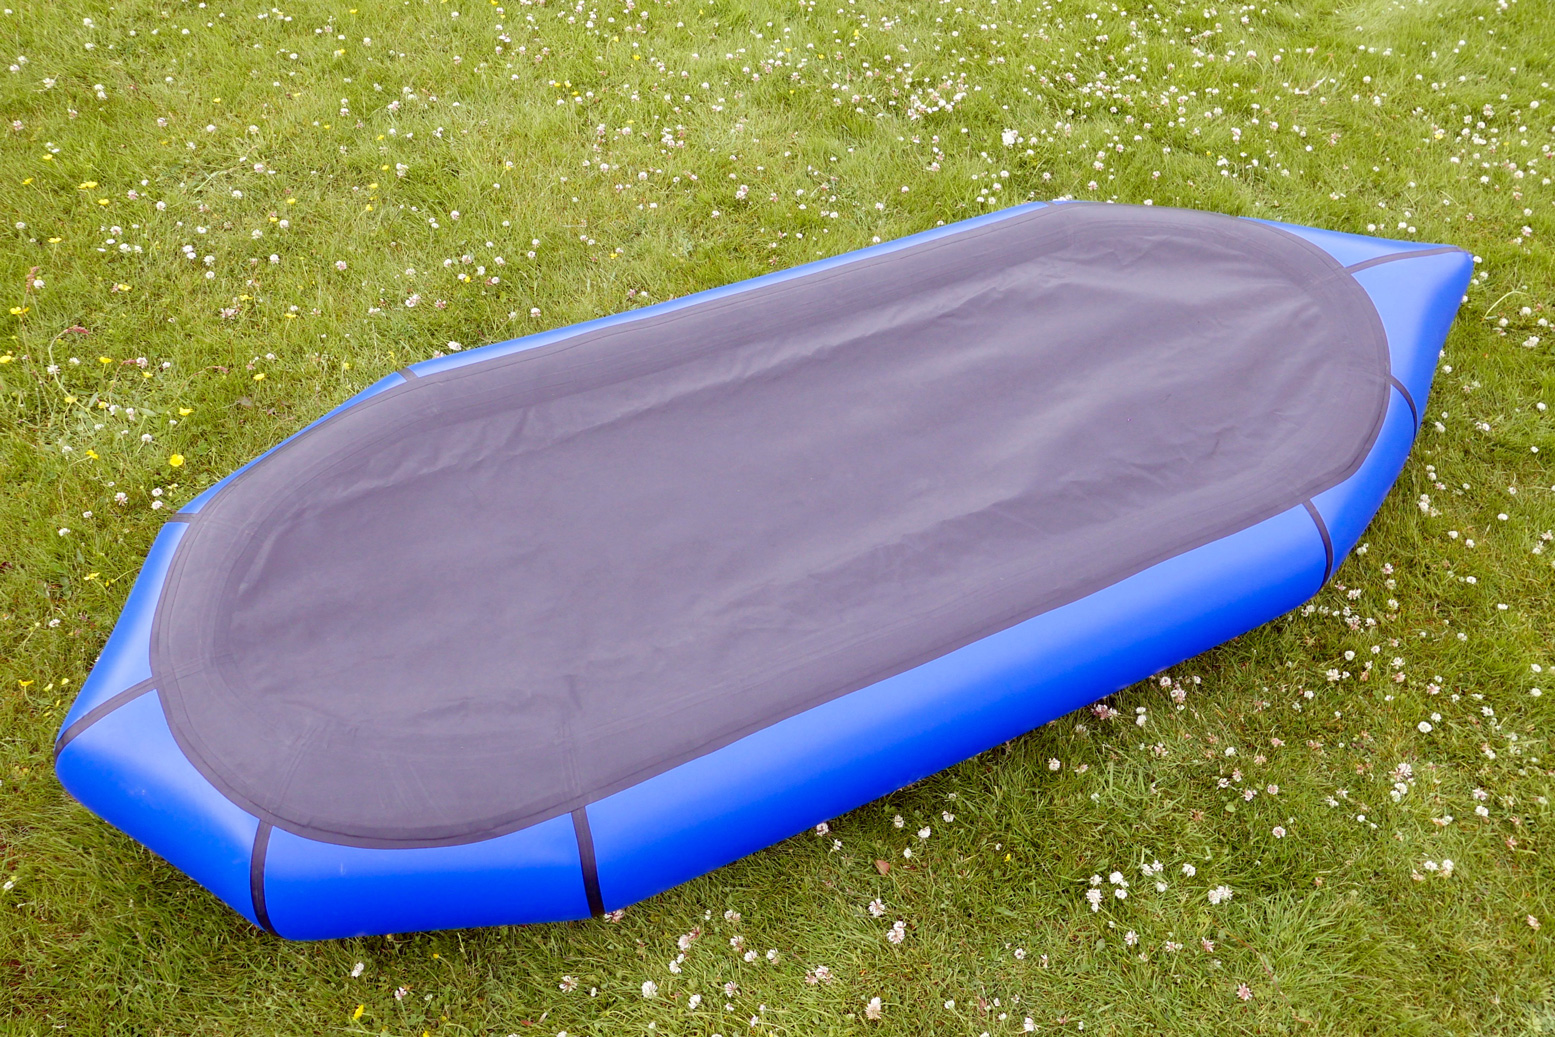
Flip the boat over and you can see that there are slight bulges at each end (left). I’m told it’s a cunning design feature to produce ‘negative rocker’ (opposite of upswept ends) and help with tracking and speed. The similar-sized EX280 we tried was flat floored and I must say it seemed to work. The S1 tracks fine without the skeg.
The 410D floor has a good overlap of glue where it attaches to the 210D hull tubes covering the tube seams (glued because I think you can’t easily heat weld two different deniers of TPU). The quality of the taping is all as neat as you like, with not a single strand of stray glue or malformed creasing.
The skeg (directional fin) is Gumotex size but slips on like a Sea Eagle IK (‘American box fitting’ iirc, same as on iSUP boards) into a moulded plastic slot glued up the stern. It locks in place with a flat pin on a string so when removed you can secure the skeg somewhere via this pin and string. I do the same when packing my Seawave so as not to misplace the sometimes vital skeg. Even when not mounted, that skeg pad is the lowest part of the boat which scrapes first so usefully sparing the floor from damage. Other than that you have four well-positioned attachment loops, with a broad base to secure anything up to a bike. There’s the same arrangement on the stern. These mount points become less essential because you have space behind the seat to stash stuff low and retain stability and visibility. There are two more long loops inside, with another pair of mount points at the front for thigh straps. The test boat also had some handy string handles knotted on to the outermost attachment loops.
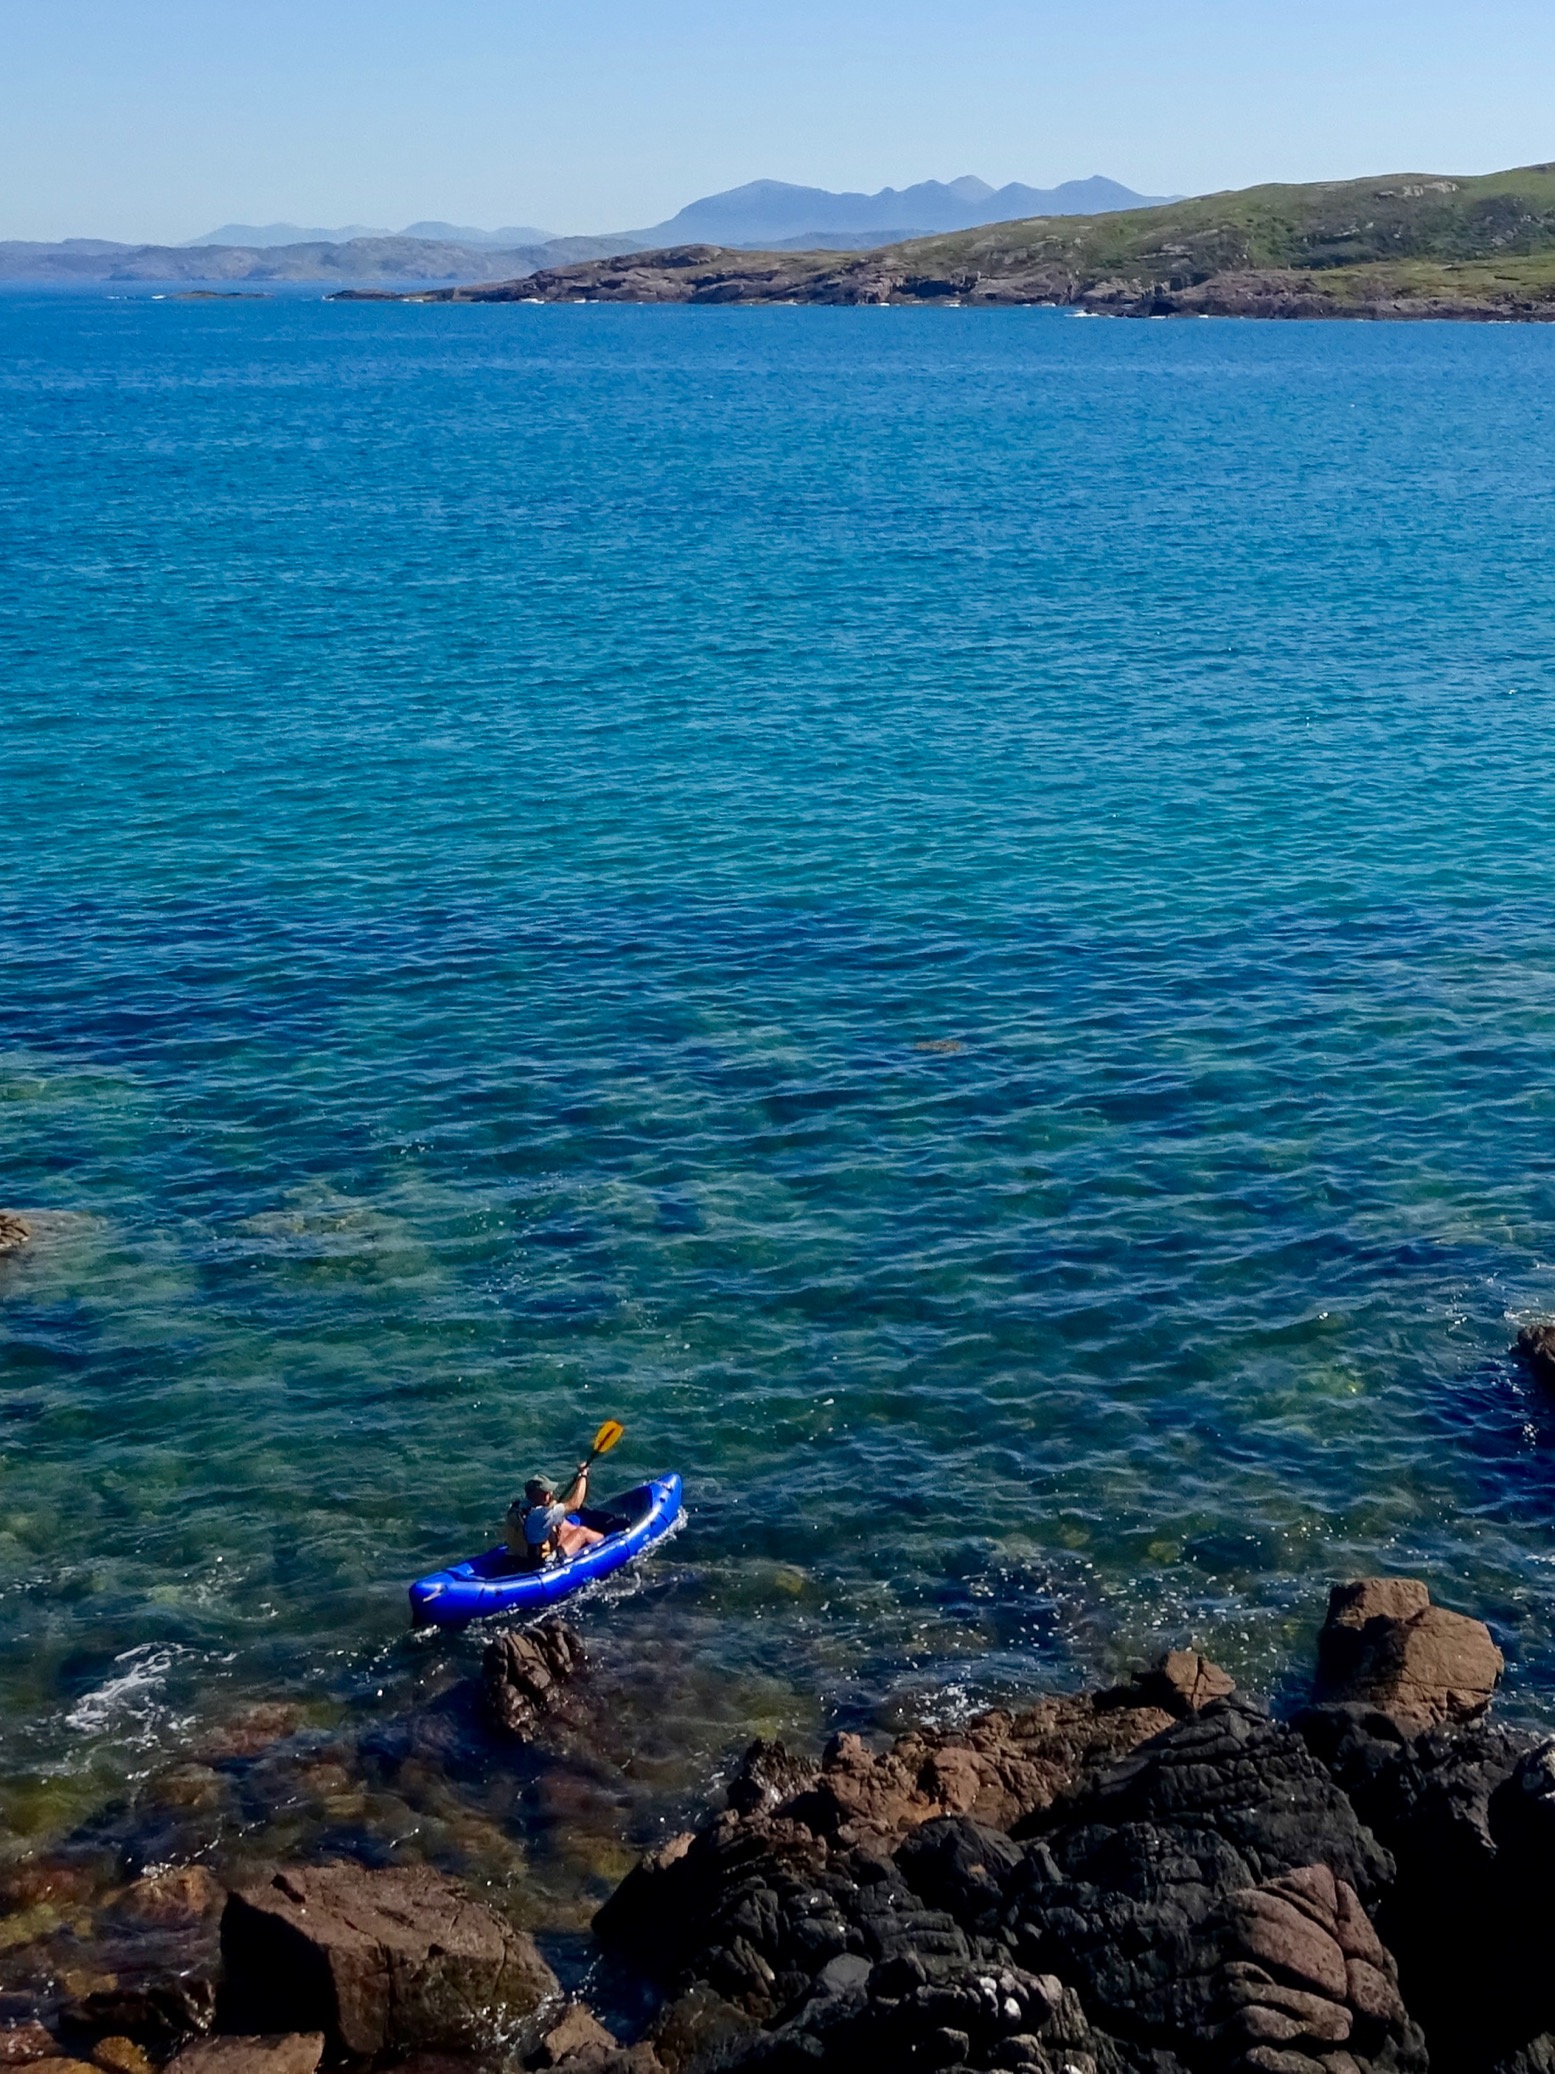
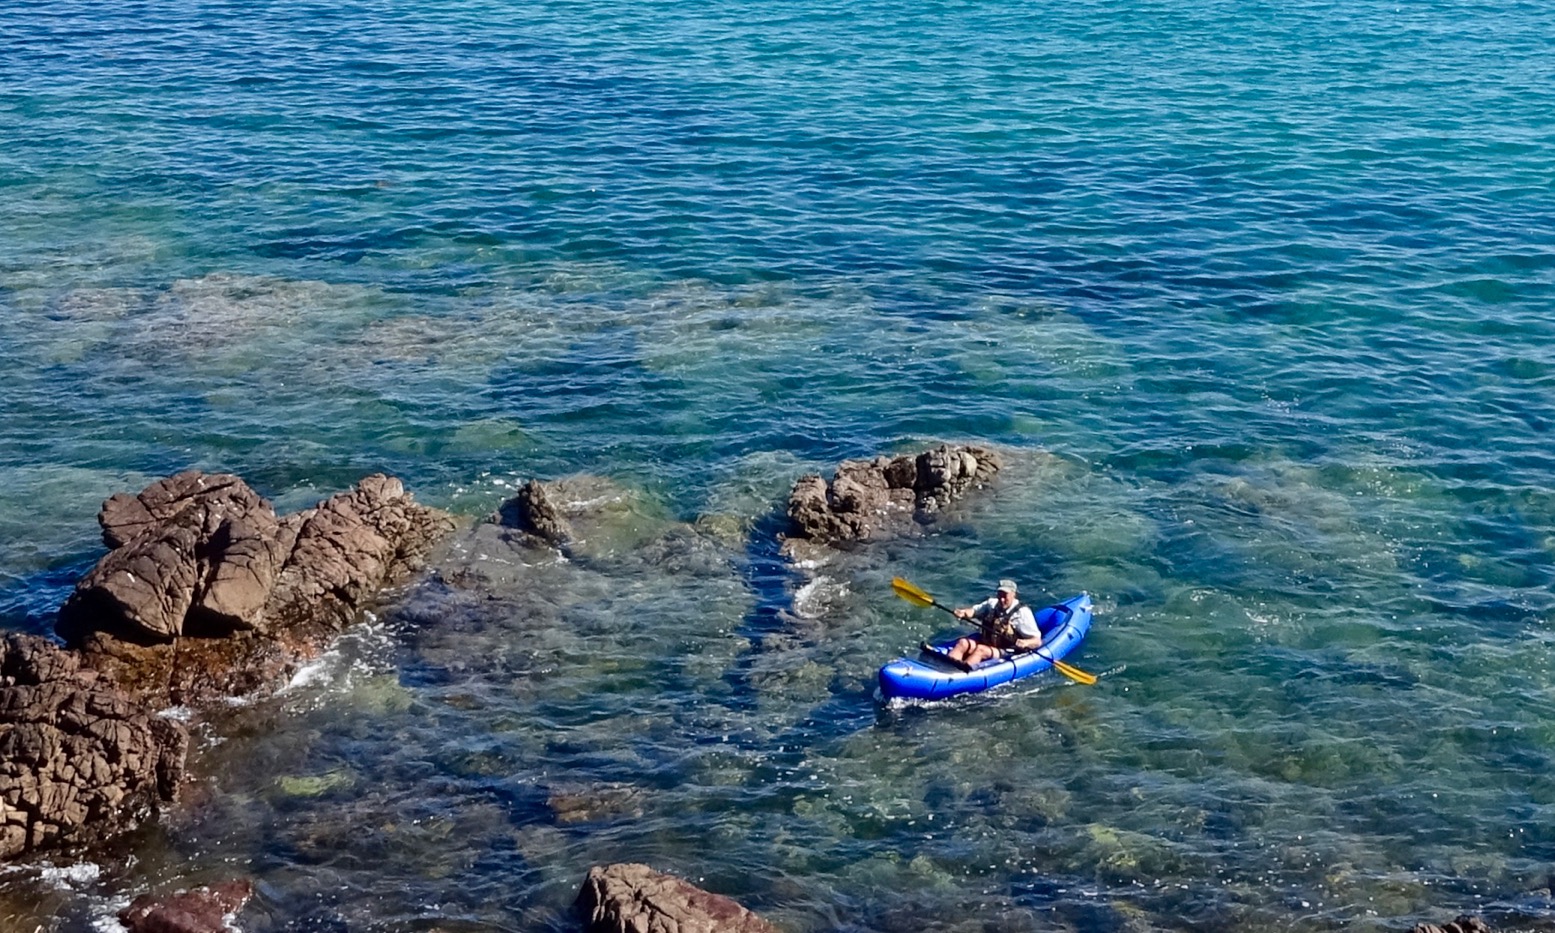
S1 at Sea There are no rivers near here bigger than a boulder-filled burn right now, so we took the S1 out along a rocky coast, along a slightly surfy beach, then rinsed it off with a quick sail down a freshwater loch. I don’t know if it’s the greater size, the kayak-like handling, the reduction of front-to-rear yawing or the elevated seat, but on a less than smooth sea I took to the S1 straight away. Despite being another single chamber packboat, it inspired confidence that I’d not necessarily experience in my smaller Alpacka Yak. I paddled it without the skeg and as expected, can’t say I missed it. The Nomad tracked very well and, compared to my Seawave kayak, doesn’t really produce enough glide per stroke to send it drastically off course, notwithstanding the small corrections you subconsciously make as you paddle along. I wonder if the lightness of the boat as well as its flat floor are what makes these intuitive micro-adjustments in tracking so effective. Who knows, but if attempting longer, more exposed sea crossings (I’m talking a mile or more, not Nova Scotia) a skeg must be a good idea to stop the boat getting pushed about from the sides, especially with a tail wind.
Without the skeg I appreciated the S1’s agility nudging in and out of the rocks as a light swell rolled in. Stability was very much not an issue; being jammed in more or less at the narrow 32-cm width with feet touching the distant bow and the well-designed backrest all helped. My hips are 40-cm wide but I didn’t really notice the squeeze as I would were I down on the floor. Up to a point you can brace with your shins which are so close together there wouldn’t be much play to pull on thigh braces (actually not so – they work OK; right).
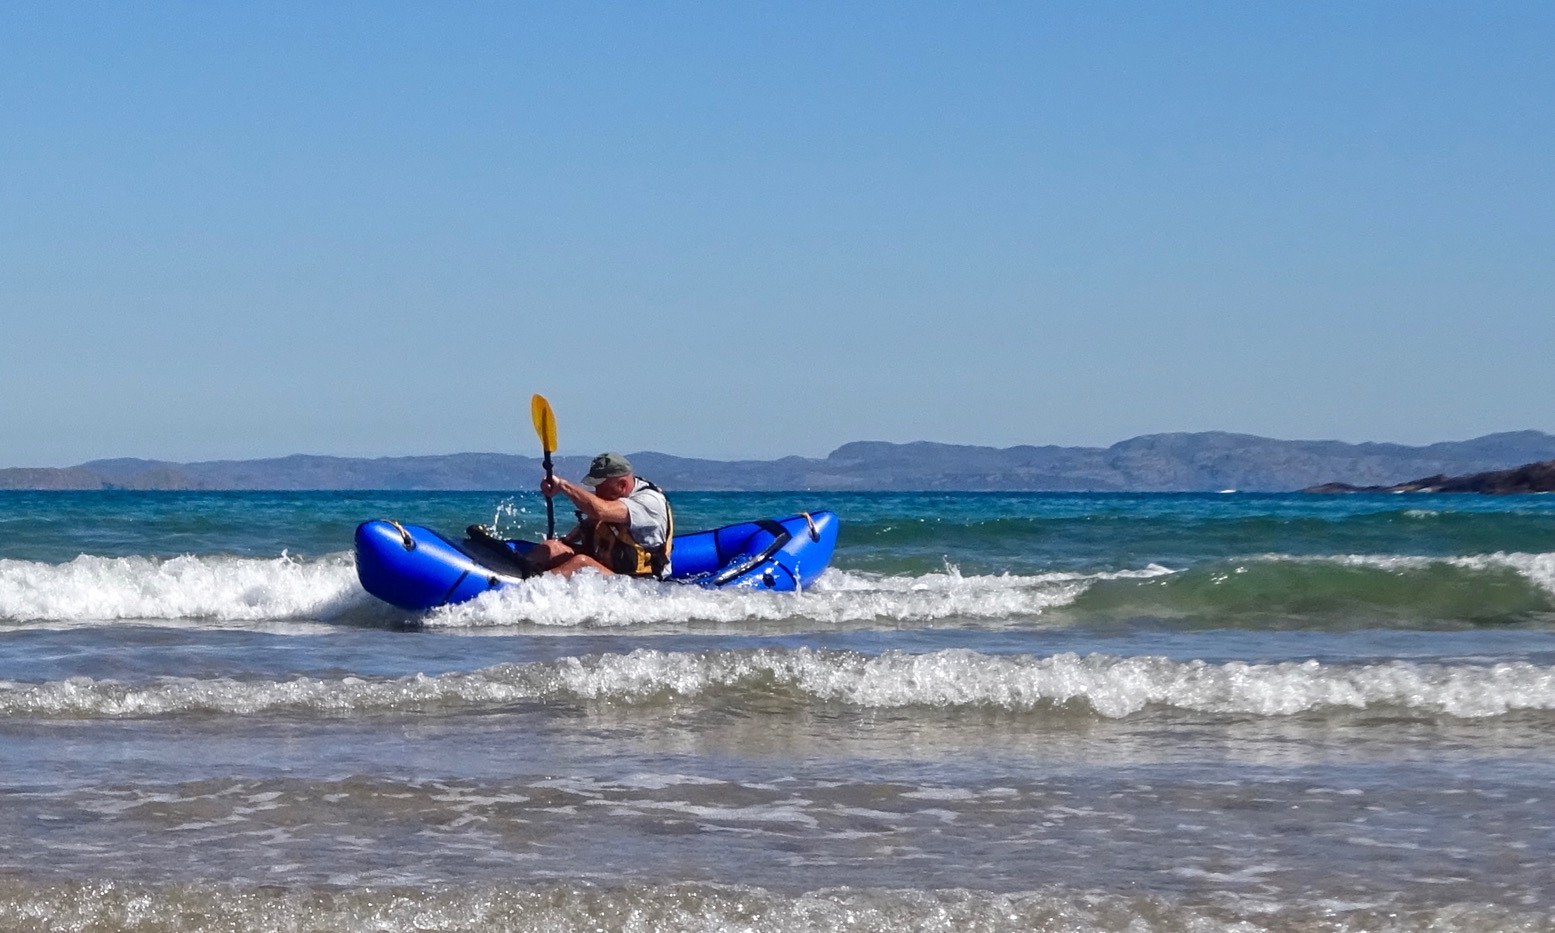
Over by the beach occasional foot-high waves were thundering on the shore; a chance to get knocked about a bit and have some fun. The stability made it easy to play around, with enough agility, clearance and central weight to spin quickly in the shallows before getting beached. Sure, some water came in, but on a warm day it’s a lot more fun playing with an open boat. To drain it just hop out, flip over, flip back and hop back in.
Even without the skeg, the central, kayak-like paddling position, as well as the length (Length-Weight Index 3.38 – about half that of a typical hardshell sea kayak), pretty much eliminates your typical packraft yawing. Not so sure about crossing over and circling the Summer Islands – it’s still a single-chamber craft – but I can see coast-hopping being enjoyable in the way it wouldn’t be in a regular solo packraft. On the way back from the beach against a quartering wind, the GPS recorded a brief high of 4.1mph paddling along normally.
We nipped over to freshwater Loch Ra which is now so low I had to wade a couple of hundred metres to find some depth. The skeg was now on but I can’t say I felt like it made much difference the way it would do on my IK. We went out on my Seawave a few weeks ago and the forgotten skeg was a right pain downwind. Upwind it’s barely necessary. I hooked up the WindPaddle to the yellow string handle. The breeze was blowing only about a 6-8mph but the Nomad picked it up and ran with it up to 3.5mph – as fast as I could have paddled. Again, I don’t think the skeg helped with the tracking as the boat was effectively being dragged along by its nose like a wet towel. Later in the afternoon I went back out onto the loch, paddling up briskly to the windward end where I let the sail take me back down. It wasn’t blowing enough to break any records but it’s nice to sit back and listen to the plink-plink of the water slapping under the bow. Mid-loch it felt like it was doing a good 4mph.
I’m really getting into this WindPaddle; I like the way you can steer up to 30° either side of the wind. On this boat it was easy to pull the sail down, cross it over once and tuck it under the knees, even with the deck on. There’s more Nomad WindPaddling here. Back at the bank I removed the sail and the skeg and went for a scoot upwind, across-wind and downwind, but still can’t say the boat was hard to track. Maybe with more of a backwind it would get out of shape, but by then the waves would briefly lift the skeg out on the crests and possibly push it around. It’s nice to have the option but also good to know the Nomad handles well enough without a skeg on loch and coast.
Fyi: if you think your boat also needs a skeg (directional fin), the Store sells an inexpensive skeg and glue-on patch from 420D floor fabric. There’s a template here.
Nomading it Up Good to know first impressions can be correct. I saw the promise in the Nomad S1 when I first clocked it on the Packrafting Store’s website. It is nearly the same length but more than half the weight and rolled-up volume of our old Gumotex Solar 300, but longer than the current 9-kilo Gumotex Twist 1 which, at just 2.6m has only half the buoyancy (ie: not much at all).
Trying it out on sea and surf-ish and loch, with sail and without skeg, I could seriously consider replacing my Yak with a Nomad (later, I did). I think there’s a potential for a skirt-free model and I’d even suggest the skeg could be an option too (P-Store make one of those too, now: S1 Light; right no skeg, deck, or braces and a 4-mount foam backrest). The main drawback is the €1299 price – that’s about £1150 or the same as a top-of-the-range, made-in-Europe Gumotex with a deck or rudder option and a signed certificate from Brzeslaw Gumotek. Longshore sell the less sophisticated EX280 double in what looks like the same fabric for half that price, and the Store themselves have albeit basic packrafts from €470. They say the deck costs a lot to make and fit but fabric and assembly in China can’t be that disparate. Of course the price you pay is right for a boat which gives you years of fun, as I have found. An Austrian Grabner double IK can cost over €3000, so can an Incept.
Alternatives to S1 As for alternatives there is really nothing like the Nomad at the moment, partly it’s because the extended stern idea has greatly improved the dynamics of many packrafts, positioning the paddler more centrally but adding length without interior space. Best choice would be Anfibio’s TXL+ which is now my main boat.
A Nomad or TXL may be on the weight limit of classic land-and-water packraft camping, but they certainly make travelling somewhere by plane or a train or on a pushbike much less of an effort than with even the lightest IK, while giving IK-like performance once on the water, be it a gnarly river, a windy loch or a rocky seashore. Kayakraft? Packayak? It’s definitely not a kakraft.
Thanks to the Anfibio Packrafting Store for supplying another test boat. More about it here.
“The Nomad is another co-development between Anfibio Packrafting and MRS (Micro Rafting System). Combined with MRS’s manufacturing expertise and fabric know-how, our years of packrafting experience helped refine the design of the final product. Serial production takes place in the Far East with manufacturing carried out in small, hand-built batches. All products have an extended three-year warranty.”
For a couple of years Longshore International was the first and only UK-based outlet to offer self-branded packrafts sourced from China. As far as I know, up till that time the only option to buy new packrafts in the UK has been the Alpacka outlet up in Aviemore.
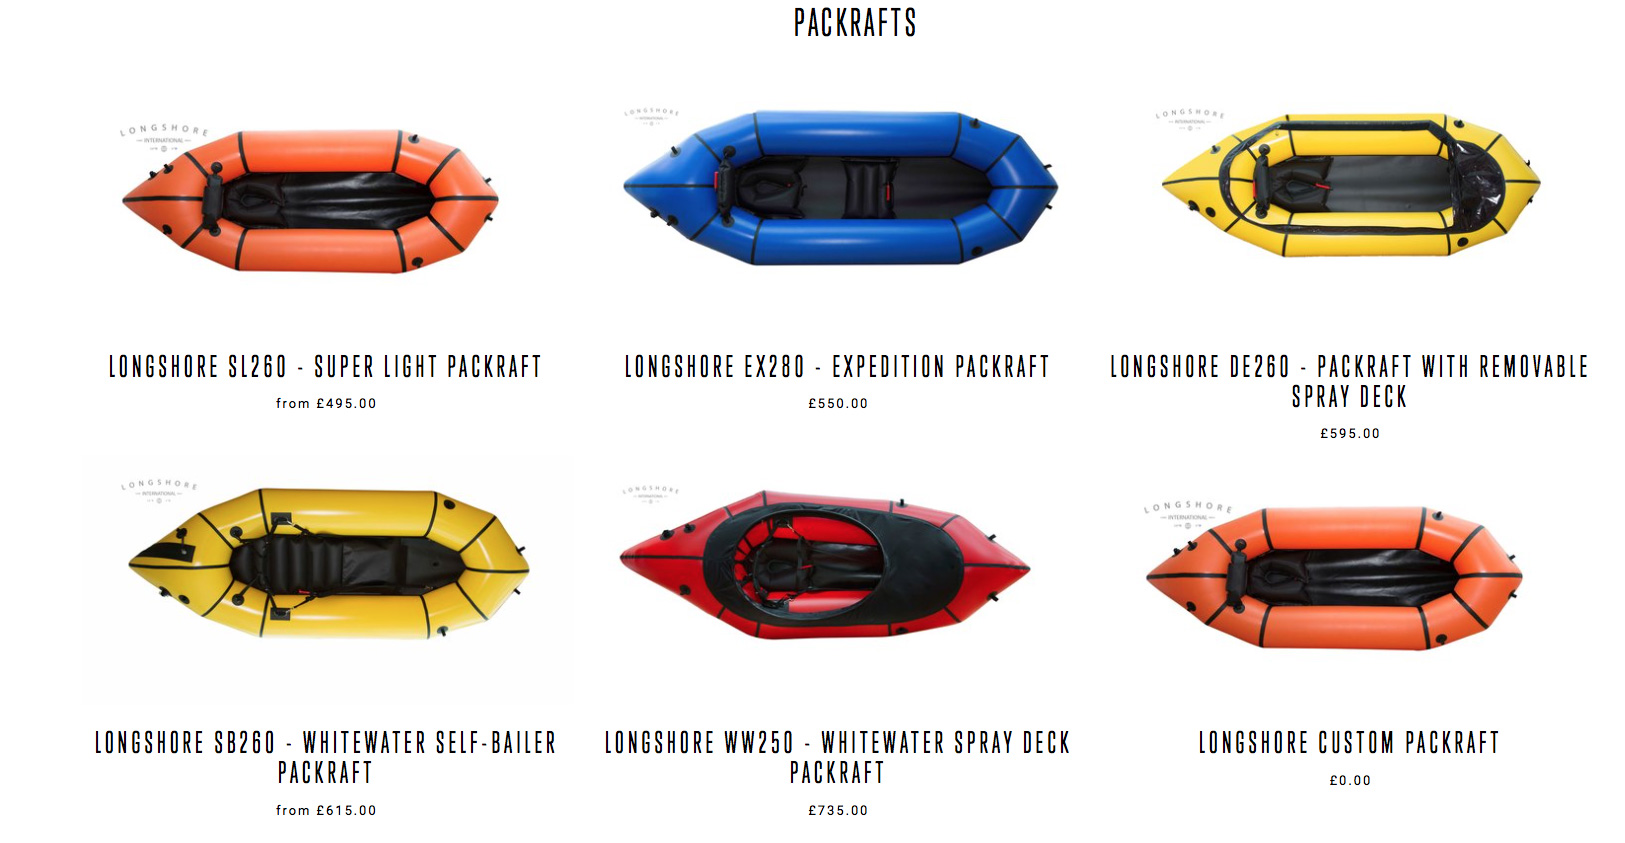
At the time of writing this in 2018 Longshore had five models (right) starting at £495 as well as a custom option, all laid out a particularly well-designed website which keeps it all simple.
Their boats all closely resemble Alpackas new and recent. No surprise there: the Alpacka cat is well and truly out of the bag. But as with bicycles or an axe, there are limited ways of doing packrafts. Without resorting to gimmicks, most of the genuinely worthwhile ideas and innovations have all been done. All that remains is for prices to drop to attract more than enthusiasts, or possibly lighter and stronger fabrics like Vectran. The boat we tested was the EX280 Expedition, pitched as a heavy hauler or a tandem.
Quite big, actually
What they said: The EX 280 is ideal for river, estuary or coastal cruising and can be paddled by either one or two people. It could also be used for fishing or as a tender to a small yacht. As our longest packraft it tracks well and is the fastest and easiest to paddle.
Out of the box The EX280 cost just £550. We chose to try it as a double rather than a load carrier as it’s something new to me and I imagine is also an attractive idea to other recreational paddlers; a compact, light boat for enjoying time on the water. At my request the EX we got differed from the website images in that it had a backrest fitted for the front paddler. I can’t see paddling being comfy upfront without one of these.
After weighing in at 4.6kg with strap and air bag, once unrolled I was pleased to see how long it looked; I’ve had IKs that are nearly as long. Solo or two-up, that ought to add up to steadier tracking which packrafts do well anyway, but also less bow yawing which can slow a packraft down. The EX uses the usual 210D nylon-core TPU for the hull, but on this boat it’s coated inside and out like the original Alpackas. A few years back Alpacka quietly slipped in single-sided hull fabric; it saves weight, price and bulk of course, but counterintuitively they also claimed single-sided was more tear resistant. Can’t see how unless the core fabric is different, but Longshore reckon a double-coated hull is stiffer – and longitudinal rigidity becomes important once a low-pressure inflatable boat (packraft or IK) exceeds a certain length. I know from my IKs that a stiff PVC like my old Incept can help make a boat more rigid compared to more pliable synthetic rubbers like Nitrilon or Hypalon. To fill the EX up took about 18 airbag-fulls.
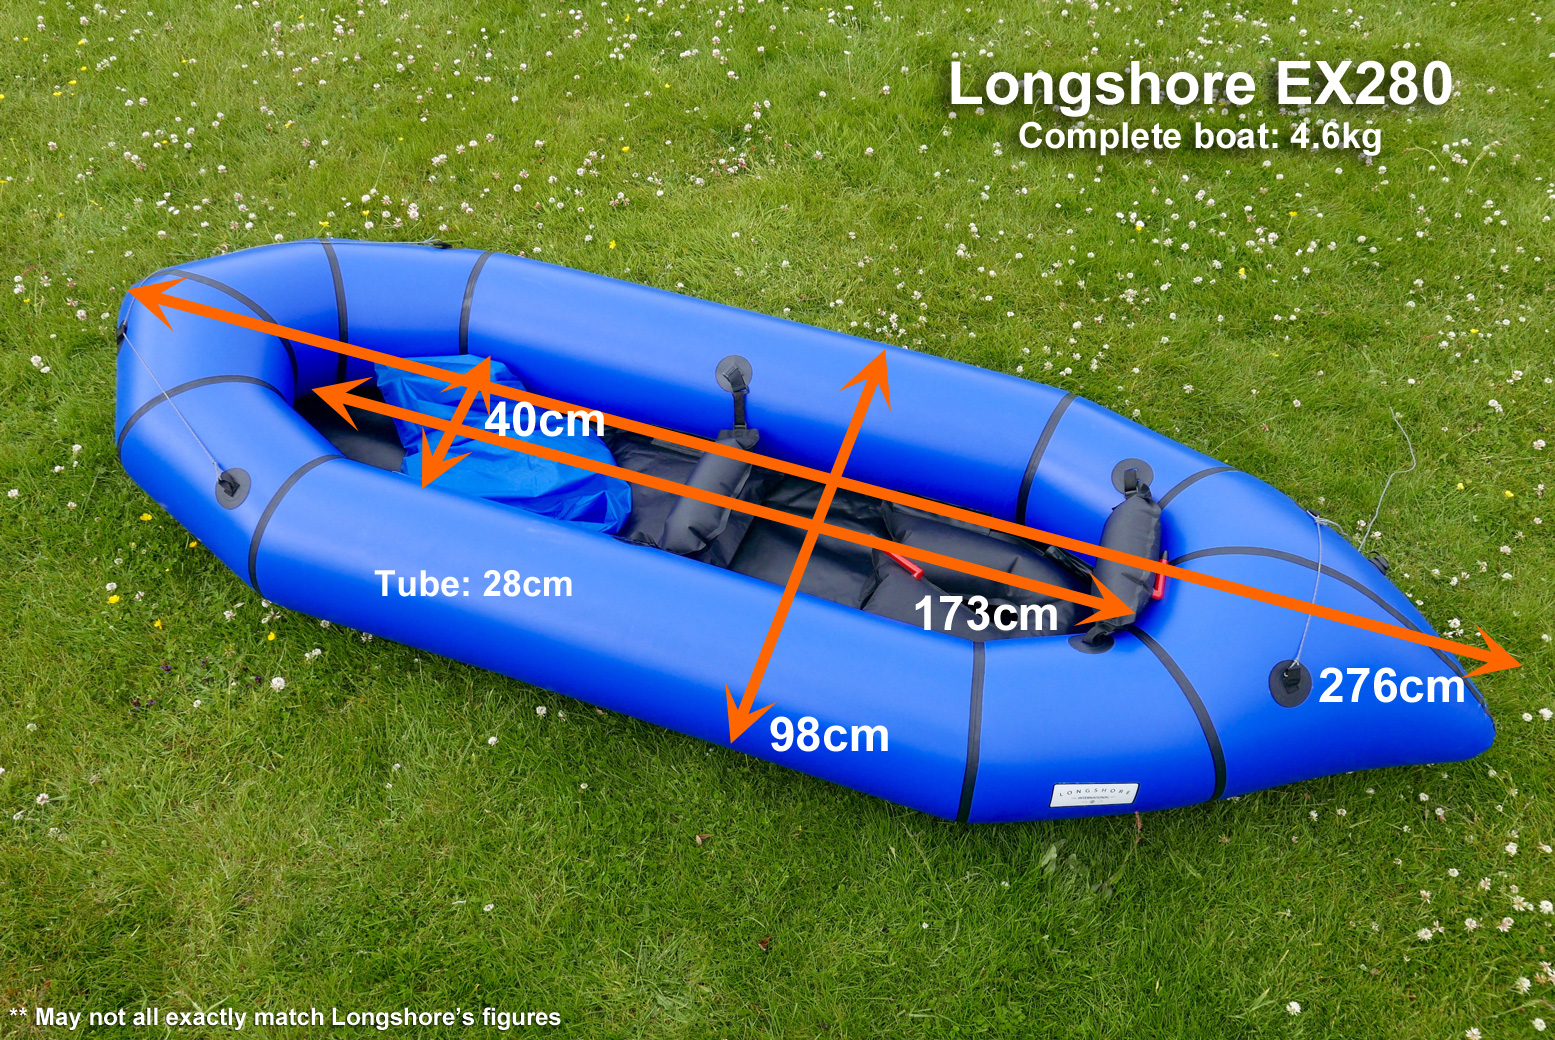
Side tubes are 28cm and parallel, as are most of their models. The consistent 40-cm interior width makes the EX nearly a metre wide which for smaller persons or those sat low can interfere with paddling. It’s also a roomy 173cm long inside with the whole boat clocking in at 276cm in length. At that length two adult paddlers need to cross their legs, but hopefully not so much that knees get in the way of paddling.
The seat bases are a horseshoe at the back and a flat pad in the middle, both with solid-looking twist-lock inflation nozzles. But they imitate Alpacka’s overkill lace-up attachment system which makes removal or adjustment a faff. There’s got to be a better way of doing it and, at least at the back, the Anfibio Alpha XC we tried the other week had it – a simple strap and buckle; easy to lift, adjust or remove the seat for cleaning and drying (or sitting on at camp). On my Yak seat I’ve eliminated much of the lacing and fitted reusable zip tie. If the EX was my boat I’d work out something similarly for the forward seat which wants to be easily adjustable or removable. The rear inflatable backrest aids comfort a bit, and the front is better than nothing although an SoT-style backpad (as on my Seawave IK) would provide better support. Tim from Longshore says he’s getting some in.
Seats for long packrafts With a regular short packraft it makes sense to sit and lean against the back. With the now usual extended sterns the boat sits level enough and you stretch your legs out forward, braced off the bow with a slight knee bend. Some whitewater singles do have a back brace to position you more centrally off the back to improve agility and reduce the chance of bandersnatching (backflips) when coming out of rapids. Putting a second paddler in a packraft loses the important solid backrest. A back band helps, but unlike an IK, the non-inflatable floor can’t help sagging a few inches in the middle, lowering the critical bum-to-heel level to zero or even less. Pictured left: the bum is on a seat so probably just a little higher than the heels. For comfort and an efficient paddling stroke, you want your bum higher than the heels; just a couple of inches makes all the difference, especially if wearing a lot of cold-weather clobber. Added height also helps get the paddle over the inherent width of a packraft; away fron gnarly whitewater packrafts have stability to spare. As usual, those micro-dosing dudes at Alpacka worked it out by inventing the seat tube for the discontinued Gnu which you straddled like a horse or a jet-ski, knees down. The tube gets you higher and spreads the load across the floor, but depending on the elevation you do wonder how comfy that will be all day. It gives a good ‘forward attack’ position for racing but you lose on easy floor storage for touring which is why they invented the TiZip cargo storage solution for inside seat tube or the hull around the same time. The other way round it is to have a seat or even a plain net suspended from four points on the side tubes which support most of your spinal weight, virtually eliminating floor sag. Again you lose on backresting, but canoers have managed like this for years; the higher your bum the less a backrest is needed as the paddling action pulls your weight forward. Alpacka had three types of seats for the Gnu: the full-length straddle tube; shorter individual kneel seats and an inflatable suspension bench seat – all pictured right and it’s possible the replacement model will be similar. All are also suited to canoe style paddling and all of these ideas could be adapted or experimented with on a double like the EX280.
The EX features a moderately extended stern common to most packrafts these days. When paddled solo at the back it adds buoyancy where it’s needed, trimming the boat, while solo or two-up acting as a skeg and increasing the waterline, helping tracking and reducing bow yawing which all helps with speed. Here you’ll find the simple but effective Boston valve – see this for how they work. I wish my Yak had one of those. There are also two tape attachment loops with another four at the front. I didn’t use them but it looked like the foremost front ones could be a little higher up the hull sides and the rear ones back a bit behind the taped seam. That would give a broad platform for a pushbike which this big boat could easily handle.
At 840D double-coated, the chunky floor does not spare the grams either and has a generous, 4-inch glued overlap with the hull tubes. The tidiness of all the taped heat-welded seams matches my own Yak which you’d assume is a standard to match. Either packrafts are dead easy to assemble once you have a system and training, or factories have worked out how to reliably manufacture them without any distortions which I’m sure I’d end up with if they handed me some scissors and a heat gun.
On the water Too much work meant plans for an overnight trip got shelved, but what I was more interested in was how it handled as a double. We nipped out one evening to try the EX for size. I assumed that my 92kgs would be best sat at the back but with the standard position of the laced-in front seat there was more room for me up front. The much lighter and one-foot shorter g-friend snagged the proper back support at the stern, but looking at photos of both of paddling it (below), the boat floated perfectly level with this arrangement which must be right. Up front my crossed ankles tucked under the bow comfortably enough but once inflated, the back rest felt squidgy and unsupportive. When deflated it made more room and less squidge but put me off the back edge of the seat pad which, as said, was too much hassle to move back.
I also realised that with my weight pressing down the centre of the boat, the floor sagged so that even after fully inflating the ~4-inch thick seat, I was still probably sitting level with my heels – not really a sustainable paddling posture. Sat low also made it initially awkward to clear the near metre-wide sides with my 230-cm paddle until I adjusted the technique. At the back the g-friend with a 220-cm stick was also not always getting a clean draw. Depending on your height, I’d say a 220-cm paddle would be a minimum for this wide boat, but see below. It didn’t take long before the pool-toy hoon in me wanted to see ‘what’ll it do’ [mister]. A couple of flat-out bursts recorded a brief high of 4.3mph, with a much more sustainable 3–3.5mph in the near flat calm conditions. Even two-up, in a paddle boat max speed is determined by the hull shape which soon hits a wall. I snatched a 4.2mph paddling alone sat in the middle. But of course with the shared effort, two of you can sustain cruising for longer or with less cumulative fatigue. We’re not much faster in my twice-as-long Seawave, though the paddling effort is much less as that thing glides like no packraft ever will. As expected, the length of the EX allied with the action of two paddlers pretty much eliminated any distracting yawing at the bow common to packrafts paddled solo and without extended sterns. Tracking (maintaining a heading) was easiest with me adding steering input from the front, though I think it’s more normally done by the rear paddler.
We both briefly tried paddling solo in both positions. You’d expect less yawing with me sat in the middle of the boat and I suppose that was the case, but it sure was nice to stretch out for a change. This long boat won’t be so manoeuvrable in white water; shorter, more agile packrafts are available for that, with decks or even self-bailing floor.
Next evening we set off for the ox-blood red sandstone cliffs on Rubha Dunan below Achiltibuie township.
All was calm but I took the sail on the off-chance and on getting in after a damn good tempering, I slotted it under my seatpad for more support. Good idea! It raised me a couple of inches into an efficient paddling posture and the whole boat felt transformed. I’d topped up the air with all I had and have to say on the water the EX was surprisingly stiff for its length which must be helped by the relatively thick fabric. Despite being nearly 3 metres long this is no soggy slackraft.
The warm weather had brought in swathes of dying jelly fish which was a reminder we were in a single-chambered boat about a millimetre thick. If a seal mistook it for a tasty blue sea-pastille all we’d have is our pfds and the seat pieces. It’s all in the mind of course, but out on the water in an untried packraft you can feel vulnerable so I kept close to the shore. There’s more to look at here anyway, but things like a thick floor and double-sided hull were reassuring.
We found ourselves rounding the point sooner than expected so decided to paddle back the way we came and on along the beach towards the hostel, before hopping out, rolling up it and walking back to the car.
The EX280 is a spacious solo boat with heaps of room for easily stashing gear accessibly on the floor, so improving visibility. And it has buoyancy to spare if you also want to lash a bike across the bow without jabbing your shin on the pedals or oily chainrings. (I felt rather cramped bikerafting in my Yak the one time). Solo, I’d consider setting up a proper seat midway between the two as they are now to centralise my weight more like a kayak; if you have the room why not use it
As a double it makes a fun rec boat that’s surprisingly nippy for a packraft, helped by negligible yawing. The width means you want to pump those seats right up and consider a floor pad below to add height for adequate paddle clearance over the sides. At nearly a metre wide, there is stability to spare. And for day-long use the front paddler would benefit from the better support of a back band, as mentioned above.
Alternatives include Alpacka’s Explorer 42 available in the UK from £995 but 23cm shorter inside, their interesting Gnu (from £1180 but discontinued in 2018) with a longitudinal seat tube for two to straddle, or a solo canoe seat bench, both giving good height to get over the 101.5-cm width. Then at the Packrafting Store in Germany from €800 to €1270 you have the very light Sigma TX (160cm internal); MRS Adventure X2 (170cm) and the Kokopelli Twain (225cm) and Barracuda R2 (215cm); these later two look like they have enough room to uncross the legs.
So at £550 with two-week returns and a year’s warranty on workmanship, the Longshore EX280 is a well-made and robust packraft which is amazingly good value and available in the UK. It’s suited to two paddlers with an average height of 5′ 6″, or solo paddlers with heavier payloads who don’t mind carrying nearly 2kg over the absolute lightest alternatives.
Thanks to Tim at Longshore for supplying the test boat.
See also… The intriguing new 5-kilo, hybrid decked, 2.9-metre MRSNomad S1 ‘pakayakraft’. Kakraft or snackraft? Click and learn.
The Anfibio Packrafting Store in Germany was one of the first Alpacka dealers in Europe, but now sells other brands of packrafts from China, Russia and the US. It’s probably the only ‘packrafting supermarket’ of its kind and in 2015 we group tested a selection of their boats.
They also produce their own Anfibio branded packrafting gear, like the dry suit and inflatable jacket I use myself; the latter has become my go-to ‘pfd’ for tame paddles. In cooperation with MRS in China whose boats they were the first to import into Europe and whose design they’ve influenced, they’ve now added three lightweight Anfibio packrafts to their lineup of over a dozen boats: the Sigma TX double; Delta MX single and smallest and lightest Alpha XC which we tested here. I knew the XC would be too small for me so that job went to my g-friend who’s over a foot shorter and 40+ kilos lighter. It costs just €470 plus one type of seat or another.
Alpha symmetry In a bid to keep costs down and make them the lightest in their class, Anfibios are all symmetrical, with identical bows and sterns and parallel sides. Unless it’s like their double-elongated Barracuda R2, a conventionally short stern can make a boat back-heavy without a balancing load over the bow, as right. Even my original, first-generation green Alpacka Llama had a fattened stern to compensate for this.
This is why Alpacka’s now much-copied elongated stern from 2011 (my 2014 Yak, left) was such a clever innovation. It trimmed (‘levelled’) the boat by effectively positioning the paddler more centrally, and also acted as a skeg to further reduce the side-to-side yawing of the bow which short, wide packrafts are prone to. (It’s important to recognise this yawing is just an annoying left and right ‘nodding’ of the bow; people often confuse it with tracking (‘steering’ or going where you point it) which packrafts do better than some kayaks.
Weights and measures ** After verifying the kitchen scales (1000ml = 1000g: √) the Alpha weighed in at 1822g out of the box; the bare boat was 1422g. Interestingly, at 120cm the interior length is actually a bit more than my Alpacka Yak. At 185cm tall, I can sit in the Alpha with backrest deflated and with the same comfortable knee-bend as my Yak. Meanwhile, with legs flat on the floor, g-friend has some 15cm of foot room to spare up front.
Anfibio have missed a trick here. Assuming I’m at the upper level of average adult height and weight, and geef is at the other end, I think Anfibio could offer another model 10 or even 20cm shorter, more like Alpacka’s ultrabasic Scout (left); let’s call it an Omega XS. There are many, many packrafts for people of my height or more, but very few for 5-footers if you take the view as I do, that in a packraft you want to fit snugly, feet pressing against the bow with knees slightly bent. Being shorter would make the ‘Omega’ at least 200g lighter and enable that snug fitting for the majority of shorter-than-me persons. Like a shoe that fits right, that means better control, comfort and efficiency and is one reason I choose to replace my original Llama with the shorter Yak.
Too many pies?
Perhaps there are buoyancy issues in such a short boat which means tubes need to be fatter, speed suffers and you effectively end up in a slackraft. You don’t want that. The 25-cm side tubes are the slimmest of the Store’s dozen-plus boats, but we both found the 32cm interior width, a bit tight for comfort. Slimmer hipped individuals will feel right at home. All this doubtless carefully juggled volume, length and width adds up to a recommended payload rating of just 110kg. That’s plenty for most folks who are lighter than me. The next-size-up Anfibio Delta MX weighs only another 225g but is rated at a massive 180kg.
**May not all match Anfibio’s figures
The hull is made from the 210D, single-coated TPU, sewn and heat welded (no glue). Most packrafts are made from this wonder fabric. I think the slight translucence of the yellow Alpha makes it appear thinner than my Alpacka Yak, but feeling the fabrics up, they’re very similar. You’ll notice that, unusually, the taped join of the tubes is around the perimeter of the boat, not hidden under where the floor attaches to the hull.
The floor is smooth, double-coated 420D TPU and feels tough without making the boat bulky when rolled up. The width of the heat-welding attaching it to the hull is little more than a centimetre in places. Perhaps putting the side tube join elsewhere eliminates a weak spot at the floor and reduces the need for excessive overlap, as with the 8cm on my Yak or the Longshore. As it is, we’re assured that TPU hull fabric will tear before a properly heat-welded join separates, but as with any packraft, I’d be careful putting too much pressure on the floor. “Get in bum first!” I had to remind my tester.
Fittings and finish The Alpha comes with 5 taped loops with a pleasing textured Cordura finish to the patches. As other reviewers and the commenter below have mentioned, the three on the bow look too close together to securely lash down a load, far less a bike; the ‘triangle’ is too small and positioned over the domed bow. I also feel the fitting points are the wrong way round: you want the single central point at the front and the other two behind on the next panel back. Glue two here and you’ll have a stable, 4-point lashing base with another tab to spare. I don’t really see the value of attachment points on the already over-loaded stern of a packraft, especially when it’s not elongated. I’d sooner load stuff centrally, under my knees and have a single loop here to hang shoes off or for towing.
The inflation valve follows MRS’ innovation in fitting a Boston valve as commonly found on cheap Slackrafts (about the only useful thing on them). For a short, low-pressure boat like a packraft (as opposed to an IK) Boston valves are ideal. A Boston valve has two caps; the bigger one opens the main port for fast inflation / deflation. On top of that is a smaller square cap; unscrew that to access the one-way mushroom/flap valve and top-up the boat by mouth. Both caps also have nifty swivelling attachment collars so you can’t lose them while also making the caps easy to turn. The whole set-up is so much better than my old-Alpacka style dump valve which you need to secure with a line which gets in the way as you try and quickly screw it up. It also eliminates the separate twist-lock elbow valve which never felt that solid and being small bore, are harder to blow through and get a good fill, unlike the 2cm-wide Boston. The supplied air inflation bag (see video here) is a denier or two up on my flimsy Yak one which I often think is on the verge of ripping apart. I also like the fact that it’s a bright dayglo green; you never know when you might need a signalling device.
The seat resembles an old-style Alpacka base with backrest, except that it cleverly attaches to the back of the floor with a single adjustable strap and buckle. Simple and effective; that is all that is needed to keep the light seat in place compared to my Yak’s OTT arrangement. You also suspect that the length of this strap may have been designed to enable a shorter paddler to position the seat a little forward so as to shove a bag behind it (below). Doing this centralises their weight and helps level off the trim to reduce yawing. We tried this idea on the water – see below.
One thing I recall of a similar seat on my old Llama was the annoyance of the backrest flopping forward every time I got in (an elastic fixed that). Taller Alpha XC paddlers: consider saving €34 by ordering the plain seat base and simply lean on the back of the boat instead of using the €59 backrest version. That’s what I did briefly paddling the Alpha and it felt fine.
As for build quality. With only my 2014 Alpacka to compare, all the taping and fitments are as neatly applied. The lack of tape over the floor panel join exposes a slightly uneven cut in places and, as mentioned, the welded band interface looked rather slim. As a result of all this weight saving the Store rates the Alpha’s durability accordingly, but it’s unlikely they’ve gone too far as Alpacka may have done with their short-lived Ghost. Yes but what about the strap, you ask? Well that weighs in at 22g but is a good half-a-metre longer than it needs to be to cinch the rolled-up bundle (below), so some weight could be saved by snipping it.
On the water With light winds forecast, we picked an easy circuit with about 4km of loch paddling and a couple of short portages where we could carry the inflated boats. We often paddle together in the Seawave but I’m not sure if the g-friend has paddled a packraft since a quick go in my Llama back in 2010. So this would be a good test on how a beginner handled the Alpha.
Once the Alpha was inflated, geef went out for a spin to get a feel for the boat, then came back and went out again with my empty Chattooga dry bag behind the seat back (this bag seals 100% against air leakage – a true ‘dry bag’). No surprise: she yawed less and felt more in control sat more centrally.
With another bag of stuff under her knees the boat sat almost level. Watching her paddle she still looked a bit low in the boat which interfered with a good paddling technique, so we pulled over and pumped the seat right up and I advised trying a high-angle paddling to clear the sides and get a fuller draw from the blades. As it is, on flat water no packraft is actually that satisfying to paddle – unlike a slick kayak there is no glide. The fun lies in the places they can reach and the ease of getting them there.
We emerged onto the west end of Sionascaig loch (above) surrounded by the dramatic mountains of the Assynt, and turned south for the sluice. Being thorough, we tried sat right back without the bag one more time, but got the same high-bow yawing. Even with the bag I still observed some yawing, but as it was intermittent it could be down to my test pilot’s as yet unrefined packraft paddling knack, just as it can be trying to get a hardshell to go straight the first few times. Yawing is not tracking – this boat will go where you point it, but you’d imagine pivoting is inefficient. A bit like moving off from standstill on a bicycle, my Yak also yaws wildly as I set off, but settles down once there’s some directional momentum, nodding maybe six inches left and right.
We clambered around the sluice (above) and sat down on a tiny beach below for a snack, then I went out for a quick spin in the Alpha. At nearly twice the weight and of course without the dry bag behind, the boat was back heavy and very easy to spin. A light breeze was now blowing little wavelettes up the loch and powering on too hard, it shipped a little water over the back sides.
I reached back and felt the horizontal tape line was below the water, but the Alpha was nowhere near as edgy as the Supai Flatwater Canyon II in which I dared not even breath in too fast. Yes it yawed more than my Yak but long, smooth strokes minimise that. I’d be more concerned in less calm water, but then I’m clearly on the weight limit for the Alpha. I probably could have done this whole circuit in it but it would have not conducive to relaxation.
Through the shallow narrows we passed, arriving at the next ‘sluice’ at the end of the loch. It’s actually a runable two-foot drop if you take it fast. Like last time I came here, I wondered about trying it for fun, but chickened out. Beyond the pool below it becomes steep, narrow burn dropping to the next loch. So we tramped through the springy heather made crisp by over a fortnight without rain. We chucked the boats over a nasty wire fence then set off across the last little loch and the short walk back to the car.
Bravo Alpha Being a large person, the benefits of saving a kilo or two add up to not much in my overall packrafting mass. Therefore I don’t resent the weight of my Yak for its benefits in durability and functionality. But not everyone thinks like me. Adventure racers, canyoneers and something called ‘fast-packers’ focused on absolute minimal weights while undertaking short or easy crossings will love this boat. So too might a travelling cyclist or a light person who just wants a handy, inexpensive packraft for the odd evening splashabout rather than an expedition-ready heavy hauler. The yawing is something you can minimise with good technique or balance-out with frontal loads or weight shifting, as we did. For the price of just €470 + seat, this must be the cheapest decent packraft around. No one likes excess weight but I know I’d feel more confident paddling a proper TPU packraft like the Alpha over Supai’s amazingly light but unnervingly skimpy alternatives The extra 700 grams I can save in peace of mind.