After paddling around in the S1 I can see some ways of improving it. So I did.
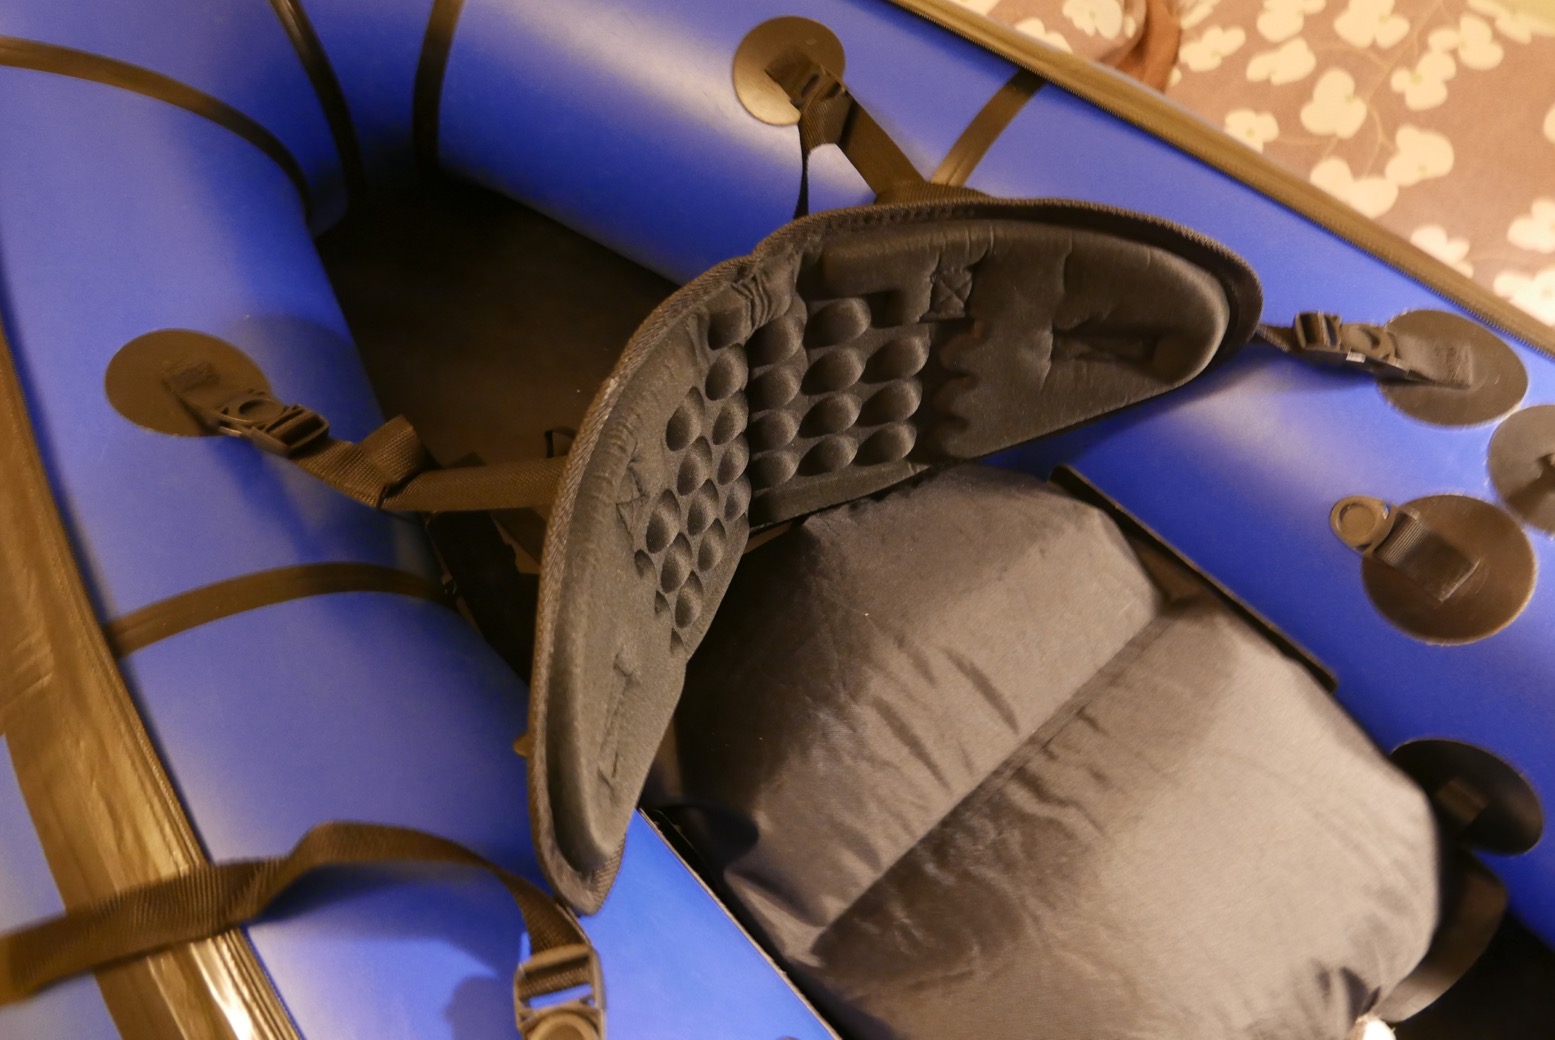
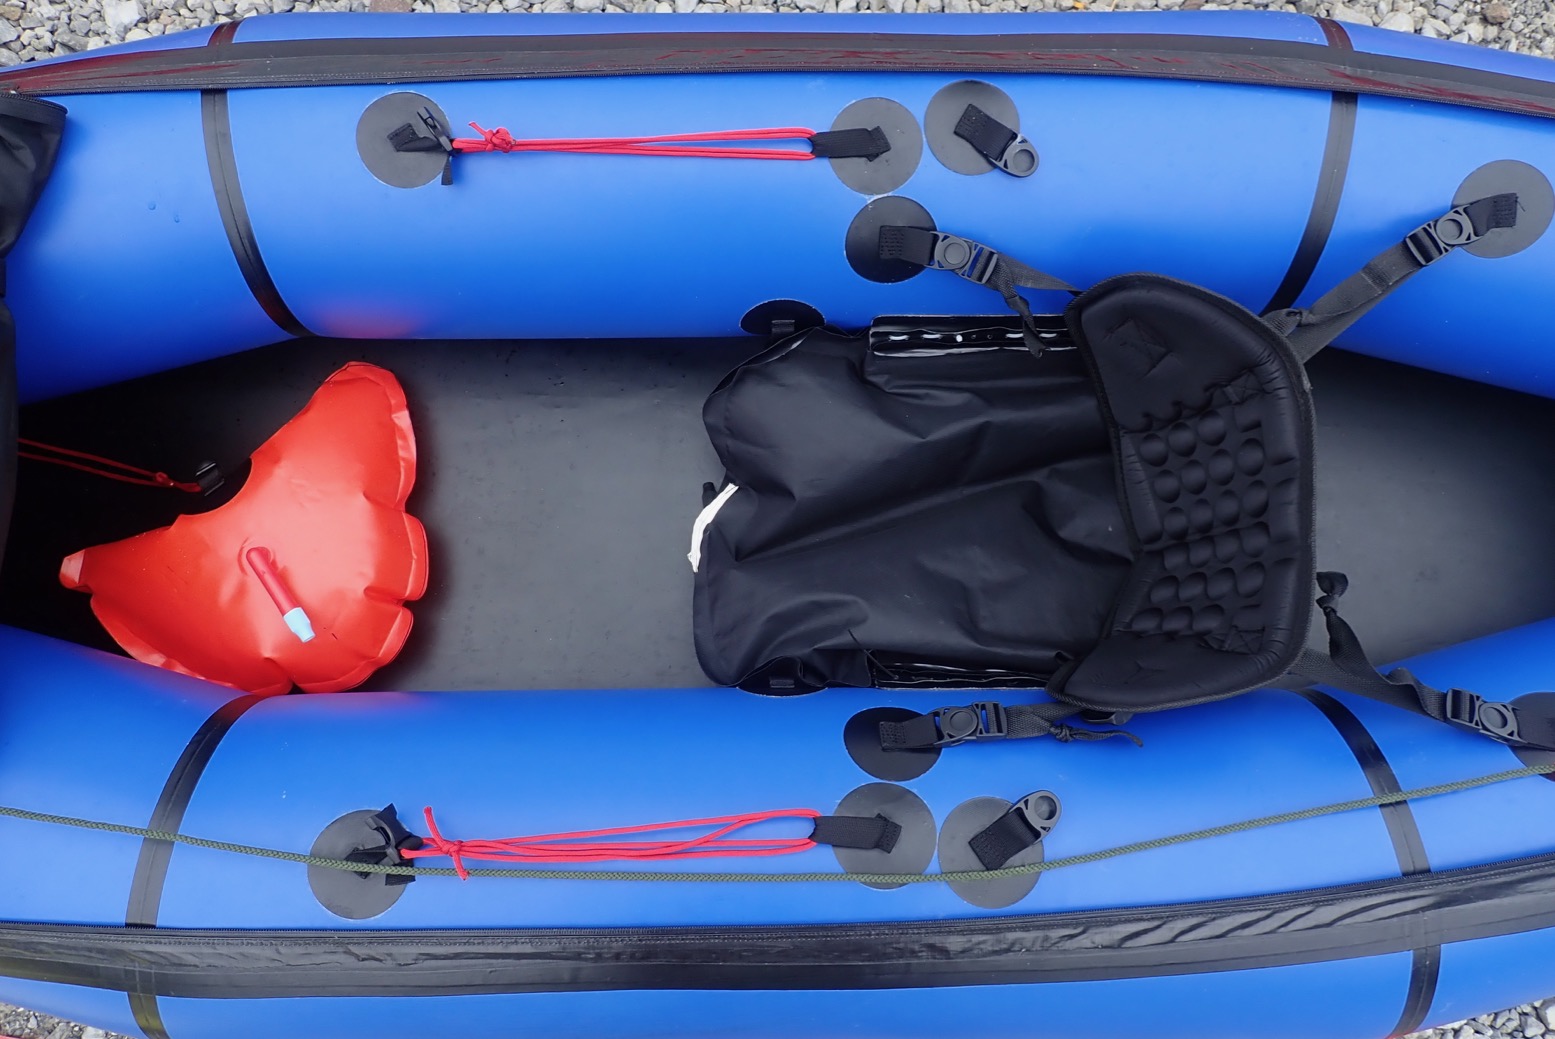
Replace the inflatable backrest with a plain foam backrest. The backrest which came with the boat had already been repaired twice and, unless it’s at the back of a packraft, who needs an inflatable backrest anyway? It’s more about support than weight-bearing comfort, like a seat base. As on my Seawave, a foam backrest (£12 on eBay; 200g) does the job and is one less thing to blow up. The press-pivot clips from the old backrest fitted on easily, and even though it only has 4 straps, not 6, it works fine. I trimmed about a foot of excess from each strap.
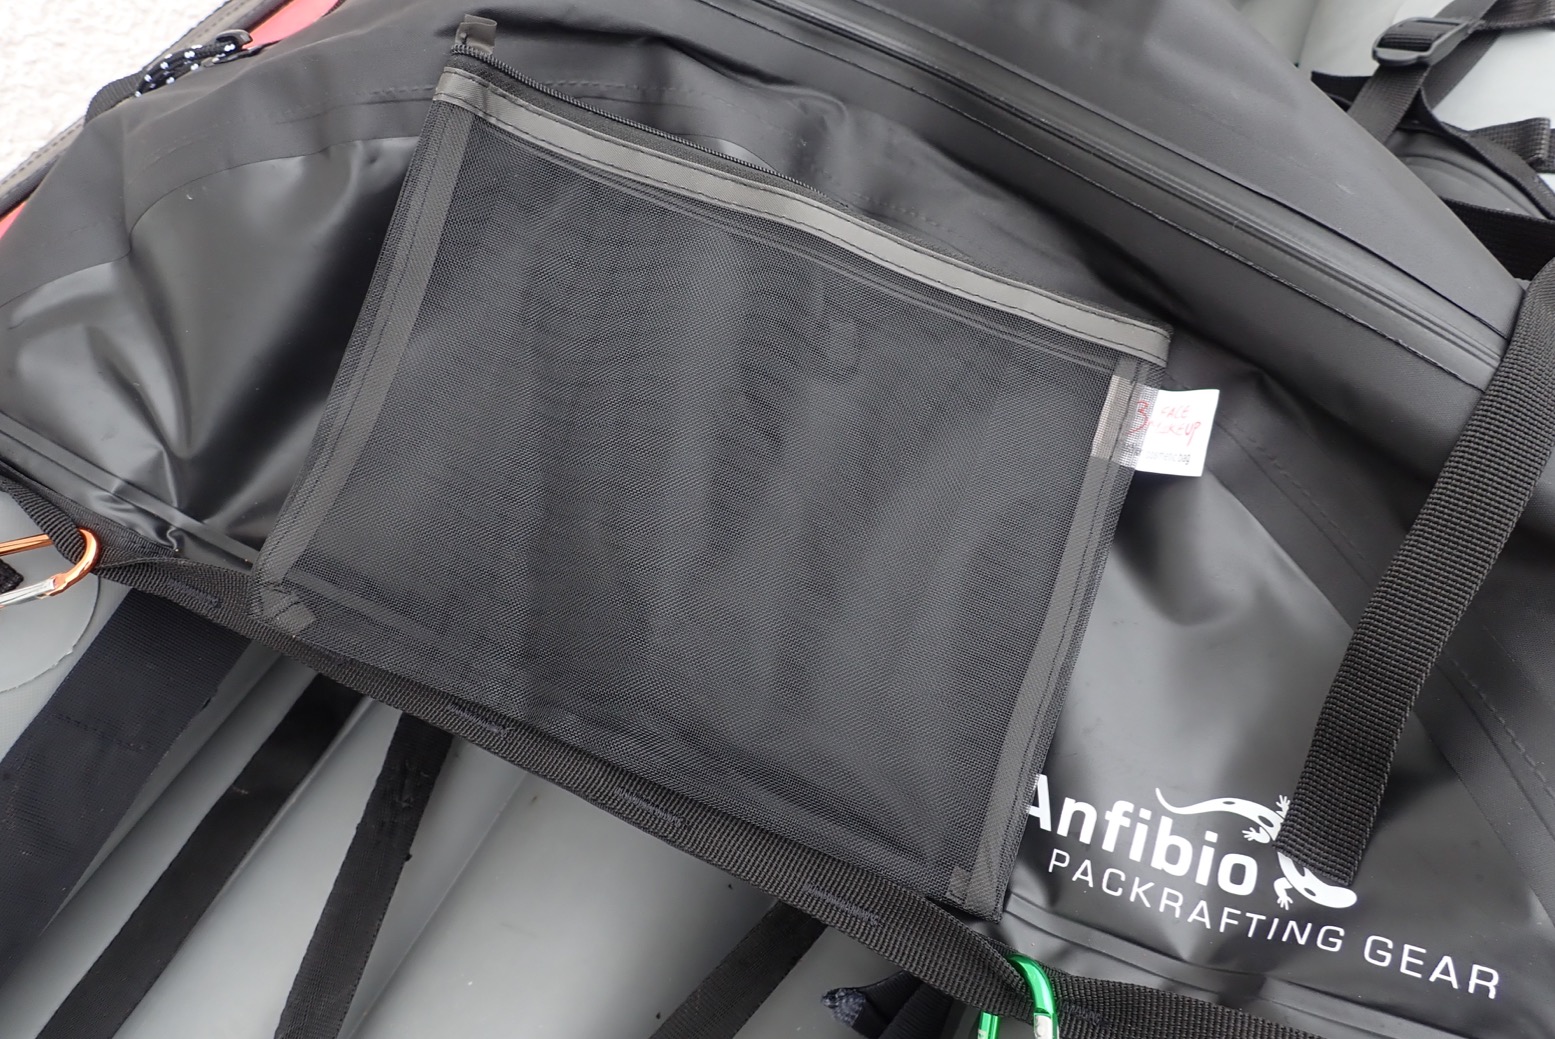
I bought some mesh zip pockets about 6” x 10” off eBay costing next to nothing from China. I zip-tied one to the back of the backrest. A handy way to ensure the airbag, K-Pump adapter and a couple of zip ties are always in the packraft.
I fitted an Anfibio footrest cushion. You lose some inflating time there, you gain it here but the Nomad’s seat is too far from the bow for efficient bracing, even for me, and moving the seat has its limits. I’ve since found the broad flat resting edge makes a more comfortable footrest than having them jammed in the bow. For flatwater I may not even need the thigh braces.
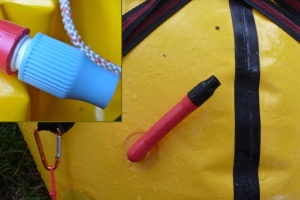
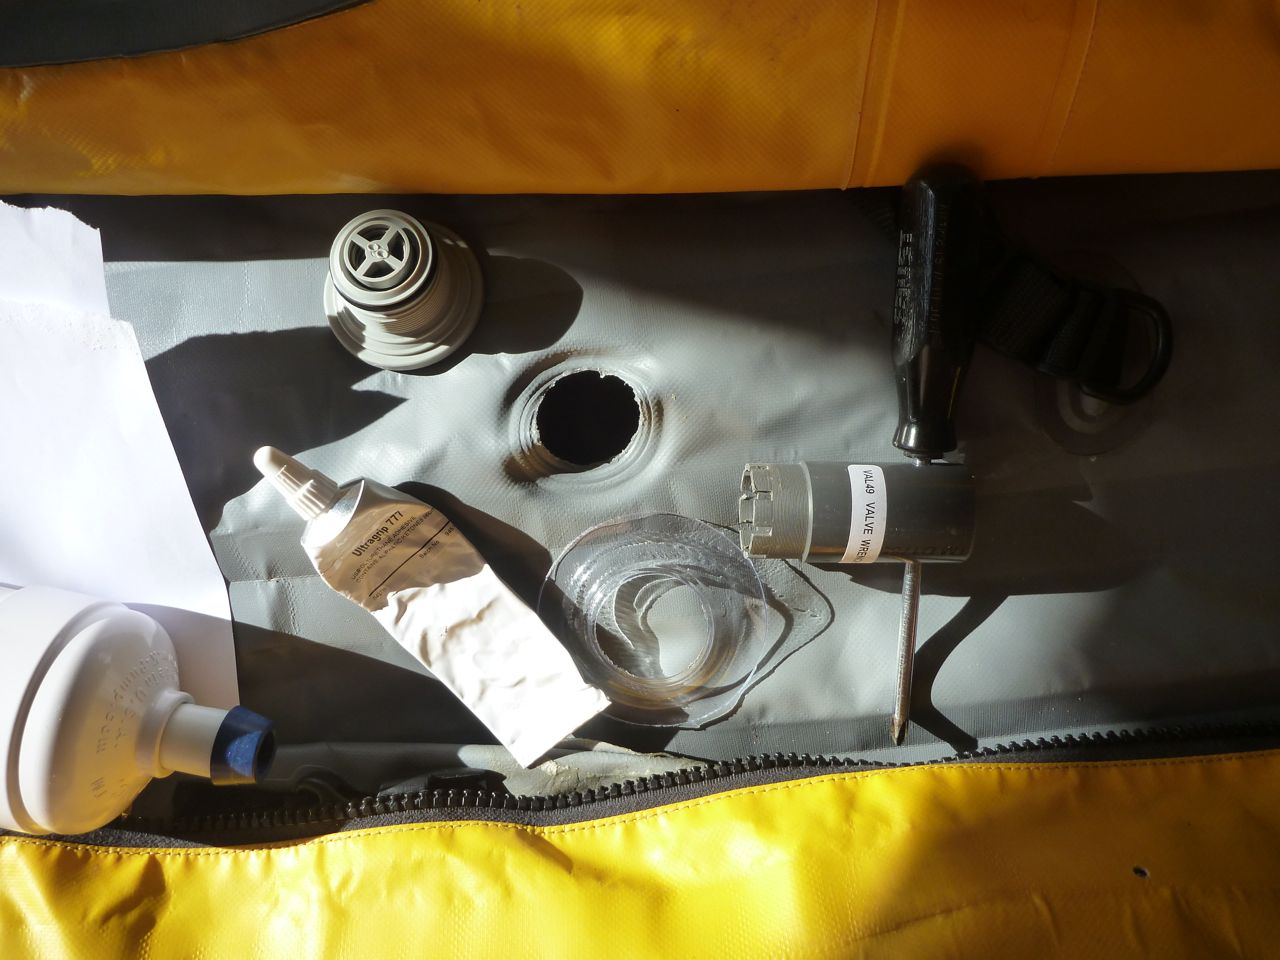
Top-up pump. The Nomad’s large volume takes a lot of tempering (topping up) to get it firm, but I can only do so much by lung. With a bit of hose on the end, the £3 pump (left) should have enabled a higher pressure, it’s the same one Alpacka were selling with some boats at one stage. But it didn’t work – or would take forever. I think it just hasn’t got what it takes. By comparison, my bulkier K-Pump Mini also with a hose nose (below), effortlessly packed in enough air to firm up the Nomad like a drum. So if it’s that important, the K-Pump it will have to be.
Quicker detach seat base. I replaced the knotted-in laces with long, thin unzipped zip-ties threaded through the holes to make the seat easier to remove for land use or for drying and cleaning the boat. Any similar plastic wire-like thing will do, as long as there is no puncture risk. But it’s still not clip-off easy. I have a better idea.
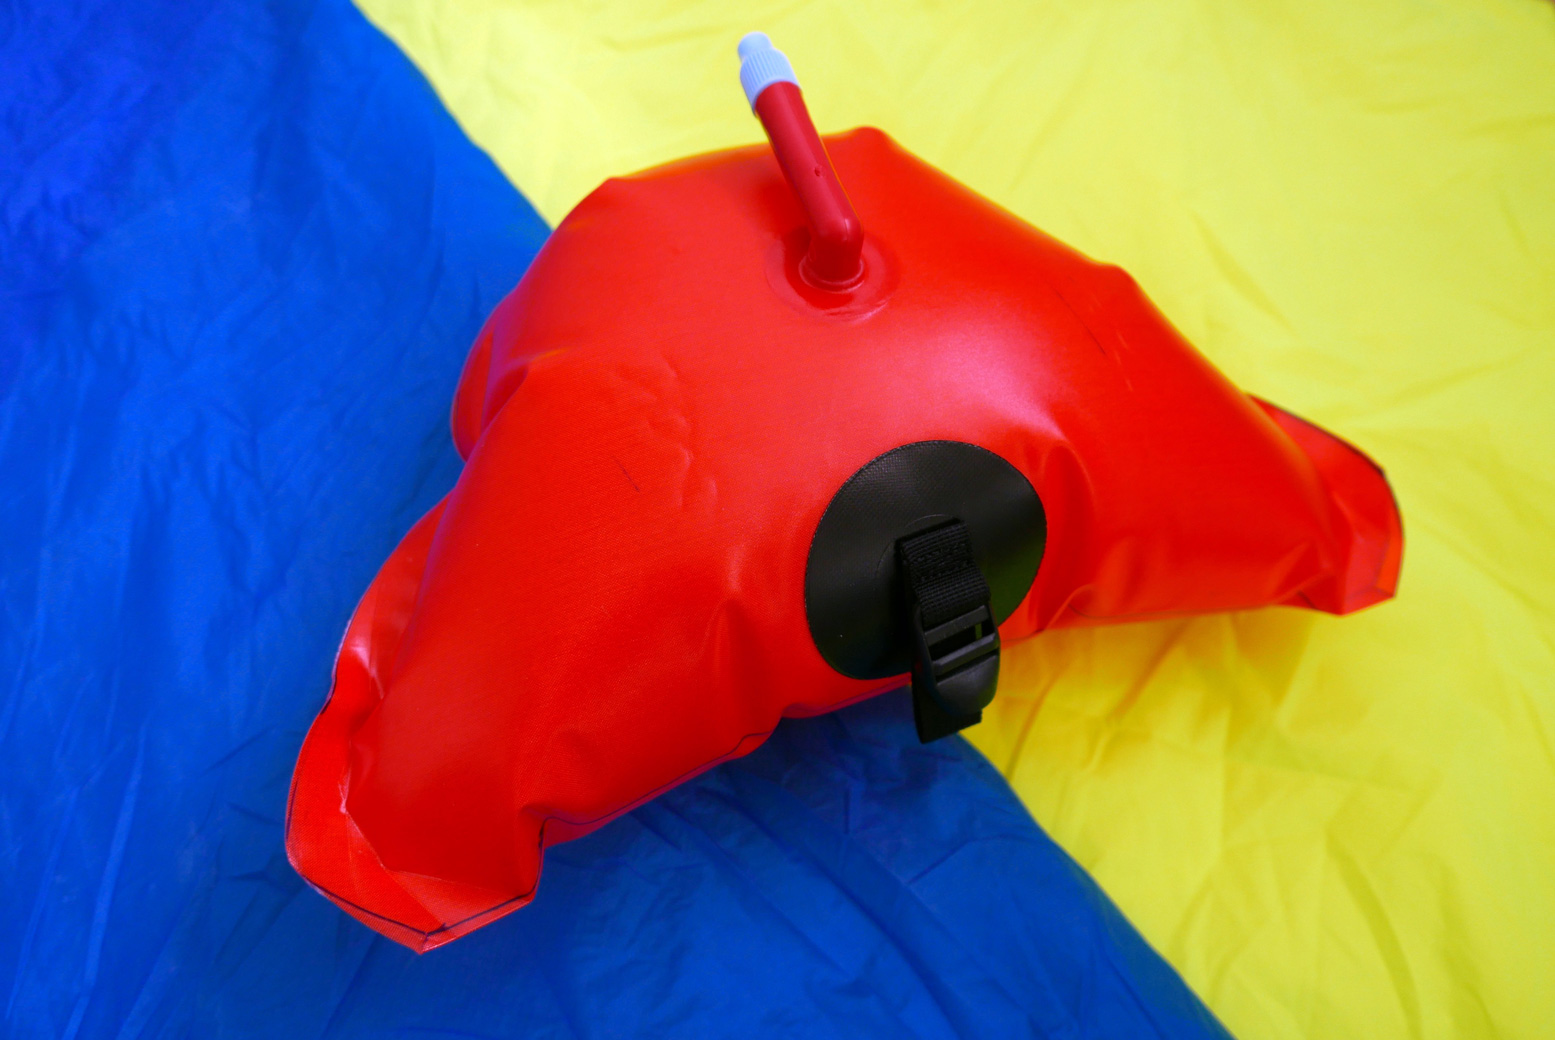
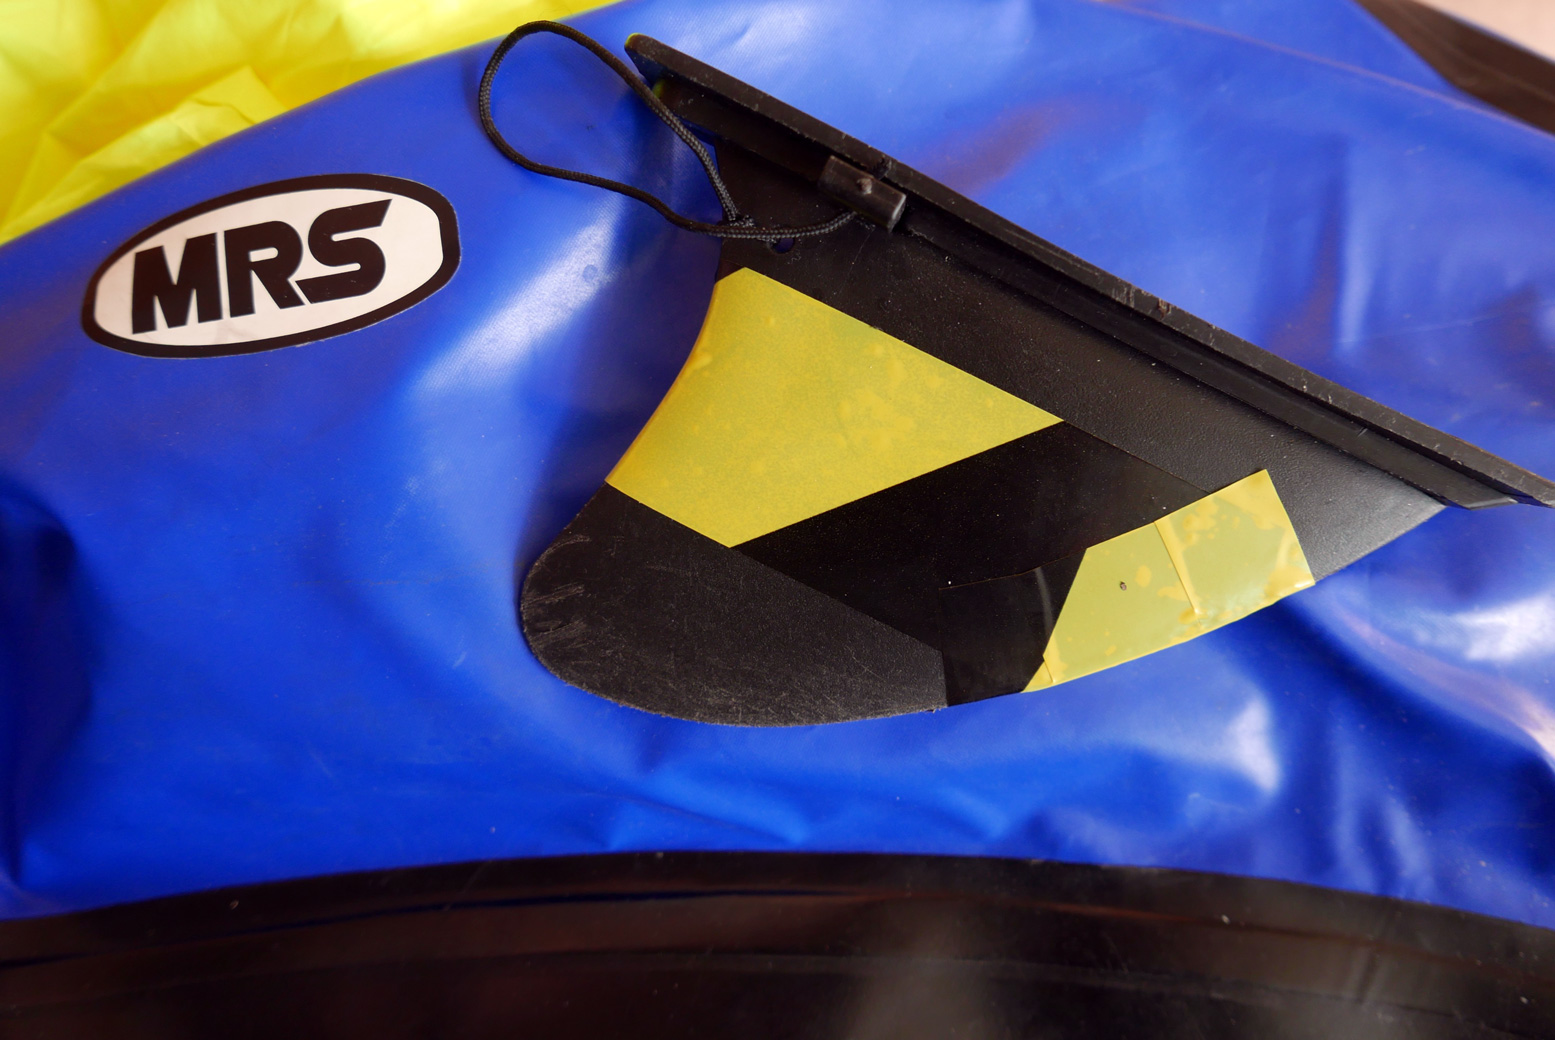
I replaced the blue MRS airbag with a brightly coloured Anfibio one. Visibility is the rationale: because packrafts lack somewhere to stash this important item (but see below), with a neon green bag I’m much less likely to forget it when packing up (done that before). It could also be handy to wave as a rescue aid if stuck on a stormy skerry in the North Atlantic (not done that yet).
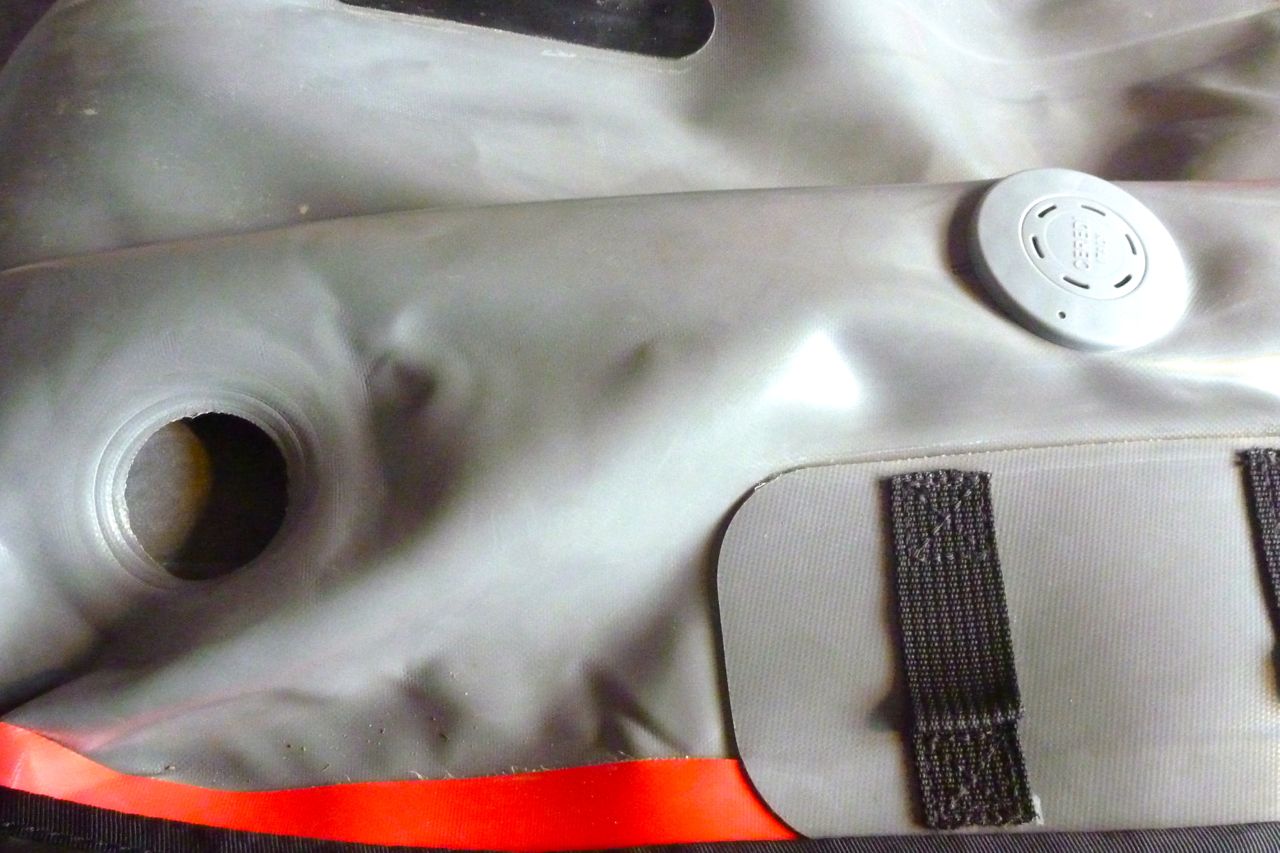
For the same reason I stuck some hazard tape on the skeg. I also threaded a reusable zip tie through a hole in the back so it can be securely attached to the boat when packing up, but in fact, unlike my IKs, on the Nomad a skeg is not essential to make it track well.
I added some sidelines; handy handles when manhandling the boat, and also useful to tuck in the paddle securely across your lap while controlling a sail. Or course having the mounting points pre-fitted makes all this much easier.
Your inflatable packboat needs a pump to take form as well as to top-up once on the water. These functions may be best performed by two different pumps. The folding bellowsfootpump (left) is history and even low-pressure IKs now come with some sort of hard plastic barrel pump. Some pump on both up and down strokes to fill your boat faster, but as you reach higher pressures they automatically or manually switch to downstroke-only inflation to reduce the effort. They work best on flat, firm ground where you can stand on the stirrup plates and get stuck in. The excellent Bravo 4 RED Kite pump below (newer ones are blue) is still well under £20 and will pump up an IK in 5 minutes.
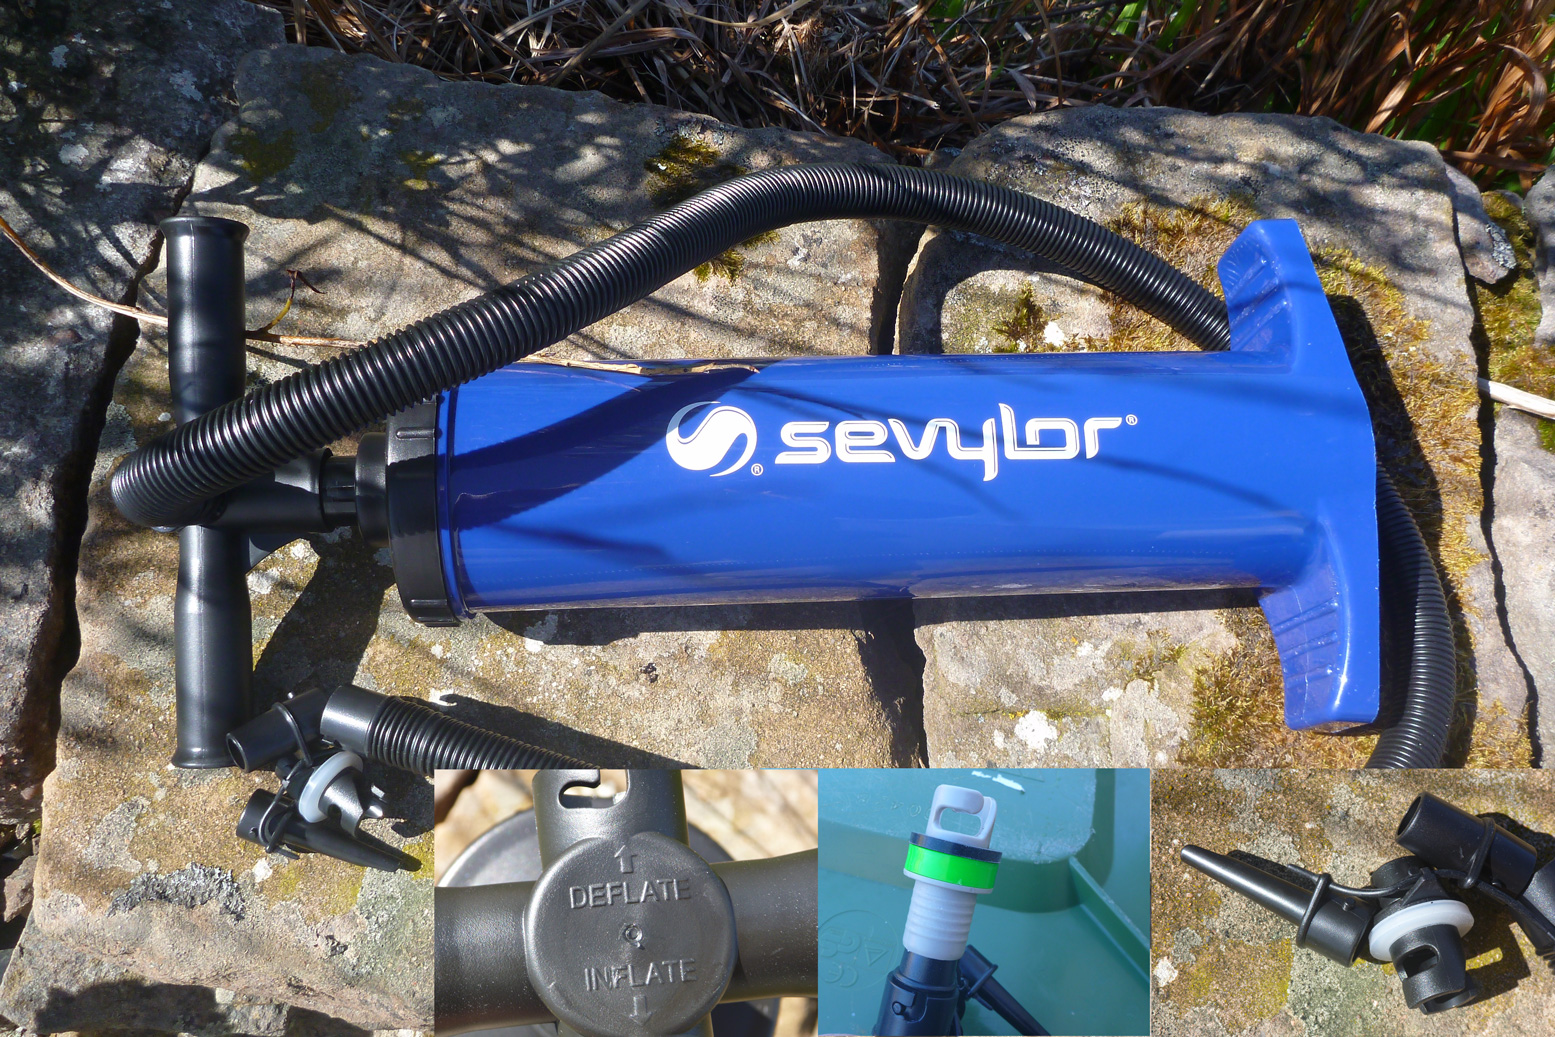
I got a Bravo 6 with my Seawave once but found it hard work – who knows why. The cheaper Bravo 4 does claim to be an ‘R.E.D’ (‘reduced effort device’) and I can confirm this isn’t some gimmicky acronym. The other port on the Bravo’s handle can be used to suck air from an IK so it rolls up good and flat; you can see creases forming in the hull as you suck it down. I left my Bravo 4 RED at home one time so bought a Sevylor RB2500G barrel pump (below left) for a tenner. Same size as the Bravo barrels, it did OK for the awkward topping-up of my Semperit’s lilo plugs and came with others adaptors plud sucked as well as pumped. But pumping up my Seawave from flat was exhausting towards the end: I actually got out of breath and had to rest! Morale of this fascinating anecdote: get a Bravo 4 RED and the right adaptor for your boat. Not all barrels have a built-in pressure gauge which is obviously dead handy in getting the right pressure without needing to faff about with a separate manometer (see below). It’s worth an extra tenner to get a built-in gauge, especially with DS boats.
Cheapo Sevy barrel – tiringHandy K-Pump Mini for topping up on the water
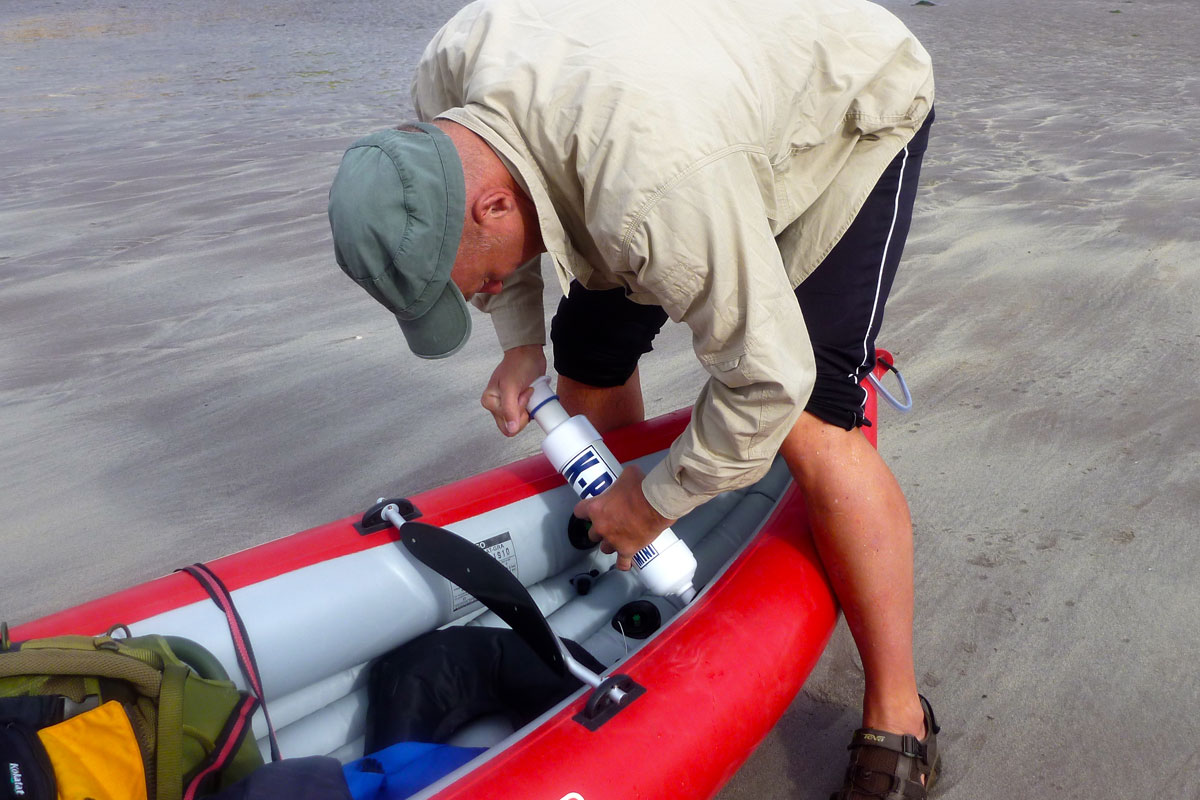
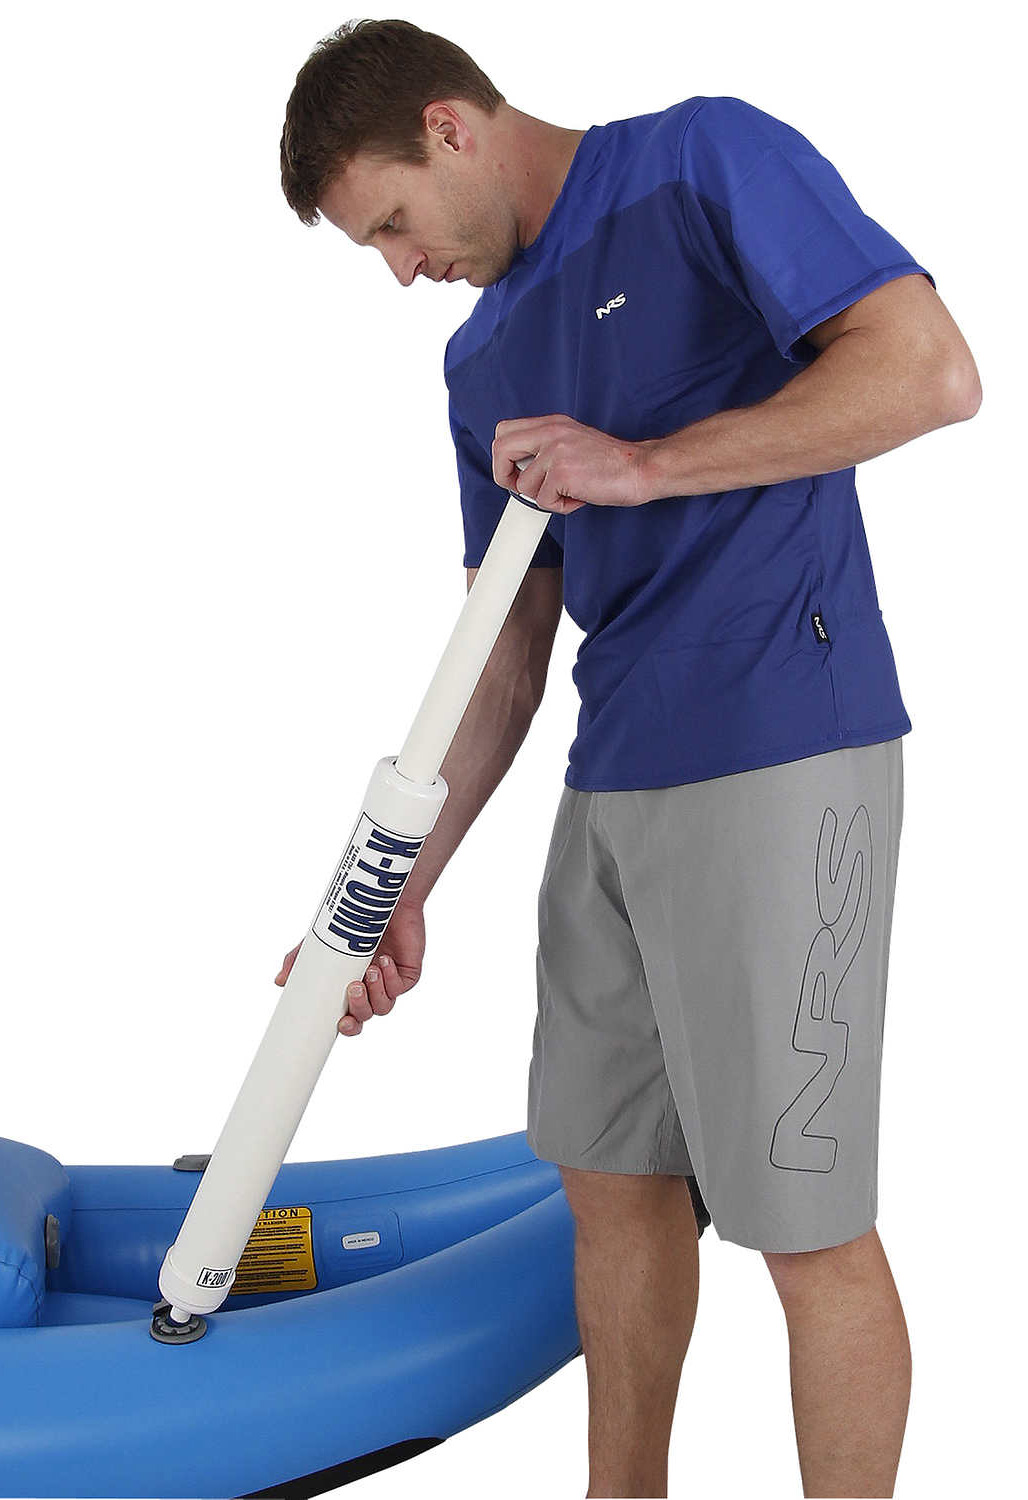
The K-Pump Mini (above right) is a handy top-up pump or compact 600-g travel pump. It took 15 minutes to fully inflate up my 14-foot Seawave; the push-fit nozzle works on any IK with one-way spring valves. You have to press and hold the nozzle against the valve. Using it a lot one time, I got the feeling it might break something or wear out the seal (which needs regreasing once in a while). I’ve also used the K-Pump to top up my Nomad S1 packraft which was too big and long to inflate firmly with just its airbag. Fuller review of the K-Pump Mini here. They’re hard to find in the UK, the very long, and slim US-made K-Pump 200 (right) may also be suited to higher-pressure dropstitch applications.
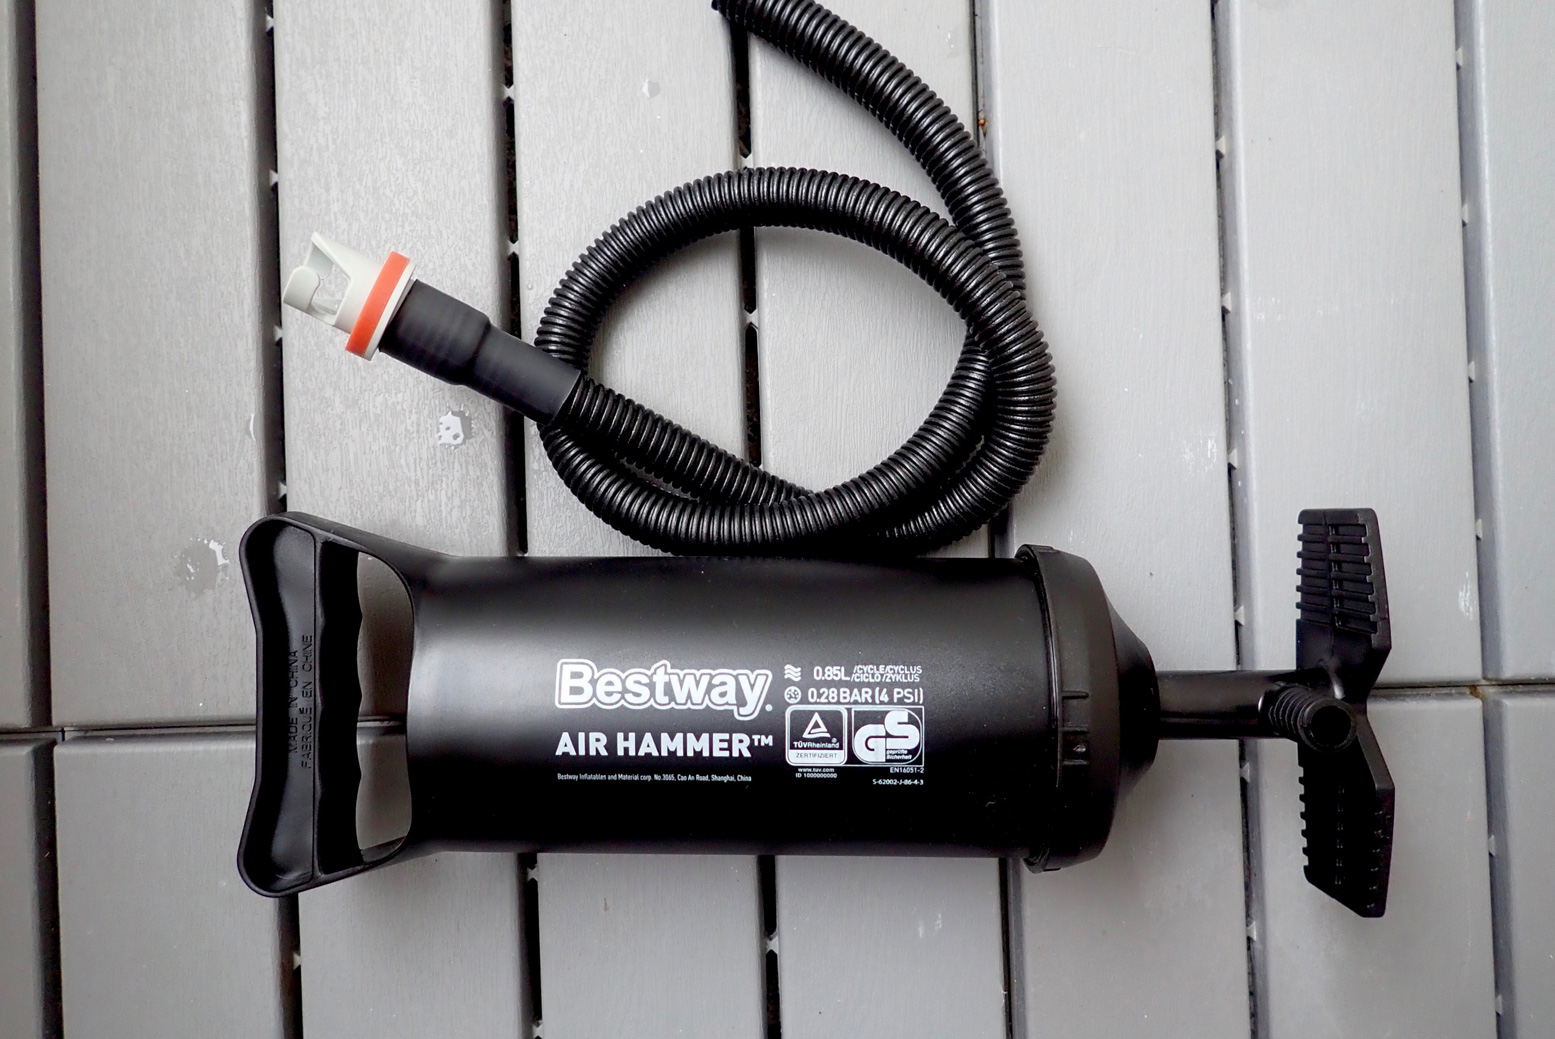
Left, the Bestway Air Hammer is an ‘upside-down’ barrel pump which comes in three sizes and costs from just £6 on eBay. If you don’t want to paddle with your full-size barrel pump, the smallest Air Hammer could work as a compact top-up pump like the K-Pump, but a tenth of the price. The one on the left came with a ROBfin and was rated at 4psi.
High-pressure pumps
More and more IKs now feature super-rigid, high-pressure dropstitch hulls – either just floors or the entire hull which runs 2–5 times higher pressures than regular IKs. Your old Bravo footpump will blow its brains out trying to reach a typical 7-10psi. Barrel pumps with long, slimbodies, as opposed to the shorter, stockier examples above, put out less volume (DS IKs have less volume anyway) but can more easily attain higher pressures. It’s something to do with the ø of the pump face x the stroke. You don’t necessarily need a super high-pressure iSup board pump.
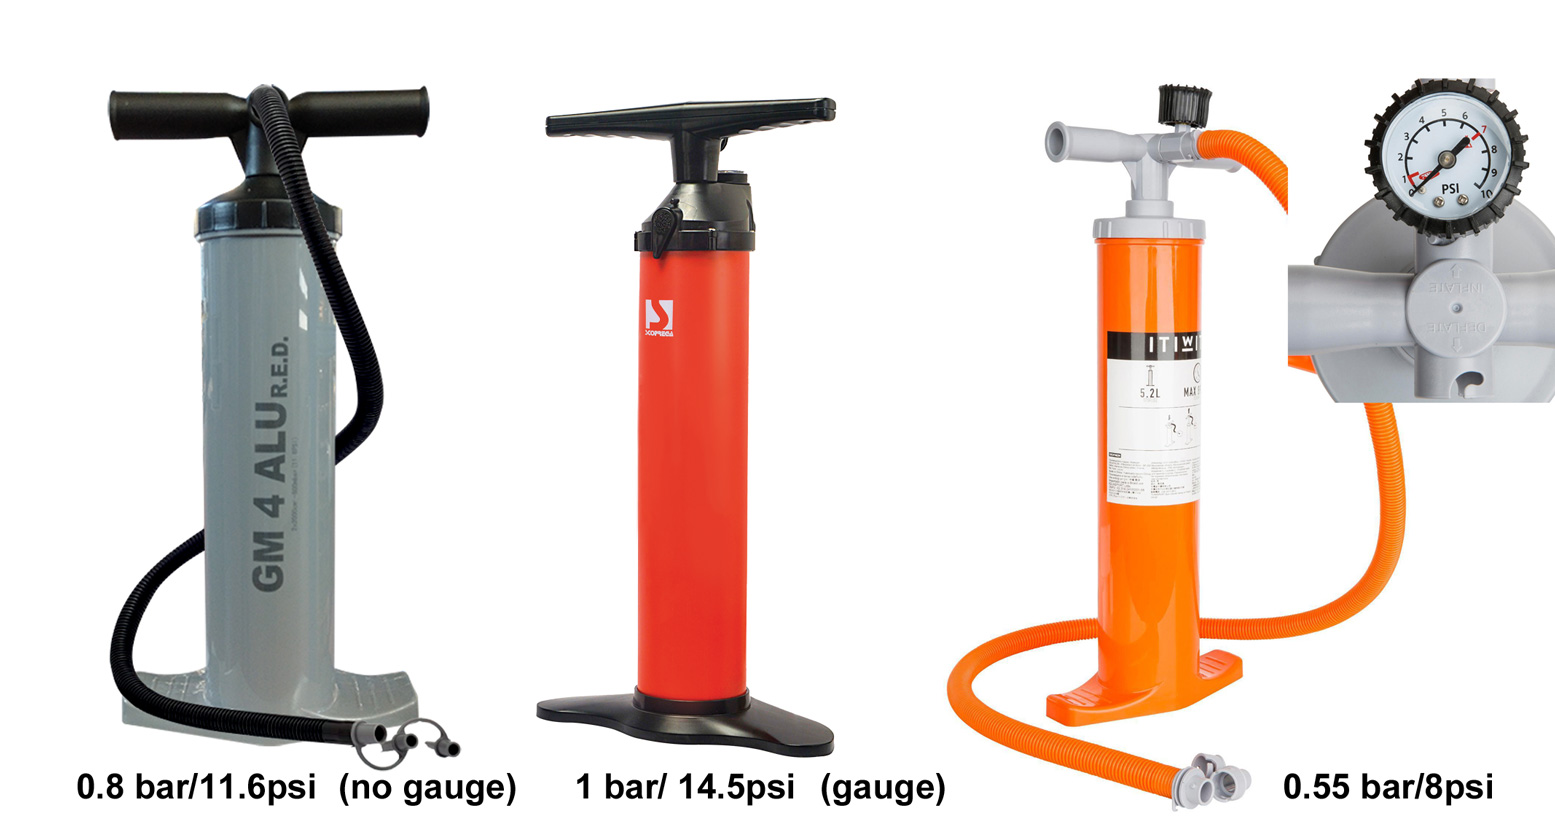
Left: Bravo Alu RED from £16 • Middle: Bravo 110 >£40 • Right Itiwit (Decathlon) £20
Some of these pumps may be double action. At a certain psi they become single action (downstroke only). I believe the Bravo Alu 4 RED (0.8 bar) works like that. Or they have a switch to do the same and help attain higher pressures. It works. Whatever pump you get for your DS IK, make sure it is rated to comfortably exceed your DS boat’s pressure rating.
Left: Kokopelli Nano pump ticks all the boxes: fold-out feet, screw-off handles, switch for one-way pumping as pressures increase, manometer in the handle. Right: twice the volume Bravo Alu 4 with auto one-way switching (so it says). The bayonet valve nozzle on the Nano keeps the valve open and so is for live (constant) manometer readings. With the push-fit (non-bayonet) adapter on the blue pump suited to Boston valves, a manometer only reads as you pump and push open the valve. Both are better than soggy footpumps.
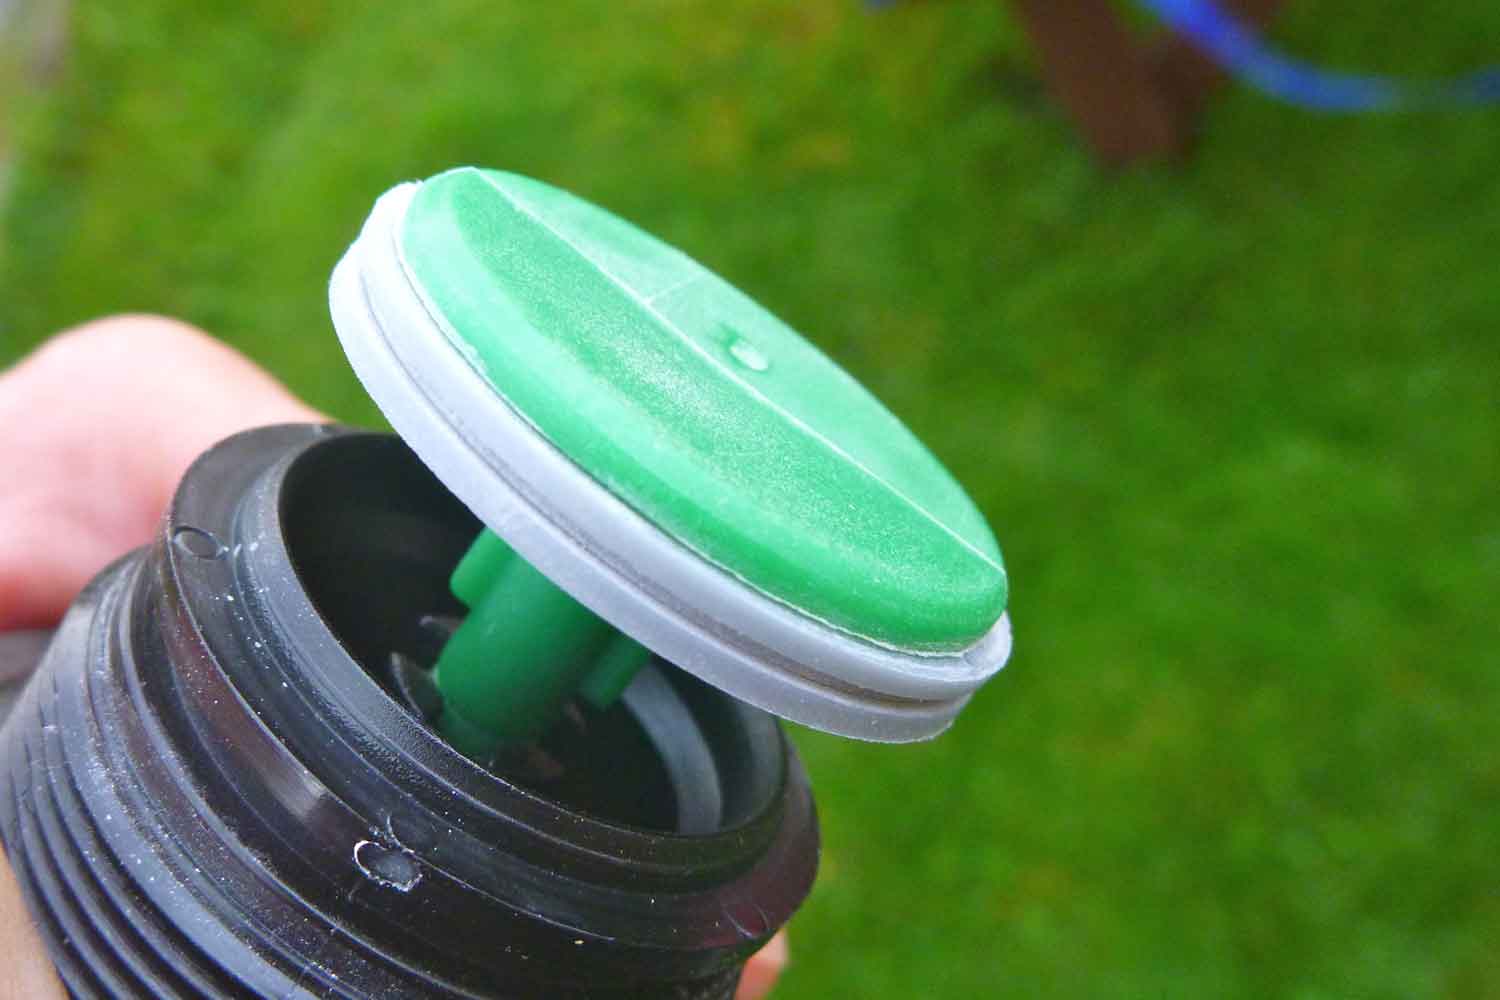
Bayonet nozzles for ‘raft’ valves. Who would have thought there’s something to be said about bayonet nozzles? Well there is. There are two types: plain (below right, Gumotex) and crossbar-peg or detent (left, Bravo). Both need soft spacer washers to fit snugly against your boat’s raft valve, but the small peg inside the green one will press open your valve stem as you connect it.
You will notice a similar peg on car tyre inflation hoses and also on a hand manometer (below). A manometer can’t get a pressure reading without this peg partially opening the valve as you push it on. A nozzle with a peg/detent means that: a: you’re not pushing the valve spring open each time you pump (easier pumping) and b: if your pump has a manometer you will get a constant/live reading as the pressure climbs which is the point of having a built-in manometer. The Bravo one goes from 3 quid; search: ‘Bravo Adjustable HP Valve adapter’. The only drawback might be that you need to remove a pegged nozzle carefully with Push-Push (Gumotex) valves. Normally a little air escapes as you do this, but if the valve doesn’t spring back closed, air will rush out. Turn slowly then pull away briskly; you’ll get the knack.
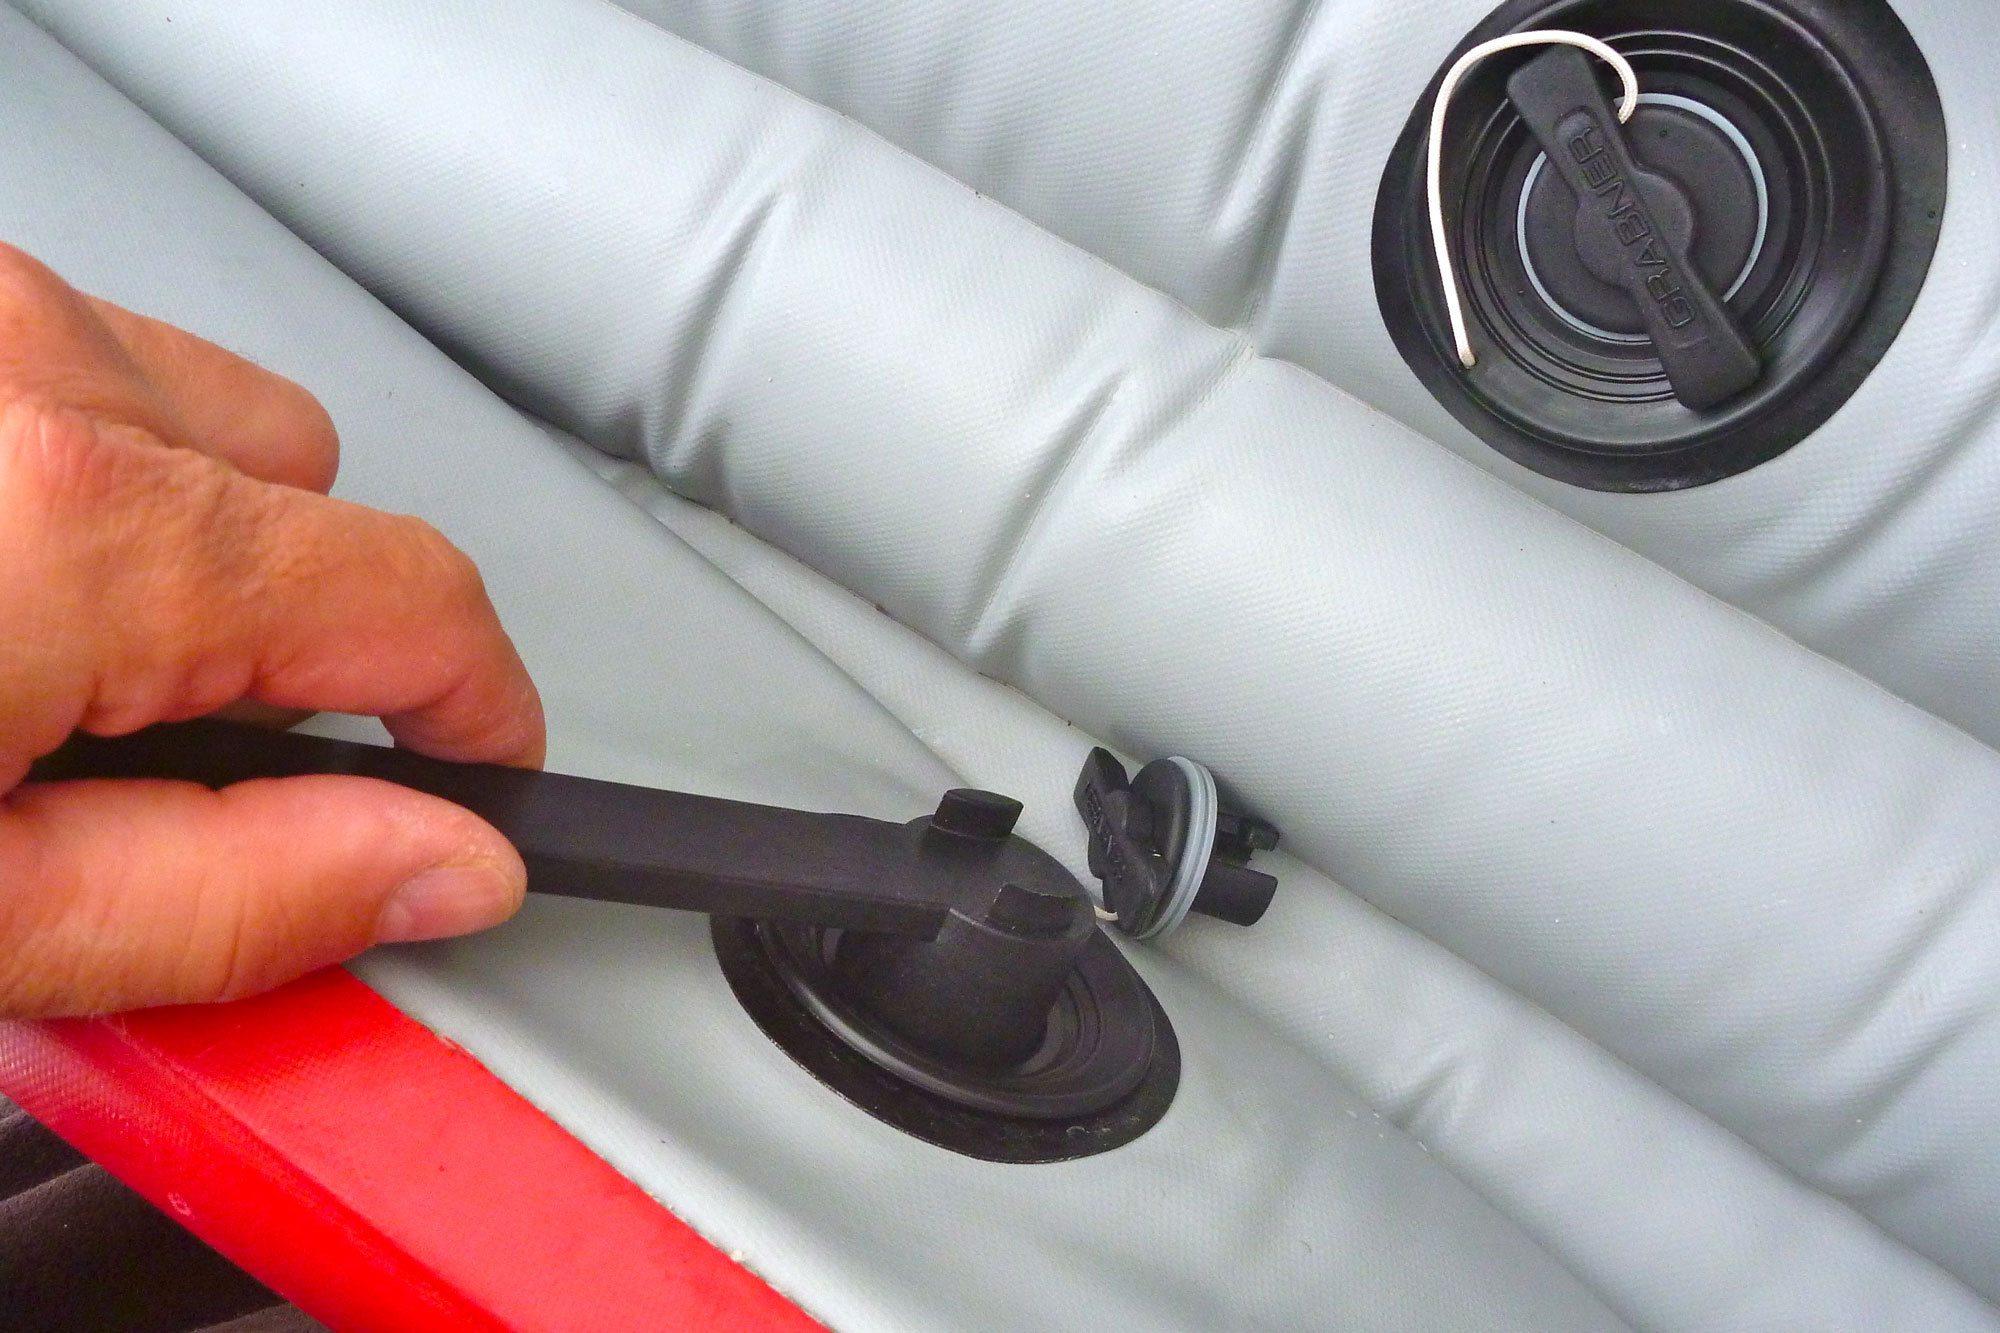
Pressure gauge (manometer) Until I got a Grabner which has no PRVs but ran a relatively high, 0.3 bar (4.3 psi), I never bothered with a pressure gauge (manometer, below) and just pumped up by feel. A lot of people do this. Since then, I ran a Gumotex Seawave and fitted PRVs to all chambers. That meant I still didn’t need a pressure gauge to get the right pressure; I simply kept pumping until each PRV hissed: the boat was then at operating pressure. My Seawave 2 was left stock (no side PRVs) so I have got into the habit of keeping a Bravo manometer with the K-Pump Mini and checking the sides at each paddle when I top up. I have checked this manometer against the floor and it measured 0.25bar which matches with the PRV rating, so I think it’s pretty accurate. Try and get a model with a range of no more than 1 bar (as below left) as that is the range you’re working in. At the moment, Sea Mark Nunn sell it in the UK.
Bravo manometer: from 13 quid and accurateAdjustable screw/peg to push open the valve
With high-pressure DS IKs, you probably want a pressure gauge as the boat will perform best at the right pressure which may be higher than you’re used to.
Packraft Pumps
Packrafts used to be inflated with a featherlight airbag which came with the boat. A nozzle on the bag screwed into the boat’s valve and you scoop air into the bag (easier with a breeze) and ‘bear hug’ it to cram the air into the boat. It’s takes about ten scoops and two minutes to inflate a boat this way, then unscrew the bag nozzle and quickly screw on the valve without losing too much air. Next, you used to top off by mouth on a separate twistlock valve: the firmer the boat the better it rides. In the video below (speeded up x 15) from walking up to a beach with my paddle in my pack, to loading up and paddling away took 8 minutes.
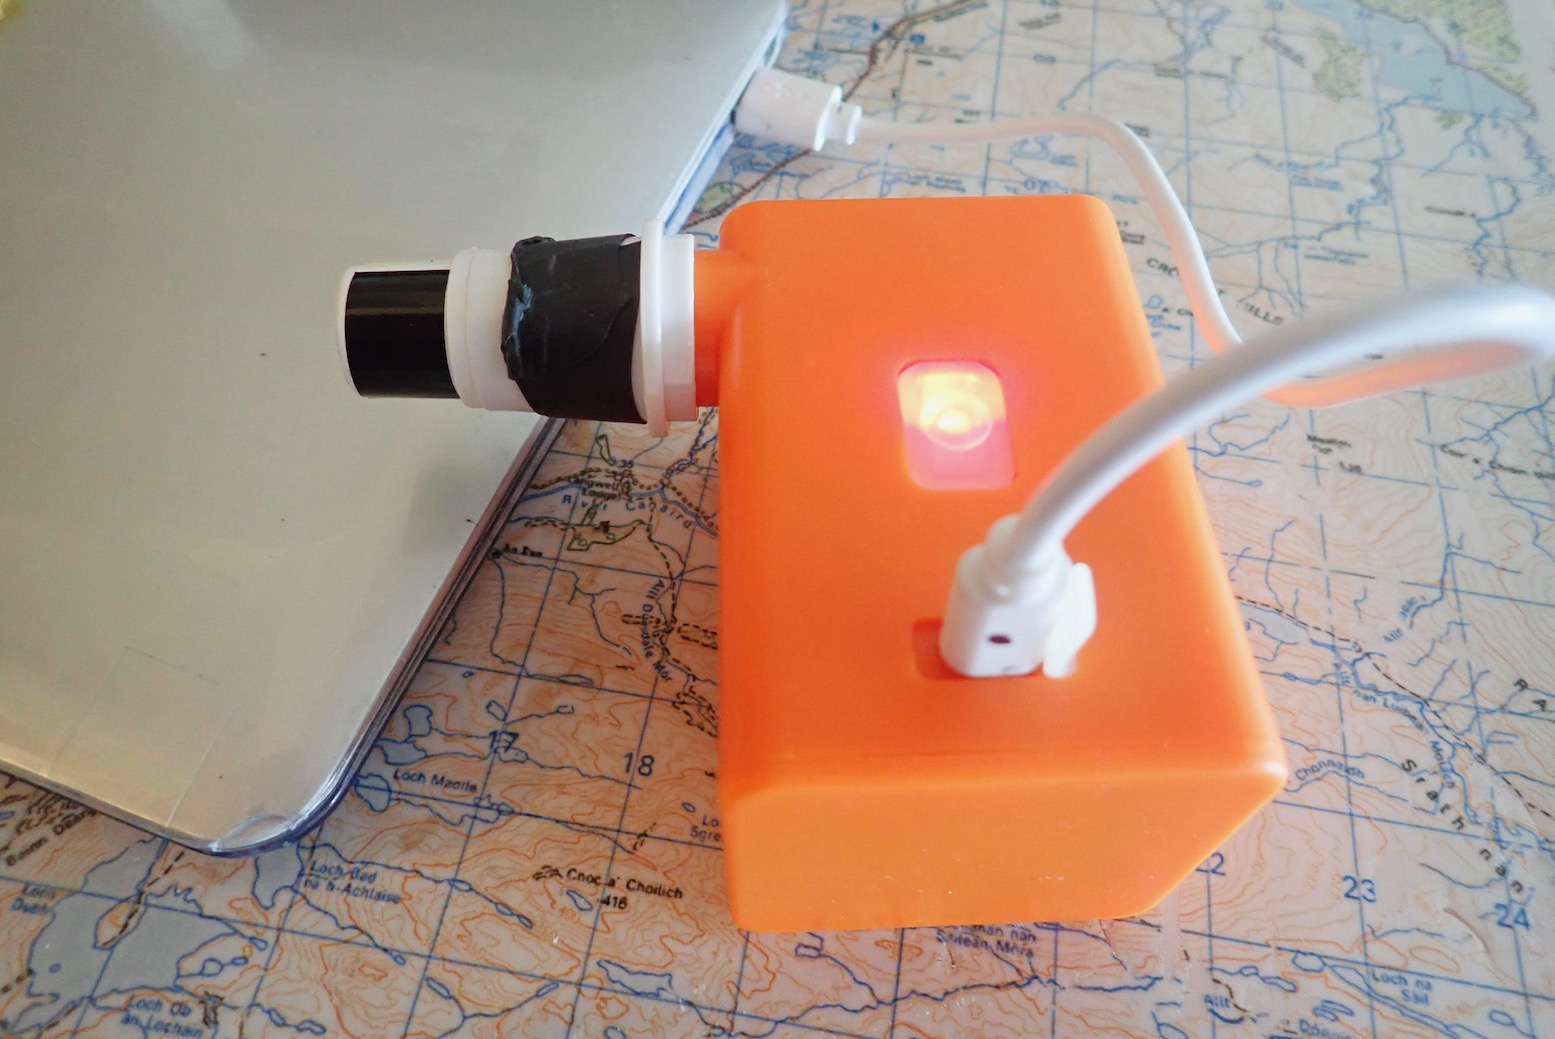
Things have moved on. Most packrafts now have a single one-way Boston valve which tackles initial inflation and topping up to a firm pressure. Inexpensive and tiny rechargeable electric pumps (left and below) now effortlessly do the initial job of the air bag, once you fit the right adaptor. Flextail minipump reviewed here.
Mini electric pump
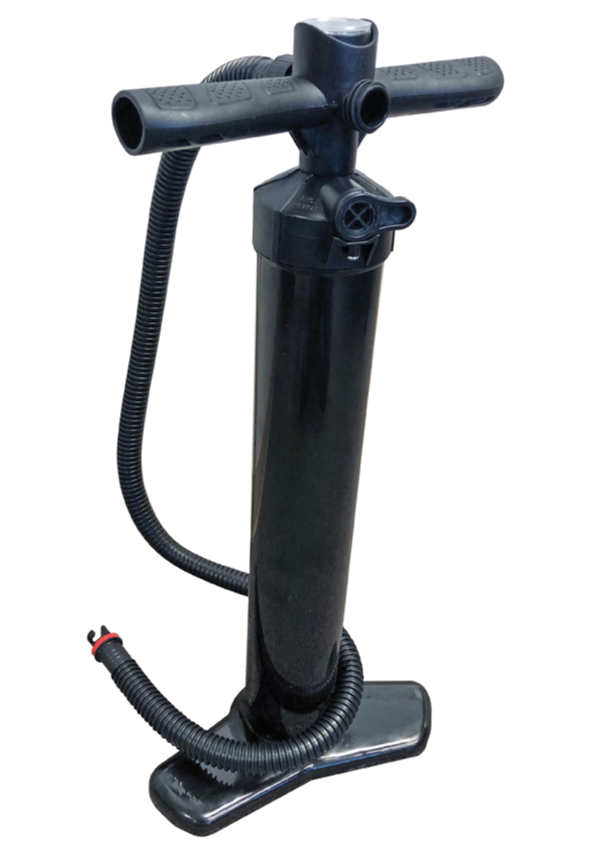
And for those who don’t have lungs like Luciano Pavarotti, once aired up a light and compact mini handpump (left) will get the boat good and firm. Firm boats paddle better, and like IKs, a packraft that feels firmly inflated by hot ambient air on land will go soft once cooled in the water and will need more topping up.
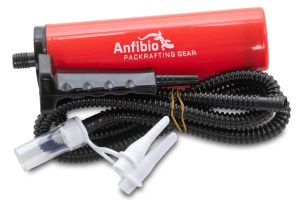
The Anfibio pump above is an adapted eBay balloon pump with an added hose so you can top-up on the water, if needed. It also differs from eBay cheapies in that the handle now unscrews from the pumping shaft to make it less prone to snapping in transit (as I found with the earlier version). With a Flextail and an Anfibio pump you’re packing good to go, but I always keep the original air bag plus a short section of garden hose (for topping up; below) with my boat in case either pump fails.
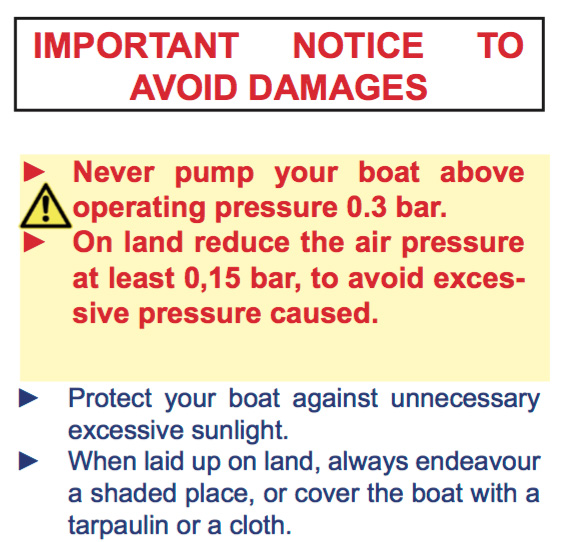
Note: a good packraft should hold air for days at a time, but don’t leave it fully inflated and out of the water in the hot sun. The air inside heats up and expands, pressures rise and the seams will get strained and may rupture.
My Gumotex Seawave is a well spec’d IK for my sort of coast-hopping and occasional touring, especially as it was factory rated to run at a higher-than-usual 0.25bar or 3.6psi (Gumo normal is 0.2). That means greater rigidity which adds up to less longitudinal sag caused by paddler weight (who, me?!) . And of course a better g l i d e. My previous Amigo and Incept both ran an even higher 0.3 bar, and it’s said that this Gumotex can also be pushed to that sort of pressure on the side tubes without risking damage. Factory hull pressures are set on the conservative side to limit warranty claims.
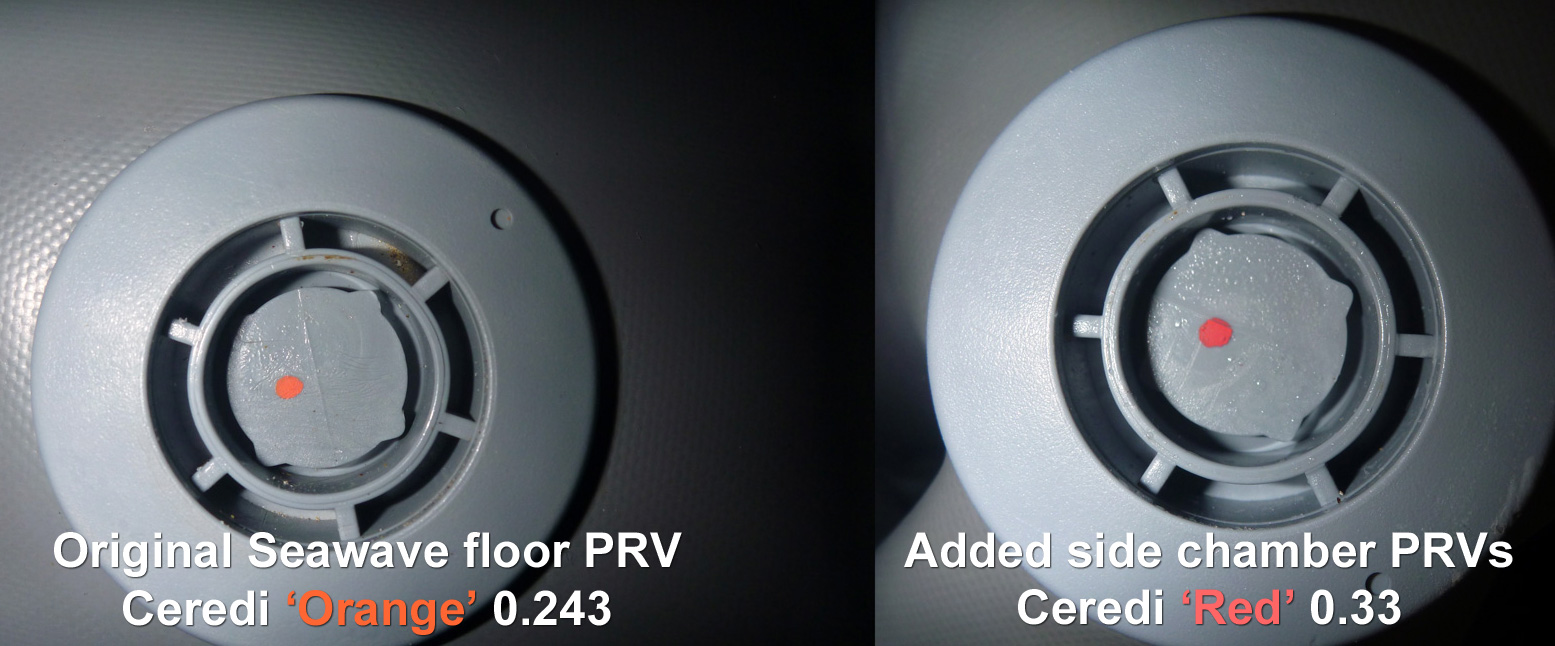
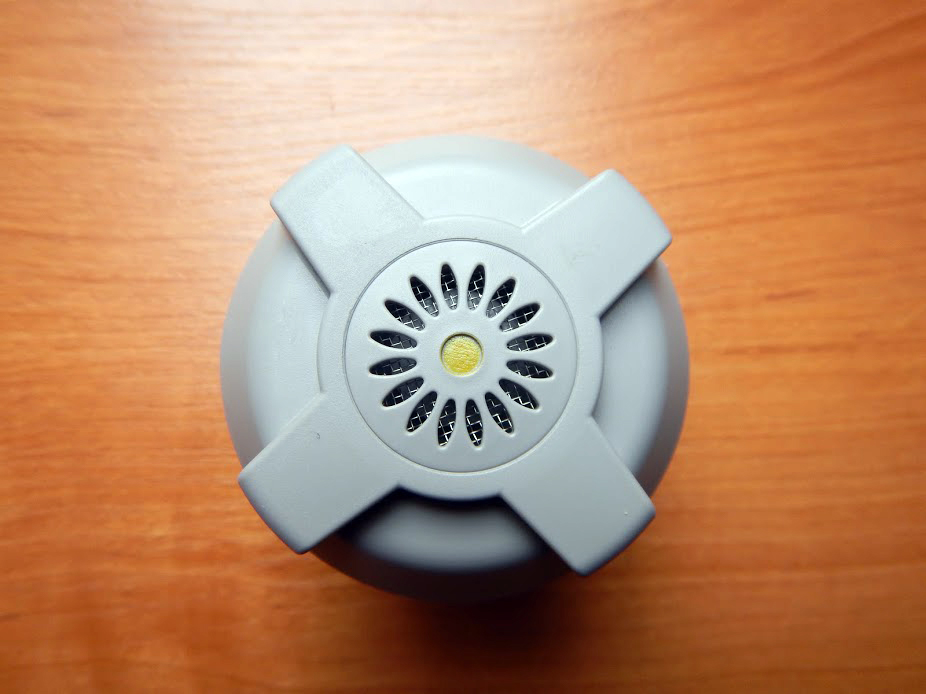
Like all the Gumboats I’ve owned, the more vulnerable I-beam floor chamber has a factory-fitted PRV set at 0.25bar/3.6psi (confirmed below). PRVs are important here as if an IK gets hot (typically out of the water on a sunny day) internal air pressure can increase to the point where seams might rupture. If separation happens to an internal I-beam in the floor it will balloon up and becomes a very difficult repair. I would not meddle with the factory-set PRV on an I-beam floor. As we all now know, the answer to I-beam floor limitations is drop-stitch technology – effectively zillions on ‘I-beams’ spreading the load over the entire area which enables much higher pressures.
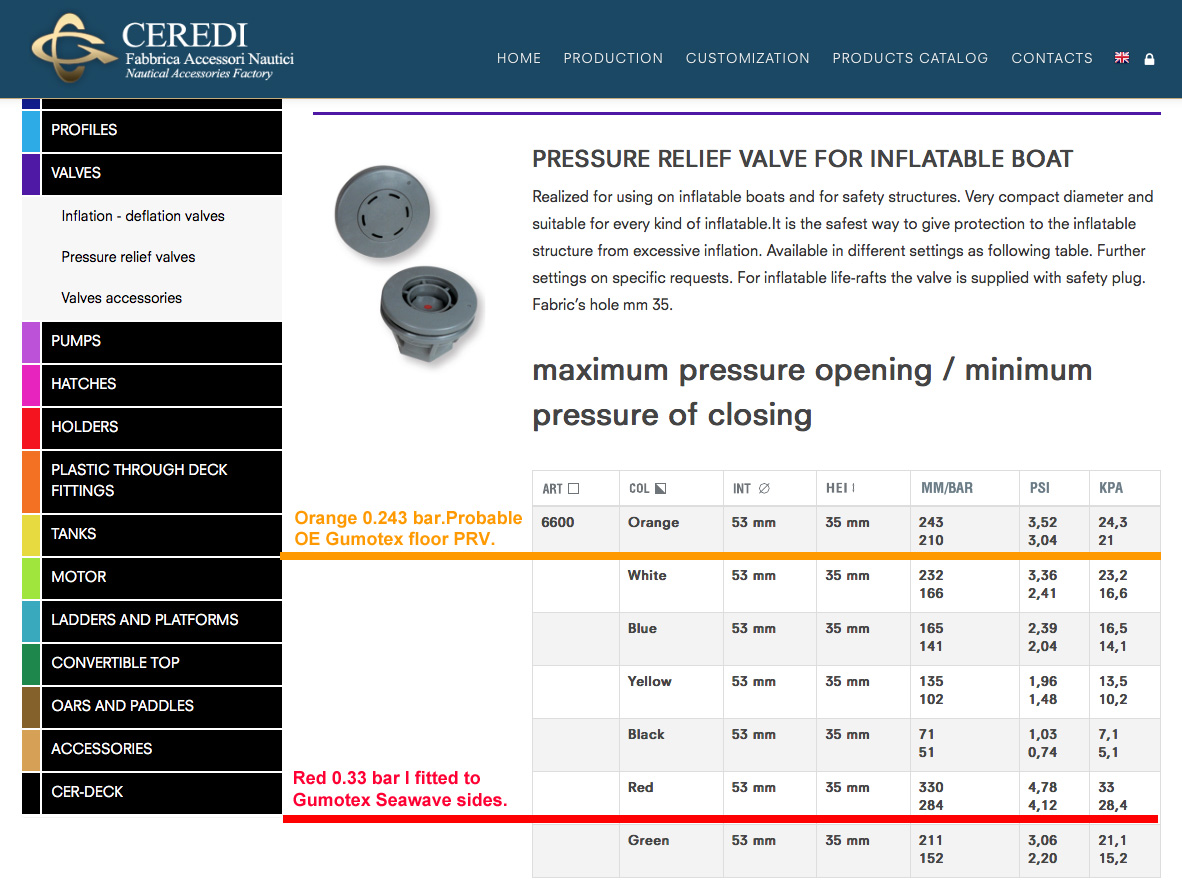
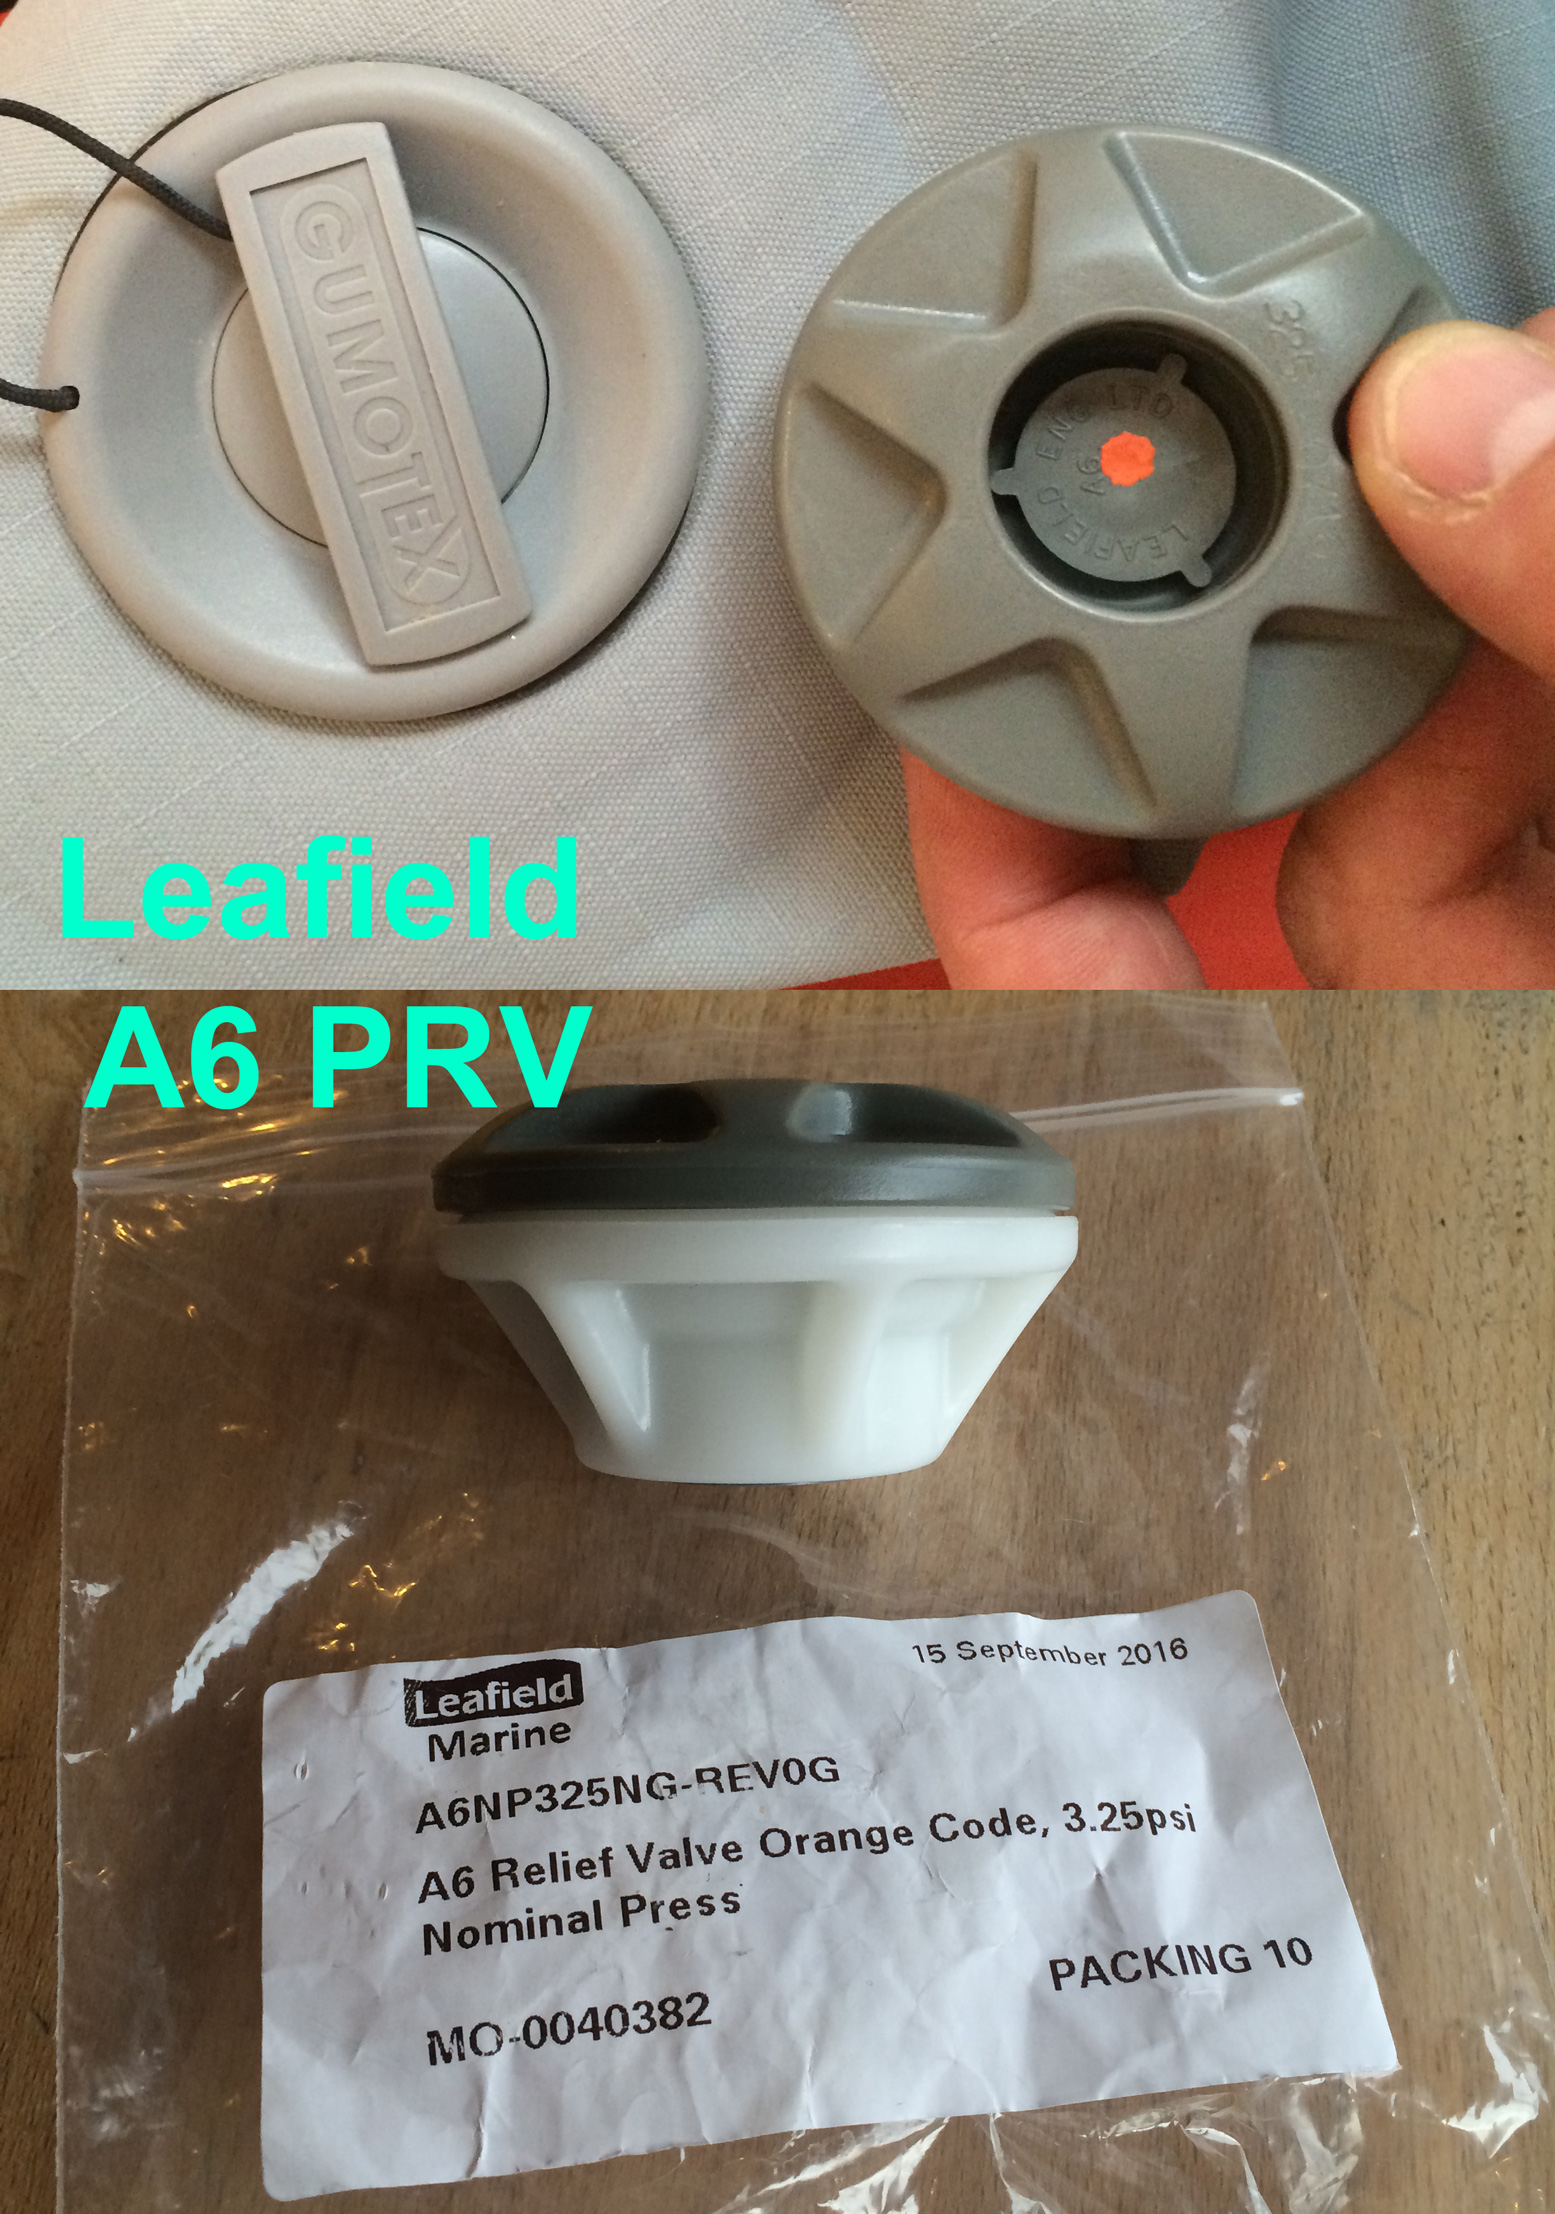
In a discussion with a French Gumtexer, he suggested that Gumotex use the same orange dot 0.243 PRVs in all their boats, irrespective of the stated official rating which is either ‘0.2’ like most – or ‘0.25’ on the Seawave. He sent me a photo of his 2016 Palava floor PRV (left) – orangey-pink, same as my Seawave and classified by Ceredi as 0.243. Officially the Palava is a ‘normal pressure’ 0.2 bar canoe. Upshot? Your Gumboat’s floor may be rated at higher pressure than you think or is officially stated. You’d assume then that the tubed sides can easily handle at least as much pressure. Then again, in the table below, Ceredi state the orange PRV will open between 0.21 and 0.243 so perhaps 0.21 it is and we all just need to calm down a bit.
PRVs use springs set to purge air before pressures reach structure-damaging levels. Then again, my Amigo had no PRVs at all so you assume Grabner were confident their floor construction was solid enough to handle occasional neglect. But I’ve been caught out before and always try to ensure a boat remains in the cooling water when moored up on hot days – even getting up to splash the sides as they tighten up like a drum.
Like most IKs with single side tubes, my Seawave had no PRVs as the tubular profile can handle higher pressures better than the flat, ‘lilo’ floor. However, if you’re planning to run them over-pressure as I am suggesting, that could be risky. The answer: fit PRVs in the side tubes – just like my old twin side tube Incept. That way you can safely leave you IK out of the water in the tropics, go and hike up a volcano (which might be described as ‘the planet’s PRVs’) knowing that all three chambers will harmlessly purge any excess pressure. Sure, when it all cools again back in the water the boat may be saggy, but better a quick top up with your K-Pump than pulling bits of shredded Nitrilon out of the palm trees. Ideally I was looking for a PRV set at a reasonable 33.33% over the factory figure of 0.25 bar – i.e.: something around 0.33 bar or 4.8psi.
I admit that the colours look pretty closebut it’s pinky-orange for the OE floor and red for my 0.33s
Well-known IK valve-makers Leafield and Halkey didn’t make anything matching my needs (or don’t sell to individuals). The Seawave’s valves are stamped ‘Ceredi Italy’ and once I managed to track them down online, I saw the same Ceredi 6600 PRV series came in options including Red 4.78 psi or 0.33 bar, (above right). In the UK they were a special order via IBS and cost £35 a pair posted.
Before you get too excited, scroll down to the bottom and read Nikola’s PRV nozzle idea.
Ceredi prices too steep for you? On eBay I bought unbranded ‘4psi‘ PRVs from China for about £4 a shot and delivered in less than 2 weeks. Note these are smaller than your Ceredi and require only a 25mm hole. The back nut will easily fit through the inflation valve hole, once you remove that. I pressure-tested the valves I received and they stood up to the claim: more here. Search eBay: ‘Air Safety Release Valve Kayak’.
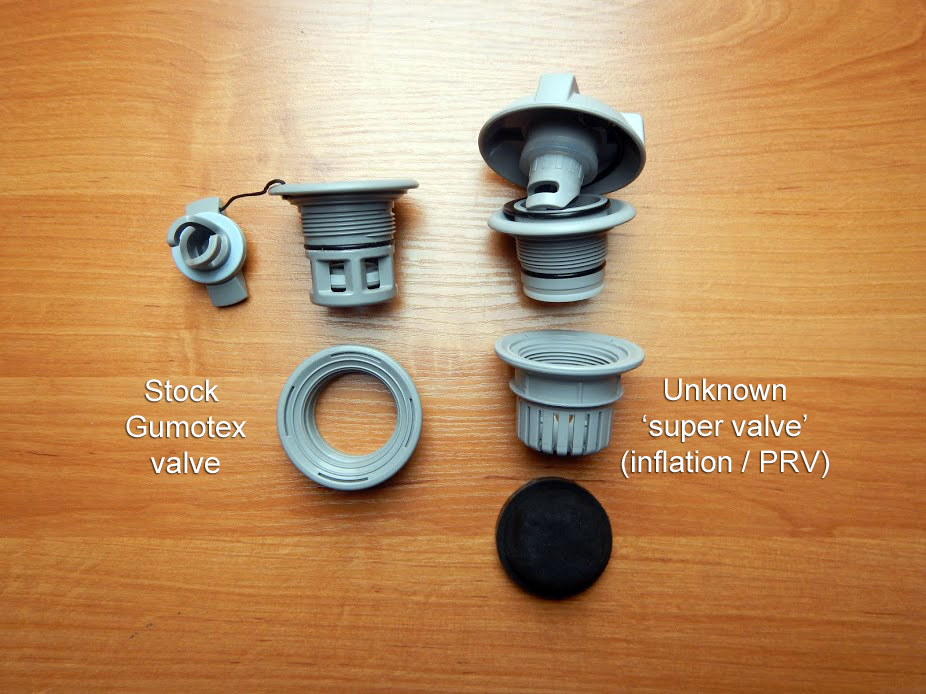
As you can read from Adam’s comment below, there is – or more probably was – a super valve which combined both inflation and pressure-release duties which means you simply replace the stock inflation-only valve. No need for extra holes to be cut. His link no longer works but I tracked it down to here; the Bravo Super Valve – that’s Bravo as in the Italian branded Chinese-made pumps we all know and love. But there is no mention of a super valve on their valve page anymore, nor in their catalog.
Fitting the Ceredi red dot PRVs
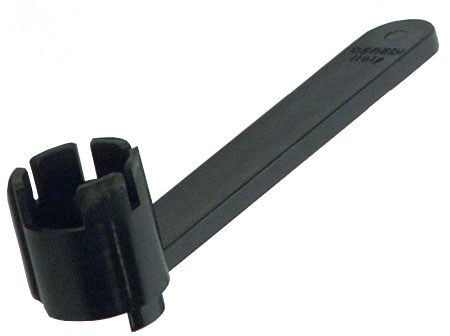
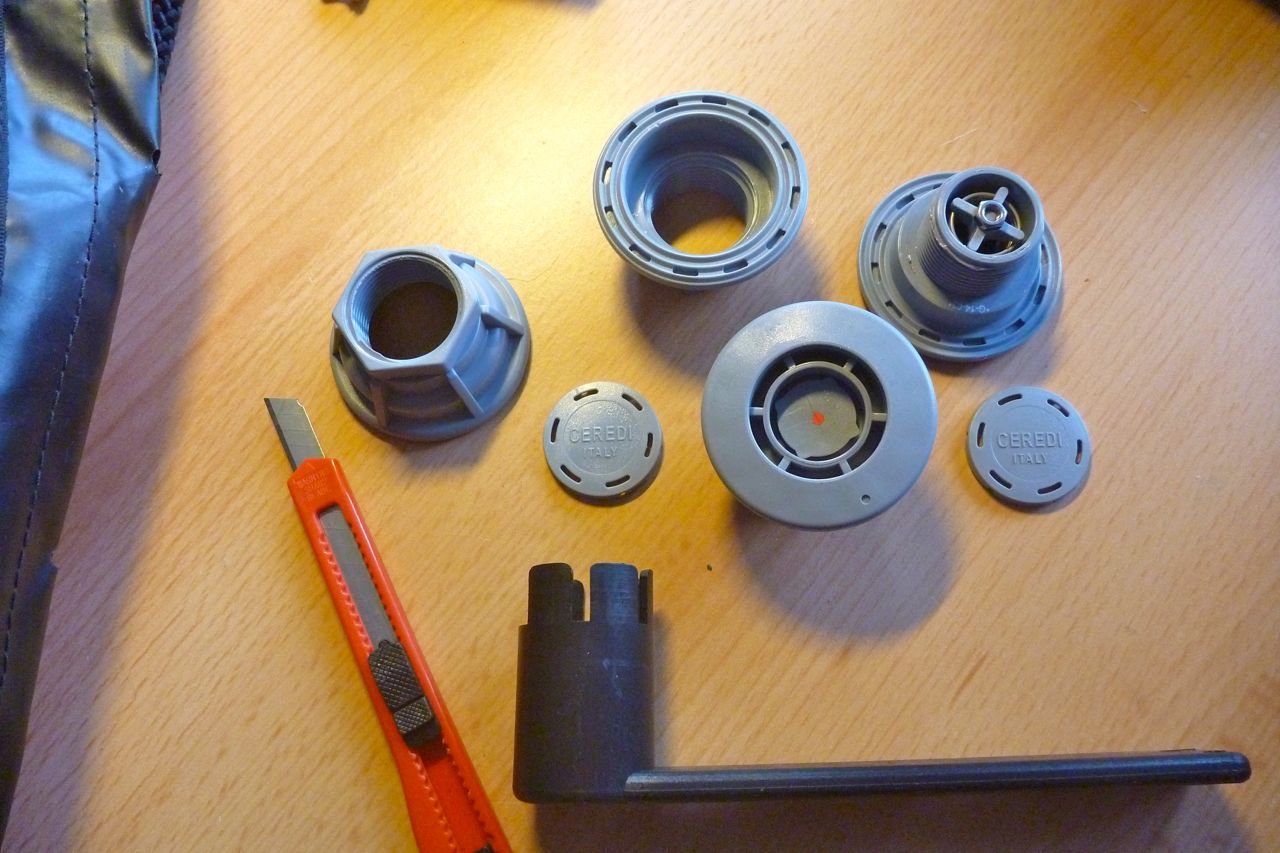
Tools and time needed • Gumotex push-push valve removing tool (fits Ceredi PRVs also). Right; £12 on ebay • Narrow-bladed knife or scalpel • Water pump/lock channel pliers • 30-60 mins
Short version • First, remove the side chamber’s inflation valve with the tool. They can be extremely stiff. If you can’t undo it, maybe think twice before going ahead. Or try silicon spray grease of 303 protectorate to lube
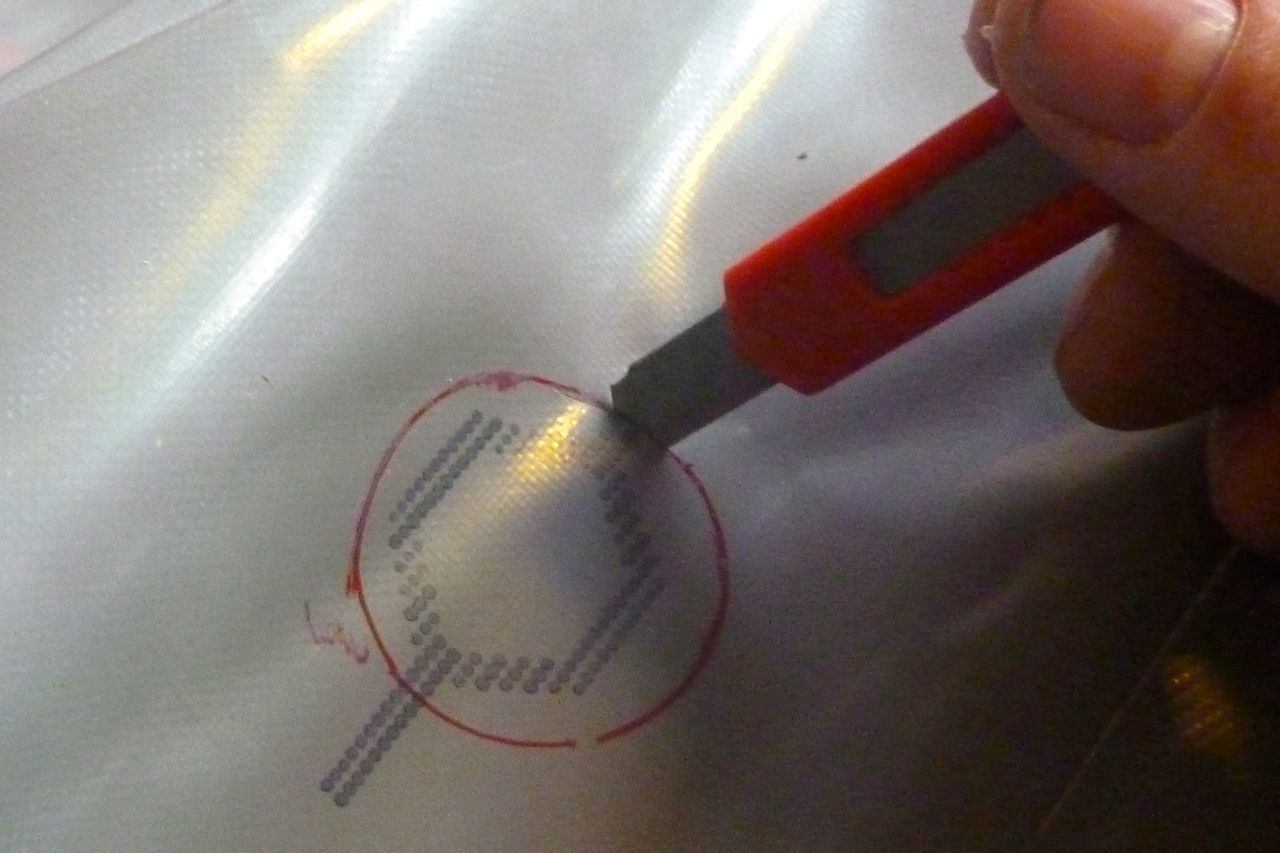
• Choose your spot, mark and then cut a 37mm hole in each side chamber. The Ceredi-suggested 35mm was not enough.Or fit the smaller, unbranded mini PRV (~25mm hole); see above. • Squeeze the PRV’s threaded back collar through the bigger inflation-valve hole, shuffle it over to the new PRV hole and loosely screw on the external part of the PRV by hand • Reassemble the inflation valve and tighten both valves with the tool • Fit push-on caps to the PRVs • Pump up and check for leaks. Maybe retighten some valves with the tool
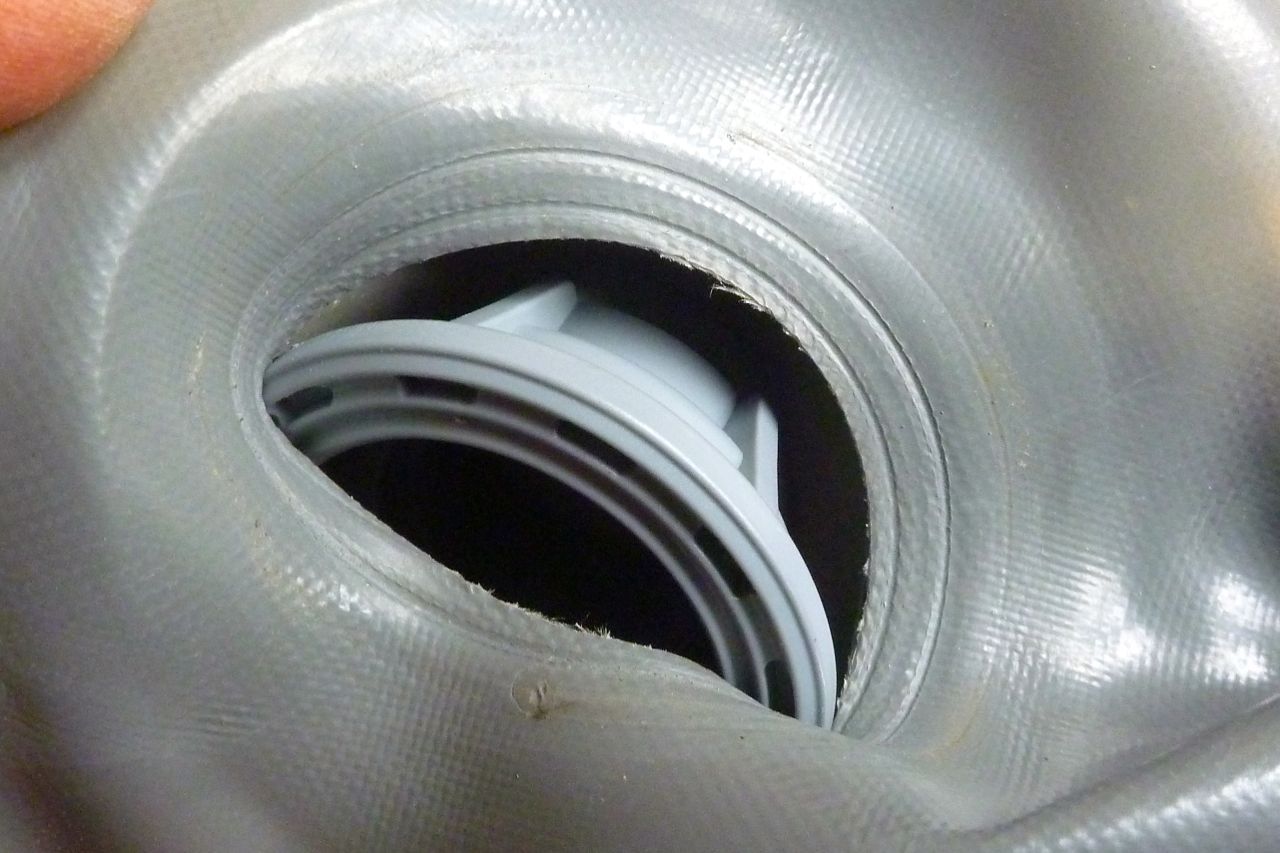
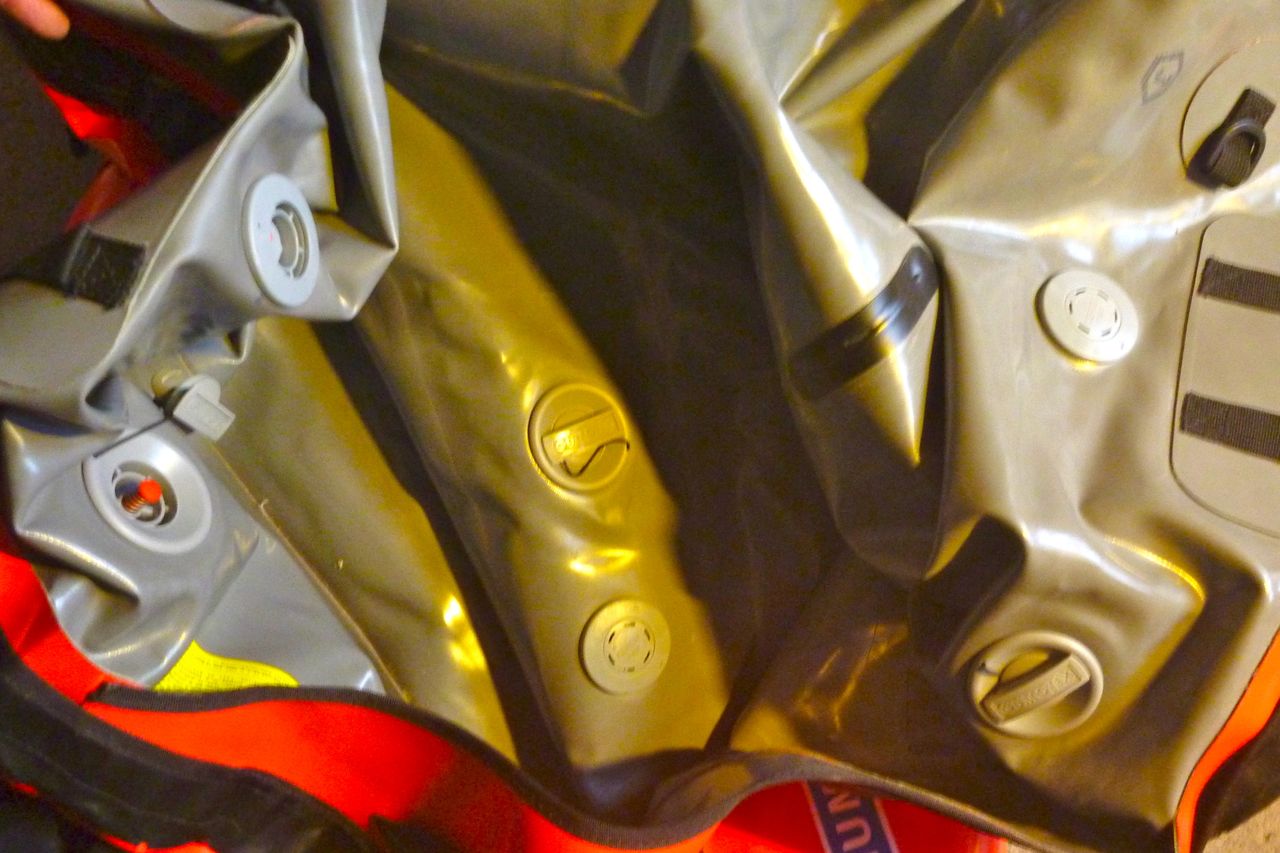
Long version I chose to fit the PRVs close to the inflation valves and at about the same level. There are mysterious markings on the inside of the Seawave to aid symmetrical positioning (Pic 2, below). I used a narrow-bladed knife and of course took care to gather up the hull skin so I wouldn’t inadvertently puncture the other side of the side tube. I assumed the 35mm hole would be big enough to take the back nut. When it wasn’t I was a bit flummoxed. Now I had a gaping hole in my boat, but no way of getting the back of the PRV inside the boat without performing a Caesarian on my Seawave. Luckily two brain cells dropped into my Hadron Collider and it occurred to me that once removed, the nearby main inflation valve’s hole might be bigger. And it was – just. One stock push-push valve was extremely hard to undo. I wondered if it had been glued in or that the plastic valve removal tool would snap (you can buy a metal one for loads more). When the other side undid with less effort I knew it had to be possible.
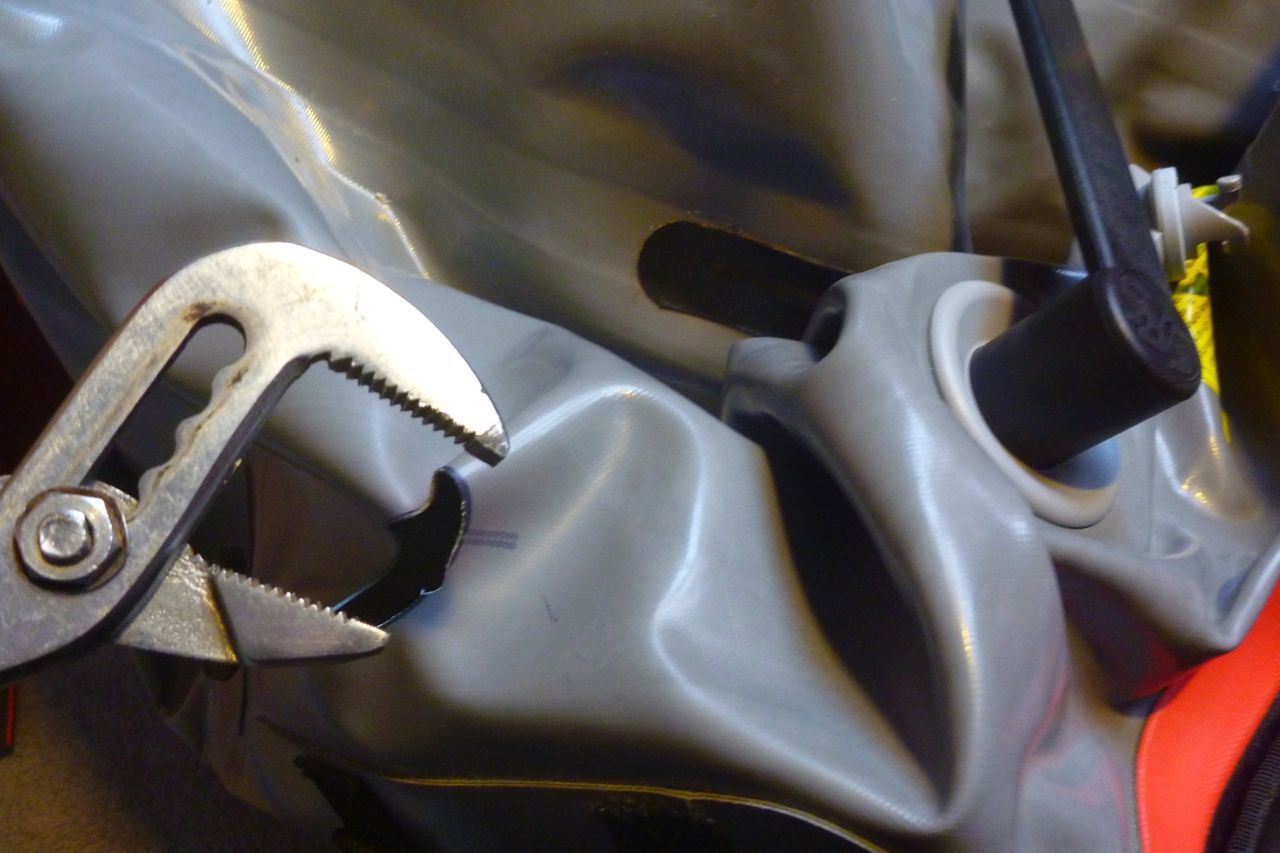
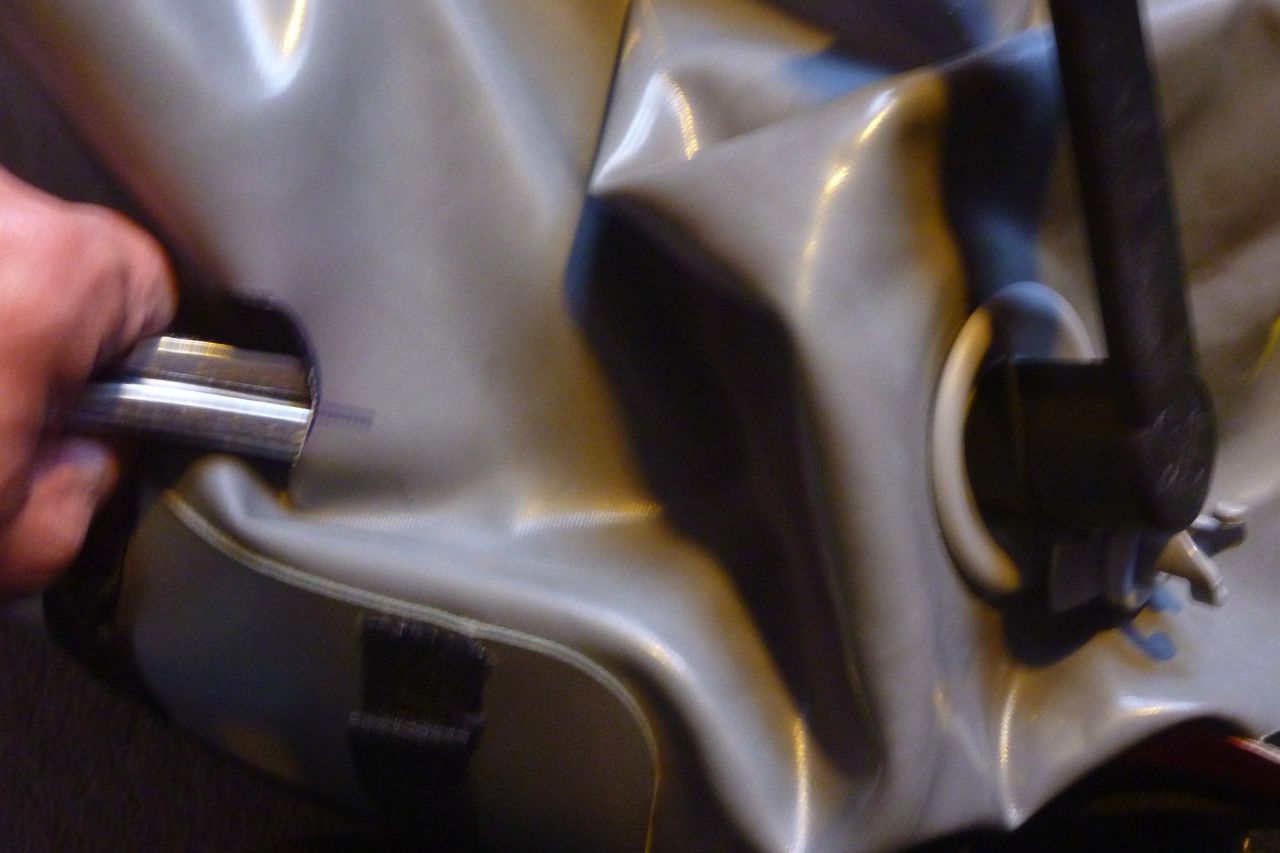
Another problem is that the internal collar or nut is only 10cm deep (pic 4, below) and so was hard to grab through the hull fabric. Until I realised this, I was grabbing the inside part of the outer valve body which screws through the collar from the outside. Trying to ‘unscrew’ the valve body from itself is like trying to pull you head off – eventually the valve tool would break. Another ‘Higgs boson’ moment came over me and I realised that by chance the two valve holes were close enough for me to get some water-pump pliers in there, grab the back collar and finish the job (pic 6, below). After that, no more problems. One thing I noticed while doing all this was the unseen protective patch on the inside of the hull opposite the inflation valves to limit wear and rubbing between valve body and hull when the boat’s delated. Nice touch, Gumotex ;-)
I did all the valves up as hard as possible with tool and hand, and in four more years had no problems. On a hot day in the sun I can hear the high-pressure side PRVs hissing away. The gallery below shows the job in chronological order.
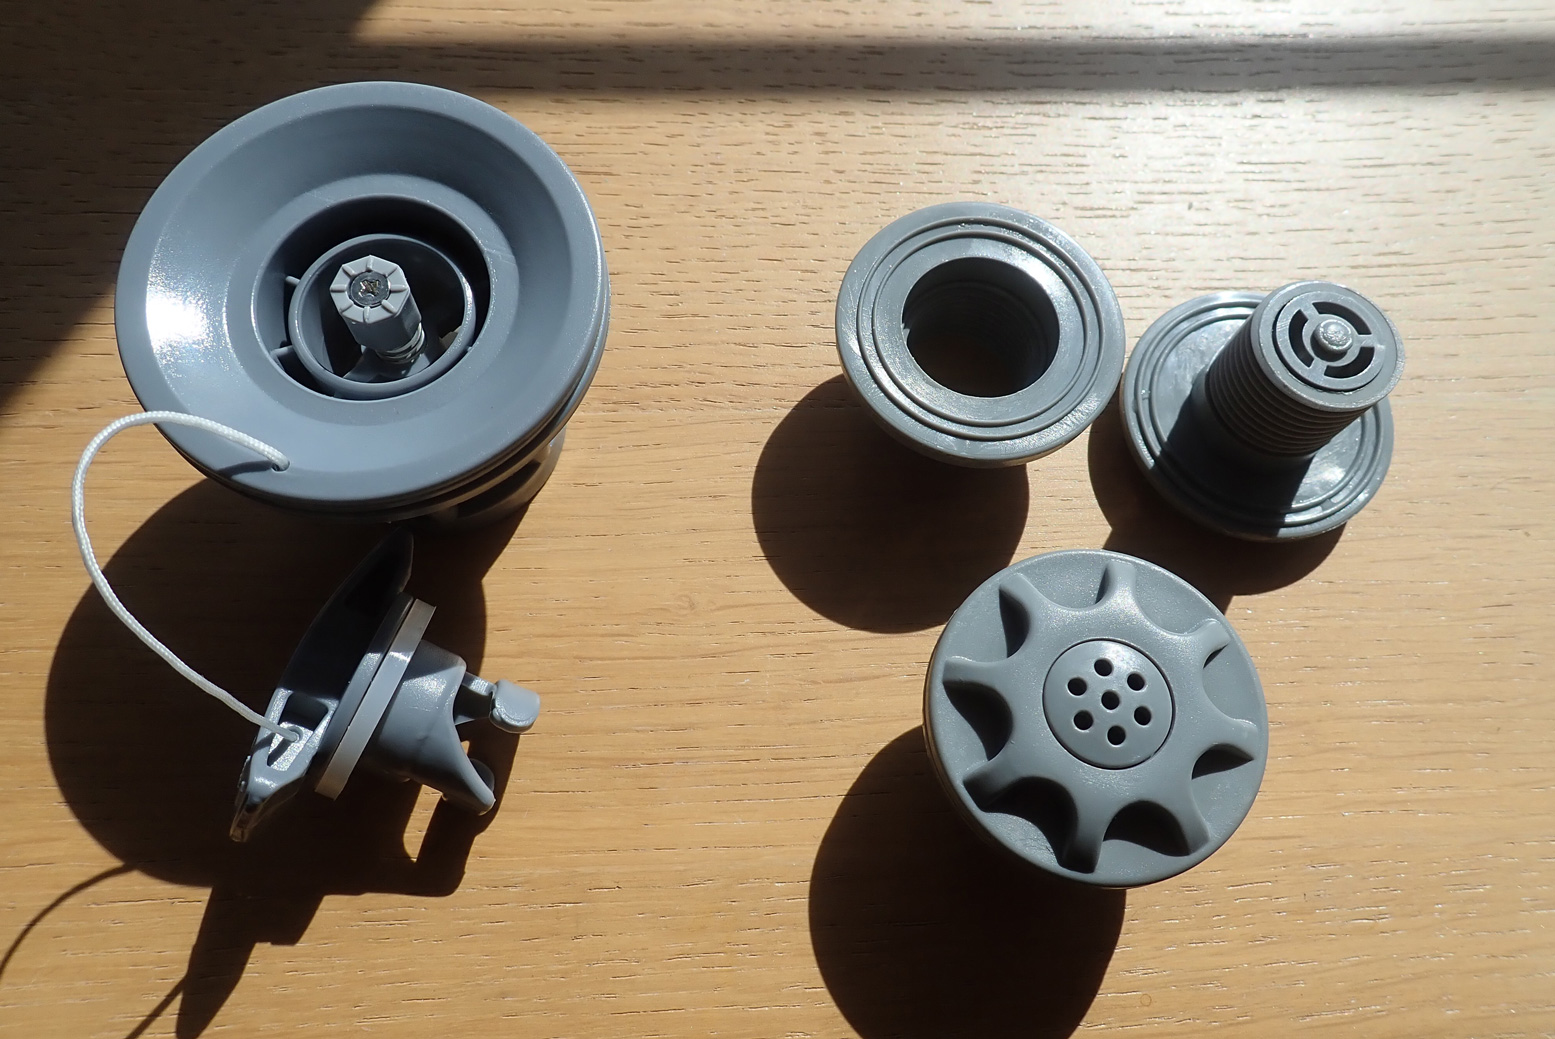
The bits you need. Note the adjustment nut, top right. Didn’t spot that originally.Incision, but the right-sized 37-mm hole is too small to pass through the ’35mm’ PRV back collar37mm hole is better, but still not wide enough to pass through the inside ‘retaining nut’ of PRV assemblyYou need to remove the main inflation valve (it’s hard to grab the inside part by hand). Then the PRV back nut just squeezes through main valve hole and can be shuffled along towards the new holeHolding the PRV back nut in place to tighten is hard by hand. So pass pliers through the main valve hole…… to clamp onto the back of the PRV assembly. This is why it helps to cut the PRV hole close to the main valvePRV done. Now replace main valveClamp them all upPRVs as far as the eye can seeSmall leaks after reassembly test: retighten all valves
Now it’ll be good know that should I doze off as the tide ebbs away, I won’t be rudely woken by an exploding boat. Another side benefit of doing this is that you’ll never need to use a manometer (pressure gauge) again. You simply pump up all three chambers until they hiss and you know they are at full operating pressure.
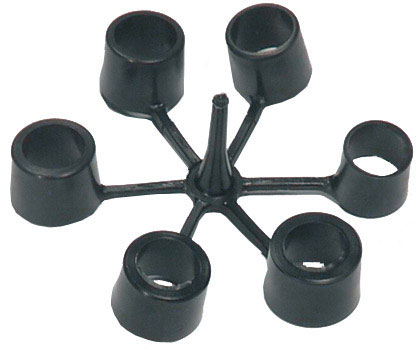
Nikola’s PRV nozzle idea In the comments below you will see Nikola suggesting the idea of using capped off PRV nozzles you’d usually fit to the end of your inflation pump hose to fill up a boat to the correct pressure without referring to a manometer. The integrated PRV in the nozzle purges at a given pressure. No scalpels required. You will need to block off the open end where the pump hose attaches. The €13 red Ceredi ones he found (left) are rated at more or less the same pressures as a Seawave: 0.25 bar/3.5 psi. I think if I was running a Seawave in a hot country I’d definitely fit some to protect (or not have to worry about) the sidetubes. It might even be possible to adjust the spring inside the Ceredis (beneath the vented cap) to get a bit more pressure before they open, getting closer to the red-dot in-hull Ceredi PRVs I fitted of Seawave 1. Or fit the similar black Grabner inflation relief valve which is rated at a more promising 0.3 bar, but, like everything Grabner, is double the price of the Ceredis.
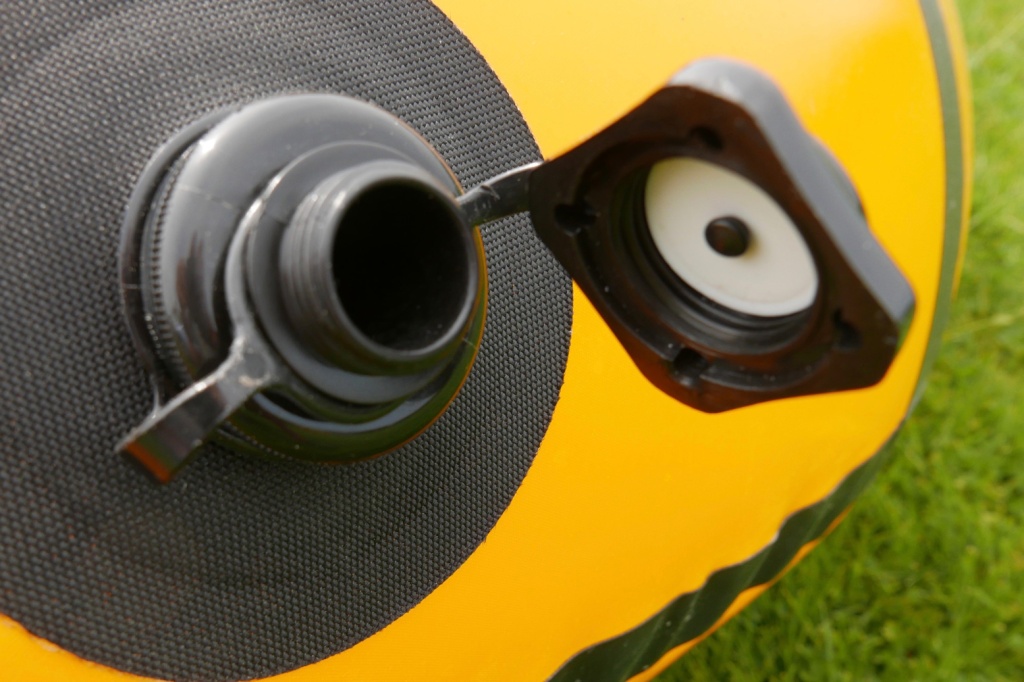
The best inflationvalves for an inflatable packboat aren’t the bungs you find on an airbed or an old Semperit. Nor the thin, twist cap stems off a Feathercraft Java or an old Alpacka. What you want are one-way valves. Like a car-tyre valve, one-way operation as well as a secureseal are the key, so what pumps in doesn’t push back or escape when you remove the inflation hose. Found on cheaper IKs and packrafts Boston valves are simple and effective for lower pressures. More below.
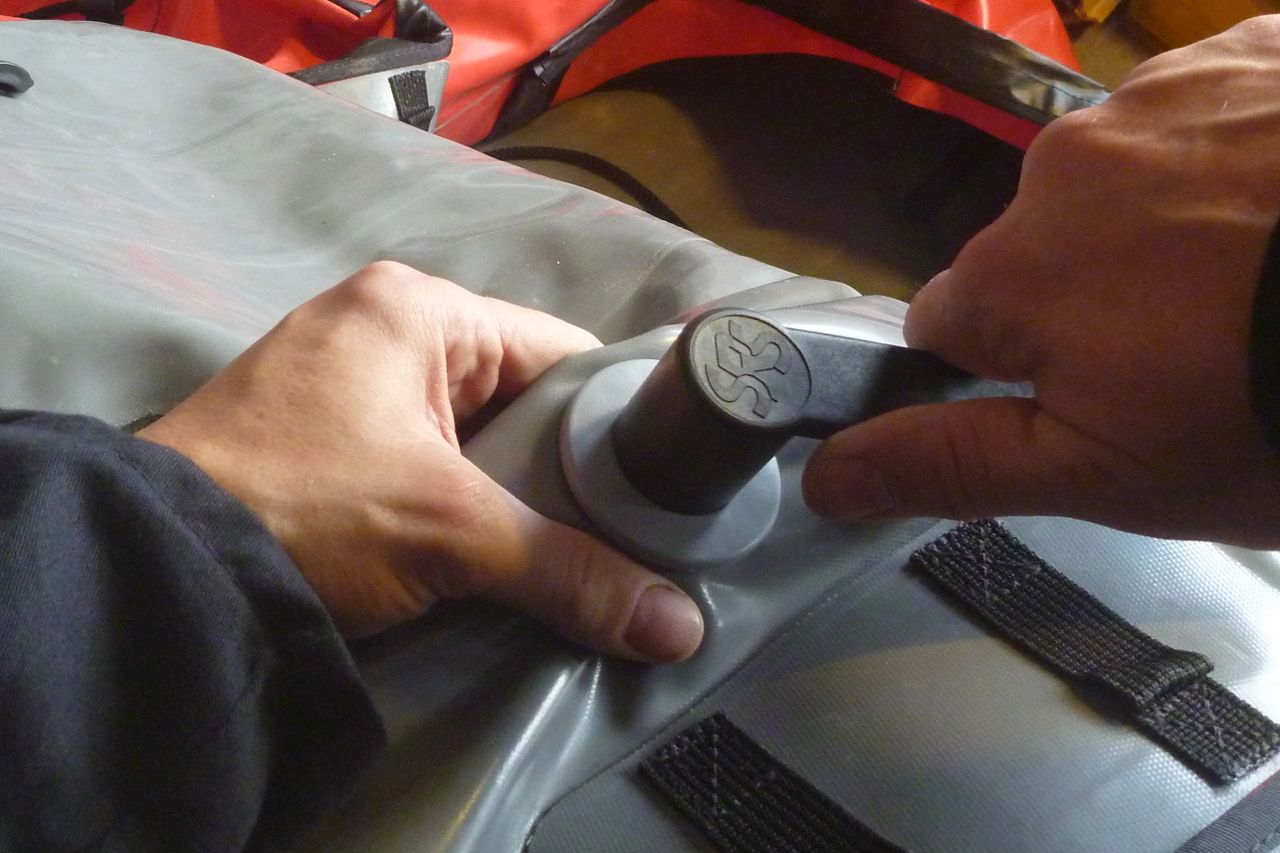
What I call raft valves (left) like Halkey Roberts, Leafield suit higher pressures and are needed for dropstitch panels. In America they’re called ‘military’ valves. With raft valves you either push and twist the button clockwise to lock open (deflating). For pumping up, push lightly and turn anticlockwise so the button springs back up to seal. This closed ‘button up’ position is the best way to transport an IK too. To lose a little pressure (say, the boat is getting hot in the sun) just jab the valve core button, same as on a car tyre.
Many raft valves are now ‘push-push’ (graphic left) which work like a clicking biro so are even easier to use. I always refit the cap seal straight away to keep water and grit out of the mechanism.
Two raft valves. On the left the collar goes inside the hull, the valve body screws into it tightly and the dust cap goes on top.
I’ve found these valves reliable on all my IKs, although this Gumotex 410C owner didn’t. Once in a while – or after the boat is new – you may want to check the valve is screwed tight against the fabric with the valve spanner, right. They’re also useful for removing the valve (or a PRV; see below) should it play up.
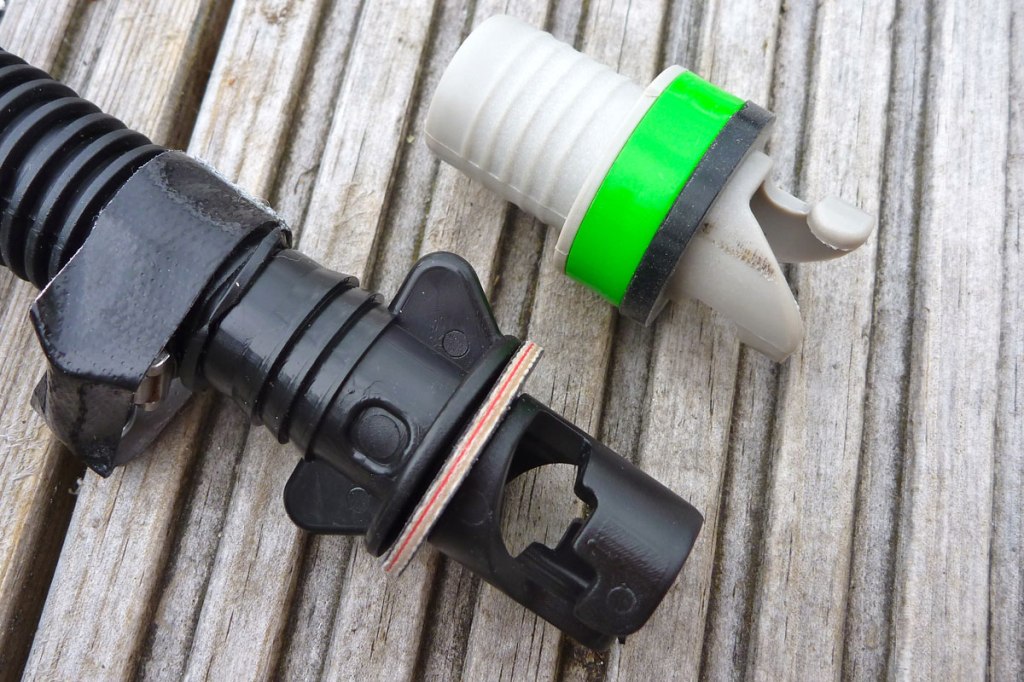
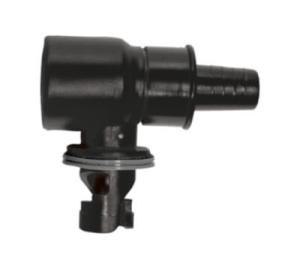
When it comes to inserting the inflation hose, a simple push-fit plug as shown below left can work; just jam the adaptor into the valve body and it usually stays in place while pumping. It looks cheap but on a Gumotex at least, works fine. With higher-pressure boats like Grabners and Incepts and some Gumotex (as well as dropstitch boats), the jam-fit can blow off so you’re better off using a bayonet fitting (below right) which won’t pop off as pressure builds.
Low-pressure valves for packrafts
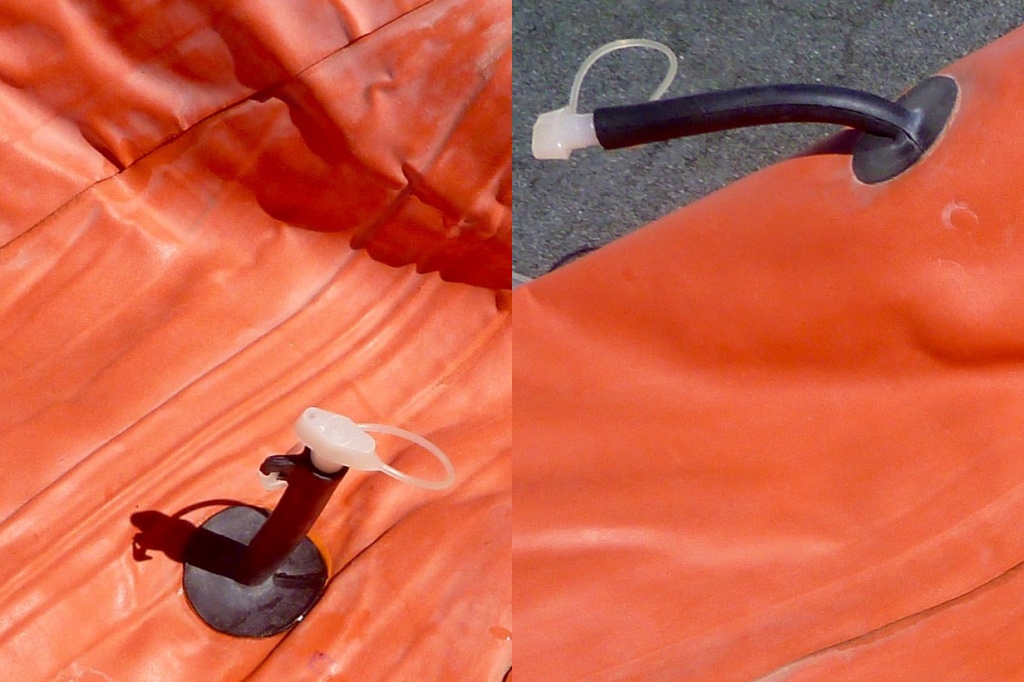
Alpackas and even Feathercraft used to use crappy, soft plastic twist-lock oral stem valves (below left) which you could never be sure were done up just right and which didn’t take well to pump nozzles.I suppose they were a step up from blow-up airbed plugs (below) which are still found on cheap IKs.
Retractable one-way flap valve. Annoying to delateLilo plugs: Ok for seats, crap on a hull
Now best used on inflatable seats and the like, they’ve been superseded by similar one-way stem valves (below right) with a light spring closure easily openable by lung pressure. They’re a bit trickier to deflate: you have to depress the ‘X’ with a finger while squeezing out the air. The one below right is actually on a buoyancy vest.
Twist-Lok: OK for seats and old packraftsSpring valve one-way for higher pressure
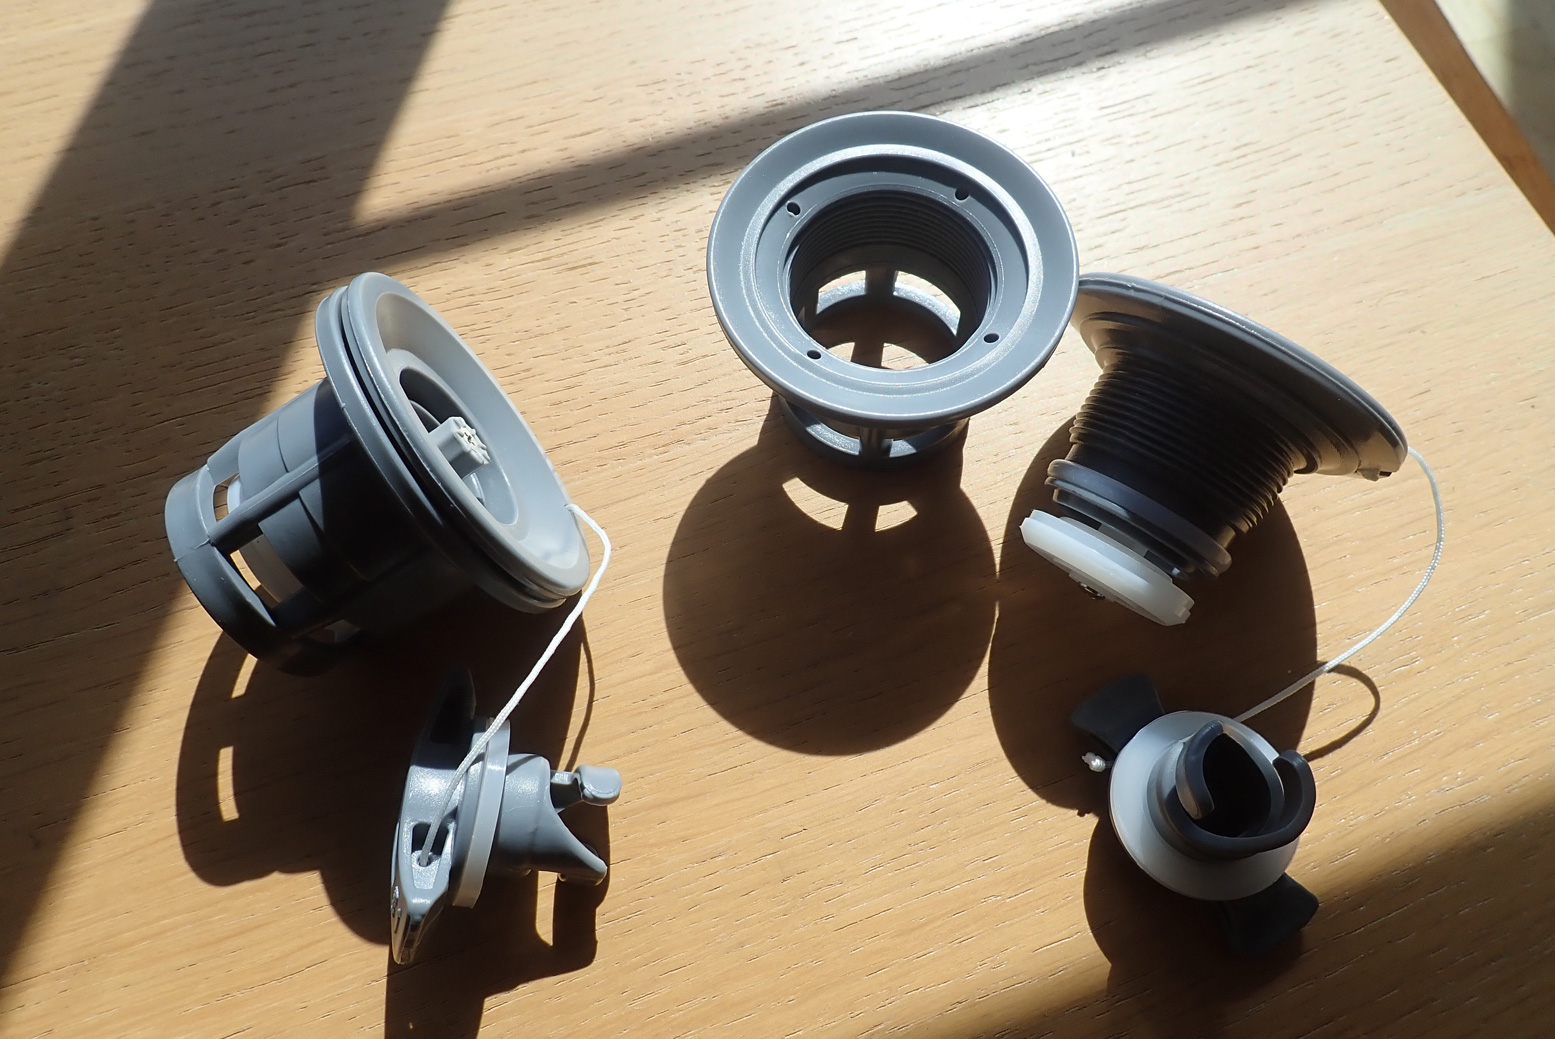
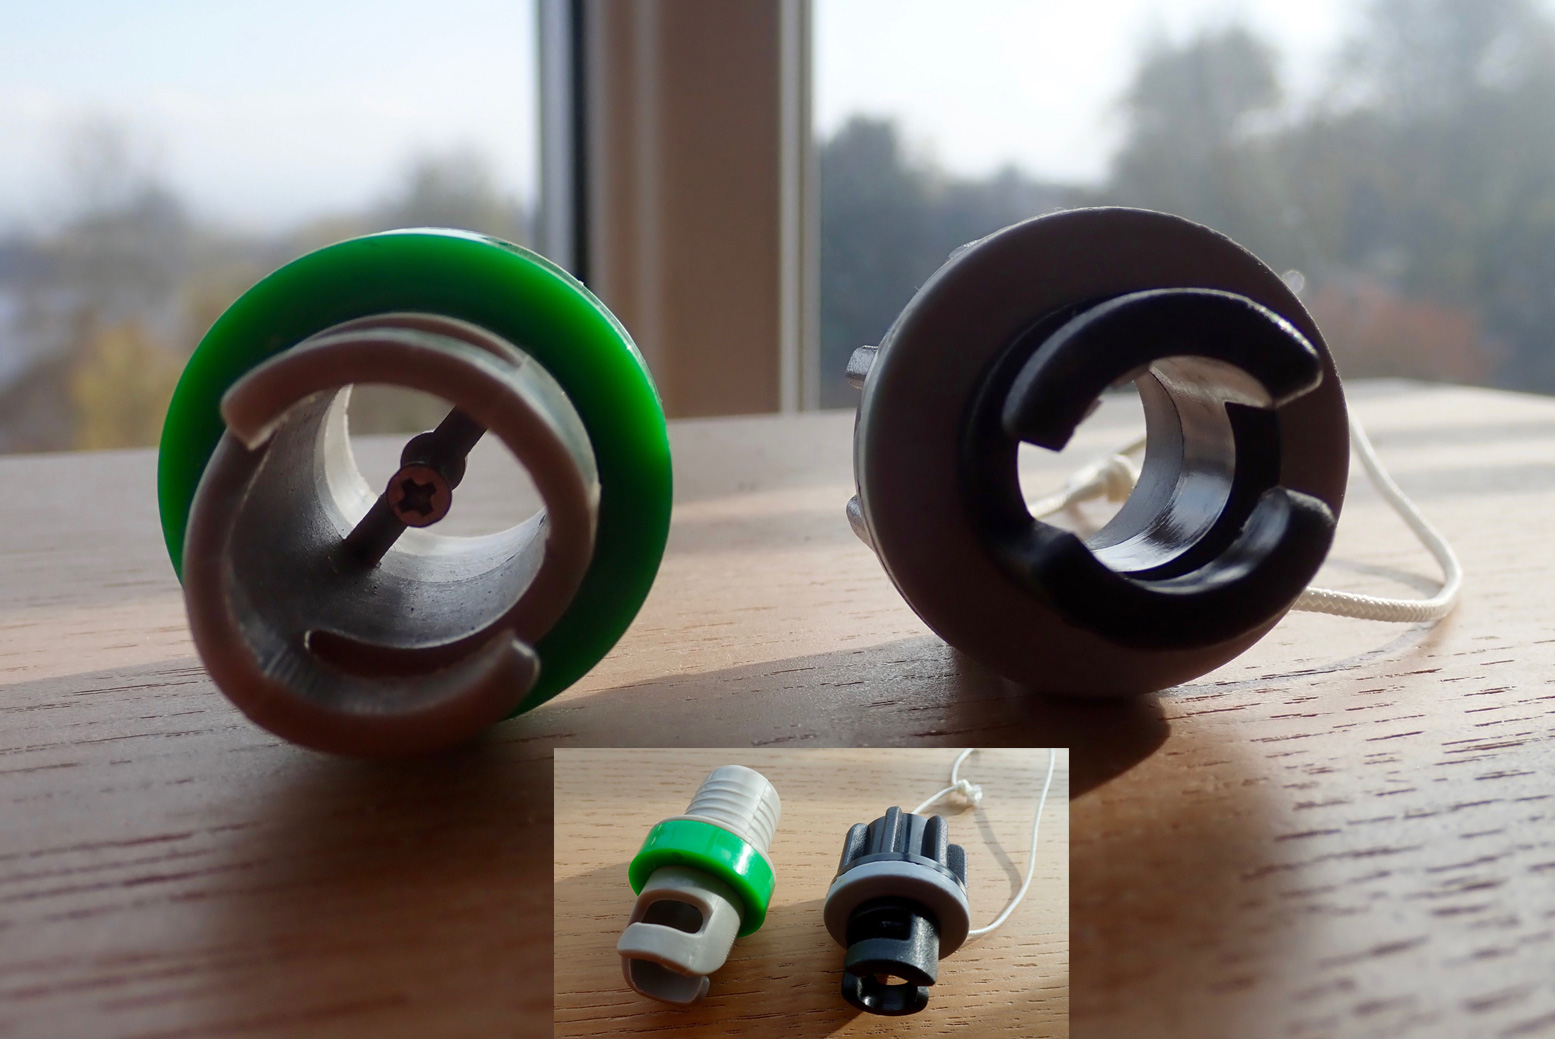
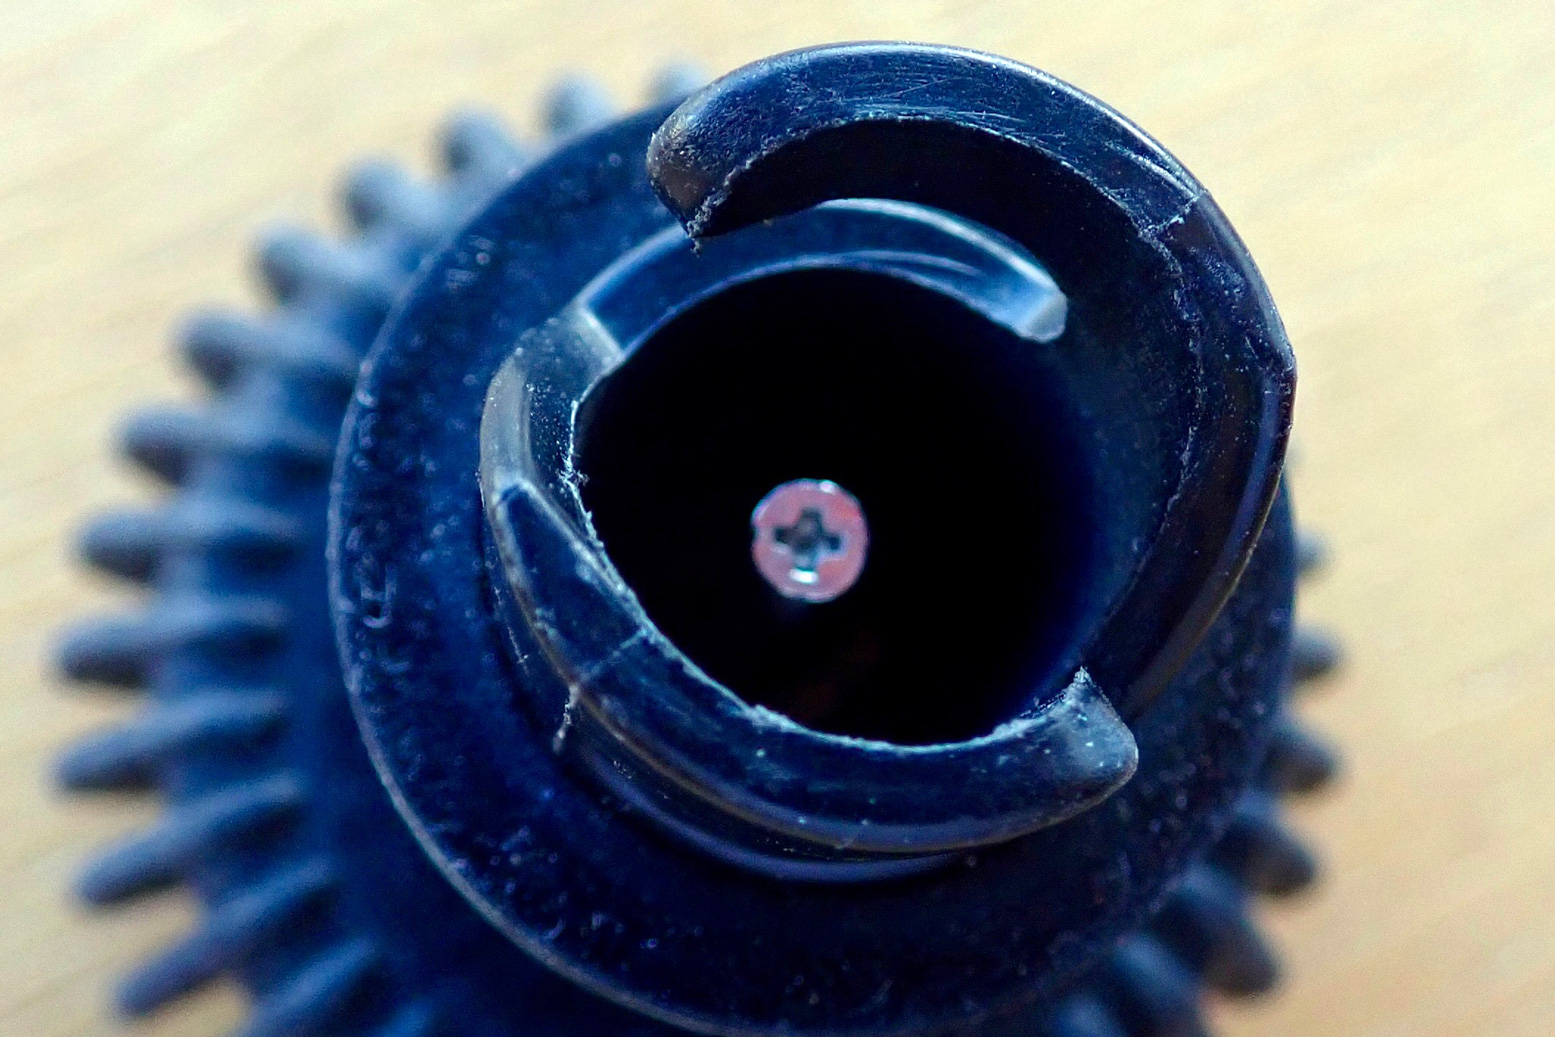
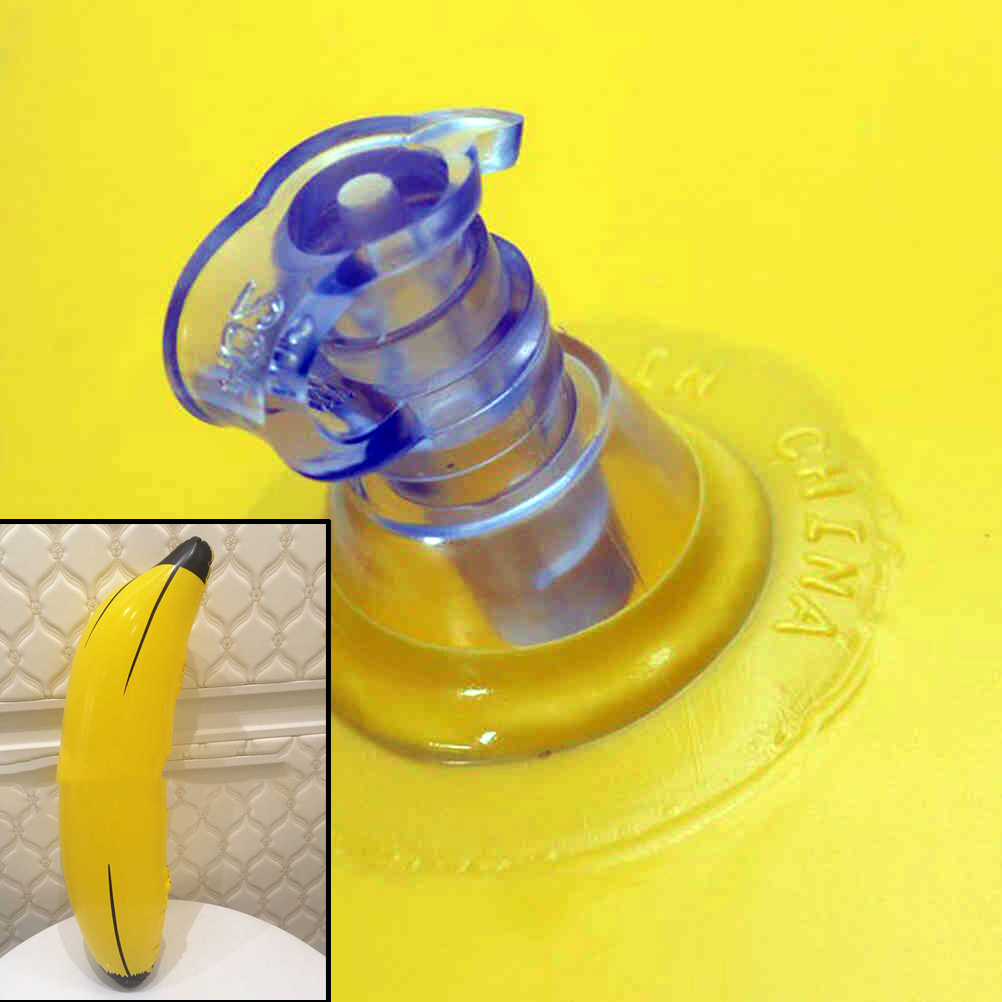
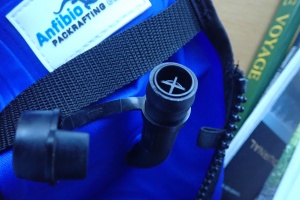
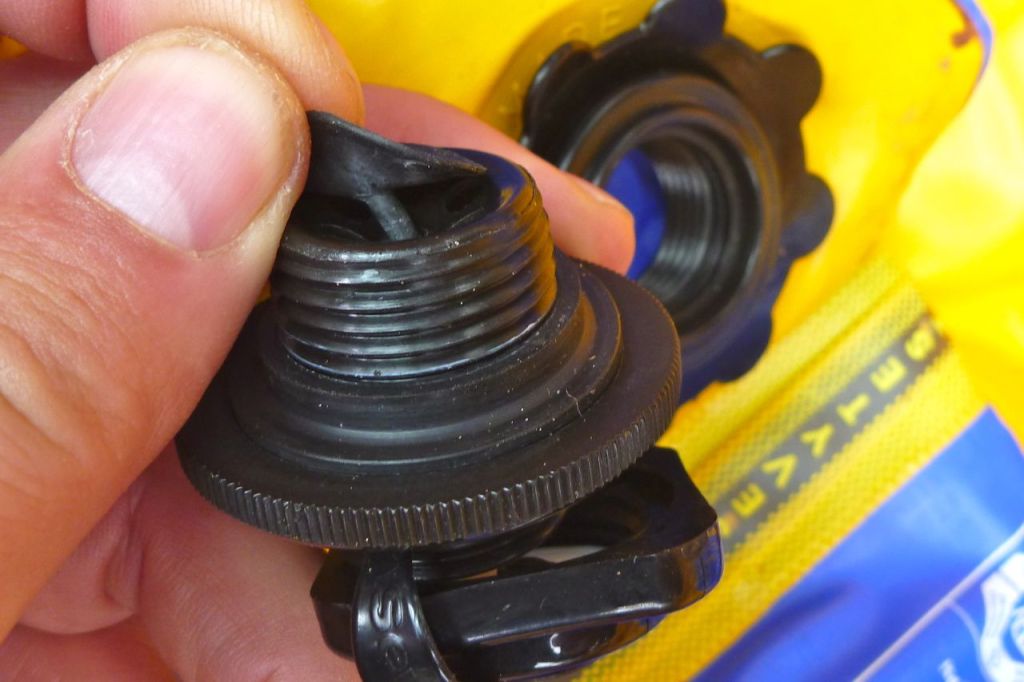
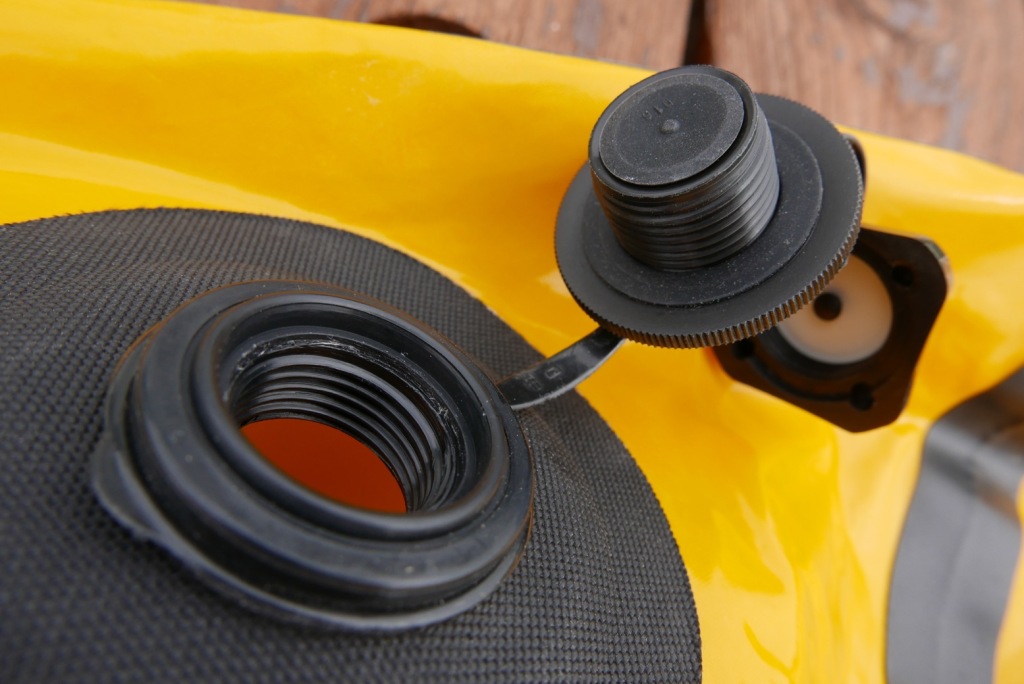
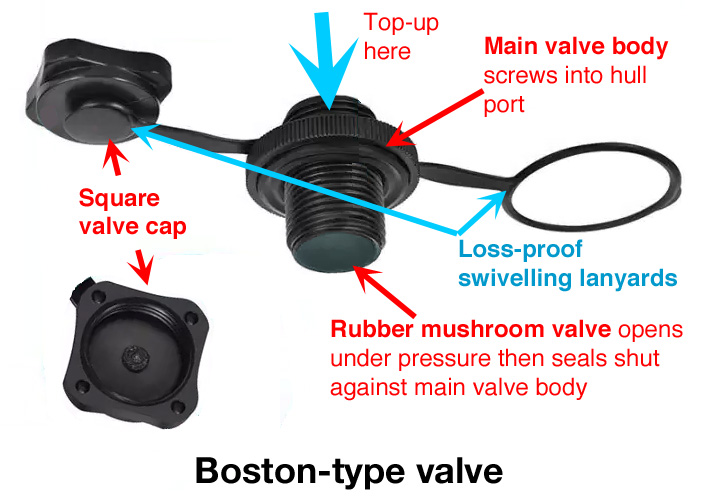
Boston valves is a generic name for a one-way valve long used on cheap IKs as well as slackrafts and have now become common on packraft hulls. Note they’re widely copied and not all may be identical, like well-known branded IK valves. The square top cap screws onto the round valve body which itself has a knurled edge to easily unscrew from the hull port (below right). Here you attach your air inflation bag or open to quickly dump the air when rolling up.
Inflation: top cap removedRubber ‘mushroom’ valveDeflation: unscrew valve body
Ideally suited to low-pressure boats like packrafts, they use a simple rubber ‘mushroom’ valve on a stem (above middle). Once the main valve body has been screwed back into the hull, unscrew the square cap to finish the inflation process by either topping off by mouth or with a hand pump.
A one-way Boston-type valve eliminates the need for the old separate stem valve and the whole assembly has swivelling plastic lanyards so nothing drops away when unscrewed.
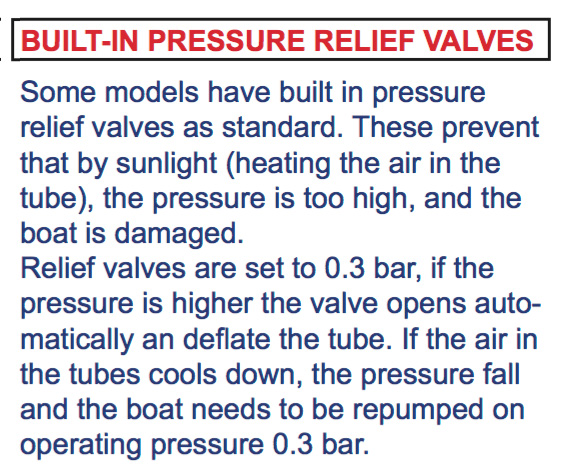
Pressure release valves (PRV) for some IKs
I’ve learned the hard way to be careful and not let an IK get too hot when out of the water. On a hot day you can feel the more exposed sidetubes tighten like a drum. This of course happens to be good for rigidity and paddling efficiency but isn’t good for the seams or an I-beam floor or the sewn seams of a cheap shell&bladder IK.
Oddly, not all Grabner IKs have PRVs which means…… faffing about with pressures on hot days.
The floor tube on my old Sunny had a pressure release valve – oddly it’s something rarely mentioned in the specs, even on current Gumboats. It’s there to protect the I-beam floor which could rupture inside under pressure (I-beam floors explained here). The valve is set to purge (open) at a certain pressure when the air inside heats up, expands and pressures rise. With Gumotex it is 3psi or 0.21 bar. It means an IK can feel a bit soft on a cool morning following a hot day; don’t worry, you don’t have a leak, it just purged some air when hot yesterday and in the cool air make sit a bit soggy. A quick top up is all you need to do. The handy thing with a PRV is that it makes a good guide to how hard you ought to pump up the other chambers of the boat without PRVs when you don’t have a pressure gauge. At whatever pump effort the floor PRV starts hissing, that’s the same or a bit more pressure to put in the side tubes which usually don’t have PRVs.
As mentioned, the air in an IK can also get cooled, for example when pumping up on a hot day and then putting the boat in a cool river: a normal scenario. Cold air contracts (loses volume/pressure). Because you want the boat to be as rigid as possible, after initial inflation it’s worth topping up again once the boat is in the water; splashing helps cool the sides. Topping up, or tempering as it’s called, optimises rigidity and with long, 2psi boats you need all the rigidity you can get. Conversely, pumping up your boat in sub-freezing temperatures then putting it on water which actually ‘heat’ it up, though this is a much less likely scenario.
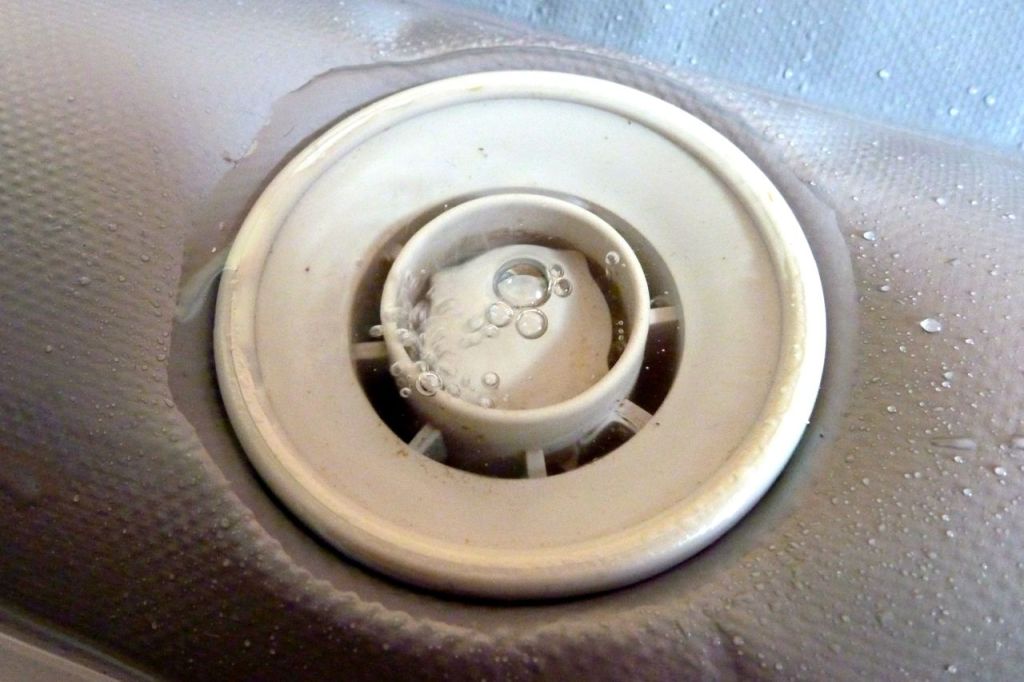
A PRV purging correctly
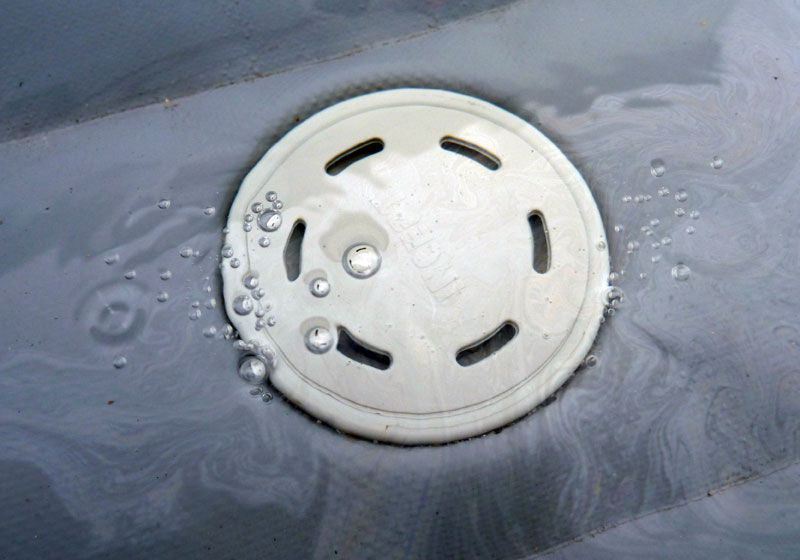
PRV leaking from the sides not through the valve. Needs tightening with a special tool; a common necessity with hastily assembled new IKs.
My higher pressure Incept K40 had PRVs on all chambers which meant you could confidently leave it in the Sahara and it would safely purge then feel a bit soft once cooled down back in the water. Picture above: Incept PRV test with the protective cap removed and purging correctly through the centre. Below: a PRV being resealed after leaking from the edges (left). This was because I failed to check tightness after buying the new boat, as recommended by the manufacturer. (My Gumotex IKs never needed such tightening or checking in years ownership.) I ended up also fitting sidetube PRVs to my Gumotex Seawave to run higher pressures and the be able to leave it pumped up and out of the water for months at a time. Like any valve, PRVs can leak due to grit on the seal or a weak or sticking spring. Grit is not so unlikely when you think they can’t have a cap and have to sit on the floor of an IK, with water and sand occasionally swilling in and down into the body. Try removing the cap and blasting it out with air and maybe give the spring a squirt with 303 (UV protectorant). The best thing is to remove the PRV with the same valve tool, inspect and clean the sealing surfaces and reinstall.
Oddly, my old Grabner Amigohad no PRVs at all and neither do the latest Holiday models and a few other Grabners, even though all run higher than normal 0.3-bar pressures. One presumes Grabner are so confident in their construction they’re not needed, despite the warnings above. It should be included with the boats, but if your pump has no gauge, Grabner do pressure relief adaptors to fit on the hose (left) which purge at 0.3 bar, so dispensing with faffing about with a handheld pressure gauge. It’s a good idea.
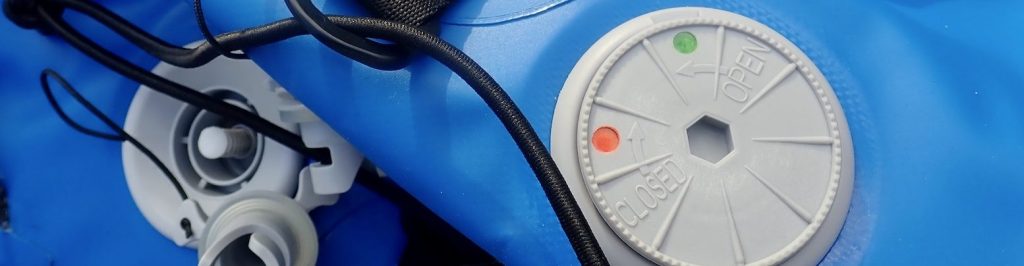
My current Zelgear Igla 410 has closeable 0.25 bar PRVs on the twin I-beam sidetubes (below). The separate DS floor runs twice that pressure but has no PRVs. I find it’s actually quite handy to ‘lock in’ the air during cool transits or when getting into the water. When the paddle is over I open the PRVs which hiss a bit back down to 0.25 bar. I leave it like that until the next paddle when I top everything back up.
Lockable PRVs; quite handy actually
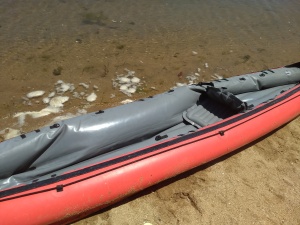
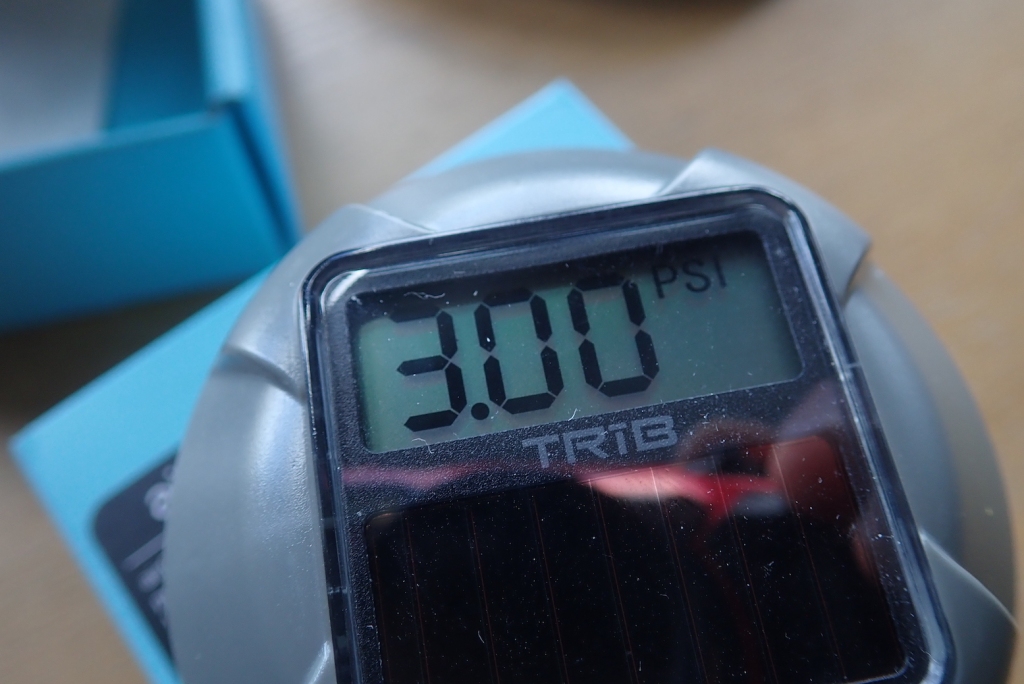
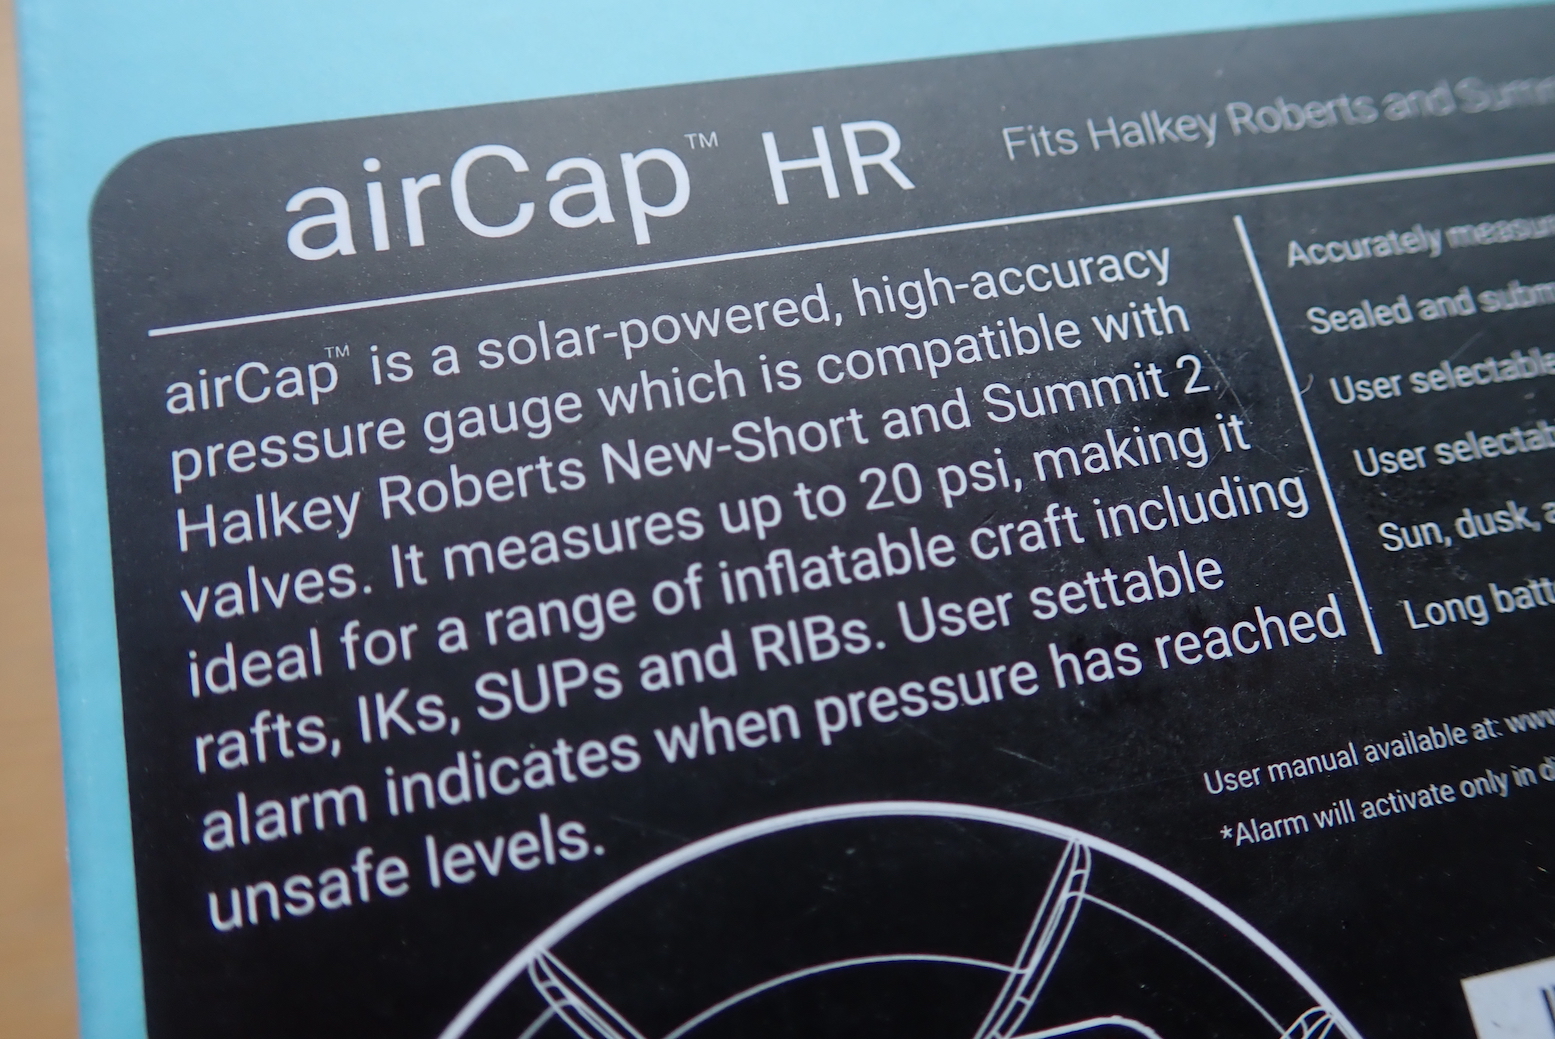
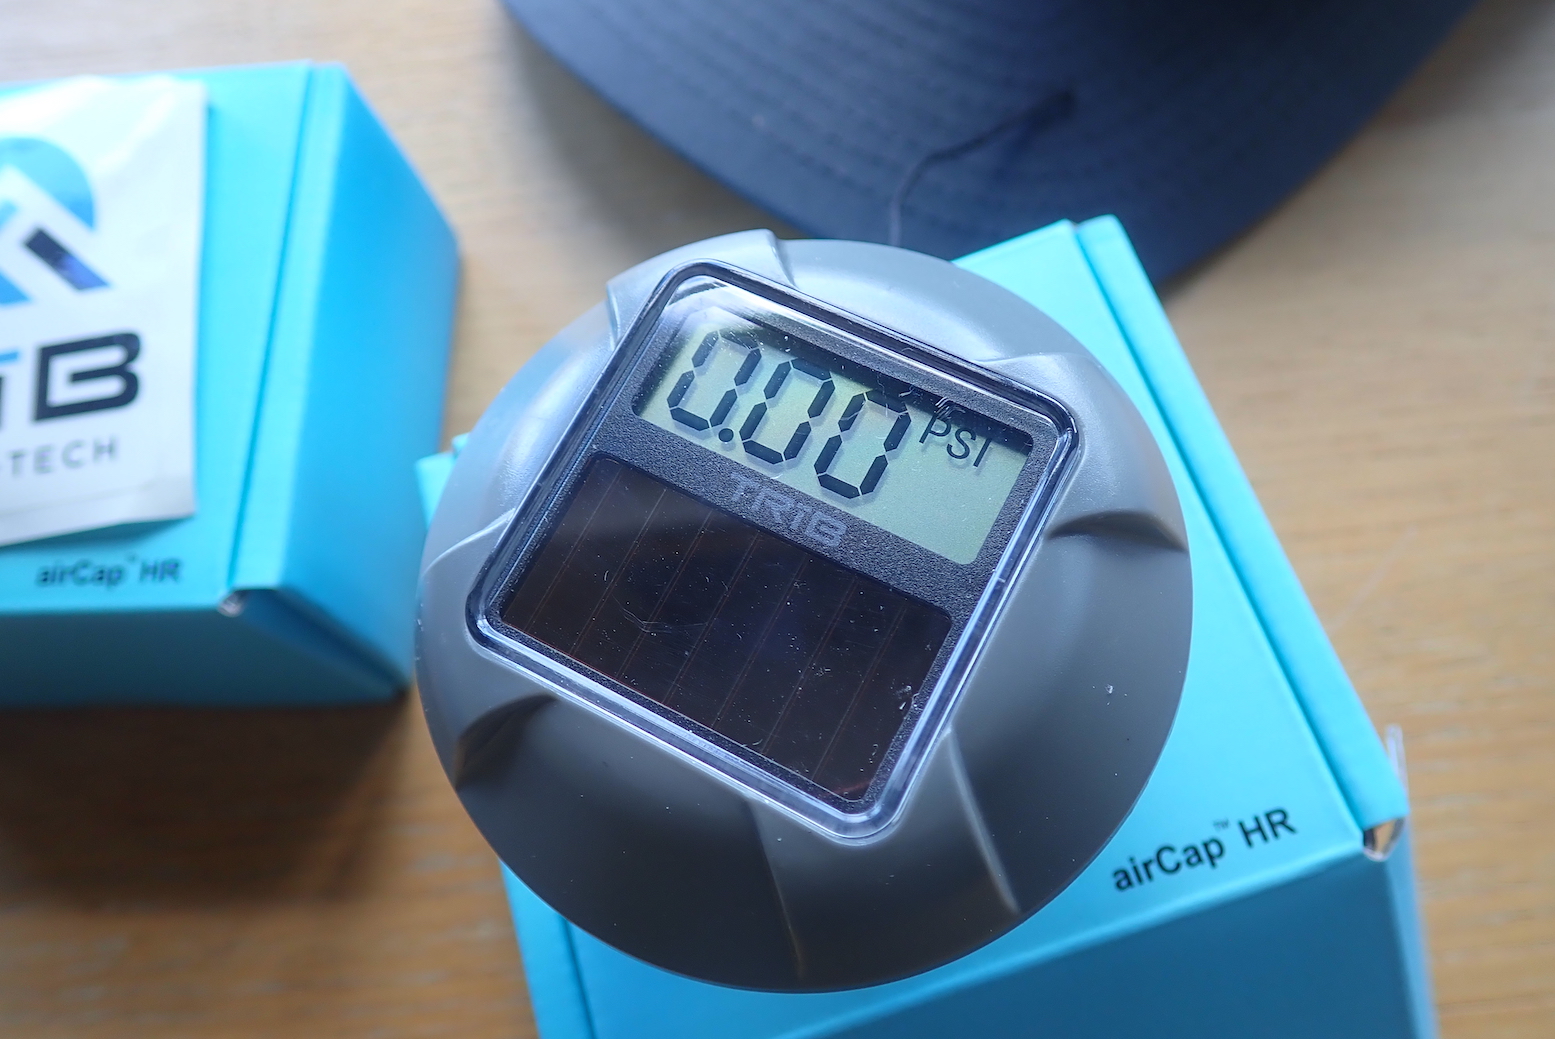
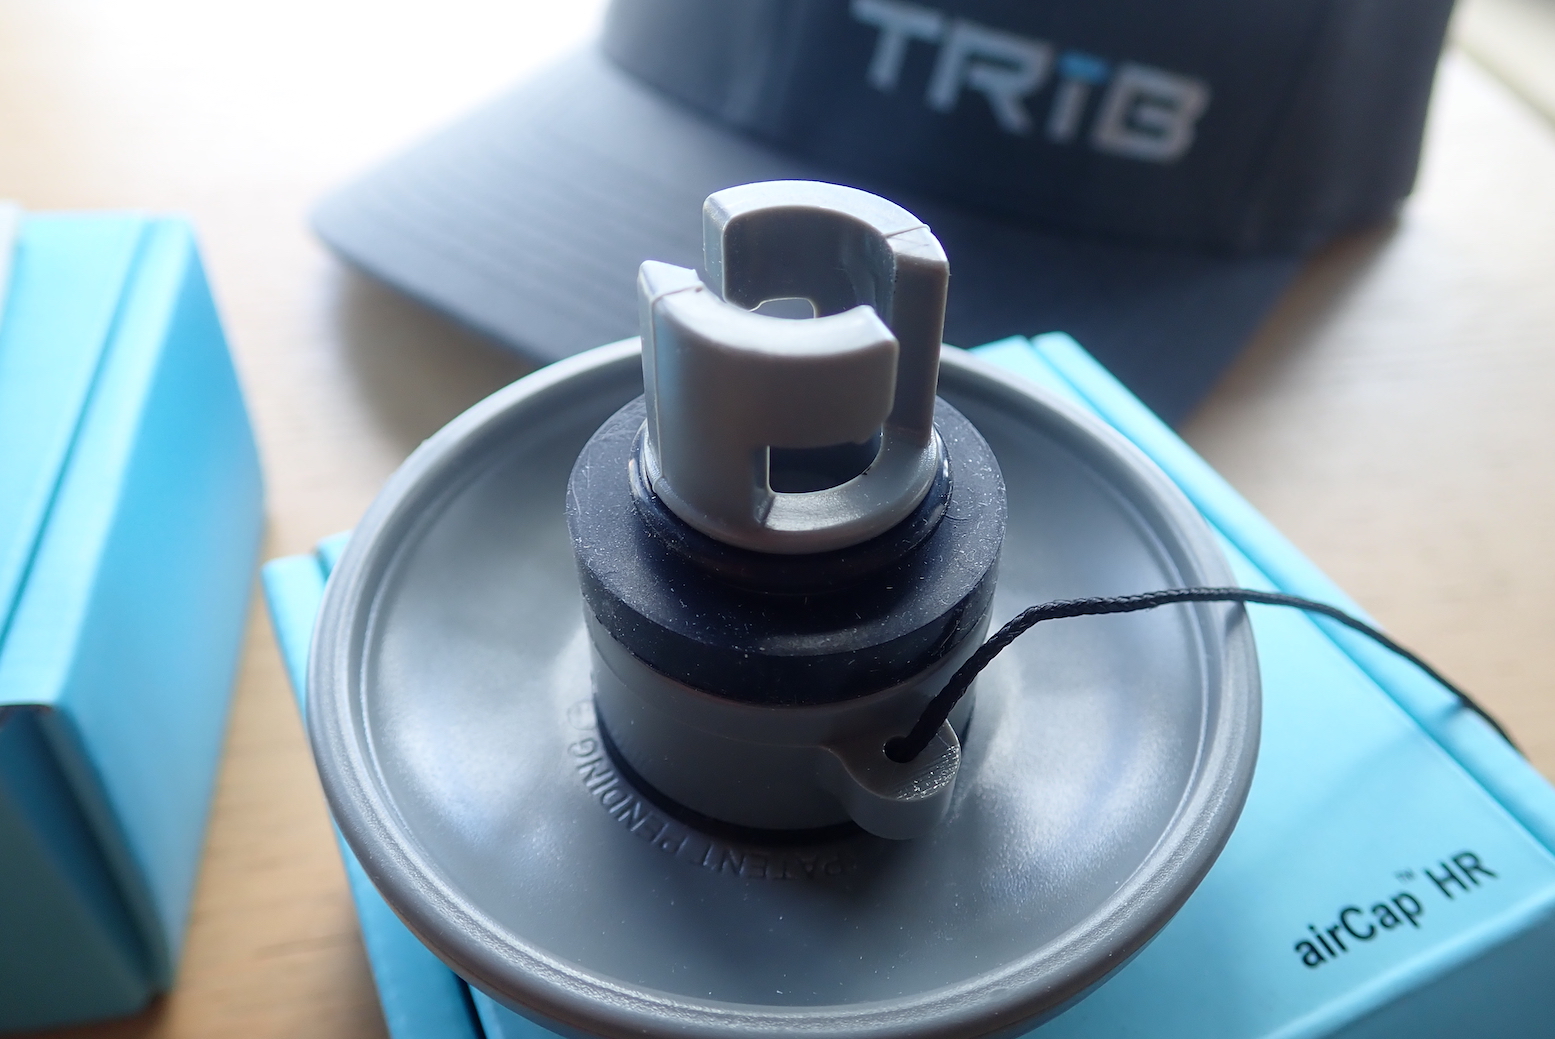
Another good idea are TRIB airCap live pressure monitors so your boat doesn’t end up like the Seawave left (actually an unexplained internal rupture while in the water). These TRIB solar-powered gadgets replace the valve cap on bayonet-type inflation valves like Halkey Roberts or Gumotex. One fitted securely an LCD display displays your pressures in psi, kPa or bar, a bit like TPMS for cars and motos. And like TPMS, you can even set a bleeping alarm at anything up to 20psi / 1.37bar. You need to make sure the seal is good and air is not slowly leaking out, but you can also use them as simple digital pressure gauges: twist on, measure and remove. Once fitted, you can watch as pressure drops after you put the boat in the water, and then seeing it rise out on a hot river bank. If I kayaked in a hot country (ie: not the UK) they’d be a simple alternative to the faff of installing PRVs. TRIB airCaps cost $40 in the US and the same in £s in the UK. The ribstore sells them.