IK&P Video of the Week: Seawave vs Sea Waves
Leave a reply

See also:
Sandbanks Style Optimal (similar to AirVolution)
Full drop-stitch inflatable kayaks main page
Advanced Elements AirFusion


US IK and iSUp brand Advance Elements have come up with a sleek and innovative new angle on full dropstitch kayaks (FDS IK): The AirVolutions feature a high-pressure two chamber ‘clamshell’ design where the upper DS panel is a demi-deck. With minimal stowage below the decks at each end, it resembles a Sit-On-Top, except (though not currently offered) you could fit a spray skirt round that coaming (cockpit rim) to be sealed right off.
There are Solo and Double/Solo models with dimensions below. The more I study these Full DS IKs, the more I think what you gain in rigidity you pay for in weight and especially bulk over similar non-FDS IKs, some with just a DS floor. Maybe PVC tough enough to handle the intended use and pressures is simply a bulky fabric. In its wheeled duffle the folded up AirVolution2 is a massive 4 feet high and 18″ wide. As with many US-branded IKs, the Airvolutions are on the wide side, but it’s claimed they can be stand-up paddled if you have good balance. That’s me out, then!
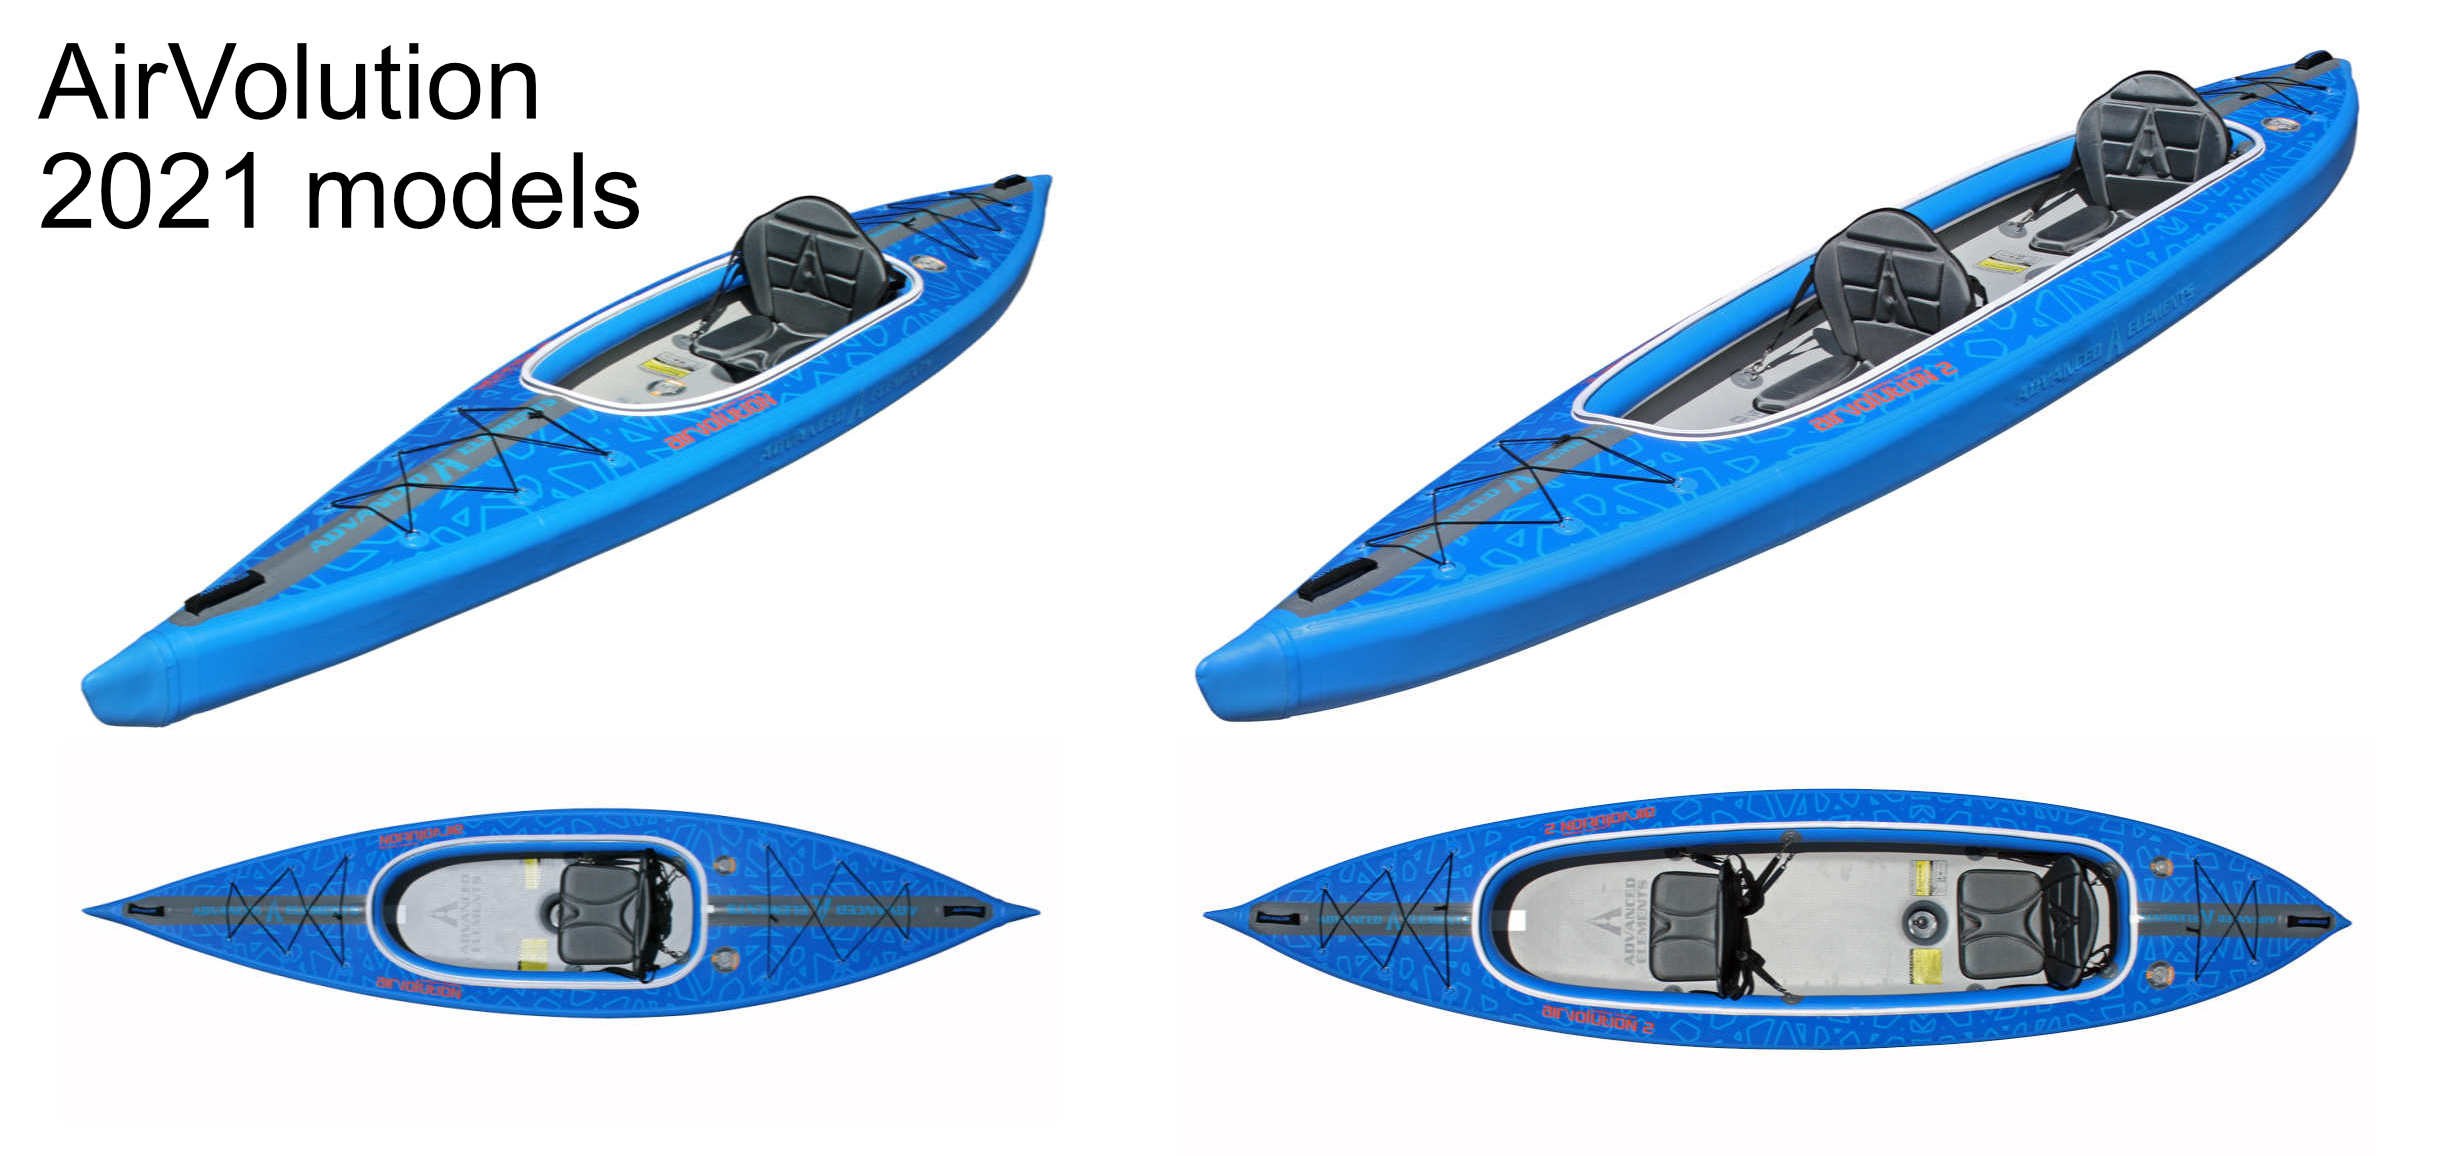
| Length | Width | Weight | Payload | |
| Solo | 13′ / 3.9m | 33″ / 84cm | 39lbs / 17.7kg | 300lbs / 136kg |
| Double | 14.5′ / 4.5m | 37″ / 94cm | 52lbs / 23.5kg | 550lbs / 249kg |
Both models are rated at 10 psi / 0.7 bar (though they will work with less) and have another DS IK innovation: Pressure Relief Valves (PRVs) on both panels set to now purge at 14psi (2021 onwards). Why not 10psi so you can blithely inflate away till the PRVs hiss? Some pressure might be purged over a hot day from the top deck but not enough to matter.

A few iSUps have PRVS, but I’ve not seen them on FDS IKs before and many potential owners will be reassured, as it should aid the as-yet untested longevity of DS panels. PRVs limit potentially destructive over-pressurisation when inflatable boats are left in the sun.
Looks like AE listened: the 2021 models got 14psi PRVs, as well as an inflatable footrest (mentioned below), a better backrest, and other detailed tidying. And they chuck in a low pressure battery pump to get the bulk of the air in. You’ll still need a 2-stage barrel pump to get it up to 10-12psi.
AirKayaks™ IK in the US seem to be a favoured AE outlet right now and have detailed reviews of both boats with loads of photos and measurements, followed by a quick flatwater spin.
There you can read the double’s open hatch is over 7.5 feet (231cm) long) and, oddly, there are no footrests (until 2021 models). A stuffed bag would work, or it would be easy to glue on some D-rings to run a footrest strap and hard tube. On a raft-wide IK like the AirVo2, it may not be worth bothering with thigh straps. Both models run a huge 9-inch skeg which will ground easily in shallows and suggests tracking with the flat floor may need help. It’s easily be replaced with a cut-down spare.
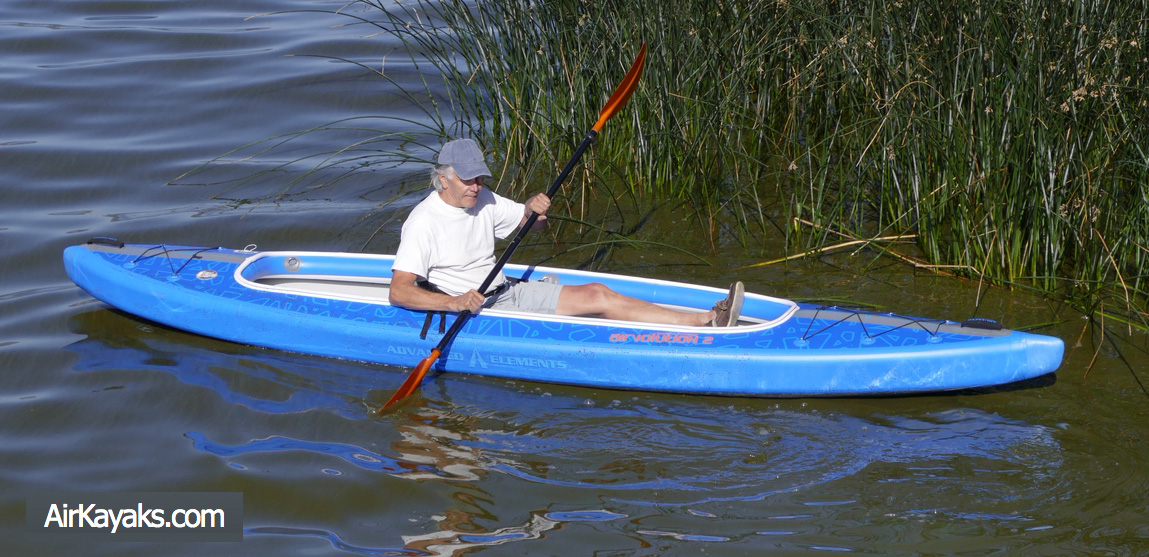
The AirVolution2 looks like a great day kayak for two, but from the photo above, even tall solo users may be better off with the less huge AirVolution, unless you add a foot brace tube. With this design, either boat has less low-down storage space than a conventional fat sidetube IK like a Seawave. Storing gear under the deck bungies just adds windage and hampers steering and stability. For touring, what gear is less than 4-5 inches high could squeeze under the covered ends, and when used solo the double has about half a metre of room behind the seat and some in front.

It’s hard to be sure, but inside it does look like the two panels have been ‘wallpapered over’ leaving no crevices to trap water and much more potentially damaging grit. This is a big improvement over hitherto conventional boxy three-panelFull DS IKs where water and crud gets in all sorts of hard-to-clean places. Being smooth inside, you’d think the AirVolutions could easily be drained by tipping upside down, then wiped down to dry. Maybe, but they’ve added a big plugged drain in the middle of the floor (left) to make that easier (it won’t work for self-bailing unless you’re very light). Judged against some of AE’s other ‘busy’ graphics, the blue boats don’t look too bad.

Up to now AE used far less elegant solutions to the problem of rigidity in long IKs. The AirVolutions: a pair of iSUp boards wrapped up and glued in the blue skin, are an interesting idea with some compromises, mostly in storage. These are day boats, not tourers, but there are many, many more day-paddlers out there.
It would be a struggle carrying a 23-kilo boat too far so for your money you get a wheelie duffle but with tiny, pavement-only wheels and clearance. There’s also a repair kit and a high-pressure, two-way switchable barrel pump which may need some brawn to reach the full 10+psi. Because high-pressure IK pumps need to be tall and slim, they’re low volume so take a while. AirKayaks reported it needed 100-150 strokes to inflate each chamber. That is a whole lot of pumping for a DS boat, but a battery pump now comes with the 2021s.
Prices in the US for 2021 are now $1200/$1500; in the UK the boat works out a bit more in £s; not such a good deal with obscure-branded 3-panel FDS IKs going for half that price. Or indeed a similar Sandbanks Optimal.
See also:
Inflatable kayak glues and repairs
Repairing a Gumotex Seawave
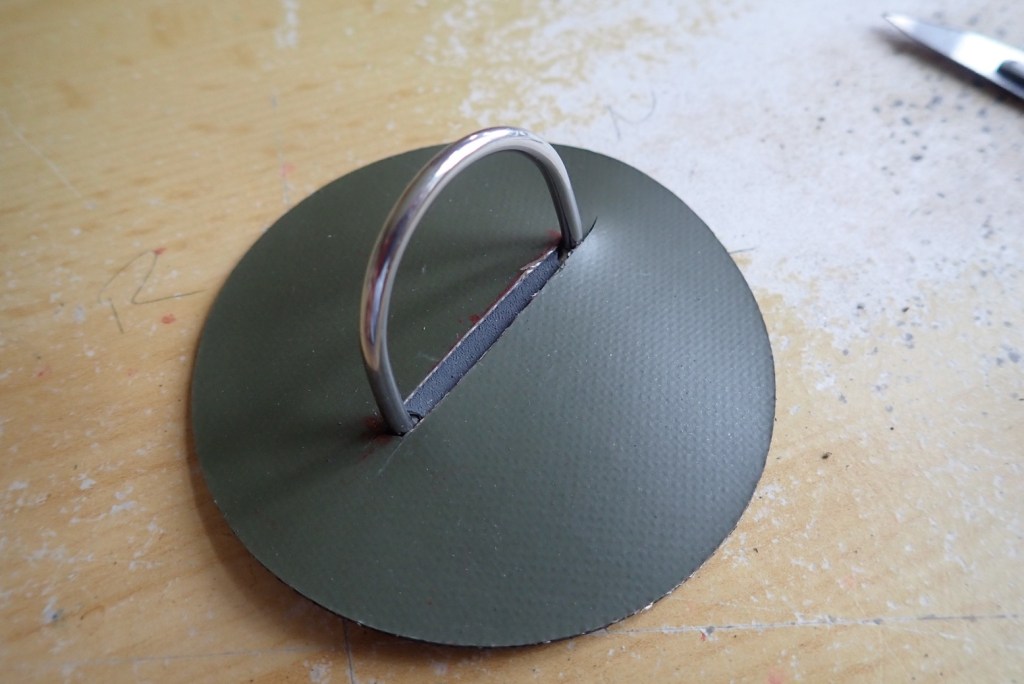
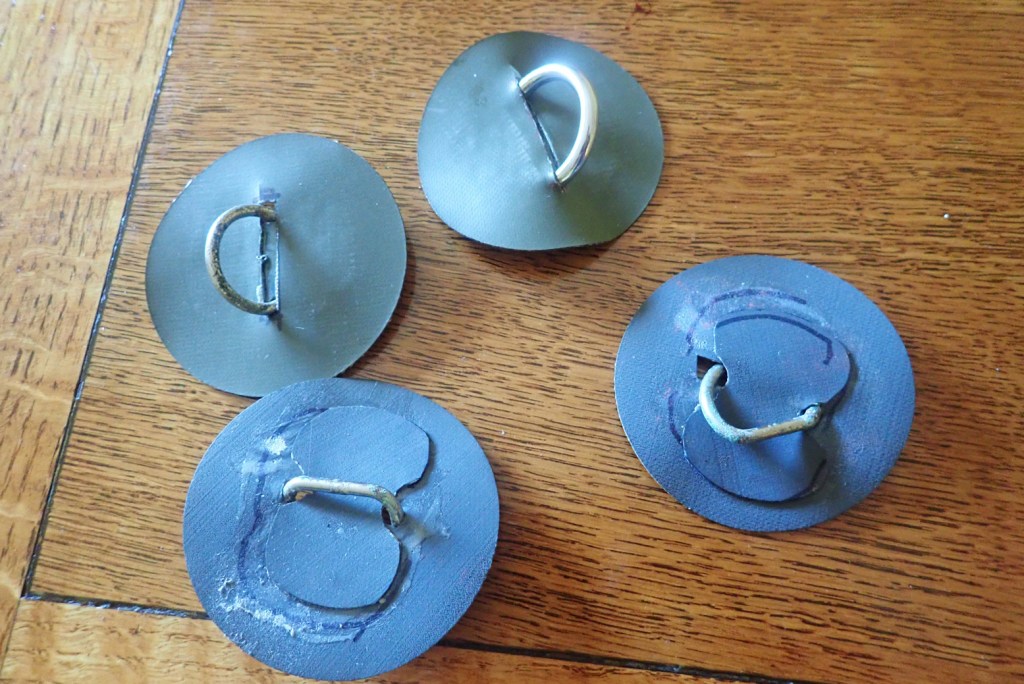
MYO alternative to D-rings
You can get ready made Chinese PVC D-rings dirt cheap on eBay but genuine rubber hypalon D-rings (not plastic PVC claiming to work on hypalon) cost a lot for what they are. Once you factor in the price of two-part glue, it adds up, especially if you have a few to fit.
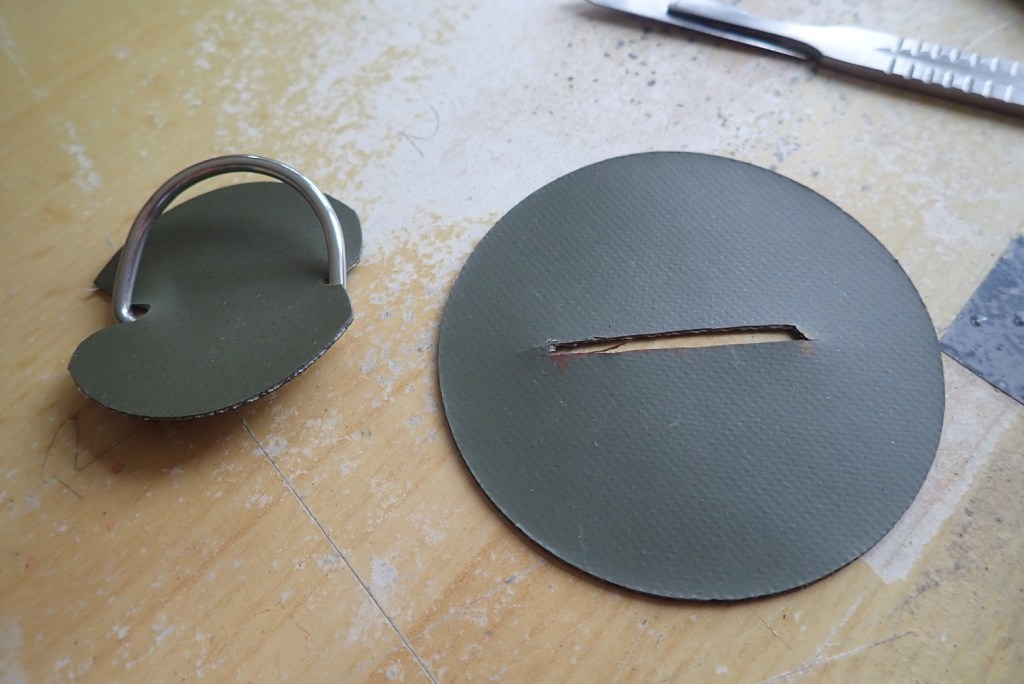
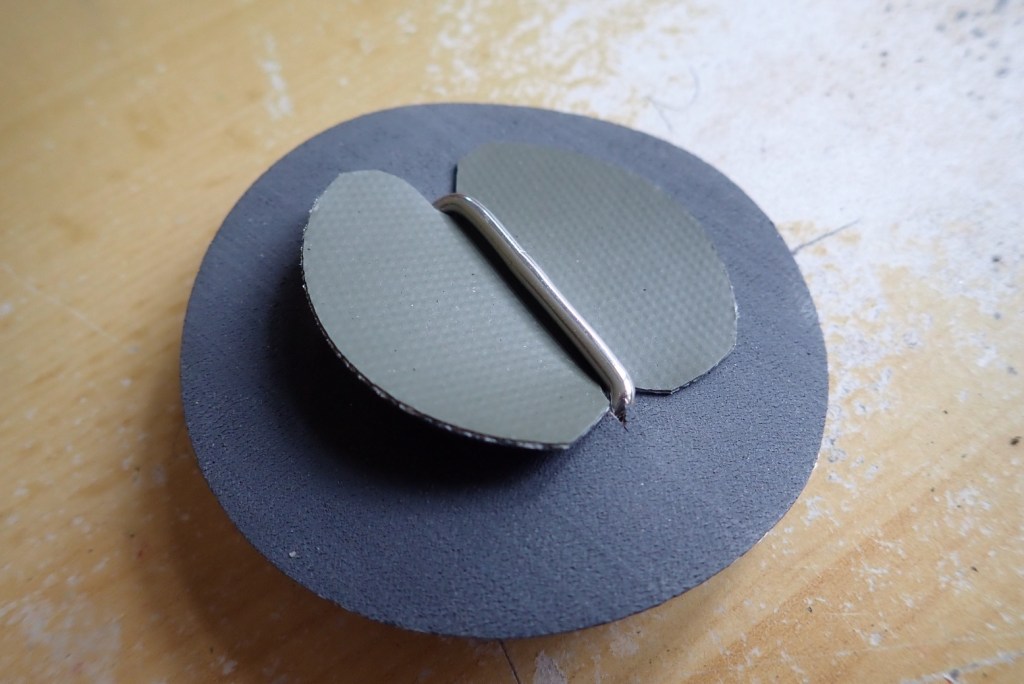
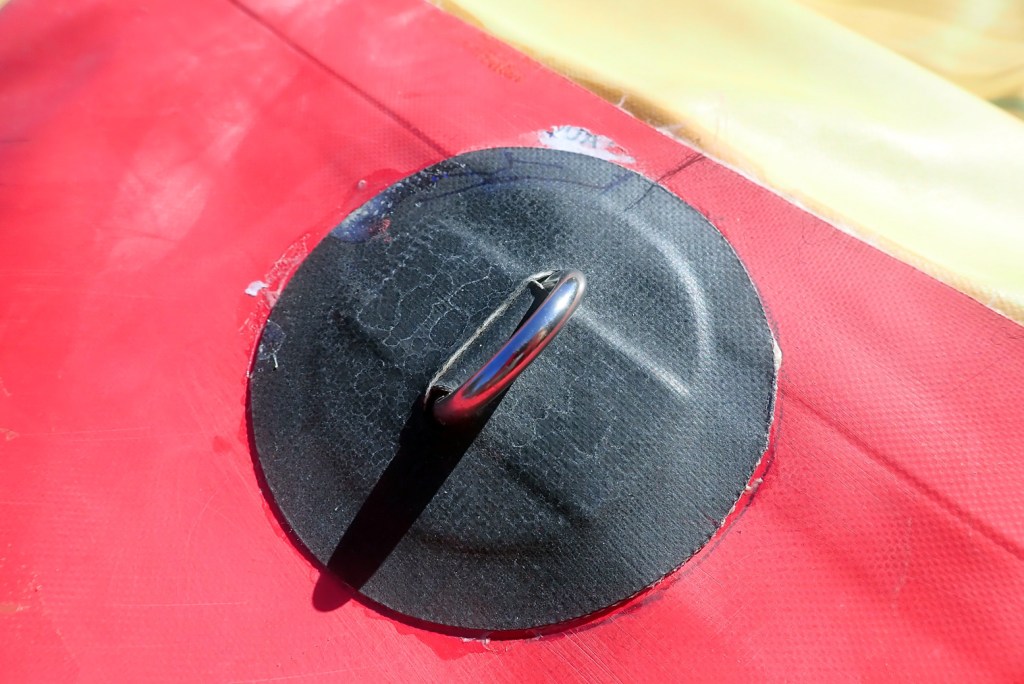
It’s fairly easy to make your own D-rings for your IK to attach gear, thigh straps, footrest mounts and so on.

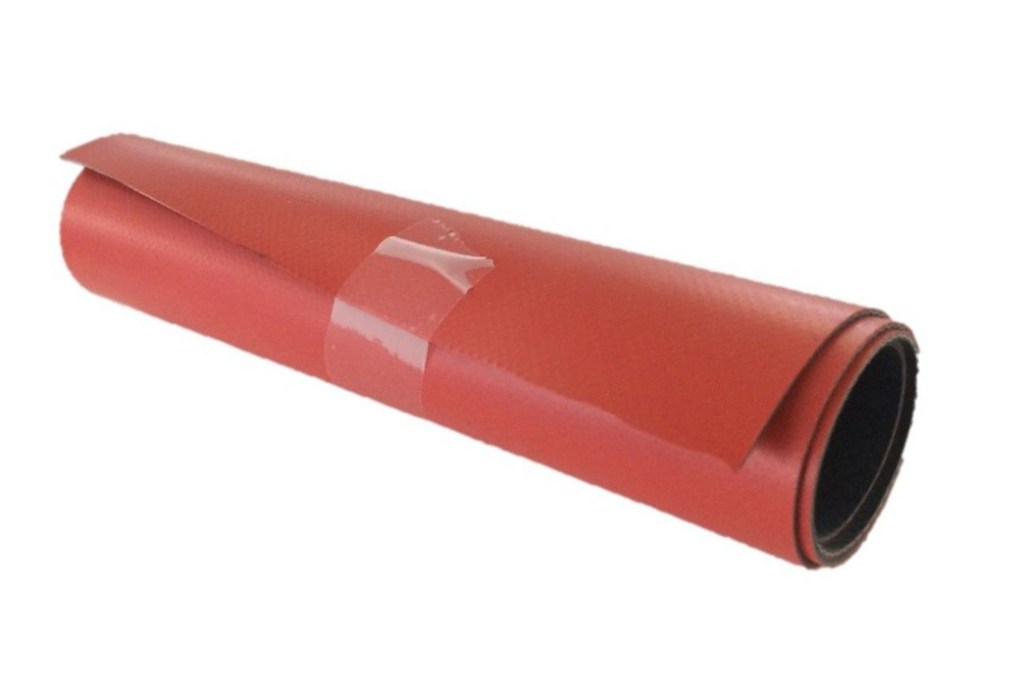
You can buy metal D-rings by the sack-load online, as well as round PVC or Hypalon patches. (‘Hypalon’ is pretty much the same synthetic rubber as Gumotex Nitrilon and Grabner Nordel EDPM). Or buy an off-cut (above right) for much less and cut your own. A D-ring doesn’t have to be round but it’s better if corners are rounded. You will notice how unusually hard it is to cut this stuff with scissors or a blade. The fibre core is tough: needed for zero-elasticity in an IK.
Pictures below show how to make your own D-rings.
Go to this page for how to apply any patch, step-by-step.


Sticking to the Rules
I needed to fit some tube-top D-rings to properly support a second backrest in my Sunny 2020. I found a stray, opened tin of Bostik 2402 two-part in my kit bag, but with an expiry date of 2009. Back then I only owned this original Sunny and looking it up, 2402 turned out to be for rubber boats. Perhaps I bought it more recently but didn’t notice the expiry date. In the tin the glue was still liquid and unseparated, but the little bottle of Bostik D-10 hardener had long since evaporated. Digging around, I also found an opened bottle of PolyMarine hardener. Comparing chemicals showed they both contained Diphenylmethanediisocyanate, one of the few words that’s too long for a Scrabble board.
I mixed the wrong-brand hardener with the 11-year old glue 25: 1 and the bond looked as good as anything.

See also:
Hyybrid IKs
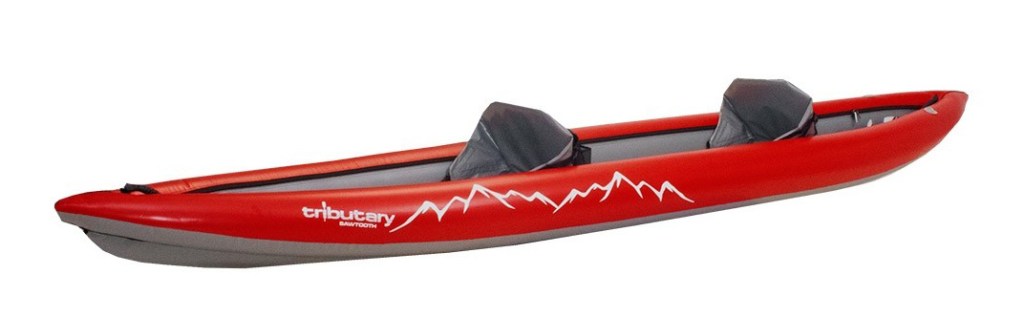
There are a lot of full or hybrid Dropstitch IKs coming out now, but Idaho-based Aire are sticking with traditional bloat technology with their 2020 Tributary Sawtooth upgrade which gets an extra two feet and ‘bold new graphics’, as they call it in motorbike world. Along with with NRS down the road and with whom they seem closely tied, they’re among the US’s more serious IK makers (both come from the rafting game). Before the Seawave came along I’d considered an Aire IK but was put off by:
• Price (US-made models)
• Excessive width
• PVC shells with slow drying bladders
• Self-bailing
In other words, as far from a high-end Gumboat as you can get. It was long-extinct Sears IKs who are said to have originally come up with the idea of ‘inner tubes‘ supporting a sewn or welded PVC shell in the early 80s. It works like a bicycle inner tube supports a tyre. Aire adopted the idea a few years later which may explain why this method is common in North America but unknown in Europe. The benefits of this type of assembly are primarily economic: quicker, less laborious assembly, although bankside repairs using sticky tape on the bladder are near-instant.
As explained on the IK Construction page, the bladder system involves easier sewing or welding of the shell (all shown in this Aire promo video – stills below). No glues or solvents needed, unlike ‘tubeless’ Gumotex or Grabners. Aire spins this as ‘double layer’ but of course they are co-dependant: without one the other is useless. For a recreational packboat user, bladder boats have drying issues because inevitably water seeps in between the two layers and stays there. Owners often complain about this and certainly in a temperate climate like the UK, proper drying would be a pain. It’s a lot of extra faffing to clean and dry than a quick wipe of a tubeless boat. Being rot-free plastic, leaving an IK wet won’t ruin it, the worst might be some mildew or staining, but as with all outdoor gear, storing wet is bad form and may affect durability, especially around sewn seams.
Whether heat-welded or sewn, the tough 1000D PVC hull casing doesn’t have to be watertight. It’s just there to protect the much tinner AireCell bladder which is accessed (and repaired or replaced) via long zippers (see boat below) which is the main way water seeps in between the layers. Other downsides include grit getting in between the shell’s floor and bladder. All-round, it adds up to more maintenance than a tubeless IK which dries in minutes after a wipedown.


You’ll struggle to tell on Aire’s website, but this budget ‘Tributary-branded’ range is ‘imported’: a presumable euphemism for ‘China’. That’s a word that’s even more tiptoed around in packboating world than PVC which, in the US, requires a health warning (left) to be sold in California.
As always, TheBoatPeople tell it like it is. They had a hand in designing the original 13-foot Sawtooth. US-design with cheaper Asian textiles and manufacture explains the reasonable pricing. It also explains the 1-year Tributary guarantee compared to the mammoth 10 years you’ll get on Idaho-assembled Aire-branded boats with urethane (not vinyl) bladders.

Numbers (with help from the reliable theboatpeople are said to be:
Weight: 19kg (42lbs)
Length: 4.65m (15′ 3″)
Width: 84cm (33″)
Payload: 201kg (440lbs)
Construction: 500/1000D PVC with vinyl bladders
Pressure: 0.17 bar (2.5psi) (PRV in floor bladder)
Price: U$ 1370 (2025)
Don’t ask me to explain the hydrodynamics, but a longer boat in the water is a faster boat, providing it’s not ridiculously wide or high or made from concrete. Longer, narrower and lighter than Aire’s US-made $2000 Super Lynx, the 2020 Sawtooth’s length-by-width factor is a pretty good 5.53 – near identical to a Seawave. (Compare other LWF’s here).

Obviously rigidity has an influence on speed and response, but up to a point a thick PVC IK (like my old Incept) is innately stiffer than more pliable rubber-based fabrics like Nitrilon. This may explain why the Sawtooth need run only 2.5psi (0.17 bar) even in a 15-foot IK, while a Seawave runs 3.6 psi and a Grabner even more. Or perhaps the vinyl AireCell bladders (right) can only safely take that pressure?

No footrest is included even though one is needed to brace against for a good paddle stroke. But Aire IKs can have have over two dozen attachment points along their full lengths (left). So besides positioning the seat/s exactly where you want them, you can easily clip-in a bit of sawn-down plastic drainpipe, which anyway is better than the mushy inflatable footrests which come with other IKs. While you’re at it, thread in some thigh straps which further improve your connection to the boat for more efficient paddling, especially at sea and in rougher conditions.


Many Aire IKs have an unusual dropped floor (right), partly because it has to be thick to work as a self-bailer. This design also means it acts like a fat keel to help tracking while its buoyancy lifts the side tubes out of the water to produce less drag and so increase speed. The Sawtooth comes with a clip-on skeg (useful at sea) and the Boat People reckon the Sawtooth is one of the fastest IKs around.

The principle of drop-floor/high sides may work, but in a self-baling boat the floor has to be thick anyway sit you up high above the water level. That means you’re less stable unless the boat is extra wide, but the Sawtooth’s width is pretty good (certainly compared to the Super Lynx).
I can see the value of self-bailing in a whitewater IK – I’d sooner have that than a deck. Not so sure in a touring IK. When heavily-loaded or two-up and passing through swell, the boat may fill from below with water. You’re getting soaked anyway, but that’s not really wanted. It’s the other thing Aire owners grumble about.
Aire IKs are unknown outside the US and certainly in the UK, and although the numbers and the price of the Sawtooth are great, for the same $1370 in the US (2025), I’d sooner choose something else.
Owners’ reviews (old model).

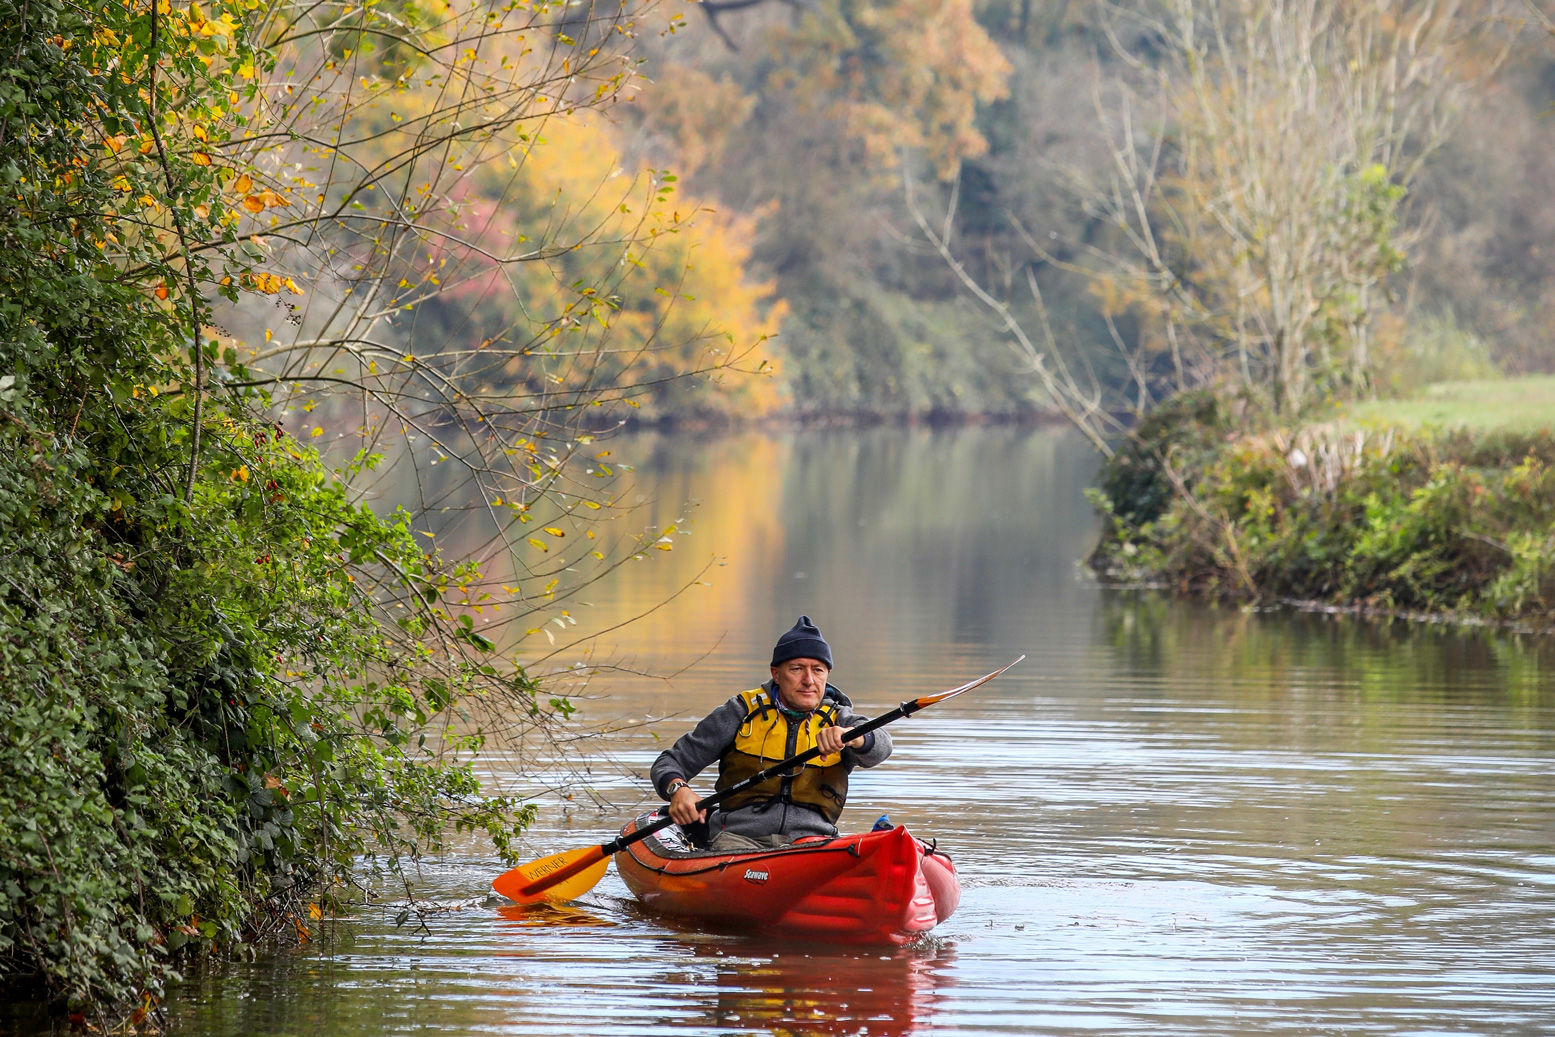
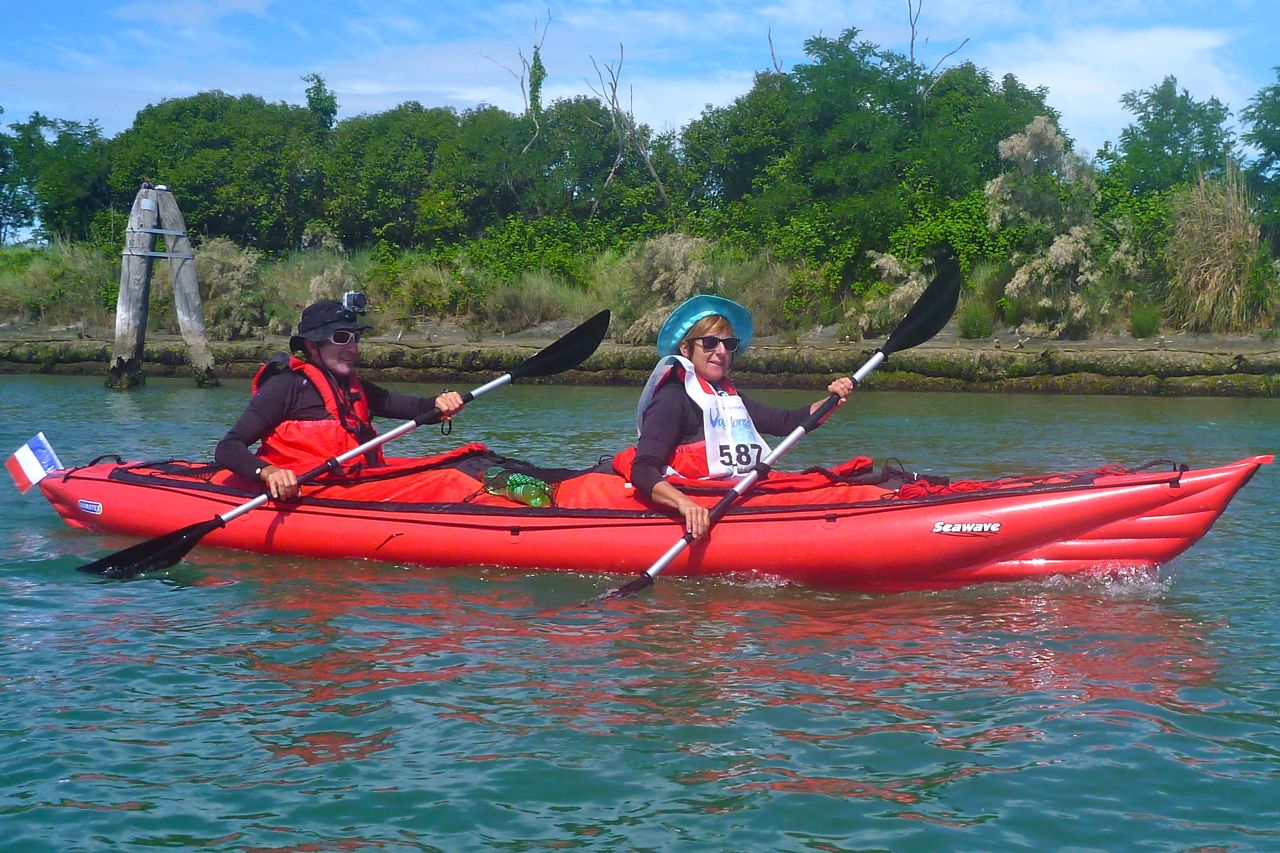
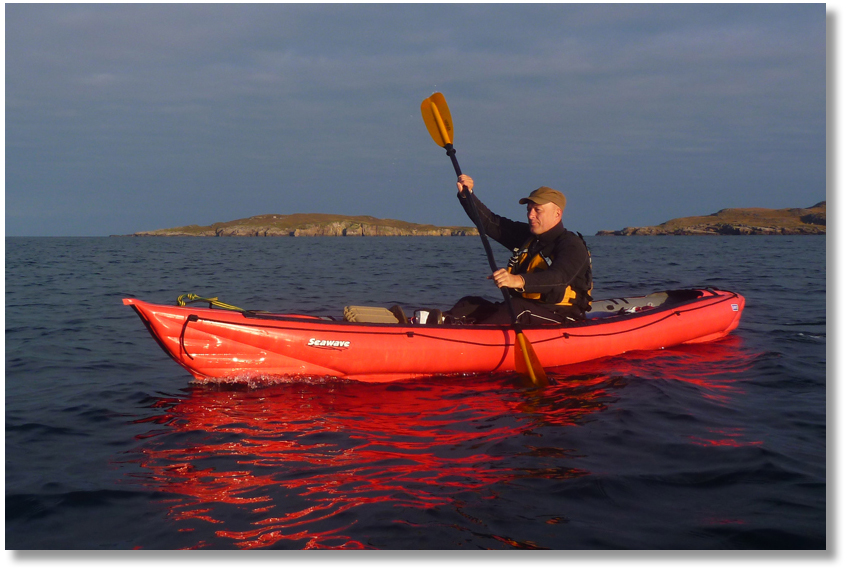
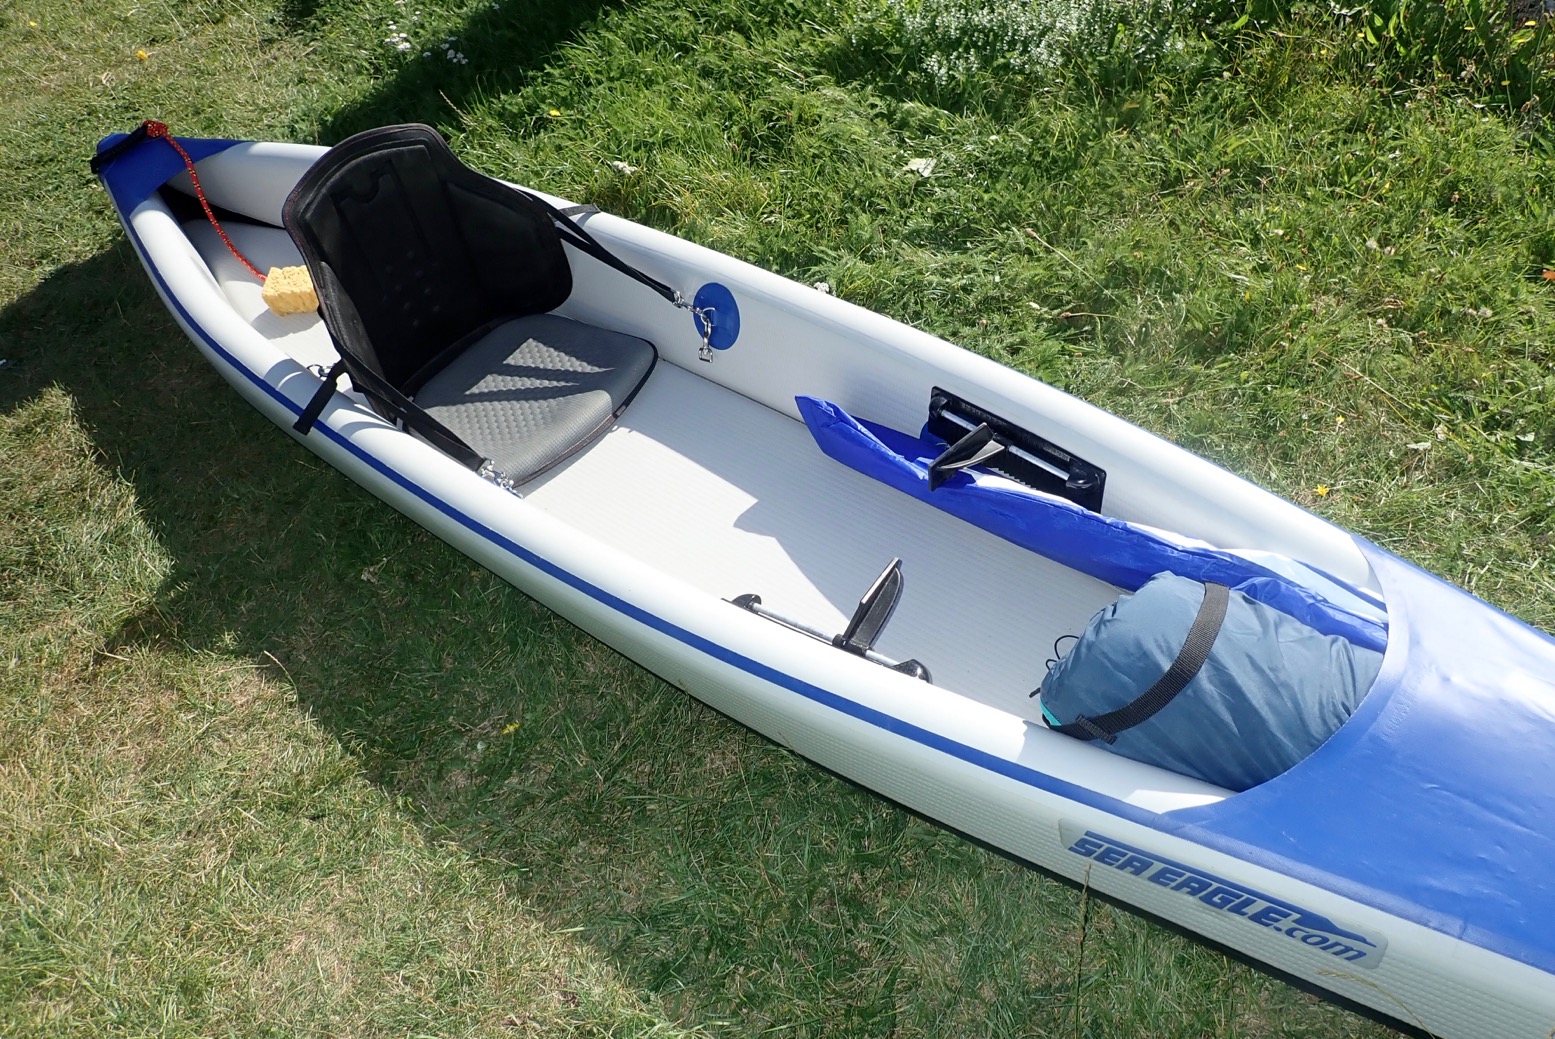
Darn. I put my Seawave on eBay to ‘test the water’ and it went within hours.
Still, it’s an excuse to show some of my favourite Seawave shots in five seasons of fantastic paddling. What a great boat that was. So great that, with nothing better available at the time, in October 2020 I bought another Seawave (left).


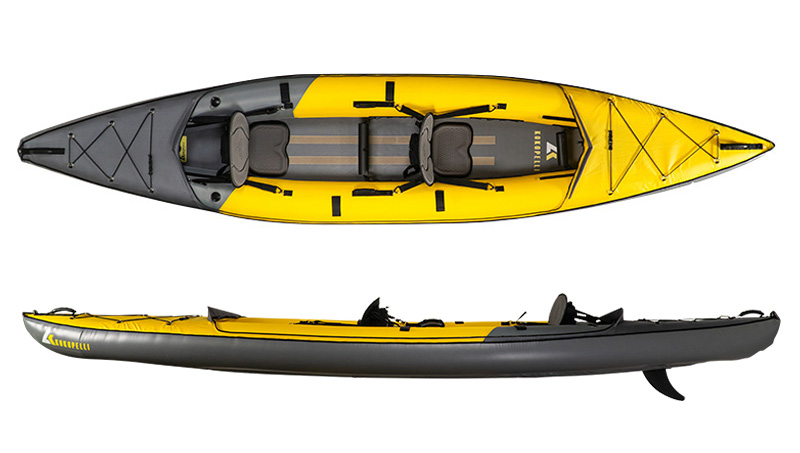
See also: Kokopelli Moki 2 tested in Scotland
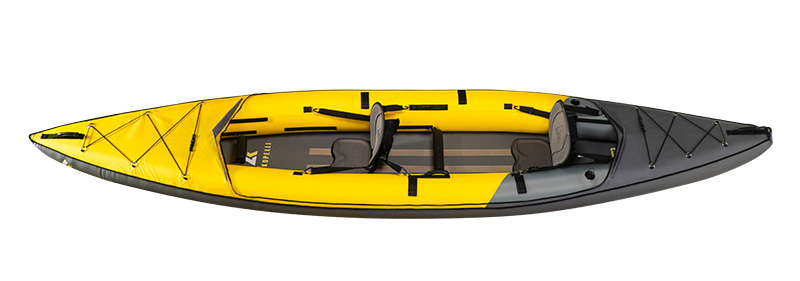
Kokopelli are a US packraft brand who started out in a Denver garage in 2012 but soon moved on to full Asian production. Known for their distinctive range of yellow TPU or PVC packrafts – long, short, bailing or decked, with the Moki I and Moki II they’ve moved into IKs.
Both Mokis are what they’re calling hybrids: dropstitch floors with conventional side tubes. Warranty is a generous 3 years. As always here at IK&P, it’s the the two-seater’s added versatility as solo tourer that’s of interest. The online stats for the Moki II are:
Weight: 24kg (53lbs) • Full kit in bag 27kg (59.5lbs) ; boat with seats 21.5kg (47.4lbs)
Length: 4.3m (14 feet)
Width: 91cm (36″) • With deck (39″); no deck (38″)
Sidetube ø: 21.8cm (8.6″) • 30.5cm (12″)
Payload: 272kg (600lbs)
Pressure: Sides 0.17bar (2.5psi) ; 0.27bar; DS floor (4 psi) • Set-up leaflet says: sides 3-4psi, floor 8-10psi
Construction: 840D Nylon side sleeves for PVC bladders; 1000D PVC DS floor
Price: U$ 999 (with tandem spraydeck); UK £950
Renting a Moki 2 a couple of months after this was written revealed several errors in the online specs. Only the length was spot on. The set up leaflet also refers to ‘… the packraft…’ a couple of times, as if it was hastily copied.
Verified figures are in red above.

Big, 21.8cm nylon sidetubes house PVC bladders which take an above-average 2.5 psi (0.17 bar) while even the dropstitch floor (DS-F) only runs an oddly low 4.5psi. That’s about the same as my uprated Seawave or a similar, regular-tubed Grabner. Can a DS-F IK be too stiff? Possibly. Turns out official online data is wrong.
As with many bladder boats and/or part or full DS IKs, weights tend to be higher and the Moki is more than most, but this may include all the extras, not least a huge roller duffle with backpack straps. The 24kg weight give may well add up to the boat with the deck and skirts.

The well-featured EVA foam seats look a bit thin in the floor, but that’s easily altered and they can be positioned securely anywhere along twin velcro bands on the floor, with the backrests braced off the hull top in both directions. A lot of IKs have these bow and stern bungies which are handy to slip a paddle in while you fiddle with a camera, but you’d not want to use them for anything important or bulky. Not listed, but you can also use velcro tabs on the side tube tops to secure paddles. The specs claim there are a dozen D-rings but they are just the bungies being repeated. There are no D-rings in the boat.
The foam rubber tube footrest/s can be repositioned in daisy chain loops, presumably sewn to the DS-F casing and there a huge, clip-on skeg (tracking fin) plus what looks like a shallow front keel to help the flat floor track straight.
The zip-on tandem zip-on deck with coaming rods and skirts come with the boat too (hatch length: 86cm, 34″); an optional solo deck is available. Plus you get a compact, two-way barrel pump and a repair kit. Add a paddle and some water and you’re all set.
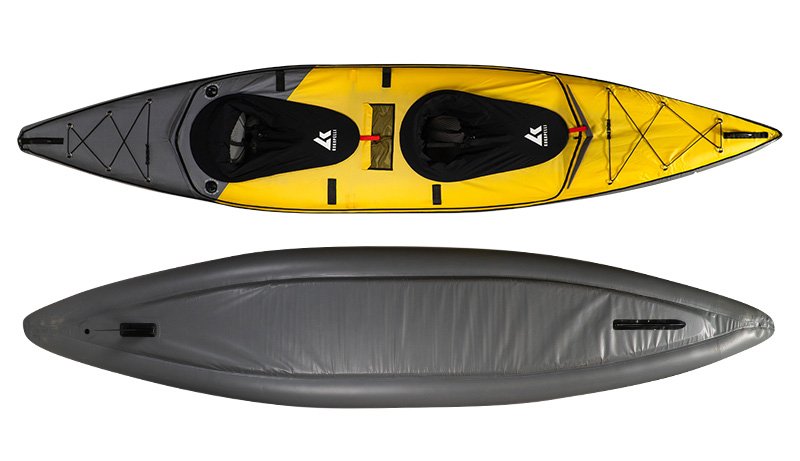

At the listed three feet or 91.4cm, both Mokis are pretty wide as so many US-branded IKs are (one reviewer verified a Moki I at 37″ wide). See true figures above. But something looks wrong with the stated dimensions (left). If the internal width between the tubes is 14″ and the side tubes are 8.6″ each, the total is 32.2″, nearly 5″ narrower and about the same as my old Seawave. That’s more than wide enough to be stable but nippy. I asked Kokopelli; someone replied but never got back and the website remains unchanged. From the proportions of the images above, the actual length looks somewhere between the two. Discrepancies explained by verified measurements, above.
We paddled a Moki II for a couple of days. Review here.

See also:
More about Hybrid IKs
Interesting discussion
Another detailed online review
Gumotex Aurion

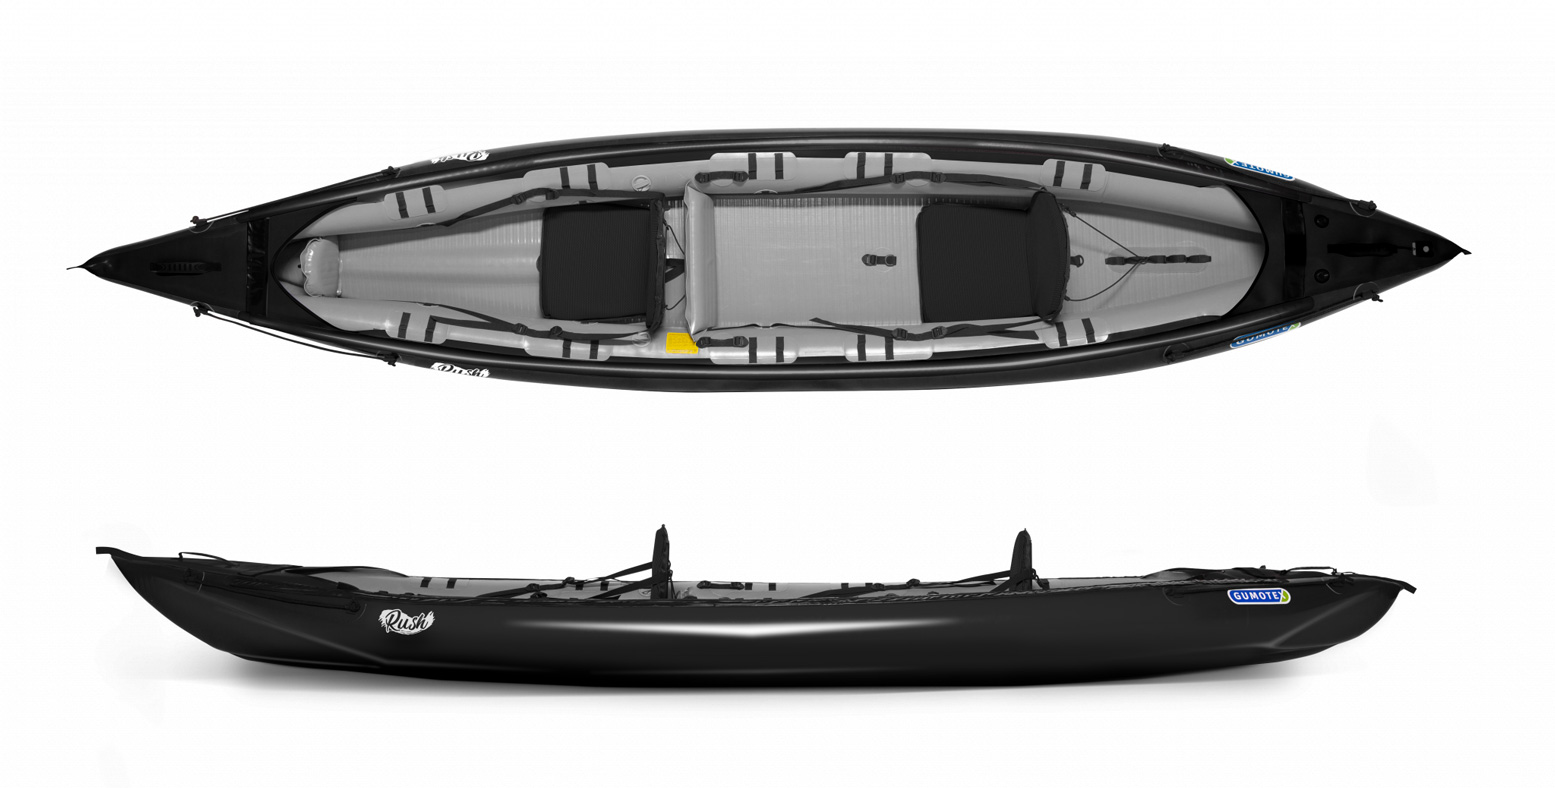
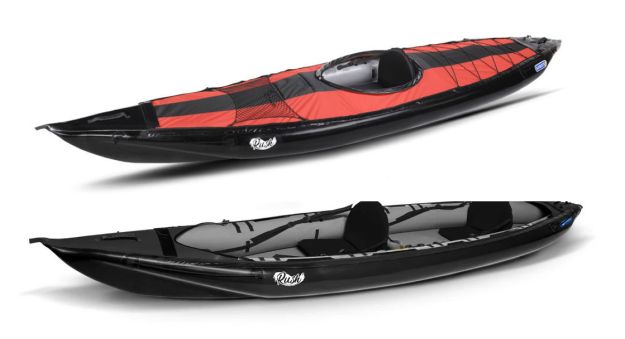
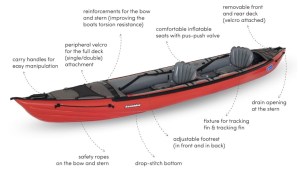
Gumotex are moving on up with hybrid dropstitch technology, originally showcased in 2019’s Thaya which is basically an old Solar 3 with a DS floor to make it more stiff. The new-for-2020 Rush 1 and 2 (above) is quite a sophisticated advance on a DSF or hybrid IK. A couple of years later the Seawave got the DSF treatment and became the Seashine at not less than £2500.
The Rush models came out in April 2020, just as the pandemic hit and lockdowns, shutdowns and slowdowns spread across the world. It’s also said there was some kind of quality control calamity at the Gumotex factory which led to many completed boats getting shredded. As a result, stock of Gumotex IKs dried up at a time when post-first-lockdown IK demand went ballistic RTW.
Other IKs gradually came back online, including other Gumotex models, but oddly, the all-new flagship Rush was put right to the back of the queue until 2023. I speculated this may have been a production issue and it seems I was right: I read in the PaddleVenture review comments:
“There is actually a modification to the Gumotex Rush [for 2021]. The drop stitch area on the bow and stern elements is said to have been improved. Apparently there were more complaints here than usual, so that at the end of last summer no more Rush models were produced and this part of the boat was revised”.
It’s not clear what the problems were, but it proves that making anything other than a flat, DS plank is tricky, but also that any boat which can get round this (like the Itiwit X500) will be superior. The Rushs were briefly back in stock in 2021 by which time all Gumotex IKs received a massive price hike which killed demand. By 2025 the R2 was listed in the UK at £2250 but easily found for £1999.

‘Hybrid’ is a cool word for a kayak which isn’t a Full DS like a Sea Eagle Razorlite and many others. These IKs are assembled from three flat dropstitch panels making boxy hulls which, according to the graphics on this page of the French Gumotex importer, can be sub-optimal in choppy waters.
Me, I also think a totally flat, barge-like floor doesn’t help, but the Rushs get round this with raised side tubes which act more like stability pontoons, a bit like the Tributary Sawtooth.
In addition you’ll see on the left the suggestion that tall, flat sides are more affected by waves and wind, which does seem plausible. Of course, if you only every intend to paddle flatwater on calm days, this doesn’t really matter.

Derived from iSuP boards, DS has become a blessing to IK floor design which hitherto had to use I-beams of parallel tubes (above) which complicates assembly and is prone to ruinous rupture if over-pressured, unless fitted with a PRV or the IK is exceptionally well made.
A Gumotex hybrid IK (below) retains the regular round side tubes of a classic IK for better secondary stability (afaiu) but features a DS floor for much-needed rigidity as boats get longer. However, unique to Gumo, DS end-panels are also used on the bow as well as shorter and less obvious panels at the stern.

A word about this fabric paraphrased from here:
“Nitrilon-Dropstich is composed of a core of 1100 dtx polyester fabric made up of two sheets joined by a mass of threads exactly 10 cm long. Unlike regular PVC-based iSuPs and DS kayaks, the durable elastomer plastic coating is not glued to the fabric, but ‘pressure-impregnated’ which eliminates delamination risks more common with bonded PVC coatings. An additional layer of polyester-reinforced Nitrilon is vulcanised to the floor bottoms making them double thickness.”
The Rushs differ from the Thaya (1st gen Gumo DSF) with the panels forming a more ‘hydroformed’ bow, another weak point with regular blunt-nosed tubed IKs. The Rush’s bow makes a water-slicing wedge sharp enough to cut ripe avocados.
The vital stats on the tandem Rush 2 are said to be 4.2m long x 82cm wide. Compare that to my Seawave at 4.5 x 78cm; the Seawave has an 11% better length/width factor (LWF) of 5.77 vs 5.12 over the Rush 2, but those are my Seawave measurements. The side tubes are said to be 19/20cm on the Rush compared to 22 on my Seawave. This and the length may contribute to the load rating dropping to 195kg vs 250 on the longer Seawave. That’s still plenty, unless you’re hauling a moose carcass out of the Yukon.
The Rush 2 official weight varies between 15.5 or 17kg, depending on where you look online. The higher figure is the same as my modified Seawave with a packraft seat mod.
Pressures are another obvious difference with the Seawave. The 6cm DS floor runs at 0.5bar (7.2psi), actually a modest level for DS, but an IK doesn’t need to be as stiff as a iSuP board. The slimmer side tubes run 0.25 bar or 3.75psi (same as the Seawave). Well, that’s according to the table from the online manual shown below. Many outlets still list 0.2 sides and so did the Gumotex website until I pointed it out.

0.25 is a bit higher than normal IK pressure, but not quite as high as 0.3 in a Grabner, a Zelgear Spark or the 0.33 bar on my modified Seawave. When you combine that with the stiff DS floor, the 0.25 sides must make the Rush IKs Gumo’s stiffest IKs by far. The difference is, I added PRVs to my Seawave sides before running them at 50% higher pressure to automatically protect them. The Rushs don’t have any PRVs which explains the warning in the manual, above right. It’s odd but worth remembering that my super-stiff Grabner Amigo didn’t feature any PRVs either, not even in the floor. Quality of construction (gluing assembly) must have a lot to do with it.

When you add any colour you want as long as it’s black, you do wonder if no PRVs is a good idea, because in the sun black things get hotter, faster. Black may be great for Cockleshell saboteurs, not so good for visibility at sea and it kills photos stone dead.
It’s true the Innova-branded Swings in North America have long had black hulls and no one complained. But they only run 0.2 bar so need help in stiffening up in the hot sun. They also have fixed decks in red. Many Grabner IKs are now made with black exteriors too (below).

One assumes the Rush’s grey, lowish-psi floor will handle increased pressures from passive solar heating, especially as it’s in the water most of the time. But the black side tubes will get taught which becomes a nuisance to manage (or worry about), even if tubes/cylinders handle high pressures better than flat slabs.
In fact, as you’ll see from the comments below and elsewhere, Gumotex have found black is not notably worse than red or green in absorbing solar heating and dangerously over-pressurising. And if you’re that worried it would be just as easy to install PRVs in the Rush side tubes, as it was on my Seawave.
Because a DS floor is flat, one imagines it will hinder effective tracking, despite having a skeg at the back. The flat hull will plane over the water and wander off to the sides like a packraft – the so-called ‘[windscreen] wiper-effect’.


So, similar to Sea Eagle‘s patented NeedleKnife Keel™ (left), Gumo added a more discrete ‘keel hump‘ under the bow (above) to compensate for the lack of old-style parallel I-beam floor tubes which added a directional element. You can see from the overhead image above that this keel hump is mirrored on the floor inside the boat, either by design or need. This protuberance makes a high-wear point on the IK in the shallows so it’s just as well the floor is double thickness Nitrilon, as mentioned above. It’s the same on any boat. On my Seawave I pre-emptively added a protective strake – a strip of hypalon – to the central tubed rib, though to be honest it never got much wear as I try and be careful. Mine was hardly worn in five years of mostly sea paddling.

Rushs can be fitted with optional decks (green on the R1, above, red on the R2, below), using the same velcro system as the Seawave, with those horribly bulky alloy spars (right) supporting the decking (surely a flexible rod like tentpole material wouldn’t be hard to make). I read on other reviews that they’ve greatly improved the coaming (hatch rim) so that spray skirts attach more securely.
In the still on the right the footrest appears to be the usual rubbish black cushion adjusted by strap and seats can be moved to a variety of positions, too, but the other images show grey footrest tubes which are supposedly dropstitch – much better.
Seats are now solid foam, but the base looks too thin and low to me. A stiff foam backrest (with side bracing straps) is good, but an inflatable seat base is much more comfortable to sit on because you can vary the pressure and so the height. Foam eventually loses its cushioning but an inflatable seat doesn’t need to be made of hefty hull-grade hypalon, as on other Gumo IKs (more in the vid below). But anyway, a seat is easily changed to suit your prefs. More on IK seats here.
Below, a review of a Rush 1 by Austrian Steve. Can’t understand a word but some observations: I like his convertible Eckla Rolly trolley/cart/camp chair; also love the lovely long canoe chute at 20:40. Have to say though, I winced a bit at some boat dragging here and there. Do the right thing, Steve; it only weighs 12kg! Note also this shortish boat seemed to track pretty well without a skeg – the frontal keel-hump may be effective in leading it by the nose, after all. But in the comments Steve admits the stiff, flat floor slaps down hard on wave trains coming out of rapids and I suppose would be the same at sea. It’s a drawback of flat, raft-like DS floors.
See this for an easily translatable written review also in German.
The rrp of a 2025 Rush1/Rush2 is now a £1599/2250 (with 10% discounts), plus decks going from £47v5 (solo; R2) and a rudder kit for £329, same as the Seawave unit.
As you can see, I have been comparing the Rush 2 with my Seawave and wondered if it might be time (or an excuse) to change. An unprecedented five years of ownership proves there’s nothing wrong with my Seawave [I sold my Seawave in May 2020 but bought another in October].
What are the benefits of a Rush 2? Black is not such an attractive or useful colour for a boat at sea. Neither is losing a foot in length or 50kg in payload over the Seawave. But possibly less bulk and 2-3 fewer kilos is appealing.
On a river the greater nippiness from less length will have benefits, but for that I have a packraft. As for greater rigidity, it looks pretty good in this clip but my adapted HP Seawave was very good compared to the lower-pressure Gumboats, and it seems the speed (see below) is no greater, although the gliding effort is reduced. A Seawave with a DS floor – the Seashine (left) – appeared in 2023, now costing about 50% more than a regular Seawave.
Good owner’s review (in French)

I really want to go with you
Really want to show you, Lord
That it won’t take long, my Lord
Hallelujah, Hare Rama….
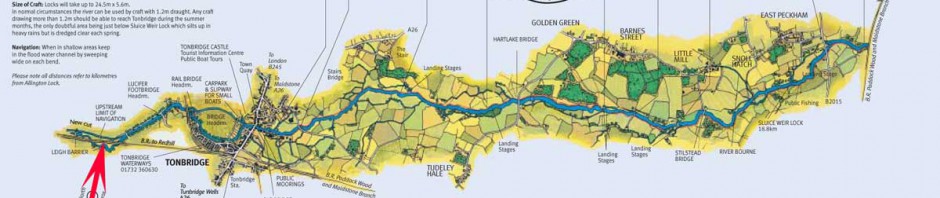
Picked up while scanning the radio on the drive to Tonbridge, there were much worst earworms to be stuck with than George Harrison’s 1970 pop hymn.

I was on the water at Town Lock before 9am on a mid-September day set to hit 25. This was surely, absolutely, positively the very last day of summer. End of!
But just after 9am something was wrong. The MRS was saggy and I knew why. Annoyingly, it tends to need a top-up a full 5 minutes in, not just by resting empty on the cold water as I get ready to hop in. I put it down to being a high-volume and thin-skinned boat which takes a while to cool down and lose a little pressure once on the water. Plus, because you sit in the middle – not the back like a normal packraft – you notice the hull sag-crease to either side and feel the flex-bobbing as you paddle. That is why the K-Pump I’d dismissed today is a good idea with the Nomad: it gives the MRS a darn good over-pump before putting in and avoids the need to do it again in a few minutes. I suppose another way would be liberally splashing the boat all over for a few minutes before final top off.
Now as taut as a harp string, I set off into the low morning sun, passing trees still in full leaf but slowly losing their sheen. I know that feeling.
The Medway would ordinarily be a fun-to-do-once southern English river if it wasn’t for the half-dozen jaunty canoe chutes installed to bypass the locks and weirs without portaging. Another way of spicing it up is to race it in a K1 kayak little wider than your hips. The first such bloke shot past me annoying close, paddling so fast he was bobbing up and down like a dashboard doggie. Soon a few others followed, including a double which must have been 22 feet long, and a guy in a plywood Wenonah with a lightning-fast single-paddle switch.

On the walk to Town Lock I’d passed several bands of early-morning Mamils browsing and clacking outside Tonbridge High Street’s 525 coffee shops – a common Sunday-morning sighting these days. But it seems a sub-species has evolved out of the recreational lifestyle gene pool – Mamiks – steely-eyed K1 kayakers, competitive City types going hell-for-leather, a club burn-up belting past at what looked like double my speed.
But it seems one thing these slender 18-foot training razors couldn’t do was shoot the lock chutes, even if it saved them minutes of cumbersome portaging taken at a trot. Presumably skimpy and unhinged rudders would snap off, or the pencil-thin boat would get crossed-up on exit and flip like a fish-farm salmon.

By mid-morning there were plenty of other regular paddlers on the Medway: SoTs, canoes (but no SUPs), all enjoying a sunny Sunday on the water. I even spotted two Medway firsts: a wild swimmer bobbing along, followed by a naturist wild swimmer tiptoeing down a bank and finally, another old couple in their brand-new retirement Sevy Riviera which looked uncharacteristically pert. My sweet lord, they’re all out today.

Sweat was dripping from my nose and the back-breeze helped, but I did seem to be going at a good old lick for a packraft. I also noticed that I was paddling like you’re supposed to. I spotted this bizarre development on my last outing: I was pushing forward with my high arm (‘press-ups’), less pulling the lower arm through the water (‘pull-ups’). I was informed of this technique (along with ‘lighthouse’ torso pivoting) years ago by a mate who did a 1:1 paddle-stroke course, but don’t know what’s suddenly brought it on. Maybe I’ve had a knock to the head.
Up ahead it was time to line it up and sluice on down the side of Sluice Weir – the longest, steepest and sadly the last chute on this part of the Medway. I imagine it’s given many newbies a bit of a fright, but the light and buoyant Nomad sashayed off the end with a shrug.
From here it was dogwater all the way to Yalding Tea Rooms where I caught up with a young SoT woman who’d left Town Lock just before me. Following her for a while, she was definitely flagging. I knew that feeling at around this distance too, but not today.

I never know how far this paddle is, or I forget as I circle, gape-mouthed round my gilded bowl. 12 miles? At least 3 hours then, so I thought I might catch the hourly 1.12 train from Yalding back to Tonbridge. But by half-eleven I was already upon Hampstead Lock (above), 11 miles according to the official map (below). Take out the breaks and that was a moving average of 5.5mph. Five years ago I thought 3.4 was good. I need to update my avatar.
Not bad for a packing MAMIK then, and a great way to end the season.
Hare Rama, Hare Krishna, Krishna Krishna…
Like many paddlers, when I get out of the boat I’m always careful to hold the lead and move slowly, in case I kick the very light boat away from the bank – an awkward situation if alone, especially on a Pacific island with a typhoon on the horizon.
While the Nomad was dripping dry at Hampstead Lock, resting on the beam of the lock gate, a gust blew it into the lock. Bugger! Luckily, it landed right way up, but ten feet down, there was no way I could reach it. Luckily too, it was caught in an eddy caused by the sluicing and right by the wall, not drifting off towards Maidstone. This gave me time to think. I reassembled the paddle and, hanging right off the lock side and holding the blade by the tips of my fingers, was j u s t able to nudge the boat towards some slimy steps, just as a motor boat drew up to the lock, probably wondering ‘What the heck is this chap playing at?’
I’ve learned similar lessons with pitched but unweighted tents: beware the unseen gust; it blows for you.

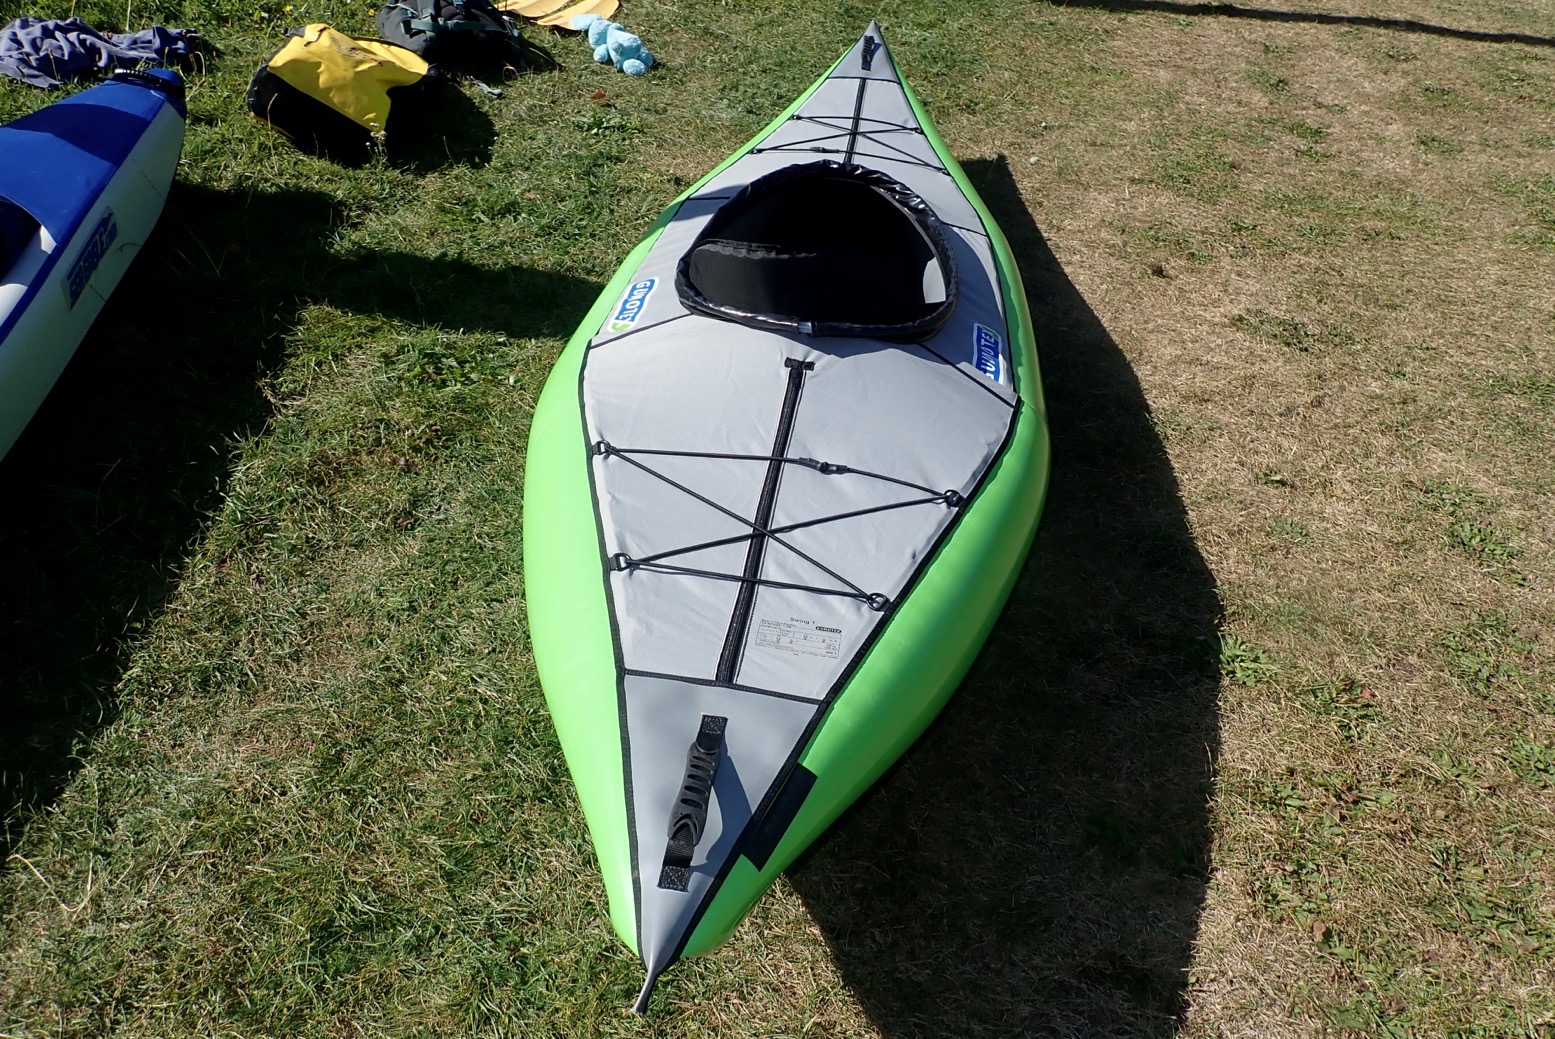

During this gust-driven mini-drama, out of the corner of my eye I’d spotted some IK activity nearby; something grey and thin; something green and fat. Turned out it was man and boy heading out for a paddle in a Razorlite 393 and a Gumo Swingbot. I’ve not seen the drop-stitch Sea Eagle before (nor a Swing, tbh) and have to say I was impressed by the look of the SE – and not just because it was next to a dumpy Swing (not one of Gumotex’s finest IKs). Those wide footrests on the RL might well help brace it, as long as knees don’t get in the way. And it had what they call a good fit and finish, but then so it should for a grand. The bloke knew his Gumboats and that a few other brands produced DS IKs near-identical to the RL. He was very pleased with the fast Sea Eagle. I’m still not convinced by the flat floor but one day I’ll get I got to try one.


See also:
Packrafting Swanage


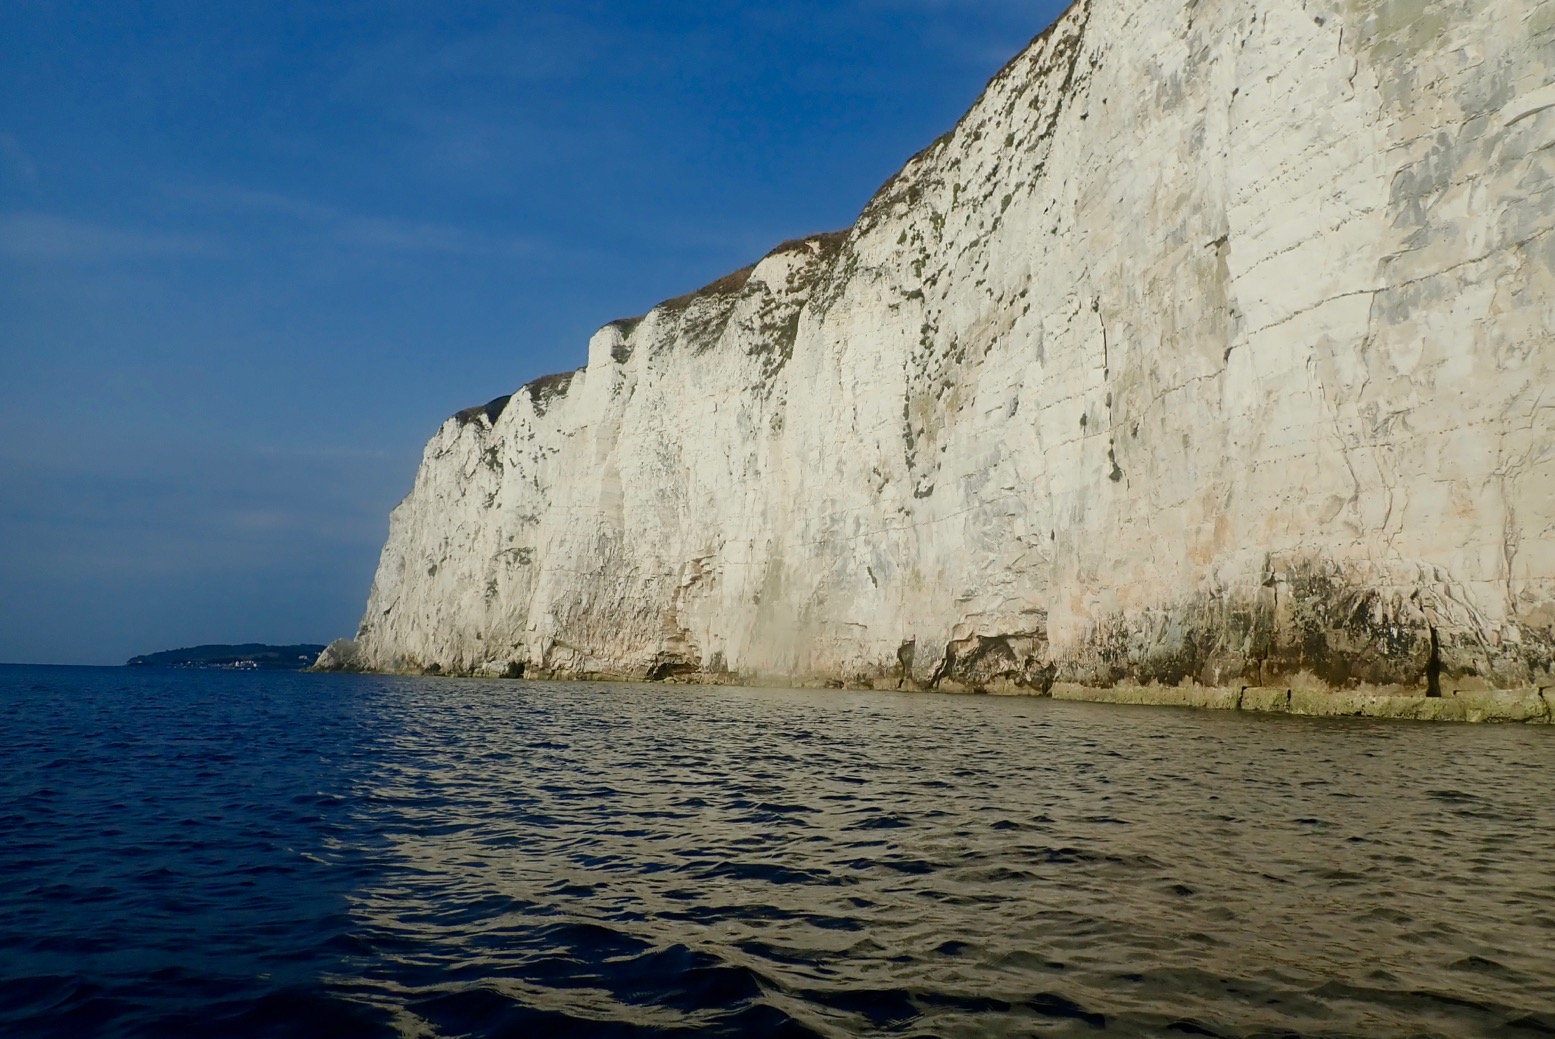
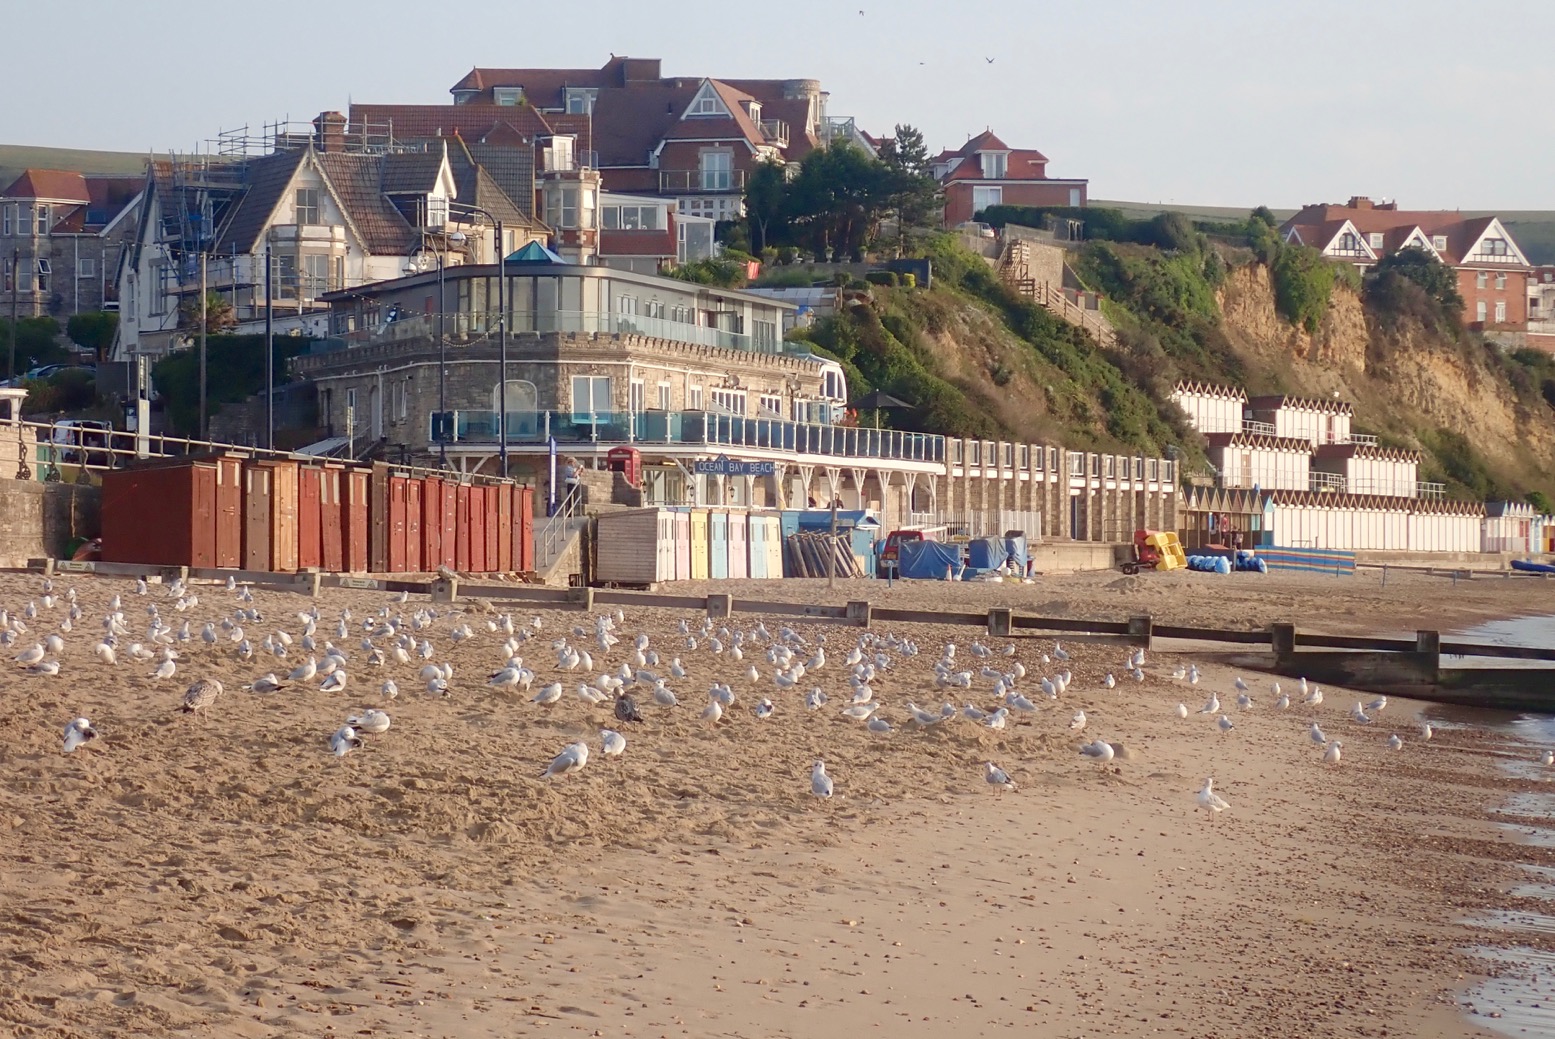
Ten minutes after a paddling away from a tranquil Swanage seafront bathed in a Turneresque light (above), we found ourselves battling a stiff breeze rolling off the Ballard Downs on the north edge of Swanage Bay.
The odd whitecap scurried by, a sign that the IK Limit was not far away. This felt like more than the predicted 10mph northerly. We dug onward, and once tucked below the cliffs the pounding eased. The northerly was probably amplified as it rushed down the south slope of the Downs and hit the sea. We’d paddled through that turbid patch – a bit of a shock before breakfast. What would it be like once out in the open round Ballard Point? Mutiny was afoot.
“Let’s see how it is round the corner, then decide,” I informed the crew.
“Aye aye, cap’n sir.”
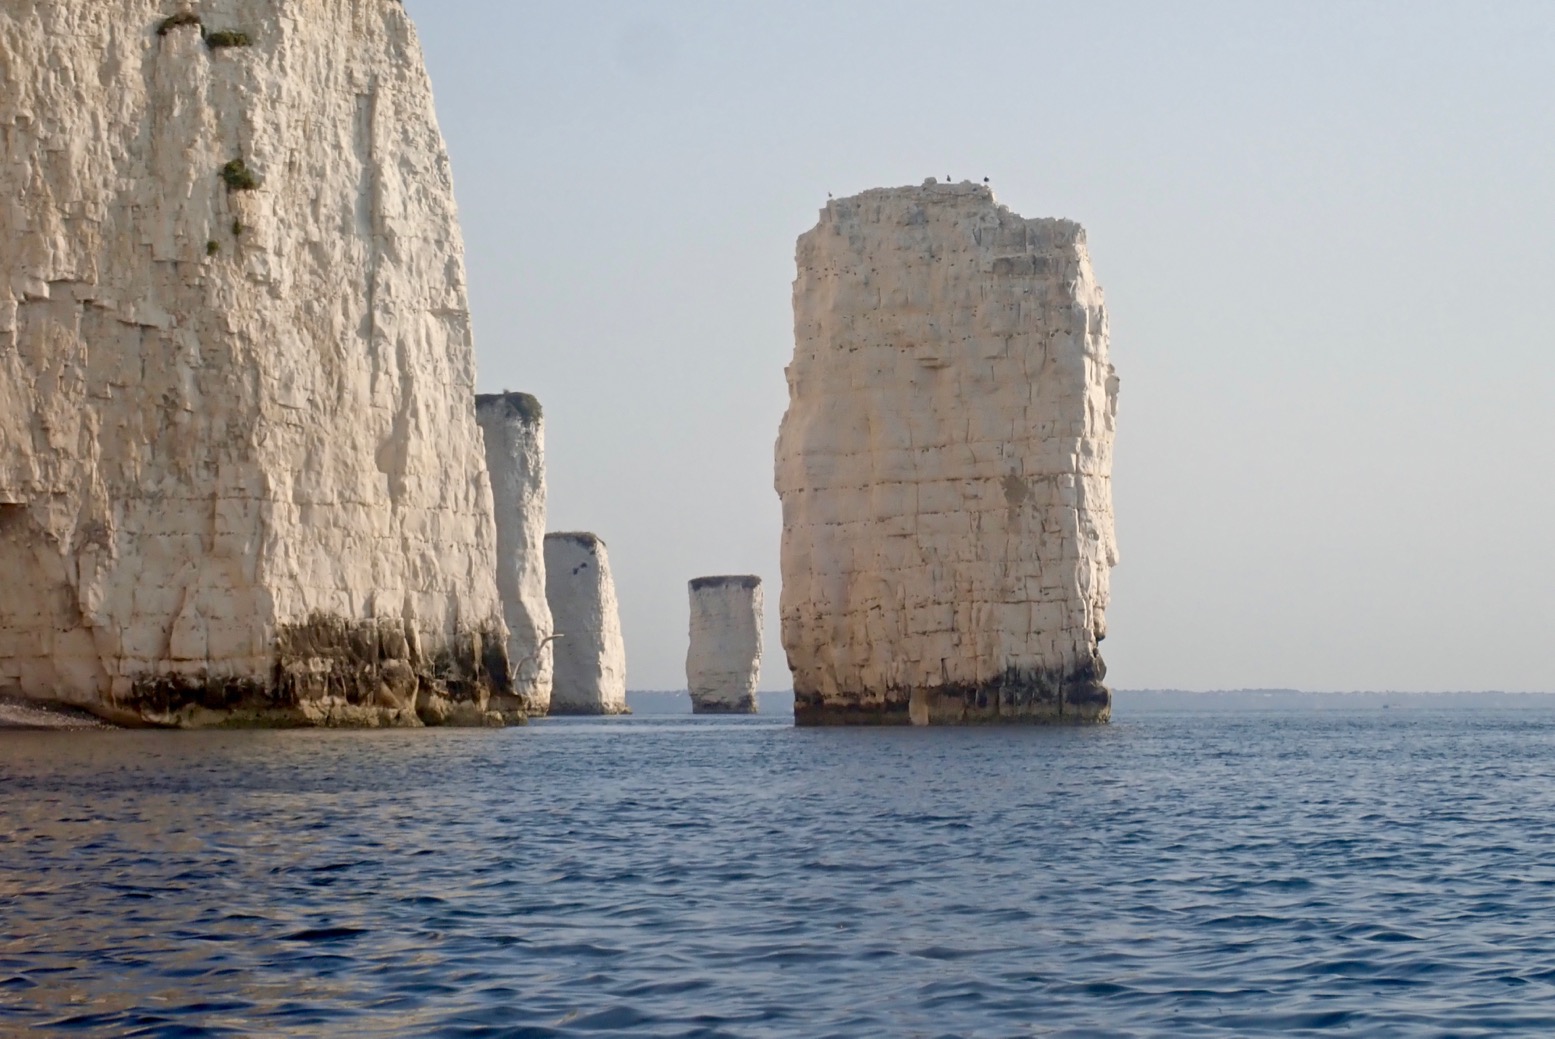
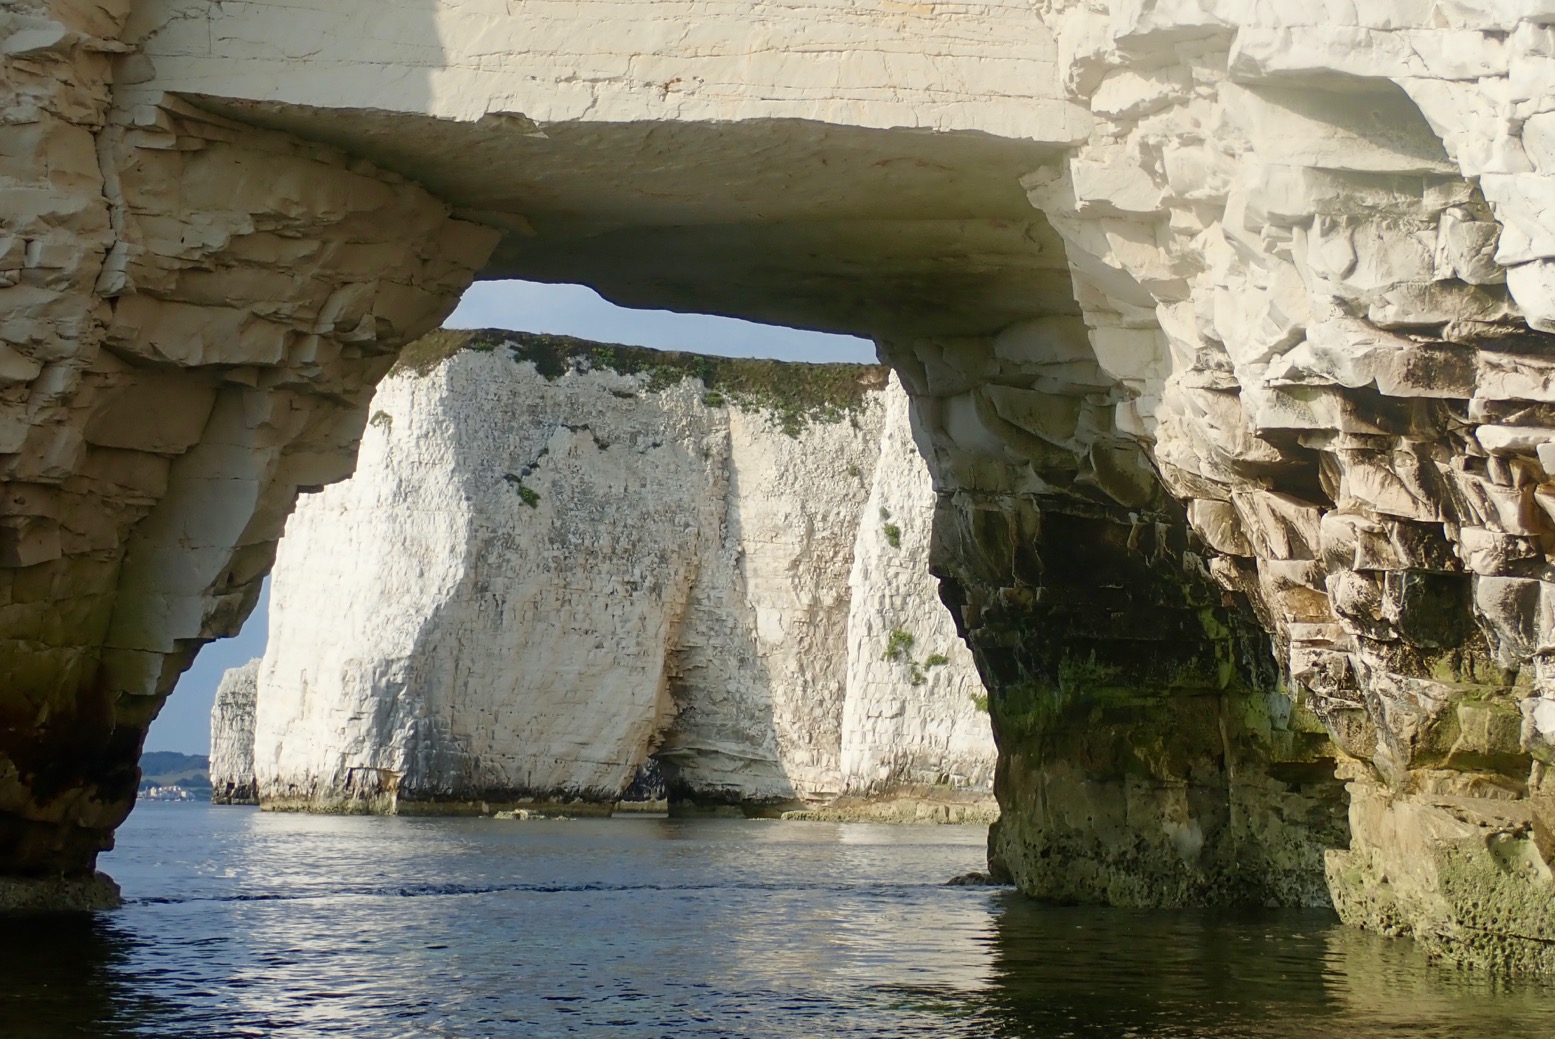
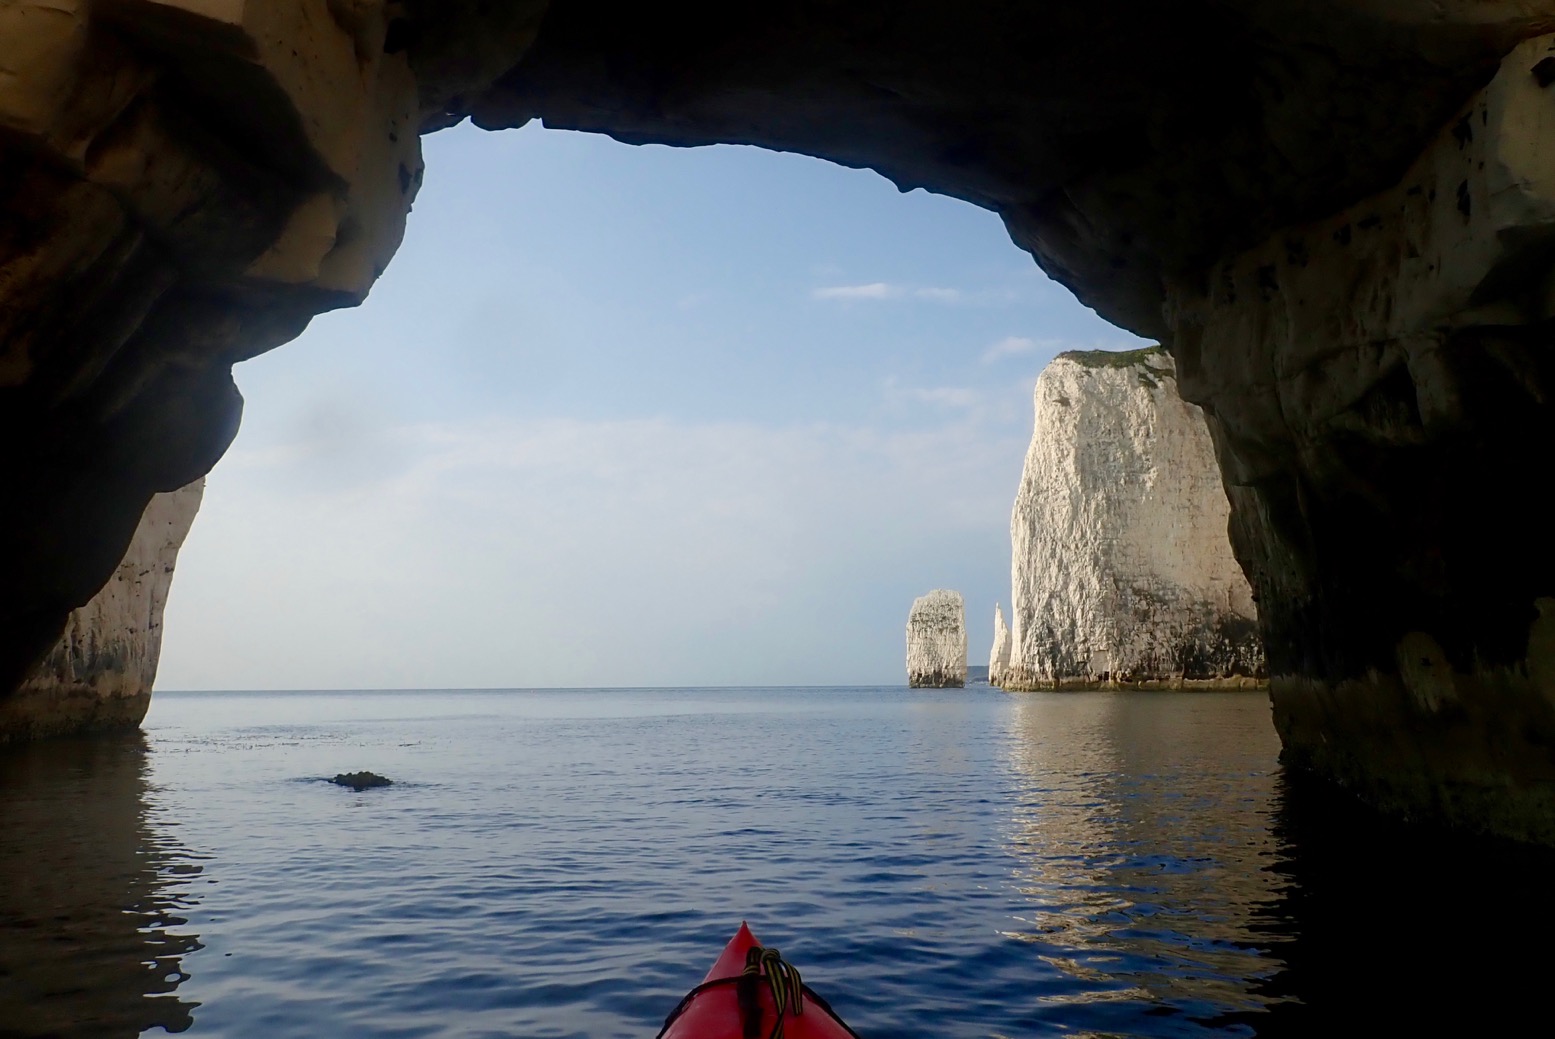
We eased around the corner expecting the worst, but were greeted by a magical sight: a line of 200-foot high chalk cliffs receding to a distant group of stacks and pinnacles glowing in the soft morning light and all soothed by a gentle breeze.
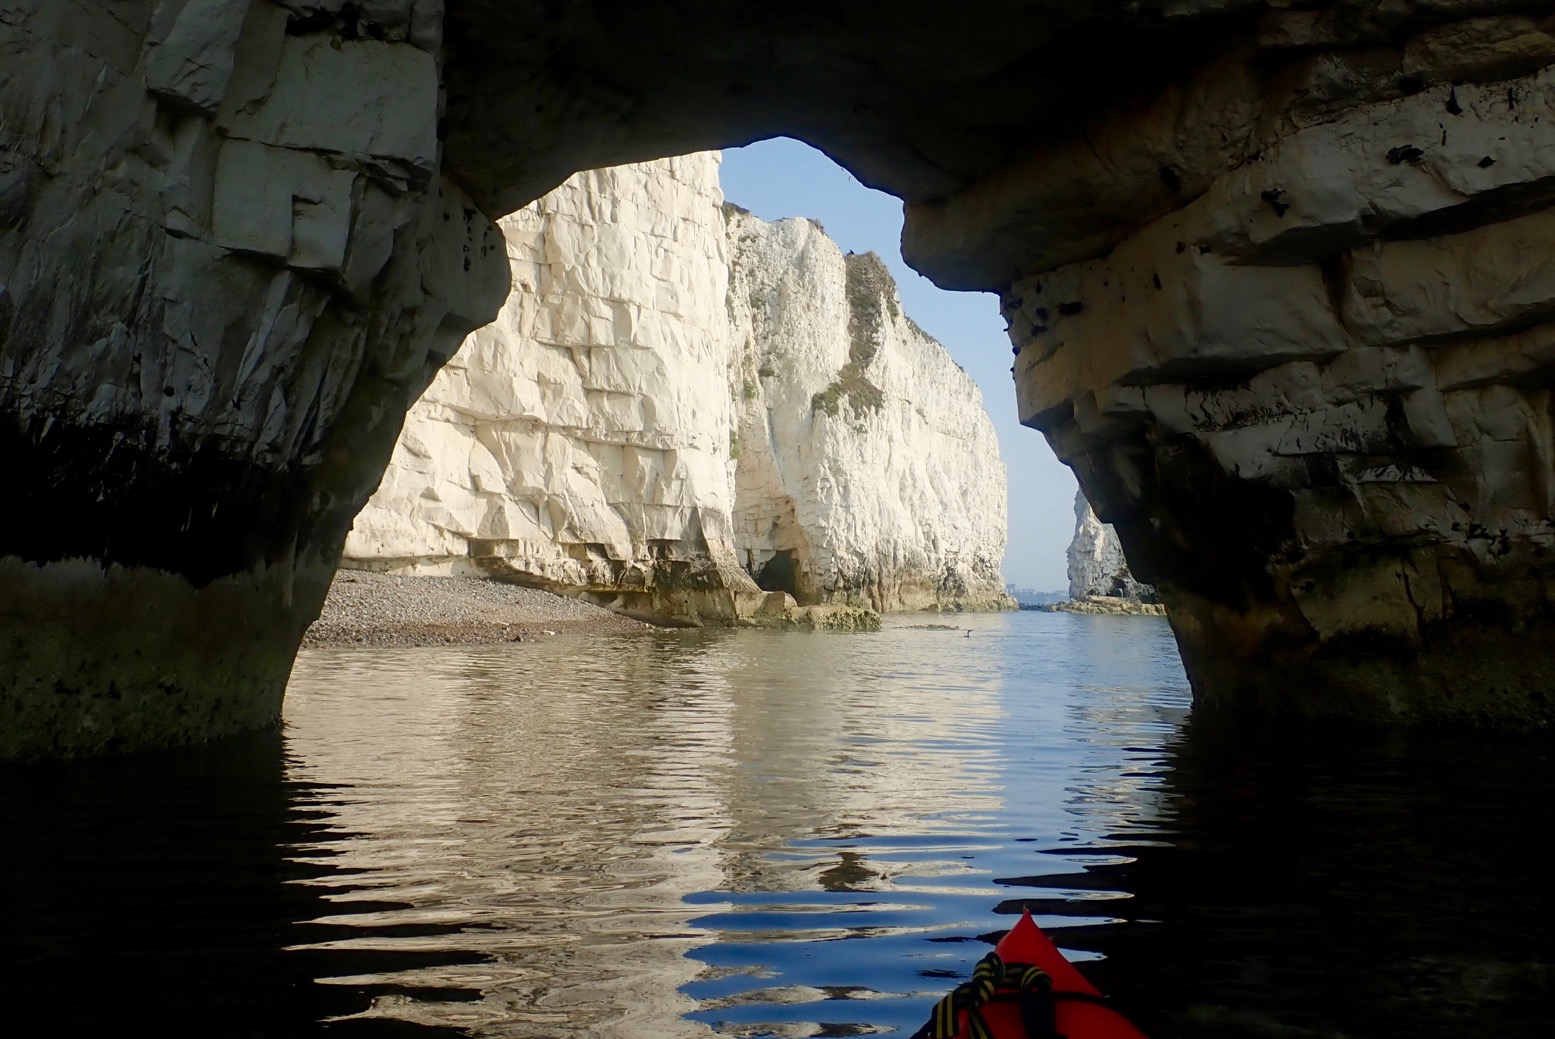
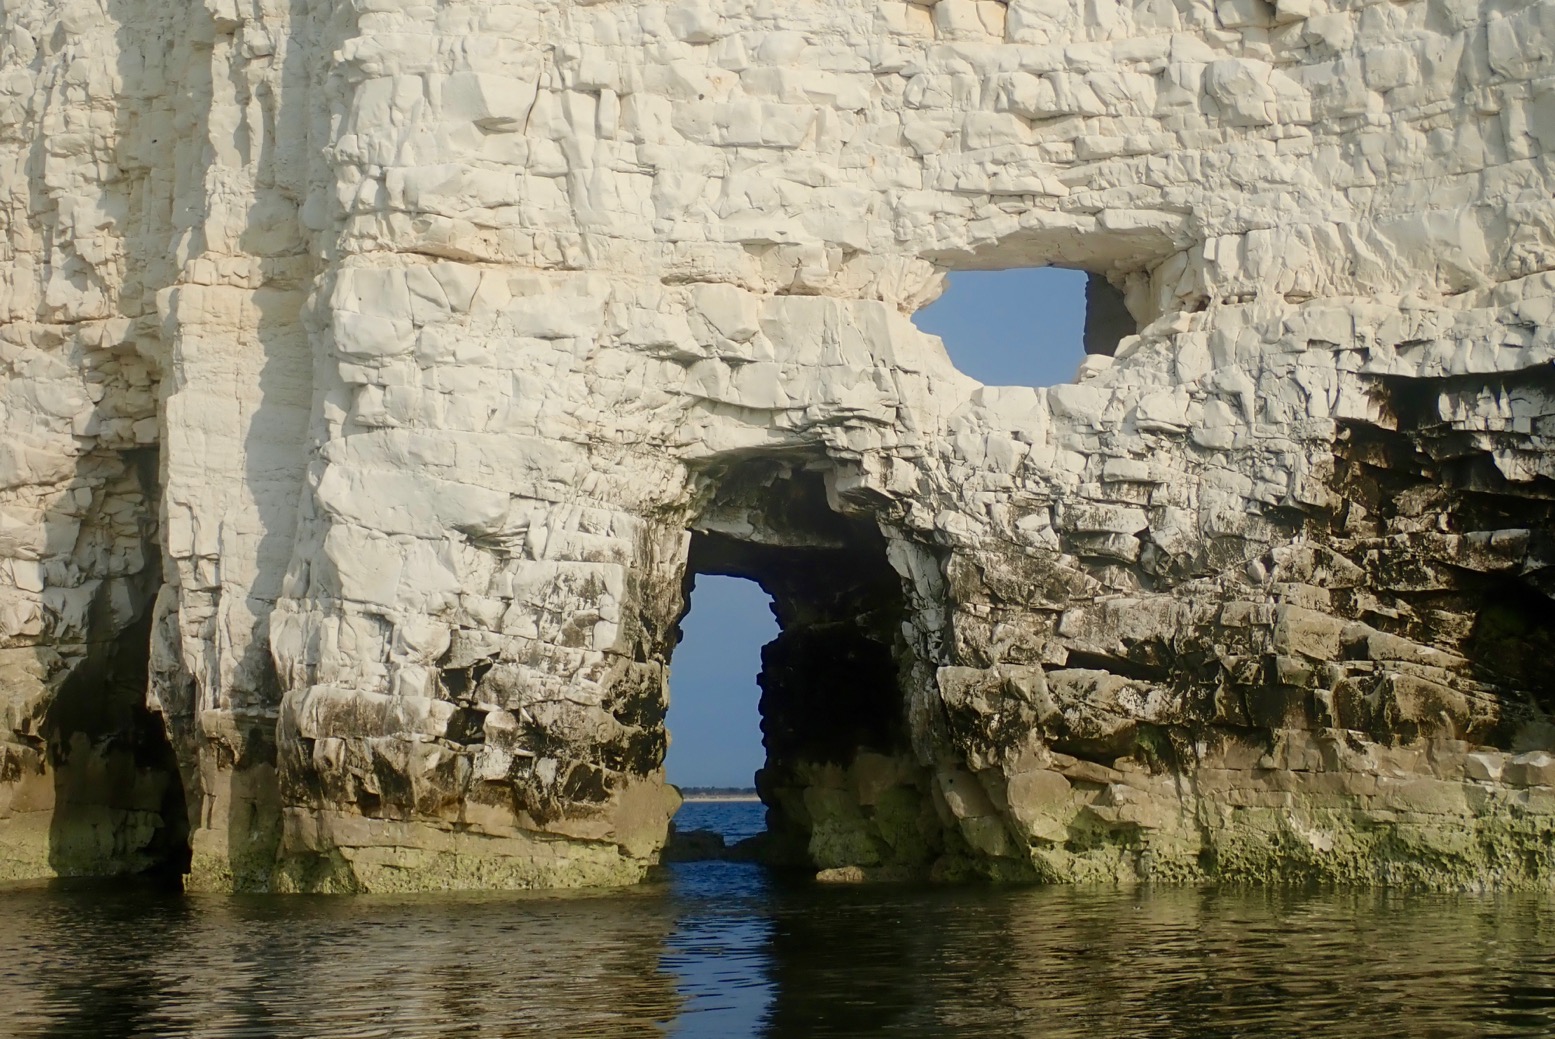
 It was only a mile from here to Handfast Point aka: Old Harry, passing several stacks, arches, caves and slots. Ever the goldfish in its bowl, I’d got distracted before looking up tide times, but judging by yesterday evening’s paddle around Brownsea Island in nearby Poole Harbour, it was a couple of hours into its southerly ebb. We arrived at Harry’s about mid-tide but with still just enough water to paddle through most of the arches as well as some narrow slots which were already running too fast to tackle against the flow (below). A bit of a tidal race swirled past the Point, but nothing dramatic.

I’ve been planning to do Swanage for years and it was even better than expected. It must have been packed out yesterday on the bank holiday, but today, before 9am we had the place to ourselves. It’s a fascinating geological formation and all the better explored from a paddleboat.

Lit by a rising sun and on the top half of the tide must be ideal timing for a visit here. All up, it was only a two-hour roundtrip from Swanage seafront and in similarly good conditions would be easily packraftable from the north off nearby Studland beach.
Hope to paddle this again, one time.PS: Little did I know that this summer 2019 paddle would be out last sea paddle in the Seawave. Not since my original Gumo Sunny on which I learned and did so much, have I owned an IK for so long and had such fun times. What a great boat that was.