News of the new 3psi/ 0.2bar Gumotex Twists made of slicker, full-coat Nitrilon Light came out in 2015. Then in 2017 they dropped that fabric and returned to regular Nitrilon. Weights went up, so did the price, but the boats ought be bombproof which you could not say for the original models. (But see below). The 3.60-metre x 83cm T2 double now goes for around £500 and weighs 13kg. The 2.6-metre x 79cm T1 (green, left) costs £400 and weighs 9kg. This >2018 model should have three pairs of D-ring seat mounts on the hull top.Now with the slick fabric coated on both inside and out, the boat ought to be tougher and will certainly be much quicker drying.
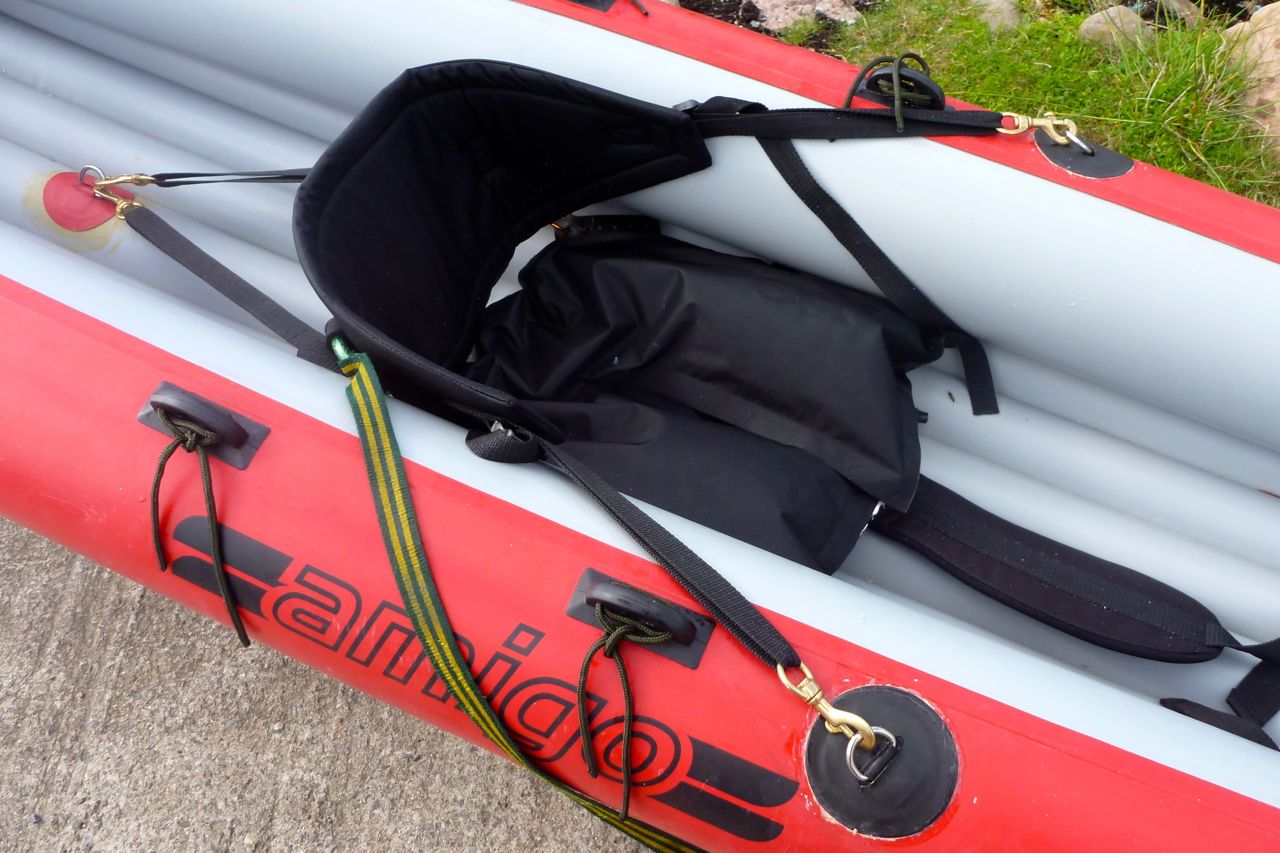
They have the usual removable and adjustable but rubbish seats which Gumotex is still famed for. I think it’s a way of getting through off-cuts of Nitrilon. For long trips I’d ditch them to save bulk, weight and inflation, and fit lighter and much a more supportive SoT backband + packraft seatbase (below left), as I’ve done to all my Gumos since my Grabner Amigo.
The inflatablefootrests are also a mushy pillows, either a simple pillow, or the extra rubbish, heavy, corrugated pillow (above left). Improve your Twist by ditching them too (cut up into useful Nitrilon patches), and fit a piece of hard PVC drainpipe for a proper hard footrest.
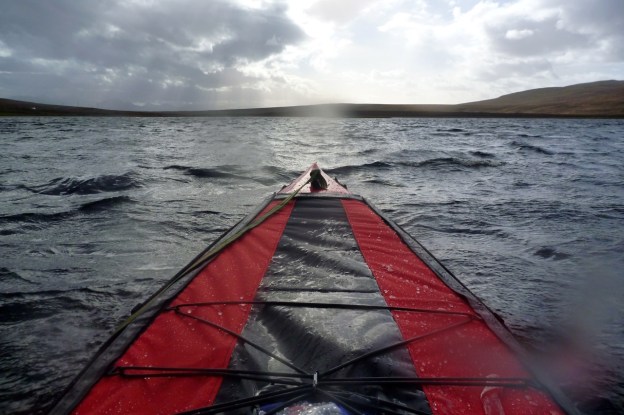
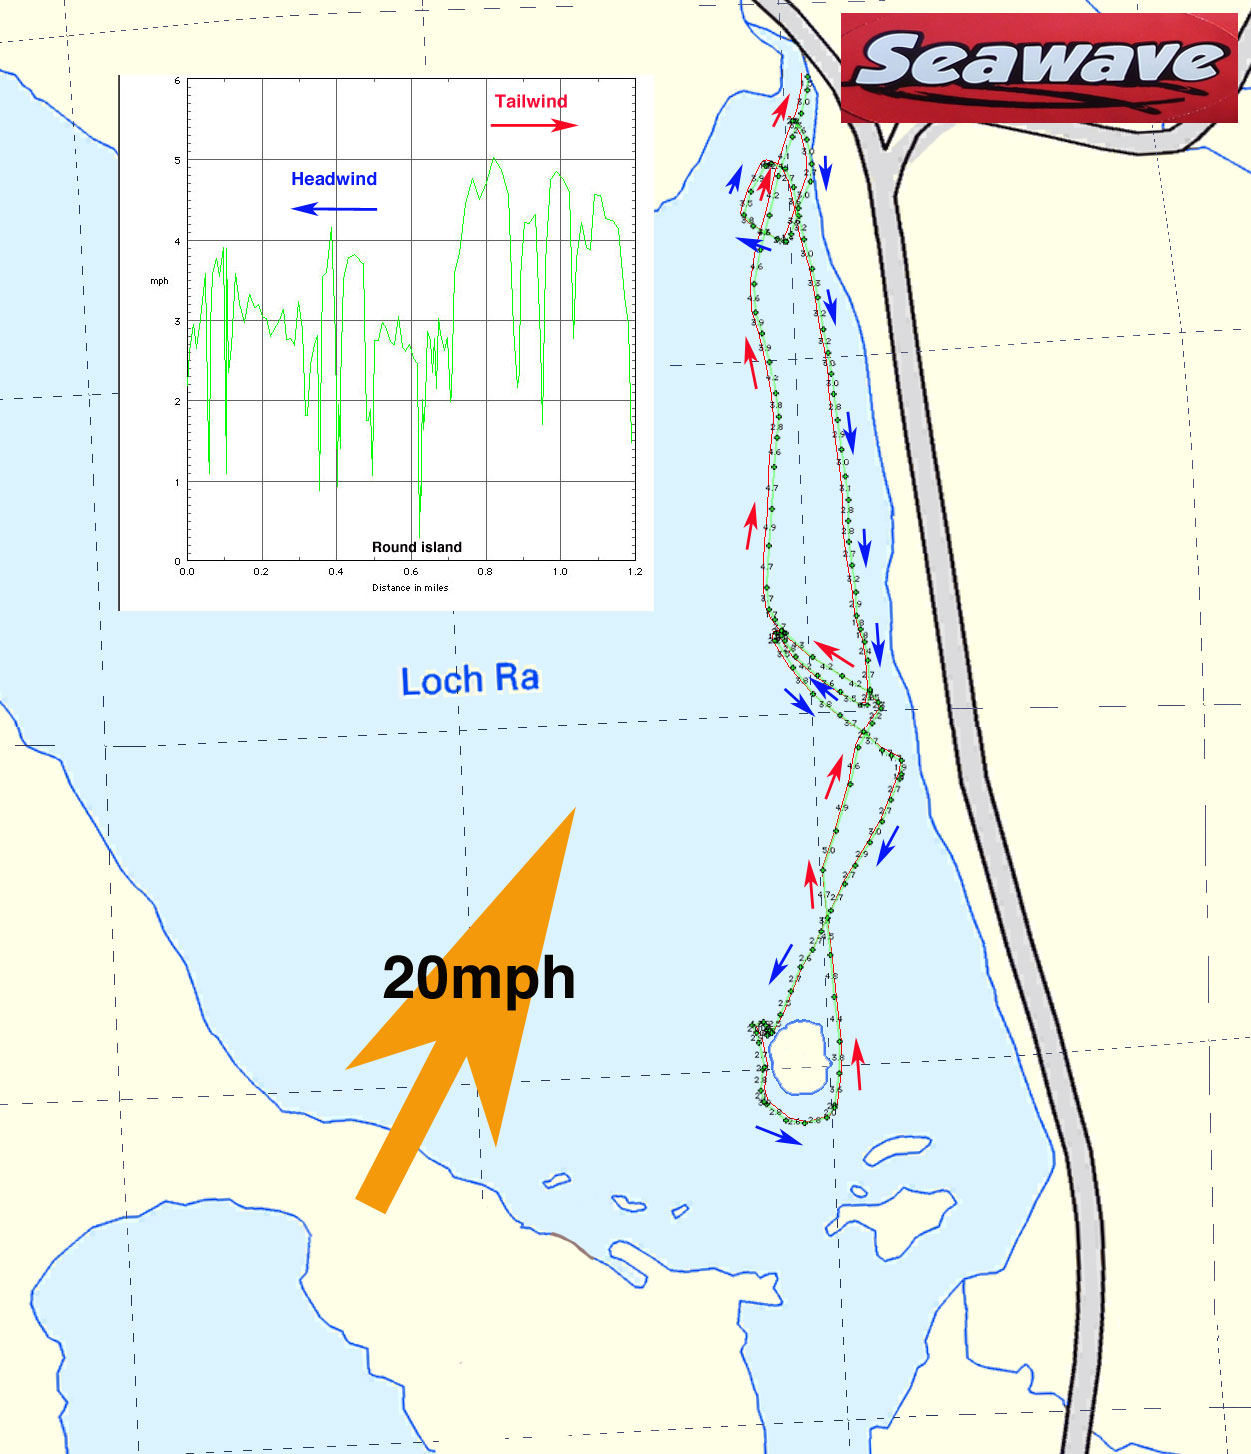
The new boat had to get christened in what they call a ‘fresh breeze’. It was only going to get windier over the next few days. Either that or it would stay rolled up till the new year. I went to freshwater Loch Ra round the back where I took my packraft for a ‘gale test‘ one time. It’s a safe place for this sort of thing. My new wind gauge – a tenner on ebay – was reading a moderate 15 mph, but it felt like more. I do wonder about the accuracy of that thing. Turns out Ardmair near Ullapool was registering a solid 25 with a spike up to 35 around the time I was out. So let’s call it at least 20 mph – not really IK weather.
I pumped the sides up to about 0.33 bar (4.8psi) and jury-rigged a quick footrest stirrup, but under the deck it was hard to line up quickly when you’re getting in while being blown around. I have a better idea to counter-tension it into position from the other end with an elastic (left). That, or copy the Amigo set up with D-rings – less straps cluttering up the floor that way.
Used to hoping effortlessly into open boats and setting off whatever the conditions, the need to negotiate the deck made getting in all the more awkward – though a grounding skeg is also a factor. With an onshore wind, I figured out a nose-to-the-shore angle but had the paddle blown out of my hands just as I was slotted in. I retrieved it and tried again using those nifty deck elastics for the stick, then backed up and swung into the wind.
As expected progress was slow until I found a rhythm, and then just very effortful – like hauling a head hose uphill. The Seawave’s more rounded hull means it’s a little more tippy than the mattress-flat Amigo, but in a good way. I never thought I’d write that line, but a little rolling means side waves need not push you over if you counter brace, though I can’t say the Amigo riding side waves flat like a raft was ever a problem. If it didn’t tilt with the waves water would pour over the sides. With the Seawave’s deck, lateral sea waves need not deck the Seawave.
Before I got too far out I checked to see I felt in control across the wind. It was blowing so hard I only needed to paddle on one side to go straight, but no stability worries. Then downwind with no untoward weathercocking either, all things considered. Further out on the small loch the fetch flattened a bit but another side-to-the-wind run saw the long boat extremely hard to bring back into the wind. A rudder would be handy, or maybe more aggressive leaning or my weight further back. It felt like my position was a bit too far forward to lever the bow round while the wind pushed on me and the sides. Not sure if that makes actual hydrodynamic sense, but without knowing the Seawave’s normal seat position, there’s certainly room to move my seat back in the cockpit a few inches to see if it makes a difference: more ‘rudder effect’ with a rearward paddler. This animated gif on the right shows the seat about 4 inches further back. Of course these were conditions where you’d expect a long, unloaded, over-buoyant IK to handle like a drifting log.
Upwind it felt like I was crawling along but I got to an island faster than expected, got beached then carefully inched around it. As I knew well, a backwind may be less effort but can be as hard if you can’t keep the back of the boat from coming round – a common flaw with wind-prone IKs. But the Seawave tracked pretty well, right on- and then just off the wind, with only the occasional double pull on one side to level up. I did a bit more crosswind practice but by now I was pooped and even needed to drink out of the loch. Any hope of more tests without the skeg, without deck, at factory pressures and so on would all have to wait.
Back home the GPS showed up some surprises. Into the wind I was hacking at a surprising 3mph, across it at 4 and downwind at up to 5mph. All much more than it felt. I’m pretty sure the Incept would have managed the same – and it was less effort than in the Amigo.
Even with the Rush models for 2020, Gumotex still claim their Framura IK is their fastest boat. For coastal ‘yaking the numbers certainly look great: 16kg + 4.1m x 75cm wide That’s 29.5″ and about as wide as you’d want to be in a proper IK. I see that in France it’s homologated for use as a kosher ‘Cat C, 10km from shore’ sea kayak while in North America it’s sold as a Swing EX.
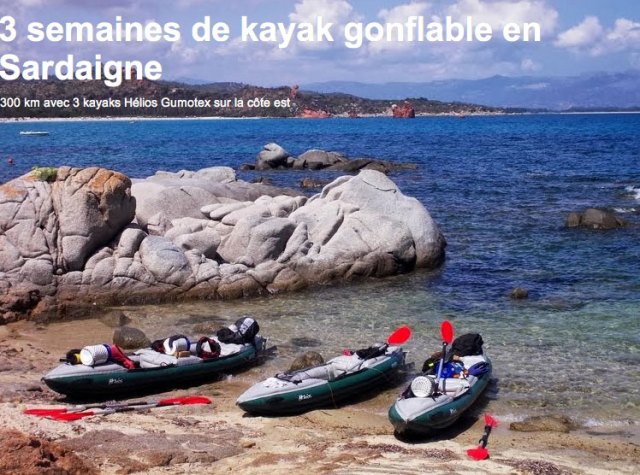
Oi! Not sure I’d be dragging my IK over the sand like that.
From the bow shape it looks like it’s based on the slightly shorter but much wider Swing 2 – or the longer but also wider and higher pressure Seawave. That lightweight deck is fixed and has Swing-like struts to keep it up and shed water. Access is by straight zips or down the hatch. Like the Swings, they leak until the Swings were upgraded in 2025 along with the new Aurion, a hybrid Framura.
As for pressures, the Framura runs a disappointing 0.2 bar/2.9psi, not the 0.25 bar of the Seawave. But I read that Gumo-recommended max pressures are on the conservative side: the side tubes can be run up to 50% higher with great improvements in rigidity, and the floor runs an 0.2 bar PRV so can’t be over-pressured). I also read somewhere they got 12kph out of a Framura while testing at sea. The best I ever got out of my Java or Incept was a short burst of 10kph, so that is fast.
In 2016 they introduced a rudder kit (left) for the Framura/EX. I made one for my Seawave but in the end, could not be bothered with it on day paddles. On multi-day runs where you get the weather you’re given, a rudder may be a good idea.
Slim, not like an otherwise similar Swing
I like the look of the 4.1-metre-long Framura but I liked my Seawave more. Framura, by the way, is a nice spot on the Italian Riviera, not far from Portofino. Not, as I thought, a hint that the new boat uses a frame(ura) to maintain rigidity. That rarely works with IKs, in my experience. You do wonder if the new hybrid Rush 2 supercedes the 2015 Framura.More Framura in this video. See also this.
I’m not convinced the 0.2 bar Framura is that much faster than a longer, stiffer Seawave. And I also suspect it has not been such a sales success either. Perhaps claiming the former has something to do with the latter.
It’s understandable to worry that something like an inflatable boat is a bit of a liability when out in the middle of a deep lake, hairing down some white-water or when far out to sea. This is especially pertinent if your only experience is a beach toy made of a thin and stretchy PVC film.
I’ve owned over a dozen inflatable boats and have only had one tiny thorn pinprick in the Incept, age-related fabric perforation on an ancient Semperit and a hole worn through careless transportation in my Seawave.
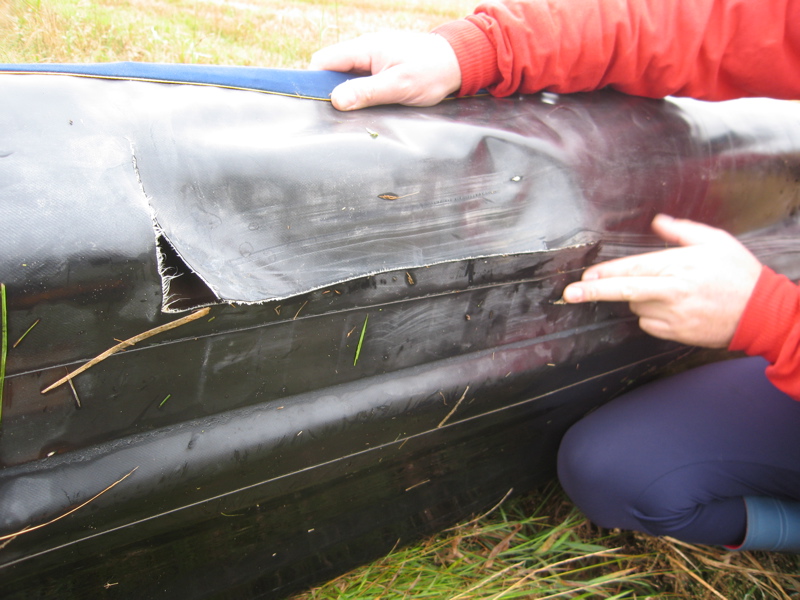
Once on the actual water it’s hard to think of anything actually puncturing my full Nitrilon Gumotex IKs or the old Grabner. What more often happens is some kind of accidental wear or rubbing when not paddling or during transportation, like the trolley wheels which wore a hole in my Seawave, or the windy tree branch which rubbed (but did not puncture) my Grabner (left). I also snagged my packraft’suninflated floor on submerged concrete once, then added protection to the outside and padding on the inside to stop that happening again.
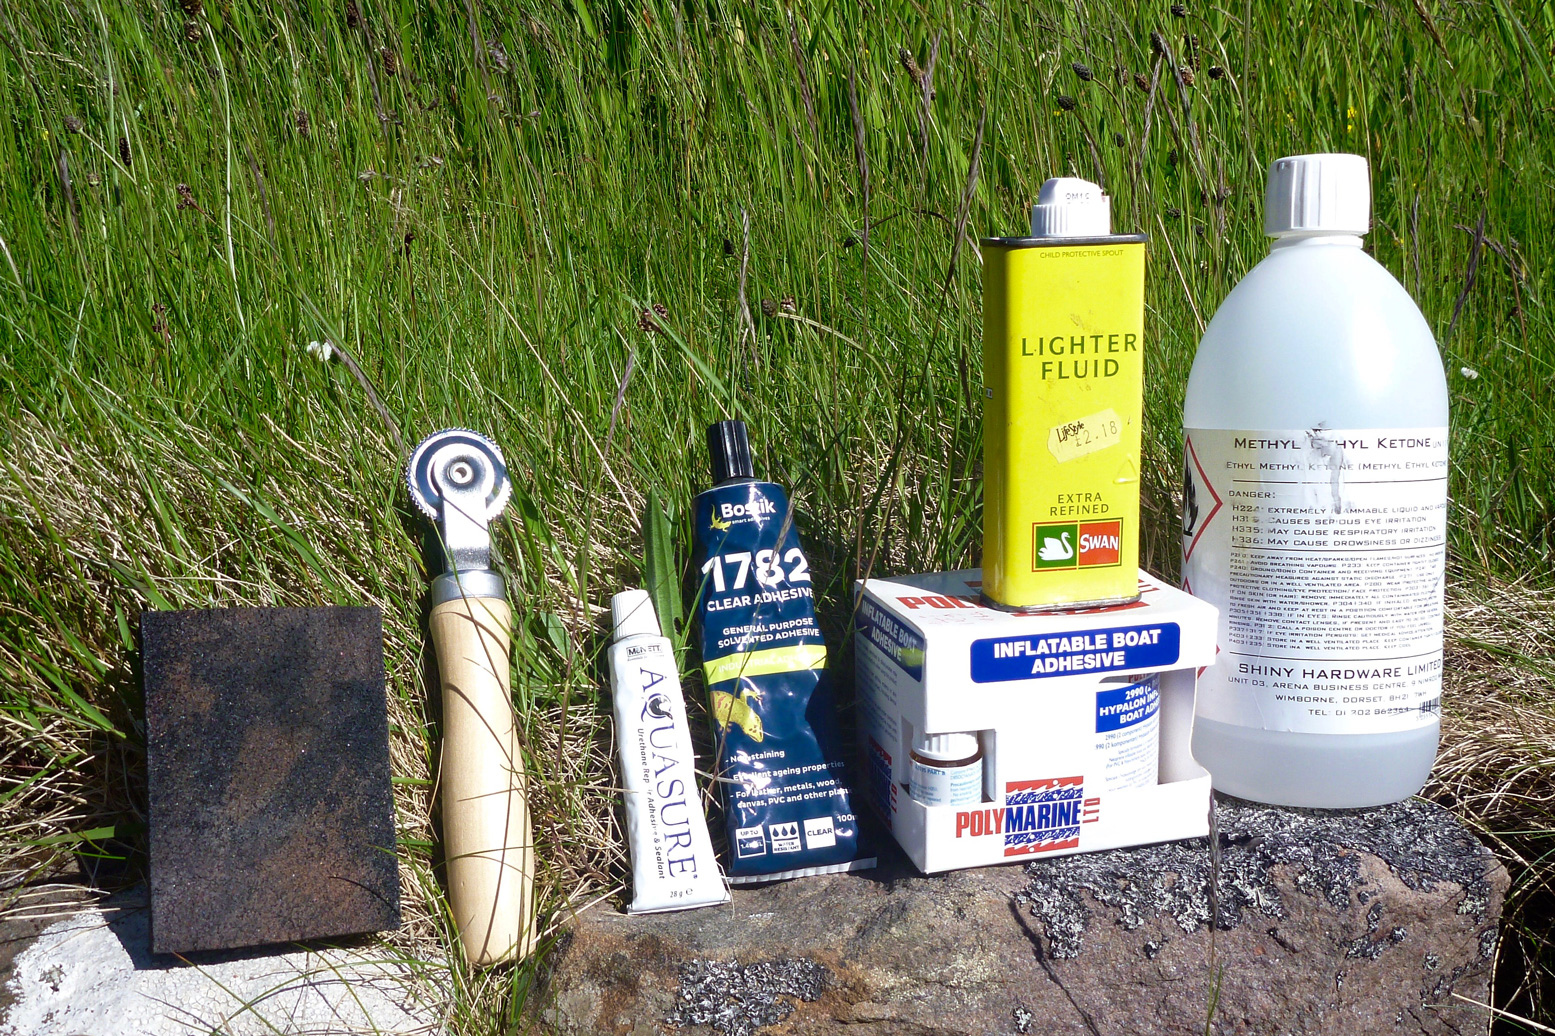
I’ve also travelled with cheap slackrafts that have got ruined within minutes and punctured every other day. You do get what you pay for. So when it comes to glue I’ve learned that preparation and application are vital to getting a good repair: rough it up; wipe it down with solvent, apply the right glue to both surfaces, wait, then slap on the patch and press down hard with roller to achieve a long-lasting bond. More below.
Is your boat plastic or rubber? As explained here, broadly speaking IKs are made of either rubber- or PVC-coated fabrics. Rubber-based Hypalon, EDPM or Nitrilon is much less used now and most with the tubeless construction method. On a boat like this, rough up the surface, clean with solvent (see below), apply the right glue and a same-material patch, all which needs to be done well as the patch is vulnerable on the outside. Or, you can just dab some Aquaseal directly onto a small hole in the hull to protect it from wear, as shown above left (not an actual puncture).
One-part glues I’ve succeeded in gluing on non-critical D-rings onto Gumotex Nitrilon and Grabner EDPM (Grabner), as well as PVC to Nitrilon using single-part Aquasure urethane sealant/adhesive (‘Aquaseal‘ in North America). Allowing Aquasure or similar to half-cure in air for 30 minutes, then sticking together and letting it ‘seal’ to itself is a way of bonding anything – even non-compatible rubber-based Nitrilon to PVC, as I did here. SeamGrip is a runnier version of Aquasure to get into cracks and seams. Though I’ve not tried it yet, British-made Stormsure is the same thing. Apply a thin film of Aquasure to both surfaces; wait half an hour, then bond with all you’ve got.
In the UK you can buy Aqausure in 28g tubes from £6, or 250g for around £24. Unless you have a lot to glue/seal jobs, be wary of saving money with the big, 250-g tube. Give it a chance and it’ll split and harden before you get to use it all, even if it’s effectively over half price. Alternatively, I’m told a good tip is to store it in the freezer once opened.
The other one-part glue I used on my PU/PVC Incept IK, Slackrafts and used recently on an old hypalon Semperit is Bostik 1782, not least because it once went real cheap on ebay.
I can’t say it worked that well on my Incept; two-part adhesive is always better. Even on the slackraft the Bostik softened and shrivelled the thin PVC. But on non-critical applications (D-rings and none-huge tears), 1782 seems to work well on hypalons (rubber is always easier to glue than plastic PVC) and at £10 for 100ml was good value. Plus it’s a nitrile rubber/resin-based solution and I’ve found won’t go off and harden in the tube like Aquaseal often does. It’s my favourite, do-it-all, one-part glue.
For years Gumotex supplied rubbish Chemopren Universal gluing in their repair kits. It looked like the brown rubber solution you’d use on a bicycle inner tube. I tried to use it on my Gumotex Sunny years ago and found it was crap. Back then it may have been me, but I tried to use Chemopren again recently on my hypalon Semperit and it wouldn’t even adhere to a roughed up, MEK’d surface! To be fair, it might have been many years old, but so are my other glues.
The glue that came with my second Seawave in 2020 was a small tube of Elastick (left). It looks like a generic polyurethane do-it-all glue, like Aquasure. It will probably remain unused with the boat until it turns solid. I’d sooner rely on Nirtile-based 1782 or Aquasure for field repairs. Tbe problem with these urethane glues is once you open them or the alloy casing cracks they dry up and harden.
Two-part glue
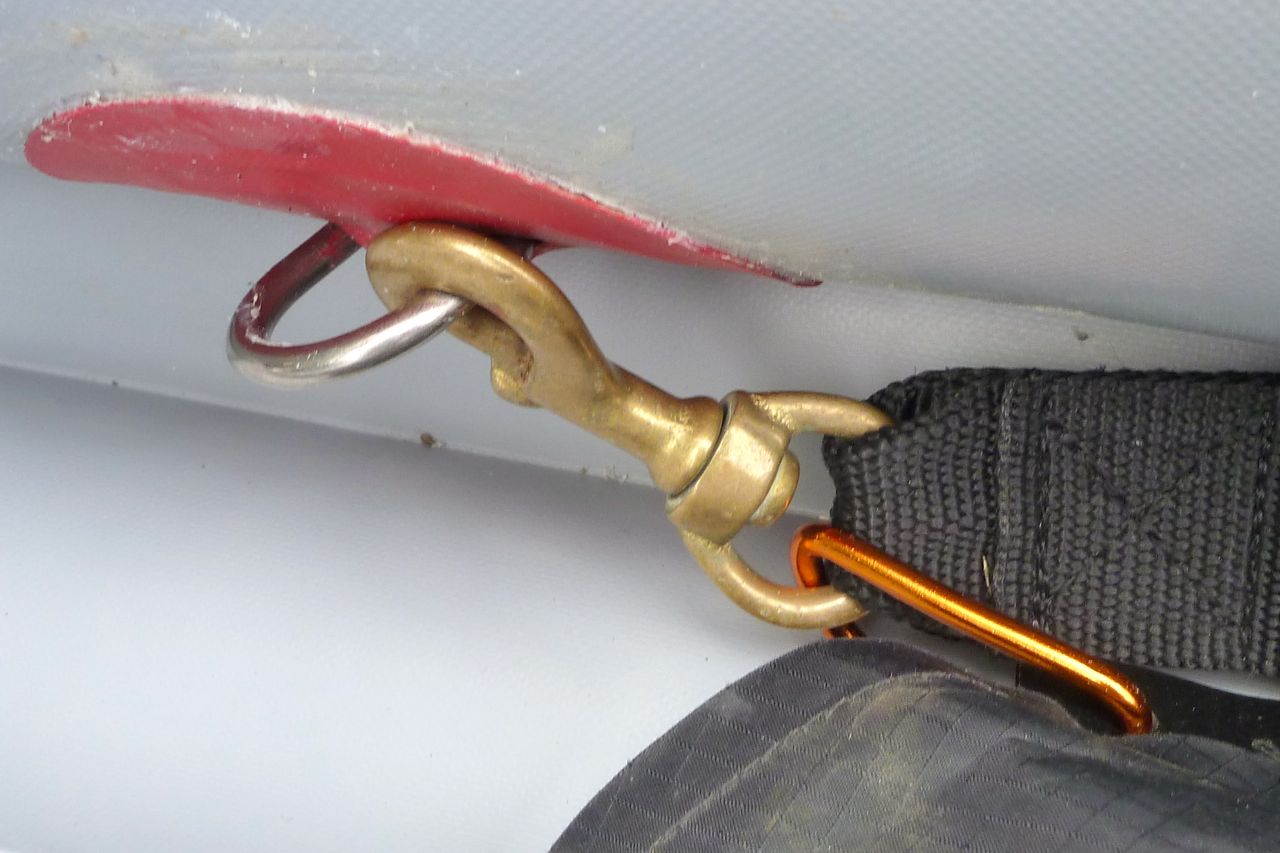
For important jobs use much stronger two-part adhesives suited to actually assembling air boats as well as making more permanent fittings and bomb-proof repairs. At about £15 posted for a 250-mil tin, PolyMarine 2990 Hypalon adhesive is much cheaper per ml than Aquaseal or Bostik 1782. In the UK Ribstore and Ribright sell similar stuff, and Bostik 2402 is the same but prices vary wildly. Just make sure you buy for Hypalon or PVC. I’ve used it to glue D-rings onto my Grabner (more here), floor patches to my Alpacka, latex socks to my dry trousers and patches as well as repairs to my Nitrilon Seawave and Sunny. It sticks like shit to a s***el.
The trick is to measure out the correct quantity. Above: the small bowl about half full of glue and hardener – about 10cc or 2 tablespoons? – was enough to fit two 80mm D-rings. Each surface: the back of the Ds and the hull, need two applications half an hour apart.
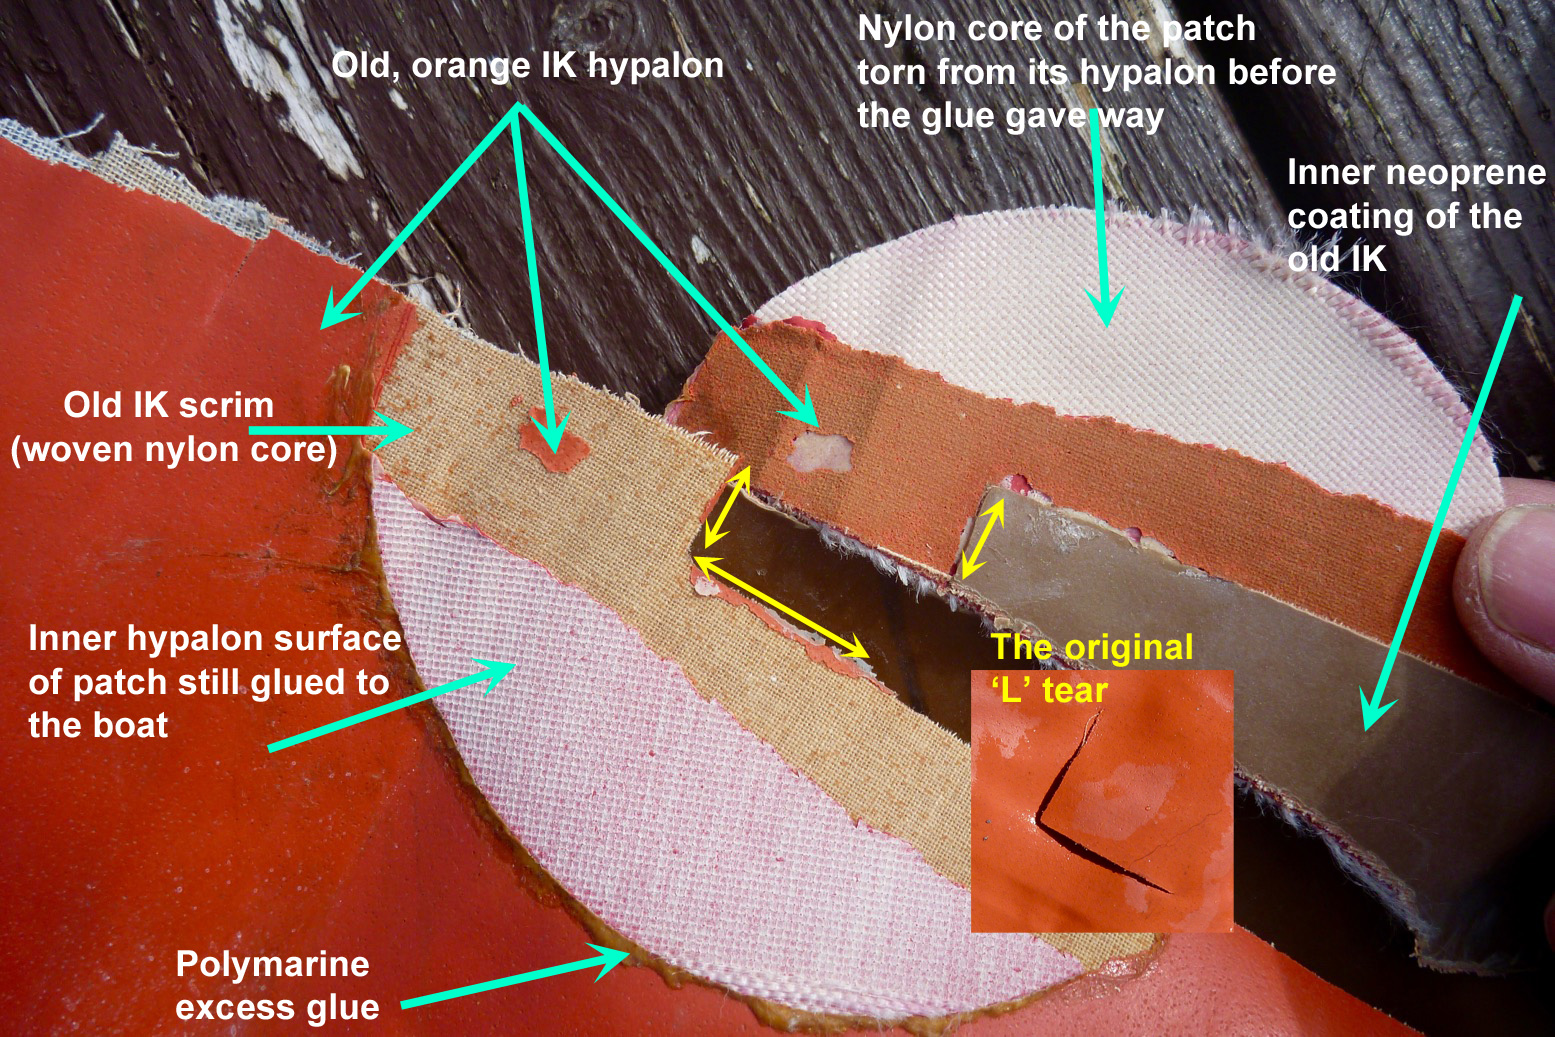
In 2017 when I dismembered an old IK, I was easily able to pull off recent patches glued on with Bostik by hand. But I could only pull off Polymarined patches with a pair of Knipex hydraulic trench pliers and even then, the patch coating pulled away from it’s core (lighter exposed weave below) or the patch remained stuck to the boat and instead pulled off the dead’s boat’s hypalon coating revealing the fabric’s yellowed core or scrim. The two recently glued surfaces could not be separated. They say the mixing of the two components causes a chemical ‘vulcanisation’ and molecular cross-linking which creates a very strong bond. Mixing and applying two-part is a pain, but it works.
Get a good roller
Single or two-part, once you apply your patch, roll it very hard with something like the classic Baltic-pine handled Sealey TST15 stitch roller (left) aka: tyre repair roller used for innertube and tyre repairs. The knurled metal wheel set in a solid handle applies much greater pressure than a wide plastic roller I used to use, and they’re only about a fiver on eBay. Buy one now so you’re ready.
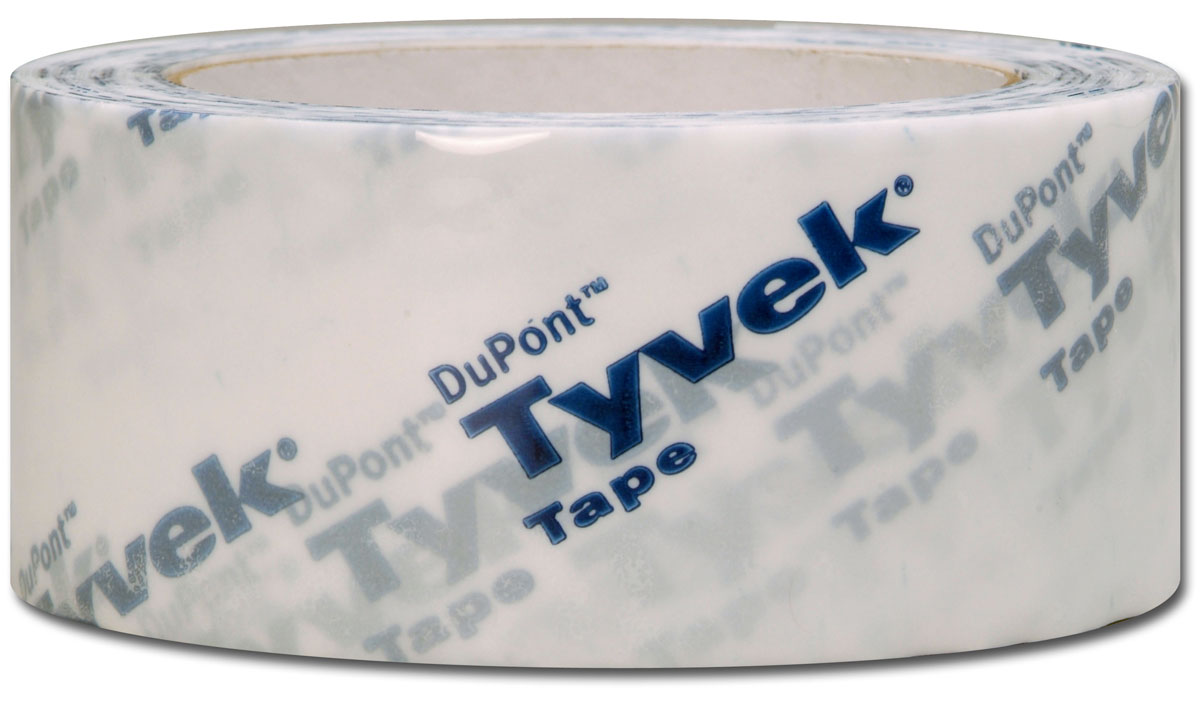
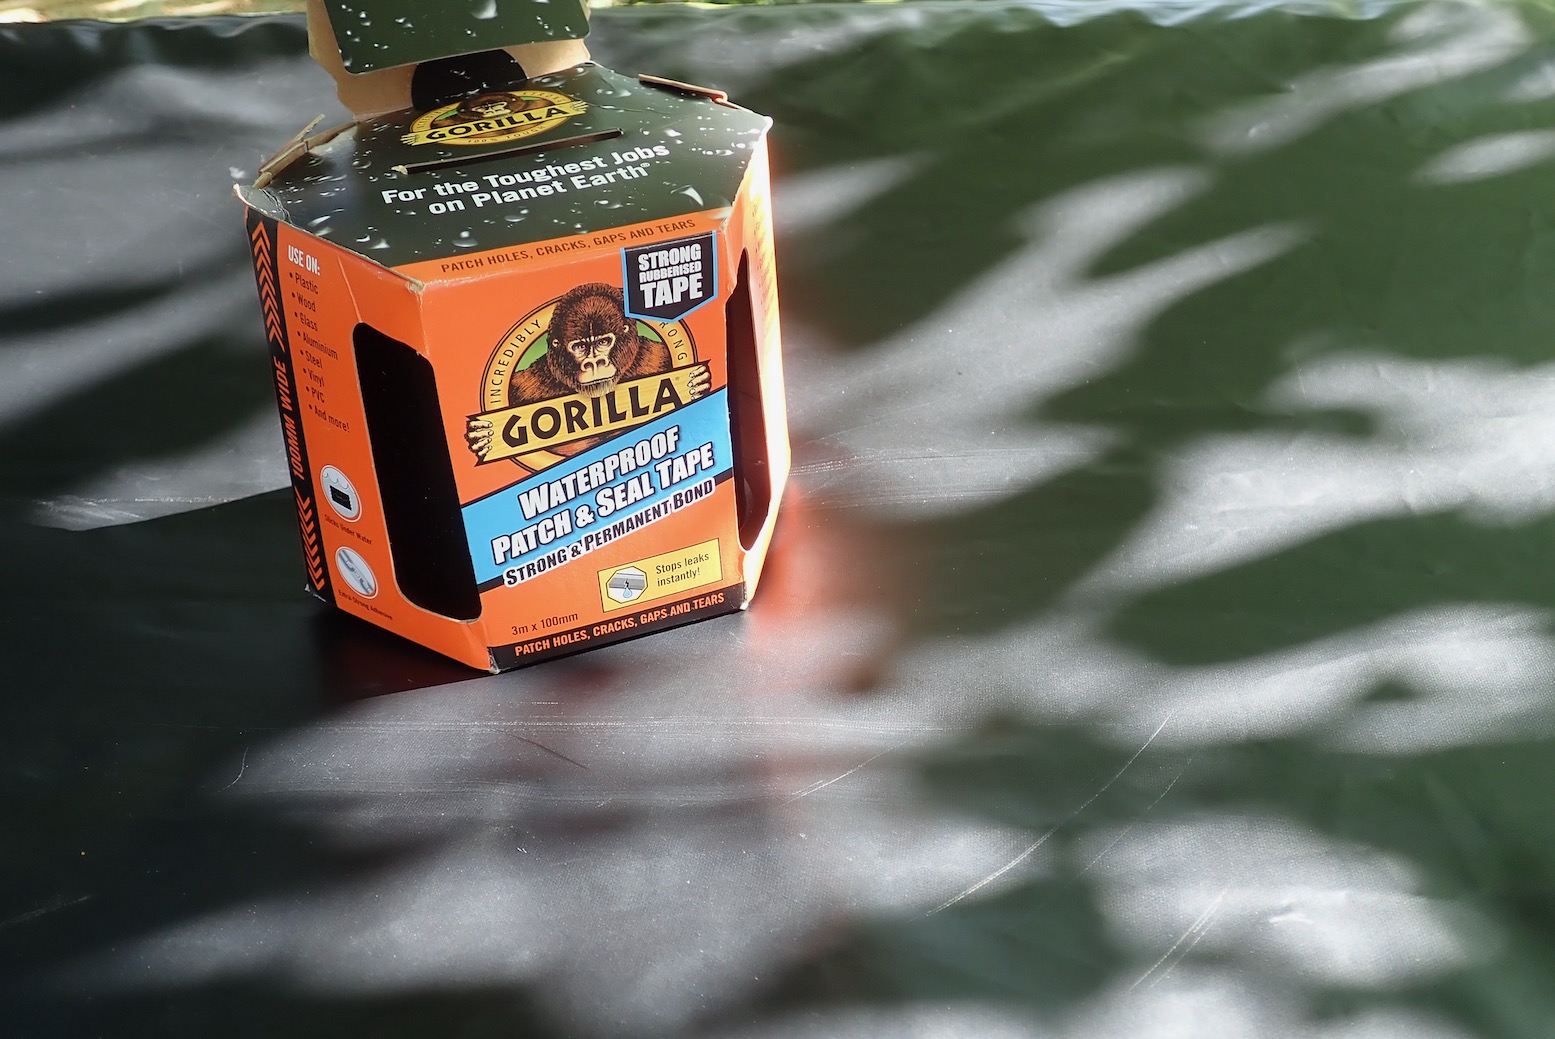
Bladder boat and packraft repairs With smooth-skinned packrafts use two-inch wide Tyvec tape produced by DuPont. Just peel off the back and apply a section to pricks or small tears once the surface has been cleaned and dried. No need for roughing up, but a quick wipe with solvent won’t do any harm. Larger tears can be sewn then taped. Tyvec will work on urethane IK bladders or use ultra tacky Gorilla Patch & Go tape for deep floor scratches and cuts. It will remain impermeable even once immersed.
Helaplast to stick things onGorilla P&G for repairs
Aire-style bladder boat repairs are actually easy. According to Aire’s youtube vid, you unzip the hull shell, slap on a bit of Tyvec on the split, tape up the inner side of the hull shell gash to keep out grit, reflate and off you go. You can glue up in the usual way later, if necessary. I had the feeling that on my Feathercraft Java the urethane-coated sponsons made of thin ripstop nylon fabric (like tent flysheet material) couldn’t have been securely repaired with tape. In fact, it would be difficult to bond anything well to the slippery nylon fabric compared to smooth urethane plastic or hypalon-like surfaces, but perhaps once inflated the seal would have been fine.
On this Sevylor it was the green envelope which ripped a metre long on the second outing! The owned may have over-inflated on a hot day – it only runs 1-1.5psi. The envelope is just a nylon fabric shell so would be an easily sewn repair. Usually it’s the inserted bladders which go. They can be patched.
Once you’ve done your roughing up (sandpaper or a foam abrasive sanding block, left) you need to clean off the residue as well as any oil or grease present. Anything will do in a pinch; alcohol and spirits, after-shave or nail polish remover (acetone), lighter fluid, white gas or petrol of course, but not oilier diesel, aviation fuel or Nivea for Men. Bleaching agents aren’t the same thing. In the end just use water to remove the dusty, post-roughing residue, and on a cold day it can help to warm up the damaged surface to cure the glue more quickly.
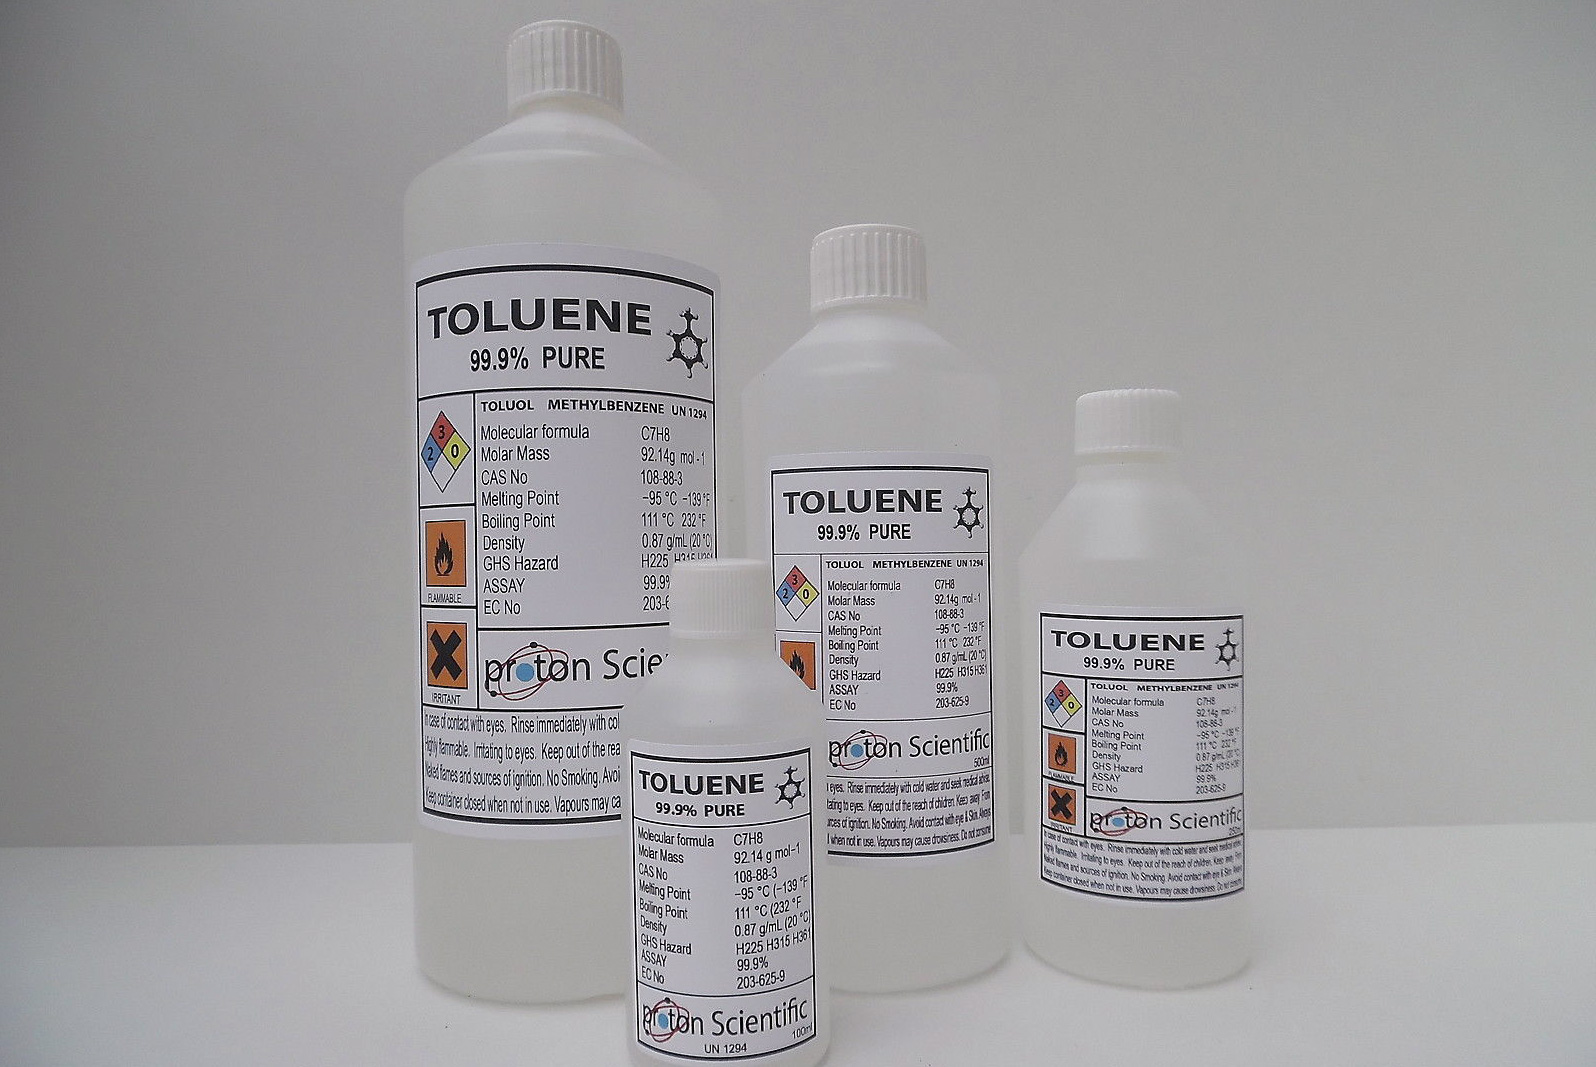
Tri Nitro Toluene (TNT)
For a travel repair kit a tin of lighter fluid (same as white gas) or nail polish remover (acetone) are easy to buy and handy to pack. Back at home I’ve found MEK (Methyl Ethyl Ketone) is inexpensive at £9/ltr and hideously effective. Acetone is even cheaper and perhaps less extreme – all we’re really talking about is cleaning off any grease and the dust after sanding. They say MEK is for PVC boats rather than Hypalon, but on a thin plastic slackraft the PVC will shrivel up before your eyes once MEK’d. Even on rubber-based coatings use MEK or similar toluene sparingly. Expect some colour to come away on the cloth and the coating to soften at bit: good for adhesion. Note the NRS video above specifically recommends toluene (the second ‘T’ in ‘TNT’ explosive, fyi) for hypalon. On ebay uk it’s the same £9/ltr but they won’t post this stuff around the USA.
Huge tears and bear bites
If you have a huge gash, as in the folding Klepper’s hull below, sewing is the only way to contain the tear when applied to an IK. Then apply a huge patch with adhesive, as normal. The boat below caught a cut-down metal fence stake buried in a shallow river bed and was actually sent back to Klepper for professional repair. It’s tempting to think an IK’s pressurised hull would have skimmed over the stake rather than snagged it. The smaller 1-inch L-tear on the left was glued with a 5-inch patch but the 30-year-old IK proved to be totalled.
This huge tear…was carefully sewn up..and patched. Good as new.This old Klepper caught a metal stake buried in a riverbed. Rrrrrrrip. Even then, sewing up the tear and a big enough patch, that would be an easy repair
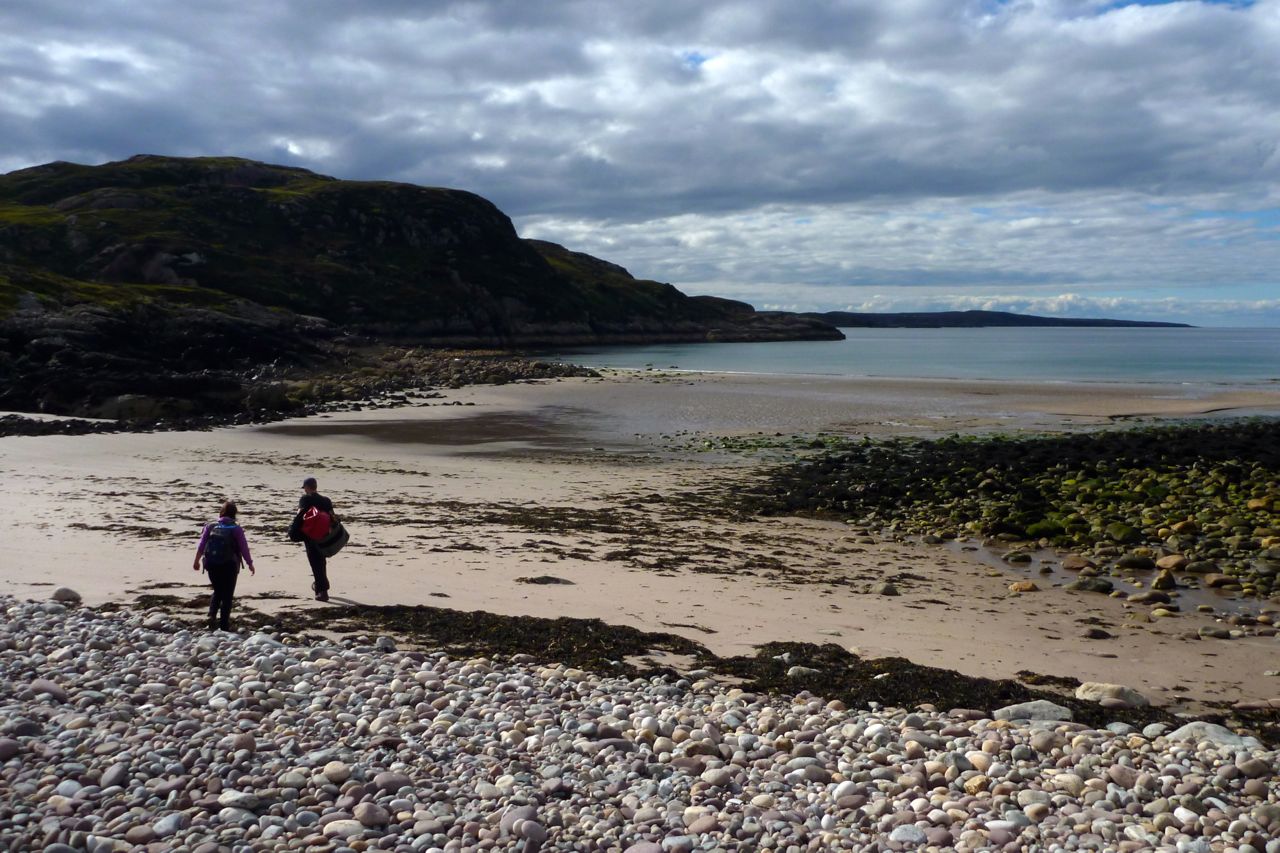
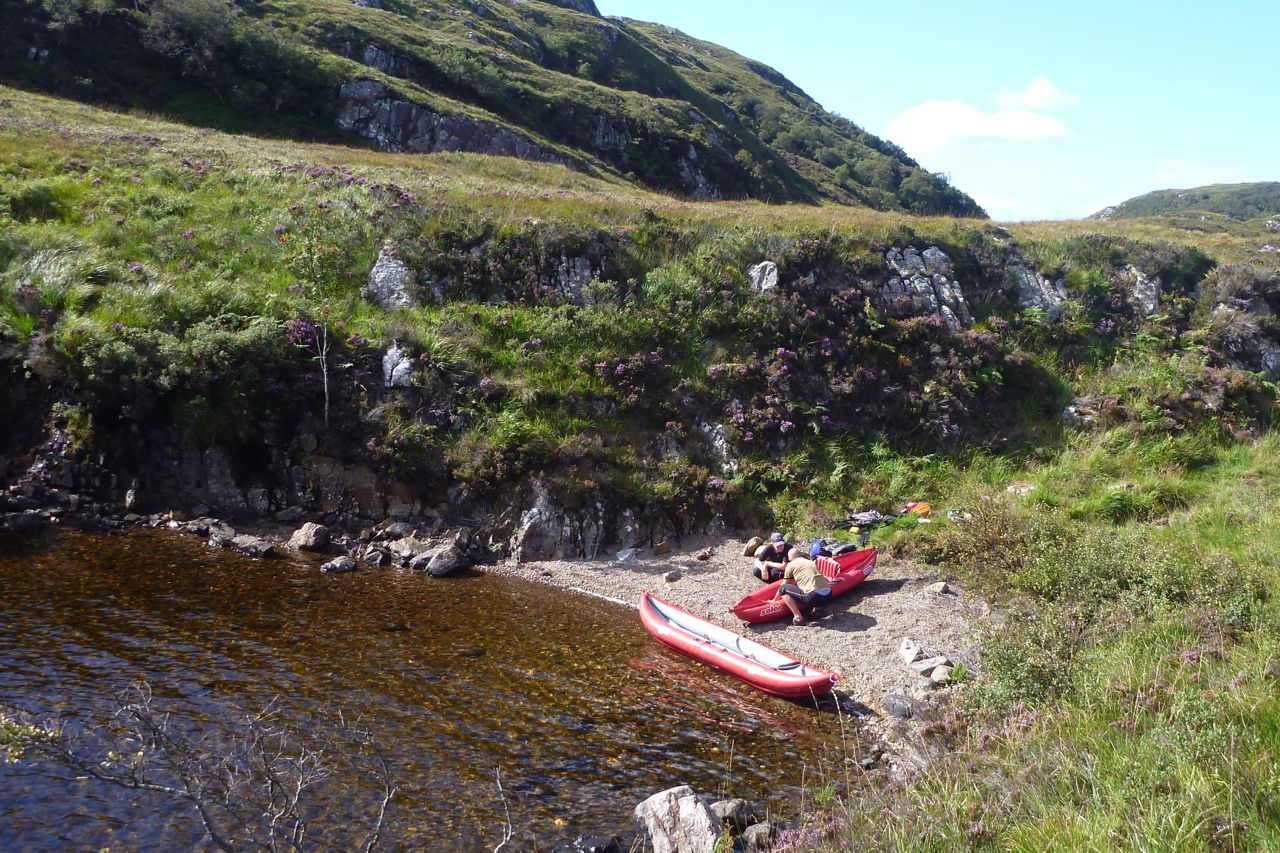
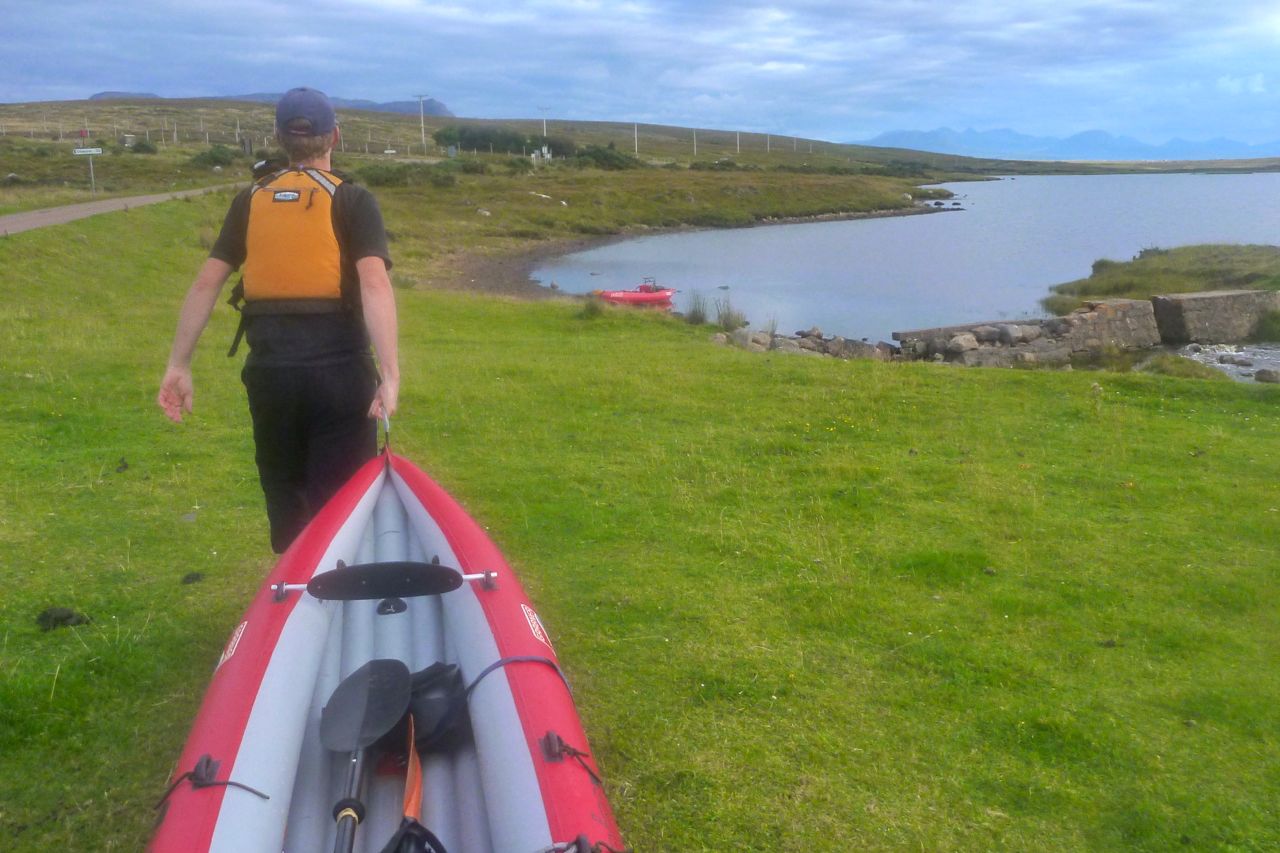
My grand plans to try out my new packframe on a trek from Loch Maree back to the Summers got radically downsized to a day out from Inverpolly. Down at Boat Bay we pumped up the IKs and set off along a route I’d packrafted a couple of years ago.
Surrounded by the singular Assynt peaks, Sionasgaig loch is an amazing place to splash about in a paddle boat, but at kayak speeds that stage was over rather too quickly. Just as well though, as I was trying the Amigo without a skeg, and two-up it wasn’t working. Into the wind was possible with one paddling, but out on Sion with a side wind, even with one in control the lighter back kept swinging off the wind. We put a bag in the back, but at the Sluice Portage (above) we had to commandeer the skeg off Craig in the Solar who up to that point was loving his day out on the lochs. I assured him the Solar was manageable without a skeg as long as he applied appropriate levels of paddling finesse. This low level, almost sub-conscious correction to the tracking is something that’s difficult to achieve when two people are paddling one boat. It’s a shame that a skeg is such a vital accoutrement.
We’d all want them for the Enard Bay sea stage, so at the end of Loch Uidh Tarraigean, g-friend nipped back a couple of miles to the car where the forgotten skeg hopefully lay under a seat. By the time Craig and I had portaged over to little Loch na Dail, crossed it and walked up to the road, the car arrived with the errant skeg.
Past Inverpolly Lodge.
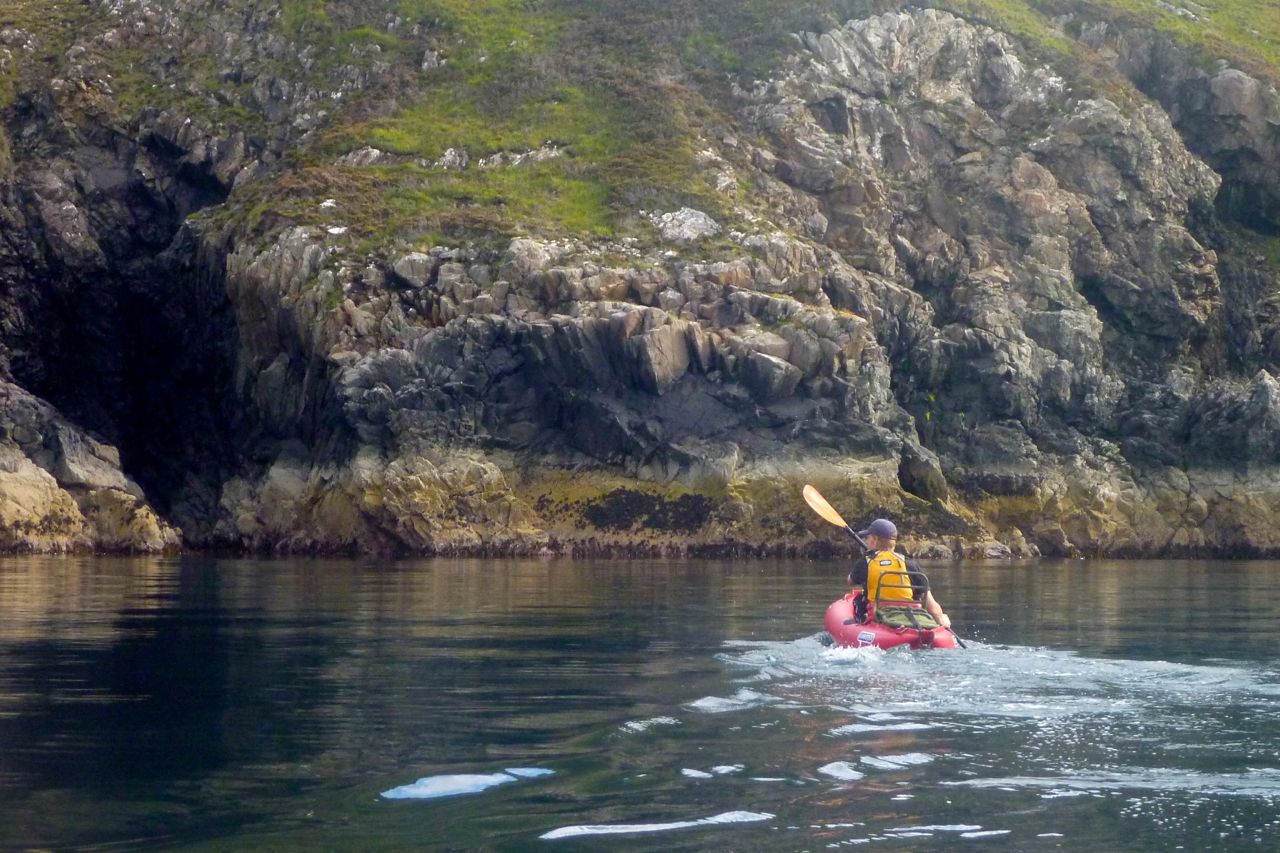
After lunch we rolled the boats up, coasted down to the fish hatchery on the River Polly and set off down the track towards Inverpolly Lodge and Polly Bay beyond. We’d crept up here on our bikes a few months back, to check out ‘Loch Sal’ bay north of the lodge. There’s boat ramp and fish pens there, which was good to know when I passed a while later on my Enard Bay paddle to Lochinver. First time there and Polly Bay glittered invitingly at low water. On with in the skegs, in with the air and out we go into the flat calm. While exploring a bay round the corner, Craig managed to spot an otter gnawing over its lunch at the back of a chasm.
Arriving at Polly Bay
We worked our way around the coastline fringed with kelp exposed by the very low tide. Further along, winkle pickers were at work at Garvie Point, but then cloud rolled in on an annoying north wind; that is why you want skegs at sea. The little Solar bobbed about on the waves, but Craig seemed to be managing fine. We edged round Camas a Bhothain bay – no seals at play today – and slipped through the reef into Achnahaird Bay.
It was now quite chilly and my proposal to form a holding pattern for three hours until the spring tide filled the bay was roundly vetoed. When Achnahaird Bay fills right up on spring tides, you can paddle up the Loch Raa outlet stream almost to the road junction car park, for the short portage to Raa. As it was, there was enough flow to tow the boats all the way up. We’d left a bike here so the Mrs cycled back over the hill to get the car, while Craig and I paddled across Loch Raa and then to the north side of Loch Vatachen. I did this bit without the skeg and was reassured to find that one up the Amigo tracked at least as well as the Sunny did in the same state. Perhaps it’s all down to more centred weight and the aforementioned correcting finesse. I’ll be on the River Spey in a couple of weeks where it’s good to know a skeg won’t be needed (it was).
On the north side of Loch Vatachen we aired down for the short but arduous slog up the hillside to the peat track that leads back to Polbain, a more direct route than following the road. Maybe it’s down to late summer growth, but the grassy tussocks and toe-dragging shrubbery made for an exceedingly tiresome, one-mph haul. Each step required lifting to knee height, and crossing the boggy stream course midway ingested one of Craig’s cherished flip-flops. Struggling a bit with his kayak in a shoulder bag, I was amazed it had managed to stay with him that far. My well-used Teva Omniums clung better to my feet if not the ground, and the heavily loaded packframe sat securely on my back, but I wouldn’t want to spend all day doing this. By the time we reached the peat track where locals periodically excavate their allocations, the sun was setting over the Assynt peaks to the northeast. From here it was a short downhill walk to the village and, after some 12 miles, attending to all the food that was fit to eat.
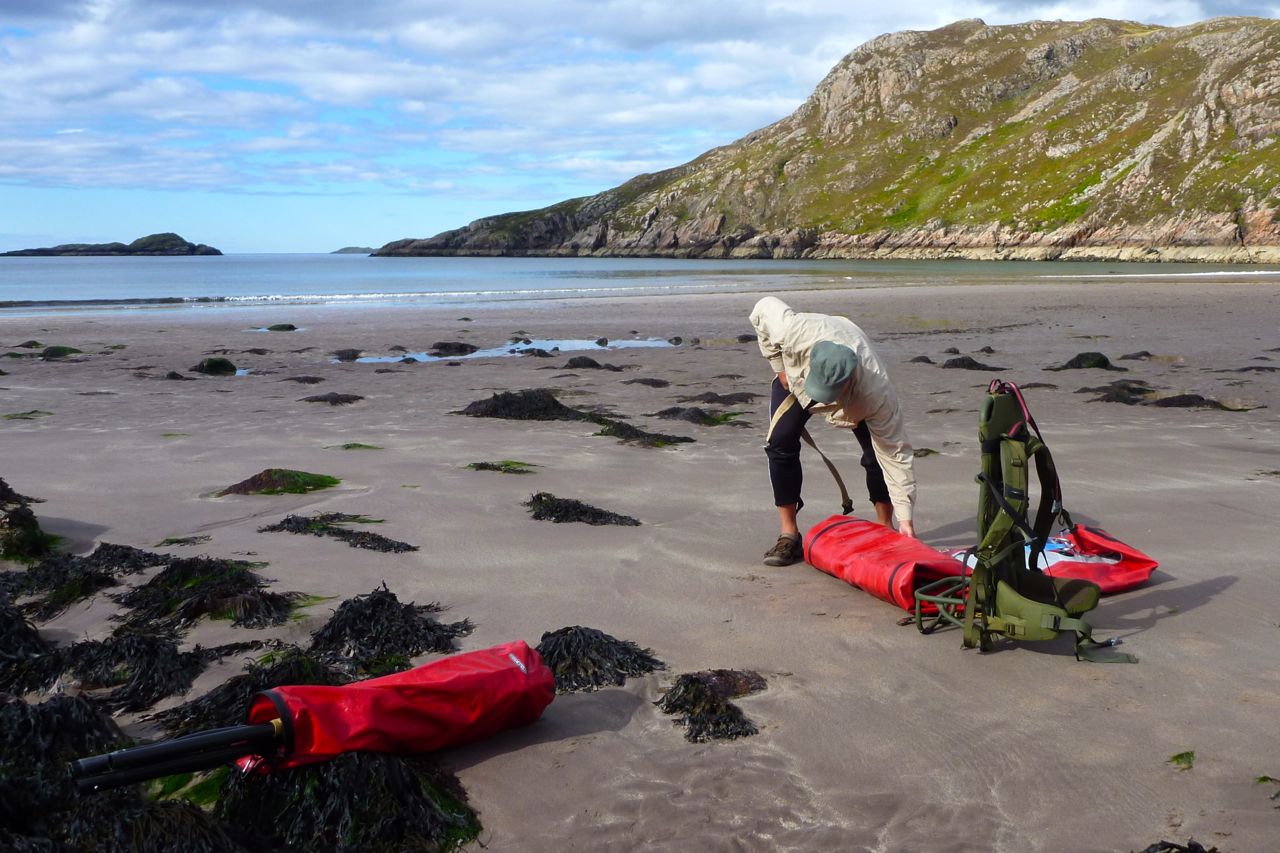
I thought I liked the idea of packframes for pack boating – a rigid rucksack harness and frame without the bag element. The boat, paddles plus dry bags are all lashed to a frame, alongside a drybag.
In the US one time I saw some packframes at a hunting outfitters in Flagstaff (left) that were much better than anything I’ve seen in the UK and going from just $80.They had hinged L-sections to support loads, and looked like an ideal carrier for the UDB and boats. As it stands, my UDB is still my preferred haul bag for overnight pack boating activities. Good analysis, history and list of packframes
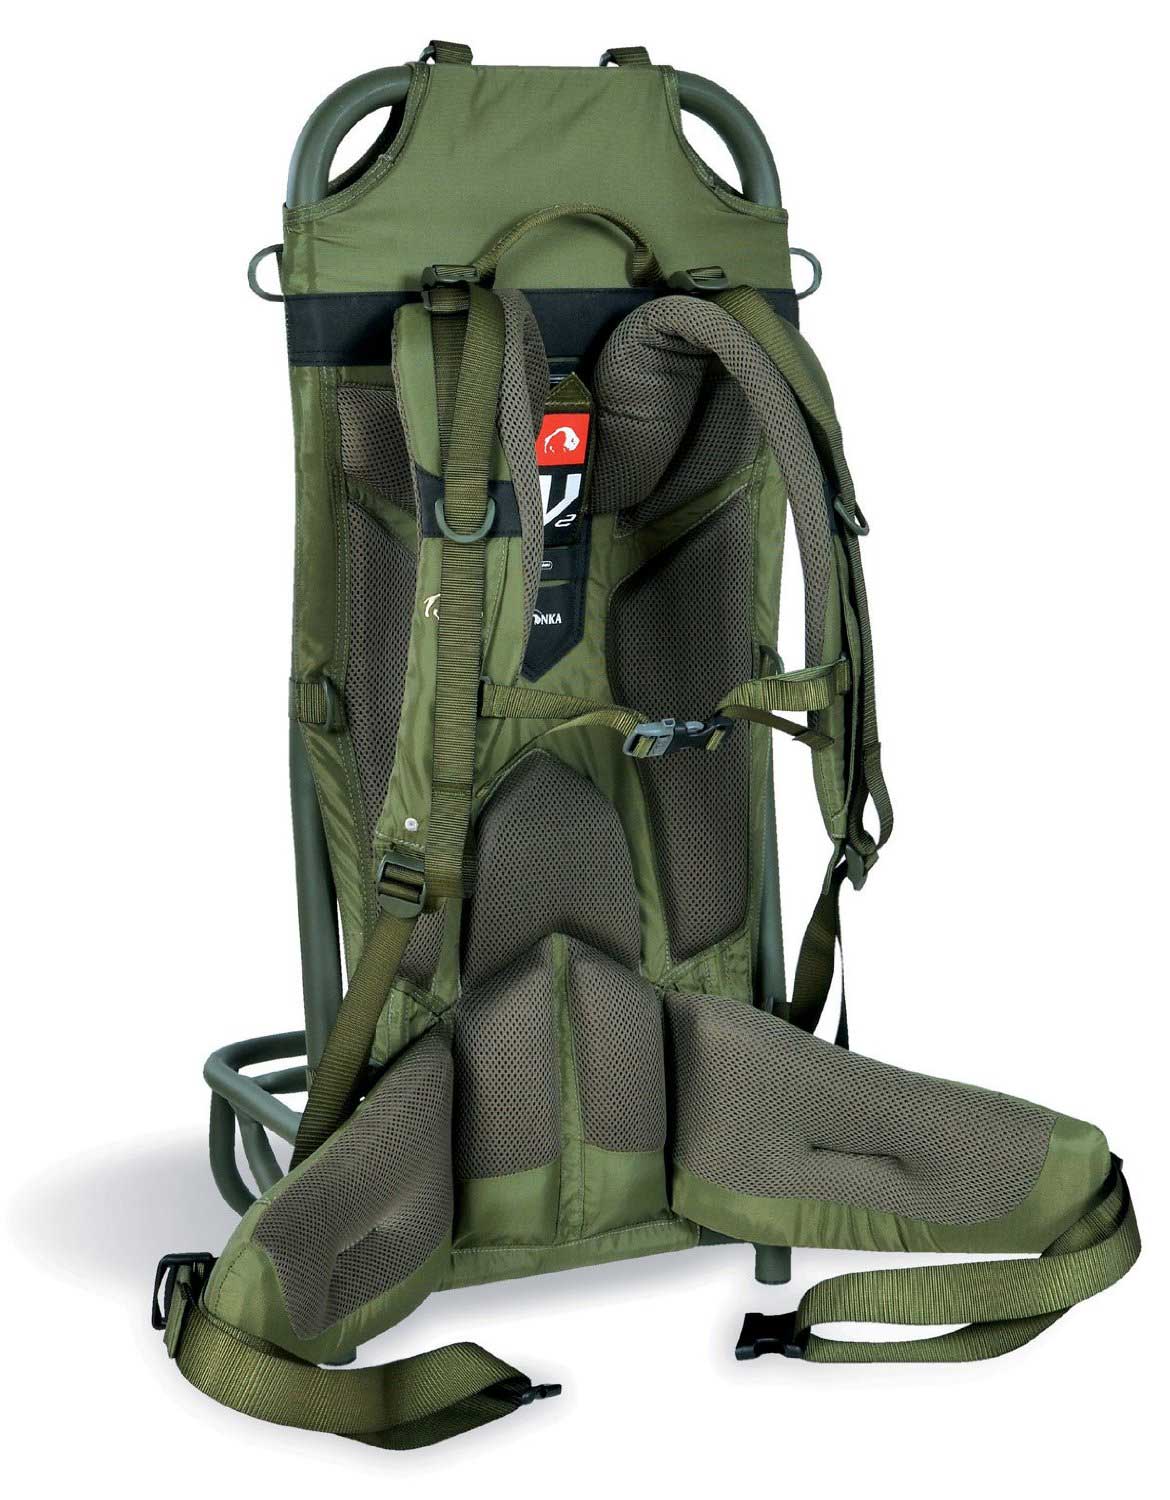
Tatonka Lastenkraxe review Lastenkraxe? A Nordic nutcracker? An uncredited evil troll out of Harry Potter? Tatonka is a German company who produce some crafty and functional stuff, such as their pot/cup. A little research reveals that Lasten + kraxeadds up to ‘load bearer’ + ‘rucksack. Vorsprung durch kraknik.
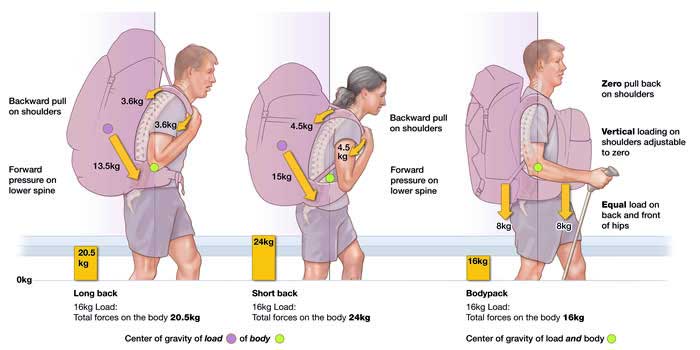
The Lax differs from the hinged hunters’ frames by having a well triangulated, rigid platform. A bit over the top for load bearing perhaps and it certainly won’t slip under the bed so easily. But besides being rated at an eye-watering 50kg, the platform provides the unexpected benefit of standing up straight when placed on flat ground and being a ready-made camp seat.
It weighs 2.7kg but feels lighter for the amount of alloy in there. And like all modern packs, you can adjust the harness to suit your back length, as well as do the usual micro-adjusting to the chunky hip belt and shoulder straps and the all important, non-elasticated, sternum strap. The Lax will obviously work fine for packraft expeditioning, plus kayak day trips where a trolley can’t be used, but I wanted to see if carrying my Amigo IK was a viable option for camping too. The Amigo weighs about 15kg ready to go, and as you can see, takes up much of the packframe when strapped on vertically. Horizontally would make more space above, but having walked about five miles on road, track as well as very rough hillside, treating the Amigo like a packraft will be a tall order.
I recall the Terra backpack on my first packrafting trip in 2010 weighed 18kg with a few days’ food and a drysuit. The Amigo is at least 12kg heavier than a packraft so that’s 30 kilos. I was walking around with about 20kg which felt like plenty. As said, the Lax is rated at up to 50kg which is hard to believe; the stitching alone would be under immense strain.
Realistically, camping with the kayak would work best where there was more water between short and fairly easy walks (few bogs and steep inclines – so not really Scotland then). Of course, having a kayak as opposed to a packraft makes lone coastal paddling and sea loch crossings less intimidating.
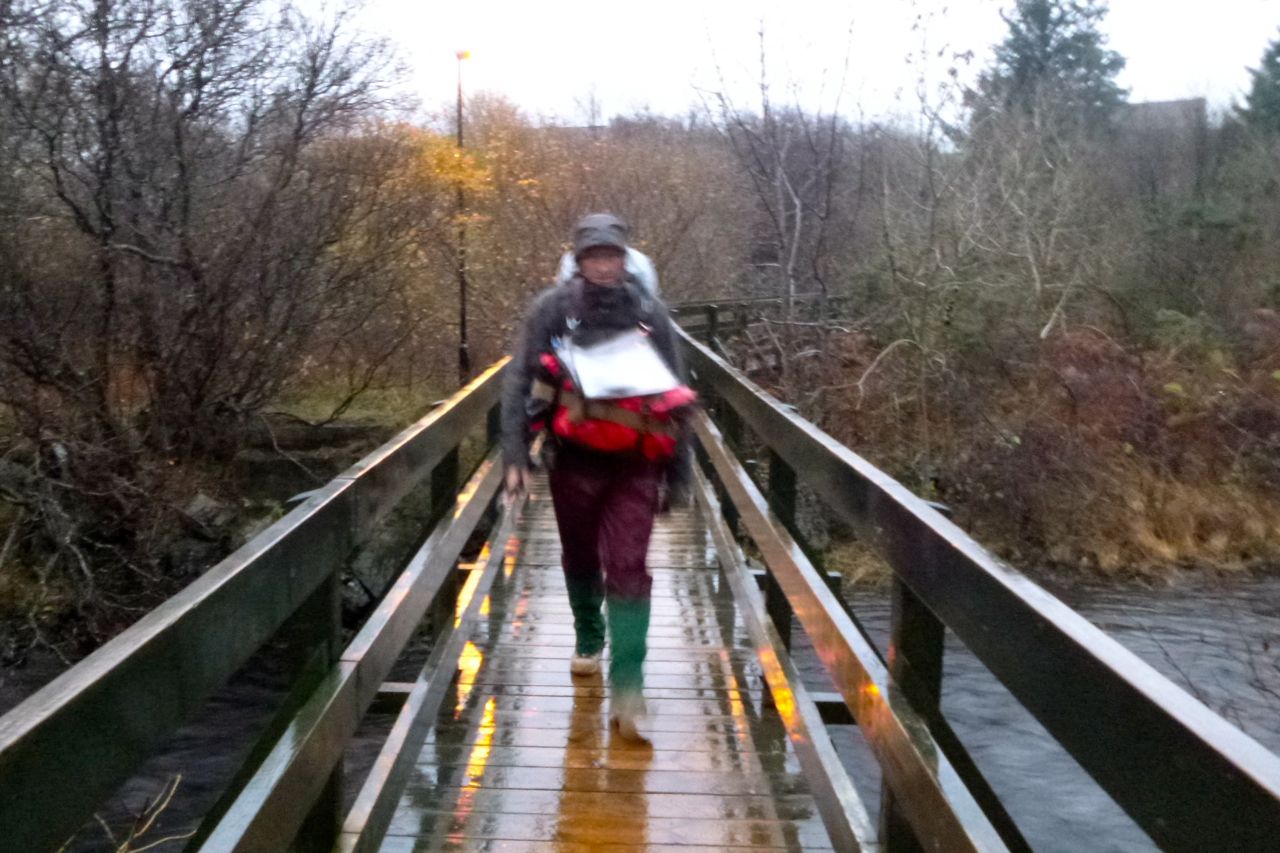
Comfort is as good as can be expected with a 20-kg load, but I think it’s safe to say a rigid frame is less compliant than a modern frameless backpack like my Berghaus C71 (2.6kg). On one stage the lower frame was digging into my hips through the hip belt, although on the next walk I must have adjusted it better and it was fine over terrain that at times was barely walkable. I wasn’t using a packstaff this time, but off-piste that would be a great help.
Early days yet, but quality of construction seems good. I like the lift handle and generous padding. One thing I’d like to see on any harness like this is a pocket or two on the padded hip belt, or even just a bit of tucking mesh. The platform construction looks solid and as well as being a pack stand, with a some cushioning would also make a solid camp seat when unloaded. This is a much discussed and under-rated item, and one on which you could even lean back on, just like you weren’t supposed to do in school. The solidity of this structure also opens up the possibility of adding that nirvana of urban packboat portaging: trolley wheels. More about that if I get round to it. Rrp in Germany for the Tatonka Lastenkraxe is €170. My green one cost £95 off amazon. Black ones were another 20 quid.
In my packframe investigations I discovered that in the Tatra mountains of eastern Europe there’s a local ‘iron man’ sport of ‘Nosicsky’ (‘portaging’): carrying massive loads on wooden L-packframes. Perhaps it was once a way of resupplying mountain refuges when the mules were on strike. As you can see, over 200kg was a record one time, but it proves that L-frames were the original do-it-all packframe, long before modern backpacks found frameless alternatives that kept the weight closer to your back.
I also came across the Kiwi Aarn website which showcases a frontal load ‘FlowMo Bodypack’ to help improve you posture and balance weight distribution. They’ve designed two pockets for the front straps to carry dense but compact items (like water) while still being able to see where to put your feet. Sounds like a good idea but many of us, like Jeff on the left in the Kimberley (with my old Terra 65), have come up with a similar solution intuitively, when needing to carry a day pack as well as a backpack. Still, it’s an idea worth considering when you have a 15-kilo boat on your back.
Since I wrote this I did try a similar idea on our CWT recce, well at least carrying the packraft on my chest. It did feel good on regular ground: better posture, less stooping – but on gnarly terrain the bulk got in the way of the ground at my feet which got dangerous in the places we were walking. To be fair, Aarn acknowledge this limitation.