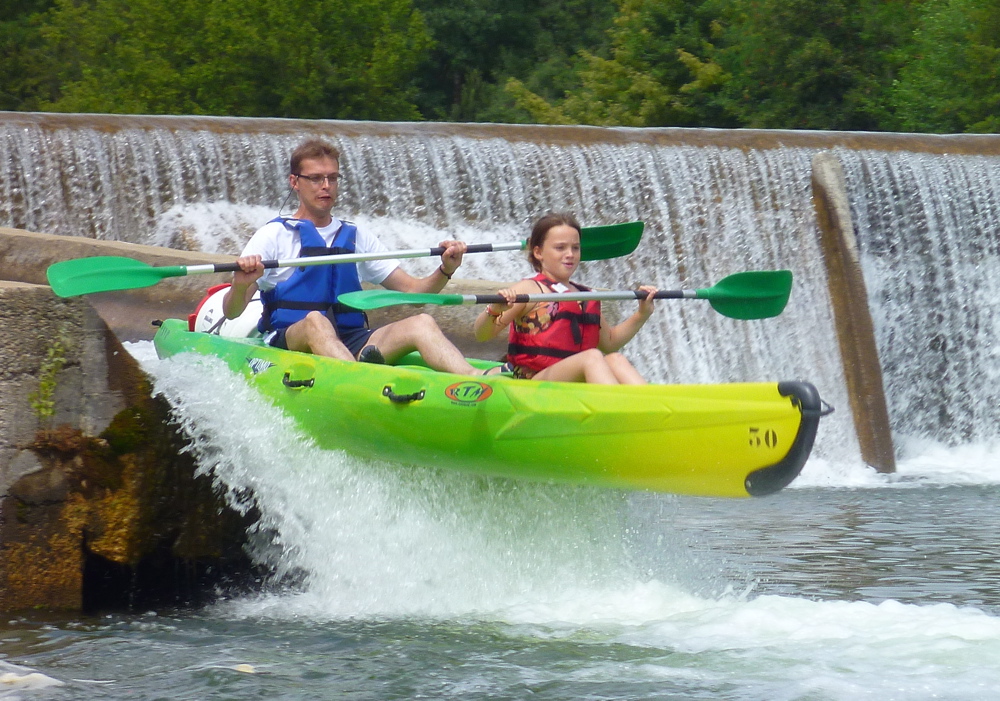
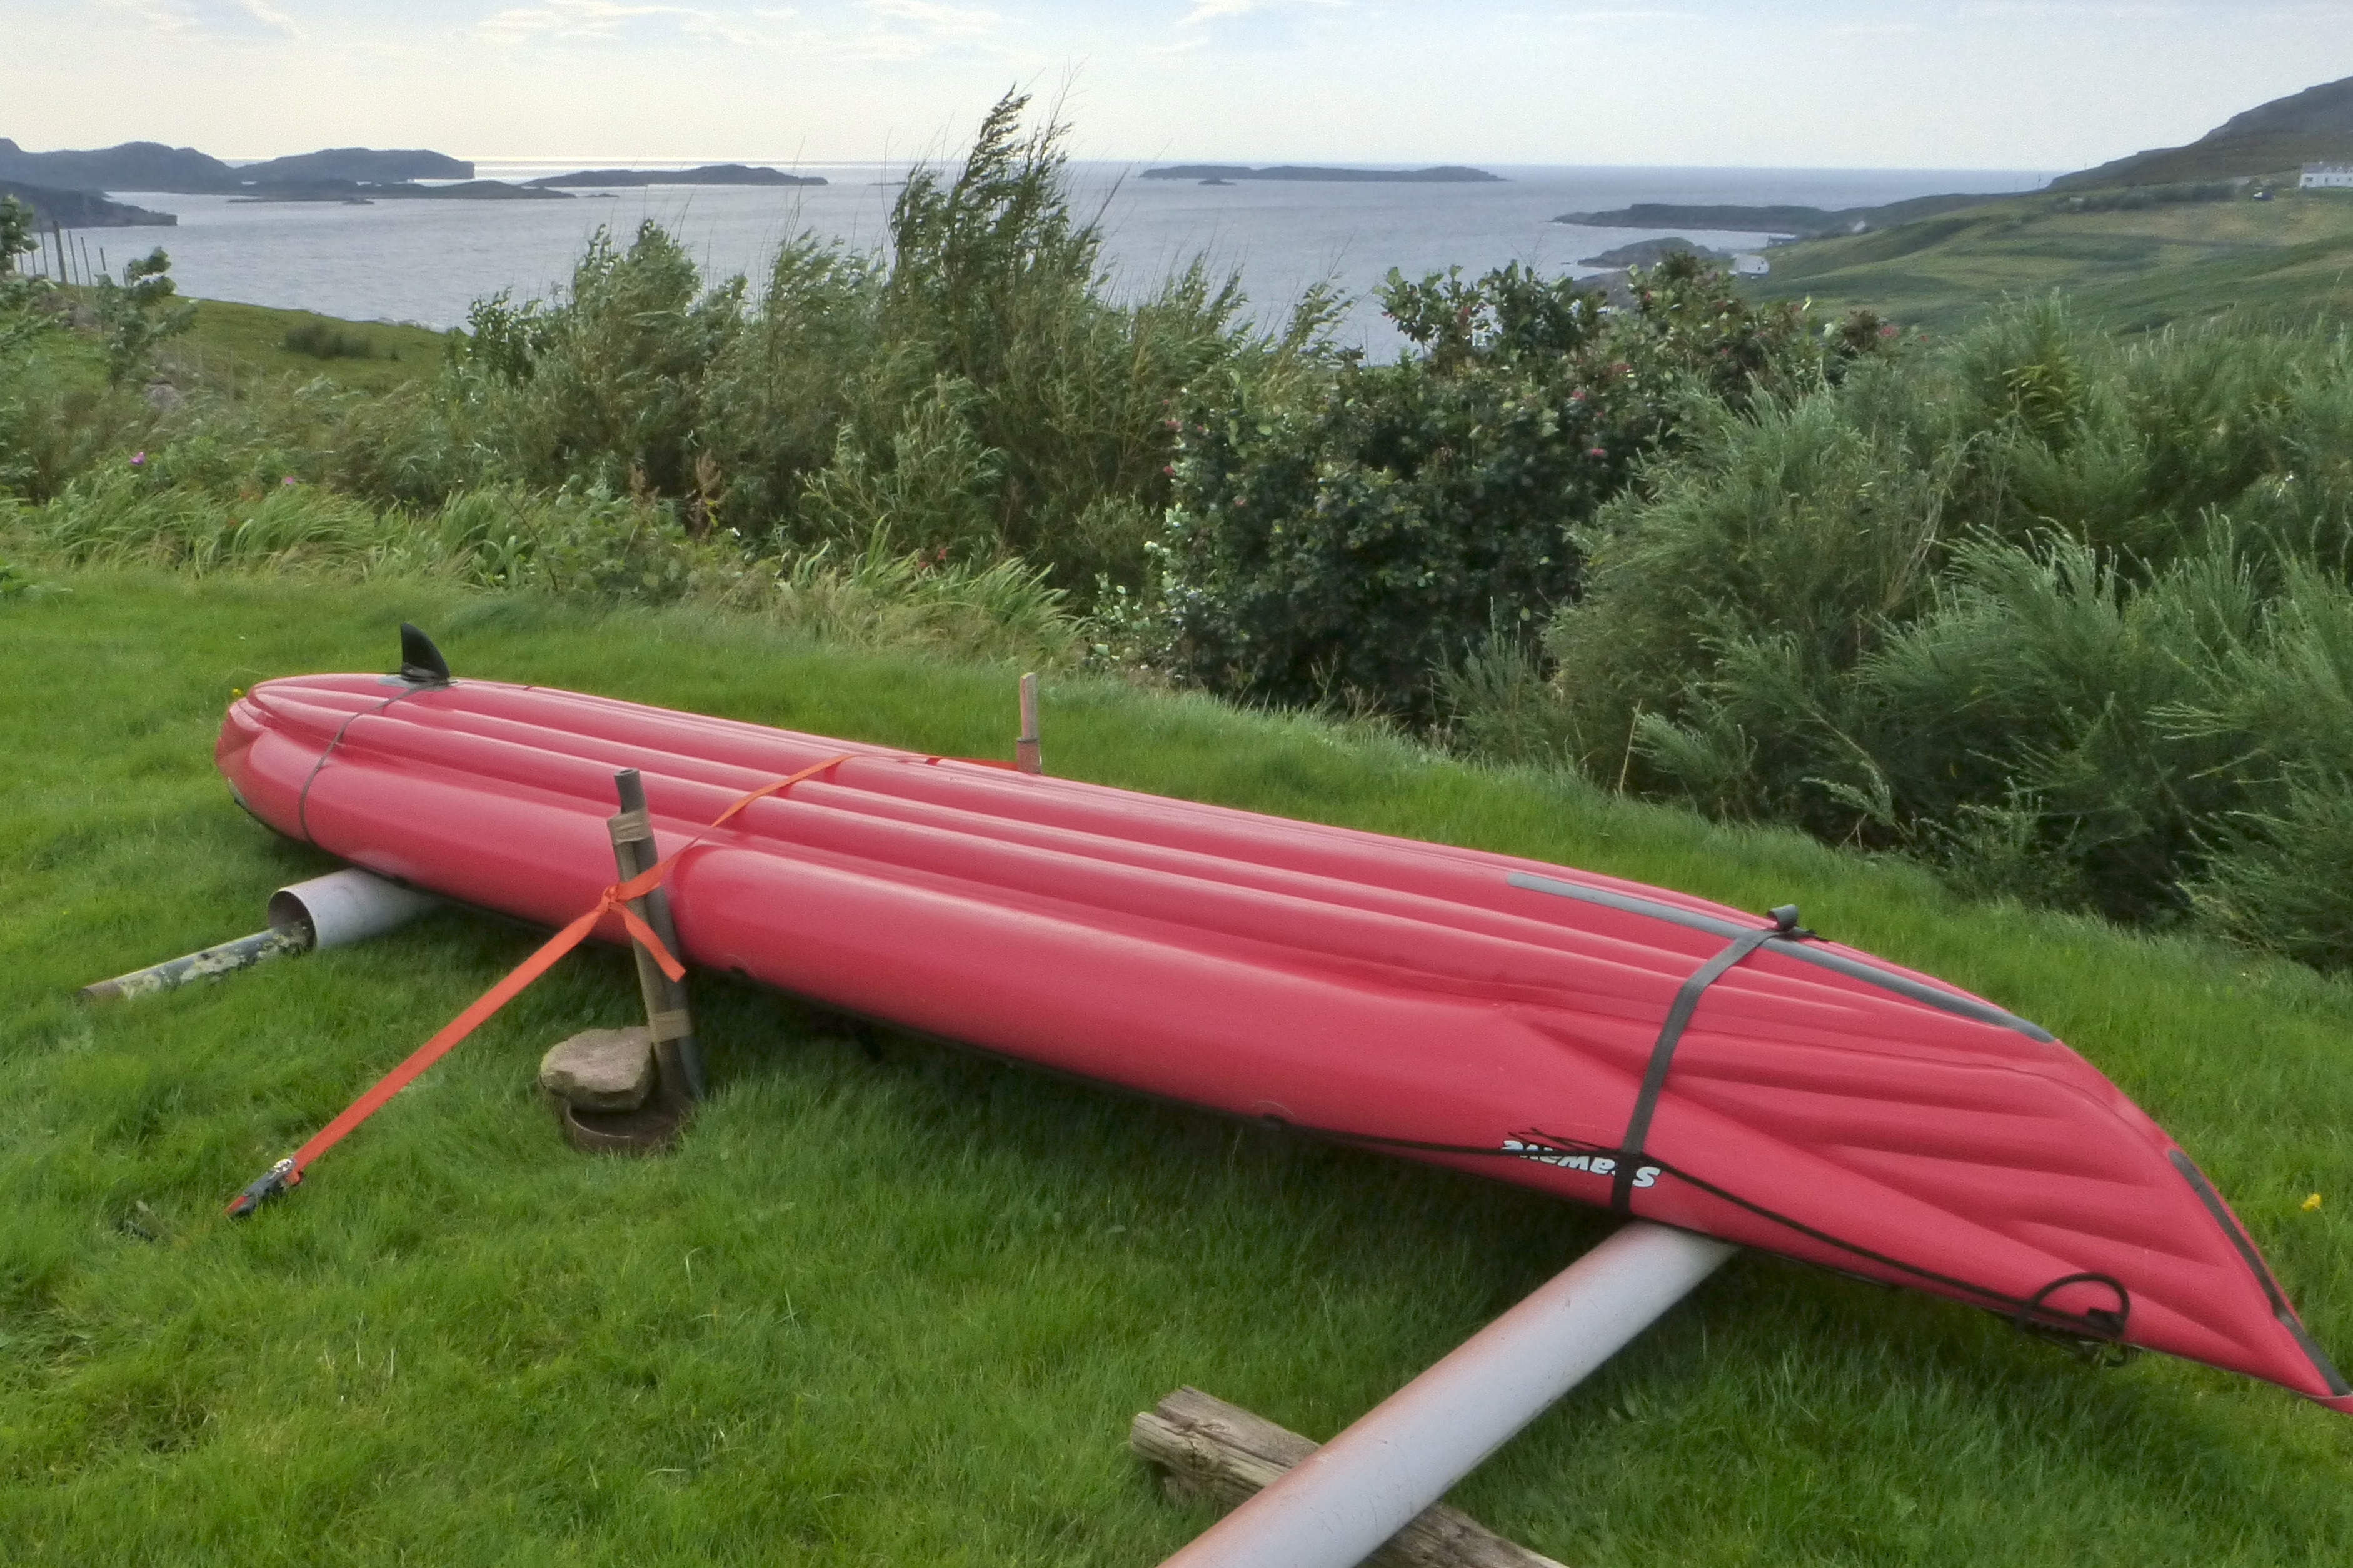
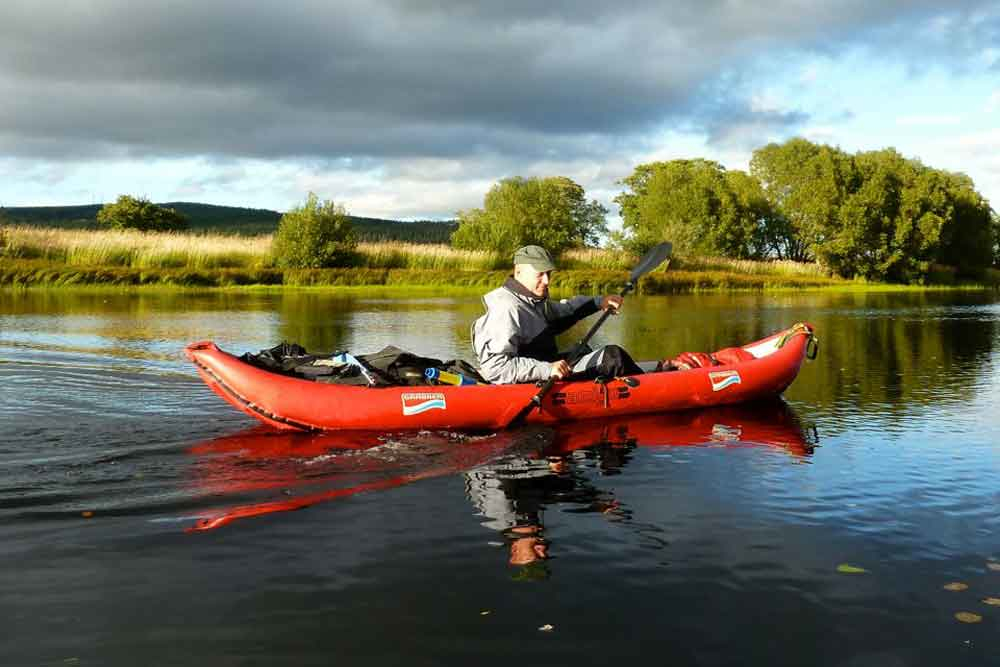
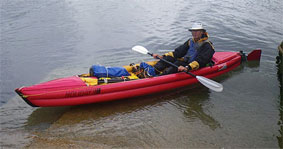
Here’s my gallery of a run down the Spey river we did one September in 2007; three days from Aviemore to the sea – about 85 kms or 53 miles, camping two nights. Me in my Sunny and a new dry suit, Steve in a Pouch tandem folding battleship, Dave in a Klepper folder and Jon in a red kayak made of rigid, hard plastic called a Carolina; quite robust and fast it was, but a bit heavy and not something he could transport easily on a bus. It remains to be seen if these ‘hard shells’ will catch on. The Spey is a famous Scottish canoe run; it’s also famed for salmon fishing and its malt whiskey distilleries. Although the river is said to be open all year to paddlers (see the online guide below for details), when an estate is charging an overseas tourist hundreds of pounds a day to fish off their banks, they don’t want you getting too close and upsetting the client’s concentration. As far as we knew we were there on the last weekend of the salmon season and only once got waved away from a bank of anglers.
That year the river was a bit shallow in places, though none of us quite needed to get out and walk. Even then my Sunny filled on a couple of occasions, despite some piffling rapids, so a dry suit was a good call. Jon was the only one to fall out which just goes to show what lethal boats these SinKs can be – that thing is less than 26 inches wide! It is of course very satisfying to follow a river down to the sea, watch it change and paddle right into to the waves (oddly the tides only reach in a few hundred metres at Spey Bay). Whatever boat you’re in it’s a great run with easy white water, and easy side access. Anything rated for a canoe is fine in an IK. ForDave unfortunately it all ended on the morning of Day 2 when his Klepper snagged on an embedded metal stake (an old fence post?) and ripped a foot-long hole in his hull. Kleput!
There’s a road close to the Spey all the way and he managed to get a lift back to his car and was there that night to drive us to the campsite in Aberlour, 2.5kms from the river. I do recall a very nice meal in the pub that night, in a bar with scores on malts lined up on the back shelf. Dave was also able to pick us up from Spey Bay where there’s a formica-era cafe. The nearest station is Elgin, about 13 miles away. You could packraft the Spey too; it would be fast enough and if you combine it with the Loch Morar stage I packrafted last summer down to Gairlochy, after a 40-mile transit up the A86 to Newtonmore (20 miles upstream from Aviemore) you’ve completed a ~150-mile Scottish coast-to-coast run; Atlantic to the North Sea. I know of a couple of packrafters who have done most of it, including these two guys in the freezing winter of 2009-10. Along with many other reports, there’s a detailed online guide here. Harveys make a waterproof map of the Speyside Way walk which of course follows the river closely.
Just like their bikes and many other things, in southern France those Frenchies dig their recreational paddling. Unlike the UK, they don’t care if it’s an inflatable, a canoe, kayak, packraft or two bin bags and a stick. And unlike England and Wales, (see green box below), no river permits or licenses are required; just adhere to sensible regs. Add the fresh food, good camping, inexpensive ‘creaky stair’ hotels, great weather, natural spectacle, easy access by rail or bus, plus beautiful medieval villages with weekly markets and you’ve got a great packboating holiday with as much easy white water action as you like.
The sorry state of paddling in England & Wales
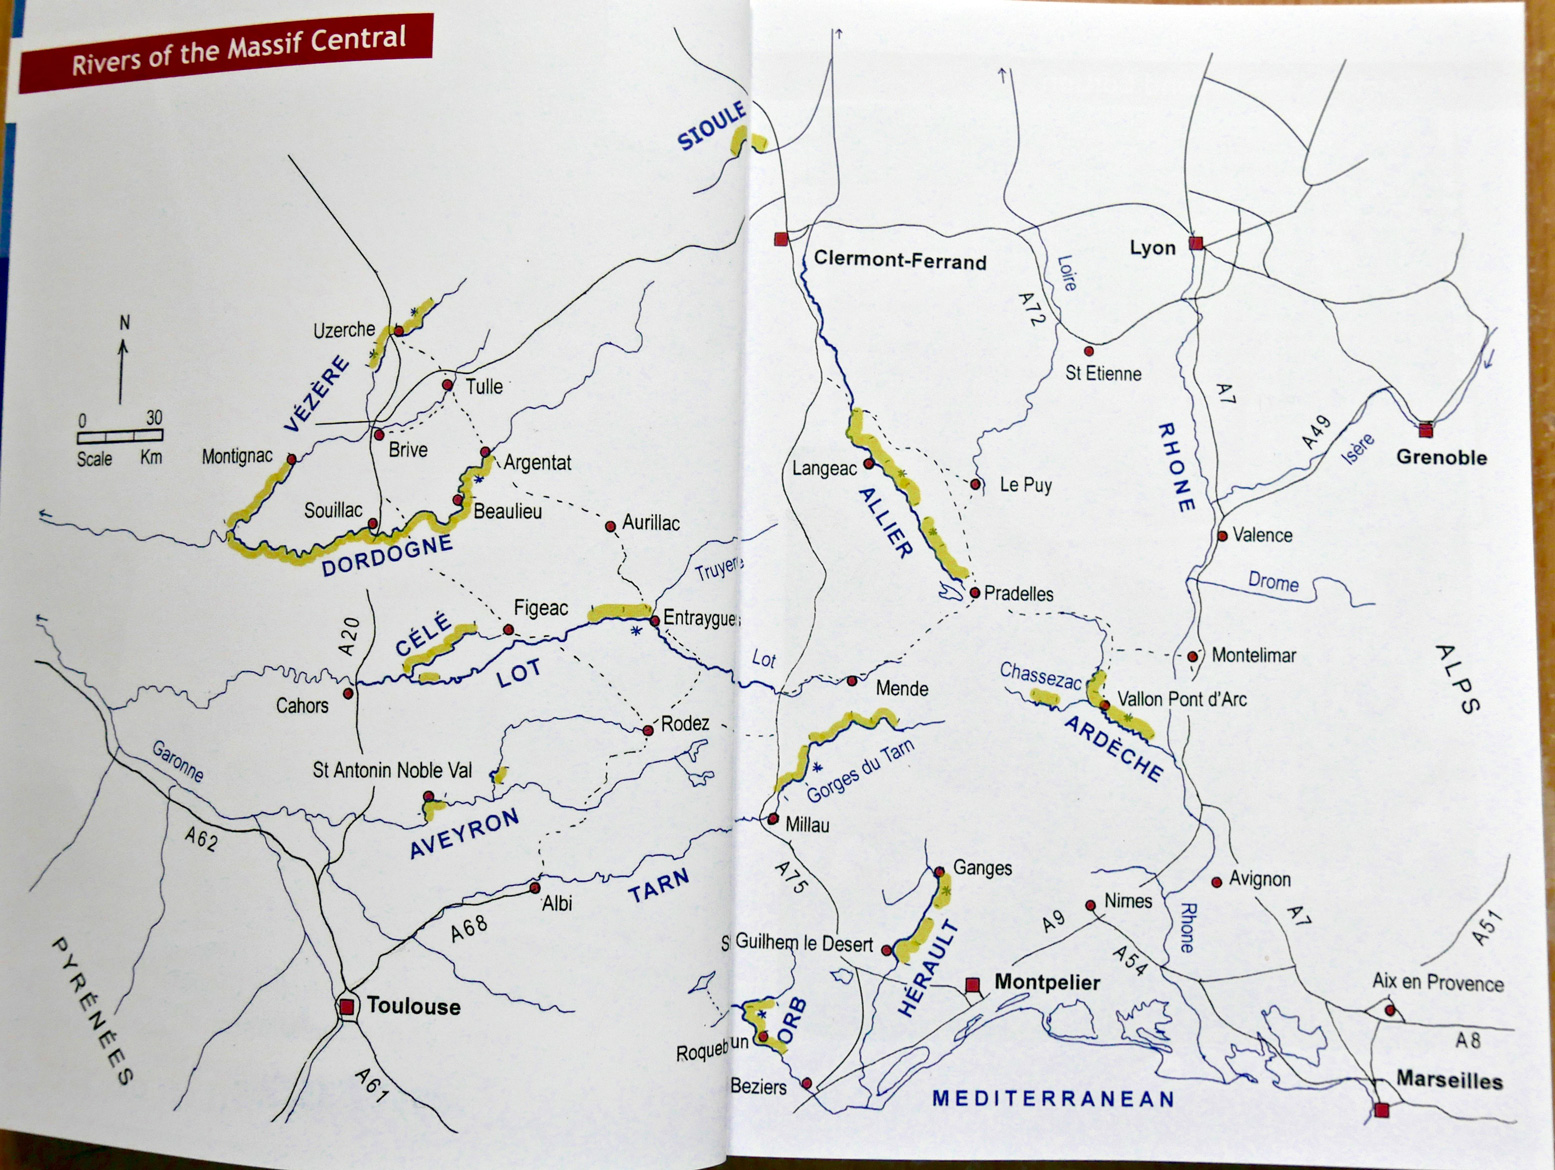
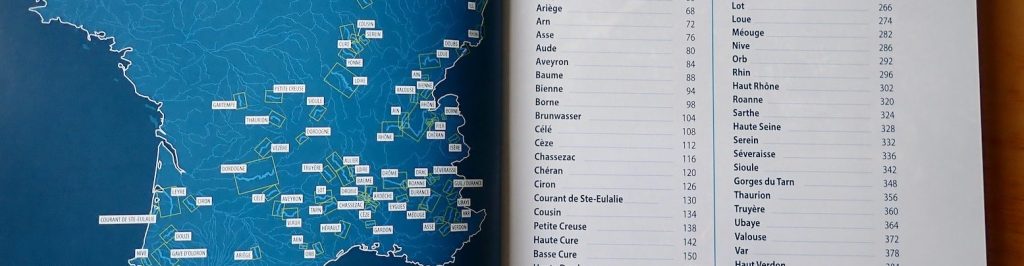
Did I miss anything? Yes: the long-overdue second edition of Rivers Publishing’s guide (left) which originally opened up this area’s potential to me. Generally aimed at ‘family’ canoeing, Best Canoe Trips in the South of France has river descriptions so you don’t have to worry too much about what’s downriver. As a serious guidebook it could be better, so if you read French, Rivières Nature en France (right) has better maps and covers many more rivers.
Massif – loadsa rivers
Extending south from the city of Clermont Ferrand 200km to the former Roman colony of Nimes, the Massif Central is an undeveloped and relatively unpopulated upland region of extinct volcanoes and 1000-metre limestone pleateaux or causses. About the size of Belgium, the highest peak is the 1885m (6184ft) Puy de Sancy in the Parc des Volcans near Clermont. Now you know where all that Volvic mineral water comes down from.
Early morning train from Brioude.
Getting there from the UK The key airports to access the region include Clermont, Montpellier, Nimes, Lyon and Rodez with Easyjet, Ryanair and FlyBe, among others. Nimes is probably the most useful, but Easyjet (Lyon, Montpellier) has daily rather than weekly Ryanair flights with better prices when booked late. There are also fast TGV trains to Nimes via Paris, taking just 6-7 hours from London (red lines, left) but elsewhere or beyond, things slow down considerably as you head for the Massif (blue area on map, left), so it’s unlikely you’ll get to a river on the same day as leaving the UK. A train is a much more agreeable than flying of course, but even in summer and once you pay for baggage, budget airlines work out much cheaper and as fast or faster, depending on where you start.
Dordogne (red) then Vezere with the Mrs. My first French paddles in 2005. We took out at Tremolac, the first big barrage and 40km from the airport at Bergerac.
Rivers Take your pick from the easy Dordogne and Vezere, more challenging but easily accessed Allier, a Herault day trip, Tarn, Ceze, Chassezac which joins the Ardeche. Then there’s the Gardon and little-known but slightly greasy Lardon. Come August the biggest danger on the Ardeche is getting nutted by an out-of-control plastic rental kayak. In 2018 I did the Tarn again, from Florac all the way to Millau in a packraft, and a few weeks later the Allier too. Maps below from the Best Canoe Trips… and Rivières Nature guidebooks.
English guidebookFrench guidebook
They’re all fun in an IK provided the boat is not too long. With a long boat problems occur when the front noses into slower water or catches a rock, while the back is still in a fast current; the boat swings sideways, high sides and tips you out. In a slightly slower but much more stable and agile packraft I’d pick the frothier rivers like the Allier, the Tarn and Ardeche, because a packraft makes sub-Class 3 whitewater easy and safe. Packrafting the Tarn in 2018, I’m pretty sure I’d have struggled to control my 4.5-metre Seawave IK in some rapids.
But then again, packrafting the Allier a few weeks later, I was pleased I decided to walk round an 8-km gorge section of relatively sustained Class 3 rapids (left; a self-bailing Gumotex Scout) which would have swamped my Yak again and again. Here a decked or self-bailing packboat works better. And from what I’ve seen, two-up in a kayak or canoe makes things even more complicated unless both are experienced. If you do these rivers early in the season (June, July) there can be more flow, frothier rapids and certainly fewer crowds than early August. But summer storms can raise levels overnight.
Maps and river levels There’s a very good official website for live river levelshere with more about it here. For general mapsof France right down to 1:25k scale and beyond, have a search here, or download the IGN Rando app and download for offline use. As the Best Canoe Trips… guidebook says, IGN maps better than Google Maps, just as OS is in the UK. All that’s missing are markers identifying canoe chutes on the weirs.
Evening on the Allier
The rivers TheAllier is a good choice for packboating as you can get a train from Clermont via Brioude all the way to the village of Chapeauroux, where the easier section flows right back to Brioude. Note Alleyras to Monistrol is now open (see link) but beware the first 8km out of Monistrol to Prades through the gorge. Long version in the link above, but you’ll see it from the train coming upstream and may be alarmed, as I was in 2018, even though I’m pretty sure I kayaked it 12 years ago as a clueless newb.
The Ceze and Herault are car and shuttle-with-bike day trips. The classic Tarn Gorge starts from Florac (noon bus from Ales) and cuts 85km below the Causse Mejean to Millau with its famous viaduct just beyond. A great run with easy rapids, bar one or two not mentioned in the guidebook. Being out of the Massif, the Dordogne-Vezere (map above) are easier paddles, but iirc took me a bit of bus and train’ing after a Ryanair to Rodez and out from Bergerac. Perfect for your first IK adventure, but it could be slow and a bit dull in a packraft.
And if you don’t have a packboat or can’t be bothered to bring yours, no worries. Get down to a river and rent an SoT for as long as you like. It’s all set up for you. Click the river links for more galleries.
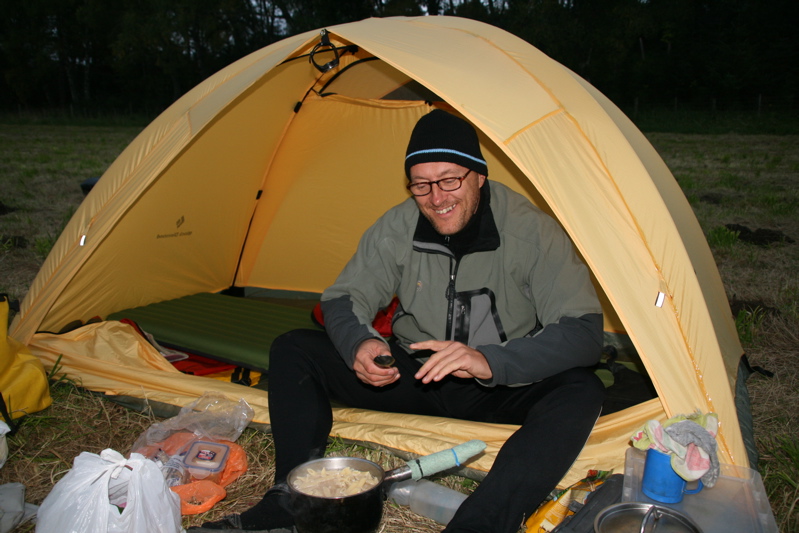
Eats, Chutes & Lodges On any big Massif river there’s a well-established riverside campsite and canoe/kayak/SoT rental scene, so that by August flotillas of holidaymakers pack out popular rivers like the Ardeche and Tarn. Plus, at any time you can pull over to wander through a village which will very often have a basic hotel from 40 euros, like the one left on the Allier.
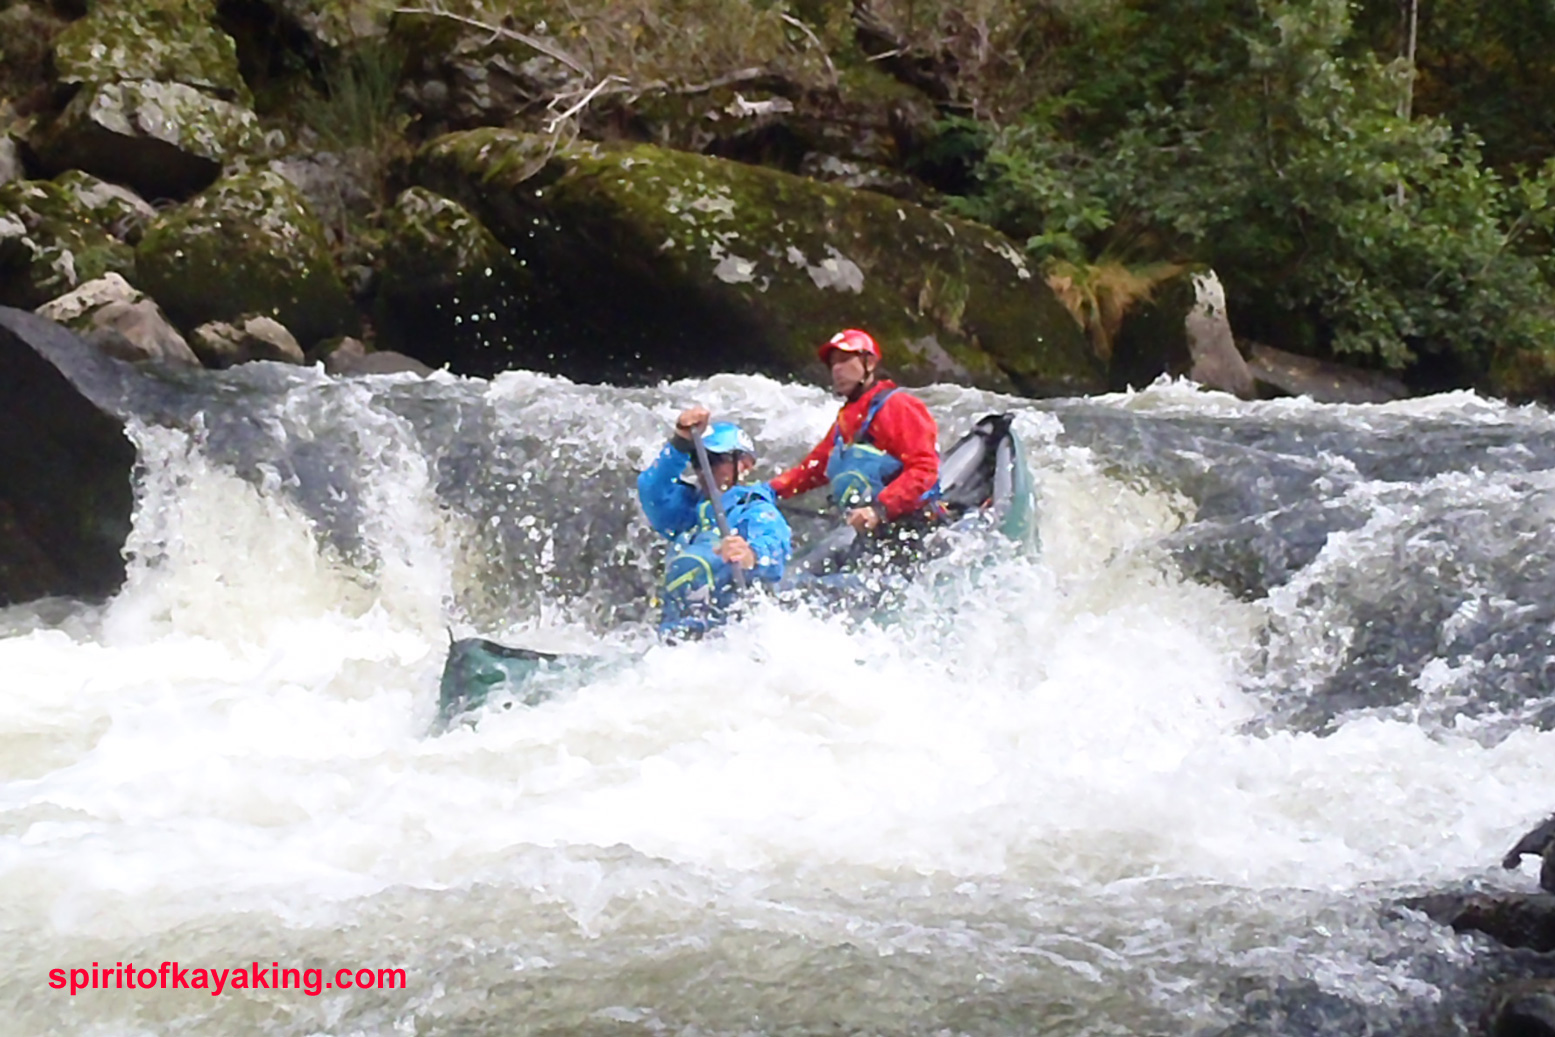
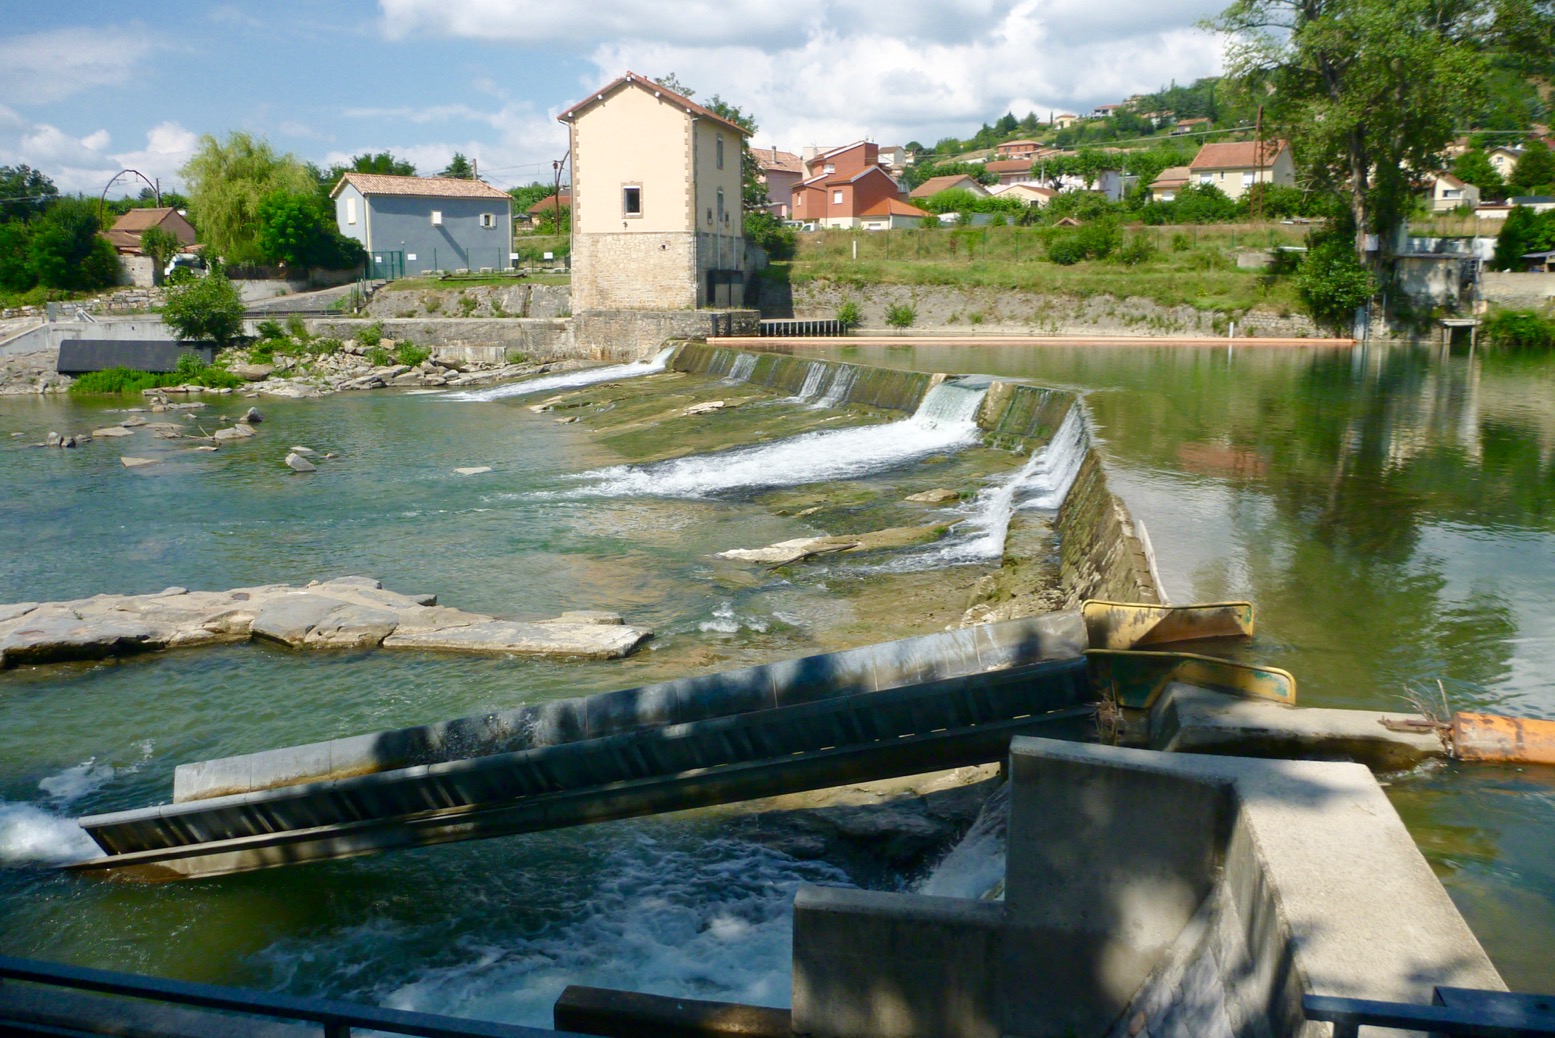
Some of these rivers cut through spectacular gorges and are strung out with easy rapids up to Class III, weirs to portage round or tip over and which often have a glissiere or canoe chute (left and below) which shoot you down the face of a weir without the need to get out and carry. Great fun and often easier than they look. There are no locks until you leave the Massif and enter the intensively farmed lowlands by which time the fun is over.
A few years ago I got a batch of discounted Decathon Quechua ‘2 seconds 1’ pop-up tents (right; £20) for a desert tour I was running, and have a couple leftover. Now everyone’s offering cheap pop-ups. People love the idea and though I don’t suppose this is a tent you’d want on the north face of Annapurna in a gale, when you arrive at a camp tired after a day of desert biking, you just want to click your fingers and, Abracadabra, you have a cozy shelter to call your own.
Whoever came up with the idea of flexible hoops sewn into a 3-D form to spring apart and make a tent or shelter was ingenious. I still marvel at it today. It seems a photographer John Ritson got to idea of adding fabric to a flat loop in 1985 and invented the collapsible Lastolite light reflector (right) after he saw a carpenter fold the blade of a bandsaw (See the bottom of this page). I imagine a Lastolite (a 38-incher costs £50) was the motivation behind the WindPaddle idea, but from a plain disc to a tent is quite a leap.
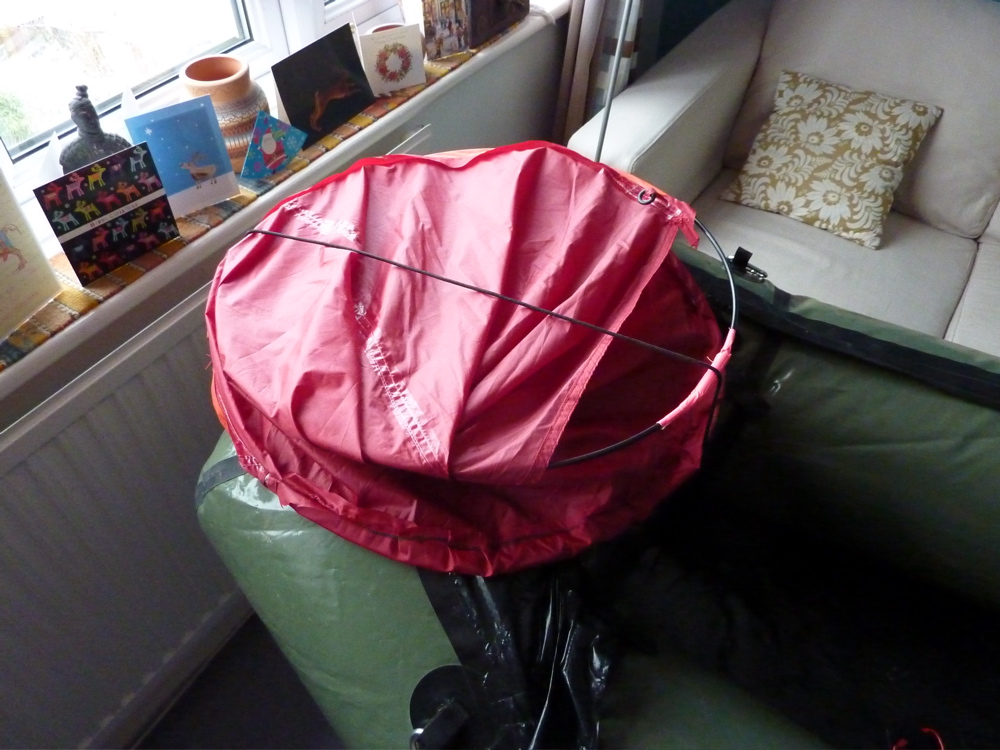
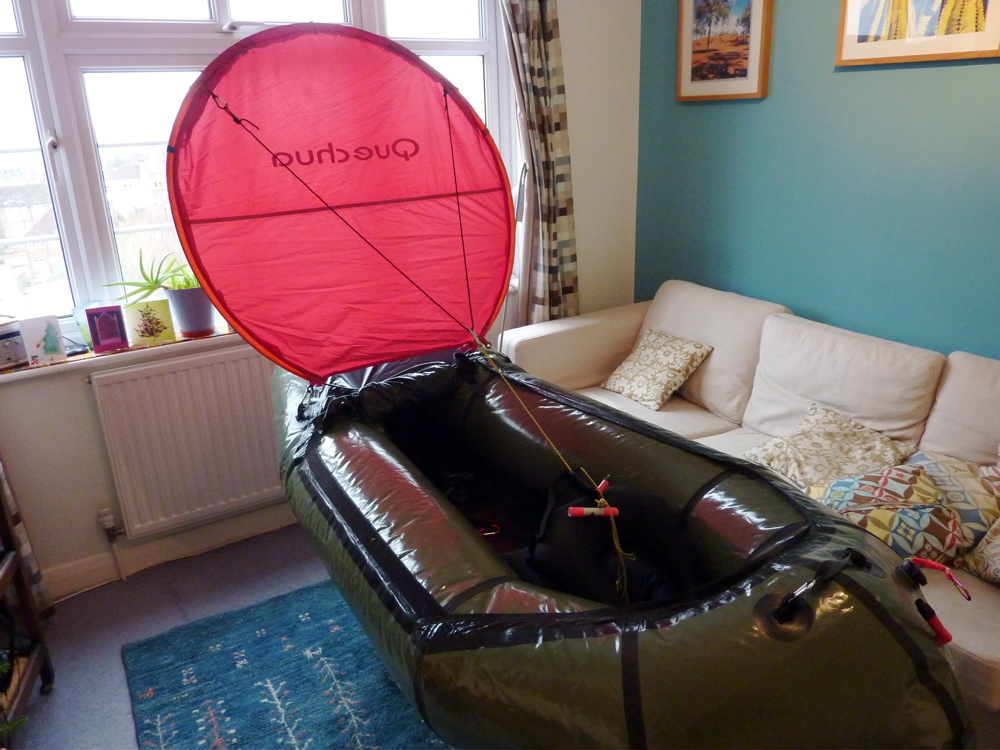
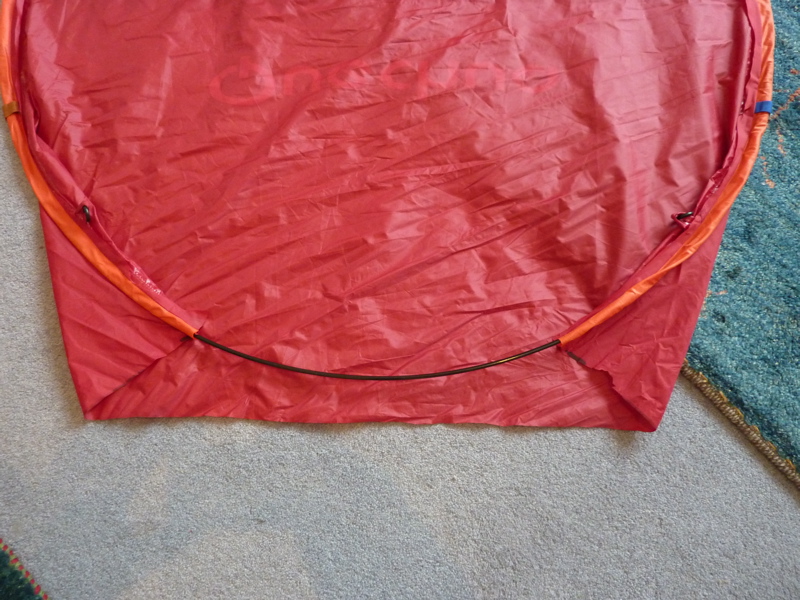
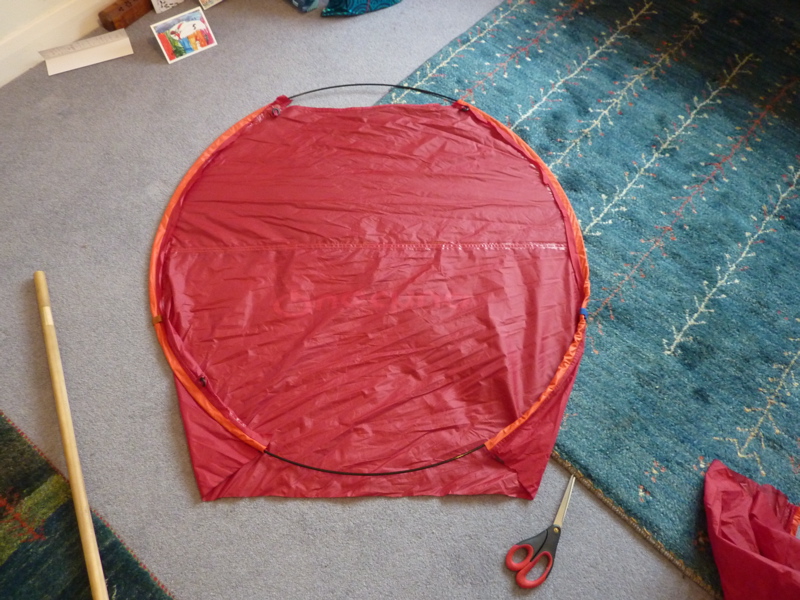
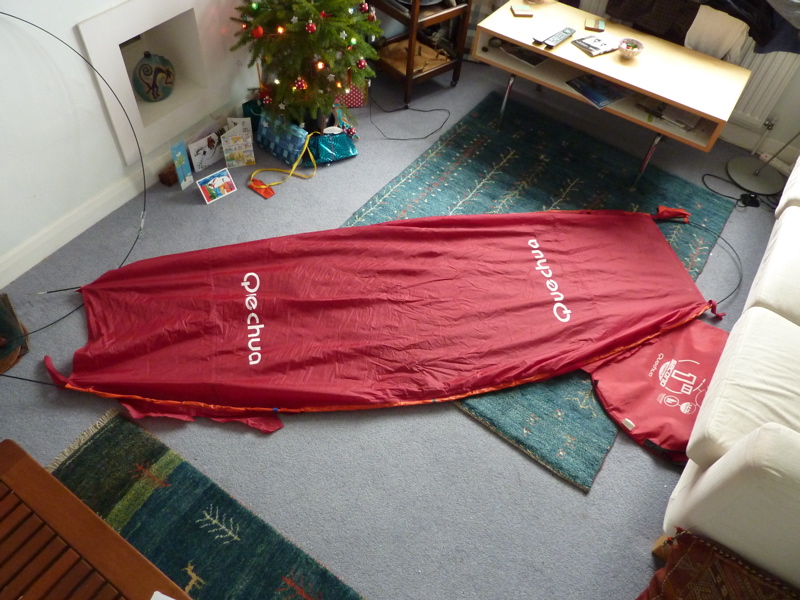
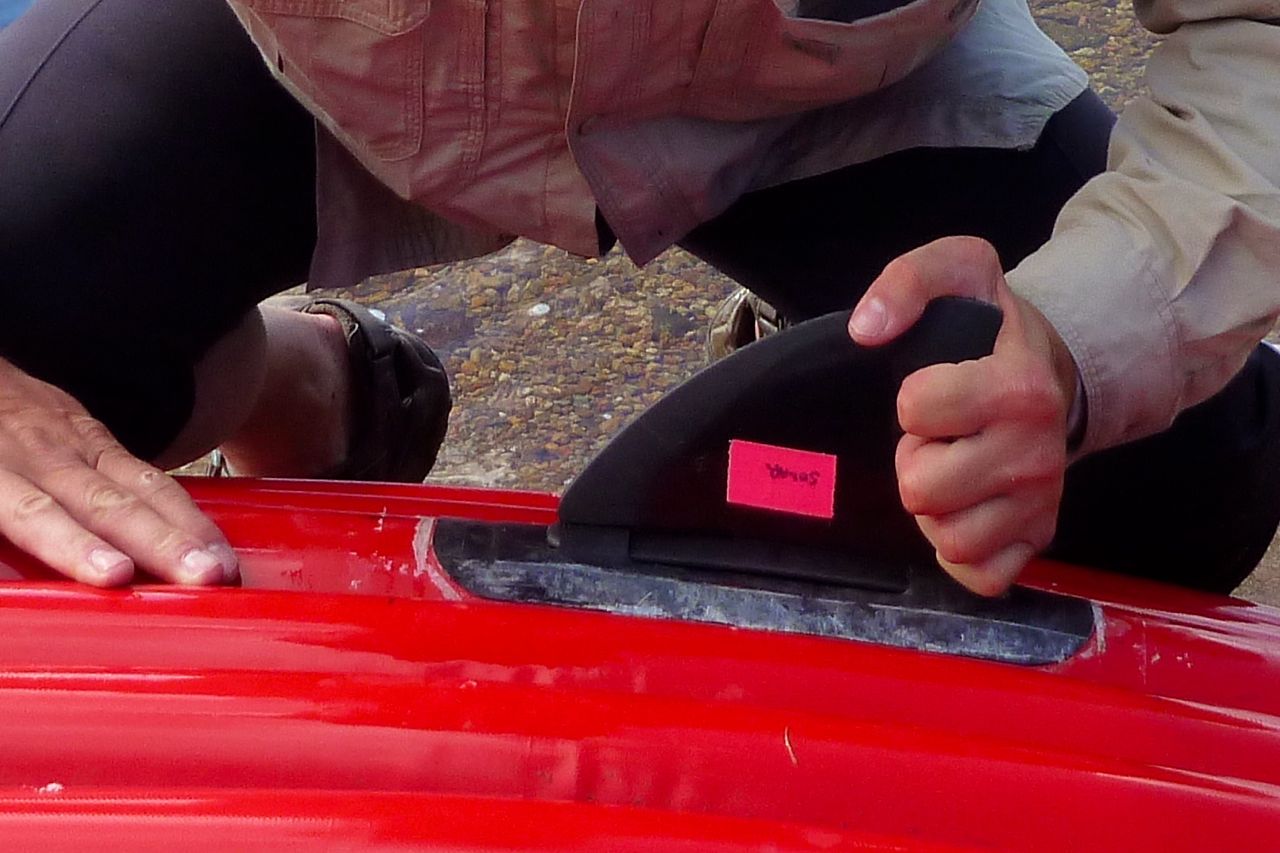
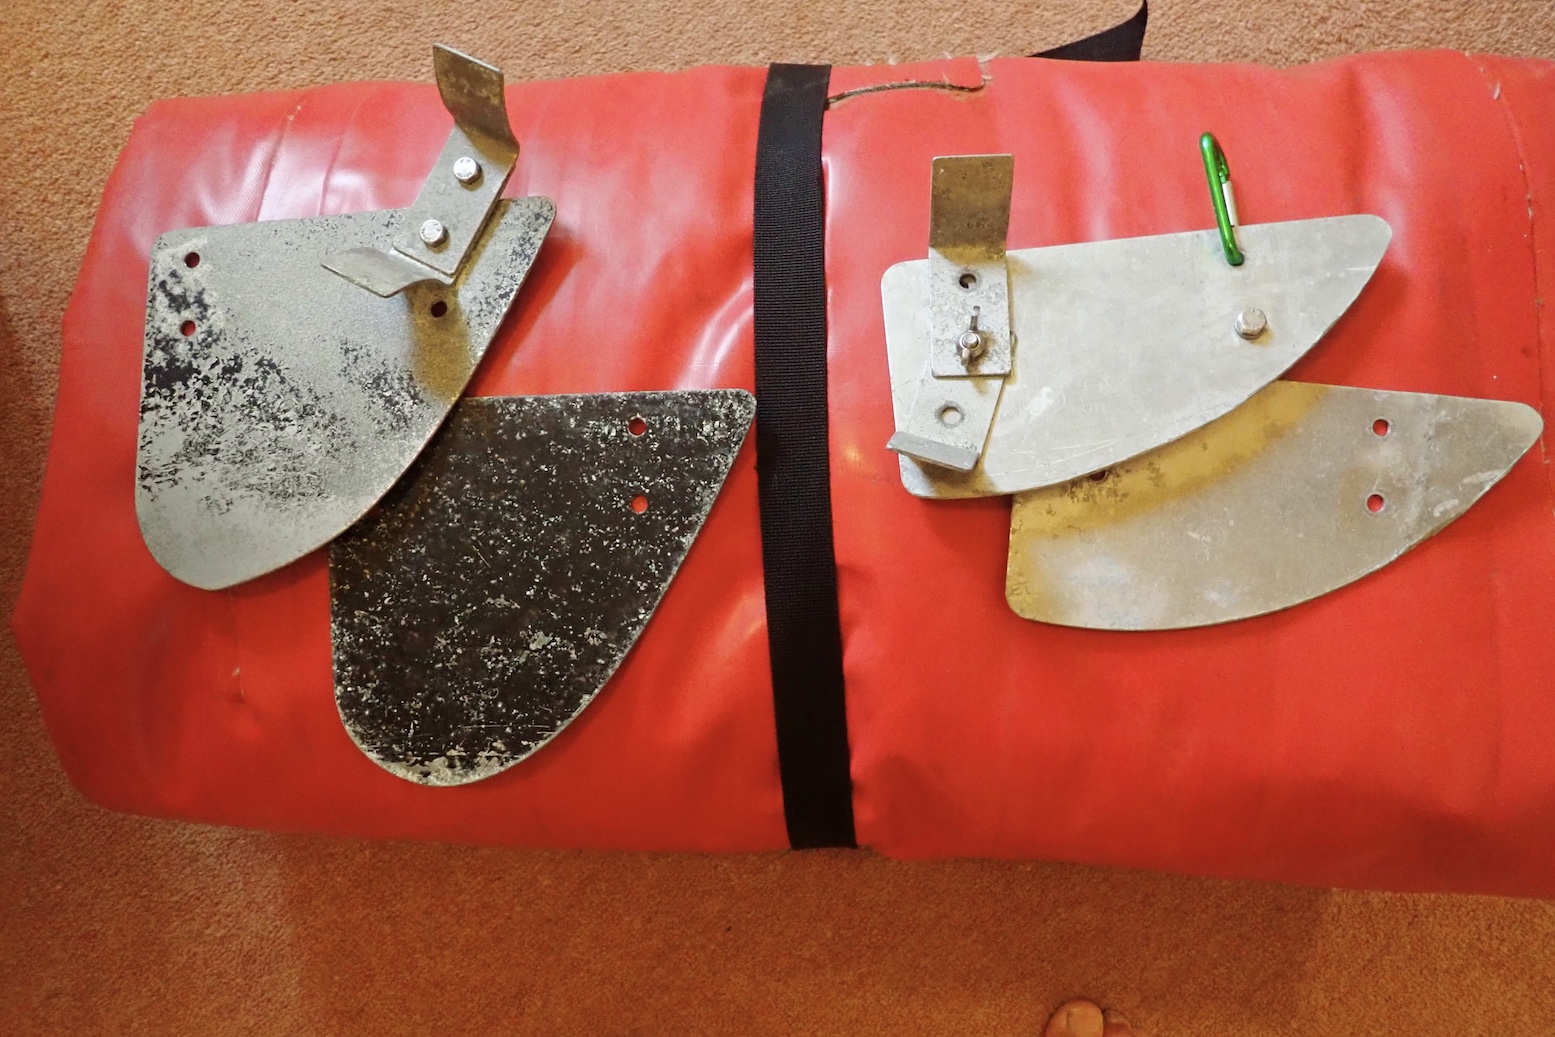
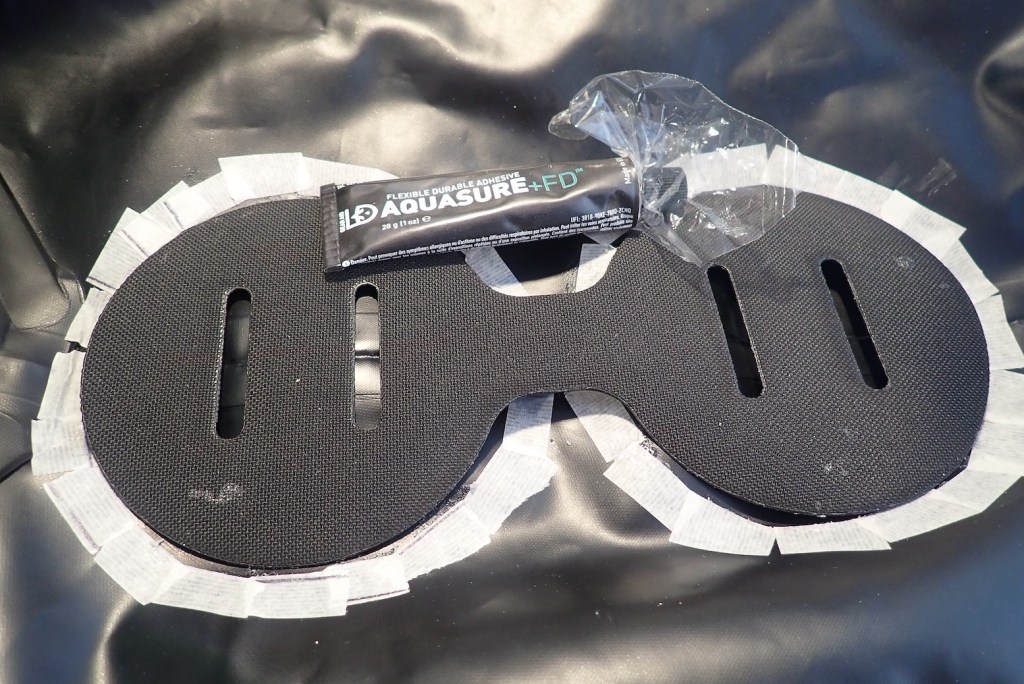
So I took a knife to one of my used Quechua tents. Bad though it felt shredding a perfectly functional shelter, in the spirit of the Inca shaman, it will be reincarnated as a sail – or more ill-conceived clutter to shove under the bed. Dismembering the Quechua gives two giant hoops of 4mm nylon-coated alloy and another of 6mm. Having been told that WindPaddles can deform easily under strong winds, I chose the thicker wire to use for the hoop (Gallery pic 2, below) in the hope of reducing this possibility. (Warning: when opened up these springy wires can fly about all over the place). Cutting the thick loop in half and rejoining it with the metal collar/tube (don’t lose this bit) gives a hoop of around 40 inches or 1 metre diametre making a sail area of 0.785 m2 (8.45 ft2) – similar to a WindPaddle, but with negligible dishing. I built up the sawn-off end with some cloth tape to stuff into the collar-tube, and then taped it all up (so it’s easily undoable). There’s enough fabric in the main body of the tent’s flysheet (Gallery pic 1) to make two 40″ disc sails if you cut from the middle, so 1 tent fly = 2 sails. I only worked this out after I cut. You want to use each curved end of the flysheet with as much orange hem-sleeve as possible (Gallery pic 4) – it saves on sewing later. You don’t want, as I thought, the flat middle section which of course won’t become a smooth disc once formed into a loop with the wire. Gallery pics 5 to 9 show how to gather up the slack, trim it, tack it down and get the Mrs to sew it up as if she hasn’t got enough work to be getting on with at this time of year. Gallery picture 10 is the sewn-up sail with a handy gap at the bottom for I don’t know what and which also happens to coincide with the position of two little hooped tabs at 5- and 7 o’clock which you can use mount it to an Alpacka’s rearmost bow loops using mini snaplinks (Gallery picture 11). By chance there are 2 more sewn-on plastic rings at 10- and 2 o’clock to mount a control string. The length of string I used happened to be just right to wrap around the folded over tent, though it’s all under tension and pretty unstable; you might want something like a bulldog clip to stop the sail deploying unexpectedly. I also think my control string may be on the short side, but it’s what was lying around. My disc tent doesn’t have anywhere near the dishing (depth) of a WindPaddle or an umbrella-like spinnaker sail I am told. I still haven’t worked out if this is significant (it is). One would imagine a deeper WP-like sail – a ‘bowl’ rather than a ‘saucer’ – would be more stable downwind but less good at tacking across it (probably correct) but what do I know? Last time I sailed a boat was over 35 years ago. I suspect a flip-out disc sail like this is probably a compromise when it comes to sailing effectively, but then so are pack boats. If round sails were such a good idea the Vikings would have them. It may even prove to be not fully useful and so just more junk to carry about which is why, after trying the umbrella, I chose to make one for next to nothing rather than spend £140 ($215) on a WindPaddle in the UK. It was easy to make, is light (250g or 9oz), and it can swapped between my Alpacka packraft and Sunny IK in the time it takes to unclip 2 snaplinks and attach them elsewhere. Other uses include something to sit on, a doormat for the tent, a windbreak, sunshade or umbrella. There is a slight problem: you can’t see where you’re going, especially on the shorter packraft with a metre-wide sail a metre on front of you, but on most water that ought not matter too much and if it does, I can cut in a window (like a WindPaddle) if that is the sail’s only flaw. As to how it sails, Monday after Christmas had a good southerly wind and the warmest day for weeks (ie: above freezing), but the reservoir I chose was a rink and looks like it’ll be that way for a while. It’s been the coldest December in the UK since records began so a test run make take a few weeks to complete. To see how it sailed first time out, click this.
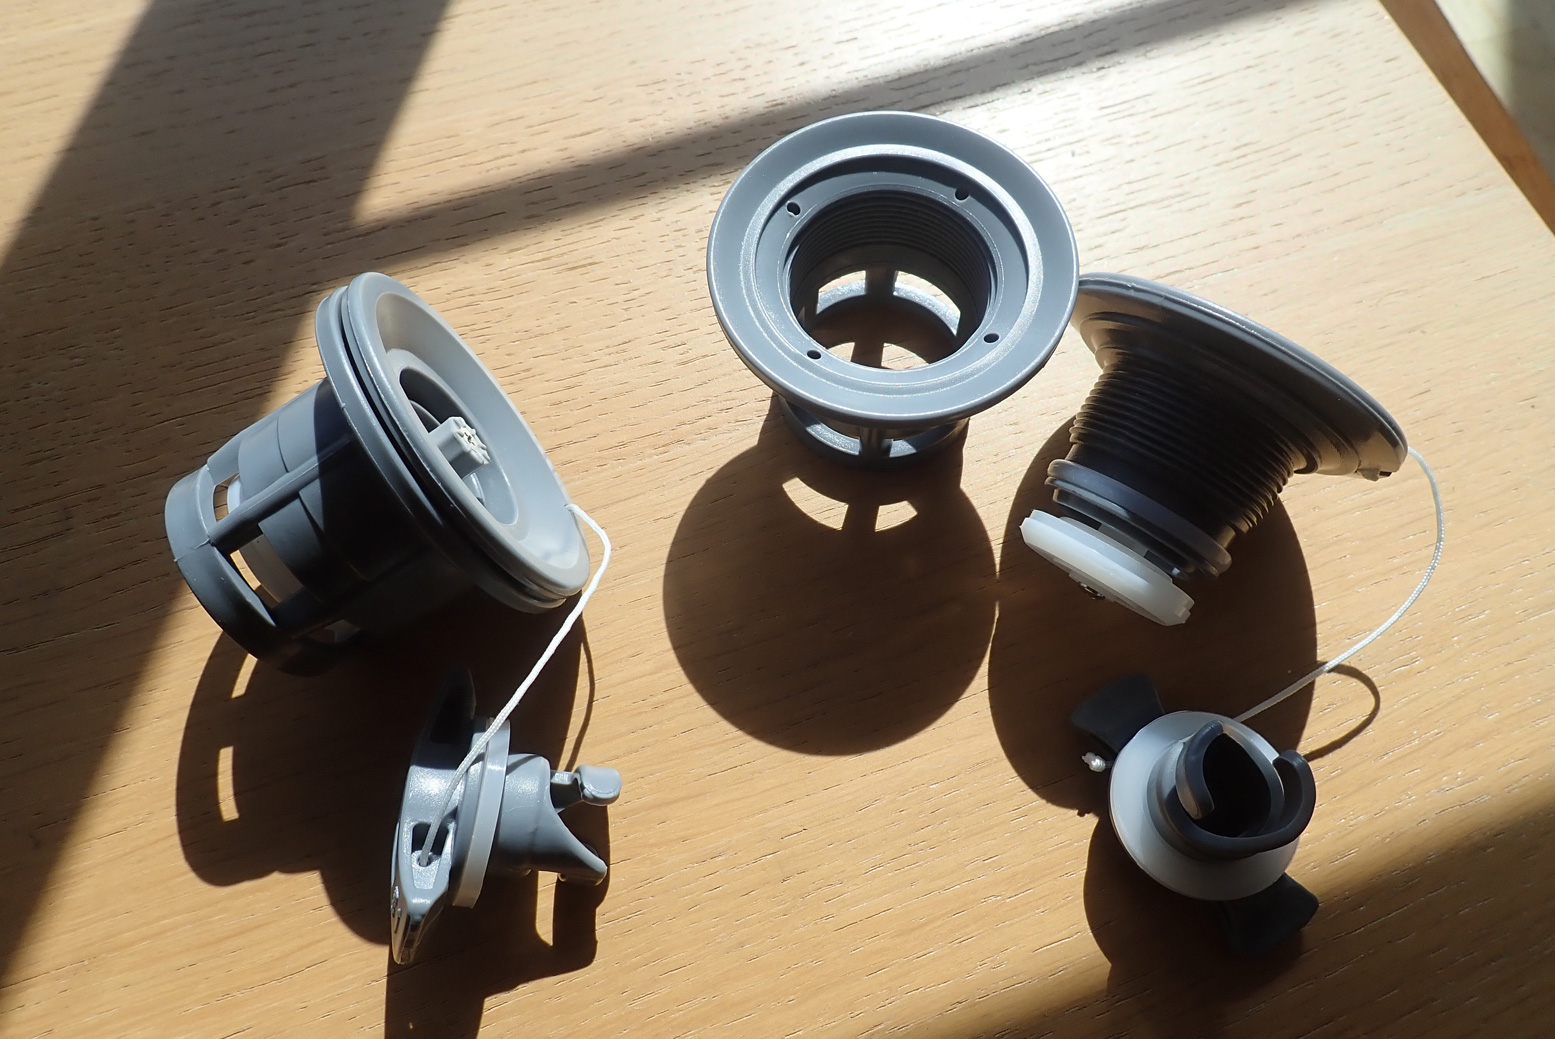
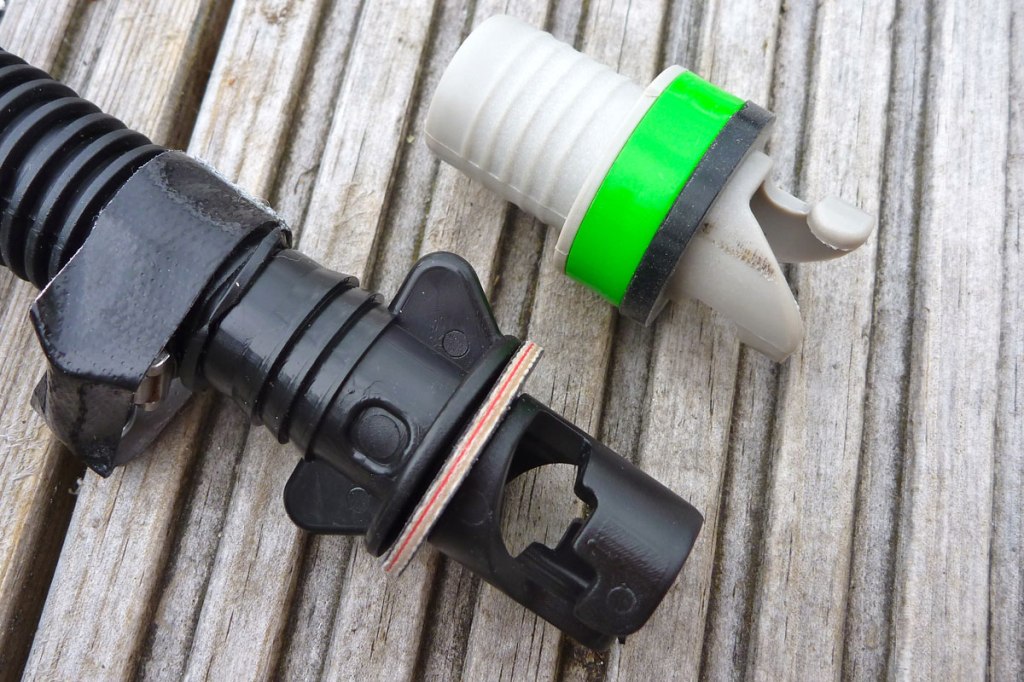
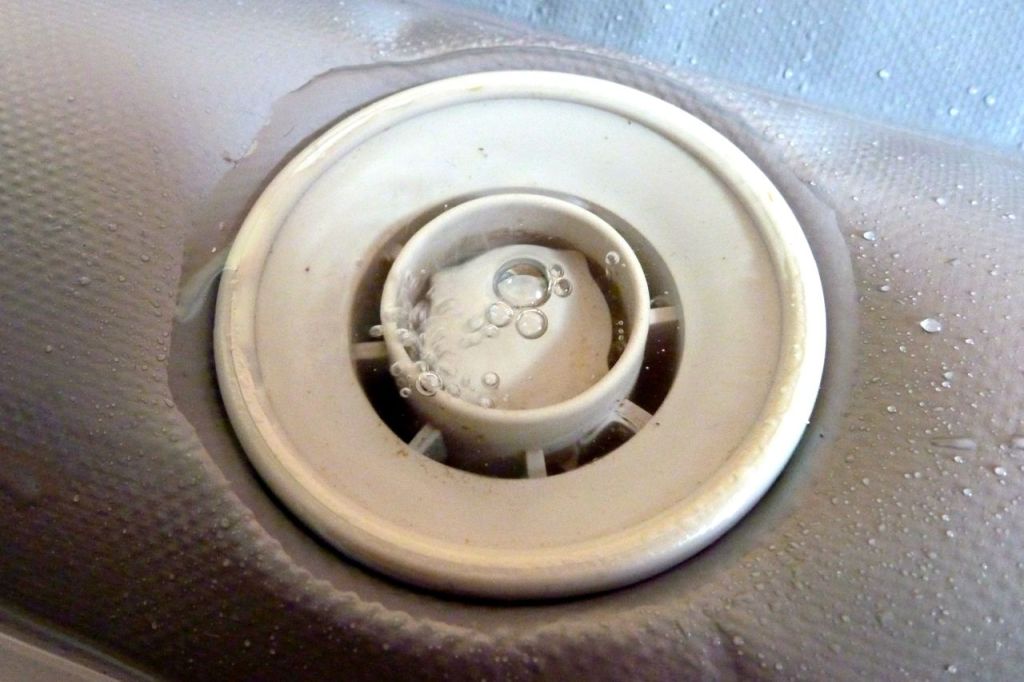
The best inflationvalves for an inflatable packboat aren’t the bungs you find on an airbed or an old Semperit. Nor the thin, twist cap stems off a Feathercraft Java or an old Alpacka. What you want are one-way valves. Like a car-tyre valve, one-way operation as well as a secureseal are the key, so what pumps in doesn’t push back or escape when you remove the inflation hose. Found on cheaper IKs and packrafts Boston valves are simple and effective for lower pressures. More below.
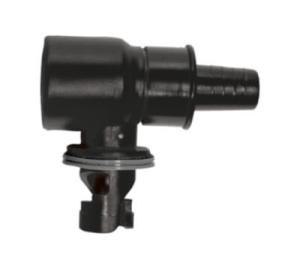
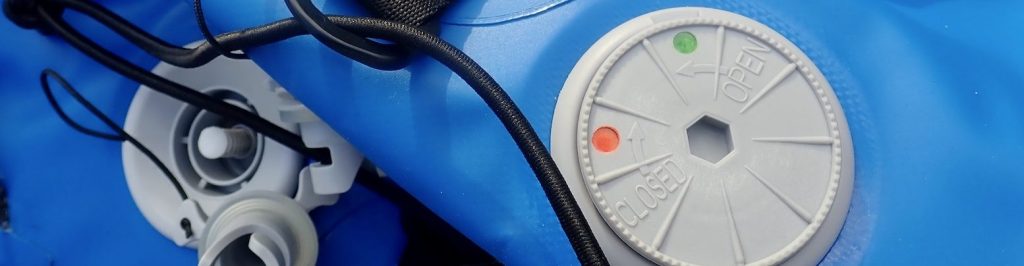
What I call raft valves (left) like Halkey Roberts, Leafield suit higher pressures and are needed for dropstitch panels. In America they’re called ‘military’ valves. With raft valves you either push and twist the button clockwise to lock open (deflating). For pumping up, push lightly and turn anticlockwise so the button springs back up to seal. This closed ‘button up’ position is the best way to transport an IK too. To lose a little pressure (say, the boat is getting hot in the sun) just jab the valve core button, same as on a car tyre.
Many raft valves are now ‘push-push’ (graphic left) which work like a clicking biro so are even easier to use. I always refit the cap seal straight away to keep water and grit out of the mechanism.
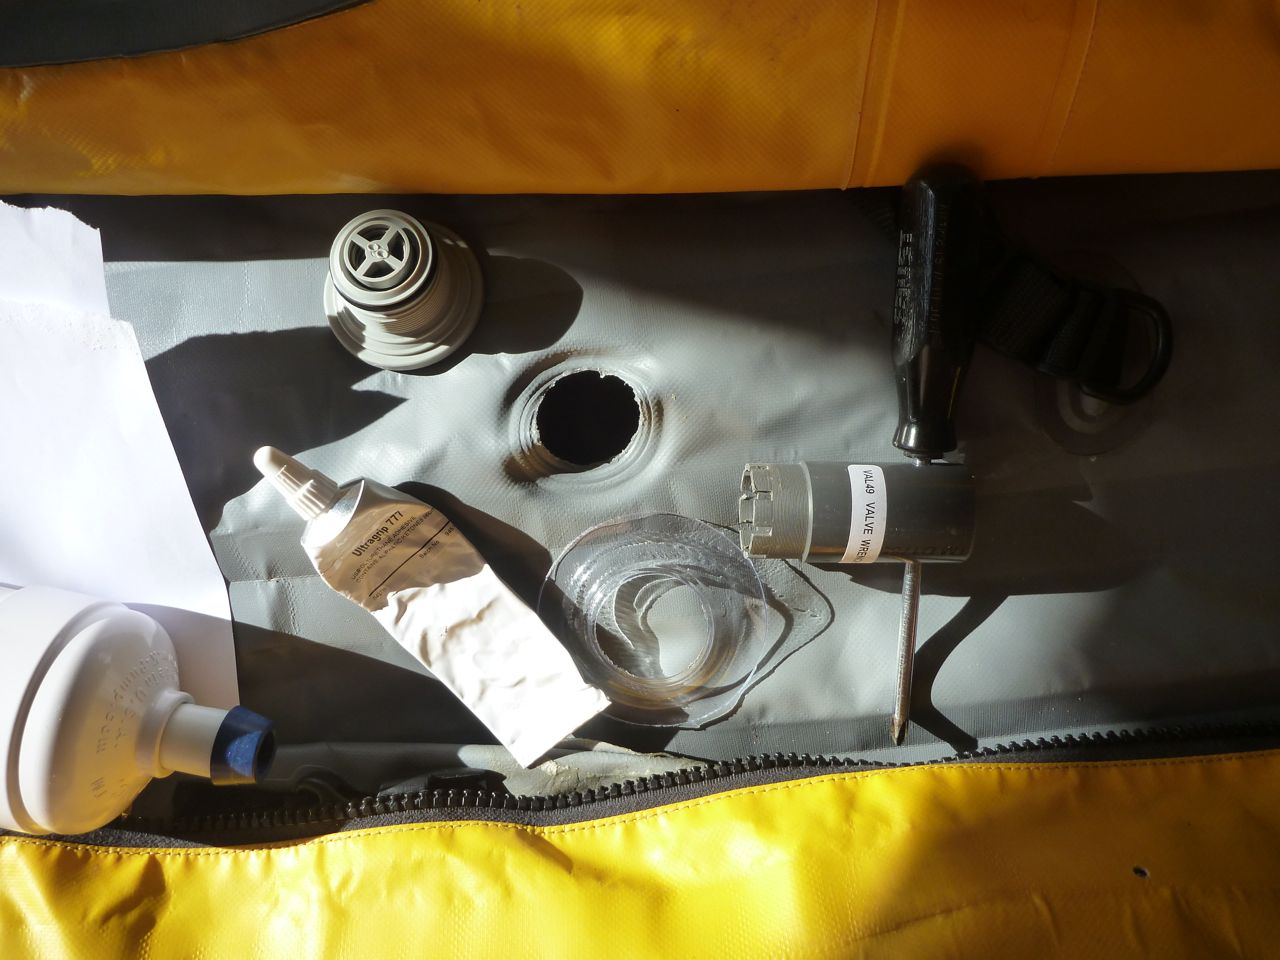
Two raft valves. On the left the collar goes inside the hull, the valve body screws into it tightly and the dust cap goes on top.
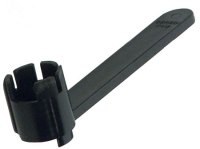
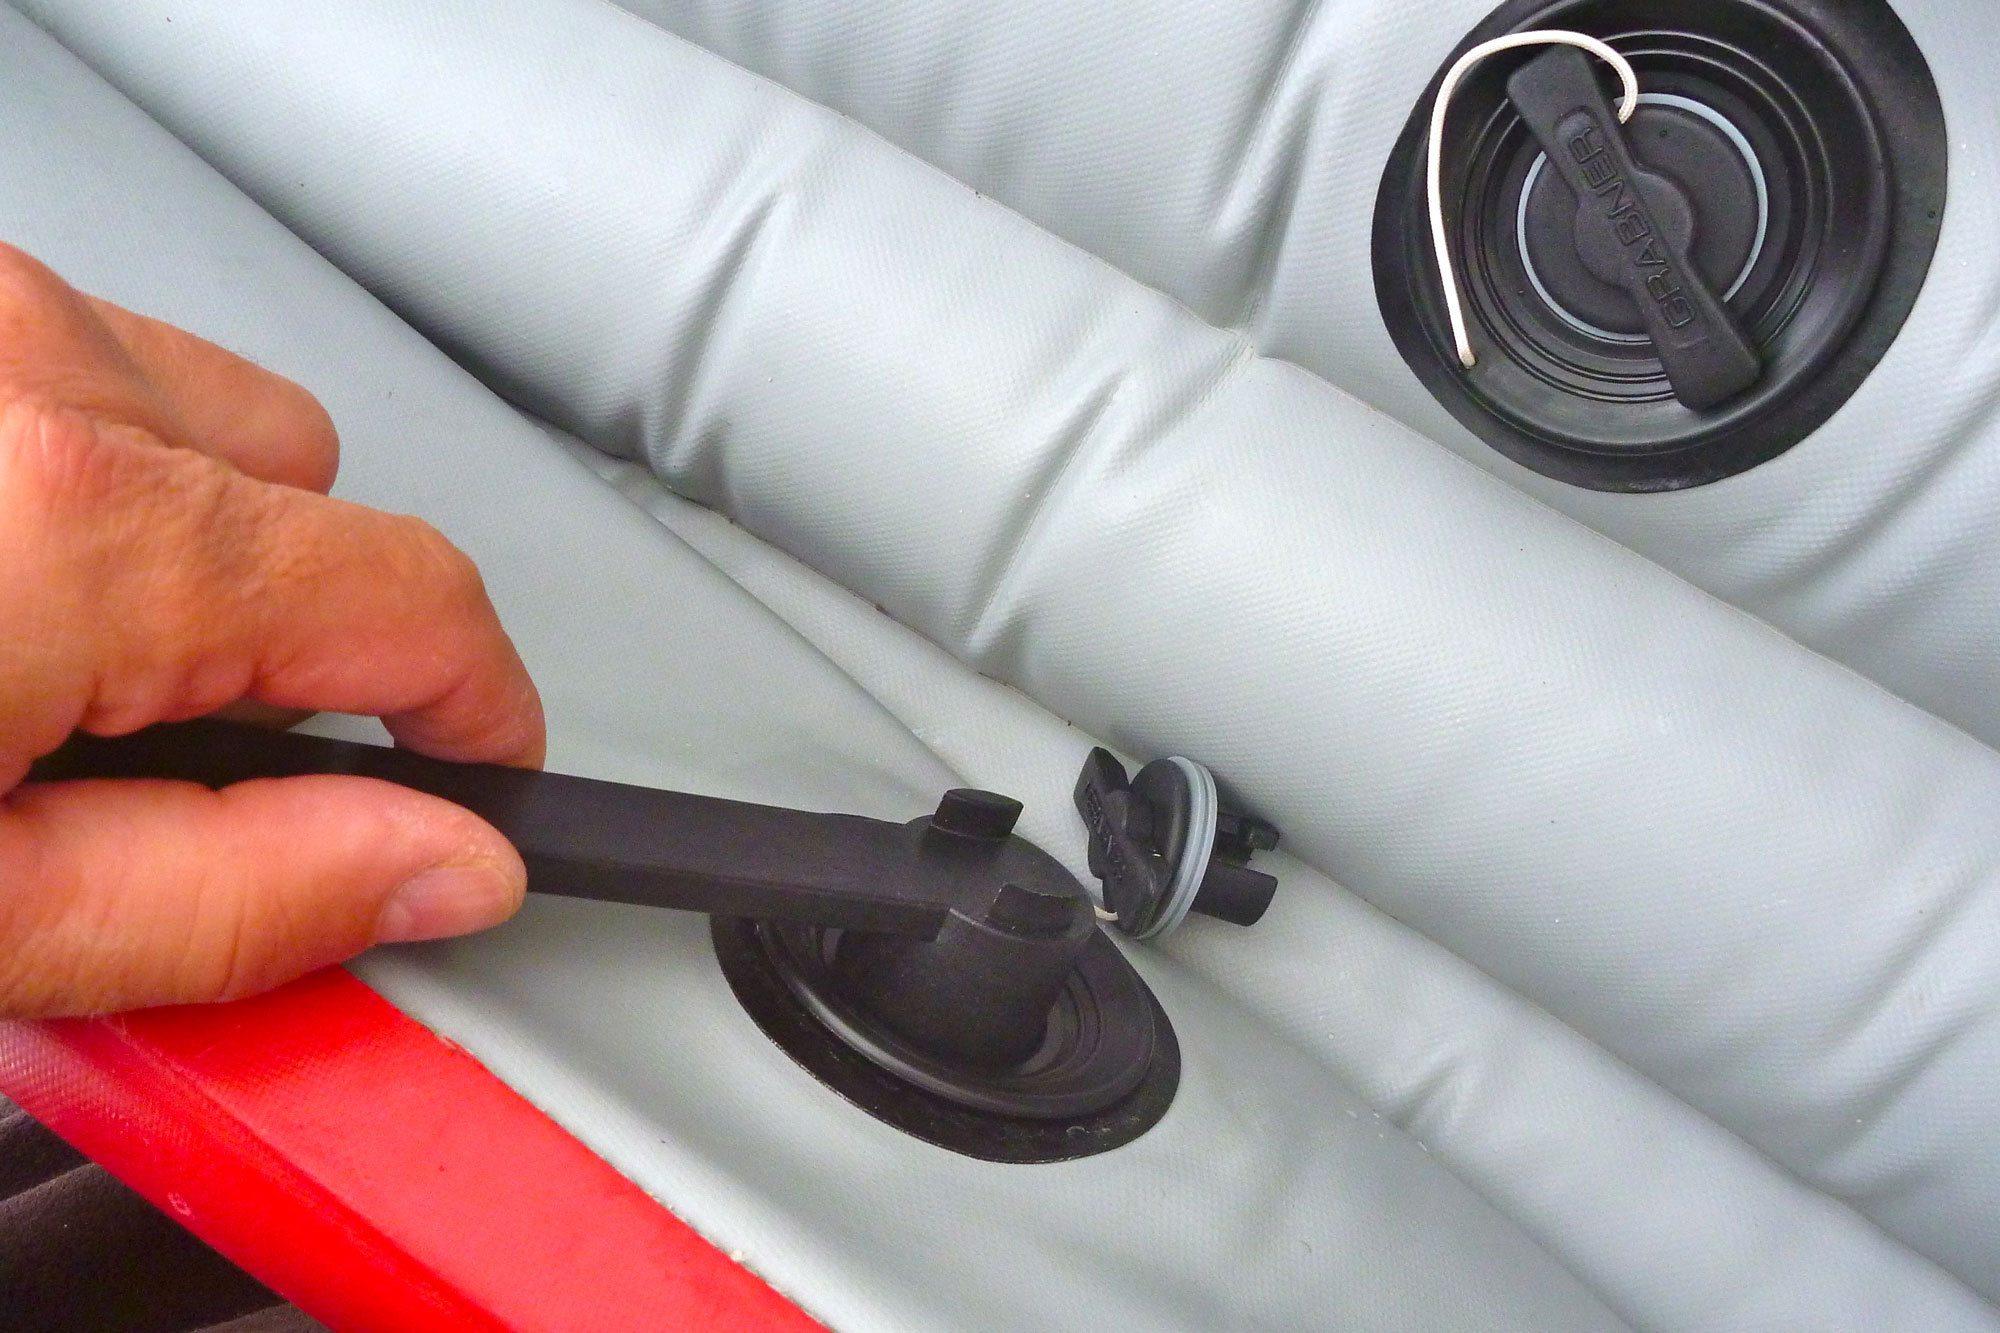
I’ve found these valves reliable on all my IKs, although this Gumotex 410C owner didn’t. Once in a while – or after the boat is new – you may want to check the valve is screwed tight against the fabric with the valve spanner, right. They’re also useful for removing the valve (or a PRV; see below) should it play up.
When it comes to inserting the inflation hose, a simple push-fit plug as shown below left can work; just jam the adaptor into the valve body and it usually stays in place while pumping. It looks cheap but on a Gumotex at least, works fine. With higher-pressure boats like Grabners and Incepts and some Gumotex (as well as dropstitch boats), the jam-fit can blow off so you’re better off using a bayonet fitting (below right) which won’t pop off as pressure builds.
Low-pressure valves for packrafts
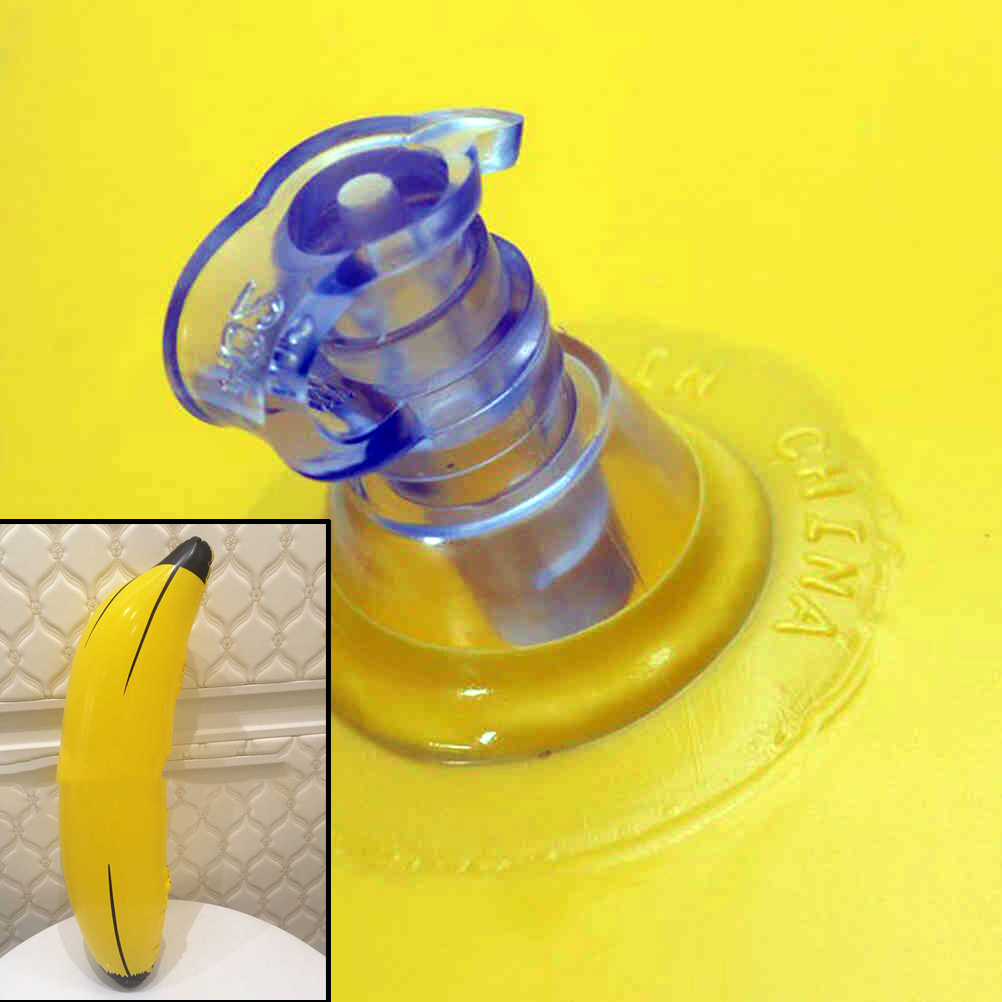
Alpackas and even Feathercraft used to use crappy, soft plastic twist-lock oral stem valves (below left) which you could never be sure were done up just right and which didn’t take well to pump nozzles.I suppose they were a step up from blow-up airbed plugs (below) which are still found on cheap IKs.
Retractable one-way flap valve. Annoying to delateLilo plugs: Ok for seats, crap on a hull
Now best used on inflatable seats and the like, they’ve been superseded by similar one-way stem valves (below right) with a light spring closure easily openable by lung pressure. They’re a bit trickier to deflate: you have to depress the ‘X’ with a finger while squeezing out the air. The one below right is actually on a buoyancy vest.
Twist-Lok: OK for seats and old packraftsSpring valve one-way for higher pressure
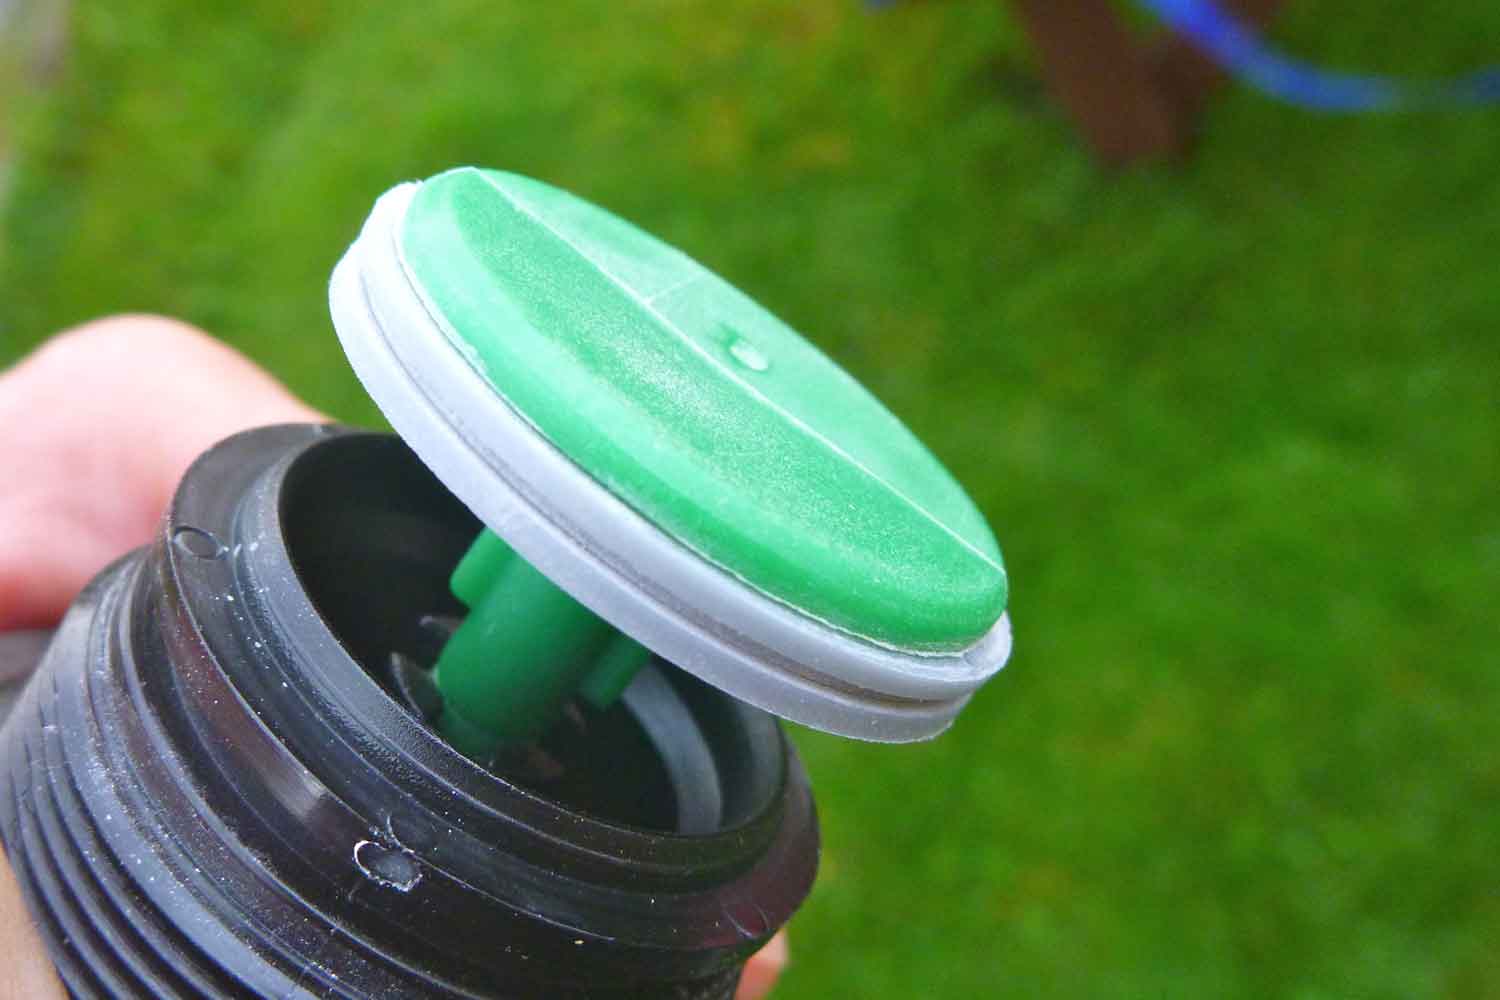
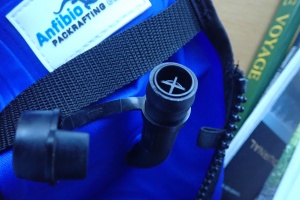
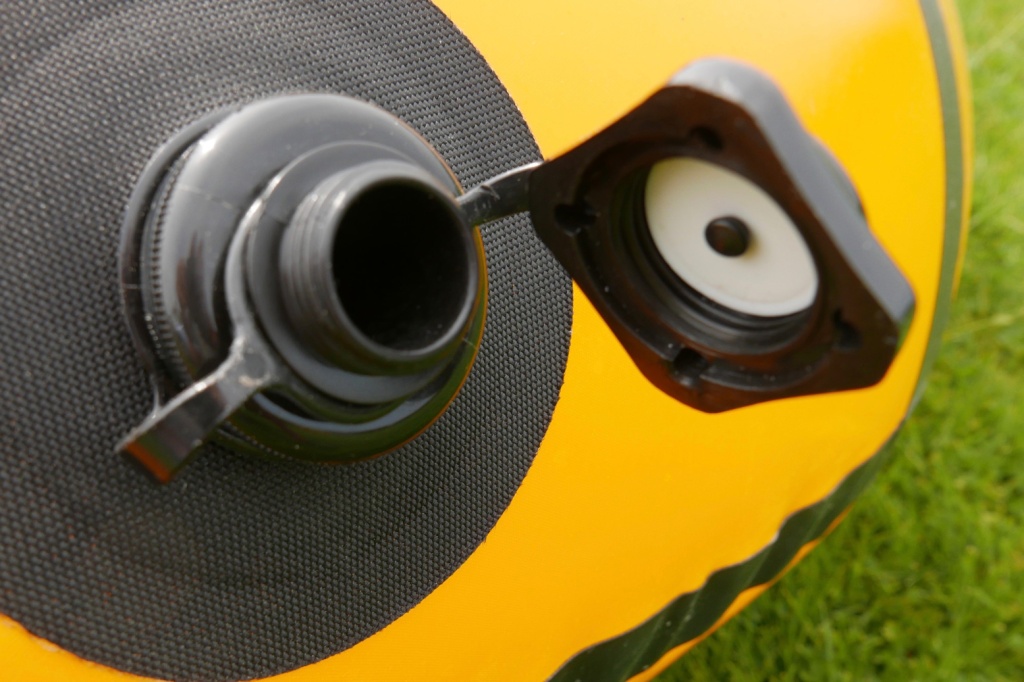
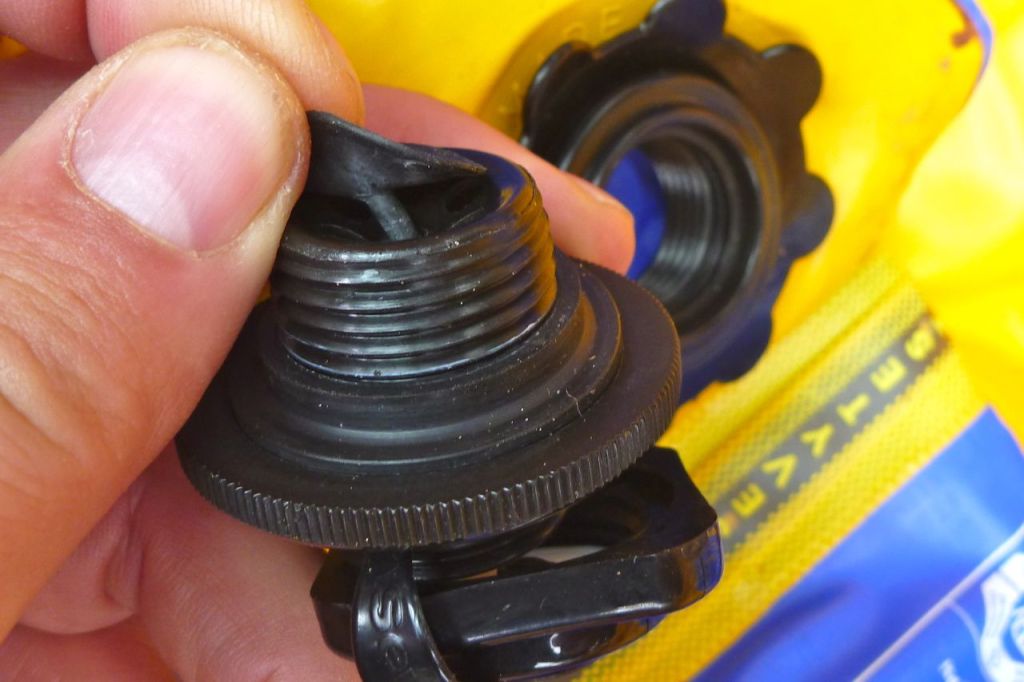
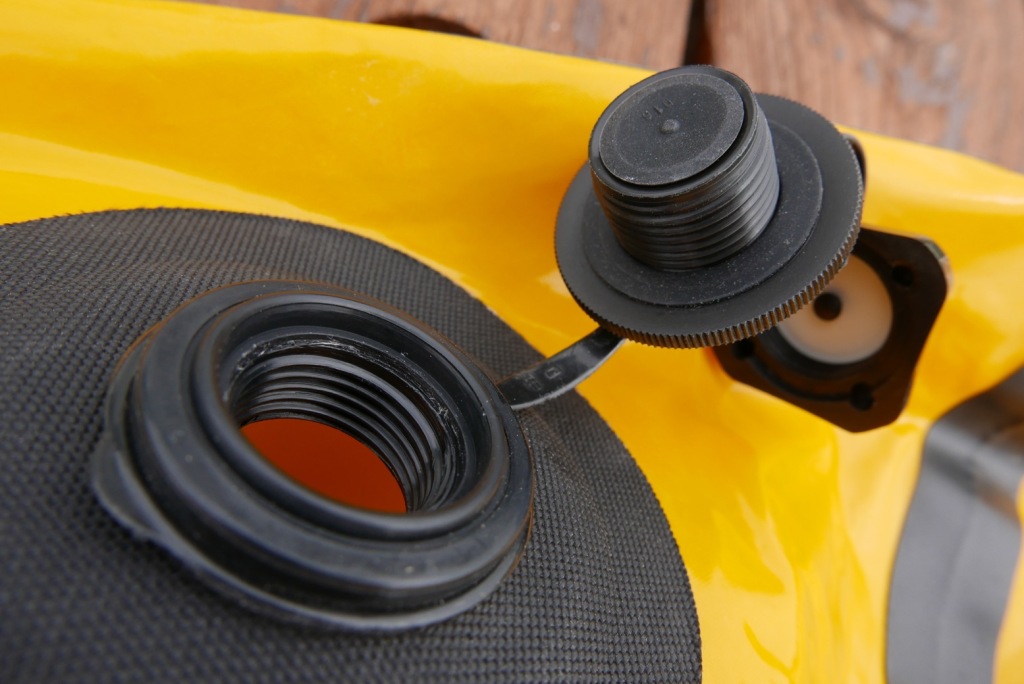
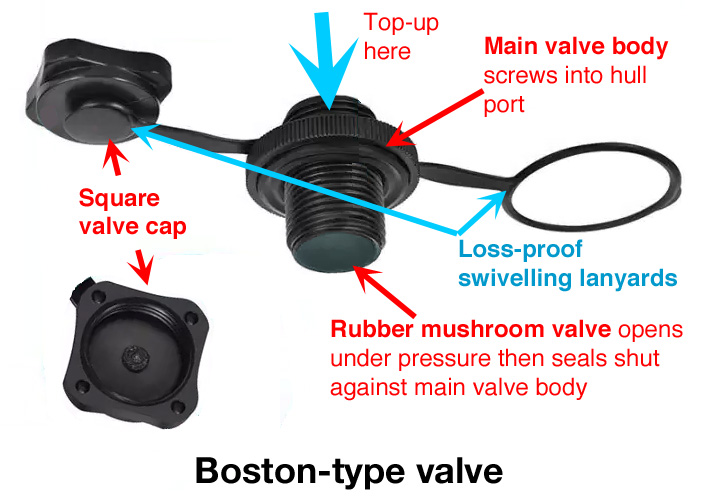
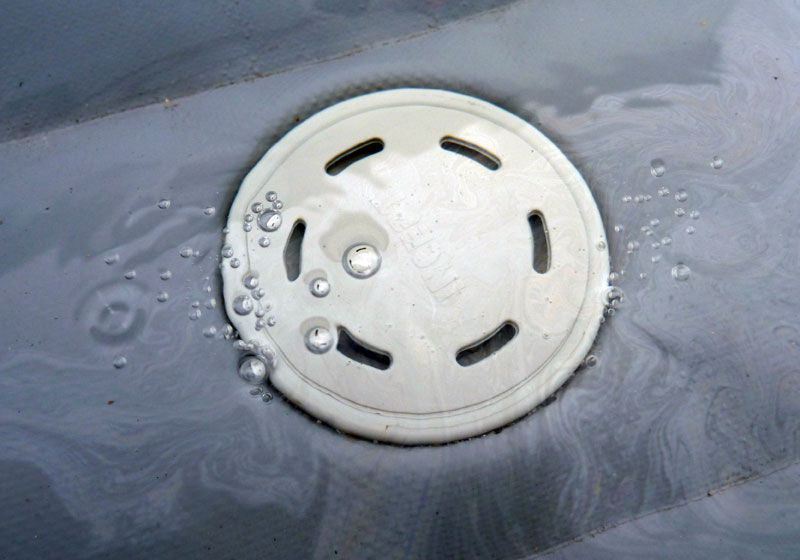
Boston valves is a generic name for a one-way valve long used on cheap IKs as well as slackrafts and have now become common on packraft hulls. Note they’re widely copied and not all may be identical, like well-known branded IK valves. The square top cap screws onto the round valve body which itself has a knurled edge to easily unscrew from the hull port (below right). Here you attach your air inflation bag or open to quickly dump the air when rolling up.
Inflation: top cap removedRubber ‘mushroom’ valveDeflation: unscrew valve body
Ideally suited to low-pressure boats like packrafts, they use a simple rubber ‘mushroom’ valve on a stem (above middle). Once the main valve body has been screwed back into the hull, unscrew the square cap to finish the inflation process by either topping off by mouth or with a hand pump.
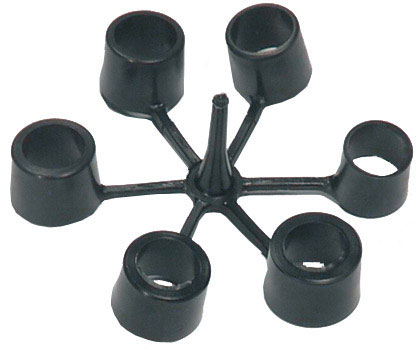
A one-way Boston-type valve eliminates the need for the old separate stem valve and the whole assembly has swivelling plastic lanyards so nothing drops away when unscrewed.
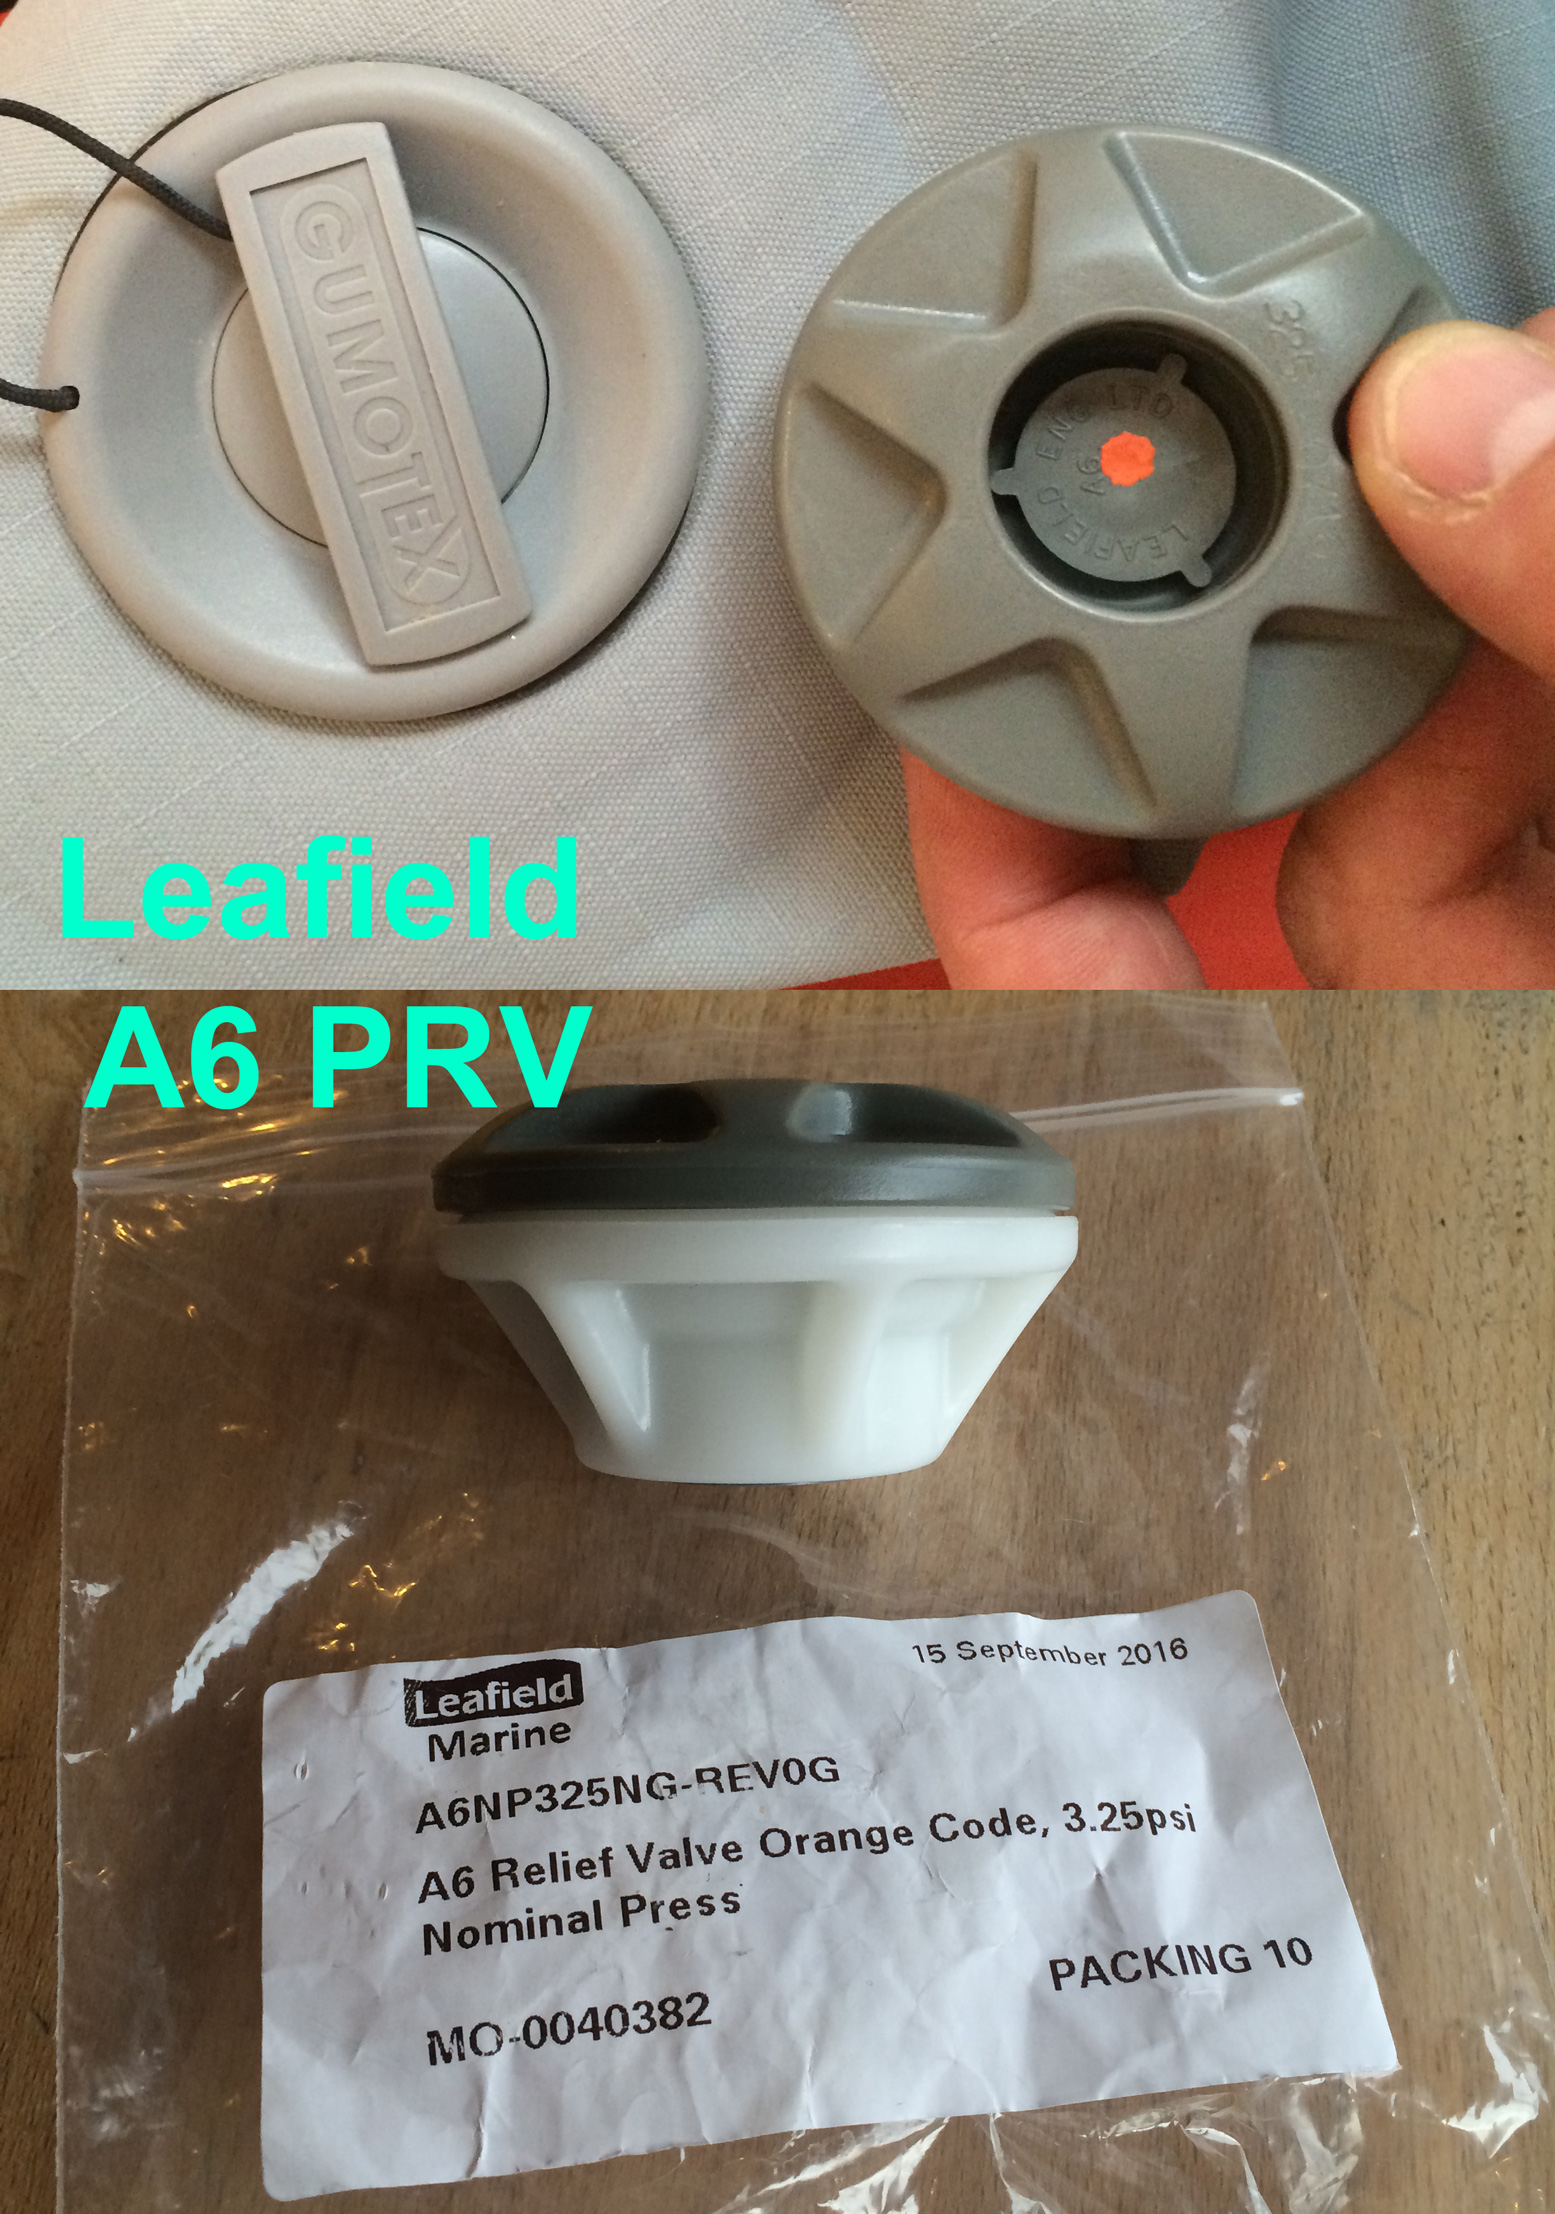
Pressure release valves (PRV) for some IKs
I’ve learned the hard way to be careful and not let an IK get too hot when out of the water. On a hot day you can feel the more exposed sidetubes tighten like a drum. This of course happens to be good for rigidity and paddling efficiency but isn’t good for the seams or an I-beam floor or the sewn seams of a cheap shell&bladder IK.
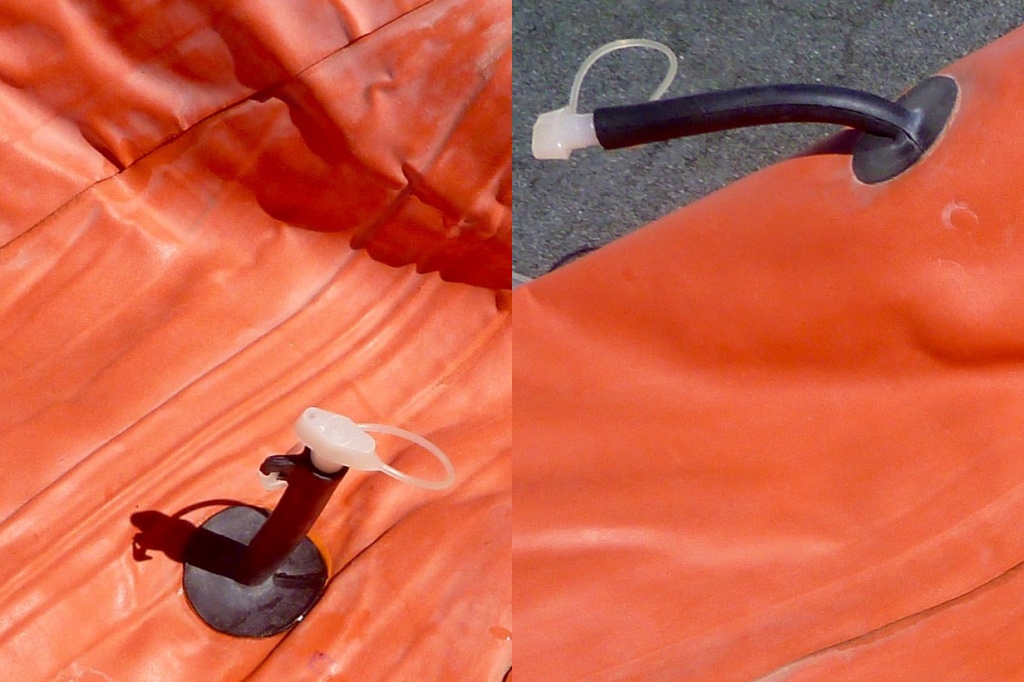
Oddly, not all Grabner IKs have PRVs which means…… faffing about with pressures on hot days.
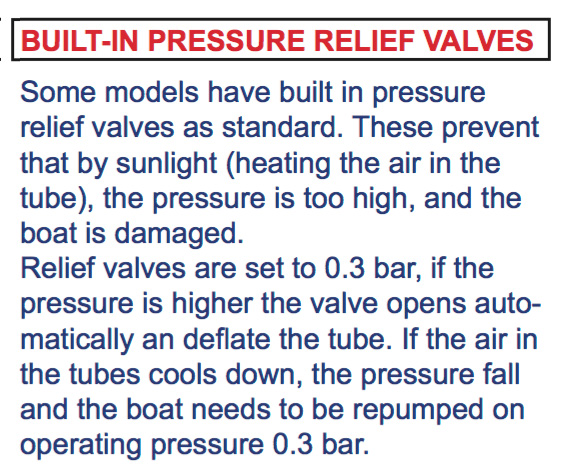
The floor tube on my old Sunny had a pressure release valve – oddly it’s something rarely mentioned in the specs, even on current Gumboats. It’s there to protect the I-beam floor which could rupture inside under pressure (I-beam floors explained here). The valve is set to purge (open) at a certain pressure when the air inside heats up, expands and pressures rise. With Gumotex it is 3psi or 0.21 bar. It means an IK can feel a bit soft on a cool morning following a hot day; don’t worry, you don’t have a leak, it just purged some air when hot yesterday and in the cool air make sit a bit soggy. A quick top up is all you need to do. The handy thing with a PRV is that it makes a good guide to how hard you ought to pump up the other chambers of the boat without PRVs when you don’t have a pressure gauge. At whatever pump effort the floor PRV starts hissing, that’s the same or a bit more pressure to put in the side tubes which usually don’t have PRVs.
As mentioned, the air in an IK can also get cooled, for example when pumping up on a hot day and then putting the boat in a cool river: a normal scenario. Cold air contracts (loses volume/pressure). Because you want the boat to be as rigid as possible, after initial inflation it’s worth topping up again once the boat is in the water; splashing helps cool the sides. Topping up, or tempering as it’s called, optimises rigidity and with long, 2psi boats you need all the rigidity you can get. Conversely, pumping up your boat in sub-freezing temperatures then putting it on water which actually ‘heat’ it up, though this is a much less likely scenario.
A PRV purging correctly
PRV leaking from the sides not through the valve. Needs tightening with a special tool; a common necessity with hastily assembled new IKs.
My higher pressure Incept K40 had PRVs on all chambers which meant you could confidently leave it in the Sahara and it would safely purge then feel a bit soft once cooled down back in the water. Picture above: Incept PRV test with the protective cap removed and purging correctly through the centre. Below: a PRV being resealed after leaking from the edges (left). This was because I failed to check tightness after buying the new boat, as recommended by the manufacturer. (My Gumotex IKs never needed such tightening or checking in years ownership.) I ended up also fitting sidetube PRVs to my Gumotex Seawave to run higher pressures and the be able to leave it pumped up and out of the water for months at a time. Like any valve, PRVs can leak due to grit on the seal or a weak or sticking spring. Grit is not so unlikely when you think they can’t have a cap and have to sit on the floor of an IK, with water and sand occasionally swilling in and down into the body. Try removing the cap and blasting it out with air and maybe give the spring a squirt with 303 (UV protectorant). The best thing is to remove the PRV with the same valve tool, inspect and clean the sealing surfaces and reinstall.
Oddly, my old Grabner Amigohad no PRVs at all and neither do the latest Holiday models and a few other Grabners, even though all run higher than normal 0.3-bar pressures. One presumes Grabner are so confident in their construction they’re not needed, despite the warnings above. It should be included with the boats, but if your pump has no gauge, Grabner do pressure relief adaptors to fit on the hose (left) which purge at 0.3 bar, so dispensing with faffing about with a handheld pressure gauge. It’s a good idea.
My current Zelgear Igla 410 has closeable 0.25 bar PRVs on the twin I-beam sidetubes (below). The separate DS floor runs twice that pressure but has no PRVs. I find it’s actually quite handy to ‘lock in’ the air during cool transits or when getting into the water. When the paddle is over I open the PRVs which hiss a bit back down to 0.25 bar. I leave it like that until the next paddle when I top everything back up.
Lockable PRVs; quite handy actually
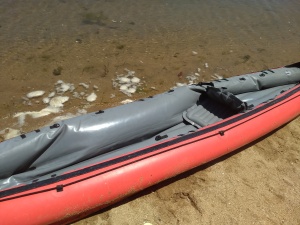
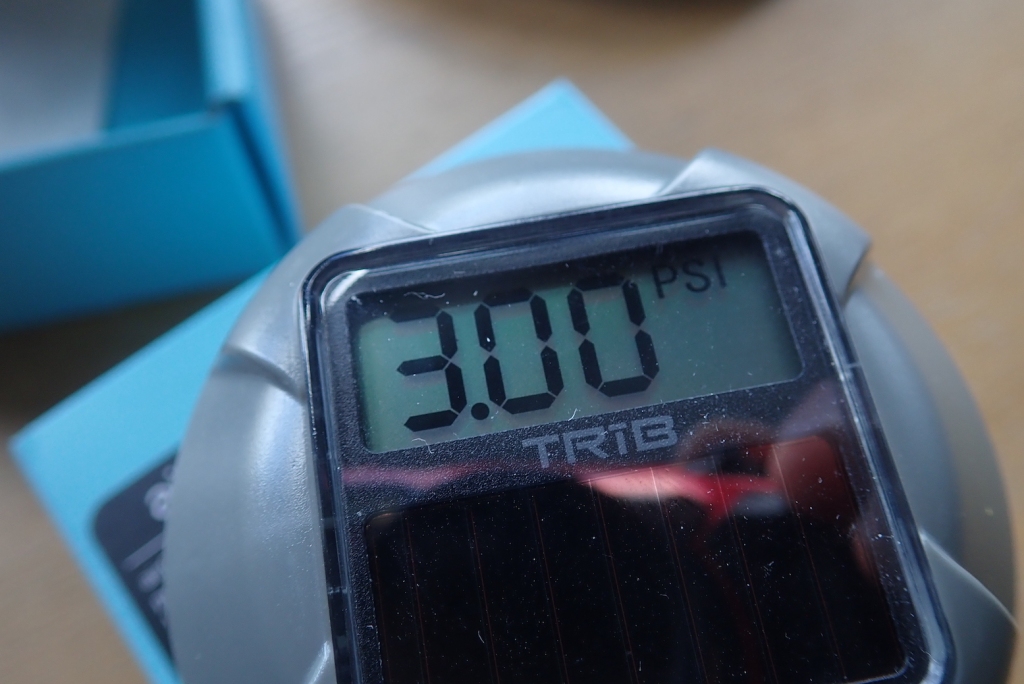
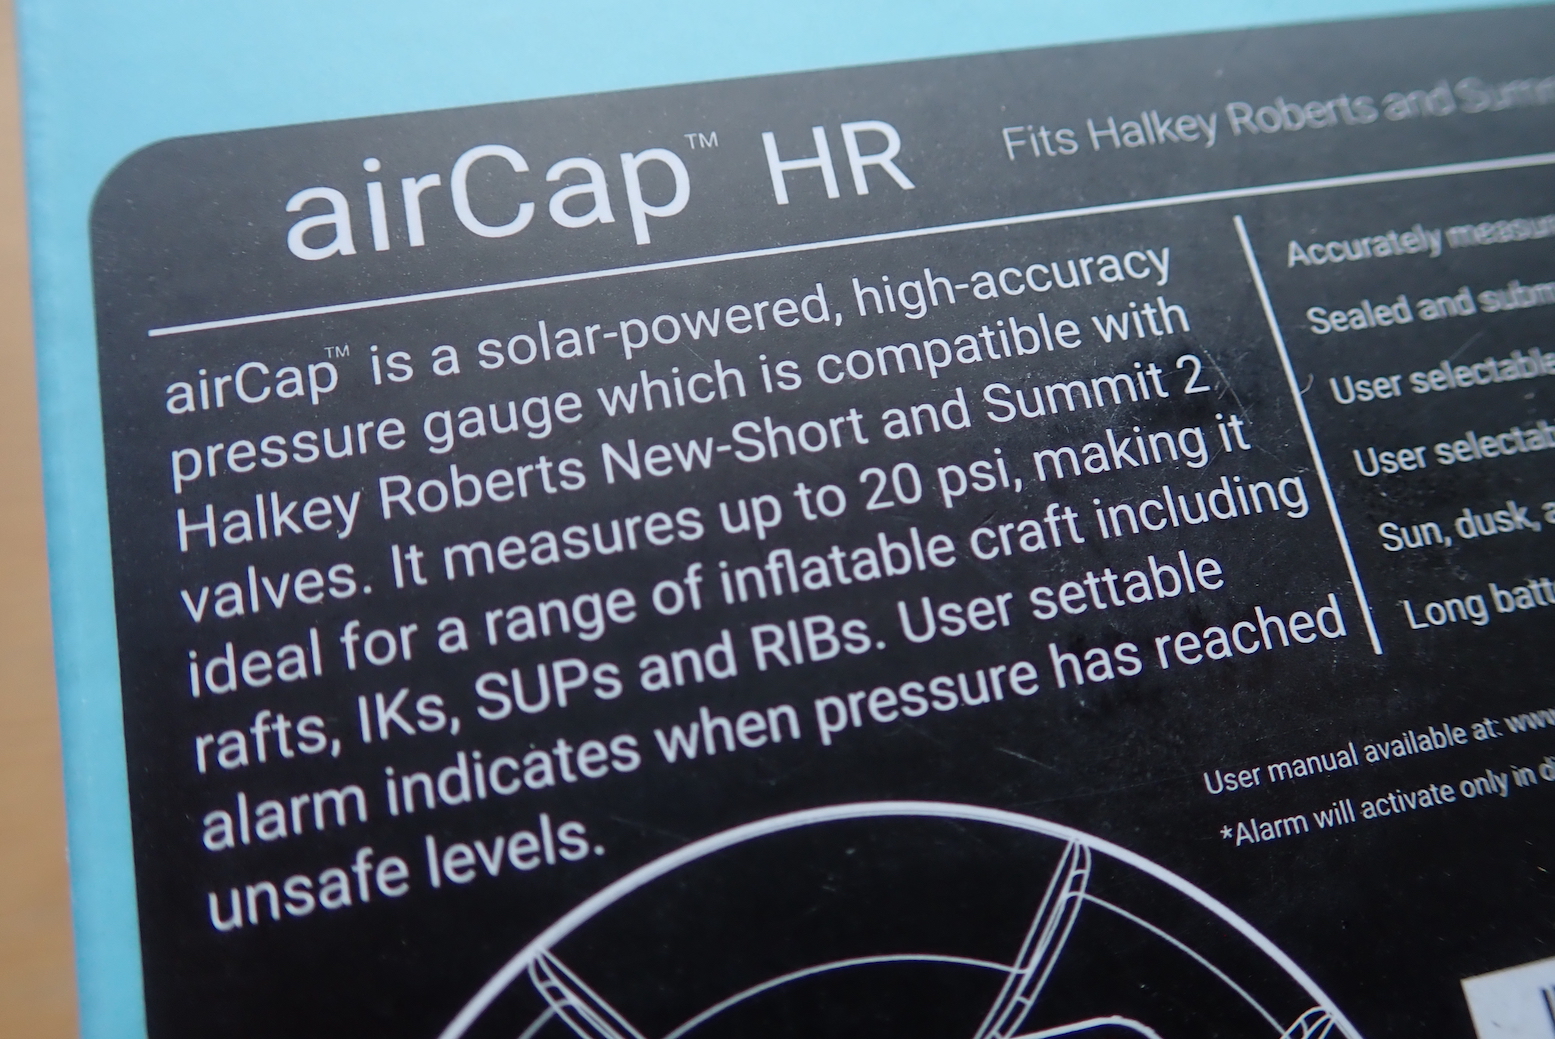
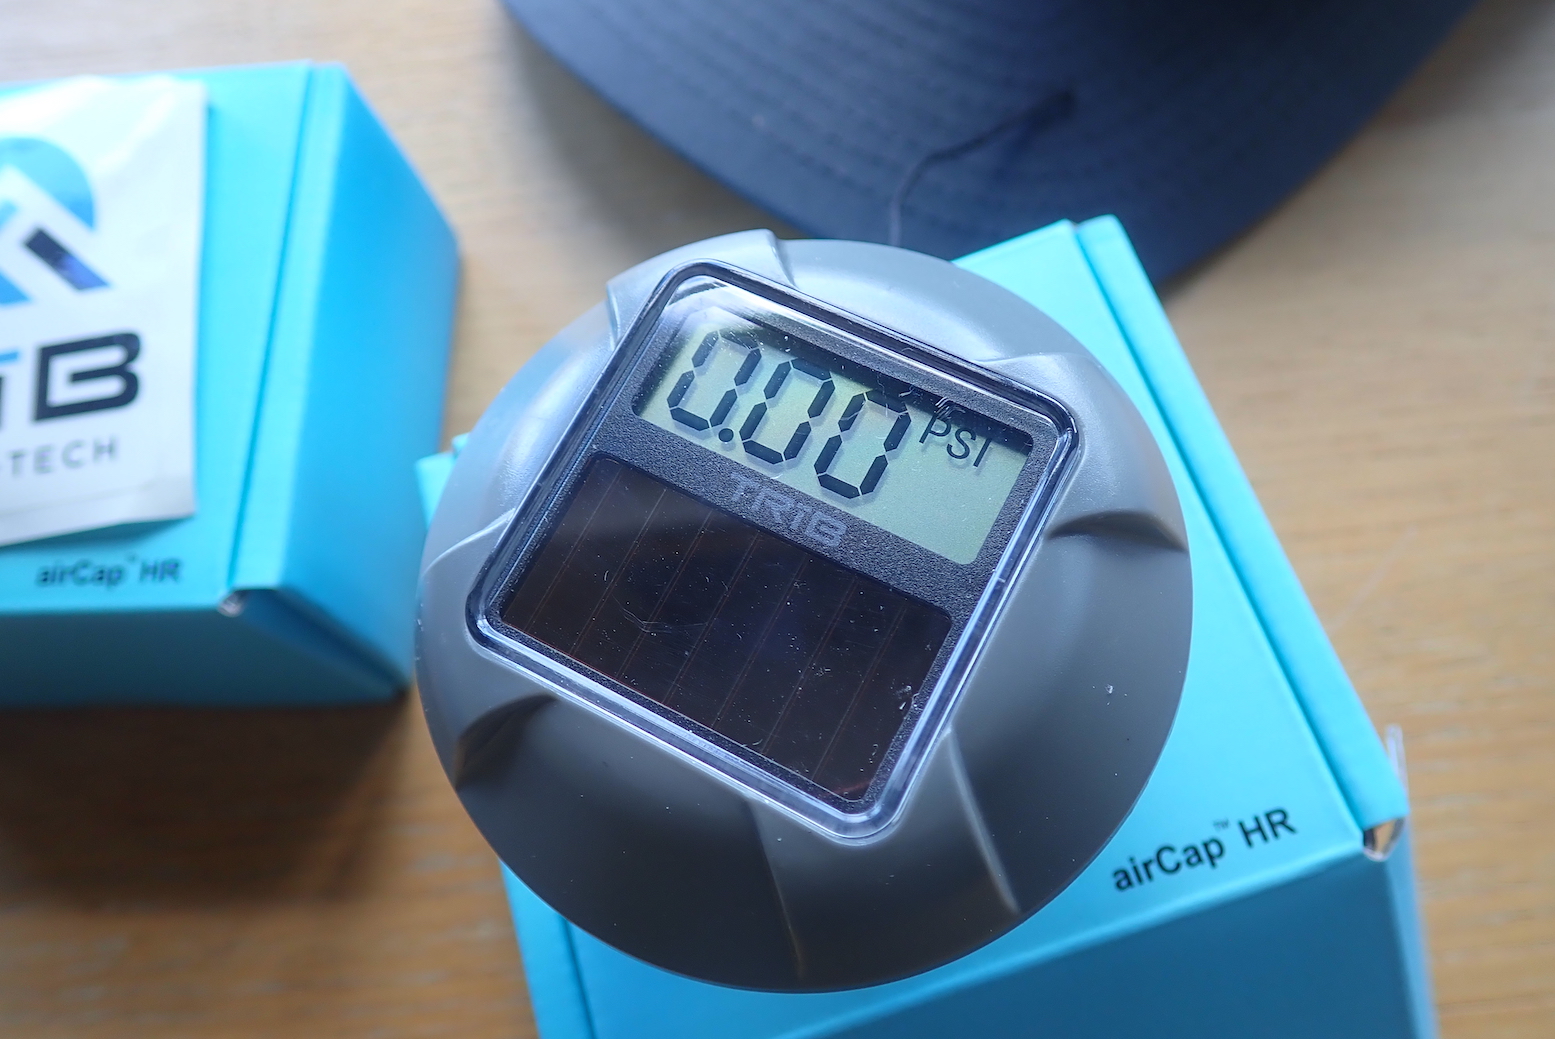
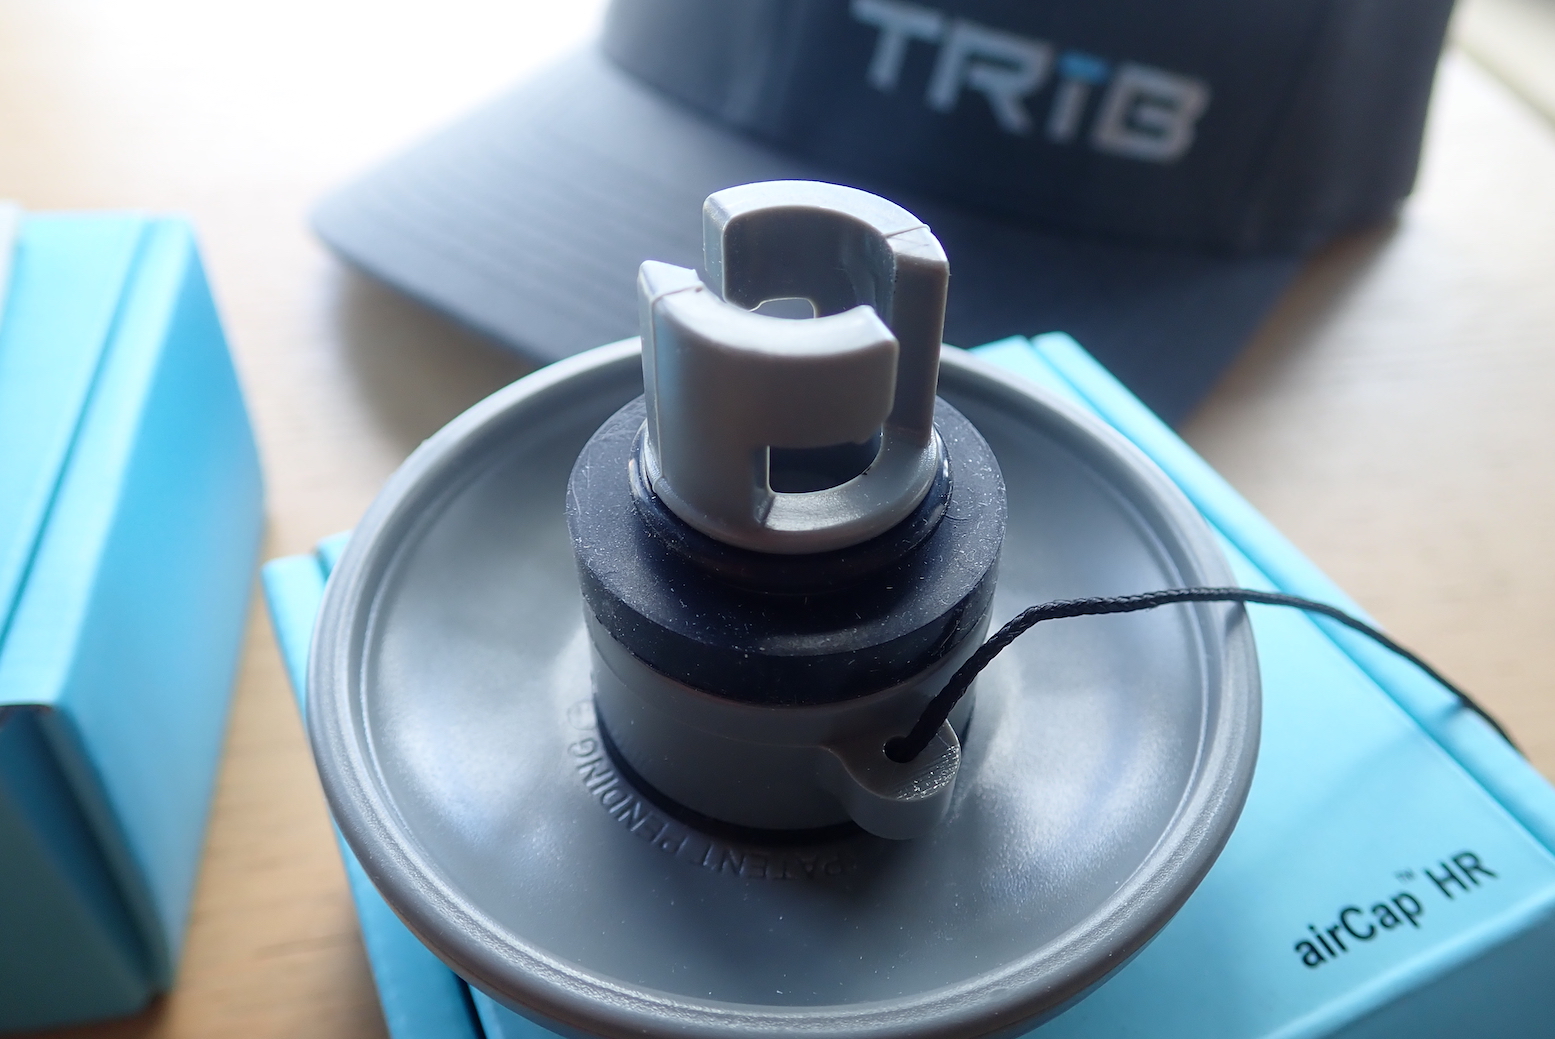
Another good idea are TRIB airCap live pressure monitors so your boat doesn’t end up like the Seawave left (actually an unexplained internal rupture while in the water). These TRIB solar-powered gadgets replace the valve cap on bayonet-type inflation valves like Halkey Roberts or Gumotex. One fitted securely an LCD display displays your pressures in psi, kPa or bar, a bit like TPMS for cars and motos. And like TPMS, you can even set a bleeping alarm at anything up to 20psi / 1.37bar. You need to make sure the seal is good and air is not slowly leaking out, but you can also use them as simple digital pressure gauges: twist on, measure and remove. Once fitted, you can watch as pressure drops after you put the boat in the water, and then seeing it rise out on a hot river bank. If I kayaked in a hot country (ie: not the UK) they’d be a simple alternative to the faff of installing PRVs. TRIB airCaps cost $40 in the US and the same in £s in the UK. The ribstore sells them.
The Aire Cheetah seat (left) turned out to be no worse than the inflatable original, but was a bit lighter – even though it weighs just over 2kg. I’ve also set it up so I clip the seat to the boat’s seat mounts (which originally used a knotted bit of rope) so I can take it out at camps or to dry/clean the boat. Plus, along with the box for a footrest (below), it’s one less thing to pump up.
Firm backresting was a problem with the OE seat; or to be precise, fitting points to hold the back of the seat upright as you push back with your feet. Because the support strap is attached from the seat top to the front seat base, as you lean bank it just pivots rather than supports. The 410C is much better in this respect. To cut a long story short, I imitated them by gluing mounts to the hull’s side tubes to attach to the seat top. This way the pulling force is in a better line and the seat doesn’t pull down. Some say though that the old-style seat have better back support than the plain Mk2/3 style Sunny seats. Since fitting on the side tube mounts (the real answer to this problem) I don’t think about the seat now which must mean it works. The Aire seat is still a bit heavy though.
Footrest The OE inflatable footrest pillow was non-adjustable (on the 410C it is) and always too far away to be effective, even for me at 6′ 1″, so I replaced it with a 5010 Otter box (left), which of course has uses to store stuff on the water.
However I then noticed the strain of me pushing back off the box was tearing the lower seat mount tabs glued to the hull (where the rope used to be). The box is now attached directly to the seat with adjustable slings. This way I now push inside a ‘closed loop’ made up of the seat and box, so only straining the sling and clip joins which make up the loop – and not the boat mounts. Of course this does mean there’s some energy-absorbing slack between me and the boat, but it’s a gumboat not a K1 racer alas, so will have to do.
Although I find I’m happy to paddle with my legs lying flat, when you want to go for it a firm foot brace and a bent knee are much better, but require a fairly solid seat to push against. The long box-to-seat strap loop seems to work OK and I discovered a side benefit; the straps can be pulled over my knees to make thigh braces (right); another possibly handy feature when the going gets rough. It’s not like bracing directly off the hull or anywhere near as good as with a SinK’s ‘underdeck’; it’s more to achieve good paddle thrust using the core not the arms which they keep telling you to do. And anyway, even in the roughest rapids I’ve done, the Sunny feels stable enough without thigh braces and if anything I prefer having my legs free to stick out to steady myself (or fall out neatly). The Sunny usually swamps long before things get hairy enough to tip it over.
As mentioned above, sometimes I feel with the Cheetah seat that my butt ought to be a bit higher. It’s also pretty heavy at 2 kilos (4.5 lbs). Now I’ve inherited a spare new-style Alpacka packraft seat (left), I may try and adapt it to fit the Sunny. The Alpacka seat is not half as robust as the OE Gumo Nitrilon seat so it needs to be supported in a way that won’t wreck it. I haven’t worked out how to do that is yet; maybe a stick across the hull like a Grabner, but that requires gluing. This seat will be higher than the Aire which is an important feature with kayaks: butt higher than heels is much more sustainable, comfortable and efficient for paddling, so you want to set a seat as high as you feel safe, bearing in mind CoG and stability as discussed here. The Alpacka seat also weighs just 220 grams (half a pound), saving nearly 1.5 kilos, or nearly 10% of a Sunny, and a bit of bulk… (but I got rid of the Sunny before I had a chance to work this one out).
Short answer: IKs: yes. Packrafts: helps away from white water
Generic, over-tall skeg. Snap-prone but trimable.
A skeg is like a fixed ‘rudder’ under the back of the boat which makes it easier to go straight (track). Only the very cheapest single-skin vinyl IKs don’t have skegs (Grabner, one of the most expensive IKs, is an exception; though it’s an optional add on). If you’re IK doesn’t come with one, it’s easy to glue one on (see below).
Some flat-floored IKS have up to three (imo, a gimmick), and many skegs on Chinese-made IKs are unnecessarily tall (too deep) which makes them snap-prone. Just about all skegs can be easily removed by hand, because in shallow rivers you might want to do so to avoid grounding. You can as easily buy a spare and trim it with a hacksaw.
Gumotex skeg glued to a Grabner Amigo
Original over-sized Gumotex alloy skeg on the left. Later smaller; now tough plastic.
Years ago Gumotex introduced a slip-on, black plastic tracking fin (skeg, above) which was near identical in shape to one I’d had made to replace the old-style oversized alloy skeg (left). A smaller skeg made better clearance and still tracked fine. But metal bends; tough plastic is much better and that’s what all their boats come with now. I’ve fitted these plastic skegs to older Gumotex IKs and other IKs. The kit is about £25 + glue, and the plastic skeg is pretty much unbreakable. Just make sure you glue the mounting patch on really well; it helps if your boat is made from a matching rubber fabric as the supplied Nitrilon patch or make your own patch from same fabric. But I have glued PVC to rubber successfully – use good two-part glue. The pictures below help you see where to position a skeg.
On shore a skeg is a pain with a loaded boatSkeg: underneath and at the backGluing a Gumotex fin to a Grabner (which come with no skegs)
I fitted the Gumotex plastic skeg to my Grabner Amigo IK (above) and at sea used it all the time. But on the shallow River Spey (below) this boat didn’t handle at all well without a skeg, possibly because the tailwind pushed the kicked-up stern around. It was really quite annoying because a few years earlier my broadly similar Sunny managed the Spey just fine without a skeg, so skeg-free tracking clearly varies from boat to boat.
Paddling without a skeg If you’re an experienced paddler you’ll have acquired the knack of going straight without a skeg – handy for paddling shallow rivers where the skeg would ground. A little more paddling finesse and constant smallcorrections are required, especially if powering on. It’s good to learn this technique before you need to: fix your eyes on a tree or marker on a distant bank and paddle as gently as you like towards it, not looking away and keeping the nose of the boat in line with the marker. By using very light strokes you’ll see it can be done if it’s not too windy when again, a skeg helps with tracking (going straight).
Gumo Solar with no skeg
I even found I could paddle a ten-foot Solar 300 (above) without a skeg. Once you know you can go straight without a skeg, it’s just a matter of adopting the same finesse but with a bit more power. Only when you attempt the speeds of a Viking longship will bow deflection or yawing get too much because to paddle faster and still go straight you need a skeg. Out at sea or on busier rivers, I always use a skeg.
IK&P Tip: drill a small hole in your plastic skeg and attach a ring or zip tie directly to you boat. It’s annoying to turn up and find you misplaced your skeg.
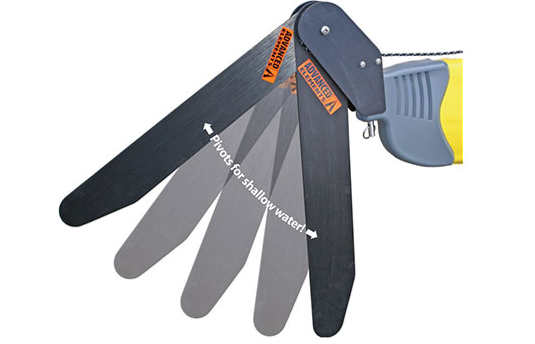
I’ve often thought a hinged retractable skeg would be a good idea: it would pivot backwards when dragging in shallows, then drop back down when there’s enough depth. It seems SUPs need skegs and in the US, FrogFish have made such a thing for boards, but you hear the spring can be a weak point. If your kayak has a rudder mount (or you can make one), another way of doing it is fitting a swing-down skeg similar to kayak rudders. It works the same way as a rudder with a looped cord swinging the skeg up over the stern, or down into the water. The pivot skeg shown top right is made by Advanced Elements for their AirFusion IK and costs about $/£80. Or have a look here.
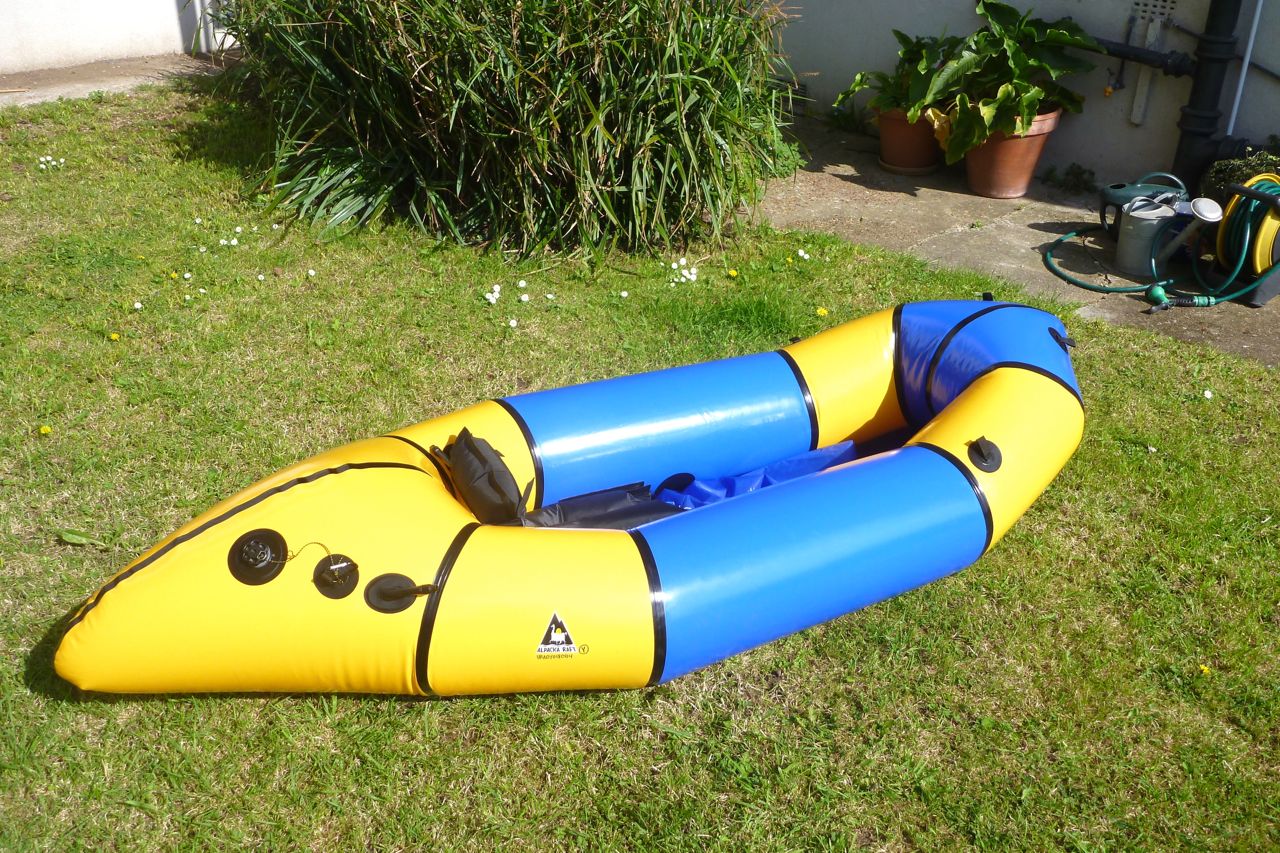
Packrafts
On shorter, wider, slower solo packrafts the consensus used to be that skegs made little difference. Especially when unloaded and with a full-weight paddler, the bow yaws merrily left to right as your paddling pivots the boat from the back. Or so I used to think until I tried the skeg on my Rebel 2K. Up to then I’d been ambivalent about them – using the same boat fully loaded a few weeks earlier on a fast flowing river, yawing had not been an issue. But unloaded (and with my generous 95kg of ballast) yawing was notably reduced with a skeg. Speed however, was the same or was too small to measure.
If you think about it, a packraft actually pivots from a point around the middle of your swinging paddle, not from the stern, as it feels from the seat. The centre of mass behind the pivot point does make an unladen bow yaw more, but the stern will yaw too; just less and unnoticed.
Longer stern puts you more in the middle of the boat, like a kayak
One reason some packrafts may manage without a skeg is that way back in 2011 Alpacka invented the ingenious extended stern (right). It helped limit yawing much like a skeg, and effectively positioned the paddler more centrally, like a kayak, while also adding trim. This idea has been widely copied by just about everyone since and it definitely works, compared to the original dumpy Alpackas. But as mentioned, once there’s a good load over the bow, yawing is reduced in any packraft. Anfibio sell a detachable shallow skeg and glue-on patch for €21. My Rebel 2K came with a skeg and I must admit I use it most of the time now. But it does not have a fully extended stern like the Alpacka above right. Then again, my longer Nomad tracked great without the skeg.
Skeg on an MRS Nomad. Tbh, tracks great without itSkeg on an Anfibio 2K. Reduces yawing
Frontal skeg? Now I have a longer 2.8-m Anfibio Sigma TXL and I was curious to see if adding a frontal skeg would make a difference. Seated centrally or two-up, this boat does not yaw from the boat like an unloaded solo packraft, but it does wander a bit (track poorly), especially with the inflated floor pad). I decided a front skeg did not help much, though it might improve sailing.
When I decided to buy an IK back in 1998 there were not as many models available as today. And information about inflatables was very scarce. I intended to make multi-day trips with this boat, but the only paddler I had heard of doing so was the late Audrey Sutherland. In a Sea Kayaker magazine article she mentioned she paddled a 13-foot Semperit Forelle III for extended trips in Alaska. I wanted the same boat because it was obviously proven as a durable expedition craft by her many summer trips done there.
Doing some research on the Internet I also found a very convincing article by Marge Nichols. We got in touch by e-mail and she gave me valuable information about her Grabner Holiday, almost identical to the Forelle, but now manufactured by Grabner. The good news was that Grabner was a European company and they had a reseller in Paris so I could have a look at the boat before ordering one.
I wanted a boat that I could use for multi-day solo trips, and day trips in tandem with my wife, or for taking the kids around. The boat would be paddled mostly on the sea, wherever we would take it during our vacations. It would be transported by car, bus, train or plane. As we are living in an apartment in Paris, it would be stored in our small basement unit.
The boat itself is very well made and the material is very sturdy. It doesn’t take long to inflate up to 0.3 bars (4.5 psi); less time than installing the rudder. The aluminum tubes used for backrests look like crap compared to the hull, the rudder pedals or the rudder head. The plastic part of the backrest is attached with tiny screws that did not last long and I soon replaced them with bigger screws. The wooden rudder blade is tough but not very hydrodynamically profiled. I use the rudder in a following sea (backwind) to go straight, or in beam [side] winds as the rudder helps control drifting leeward.
Compared to my rigid sea kayak the H2 is a good 30% slower. But the main performance difference is that the H2 cannot be accelerated beyond 3 knots (3.4mph), while I can boost my rigid kayak beyond 5 knots (5.7mph) for a while if need be. In a following sea the H2 doesn’t surf without a steep wave. Paddling against a short wind-induced chop is a trudge as you can’t control it with hips and knees as in a SinK, it bobs like a cork on the waves, which is annoying if it lasts a few hours.
The 3.95 metre H2 floats high on the water. Even though this means more windage, it also means less water splashing in. It does take water so I always sit in a pond, but not to the point I need to bail, except after some hours being beaten by a rough chop. I was sometimes swamped by some dumping waves when paddling inside the impact zone along exposed shores but the boat didn’t sink and was still manoeuvrable. I just had to escape the impact zone then bail the cockpit.
Being 75 cm (29.5″) wide the H2 is very stable, even more when loaded down with gear, and I never felt I was on the verge of capsizing. Just in case I did some capsizing/re-entry exercises in deep water. It’s easier to get back on board using a looped rope hanging from the boat. The H2 is short and highly manoeuvrable. It turns on itself with a few paddle strokes. Draw strokes work very well and there is no need to edge it on its chine to make a sharp turn as with a hard shell sea kayak. This makes exploring caves and rock gardens easy. There are plenty of useless footrest adjustment fittings in the cockpit (left) and none for attaching gear. I bought some D-ring fittings from Grabner and glued them in the front on each inside of the bottom tubes. Drybags are maintained by shock cord and secured by a leash. In order to push the cylindrical bag further in the front, I deflate the deck. The dry bags buoyancy is enough to compensate for the loss of the front deck buoyancy. When I stop on the shore while the tide is ebbing, if I don’t want the boat to be grounded by the receding water, I install a mooring fore and aft. For achieving this I use two painters and a netbag (made of a piece of fishing net found while beachcombing). I fill the netbag with pebbles and secure it to the aft painter. I put the bag on the rear deck so that it falls in the water if I shake the boat. The fore painter is attached to a rock or a tree on the shore. I push the boat off. When the front painter pulls the boat back, the bag falls in the water and anchors the boat. When I want to get the boat back, I just pull on the front painter and the boat comes dragging the pebble bag. Then I haul in the bag with the aft painter, remove the pebbles, tidy the painters and we’re done. When the wind is offshore I just need the fore painter. Paddles I carry two identical two-piece paddles (one spare), 230cm long with narrow grp blades, Lendal GRP shaft made by Plasmor, #1 sea kayak manufacturer in France. When traveling by plane, I carry a Lendal Kinetic 4-piece split paddle. I use shorter paddles, 218cm, with my regular rigid sea kayaks. But the width and height of the sides of the H2 require longer paddles for reaching water.


