Author Archives: Chris S

Tested: Lowa Desert Elite boots for packrafting

lowaelitt

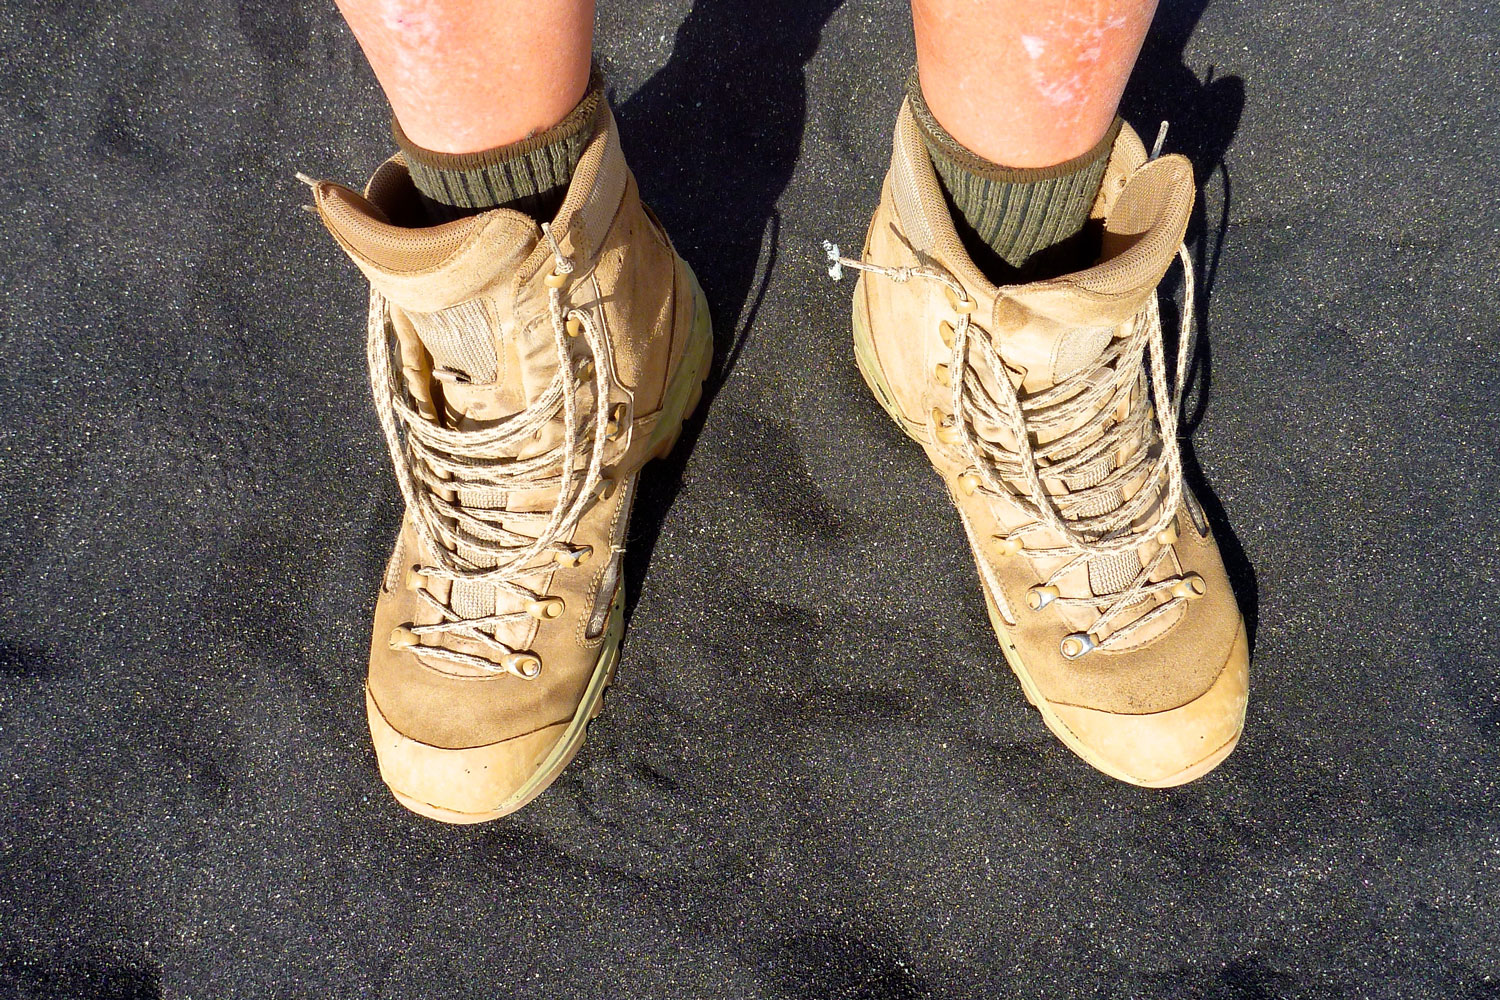
In a line Sturdy, inexpensive, no-membrane boot with rock-hard soles that are immune to sharp, stony trails.

Cost Rrp £175/$330. Got mine new for £70 off ebay uk and another pair for £20 used.

Weight 901g (10.5 UK) + 86g Sole insoles

Vibram

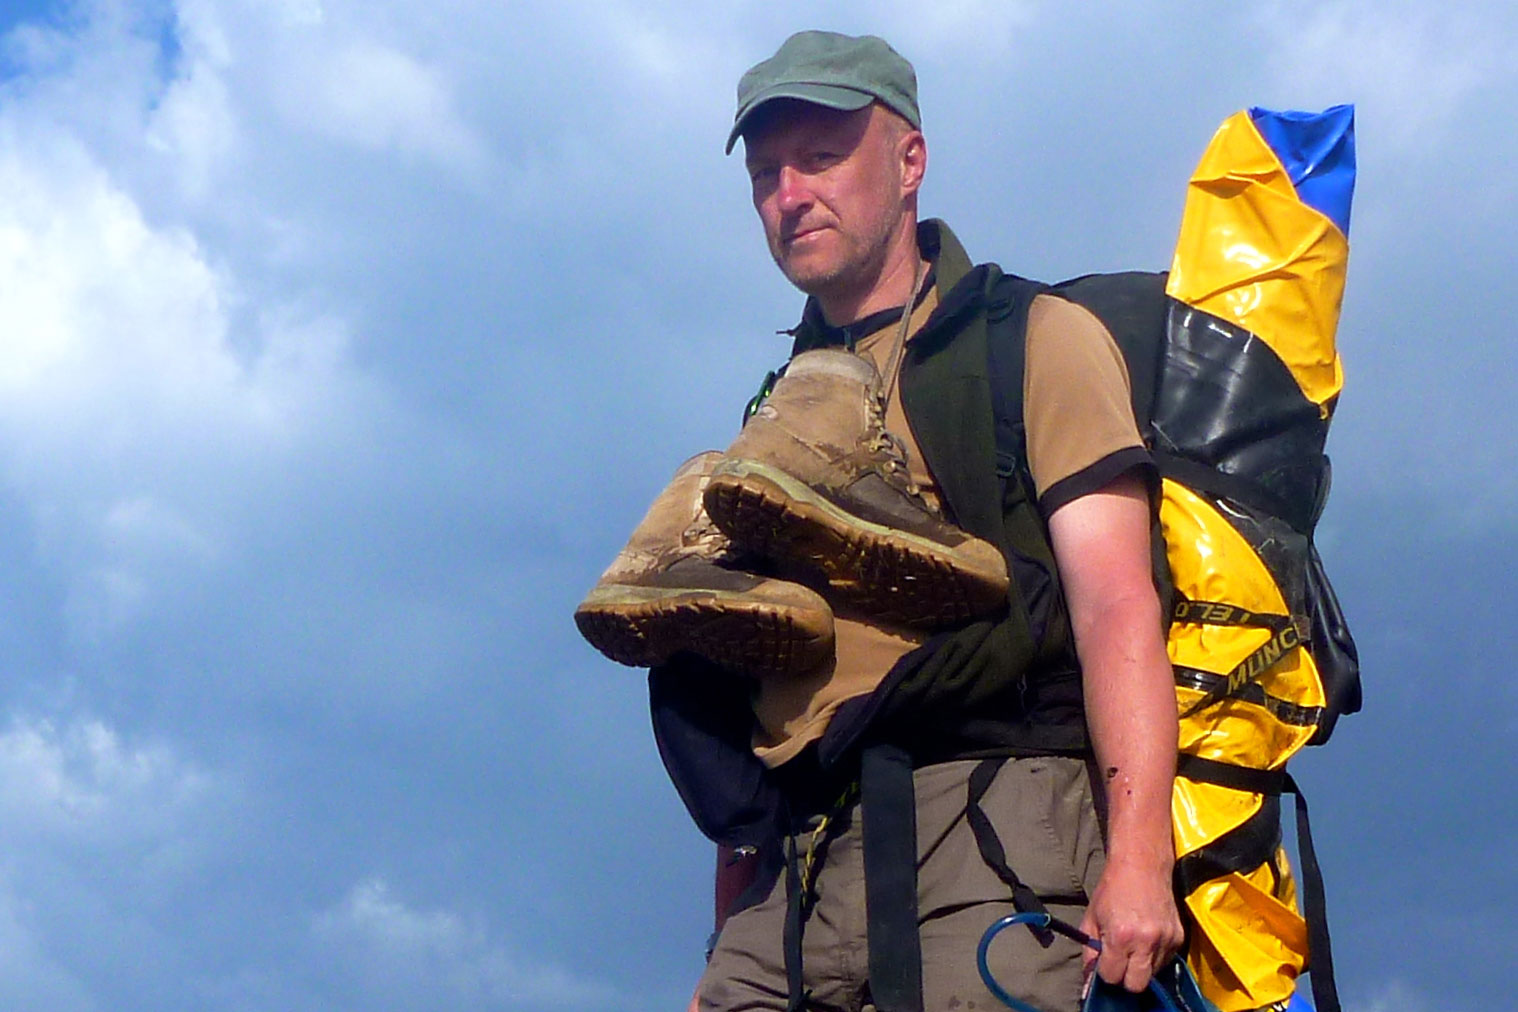
Available over half price new on eBay uk; round toe box avoids toe-mashing blisters; chunky, gimmick-free Vibram tread; no membrane so will dry quickly and won’t get hot; with heat-contoured Sole footbed these boots are as comfortable as you can expect for something with minimal padding taking 120-kilo loads.

Feel clompy, but then they are classified as a heavy-duty military boot; OE removable insole was truly rubbish; like an over-inflated moto tyre, the stiff sole (in an impact sense, not flex) tends to skate or roll off loose stones where softer soles would conform and grip. Can get painful on too much asphalt, but that could be my old feet.

snowshoe

Used for UK packrafting, motorbiking, days walks up to 15 miles, a two-week walk with packraft in SW Turkey and another two-weeker in Mauritania with camels.

After about a year’s use including the Turkish coast with my packraft, I think I’ve finally settled on some packrafting boots that are up to negotiating rough cross-country terrain but can also recover well from getting soaked.

lowaerlite

For ages I was looking among the mainstream boot makers in outdoor shops for something with a loose-stone proof sole but without a breathable membrane. To me this whole membrane business in boots is the biggest trick since Kaiser Soze convinced us he was a figment of our imagination. Once a boot goes in the water over the top (in Scotland it can happen) all the king’s Gore-Tex and all the king’s men won’t keep Humpty’s boots dry. In fact I think Gore-tex and the like will merely prolong the drying process even when the GTX membrane fails as it surely will in something as abused as a boot.

nrsparagon02
alt-berg

As the name suggests, the Elites are something all the major boot manufacturers in the US and Europe have been banging out since the invasion of Iraq. I don’t want you to think I flit around in camo-gear forever ‘checking my exits (well not since my teenage years) but you have to admit the best military gear is made to serve a purpose rather than look fashionable in a logo-over your-back-right shoulder kind of way. I did try some very similar Meindl Desert Fox boots and years ago (before the wars) had UK-bootmaker Alt-Berg sponsor me a custom desert boot (right) for an ambitious ride into the desert before these types of boots acquired military connotations.

ohsole

Significantly on this Turkish walk where I drank up to 3 litres a day and still got in parched, I never felt the compulsion to air off and cool down my feet at lunch time. I didn’t even think about it and when you consider the terrain, load and temps that’s quite a testament to all-day comfort.
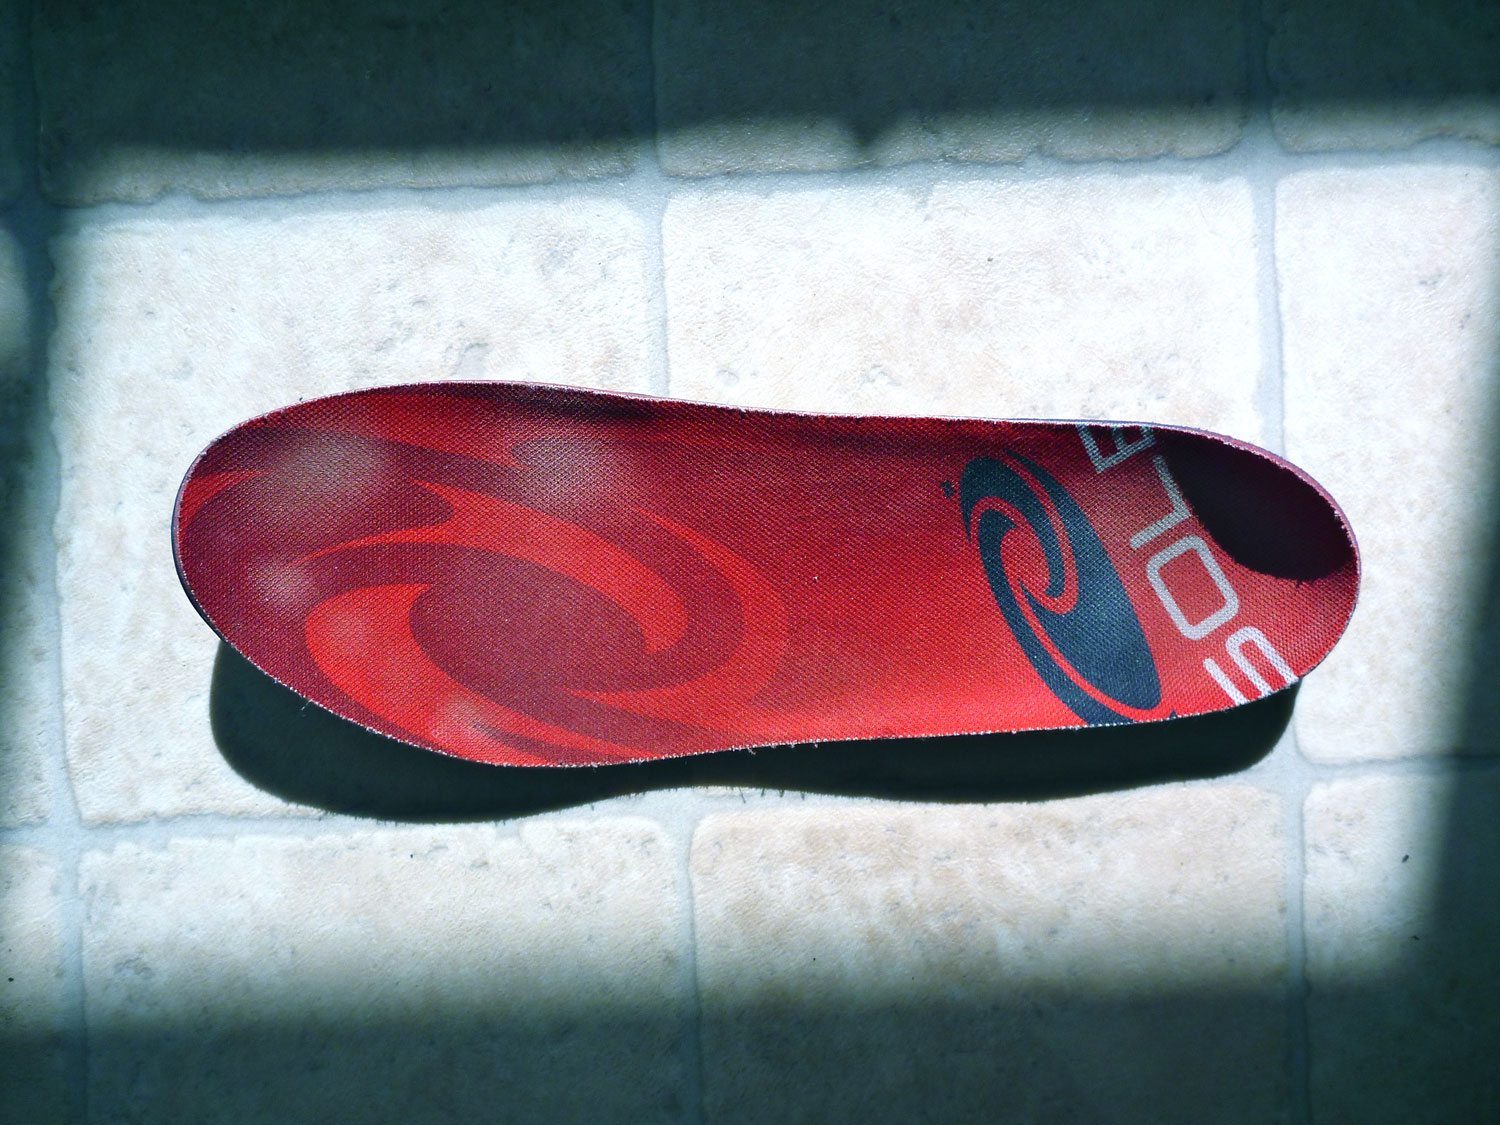
No other boot I’ve owned could have managed that, though I’m sure the gallingly expensive Sole heat-moulded footbeds (left) contributed greatly to that all-day comfort. With them and the inside of the boot’s sole there’s virtually no cushioning; all you have is what spring there is in your socks and the flesh on your feet. Sure it was good to take them off at the end of a long day, but then so it was with the pack and everything else I wore.

nrsparagon07

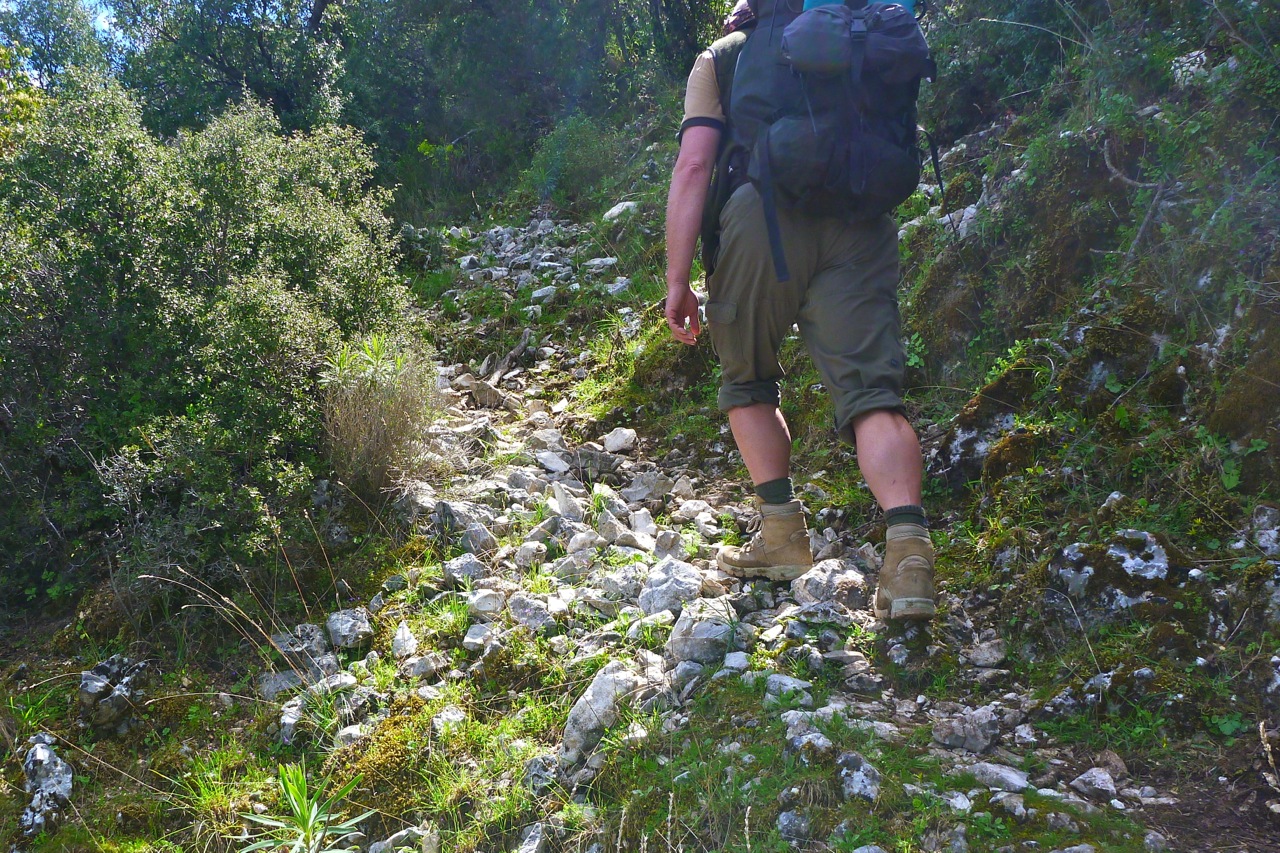
The only time my feet got into the red zone and I felt blisters coming on was while walking with another guy who moved pretty fast over the sharp, weathered rocks and loose stones which required full concentration and packstaff support. I kept up just, but it was an uncomfortable pace. Luckily I knew that afternoon would end for me with a paddle to the village. Next day I set of again in the boat across the lagoon and then resumed dawdling along at my own pace and my feet felt fine.

udb9

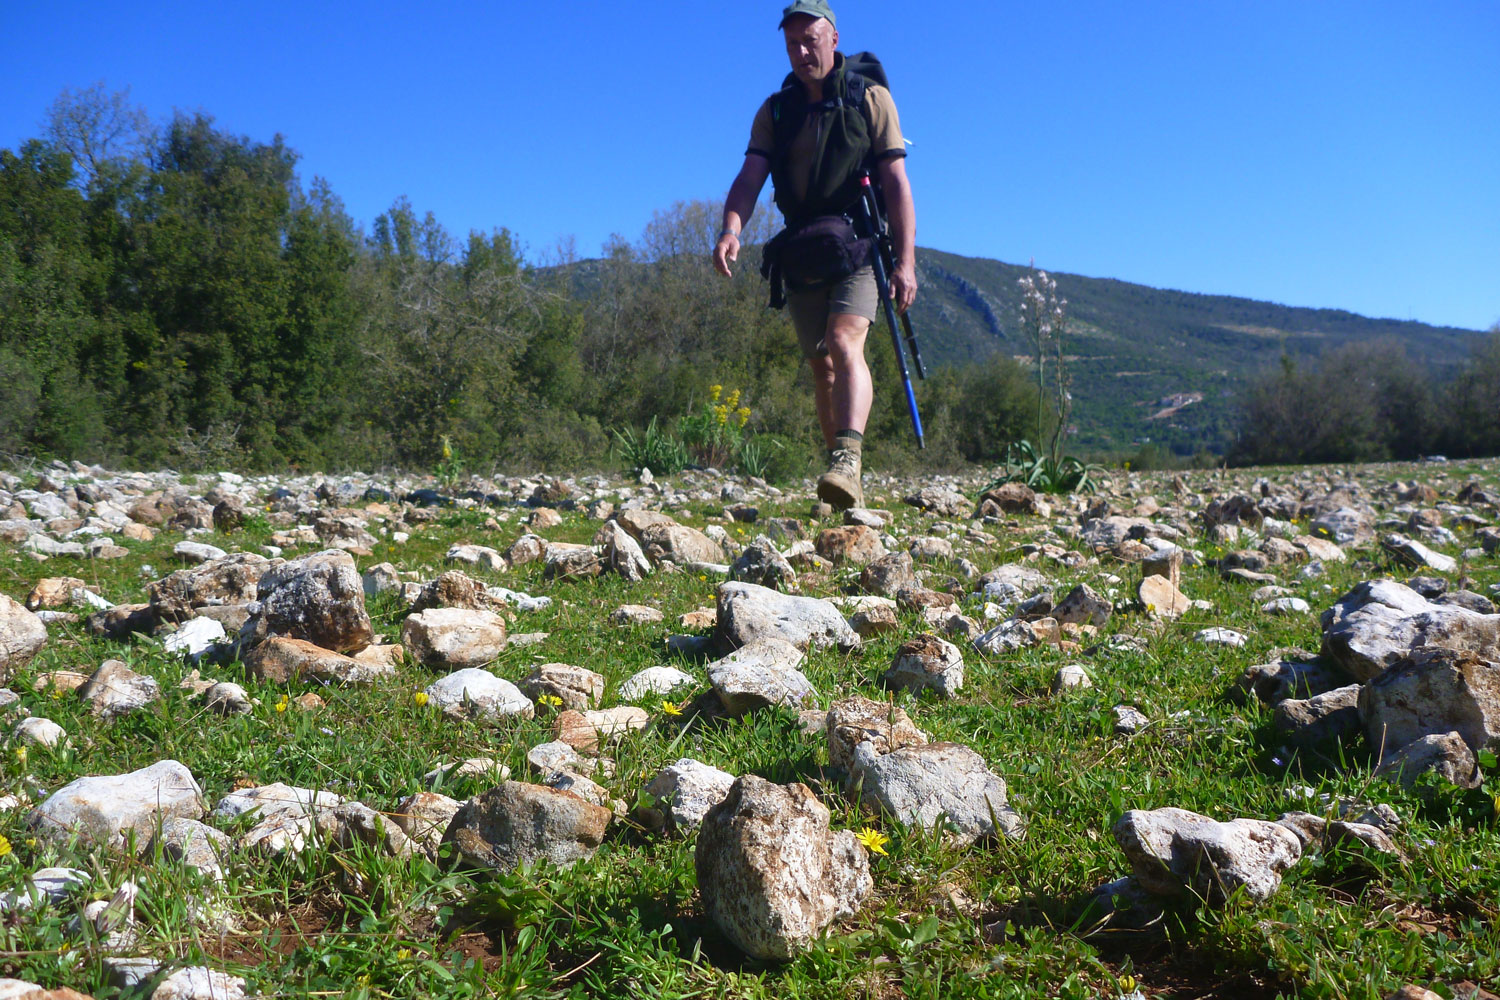
It’s not all rosy in the Lowa Elite squadron though. One problem I had with the boots was their tendency to skate on loose rocks and there were plenty of those on the Lycian Way. All walkers I met found the terrain challenging at times (trip report coming) but I must admit I lost confidence in my walking ability on some of the rubble-strewn coastal side slopes where thorny overgrown scrub often exacerbated the difficulties to force me off balance or to stoop. These stumbles set off old injuries in my legs which I usually manage. I couldn’t have managed without my packstaff (left). The fastest walkers I encountered were all using twin poles.

cwtsul31


The other time the boots showed their limits was on extended road walking when the balls of one foot would get sore, but again I put this down to an old broken foot which plays up at other times too, like with those Alt-Bergs back in 2003 when I was merely riding a bike. Slipping into something more comfortable like a pair of Doc Martins would have solved that and the unvarying plod of road walking is something many boot walkers dislike.
I suppose there can be no compromise: on the trail either your feet soles get mashed from the pummelling that soft boot soles transfer; or you’re walking in a pair of clogs immune to whatever’s underfoot. I slipped back once and fell forward twice in 200+ kms and had many more slips.

lowar

It would be great to have a trail shoe made on the same solid footbed as I suspect the whole boot ankle-support thing is something of a myth unless you’re carrying really heavy loads. If a few more stones get in then so be it – a shoe will be lighter and the foot cooler. But I suppose you could use the same ‘it’s an artificial aid’ argument for a packstaff.

lowaelit

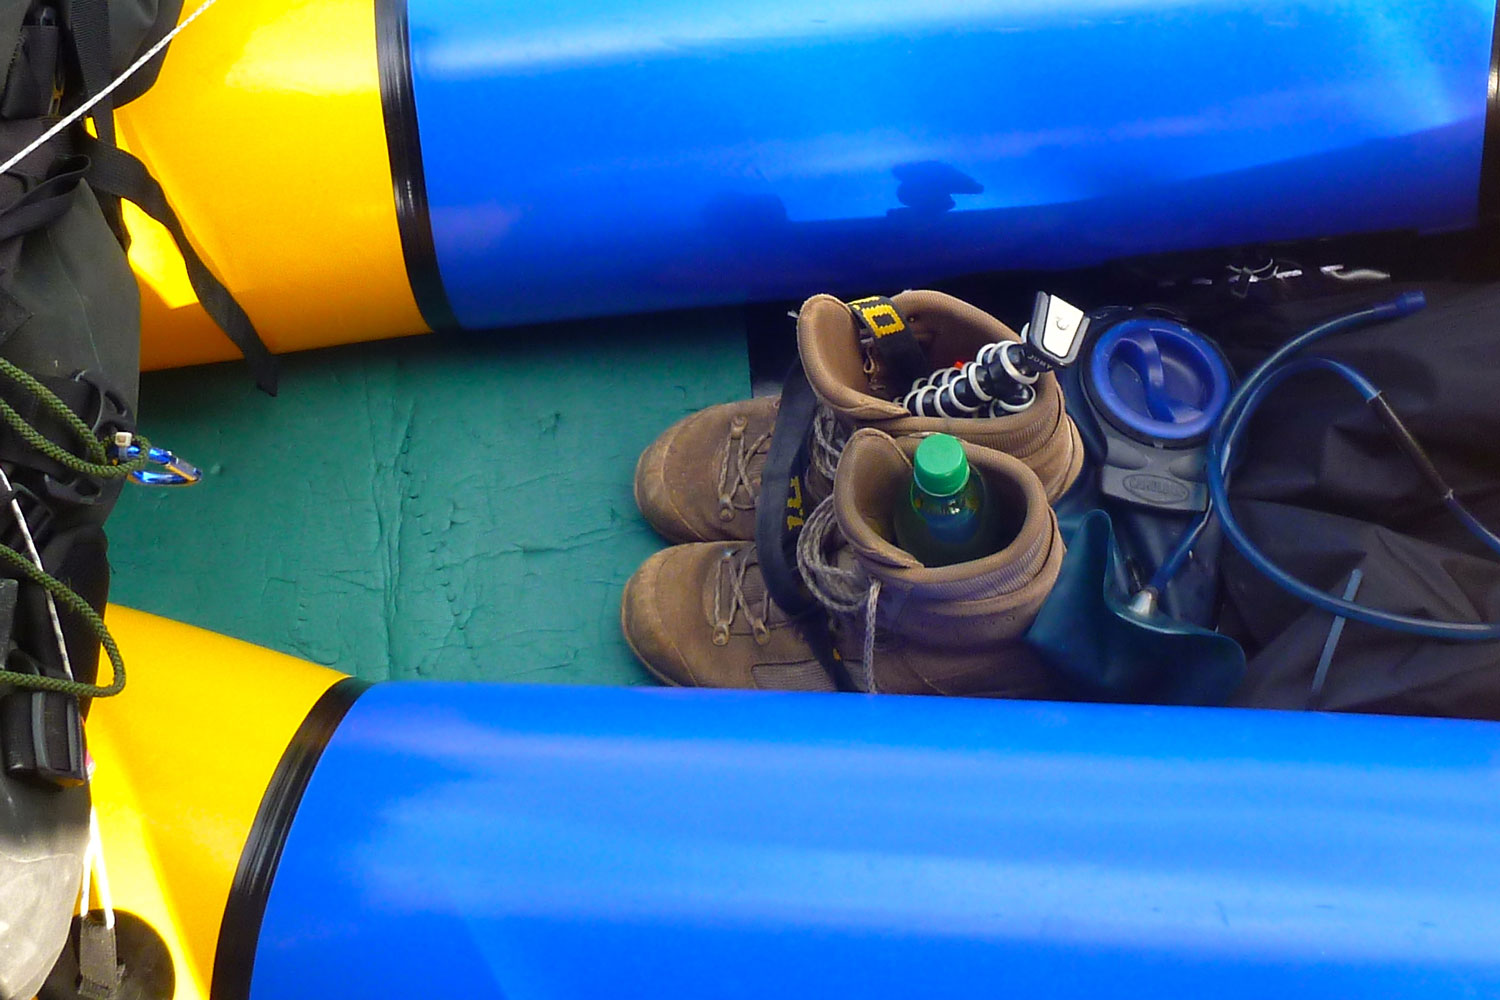
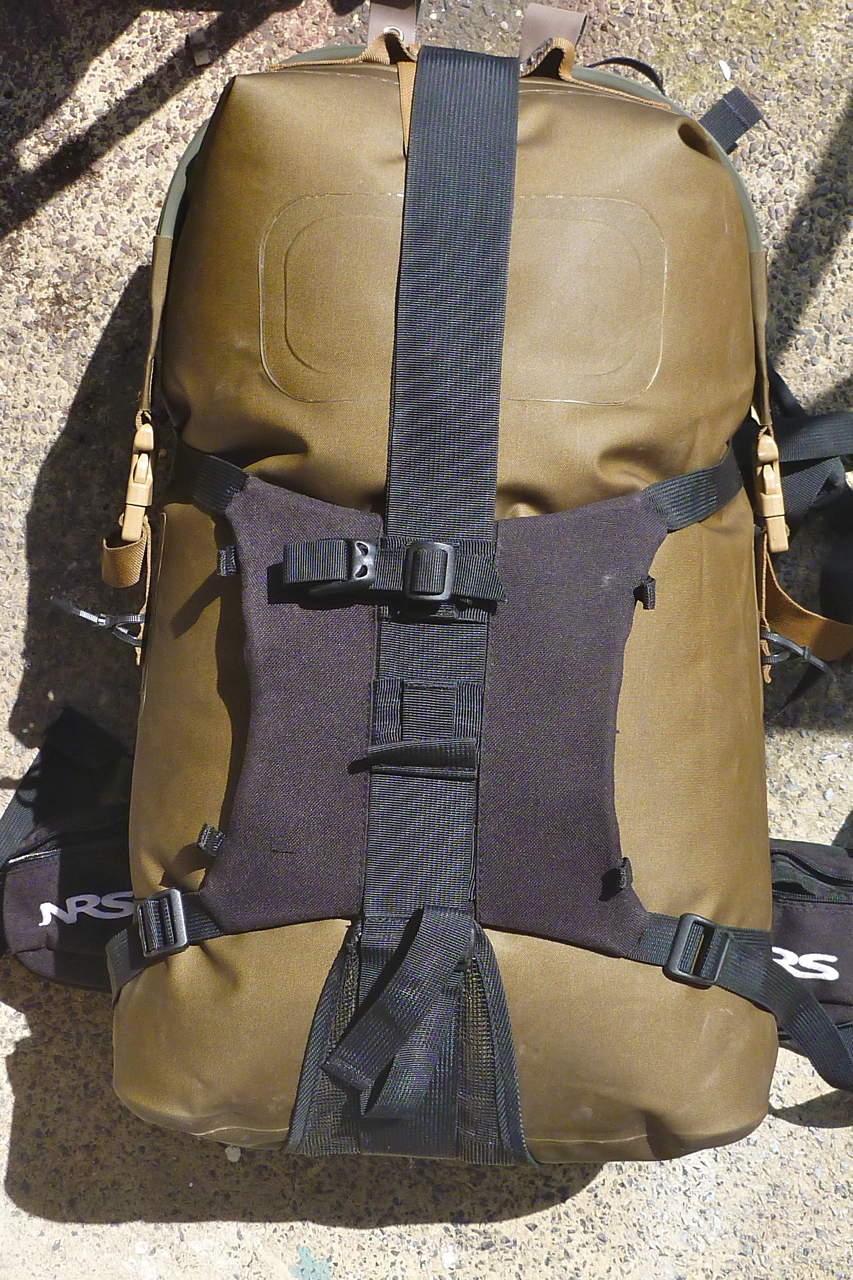
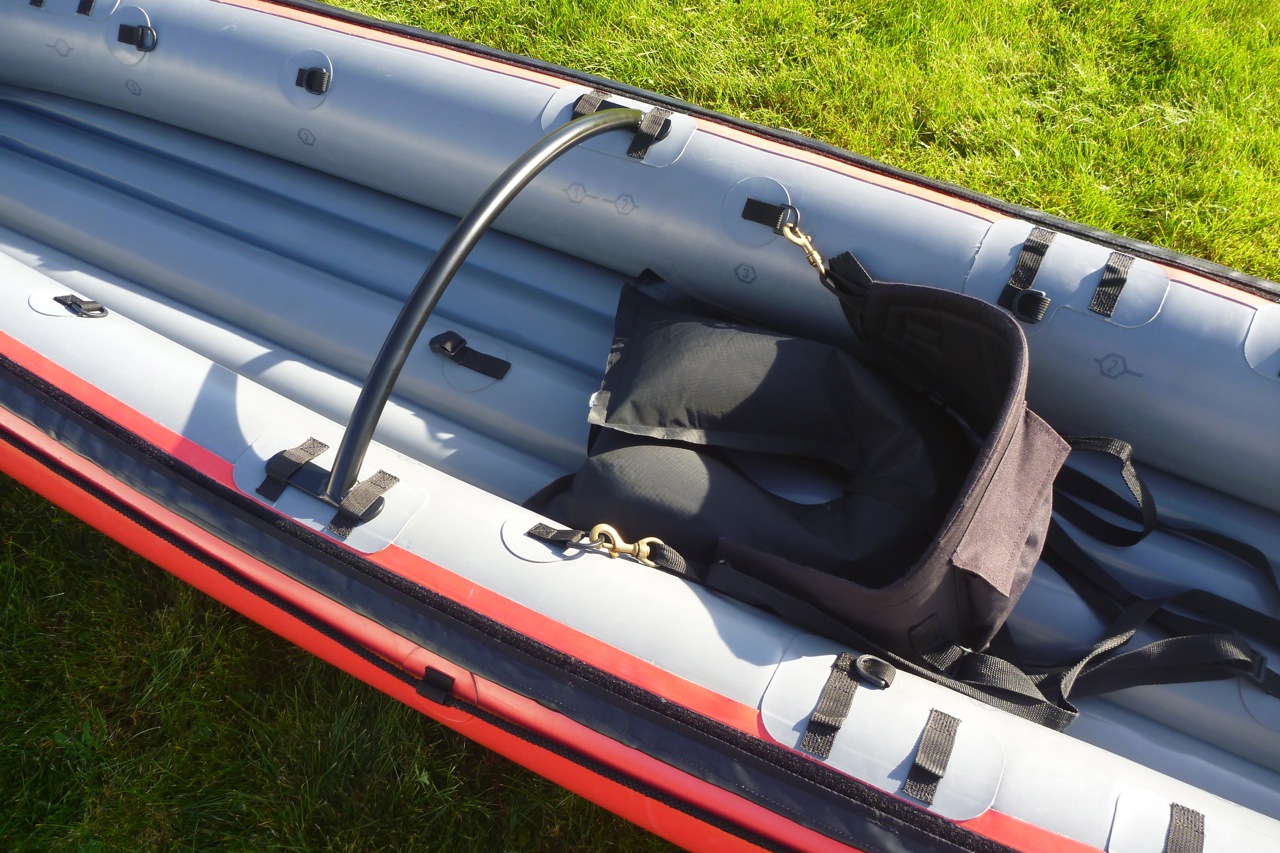
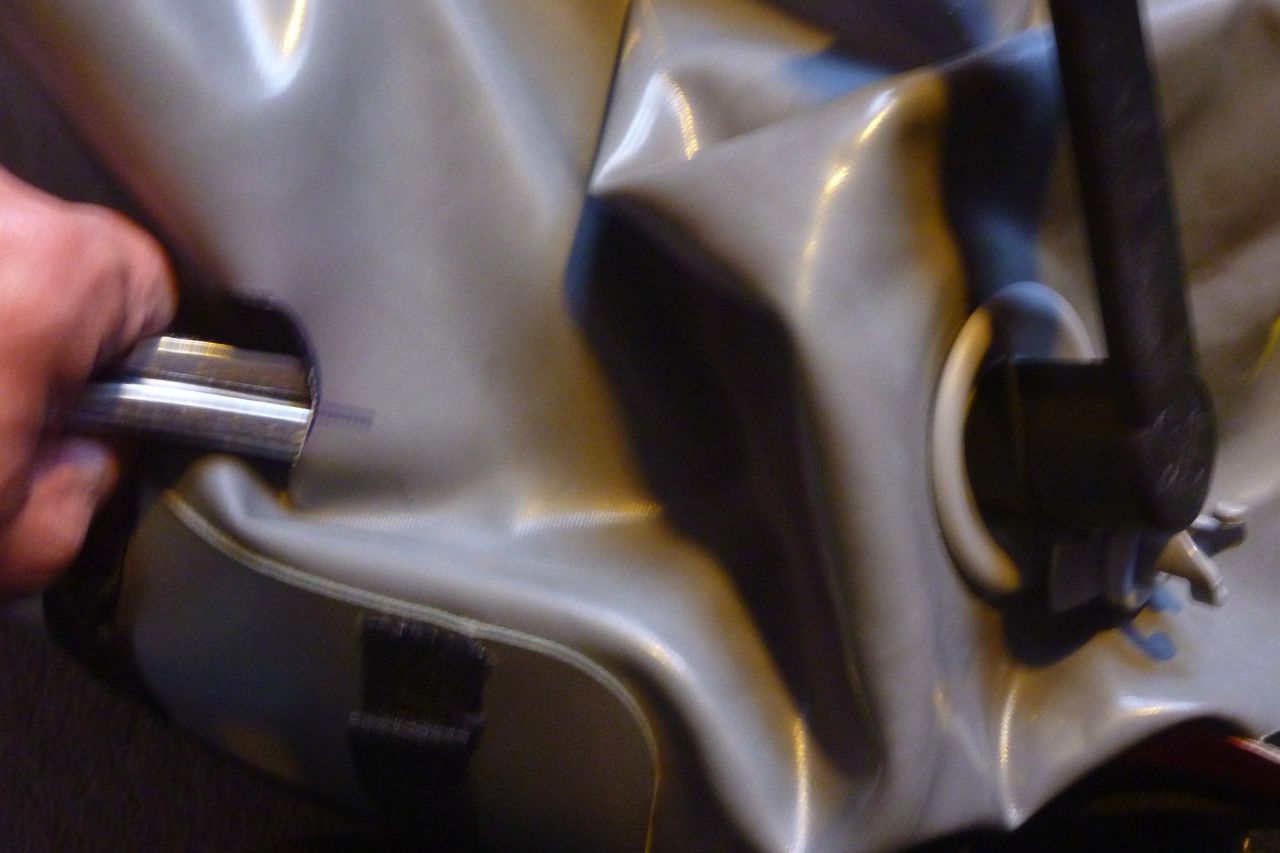
As for wet weather UK tramping I’m happy to use either SealSkinz membrane socks (while they last) or, to be honest just wear any old thick wool or whatever socks that keep the feet warm when wet. I don’t tend to get cold feet and don’t mind warm wet feet. In the packraft, to spare the boat and air the feet in Turkey I choose not to wear boots so stick them between my knees (right) where they make handy pods for a water bottle and the camera.

toe
randy

Damage report
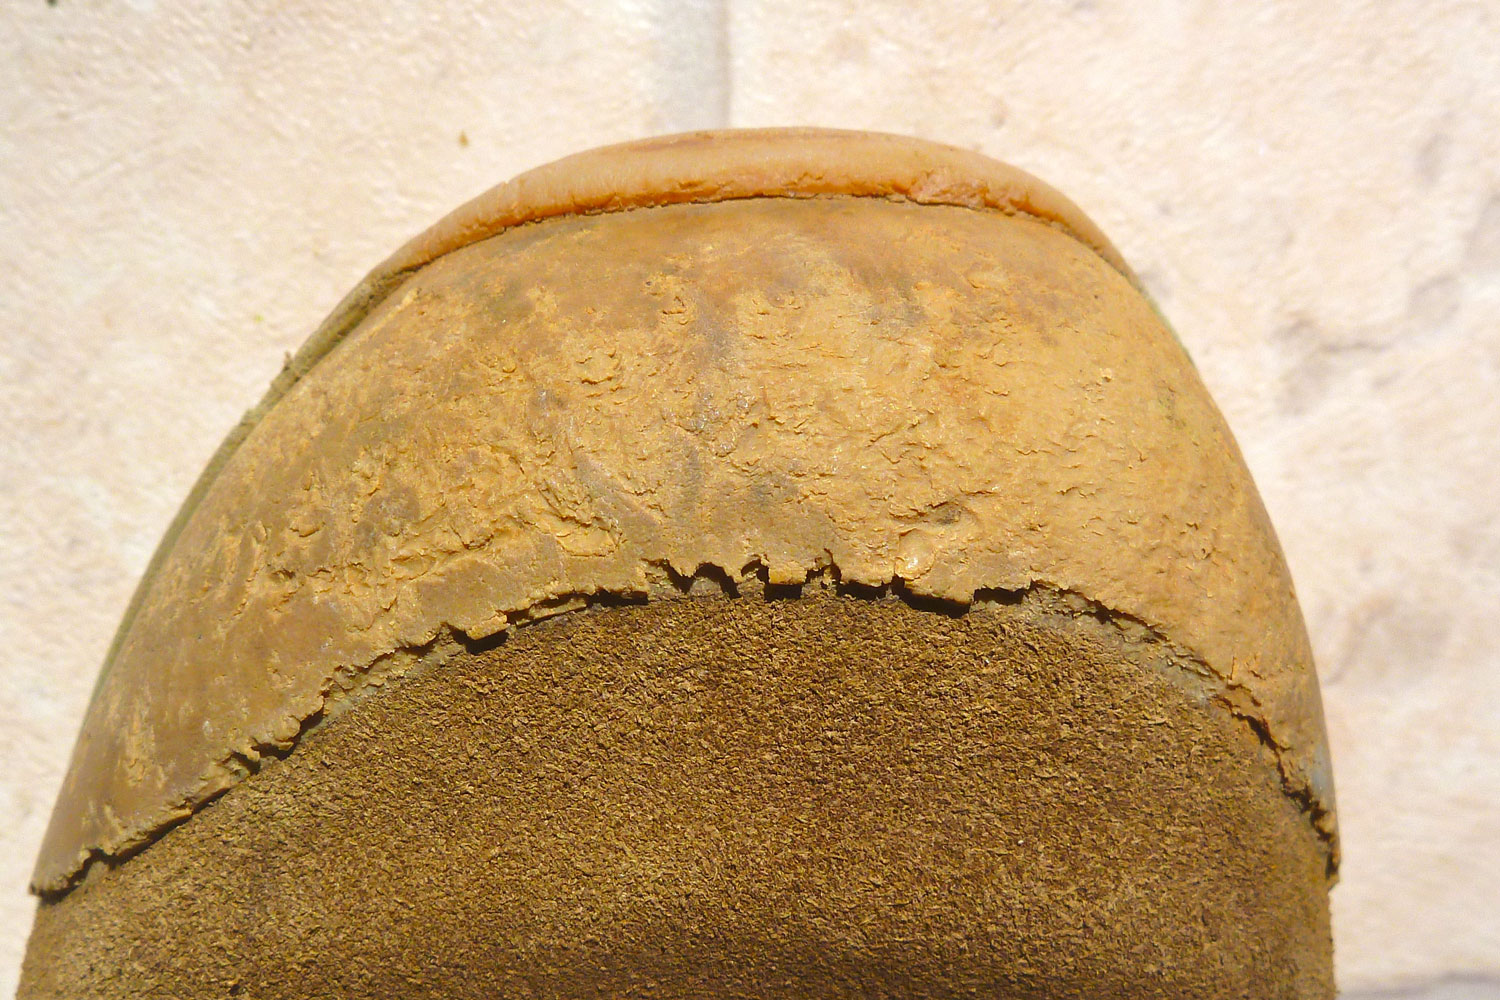
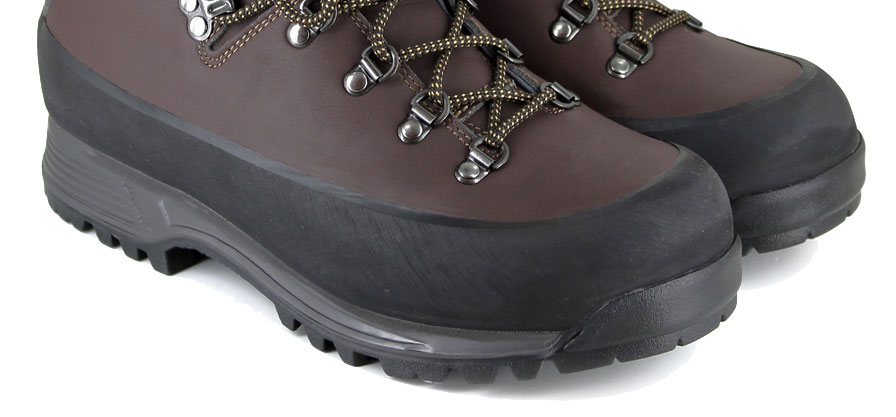
I’ve worn out a pair of regular outdoor shop shoes in one 12-day Sahara camel trek – and also ended up with my feet badly blistered. The Lowas handled the recent bashing much better. As you can see on the left the toe box got a hammering and one thing a desert boot could do with is a fat rand (right) to protect the stitching from stone damage. It’s not all sand dunes in the desert.

lowaelite2
lowaelite1

The fabric side panel threading on one boot is now missing a few stitches and the front of the sole was coming away from the toe too. But both those things ought to be easy to repair, with the sewing not risking damaging any futile membrane.
The paint has chipped off the lace D-rings or hooks (right). They’re also rusting a little, probably after wading in seawater. The set-back double-rivited D-ring has a pinch-locking cam in it to jam the lace in place, but the laces have shown no signs of wear.

lowaelite3

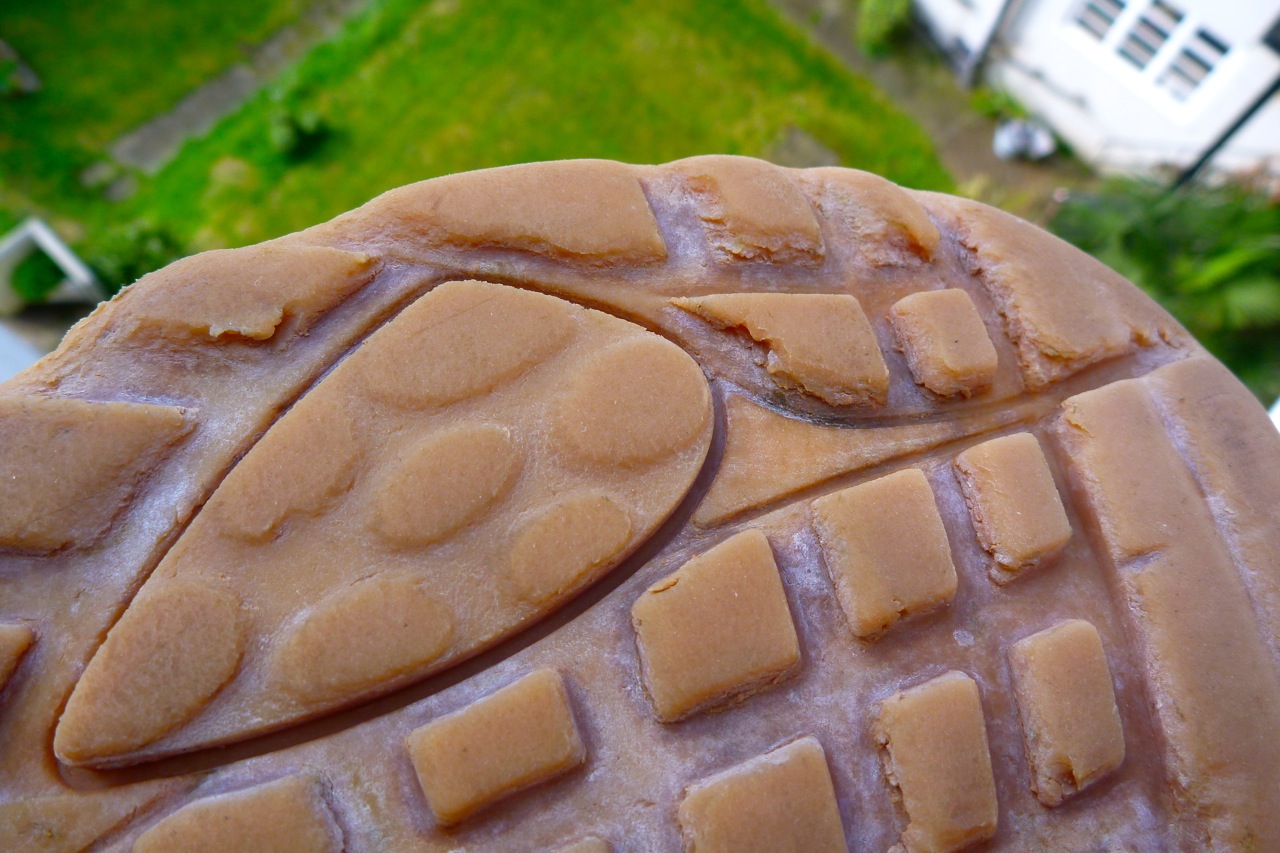
With a combined weight of some 120-kilos pressing on them the heavily lugged Vibram outsoles have lost their edge and are a little chewed up but have plenty of life left in them. On the Lycian Way I met people taking a day out to bus to a town in search of more rugged footwear, while others bathed their feet in salty lagoons in the hope they’d recover.

ice-281

To summarise: what makes these Lowas work for me is the round toe that suits my wide feet (extra wide version available, but rarely cheap on eBay); the quick-drying fully breathable uppers keep feet cool which I’m sure mitigates blistering; the solid outsole feels immune to sharp rocks while the Sole insole provides an anatomic footbed that’s customised to your actual foot shape. Plus they’re half the price or less than anything similar at Cotswold and all the rest. And I quite like the sandy colour – a scrub in the bath cleans them up nicely.

booter
lowaelitte

But these Middle Eastern wars may not go on forever so I just talked myself into buying a back-up pair, used but actually in better nick than mine are now, and for just £20. In 2020 there were still loads of near new Elites on Ebay for around £25.

Update 2018.
I used the Lowas alongside my Teva Omniums on a two-week camel trek in Mauritania (negligible load carried). Good to have a choice but, while a bit over the top, in the end the Lowas was the better do-it-all footwear for that trip. Flip-flops would have done around the camp to avoid the thorn menace and for an airing one can go barefoot in the dunes.

rimboots

I originally looked at jungle boots: similar membrane-free military footwear that’s designed for frequent soaking and drying. They feature minimal leather on the uppers, with Cordura nylon panels elsewhere, as well as instep drainage holes (left) like I bodged on previous shoes.
Jungle boots tend to be high to keep creepy crawlies out, but at least these sections are not stiff and so end up light. Left is the British-made Altberg jungle boot. Silverman’s illustrate both types of Altberg J-boots which cost around £170 and use ‘amfibio’ leather suited to being soaked. I took a chance and bought a used pair off ebay once. Very well made with a solid, rock-proof sole, but a couple hours’ walking proved they were a little too big for me. I’ve compromised on boots before and don’t want to make that mistake again.

Tested: NRS Paragon pack harness revıew

See also Tatonka Lastenkraxe

nrsparagon02

In a line Surprisingly effective and well-featured carry-all pack harness.

Cost $100 from NRS but no longer made. The Six Moon Flex Pak is similar and a bit more sophisticated. I’ll be testing one of those shortly.

Weight 1340g.

Capacity Vertical strap adjusts out to 1.96m; horizontal straps up to 1.8m. That’s a pack volume of some 200 litres but I imagine anything more than 25kg will be hard carrying. For that you’d want a Lastenkraxe.

paragonnrs

Features Padded hip belt with small zip pockets, chest strap, fully adjustable 3-belt pack harness, padded plastic backboard; ice axe loop; padded pouch with elasticated cord on the back.

Where used On a 200-km walk with packraft along SW Turkey’s Lycian Way. Walking in Umbria carrying a holdall. Day trips with packraft.

tik Q/d clips make getting to the pack easy.
More comfortable than you’d think
Fully adjustable
Capacity for bigger loads than you can probably lift. Pouches could easily be added to the side straps.

cros Zip pockets on hip belt too small and awkward to get to.
Not made anymore.
Padding a bit lean over a long day on rugged terrain.

What they [used to] say
The NRS Paragon Pack is the epitome of versatility. Rather than buying an entirely new dry bag, the Paragon™ Pack allows you to retrofit your existing bags into the ideal portage pack.

What’s wrong with a normal backpack?
It took me a long time to find NRS’s Paragon was just what I needed for travelling with a paddle in my pack. It then took another year to get round to testing it properly on a long walk with a small boat.
I admit a decent conventional backpack is better suited to walking long distances over rough terrain with heavy loads. I tried that on my first packrafting trip in Scotland, carrying a giant PVC drybag for my TNF Terra 65 while on the water. Although it’s not happened yet, the problem would be capsizing at which point the roll-top ‘drybag’ couldn’t be expected to seal for long. Because of that, everything inside that mattered needed its own drybag, neither of which would also last a prolonged immersion. All that bagging makes access a faff.

udb

Then in 2010 I got myself my still brilliant Watershed UDB – a 1.1-kilo, 96-litre holdall made from a bombproof fabric and with a chunky drysuit zip – that is drysuit-dry not roll-top ‘drybag’-dry.
I like my Mk1 UDB (also no longer made) because it’s a genuine immersion bag so doesn’t require back-up drybagging of the contents. Zip up the heavy seal and it’s as airtight as your pack boat and good to go. What’s more – especially on a packraft – a bag like this provides 96-litres of reassuring secondary buoyancy should my single-chamber packraft boat go flat on the water.

nrsparagon09

The UDB came with a rudimentary backpacking harness which, like the handles, were sewn to the bag. As we all know, a load-carrying backpack needs some kind of rigid frame or plate linking the waist belt and the shoulder straps so the weight can rest low on the hips, not hang high from the shoulders. When walking for days with typical 18-kilo loads, that makes a big difference to comfort and stability. The UDB’s token harness wasn’t designed for this and anyway, was poorly positioned on the bag.

lastenkraxe-black

As you can read here, I did the usual searches for ex-mil packframes and thought of cutting up a regular used backpack, but not before buying a Tatonka Lastenkraxe (left). That system, based on hunter’s L-frame packframes I’d seen in the US, can certainly carry a load but even with its huge padded straps and belts, at 2.7kg is a bit OTT and clanky for packraft travels. I think these sort of packframes are more suited to man-hauling very heavy loads or relatively easy terrain and then doubling up as a camp stool.

nrsparagon01

On the Trail
At Gatwick check-in the Paragon slipped easily inside my UDB, avoiding the problem of stray straps getting caught in conveyors or landing gear. At the other end, fitting it took 10 minutes and I was out of the airport on the 3-km walk to the nearest hotel.
I had concerns that the rigidity of the backboard (or ‘lumber support system’) wouldn’t be up to it, but of course once any pack is solidly strapped to a bendy board it can flex with the body but will maintain the rigid distance between the hip and shoulder belts. Only the strap mounting arrangements can come adrift under the load and for me, they didn’t.

nrsparagon04

My load was around 17-kilos + water and other bits in a small waist bag. That’s one flaw in running a UDB: there are no handy side- or mesh pockets to use, far less a slot to take a 3-litre water bladder. I was planning to rig something up between pack and harness but never got round to it. Early on, the Lycian Way was initially well provided with gushing springs, wells and cisterns meaning I could get by on just a half-litre bottle. Later, I needed another bottle but even then was often parched as the weather warmed up and usable cisterns got strung out.

Once something works OK I tend not to fiddle. I might have tried extending the back length to drive the weight more to the hips. The strap and back padding is not in the plush Lastenkraxe league. While I did have problems managing my balance on the gnarly and awkward coastal paths, in the end I can’t blame that on the Paragon, just the load, the terrain and me.

The lightweight NRS Paragon could easily take my current Seawave IK rolled up for short cross-country portages to and from the water. It will worked well with my other Watershed backpack – the 70-litre Westwater (left). Like the UDB, that bag came with rudimentary shoulder straps but became all the more useful and comfortable as a backpack once strapped to the Paragon. The pictures show a little more clearly how the pack wraps around a bag.

Now I know it works I may look into fitting fatter shoulder straps on the Paragon’s straps and other minor mods. Or maybe I’ll just leave it as it is.

nrsparagon06

Tested: Woodgas Stove Mk2 review

See also:

Honey Stove (wood burner)
Gimp Stove (solid fuel)

woodgastove07

In a line Lightweight air travel-friendly ‘burn anything’ woodstove that’s more efficient than an open fire.

Cost £50. (This unit was supplied free of charge by SBS for review).

Weight 276g in bag.

How used Boiling water on a two-week walk and paddle in southwest Turkey.

Good points Very light; operating knack soon acquired; in the right environment fuel is everywhere; quicker and more efficient that a pot on an open fire. Unlike gas or liquid cans, can carry on a plane without issues. Tatonka folding-handle mug just fits inside.

Bad points: Seems expensive at 50 quid; feels a bit flimsy; MkII pot support wires felt less secure for mugs than the feet on the Mk1 version (on ebay for under a tenner) but take much less space and are lighter; after a few uses my fuel tray ‘shrunk?’ and could slip through (explanation below). Wouldn’t be my first choice in damp UK conditions.

See also…

burners
msr-stowaway-open-2-z

Review: For this 200-km trip along the Mediterranean coast I was all set to just heat up water on small open fires until I remembered the Wild Stoves woodgas stove still sitting unused. The plan had been to use it on my Sahara camel treks but they off at the moment. Walking and paddling as much of the Lycian Way as I could manage in a fortnight would give me a chance to finally put the woodgas stove to the test.

woodgassing

As carrying compressed gas cans on a plane is considered bad form and quite possibly detectable these days, taking the woodgas stove avoided the need to track down a suitable gas can or other fuel in the small Turkish towns I’d pass through on the way to the trail head, as well as the tedious anxiety of making that fuel last. Who hasn’t ditched gas cans for a flight back home? On the right, comparative weights which shows that of the options available to me the woodgas stove was a good choice.

vkettle

I was only planning to boil water so did consider taking my proven Australian V-kettle (left) but its packed volume is about twice as much, it weighs 650g and anyway I wanted to try out the stove.
Gary at SBS sent some wax-impregnated paper firelighters as well as a suggestion that woodpine pellets as used in posher types of cat litter would be a good way to get the knack. I tracked down a 3-kilo bag at a garden centre for as many pounds and took a portion with, but once there found my pellets were small enough to fall through the stove’s fuel tray vents. A few fine twigs or dry leaves fixed that, but even then I’m not sure the cat litter I had made that much difference as there was plenty of very dry wood wherever I stopped. In the end I dumped the remaining cat litter to save weight.

woodgastove05

By chance my handy 450-mm Tatonka pot-cup just fitted inside the stove (right) making a slightly taller packed volume that still fitted in the bag, but giving the cup’s full volume in which to store stuff. That was all the cooking pot I needed for my water boiling needs. My stainless Tatonka perched rather unsteadily on the wire supports and soon acquired a glossy black varnish of burned pine sap. Apparently wiping some liquid soap on the cup will stop that forming or make it easy to scrub off.
If you want to cook rather than boil, Wild Stoves sell the stove with a 775-ml stainless-steel MSR Stowaway pot with clip down handle and lid (right). The stove fits neatly inside.

I hear a crude woodgas stove or something similar is easily made for a couple of concentric cans which is why some baulk at Wild’s £50 asking price. But it’s more than just vented a windshield on which to rest a pan which is more or less what a Trangia is. Like a Trangia or the linked home-made stove above, air feeds in from the base to feed the fuel tray’s twiggy charge – but once burning that charge then warms the double-walled sides of the woodgas stove’s combustion chamber, sucking up more air to create a secondary, hotter burn as it mixes with wood gas emitted by the burning charcoal developing below. Or something like that. It’s this  secondary burn  coming out of the vents just below the pot which makes a woodgas stove more efficient than simply putting it over a three-stone fire. And it’s certainly more in keeping with the keep-it-simple ethos than similar woodgas stoves which – hard to believe – resort to a battery powered fan to stoke the flames! That’s surely an admission that the design is flawed.

woodgastove15

woodgastove02

The scraps of Mediterranean scrub I readily found easily got a burn going. Kindling and the firelighter strips were another matter. As I got the hang of the stove with Gary’s detailed instructions to counter-intuitively put kindling on top as the stove burns downwards, I tried to use no artificial aids (short of rubbing two sticks together to make a flame). It’s always good to be prepared if you run out of waste paper, but I never quite got the hang of it. Maybe dead eucalyptus leaves doesn’t kindle as well as a handful of dry Saharan camel grass.

woodgastove12

So a bit of wax paper tucked into the top kindling of thin twigs (left) worked best to initiate a reliable, faff-free burn. At best the stove would be ‘on the gas’ in about 2 minutes. Orange flames would emerge in a ring from the top vents and soon my mug was making kettle-like noises. It probably took a bit longer than my mini butane gas burner with a good wind shield – or a well-packed v-kettle, but – besides benefits already mentioned – we’re talking a couple extra minutes to reach a boil. As long as it takes to prepare an ekmek and kaşir sandwich.

woodgastove17

All was going well until one chilly and overcast day up at 850m (right) when, with a long and high afternoon’s walk to go, I really needed the benefits of a quick hot pint of cuppa soup. I perched by a well on the edge of a village but for some reason the stove wouldn’t gas up. The fuel was as dry and brittle as dead wood can be. Was it the altitude, the cold, the wind, the wrong wood? Half my matches, several sheets of  wax paper and then pages from my guidebook went up until, determined to get a feed, I finally I got a lukewarm soup but lost over half a precious hour in the process.
Then I noticed the fuel tray resting low and unevenly inside the base housing. Turned out that presumably the heat had deformed the tray which was now a little smaller than the base tray’s rim support. Neither was especially oval from careless packing but the tray could now easily get displaced and so messed up the convection needed to make it all work. Knowing that to be the cause, next time I was careful while loading the fuel tray and had no more problems, even if some days getting on the gas took longer than others. I put that down to varying wood types and atmospheric anomalies.

woodgastove03

woodgastove04

The woodgas stove is a little more fiddly than a conventional upward-burning volcano kettle but of course a kettle is only a kettle. Making do with food and drink that only required hot water was fine with me on this trip (I spent most nights half-boarding in pensions), but a stove can of course cook proper food. Had I been doing more wild camping I know from previous experience that despite its convenience, freeze-dried ‘bag food’ gets galling after more than a few days.

It may not be my first choice up in the sodden, treeless far north of Scotland but I now know the woodgas stove is ideally suited to Mediterranean or sub-tropical conditions and means wherever I might land by plane, I’ll have a reliable cooking stove just as long as I can find something to burn in it.
I see Wild sell the usual ‘Kelly kettles’ with those redundant fuel trays plus chains and plugs and what not, as well as a smaller but similarly over-designed ‘SAS’ mKettle. How complicated does a v-kettle have to be? It would be great to see Wild add a light and simple v-kettle to their range, similar to the one-piece + lid version I use. It would sit well alongside their similarly basic but ingeniously functional woodgas stove.

Gumotex Seawave: Modifications and Improvements

Updated 2021 for Seawave 2

Seawave main page
MYO Seawave rudder

yalding

Grappling to get the boat out of the muddy Medway river at Yalding one time put a light scrape on the hull. It reminded me that, along with fitting PRVs to the sidetubes, another winter job was to fit a protective strake under the bow where most scraping occurs. Better to get the protection in early while the boat is newish.

straker
ami-poly

A 70 x 15cm Hypalon off-cut (close enough to Nitrilon) was 14 quid on ebay and once trimmed left enough for another strake or two. I had some Polymarine two-part adhesive (below) and glued the strip to the boat’s curved form with the floor inflated, even if that meant working the roller to press it all together was less effective. I then slathered some Seam Seal around the nose of the strake to protect it from unpeeling (less runny Aquaseal would have been better but a Seam Seal tube was open. More on glues here).

2021 Update A strake is a good idea but actually got hardly worn, so on Seawave 2 I just stuck on some Gorilla tape, maybe two layers, in the same place. Easily renewed/removed.

While the boat was filling the hallway and causing a hazard to domestic navigation I also bodged up a better system for the all-important footrest. A bit of inner tube now counter-tensions the footrest from the bow to keep it in position. It means the thing is now fully adjustable across a wide range of positions, can easily be fine-tuned from the water, removes in seconds for boat cleaning/drying and needed no extra fittings glued to the boat. Once great thing about the Seawave is the multitude of attachment points on the floor and sides.

2021 Update On Seawave 2 I just passed an adjustable sling through the tube and clipped it to the sides (left). Much simpler.

sw12

While on the river my aged Mk1 Alpacka U-seat base went flat, split right in the U. This seat is part of a lighter and comfier system I brought over from my Amigo – an improvement on the one-piece Seawave seats. It’s currently unfixed to the boat and the thin nylon must have ripped while yanking it into position on the river after getting back in. Again, I’m trying to avoid gluing extra D-rings to the hull – they’d limit seat base adjustment options anyway.

alpacka-seat

Better then to attach the seat base to the base of the backrest with a couple of zip ties. The whole backrest/seat base can then slide forward and back off the backrest side straps and it all unclips from the boat in less than 3.7 seconds. I glued up the punctured U-seat but it won’t last, so I’ve ordered MkII Alpacka seats (left) from Packrafting Store: €70 delivered for a pair. From Alpacka US the seats cost $25 but their auto-calculated international postage is nuts, let alone tax and VAT issues. These seats have the U filled in like a webbed foot: stronger and less floppy for just ~12g extra weight.

2021 Update. I’m using the same system on Seawave 2; a non-U packraft seatbase and a used backrest off a Bic SoT with a piece of stiff plastic board slotted inside.

I’ve also ditched my old my SoT thigh straps (left). Nicely padded and effective though they were, the brass spring connectors and padding made them feel heavy and bulky at ~720g.

Instead I got some non-padded Anfibio packrafting straps (they’re different now). With my biners they come in at 270g. The delta-straps dangling off the sides are a clever idea, designed to give a more direct pull when rolling a packraft for example. Can’t see myself doing that in any of my boats. Whether you’re rolling or just paddling, in rough water the more direct connection with the boat the better. I’m a big fan of these light but effective straps now. No need for paddling.

Fitting 4.8psi (0.33bar) PRVs to Seawave IK sidetubes

Seawave main page
General article covering PRVs
Unexplained Seawave failures ;-/
Testing unbranded PRVs
Servicing and troubleshooting PRVs

My Gumotex Seawave is a well spec’d IK for my sort of coast-hopping and occasional touring, especially as it was factory rated to run at a higher-than-usual 0.25bar or 3.6psi (Gumo normal is 0.2). That means greater rigidity which adds up to less longitudinal sag caused by paddler weight (who, me?!) . And of course a better g l i d e. My previous Amigo and Incept both ran an even higher 0.3 bar, and it’s said that this Gumotex can also be pushed to that sort of pressure on the side tubes without risking damage. Factory hull pressures are set on the conservative side to limit warranty claims.

Like all the Gumboats I’ve owned, the more vulnerable I-beam floor chamber has a factory-fitted PRV set at 0.25bar/3.6psi (confirmed below). PRVs are important here as if an IK gets hot (typically out of the water on a sunny day) internal air pressure can increase to the point where seams might rupture. If separation happens to an internal I-beam in the floor it will balloon up and becomes a very difficult repair. I would not meddle with the factory-set PRV on an I-beam floor.
As we all now know, the answer to I-beam floor limitations is drop-stitch technology – effectively zillions on ‘I-beams’ spreading the load over the entire area which enables much higher pressures.

In a discussion with a French Gumtexer, he suggested that Gumotex use the same orange dot  0.243 PRVs in all their boats, irrespective of the stated official rating which is either ‘0.2’ like most – or ‘0.25’ on the Seawave. He sent me a photo of his 2016 Palava floor PRV (left) – orangey-pink, same as my Seawave and classified by Ceredi as 0.243.
Officially the Palava is a ‘normal pressure’ 0.2 bar canoe. Upshot? Your Gumboat’s floor may be rated at higher pressure than you think or is officially stated. You’d assume then that the tubed sides can easily handle at least as much pressure. Then again, in the table below, Ceredi state the orange PRV  will open between 0.21 and 0.243 so perhaps 0.21 it is and we all just need to calm down a bit.

Guatemala, Fuego volcano, Strombolian eruption

PRVs use springs set to purge air before pressures reach structure-damaging levels. Then again, my Amigo had no PRVs at all so you assume Grabner were confident their floor construction was solid enough to handle occasional neglect. But I’ve been caught out before and always try to ensure a boat remains in the cooling water when moored up on hot days – even getting up to splash the sides as they tighten up like a drum.

cerediprv

Like most IKs with single side tubes, my Seawave had no PRVs as the tubular profile can handle higher pressures better than the flat, ‘lilo’ floor. However, if you’re planning to run them over-pressure as I am suggesting, that could be risky.
The answer: fit PRVs in the side tubes – just like my old twin side tube Incept. That way you can safely leave you IK out of the water in the tropics, go and hike up a volcano (which might be described as ‘the planet’s PRVs’) knowing that all three chambers will harmlessly purge any excess pressure. Sure, when it all cools again back in the water the boat may be saggy, but better a quick top up with your K-Pump than pulling bits of shredded Nitrilon out of the palm trees.
Ideally I was looking for a PRV set at a reasonable 33.33% over the factory figure of 0.25 bar – i.e.: something around 0.33 bar or 4.8psi.

prvcolours
I admit that the colours look pretty close but it’s pinky-orange for the OE floor and red for my 0.33s

Well-known IK valve-makers Leafield and Halkey didn’t make anything matching my needs (or don’t sell to individuals). The Seawave’s valves are stamped ‘Ceredi Italy’ and once I managed to track them down online, I saw the same Ceredi 6600 PRV series came in options including Red 4.78 psi or 0.33 bar, (above right). In the UK they were a special order via IBS and cost £35 a pair posted.

Before you get too excited, scroll down to the bottom and read Nikola’s PRV nozzle idea.

Ceredi prices too steep for you? On eBay I bought unbranded ‘4psi‘ PRVs from China for about £4 a shot and delivered in less than 2 weeks.
Note these are smaller than your Ceredi and require only a 25mm hole. The back nut will easily fit through the inflation valve hole, once you remove that.
I pressure-tested the valves I received and they stood up to the claim: more here.
Search eBay: ‘Air Safety Release Valve Kayak’.

As you can read from Adam’s comment below, there is – or more probably was – a super valve which combined both inflation and pressure-release duties which means you simply replace the stock inflation-only valve. No need for extra holes to be cut. His link no longer works but I tracked it down to here; the Bravo Super Valve – that’s Bravo as in the Italian branded Chinese-made pumps we all know and love. But there is no mention of a super valve on their valve page anymore, nor in their catalog.


Fitting the Ceredi red dot PRVs

grabtool

Tools and time needed
• Gumotex push-push valve removing tool (fits Ceredi PRVs also). Right;  £12 on ebay

• Narrow-bladed knife or scalpel
• Water pump/lock channel pliers
• 30-60 mins

Short version
• First, remove the side chamber’s inflation valve with the tool. They can be extremely stiff. If you can’t undo it, maybe think twice before going ahead. Or try silicon spray grease of 303 protectorate to lube

• Choose your spot, mark and then cut a 37mm hole in each side chamber. The Ceredi-suggested 35mm was not enough. Or fit the smaller, unbranded mini PRV (~25mm hole); see above.
• Squeeze the PRV’s threaded back collar through the bigger inflation-valve hole, shuffle it over to the new PRV hole and loosely screw on the external part of the PRV by hand
• Reassemble the inflation valve and tighten both valves with the tool
• Fit push-on caps to the PRVs
• Pump up and check for leaks. Maybe retighten some valves with the tool

Read this Interesting post

prvvs.jpg
Hadron

Long version
I chose to fit the PRVs close to the inflation valves and at about the same level. There are mysterious markings on the inside of the Seawave to aid symmetrical positioning (Pic 2, below). I used a narrow-bladed knife and of course took care to gather up the hull skin so I wouldn’t inadvertently puncture the other side of the side tube. 
I assumed the 35mm hole would be big enough to take the back nut. When it wasn’t I was a bit flummoxed. Now I had a gaping hole in my boat, but no way of getting the back of the PRV inside the boat without performing a Caesarian on my Seawave. Luckily two brain cells dropped into my Hadron Collider and it occurred to me that once removed, the nearby main inflation valve’s hole might be bigger. And it was – just.
One stock push-push valve was extremely hard to undo. I wondered if it had been glued in or that the plastic valve removal tool would snap (you can buy a metal one for loads more). When the other side undid with less effort I knew it had to be possible.

Another problem is that the internal collar or nut is only 10cm deep (pic 4, below) and so was hard to grab through the hull fabric. Until I realised this, I was grabbing the inside part of the outer valve body which screws through the collar from the outside. Trying to ‘unscrew’ the valve body from itself is like trying to pull you head off – eventually the valve tool would break. Another ‘Higgs boson’ moment came over me and I realised that by chance the two valve holes were close enough for me to get some water-pump pliers in there, grab the back collar and finish the job (pic 6, below). After that, no more problems.
One thing I noticed while doing all this was the unseen protective patch on the inside of the hull opposite the inflation valves to limit wear and rubbing between valve body and hull when the boat’s delated. Nice touch, Gumotex ;-)

I did all the valves up as hard as possible with tool and hand, and in four more years had no problems. On a hot day in the sun I can hear the high-pressure side PRVs hissing away. The gallery below shows the job in chronological order.

Now it’ll be good know that should I doze off as the tide ebbs away, I won’t be rudely woken by an exploding boat. Another side benefit of doing this is that you’ll never need to use a manometer (pressure gauge) again. You simply pump up all three chambers until they hiss and you know they are at full operating pressure.

smoko

Nikola’s PRV nozzle idea
In the comments below you will see Nikola suggesting the idea of using capped off PRV nozzles you’d usually fit to the end of your inflation pump hose to fill up a boat to the correct pressure without referring to a manometer. The integrated PRV in the nozzle purges at a given pressure. No scalpels required.
You will need to block off the open end where the pump hose attaches. The €13 red Ceredi ones he found (left) are rated at more or less the same pressures as a Seawave: 0.25 bar/3.5 psi. I think if I was running a Seawave in a hot country I’d definitely fit some to protect (or not have to worry about) the sidetubes.
It might even be possible to adjust the spring inside the Ceredis (beneath the vented cap) to get a bit more pressure before they open, getting closer to the red-dot in-hull Ceredi PRVs I fitted of Seawave 1. Or fit the similar black Grabner inflation relief valve which is rated at a more promising 0.3 bar, but, like everything Grabner, is double the price of the Ceredis.

Seawave: windy test run with deck

Seawave main page
swv1

The new boat had to get christened in what they call a ‘fresh breeze’. It was only going to get windier over the next few days. Either that or it would stay rolled up till the new year.
I went to freshwater Loch Ra round the back where I took my packraft for a ‘gale test‘ one time. It’s a safe place for this sort of thing. My new wind gauge – a tenner on ebay – was reading a moderate 15 mph, but it felt like more. I do wonder about the accuracy of that thing. Turns out Ardmair near Ullapool was registering a solid 25 with a spike up to 35 around the time I was out. So let’s call it at least 20 mph – not really IK weather.

footard

I pumped the sides up to about 0.33 bar (4.8psi) and jury-rigged a quick footrest stirrup, but under the deck it was hard to line up quickly when you’re getting in while being blown around. I have a better idea to counter-tension it into position from the other end with an elastic (left). That, or copy the Amigo set up with D-rings – less straps cluttering up the floor that way.

seawave2dek


Used to hoping effortlessly into open boats and setting off whatever the conditions, the need to negotiate the deck made getting in all the more awkward – though a grounding skeg is also a factor. With an onshore wind, I figured out a nose-to-the-shore angle but had the paddle blown out of my hands just as I was slotted in. I retrieved it and tried again using those nifty deck elastics for the stick, then backed up and swung into the wind.

As expected progress was slow until I found a rhythm, and then just very effortful – like hauling a head hose uphill. The Seawave’s more rounded hull means it’s a little more tippy than the mattress-flat Amigo, but in a good way. I never thought I’d write that line, but a little rolling means side waves need not push you over if you counter brace, though I can’t say the Amigo riding side waves flat like a raft was ever a problem. If it didn’t tilt with the waves water would pour over the sides. With the Seawave’s deck, lateral sea waves need not deck the Seawave.

Before I got too far out I checked to see I felt in control across the wind. It was blowing so hard I only needed to paddle on one side to go straight, but no stability worries. Then downwind with no untoward weathercocking either, all things considered. Further out on the small loch the fetch flattened a bit but another side-to-the-wind run saw the long boat extremely hard to bring back into the wind. A rudder would be handy, or maybe more aggressive leaning or my weight further back. It felt like my position was a bit too far forward to lever the bow round while the wind pushed on me and the sides. Not sure if that makes actual hydrodynamic sense, but without knowing the Seawave’s normal seat position, there’s certainly room to move my seat back in the cockpit a few inches to see if it makes a difference: more ‘rudder effect’ with a rearward paddler. This animated gif on the right shows the seat about 4 inches further back. Of course these were conditions where you’d expect a long, unloaded, over-buoyant IK to handle like a drifting log.

swv-speeds


Upwind it felt like I was crawling along but I got to an island faster than expected, got beached then carefully inched around it. As I knew well, a backwind may be less effort but can be as hard if you can’t keep the back of the boat from coming round – a common flaw with wind-prone IKs. But the Seawave tracked pretty well, right on- and then just off the wind, with only the occasional double pull on one side to level up. I did a bit more crosswind practice but by now I was pooped and even needed to drink out of the loch. Any hope of more tests without the skeg, without deck, at factory pressures and so on would all have to wait.

Back home the GPS showed up some surprises. Into the wind I was hacking at a surprising 3mph, across it at 4 and downwind at up to 5mph. All much more than it felt. I’m pretty sure the Incept would have managed the same – and it was less effort than in the Amigo.

Gumotex Seawave main page

 
pagemoved
Seawave main page

Paddling a Blood Moon

moons

As the seasons change and the days shrink, the weather seems to flip from one extreme to the other. A few nights ago it was howling from the east at over 60mph and began to sound a little scary in our exposed cottage. We’ve had 60 a few weeks ago but from the prevailing southwest. I have a theory that a less usual easterly gale is noisier because it blows against the wind-bent vegetation. I got up at 5am to check things out and found the bike blown over, even though it was hard against a wall. The kayak – that was gone, but being red I knew it would be easy enough to find in the daylight. Turns out it was nestling in a ditch not far away.

I’ve pondered on similar sound theories about high water on a spring tide. Assuming it’s not all drowned by the wind and waves, there’s a certain rushing and gurgling sound I’m not sure I’ve heard at other times. Again, I could only explain it by weathering: the higher and so less smoothed down parts of the rocky seashore are responding noisily to their fortnightly lapping. Sadly, a recent communiqué from Stockholm informs me that neither theory will be shortlisted for a Nobel Prize.

mooner

There’s also been talk of a blood moon lately. Not a theory but an astronomically accredited rosy-orange glow brought on by the fuzzy edge of the earth’s shadow. Though the recent one wasn’t visible in the UK as it was earlier this year, with the current calm conditions I figured a moonlight paddle would make a novel experience.
On the beach about 8pm, the moon was just rising over Suilven to the northeast. An hour before high water, geometrically, the idea of the moon ‘pulling’ the water in towards it made perfect sense. And blow me down if it didn’t have an orangey hue (not caught by my camera), though I realise that’s just because it was rising.

moonai

Out on the water in the dark I thought it might be unnerving – part of this idea was a bit of a dare. But if anything it was all rather magical. For once the boat remained perfect still as I tried to take some pictures and just as the thought – ‘I wonder if there’s any phosphorescence [sic]’ – passed through my head, the bow and paddle blades revealed a light twinkling in their wake that definitely wasn’t reflected moonlight. Taking a picture was impossible, though later I did notice it didn’t require agitating the water to see luminescent entities darting about. In fact the correct word is bioluminescence. Is it an ordinary phenomenon up here? Do tides, moon, season and temperatures have any influence? Who knows.

The low moon reflecting on Badentarbet Bay reminded me of a bogus tourist event they have in Broome, northwestern Australia. A low tides the moon rising over the mudflats of Roebuck Bay creates a very similar stepped effect, all the excuse they need to add it to their packed events calendar and run a New Age-y beach market. It’s bogus because it not unique to Broome or anywhere, and in my guidebook writing days out there, my bullshit antennae had to remain tuned to a high pitch. Broome is a lovely spot and has many genuinely unique attractions, but you’ll see the same lunar effect 600km down the road in Port Hedland. And anyone who knows the difference between PH and Broome will understand why PH don’t crow about their staircase too much.
As the tide topped out I was really rather cozy, wrapped up in my Anfibio drysuit and Gul fleece onesie – floating but not drifting between the moon and the stars and whatever was glittering below. This might be one of my last paddles in the Grabner and a new boat is on its way. I hope get a chance to take it for a spin before we migrate back south

Gumotex Framura

See also
Gumotex Aurion

framura

Even with the Rush models for 2020, Gumotex still claim their Framura IK is their fastest boat. For coastal ‘yaking the numbers certainly look great:
16kg + 4.1m x 75cm wide

That’s 29.5″ and about as wide as you’d want to be in a proper IK. I see that in France it’s homologated for use as a kosher ‘Cat C, 10km from shore’ sea kayak while in North America it’s sold as a Swing EX.

framurai
Oi! Not sure I’d be dragging my IK over the sand like that.

From the bow shape it looks like it’s based on the slightly shorter but much wider Swing 2 – or the longer but also wider and higher pressure Seawave. That lightweight deck is fixed and has Swing-like struts to keep it up and shed water. Access is by straight zips or down the hatch. Like the Swings, they leak until the Swings were upgraded in 2025 along with the new Aurion, a hybrid Framura.

As for pressures, the Framura runs a disappointing 0.2 bar/2.9psi, not the 0.25 bar of the Seawave. But I read that Gumo-recommended max pressures are on the conservative side: the side tubes can be run up to 50% higher with great improvements in rigidity, and the floor runs an 0.2 bar PRV so can’t be over-pressured). I also read somewhere they got 12kph out of a Framura while testing at sea. The best I ever got out of my Java or Incept was a short burst of 10kph, so that is fast.

frama
framurarudder

In 2016 they introduced a rudder kit (left) for the Framura/EX. I made one for my Seawave but in the end, could not be bothered with it on day paddles. On multi-day runs where you get the weather you’re given, a rudder may be a good idea.

Slim, not like an otherwise similar Swing

I like the look of the 4.1-metre-long Framura but I liked my Seawave more. Framura, by the way, is a nice spot on the Italian Riviera, not far from Portofino. Not, as I thought, a hint that the new boat uses a frame(ura) to maintain rigidity. That rarely works with IKs, in my experience. You do wonder if the new hybrid Rush 2 supercedes the 2015 Framura. More Framura in this video. See also this.

I’m not convinced the 0.2 bar Framura is that much faster than a longer, stiffer Seawave. And I also suspect it has not been such a sales success either. Perhaps claiming the former has something to do with the latter.

gumbo framura